Author: Rajendra Zore

  • The 7 Best Node.js Hosting Platforms for 2026 (Free + Paid)

    The 7 Best Node.js Hosting Platforms for 2026 (Free + Paid)

    Choosing where to host your Node.js application can be tough. Should you use a free platform for quick tests, or invest in a scalable setup that supports complex APIs and MySQL databases? This guide breaks down the best options in 2026 – so you can find the right balance of cost, control, and performance.

    In this comprehensive guide, we’ll cover the best Node.js cloud hosting options available in 2026. We’ll explore everything from free Node.js hosting platforms perfect for testing and development to enterprise-grade solutions for scaling production applications.

    Whether you’re looking to host a simple Node.js website, deploy a complex API, or set up a full-stack application with MySQL integration, we’ll help you understand the trade-offs between managed platforms such as Heroku, Railway, and Vercel versus the flexibility of running your own VPS.

    A Quick Comparison of the Best Node.js Hosting Platforms

    To simplify your decision, we’ve created a comparison table that breaks down the key features of our top picks. Use this as a starting point to identify which platforms best align with your project’s needs. Then, jump to the section below to read a detailed analysis.

    PlatformPricing ModelFree Tier DetailsBest ForKey Features
    RunCloudSubscription5-day free trialDevelopers want full server control with a simple management panel.Atomic Git Deployments, Server Health Monitoring, Multi-server support, Backup/Restore.
    RenderPay-as-you-goYes (for services with usage limits)Startups and developers looking for a modern, autoscaling Heroku alternative.Zero-downtime deploys, Managed PostgreSQL, Private Networking, Docker support.
    Fly.ioPay-as-you-goYes (Generous “free allowance” on resources)Globally distributed applications that need low-latency performance.Global Edge Deployment, Docker-based, Built-in Postgres, Custom Domains w/ SSL.
    VercelPer-user SubscriptionYes (For hobby/personal projects)Front-end developers using frameworks like Next.js and Jamstack sites.Git integration, Serverless Functions, Global CDN, Analytics.
    NetlifyPer-user SubscriptionYes (Generous tier for personal projects)Jamstack and static-first websites that use serverless functions for backend tasks.Git-based workflow, Serverless Functions, Form & Identity Management.
    HerokuUsage-based (“Dynos”)No longer offers a viable free tier for apps.Beginners and teams who need a simple PaaS with a massive add-on ecosystem.Simple git push deploys, Extensive Add-on Marketplace, Managed Databases.
    DigitalOcean App PlatformTiered / Pay-as-you-goYes (For static sites)Developers who have already invested in the DigitalOcean ecosystem.Fully managed platform, Scales from source code, Integrates with other DO products.

    Top Node.js Hosting Platforms

    Here are some of the best cloud hosting platforms where you can host your Node.js application with minimal effort.

    RunCloud

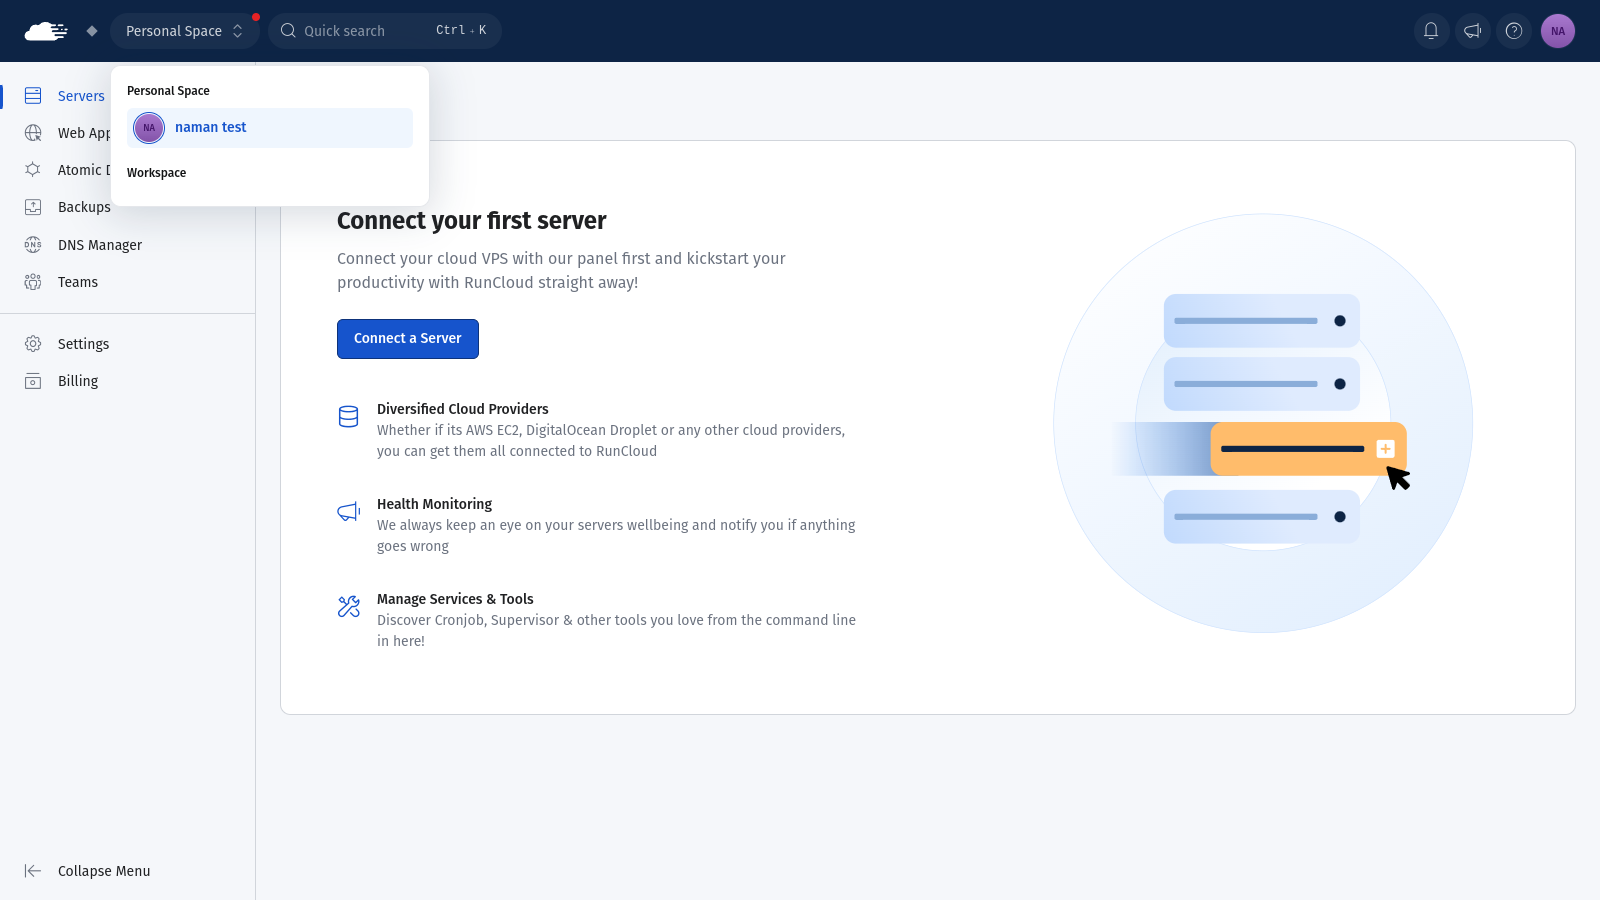
    RunCloud turns your VPS into a powerful, easy-to-manage hosting platform for Node.js applications. It removes the hassle of manual server setup while adding enterprise-grade features.

    Most platforms on this list lock you into their ecosystem. RunCloud doesn’t.

    It gives you full control over your servers – on any cloud provider – while still offering the same modern deployment tools and monitoring features developers expect. RunCloud works seamlessly with every major cloud provider:

    • Deploy on DigitalOcean’s affordable droplets
    • Leverage AWS’s global infrastructure
    • Use Google Cloud’s cutting-edge network
    • Host on Vultr’s high-performance instances
    • Run on Linode’s developer-friendly platform
    • Or even manage your self-hosted servers

    Benefits of Using RunCloud

    • Git Integration: Supports direct deployment from Git repositories 
    • SSL Management: Free SSL certificates and automatic renewal
    • Security Features:
      • Web Application Firewall (WAF)
      • Automated security patches
      • IP blocking
      • SSH hardening
    • Performance Optimization:
      • Built-in Redis caching
      • Server optimization
      • Resource monitoring
    • Team Collaboration: Multi-user access with role-based permissions

    Pricing

    • Essentials: For $9/month, the Essentials plan provides all the fundamental tools to manage a single server with unlimited applications, backups, and 1-click SSL.
    • Professional: The Professional plan, priced at $19/month, is designed for developers shipping to production by expanding to 50 servers and adding advanced tools, such as application cloning and 10 staging environments.
    • Business: At $49/month, the Business plan is tailored for teams managing mission-critical workloads, including zero-downtime atomic deployments, team management, and API access.
    • Enterprise: The Enterprise plan, priced at $399/month, is designed for large-scale businesses that require extensive capacity, supporting up to 500 servers, 50 team seats, and high-volume API access.
    Suggested read: How to install & setup Ghost (NGINX and OpenLiteSpeed)

    RunCloud strikes the perfect balance between convenience and control by offering developers a unique hybrid approach to server management. While its intuitive dashboard simplifies common tasks, you retain complete access to your server’s underlying infrastructure. With full SSH access, you can dive into the command line whenever needed, whether for troubleshooting or advanced configurations.

    Unlike managed solutions that hide the filesystem from you, RunCloud provides direct access to your files, making it easier to debug issues, implement custom solutions, or perform granular backups. This combination of visual management tools and low-level access means platform limitations never constrain you.

    Additionally, RunCloud provides access to its API, which allows you to manage your server exactly as you need while still benefiting from its streamlined interface.

    Suggested read: The Best Web Development Tools To Level Up Your Stack

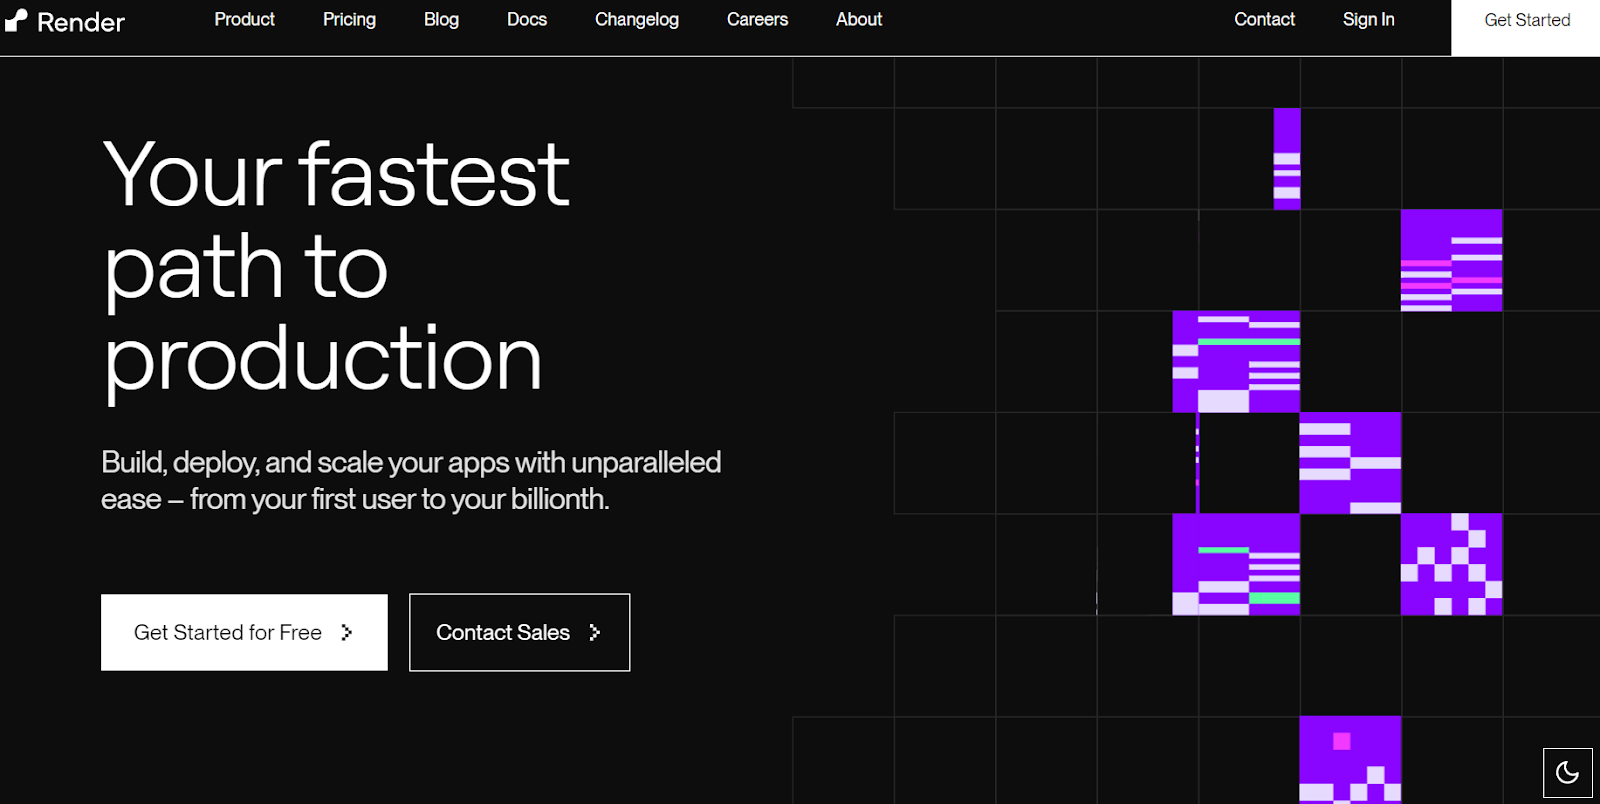
    Render

    Render is a modern cloud platform that reduces the complexity of deploying and managing Node.js applications. Unlike traditional hosting services that require extensive DevOps knowledge, Render abstracts away the infrastructure complexities while maintaining powerful capabilities.

    The platform automatically handles crucial aspects such as SSL certificate management, continuous deployment from Git repositories, and DDoS protection, which allows developers to focus primarily on their code.

    Paid Plans: Starting at $0/month, paid plan costs $19/month

    Best For: Small to medium-sized applications, startups

    Notable Features:

    • Zero-downtime deployments
    • Automatic scaling
    • Built-in DDoS protection
    • Native PostgreSQL support

    When traffic increases, Render automatically handles load balancing and scaling, requiring no manual intervention. The platform’s integrated PostgreSQL and Redis offerings are particularly valuable for Node.js developers, as they come with automatic backups, point-in-time recovery, and secure private networking. This makes it an excellent choice for novice users who don’t want to handle the infrastructure themselves.

    The platform’s ability to automatically sleep inactive services in development environments, and wake them on demand, helps optimize costs – especially for developers managing multiple projects or staging environments.

    Suggested read: How To Monitor Your Web App’s RAM & CPU Usage with Netdata

    Fly.io

    Fly.io is a developer-centric platform that excels in hosting Node.js applications and takes a unique approach to cloud deployment and pricing. It offers an innovative edge deployment model that automatically distributes applications across global regions for optimal performance. It also provides seamless WebSocket support, built-in Redis integration, and native PostgreSQL hosting capabilities, which makes it a great choice for JavaScript developers.

    Paid Plans: Pay-as-you-go plans, with a simple application costing approximately $15/month

    Best For: Distributed applications, edge computing

    Notable Features:

    • Global deployment with edge locations
    • WebSocket support
    • Built-in Postgres databases
    • Docker-based deployments

    It has sophisticated containerization support using its enhanced Docker implementation. This ensures that Node.js applications can be deployed with minimal configuration while maintaining full access to native Node.js features and packages.

    Similar to other tools in this list, Fly.io automatically handles crucial aspects such as SSL/TLS certification, HTTP/2 support, and global load balancing while still providing developers with granular control when needed.

    But what really distinguishes Fly.io is its approach to regional deployment. Node.js applications can be automatically distributed to edge locations closest to users, resulting in significantly reduced latency and improved application performance.

    Suggested read: How To Create a Docker Image For Your Application

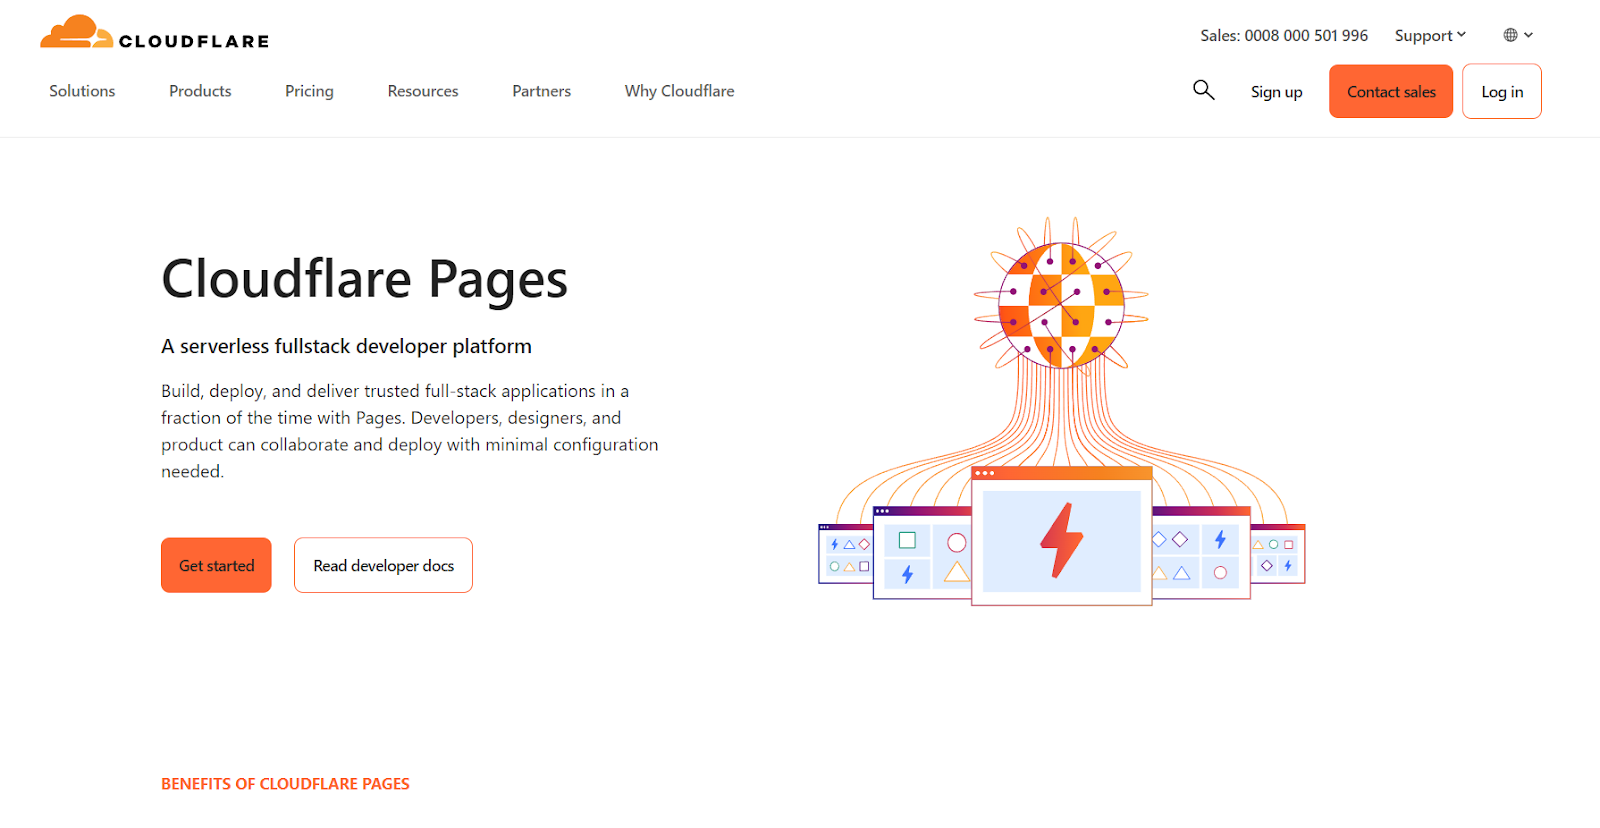
    Cloudflare Pages + Workers

    Cloudflare offers a serverless platform to host Node.js applications using a unique combination of Workers and Pages. This is particularly compelling for Node.js developers because it eliminates the traditional distinction between frontend and backend deployments and allows for seamless integration of serverless functions with static content.

    Cloudflare has its own extensive global network, and it can place compute resources within 50ms of 95% of the world’s Internet-connected population. This results in exceptional website performance and page speed improvements.

    Free Tier Includes:

    • Unlimited sites
    • Unlimited requests
    • 100,000 Workers invocations/day
    • Unlimited bandwidth

    Paid Plans: Starting at $5/month

    Best For: JAMstack applications, serverless architecture

    Notable Features:

    • Global CDN
    • Automatic git deployment
    • Zero cold starts
    • Edge computing capabilities

    Additionally, Cloudflare uses a standard JavaScript runtime that ensures compatibility with existing Node.js packages and libraries while offering free egress and static asset hosting. It integrates essential development tools, including CI/CD pipelines, git-based deployments, and live previews, making it particularly attractive for teams looking to streamline their development workflow.

    It can auto-provision and directly integrate with other Cloudflare services such as KV (key-value storage), Durable Objects (distributed computing), R2 (object storage), and D1 (SQL database), providing developers with a complete ecosystem for building sophisticated Node.js applications.

    Suggested read: The 12 Best cPanel Alternatives to Manage Your Servers

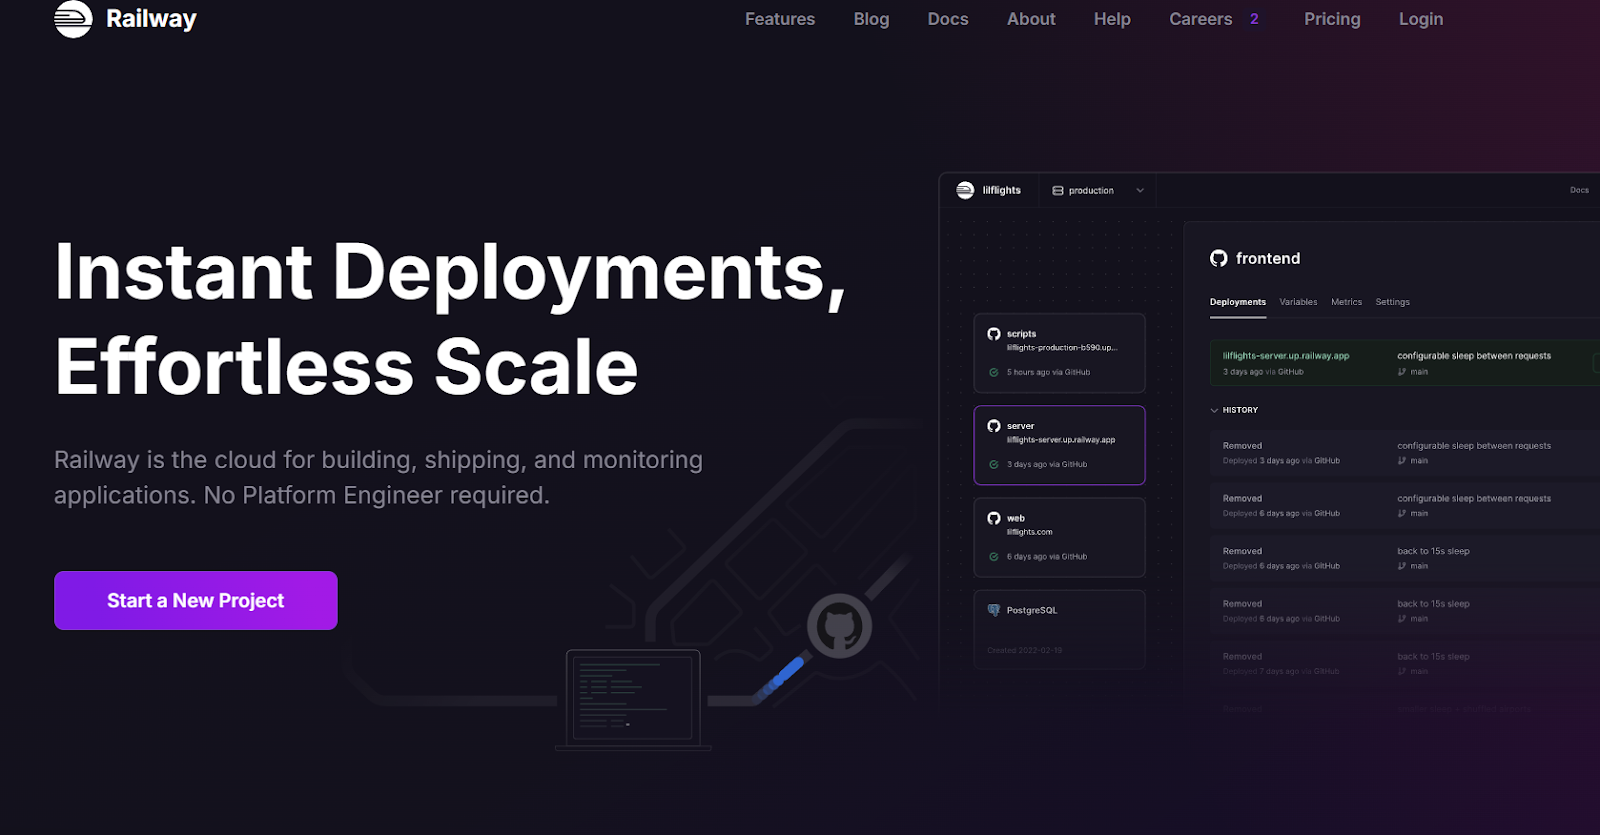
    Railway

    Railway is a developer-first platform with an impressive array of features that takes the pain out of deployment. It supports deploying directly from GitHub repositories, local codebases, and Docker containers. What sets it apart is its developer-centric features that dramatically speed up the development cycle. Railway’s automatic preview environments for pull requests mean you can test changes in isolation before merging to production.

    It also offers horizontal scaling capabilities, with support for 50+ replicas per service and round-robin load balancing, making it a great choice for fast-growing applications. Railway’s networking stack is particularly impressive, offering up to 100 GBPS of transfer speed for private networking between services and up to 10 GBPS for public traffic.

    Advanced users can also take advantage of their extensive observability tools – including 90-day log retention, JSON-structured logs, and comprehensive metrics monitoring.

    Free Tier Includes:

    • $5 credit monthly
    • 512MB RAM
    • Shared CPU
    • 1GB disk

    Paid Plans: Starting at $5/month

    Best For: Full-stack applications, development teams

    Notable Features:

    • One-click deployments
    • Built-in databases
    • Automatic HTTPS
    • Team collaboration tools

    Suggested read: Self-Managed or Managed Hosting: Which One is Right for You?

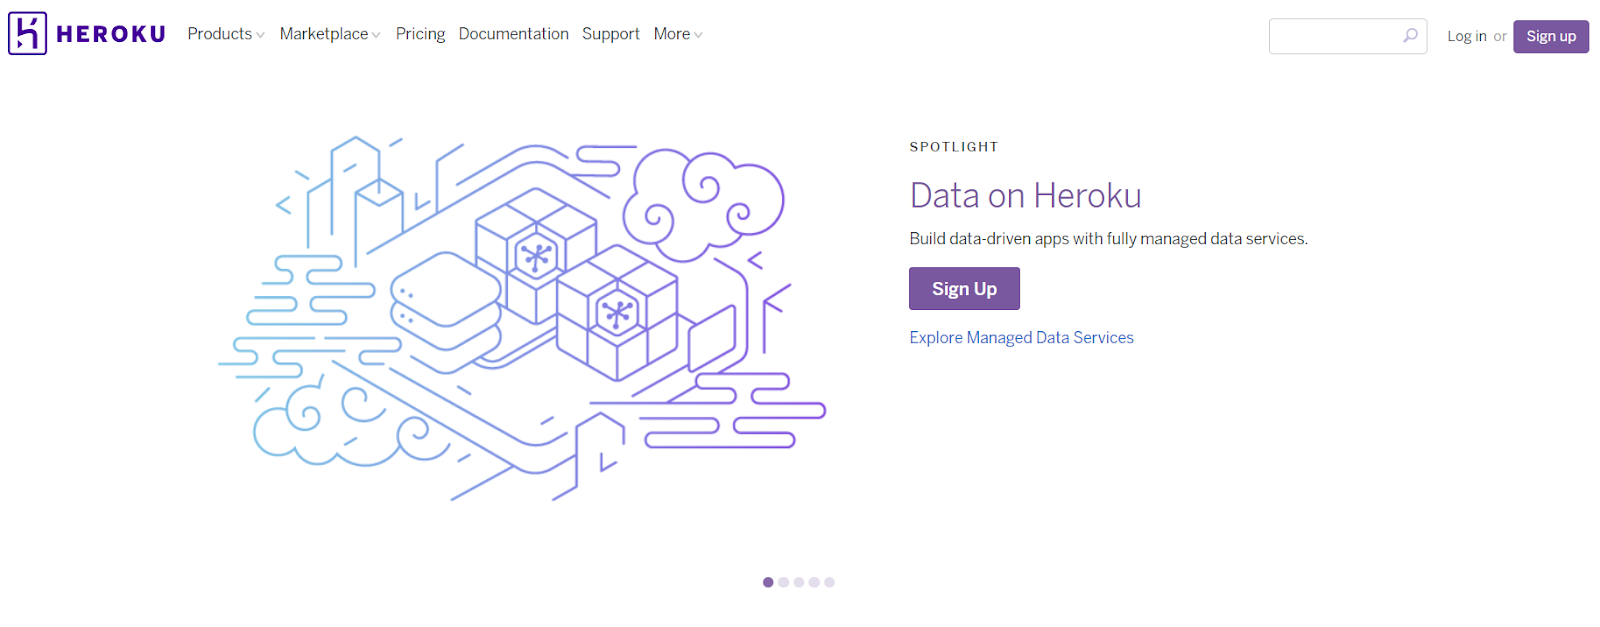
    Heroku

    Heroku was one of the first Platform-as-a-Service (PaaS) solutions, offering developers a seamless way to deploy Node.js applications without getting bogged down by infrastructure complexities. Heroku’s “dynos” are lightweight Linux containers that provide flexible computing options starting from as low as $7 per month.

    Similar to other cloud providers, Heroku has a comprehensive ecosystem of managed services, from PostgreSQL databases and Redis key-value stores, to automated certificate management and zero-downtime deployments.

    Free Tier: Discontinued

    Paid Plans: Starting at $5/month

    Best For: Enterprise applications, scalable projects

    Notable Features:

    • Extensive add-on marketplace
    • Advanced monitoring
    • Auto-scaling
    • Managed containers
    heroku hosting for NodeJS

    With features such as Heroku Pipelines, developers can create sophisticated CI/CD workflows that automate the journey from code to production. Additionally, Heroku’s Review Apps feature automatically creates temporary environments for pull requests, making code review and testing much easier and faster.

    When it comes to monitoring and maintenance, Heroku provides built-in application metrics, log management, and automated OS patching to ensure your Node.js applications remain healthy and secure.

    Suggested read: Cloud Hosting vs VPS Hosting – Which One Should You Choose in 2024?

    Vercel

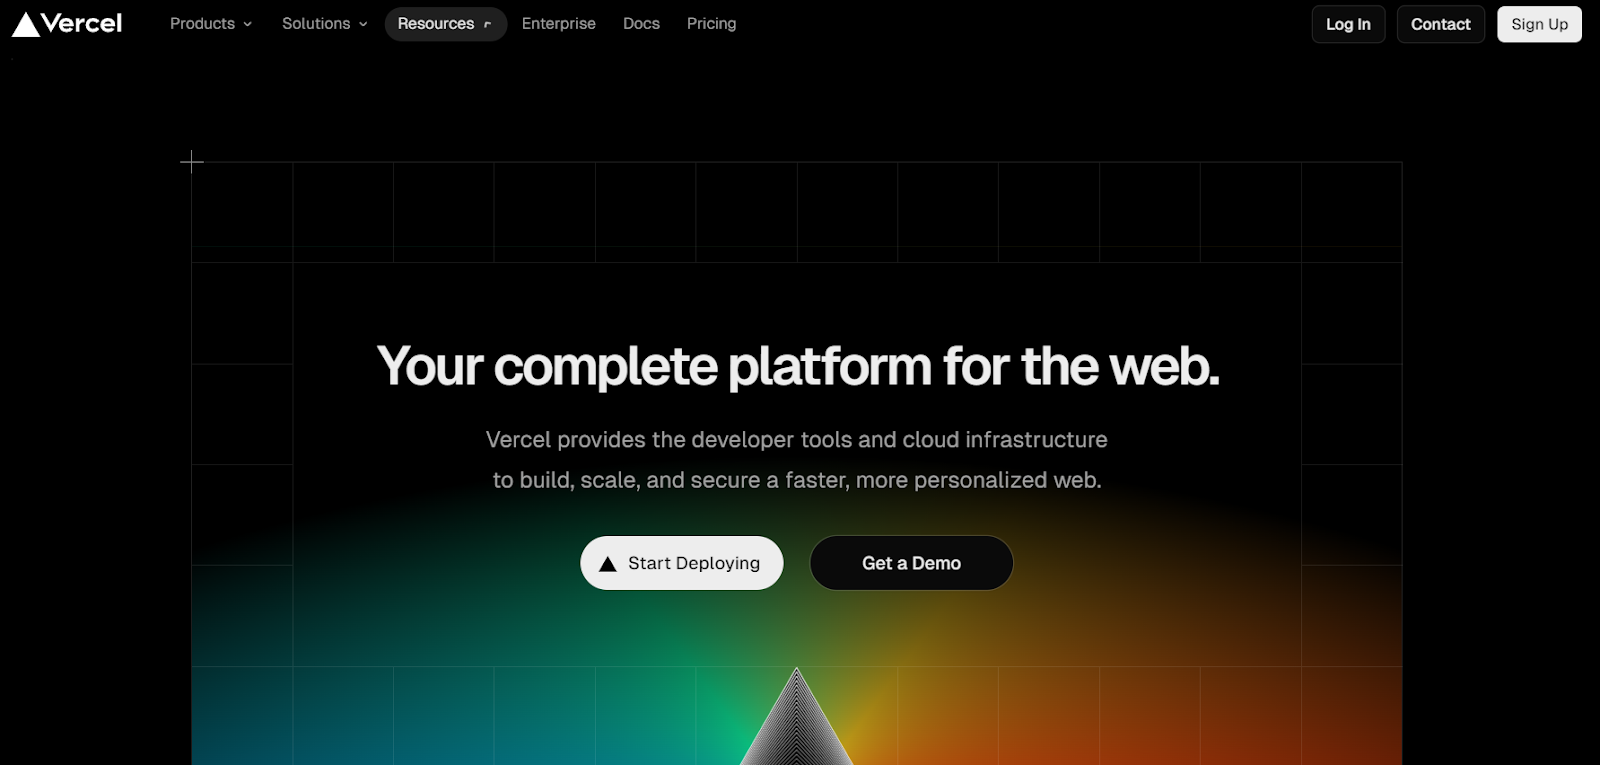
    Vercel has a zero-configuration platform that prioritizes developer experience above everything else. It is very popular among JavaScript developers due to its seamless integration with popular frameworks like Next.js.

    What makes Vercel particularly powerful for Node.js developers is its serverless functions architecture. This architecture automatically handles the deployment and optimization of resources across 18 regions, eliminating the need for complex infrastructure management. It also offers automatic edge deployment across hundreds of global locations for lightning-fast content delivery.

    Free Tier Includes:

    • 100GB bandwidth/month
    • Serverless functions
    • CI/CD pipeline

    Paid Plans: Starting at $20/month

    Best For: Next.js applications, frontend-heavy projects

    Notable Features:

    • Edge functions
    • Analytics
    • Preview deployments
    • Team collaboration
    vercel hosting ofr node js

    Vercel also includes built-in DDoS protection at the edge and L3/L4 protection at every location, ensuring applications remain secure without compromising on performance. This makes it a great option for hosting NodeJS applications.

    How to Choose the Right Node.js Hosting for Your Project

    There’s no single best platform – it depends on your project. Use these four questions to narrow your choices and find the best fit for how you build and scale applications.

    1. Scalability

    Your application’s hosting needs will likely evolve over time. Choose a platform that can grow with you.

    • For Personal Projects & Prototypes: Start with a platform that offers a generous free tier. Render, Vercel, and Fly.io are excellent choices that enable you to deploy and run small applications with no initial investment.
    • For Growing Startups: Prioritize platforms that simplify the scaling process. Render’s autoscaling and Heroku’s flexible “dynos” let you handle traffic spikes without manual intervention. A solution like RunCloud on a cloud provider (e.g., DigitalOcean, AWS) also gives you a clear path to scale your server resources as needed.
    • For Large-Scale & Enterprise Apps: Focus on performance, reliability, and global reach. Fly.io excels at deploying applications close to your users worldwide, reducing latency. For maximum control and security, using RunCloud to manage dedicated servers gives you unparalleled power over your infrastructure.

    2. Developer Experience (GUI vs. CLI)

    How your team likes to work is an important factor.

    • GUI-Focused Teams: If you prefer a visual dashboard to manage deployments, environments, and settings, you’ll feel at home with Render, Vercel, or DigitalOcean App Platform. Their web interfaces are intuitive and require minimal setup.
    • CLI-First Developers: For those who live in the terminal, a command-line-interface-driven workflow is faster and more powerful. Fly.io and Heroku are famous for their excellent CLIs that let you deploy and manage apps with just a few commands.
    • The Best of Both Worlds: RunCloud strikes a unique balance. It provides a clean, powerful web dashboard to manage servers provisioned from any cloud provider, abstracting away complex server administration while still giving you the underlying power and SSH access of a full VPS.

    3. Budget and Pricing Models

    Understand how you will be charged to avoid surprise bills.

    • Fixed & Predictable: A subscription model, like that offered by RunCloud, provides a predictable monthly cost, which is great for budgeting.
    • Pay-As-You-Go: If your traffic is variable, the PAYG models of Render and Fly.io are ideal. You only pay for the resources you actually consume, making it highly efficient for apps with inconsistent usage patterns.
    • Tiered Pricing: Platforms like Heroku and Vercel often have structured tiers. These are good starting points, but be sure to monitor your usage to know when you might need to upgrade to the next level.

    4. Database and Integration Needs

    Your application is more than just Node.js code. Consider your database and other service requirements.

    • Integrated Managed Databases: For ultimate convenience, platforms like Render and Heroku offer managed databases that can be provisioned and connected to your application in just a few clicks. This removes the headache of database setup and maintenance.
    • Broad Ecosystem: Heroku’s main strength is its massive add-on marketplace. You can easily integrate dozens of third-party services for logging, monitoring, caching, and more.

    Wrapping Up

    In this post, we’ve explored several powerful platforms for deploying Node.js applications, from Railway’s developer-centric approach to Heroku’s mature ecosystem and Vercel’s cutting-edge infrastructure. Each platform offers unique advantages that could align with your project needs, whether it’s extensive database options, scalability, or edge computing capabilities.

    However, it’s crucial to consider the trade-offs associated with these Platform-as-a-Service solutions. While they offer convenience, users are often locked into their specific ecosystems, with limited control over the underlying infrastructure.

    Your hosting costs can quickly escalate as you scale, and you’re ultimately at the mercy of their pricing models and platform-specific limitations. Many developers want more control over their server environment or the ability to optimize configurations for their specific use cases.

    This is where RunCloud offers a compelling alternative.

    Unlike platform-specific solutions, RunCloud works with any cloud provider – whether it’s DigitalOcean, AWS, Google Cloud, or others – giving you the freedom to choose and switch providers as needed.

    With RunCloud, you get the best of both worlds: complete server control through CLI for when you need to fine-tune your setup, alongside a powerful dashboard that makes server management accessible and efficient.

    Want full control without the complexity?

    Try RunCloud free for 5 days and see how easily you can manage your Node.js servers across any cloud provider.

    Start Your Free RunCloud Trial

    FAQs on Node.js Hosting

    How much does it cost to host a Node.js server?

    Node.js hosting costs vary widely, from free tiers on platforms such as Cloudflare to hundreds of dollars per month for dedicated servers. Factors influencing price include required resources (CPU, RAM), bandwidth, and chosen hosting provider (shared, VPS, dedicated, or serverless).

    How do I run a node server locally?

    Install Node.js and npm on your machine. Then, navigate to your project’s directory in the terminal and run the command node server.js (or node index.js, depending on your main file).

    Which cloud database is best for node JS?

    Node.js is database-agnostic, meaning it works well with various databases. Popular choices include MongoDB (NoSQL, document-based) for flexibility and PostgreSQL (SQL, relational) for robust data integrity, depending on your project’s needs.

    How many clients can a NodeJS server handle?

    Due to its non-blocking, event-driven architecture, Node.js excels at handling concurrent connections. The number of clients depends on server resources, application complexity, and efficient code implementation, potentially scaling to thousands or even millions.

    Which architecture is best for node JS?

    Microservices architecture is often a good fit for Node.js applications as it allows for independent scaling and deployment of individual services. Alternatively, a more traditional monolithic architecture can be suitable for smaller projects with simpler requirements.

    Can I run NodeJS on shared hosting?

    Some shared hosting providers offer Node.js support, but it may be limited. Ensure your chosen provider allows SSH access and custom startup scripts to run your Node.js application effectively.

  • How to Fix WordPress Revisions Not Showing [SOLVED]

    How to Fix WordPress Revisions Not Showing [SOLVED]

    Are your WordPress post revisions not showing? Has your WordPress revisions option suddenly become invisible, or disabled? We’ve got you covered!

    In this article, we’ll explain exactly what the problems are likely to be, and how to get your WordPress revisions showing and working correctly.

    WordPress is a dynamic CMS that allows website owners and content creators to easily edit and update existing content. However, the editing process isn’t always straightforward, and mistakes or unintended changes can happen.

    To overcome this, WordPress provides a WordPress post revisions feature that can automatically create snapshots of your content every time you save a draft or update a published post. This built-in system allows website administrators and content creators to:

    • Track changes made to content over time
    • Restore previous versions of a post
    • Recover accidentally deleted content
    • Collaborate more effectively by maintaining a comprehensive editing history

    Each revision captures the entire state of a post at a specific moment, including text, formatting, and metadata. WordPress automatically creates a new revision every time you save a draft or update a published post.

    This feature provides peace of mind for content creators, bloggers, and website administrators by ensuring that no valuable work is permanently lost due to accidental deletions or unwanted edits.

    Whether you’re managing a personal blog, a corporate website, or a complex multi-author platform, revisions offer a transparent, reliable mechanism to manage content development.

    In this guide, we’ll discuss the challenges surrounding WordPress revisions and focus on why this feature might suddenly become invisible.

    Our goal is to equip you with practical, step-by-step solutions to diagnose and resolve issues preventing your content’s version history from displaying correctly. We’ll explore the most common reasons behind missing revisions and provide clear steps to restore this functionality.

    Why WordPress Revisions Are Not Showing

    WordPress revisions are a powerful feature designed to track content changes, but various technical and configuration issues can interrupt their functionality. Let’s see a few reasons why WordPress revisions don’t work:

    1. Revision Limit Settings: WordPress has a default limit on the number of revisions stored. If this limit is set too low or disabled, fewer revisions might appear (or none at all).
    2. Plugin Interference: Some plugins that modify post-editing or database interactions can disrupt the revision tracking mechanism.
    3. Theme Compatibility Issues: Custom themes might inadvertently modify WordPress core functions related to post revisions.
    4. Database Configuration: Incorrect database settings or optimization plugins can suppress revision storage.
    5. User Role Permissions: Certain user roles might have restricted access to viewing post revisions.
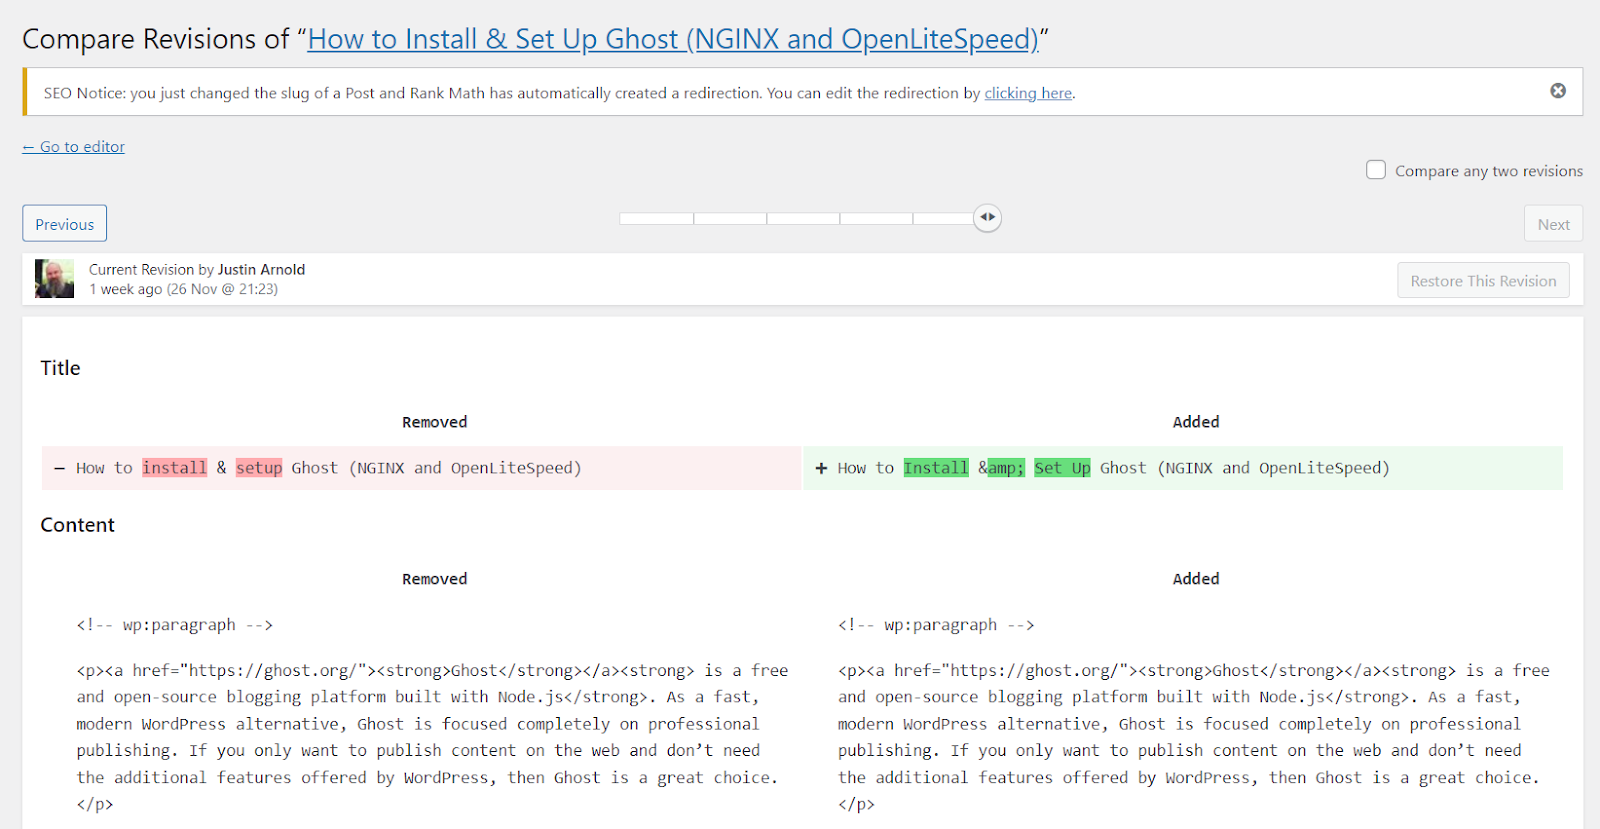
    Viewing revisions in WordPress dashboard

    Suggested read: The Complete WordPress Speed Optimization Guide

    Ways to Re-Enable WordPress Revisions

    You can take steps to troubleshoot WordPress revision settings in your WordPress website.

    Enabling Post Revisions from wp-config

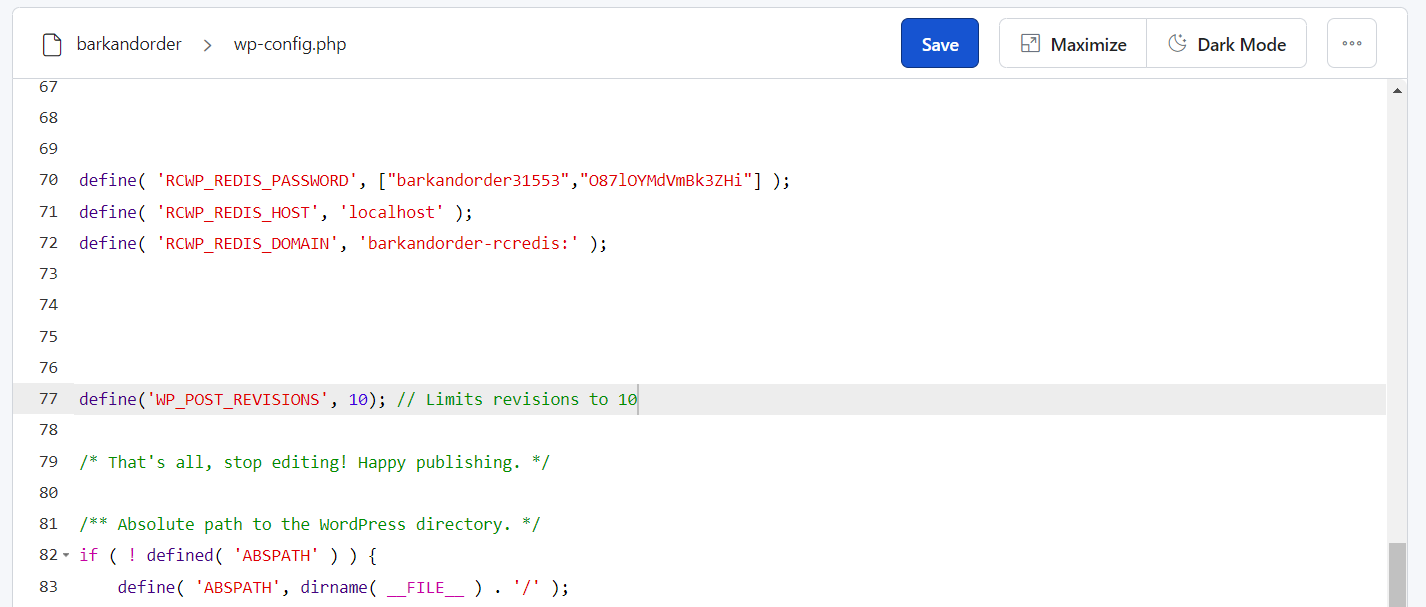
    The WordPress revisions setting in your WordPress website may be disabled. You can easily enable post revisions by editing your server’s ‘WP_POST_REVISIONS’ environment variable. To do this, you can add the following code to your wp-config.php file:

    define('WP_POST_REVISIONS', 10); // Limits revisions to 10
    // Or for unlimited revisions
    define('WP_POST_REVISIONS', true);
    enabling WordPress revisions in wp-config.php file

    This method allows fine-tuned control over revision tracking directly in your WordPress configuration file. Place the code before the line that says, “That’s all, stop editing!” and save it. Once you save the file, new revisions will be saved in your WordPress website whenever you create an edit.

    Suggested read: The Complete WordPress Speed Optimization Guide

    Enabling Revisions for Custom Post Types

    Custom post types in WordPress require specific configurations to enable revision tracking. This process ensures your custom content types maintain the same version control capabilities as standard WordPress posts.

    Method 1: Registering Custom Post Type with Revisions

    When creating a custom post type, add ‘revisions’ to the ‘supports’ parameter during registration:

    register_post_type('your_cpt_name', array(
        'supports' => array('title', 'editor', 'revisions'),
        'public' => true,
        'label' => 'Custom Post Type Name'
    ));

    Suggested read: How to Migrate WordPress From Shared Hosting To Cloud Server

    Method 2: Advanced Custom Fields (ACF) Integration

    Custom post types in WordPress often require specific configurations to enable revision tracking. When working with plugins like Custom Post Type UI or Advanced Custom Fields (ACF), you must explicitly add revision support during post-type registration. Use the following code snippet to enable post revisions:

    add_filter('acf/settings/save_json', 'my_acf_json_save_point');
    function my_acf_json_save_point($path) {
        return get_stylesheet_directory() . '/acf-json';
    }

    By configuring these settings, you can enable revisions in custom post types, allowing you to maintain the same revision tracking capabilities as standard WordPress posts.

    Suggested read: Protect Your WordPress Login pages with Cloudflare Zero Trust

    Limiting Post Revisions for Better Performance

    WordPress revisions consume database storage over time, potentially impacting site performance. If you run a big site with lots of revisions, your database can become bloated and sluggish. Website owners can maintain optimal database efficiency by implementing strategic revision limits while preserving critical content version history.

    Proactively managing post revisions helps maintain website speed, reduces storage requirements, and ensures a streamlined content management experience. Website administrators should periodically review and optimize revision settings to balance content tracking needs with system performance.

    Suggested read: The Best WordPress Caching Plugins To Speed Up Your Site (2024)

    Why Disabling Revisions is No Longer Recommended

    Modern web infrastructure has dramatically changed the perspective on disabling WordPress post revisions for performance optimization. What was once considered a best practice is now considered an unnecessary compromise.

    Advanced hosting technologies and caching mechanisms have effectively neutralized previous performance concerns. Website administrators now recognize that version tracking provides more value than marginal resource savings.

    Network-level CDNs and application-level caching solutions such as Redis and Memcached dramatically reduce database query loads. Additionally, modern database systems implement sophisticated query caching mechanisms that minimize performance overhead.

    WordPress revisions consume negligible database storage compared to total website resources. Modern hosting environments handle database overhead with remarkable efficiency and scalability. Furthermore, disk storage costs have dramatically decreased, making content preservation more economical than potential data loss. The minimal computational resources required for revision tracking are inconsequential compared to other website operations.

    Suggested read: The 5 Best WordPress Security Plugins (2024)

    Wrapping Up WordPress Revisions Management

    In this post, we’ve discussed steps for managing WordPress revisions, covering everything from troubleshooting missing versions to why revision tracking is considered useful despite minimal performance impact. You can maintain robust content version control while ensuring website efficiency by understanding revision tracking, configuration methods, and best practices.

    If you are a WordPress website owner seeking streamlined deployment and management, you should use RunCloud to manage your websites.

    RunCloud eliminates complex server management challenges, providing:

    • One-click WordPress deployments
    • Advanced caching configurations
    • Security hardening
    • Seamless migration tools

    Optimize your WordPress website’s performance and management – get started with RunCloud.

    For further WordPress optimization insights, explore RunCloud’s comprehensive guides:

    FAQs on WordPress Post Revisions

    How do I delete old revisions in WordPress?

    You can use a database optimization plugin like WP-Optimize or manually delete revisions through phpMyAdmin by running an SQL query to remove older entries from the wp_posts table.

    How many revisions does WordPress keep?

    WordPress keeps unlimited post revisions by default, but you can limit this to a specific number (like 10) by adding a code snippet to your wp-config.php file.

    How do I reduce revisions in WordPress?

    Add a simple code snippet to wp-config.php that limits the number of revisions, such as define('WP_POST_REVISIONS', 5); to keep only the most recent five revisions.

    How do I see all revisions in WordPress?

    Open the post editor and click on the “Revisions” button at the top right corner. This button displays a side-by-side comparison of different versions of your post.

    How do I optimize and clean all post revisions in WordPress?

    Use database optimization plugins like WP-Optimize or Advanced Database Cleaner to remove unnecessary post revisions and improve overall database performance.

    How do I turn off autosave and revisions in WordPress?

    You can disable autosave by adding disableautosave:true in your theme’s functions.php file and limit revisions to 0 by adding define('WP_POST_REVISIONS', false); in wp-config.php.

  • How to Reorder WordPress Dashboard Menu Items

    How to Reorder WordPress Dashboard Menu Items

    If you manage a WordPress website, you’ll be very familiar with the WordPress dashboard, which is used for content creation, site maintenance, and administrative tasks.

    However, many users feel that the default admin menu is cluttered, with many essential tools scattered, while less-used sections of the website consume valuable screen space.

    This comprehensive guide will walk you through multiple strategies to take complete control of your WordPress dashboard menu. From simple drag-and-drop techniques to advanced custom coding methods, you’ll discover how to:

    • Rearrange admin menu items with precision
    • Hide unnecessary menu sections
    • Create role-based menu experiences
    • Implement custom menu orders using PHP
    • Leverage powerful WordPress and plugin-based solutions

    Whether you’re struggling with a cluttered dashboard, seeking to improve team workflow, or simply want a more personalized administrative experience, this guide will provide the tools and knowledge to transform your WordPress backend into a clean dashboard.

    Let’s get started!

    Benefits of Reordering Your WordPress Dashboard Menu

    Rearranging your WordPress dashboard menu improves your administrative experience, as a cluttered interface transforms into a personalized, efficient workspace. This customization saves time and dramatically improves workflow.

    This dashboard customization allows you to:

    • Prioritize the tools and sections you use most frequently, bringing them to the top of the menu for instant access.
    • Reduce cognitive load by organizing menu items in a way that makes logical sense to your specific workflow.
    • Minimize the time spent hunting for specific settings or features.
    • Create a more comfortable and personalized administrative environment that reflects your unique working style.

    Once you modify your site menu according to your needs, content management, site maintenance, and administrative tasks become more intuitive. You’ll focus on creating content, not navigating a complex dashboard.

    Suggested read: Protect Your WordPress Login pages with Cloudflare Zero Trust

    How to Reorder Dashboard Menu Items in WordPress

    So we know why you should re-order your menu items, now let’s see how to do this.

    Method 1: Reorder Dashboard Menu Items via Admin Menu Editor Plugin

    Step 1 – Install Admin Menu Editor Plugin

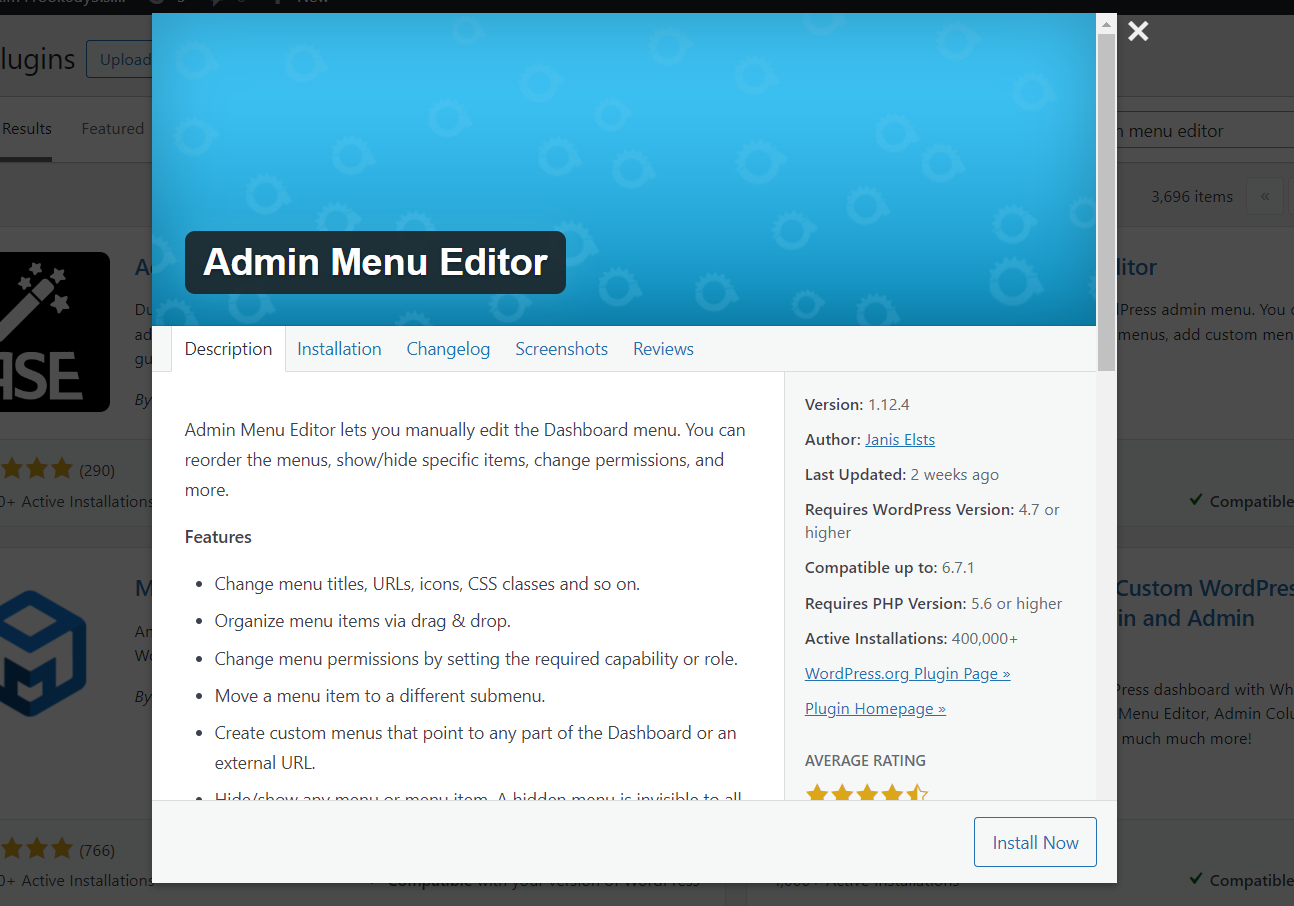
    Start by navigating to your WordPress dashboard and clicking on “Plugins” in the left-hand menu, then select “Add New“, and use the search bar to find “Admin Menu Editor” by searching for the plugin name.

    WordPress Dashboard Menu

    Click the “Install Now” button next to the plugin, and after installation, activate the plugin by clicking the “Activate” button. This will enable the menu customization features in your WordPress backend.

    Suggested read: Everything You Need To Know About wp-config.php File

    Step 2 – Rearrange the Menu Items from Plugin Settings

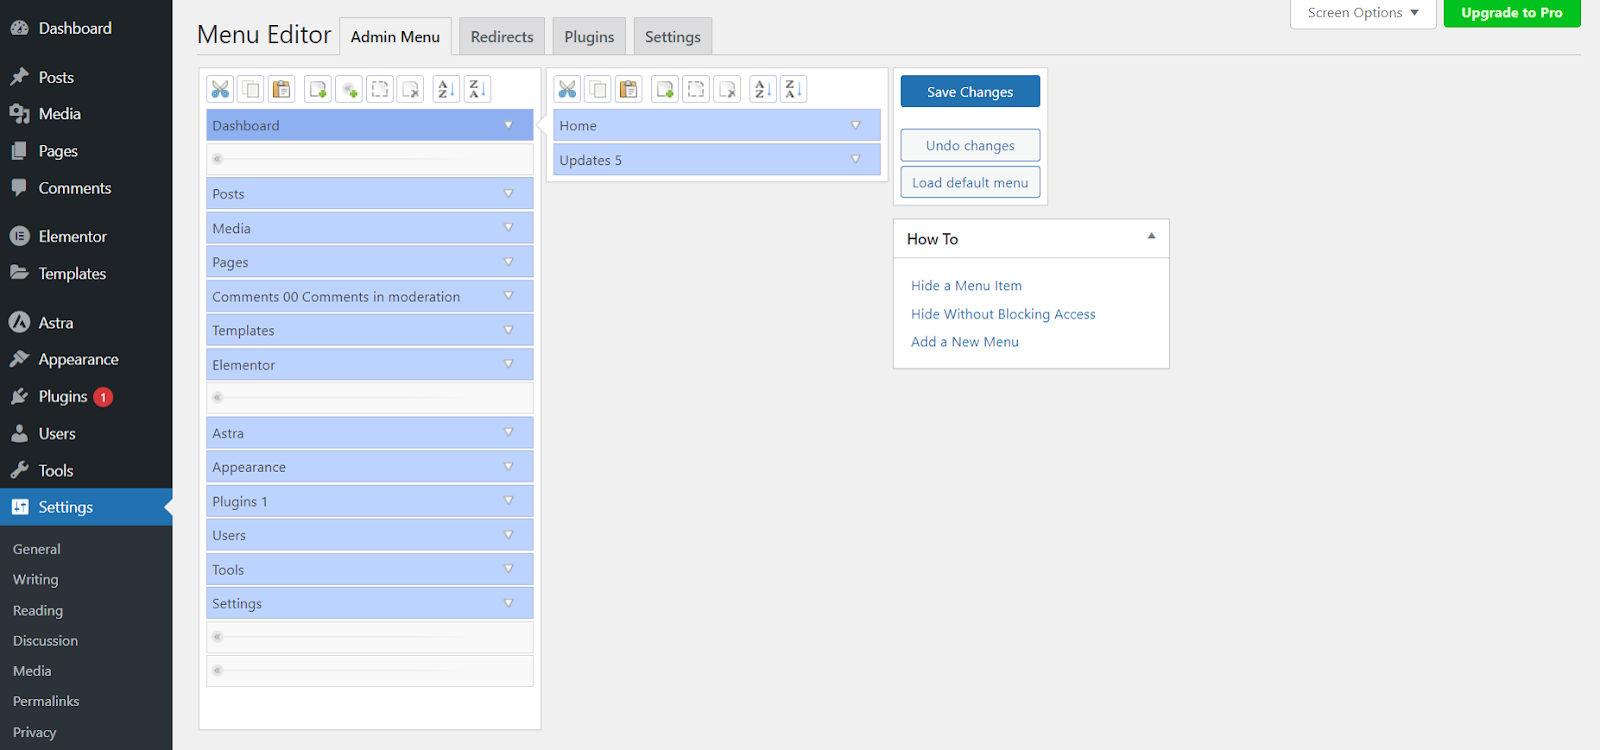
    After activation, locate the new “Menu Editor” option that will appear in your WordPress dashboard sidebar and click on it to open the customization menu. On this screen, you’ll see a full representation of your current dashboard menu structure.

    You can use the intuitive drag-and-drop functionality to reorder menu items by simply clicking and holding an item and then dragging it to your desired position. This allows you to prioritize the most frequently used sections and create a more personalized administrative experience that matches your specific workflow and preferences.

    Suggested read: 10 Best WordPress Management Tools To Easily Manage Multiple Websites

    Step 3 – Customize Button Actions

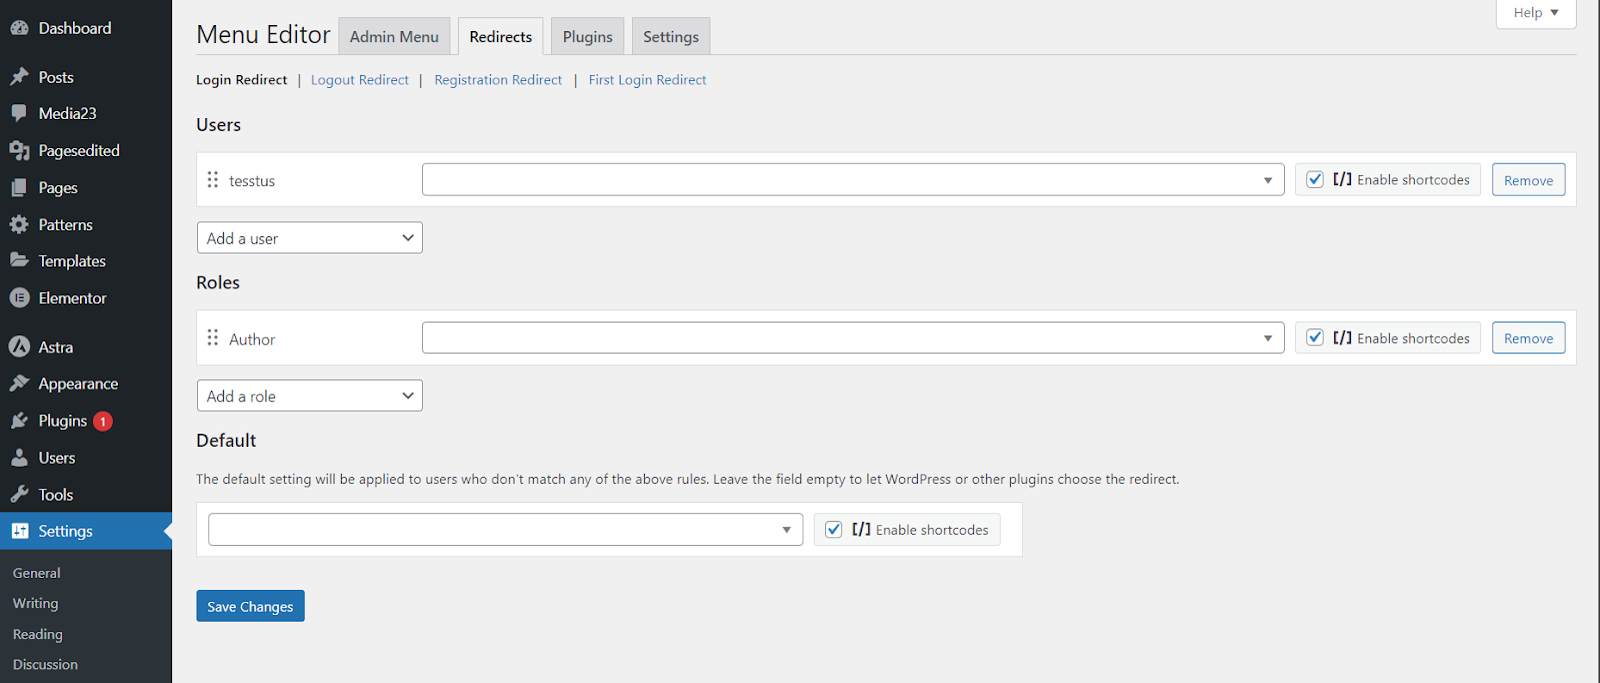
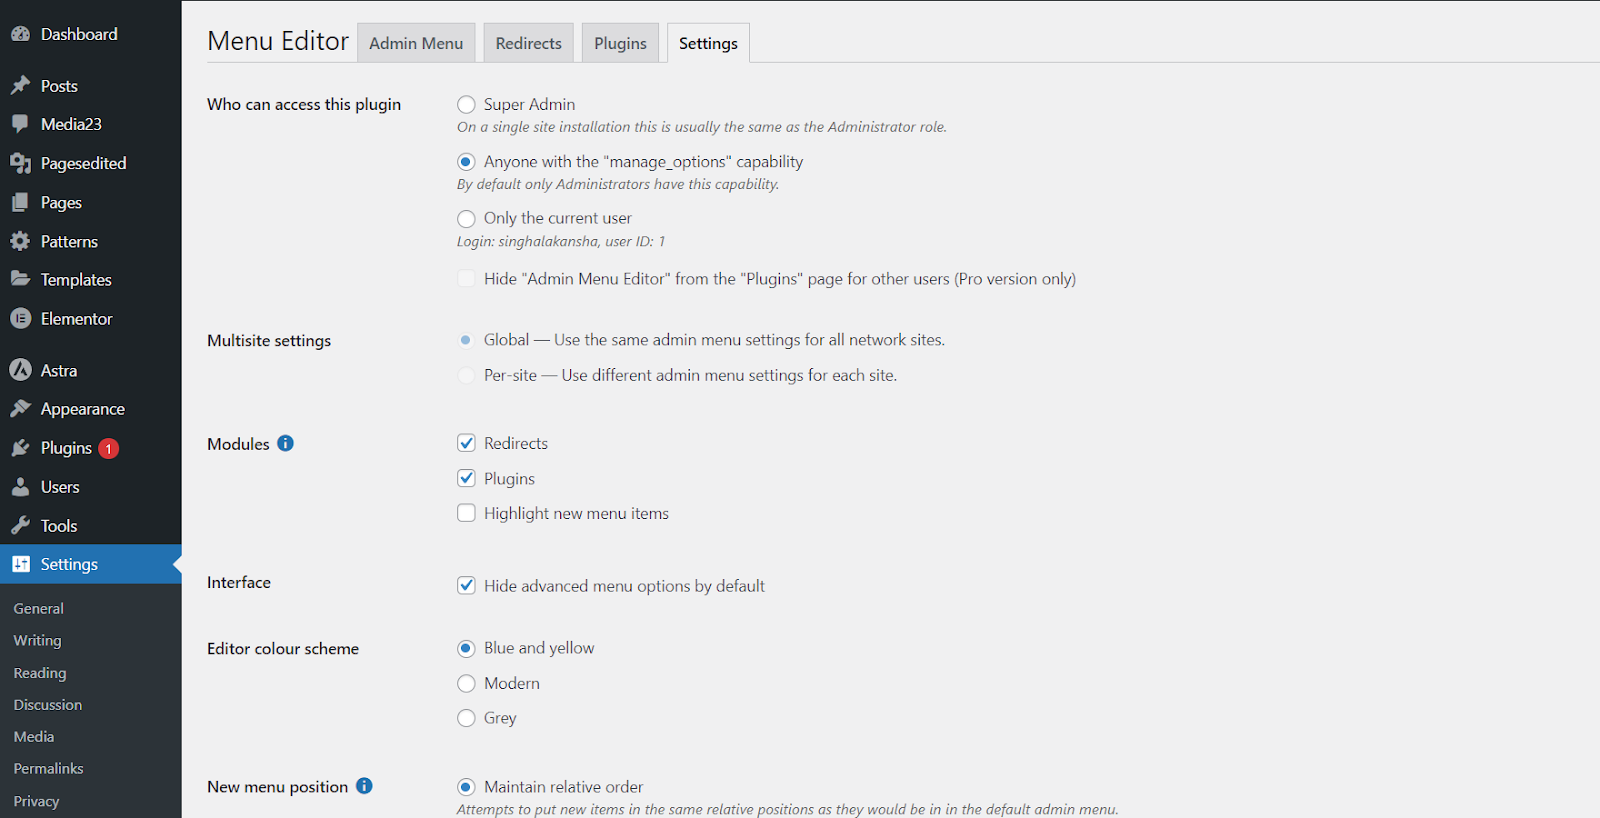
    Admin Menu Editor provides features such as access control based on user roles, multisite settings management, and precise menu positioning. Administrators can use these features to create highly tailored dashboard experiences that enhance security, streamline workflow, and prevent unauthorized access to sensitive site areas.

    For example, a large organization with multiple content creators could use these settings to ensure that writers only see post-related menus, and editors have additional publishing capabilities, while keeping critical settings like plugin management and site-wide configurations exclusively accessible to top-level administrators.

    Additionally, the Admin Menu Editor’s debugging and error verbosity levels allow technical teams to troubleshoot menu permission issues efficiently. Its options range from minimal error reporting to comprehensive diagnostic information, making it invaluable for agencies managing numerous client websites.

    Suggested read: How to Easily Optimize WordPress Website With RunCloud Hub

    Method 2: Manual Theme File Editing (For Advanced Users)

    If you prefer a more technical approach or can’t use plugins, you can manually edit menu items by modifying your theme’s functions.php file using custom PHP code. However, this is a technical method which is only recommended for advanced users as it requires:

    • A good understanding of PHP
    • Permission to edit the WordPress code directly

    Step 1: Accessing the Theme Customization Files

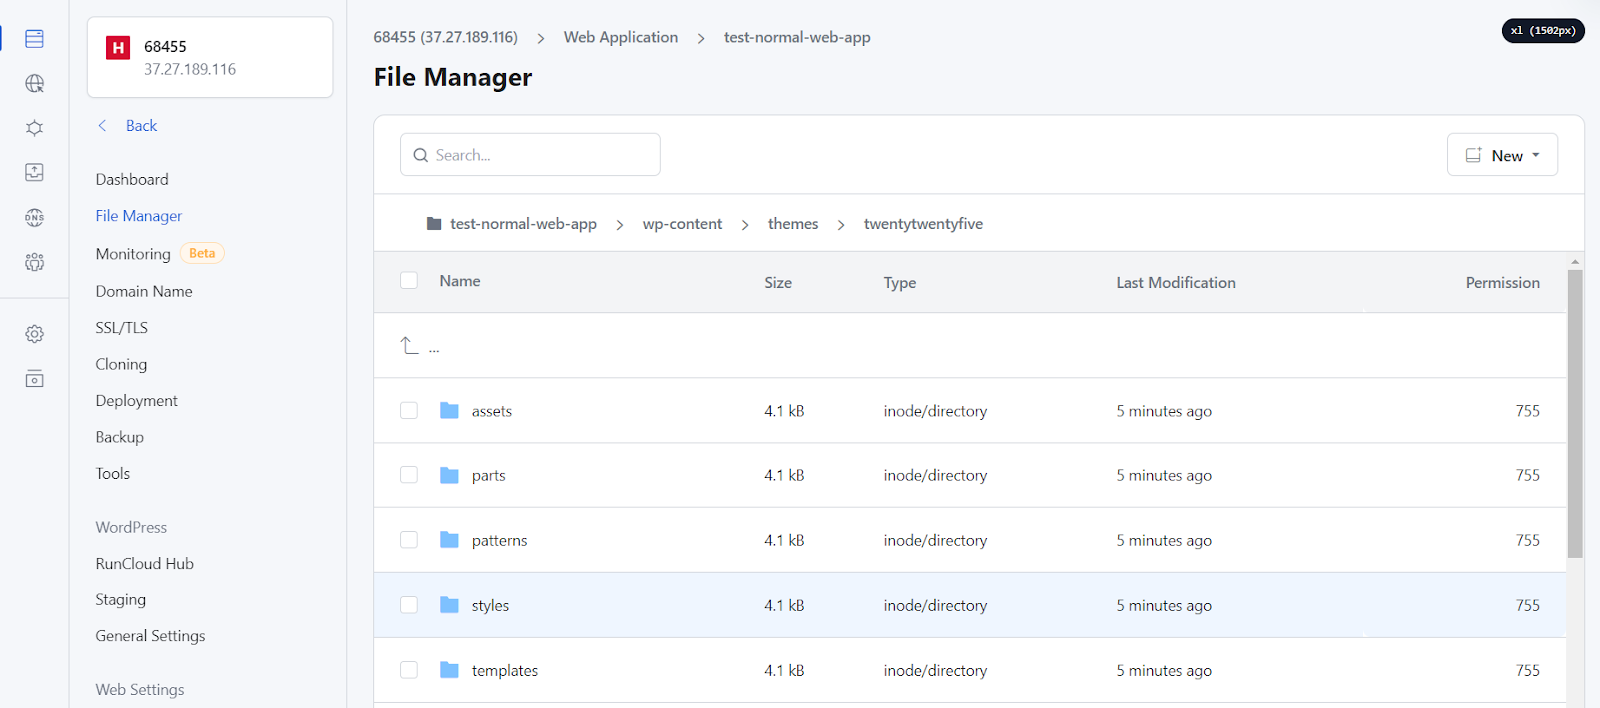
    Open your RunCloud WordPress website’s theme directory, typically located in wp-content/themes/your-theme-name/, and locate the functions.php file using the file manager or via SSH connection. If you’re using a child theme (recommended), open the child theme’s functions.php file to ensure your customizations are not lost during theme updates.

    Suggested read: The Complete WordPress Speed Optimization Guide

    Step 2: Customizing Menu Order with PHP Code

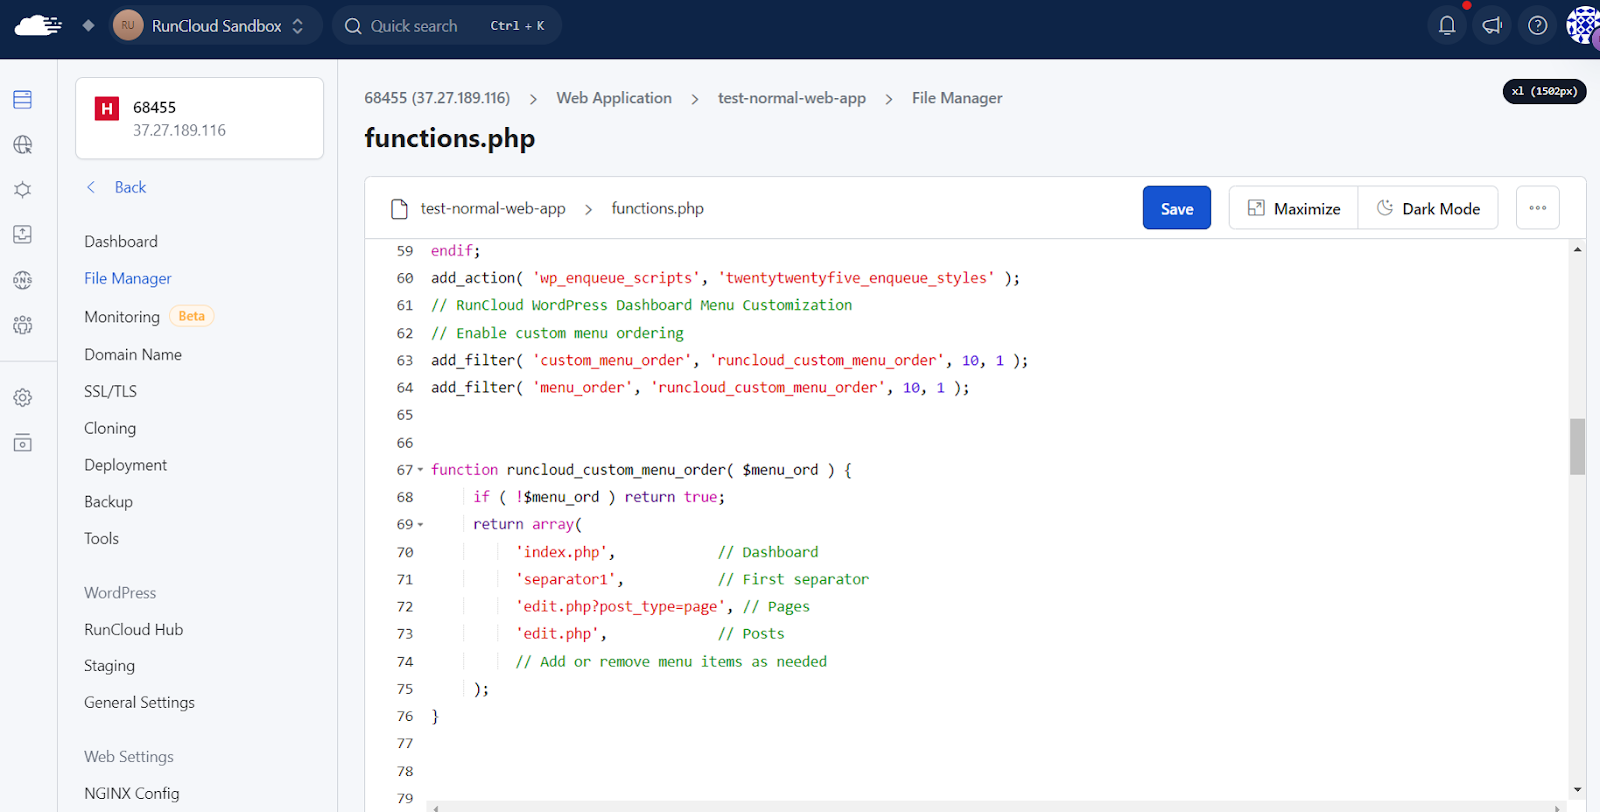
    Add the following custom PHP code to your functions.php file to reorder the WordPress dashboard menu items:

    // RunCloud WordPress Dashboard Menu Customization
    // Enable custom menu ordering
    add_filter( 'custom_menu_order', 'runcloud_custom_menu_order', 10, 1 );
    add_filter( 'menu_order', 'runcloud_custom_menu_order', 10, 1 );
    function runcloud_custom_menu_order( $menu_ord ) {
         if ( !$menu_ord ) return true;
         return array(
              'index.php',            // Dashboard
              'separator1',           // First separator
              'edit.php?post_type=page', // Pages
              'edit.php',             // Posts          // Add or remove menu items as needed
         );
    }

    Step 3: Save The Changes

    After making the necessary changes to your functions.php file, you can save it and refresh your WordPress dashboard. The updated menu list will reflect on your dashboard immediately.

    Advanced WordPress Dashboard Customization Techniques

    WordPress provides a rich set of built-in functions that allow for even more sophisticated menu and page customization beyond basic ordering. Here are some powerful functions to further enhance your dashboard management:

    • add_menu_page() enables you to create entirely new top-level menu items in the WordPress dashboard. It gives you complete flexibility to introduce custom administrative sections tailored to your specific website needs. This function allows you to specify the menu title, capability requirements, unique slug, and even a custom icon for your new menu item.
    • The remove_menu_page() function allows developers to remove specific top-level admin menu items from the WordPress dashboard by providing the menu’s unique slug. By calling this function within the admin_menu action hook, you can selectively hide menu pages and customize sections in the WordPress admin interface.
    • add_media_page() specifically allows you to add custom pages to the Media menu, which can be incredibly useful for creating specialized media management interfaces or implementing custom media-related functionality.
    • add_meta() offers a programmatic way to add custom metadata to posts, which can be particularly helpful for creating advanced content management systems or implementing complex editorial workflows. This function allows you to dynamically attach additional information to your WordPress content that can be used for filtering, sorting, or displaying extra details.
    • add_menu_classes() enables fine-tuned control over the CSS classes applied to top-level administration menu items, allowing you to customize the visual presentation and behavior of your dashboard navigation. This function is particularly useful for advanced theming and creating more intuitive administrative interfaces that match your specific design requirements.

    Wrapping Up

    In this guide, we have provided you with steps to modify and customize your WordPress dashboard. However, when implementing dashboard menu customizations, you should always test your modifications in a staging environment to ensure they don’t disrupt your website’s functionality or user experience.

    If you are using RunCloud, you can simply do this by using our one-click staging feature. RunCloud also makes WordPress installation and updates incredibly straightforward, allowing users to manage complex web infrastructure with remarkable ease.

    What truly distinguishes RunCloud is its atomic deployments functionality, which allows you to create version-controlled WordPress development. You can use this to create staging sites for risk-free testing of customizations.

    Master your WordPress sites with RunCloud! Start your FREE RunCloud trial today

    FAQs About the WordPress Dashboard Menu

    How do I organize my WordPress dashboard?

    Organizing your WordPress dashboard is straightforward and can significantly improve your site management efficiency by allowing you to rearrange menu items to your preferred order. WordPress provides intuitive built-in functionality that lets you customize the menu layout by creating custom child themes with PHP code to prioritize the most frequently used sections and create a more personalized administrative experience that aligns with your specific workflow and needs.

    Can only the admin access the WordPress dashboard?

    WordPress provides multiple levels of dashboard access through its robust user role management system, with the primary administrator having full control, and other roles such as editors, authors, and contributors receiving limited or specific access to dashboard features. The default WordPress user roles are carefully designed to provide granular permissions, ensuring that each team member can access only the sections and functions relevant to their responsibilities, which helps maintain site security while allowing collaborative content management.

    How do I customize my WordPress dashboard menu?

    Customizing your WordPress dashboard menu can be achieved through several methods. Firstly, you can use the “Admin Menu Editor” Plugin in WordPress to use its menu personalization options. Alternatively, advanced users can also use custom code to create a completely tailored dashboard experience. This allows you to not just reorder menu items but also hide, rename, and precisely control every aspect of your administrative interface for maximum efficiency and user-friendliness.