Author: RunCloud Team

  • ​How to Use SFTP with FileZilla to Securely Transfer Files on RunCloud

    ​How to Use SFTP with FileZilla to Securely Transfer Files on RunCloud

    In this tutorial, you will learn how to use SFTP with FileZilla to securely transfer and manage files on RunCloud server.

    FTP is not secure

    FTP (File Transfer Protocol) uses clear text for all transmissions. Anyone is able to read the FTP usernames, passwords, commands and data by packet capture (sniffing) on the network. By default, RunCloud Firewall blocks FTP (port 21) at your server. You are recommended to use SFTP for file transfer instead.

    Tip: You can use RunCloud File Manager in RunCloud panel for simple file management.

    What is SFTP?

    SSH or Secure File Transfer Protocol (SFTP) is a secure file transfer protocol for file access, transfer, and management. It adapts the Secure Shell (SSH) protocol with encryption and secure authentication on both server and client.

    SFTP provides two user-authentication options when connecting to your server: a)passwords or b)SSH2 key-based authentication. The SSH Keys is more secure than password.

    What is FileZilla?

    FileZilla is a free, open source FTP client that supports FTP, SFTP, FTPS. It is available for Windows, Mac OS X, and Linux. Download FileZilla Client.

    SFTP via Passwords
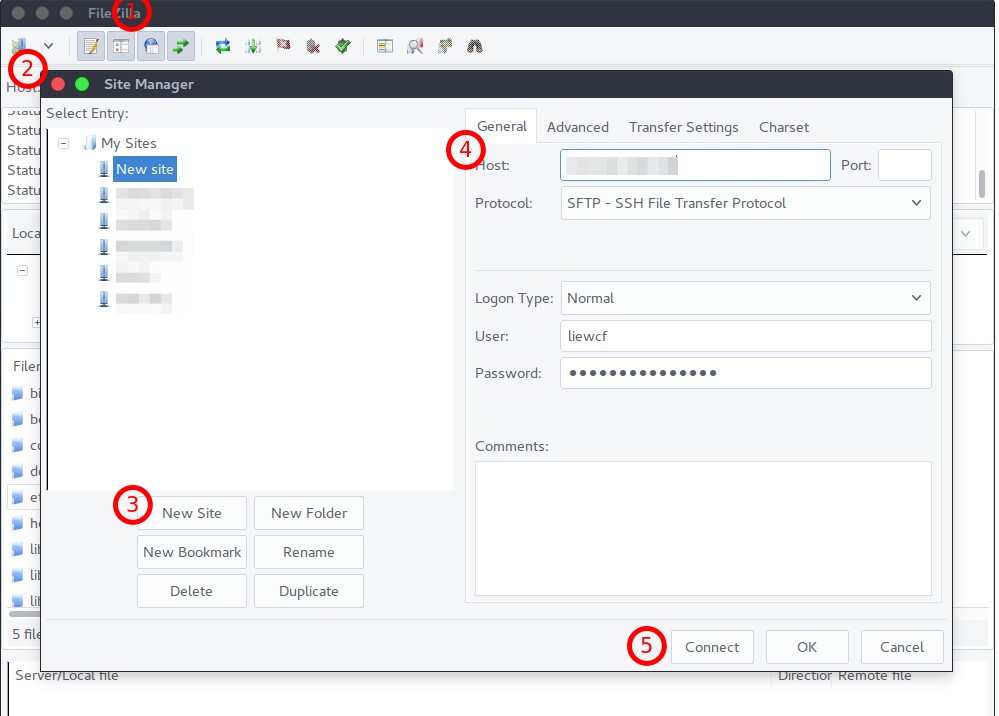
    Filezilla SFTP via Password
    1. Open FileZilla client
    2. Open Site Manger by clicking the top left icon in menu bar, or press Ctrl+S
    3. Click New Site button and gives a name to the new site connection
    4. At the right side panel enter the following information:
      • Host: [RunCloud server IP address]
      • Port: 22
      • Protocol: SFTP – SSH File Transfer Protocol
      • Logon Type: Normal
      • User: [System User’s username]
      • Password: [System User’s password]
    5. Click Connect button to connect (OK button to save the connection)
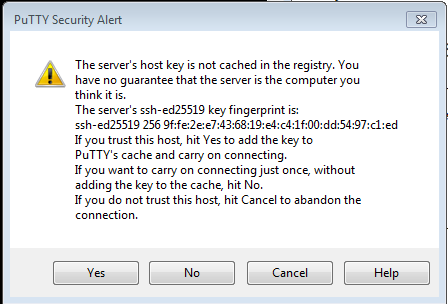
    6. Accept fingerprint warning when prompt
    7. You are now connected to RunCloud server via SFTP using password

    SFTP via SSH2 Key-based Authentication

    If you have not yet create an SSH key pair, then follow one of the two tutorial below:

    Method #1

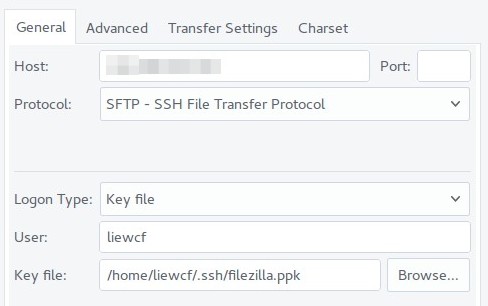
    FileZilla SFTP via SSH key
    1. Open FileZilla client
    2. Open Site Manger by clicking the top left icon in menu bar, or press Ctrl+S
    3. Click New Site button and gives a name to the new site connection
    4. At the right side panel enter the following information:
      • Host: [RunCloud server IP address]
      • Port: 22
      • Protocol: SFTP – SSH File Transfer Protocol
      • Logon Type: Key file
      • User: [System User’s username]
      • Key file: [select your SSH private key in .ppk or .pem format]
    5. Click Connect button to connect (OK button to save the connection)
    6. You are now connected to RunCloud server via SFTP using SSH key

    Method #2
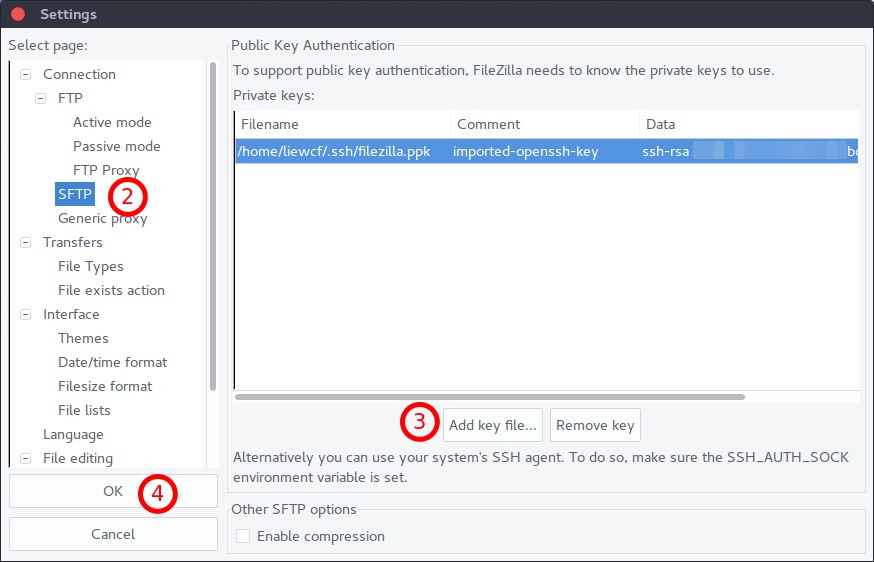
    Add SSH key into FileZilla
    1. Open FileZilla client
    2. In the Edit – Preferences menu, select SFTP under Connection
    3. Click Add key file… button to add your SSH private key (If your key is in OpenSSH format, FileZilla will prompt you to convert it to PuTTY’s PPK format)
    4. Click OK button to save setting and exit Preferences window
    5. Follow Method #1 above but select Interactive for Logon Type

    Wrapping Up

    RunCloud is a powerful and easy-to-use platform that helps you manage your websites on any cloud server. With RunCloud, you don’t need to be a Linux expert to set up, secure, and optimize your web applications. You can do everything from a simple and intuitive dashboard, saving you time and hassle.

    RunCloud supports various web servers, PHP versions, databases, and frameworks. You can also monitor your server performance, back up your data, and automate your tasks with RunCloud. Whether you are a developer, a freelancer, or a business owner, RunCloud can help you run your websites faster and smoother.

    What are you waiting for? Join RunCloud today and enjoy the best web hosting solution for your websites. It’s free for 7 days, no strings attached!

  • How To Use SSH Keys with PuTTY on RunCloud

    How To Use SSH Keys with PuTTY on RunCloud

    SSH keys are more secure than passwords and can help you log in without having to remember long passwords.

    With RunCloud you can easily add your ssh key to your server. If you are running an *NIX type OS such as MacOS or any Linux distro, ssh is already included with your OS. You can easily open a Terminal window execute ssh commands to connect to remote hosts.

    For Windows users, This has traditionally been a bit of a challange. It has required the installation of 3rd party software called PuTTY. This software creates SSH sessions from your local OS to the server.

    It must be mentioned that this situation has changed recently. Since the Windows 10 Creators Update in 2017, Windows 10 users can enable the Linux Bash Shell for Windows and use a beta OpenSSH client to directly connect with remote servers via SSH. We will show you how to use the Windows 10 Linux Bash Subsystem for SSH in a future tutorial. Having said this, it is a beta client so there may still be some bugs whereas PuTTY is a truly tried and battle tested solution.

    In this tutorial, I’ll guide you how to connect to your Runcloud managed server with PuTTY.

    1.Download and Install

    To get started you just need to install PuTTY to your computer. Here is the download link

    2.Create an SSH Key Pair

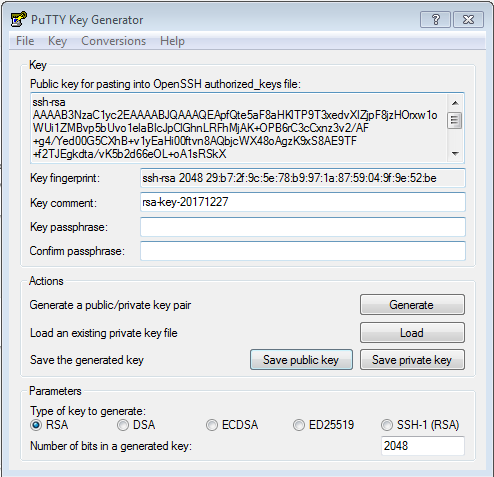
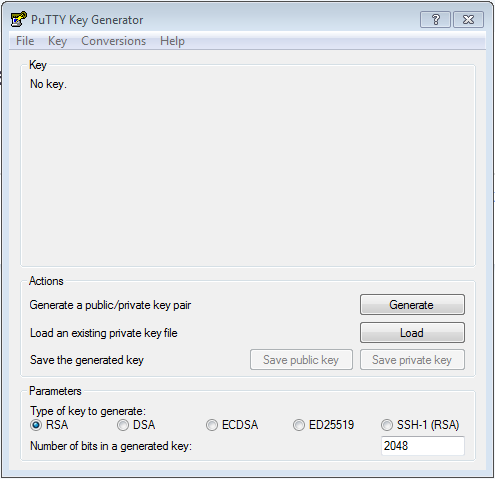
    Now you need to create an SSH key Pair. Open the PuTTYgen program through your Start Menu or by tapping the Windows key and typing “PuTTYgen”. It will look something like this:

    Just click on generate button then the process will start:

    In case you didn’t read the program’s instructions, MOVE YOUR MOUSE OVER THE BLANK AREA RANDOMLY so the program will generate an ssh key. After the key is generated the program will show you something like this:

    Remember to save the public key and the private key to any folder that you wanted. Let me explain a bit about these two keys.

    The Private key is used to determine and verify the user’s identity, therefore the key cannot be passed to anyone else. If another person obtains this key, they will be able to falsely access any account that you link with this private key and issue bogus commands.

    The Public key is the key that is associated with your private key that you will install on other machines and accounts, this will enable access to them without a password. This key can be share freely.

    Now that you have generated the keys that you need, we’ll continue to the next step.

    3.Upload Your Public Key to Runcloud.

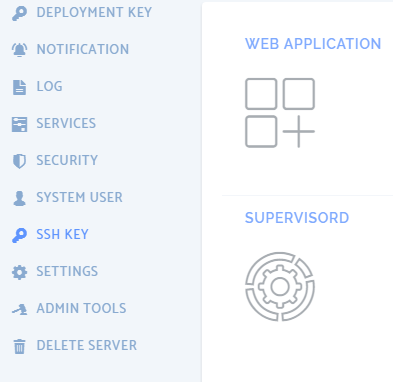
    To upload your public key to runcloud, first you need to open the ssh key menu on the runcloud panel on the server that you wish to connect to:

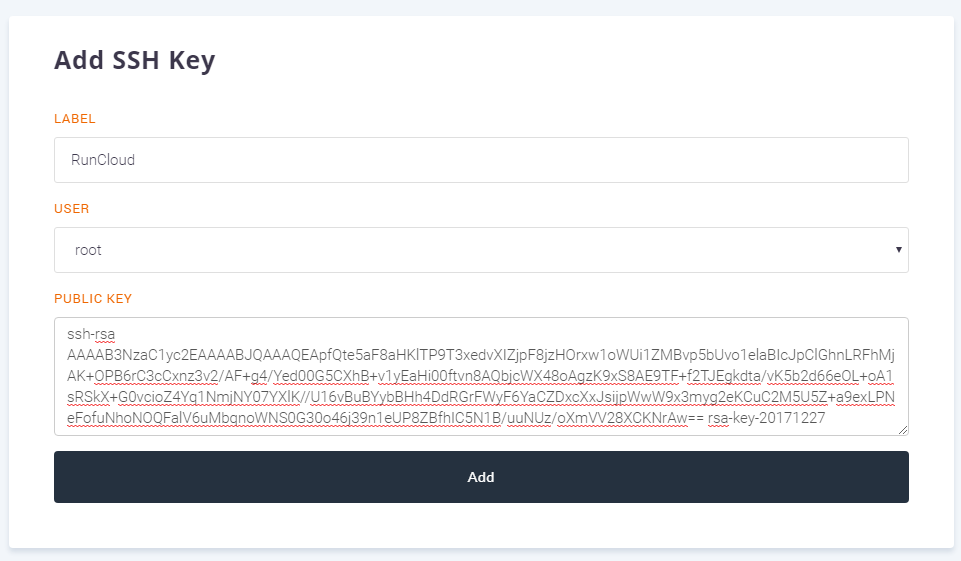
    Then you need to create SSH key, It will look like this:

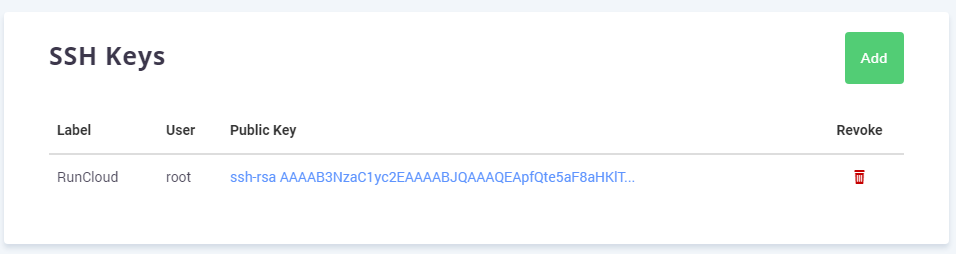
    Make sure the user selected is also the Web Appilcation owner. In this tutorial, I’ll be using root (ROOT CAN’T HAVE ANY WEB APPLICATION. PLEASE DON’T USE ROOT USER TO UPLOAD, CREATE OR EDIT YOUR WEB APPLICATION FILES). After you finish your public key will be displayed on the panel screen:

    4.Setting Up an SSH Session with SSH Keys in PuTTY

    Now you have your uploaded your public key into your server, the last step is to setting up the connection.

    Start up the PuTTY program through your Start Menu or by tapping the Windows key and typing “PuTTY”.

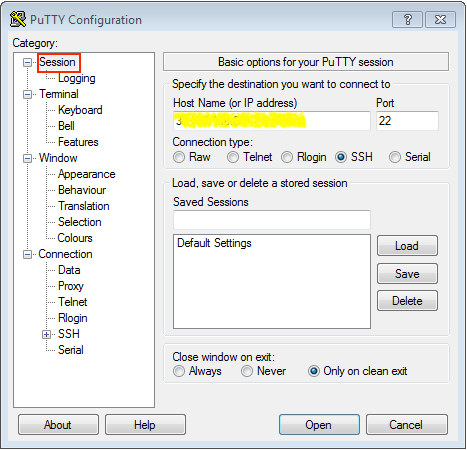
    Inside the program you will see the session screen:

    Just insert your server ip address. The port is 22 this is standard port for ssh.
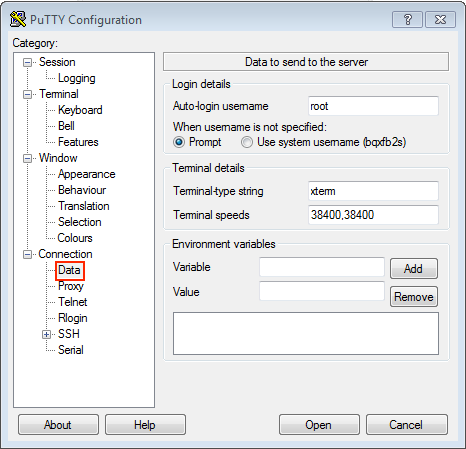
    You need to set your data and SSH auth. On the data screen I have added root to the auto-login username, but assuming you followed my advice above, you should be using the Web Application owner so use that username instead:

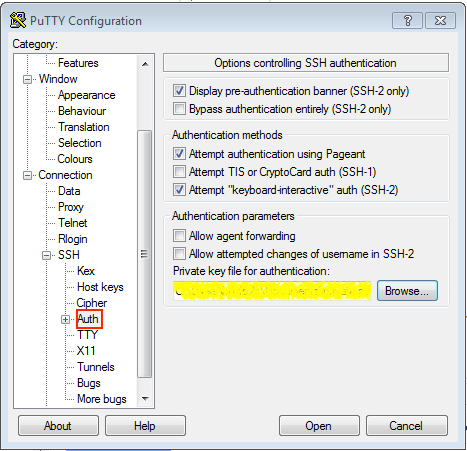
    Then select your saved private key in the SSH auth screen:

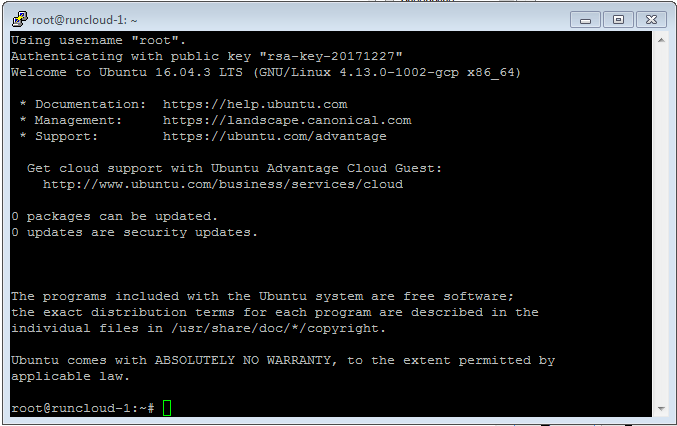
    Now all configurations are done, you just need to revisit the session screen and click the OPEN button. You will get a prompt to click yes, once clicked you are now connected: