Category: Docker

  • How to Install Docker on Windows Server 2016, 2019 & 2022

    How to Install Docker on Windows Server 2016, 2019 & 2022

    Although Linux remains the easier and more efficient platform for most containers, Windows Server still plays a major role in many production environments. If your applications, tooling, or infrastructure tie you to Windows, mastering Docker on Windows Server becomes a practical requirement.

    You might be working with Windows containers because:

    • Legacy .NET Framework apps: Older ASP.NET MVC sites, WCF services, or Windows Services that can’t run in Linux containers.
    • Your Application Has Windows-Specific Dependencies: Some applications are deeply woven into the Windows operating system. If your code calls on technologies like Microsoft Message Queue (MSMQ), COM+, relies on assemblies in the Global Assembly Cache (GAC), or interacts directly with the Windows Registry in complex ways, then you will need a Windows environment to function.
    • Your Company Runs on Windows: Corporate policy and existing infrastructure are powerful forces. If all your servers are Windows-based, then your monitoring tools would be optimized for it, your security policies would be built around Active Directory, and your entire team’s expertise would lie in managing a Windows environment. In this scenario, introducing a few Linux servers adds significant operational overhead.
    • You need a Windows CI/CD Build Agent: A Windows environment is required to build and package Windows applications. You cannot compile a WPF desktop application, run MSBuild for a full .NET solution, or create a Windows Installer (.msi) package on a Linux build agent. A containerized Windows build agent gives you a clean, repeatable, and isolated environment for every single build.

    In this guide, we’ll explain how to install Docker on Windows Server. By the end of this article, you will be able to install it and run containers without any help.

    If you’re using Windows Server only because Linux feels unfamiliar, you don’t need to avoid it. RunCloud provides an intuitive dashboard for managing fast and secure Linux servers without requiring complex command-line knowledge.

    Explore How RunCloud Simplifies Linux Hosting →

    Prerequisites and Requirements For Docker on Windows

    A good DevOps engineer knows that a successful deployment is 90% preparation. Before you type a single installation command, verify that your environment is properly set up.

    Section 1: System Requirements & Hypervisor Check

    Check that you’re running a supported 64-bit Windows Server version (2016, 2019, or 2022). Then confirm CPU virtualization is enabled. How you check this depends on whether you are on bare metal or a virtual machine.

    If Your Server is a Physical Machine:

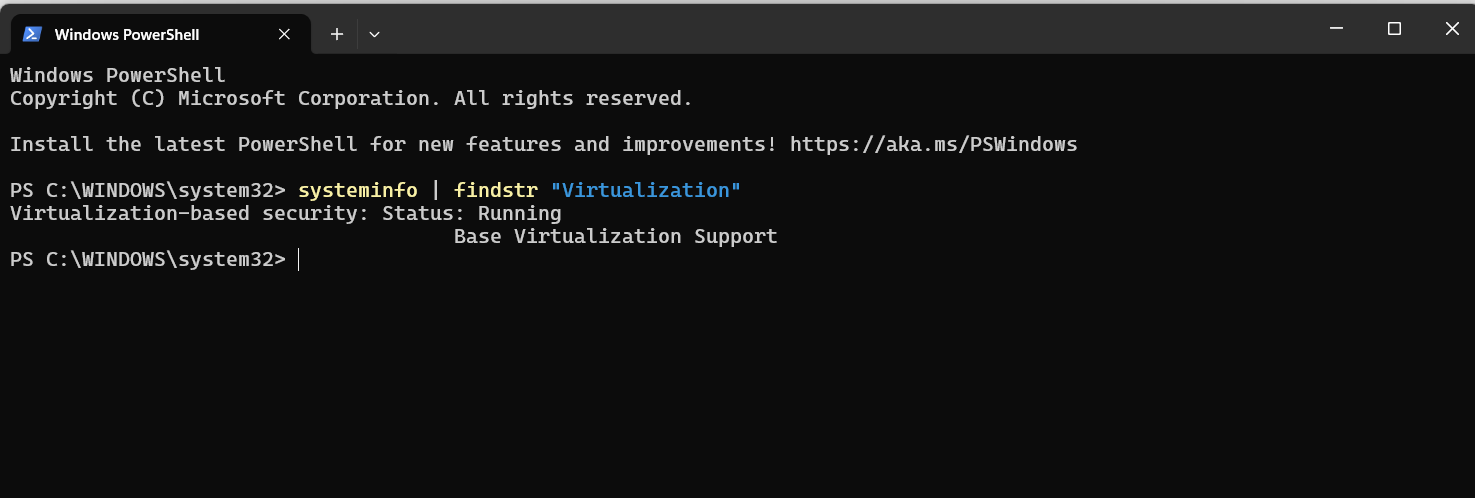
    You need to verify that virtualization support (often referred to as Intel VT-x or AMD-V) is enabled in the server’s BIOS or UEFI. The easiest way to check this from within Windows is to run a simple PowerShell command.

    Open an elevated PowerShell prompt and run the following command:

    systeminfo | findstr "Virtualization"

    Look at the output. You need to see Hyper-V – Virtualization Enabled in Firmware: Yes. If it says “No,” you must reboot the server, enter the BIOS/UEFI settings, and enable the feature.
    If Your Server is a Virtual Machine (VM):

    If your server runs inside a VM, you must enable nested virtualization on the host. Docker cannot run inside a VM without it.

    This setting is not configured inside your Windows Server VM. You must configure it from the management interface of the host hypervisor that is running your VM.

    • For VMware ESXi/vSphere: Shut down the VM. Edit the VM’s settings, expand the CPU section, and check the box for “Expose hardware-assisted virtualization to the guest OS.”
    • For Microsoft Hyper-V: Shut down the VM. Open a PowerShell prompt on the Hyper-V host (not the guest VM) and run the command: Set-VMProcessor -VMName “Your-VM-Name” -ExposeVirtualizationExtensions $true.

    Section 2: Install Latest Windows Updates

    Unlike a simple application, the Docker Engine integrates deeply with the Windows kernel. Microsoft regularly releases critical bug fixes, performance improvements, and even new container features directly through Windows Updates. By skipping updates, you are likely to encounter strange bugs, networking issues, or outright installation failures that the Windows engineering teams have already resolved.

    Prepare your server for a successful installation by getting it completely up to date.

    1. Open the Start Menu, type “Check for updates,” and open the System Settings panel.
    2. Click the “Check for updates” button and let Windows scan for all necessary updates.
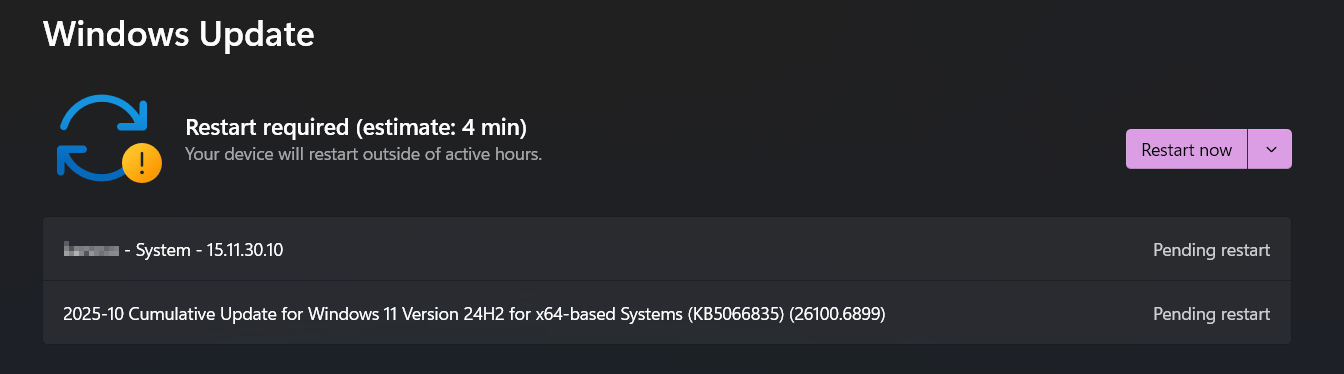
    1. After the updates are installed, you will be prompted to restart your device. Do it. Rebooting your computer ensures that all changes are fully applied to the operating system before you proceed.

    Section 3: Understanding Windows vs. Linux Containers

    Windows Server can run both Windows and Linux containers, but you must choose the right one for your app. Pick Windows containers for .NET Framework or Windows-specific APIs. Use Linux containers for standard web stacks like NGINX, Node.js, Python, and databases.

    When Should You Use Windows Containers?

    These are native Windows containers. They run directly on your server, sharing the host’s Windows kernel, which makes them highly efficient and start quickly. Think of them as highly isolated Windows processes that have their own filesystem and registry, but fundamentally speak “Windows.”

    • Common Base Images: When you build a Windows container, you’ll start from a base image provided by Microsoft, such as:
      • Windows Server Core: This is the most common choice. It offers the best compatibility for older applications, as it includes a large subset of Windows APIs and services, such as IIS.
      • Nano Server: This is an incredibly lightweight, stripped-down version of Windows. You use it for modern, self-contained .NET Core/5/6+ applications to create the smallest possible image size.
    • When to use them: You must use a Windows container if your application is:
      • Built on the .NET Framework (e.g., version 4.8 or earlier).
      • An IIS-hosted website (ASP.NET, classic ASP).
      • A Windows Service.
      • Dependent on Windows-specific technologies like MSMQ, COM+, or the GAC.

    When Should You Use Linux Containers?

    When you want to run a standard Linux container (like one for NGINX, Python, or Node.js), Docker on Windows cleverly uses virtualization to run a tiny, purpose-built Linux virtual machine in the background. Your Linux containers run inside this hidden VM, not directly on the Windows kernel.

    You should use a Linux container when your application is a standard Linux workload. This is perfect for:

    • Web servers like NGINX or Apache.
    • Applications written in Python, Node.js, Ruby, or Go.
    • Databases like PostgreSQL, MySQL, or Redis.
    • Essentially, any application you would normally find on Docker Hub that is not explicitly for Windows.

    3. Installation Guide: Using PowerShell

    To manage a Windows Server effectively, you need to embrace automation and scripting. For the entire installation, we will use PowerShell for all tasks. It’s repeatable, less prone to human error, and the professional way to configure your servers.

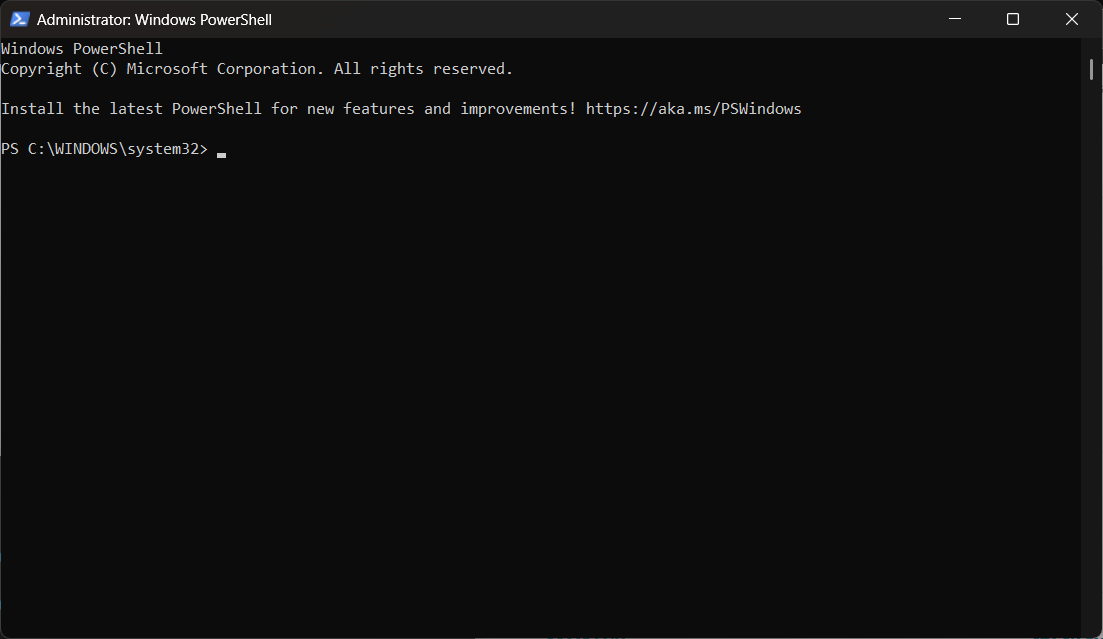
    First, open PowerShell as an Administrator. You can do this by right-clicking the Start button and selecting “Windows PowerShell (Admin)” or “Windows Terminal (Admin)”.
    Step 1: Enable Required Windows Features

    Before you can install the Docker Engine, you must first enable the underlying features in the Windows operating system that support containerization and virtualization.

    In your elevated PowerShell window, run the following commands one by one:

    # Installs the core Windows Containers feature
    Install-WindowsFeature -Name Containers
    # Installs the Hyper-V role. This is best practice for security and compatibility.
    Install-WindowsFeature -Name Hyper-V 

    Even if you only plan to run Windows containers, installing the Hyper-V role enables “Hyper-V isolation.” This is a more secure way to run containers, as each one gets its own lightweight, dedicated kernel, preventing anything inside the container from affecting the host server.

    Step 2: Install the Docker Engine on Windows

    After your server has restarted, open another elevated PowerShell window. You will now use Microsoft’s DockerMsftProvider module to find and install the Docker Engine directly from a trusted repository.

    Run these two commands:

    # Installs the PowerShell module that knows how to find and install Docker
    Install-Module -Name DockerMsftProvider -Repository PSGallery -Force
    # Uses the module to install the latest validated version of Docker Engine
    Install-Package -Name docker -ProviderName DockerMsftProvider

    You will be asked to trust the repository; type A (for “Yes to All”) and press Enter to proceed.

    Step 3: Post-Install Verification

    Once your server is back online, it’s time to confirm that everything is working as expected. Open a new elevated PowerShell window and run these checks.

    1. Check the Docker Service: The Docker Engine runs as a Windows service. Run the following command to verify it. You should see the Status listed as Running.
    Get-Service docker
    1. Check the Docker CLI: Run the following command to verify that the docker command is available in your system’s PATH.
    docker --version

    This should return the Docker version you just installed, for example: Docker version 20.10.9, build 79ea9d3.

    1. Get Detailed Information: The ‘docker info’ command provides a comprehensive overview of your installation.
    docker info

    Post-Installation Configuration

    After installation, make Docker production-ready by adjusting these settings:

    • Create the Config File: Create a file named daemon.json inside the C:\ProgramData\docker\config\ directory. You will need to create the config folder yourself if it does not exist.
    • Move the Docker Data Directory: To prevent filling your C: drive, add the following to your daemon.json: "data-root": "D:\\Docker". This moves all images, volumes, and container data to the specified path on your D: drive.
    • Set up a Registry Mirror: To speed up image pulls for docker pull, configure a local mirror. Add "registry-mirrors": ["https://your.registry-mirror.url"] to prioritize pulling from your faster, local cache.
    • Grant Access to Non-Admins: To allow standard users to run Docker commands, add the following to the configuration: "group": "docker". This gives members of the local Docker security group access to the Docker engine.
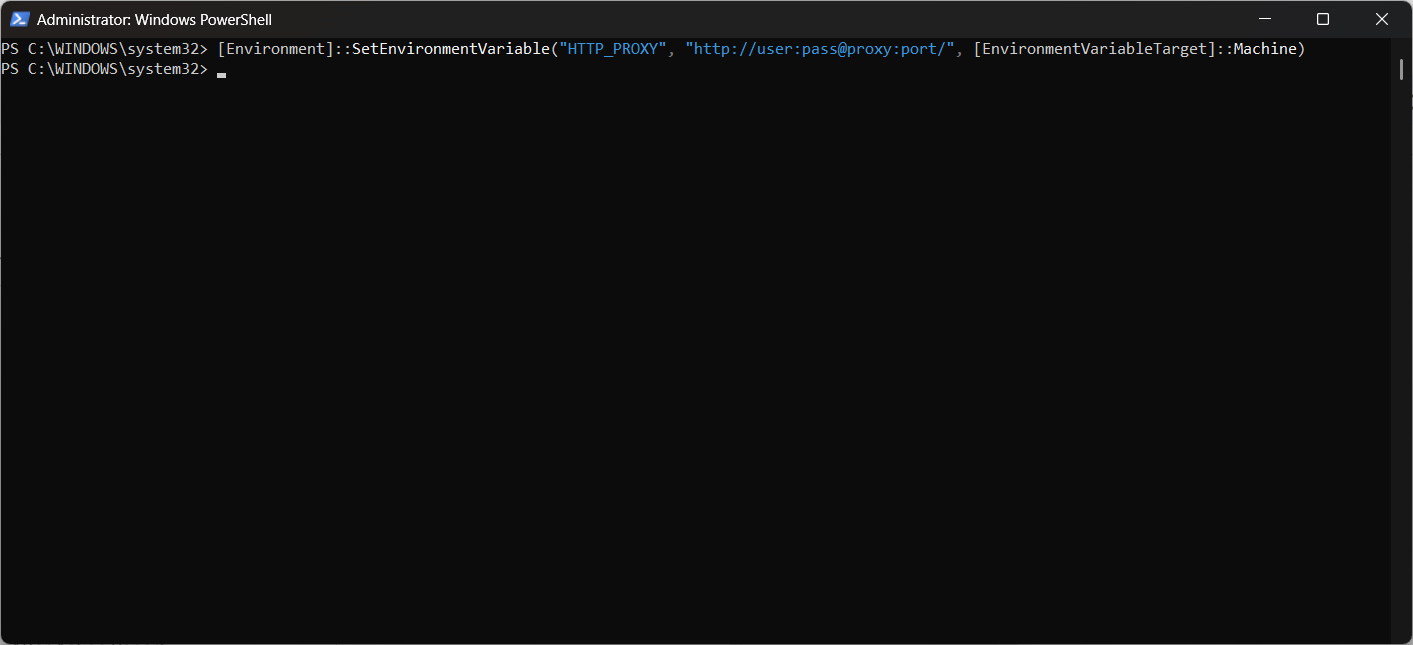
    • Set a Network Proxy: To use Docker behind a corporate proxy, you must set an environment variable. Use PowerShell to run [Environment]::SetEnvironmentVariable("HTTP_PROXY", "http://user:pass@proxy:port/", [EnvironmentVariableTarget]::Machine).
    installing docker on windows
    • Run a Test Container: After configuring and restarting the Docker service, always confirm it’s working correctly. Run docker run mcr.microsoft.com/windows/nanoserver:ltsc2022 powershell -Command "echo Hello from your configured container!" to verify it works correctly.

    Suggested read: Self-Hosting Docker vs Cloud-Based Docker

    After Action Report

    Docker on Windows solves specific use cases, but most modern stacks run faster and more reliably on Linux. If you want that performance without managing Linux manually, RunCloud gives you a clean dashboard for deploying and managing Linux servers with ease.

    With RunCloud, you get:

    • Rock-Solid Security: RunCloud automates complex security configurations, so your server is hardened and protected from the start.
    • Total Flexibility: It works with any cloud provider (e.g., AWS, DigitalOcean, Vultr) or even a server in your own home. You never get locked into a single provider.
    • Complete Control: You always retain full root access and complete control of your server; RunCloud is your co-pilot, not a black box.

    If you’re ready to run Docker with fewer constraints and better performance, try hosting your containers on a fast Linux server managed through RunCloud’s easy dashboard.

    Create your free RunCloud account and deploy your next container the simple way.
  • Effortless n8n Hosting with RunCloud, Docker, and NGINX

    Effortless n8n Hosting with RunCloud, Docker, and NGINX

    n8n is an open-source automation platform that connects apps and services to streamline repetitive tasks – all under your control.

    If you want full control over your setup, self-hosting n8n is the way to go. But managing your own infrastructure doesn’t have to be complicated.

    In this guide, you’ll learn how to deploy n8n using Docker, configure it securely with NGINX and SSL, and use RunCloud to handle the heavy lifting – from server setup to backups.

    Let’s get started.

    Why Host n8n with RunCloud & Docker?

    Why Use RunCloud and Docker to Host n8n?

    • Full control – Keep your data and workflows on your own terms.
    • Simplified management – RunCloud handles your domain, SSL, and NGINX config.
    • Efficient setup – Docker keeps n8n isolated and updates easy.
    • Multi-app support – Run multiple apps on one server with ease.

    Let’s explore how to get your n8n instance running smoothly with RunCloud.

    Step-by-Step Instructions to Install n8n

    Follow these steps to create your own n8n instance on your server:

    You’ll need:

    • A cloud server (e.g., DigitalOcean, Vultr) connected to RunCloud
    • A domain or subdomain pointed to your server IP

    If you use RunCloud’s Cloudflare integration, DNS setup takes just a few clicks during web app creation.

    Step 1: Create a New Web Application in RunCloud

    RunCloud makes it very easy to manage domain names, SSL certificates, and backups for your web applications. But before we can configure all that, you will need to create a dedicated web application for n8n:

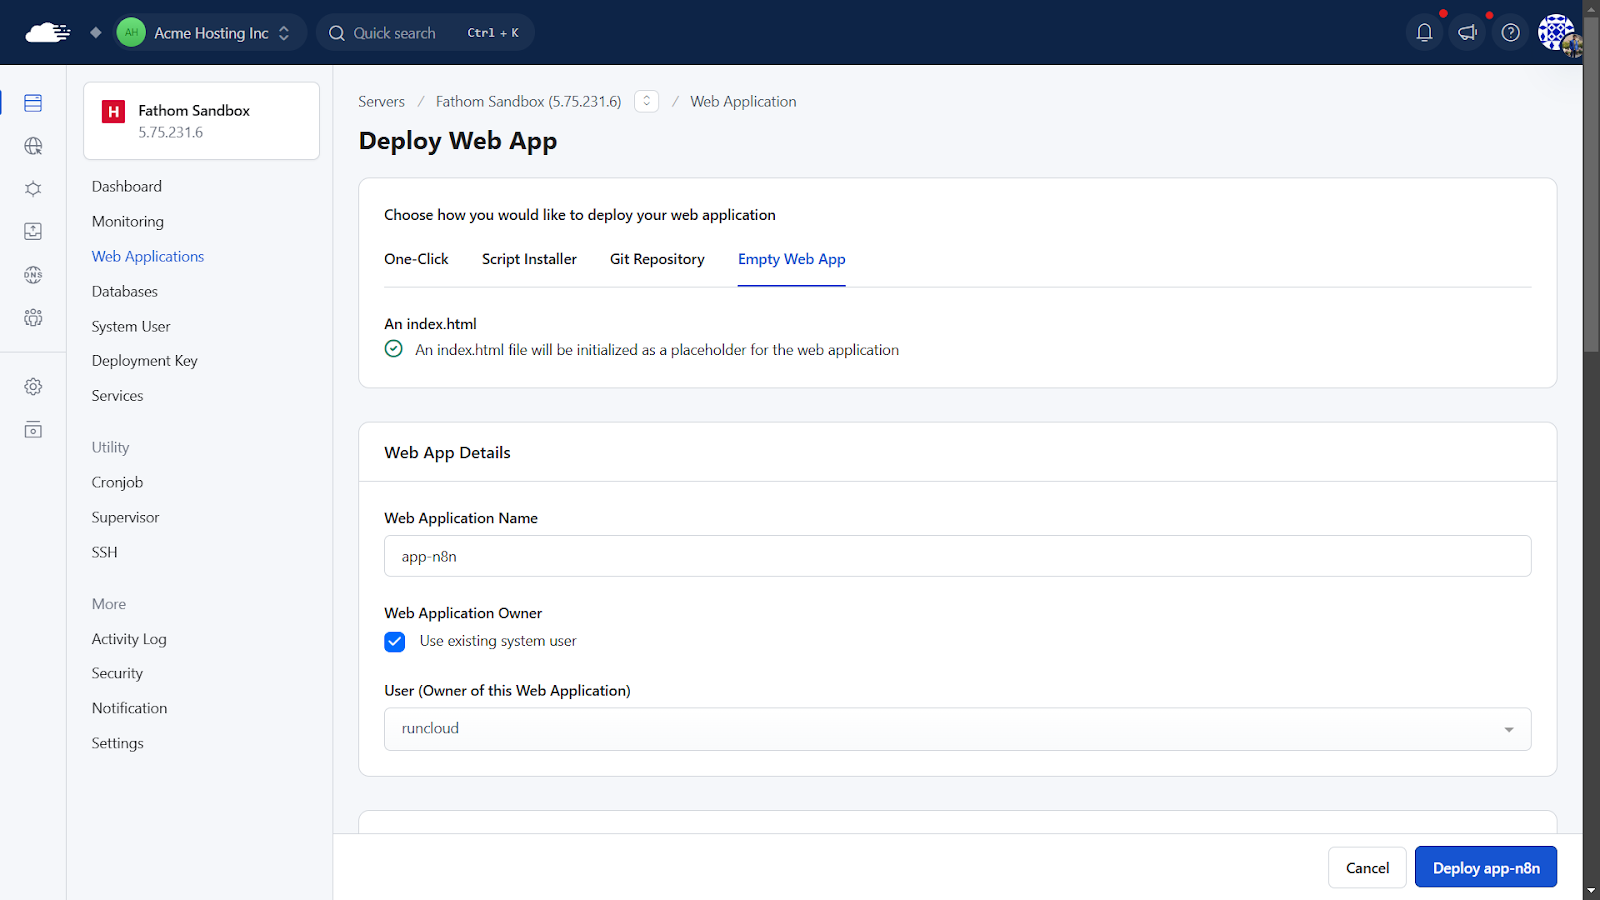
    1. Log in to your RunCloud dashboard, navigate to “Web Applications“, and click “Create Web Application“.
    2. Application Name: Give it a descriptive name, e.g., “n8n-app”.
    3. Web Application Owner: Select your system user. For maximum security, it is recommended that you create a new user account for each web application.
    4. Domain Name: Enter the custom domain you’ll use for n8n (e.g., n8n.example.com). If you are using RunCloud’s Cloudflare integration, you can easily update necessary DNS records with a single click.
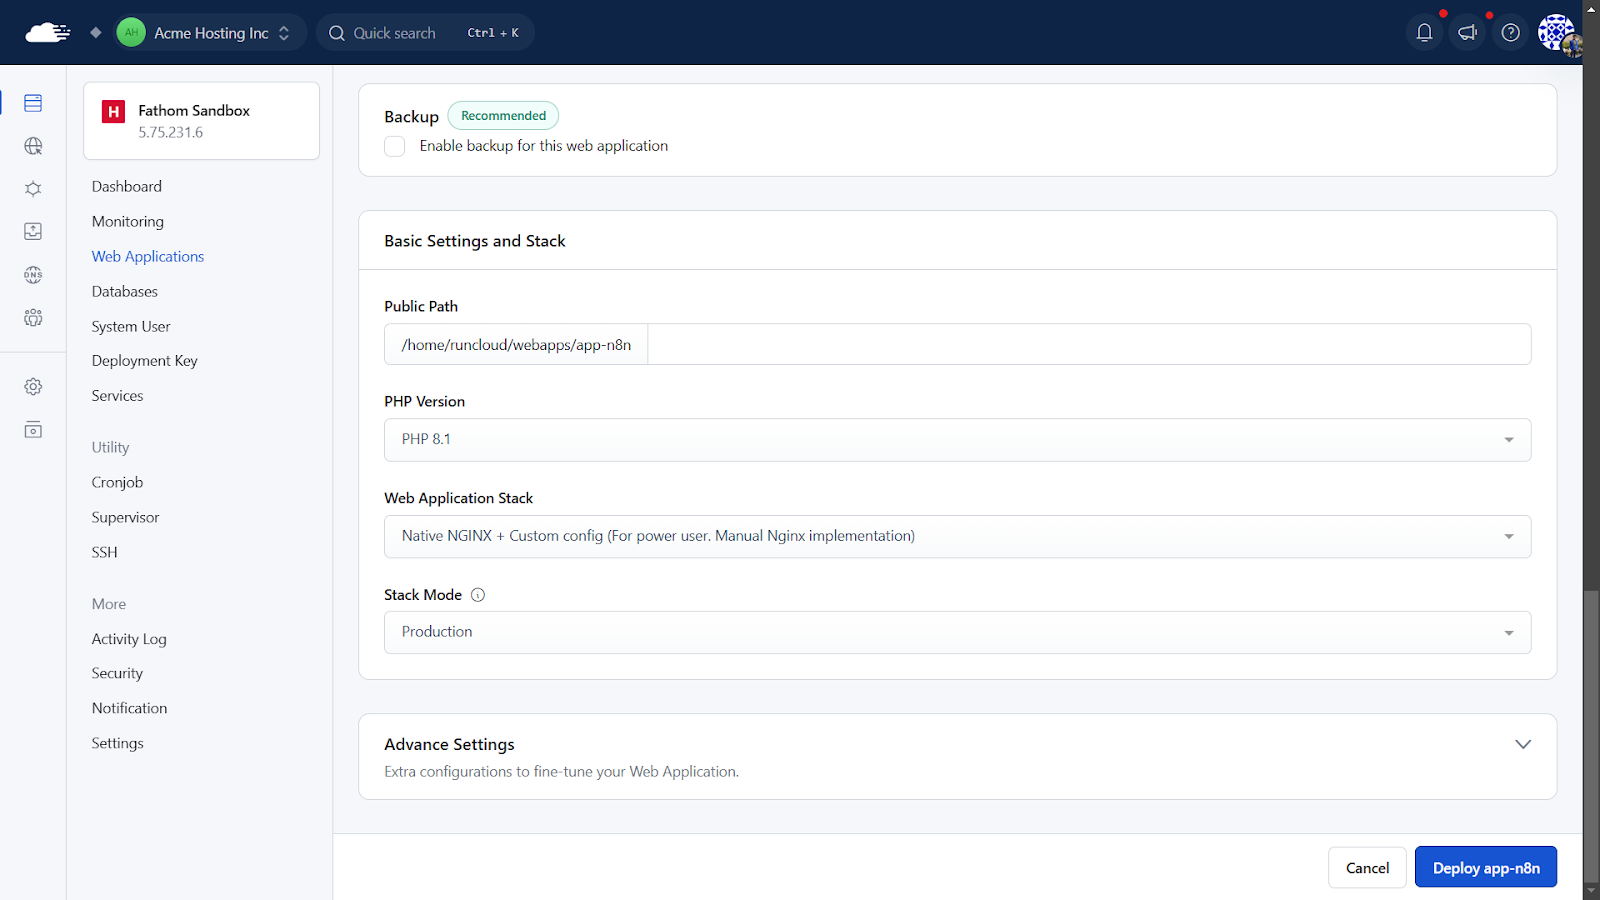
    1. PHP Version: You can select any PHP version; n8n itself doesn’t use it directly as it’s containerized, but RunCloud requires one to be set. The default is fine.
    2. Web Application Stack: For this setting, select “Native NGINX + custom config” as we will be using this as a proxy to connect to the n8n Docker container.
    3. After configuring all settings, click “Create Web Application” to deploy the web application.
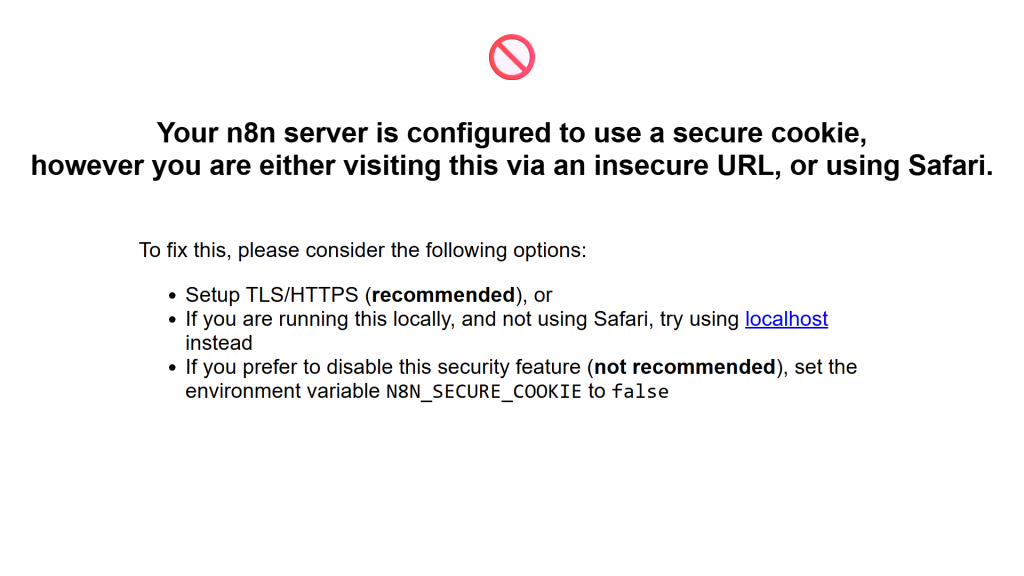
    1. SSL/TLS: Once the app is created, go to its SSL/TLS section in RunCloud. Use Let’s Encrypt to get a free SSL certificate. If you skip this step, you will get the following error later in the process:

    Step 2: SSH into Your Server and Navigate to Your Web App Directory

    After creating the web application, connect to your server via SSH. If you don’t know how to do this, read our documentation on How to Connect to Your Server via SSH to learn more.

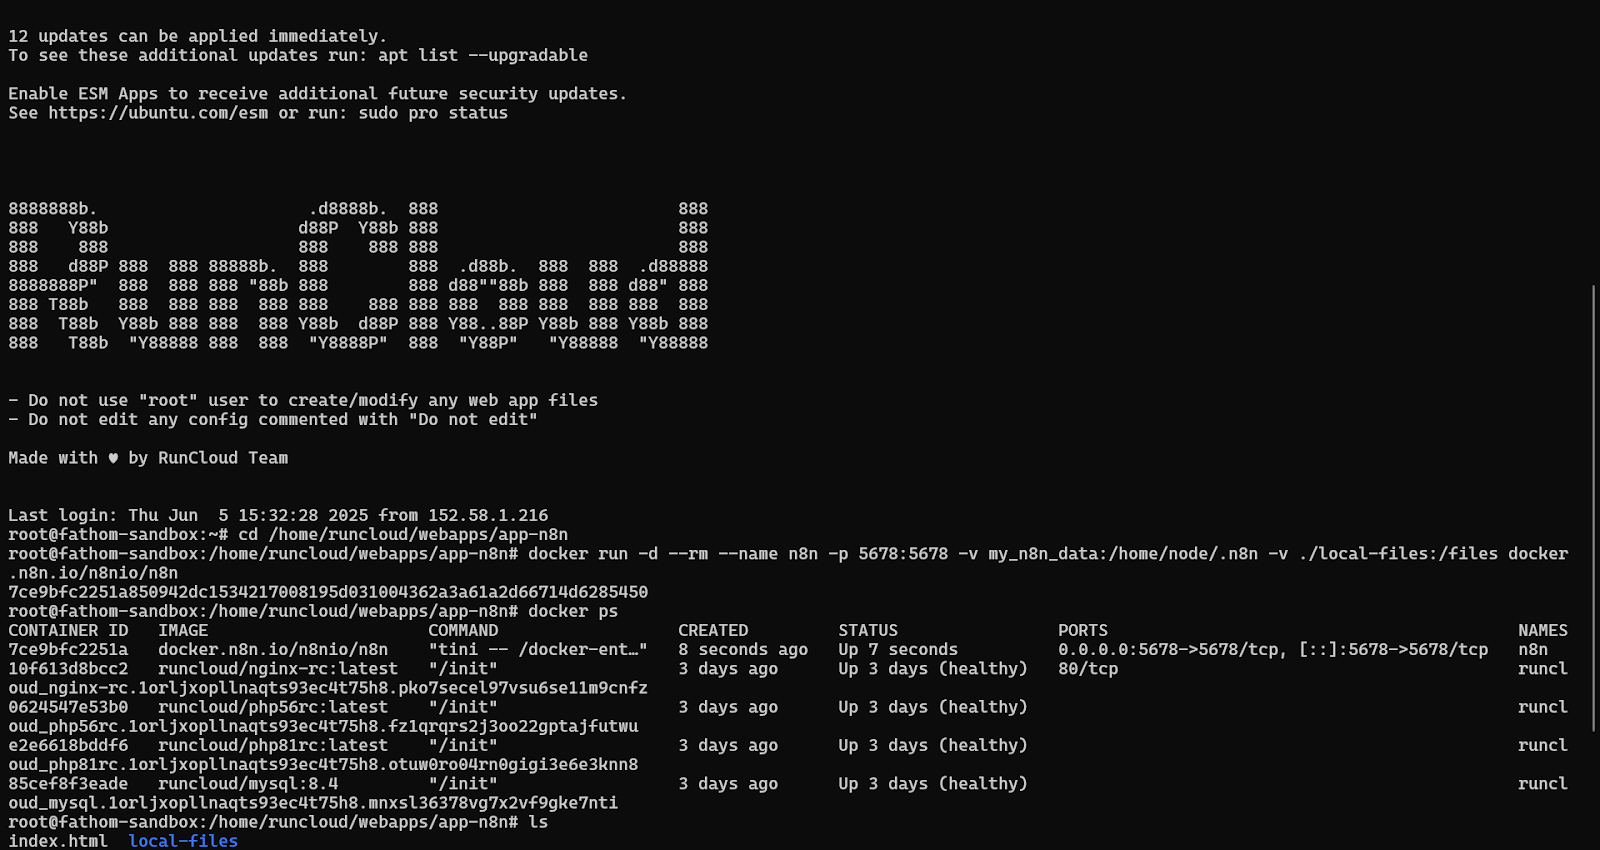
    After connecting to your server, navigate to the web application’s root directory you just created in RunCloud using the ‘cd’ command. Make sure to replace the path in the following command with the actual root path of your web application:

    cd /home/runcloud/webapps/<app-name>

    Step 3: Create the local-files Directory

    In this directory, you can create a new directory that will be mapped to the Docker container. This will contain the web application data of your n8n instance. Execute the following command to create this directory:

    mkdir n8n_data
    sudo chown -R 1000:1000 n8n_data

    This will store your n8n data and assign the correct ownership permissions so that the data is accessible from the Docker container.

    Step 4: Create the Docker Application

    Now, let’s define and launch our n8n application using Docker. You have two ways to approach this. For a very quick start, you could use the following Docker run command:

    docker run -d --rm \
      --name n8n \
      -p 5678:5678 \
      -e GENERIC_TIMEZONE="UTC" \
      -e TZ="UTC" \
      -e N8N_HOST="app-n8n.EXAMPLE.com" \
      -e N8N_EDITOR_BASE_URL="https://app-n8n.EXAMPLE.com/" \
      -e N8N_PROTOCOL="https" \
      -e N8N_ENFORCE_SETTINGS_FILE_PERMISSIONS=true \
      -e N8N_RUNNERS_ENABLED=true \
      -e N8N_LICENSE_ACTIVATION_KEY="EXAMPLE" \
      -e N8N_EMAIL_MODE="smtp" \
      -e N8N_SMTP_HOST="smtp.EXAMPLE.com" \
      -e N8N_SMTP_PORT="25" \
      -e N8N_SMTP_USER="EXAMPLE" \
      -e N8N_SMTP_PASS="EXAMPLE" \
      -e N8N_SMTP_SENDER="N8N <n8n@EXAMPLE.com>" \
      -e N8N_SMTP_SSL=true \
      -e N8N_SMTP_STARTTLS=true \
      -v ./n8n_data:/home/node/.n8n \
      docker.n8n.io/n8nio/n8n

    Once you run the above command, Docker will download and run the required containers for your application.

    For more flexibility (custom env settings, time zones), use Docker Compose instead. See n8n’s Docker documentation for advanced setups.

    Step 5: Configure NGINX Reverse Proxy via RunCloud

    After enabling the Docker container, you must configure a reverse proxy to route traffic to your container.

    1. In RunCloud, go to your n8n-app
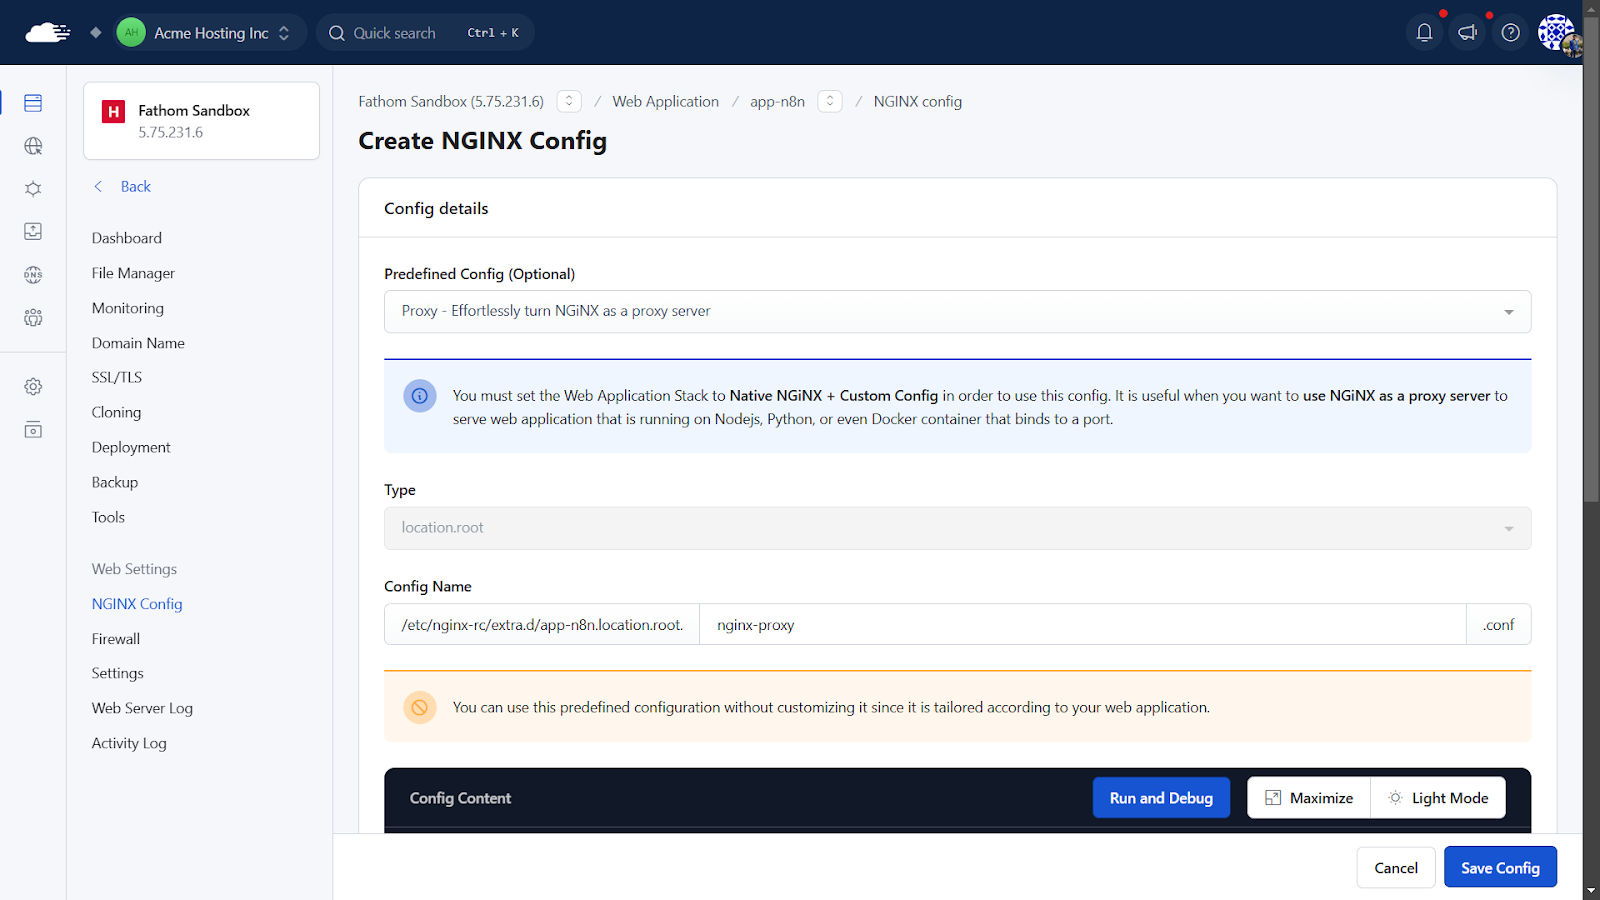
    2. Under “NGINX Config“, click “Create NGINX Config“
    3. Select: Proxy – Turn NGINX into a proxy server
    4. Name it n8n-proxy
    1. In the Content box, paste the following NGINX configuration:
    proxy_pass http://host:5678;
    # > uncomment below line if you want to disable proxy buffering
    # proxy_buffering off;
    proxy_set_header X-Real-IP $remote_addr;
    proxy_set_header X-Forwarded-Host $host;
    # > websocket support. if you want to proxy websockets, uncomment 3 lines below
    proxy_http_version 1.1;
    proxy_set_header Upgrade $http_upgrade;
    proxy_set_header Connection "upgrade";
    1. After configuring the required settings, click “Create NGINX Config“. RunCloud will test and apply this configuration on your server immediately.

    Step 6: Access Your Secure n8n Instance

    After enabling the proxy, open your web browser and go to the domain you configured for your web application (e.g., https://n8n.example.com).

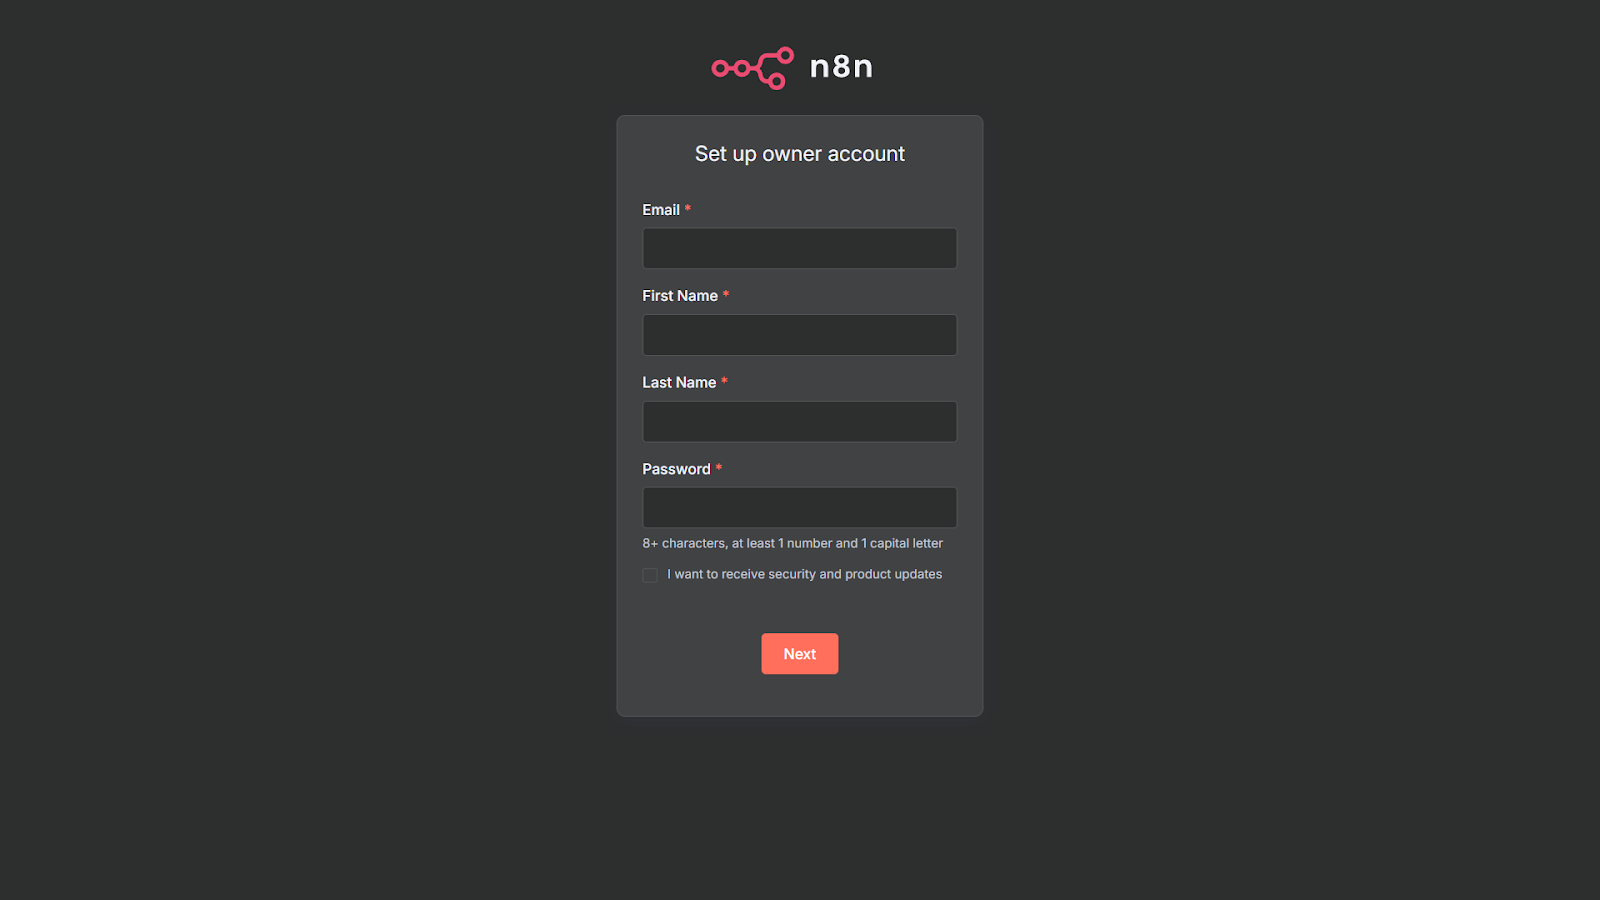
    If you use RunCloud’s built-in SSL manager, you will see the following n8n setup screen to create your account:

    Step 7: Enable Backups

    Don’t skip this. Backups protect your data and save time if anything breaks.

    In your RunCloud dashboard, set up automated backups for your n8n-app. You can create daily snapshots of your files and easily restore them if needed.

    Learn more in our backup guide.

    Final Thoughts: Your Automation Journey and Beyond with RunCloud

    You now have a secure, fully self-hosted n8n setup – managed through RunCloud and running in Docker.

    But setting up n8n is just scratching the surface of what RunCloud can simplify for you. You can also use RunCloud to effortlessly host other applications without diving deep into complex server configurations. With RunCloud, you can easily deploy and manage:

    • Nextcloud: Your private cloud for files, calendars, and contacts.
    • WHMCS: The leading web hosting automation platform.
    • WordPress: The world’s most popular content management system.
    • FreeScout: A powerful open-source help desk and shared inbox.
    • Ghost CMS: A sleek and modern platform for professional publishing.
    • And much more…

    RunCloud takes the hassle out of server administration, allowing you to focus on what you do best → building, creating, and automating.

    Ready to simplify your server management? Sign up for RunCloud today.

  • How to Deploy Supabase to Hetzner, UpCloud & More

    How to Deploy Supabase to Hetzner, UpCloud & More

    Supabase is the most popular open-source Backend-as-a-Service (BaaS) platform, which offers developers the freedom and control of self-hosting.

    By combining the power of Supabase with the simplicity of RunCloud’s server management panel, you can deploy a scalable and private backend for your applications without vendor lock-in.

    In this tutorial, we will guide you through every step of deploying a containerised Supabase instance on a server managed by RunCloud.

    We will demonstrate how RunCloud’s flexibility enables you to run complex Docker applications with ease, providing you with full control over your infrastructure.

    Let’s get started!

    How To Self-Host Supabase on RunCloud

    Before we begin, ensure you have the following three prerequisites in place. This guide assumes you have already completed these initial steps.

    1. A RunCloud Account: You can sign up for a free or paid plan on the RunCloud website.
    2. A Cloud Server Provider: You’ll need an account with a cloud provider like Hetzner, DigitalOcean, Vultr, or AWS.
    3. Basic SSH Knowledge: You will need to connect to your server via SSH. We highly recommend setting up an SSH key for secure access. RunCloud’s documentation provides a clear guide on how to manage SSH keys.

    Step 1: Choosing and Provisioning the Right Server

    Supabase offers a comprehensive suite of tools, including a PostgreSQL database, authentication services, storage, and more. These services are resource-intensive. To ensure a smooth experience, you’ll need to provision a server with adequate resources.

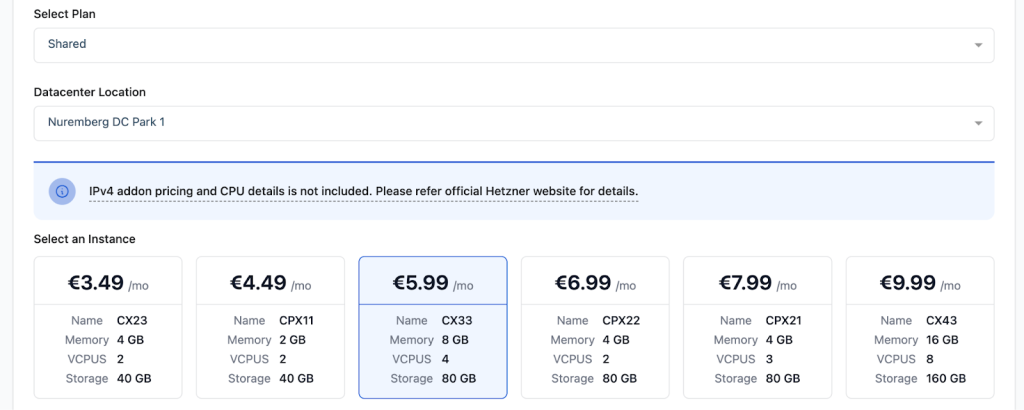
    For this tutorial, we recommend a server with at least 8GB of RAM and four vCPUs. This provides sufficient headroom for all backend services to run smoothly. Depending on your specific use case and expected traffic, you may need to scale this up or down.

    If you want to learn more about this process, read our dedicated guides, which cover the process of connecting a new server in great detail:

    Regardless of what server size you pick, your RunCloud subscription provides you with the ability to create an unlimited number of web applications.

    This flexibility allows you to deploy as many applications on your server as its hardware resources can physically handle, making it an extremely cost-effective solution for developers and agencies managing multiple projects.

    Step 2: Creating a Web Application in RunCloud

    Next, we need to create a “container” or placeholder within RunCloud for our Supabase installation. This web application will define the directory structure and the domain that will point to our Supabase instance.

    1. From your RunCloud dashboard, navigate to your server and click on Web Applications.
    2. Click Add Web Application.
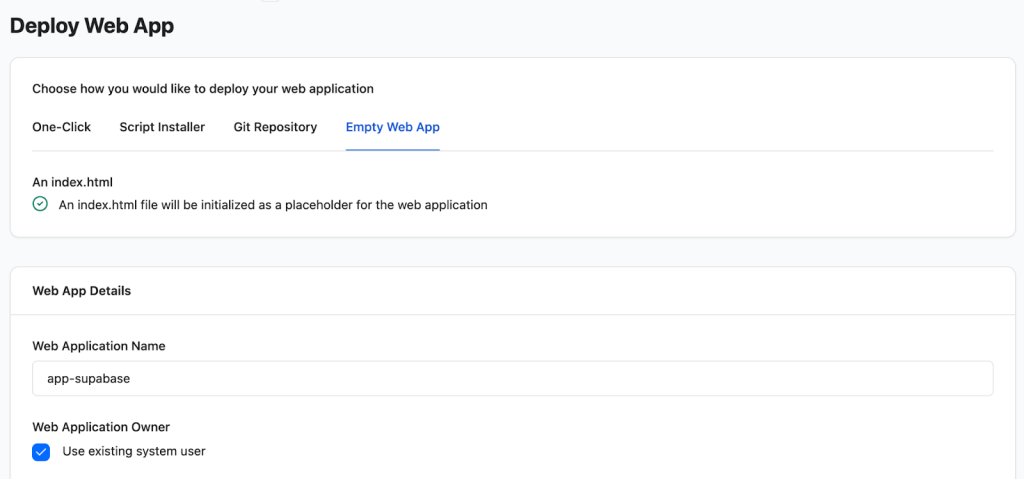
    3. Choose the Empty Web App option. This is important because we will be deploying a custom Docker setup, not a standard PHP application.
    4. Fill in the Web App Details:
      • Web Application Name: Give it a descriptive name, such as ‘app-supabase’.
      • Web Application Owner: You can use the default system user.
      • Domain Name: It’s highly recommended to use a real domain or subdomain (e.g., supabase.yourdomain.com). This will make accessing your instance much easier. For guidance on pointing your domain, please consult your domain provider’s documentation and the RunCloud DNS settings guide.
    1. Select the Web Application Stack: Select Native NGINX + Custom config. This stack gives us the raw power to configure NGINX as a reverse proxy later, which is essential for routing traffic to our Docker containers.
    2. Deploy the Application: After configuring the basic settings, you can deploy the application on your server by clicking “Deploy”. 
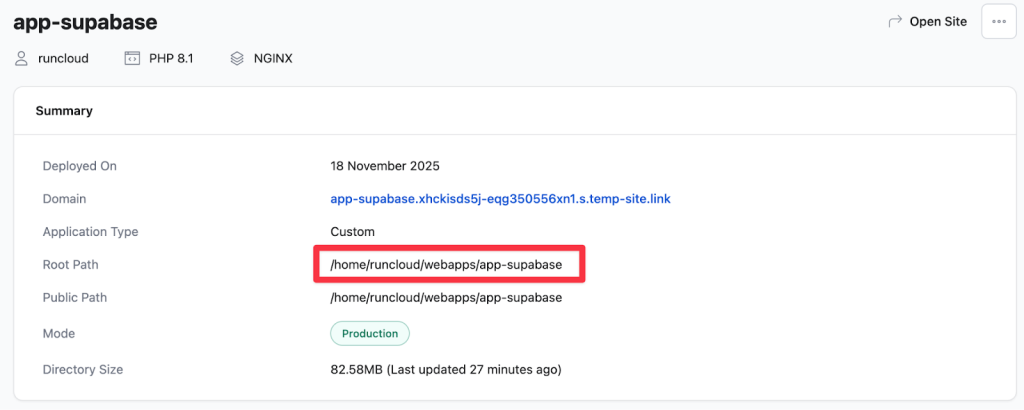
    3. Note down the Project Root: After the application is created, take note of the Web Root Path, which is displayed on the dashboard. This will be something like /home/runcloud/webapps/app-supabase. You will need this exact path in a later step.

    Step 3: Connecting to Your Server via SSH

    After creating your web application, we will begin the process of installing Supabase on the server. For this, we need to run several commands directly on the server. You’ll need to SSH into your server using the SSH credentials provided by your cloud provider.

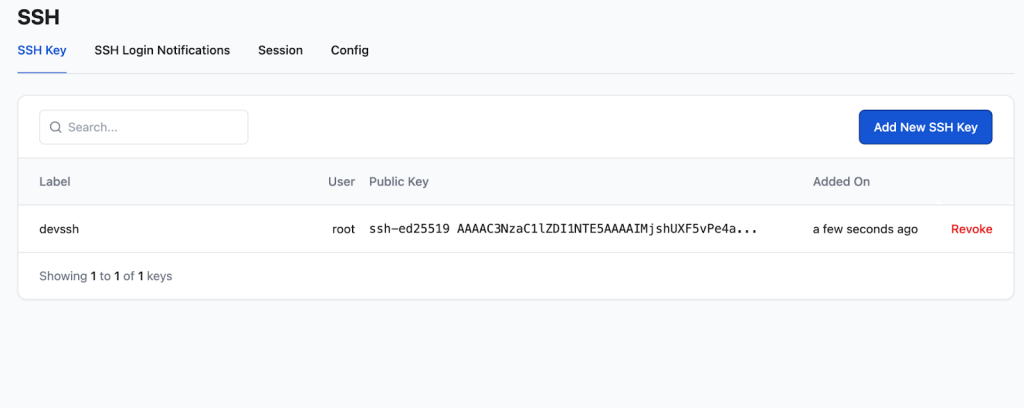
    For enhanced security and convenience, we recommend adding your public SSH key to RunCloud Vault. This allows you to log in without typing a password, and is more secure.

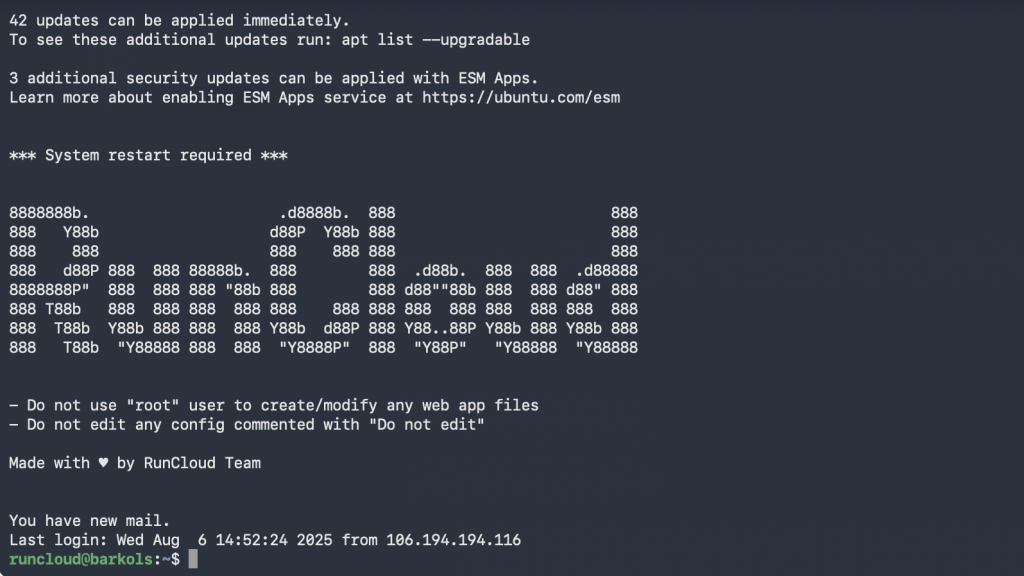
    Once your key is added to the RunCloud vault, open your terminal and run the following command to connect to the server via SSH: 

    ssh-i ~/.ssh/your_private_key runcloud@<YOUR_SERVER_IP>

    After successful login, you’ll see a welcome message from RunCloud:

    Step 4: Cloning and Preparing the Supabase Docker Files

    Now that you’re inside the server, it’s time to download the official Supabase Docker configuration and move it into the web application directory we created. Run the following commands one by one:

    Navigate to a temporary directory. This is a safe place to clone the repository before moving the files.

    cd /tmp

    Clone the official Supabase repository. The –depth 1 flag performs a shallow clone, downloading only the latest version to save time and space.

    git clone --depth 1 https://github.com/supabase/supabase

    Copy the Docker files to the root of your project. Replace <runcloud project root> with the actual path you noted in Step 2.

    cp -rf supabase/docker/* <runcloud project root> 

    Copy the example environment file. This file contains all the configuration variables Supabase needs. We will edit this in the next step.

    cp supabase/docker/.env.example <runcloud project root>/.env

    Step 5: Configuring Your Supabase Environment

    After copying the files, you need to configure your environment. The .env file you just created contains default, insecure passwords and secret keys. You must change these before launching your Supabase installation.

    Navigate to your project root directory:

    cd <runcloud project root>

    Open the file for editing using nano: If you are not comfortable with nano, you can use any other text editor that you like, or read our blog post on How to Edit Files on Remote Servers with SSH and Nano

    nano .env

    Update Passwords and Secret Keys: After opening the file, carefully review its contents. At a minimum, you must change the following values to strong, randomly generated strings. You can use an online password generator for this.

    1. POSTGRES_PASSWORD: This is the password for the superuser account in your PostgreSQL database. Change this to a very long, complex, and unique password.
    2. JWT_SECRET: This secret is used to sign JSON Web Tokens (JWTs) for user authentication and authorisation. Update this with a long, randomly generated token, ideally 32 characters or more.
    3. ANON_KEY and SERVICE_ROLE_KEY: These JWTs are used for the anon (public) and service_role (admin/backend) users, respectively. While they are full tokens, the underlying signing secret (JWT_SECRET) is the primary vulnerability if unchanged. While changing the JWT_SECRET effectively invalidates the default keys, it is best practice to generate new, unique keys for both the ANON_KEY and SERVICE_ROLE_KEY after updating the JWT_SECRET.
    4. DASHBOARD_USERNAME and DASHBOARD_PASSWORD: These credentials control access to the Supabase management dashboard. Change both the default username and the default password to strong, unique values.
    5. SECRET_KEY_BASE: This is a cryptographic key used for various internal security features within the application framework (often related to cookie signing or encryption). Replace the current value with a long, random, and unique cryptographic key.
    6. VAULT_ENC_KEY and PG_META_CRYPTO_KEY: These are encryption keys used for encrypting secrets and other sensitive data stored within the database vault and the metadata store. Update both keys with unique, randomly generated encryption keys that are at least 32 characters long.

    The file also contains optional settings for sending emails, analytics, and logging. You can leave these blank for now unless you plan to use those services. After you have made the necessary changes, press Ctrl+X, then Y, and then Enter to save your changes in nano.

    Step 6: Launching the Supabase Services with Docker

    Once you have updated your .env file, you are now ready to launch your Supabase instance. This process is very simple, and it requires you to run just two commands:

    Pull the latest Docker images

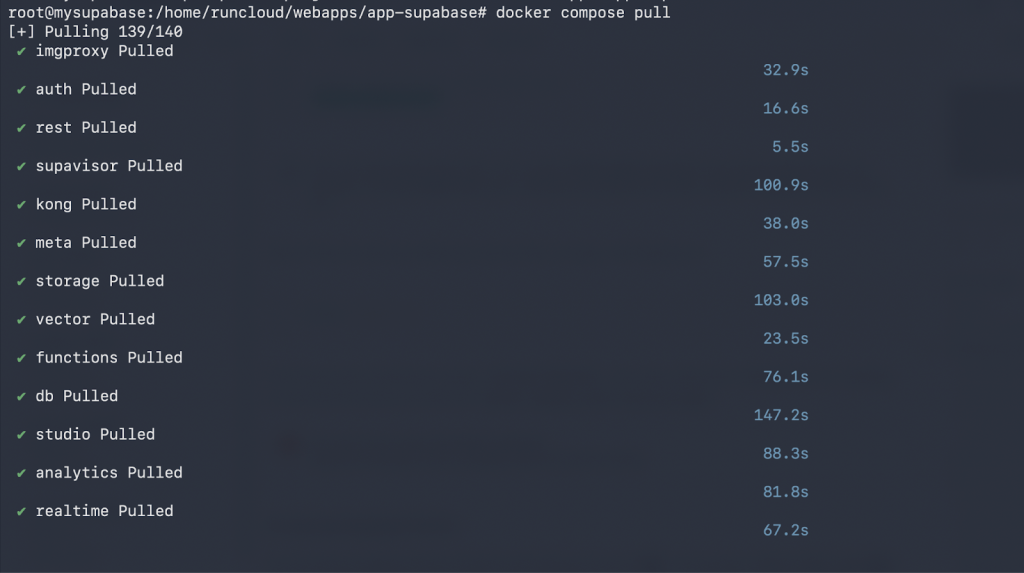
    This command downloads all the necessary container images for each Supabase service (database, auth, storage, etc.). This may take several minutes, depending on your server’s network speed.

    docker compose pull 

    Start Supabase Services in detached mode

    The ‘up’ command starts the containers, and the ‘-d’ flag runs them in the background, so they continue to run after you log out of your SSH session.

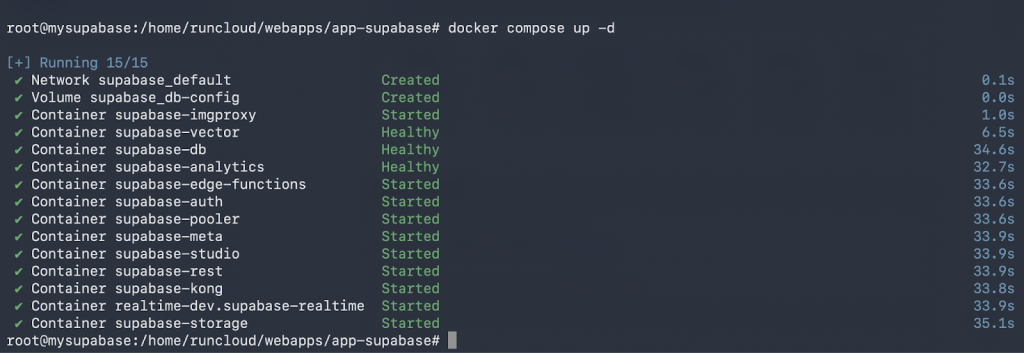
    docker compose up -d

    You will see output indicating that all the services have started successfully.

    Your Supabase instance is now running inside Docker on your server! However, it’s not yet accessible from the internet. For that, we need to set up a reverse proxy.

    Step 7: Configuring an NGINX Reverse Proxy

    The Supabase stack listens for traffic internally on port 8000. We need to tell NGINX to take all incoming web traffic (on ports 80 and 443) for your domain and forward it to this internal port. This is a classic reverse proxy setup, and RunCloud makes it very simple.

    1. Go back to your RunCloud dashboard and navigate to your app-supabase web application.
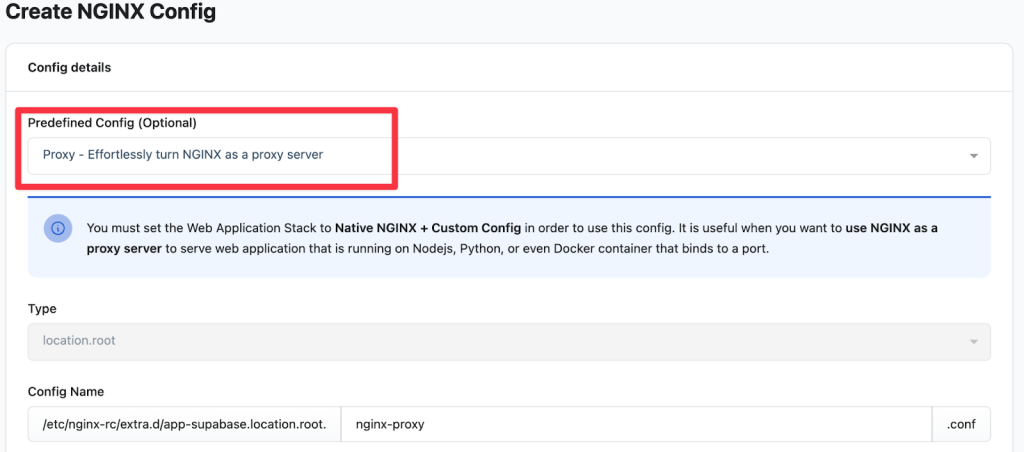
    2. Go to the NGINX Config section and click Create NGINX Config.
    3. From the “Predefined Config” dropdown, select “Proxy – Effortlessly turn NGINX…”
    1. Delete all the default content in the text editor and paste the following configuration into the editor:
    proxy_pass http://host:8000;
    proxy_set_header X-Real-IP $remote_addr;
    proxy_set_header X-Forwarded-Host $host;
    proxy_http_version 1.1;
    proxy_set_header Upgrade $http_upgrade;
    proxy_set_header Connection "upgrade";
    1. Click “Save Config” to apply the new configuration.

    Step 8: Access Your Supabase Dashboard

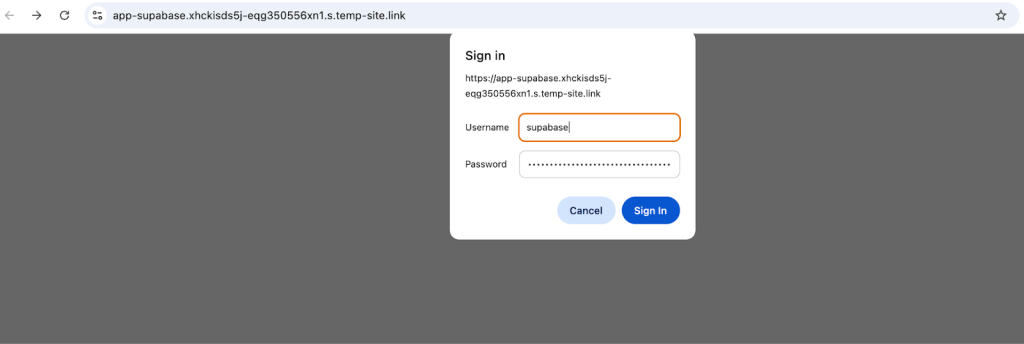
    Your self-hosted Supabase instance is fully deployed and accessible on the internet. You can now open your web browser and navigate to the domain you configured in Step 2 (e.g., https://supabase.yourdomain.com). When you visit this site, you should see the Supabase Studio login screen.

    Enter the credentials you configured in the .env file from the previous step, and you will be logged in to your own Supabase dashboard, ready to create tables, manage users, and build your next great application.

    installing a self-hosted supabase instance on runcloud

    Final Thoughts & Your Next Steps

    Congratulations on taking control of your backend by deploying a fully self-hosted Supabase instance! This tutorial shows more than just how to deploy Supabase; it showcases the true power and flexibility of RunCloud as a central hub for all your server management needs.

    But your journey with RunCloud doesn’t have to end here. The same platform that now runs your complex Dockerized Supabase application is perfectly equipped to manage all your other projects.

    Whether you’re running a high-traffic WordPress site, a modern Laravel application, a content-rich Ghost CMS, an n8n instance for your automation workloads, or even a private cloud with Nextcloud, RunCloud provides the tools to manage it all effortlessly.

    If you are a developer who needs a professional workflow, RunCloud provides features such as Git integration for atomic deployments, creating a smooth CI/CD pipeline directly from your repository.

    Perhaps one of the most compelling advantages of using RunCloud is its predictable, resource-independent pricing model. RunCloud does not charge you based on your server’s specifications or resource consumption. Whether you choose a small 2GB RAM server or a powerful 64GB machine to run your Supabase instance, your RunCloud subscription cost remains the same, offering predictable expenses as you grow.

    Sign up for RunCloud today.

    Frequently Asked Questions About Self-Hosting Supabase with RunCloud

    How do I scale my server if my Supabase application grows?

    RunCloud is completely cloud-provider agnostic, meaning it doesn’t lock you into a specific hardware provider. When you need more power, you can simply resize your server at Hetzner, DigitalOcean, or any other provider, and RunCloud will continue to manage it seamlessly.

    How does RunCloud help secure my self-hosted Supabase instance?

    Security is a primary concern with self-hosting, and RunCloud automates the most critical tasks for you. It configures an isolated web application environment, sets up a server firewall with a single click, and provides timely notifications for security updates, ensuring your server remains up-to-date and protected from common threats.

    What’s the easiest way to back up my database?

    Manually scripting database backups is tedious and prone to errors. RunCloud offers a straightforward, off-server backup solution that allows you to schedule backups for your database and files with just a few clicks. This ensures that your critical user data is always secure and can be easily restored in the event of an emergency.

    How do I add an SSL certificate to my Supabase domain to secure API calls?

    RunCloud offers free, auto-renewing Let’s Encrypt SSL certificates for any domain associated with your web application. You can secure your Supabase API endpoints and dashboard with a trusted HTTPS connection with a single click, eliminating the complexity of manual certificate generation and renewal.

    Supabase has many services. How can I monitor my server’s health and resource usage?

    RunCloud’s dashboard provides a real-time health monitoring system for your server. You can instantly check CPU, RAM, and disk usage to ensure your server has enough resources to run smoothly. This visual overview helps you anticipate scaling needs and troubleshoot performance issues before they impact your users.

  • How to SSH Into Docker Container

    How to SSH Into Docker Container

    If you’ve ever searched for information on how to SSH into a Docker container, you’ve probably found conflicting advice. The truth is, you don’t usually need to run an SSH server inside a container at all. Instead, Docker provides built-in commands that give you secure, direct access to your containers.

    In this guide, we’ll show you the correct ways to get a shell inside a running container, explain the difference between docker exec and docker attach, and demonstrate how to safely detach without stopping your application. We’ll also cover when copying files makes sense, and why adding a full SSH server inside a container should be avoided except in rare cases.

    Let’s get started!

    Why should you use CLI over Docker Desktop?

    While graphical user interfaces for Docker exist, the CLI is the primary and most powerful way to interact with the Docker daemon and containers. There are several scenarios where you’ll need to access your Docker server via the CLI:

    • Automation and Scripting: The most significant advantage is the ability to script any Docker operation. The CLI allows you to build a CI/CD pipeline, automate deployments, create complex multi-container setups with Docker Compose, and much more.
    • Server Environments: Most servers run headless (without a graphical interface). When you SSH into a remote production server, the CLI is the only way to manage Docker containers.
    • Precision and Control: The CLI gives you fine-grained control over every possible Docker option and flag. This level of precision is often abstracted or unavailable in GUIs.
    • Resource Efficiency: The CLI is lightweight. GUIs consume additional system resources that are better allocated to your applications, which is critical on a production server.
    • Universality: The Docker CLI is consistent across all platforms (Linux, macOS, and Windows). This universal experience makes it a reliable tool for developers and administrators, regardless of their local operating system.

    Suggested read: Essential Commands for Getting Started with Docker

    How To Get a Shell Into a Docker Container

    When debugging an issue in a Docker container, shell access is extremely helpful because it lets you monitor and inspect individual services.

    The phrase “SSH into a container” is common, but technically a misnomer. The most common and recommended methods do not involve running an SSH server inside the container at all. Let’s explore the primary techniques for gaining access and their common use cases.

    Using the ‘docker exec’ command (Recommended)

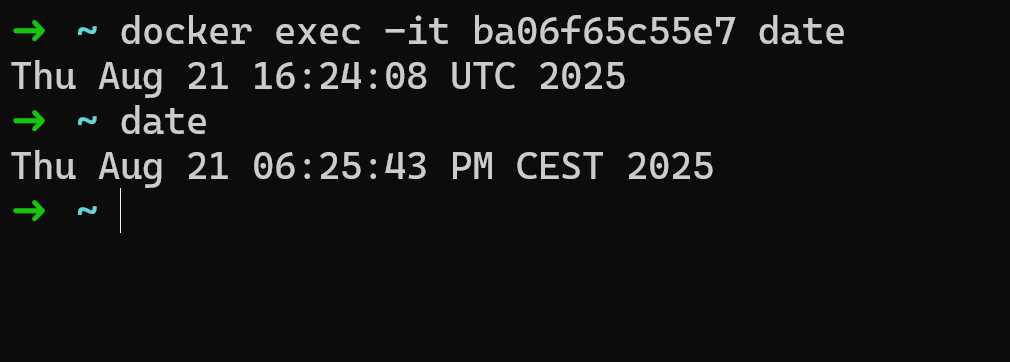
    The docker exec command is the most direct and recommended method for getting an interactive shell in a running container. This command starts a new process inside the container, letting you run commands without attaching to its primary process. Use the following command to get CLI access to your Docker container:

    docker exec -it <container_name_or_id> <command>
    • -i (–interactive): Keeps STDIN open, allowing you to type commands.
    • -t (–tty): Allocates a pseudo-TTY, which connects your terminal to the container’s shell, making it interactive.
    • <command>: The command to run. To get a shell, this is typically /bin/bash or /bin/sh.

    In the above example, we executed the date command inside a container with the ID ba06f65c55e7. It returned the current date and time of the Docker container (which was different from the host system).

    When to use the ‘docker exec’ Command

    • Debugging a Live Application: If your web server is running in a container and throwing errors, you can use docker exec to get a shell, check log files that aren’t being piped to stdout, inspect the environment variables (env), or use tools like curl from inside the container to test network connectivity to other services.
    docker exec -it my-web-app /bin/bash
    • Running Database CLI Tools: You need to inspect a database running inside a container. To do so, you can exec into the container and use a command-line client like psql or mysql.
    docker exec -it my-postgres-container psql -U myuser -d mydatabase
    • Installing Debugging Tools: Your container uses a minimal base image and doesn’t include tools like ping or vim. You can use exec to open a shell and install them temporarily for the current session.
    # Get a shell and then install curl
    docker exec -it my-app /bin/sh
    # Inside the container shell:
    # apt-get update && apt-get install -y curl

    Note: Changes made via docker exec (like installing a package) are ephemeral. If the container restarts, they will be gone. To make permanent changes, you should modify your Dockerfile and rebuild the image.

    Using the ‘docker attach’ Command

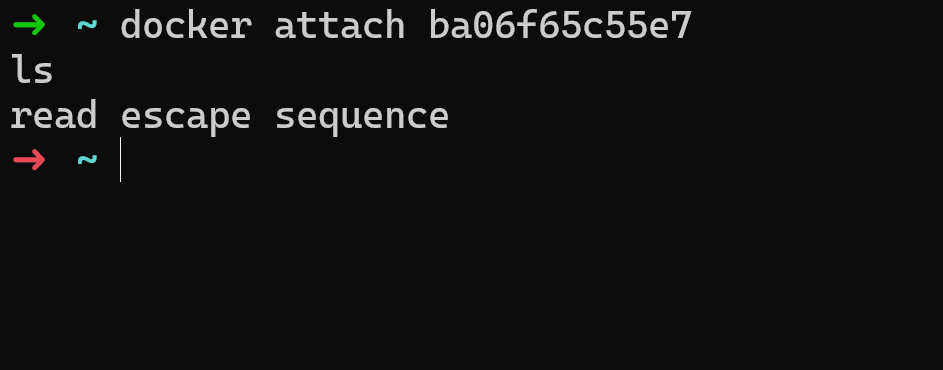
    The docker attach command connects your terminal’s input and output streams directly to the container’s main process (PID 1). This is fundamentally different from docker exec, which starts a new process. Execute the following command to attach to a Docker container:

    docker attach <container_name_or_id>

    When to use the ‘docker attach’ Command:

    • Interactive Applications: If you use a container that runs an interactive process by default (like a Python REPL or a shell itself), you can use the docker attach command to connect to it.
    # Start a basic container with an interactive shell process
    docker run -it --name my-interactive-shell ubuntu /bin/bash
    # If you detach, you can re-attach with:
    docker attach my-interactive-shell
    • Viewing Real-time Logs: If a container’s main process is an application that logs directly to stdout, docker attach will show you that live output, similar to the docker logs -f command.

    How to Detach from a Docker Container Safely

    When you use the docker attach command, you should understand that your terminal session becomes directly wired to the container’s primary process (PID 1). This means that keyboard signals like Ctrl-C are passed directly through to the application. If the main process within the container is a shell or an application that isn’t specifically programmed to handle this interrupt signal, it will interpret Ctrl-C as a command to terminate.

    And since a Docker container’s lifecycle is tied directly to its main process, this action will cause the process to shut down, and as a result, the container itself will stop completely. This often surprises new users, who expect to just exit the logs, but instead end up shutting down the entire application.

    Attach docker container (ssh into docker)

    To safely disconnect from an attached container without terminating it, you must use Docker’s specific escape sequence: holding the Ctrl key and pressing P, followed immediately by Q. This key combination is intercepted by the Docker client on your local machine and is not sent to the process running inside the container.

    Suggesed Read: Self-Hosting vs Cloud-Based Docker

    Copying Files in a Docker Container

    The docker cp command copies files to and from a Docker container. Before using it, though, it’s worth understanding that Docker Volumes are usually a better way to handle persistent data.

    When Not to use the docker cp Command

    A Docker Volume is a standard mechanism for decoupling the data your application generates from the container’s lifecycle. A volume is like a USB drive that can be attached to one or more containers. The biggest advantage of using volumes is that the data within a volume persists even if the container is stopped, deleted, or rebuilt. This makes it ideal for databases, application logs, user-uploaded content, and critical configuration files.

    If you need a consistent and reliable way to share files between your host machine and a container, or ensure that your data survives container restarts, you should always use volumes by mounting them when you first run the container (e.g., using the -v or --mount flag with docker run).

    When to use the docker cp Command

    While volumes are the correct solution for persistent application data, there are specific scenarios where you might need to perform a one-time, manual file transfer. This is where the docker cp command becomes an invaluable utility for ad-hoc operations.

    The docker cp command is useful in several situations, such as:

    • Quickly pulling a specific log file from a running container for analysis
    • Pushing a hotfix configuration file without rebuilding the image
    • Extracting a build artifact that was generated inside a temporary container.

    Copy from container to host:

    docker cp <container_name_or_id>:/path/to/file /path/on/host

    Copy from host to container:

    docker cp /path/on/host <container_name_or_id>:/path/to/file

    Running an “Actual SSH” Server (Not Recommended)

    While technically possible, running an SSH server inside your container is considered an anti-pattern. Docker containers are designed to be lightweight, disposable, and focused on a single process. Adding an SSH server adds unnecessary bulk and complexity.

    When Might You Actually Need It?

    • Legacy Systems: You’re containerizing a legacy application, and existing management scripts or tools rely exclusively on SSH to function.
    • Providing Sandboxed User Environments: You are using a container to give a user a sandboxed environment on a shared server, and they need to connect with a standard SSH client.

    If you must do this, you would need to:

    1. Modify your Dockerfile to install an SSH server (e.g., openssh-server).
    2. Configure the SSH server, add user accounts, and manage SSH keys.
    3. EXPOSE port 22 in the Dockerfile.
    4. Run the container, mapping a host port to the container’s port 22 (e.g., docker run -p 2222:22 …).

    Final Thoughts

    You now know the right way to SSH into a Docker container – by using Docker’s own tools like docker exec for most cases, and docker attach when you need to connect to a container’s main process. Running a full SSH server inside a container isn’t just unnecessary – it adds complexity and risks that Docker was designed to avoid.

    Mastering these commands gives you confidence in managing containers directly. But if you want to go further – scaling deployments, automating workflows, and simplifying day-to-day server management – RunCloud gives you the best of both worlds: a clean interface with the full power of the CLI underneath.

    Sign up for RunCloud today and make managing your servers and Docker environments faster, easier, and more reliable.

  • The Best Docker Alternatives for Containerization in 2025

    The Best Docker Alternatives for Containerization in 2025

    Docker has changed software development and application deployment through containerization. Its intuitive command-line interface, tools such as Docker Desktop, and the vast Docker Hub ecosystem have all made creating, sharing images, and running containerized applications incredibly accessible.

    But many people don’t realise that the Docker engine isn’t the only containerization technology available.

    This post will discuss some of the best alternatives to Docker and compare powerful options that adhere to the Open Container Initiative (OCI) standards.

    Whether you’re concerned about security, optimizing for Kubernetes clusters, managing container images across different container registries, or simply seeking improvements in your container management strategy, by the end of this article, you will be able to find the best containerization platform for your specific needs.

    Let’s get started!

    What is Containerization?

    Containerization is a new way to deploy applications on a remote server. Traditionally, we’ve been copying the application’s source code and executing it on the remote server.

    However, containerization technology allows us to bundle an application’s code and all its necessary dependencies, libraries, configuration files, and binaries, into a single, isolated unit called a container. This container image is a self-sufficient package that can run consistently across different computing environments, from a developer’s laptop to production servers in the cloud or on-premises data centers.

    In Linux, containerization uses operating system-level virtualization features, such as namespaces and control groups (cgroups). Unlike traditional virtual machines (VMs) that require a full guest operating system for each instance, containers share the host system’s OS kernel. This makes containers very lightweight, faster to start, and less resource-intensive than VMs. This allows developers to deploy multiple containers on a single VM for higher density and more efficient use of underlying hardware resources.

    📖 Suggested read: 20 Essential Docker Commands You Should Know

    Best Docker Alternatives for Containerization

    Docker is by far the most popular container runtime available. So much so that many people use the terms ‘Docker’ and ‘containers’ interchangeably – but it isn’t the only containerization technology.

    Let’s take a look at alternative container runtimes that you can use instead of Docker:

    S No.NameVisit Website
    1Podman https://podman.io/
    2Linux Containers https://linuxcontainers.org/
    3Red Hat OpenShift https://www.redhat.com/en/technologies/cloud-computing/openshift
    4Apptainer/Singularityhttps://apptainer.org/
    5Containerd https://containerd.io/
    6Cri-ohttps://cri-o.io/
    7Mirantis Container Runtime https://www.mirantis.com/software/mirantis-container-runtime/

    Podman

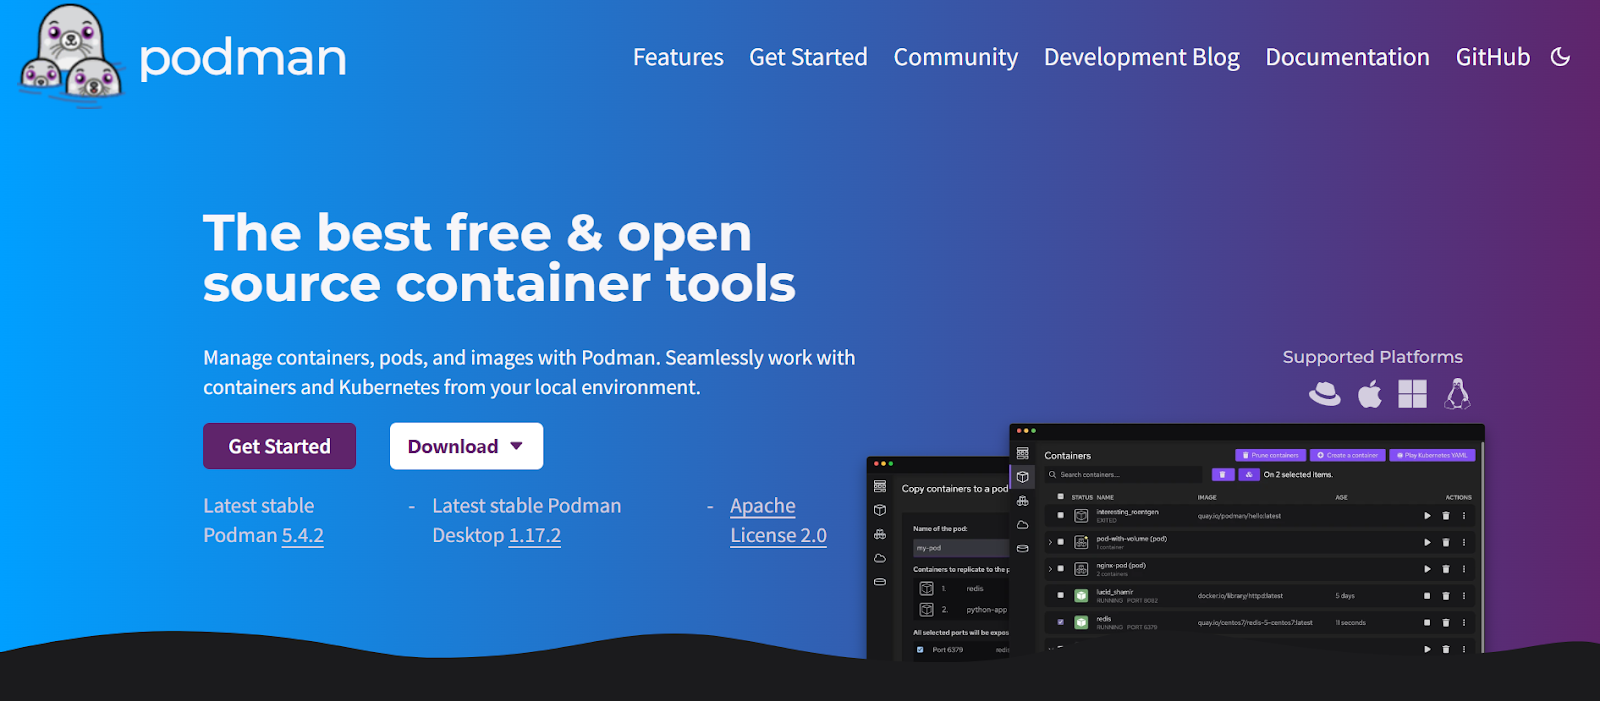
    Podman is a helpful tool for anyone working with software containers. It lets you easily find, download, run, build, and share containers using straightforward commands like search, pull, run, build, and push. One special thing about Podman is its ability to group related containers into ‘pods’, which makes it easier to manage applications where different parts need to work closely, similar to how bigger systems like Kubernetes operate.

    If you prefer using a visual interface instead of typing commands, you can use the Podman Desktop application on Windows, macOS, and Linux. This app gives you a single screen to manage your containers, even if they were created with other tools such as Docker.

    Podman Desktop makes building new container images simple, as well as getting images from online repositories, grouping containers into pods, and checking logs. It even helps you prepare and move your container applications to run on Kubernetes.

    📖 Suggested read: How to Create a Docker Image for Your Application

    Linux Containers

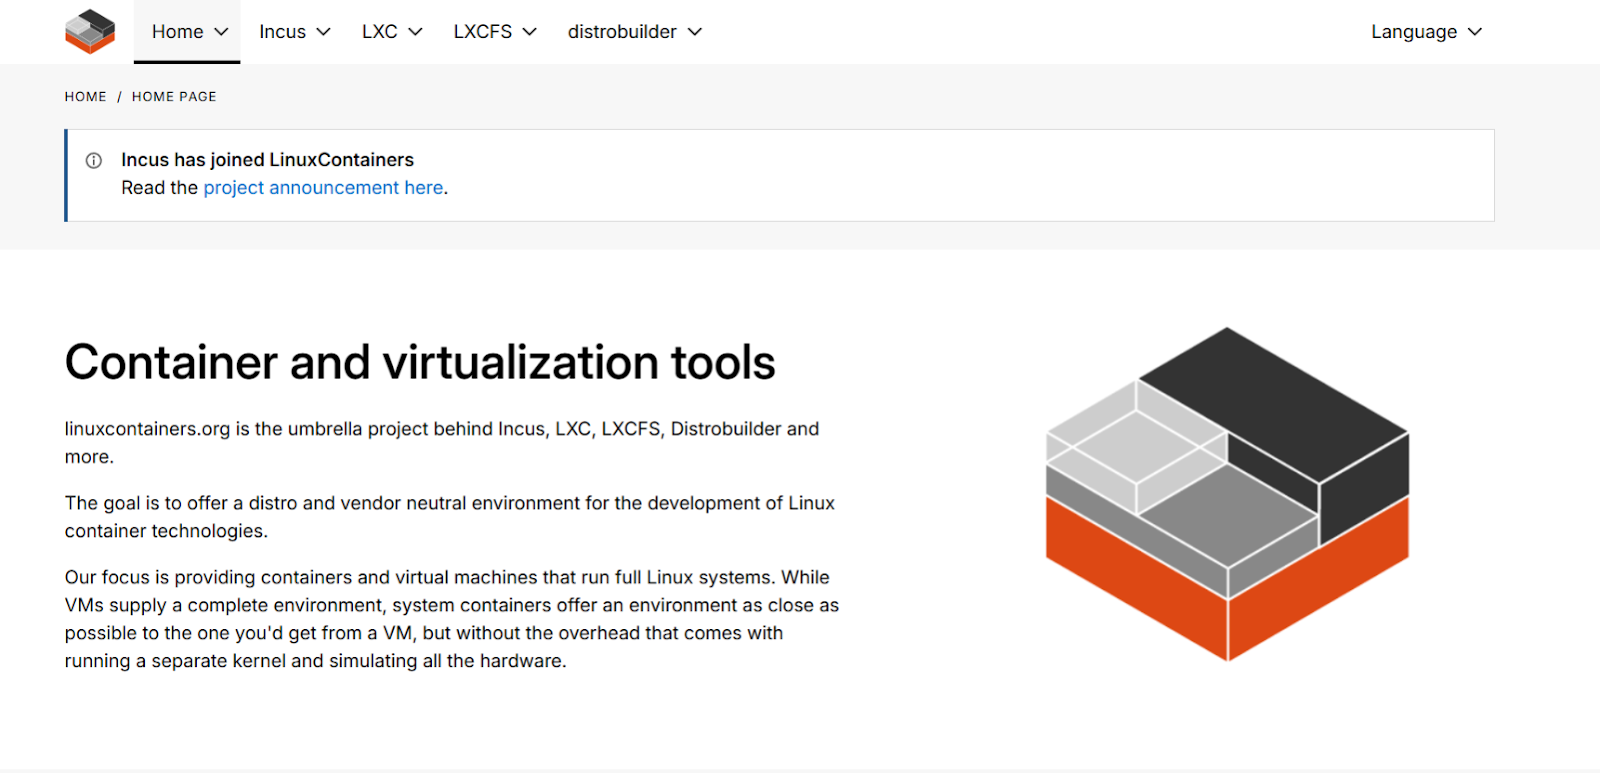
    Linux Containers, often abbreviated as LXC, are one of the longest-standing options built directly on the Linux kernel and include features such as namespaces and groups. LXC aims to create environments close to a standard Linux installation but without a separate kernel. This differs slightly from Docker, which typically focuses on packaging a single application and its dependencies.

    LXC is geared more towards running a ‘system container’ – a lightweight virtual machine that can run multiple services or a full init system inside. This ‘system container’ approach might not be a drop-in replacement for your Docker workflow and may require you to configure how you deploy applications.

    LXC uses powerful Linux features and offers management tools and libraries (like liblxc). It mimics a full OS environment, which might be more than most people need for simple application isolation. LXC could be great if you needed to replicate a traditional server setup within a container, but if you are just looking to run your apps, it might introduce unnecessary complexity.

    📖 Suggested read: Docker Security: Best Practices to Secure a Docker Container

    Red Hat OpenShift

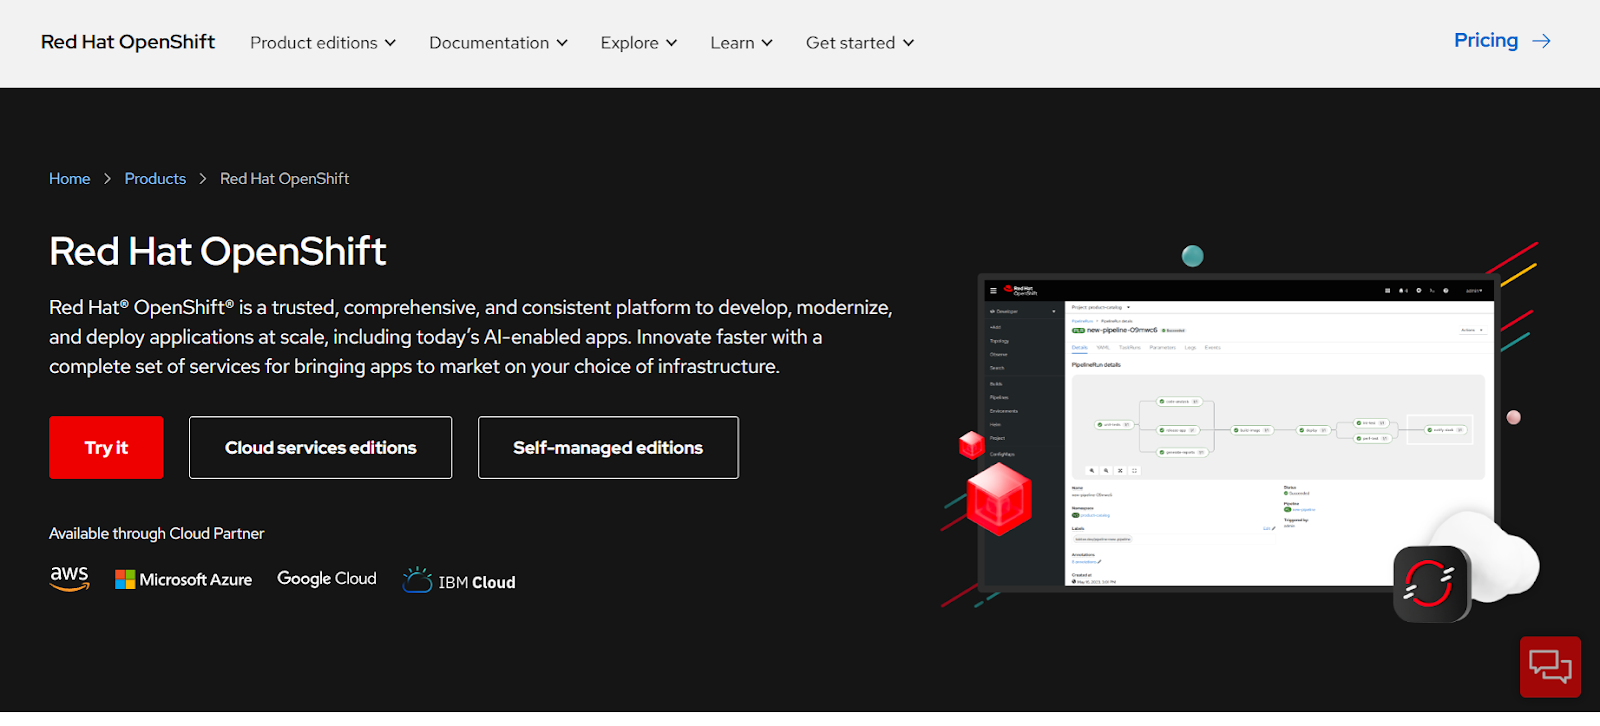
    Red Hat OpenShift is much more than just a container runtime. It is a full-fledged application platform built on Kubernetes designed to handle the entire lifecycle of applications, from development and building to deployment and management at scale, even across different cloud environments or on your own servers.

    If you just want to build and run containers, this might not be the right tool for you. Red Hat OpenShift is designed to provide a consistent environment with integrated tools for building, automating deployments (like CI/CD pipelines), and managing applications, not just basic container orchestration.

    The platform offers different ways to use it, either as a managed service on clouds like AWS or Azure, where Red Hat handles the underlying infrastructure, or as a self-managed service for more control. It also has built-in security, developer tools, and the ability to manage virtual machines alongside containers.

    While Red Hat OpenShift is a powerful tool, especially for larger teams or complex applications that need this robust management and security, it is also more complex than just using Docker. Therefore, you must weigh whether the comprehensive features justify the potential learning curve and operational overhead for your needs.

    📖 Suggested read: How to Install WordPress on Docker in 2025 [Step-By-Step Guide]

    Apptainer

    Apptainer, which used to be called Singularity, is another tool for packaging and running software inside containers, similar to how Docker works. It’s open-source software, now part of the Linux Foundation, and designed to be straightforward, quick, and safe. Apptainer is particularly popular in environments where many people share the same computer systems, like university computing clusters or research labs, and for running software that needs a lot of computing power.

    It primarily focuses on performance-intensive applications commonly found in High-Performance Computing (HPC), scientific research, and AI/ML workloads. It is designed for environments where maximizing computational performance, managing complex software stacks, ensuring reproducibility, and handling specialized hardware like GPUs is very important.

    Apptainer is different in handling containers and interacting with the computer it’s running on. It packs everything into a single file, making the container easy to copy, move between computers, or share with others. Apptainer also lets the software inside the container easily use special hardware on the host machine, like powerful graphics cards (GPUs) or fast network connections, which is important for scientific computing.

    Its security approach is also quite simple: by default, you have the same permissions inside the container as you do outside, which helps prevent users from accidentally gaining extra privileges on the system.

    📖 Suggested read: What Are Docker Logs And How To Use Them

    Containerd

    Containerd is a core container runtime focused on managing the complete container lifecycle. This includes tasks like image transfer and storage, container execution and supervision, low-level storage, and network attachments.

    It might surprise you that Docker uses containerd under the hood (or components derived from it), meaning containerd isn’t necessarily a replacement for the entire Docker developer experience, but rather the engine component that does the heavy lifting.

    However, it is much lower-level than the Docker run command, as it exposes the distinct stages of container creation and execution. Rather than providing developers with a simple, all-in-one command-line interface, it’s designed more for integration into larger systems or for users who need fine-grained control.

    It has well-established documentation, API, and client libraries, particularly for the Go client for programmatic control. You can easily use this client to connect to the daemon, pull images, create OCI specs, manage snapshots (container filesystems), and much more.

    While containerd is a crucial piece of the container ecosystem and the standard runtime interface (CRI) implementation for Kubernetes, it doesn’t directly replace the user-facing Docker command-line tool and its associated build/compose functionalities out of the box. Instead, it replaces the runtime part that Docker traditionally managed.

    If you are looking for just the runtime component, containerd is the go-to option. However, replicating the full Docker developer workflow requires other tools (such as nerdctl for a Docker-compatible CLI or build tools like BuildKit).

    📖 Suggested read: Bringing Containerization to RunCloud’s Cloud Architecture

    Cri-o

    If you are working with Kubernetes, you might already be familiar with CRI-O. It is a lightweight Kubernetes Container Runtime Interface (CRI) implementation. This means its primary purpose isn’t to be a general-purpose container engine like Docker, but rather to provide exactly what Kubernetes needs to manage container lifecycles (pods) efficiently and reliably, using standard OCI-compliant runtimes like runc underneath.

    CRI-O acts as the bridge between the Kubernetes kubelet and the low-level container operations. It handles pulling images from any OCI-compliant registry, managing container storage, generating the OCI runtime spec, launching the actual runtime (like runc), setting up networking via CNI, and using conmon for monitoring. Concentrating only on these Kubernetes-essential tasks, it aims to be more stable and resource-efficient within a cluster than a more feature-rich daemon like Docker’s.

    If you are thinking of replacing Docker, you can use CRI-O to replace the runtime component on the Kubernetes nodes. However, you should note that it doesn’t offer a direct replacement for the Docker command-line interface or tools such as Docker Compose for local development workflows.

    Mirantis Container Runtime

    Mirantis Container Runtime (MCR) is similar to ‘Docker Engine – Enterprise’. It is designed to be compatible with the core Docker API and commands you might already know. The main goal of MCR is to provide this familiar Docker Engine functionality, but specifically tailored for enterprise needs, along with commercial support (like 24×7 options) and enhanced security features, which might be necessary if your organization has stricter requirements than those that standard open-source Docker offers.

    MCR heavily emphasizes security aspects often required by large organizations or regulated industries. For example, it uses FIPS 140-2 validated cryptography, has secure default configurations, and offers capabilities like enforcing the use of digitally signed images to secure the software supply chain.

    It has broad capability as it supports both Linux and Windows containers. It can run in standalone mode, as part of a Kubernetes deployment, or in Docker Swarm clusters. This means you can use it in various infrastructure setups without demanding a complete overhaul of orchestration strategies.

    Wrapping Up

    Choosing the right container runtime is a critical decision that depends heavily on your team’s needs, your infrastructure, and the type of applications you’re building. While Docker has been the default choice for years, it’s clear that the container landscape in 2025 offers powerful alternatives such as Podman, LXC, containerd, CRI-O, and OpenShift, each with unique strengths.

    If you manage large Kubernetes clusters, CRI-O or containerd might make sense. If you need a daemon-less solution with strong security principles, Podman is a compelling option. And if you operate in highly regulated enterprise environments, Mirantis Container Runtime brings Docker compatibility with hardened security features.

    However, while choosing the right containerization platform is critical, managing your servers and deployments effectively is equally important – and that’s where RunCloud comes in.

    RunCloud simplifies server management for developers and teams working with containerized or traditional PHP-based applications. Whether you’re using Docker, containerd, or another runtime under the hood, RunCloud helps you:

    • Deploy web applications faster
    • Set up automated backups
    • Manage server security with best practices baked in
    • Monitor performance from a unified dashboard
    • Scale projects effortlessly as your infrastructure grows

    Instead of worrying about the underlying complexities of servers and deployments, you can focus entirely on building and shipping better software.

    If you’re ready to streamline your application deployments and server management, no matter what container runtime you use, sign up for RunCloud today.

    Thousands of developers and businesses already trust RunCloud to manage their mission-critical projects. Discover a simpler, faster, more scalable way to run your applications.

    FAQs on Docker Alternatives for Containerization

    Is Podman better than Docker?

    Podman isn’t inherently ‘better’, but it offers advantages such as a daemonless architecture for enhanced security and rootless container execution. Docker has a more mature ecosystem and wider initial adoption, which makes it a strong choice for many workflows.

    Do I need Kubernetes if I use Docker?

    No, you don’t automatically need Kubernetes just for using Docker, as Docker excels at managing containers on a single host. Kubernetes becomes necessary to orchestrate, scale, and manage containerized applications across multiple hosts or clusters.

    Is LXC faster than Docker?

    LXC can exhibit slightly better performance in certain benchmarks due to operating at a lower level, closer to the kernel, often termed ‘system containers’. However, for typical application container workloads managed by Docker, the performance difference is usually negligible and less critical than Docker’s developer-focused tooling. The choice often depends on whether you must run full OS-like environments (LXC) or isolated applications (Docker).

    What is the best containerization platform?

    There is no single ‘best’ containerization platform; the ideal choice depends on your specific use case, team expertise, and requirements. Docker remains extremely popular for its ease of use and rich ecosystem, while Podman is favored for security-focused or daemonless environments.

    What is the difference between Docker and Kubernetes?

    Docker primarily focuses on building, shipping, and running individual containerized applications, often on a single machine. On the other hand, Kubernetes is a container orchestration platform designed to automate the deployment, scaling, and management of containerized applications across clusters of machines. Simply put, Docker creates the containers, and Kubernetes manages them at scale in production environments.

    Are Docker alternatives suitable for high-traffic applications?

    Docker alternatives like Podman, containerd, and CRI-O are suitable and commonly used for high-traffic, production-grade applications. The ability to handle high traffic effectively relies heavily on the orchestration layer (like Kubernetes) and the application architecture.

    What is the difference between containerization and virtualization?

    Virtualization creates virtual machines (VMs), each running a complete operating system instance with its own kernel on top of a hypervisor. Containerization packages an application and its dependencies, isolating them at the process level while sharing the host OS kernel. Therefore, containers are much lighter, faster to start, and consume fewer resources than VMs.

  • How to Build a CI/CD Pipeline with GitHub Actions and Docker

    How to Build a CI/CD Pipeline with GitHub Actions and Docker

    Are you tired of manually building, testing, and deploying your applications?

    Modern Continuous Integration (CI) and Continuous Deployment (CD) approaches can automatically trigger a deployment pipeline to build your Docker image, run tests, push it to a container registry like GHCR or Docker Hub, and deploy it to your server.

    The best part is that you can complete all of this in less than a minute after pushing code to your GitHub repository.

    By combining Docker with the automation capabilities of GitHub Actions, you can create a fast and effective DevOps pipeline. Docker ensures your application runs the same way everywhere by packaging it with its dependencies in a portable Docker container based on instructions in your Dockerfile. GitHub Actions then automates the build and push steps, securely manages secrets like access tokens, and handles the final deployment to your infrastructure.

    In this guide, we’ll walk you through configuring your GitHub Actions workflow step-by-step, from publishing a container to deploying it on your server without third-party tools or subscriptions.

    By the end of this tutorial, you will be able to configure a deployment pipeline that updates your live server in under a minute after you push changes to it.

    Let’s get started!

    What are GitHub Actions?

    GitHub Actions is a powerful automation tool built directly into the GitHub platform. It listens for specific events happening in your repository, like someone pushing new code, creating a pull request, or even on a set schedule, and then automatically performs tasks you’ve defined. These tasks form a workflow, which is essentially a sequence of steps designed to achieve a specific goal. You can use this functionality to create a Continuous Integration (CI) and Continuous Deployment (CD) pipeline.

    This means you can automate the entire process of building your software, running tests to ensure quality, and even deploying it to servers (perhaps managed through tools such as RunCloud) without manual intervention.

    Key Features of GitHub Actions

    GitHub Actions has several useful features that make it a compelling choice for automation. Firstly, its event-driven nature allows workflows to trigger automatically in response to a wide variety of GitHub events. Secondly, matrix builds let you efficiently test your code across different environments simultaneously; you can define combinations of operating systems (like Linux, macOS, and Windows), software versions (like different Node.js or Python versions), or other variables, and GitHub Actions will run a job for each combination.

    Furthermore, GitHub provides hosted runners, which are virtual machines managed by GitHub that can execute your workflow jobs without requiring you to manage any infrastructure. If you have very specific needs, then you can also consider using self-hosted runners on your own servers or cloud infrastructure.

    All the actions and workflows on GitHub can be reused. You can even configure pre-built steps created by the community (available in the GitHub Marketplace) and save significant development time. Lastly, GitHub Actions includes integrated secrets management for securely handling sensitive information like API keys and passwords. It provides live logs for monitoring workflow progress in real time and the ability to store artifacts like build outputs or test reports.

    📖 Suggested read: What is Docker And How Does it Work

    Steps to Deploy Docker Container with GitHub Actions for CI/CD

    Let’s walk through the steps to automate building your application’s Docker image, pushing it to a registry, and then deploying it to your server every time you push changes to your repository.

    Prerequisites:

    • GitHub Repository: You need a GitHub repository containing all your application code. Make sure you have committed and pushed your latest code changes to GitHub.
    • Dockerfile: You must have a Dockerfile in the root of your repository. This file contains the step-by-step instructions Docker uses to build an image of your application. The specific commands inside the Dockerfile depend heavily on your application’s language, framework, and dependencies (e.g., installing packages, copying code, setting entry points), so we assume you have already created a functional Dockerfile.

    Step 1: Connect to Linux Server via SSH

    First, ensure you can connect to the target Linux server where your Docker container will run. You’ll need SSH access for this.

    ssh your_server_user@your_server_ip

    In the above command, replace your_server_user with your username and your_server_ip with the server’s IP address. If you manage your server with RunCloud, you can use the simplified SSH key management to store SSH keys. We recommend reading the RunCloud documentation to learn how to easily create and manage SSH keys for secure server access.

    📖 Suggested read: What Are Docker Images And How To Use Them

    Step 2: Verify Docker Installation on the Server

    Once connected to your server via SSH, you need to confirm that Docker is installed and running correctly. The Docker Command Line Interface (CLI) is required to pull images and run containers. You can test this by running the standard Docker test image:

    docker run hello-world

    If Docker is installed and working, you will see a message starting with “Hello from Docker!”. This message indicates that your installation appears to be working correctly.

    If the command fails or Docker is not found, you must install Docker Engine on your Linux server before proceeding. Follow the official Docker installation documentation specific to your server’s Linux distribution (e.g., Ubuntu, RHEL).

    📖 Suggested read: How To Create a Docker Image For Your Application

    Step 3: Add GitHub Action Secrets for SSH Access

    To allow your GitHub Actions workflow to securely log in to your server and execute deployment commands, you must store your server’s connection details as encrypted secrets in your GitHub repository. You should never hardcode sensitive information directly into your workflow file – we recommend using GitHub’s built-in secret management system for this.

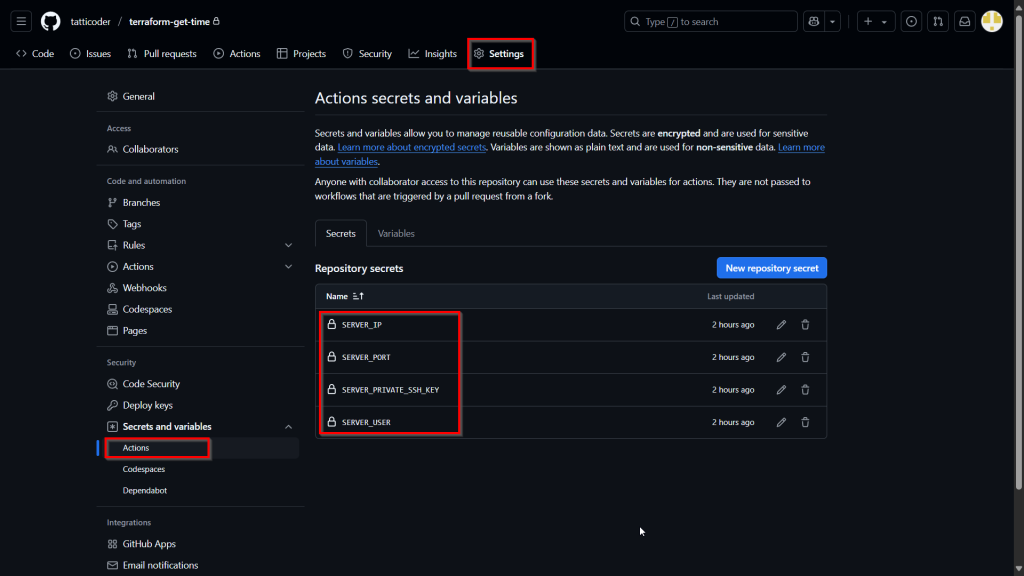
    Navigate to your GitHub repository > Settings > Secrets and variables > Actions. Click “New repository secret” for each of the following:

    1. SERVER_IP: The public IP address of your Linux server.
    2. SERVER_PORT: The SSH port for your server (usually 22, but might be different if customized).
    3. SERVER_USER: The username you use to log in to your server via SSH. We strongly recommend creating a new user account specifically for this deployment step and giving it appropriate permissions for better security.
    4. SERVER_PRIVATE_SSH_KEY: The entire content of the private SSH key file that corresponds to a public key authorized on your server. Your private SSH key should look something like this:
    -----BEGIN OPENSSH PRIVATE KEY-----
    b3BlbnNzaC1rZXktdjEAAAAABG5vbmUAAAAEbm9uZQAAAAAAAAABAAABlwAAAAdzc2gtcn
    ...
    UV7ErwUhELMZFrAAAAE3RhdHRpY29kZXJAc3Rhcmx1c3QBAgMEBQYH
    -----END OPENSSH PRIVATE KEY-----

    Using secrets prevents exposing your server credentials in your codebase. The workflow will reference these secrets securely during execution. We strongly recommend creating a dedicated SSH key pair specifically for automation.

    Again, consulting the RunCloud documentation can be very helpful in generating and managing SSH keys securely, especially regarding best practices for SSH security.

    📖 Suggested read: Understanding Docker Services | RunCloud Docs

    Step 4: Configure GitHub Actions Workflow

    Now, define the CI/CD pipeline using a GitHub Actions workflow file. This file tells GitHub what steps to perform when triggered (e.g., on a push to your main branch).

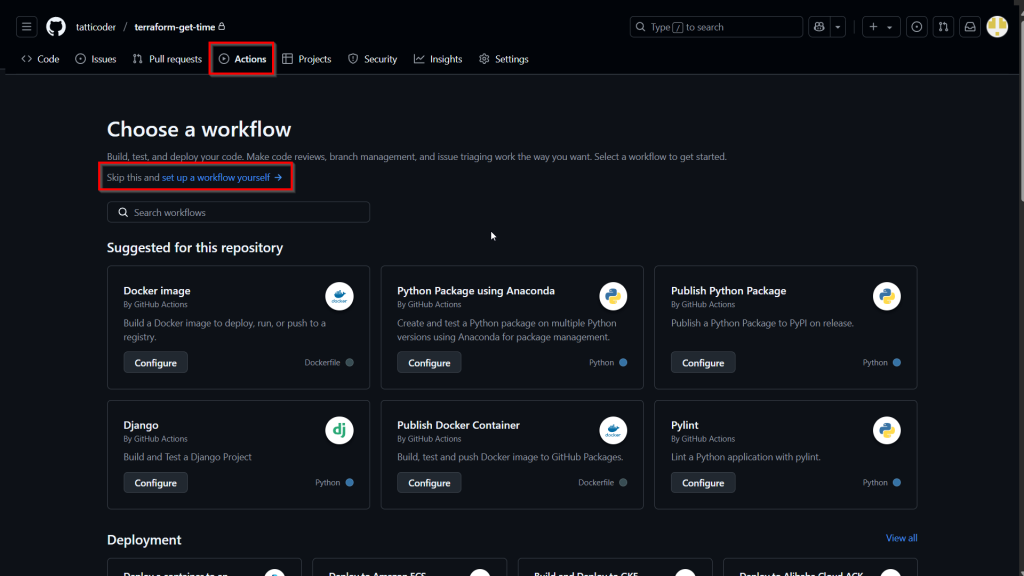
    Create a YAML file named docker-publish.yml inside your repository’s .github/workflows/ directory. You can create this directory and file directly via the GitHub web interface or in your local repository using a text editor, and then commit and push the changes.

    Storing secrets for GitHub Actions

    Paste the following code into .github/workflows/docker-publish.yml:

    name: Publish & Deploy Docker container
    
    # This workflow uses actions that are not certified by GitHub.
    # They are provided by a third-party and are governed by
    # separate terms of service, privacy policy, and support
    # documentation.
    
    
    on:
      push:
        # Adjust branch name if needed (e.g., master, production)
        branches: [ "main" ]
        # Publish semver tags as releases.
        tags: [ 'v*.*.*' ]
    env:
      # Use docker.io for Docker Hub if empty
      REGISTRY: ghcr.io
      # github.repository as <account>/<repo>
      IMAGE_NAME: ${{ github.repository }}
    jobs:
      build:
        runs-on: ubuntu-latest
        permissions:
          contents: read
          packages: write
          # This is used to complete the identity challenge
          # with sigstore/fulcio when running outside of PRs.
          id-token: write
    
    
        steps:
          - name: Checkout repository
            uses: actions/checkout@v4
    
    
          # Install the cosign tool except on PR
          # https://github.com/sigstore/cosign-installer
          - name: Install cosign
            if: github.event_name != 'pull_request'
            uses: sigstore/cosign-installer@59acb6260d9c0ba8f4a2f9d9b48431a222b68e20 #v3.5.0
            with:
              cosign-release: 'v2.2.4'
    
    
          # Set up BuildKit Docker container builder to be able to build
          # multi-platform images and export cache
          # https://github.com/docker/setup-buildx-action
          - name: Set up Docker Buildx
            uses: docker/setup-buildx-action@f95db51fddba0c2d1ec667646a06c2ce06100226 # v3.0.0
    
    
          # Login against a Docker registry except on PR
          # https://github.com/docker/login-action
          - name: Log into registry ${{ env.REGISTRY }}
            if: github.event_name != 'pull_request'
            uses: docker/login-action@343f7c4344506bcbf9b4de18042ae17996df046d # v3.0.0
            with:
              registry: ${{ env.REGISTRY }}
              username: ${{ github.actor }}
              password: ${{ secrets.GITHUB_TOKEN }}
    
    
          # Extract metadata (tags, labels) for Docker
          # https://github.com/docker/metadata-action
          - name: Extract Docker metadata
            id: meta
            uses: docker/metadata-action@96383f45573cb7f253c731d3b3ab81c87ef81934 # v5.0.0
            with:
              images: ${{ env.REGISTRY }}/${{ env.IMAGE_NAME }}
    
    
          # Build and push Docker image with Buildx (don't push on PR)
          # https://github.com/docker/build-push-action
          - name: Build and push Docker image
            id: build-and-push
            uses: docker/build-push-action@0565240e2d4ab88bba5387d719585280857ece09 # v5.0.0
            with:
              context: .
              push: ${{ github.event_name != 'pull_request' }}
              tags: ${{ steps.meta.outputs.tags }}
              labels: ${{ steps.meta.outputs.labels }}
              cache-from: type=gha
              cache-to: type=gha,mode=max
    
    
          # Sign the resulting Docker image digest except on PRs.
          # This will only write to the public Rekor transparency log when the Docker
          # repository is public to avoid leaking data.  If you would like to publish
          # transparency data even for private images, pass --force to cosign below.
          # https://github.com/sigstore/cosign
          - name: Sign the published Docker image
            if: ${{ github.event_name != 'pull_request' }}
            env:
              # https://docs.github.com/en/actions/security-guides/security-hardening-for-github-actions#using-an-intermediate-environment-variable
              TAGS: ${{ steps.meta.outputs.tags }}
              DIGEST: ${{ steps.build-and-push.outputs.digest }}
            # This step uses the identity token to provision an ephemeral certificate
            # against the sigstore community Fulcio instance.
            run: echo "${TAGS}" | xargs -I {} cosign sign --yes {}@${DIGEST}
    
    
      deploy:
        needs: build
        runs-on: ubuntu-latest
        steps:
          - name: SSH and Deploy to Server
            uses: appleboy/ssh-action@v1
            with:
              host: ${{ secrets.SERVER_IP }}
              username: ${{ secrets.SERVER_USER }}
              key: ${{ secrets.SERVER_PRIVATE_SSH_KEY }}
              port: ${{ secrets.SERVER_PORT }}
              script: |
                echo ${{ secrets.GITHUB_TOKEN }} | docker login ${{ env.REGISTRY }} -u ${{ github.actor }} --password-stdin
                echo "--- Pulling latest Docker image ---"
                docker pull ghcr.io/tatticoder/terraform-get-time:main
                echo "--- Stopping existing container (if running) ---"
                docker stop my_container 
                echo "--- Removing existing container ---"
                docker rm my_container 
                echo "--- Starting new container ---"
               # Adjust ports (-p host:container) 
               # Add any necessary environment variables (-e)
                docker run -d --name my_container -p 3000:80 ghcr.io/tatticoder/terraform-get-time:main

    Let’s understand the important sections of the above code snippet:

    • name: Sets the display name for your workflow in the GitHub Actions tab.
    • on: push: branches: [ main ]: This triggers the workflow every time code is pushed to the main branch. You can change main to your default or production branch name (e.g., master).
    • Build Job: This section handles the process of creating and publishing the Docker container.
      • Checkout code: Uses the standard actions/checkout action to get your repository code onto the runner.
      • Log in to GHCR: Uses docker/login-action to authenticate with GitHub Container Registry using the automatically generated GITHUB_TOKEN.
      • Build and push: Uses docker/build-push-action.
    • Deploy via SSH Job: This job uses the popular SSH Remote Commands action to connect to your server using the secrets you configured and execute commands.
      • host, username, key, port: These fields use the secrets you created in Step 3.
      • script: This block contains the shell commands which will be executed on your target server.

        ❗Very Important – please read the following points very carefully:
        • The first command logs into GHCR on the server. Pulling public GHCR images might not require login. For private images, you can just use the provided command without any modifications.
        • The subsequent command pulls the latest tagged image from GHCR. Make sure to edit this command and replace ghcr.io/tatticoder/terraform-get-time:main with the name of your container image and its corresponding tag.
        • The subsequent command stops and removes any container with the name ‘my_container’ to avoid conflicts. Make sure to temporarily remove these commands to prevent the workflow from failing if the container doesn’t exist yet.
        • The final command runs a new container in detached mode (-d) using the pulled image. Make sure to replace the image’s name with the one you want to use and configure any additional parameters as per your requirements.

    ⚠️ Warning: The deployment script uses docker stop and docker rm before docker run. This means there will be a brief moment of downtime while the container is replaced. For zero-downtime deployments, more advanced strategies like blue-green deployments or using orchestration tools like Kubernetes are needed, which are beyond this basic setup.

    To minimize the impact of downtime, you can consider deploying once a day on weekdays outside of peak hours. This schedule can be configured easily using the GitHub action itself.

    📖 Suggested read: Docker Security: Best Practices to Secure a Docker Container

    Step 5: Commit Workflow and Trigger Deployment

    Finally, save the docker-publish.yml file. If you created it locally, commit it and push it to your GitHub repository using the following commands:

    git add .github/workflows/docker-publish.yml
    git commit -m "Add GitHub Actions workflow for Docker build and deploy"
    git push 
    Deploying and running a GitHub Actions for CI/CD

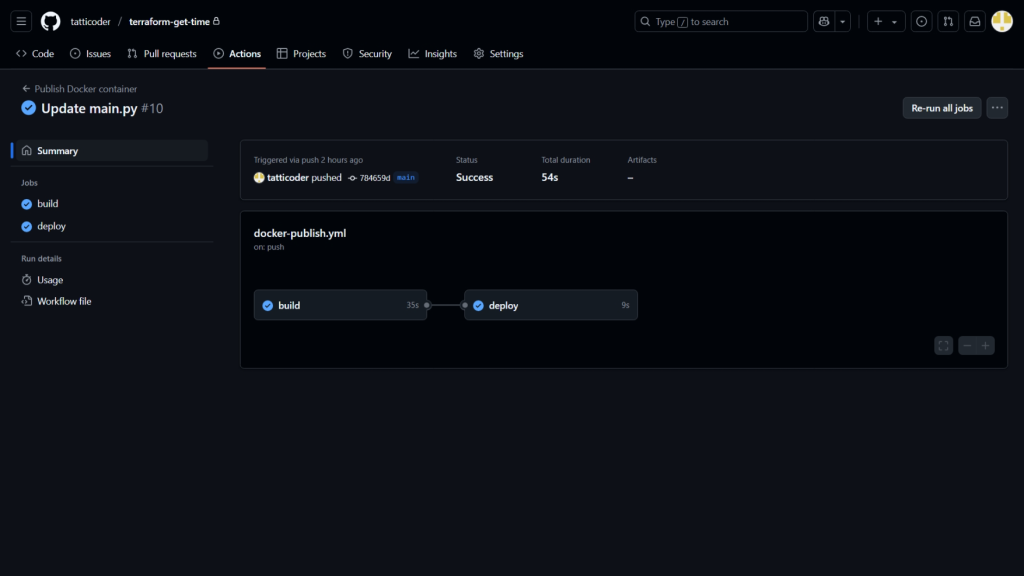
    Once you push this commit (or any future code changes) to the specified branch (main in this example), GitHub Actions will automatically detect the workflow file and start executing the defined steps.

    You can monitor the progress by going to the “Actions” tab in your GitHub repository. If all steps succeed, your code will be built into a Docker image, pushed to GHCR, and then pulled and run as a container on your designated Linux server.

    Once you have published your Dockerfile to GHCR, you will see a new tab in the bottom right of your GitHub dashboard. You can click on the name of your package to view your recently published packages.

    Step 6: Remove Unused Docker Resources (Optional)

    When you use a CI/CD pipeline, you will quickly end up with a large number of old obsolete containers on your server. These containers are often not needed and can slowly fill your disk space. If you are running low on disk space, then you can add an optional cleanup step to your deployment script to prevent your server’s disk space from filling up with old, unused Docker images, containers, and ‘build cache’.

    The following command will automatically remove any Docker resources (like stopped containers and images not associated with a running container) that haven’t been used in the last 24 hours without requiring confirmation. Running this periodically helps maintain server health and efficiently reclaim storage:

    docker system prune --filter "until=24h" --force

    If your deployment process takes a long time, consider optimizing the build stage of your container by using a caching layer within Docker to cache dependencies.

    Wrapping Up: Who Should Use Docker with GitHub Actions for CI/CD?

    Whether you’re a solo developer or part of a large team, automating builds and deployments saves invaluable time and reduces the potential for human error inherent in manual processes.

    While GitHub Actions handles the automation of building your Docker images and triggering deployment scripts, manually configuring, securing, monitoring, and updating servers can be complex and time-consuming.

    RunCloud provides a clean, efficient way to manage servers without the usual hassle. From provisioning and security hardening to database setup and app deployment, it streamlines the tasks that slow developers down. You stay in control of your infrastructure, but without getting buried in configuration files or command-line firefighting.

    That means more time building, testing, and shipping better software.

    Ready to take the work out of server management? Start with RunCloud today.

    FAQs on Docker with GitHub Actions for CI/CD

    What are the advantages of using Docker for CI/CD?

    Docker ensures consistent environments from development through production. It provides process isolation and ensures that builds and tests don’t interfere with each other or the host system dependencies. 

    How do I secure my Docker images in GitHub Actions?

    Start by scanning your images for vulnerabilities using container scanning tools directly within your GitHub Actions workflow. To reduce the attack surface, use minimal, trusted base images and avoid installing unnecessary packages. Always configure containers to run as non-root users and manage secrets securely using GitHub Secrets, never embedding them in the image layers.

    Can I use Docker Compose with GitHub Actions?

    Yes, Docker Compose can be effectively used within GitHub Actions workflows to manage multi-container setups. You simply need to ensure Docker Compose is installed on the runner, then use standard docker-compose commands to build images or spin up services like databases for integration testing.

    What is the best way to manage secrets in GitHub Actions?

    The most secure and recommended method is using GitHub Actions encrypted secrets, which are configured at the repository or organization level. These secrets can then be safely accessed within your workflow as environment variables or passed to specific actions needing credentials. Never hardcode sensitive information directly in your workflow files or application code checked into version control.

    Is Docker necessary for CI/CD?

    While not strictly mandatory, Docker offers substantial benefits that make it a highly popular choice for modern CI/CD pipelines. While alternative options are available, Docker provides reproducible and isolated build/test environments that are useful for reliable continuous integration and delivery.

    How does Docker improve CI/CD pipelines?

    Docker drastically improves CI/CD pipelines by guaranteeing environment consistency across all stages, from developer laptops to production servers. Its containerization isolates dependencies, preventing conflicts and simplifying the configuration of build agents. 

    Can I use self-hosted runners with Docker in GitHub Actions?

    You can absolutely use self-hosted runners with Docker in GitHub Actions. This approach gives you complete control over the build environment and resources.

    What is the difference between Docker and Kubernetes for CI/CD?

    Docker is primarily used within the CI/CD pipeline to build application images, run tests in isolated containerized environments, and consistently package dependencies. Kubernetes is a container orchestrator typically acting as the deployment target after the CI pipeline, responsible for managing the runtime, scaling, and health of containers in a cluster. Docker creates the portable application packages used in CI, while Kubernetes manages fleets of those packages in production or staging environments (CD).

  • How to Deploy Laravel with Docker on VPS in 2025 (Comprehensive Guide)

    How to Deploy Laravel with Docker on VPS in 2025 (Comprehensive Guide)

    Deploying your Laravel application with Docker on a VPS might seem daunting at first – especially when you’re juggling server configurations, dependency management, and ensuring your app runs seamlessly in production. Even after building a well-optimized web application, replicating your local environment on a server can be a whole new challenge.

    In this comprehensive guide, we’ll show you how to deploy Laravel with Docker on a VPS using Laravel Sail.

    Sail simplifies the process by handling the Docker setup for you, making it a great option whether you’re new to Docker or looking for a streamlined approach.

    You’ll learn how to download Laravel, spin up essential services such as the web server, PHP, and database, and run the necessary setup commands to get your application live.

    Let’s dive in!

    Why Use Docker for Laravel Deployment?

    Deploying a Laravel application from your local development setup to a live production server is not easy. If you have deployed applications in the past, you’ll probably agree that the deployment process introduces numerous complexities, and it’s challenging to manage environment consistency.

    Traditionally, server setup involved manually installing and configuring PHP, web servers such as NGINX or Apache, databases, caching services such as Redis or Memcached, and countless system libraries – all directly onto the server’s operating system.

    This process is not only time-consuming but also prone to errors and inconsistencies. Subtle differences between development, staging, and production environments cause unexpected bugs and failures during application deployment.

    Docker fundamentally solves this by enabling you to package your entire application into standardized, isolated units called Docker containers, including its specific dependencies and configurations.

    Advantages of Dockerizing Laravel Applications

    The primary advantage of containerizing your Laravel applications with Docker is that it allows you to have a consistent development and deployment experience for all developers. By packaging your application code along with the exact versions of PHP, extensions, web server (NGINX/Apache), system libraries, and other dependencies within a Docker image, you eliminate variations between developer machines, testing environments, and production servers.

    This portability means a container built on one machine will run identically on any other machine with Docker installed, drastically reducing bugs related to environment differences.

    In addition, Dockerization brings significant benefits in terms of isolation, scalability, and resource efficiency for Laravel projects. Each Docker container runs in its own isolated userspace, preventing conflicts between different applications or microservices running on the same host. It also enhances security by limiting the potential blast radius of vulnerabilities.

    This isolation makes it easier to scale specific components of your application (e.g., PHP-FPM workers, queue workers) independently based on demand, often orchestrated via Docker Compose or more advanced container management tools such as Kubernetes.

    Compared to traditional virtual machines, containers have significantly lower overhead as they share the host OS kernel. This leads to faster startup times, better resource utilization, and the ability to run more application instances on the same hardware, ultimately improving overall reliability and cost-effectiveness.

    📖 Suggested read: What is Docker And How Does it Work

    Step-by-Step Instructions For Deploying Your First Laravel App with Docker (Sail)

    This section explains how to deploy your Laravel application on a generic cloud VPS using Docker.

    If you are using RunCloud to manage your servers, then you can refer to our Laravel documentation to learn how to do this effectively.

    Prerequisites

    Before we begin installing Laravel, ensure your server environment is correctly prepared.

    1. Server Access: You’ll need access to a Linux server (such as a VPS from providers such as DigitalOcean, Linode, Vultr, etc.) via SSH.
    1. Sudo Privileges: You must be logged in as a user with sudo privileges or as the root user directly (though using a sudo user is generally recommended for security). Remember, commands run with sudo have elevated permissions, so execute them carefully.
    2. Docker Installation and Service: Docker must be installed and running on your server. You can check if it is installed by running docker –version. If it’s not found, you’ll need to install it following the official Docker documentation for your Linux distribution.

    Note: Many cloud providers offer server images with Docker pre-installed. Using one of these can save you the installation step.

    📖 Suggested read: What Are Docker Images And How To Use Them

    Step 1: Download Your Laravel Application

    We will use the official Laravel.build service to download a starter Laravel project configured for Sail. The command below downloads a script and executes it using bash.

    Run this command, making sure you replace runcloud-laravel-app with the desired name for your application’s directory. This name will be used for the project folder.

    curl -s https://laravel.build/runcloud-tutorial | sudo bash

    Important Security Precaution: Piping (|) commands directly from curl to sudo bash executes the downloaded script with root privileges. While laravel.build is an official and trusted source, be cautious when running scripts from the internet this way. Read our blog post on Pipes vs Xargs to learn more on this topic.

    📖 Suggested read: How To Create a Docker Image For Your Application

    In the above command:

    • curl -s: Downloads the script silently (no progress meter).
    • https://laravel.build/runcloud-tutorial: This tells the service to generate a setup script for an app named runcloud-tutorial.
    • | sudo bash: Pipes the downloaded script directly to the bash interpreter, executed with sudo (root) privileges. This creates the project directory and sets initial permissions.

    Step 2: Navigate into Your Application Directory

    Once the previous command completes, navigate into the newly created project directory. Remember to use the actual application name you chose:

    cd runcloud-tutorial

    You should now be inside your Laravel project’s root directory.

    📖 Suggested read: Understanding Docker Services | RunCloud Docs

    Step 3: Start the Docker Containers with Laravel Sail

    Laravel Sail is an interface for managing your application’s Docker containers. We’ll use it to build and start the necessary services (web server, PHP, database, etc.).

    Execute the following command to start Sail in “detached” mode (-d), meaning the containers will run in the background:

    sudo ./vendor/bin/sail up -d

    In the above command:

    • sudo: We use sudo here because Sail needs root permissions to manage Docker networking and volumes.
    • ./vendor/bin/sail: Executes the Sail script located in your project’s vendor directory.
    • up: This command tells Docker (via Sail and Docker Compose) to create and start the containers defined in the docker-compose.yml file. The first time you run this, it will download the necessary Docker images (such as PHP, NGINX, MySQL), which can take several minutes (sometimes ten or more), depending on your internet connection.
    • -d: Runs the containers in the background so your terminal prompt remains available.

    📖 Suggested read: Docker Security: Best Practices to Secure a Docker Container

    Step 5: Run Database Migrations

    Once the containers (including the database container) are running, you’ll need to set up your application’s database schema. Laravel uses “migrations” for this.

    Run the following command to execute the default Laravel migrations:

    sudo ./vendor/bin/sail artisan migrate

    In the above command:

    • sudo ./vendor/bin/sail: Again, we use Sail to execute a command.
    • artisan migrate: This tells Sail to run the PHP artisan migrate command inside the main application container (the one running PHP). This command creates the necessary tables in the database (like the users table, etc.).

    You should see an output indicating that the migrations ran successfully.

    Step 6: Access Your Application

    Your Laravel application should now be running and accessible!

    • On a Server: Open your web browser and navigate to your server’s public IP address: http://your_server_ip. Sail, by default, configures the web server container to listen on port 80.
    • On Your Local Machine (if developing locally): If you performed these steps on your local computer instead of a server, you can usually access it via http://localhost.

    If you cannot access the site via the server’s IP address, your server’s firewall might be blocking incoming connections on port 80 (HTTP). You will need to configure your firewall (e.g., ufw, firewalld, or your cloud provider’s firewall settings) to allow traffic on TCP port 80.

    📖 Suggested read: How to Use Cloudflare Firewall Rules to Protect Your Web Application

    Step 7: Troubleshooting Potential Permission Errors (If Needed)

    Sometimes you might encounter file permission errors within your Laravel application, due to how Docker handles file volumes and user mapping between the host server and the container. This often happens because the web server process inside the container (running as the sail user) doesn’t have write permission to files owned by the root user on the host (created during the initial curl | sudo bash step).

    If you suspect permission issues, you can fix them by changing the ownership of the project files inside the container to the sail user.

    Enter the main application container as root:

    sudo ./vendor/bin/sail root-shell

    This gives you a root command prompt inside your Laravel application’s container.

    Change ownership recursively: This command changes the owner and group of the html directory (as well as everything inside it) to sail:

    chown -R sail:sail /var/www/html

    Let’s understand each part of the above command.

    • chown: Change owner command.
    • -R: Recursive (apply to the directory and all files/directories within it).
    • sail:sail: Set the user to sail and the group to sail.
    • html: The target directory (which corresponds to your project root, mounted at /var/www/html).

    Close the container shell:

    exit

    After running these commands, try accessing your application again, and refresh the web page.

    Wrapping Up: Deploying Laravel with Docker on a VPS

    While Sail simplifies the Docker aspect for a single Laravel project, managing the underlying server, handling security configurations, setting up monitoring, deploying multiple applications, and keeping everything updated still requires significant effort and Linux expertise. This is where platforms specifically designed for server management truly shine.

    RunCloud makes it incredibly easy to develop, deploy, and maintain your web applications across one or many servers, all from a single, intuitive central dashboard.

    It abstracts away the complexities of server administration, letting you focus on building great applications.

    RunCloud works with standard Laravel applications, high-performance setups such as Laravel Octane, and popular CMS platforms such as WordPress. You can start using RunCloud and choose from various optimized server stacks directly through the RunCloud interface.

    Ready to experience truly effortless server management and application deployment?

    Sign up for RunCloud today and see the difference for yourself!

    FAQs on Deploying Laravel with Docker on a VPS

    What are the benefits of using Docker for Laravel deployment?

    Docker packages your Laravel app and its dependencies into containers, ensuring consistent environments from development to production. This isolation prevents conflicts between application dependencies and simplifies portability across different servers or cloud providers.

    How do I secure my Dockerized Laravel application?

    You can secure your Dockerized Laravel app by following standard web security practices within your code, using minimal, trusted base images, and running containers as non-root users. RunCloud provides several security features out of the box and simplifies configuration management.

    Can I use Docker Compose with Laravel?

    Absolutely, Docker Compose is highly recommended, especially for local development and simpler multi-container production setups with Laravel. It allows you to define and manage all the related services your application needs (such as the web server, PHP-FPM, database, and cache) in a single YAML file. This makes it easy to spin up, connect, and manage the entire application stack with simple commands.

    What is the best way to manage environment variables in Docker?

    For security reasons, avoid hardcoding environment variables or committing .env files directly into your Docker image. Instead, pass environment variables into the container at runtime using Docker’s -e flag, Docker Compose environment, or env_file directives.

    Is Docker necessary for deploying Laravel?

    No, Docker isn’t strictly necessary; you can successfully deploy Laravel using a traditional approach by setting up a LAMP or LEMP stack directly on your VPS. However, Docker provides significant advantages in environment consistency, dependency management, and deployment predictability. Tools such as RunCloud make both traditional and Docker-based deployments significantly easier to manage.

    What are the alternatives to Docker for deploying Laravel?

    You can deploy your web applications using the traditional deployment directly onto a configured VPS. RunCloud makes this process extremely easy by providing a centralized dashboard for VPS management.

    Can I use Kubernetes to manage Laravel deployments?

    Yes, Kubernetes (K8s) is a powerful container orchestration system suitable for managing complex, large-scale Laravel applications requiring high availability, auto-scaling, and rolling updates. However, it introduces significant operational complexity compared to simpler Docker or Docker Compose setups. Managing deployments via a tool such as RunCloud provides sufficient capability for many projects without the K8s learning curve.

    What is the difference between Docker and traditional VPS deployment?

    Traditional VPS deployment required you to install and manage all software (OS, web server, PHP, database, dependencies) directly on the virtual server, sharing the host OS kernel and resources in a less isolated way. Docker uses containerization to package the application and its dependencies into isolated user-space environments that run consistently anywhere, sharing the host OS kernel but keeping libraries and binaries separate.

  • Self-Hosting Docker vs Cloud-Based Docker: Pros and Cons

    Self-Hosting Docker vs Cloud-Based Docker: Pros and Cons

    Do you ever feel like getting your software to run reliably everywhere is almost as challenging as writing it in the first place? If so, then we strongly recommend learning all about Docker containerization.

    Docker containerization is a technology that packages applications into neat, portable containers that can be run anywhere.

    But once you’ve created containers, the next big question is – where they should live? Do you take command of your own hardware in a self-hosted setup, or leverage the vast power and convenience of the cloud?

    This guide will also help you choose between self-hosting Docker and using cloud platforms.

    Let’s get started!

    What is Docker?

    You know that classic developer joke, “But it works on my machine!” – funny because it’s often painfully true. Getting software to run correctly on different computers, with all their various settings and installed programs, has often been a massive headache. Docker is a way to fix this.

    Docker is like a standardized shipping container, but for software. You package your application and everything it needs to run (like specific code libraries, tools, and settings) into a neat little box called a “container”. This container can run practically anywhere, on your laptop, a colleague’s computer, or a server in a data center, and it should always work exactly the same way.
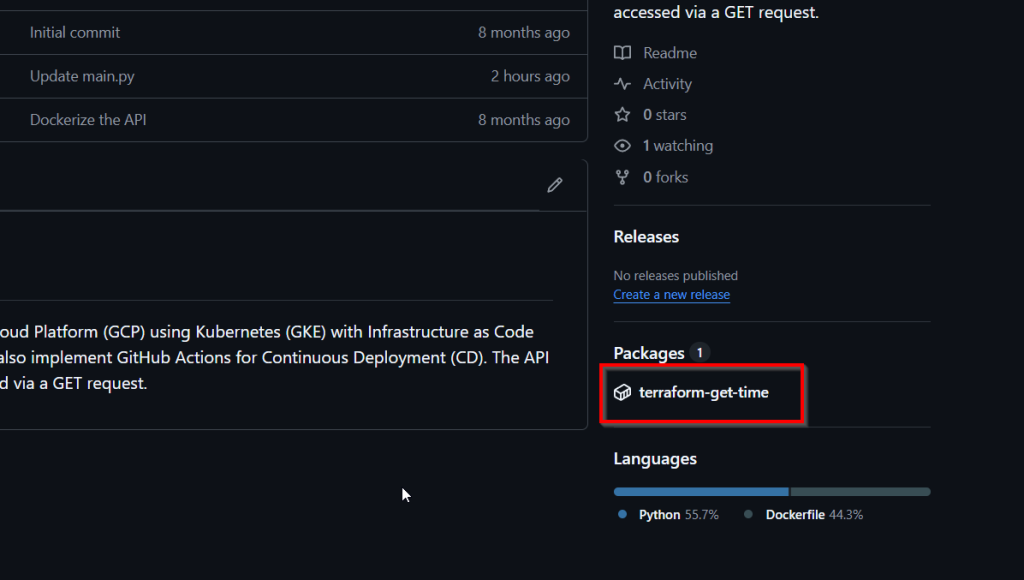
    Docker essentially isolates your application, so it doesn’t care what else is running on the host computer. It brings its own environment with it. This makes developing and deploying applications much faster and more reliable.

    But it’s important to remember that Docker isn’t the only container runtime out there! Other great technologies, such as Podman and Containerd, do similar things, offering different features or approaches that some people prefer. So, while you’ll hear “Docker” a lot, think of it as the famous brand name for a type of technology (containers) with several players.

    📖 Suggested read: What is Docker And How Does it Work

    What is Self-Hosting Docker?

    It means you take responsibility for running these containers on the hardware you manage. Instead of paying a cloud company such as AWS or Google Cloud to run your applications, you set up your own server (which could be an old PC in your closet, a powerful machine you bought specifically for this, or even a tiny Raspberry Pi) and use Docker (or one of its alternatives) to run the software containers on it.

    You can think of it as choosing between renting an apartment (using a cloud provider) and owning your own house (self-hosting). When you self-host Docker applications, you set up the server, install the base operating system, install Docker itself, and then deploy and manage the application containers on that system.

    This could be for running anything from a personal blog, a media server like Plex, a file-syncing service, a password manager, or even more complex business applications. You’re the landlord, the maintenance crew, and the resident all rolled into one.

    📖 Suggested read: What Are Docker Images And How To Use Them

    What Are The Benefits of Self-Hosting Docker?

    Why would anyone go through the trouble of setting up their own server to run Docker containers? Well, there are some pretty compelling reasons. The biggest one is often control.

    When you self-host, you have complete control over your data and how the application is configured. Your data stays on your hardware, which can be a huge plus for privacy-conscious folks. You’re not subject to a cloud provider’s terms of service changes, price hikes, or potential service shutdowns.

    Another major benefit can be cost savings, especially in the long run. While there’s an upfront cost for hardware, you avoid potentially hefty monthly subscription fees for cloud services, especially if you need to run many applications or require significant resources.

    It’s also an incredible learning opportunity. Setting up and managing your own server and Docker environment teaches you a ton about Linux, networking, security, and how applications really work under the hood, which are valuable skills in today’s tech world. Plus, you get the satisfaction of building and managing your own little corner of the internet.

    📖 Suggested read: How To Create a Docker Image For Your Application

    What Are The Drawbacks of Self-Hosting Docker?

    As you might have guessed already, self-hosting Docker isn’t easy, and it comes with its own set of chores. The biggest drawback of self-hosting is responsibility. You are solely responsible for everything: buying and maintaining the hardware, installing and updating the operating system and Docker, configuring network settings, ensuring security (this is a big one!), and performing regular backups.

    If something breaks, there’s no support line to call, and it’s up to you to fix it. This requires a certain level of technical knowledge and a willingness to learn and troubleshoot.

    There’s also the upfront cost of hardware, which can range from minimal for a Raspberry Pi to significant for a powerful server. You also need to consider ongoing costs like electricity. Furthermore, your home internet connection might not be ideal for hosting services, especially regarding upload speed or data caps.

    Finally, it takes time, time to set up, time to maintain, and time to fix things when they inevitably go wrong. It’s definitely more involved than just clicking a button on a cloud provider’s website.

    📖 Suggested read: When And Why To Use Docker — Full Guide

    What is Cloud-Based Docker?

    The flip side to running Docker containers on your own servers (self-hosting) is Cloud-Based Docker. This means you’re paying a cloud provider like Amazon Web Services (AWS), Google Cloud Platform (GCP), Microsoft Azure, DigitalOcean, or others, to run your Docker containers for you on their massive, optimized infrastructure.

    Instead of managing physical servers yourself, you interact with web dashboards or command-line tools to tell the provider what containers you want to run, how many resources they need, and how they should connect to the internet or other services.

    Think back to the apartment versus house analogy. Cloud-based Docker is like renting a fully serviced apartment in a large complex. You don’t worry about the building’s foundation, the plumbing, or the electricity grid connection; the building management (the cloud provider) handles all that.

    They offer various services specifically designed for running containers, ranging from simple “run this container for me” options to complex orchestration systems like Kubernetes (often provided as managed services like EKS, GKE, or AKS) that can manage large clusters of containers automatically. This option allows you to focus more on your application inside the container and less on the nuts and bolts that keep it physically running.

    📖 Suggested read: Docker Security — Best Practices to Secure a Docker Container

    What Are The Benefits of Cloud-Based Docker?

    Choosing the cloud route for your Docker containers comes with some significant advantages. One of the biggest perks is scalability.

    Need more power for a sudden traffic spike? With most cloud providers, you can scale up your resources (CPU, RAM, number of container instances) almost instantly with just a few clicks or commands – and scale back when demand drops.

    Most cloud providers only bill for what you use, which can be very efficient. Reliability and uptime are also major selling points; these providers have teams of experts, redundant hardware, backup power, and high-speed network connections designed to keep things running smoothly, often backed by guarantees called Service Level Agreements (SLAs).

    Additionally, cloud providers handle the underlying infrastructure management, and you don’t need to worry about hardware failures, operating system updates, or patching the Docker engine itself. This frees up your time to focus purely on developing and improving your application.

    They also offer a rich ecosystem of integrated services, making it easy to add databases, load balancers, monitoring tools, automatic backups, and advanced security features to your containerized applications. Getting started can often be quicker and require less upfront investment than buying dedicated server hardware.

    📖 Suggested read: 20 Essential Docker Commands You Should Know

    What Are The Drawbacks of Cloud-Based Docker?

    While the convenience is tempting, renting a cloud server has its downsides. The most obvious one is cost. While pay-as-you-go sounds great, cloud bills can quickly spiral out of control if you’re not careful about resource usage, especially at scale, or leave resources running unnecessarily.

    Understanding the often complex pricing models of different providers requires careful attention. You might also experience “vendor lock-in”, where moving your setup from one cloud provider to another becomes difficult due to reliance on specific proprietary services or tools.

    Another key drawback is reduced control. You don’t own the hardware and have limited say over the underlying infrastructure, network configuration specifics, or the provider’s maintenance schedules. Although cloud providers offer a lot of flexibility, some advanced users might also encounter limitations compared to having direct access to the bare metal.

    Data privacy can also be a concern for some; your application data resides on the provider’s servers, subject to their terms, policies, and the legal jurisdiction they operate under. Lastly, while cloud platforms abstract away hardware management, navigating their vast array of services, interfaces, and configurations introduces its own layer of complexity that requires learning.

    Wrapping Up: Who Should Use Self-Hosting Docker vs Cloud-Based Docker?

    Choosing between self-hosting Docker and using a cloud-based provider depends on your needs, technical comfort level, budget, and priorities.

    If you prioritize maximum control over your data, enjoy tinkering with technology, have particular privacy requirements, or are looking for the potentially lowest long-term cost (and don’t mind the upfront hardware investment and maintenance), then self-hosting Docker on your own server is likely a great fit.

    On the other hand, if your priority is convenience, rapid scalability, high availability backed by SLAs, and minimizing the time spent on infrastructure management, then a cloud-based Docker solution (like those from AWS, Google Cloud, Azure, etc.) is probably the way to go. This path suits startups needing to move fast, businesses experiencing variable workloads, teams that prefer focusing solely on application development, and anyone who values the ease of integrated managed services like databases and load balancers. While potentially more expensive month-to-month, it offloads a significant operational burden.

    Ultimately, the “best” choice is the one that aligns with your goals.

    But what if you want the control and potential cost benefits of self-hosting without all the command-line complexity?

    That’s where RunCloud comes in!

    Installing and hosting WordPress in Docker

    RunCloud dramatically simplifies managing your own servers and deploying applications, including Docker containers for managing different PHP runtimes.

    Sign up for RunCloud today and discover how simple server management can be.

    FAQs on Self-Hosting Docker vs Cloud-Based Docker

    Is self-hosting Docker more secure than cloud-based Docker?

    Security depends heavily on implementation, not just the hosting type; self-hosting Docker gives you full control over security measures, but you are entirely responsible for implementing and maintaining them correctly. Cloud providers invest heavily in security infrastructure and personnel, offering robust protection, but you rely on their systems and policies. Ultimately, a poorly secured self-hosted setup is less secure than a well-managed cloud environment, and vice versa.

    What are the cost differences between self-hosting Docker and using a cloud-based solution?

    Self-hosting Docker typically has higher upfront hardware costs but can lead to lower, predictable monthly expenses, mainly electricity and internet. Cloud-based Docker solutions usually have little to no upfront cost but involve recurring monthly fees based on resource consumption, which can escalate quickly as usage grows. Carefully analyze your expected resource needs and growth to determine the most cost-effective option.

    Which is more scalable: self-hosted Docker or cloud-based Docker?

    Cloud-based Docker solutions are inherently designed for easy and rapid scalability. You can adjust resources up or down almost instantly via dashboards or APIs. Scaling a self-hosted Docker environment requires manually adding more hardware (servers, RAM, storage), which takes time, planning, and physical intervention.

    Can I easily switch from self-hosting Docker to a cloud-based solution?

    Migrating Docker containers themselves is relatively straightforward since containers package dependencies, but the ease of switching depends on your overall architecture. If your self-hosted setup relies heavily on local network configurations or specific hardware integrations, moving to a cloud provider will require careful planning and reconfiguring networking, storage, and associated services.

    What is the performance difference between self-hosting and cloud-based Docker?

    Performance can vary greatly depending on the hardware (self-hosted) or chosen instance types (cloud) and network conditions. High-end self-hosted hardware might outperform entry-level cloud instances, while premium cloud instances offer performance levels that are hard to match along with optimized network backbones.

    Is self-hosting Docker suitable for small businesses?

    Self-hosting Docker can be suitable for small businesses, especially those with in-house technical expertise or those using management tools. It offers potential cost savings and greater data control. However, it requires a commitment to managing infrastructure, security, and updates, which can divert focus from core business activities.

    What are the maintenance requirements for self-hosting Docker?

    Self-hosting Docker demands ongoing maintenance, including updating the host operating system, patching the Docker engine itself, monitoring resource usage, managing hardware, and maintaining security configurations. You are also responsible for setting up and verifying backups and planning for hardware failures. Using server management platforms like RunCloud can automate some tasks, but the ultimate responsibility for the infrastructure’s health and security rests with the owner.

    How does data backup work in self-hosting vs cloud-based Docker solutions?

    With self-hosting Docker, you must design and implement your backup strategy, deciding what data (volumes, databases, config files) to back up, how often, and where to securely store the backups. Cloud providers typically offer integrated, often automated, backup solutions for storage volumes and databases associated with your containers.

  • How to Install WordPress on Docker in 2025 [Step-By-Step Guide]

    How to Install WordPress on Docker in 2025 [Step-By-Step Guide]

    Are you launching a new WordPress site? If yes, then making the decision to install WordPress on Docker makes a great deal of sense.

    Why use Docker for running a WordPress website?

    You’re obviously looking at how to install WordPress on Docker, but it’s worth being fully aware of why this is a good idea.

    In this article we’ll explain exactly what the benefits are of using Docker over a traditional VPS, and how you can easily install and run WordPress (as well as WooCommerce) on Docker.

    But first, let’s see what Docker is and why people use it.

    What is Docker?

    Docker is a platform that uses containerization technology to enable developers to create, deploy, and manage applications in a consistent environment across different systems.

    A container is a lightweight, standalone, and executable package that includes everything needed to run a piece of software: the code, runtime, system tools, libraries, and settings.

    Unlike traditional virtual machines, containers share the host system’s kernel, which makes them more efficient in terms of resource usage and speed.

    Docker provides a high level of isolation and security while allowing multiple containers to run on the same host system without interfering with each other. Containers are highly portable and can run consistently on any environment that supports Docker – from a developer’s local machine to large-scale production servers in the cloud.

    Suggested Read: How To Create a Docker Image For Your Application

    What are the Advantages of Docker in WordPress?

    Using Docker for WordPress offers several significant advantages:

    Consistent Development Environments

    Docker ensures that the WordPress environment is consistent across all stages of development, from local development to testing and production. This consistency eliminates the “it works on my machine“ problem, ensuring that if a WordPress site works in a Docker container on one machine, it will work in a Docker container on any other machine.

    Simplified Dependency Management

    WordPress sites often rely on specific versions of PHP, MySQL, and various extensions. Docker allows developers to define these dependencies in a Dockerfile and docker-compose.yml file, ensuring that everyone working on the project uses the same versions and configurations. This avoids issues arising from incompatible dependencies or missing libraries.

    Isolation and Security

    Docker containers run in isolated environments, which means that each WordPress instance is completely separated from others. This isolation enhances security by limiting the potential impact of vulnerabilities in one container on others. Additionally, Docker’s use of namespaces and control groups (cgroups) provides further isolation and resource control, enhancing the security and stability of the overall system.

    Scalability and Load Balancing

    Docker makes it easy to scale WordPress instances horizontally. By spinning up additional containers, you can distribute the load across multiple instances to handle increased traffic. Docker’s orchestration tools, such as Kubernetes and Docker Swarm, further simplify the process of managing multiple containers, load balancing, and ensuring high availability.

    Resource Efficiency

    Containers share the host system’s kernel and use fewer resources compared to traditional virtual machines. This efficiency means you can run more WordPress instances on the same hardware, reducing costs and improving performance. Docker’s lightweight nature also contributes to faster start-up times for containers, enhancing the overall responsiveness of the system.

    Flexibility and Portability

    Docker containers can run on any platform that supports Docker, including various Linux distributions, Windows, and macOS. This flexibility allows developers to work in their preferred environment and ensures that the WordPress site can be deployed across different infrastructures without modification. This portability is particularly beneficial for cloud deployments and hybrid environments.

    How to Install WordPress on a Server Using Docker

    Let’s walk through the steps for setting up a WordPress website using Docker Compose on a Linux server.

    Prerequisites

    Make sure you have Docker and Docker Compose installed on your Linux server. If you don’t, you can install them by following the official documentation for Docker and Docker Compose.

    Once they are installed, you can check whether are are working properly using the following commands:

    docker --version
    docker-compose -v

    Create a Project Directory

    First, you need to log in to your server via SSH and create a directory where you’ll store your WordPress files – you can name it anything you like. For example, run the following code snippet to create a folder named my-wordpress-site:

    mkdir my-wordpress-site
    cd my-wordpress-site

    Create a Docker Compose YAML File

    After creating the directory, you need to create a file named ‘docker-compose.yml‘. This file will define the services and configurations required for your WordPress installation.

    Open the docker-compose.yml file in your preferred text editor (such as nano, vim, or gedit). Read our tutorial on how to edit files over SSH if you don’t know how to do this.

    After opening the file in a text editor, add the following content to the file:

    version: '3'
    services:
      db:
        image: mysql:5.7
        volumes:
          - db_data:/var/lib/mysql
        restart: always
        environment:
          MYSQL_ROOT_PASSWORD: your_mysql_root_password
          MYSQL_DATABASE: wordpress
          MYSQL_USER: wordpress
          MYSQL_PASSWORD: your_mysql_password
      wordpress:
        depends_on:
          - db
        image: wordpress:latest
        ports:
          - 8000:80
        restart: always
        volumes:
          - wp_data:/var/www/html
        environment:
          WORDPRESS_DB_HOST: db:3306
          WORDPRESS_DB_USER: wordpress
          WORDPRESS_DB_PASSWORD: your_mysql_password
    volumes:
      db_data: {}
      wp_data: {}


    In the above snippet, replace your_mysql_root_password and your_mysql_password with your desired MySQL root password and WordPress database password, respectively. You can also change the database user if you want to set it to a custom value.

    Start the Docker Containers

    After creating the file, you need to run the following command in your project directory to start the Docker containers:

    docker-compose up -d

    When you run the above command, Docker Compose will pull the necessary images, set up the containers, and configure network connections. This process may take a few minutes.

    Access Your WordPress Site

    Once the containers are up and running, open a web browser and type the following URL to access your website:

    http://your-server-IP:8000

    Make sure you replace your-server-IP with the actual IP address of your server.

    Once you open the above URL in your browser, the WordPress setup wizard should appear, guiding you through the initial configuration.

    Installing WordPress on Docker

    Follow the instructions in the setup wizard to complete the installation by setting your preferred language, site title, username, password, and email address. After successful setup, you’ll be taken to the WordPress admin dashboard where you can customize your website by installing themes, plugins, and publishing content.

    Stop and Restart Containers

    Once you have started the containers, they will keep running in the background until you shut them down. If you wish to stop the containers for any reason, then you can use the following command:

    docker-compose down

    This command will terminate and remove the containers while retaining the data in the database volume. If you want to restart the containers later, go to your project directory and run:

    docker-compose up -d

    Suggested read: What Are Docker Logs And How To Use Them

    Installing WordPress Using RunCloud

    We have explained how to use Docker to install multiple websites on a single server, but did you know that you can also do this using RunCloud – and much more easily?

    RunCloud allows you to install new WordPress applications with a single click, and provides you an option to choose between Nginx, OpenLiteSpeed, and Docker server environments.

    To launch a WordPress site, all you need to do is click “Deploy a web app” and fill in the basic details such as the name of the application (or use the default name provided by RunCloud).

    Next, you need to configure the login information for your WordPress dashboard, and other information such as site name, multisite option, etc.

    After you have configured the login credentials, you can continue setting DNS, backup, PHP version, etc. or just use the default configuration and change it later from the RunCloud dashboard.

    Wordpress on RunCloud

    After making the necessary changes, you can hit “Deploy” to automatically set up your website on your server – and the best part is that you can do the exact same process once again to install another site (or as many as you want) on the same server.

    Suggested read: 20 Essential Docker Commands You Should Know

    Wrapping Up

    In this post, we have walked you through how to install WordPress on Docker. One of the main reasons people use Docker is because it allows them to run multiple applications on the same server, which saves costs.

    But what if we told you that there is a better way to take advantage of the flexibility of Docker without leaving the comfort of a GUI dashboard?

    RunCloud provides a feature rich dashboard which is compatible with any cloud provider and doesn’t impose arbitrary restrictions on the number of apps, backups, cron jobs, etc. – if your server can handle it, then you can do it!

    Start using RunCloud today!

    FAQ: Installing WordPress on Docker

    Can WordPress run on Kubernetes?

    Yes, WordPress can run on Kubernetes. While Docker is commonly used for local development and testing, Kubernetes provides a powerful orchestration platform for deploying and managing containerized applications, including WordPress. Kubernetes allows you to achieve scalability, resilience, and ease of management for your WordPress deployment.

    What are the best practices for Docker in WordPress?

    When using Docker for WordPress, consider the following best practices:
    Use Docker Compose: Docker Compose simplifies the setup by defining services, networks, and volumes in a single YAML file. It allows you to coordinate multiple containers (e.g., MySQL, Nginx, and WordPress) to work together.
    Separate Containers: Run WordPress and its components (like MySQL or Nginx) in separate containers. This isolation ensures better resource management and scalability.
    Persistent Volumes: Use persistent volumes to store data (e.g., WordPress files, database) outside the containers. This ensures data persistence even if containers are restarted or rescheduled.
    Security: Secure your containers by using environment variables for sensitive information (e.g., database credentials). Avoid hardcoding secrets in your Dockerfiles or Compose files.
    Regular Backups: Back up your data regularly. Docker volumes make it easier to back up and restore data.

    How to update WordPress in a Docker container?

    To update WordPress in a Docker container:
    Pull the Latest WordPress Image: Pull the latest WordPress image from Docker Hub using docker pull wordpress:latest.
    Stop and Remove Existing Containers: Stop and remove the existing WordPress container and its associated containers (e.g., MySQL, Nginx).
    Create New Containers: Create new containers using the updated WordPress image. Ensure that you use the same volumes for data persistence.
    Update Configuration: If necessary, update your configuration files (e.g., wp-config.php) to match any changes in the new WordPress version.
    Restart Containers: Restart the containers to apply the changes.

    Default Login for WordPress Docker

    There are no default credentials for WordPress regardless of Docker environments. You need to set up credentials when you log in to your WordPress dashboard for the first time.

  • Bringing Containerization to RunCloud’s Cloud Architecture

    Bringing Containerization to RunCloud’s Cloud Architecture

    With a quarter of all businesses relying on Docker (according to this Datadog study) and over 20% of web hosts running it – Docker’s containerization architecture is tried, tested, and relied upon from startup to enterprise.

    At RunCloud, we’re pleased to announce that we are now rolling out support for Docker, making it easier for its users to deploy and manage their web applications (powered by Docker containerization architecture).

    In this article, we’re going to cover exactly what this means and what you will now be able to do with the combined power of RunCloud and Docker.

    Why Containerization – What Led Us Here

    Firstly, a very brief bit of history.

    What came before Docker, and why was Docker needed?

    Most enterprise companies, by default, usually treat all users as untrusted and try to limit their access to services even if they are performing just a simple action. One technology that is commonly used for this purpose is chroot jail. This is a way of isolating a single process and its children from the rest of the system. It’s often used within VMs, resulting in a Dedicated → VM → chroot structure.

    The problem with chroot jail is that it requires copying or mounting all necessary files from the host to the jail – which can be difficult to manage if multiple jails are needed.

    Additionally, many applications only support a single jail, making it difficult to provide each user with their own jail. Overall, jailing users can be messy and requires careful tracking of shared objects and binaries within the jail.

    When jailing users became difficult to manage, several major companies sought to create a new technology that would make it easier. This led to the development of Linux Containers (LXC), which offered a VM-like solution without the need to create a virtual machine. However, LXC was difficult for many people to use, as it required creating your own image rather than using pre-made solutions. This limited the adoption of LXC, despite its powerful capabilities.

    In contrast to VMs, container images are read-only and faster to start up. This led to the creation of Docker, which was developed by Docker Inc. with a focus on security, ease of use, and portability. Docker has become one of the most popular tools in the world of DevOps and allows for easy sandboxing of servers. In 2015, Docker launched the Open Container Initiative (OCI) to provide a standard for OS-level virtualization.

    The Benefits of Docker Containerization with RunCloud

    1. Enhanced Security

    If your web app gets hacked while running natively on RunCloud, hackers may well be able to gain access to the root shell if the server isn’t hardened properly. This is clearly bad news, as once the root user gets compromised, hackers gain access to everything on the server.

    But in Docker, if your site gets compromised, you just need to clean up your web app and then restart the Docker container to roll everything back to how it should be quickly, easily, and relatively painlessly.

    Using Docker allows us to better implement the rule of least privilege. Everyone with access to your server is treated as if you don’t know what their intention or capabilities are. Someone accessing your server may just want to do their job, perhaps they have bad intentions, or maybe they are a complete beginner who may inadvertently run a command that could make your server crash.

    With Docker running inside RunCloud, we have `rc-shell` (RunCloud Shell) that will jail users inside their own container. Anything they do will only affect their data and their container – leaving the rest of the server unscathed.

    2. Improved Performance

    Although Docker may look like a virtual machine, it’s actually very different from that concept. Deleting old Docker containers and launching a fresh one takes only a couple of seconds. By using Docker to run your server, you can expect near-native performance, with improved performance when used in production at scale (as a result of isolation).

    3. Better Server Management

    Using containers for your server makes it much easier to manage your servers.

    Firstly, since you are not installing services directly on the operating system, your server will be much cleaner, and you will encounter fewer problems in server management.

    Secondly, suppose you need to use an older version of PHP on your site in the future. It will be much easier to do so with a containerized server since the version of the operating system running on the server might drop support for older PHP versions in the future.

    Finally, upgrading your server will be much simpler because you won’t have to worry about compatibility issues with shared libraries or other potential causes of server crashes.

    4. Same Dashboard/No Learning Curve

    RunCloud aims to provide an easy-to-use interface for managing containerized servers – users migrating from native RunCloud installations will find the transition to using containers to be smooth and straightforward.

    Additionally, users don’t need to have any knowledge of Docker to use RunCloud, as they won’t need to use any Docker commands. The learning curve for using Docker with RunCloud is relatively shallow, with only a few new concepts for users to learn in order to get started. Overall, using Docker inside RunCloud offers a more user-friendly experience for managing your server.

    What’s New?

    There are a lot of new features coming to RunCloud. Here are some of the most exciting ones.

    Add Individual Services

    In a native installation of RunCloud, all necessary software such as NGINX, PHP, MariaDB, Redis, and Beanstalkd are installed and can be started or stopped as needed.

    In a containerized server, you now have the option to run each of these components individually – and can even choose not to run any of them if desired. Additionally, if a necessary image is not present on the server, it can automatically be downloaded from Docker Hub to ensure that everything is up to date and ready to run.

    adding individual services in runcloud

    Quick and Easy Upgrades

    With a native installation of RunCloud, some software, such as Redis and Beanstalkd may not be automatically updated after being installed. In order to enable automatic updates for these components, you may need to use third-party software, which can sometimes cause update failures and lead to issues such as agents not updating to the latest version.

    In contrast, a containerized server automatically checks for the latest versions of all necessary components every 3 hours, ensuring that your software is always up to date and avoiding potential update & security issues.

    Selectively Upgrade Services

    MariaDB and Beanstalkd use exclusive locks, which means that during an upgrade, they can each cause a few seconds of downtime, as the running container must be stopped in order to start a new one. While the process of starting a new container is instantaneous, the health check process may cause a delay in reporting the status of the running service. Because of this, we have provided the option to enable or disable automatic updates for MariaDB and Beanstalkd.

    However, it is generally recommended to avoid automatically updating critical software and instead has updates performed by a professional. With Docker, however, updates can be performed more easily and with minimal downtime. By default, MariaDB and Beanstalkd will not be automatically updated, but users can change this behavior if desired.

    With native installations of RunCloud, updates to the agent software can sometimes result in new versions of other software being automatically installed on the server, even if the user doesn’t need or want them. For example, if an update to the agent brings PHP 8.0 to the server, it will be automatically installed whether the user wants it or not.

    However, in a containerized server, the user has the ability to choose which versions of software they want to use and can easily remove any unnecessary components from the server stack. This allows for greater control over which software is installed and used on the server.

    Easily Restore Passwords

    In a native installation of RunCloud, the password for the MariaDB root user is stored in the /etc/mysql/conf.d/root.cnf file. If this password is accidentally changed, it must be updated in the file in order to access the MariaDB server, and it can be difficult to regain access to the server if the password isn’t known.

    In a containerized server, if the password in the /etc/mysql/conf.d/root.cnf file is changed, the MariaDB server will automatically reset the root password to match the new password specified in the file, allowing you to easily regain access to the server.

    Automatic Network Management

    In a containerized server, the values localhost and 127.0.0.1 no longer refer to the server itself but instead indicate the location of the current container. This can cause issues when installing software, such as WordPress, that expects these values to refer to the server.

    To address this, RunCloud uses the host to indicate the host machine rather than the current container. This can be used in the DB_HOST setting when installing WordPress, for example, to ensure that the database connection is established with the host machine rather than the PHP container. Additionally, the values mariadb and redis can be used to connect to the MariaDB and Redis containers, respectively, within your application.

    Isolate Users

    Docker is designed to run as a privileged user, such as the root, or a user with sudo access. In RunCloud, creating a system user does not automatically grant that user privileged access. Since PHP is not installed natively on the server, users will not be able to run PHP-related commands.

    To overcome this limitation, RunCloud is introducing rc-shell, a jailed shell that allows users to run commands within a Docker container. Whenever a user connects to the server via SSH or SFTP, a new container is created, and the user is logged in to that container. This provides a secure environment where the user can only access their own files and has access to all necessary commands.

    The only limitation is that each user can only choose one PHP version to use as their PHP command-line interface (CLI). However, users can choose whether to use the same PHP CLI version as the server or a different version for their own user account.

    Run Different Versions of The Same Command

    With a native installation of RunCloud, the php command refers to the PHP command-line interface (CLI) that is installed on the server. In a containerized server, this behavior is the same, and the php command refers to the default PHP CLI version that is installed on the server.

    If a user wants to use a different PHP CLI version, they can use the /RunCloud/Packages/<php version>/bin/php command, where <php version> is the version of PHP they want to use.

    In a containerized server, users can also use commands such as php72rc, php73rc, php74rc, etc., to run a specific PHP CLI version. However, the composer and wp commands will always use the default PHP CLI version and cannot be changed at this time. This applies to both native and containerized installations of RunCloud.

    When the root user runs the php, wp, or composer command within a user’s directory, such as /home/user/webapps/mysite, these commands will automatically be run as if they were being executed by the user. This means that the root user does not need to switch to the other user in order to run these commands.

    For example, if the root user runs the command composer install within /home/amir/webapps/mysite, it will be executed as if the amir user had run the command themselves. This provides a convenient and user-friendly way to manage these commands within a user’s directory.

    “Run as” / Emulate / Mock User

    Due to the limitations described above, cron and supervisor may not be able to run the php, composer, and wp commands as a specific user. To overcome this, RunCloud provides a feature called “fake run as” for use with cron and supervisor.

    When using this feature, the specified command will be run as the root user, but it will be executed as if it were being run by the user specified in the “fake run as” field. This only applies to the php, composer, and wp commands and should not be used for any other commands. Using this feature allows cron and supervisor to run these commands as if they were being executed by a specific user, even though they are actually being run by the root user.

    Restart Services Selectively

    In a native installation of RunCloud, the systemctl command can be used to reload PHP-FPM for a specific PHP version. For example, to reload PHP-FPM for PHP 7.4, you can use the command systemctl reload php74rc-fpm.

    In a containerized server, the <phpversion> reload command can be used instead, where <phpversion> is the specific PHP version you want to reload. For example, to reload PHP-FPM for PHP 7.4, you can use the command php74rc reload. The nginx-rc reload command can also be used to reload Nginx in a containerized server. This provides a convenient and user-friendly way to manage and reload PHP-FPM and Nginx on a containerized server.

    How To Use Docker On RunCloud

    It is fairly straightforward to use Docker on RunCloud.

    1. Create a fresh Ubuntu server on your favorite public cloud, and click “Connect a New Server” in your RunCloud dashboard. Pick the “Containerized” option and complete the necessary fields.
    creating containerized server in runcloud
    1. Having done that, you can either continue via direct installation, or choose to install manually as you normally would.
    manual installation of containerized server on runcloud

    Summary

    The infrastructure improvements that Docker containerization allow us to deliver are incredibly powerful, and – in some ways – we’ve only really scratched the surface of what’s possible.

    By rolling out support for Docker, we’re making it easier for users to deploy and manage web applications, including testing in consistent, isolated environments – also playing a role in preparing our architecture for further improvements planned in 2023 and beyond. This is an important step for RunCloud and all of our users.

    With RunCloud, you don’t need to be a system administrator or Linux expert to manage your cloud infrastructure. With everything from backups, staging, cloning, atomic deployments, and more – RunCloud makes it truly enjoyable to manage your own production-grade infrastructure. Learn more & get started today.