Category: Laravel

  • Laravel Hosting: Best Platforms for Deploying Laravel Apps

    Laravel Hosting: Best Platforms for Deploying Laravel Apps

    Laravel currently powers over 1.5 million websites globally, and the ecosystem is growing faster than ever. Because of this massive growth, finding the best Laravel hosting has become a top priority for development teams, agencies, and enterprise architects. 

    This article compares several leading Laravel hosting solutions, including their strengths, pricing models, and suitability for different development workflows. 

    Common Challenges with Hosting Laravel Apps

    When choosing how to host a Laravel application, developers may need to consider the following challenges:

    1. The DevOps Burden of Unmanaged Servers: It takes a frustrating amount of time and effort to manage servers manually. Configuring NGINX, securing firewalls with iptables, manually renewing Let’s Encrypt certificates, and troubleshooting PHP-FPM bottlenecks require significant effort.
    2. Vendor Lock-in: Some managed and serverless platforms encourage the use of provider-specific databases, caching services, storage systems, or deployment configurations. The more closely an application depends on these services, the more work may be required to migrate it elsewhere. 
    3. Cost Predictability at Scale: Usage-based pricing can make monthly costs harder to predict, particularly during sustained traffic increases or unexpected spikes. In some cases, this can cost more than a flat-rate compute instance. 
    4. Architectural Isolation: Some server configurations make it difficult to run applications that require conflicting PHP versions or supporting services. Without suitable isolation, these differences can cause dependency conflicts. 
    Top Laravel Hosting Platforms

    The platforms below take different approaches to server management, application isolation, pricing, and scalability. The best Laravel hosting option will depend on your technical requirements and preferred level of infrastructure control.

    Laravel Forge

    Laravel Forge is a developer-focused server management tool and has been the go-to choice in the PHP community since 2014. It is created by the team behind the Laravel framework itself and is designed to provision and manage VPS instances across popular cloud providers such as DigitalOcean, AWS, and Hetzner. 

    The greatest strength of Forge is its deep, native understanding of the modern PHP ecosystem. It provides first-class support for managing background queue workers via Supervisor, handling scheduled cron tasks, and deploying database clusters straight from a clean, minimalist dashboard. If you work primarily within the Laravel ecosystem, Forge provides a closely integrated way to provision servers and deploy applications. 
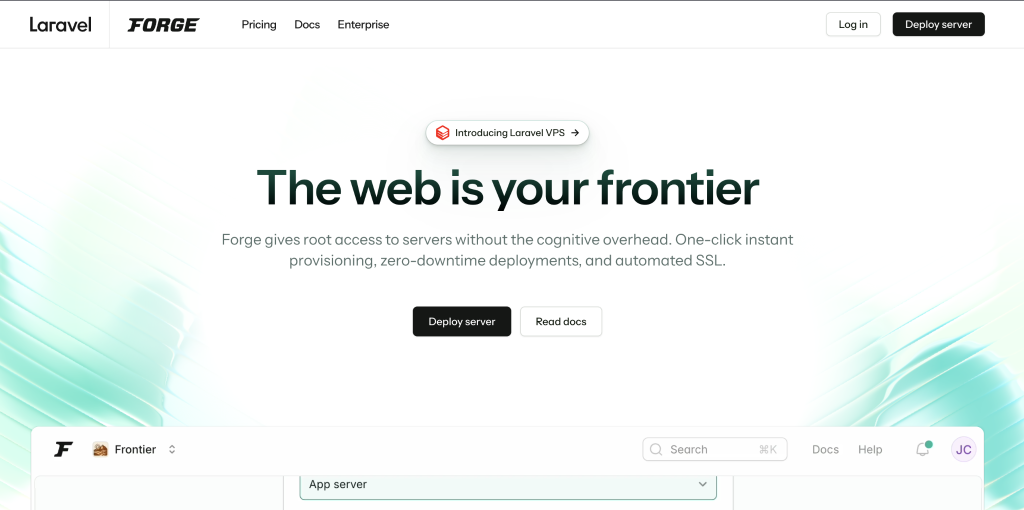
    Laravel Forge website homepage

    Suggested read: What is Laravel? A Comprehensive Guide for 2026

    While Forge is incredibly powerful, it traditionally installs your software stack natively onto the server’s operating system. This approach is highly efficient but may occasionally require extra care when running multiple applications on the same server that require conflicting versions of secondary services. For teams that prefer a deployment service created by the Laravel team, Forge remains a strong option. 

    Cost: Forge uses a SaaS model. The Hobby plan starts at $12 per month for managing a single server. As your needs grow, you can upgrade to the Growth plan at $19 per month for unlimited servers, or the Business plan at $39 per month to unlock advanced deployment workflows and priority support. You simply pay this flat management fee alongside your separate raw cloud server costs.

    Laravel Cloud & Laravel Vapor

    If you want to eliminate server management, you can use one of two first-party cloud solutions: Laravel Vapor and the newly launched Laravel Cloud. Laravel Vapor is a serverless deployment platform powered by AWS, while Laravel Cloud is a managed application platform built specifically for Laravel. Both reduce the amount of infrastructure that developers must manage directly. 

    Laravel Vapor deploys applications to AWS Lambda and can automatically scale application capacity in response to changing traffic. This makes it suitable for applications with variable or unpredictable workloads. Laravel Cloud supports hibernation for compatible compute resources. These resources can scale to zero while idle and resume in under 500 milliseconds when traffic returns, reducing compute charges during inactive periods. 
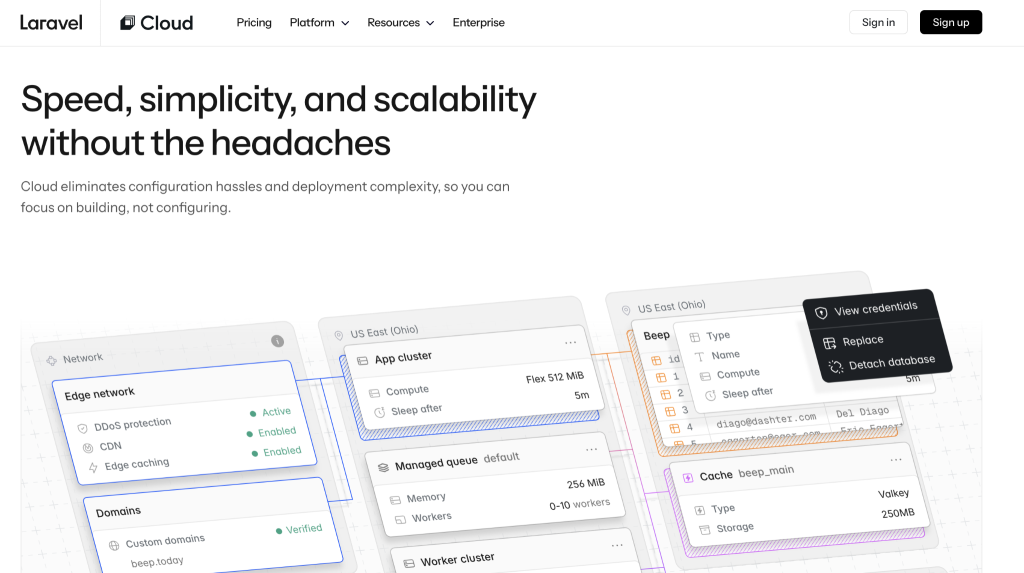
    Laravel Cloud website homepage

    Suggested read: How to Install and Deploy Bagisto (Laravel eCommerce)

    These platforms suit developers who want to reduce the amount of infrastructure they manage directly. Laravel Cloud automatically injects your environment variables, handles dedicated worker clusters for queue processing, and offers native support for managed databases. You can connect your repository and deploy your code while the platform manages much of the underlying routing and infrastructure. Scaling behavior and resource allocation can then be configured for the application. 

    Cost: These platforms rely on usage-based billing. Vapor offers a free Sandbox tier, while its paid plans and any underlying AWS resources incur separate charges. Laravel Cloud’s Starter plan costs $5 per month and includes $5 in monthly usage credits. Further charges depend on the resources used. This pricing can suit small or variable workloads, although costs may be harder to forecast than those of a fixed-price server. 

    Cloudways

    Cloudways provides a good balance between traditional shared hosting and complex cloud infrastructure by offering a fully managed experience. Instead of buying a server from DigitalOcean and connecting it to a separate control panel, Cloudways bundles the server and the management interface into a single, unified monthly bill.

    Cloudways includes caching, SSL management, backups, and several server security features. Other services, including CDN and malware-protection products, may be available as paid add-ons. Their platform is incredibly user-friendly, allowing you to launch applications, configure SSL certificates, and manage automated backups with just a few clicks.
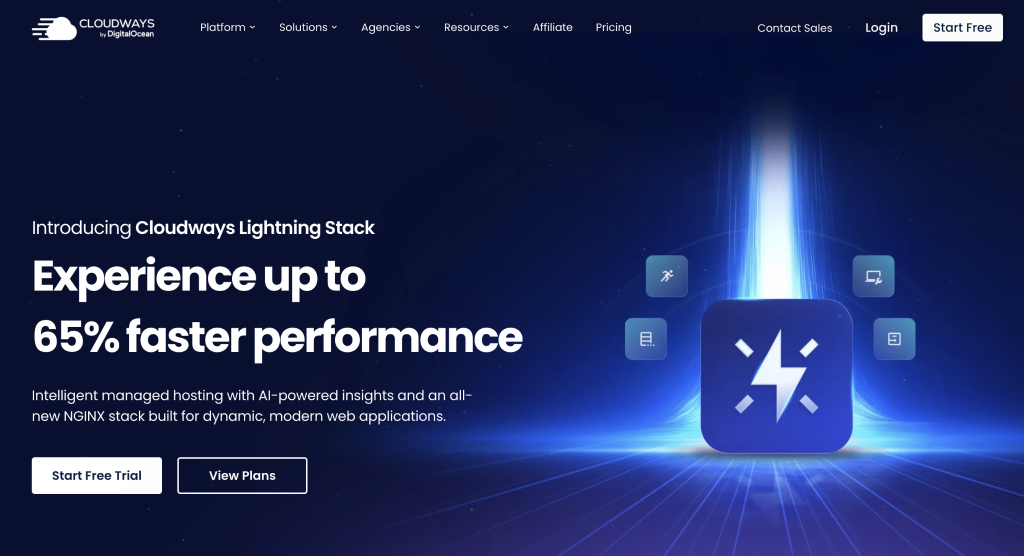
    Cloudways website homepage

    Suggested read: How to Deploy Laravel with Docker on VPS in 2025 (Comprehensive Guide)

    The primary trade-off with Cloudways is its pricing structure at scale. Because they bundle the service, you pay a markup on the underlying server cost. While this is fantastic for one or two small servers, if you are running a digital agency that manages dozens of large servers, you may find that these markup fees become quite expensive compared to purchasing unmanaged servers directly. 

    Cost: Cloudways is highly attractive for single-server setups. Cloudways currently advertises DigitalOcean-based managed hosting plans starting at $11 per month, which include server resources and Cloudways’ management platform. Cloudways also provides 24/7 support, which may appeal to business owners who do not want to manage servers without assistance.

    Ploi

    Ploi is a SaaS server management panel designed for developers and agencies. Ploi connects to your VPS and offers an easy-to-navigate, functional interface. It also provides several unique features that anticipate the needs of modern web agencies.

    For example, it includes out-of-the-box support for load balancing, status pages, and staging-to-production deployment workflows. Furthermore, its seamless one-click installations across platforms such as WordPress, Statamic, and Nextcloud make it incredibly versatile for agencies managing mixed technology stacks.

    Ploi also offers a Team Management feature to help you collaborate with team members. You can create a team and maintain full control over who has access to what. It provides granular, role-based permissions that you can configure per user, per server, and per site. This makes it possible to grant a team member specific access, such as database-only rights, without compromising other areas. 
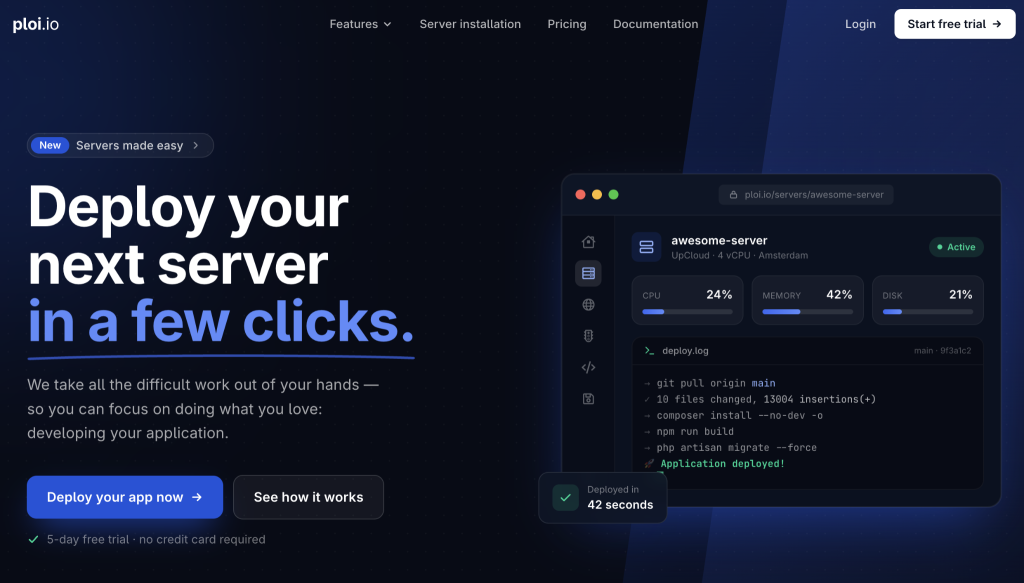
    Ploi website homepage

    Suggested read: Laravel With Git Deployment The Right Way

    It successfully takes complex infrastructure tasks, such as setting up load balancers or configuring database backups with external providers, and simplifies them into intuitive processes. 

    Cost: Ploi offers a free plan for one server. Its paid Basic plan costs €8 or $10 per month for up to 5 servers, while higher plans increase the server allowance and add more features. 

    Upsun

    Upsun is a modern, multi-cloud Platform-as-a-Service (PaaS) that offers deep, native integrations specifically tailored for Laravel development. Unlike traditional VPS management tools, Upsun manages the underlying infrastructure entirely across AWS, Azure, and GCP, while allowing you to define managed services (such as PostgreSQL, Redis, or RabbitMQ) directly in your configuration files.

    A notable Upsun feature is its support for preview environments. When you create a new Git branch, Upsun can automatically spin up an isolated preview environment that inherits live data, services, and routing from your production setup. This allows your team to test bug fixes and new features in a highly realistic, production-like setting before ever pushing to the live app.
    Upsun website homepage

    Upsun also includes built-in integrations for Blackfire.io to profile your database queries and queue jobs, along with environment-specific toggles for Laravel Telescope. It even supports dedicated worker containers for Laravel Horizon, ensuring your background queues never compete with your web traffic for resources.

    Cost: Because Upsun uses resource-based, per-second pricing, the final cost depends on the resources and services used. Its pricing calculator can provide an estimate, though the monthly total may vary based on the precise CPU, RAM, and storage your application consumes, alongside variable and fixed components such as user licenses (€10.00/user/month), project fees (€9.00/project/month), storage (€0.49/GB/month), backups (€0.10/GB/month), and request volume (€1.00/100,000 requests). 

    RunCloud

    RunCloud (that’s us!) is a server management platform for teams who want to use their own cloud servers and manage them through a graphical interface. It can connect to compatible Ubuntu servers from a wide range of cloud providers.

    What sets RunCloud apart is its innovative use of Docker-containerized servers. If you use the Dockerized server stack on RunCloud, you can isolate different web applications on your server. 
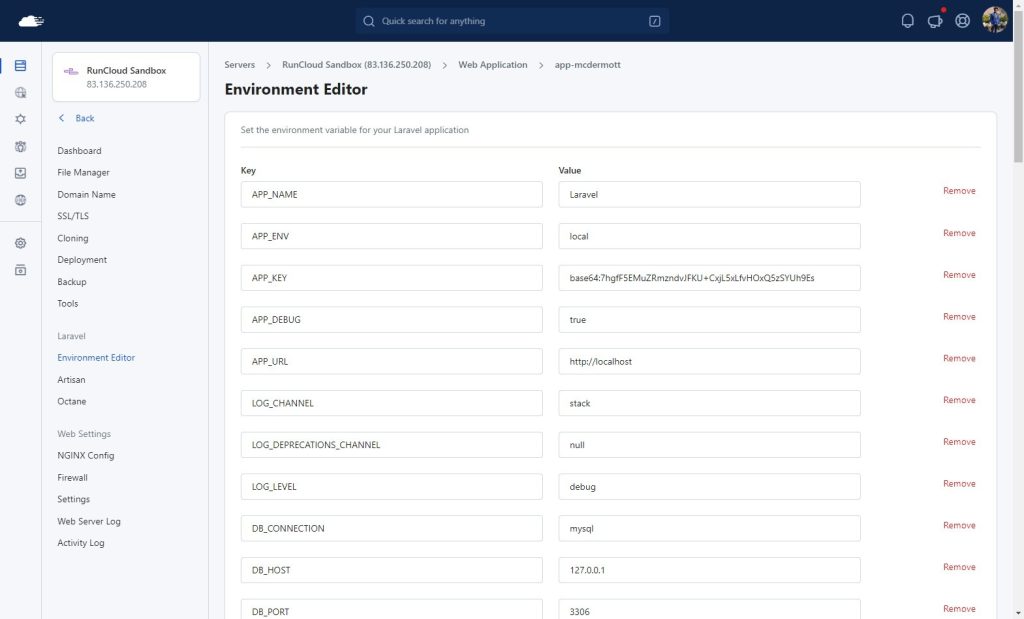
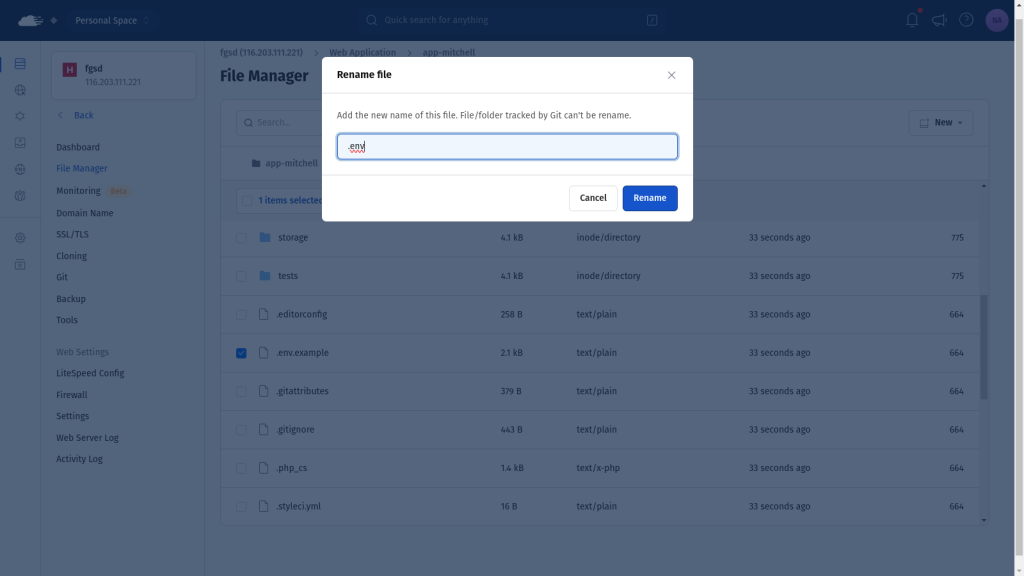
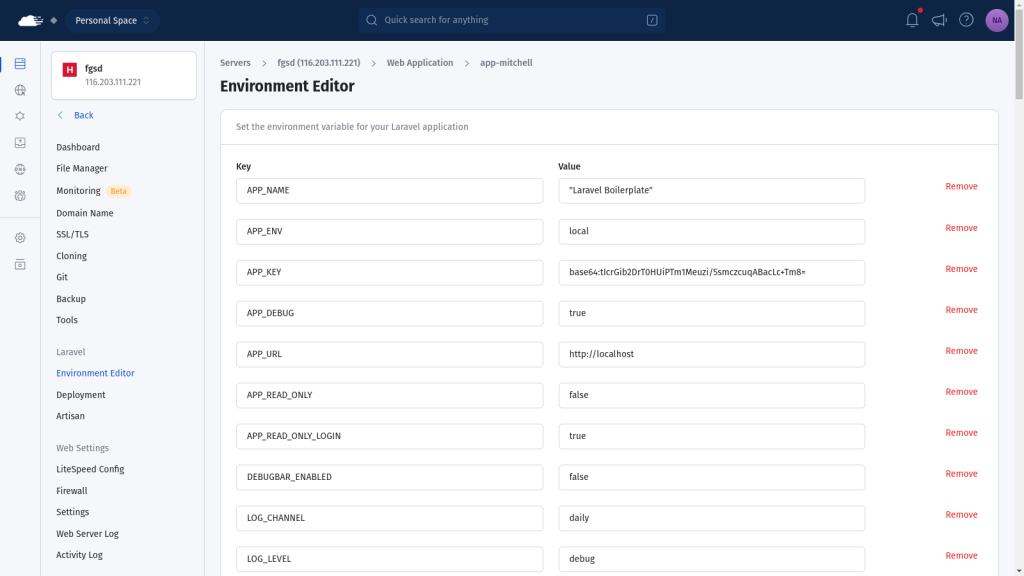
    RunCloud Laravel Environment editor

    This isolation can prevent dependency conflicts between applications and reduce the impact of an application-level problem on other containers. It also allows different applications to use different supported PHP versions on the same server. Container isolation does not remove the need to secure and update the host server and each application.

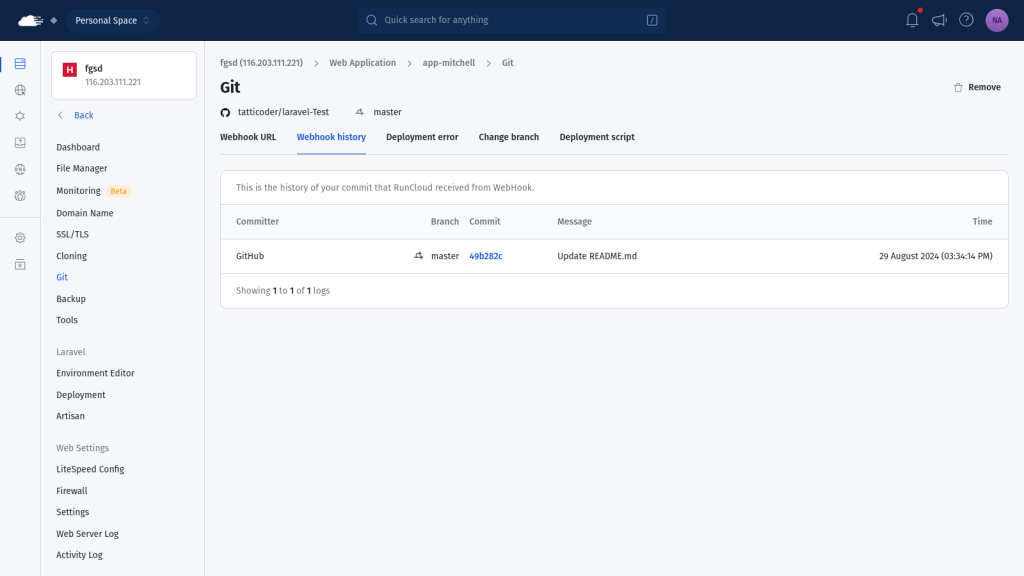
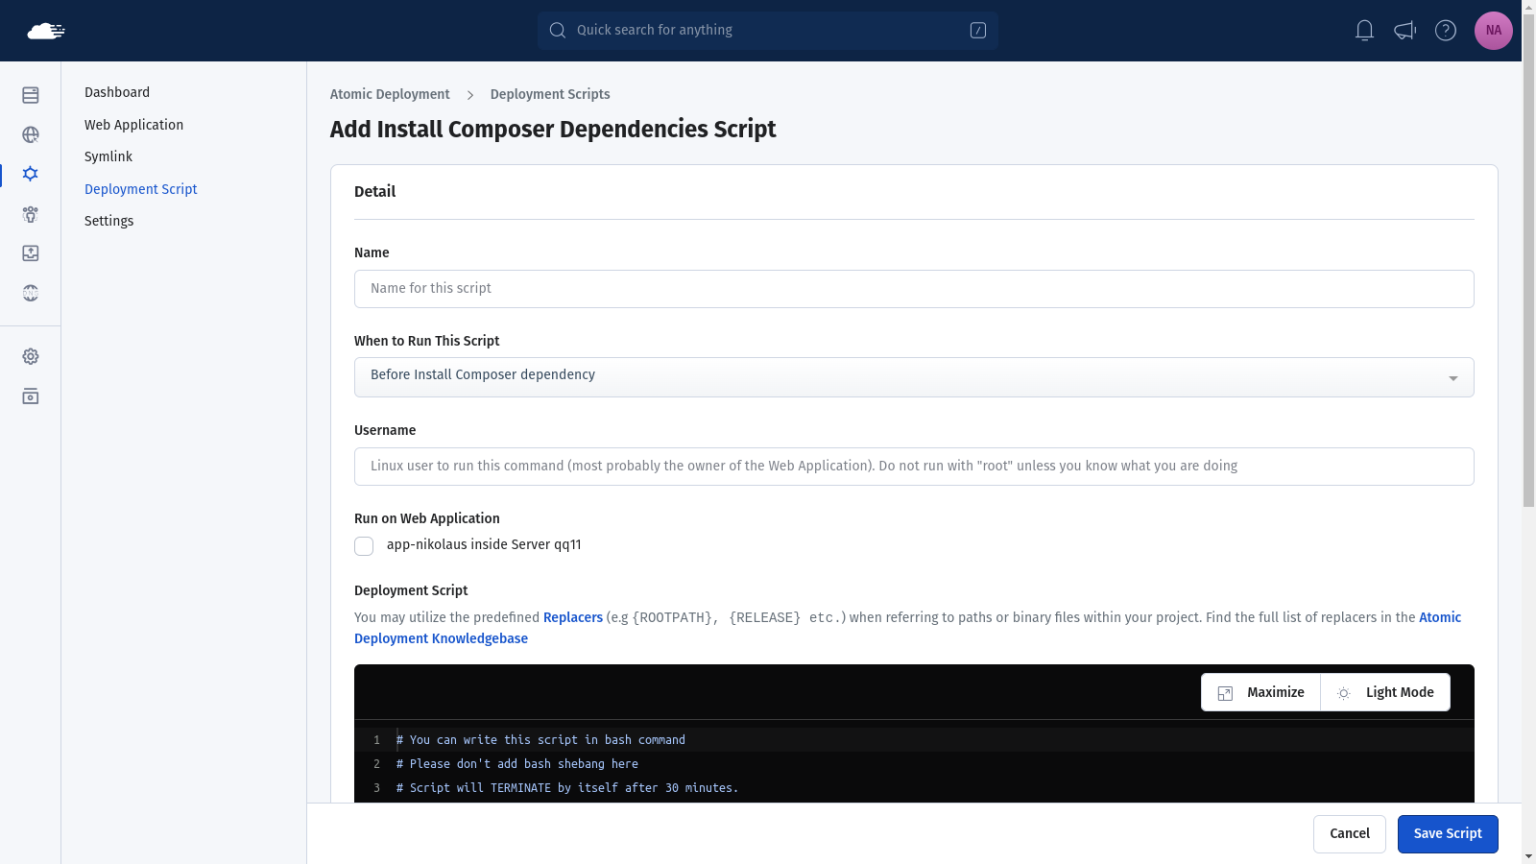
    RunCloud also offers Git with atomic deployment functionality. This minimizes application downtime during updates by preparing your new release in an isolated directory before updating the active web root symlink. To coordinate this process across your organization, you can use RunCloud’s teams and workspaces features to partition your projects and manage access permissions for your team members.
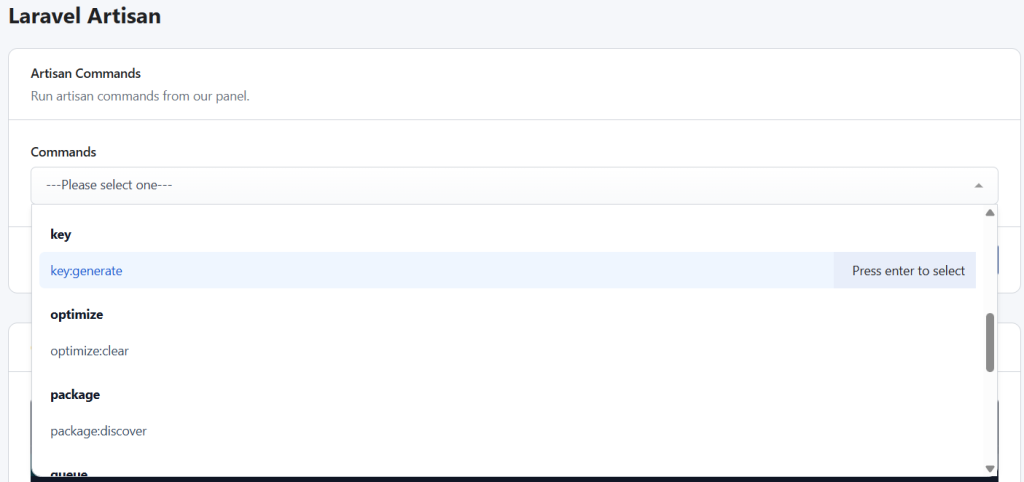
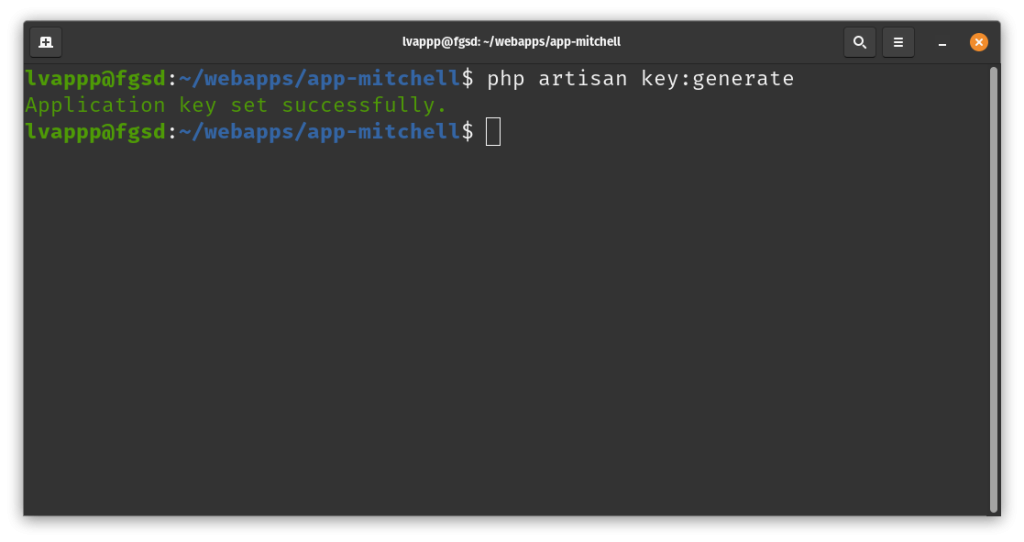
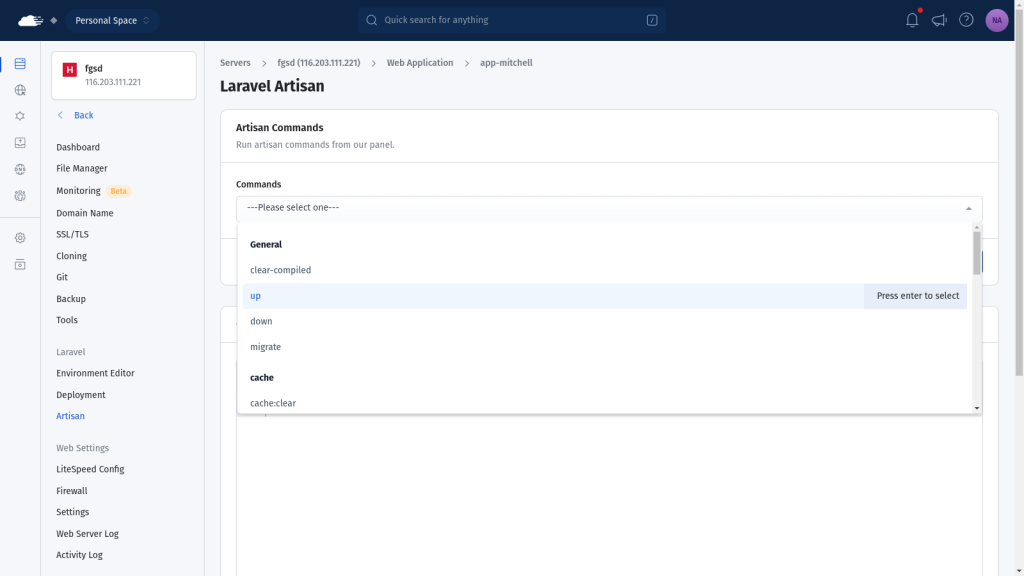
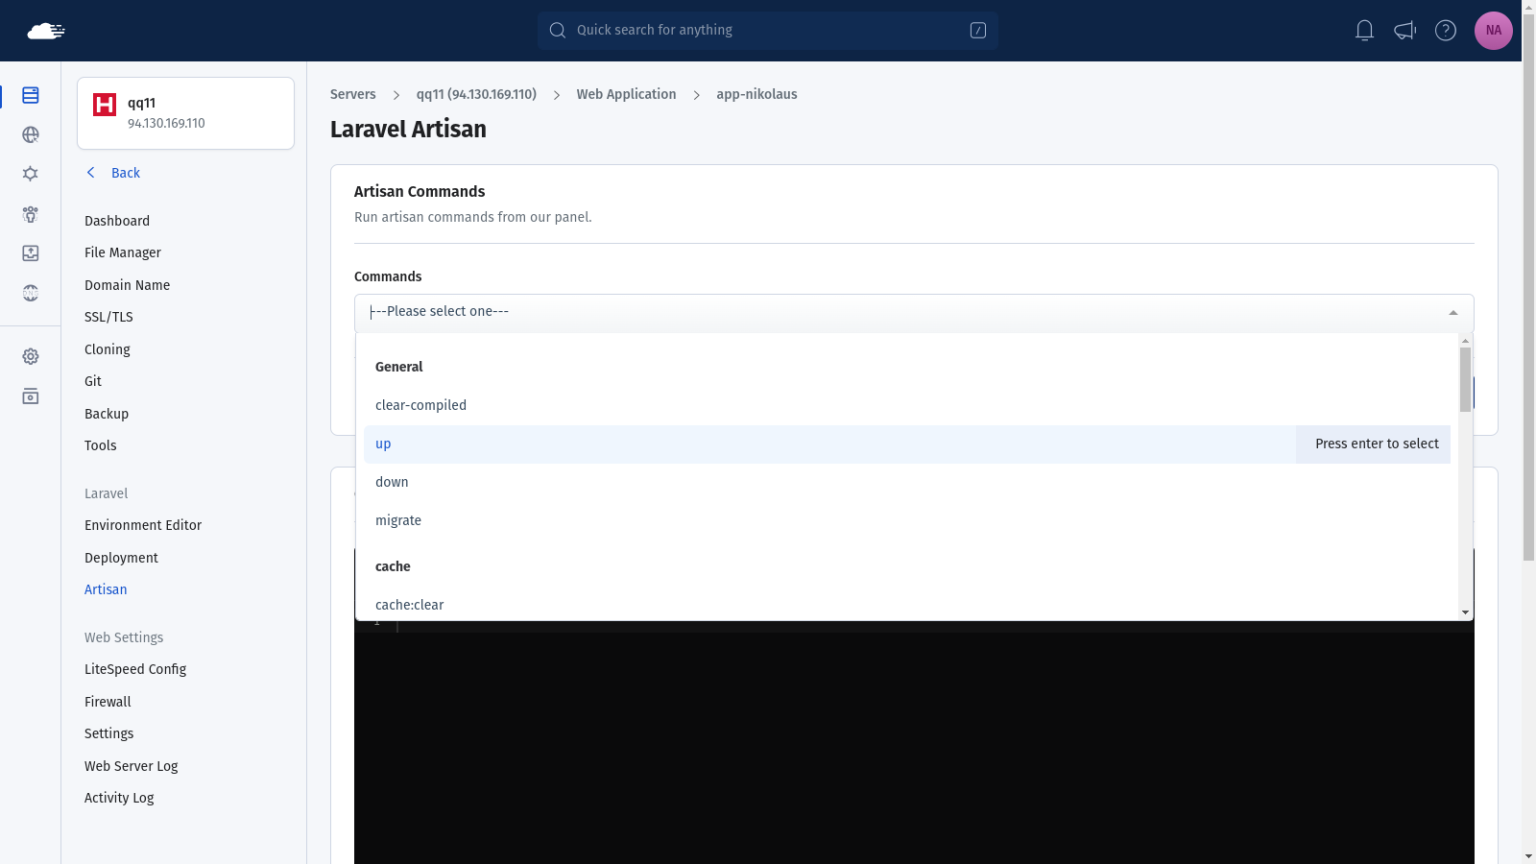
    Laravel Artisan

    You can also use the RunCloud API to configure applications, trigger deployments, and automate recurring server-management tasks. For high-performance setups, follow our guide to set up Laravel Octane on RunCloud servers.

    Cost: RunCloud uses flat-rate subscription plans, with cloud-server charges paid separately. The Essentials plan costs $9 per month for one server. The Professional plan costs $19 per month and supports up to 50 servers, while the Business plan costs $49 per month and supports up to 100 servers. Business also includes features such as atomic deployment, team management, a Web Application Firewall, and API access. 

    Total Cost of Ownership for Hosting Laravel Apps

    The relative cost of a PaaS, serverless platform, or server management panel depends on the application’s traffic, resource requirements, staffing needs, and operational model. A control panel may offer predictable management fees, while a PaaS can reduce the time spent on infrastructure maintenance.

    Direct cost comparisons between these platforms are difficult because they include different services and use different billing models. RunCloud and Forge charge a management subscription in addition to the cost of your servers. Cloudways combines managed hosting and server resources into a single price. Laravel Cloud and Upsun charge according to the resources and services used. 

    Infrastructure ModelManagement Fee TierCompute Cost ModelTCO: 1 Server / MoTCO: 10 Servers / Mo
    RunCloud (Essentials/Pro)$9 to $19 / moRaw compute ($6/svr)$15.00$79.00
    Laravel Forge (Hobby/Pro)$12 to $39 / moRaw compute ($6/svr)$18.00$99.00
    Cloudways (Managed)Bundled markupApprox. $14/svr base$14.00$140.00
    Laravel Cloud (PaaS)$5 to $200+ / moUsage-based / Scale$5.00+ usageVariable (High)
    Upsun (PaaS)Resource-basedUsage / Per SecondVariableVariable (High)

    Final Thoughts

    In this post, we have discussed several tools for managing and hosting your Laravel applications. Forge offers close ties to the Laravel ecosystem; Laravel Cloud and Vapor reduce the need for direct infrastructure management; Cloudways bundles hosting and management; Ploi provides agency-focused server tools; and Upsun offers a managed multi-cloud platform. RunCloud suits teams that want to retain control of their cloud servers while managing them through a central panel. 

    RunCloud offers a 7-day free trial for developers and teams who want to test its server management, deployment, and application isolation features.
    Start using RunCloud Today.

  • How to Install and Deploy Bagisto (Laravel eCommerce)

    How to Install and Deploy Bagisto (Laravel eCommerce)

    Launching an e-commerce store can seem complex, especially when dealing with server configurations and deployment complexities. But what if you could deploy a feature-rich, Laravel-based eCommerce platform in just a few simple steps?

    In this guide, we’ll show you exactly how to install Bagisto, a leading open-source eCommerce solution, using the power and simplicity of the RunCloud server management panel.

    In this tutorial, we will provide a complete, step-by-step walkthrough designed for users with limited knowledge of Linux CLI. You will learn how to set up your server environment, deploy the Bagisto application, connect your database, and perform the final installation, all with the help of RunCloud’s intuitive dashboard.

    Let’s get your online store up and running!

    What is Bagisto and Why Should You Use It?

    Bagisto is a powerful, open-source eCommerce platform built on top of Laravel. It provides a complete solution for businesses looking to create and manage an online store.

    If you’re already familiar with Laravel, then you should definitely try out Bagisto as it extends Laravel’s built-in features, elegant syntax, and extensive ecosystem. This means developers don’t have to build an eCommerce system from scratch; instead, they can use Bagisto’s pre-built modules and extend its functionality using familiar Laravel patterns, which can significantly speed up the development process.

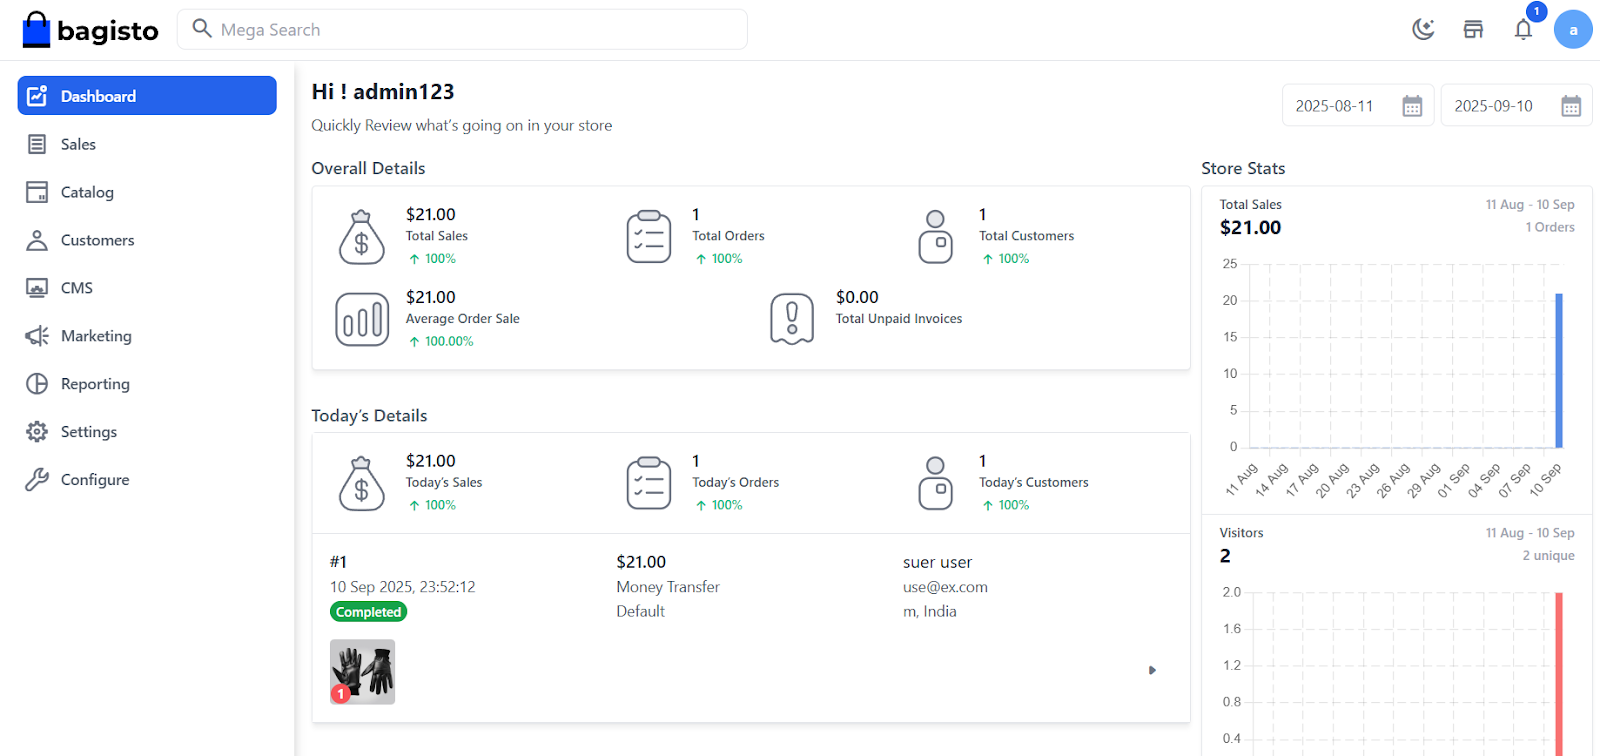
    Bagisto dashboard

    Key Features of Bagisto:

    • Multi-Source Inventory: Manage your stock across multiple locations and channels from a single platform.
    • Multi-Currency and Locale: Easily configure your store to support different currencies, languages, and regional taxes to sell to a global audience.
    • Access Control Level (ACL): Implement a role-based permission system to control what your team members can access and manage within the admin panel.
    • Built-in Payment Integrations: Bagisto supports popular payment gateways, making it simple to start securely accepting payments.
    • Advanced Reporting: Gain insights into your sales, customers, and products with detailed reports and analytics.

    Step-by-Step Guide for Installing Bagisto via RunCloud

    RunCloud is a powerful server management panel that makes deploying and managing web applications like Bagisto incredibly straightforward. By handling the complex server configuration, it allows you to focus on building your application.

    Follow the steps below to get your Bagisto store up and running with RunCloud.

    Step 1: Create a New Database and Database User

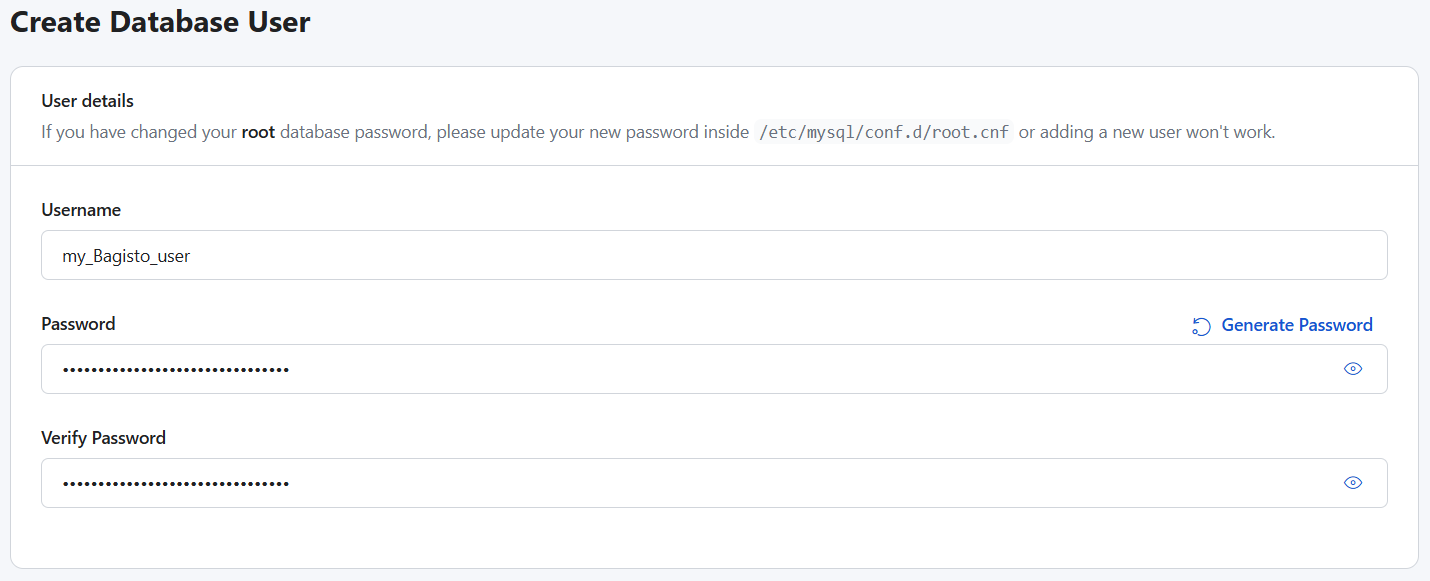
    First, your application needs a database to store all its information, such as products, orders, and customer details. Log in to your RunCloud dashboard and navigate to the “Databases” tab on your server.

    Here, you will first create a database user by clicking “Add New Database User“.

    Once you have created the user, make sure you’re in the Database tab and click “Add New Database”. Give your database a name, and from the dropdown menu, select the user you just created to grant it access.

    Step 2: Create a New Web Application

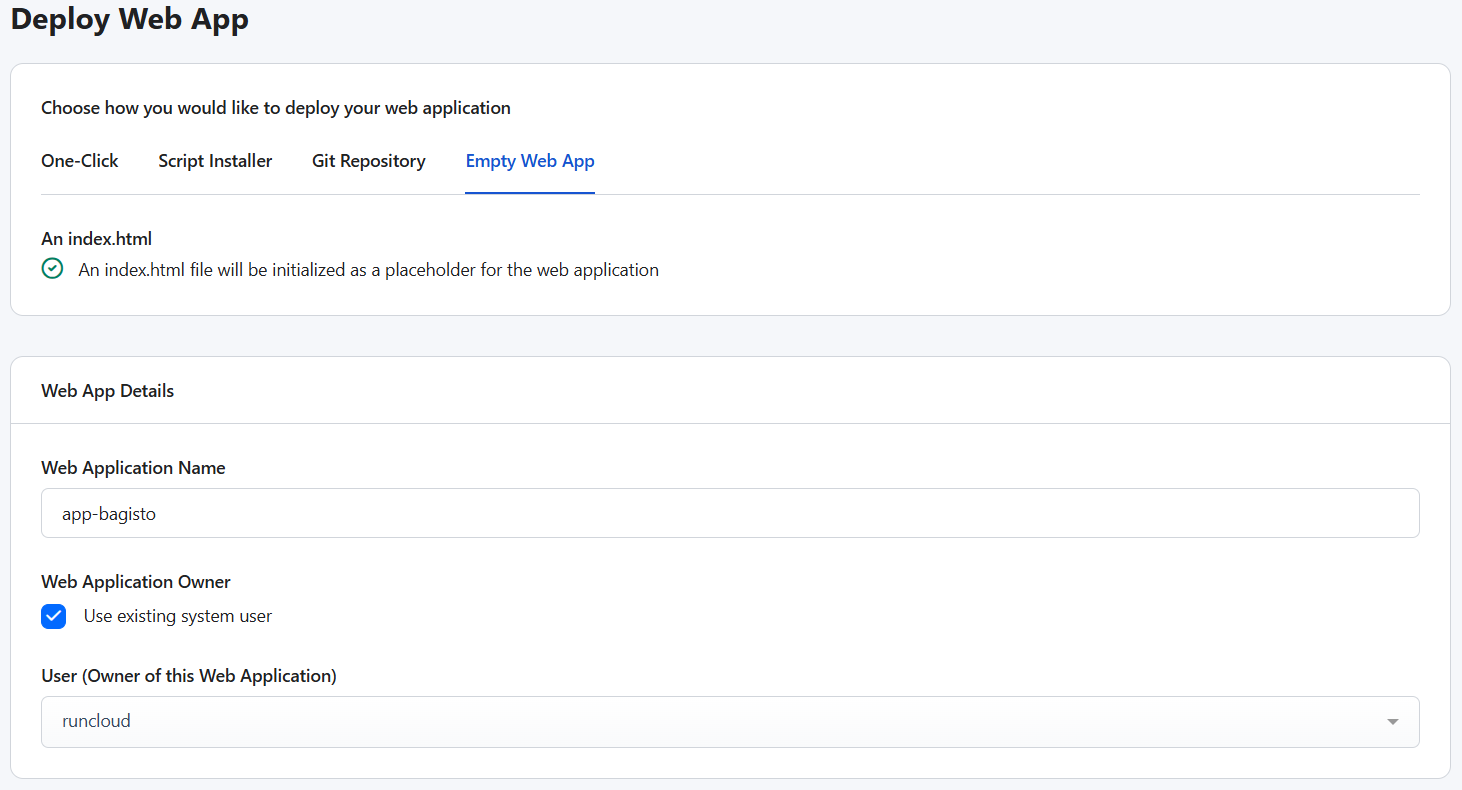
    Next, you need to set up the web application environment where your Bagisto files will be stored. In your RunCloud dashboard, go to the “Web Applications” section and click “Create Web Application“.

    Switch to the “Empty Web App” tab and fill in the basic details for your application.

    You will need to configure a few settings here to ensure Bagisto runs correctly:

    • Enter your domain name
    • Configure SSL
    • Select your application owner
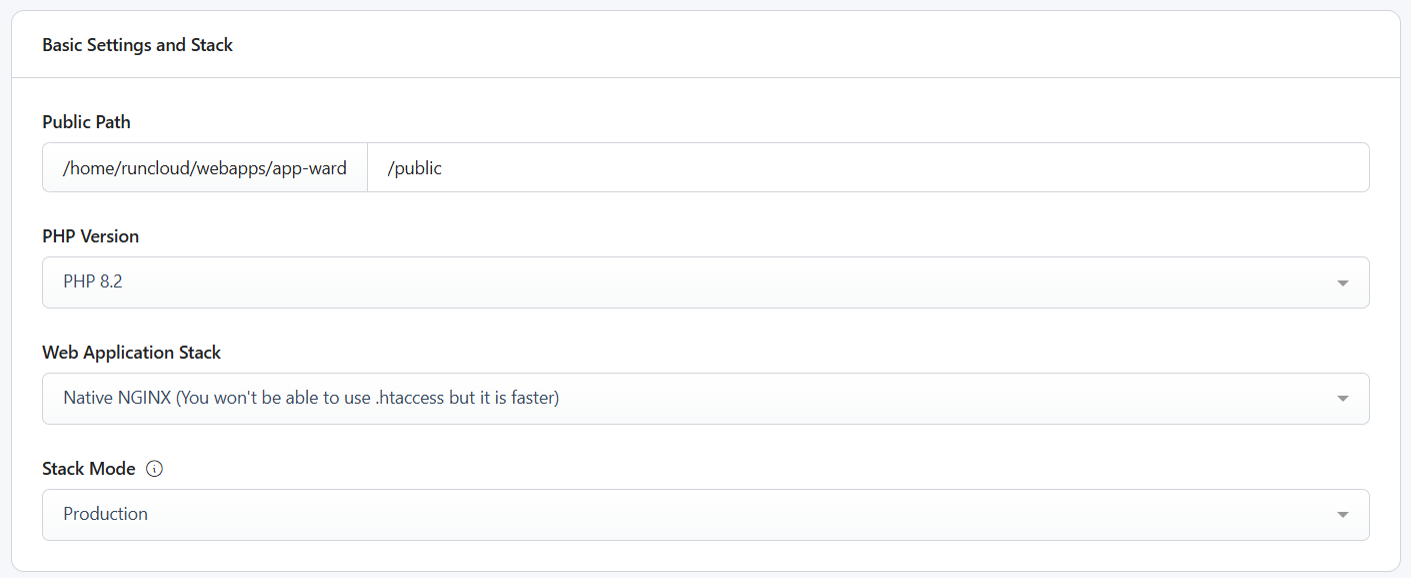
    • Choose PHP version 8.2 (this is the recommended version for Bagisto at the time of writing).

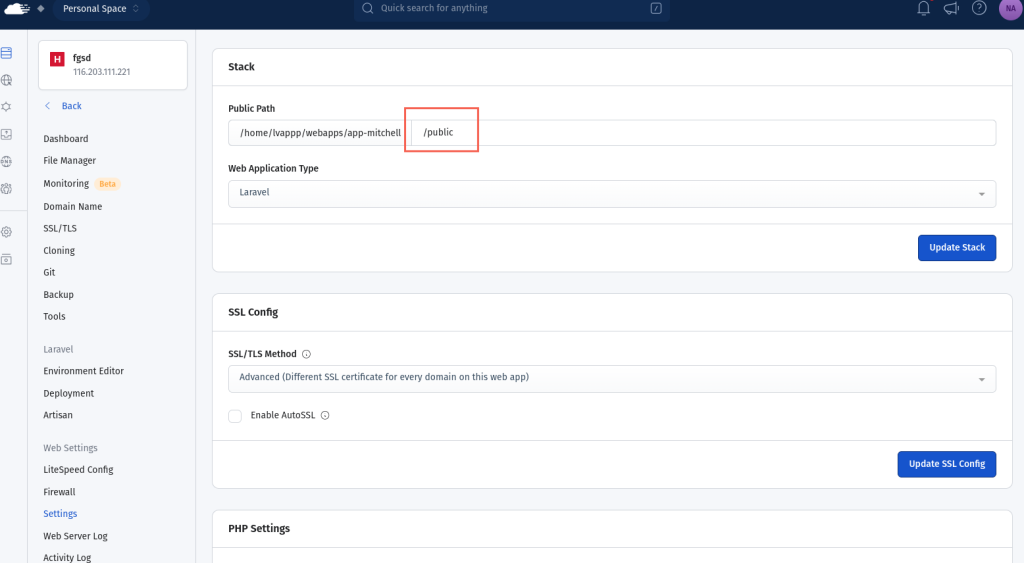
    Finally, under “Web Application Settings“, change the Public Path from its default to /public, which is the standard directory structure for Laravel applications.

    Once you have made the necessary changes, you can deploy the application on your server.

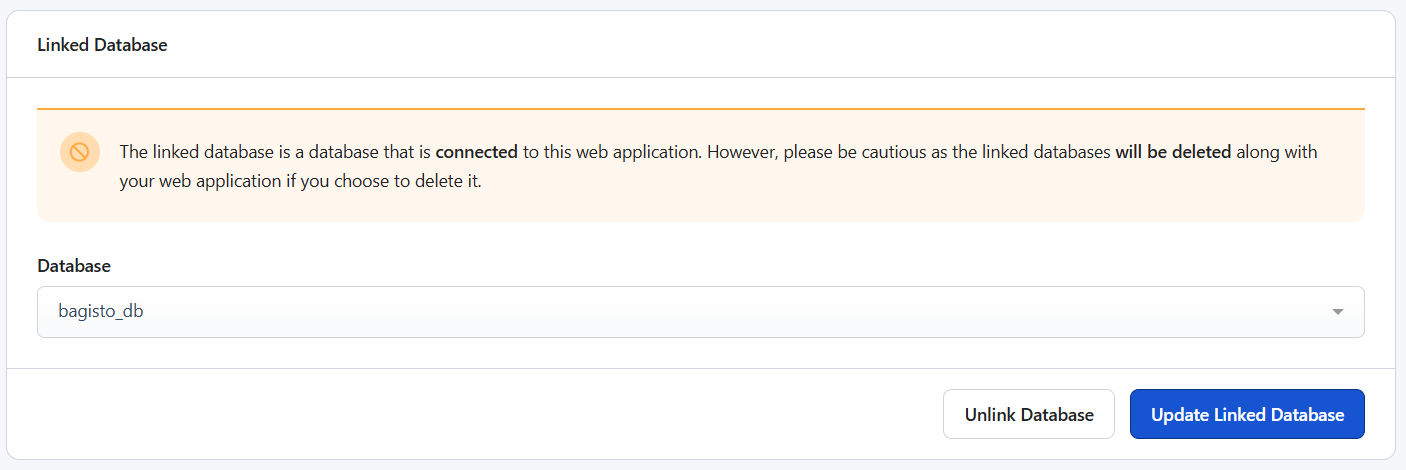
    Step 3: Connect the Database

    After you create the web application, you need to connect the database you created in the first step.

    Go to your new web application in the RunCloud dashboard and find the “Settings” tab on the left-hand menu.

    On this page, you can select your Bagisto database and user from the dropdown menus to attach them to the application. This step ensures that when RunCloud performs a backup of your application, it will include both the files and the connected database in a single backup file.

    Step 4: Connect to Your Server via SSH and Prepare the Directory

    Now it’s time to connect to your server to install Bagisto itself. If you are not sure how to do this, then you can follow our previous guide, which explains how to use an SSH client like Terminal (on macOS/Linux) or PuTTY (on Windows), to log in.

    Once connected, you need to navigate to your application’s root directory using the following command, replacing <root path> with the root path of your application, which is displayed in the RunCloud dashboard:

    cd <root path>

    When RunCloud creates a new application, it places a default public folder with an index.html file inside. Since Bagisto’s installation process will create its own public folder, you must first delete the existing one. You can do this by running the following command in your terminal:

    rm -rf public

    Step 5: Install Bagisto with Composer

    You can now install Bagisto using Composer. Execute the following command in your application’s root directory to download and install all the necessary Bagisto files. The . at the end of the command tells Composer to install the files in the current directory:

    composer create-project bagisto/bagisto .

    Step 6: Initialize the Bagisto Application

    After Composer has finished downloading the files, you need to run the Bagisto installation script. This script will set up your database tables, create your administrator account, and configure other essential settings for your store. To start this process, run the following command in your terminal:

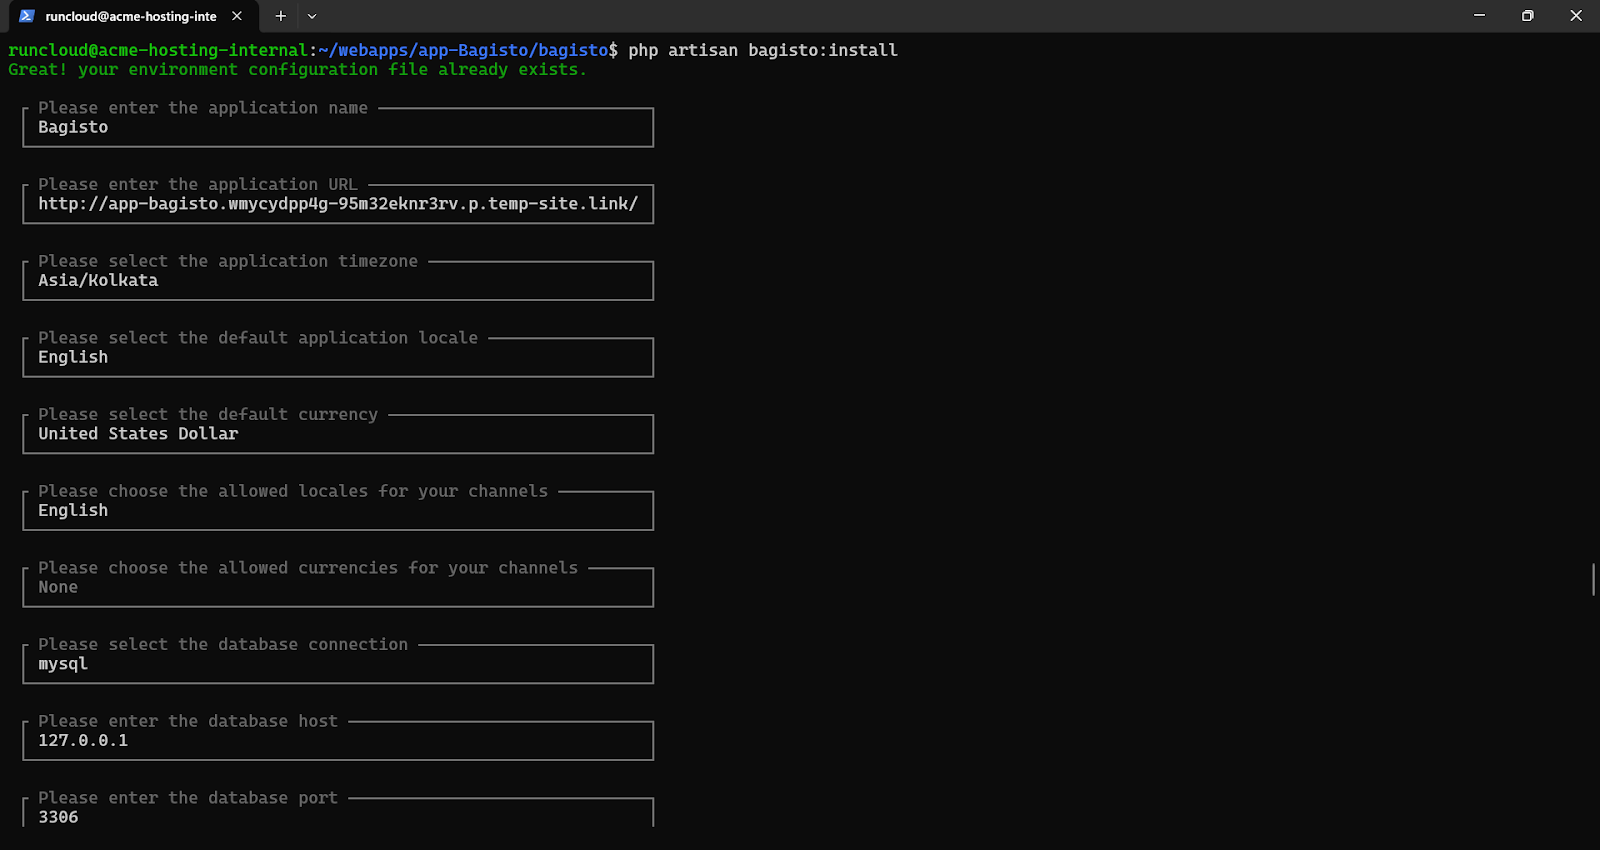
    php artisan bagisto:install

    The installer will prompt you to enter several details:

    • Your database name
    • Username
    • Password (which you created in Step 1)
    • Your desired admin email and password

    Once you have filled in all the information, the installation will complete, and you will see a message confirming its success, along with your admin login URL.

    Note: If you are using a Dockerized server on RunCloud, you will need to use the host value (instead of localhost) in your database configuration. To learn more about this, refer to the documentation on Networking in a RunCloud Containerized Server.

    Step 7: Log In and Start Building Your Store

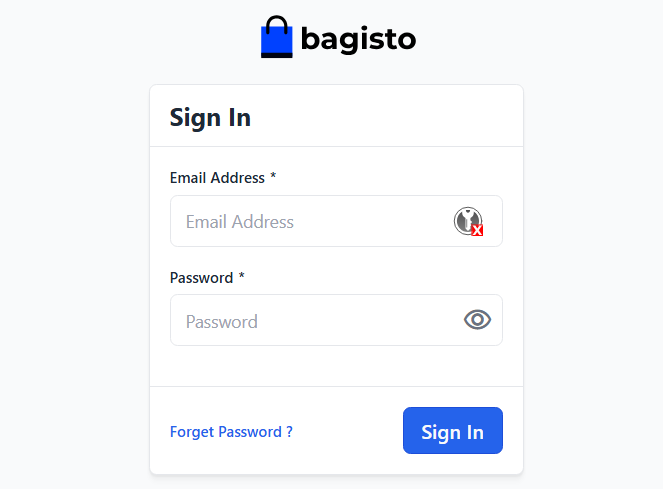
    Congratulations, your Bagisto store is now installed! You can now access the admin panel by navigating to your domain, followed by /admin (e.g., http://runcloud-demo.com/admin). Use the credentials you set up during the installation process to log in and begin adding products, configuring settings, and customizing your new eCommerce store.

    Step 8: Optimize Your Application Type in RunCloud

    To make managing your new Bagisto store even easier, there is one final step you can take within the RunCloud dashboard.

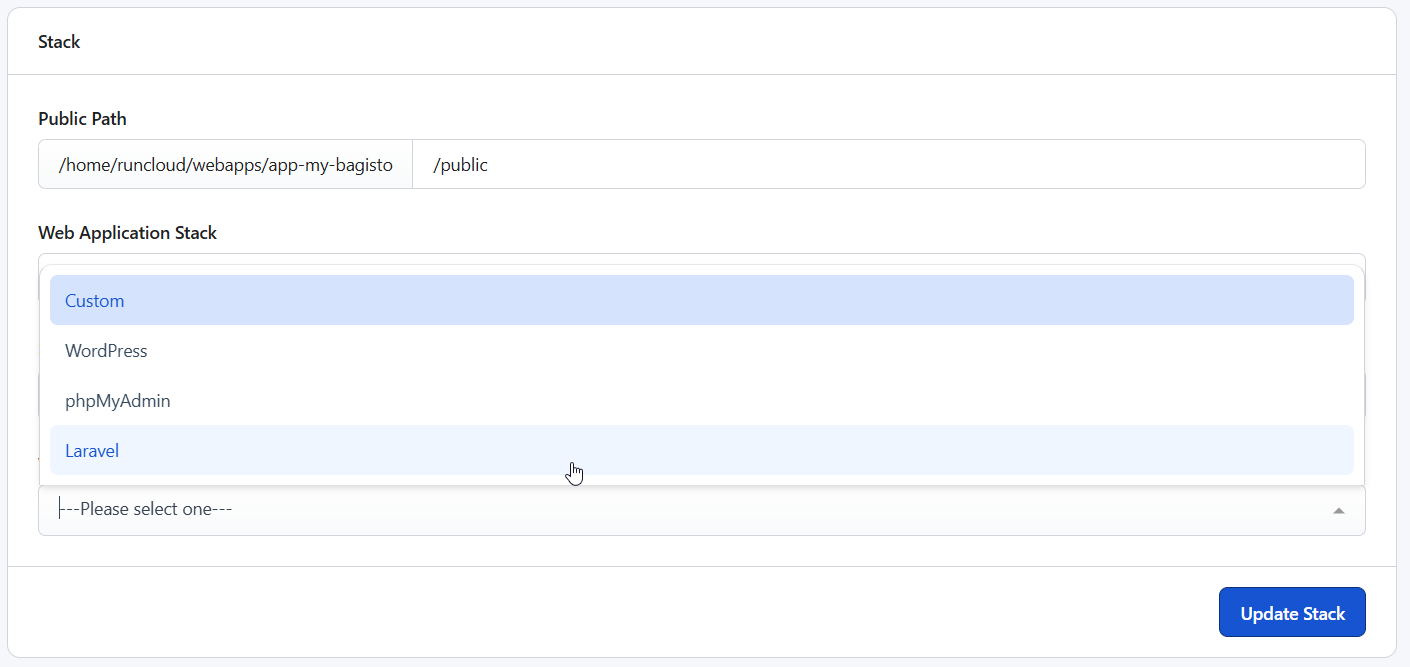
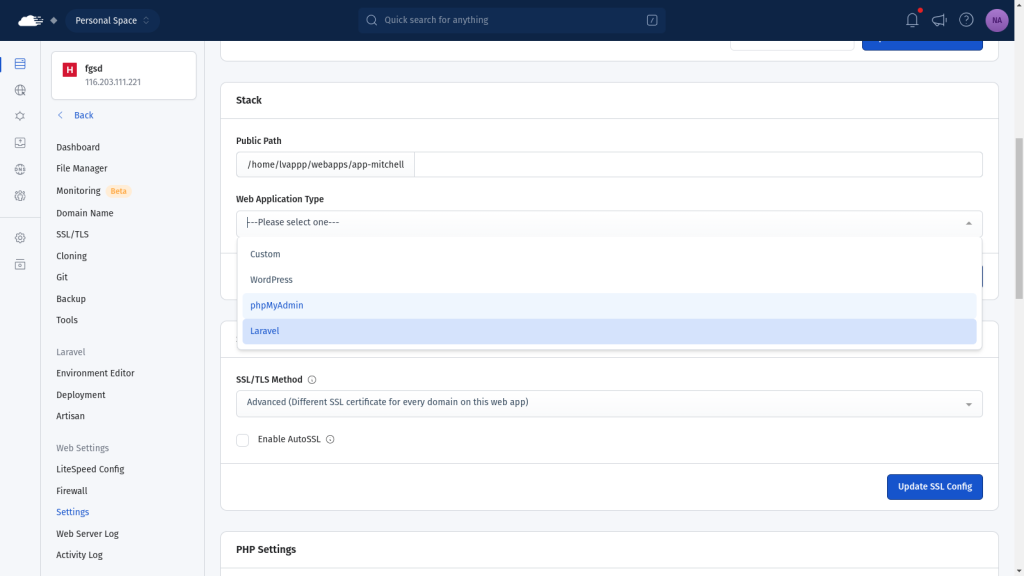
    Navigate to your web application’s “Settings” page and change the “Application Type” from “General” to “Laravel.” This change unlocks a suite of powerful, Laravel-specific features in your RunCloud dashboard.

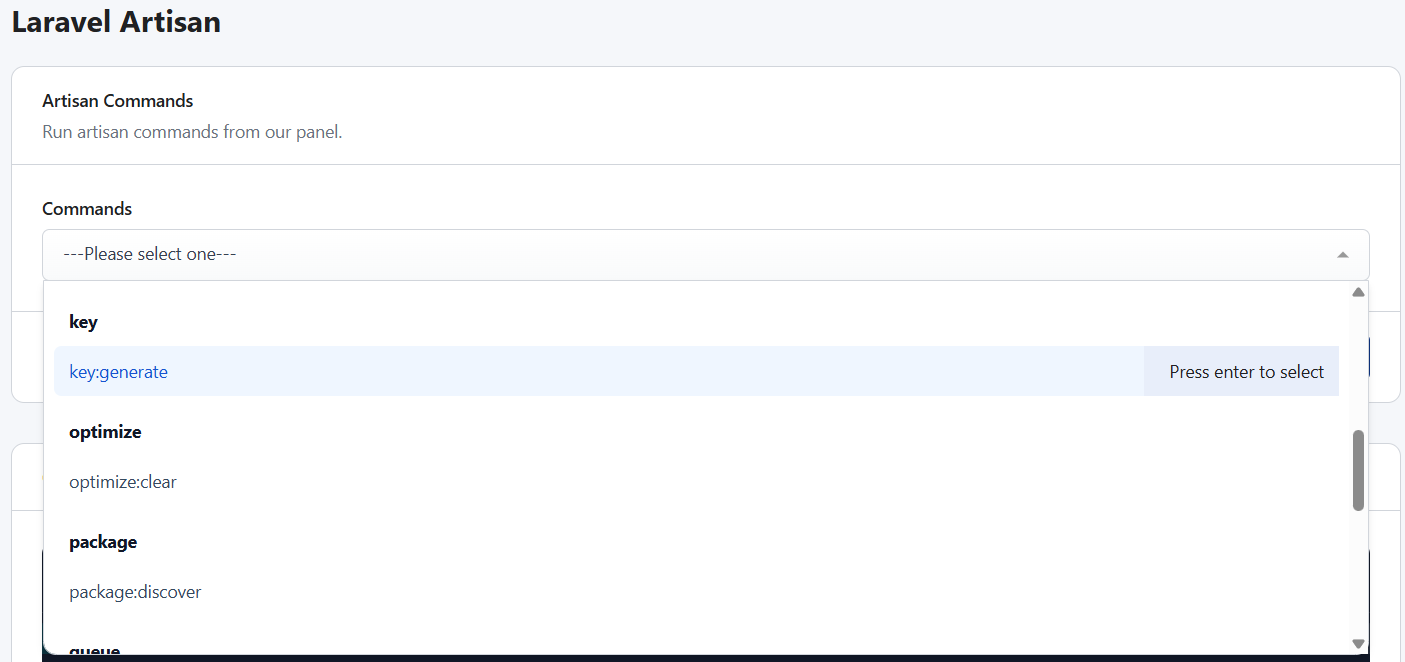
    You will see new menu items that allow you to run Artisan commands, manage scheduled tasks (cron jobs), and configure message queues directly from the web interface, without ever needing to log in via SSH for these routine tasks. This feature is one of the many ways RunCloud simplifies application management and maintenance.

    Step 9: Enable Backups and Harden Your Server for Production

    Now that your Bagisto store is running, the final and most critical steps are to secure your application by setting up automated backups and hardening your server’s security settings.

    RunCloud makes this incredibly simple; just navigate to the “Backup” section of your web application in the dashboard, choose your preferred cloud storage provider, and set a schedule.

    Once configured, RunCloud will automatically back up your application files and the connected database, giving you complete peace of mind.

    For securing the server, we recommend reading the following resources:

    Wrapping Up

    And there you have it! In just a few steps, you have successfully deployed a powerful, production-ready Bagisto eCommerce store. You can now log in, start adding your products, and customize your storefront to match your brand.

    Throughout this process, you’ve seen firsthand how RunCloud streamlines what can often be a complex and time-consuming task. From creating databases and managing application settings with a few clicks to providing powerful, application-aware features, RunCloud handles the heavy lifting of server management so you can focus on what truly matters: building your online business.

    While this tutorial focused on Bagisto, a Laravel-based application, RunCloud’s power and flexibility extend far beyond a single framework. Whether you’re looking to host a modern blog using Ghost, set up your own private cloud with Nextcloud, or deploy a custom application built with Next.js, our platform is designed to make it simple and efficient. We encourage you to explore our other guides to see just how versatile RunCloud is.

    Ready to simplify your server management?

    Sign up for RunCloud today.

  • How to Build a CI/CD Pipeline with GitHub Actions and Docker

    How to Build a CI/CD Pipeline with GitHub Actions and Docker

    Are you tired of manually building, testing, and deploying your applications?

    Modern Continuous Integration (CI) and Continuous Deployment (CD) approaches can automatically trigger a deployment pipeline to build your Docker image, run tests, push it to a container registry like GHCR or Docker Hub, and deploy it to your server.

    The best part is that you can complete all of this in less than a minute after pushing code to your GitHub repository.

    By combining Docker with the automation capabilities of GitHub Actions, you can create a fast and effective DevOps pipeline. Docker ensures your application runs the same way everywhere by packaging it with its dependencies in a portable Docker container based on instructions in your Dockerfile. GitHub Actions then automates the build and push steps, securely manages secrets like access tokens, and handles the final deployment to your infrastructure.

    In this guide, we’ll walk you through configuring your GitHub Actions workflow step-by-step, from publishing a container to deploying it on your server without third-party tools or subscriptions.

    By the end of this tutorial, you will be able to configure a deployment pipeline that updates your live server in under a minute after you push changes to it.

    Let’s get started!

    What are GitHub Actions?

    GitHub Actions is a powerful automation tool built directly into the GitHub platform. It listens for specific events happening in your repository, like someone pushing new code, creating a pull request, or even on a set schedule, and then automatically performs tasks you’ve defined. These tasks form a workflow, which is essentially a sequence of steps designed to achieve a specific goal. You can use this functionality to create a Continuous Integration (CI) and Continuous Deployment (CD) pipeline.

    This means you can automate the entire process of building your software, running tests to ensure quality, and even deploying it to servers (perhaps managed through tools such as RunCloud) without manual intervention.

    Key Features of GitHub Actions

    GitHub Actions has several useful features that make it a compelling choice for automation. Firstly, its event-driven nature allows workflows to trigger automatically in response to a wide variety of GitHub events. Secondly, matrix builds let you efficiently test your code across different environments simultaneously; you can define combinations of operating systems (like Linux, macOS, and Windows), software versions (like different Node.js or Python versions), or other variables, and GitHub Actions will run a job for each combination.

    Furthermore, GitHub provides hosted runners, which are virtual machines managed by GitHub that can execute your workflow jobs without requiring you to manage any infrastructure. If you have very specific needs, then you can also consider using self-hosted runners on your own servers or cloud infrastructure.

    All the actions and workflows on GitHub can be reused. You can even configure pre-built steps created by the community (available in the GitHub Marketplace) and save significant development time. Lastly, GitHub Actions includes integrated secrets management for securely handling sensitive information like API keys and passwords. It provides live logs for monitoring workflow progress in real time and the ability to store artifacts like build outputs or test reports.

    📖 Suggested read: What is Docker And How Does it Work

    Steps to Deploy Docker Container with GitHub Actions for CI/CD

    Let’s walk through the steps to automate building your application’s Docker image, pushing it to a registry, and then deploying it to your server every time you push changes to your repository.

    Prerequisites:

    • GitHub Repository: You need a GitHub repository containing all your application code. Make sure you have committed and pushed your latest code changes to GitHub.
    • Dockerfile: You must have a Dockerfile in the root of your repository. This file contains the step-by-step instructions Docker uses to build an image of your application. The specific commands inside the Dockerfile depend heavily on your application’s language, framework, and dependencies (e.g., installing packages, copying code, setting entry points), so we assume you have already created a functional Dockerfile.

    Step 1: Connect to Linux Server via SSH

    First, ensure you can connect to the target Linux server where your Docker container will run. You’ll need SSH access for this.

    ssh your_server_user@your_server_ip

    In the above command, replace your_server_user with your username and your_server_ip with the server’s IP address. If you manage your server with RunCloud, you can use the simplified SSH key management to store SSH keys. We recommend reading the RunCloud documentation to learn how to easily create and manage SSH keys for secure server access.

    📖 Suggested read: What Are Docker Images And How To Use Them

    Step 2: Verify Docker Installation on the Server

    Once connected to your server via SSH, you need to confirm that Docker is installed and running correctly. The Docker Command Line Interface (CLI) is required to pull images and run containers. You can test this by running the standard Docker test image:

    docker run hello-world

    If Docker is installed and working, you will see a message starting with “Hello from Docker!”. This message indicates that your installation appears to be working correctly.

    If the command fails or Docker is not found, you must install Docker Engine on your Linux server before proceeding. Follow the official Docker installation documentation specific to your server’s Linux distribution (e.g., Ubuntu, RHEL).

    📖 Suggested read: How To Create a Docker Image For Your Application

    Step 3: Add GitHub Action Secrets for SSH Access

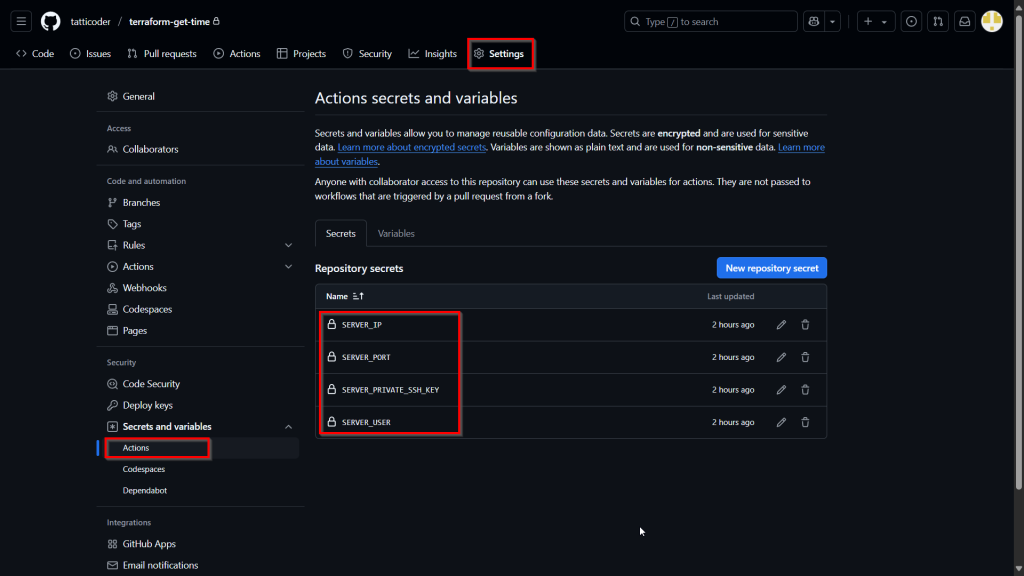
    To allow your GitHub Actions workflow to securely log in to your server and execute deployment commands, you must store your server’s connection details as encrypted secrets in your GitHub repository. You should never hardcode sensitive information directly into your workflow file – we recommend using GitHub’s built-in secret management system for this.

    Navigate to your GitHub repository > Settings > Secrets and variables > Actions. Click “New repository secret” for each of the following:

    1. SERVER_IP: The public IP address of your Linux server.
    2. SERVER_PORT: The SSH port for your server (usually 22, but might be different if customized).
    3. SERVER_USER: The username you use to log in to your server via SSH. We strongly recommend creating a new user account specifically for this deployment step and giving it appropriate permissions for better security.
    4. SERVER_PRIVATE_SSH_KEY: The entire content of the private SSH key file that corresponds to a public key authorized on your server. Your private SSH key should look something like this:
    -----BEGIN OPENSSH PRIVATE KEY-----
    b3BlbnNzaC1rZXktdjEAAAAABG5vbmUAAAAEbm9uZQAAAAAAAAABAAABlwAAAAdzc2gtcn
    ...
    UV7ErwUhELMZFrAAAAE3RhdHRpY29kZXJAc3Rhcmx1c3QBAgMEBQYH
    -----END OPENSSH PRIVATE KEY-----

    Using secrets prevents exposing your server credentials in your codebase. The workflow will reference these secrets securely during execution. We strongly recommend creating a dedicated SSH key pair specifically for automation.

    Again, consulting the RunCloud documentation can be very helpful in generating and managing SSH keys securely, especially regarding best practices for SSH security.

    📖 Suggested read: Understanding Docker Services | RunCloud Docs

    Step 4: Configure GitHub Actions Workflow

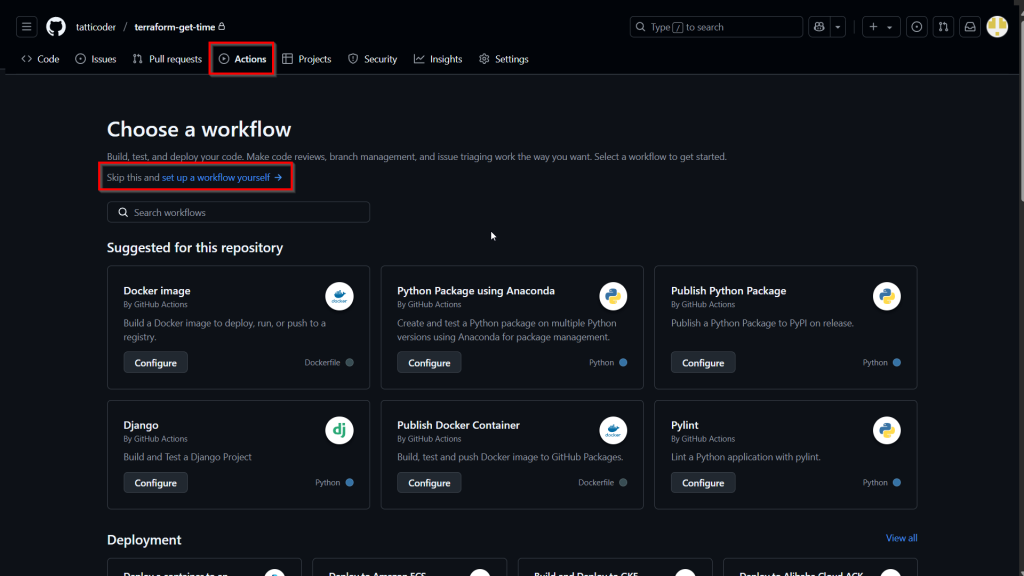
    Now, define the CI/CD pipeline using a GitHub Actions workflow file. This file tells GitHub what steps to perform when triggered (e.g., on a push to your main branch).

    Create a YAML file named docker-publish.yml inside your repository’s .github/workflows/ directory. You can create this directory and file directly via the GitHub web interface or in your local repository using a text editor, and then commit and push the changes.

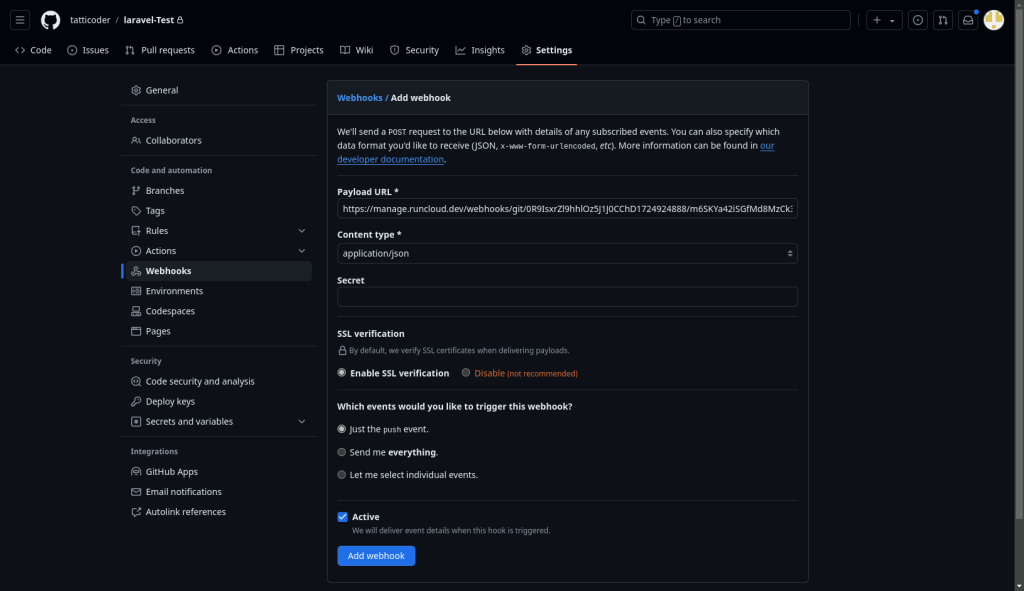
    Storing secrets for GitHub Actions

    Paste the following code into .github/workflows/docker-publish.yml:

    name: Publish & Deploy Docker container
    
    # This workflow uses actions that are not certified by GitHub.
    # They are provided by a third-party and are governed by
    # separate terms of service, privacy policy, and support
    # documentation.
    
    
    on:
      push:
        # Adjust branch name if needed (e.g., master, production)
        branches: [ "main" ]
        # Publish semver tags as releases.
        tags: [ 'v*.*.*' ]
    env:
      # Use docker.io for Docker Hub if empty
      REGISTRY: ghcr.io
      # github.repository as <account>/<repo>
      IMAGE_NAME: ${{ github.repository }}
    jobs:
      build:
        runs-on: ubuntu-latest
        permissions:
          contents: read
          packages: write
          # This is used to complete the identity challenge
          # with sigstore/fulcio when running outside of PRs.
          id-token: write
    
    
        steps:
          - name: Checkout repository
            uses: actions/checkout@v4
    
    
          # Install the cosign tool except on PR
          # https://github.com/sigstore/cosign-installer
          - name: Install cosign
            if: github.event_name != 'pull_request'
            uses: sigstore/cosign-installer@59acb6260d9c0ba8f4a2f9d9b48431a222b68e20 #v3.5.0
            with:
              cosign-release: 'v2.2.4'
    
    
          # Set up BuildKit Docker container builder to be able to build
          # multi-platform images and export cache
          # https://github.com/docker/setup-buildx-action
          - name: Set up Docker Buildx
            uses: docker/setup-buildx-action@f95db51fddba0c2d1ec667646a06c2ce06100226 # v3.0.0
    
    
          # Login against a Docker registry except on PR
          # https://github.com/docker/login-action
          - name: Log into registry ${{ env.REGISTRY }}
            if: github.event_name != 'pull_request'
            uses: docker/login-action@343f7c4344506bcbf9b4de18042ae17996df046d # v3.0.0
            with:
              registry: ${{ env.REGISTRY }}
              username: ${{ github.actor }}
              password: ${{ secrets.GITHUB_TOKEN }}
    
    
          # Extract metadata (tags, labels) for Docker
          # https://github.com/docker/metadata-action
          - name: Extract Docker metadata
            id: meta
            uses: docker/metadata-action@96383f45573cb7f253c731d3b3ab81c87ef81934 # v5.0.0
            with:
              images: ${{ env.REGISTRY }}/${{ env.IMAGE_NAME }}
    
    
          # Build and push Docker image with Buildx (don't push on PR)
          # https://github.com/docker/build-push-action
          - name: Build and push Docker image
            id: build-and-push
            uses: docker/build-push-action@0565240e2d4ab88bba5387d719585280857ece09 # v5.0.0
            with:
              context: .
              push: ${{ github.event_name != 'pull_request' }}
              tags: ${{ steps.meta.outputs.tags }}
              labels: ${{ steps.meta.outputs.labels }}
              cache-from: type=gha
              cache-to: type=gha,mode=max
    
    
          # Sign the resulting Docker image digest except on PRs.
          # This will only write to the public Rekor transparency log when the Docker
          # repository is public to avoid leaking data.  If you would like to publish
          # transparency data even for private images, pass --force to cosign below.
          # https://github.com/sigstore/cosign
          - name: Sign the published Docker image
            if: ${{ github.event_name != 'pull_request' }}
            env:
              # https://docs.github.com/en/actions/security-guides/security-hardening-for-github-actions#using-an-intermediate-environment-variable
              TAGS: ${{ steps.meta.outputs.tags }}
              DIGEST: ${{ steps.build-and-push.outputs.digest }}
            # This step uses the identity token to provision an ephemeral certificate
            # against the sigstore community Fulcio instance.
            run: echo "${TAGS}" | xargs -I {} cosign sign --yes {}@${DIGEST}
    
    
      deploy:
        needs: build
        runs-on: ubuntu-latest
        steps:
          - name: SSH and Deploy to Server
            uses: appleboy/ssh-action@v1
            with:
              host: ${{ secrets.SERVER_IP }}
              username: ${{ secrets.SERVER_USER }}
              key: ${{ secrets.SERVER_PRIVATE_SSH_KEY }}
              port: ${{ secrets.SERVER_PORT }}
              script: |
                echo ${{ secrets.GITHUB_TOKEN }} | docker login ${{ env.REGISTRY }} -u ${{ github.actor }} --password-stdin
                echo "--- Pulling latest Docker image ---"
                docker pull ghcr.io/tatticoder/terraform-get-time:main
                echo "--- Stopping existing container (if running) ---"
                docker stop my_container 
                echo "--- Removing existing container ---"
                docker rm my_container 
                echo "--- Starting new container ---"
               # Adjust ports (-p host:container) 
               # Add any necessary environment variables (-e)
                docker run -d --name my_container -p 3000:80 ghcr.io/tatticoder/terraform-get-time:main

    Let’s understand the important sections of the above code snippet:

    • name: Sets the display name for your workflow in the GitHub Actions tab.
    • on: push: branches: [ main ]: This triggers the workflow every time code is pushed to the main branch. You can change main to your default or production branch name (e.g., master).
    • Build Job: This section handles the process of creating and publishing the Docker container.
      • Checkout code: Uses the standard actions/checkout action to get your repository code onto the runner.
      • Log in to GHCR: Uses docker/login-action to authenticate with GitHub Container Registry using the automatically generated GITHUB_TOKEN.
      • Build and push: Uses docker/build-push-action.
    • Deploy via SSH Job: This job uses the popular SSH Remote Commands action to connect to your server using the secrets you configured and execute commands.
      • host, username, key, port: These fields use the secrets you created in Step 3.
      • script: This block contains the shell commands which will be executed on your target server.

        ❗Very Important – please read the following points very carefully:
        • The first command logs into GHCR on the server. Pulling public GHCR images might not require login. For private images, you can just use the provided command without any modifications.
        • The subsequent command pulls the latest tagged image from GHCR. Make sure to edit this command and replace ghcr.io/tatticoder/terraform-get-time:main with the name of your container image and its corresponding tag.
        • The subsequent command stops and removes any container with the name ‘my_container’ to avoid conflicts. Make sure to temporarily remove these commands to prevent the workflow from failing if the container doesn’t exist yet.
        • The final command runs a new container in detached mode (-d) using the pulled image. Make sure to replace the image’s name with the one you want to use and configure any additional parameters as per your requirements.

    ⚠️ Warning: The deployment script uses docker stop and docker rm before docker run. This means there will be a brief moment of downtime while the container is replaced. For zero-downtime deployments, more advanced strategies like blue-green deployments or using orchestration tools like Kubernetes are needed, which are beyond this basic setup.

    To minimize the impact of downtime, you can consider deploying once a day on weekdays outside of peak hours. This schedule can be configured easily using the GitHub action itself.

    📖 Suggested read: Docker Security: Best Practices to Secure a Docker Container

    Step 5: Commit Workflow and Trigger Deployment

    Finally, save the docker-publish.yml file. If you created it locally, commit it and push it to your GitHub repository using the following commands:

    git add .github/workflows/docker-publish.yml
    git commit -m "Add GitHub Actions workflow for Docker build and deploy"
    git push 
    Deploying and running a GitHub Actions for CI/CD

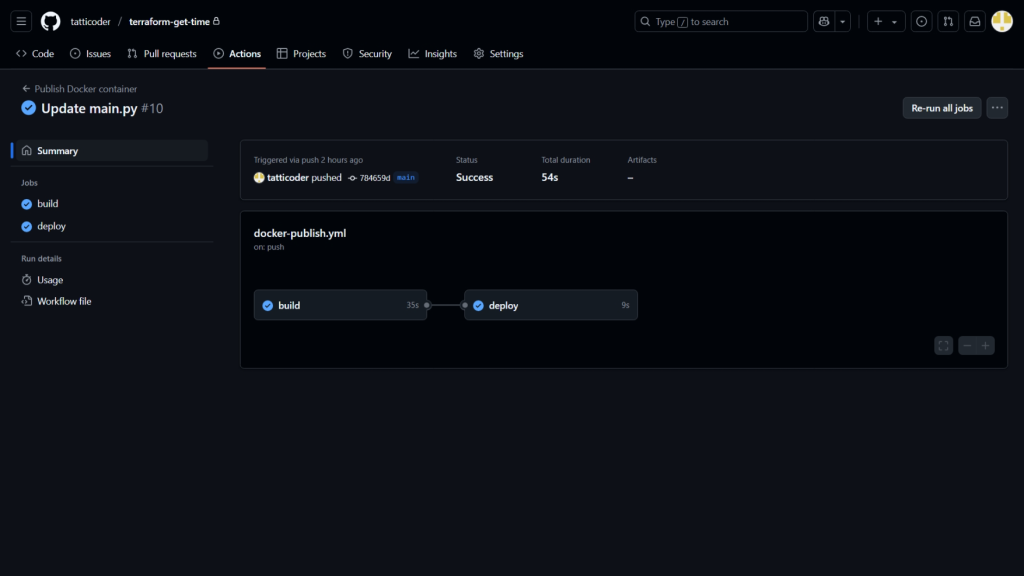
    Once you push this commit (or any future code changes) to the specified branch (main in this example), GitHub Actions will automatically detect the workflow file and start executing the defined steps.

    You can monitor the progress by going to the “Actions” tab in your GitHub repository. If all steps succeed, your code will be built into a Docker image, pushed to GHCR, and then pulled and run as a container on your designated Linux server.

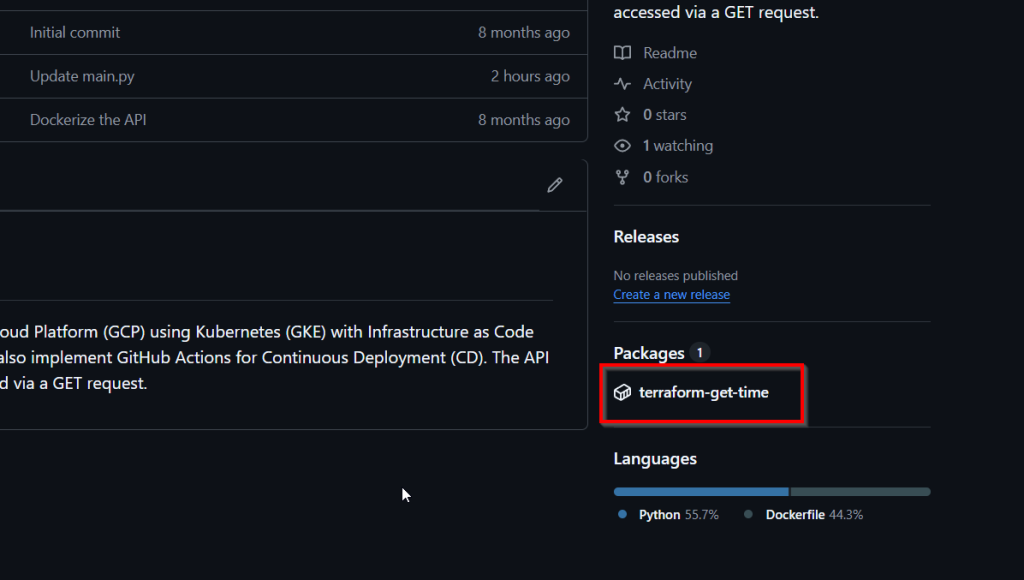
    Once you have published your Dockerfile to GHCR, you will see a new tab in the bottom right of your GitHub dashboard. You can click on the name of your package to view your recently published packages.

    Step 6: Remove Unused Docker Resources (Optional)

    When you use a CI/CD pipeline, you will quickly end up with a large number of old obsolete containers on your server. These containers are often not needed and can slowly fill your disk space. If you are running low on disk space, then you can add an optional cleanup step to your deployment script to prevent your server’s disk space from filling up with old, unused Docker images, containers, and ‘build cache’.

    The following command will automatically remove any Docker resources (like stopped containers and images not associated with a running container) that haven’t been used in the last 24 hours without requiring confirmation. Running this periodically helps maintain server health and efficiently reclaim storage:

    docker system prune --filter "until=24h" --force

    If your deployment process takes a long time, consider optimizing the build stage of your container by using a caching layer within Docker to cache dependencies.

    Wrapping Up: Who Should Use Docker with GitHub Actions for CI/CD?

    Whether you’re a solo developer or part of a large team, automating builds and deployments saves invaluable time and reduces the potential for human error inherent in manual processes.

    While GitHub Actions handles the automation of building your Docker images and triggering deployment scripts, manually configuring, securing, monitoring, and updating servers can be complex and time-consuming.

    RunCloud provides a clean, efficient way to manage servers without the usual hassle. From provisioning and security hardening to database setup and app deployment, it streamlines the tasks that slow developers down. You stay in control of your infrastructure, but without getting buried in configuration files or command-line firefighting.

    That means more time building, testing, and shipping better software.

    Ready to take the work out of server management? Start with RunCloud today.

    FAQs on Docker with GitHub Actions for CI/CD

    What are the advantages of using Docker for CI/CD?

    Docker ensures consistent environments from development through production. It provides process isolation and ensures that builds and tests don’t interfere with each other or the host system dependencies. 

    How do I secure my Docker images in GitHub Actions?

    Start by scanning your images for vulnerabilities using container scanning tools directly within your GitHub Actions workflow. To reduce the attack surface, use minimal, trusted base images and avoid installing unnecessary packages. Always configure containers to run as non-root users and manage secrets securely using GitHub Secrets, never embedding them in the image layers.

    Can I use Docker Compose with GitHub Actions?

    Yes, Docker Compose can be effectively used within GitHub Actions workflows to manage multi-container setups. You simply need to ensure Docker Compose is installed on the runner, then use standard docker-compose commands to build images or spin up services like databases for integration testing.

    What is the best way to manage secrets in GitHub Actions?

    The most secure and recommended method is using GitHub Actions encrypted secrets, which are configured at the repository or organization level. These secrets can then be safely accessed within your workflow as environment variables or passed to specific actions needing credentials. Never hardcode sensitive information directly in your workflow files or application code checked into version control.

    Is Docker necessary for CI/CD?

    While not strictly mandatory, Docker offers substantial benefits that make it a highly popular choice for modern CI/CD pipelines. While alternative options are available, Docker provides reproducible and isolated build/test environments that are useful for reliable continuous integration and delivery.

    How does Docker improve CI/CD pipelines?

    Docker drastically improves CI/CD pipelines by guaranteeing environment consistency across all stages, from developer laptops to production servers. Its containerization isolates dependencies, preventing conflicts and simplifying the configuration of build agents. 

    Can I use self-hosted runners with Docker in GitHub Actions?

    You can absolutely use self-hosted runners with Docker in GitHub Actions. This approach gives you complete control over the build environment and resources.

    What is the difference between Docker and Kubernetes for CI/CD?

    Docker is primarily used within the CI/CD pipeline to build application images, run tests in isolated containerized environments, and consistently package dependencies. Kubernetes is a container orchestrator typically acting as the deployment target after the CI pipeline, responsible for managing the runtime, scaling, and health of containers in a cluster. Docker creates the portable application packages used in CI, while Kubernetes manages fleets of those packages in production or staging environments (CD).

  • How to Deploy Laravel with Docker on VPS in 2025 (Comprehensive Guide)

    How to Deploy Laravel with Docker on VPS in 2025 (Comprehensive Guide)

    Deploying your Laravel application with Docker on a VPS might seem daunting at first – especially when you’re juggling server configurations, dependency management, and ensuring your app runs seamlessly in production. Even after building a well-optimized web application, replicating your local environment on a server can be a whole new challenge.

    In this comprehensive guide, we’ll show you how to deploy Laravel with Docker on a VPS using Laravel Sail.

    Sail simplifies the process by handling the Docker setup for you, making it a great option whether you’re new to Docker or looking for a streamlined approach.

    You’ll learn how to download Laravel, spin up essential services such as the web server, PHP, and database, and run the necessary setup commands to get your application live.

    Let’s dive in!

    Why Use Docker for Laravel Deployment?

    Deploying a Laravel application from your local development setup to a live production server is not easy. If you have deployed applications in the past, you’ll probably agree that the deployment process introduces numerous complexities, and it’s challenging to manage environment consistency.

    Traditionally, server setup involved manually installing and configuring PHP, web servers such as NGINX or Apache, databases, caching services such as Redis or Memcached, and countless system libraries – all directly onto the server’s operating system.

    This process is not only time-consuming but also prone to errors and inconsistencies. Subtle differences between development, staging, and production environments cause unexpected bugs and failures during application deployment.

    Docker fundamentally solves this by enabling you to package your entire application into standardized, isolated units called Docker containers, including its specific dependencies and configurations.

    Advantages of Dockerizing Laravel Applications

    The primary advantage of containerizing your Laravel applications with Docker is that it allows you to have a consistent development and deployment experience for all developers. By packaging your application code along with the exact versions of PHP, extensions, web server (NGINX/Apache), system libraries, and other dependencies within a Docker image, you eliminate variations between developer machines, testing environments, and production servers.

    This portability means a container built on one machine will run identically on any other machine with Docker installed, drastically reducing bugs related to environment differences.

    In addition, Dockerization brings significant benefits in terms of isolation, scalability, and resource efficiency for Laravel projects. Each Docker container runs in its own isolated userspace, preventing conflicts between different applications or microservices running on the same host. It also enhances security by limiting the potential blast radius of vulnerabilities.

    This isolation makes it easier to scale specific components of your application (e.g., PHP-FPM workers, queue workers) independently based on demand, often orchestrated via Docker Compose or more advanced container management tools such as Kubernetes.

    Compared to traditional virtual machines, containers have significantly lower overhead as they share the host OS kernel. This leads to faster startup times, better resource utilization, and the ability to run more application instances on the same hardware, ultimately improving overall reliability and cost-effectiveness.

    📖 Suggested read: What is Docker And How Does it Work

    Step-by-Step Instructions For Deploying Your First Laravel App with Docker (Sail)

    This section explains how to deploy your Laravel application on a generic cloud VPS using Docker.

    If you are using RunCloud to manage your servers, then you can refer to our Laravel documentation to learn how to do this effectively.

    Prerequisites

    Before we begin installing Laravel, ensure your server environment is correctly prepared.

    1. Server Access: You’ll need access to a Linux server (such as a VPS from providers such as DigitalOcean, Linode, Vultr, etc.) via SSH.
    1. Sudo Privileges: You must be logged in as a user with sudo privileges or as the root user directly (though using a sudo user is generally recommended for security). Remember, commands run with sudo have elevated permissions, so execute them carefully.
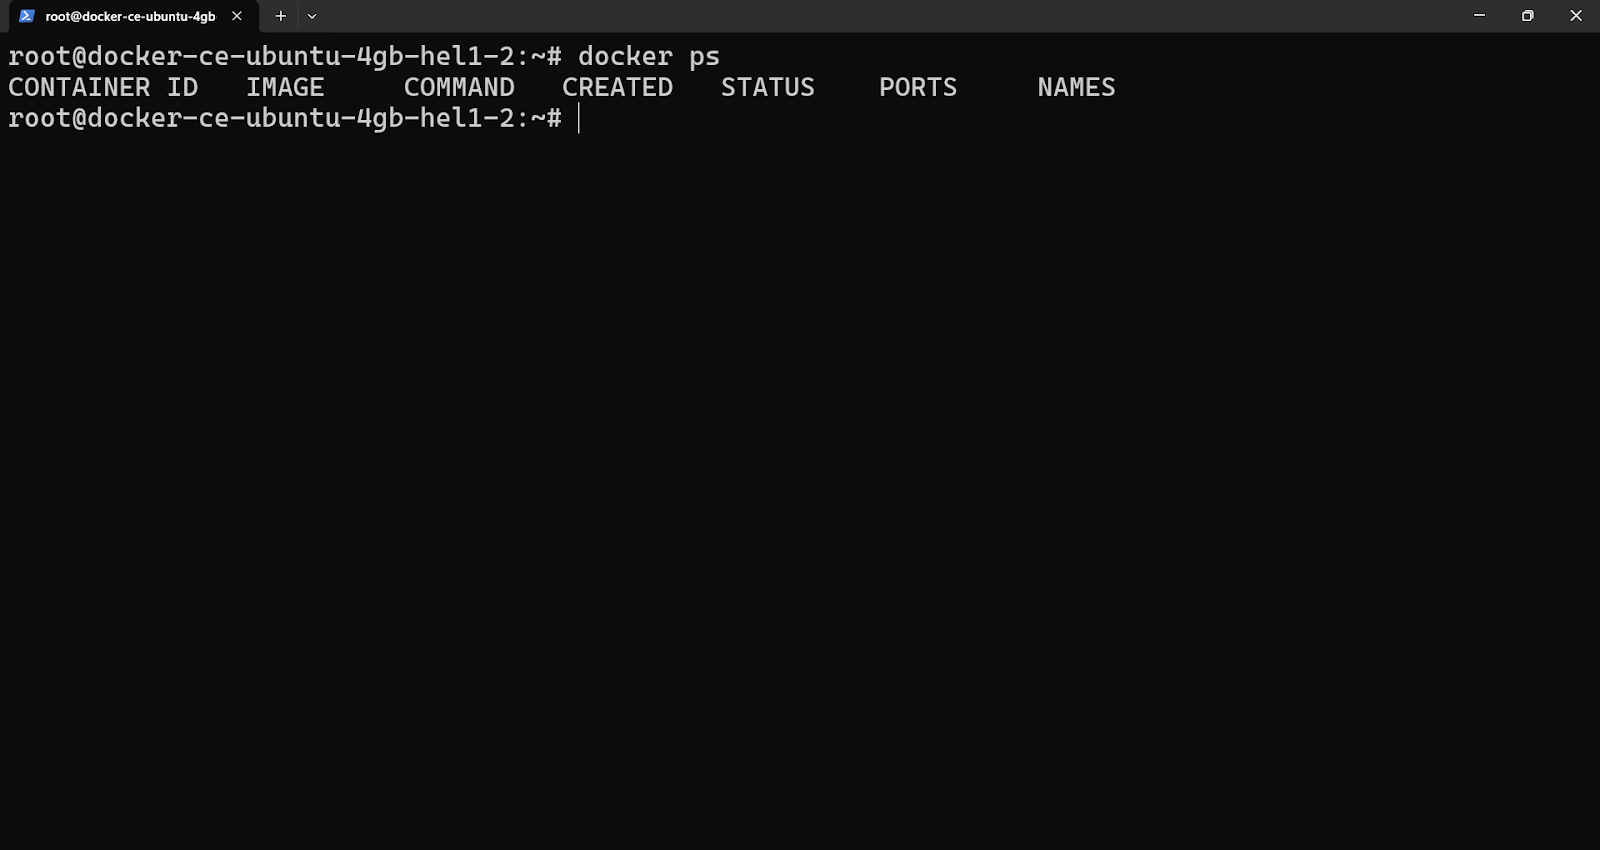
    2. Docker Installation and Service: Docker must be installed and running on your server. You can check if it is installed by running docker –version. If it’s not found, you’ll need to install it following the official Docker documentation for your Linux distribution.

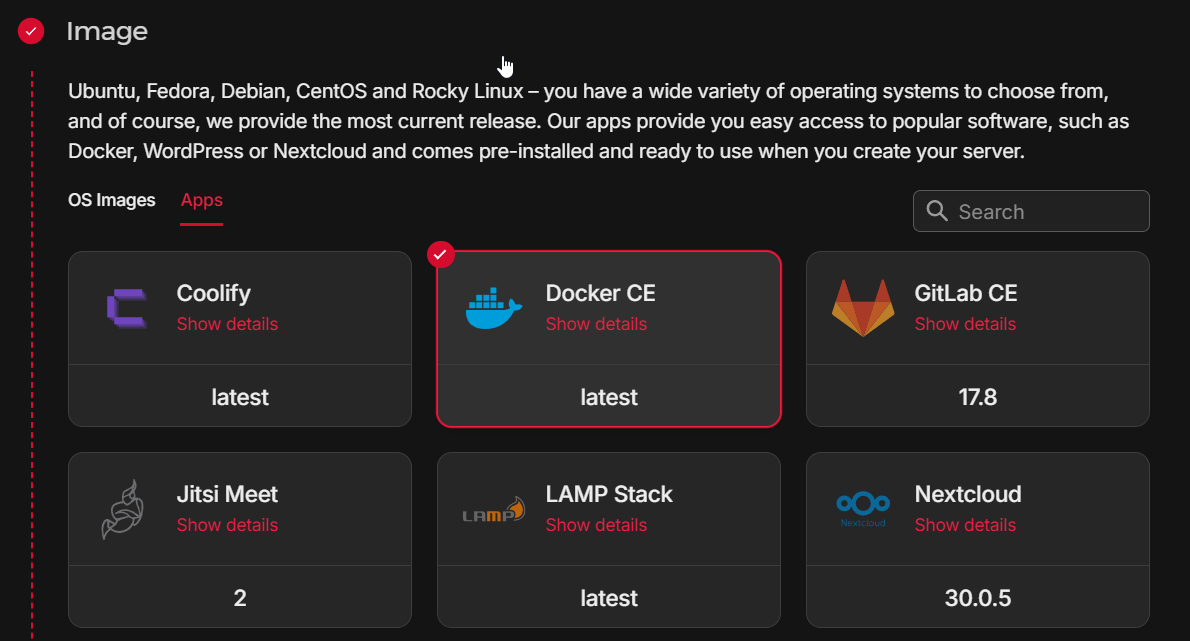
    Note: Many cloud providers offer server images with Docker pre-installed. Using one of these can save you the installation step.

    📖 Suggested read: What Are Docker Images And How To Use Them

    Step 1: Download Your Laravel Application

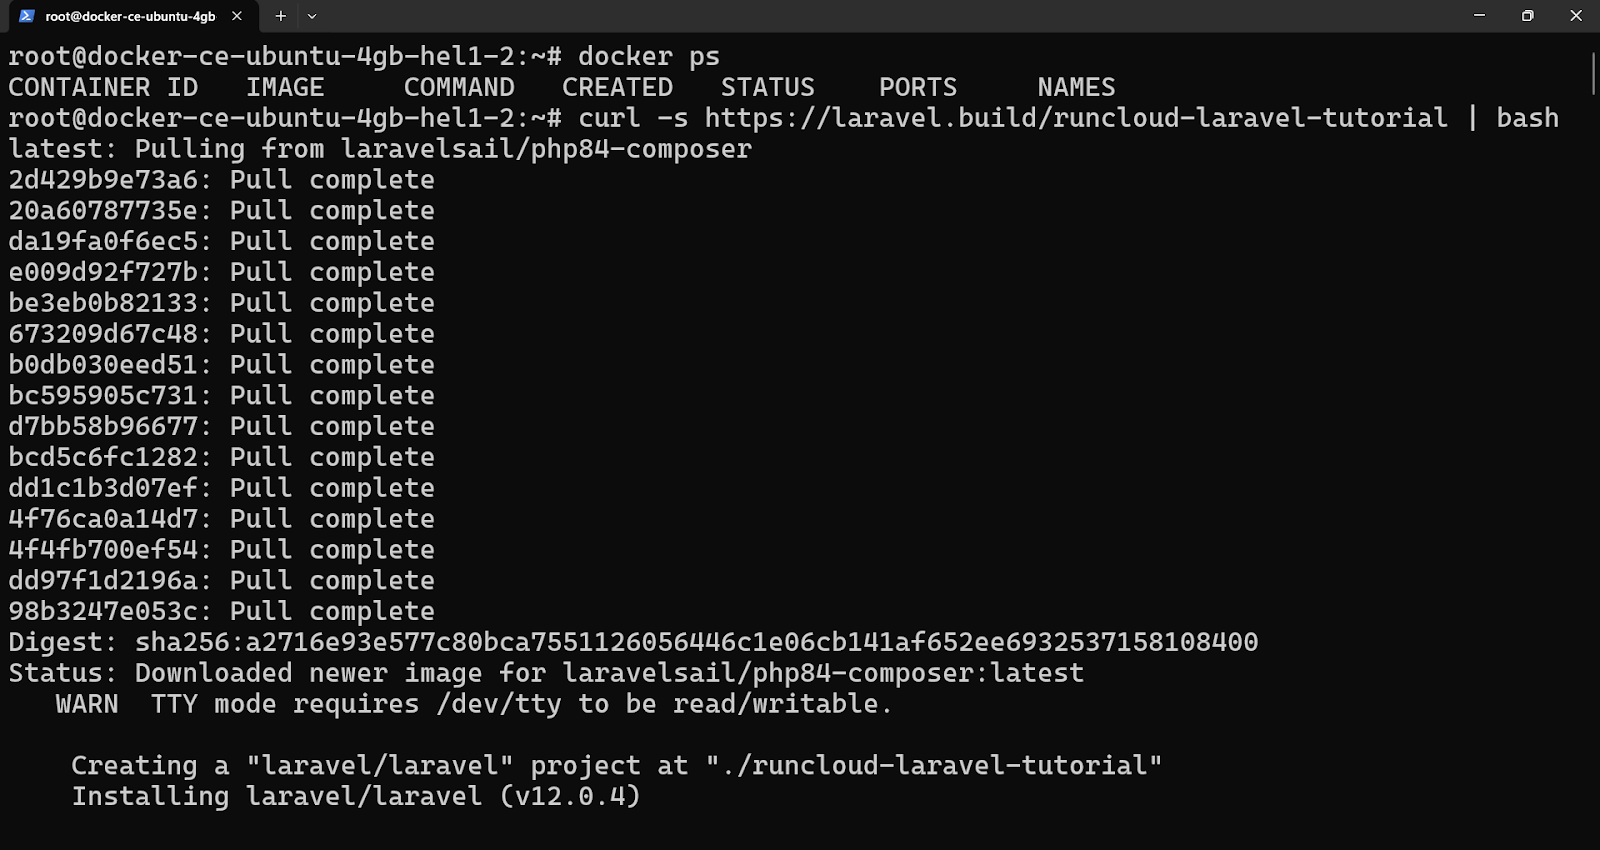
    We will use the official Laravel.build service to download a starter Laravel project configured for Sail. The command below downloads a script and executes it using bash.

    Run this command, making sure you replace runcloud-laravel-app with the desired name for your application’s directory. This name will be used for the project folder.

    curl -s https://laravel.build/runcloud-tutorial | sudo bash

    Important Security Precaution: Piping (|) commands directly from curl to sudo bash executes the downloaded script with root privileges. While laravel.build is an official and trusted source, be cautious when running scripts from the internet this way. Read our blog post on Pipes vs Xargs to learn more on this topic.

    📖 Suggested read: How To Create a Docker Image For Your Application

    In the above command:

    • curl -s: Downloads the script silently (no progress meter).
    • https://laravel.build/runcloud-tutorial: This tells the service to generate a setup script for an app named runcloud-tutorial.
    • | sudo bash: Pipes the downloaded script directly to the bash interpreter, executed with sudo (root) privileges. This creates the project directory and sets initial permissions.

    Step 2: Navigate into Your Application Directory

    Once the previous command completes, navigate into the newly created project directory. Remember to use the actual application name you chose:

    cd runcloud-tutorial

    You should now be inside your Laravel project’s root directory.

    📖 Suggested read: Understanding Docker Services | RunCloud Docs

    Step 3: Start the Docker Containers with Laravel Sail

    Laravel Sail is an interface for managing your application’s Docker containers. We’ll use it to build and start the necessary services (web server, PHP, database, etc.).

    Execute the following command to start Sail in “detached” mode (-d), meaning the containers will run in the background:

    sudo ./vendor/bin/sail up -d

    In the above command:

    • sudo: We use sudo here because Sail needs root permissions to manage Docker networking and volumes.
    • ./vendor/bin/sail: Executes the Sail script located in your project’s vendor directory.
    • up: This command tells Docker (via Sail and Docker Compose) to create and start the containers defined in the docker-compose.yml file. The first time you run this, it will download the necessary Docker images (such as PHP, NGINX, MySQL), which can take several minutes (sometimes ten or more), depending on your internet connection.
    • -d: Runs the containers in the background so your terminal prompt remains available.

    📖 Suggested read: Docker Security: Best Practices to Secure a Docker Container

    Step 5: Run Database Migrations

    Once the containers (including the database container) are running, you’ll need to set up your application’s database schema. Laravel uses “migrations” for this.

    Run the following command to execute the default Laravel migrations:

    sudo ./vendor/bin/sail artisan migrate

    In the above command:

    • sudo ./vendor/bin/sail: Again, we use Sail to execute a command.
    • artisan migrate: This tells Sail to run the PHP artisan migrate command inside the main application container (the one running PHP). This command creates the necessary tables in the database (like the users table, etc.).

    You should see an output indicating that the migrations ran successfully.

    Step 6: Access Your Application

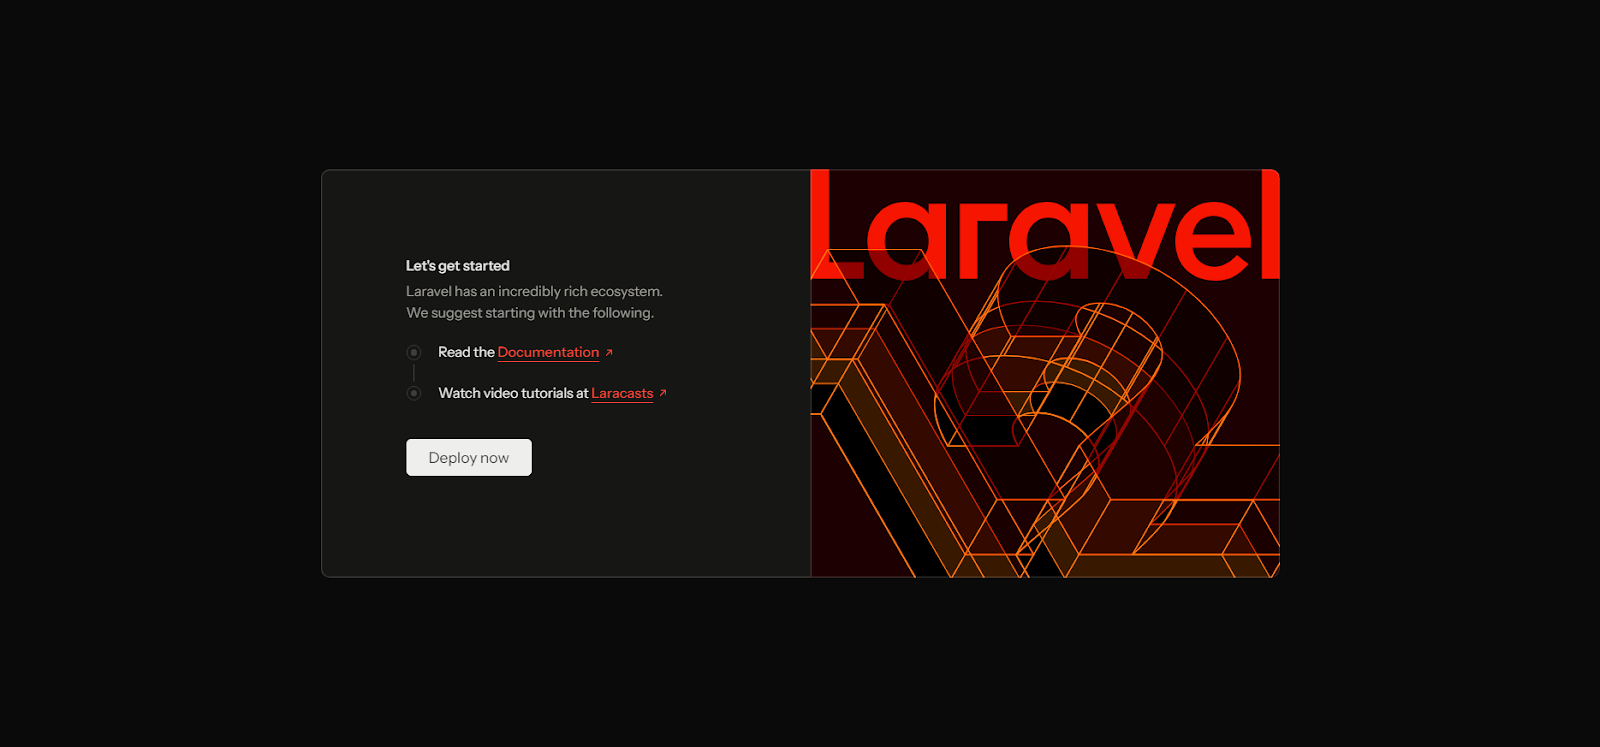
    Your Laravel application should now be running and accessible!

    • On a Server: Open your web browser and navigate to your server’s public IP address: http://your_server_ip. Sail, by default, configures the web server container to listen on port 80.
    • On Your Local Machine (if developing locally): If you performed these steps on your local computer instead of a server, you can usually access it via http://localhost.

    If you cannot access the site via the server’s IP address, your server’s firewall might be blocking incoming connections on port 80 (HTTP). You will need to configure your firewall (e.g., ufw, firewalld, or your cloud provider’s firewall settings) to allow traffic on TCP port 80.

    📖 Suggested read: How to Use Cloudflare Firewall Rules to Protect Your Web Application

    Step 7: Troubleshooting Potential Permission Errors (If Needed)

    Sometimes you might encounter file permission errors within your Laravel application, due to how Docker handles file volumes and user mapping between the host server and the container. This often happens because the web server process inside the container (running as the sail user) doesn’t have write permission to files owned by the root user on the host (created during the initial curl | sudo bash step).

    If you suspect permission issues, you can fix them by changing the ownership of the project files inside the container to the sail user.

    Enter the main application container as root:

    sudo ./vendor/bin/sail root-shell

    This gives you a root command prompt inside your Laravel application’s container.

    Change ownership recursively: This command changes the owner and group of the html directory (as well as everything inside it) to sail:

    chown -R sail:sail /var/www/html

    Let’s understand each part of the above command.

    • chown: Change owner command.
    • -R: Recursive (apply to the directory and all files/directories within it).
    • sail:sail: Set the user to sail and the group to sail.
    • html: The target directory (which corresponds to your project root, mounted at /var/www/html).

    Close the container shell:

    exit

    After running these commands, try accessing your application again, and refresh the web page.

    Wrapping Up: Deploying Laravel with Docker on a VPS

    While Sail simplifies the Docker aspect for a single Laravel project, managing the underlying server, handling security configurations, setting up monitoring, deploying multiple applications, and keeping everything updated still requires significant effort and Linux expertise. This is where platforms specifically designed for server management truly shine.

    RunCloud makes it incredibly easy to develop, deploy, and maintain your web applications across one or many servers, all from a single, intuitive central dashboard.

    It abstracts away the complexities of server administration, letting you focus on building great applications.

    RunCloud works with standard Laravel applications, high-performance setups such as Laravel Octane, and popular CMS platforms such as WordPress. You can start using RunCloud and choose from various optimized server stacks directly through the RunCloud interface.

    Ready to experience truly effortless server management and application deployment?

    Sign up for RunCloud today and see the difference for yourself!

    FAQs on Deploying Laravel with Docker on a VPS

    What are the benefits of using Docker for Laravel deployment?

    Docker packages your Laravel app and its dependencies into containers, ensuring consistent environments from development to production. This isolation prevents conflicts between application dependencies and simplifies portability across different servers or cloud providers.

    How do I secure my Dockerized Laravel application?

    You can secure your Dockerized Laravel app by following standard web security practices within your code, using minimal, trusted base images, and running containers as non-root users. RunCloud provides several security features out of the box and simplifies configuration management.

    Can I use Docker Compose with Laravel?

    Absolutely, Docker Compose is highly recommended, especially for local development and simpler multi-container production setups with Laravel. It allows you to define and manage all the related services your application needs (such as the web server, PHP-FPM, database, and cache) in a single YAML file. This makes it easy to spin up, connect, and manage the entire application stack with simple commands.

    What is the best way to manage environment variables in Docker?

    For security reasons, avoid hardcoding environment variables or committing .env files directly into your Docker image. Instead, pass environment variables into the container at runtime using Docker’s -e flag, Docker Compose environment, or env_file directives.

    Is Docker necessary for deploying Laravel?

    No, Docker isn’t strictly necessary; you can successfully deploy Laravel using a traditional approach by setting up a LAMP or LEMP stack directly on your VPS. However, Docker provides significant advantages in environment consistency, dependency management, and deployment predictability. Tools such as RunCloud make both traditional and Docker-based deployments significantly easier to manage.

    What are the alternatives to Docker for deploying Laravel?

    You can deploy your web applications using the traditional deployment directly onto a configured VPS. RunCloud makes this process extremely easy by providing a centralized dashboard for VPS management.

    Can I use Kubernetes to manage Laravel deployments?

    Yes, Kubernetes (K8s) is a powerful container orchestration system suitable for managing complex, large-scale Laravel applications requiring high availability, auto-scaling, and rolling updates. However, it introduces significant operational complexity compared to simpler Docker or Docker Compose setups. Managing deployments via a tool such as RunCloud provides sufficient capability for many projects without the K8s learning curve.

    What is the difference between Docker and traditional VPS deployment?

    Traditional VPS deployment required you to install and manage all software (OS, web server, PHP, database, dependencies) directly on the virtual server, sharing the host OS kernel and resources in a less isolated way. Docker uses containerization to package the application and its dependencies into isolated user-space environments that run consistently anywhere, sharing the host OS kernel but keeping libraries and binaries separate.

  • Self-Hosting Docker vs Cloud-Based Docker: Pros and Cons

    Self-Hosting Docker vs Cloud-Based Docker: Pros and Cons

    Do you ever feel like getting your software to run reliably everywhere is almost as challenging as writing it in the first place? If so, then we strongly recommend learning all about Docker containerization.

    Docker containerization is a technology that packages applications into neat, portable containers that can be run anywhere.

    But once you’ve created containers, the next big question is – where they should live? Do you take command of your own hardware in a self-hosted setup, or leverage the vast power and convenience of the cloud?

    This guide will also help you choose between self-hosting Docker and using cloud platforms.

    Let’s get started!

    What is Docker?

    You know that classic developer joke, “But it works on my machine!” – funny because it’s often painfully true. Getting software to run correctly on different computers, with all their various settings and installed programs, has often been a massive headache. Docker is a way to fix this.

    Docker is like a standardized shipping container, but for software. You package your application and everything it needs to run (like specific code libraries, tools, and settings) into a neat little box called a “container”. This container can run practically anywhere, on your laptop, a colleague’s computer, or a server in a data center, and it should always work exactly the same way.

    Docker essentially isolates your application, so it doesn’t care what else is running on the host computer. It brings its own environment with it. This makes developing and deploying applications much faster and more reliable.

    But it’s important to remember that Docker isn’t the only container runtime out there! Other great technologies, such as Podman and Containerd, do similar things, offering different features or approaches that some people prefer. So, while you’ll hear “Docker” a lot, think of it as the famous brand name for a type of technology (containers) with several players.

    📖 Suggested read: What is Docker And How Does it Work

    What is Self-Hosting Docker?

    It means you take responsibility for running these containers on the hardware you manage. Instead of paying a cloud company such as AWS or Google Cloud to run your applications, you set up your own server (which could be an old PC in your closet, a powerful machine you bought specifically for this, or even a tiny Raspberry Pi) and use Docker (or one of its alternatives) to run the software containers on it.

    You can think of it as choosing between renting an apartment (using a cloud provider) and owning your own house (self-hosting). When you self-host Docker applications, you set up the server, install the base operating system, install Docker itself, and then deploy and manage the application containers on that system.

    This could be for running anything from a personal blog, a media server like Plex, a file-syncing service, a password manager, or even more complex business applications. You’re the landlord, the maintenance crew, and the resident all rolled into one.

    📖 Suggested read: What Are Docker Images And How To Use Them

    What Are The Benefits of Self-Hosting Docker?

    Why would anyone go through the trouble of setting up their own server to run Docker containers? Well, there are some pretty compelling reasons. The biggest one is often control.

    When you self-host, you have complete control over your data and how the application is configured. Your data stays on your hardware, which can be a huge plus for privacy-conscious folks. You’re not subject to a cloud provider’s terms of service changes, price hikes, or potential service shutdowns.

    Another major benefit can be cost savings, especially in the long run. While there’s an upfront cost for hardware, you avoid potentially hefty monthly subscription fees for cloud services, especially if you need to run many applications or require significant resources.

    It’s also an incredible learning opportunity. Setting up and managing your own server and Docker environment teaches you a ton about Linux, networking, security, and how applications really work under the hood, which are valuable skills in today’s tech world. Plus, you get the satisfaction of building and managing your own little corner of the internet.

    📖 Suggested read: How To Create a Docker Image For Your Application

    What Are The Drawbacks of Self-Hosting Docker?

    As you might have guessed already, self-hosting Docker isn’t easy, and it comes with its own set of chores. The biggest drawback of self-hosting is responsibility. You are solely responsible for everything: buying and maintaining the hardware, installing and updating the operating system and Docker, configuring network settings, ensuring security (this is a big one!), and performing regular backups.

    If something breaks, there’s no support line to call, and it’s up to you to fix it. This requires a certain level of technical knowledge and a willingness to learn and troubleshoot.

    There’s also the upfront cost of hardware, which can range from minimal for a Raspberry Pi to significant for a powerful server. You also need to consider ongoing costs like electricity. Furthermore, your home internet connection might not be ideal for hosting services, especially regarding upload speed or data caps.

    Finally, it takes time, time to set up, time to maintain, and time to fix things when they inevitably go wrong. It’s definitely more involved than just clicking a button on a cloud provider’s website.

    📖 Suggested read: When And Why To Use Docker — Full Guide

    What is Cloud-Based Docker?

    The flip side to running Docker containers on your own servers (self-hosting) is Cloud-Based Docker. This means you’re paying a cloud provider like Amazon Web Services (AWS), Google Cloud Platform (GCP), Microsoft Azure, DigitalOcean, or others, to run your Docker containers for you on their massive, optimized infrastructure.

    Instead of managing physical servers yourself, you interact with web dashboards or command-line tools to tell the provider what containers you want to run, how many resources they need, and how they should connect to the internet or other services.

    Think back to the apartment versus house analogy. Cloud-based Docker is like renting a fully serviced apartment in a large complex. You don’t worry about the building’s foundation, the plumbing, or the electricity grid connection; the building management (the cloud provider) handles all that.

    They offer various services specifically designed for running containers, ranging from simple “run this container for me” options to complex orchestration systems like Kubernetes (often provided as managed services like EKS, GKE, or AKS) that can manage large clusters of containers automatically. This option allows you to focus more on your application inside the container and less on the nuts and bolts that keep it physically running.

    📖 Suggested read: Docker Security — Best Practices to Secure a Docker Container

    What Are The Benefits of Cloud-Based Docker?

    Choosing the cloud route for your Docker containers comes with some significant advantages. One of the biggest perks is scalability.

    Need more power for a sudden traffic spike? With most cloud providers, you can scale up your resources (CPU, RAM, number of container instances) almost instantly with just a few clicks or commands – and scale back when demand drops.

    Most cloud providers only bill for what you use, which can be very efficient. Reliability and uptime are also major selling points; these providers have teams of experts, redundant hardware, backup power, and high-speed network connections designed to keep things running smoothly, often backed by guarantees called Service Level Agreements (SLAs).

    Additionally, cloud providers handle the underlying infrastructure management, and you don’t need to worry about hardware failures, operating system updates, or patching the Docker engine itself. This frees up your time to focus purely on developing and improving your application.

    They also offer a rich ecosystem of integrated services, making it easy to add databases, load balancers, monitoring tools, automatic backups, and advanced security features to your containerized applications. Getting started can often be quicker and require less upfront investment than buying dedicated server hardware.

    📖 Suggested read: 20 Essential Docker Commands You Should Know

    What Are The Drawbacks of Cloud-Based Docker?

    While the convenience is tempting, renting a cloud server has its downsides. The most obvious one is cost. While pay-as-you-go sounds great, cloud bills can quickly spiral out of control if you’re not careful about resource usage, especially at scale, or leave resources running unnecessarily.

    Understanding the often complex pricing models of different providers requires careful attention. You might also experience “vendor lock-in”, where moving your setup from one cloud provider to another becomes difficult due to reliance on specific proprietary services or tools.

    Another key drawback is reduced control. You don’t own the hardware and have limited say over the underlying infrastructure, network configuration specifics, or the provider’s maintenance schedules. Although cloud providers offer a lot of flexibility, some advanced users might also encounter limitations compared to having direct access to the bare metal.

    Data privacy can also be a concern for some; your application data resides on the provider’s servers, subject to their terms, policies, and the legal jurisdiction they operate under. Lastly, while cloud platforms abstract away hardware management, navigating their vast array of services, interfaces, and configurations introduces its own layer of complexity that requires learning.

    Wrapping Up: Who Should Use Self-Hosting Docker vs Cloud-Based Docker?

    Choosing between self-hosting Docker and using a cloud-based provider depends on your needs, technical comfort level, budget, and priorities.

    If you prioritize maximum control over your data, enjoy tinkering with technology, have particular privacy requirements, or are looking for the potentially lowest long-term cost (and don’t mind the upfront hardware investment and maintenance), then self-hosting Docker on your own server is likely a great fit.

    On the other hand, if your priority is convenience, rapid scalability, high availability backed by SLAs, and minimizing the time spent on infrastructure management, then a cloud-based Docker solution (like those from AWS, Google Cloud, Azure, etc.) is probably the way to go. This path suits startups needing to move fast, businesses experiencing variable workloads, teams that prefer focusing solely on application development, and anyone who values the ease of integrated managed services like databases and load balancers. While potentially more expensive month-to-month, it offloads a significant operational burden.

    Ultimately, the “best” choice is the one that aligns with your goals.

    But what if you want the control and potential cost benefits of self-hosting without all the command-line complexity?

    That’s where RunCloud comes in!

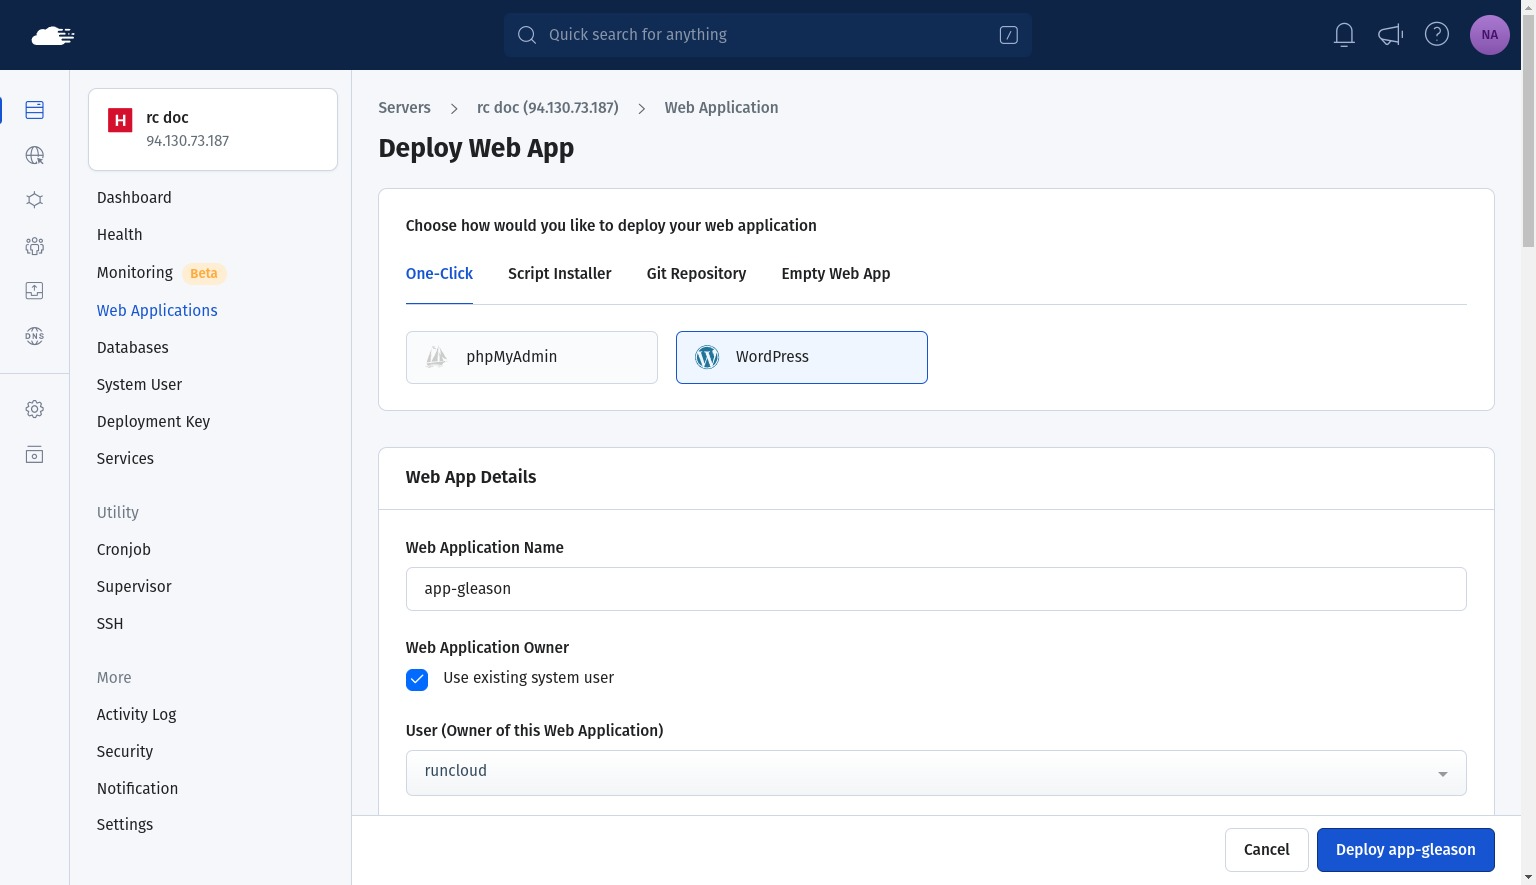
    Installing and hosting WordPress in Docker

    RunCloud dramatically simplifies managing your own servers and deploying applications, including Docker containers for managing different PHP runtimes.

    Sign up for RunCloud today and discover how simple server management can be.

    FAQs on Self-Hosting Docker vs Cloud-Based Docker

    Is self-hosting Docker more secure than cloud-based Docker?

    Security depends heavily on implementation, not just the hosting type; self-hosting Docker gives you full control over security measures, but you are entirely responsible for implementing and maintaining them correctly. Cloud providers invest heavily in security infrastructure and personnel, offering robust protection, but you rely on their systems and policies. Ultimately, a poorly secured self-hosted setup is less secure than a well-managed cloud environment, and vice versa.

    What are the cost differences between self-hosting Docker and using a cloud-based solution?

    Self-hosting Docker typically has higher upfront hardware costs but can lead to lower, predictable monthly expenses, mainly electricity and internet. Cloud-based Docker solutions usually have little to no upfront cost but involve recurring monthly fees based on resource consumption, which can escalate quickly as usage grows. Carefully analyze your expected resource needs and growth to determine the most cost-effective option.

    Which is more scalable: self-hosted Docker or cloud-based Docker?

    Cloud-based Docker solutions are inherently designed for easy and rapid scalability. You can adjust resources up or down almost instantly via dashboards or APIs. Scaling a self-hosted Docker environment requires manually adding more hardware (servers, RAM, storage), which takes time, planning, and physical intervention.

    Can I easily switch from self-hosting Docker to a cloud-based solution?

    Migrating Docker containers themselves is relatively straightforward since containers package dependencies, but the ease of switching depends on your overall architecture. If your self-hosted setup relies heavily on local network configurations or specific hardware integrations, moving to a cloud provider will require careful planning and reconfiguring networking, storage, and associated services.

    What is the performance difference between self-hosting and cloud-based Docker?

    Performance can vary greatly depending on the hardware (self-hosted) or chosen instance types (cloud) and network conditions. High-end self-hosted hardware might outperform entry-level cloud instances, while premium cloud instances offer performance levels that are hard to match along with optimized network backbones.

    Is self-hosting Docker suitable for small businesses?

    Self-hosting Docker can be suitable for small businesses, especially those with in-house technical expertise or those using management tools. It offers potential cost savings and greater data control. However, it requires a commitment to managing infrastructure, security, and updates, which can divert focus from core business activities.

    What are the maintenance requirements for self-hosting Docker?

    Self-hosting Docker demands ongoing maintenance, including updating the host operating system, patching the Docker engine itself, monitoring resource usage, managing hardware, and maintaining security configurations. You are also responsible for setting up and verifying backups and planning for hardware failures. Using server management platforms like RunCloud can automate some tasks, but the ultimate responsibility for the infrastructure’s health and security rests with the owner.

    How does data backup work in self-hosting vs cloud-based Docker solutions?

    With self-hosting Docker, you must design and implement your backup strategy, deciding what data (volumes, databases, config files) to back up, how often, and where to securely store the backups. Cloud providers typically offer integrated, often automated, backup solutions for storage volumes and databases associated with your containers.

  • How To Upload an Image File In Laravel

    How To Upload an Image File In Laravel

    Whether you’re building a portfolio website, an e-commerce platform, or a social media app, the need to handle user-uploaded images is a common requirement.

    In this comprehensive guide, we’ll explore how to upload an image in Laravel, covering everything from setting up your project to troubleshooting common errors.

    By the end of this guide, you’ll know how to use Laravel’s powerful file storage capabilities to integrate image uploads into your projects seamlessly.

    So, let’s get started!

    How to Upload Images in Laravel

    Follow the steps below to add image upload functionality to your Laravel project.

    1. Setting Up Your Laravel Project for Image Upload

    Setting up the necessary file storage and configuration is important when working with image uploads in a Laravel application. Laravel provides a robust file storage system that allows you to manage file uploads, including images, easily.

    First, you’ll need to configure the file storage driver in your config/filesystems.php file. Laravel supports several storage drivers, such as local, Amazon S3, and others. For this example, we’ll use the local storage driver, which stores the uploaded files in the storage/app/public directory.

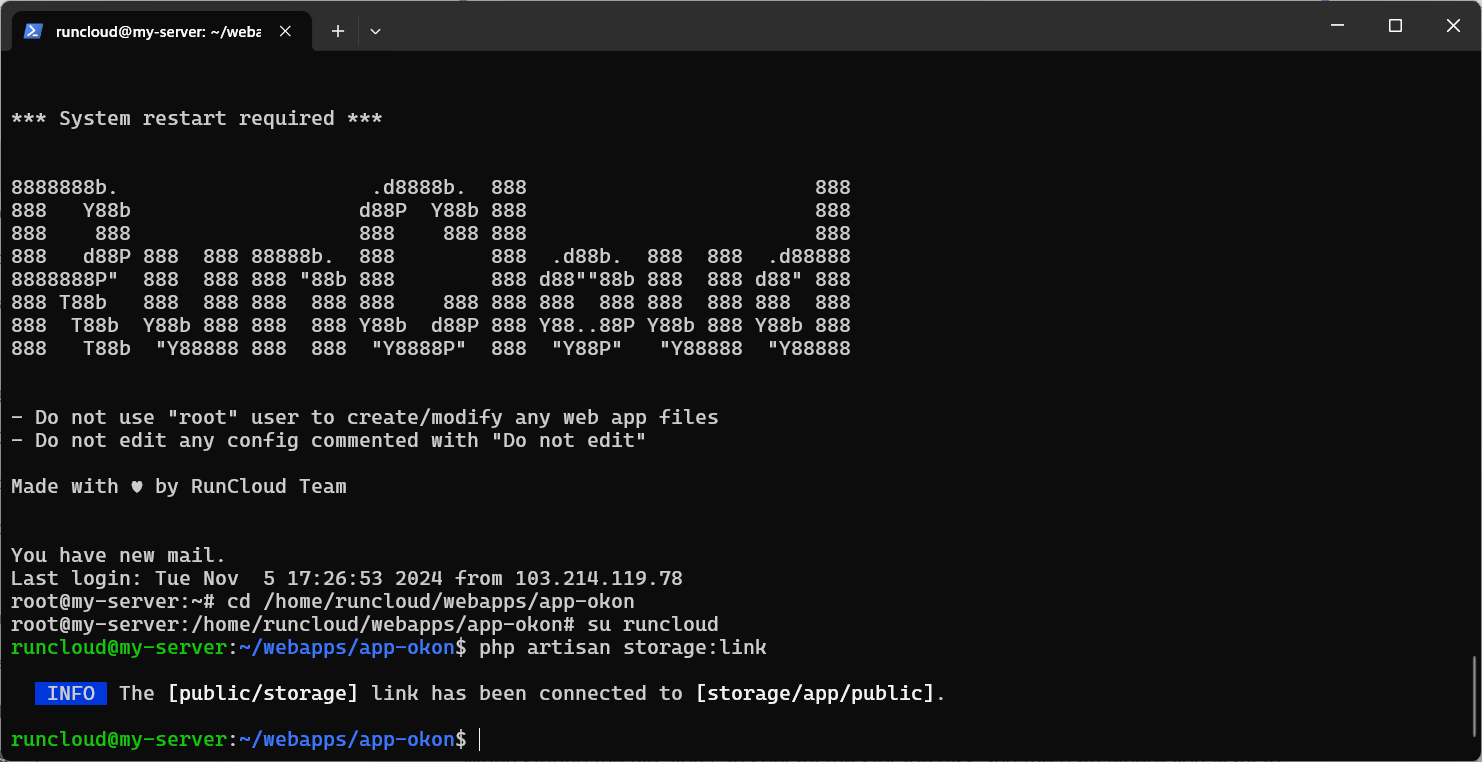
    Next, you’ll need to create a symbolic link between the storage/app/public directory and the public/storage directory. This allows the uploaded images to be accessible through the web server. You can create this link by running the php artisan storage:link command in your terminal.

    Upload images in laravel

    Suggested read: Laravel With Git Deployment The Right Way

    2. Creating an Image Upload Form

    After creating the symlink, you’ll need to create a form in your Laravel application’s view to allow users to upload images. This form should include an <input> element of type file to allow users to select the image they want to upload.

    You’ll also need to include the CSRF token in your form, which helps protect your application from cross-site request forgery attacks. You can do this by using the @csrf directive in your Blade template.

    For example, if you want to upload images using the POST method to submit them to the upload.store route, you can use the following code snippet:

    <form action="{{ route('upload.store') }}" method="POST" enctype="multipart/form-data">
        @csrf
        <input type="file" name="image" id="image">
        <button type="submit">Upload</button>
    </form>

    Suggested read: How to Check Laravel Project Version Installed in CMD?

    3. Handling Image Upload in Laravel Controller

    Once the user submits the image upload form, you’ll need to handle the file in your Laravel controller. You can use the $request->file() method to access the uploaded file and then store it using the $request->file()->store() method.

    When storing the file, you can specify the storage disk and the path where you want to save the file. For example, you could save the file in the public/images directory using the following code:

    public function store(Request $request)
    {
        $request->validate([
            'image' => 'required|image|max:2048',
        ]);
        $imagePath = $request->file('image')->store('public/images');
       // Save the image path to the database or perform other actions
        return redirect()->route('upload.create')->with('success', 'Image uploaded successfully.');
    }

    This code snippet first validates the incoming request, ensuring that the image field is required, the file is an image, and the file size is no greater than 2MB. It then stores the uploaded image in the public/images directory using the store() method.

    After storing the file, you can save the file path in your database so that you can later retrieve and display the uploaded image.

    Suggested read: Laravel Octane – What It Is, Why It Matters & Getting Started

    4. Displaying Uploaded Images

    To display the uploaded images, you can use the asset() helper function in your Blade template. This function will generate the appropriate URL for the file based on your application’s configuration.

    For example, if you saved the file in the public/images directory, you can display the image using the following code:

    <img src="{{ asset('storage/images/' . $image->filename) }}" alt="{{ $image->filename }}">

    Suggested read: Setting Up Local WordPress Dev in Minutes Using Laravel Valet

    5. Security Considerations for Image Upload in Laravel

    When handling image uploads in your Laravel application, it’s essential to consider security measures to prevent malicious file uploads and other vulnerabilities.

    1. One important security consideration is file validation. You should always validate the file type, size, and other attributes to ensure that the uploaded file is a valid image and doesn’t exceed your application’s size limits.
    2. Another important security consideration is file path sanitization. To prevent directory traversal attacks, you should always sanitize the file path before storing or displaying the uploaded images.
    3. Finally, you should consider implementing additional security measures, such as restricting file types, scanning uploaded files for malware, and limiting the number of uploads per user or per session.

    Suggested read: How To Optimize Laravel for Performance (8 Expert Tips)

    Troubleshooting Common Errors During Laravel Image Upload

    When working with image uploads in a Laravel application, you may encounter various errors and issues. Let’s explore some common errors and how to troubleshoot them.

    “File Too Large” Error

    One common error that can occur during image uploads is the “File too large” error. This typically happens when the uploaded file exceeds the maximum file size allowed by your server configuration or Laravel application settings.

    To troubleshoot this issue, you should first check your php.ini file and ensure that the upload_max_filesize and post_max_size directives are set to values that accommodate your expected file sizes. You can also check the config/filesystems.php file in your Laravel application and update the max_size option for the relevant disk configuration.

    If the issue persists, you can try adding a specific file size validation rule in your form request:

    $request->validate([
        'image' => 'required|image|max:2048',
    ]);

    This will ensure that the uploaded file is no larger than 2MB (2048 kilobytes).

    Suggested read: The 10 Best PHP Frameworks (Complete Guide)

    “Invalid File Type” Error

    Another common error is the “Invalid file type” error, which occurs when the uploaded file is not a valid image format (e.g., JPG, PNG, GIF).

    To troubleshoot this issue, you should first check the mimes validation rule in your form request:

    $request->validate([
        'image' => 'required|image|mimes:jpeg,png,gif',
    ]);

    This rule ensures that the uploaded file is a valid image and that the file extension matches the specified MIME types (in this case, JPEG, PNG, and GIF).

    If the issue persists, you can also try using the image rule instead of the mimes rule, as the image rule performs more comprehensive validation and ensures that the uploaded file is a valid image, regardless of the file extension:

    $request->validate([
        'image' => 'required|image',
    ]);

    File Ownership and Permissions Issues

    Sometimes, you may encounter issues with file ownership and permissions when trying to upload images. This can happen if your web server doesn’t have the necessary permissions to write to the storage directory.

    To troubleshoot this issue, you should first check the file permissions of the storage/app/public directory (or the directory where you’re storing the uploaded images). Ensure that the web server user (e.g., www-data on Ubuntu, apache on CentOS/RHEL) has write permissions to this directory.

    You can also try running the php artisan storage:link command to create a symbolic link between the storage/app/public directory and the public/storage directory, which can help resolve some permission-related issues.

    Tip: If you are using RunCloud, you can resolve this issue by going to the “Tools” tab and clicking the “Fix Ownership” button.

    fix ownership in runcloud

    Inconsistent Image Display

    If you’re experiencing issues with inconsistently displaying uploaded images, it could be due to caching or a misconfiguration in your application’s routing or asset handling.

    To troubleshoot this, you can try adding a timestamp or a unique query parameter to the image URL when displaying the image in your Blade templates:

    <img src="{{ asset('storage/images/' . $image->filename . '?v=' . $image->updated_at->timestamp) }}" alt="{{ $image->filename }}">

    This will ensure that the browser always fetches the latest version of the image rather than relying on a cached version.

    Additionally, you can check your application’s asset configuration in the config/filesystems.php file and ensure that the correct disk and URL are being used for image storage and retrieval.

    Suggested read: How To Configure LSCache for Laravel (Configuration Guide)

    Wrapping up

    In this guide, we’ve explored the ins and outs of image uploads in Laravel, including:

    • Setting up your project to handle file storage
    • Creating image upload forms
    • Processing uploads in your controllers
    • Displaying the uploaded images

    However, the journey doesn’t end here. As your Laravel application grows, managing the infrastructure and hosting environment becomes increasingly important – this is where RunCloud comes in.

    RunCloud is a powerful and user-friendly platform that simplifies the deployment and management of your Laravel applications. Building and launching your Laravel applications is significantly faster and easier with RunCloud.

    It makes complex server tasks, like setting up servers, managing SSL certificates, and integrating with popular cloud providers both quick and simple. This means spending less time on tedious setup and more time building awesome features for your users.

    Experience the benefits of simplified Laravel hosting.

    Learn more & get started with RunCloud today.

    FAQs on Image Upload in Laravel

    How to Display an Image in Laravel

    To display an uploaded image in your Laravel application, you can use the asset() helper function to generate the appropriate URL for the image. This function will generate the correct URL based on your application’s configuration, even if the image is stored outside the public directory. For example, if you stored an image in th storage/app/public/images directory, you can display it using the following code:

    <img src="{{ asset('storage/images/example.jpg') }}" alt="Example Image">

    How to Upload PDF Files using Laravel

    Uploading PDF files in Laravel is very similar to uploading images. You can use the same file upload process, but you’ll need to adjust the file validation to accept PDF files instead of images.

    For example, you can use the mimes rule in your form request validation to ensure that the uploaded file is a PDF:

    $request->validate([
        'file' => 'required|mimes:pdf',
    ]);

    After the file is uploaded, you can store the file path in your database and display a download link for the PDF in your application.

    How to Put Public Images in Laravel

    To make uploaded images publicly accessible in your Laravel application, you can store them in the public directory instead of the storage/app/public directory.
    First, create a new directory, such as public/images, in your public folder. Then, update your file upload logic to store the images in this directory:

    $imagePath = $request->file('image')->store('images', 'public');

    Finally, you can display the images using the asset() helper function, as you would for any other public asset in your application.

    How to Add Image Validation in Laravel

    To add image validation to your Laravel application, you can use the image rule in your form to request validation. This rule ensures that the uploaded file is a valid image and meets certain criteria, such as file size and MIME type.
    Here’s an example of how you can add image validation to your form request:

    $request->validate([
        'image' => 'required|image|max:2048'
    ]);

    This will ensure that the image field is required, the file is a valid image, and the file size is no larger than 2MB.

    You can also use other validation rules, such as mimes or dimensions, to refine your image validation requirements further.

    How to Get Image Type in Laravel

    To get the type of image uploaded to your Laravel application, you can use the getClientOriginalExtension() method on the UploadedFile object.

    For example, in your controller:

    $image = $request->file('image');
    $imageType = $image->getClientOriginalExtension();

    This will give you the file extension of the uploaded image, which you can then use to determine the image type.
    Alternatively, you can use the getMimeType() method to get the MIME type of the uploaded image:

    $image = $request->file('image');
    $imageMimeType = $image->getMimeType();

    This can be useful for additional validation or processing of the uploaded image

  • How to Check Laravel Project Version Installed in CMD?

    How to Check Laravel Project Version Installed in CMD?

    Do you develop Laravel projects regularly? If so, you might eventually forget what version you used while developing the application.

    Whether you’re a seasoned developer or just starting with Laravel, knowing how to quickly and accurately determine your project’s version is essential.

    This comprehensive guide will walk you through various methods to check your Laravel version using the command line interface (CLI). We’ll cover several applicable techniques across different operating systems and environments to ensure you can access this vital information regardless of your development setup.

    By the end of this article, you’ll be equipped with multiple reliable ways to find your Laravel version, enabling you to make informed decisions about updates and troubleshooting.

    Let’s dive in!

    What is Laravel?

    Laravel is a powerful, open-source PHP web application framework designed to make web development more efficient and enjoyable. It offers a wide range of built-in tools and libraries that simplify common tasks such as routing, authentication, caching, and database management.

    Suggested read: Laravel Octane – What It Is, Why It Matters & Getting Started

    Understanding Laravel’s Version Numbering

    Laravel follows semantic versioning (SemVer), which uses a three-part version number: MAJOR.MINOR.PATCH.

    1. MAJOR version changes indicate incompatible API changes
    2. MINOR version changes add functionality in a backward-compatible manner
    3. PATCH version changes make backwards-compatible bug fixes

    Suggested read: Laravel With Git Deployment The Right Way

    Importance of Knowing Your Laravel Version

    Understanding which version of Laravel you’re using is crucial for several reasons:

    1. Security updates: Older versions may have security vulnerabilities.
    2. Feature availability: Newer versions introduce new features and improvements.
    3. Compatibility: Some packages or dependencies may require specific Laravel versions.
    4. Upgrade planning: Knowing your current version helps in planning upgrades.

    Suggested read: How To Optimize Laravel for Performance (8 Expert Tips)

    How to Check the Laravel Version

    Laravel provides several methods to check its version. Here are five different approaches you can use:

    Method 1: How to Check Laravel Version Using Artisan Commands

    1. Open Your Command Line Interface (CLI)

    Open your preferred terminal or command prompt application. If your application is hosted on a server, you must connect to it via SSH.

    2. Navigate to Your Laravel Project Directory

    Use the cd command to navigate to your Laravel project’s root directory. For example:

    cd /path/to/your/laravel/project

    3. Run the Laravel Version Command

    Execute the following Artisan command in your terminal:

    php artisan --version

    This command will display the current Laravel version installed in your project.

    Laravel Project Version via CLI

    Suggested read: How To Configure LSCache for Laravel (Configuration Guide)

    Method 2: How to Check the Laravel Framework Application File

    1. Locate the composer.json File

    Find the composer.json file in your Laravel project’s root directory. RunCloud users can access the source code of their web applications directly from the RunCloud dashboard using a user-friendly interface. Click “File Manager” on the left menu and select the file you want to open.

    Laravel Project Version in composer.json

    2. Open the composer.json File

    Open the composer.json file using a text editor of your choice.

    3. Find the Laravel Version Information

    Look for the “require” section in the composer.json file. You’ll find the Laravel framework version listed there like this:

    "require": {
        "laravel/framework": "^8.0"
    }

    Alternatively, you can use command line utilities such as grep to filter and view the file’s contents. For example, you can run the following command to view the Laravel version:

    grep laravel/framework composer.json

    Suggested read: How To Configure LSCache for Laravel (Configuration Guide)

    Method 3: How to Check Laravel Version Using Composer

    1. Open Your Command Line Interface (CLI)

    Open your terminal or command prompt. Once again, if your web application is hosted on a server, you must log in via SSH.

    2. Navigate to Your Laravel Project Directory

    Use the cd command to navigate to your Laravel project’s root directory.

    3. Run the Composer Show Command

    Execute the following Composer command:

    composer show laravel/framework

    This command will display detailed information about the Laravel framework, including its version.

    Method 4: How to Check Laravel Version in a Web Browser

    1. Create a Route to Display Version

    Open your routes/web.php file and add the following code snippet at the bottom of the file:

    Route::get('/laravel-version', function () {
        return 'Laravel Version: ' . app()->version();
    });

    After adding the above code snippet, save and close the file. Remember, if you are using RunCloud, you can easily edit your website’s source code via the dashboard.

    2. Access the Route in a Browser

    Visit http://your-app-url/laravel-version in your web browser. You’ll see the Laravel version displayed.

    3. Remove the Route After Use

    For security reasons, remember to remove this route after checking the version.

    Suggested read: The 10 Best PHP Frameworks (Complete Guide)

    Method 5: How to Check Laravel Version Using Laravel Tinker

    1. Open Your Command Line Interface (CLI)

    Open your terminal or command prompt. As we mentioned earlier, if your application is hosted on a server, you must connect to it via SSH.

    2. Navigate to Your Laravel Project Directory

    Use the cd command to navigate to your Laravel project’s root directory.

    3. Start Laravel Tinker

    Run the following command to start Laravel Tinker:

    php artisan tinker

    4. Check the Version

    In the Tinker console, enter the following command:

    app()->version();

    This will display the current Laravel version.

    Suggested read: Setting Up Local WordPress Dev in Minutes Using Laravel Valet

    Wrapping Up

    As we’ve explored throughout this guide, Laravel is a powerful and versatile framework that offers numerous methods to check and manage its version. While Laravel provides excellent tools for development, managing Laravel applications in production environments can sometimes be challenging.

    This is where RunCloud comes in to simplify your Laravel deployment and management processes.

    RunCloud is a powerful web server control panel that makes it incredibly easy to deploy, manage, and scale Laravel applications.

    With RunCloud, you can:

    1. Quickly deploy Laravel applications with just a few clicks.
    2. Automatically configure your server for optimal Laravel performance.
    3. Manage multiple Laravel versions across different projects.
    4. Automate Laravel updates and maintenance tasks.
    5. Monitor your Laravel applications’ health and performance.
    6. Implement robust security measures to protect your Laravel sites.

    Using RunCloud, you can focus more on developing your Laravel applications and less on server management and deployment intricacies.

    Whether you’re a solo developer or part of a larger team, RunCloud streamlines your workflow and enhances your productivity.

    Ready to Simplify Your Laravel Management?

    Don’t let server management complexities slow down your Laravel development. Sign up for RunCloud today and experience the ease of managing your Laravel applications in a user-friendly, efficient environment.

    FAQs on Laravel

    Which Laravel version is best?

    The best Laravel version depends on your project’s specific needs, but generally:
    For new projects: Use the latest stable version for the most up-to-date features and security updates.
    For long-term projects: Consider using the latest LTS (Long Term Support) version for extended support and stability.

    Is Laravel outdated?

    Actually, Laravel is still relevant. It’s actively maintained and regularly updated, and follows a consistent release schedule:
    Major versions are released annually.
    Frequent minor releases and patches throughout the year.
    The framework evolves with modern PHP practices and web development trends.

    Is Laravel frontend or backend?

    Laravel is primarily a backend framework, but it offers tools for frontend development as well:
    Backend: Laravel is a PHP framework for server-side logic, database interactions, and API development.
    Frontend support:
    Blade templating engine for server-side rendering
    Laravel Mix for asset compilation
    Inertia.js integration for building single-page apps
    Vue.js and React support out-of-the-box
    While Laravel excels in backend development, it provides seamless integration with various front-end technologies, making it a versatile choice for full-stack development.

    Which framework is better than Laravel?

    The “best” framework depends on specific project needs, team expertise, and personal preferences. Some frameworks often compared to Laravel include:
    Symfony: More modular, suitable for large, complex applications.
    CodeIgniter: Lighter and faster for smaller projects.
    Yii: Known for its performance and security features.
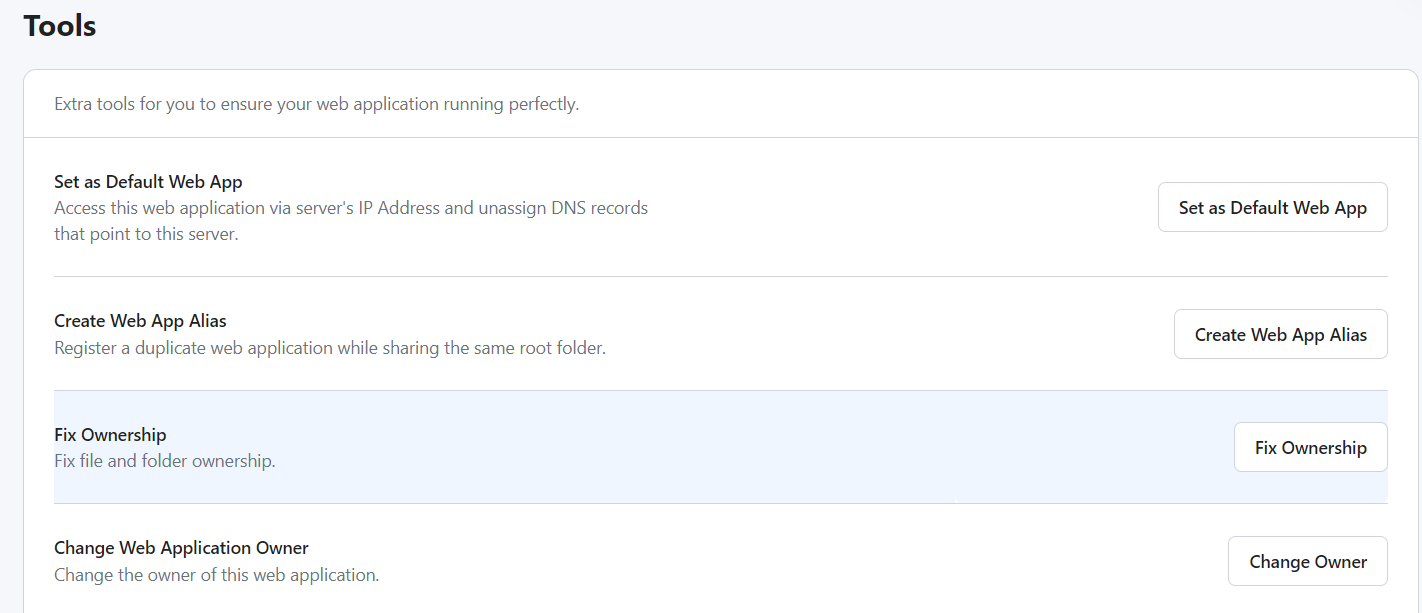
    Zend/Laminas: Enterprise-level framework with a steep learning curve.
    Lumen: Laravel’s micro-framework for microservices and APIs.
    Laravel stands out for its elegant syntax, robust features, and excellent documentation. It’s particularly strong in rapid application development and developer-friendly features.
    How do I install a new version of Laravel?

    To install a new version of Laravel, use Composer to create a new Laravel project:
    composer create-project –prefer-dist laravel/laravel project-name
    After installation, navigate to your project directory and set up your environment.

    What is Laravel’s latest version?

    Laravel 11, released in March 2024, is the latest version as of September 2024. Laravel typically releases major versions annually, so it’s always a good idea to check the official Laravel website or GitHub repository for the most current information.

    Do I need to install PHP before Laravel?

    Laravel is a PHP framework, so PHP is a prerequisite and must therefore be installed first.
    Install PHP on your system before installing Laravel.
    Ensure your PHP version meets Laravel’s requirements. For Laravel 11, PHP 8.2+ is required.
    Additional PHP extensions (such as  OpenSSL, PDO, Mbstring, Tokenizer, XML, Ctype, JSON) may be needed.
    Install Composer, the PHP dependency manager used to install Laravel.
    After setting up PHP and Composer, you can proceed with Laravel installation.

  • Laravel With Git Deployment The Right Way

    Laravel With Git Deployment The Right Way

    If you build and manage multiple web applications, then you are probably already using Git to manage and track your source code.

    Although Git is extremely useful in tracking the code, it can make the deployment process a little tricky, especially if you are working with a big team on a project with multiple branches.

    In this post, we will share step-by-step instructions on how you can use RunCloud to deploy your Laravel applications and streamline your entire workflow.

    Let’s get started!

    Prerequisites

    Before we get started, you need to make sure that you meet the following requrrements:

    git repository of laravel

    Suggested read: What is Laravel? Explain it like I’m five

    Step 1: Create a New Web App on RunCloud

    1. Log in to your RunCloud dashboard and click “Create Web App“.
    2. Choose “Git Repository” as the installation method and select your Git provider.
    3. Next you need to enter basic details such as the name of this application and the domain name that you want to use.
    1. After that, you need to fill-in the basic details about your git repository such as the name of the repository and the branch that you want to use. Pay close attention to the capitalisation as it might cause errors at a later stage.

    Suggested read: Setting Up Local WordPress Dev in Minutes Using Laravel Valet

    Step 2: Add Deployment Key to Git Provider

    1. After entering the details, you will see a deployment key which was automatically generated by RunCloud for your server. Adding the deployment key to your Git Repository allows RunCloud to access the source code in this repository on your behalf.
    2. Copy the provided deployment key and go to your Git provider’s dashboard and navigate to your repository’s settings.
    3. Find the “Deploy Keys” or similar section and add the copied key. For step-by-step instructions, refer to the documentation post specific to your git provider.

    Step 3: Deploy the Web Application

    After adding the key, you can return to the RunCloud dashboard and click on the “Deploy” button to initiate the deployment process.

    Wait for RunCloud to clone your repository and set up the initial files. This process usually takes less than a minute to complete.

    Step 4: Set Up Webhooks

    After you have deployed the web application on your server, RunCloud will generate a WebHook URL. This URL can be used to notify RunCloud when a new version of your application is available which is useful when you want to automatically deploy the latest version of your application.

    In the RunCloud dashboard, navigate to the “Git” menu for your web app and copy the webhook URL provided by RunCloud.

    Next, you need to go to your Git provider’s repository settings and find the “Webhooks” section. On this screen, create a new webhook and paste the RunCloud webhook URL. Make sure to set the content type to JSON, you can leave all other settings to their default values. After making the changes, save the webhook configuration.

    Suggested read: Laravel Octane – What It Is, Why It Matters & How To Take Advantage Of It

    Step 5: Configure Environment File

    RunCloud provides you a user friendly interface to edit the environment variables from RunCloud dashboard itself. But before you can access this interface, you need to make sure that the .env file exists in your repository.

    In this tutorial, we are using a boilerplate template which comes with .env.example file, we will simply rename it to .env. You can do this by opening the File Manager for your web app and locating the .env.example file in your project root. After that, click on the checkbox next to it and click on rename.

    If you don’t have an .env.example file, then you can simply create a new file named .env and leave it empty.

    Step 6: Install Dependencies

    Deploying an application to your RunCloud server merely clones the web application and configures the relevant settings. If you are using third party dependencies, then you will need to manually install them or create deployment scripts to automatically perform certain actions after the application is updated.

    If you don’t want to configure deployment scripts right now, then you can manually log in to server via SSH and navigate to your project’s root directory. Here, you can run the necessary commands to install or remove dependencies. For example, to install composer dependencies, you can run the following command:

    composer install
    composer install

    After installing the dependencies, you can also run the PHP artisan commands in this directory. For example, you can run php artisan key:generate to create new keys. However, later in this tutorial, we will show you a better way to do this.

    php artisan for laravel

    Step 7: Configure Web Application Settings

    After installing the dependencies, you need to tweak your application settings for it to work correctly. Firstly, you need to return to the RunCloud dashboard and go to your web app’s settings page. Here you will find the “Web Application Stack” section; in the “Public Path” field, add /public to change the publick path of your web application.

    changing public path for laravel

    Next, you need to select “Laravel” from the application type drop-down menu and save the setting. After making these changes, you can configure other settings like domain name, setting up SSL certificates for your web application, connecting a database to your application, configuring automated backups.

    Step 8: Final Checks and Testing

    After creating the application, you can visit your web app’s URL to ensure it’s functioning correctly. Start by test key features of your Laravel application to verify proper setup. Next, we recommend you to make a small change in your Git repository and push it to test the automatic deployment via webhook. If the webhook was successful, you will see a corresponding entry in the “Webhooks History” section.

    Step 9 (Bonus): Leverage RunCloud’s Laravel Management Features

    Now, as we promised earlier, we will show you how to use RunCloud to manage your Laravel applications smoothly. After changing your web application stack, you will see a new “Laravel” section in the left menu, this unlocks a bunch of new features for you.

    Firstly, you can easily view and update environment variables directly from the RunCloud dashboard. This eliminates the need for manually editing and updating .env files.

    Next, you can run Artisan commands with a single click through the RunCloud interface and keep track of which command was executed in the log entries. This eliminates the need to log into your server which can be slow and tedious.

    Finally, you can take advantage of RunCloud’s monitoring dashboard to keep track of your resource usage and identify slow scripts.

    Suggested read: How To Configure LSCache for Laravel (Configuration Guide)

    Final Thoughts

    In this guide, we’ve covered how to use Laravel and deploy applications to RunCloud in minutes. RunCloud is a powerful tool that significantly simplifies server and application management. RunCloud works with a variety of platforms and frameworks, not just Laravel. It supports:

    Start using RunCloud today and experience the ease of managing your web applications. Whether you’re a solo developer or part of a team, RunCloud can streamline your deployment process and server management tasks.

    Ready to simplify your web application deployment and management? Sign up for RunCloud today!

  • What is Laravel? A Comprehensive Guide for 2026

    What is Laravel? A Comprehensive Guide for 2026

    Building a modern web application from scratch can feel like trying to build a car by hand. But what if you had a high-end assembly line and a team of expert engineers ready to help you?

    You can do this by using Laravel.

    Laravel has become the gold standard for web development because it turns complex, repetitive coding into a clean and elegant experience. Whether you’re a curious beginner writing your first line of PHP or a developer looking to scale a massive enterprise project, Laravel provides the tools you need to build faster and more securely.

    In this guide, we’ll break down exactly what Laravel is, explore the “magic” behind its core features, and show you why it’s the top choice for developers in 2026.

    TL;DR

    FeatureDescription
    What is Laravel?Laravel is a free, open-source PHP web framework based on the MVC architecture.
    What is Laravel best for?Laravel is best for building full-stack web applications, from simple sites to complex enterprise systems.
    What are the key features of Laravel?The key features of Laravel include Eloquent ORM, Blade Templating, Artisan CLI, Built-in Authentication, and MVC Architecture.
    What are the main advantages of Laravel?The advantages of Laravel include speeding up development with elegant syntax and a rich set of pre-built components

    Suggested Read: How to Install and Deploy Bagisto (Laravel eCommerce) 

    The MVC Architecture in Laravel

    Let’s imagine you’re building a house. You wouldn’t mix your plumbing, electrical wiring, and interior design into one big pile. You’d keep them separate, so the plumber can work without tripping over the electrician. In the world of web development, the Model-View-Controller (or MVC) architecture does the same thing for your code.

    The primary goal of this architecture is to separate the application’s logic from its presentation. Let’s break down what each part does:

    • The Model (The Brains for Your Data)
      The Model is your direct link to the database. We can think of it as the part of your app that’s responsible for handling all the data. If you have a table of users, you’ll have a “User” model that can fetch, update, and create new users in that table. It manages the rules and relationships of your data. For example, the model ensures an email address is always saved in the correct format.
    • The View (The Face of your application)
      The View is what your users actually see. In Laravel, views are simple files that contain your site’s presentation code. Their only job is to display the data they are given. They don’t know where the data came from; they just know how to make it look good. This separation means your designer can work on the look and feel without ever touching the core application logic.
    • The Controller (The Traffic Director)
      The Controller acts as the intermediary between the Model and the View. When a user visits a URL on your site, Laravel’s routing system sends the request to a specific controller. The controller then processes the request. It might ask the Model to fetch some data from the database, handle user sessions, or perform some calculations. Once it has the data it needs, the controller passes it to the View, which then displays the final page to the user.
    laravel framework tutorial

    By keeping these three parts separate, Laravel makes your application easier to build, debug, and maintain.

    Suggested Read: Installing Laravel on RunCloud 

    Laravel’s Core Features and Tools

    Laravel comes with a suite of powerful tools that make it easier to build professional web applications faster and more enjoyably:

    Artisan CLI

    The Artisan CLI (Command-Line Interface) is one of Laravel’s most beloved features. Instead of manually creating files and folders for new components, you can just tell Artisan to do it for you. You can run simple commands in your terminal to handle complex tasks. For example:
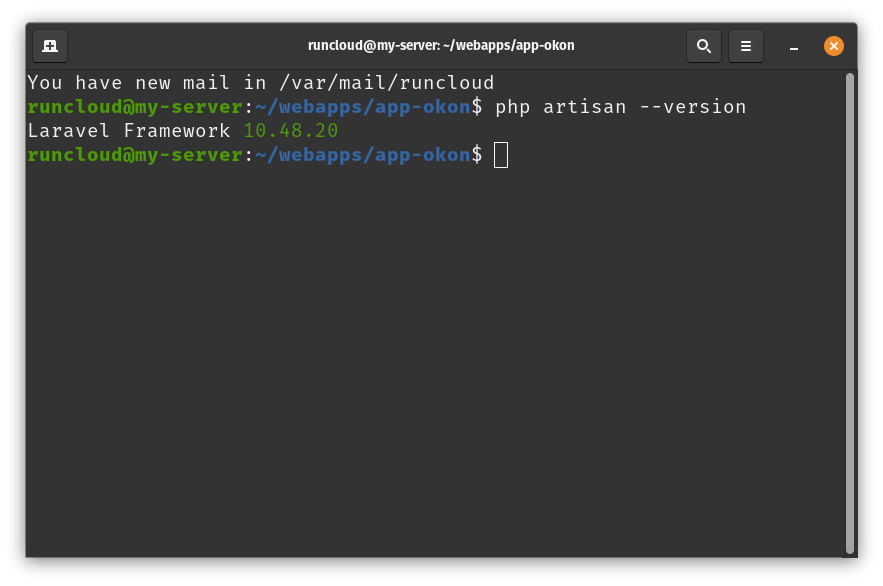
    • php artisan make:controller ProductController: Instantly creates a new controller file named ProductController with all the boilerplate code ready to go.
    • php artisan make:model Product: Creates a new Eloquent model for your products table.
    • php artisan migrate: Runs your database migrations, which are like version control for your database, allowing you to easily build and modify your table structure.

    RunCloud further streamlines development by allowing you to execute php artisan commands directly from its dashboard. This feature eliminates the need to manually log in to your server via SSH every time you need to clear the cache, run migrations, or perform other common maintenance tasks.

    Suggested Read: How to Deploy Laravel with Docker on VPS 

    Blade Template Engine

    Writing HTML and PHP together can get messy. The Blade template engine cleans it all up. Blade is Laravel’s way of letting you write clean, readable templates that are then compiled into plain PHP. Blade also provides simple directives for loops, conditional statements, and more, making it incredibly easy to build dynamic views. 

    Built-in ORM

    Interacting with a database requires writing complex SQL queries. Laravel simplifies this with the Eloquent ORM (Object-Relational Mapper). Eloquent allows you to work with your database tables as if they were simple PHP objects.

    For example, instead of writing an SQL query to get all users from your database, you can just write:

    $users = User::all();

    Eloquent handles the underlying SQL for you, which makes your code more readable and less prone to errors. 

    Built-in Authentication & Security

    Building a secure login and registration system from scratch is difficult and risky. Laravel provides built-in authentication systems right out of the box. With just a few Artisan commands, you can scaffold a complete user login, registration, and password reset system.

    Using a built-in mechanism ensures you’re protected against common vulnerabilities such as SQL injection and cross-site scripting (XSS). For password security, Laravel uses the strong Bcrypt hashing algorithm by default, ensuring that user passwords are never stored in plain text and are safely encrypted.

    Suggested Read: How to Upload an Image File in Laravel 

    The Benefits and Advantages of Using Laravel

    When you choose a web framework, you are making a decision that will impact your entire development process. Here are some of the reasons why developers and businesses choose Laravel:

    You Will Build and Launch Faster

    Laravel is designed for developer productivity. Its expressive syntax allows you to write clean, readable code that is easy to maintain. As a premier MVC framework, its organized structure removes the guesswork from building applications, allowing you to focus on creating features instead of reinventing the wheel.

    Additionally, Laravel’s modular packaging system and its integration with Composer give you access to thousands of pre-built packages. Need to integrate a payment gateway or connect to a third-party API? You can pull in a package and get started immediately, dramatically shortening your development cycle.

    Suggested Read: How To Set Up & Configure Laravel Octane | RunCloud Docs 

    You Can Build with Confidence in Your Security

    Laravel provides out-of-the-box protection against the most common web vulnerabilities, including SQL injection, cross-site request forgery (CSRF), and cross-site scripting (XSS). Its Eloquent ORM uses PDO (PHP Data Objects) parameter binding to prevent SQL injection attacks, and the framework automatically includes a CSRF token on every request to protect your application from malicious users. 

    You Can Scale Your Application as You Grow

    Your application’s needs will change over time, and Laravel is built to scale with you. Its architecture supports the development of everything from simple hobby projects to large-scale enterprise applications handling millions of requests.

    The framework also includes built-in support for distributed caching systems such as Redis and a powerful queue system that offloads time-consuming tasks, ensuring your application remains fast and responsive even under heavy load. 

    Suggested Read: Set Up Laravel with Git Deployment | RunCloud Docs 

    The Laravel Ecosystem and Extensions

    In addition to the core framework, Laravel provides a world-class ecosystem of tools, resources, and community support that allows developers to build, deploy, and manage applications with ease. This rich ecosystem is one of the primary reasons developers commit to the framework for the long term.

    Seamless Deployment and Management

    Laravel takes the pain out of deploying your application. With official tools such as Laravel Forge, you can provision and manage high-performance servers on providers including AWS, DigitalOcean, and Vultr without ever leaving a web dashboard. 

    While Laravel Forge provides an excellent official deployment solution, many developers choose alternative platforms for server management.

    One popular choice is RunCloud, a server panel that simplifies the setup, deployment, and management of PHP applications, including those built with Laravel, on various cloud providers.

    RunCloud offers features that are highly beneficial for Laravel developers:

    • Atomic Deployment: Ensures zero downtime during code deployments.
    • Security Hardening: Automatically secures your server with firewalls and other best practices.
    • Resource Management: Tools to monitor and manage server resources.

    Suggested Read: Setup Laravel with Atomic Deployment 

    Official and Community Packages

    The biggest strength of a modern framework is in its package management, and Laravel uses Composer to manage its dependencies. Composer is a popular PHP package manager that provides access to a vast library of open-source packages on Packagist.

    The Laravel team also provides a suite of official packages that offer powerful functionality with minimal setup. For example:

    • Socialite: Provides a fluent, expressive interface for authenticating with OAuth providers like Google, Facebook, and Twitter.
    • Prompts: A library to build user-friendly CLI applications.

    A Thriving and Supportive Community

    When you build with Laravel, you’re never alone. It has one of the most active and welcoming developer communities in the world. You can find answers to your questions through Laracasts (an extensive video tutorial platform), official documentation, and vibrant online forums.

    The RunCloud Community is a vibrant platform where you can connect with other developers and Laravel experts. Whether you have a complex deployment question, need advice on optimizing your Laravel application’s performance, or just want to share your latest project, you can start a new thread or chime in on existing conversations to get support directly from people who use Laravel and RunCloud every day. 

    Final Thoughts

    Throughout this guide, we’ve explored why Laravel has earned its reputation as the most popular PHP framework in the world. 

    Whether you’re a novice developer writing your first “Hello World” or an enterprise architect building a global platform, Laravel provides the scalability, security, and speed you need to succeed.

    Once you’ve built your Laravel application, the next big challenge is getting it online. For many developers, managing a server (handling security updates, configuring PHP versions, and setting up SSL certificates) is a time-consuming task that takes focus away from what really matters: your code.

    This is where RunCloud comes in.

    The best way to deploy your Laravel applications is through a managed panel that understands the framework’s specific needs. RunCloud allows you to connect your own server (from providers like AWS, DigitalOcean, or Vultr) and automates the entire setup process.

    With RunCloud, you benefit from:

    • Automatic SSL (Let’s Encrypt) setup.
    • Atomic deployments (zero downtime when you push new code).
    • Server-level security and optimization right out of the box.

    Sign Up for RunCloud Today and Deploy Your First Laravel Site in Minutes

    Frequently Asked Questions About Laravel

    Is Laravel easy to learn?

    Laravel is one of the most popular and easy-to-learn frameworks for web development. It has a clear and elegant syntax, a well-designed structure, and a comprehensive documentation. It also has a friendly and supportive community that can help you with any questions or issues. If you have some basic knowledge of PHP, HTML, CSS, and JavaScript, you can start learning Laravel in no time.

    What is the best way to learn Laravel?

    The best way to learn Laravel is by doing. You can follow the official Laravel documentation, which guides you through the basics of the framework and shows you how to create a simple blog application. You can also watch online tutorials, read books and blogs, and join online courses that teach you Laravel.
    But the most important thing is to practice and build your own projects with Laravel. This will help you improve your skills and confidence, and also give you a portfolio to showcase your work.

    Can I learn Laravel without PHP?

    Laravel is a PHP framework, which means it is built on top of PHP and uses PHP as its main programming language. Therefore, you need to learn PHP before you can learn Laravel. PHP is a widely used and powerful language for web development, and it is not very difficult to learn. Once you have a basic grasp of PHP, you can move on to Laravel and enjoy its benefits.

    Is Laravel front-end or back-end?

    Laravel is primarily a back-end (server-side) framework. It handles the “behind the scenes” work, such as communicating with the database, processing user data, and managing security. However, Laravel is a full-stack capable framework. This means it can also manage your front-end by serving HTML templates with its Blade engine or by seamlessly integrating with modern JavaScript frameworks, such as Vue or React, via tools like Inertia.js.

    Is Laravel good for beginners?

    Yes, absolutely! While it offers many features, Laravel is famous for its best-in-class documentation. If you have a basic understanding of PHP, you can follow the official “Getting Started” guide and have an app running in minutes. Beginners often struggle with the “magic” (things happening automatically), but resources such as Laracasts (the “Netflix for developers”) make learning every concept incredibly visual and simple.

    How does Laravel compare to Symfony or CodeIgniter?

    Think of it like this:
    Symfony is like a high-end toolkit for building complex, enterprise-level engines. In fact, Laravel actually uses several Symfony components under its hood.
    CodeIgniter is a lightweight, “no-nonsense” framework that is very fast and simple, but it doesn’t offer as many built-in features as Laravel.
    Laravel is the “middle ground” that provides the power of Symfony with the ease of use of CodeIgniter. It comes with “batteries included,” meaning most things you need (like login systems) are already built in.

    What is the purpose of Composer in Laravel?

    Composer is the tool that “gets” parts (packages) for your Laravel project. Without Composer, you wouldn’t be able to install Laravel or add new features (like payment processing or image resizing) created by other developers.

    I’m seeing a “Permission Denied” or “500 Error”. What did I do wrong?

    This is the #1 trouble for beginners! Most of the time, this happens because Laravel needs write permissions to certain folders. Another common issue is forgetting to create your .env file (your environment configuration). Always ensure you’ve run php artisan key:generate to set your application’s security key, which “unlocks” the framework for use.

    Do I need to be a PHP expert to use Laravel?

    You don’t need to be an expert, but you should understand the basics of Object-Oriented Programming (OOP). Laravel uses classes and objects heavily. If you know what a “variable,” an “array,” and a “function” are, you are ready to start. Laravel’s expressive syntax is actually designed to read like English, which often helps beginners learn better PHP coding habits as they go.

  • Laravel Octane – What It Is, Why It Matters & How To Take Advantage Of It

    Laravel Octane – What It Is, Why It Matters & How To Take Advantage Of It

    Laravel Octane is the latest Laravel open-source package, introduced by Taylor Otwell during his Laracon Online Talk last May 12th, 2021.

    The new Laravel package is a bigger and better version of Laravel. It’s powered by Roadrunner and Swoole, where you can store your Laravel server and website to let it handle all requests and boot-up processes. It’s faster, has a bunch of new features, and might be the future of Laravel web development.

    This guide will go over everything you need to know about Laravel Octane. What it is, why it matters, and how you can get started.

    What is Laravel Octane?

    Laravel Octane is an open-source package that boosts your Laravel application performance through stateful PHP programming.

    The package itself comes with dependencies and libraries for new features (mentioned below) and compatibility with high-performance servers such as RoadRunner and Swoole.

    Laravel VS Laravel Octane

    Laravel Octane runs on top of Laravel and PHP version 8.0 and above. It’s an addition to standard Laravel and is not a separate language.

    When comparing performance, standard Laravel apps can process up to 500 requests per second at best, while Laravel Octane easily passes 2,000 requests alone. While the data across numerous sources for this will vary somewhat, the consensus is that Laravel Octane performs at least 10x better than traditional Laravel – and that’s based on conservative estimates.

    Laravel Octane operates differently from traditional Laravel apps when it comes to servers as well. Octane has its own server through Swoole and RoadRunner, which Nginx and Apache should redirect to for incoming traffic.

    However, another key difference between standard Laravel and Laravel Octane is in PHP usage. Laravel Octane changes your PHP stack into a semi-stateful PHP framework.

    NOTE: Some sources will outright say that Laravel Octane uses a stateful PHP framework. But, since PHP is naturally stateless and most PHP developers are used to programming stateless frameworks, the Laravel Team made Laravel Octane only partially stateful. PHP libraries are also not ready to program Laravel in a completely stateful framework.

    Before proceeding with the article, one of the biggest factors you’ll need to consider before trying out Laravel Octane is the fact that you’ll have to learn stateful programming.

    Stateful PHP vs Stateless PHP

    Let’s try to break down the difference between stateful and stateless PHP without being too technical.

    Stateless PHP has servers that can act independently from a user or client’s request. The servers store user information and open the info file, send the requested query to the user or server, and then close the info file. This simplifies the design process because the info files are only opened when needed and will always be up to date for every new request.

    On the other hand, Stateful PHP utilizes servers that act together with a client or user. The servers store user information and actively remembers this data as if the info file is open throughout the entire session. This makes the user-side process faster since operations like opening and closing information files no longer need to happen.

    Real-life Example of Stateful vs Stateless PHP

    It’s easier to understand the differences between these two with a real-life example. So, here’s a simple analogy:

    You’re logging into your RunCloud account to access your personal dashboard. This dashboard contains personal information that only your account has access to. How does RunCloud know that you have access to the dashboard?

    Stateless ServersStateful Servers
    The server stores a record signifying that you just logged into your RunCloud account. When you open your dashboard, the RunCloud server opens the record and sees that you logged in with the correct credentials, then closes the record again. This process repeats every time you go from page to page.The server recognizes that you just logged into your RunCloud account and will keep this information open until you logout or end your session. During your entire session, even as you move from page to page, the RunCloud server will remember that you logged in correctly and won’t have to open and close the records to verify this.

    Aside from the contrasts in how these two work, the way of coding and thinking of stateful vs stateless PHP is also different. If you’re thinking of picking up Laravel Octane, you’ll have to dedicate some time to adapting and learning this new framework.

    Why is Laravel Octane Stateful and Why Is It Faster?

    Laravel Octane needed to adapt a stateful framework because it’s faster. Traditionally, the standard Laravel process creates a PHP worker for every incoming request (like opening a page). This means starting up an individual PHP process that needs to boot and prepare the framework before serving that one request.

    To put that into context, that PHP worker would need to boot the framework and all of the service providers it uses. It would have to register those services within that container and then boot the providers. After that, the request goes through a list of middleware classes, hitting your controller, then finally rendering a view that opens up on your computer (opening a page).

    With Laravel Octane, all the HTTP requests share the same booted framework. This means that once the framework is booted (when the website is opened for the first time), any request after that will make use of the framework that’s already been booted. Laravel Octane will not have to boot a new framework for every request, thereby decreasing the workload. This is why Laravel Octane is so much faster than traditional Laravel.

    The reason why Laravel Octane can do this effectively is because of high-performance servers like Swoole and RoadRunner.

    Swoole VS RoadRunner

    Swoole and RoadRunner are two high-performance PHP servers that can manage PHP processes across strenuous and large-traffic scenarios.

    Laravel Octane lets you choose between running Swoole or RoadRunner for your website.

    Swoole is firstly a PHP extension, which means you’ll need to compile it on top of your PHP build during the setup. If you can get past that, Swoole is faster than RoadRunner and adds some custom PHP Laravel-related features for development. On the downside though, Swoole does not work with Xdebug, the most popular debugging tool for PHP. There are also cases where monitoring tools like New Relic and Datadog don’t work reliably with Swoole because it’s incompatible with Swoole’s co-routine and CLI environment.

    RoadRunner, alternatively, works as a replacement for PHP-FPM. It doesn’t need to be compiled with your PHP files, making it easier to deploy and install on your Laravel website from the start. The only downside to RoadRunner is that it’s not as fast as Swoole and doesn’t come with Swoole’s PHP features. Other than that, it works right out of the box, and really well, if you want immediate performance improvements without modifying your PHP files.
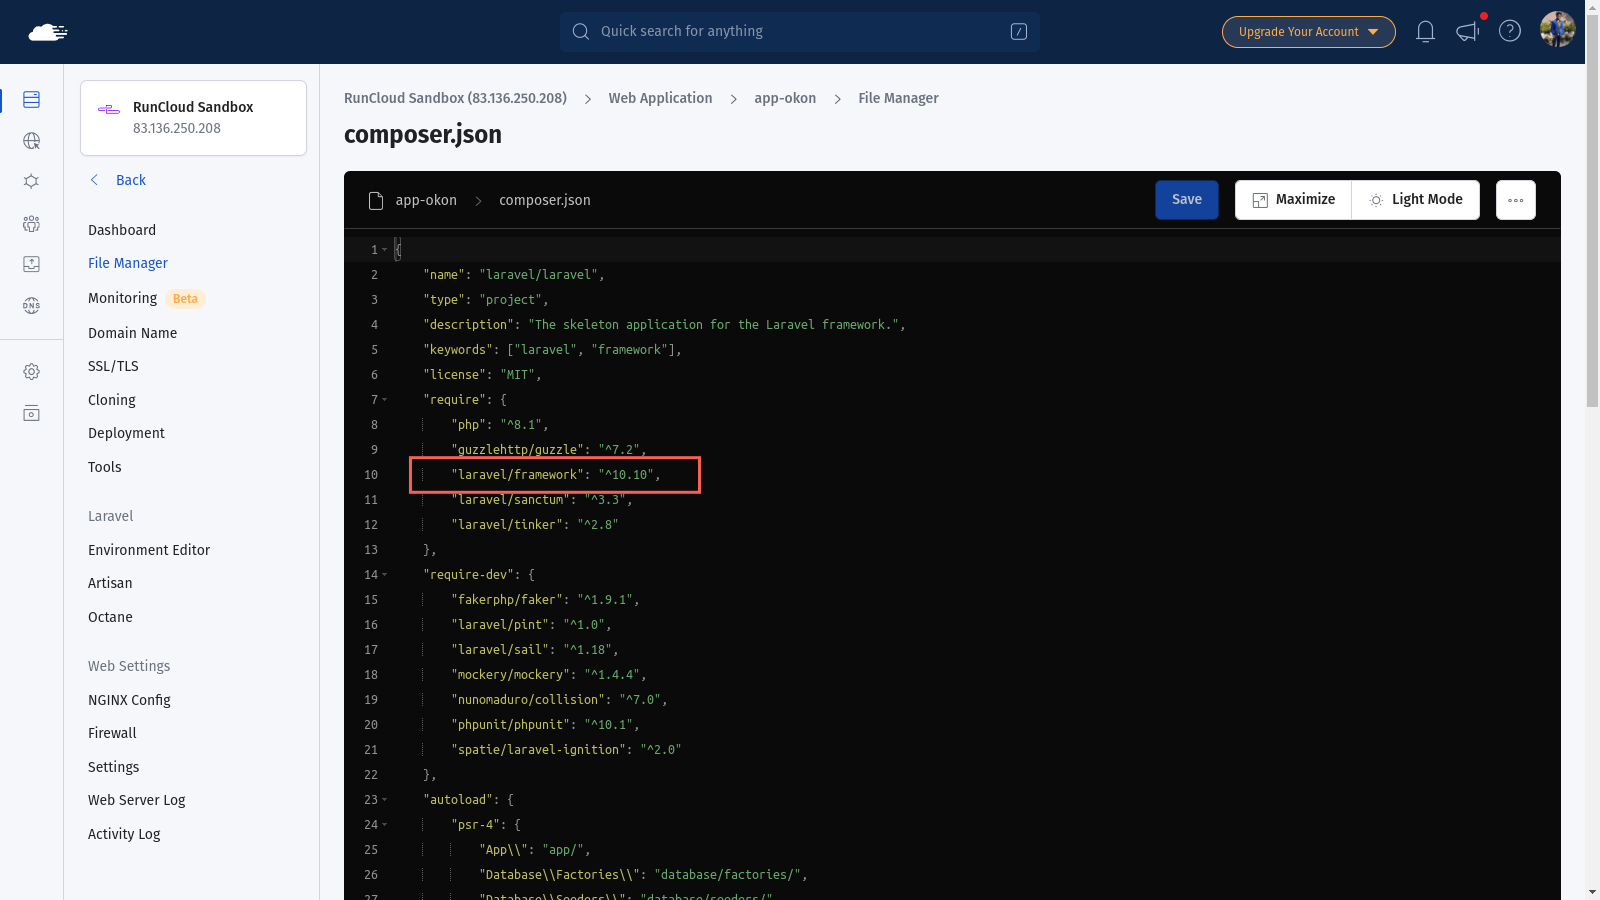
    Should You Use Laravel Octane?

    So, since speed is the number one key metric for a better-performing website, should you update your PHP version and start installing Laravel Octane?

    The short answer is that it will depend on your needs. ‘Yes’ if your website is struggling with performance, and ‘No’ if you can help it.

    Laravel Octane requires PHP version 8.0 and the adoption of a stateful programming convention.

    • There are tons of websites that run on older versions of PHP that will have to update their system just to use Laravel Octane.
    • If your development team isn’t familiar with using a stateful framework, they will also have to dedicate some time to figuring that out before adopting Laravel Octane.

    If these two issues are not a problem, then we can wholeheartedly recommend the improvement. Outside of that, unless your site is crawling and struggling from the magnitude of processes your server is handling, you may not need to upgrade to Laravel Octane.

    Laravel Octane Key Features

    To help you weigh your choices better, we’ve listed some key features from Laravel Octane, besides the obvious performance benefits. Most of these features will only apply to Laravel Octane that’s running with Swoole, so keep that in mind while reading through the list.

    Octane Workers

    PHP workers are traditionally created every time an incoming request is received. With Laravel Octane, multiple workers are created from the start making it faster for the server to immediately service requests as they are received.

    You can even specify how many workers you want to begin with, as well as the number of workers you want to initialize per CPU core. Having multiple workers helps because if one worker is busy with a task, the other worker can start servicing other requests from the user without any delays. This is how Swoole and RoadRunner increase performance by large margins.

    Here’s the code for that through Artisan:

    php artisan octane:start --workers=4

    If you’re using Swoole, you can also specify the number of task workers with this command. We’ll talk more about task workers below.

    php artisan octane:start --workers=4 --task-workers=6

    Be careful about how many workers you’ll initialize per CPU core though. The use case for this will vary from site to site and will depend on how intensive your processes are. We don’t recommend reconfiguring the Octane worker settings unless you know what you’re doing.

    Concurrent Tasks

    Laravel Octane also allows you to perform concurrent tasks, meaning these tasks will be done at the same time and not after each other. You can do this through task workers, which will only be available depending on the number you set with the octane:start command.

    php artisan octane:start --workers=4 --task-workers=6

    These task workers are separate from the web workers that receive web requests. If you want to process a task and keep a web worker busy, you can defer the task to a task worker instead.

    This feature is only available for Swoole.

    Ticks or Intervals

    Ticks make operations execute repeatedly after a specific number of seconds. These are also referred to as internals just like the setInterval method in JavaScript. Here’s what the command looks like.

    Octane::tick('simple-ticker', fn () => ray('Ticking...'))
           ->seconds(10);

    Where:

    • ‘simple-ticker’ represents the name of the ticker as a string
    • fn () => ray(‘Ticking…’) is the callable that is executed after every interval

    As of writing, there is no command to stop these ticks from running, so keep that in mind when using this feature.

    This feature is only available for Swoole.

    Octane Cache

    The Laravel Octane cache driver is powered by Swoole tables, which we’ll also talk about below.

    The cache driver reads and writes up to 2 million operations per second, making it a fast and excellent upgrade from your current caching system. It’s an in-memory cache, meaning the data will flush out when the server is restarted, so keep that in mind. This is the command you’ll need to activate the cache:

    Cache::store('octane')->put('framework', 'Laravel', 30);

    Another feature that’s related to Octane caching is being able to set a cache interval. This means you can refresh the data in the octane cache at given intervals. Here’s how you can do that.

    use Illuminate\Support\Str;
     
    Cache::store('octane')->interval('random', function () {
       return Str::random(10);
    }, seconds: 5);

    This feature is only available for Swoole.

    Octane Tables

    Swoole tables are extremely fast and provide a huge boost of performance to your server. This is because Swoole tables can be accessed by all the workers on the server, making operations and data retrieval all the faster. The only caveat to this is that all the data in the tables will be lost when the server restarts.

    Tables are defined within the table configuration array inside your application’s octane config file. The file will have a default table of 1,000 rows, but you can reconfigure that to your needs. It should look something like this:

    'tables' => [
       'example:1000' => [
           'name' => 'string:1000',
           'votes' => 'int',
       ],
    ],

    The code for accessing a table goes through the Octane::table method.

    use Laravel\Octane\Facades\Octane;
     
    Octane::table('example')->set('uuid', [
       'name' => 'Nuno Maduro',
       'votes' => 1000,
    ]);
     
    return Octane::table('example')->get('uuid');

    The Swoole table only supports string, int, and float for the column types.

    This feature is only available for Swoole.

    How to Install Laravel Octane

    Now that you know the benefits of using Laravel Octane as well as its key features, it’s time to teach you how to install it. Thankfully, since Laravel Octane is just a package, the installation process is the same as installing a dependency.

    NOTE: Laravel Octane needs PHP version 8.0+ to work.

    You can install Laravel Octane using the following command through the Composer package manager:

    composer require Laravel/octane

    This will download the Laravel Octane package. Once that’s done, install it with the help of the following command.

    php artisan octane:install

    The command will generate a configuration file config/octane.php. When you’re done installing Octane, it’s time to choose between RoadRunner and Swoole. Remember, RoadRunner is the easiest one to install as it works on top of your Laravel site, but it’s less powerful than Swoole. On the other hand, Swoole is a PHP extension which means you’ll have to compile it together with your PHP files and have it run with them.

    RoadRunner

    You can choose Roadrunner if you don’t want to install any other application packages and don’t need the extra features that come with Swoole.

    1. To start with RoadRunner, open up the config file that was generated when we installed Laravel Octane.
    2. In the file, replace the ‘server’ key into ‘roadrunner’.

    After that, run this command through composer:

    composer require spiral/roadrunner

    This will install RoadRunner to your server.

    Swoole

    As mentioned before, Swoole is much more powerful than RoadRunner and comes with some extra PHP features. Here’s how you can install Swoole:
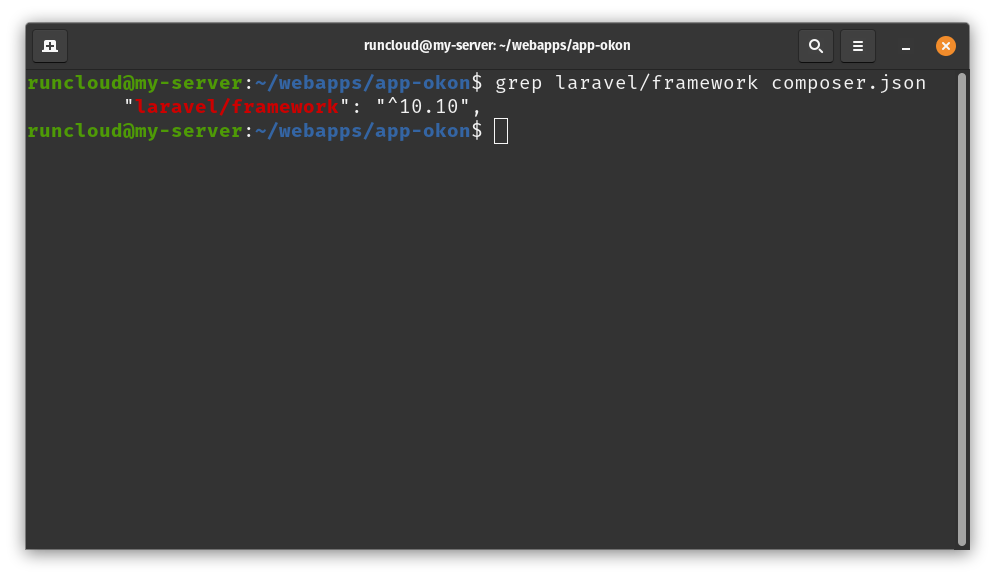
    1. Open your PECL and run the command: pecl install swoole
    2. While the installation is happening, you’ll be asked if you have support for certain technologies within Swoole. You can safely stick to default values here and proceed.

    Once Swoole is done installing, we can proceed with the next step and run the server.

    Running Laravel Octane

    With either Swoole and RoadRunner installed, you can now launch Laravel Octane with the following command:

    php artisan octane:start

    After Action Report — Install Laravel Octane on RunCloud

    Laravel Octane can be a game changer for your website, or it can be completely unnecessary — in the end, it all depends on your needs.

    There is a learning curve to mastering Laravel Octane, but the benefits of implementing Laravel Octane can be tremendous.
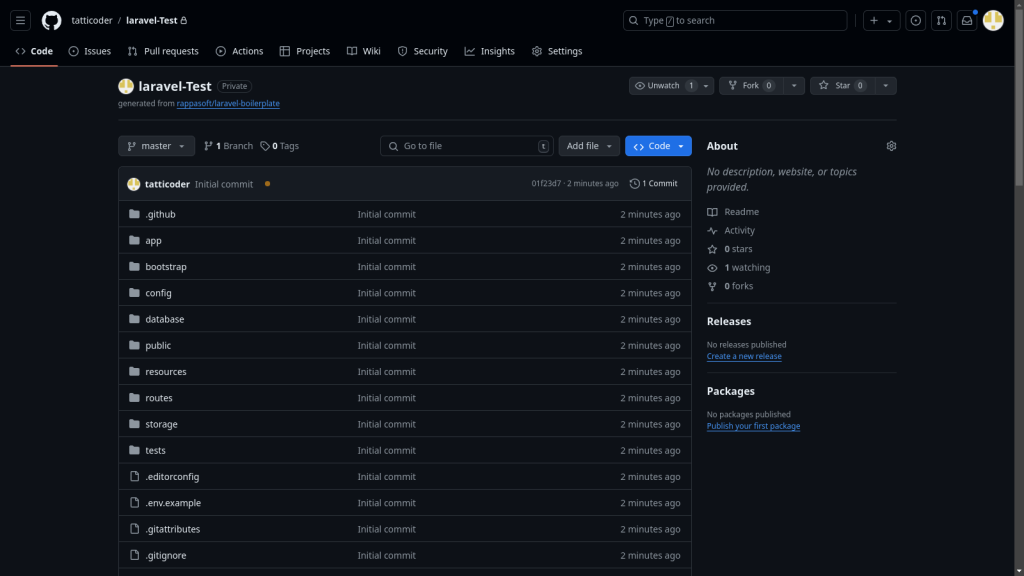
    Thinking about installing Laravel Octane on your RunCloud server? Follow our full step-by-step guide here!

    What are your thoughts on Laravel Octane? Did you try to implement it? Let’s talk in the comments below! 💬