Category: WordPress

  • How to Reduce the Impact of Third-Party Code (With/Without Plugins)

    How to Reduce the Impact of Third-Party Code (With/Without Plugins)

    You can optimize images, install caching plugins, and follow every speed guide out there – and still end up with a slow site.

    The usual culprit is third-party scripts adding hidden delays.

    This guide shows you how to find them, assess their impact, and fix the problem with simple tools.

    What Are Third-Party Scripts?

    Third-party scripts are bits of code that you add to your site but are not hosted by you. When you copy-paste a tracking code from Google Analytics or a snippet for your Facebook Pixel, you are adding a third-party script. These scripts run from someone else’s server, completely outside of your control.

    Most sites load several of these without thinking about the cost. They usually fall into a few groups:

    1. Analytics: Scripts that track your visitors, like Google Analytics, Matomo, or heatmap services like Hotjar.
    2. Advertising: Code that displays ads or tracks ad conversions, such as Google AdSense, Media.net, or the Facebook Pixel.
    3. Customer Interaction: Tools that engage your users, including live chat widgets (Tawk.to, Intercom) or third-party comment systems like Disqus.
    4. Content & Social Media: Embeds that pull in content from other platforms, like YouTube/Vimeo videos, Google Fonts, and social media share button plugins.

    Each of these adds value, but together they can create a performance nightmare. Later in this post, we’ll show you how to identify which ones are causing the most damage.

    Why Are Third-Party Scripts a Problem?

    We add new tools and scripts to our sites because they provide valuable features, but they often come with a hidden performance cost. Understanding why they slow things down will help us fix the problem.

    The External Wait

    Your website’s server quickly prepares your content, but the user’s browser must wait for a response from every other server you’ve linked to. For example, Google’s server for Analytics, Facebook’s server for the Pixel, your chat widget’s server, and so on.

    You have zero control over how fast those other servers are. If one of them is slow or temporarily down, your entire website is forced to wait.

    Render-Blocking

    When a visitor arrives at your site, their browser begins parsing the HTML document of your site from top to bottom. The parser works its way down the HTML file, and suddenly it encounters a standard <script> tag, like this:

    <script src="https://example.com/en_US/script.js"></script>

    A normal script tag loads in strict order. When the browser hits it, everything else stops until the file is fetched and executed. That pause is what creates the blank-screen delay users see.

    1. Halt DOM Construction: The parser immediately stops reading any more HTML. It cannot build any more of the page’s “skeleton” until this script is fully handled.
    2. Initiate Network Fetch: The browser must now make a completely new network request to the third-party server (in this case, example.com). This process alone has multiple potential delays, including DNS lookup, establishing a secure connection, and waiting for the external server to respond.
    3. Download the File: The browser waits to download the entire JavaScript file. If the user is on a slow connection or the external server is sluggish, this can take a significant amount of time.
    4. Execute the Script: Once the script is downloaded, the browser’s JavaScript engine must execute it from start to finish immediately. This consumes your visitor’s device CPU and memory. The browser must do this before continuing because the script could theoretically contain code (such as the old document.write() command) that alters the very structure of the DOM.
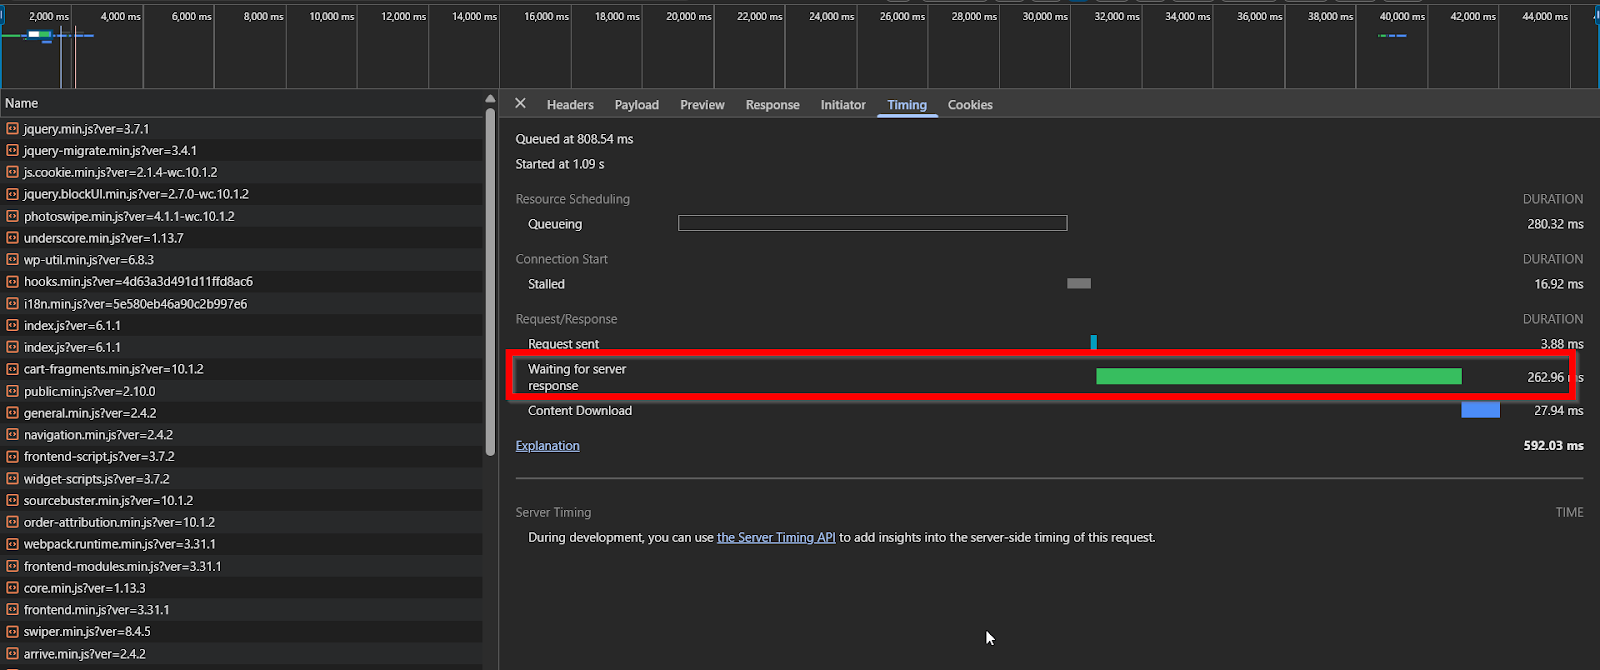
    render blockig javascript

    For the visitor, this entire sequence happens while they are staring at a blank white screen. Nothing can be painted or “rendered” for them to see because the browser’s main thread is completely tied up. This directly delays crucial performance metrics, such as First Contentful Paint (FCP), which measures the moment the first tangible content appears on the screen.

    Code Bloat

    Each additional script adds extra JavaScript and CSS files that your visitors’ browsers must download, unpack, and process. This “code bloat” consumes more of your visitors’ mobile data, drains their device’s battery, and forces their browser’s processor to work overtime, leading to a sluggish experience, especially on less powerful mobile devices.

    How to Optimize Third-Party Scripts on WordPress

    The problems mentioned above sound technical and intimidating, but we have great news: you don’t need to be a developer to fix them.

    We will guide you through a straightforward, step-by-step process to identify, audit, and optimize these scripts.

    Step 1: Finding Your Slow Script Offenders

    Before we can start optimizing a script, we need to identify it first. You need a reliable tool that can scan your website and report back exactly which third-party services are running, and more importantly, which ones are causing the biggest delays.

    Step 1.1: Choose Your Speed Test Tool

    You have several great options, but for beginners, we recommend starting with one primary tool.

    • Our Top Recommendation: Google PageSpeed Insights
      This is the industry standard. It’s free, run by Google, and focuses on Core Web Vitals.
    • A Great Alternative: GTmetrix
      GTmetrix provides incredibly detailed reports. Its most helpful feature for our purpose is the “Waterfall” chart, which provides a powerful visual timeline of every file loading on your page. This helps you literally see the scripts that are taking the longest to load. We’ll start with PSI, but it’s good to know GTmetrix is there if you want to dig deeper.

    If you are looking for more recommendations, consider reading our previous article, 8 Best GTmetrix Alternatives for Website Performance Testing (Includes Free). 

    Step 1.2: Running the Test

    This is the easiest part of the entire process.

    1. Open your web browser and navigate to the Google PageSpeed Insights website.
    2. In another tab, go to your website and copy the full URL from the address bar (e.g., https://www.example.com/).
    3. Paste your URL into the analysis box on the PageSpeed Insights page and click the “Analyze” button.

    The tool will take 30-60 seconds to scan your site and generate a comprehensive report.

    Step 1.3: Reading the Report

    The PageSpeed Insights report can look overwhelming, with scores and technical terms everywhere. If you want to learn more about this, then you can read our full-length article on How to Optimize Your Site for Google’s Core Web Vitals.

    However, if you just want to improve the scripts, you can ignore all that for now and scroll down the page past the colored circles and the sections labeled “Opportunities” and “Diagnostics.”

    You need to look for a specific diagnostic heading called “Reduce the impact of third-party code.” This is your goldmine.
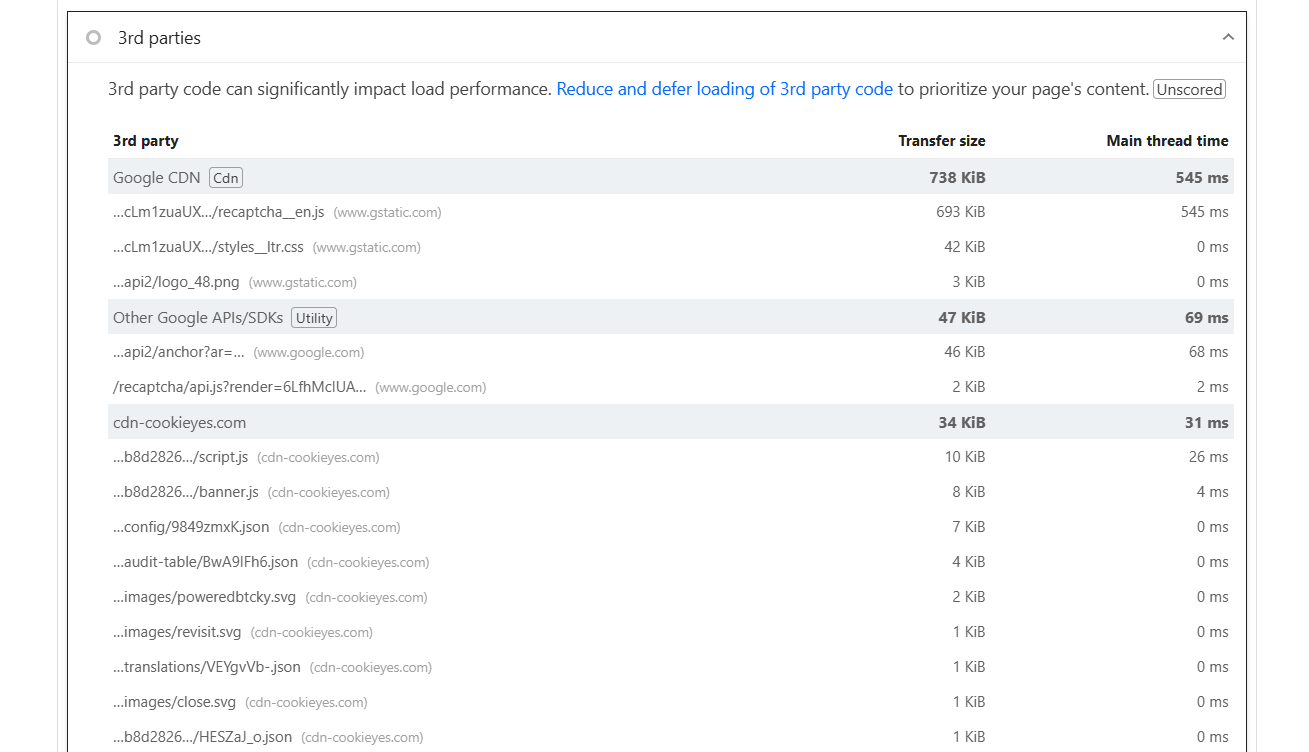
    When you click to expand this section, you will see a list of all the external domains loading resources on your site. For example:

    • googletagmanager.com or google-analytics.com (Google Analytics)
    • connect.facebook.net (Facebook Pixel)
    • fonts.gstatic.com (Google Fonts)
    • youtube.com (Embedded videos)

    The report also indicates the “Main-Thread Blocking Time,” which is the duration each script delays the construction of your page. Write down the top 3–5 scripts causing the longest main-thread blocking time. These are the ones to fix first.

    Step 2: Decide Which Scripts You Actually Need

    Now that you have your list of script offenders, your first instinct might be to look for a technical solution. But before you touch any settings, you should perform the single most effective optimization step: a strategic audit.

    The fastest script is the one you don’t load at all.

    We will approach this audit with a simple but powerful question for every third-party script you identified in your speed test. Look at each one and ask yourself:

    “Is this script helping my site reach its goals?”

    If the answer is not a clear and immediate “yes,” it’s just digital clutter that is slowing you down. It’s time to thank it for its service and let it go.

    Let’s walk through the most common scripts you found and apply this question.

    • Google Analytics
      This script tracks your website traffic, tells you where visitors come from, and shows which pages are most popular. Without this data, you will have very few insights into your user patterns.

      Verdict: KEEP. This provides essential value for making informed decisions about your site, but you may want to consider switching to alternatives, such as Plausible or Matomo Analytics.
    • Facebook Pixel / Other Ad Pixels
      These scripts track conversions from paid advertising campaigns. Ask yourself: Am I currently spending money on Facebook, Google, or other ads that rely on this pixel? If you are actively running campaigns, this script is crucial for measuring your return on investment. If you are not, it’s doing nothing but slowing down your site for every single visitor.

      Verdict: KEEP only if you are running active ad campaigns. If not, remove it for now. You can always add it back when you launch your next campaign.
    • Heatmap/Recording Scripts (e.g., Hotjar, Crazy Egg)
      These are powerful tools for understanding user behavior, but they are incredibly resource-intensive.

      Verdict: USE SPARINGLY. Turn these scripts on when you are actively running a specific test (like analyzing a new landing page), gather your data for a week or two, and then turn them off. Do not leave them running continuously.
    • Chat Widgets
      A live chat box can be a fantastic tool for lead generation, but only if people use it. Review your widget’s dashboard to determine the number of meaningful conversations it has initiated in the past month. Is it a vital part of your sales process, or is it just a slow-loading box that most visitors ignore?

      Verdict: EVALUATE. If it consistently generates leads and sales, keep it. If it sits unused, remove it and free up that performance. A simple “Contact Us” page is much faster.
    • Social Sharing Button Plugins
      Allowing visitors to share your content is great, but many plugins that do this are notoriously slow. The primary performance killer is often the “share count” feature. To display those numbers, the plugin must make separate, slow requests to Facebook, Twitter, Pinterest, and others for every single page load.

      Verdict: BE WARY. Consider switching to a modern, lightweight plugin that provides simple sharing links without the counters. The slight social proof you gain from the numbers is rarely worth the significant speed loss.
    • Comment Systems (e.g., Disqus)
      Third-party comment systems, such as Disqus, offer enhanced features like social login and improved spam filtering. However, they are often very heavy, loading many extra scripts and ads. Compare this to the default WordPress comment system, which is built in and significantly faster.

      Verdict: EVALUATE. If you have a highly active community that relies on Disqus’s features, the speed trade-off might be worth it. However, if you only get a few comments here and there, you are sacrificing critical loading speed for a feature you barely use. Choosing the right comment system is a big decision with significant performance implications. For a deeper dive into the fastest options, we highly recommend reading this detailed analysis on WordPress comment plugins.

    Step 3: Optimizing Third-party Scripts with a Plugin

    Once you have removed the unnecessary scripts, you can then use a WordPress plugin to do all the technical heavy lifting for you. We will focus on the single most impactful technique for third-party scripts: Delaying JavaScript.

    Defer vs. Delay in JavaScript

    To understand how performance plugins work, you need to know the difference between two powerful techniques for handling JavaScript. Both are designed to solve the render-blocking problem, but they do so in different ways.

    • Defer: When the browser’s HTML parser encounters a script with this attribute, it changes its default blocking behavior. Instead of stopping everything, the browser starts downloading the script file asynchronously in the background while it continues to parse the rest of the HTML and build the Document Object Model (DOM). The browser executes the deferred script only after the entire HTML document has been fully parsed.

      This is beneficial because the script’s download no longer blocks the initial rendering of the page.
    • Delay (Better for non-essential content): In this method, the target third-party script is not loaded during the initial page load. Instead, a lightweight listener script waits for the first sign of user interaction, such as scrolling down the page, moving the mouse, clicking a button, or touching the screen on a mobile device. Once that first interaction is detected, the listener dynamically injects the third-party script into the page, triggering its download and execution.

      This ensures that the page becomes interactive almost instantly, and the non-critical scripts load a few seconds later when they are least likely to impact the user’s perception of speed.

    Our Recommended Tool: WP Rocket or FlyingPress (Paid)

    You can fix these issues with free or paid tools. Paid plugins make things easier, free ones give you more manual control. Tools like WP Rocket or FlyingPress combine dozens of complex optimizations into a simple, user-friendly dashboard.

    Here is how you can implement a JavaScript delay in just a few clicks.

    1. Install and activate the WP Rocket plugin on your WordPress site.
    2. From your WordPress dashboard, navigate to Settings -> WP Rocket.
    3. In the left-hand menu, click on the “File Optimization” tab.
    4. Scroll down the page until you see the “JavaScript Files” section. Find the option labeled “Delay JavaScript execution“ and check the box to enable it.
    5. Save Changes and Clear the Cache. Click the “Save Changes” button at the bottom of the page. After it saves, you should see an option to “Clear Cache” in your top admin bar; click it to ensure your changes are live for all visitors.

    That’s it! WP Rocket is pre-configured to automatically delay many common third-party scripts. Your site should now load significantly faster on initial load. If you notice that a specific feature (such as your chat widget) has stopped working, you can add its script’s domain to the “Excluded JavaScript Files” box to have it load normally.

    Free Alternative Mention

    If you are on a tight budget, you can achieve similar results with a more hands-on approach using free plugins.

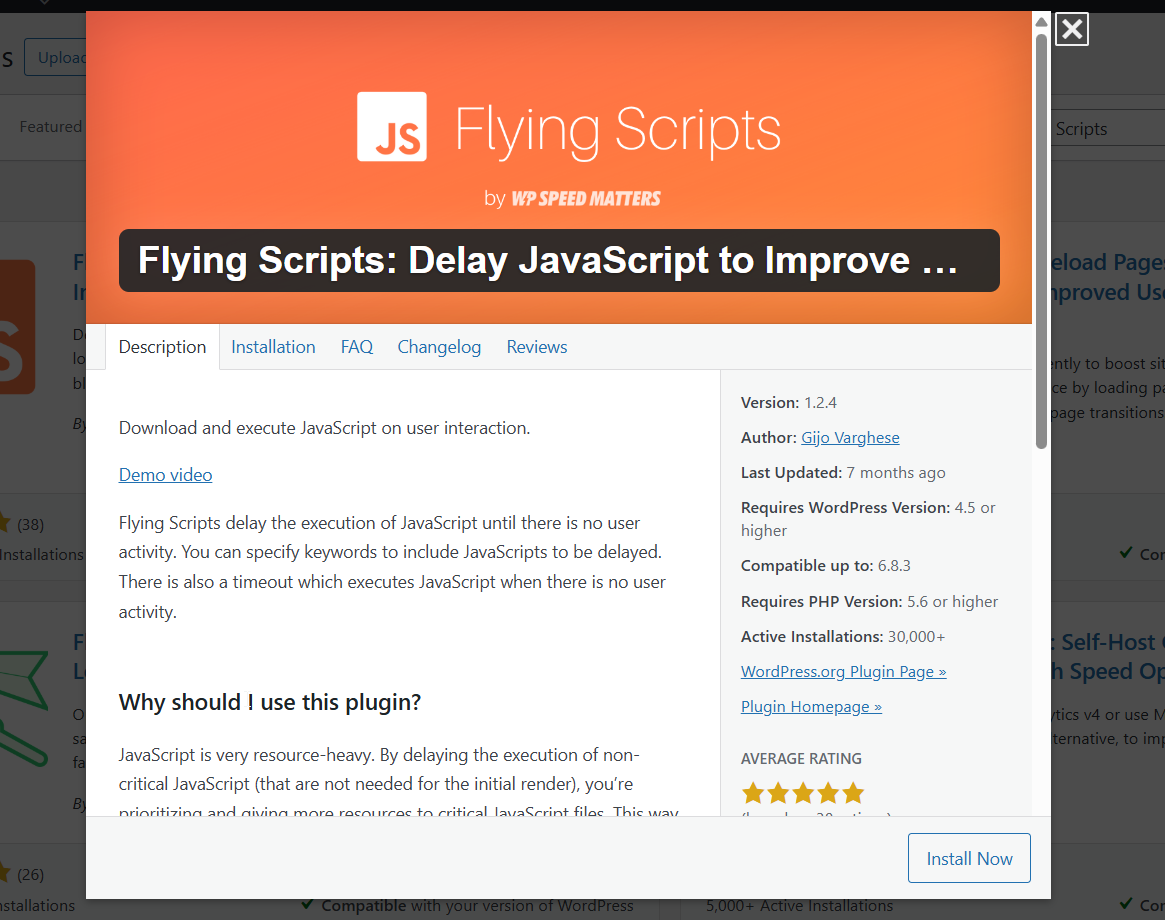
    • Flying Scripts: This is a simple, lightweight plugin designed specifically to delay JavaScript execution. You will need to manually add the keywords of the scripts you want to delay (e.g., ga, gtag, and Facebook).
    • Asset Cleanup: This is a powerful plugin that provides granular control. Its most useful feature is the ability to disable scripts on pages where they are not needed. For example, you can use it to stop your contact form plugin from loading its script on every single blog post, which is a fantastic optimization.

    Step 4: Pro-Level Tricks (That Are Still Easy for Beginners)

    By delaying JavaScript, you’ve already made a massive improvement. Now, let’s look at a couple more ways to speed up your third-party scripts:

    Technique 1: Host Google Fonts on Your Own Server

    When you use Google Fonts, your visitors’ browsers must make an extra trip to another server (fonts.googleapis.com) to download the font files. This introduces an external request and another point of failure, which can slow down your site.

    You can download those font files and host them directly on your own server. This eliminates the external request, allowing the browser to load everything from a single website.
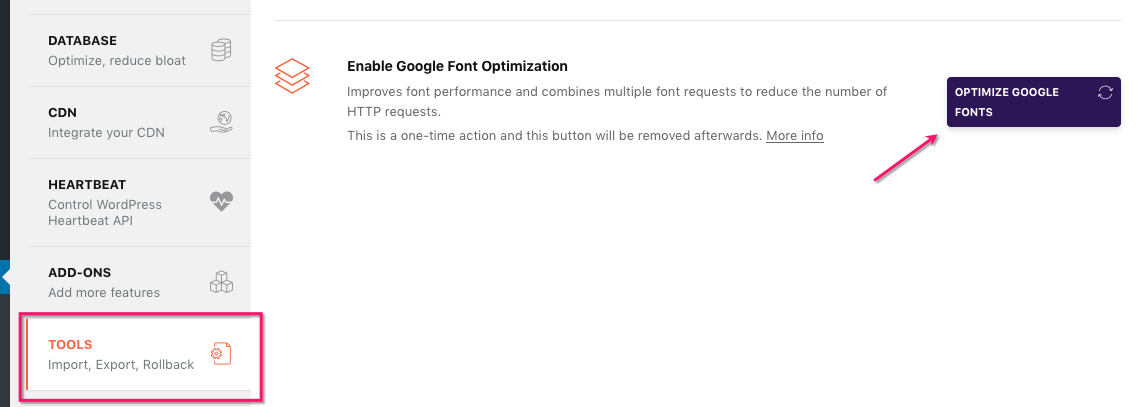
    You don’t even need to do this manually! Many performance plugins can automate this process with a single click. In performance optimization plugins like WP Rocket, you will find an option under “File Optimization” called “Optimize Google Fonts“ or “Localize Google Fonts.” Simply check the box.

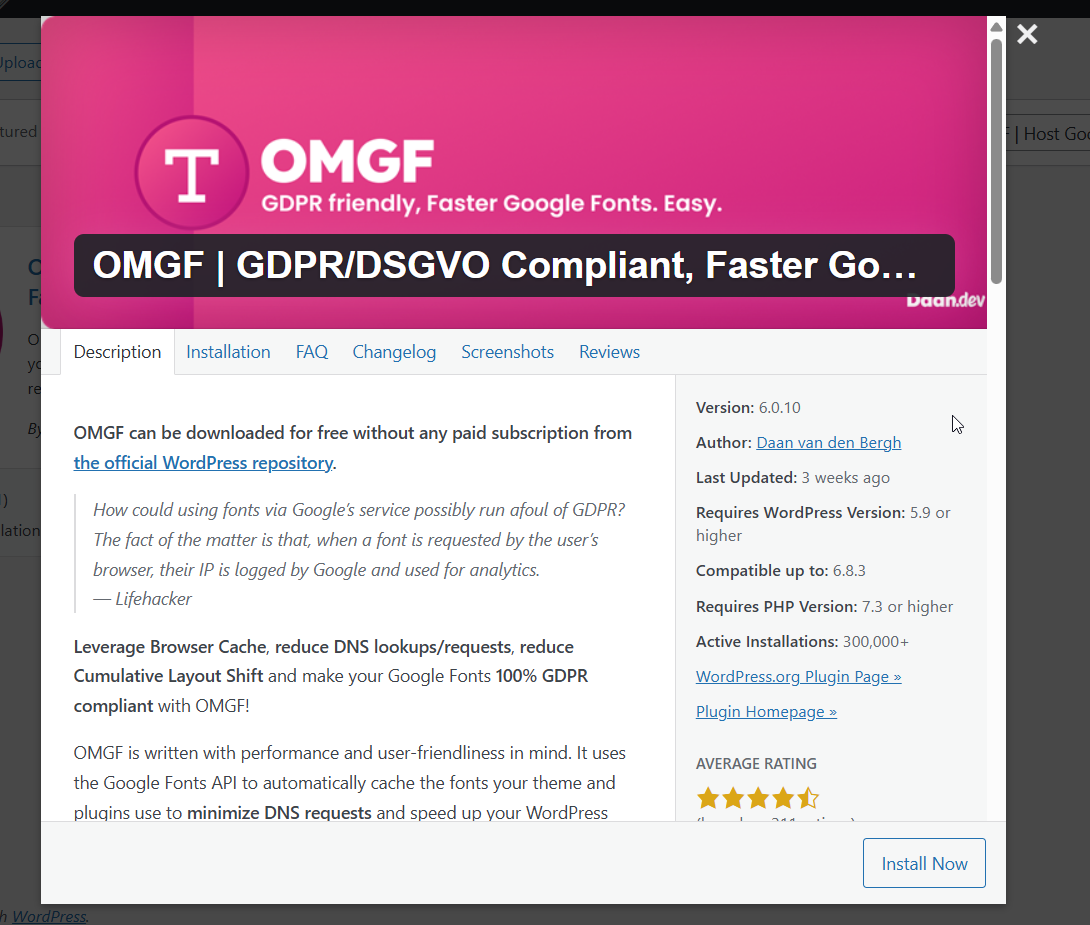
    For a free, dedicated solution, the OMGF plugin works equally well.
    Technique 2: Replace Heavy Embeds with Preview Images

    Heavy embeds, such as YouTube, Vimeo, and Maps, often add dozens of external requests before the visitor interacts with them, which can significantly impact performance. Before your visitor even interacts with them, their browser is forced to download significant amounts of data from YouTube, Twitter, or Google’s servers.

    You can replace this heavy initial load with a lightweight preview image, often referred to as a “facade.” When the page first loads, the visitor sees a static placeholder such as a thumbnail of the video, a screenshot of the map, or a stylized image of the tweet. The resource-intensive, interactive content only loads when the visitor actually clicks on the placeholder.

    In WP Rocket, this feature is enabled automatically when you check the box for “LazyLoad for iframes & videos” under the “Media” tab. This single setting will apply not just to YouTube but also to Vimeo videos and other content loaded in an iframe.

    Upgrade Your Server for Even Better Performance

    Optimizing scripts helps, but your server still carries most of the load. Third-party scripts can hit slower servers harder, especially those on shared hosting. A faster server provides more room for these tools without slowing down your site.

    If you feel like you’ve hit the limits of what shared hosting can offer, but the idea of managing your own server sounds complex and intimidating, that’s where a tool like RunCloud changes the game.

    RunCloud makes managing powerful and affordable cloud servers (from providers like DigitalOcean, Vultr, or AWS) incredibly easy, even for non-developers.

    • No Command-Line Needed: It gives you a beautiful, user-friendly control panel to manage your server, deploy websites, and configure settings without ever touching a complex command line.
    • Optimized for Speed: RunCloud automates the entire server setup process, installing a highly optimized software stack (like NGINX and the latest PHP) that is built from the ground up for speed and stability.
    • Effortless WordPress Management: You can deploy new, secure WordPress sites with a single click, complete with security features like free SSL certificates and automated backups.

    Move your site to a faster stack. RunCloud lets you manage powerful cloud servers with ease, so your site stays fast even with the tools you rely on.

    Start your free RunCloud account and see the difference.
  • How to Fix the WordPress White Screen of Death (Step by Step)

    How to Fix the WordPress White Screen of Death (Step by Step)

    Have you ever opened a website and been greeted with a blank page instead of the content you expected?

    This is known as the infamous WordPress White Screen of Death (WSOD). It is a frustrating error that only happens when something has gone critically wrong behind the scenes.

    If this has happened to you, don’t panic. This guide provides a step-by-step process for diagnosing and resolving the WordPress White Screen of Death. By following these proven steps, you’ll be equipped to pinpoint the exact cause and bring your website back online quickly.

    Let’s get started!

    What is the WordPress White Screen of Death?

    The WordPress White Screen of Death (WSOD) is a blank white screen that appears when you attempt to access your website. It usually means a fatal PHP error or database issue has occurred.

    On most live websites, PHP error reporting is disabled by default for security reasons. This means that when a script-breaking error occurs, the server stops rendering the page but has no instructions to display an error message, which results in a blank output.

    The issue can be site-wide, affecting both the public-facing site and the admin dashboard (/wp-admin), or it can be isolated to a specific page, post, or just the admin area.

    Despite the intimidating name, the WSOD is a code execution failure. Your website’s data, including posts, pages, and user information stored in the database, is almost always safe and unaffected.

    Suggested read: How to Fix WordPress High CPU Usage (10 Instant Solutions)

    Common Causes of the WordPress White Screen of Death

    Several things can cause this error:

    • Plugin Incompatibility: This is the most frequent cause. A plugin may conflict with another plugin, your active theme, or a recent WordPress core update, leading to a fatal error.
    • Theme Functionality Errors: Your active theme can cause a WSOD due to poorly written code, a syntax error in its functions.php file, or an incompatibility after an update.
    • Exhausted PHP Memory Limit: A script or process may require more memory than your server has allocated to PHP. When this memory limit is reached, the script is terminated, often leaving a blank page.
    • Corrupted Core Files: A failed or interrupted WordPress core update can leave you with missing or corrupted files, which prevent WordPress from loading correctly.
    • File Permission Issues: Incorrect read/write permissions on core WordPress files and folders can prevent the server from accessing them, leading to a failure to load.

    Suggested read: How to Fix WordPress Stuck in Maintenance Mode? [100% WORKING]

    How to Fix the WordPress White Screen of Death: 7 Proven Steps

    The White Screen of Death is a common WordPress issue that can usually be resolved by following a logical troubleshooting process. Work through these steps in order, starting with the most likely culprits, such as plugins and themes, to efficiently diagnose and resolve the error.

    Step 1: Check for Plugin Conflicts

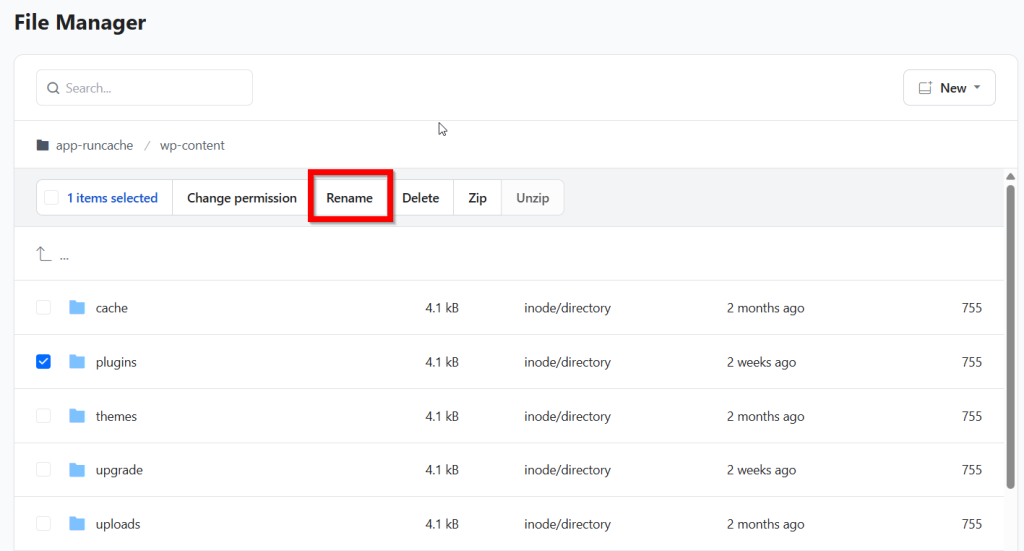
    Plugin conflicts are the most common cause of this error, so your first step is to deactivate all plugins at once. You can do this by using the RunCloud File Manager to navigate to your wp-content directory and rename the plugins folder to something like plugins_disabled. If your site comes back online, then you can rename the folder and reactivate your plugins one by one to find the one causing the error.

    Suggested read: How to Fix WordPress Revisions Not Showing [SOLVED]

    Step 2: Switch to a Default WordPress Theme

    If plugins aren’t the problem, then your active theme might be causing an issue, especially after an update or code modification. Just as we did above, use the RunCloud File Manager and navigate to /wp-content/themes/. Rename the folder of your active theme; this forces WordPress to fall back to a default theme, such as Twenty Twenty-Five. If this resolves the issue with your site, you will need to troubleshoot the theme or contact its developer for a fix.

    Step 3: Increase PHP Memory Limit

    A blank screen can occur if a WordPress process exceeds the memory allocation your server has provided. To fix this, use the RunCloud File Manager to edit your wp-config.php file and add the line just before the /* That’s all, stop editing! */ line.

    define('WP_MEMORY_LIMIT', '256M');

    This simple change often resolves memory exhaustion issues. If you are using RunCloud, then you can simply modify this setting from your dashboard without ever needing to FTP into your server. For detailed, step-by-step instructions on this topic, we recommend reading our full-length article, ‘How to Fix WordPress Memory Exhausted Error: Increase PHP‘.

    Step 4: Enable WordPress Debug Mode

    To view the specific error causing the blank screen, you must enable WordPress’s debug mode. You can do this by using the RunCloud File Manager to edit the wp-config.php file and change define('WP_DEBUG', false); to true to display the errors on the page itself.

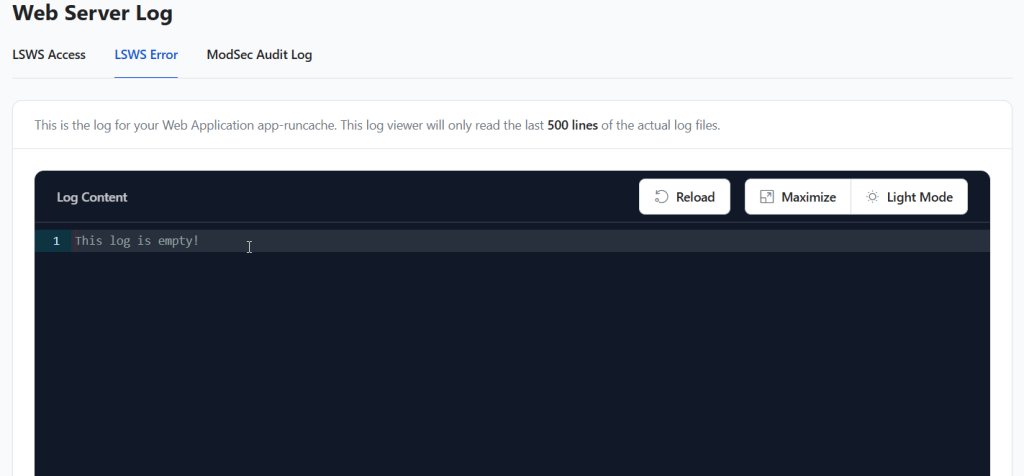
    Additionally, you can use RunCloud’s Error Log Monitoring to see PHP and NGINX errors directly from your dashboard. This will often point you to the exact problematic file and line number.

    Suggested read: How to Easily Fix Leverage Browser Caching Warning in WordPress

    Step 5: Clear WordPress and Browser Cache

    Sometimes, all your plugins and themes are correctly configured, but some parts of your site serve stale cached content. This can sometimes break a site and mask a fix you’ve already applied.

    If you have performed all the above actions, you should clear your browser cache. If you use a caching plugin or server-level caching, such as RunCloud’s RunCache, be sure to purge that cache as well. This ensures you are viewing the live, non-cached version of your site.

    Suggested read: How to Fix WordPress HTTP Error When Uploading Images (Quick Guide)

    Step 6: Fix File Permissions and Ownership Issues

    If you recently modified or created a new file on your server via CLI, then you need to make sure that you set the correct file permissions and ownership. Incorrect file and folder permissions can prevent WordPress from accessing the necessary files, resulting in a blank screen. The standard permissions are 755 for directories and 644 for files; you can check and correct these using your RunCloud File Manager or an SFTP client.

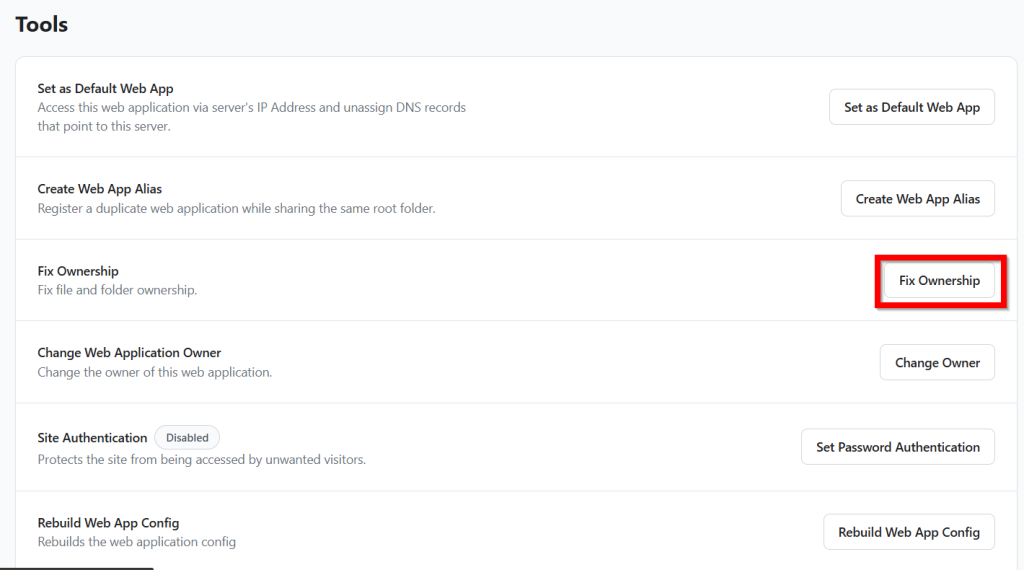
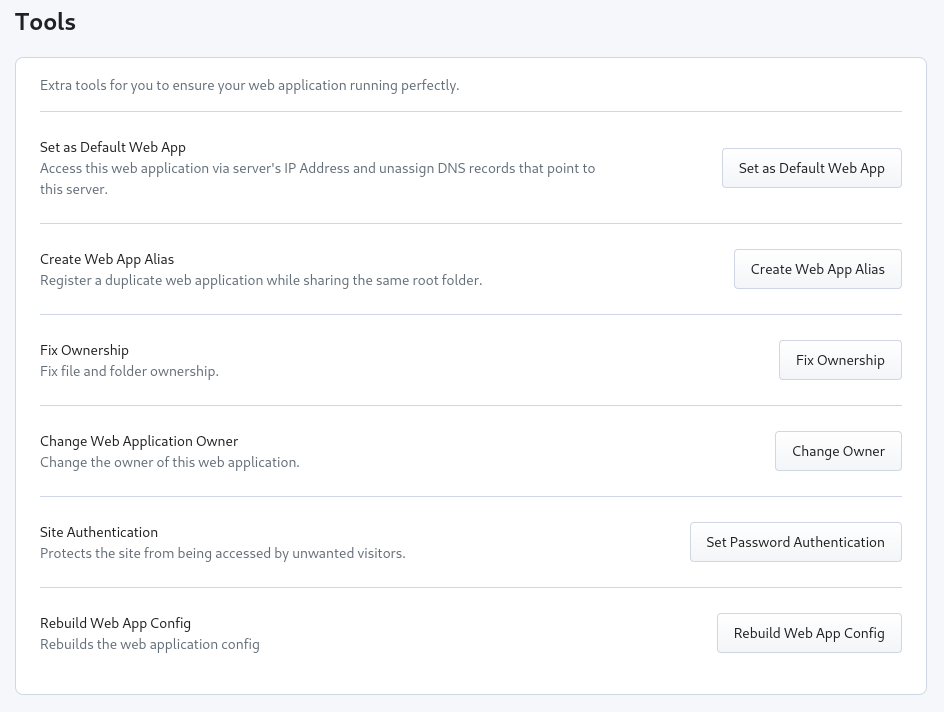
    After fixing the file permissions, you can fix the file ownership issues by simply clicking the “Fix Ownership” button in the Tools menu.

    Suggested read: 10 Best WordPress Management Tools To Easily Manage Multiple Websites

    Step 7: Remove the .maintenance File or Restore a Backup

    In this step, you should first check your site for a stuck “.maintenance” file in your root directory using the RunCloud File Manager, and delete it if it exists. If all else fails or you need an immediate fix, the safest and fastest solution is to restore your website from a recent backup.

    With RunCloud Backups & Incremental Restore, you can revert your entire web application to a stable state in just a few clicks, ensuring no data is lost and your site is back online instantly.

    Wrapping Up: Preventing the WordPress White Screen of Death in the Future

    While knowing how to fix the White Screen of Death is a valuable skill, the best strategy is to implement practices that prevent it from happening in the first place. A proactive approach to site management can save you from downtime and stress by identifying potential issues before they escalate into critical failures. Here’s how you can do this:

    Enable a Staging Environment

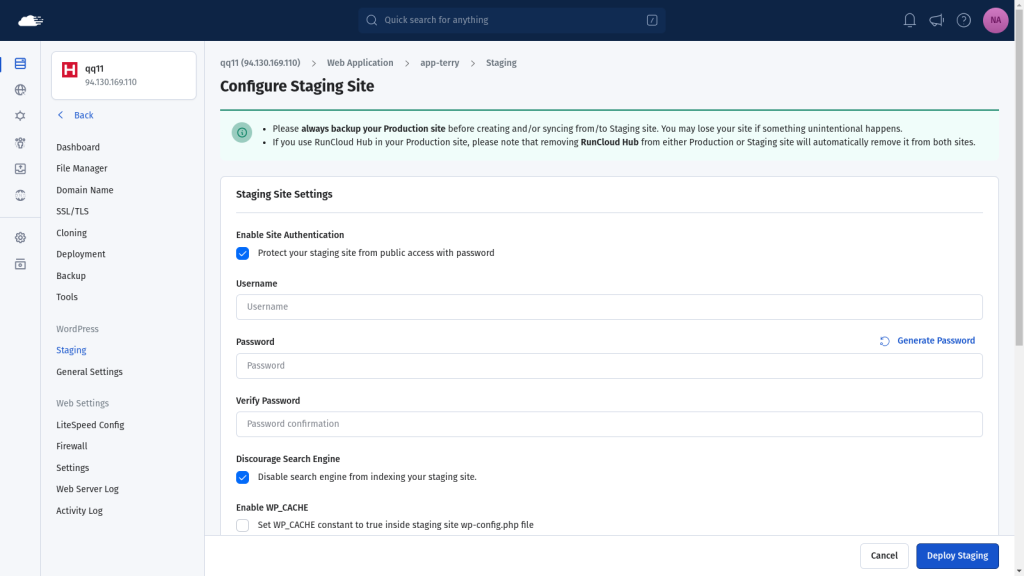
    The most effective way to prevent the White Screen of Death is never to let a breaking change reach your live site. A staging environment is an exact, private clone of your production website where you can safely test plugin updates, theme modifications, and new code. If an update causes a WSOD on your staging site, your live site remains completely unaffected, giving you a risk-free space to troubleshoot the conflict.

    In the future, you can use the WordPress staging environment feature directly within the RunCloud dashboard to create and manage these test sites with just a few clicks. To learn how to implement this process, we recommend referring to our comprehensive article on creating a WordPress staging environment.

    Install and Manage WordPress with Git

    Git is a version control system that tracks every change made to your files, allowing you to instantly roll back to a previous, working version if a new deployment causes a WSOD. This eliminates the need to manually hunt for syntax errors or faulty code after an update.

    RunCloud supports atomic deployment for Git and WordPress, making this process seamless and error-free. When you deploy, RunCloud ensures the new version is fully in place before it goes live, preventing partial-update errors that often result in a blank screen. To explore this advanced, reliable deployment method, refer to our detailed guide on:

    And finally, the most important safety net is a reliable, recent backup. Instead of relying on manual processes, use a service like RunCloud Backups & Incremental Restore to automatically save versions of your site. This ensures you can revert to a working state in seconds if an update or change causes a fatal error.

    Try RunCloud’s smart server management today.

    WordPress White Screen of Death FAQs

    How do I fix a white screen after updating WordPress?

    An update likely created an incompatibility with a plugin or your theme. Access your site via FTP or your host’s file manager, navigate to the wp-content folder, and temporarily rename the plugins folder to deactivate all plugins. If this resolves the issue, reactivate them one by one to identify the cause.

    How can I access my dashboard when the site is blank?

    If /wp-admin is also blank, you must use FTP or a file manager to access your site’s files. By renaming the active theme or plugin folders within the /wp-content/ directory, you can force WordPress to disable them and regain access to your dashboard.

    Does a plugin conflict cause a blank screen?

    Yes, plugin conflicts are one of the most frequent causes of the white screen. This occurs when two plugins are incompatible with each other or with your version of WordPress, leading to a fatal error.

    Can low PHP memory make my site go blank?

    Absolutely. If a WordPress script or plugin needs more memory than is allocated on your server, it will fail to execute and result in a blank white screen. You can often fix this by increasing the PHP memory limit in your wp-config.php file.

    How do I debug a blank WordPress page?

    The most effective method is to enable WordPress’s built-in debug mode. Edit your wp-config.php file and change define( 'WP_DEBUG', false ); to true to display the specific error message that is causing the blank screen.

    How can I restore my site without losing data?

    The white screen is a code-level issue, so your content, users, and posts in the database are generally safe. Restoring a recent backup is the safest option, but fixing the issue by deactivating the faulty plugin/theme will also bring your site back without data loss.

    What should I do if only the admin area is blank?

    If the public-facing site works but /wp-admin is blank, the issue is specific to the admin dashboard. This is often caused by a plugin or a custom function in your theme’s functions.php file, so start troubleshooting there.

  • WP Rocket vs LiteSpeed Cache: Which One is Best in 2026

    WP Rocket vs LiteSpeed Cache: Which One is Best in 2026

    Have you ever given up on a website because it was taking forever to load? Almost certainly you have – probably many times. And it’s certainly not something you want visitors to do when visiting your site!

    A slow website can lead to a poor user experience, and improving its speed is one of the best ways to keep visitors happy – and rank higher on Google.

    In this post, we will look at some of the best caching solutions available, from the server-level power of LiteSpeed Cache to the famously beginner-friendly WP Rocket.

    But before we do that, let’s quickly understand the real reason why you need caching plugins.

    What is WordPress Caching and Why Do You Need It?

    Every time a visitor arrives at your site, WordPress has to process the information, fetch necessary pages from the database, process them with PHP, and assemble the final HTML page to serve the visitor. This process happens for every single visitor, and if you get a lot of traffic, your server will become overwhelmed, and the service will slow down for everyone.

    Caching is like preparing your most popular web request ahead of time. Instead of building the page from scratch every time, a caching system takes a snapshot of the fully assembled page and serves that static copy to visitors. This is dramatically faster and uses far fewer server resources.

    The primary reason you need caching is speed. A faster website provides a significantly better user experience, keeps visitors engaged, and reduces the chance they’ll leave your site out of frustration (this is known as lowering the “bounce rate”). Additionally, by reducing the workload on your server your website will be able to handle much more traffic simultaneously without slowing down or crashing.

    Server-Level Caching with RunCloud Hub

    While there are many WordPress caching plugins available, in our opinion, there is only one winner.

    RunCloud Hub is an advanced caching plugin that offers superior performance because it operates before WordPress even gets involved. RunCloud uses a highly optimized NGINX FastCGI cache, which works at the server level to intercept visitor requests.

    This method is incredibly efficient because it completely bypasses the slow process of loading WordPress, executing PHP scripts, and querying the database for the majority of your visitors.

    The caching features built into the RunCloud platform make managing and developing your websites extremely easy. For a new user, the complexity of configuring a typical caching plugin can be daunting. With RunCloud, you can enable a powerful, server-grade cache with a single click in your dashboard, and no complicated settings are required.

    However, this solution is only available for RunCloud users. If you are not a RunCloud user yet, let’s look at some of the other popular caching solutions that are available.

    📖 Suggested read: The Best WordPress Caching Plugins To Speed Up Your Site (2025)

    Caching Plugins for WordPress

    WP Rocket

    WP Rocket has earned its reputation as one of WordPress’s most powerful and user-friendly performance plugins. It’s a comprehensive, all-in-one solution designed to speed up your website with minimal hassle, making it ideal for users who want premium results without a steep learning curve.

    Unlike many other caching plugins requiring technical expertise to configure, WP Rocket automatically applies about 80% of web performance best practices upon activation. This immediate impact on site speed and Core Web Vitals is why it’s a go-to tool for beginners and seasoned developers who value their time and want a reliable, effective optimization solution that works on any hosting platform.

    wp rocket cache plugin

    📖 Suggested read: The Complete WordPress Speed Optimization Guide

    Key Features of WP Rocket

    WP Rocket has powerful features designed for maximum impact with minimal effort. Once activated, it immediately enables page caching and creates static HTML files that drastically reduce load times for subsequent visitors. For even faster performance, its cache preloading feature automatically warms up the cache after you make changes; this ensures that all visitors get the fastest version of your site right away.

    In addition to standard caching, WP Rocket includes advanced features such as LazyLoad for images, iframes, and videos, which delays loading media until it’s actually visible to the user. It also offers database optimization tools to clean up unnecessary clutter like old post revisions and transients, and seamless one-click integration with any Content Delivery Network (CDN).

    For ecommerce sites using WooCommerce or other popular plugins, WP Rocket is intelligently configured to automatically exclude cart and checkout pages from the cache, preventing any interference with the customer’s shopping process and ensuring a smooth, fast buying experience.

    📖 Suggested read: How to Use Redis Object Cache To Speed Up a Dynamic WordPress Site

    WP Rocket Pricing

    WP Rocket is a premium plugin with a transparent pricing structure based on the number of websites you need to support. They offer licenses for a single site ($59/year), a “Plus” license for three websites ($119/year), and a “Multi” license for 50 websites ($299/year), all of which include one year of support and updates.

    LiteSpeed Cache

    LiteSpeed Cache is a powerful site acceleration plugin uniquely designed to integrate directly with LiteSpeed web servers. It is very useful for LiteSpeed servers as it has a deep, server-level integration, which allows it to manage caching more efficiently than many other plugins that operate solely at the application level.

    When your website runs on a server powered by LiteSpeed Web Server (LSWS) or OpenLiteSpeed, the LiteSpeed Cache plugin can communicate directly with the server’s built-in caching engine (LSCache) and deliver remarkable performance improvements, especially for dynamic, high-traffic WordPress sites.

    This integration enables advanced caching capabilities, such as handling logged-in users and private content, that are often difficult to achieve with other caching solutions. However, the plugin’s primary strength is also its most significant limitation: its best features are exclusive to the LiteSpeed ecosystem.

    📖 Suggested read: NGINX Caching for WordPress – Complete Guide & Tutorial

    Key Features of LiteSpeed Cache

    The LiteSpeed Cache plugin for WordPress is much more than a simple caching tool. It allows you to control server-level full-page cache directly from the WordPress dashboard. This will enable you to efficiently handle dynamic content such as WooCommerce shopping carts and logged-in user sessions.

    The plugin also includes an exclusive server-level crawler that automatically travels your site to refresh expired cache pages, ensuring visitors always experience the fastest speeds. In addition to caching, it offers an advanced set of optimization features, including image optimization, a Content Delivery Network (QUIC.cloud CDN) specifically for LiteSpeed, and tools for minifying and combining CSS, HTML, and JavaScript files.

    LiteSpeed Pricing

    LiteSpeed offers a flexible pricing model that covers software licenses and professional services. For its core products, the LiteSpeed Web Server Enterprise has an accessible entry point starting from $0/month, while the more specialized LiteSpeed Web ADC begins at $65/month. Both are available through monthly, yearly, or owned license plans.

    In addition to the software itself, LiteSpeed provides a range of paid support services, including one-time fees for tasks like installation (from $150) and WordPress optimization (from $100), as well as ongoing support options such as hourly assistance (from $150/hour) and a semi-annual optimization service priced at $1,200.

    LiteSpeed Cache Requirements and Limitations

    The biggest requirement for unlocking the full potential of the LiteSpeed Cache plugin is that your website must be hosted on a server running either LiteSpeed Web Server Enterprise, OpenLiteSpeed, or another LiteSpeed product like a WebADC. Without one of these specific server technologies, the plugin’s most powerful feature, the server-level page cache, is completely non-functional.

    In this scenario, LiteSpeed Cache acts merely as a generic optimization plugin, putting it on the same level as many other tools but without its key differentiator.

    This server dependency is the plugin’s major limitation. Many of the best hosting platforms and server management tools are built on highly tuned NGINX and Apache stacks, which are known for their performance, stability, and widespread community. You cannot use LiteSpeed’s server-side cache if your site is on one of these common server types.

    📖 Suggested read: Everything You Need to Know About WordPress Object Caching

    When to Choose WP Rocket Over LiteSpeed Cache

    When your website is not hosted on a LiteSpeed server, you should choose WP Rocket over LiteSpeed Cache. In these environments, LiteSpeed Cache’s signature server-level caching features are disabled, stripping it of its primary advantage. WP Rocket, on the other hand, is built to be universally compatible and deliver exceptional results on any server type, making it the most reliable and powerful choice for the average user.

    Furthermore, WP Rocket is better if you prioritize ease of use and a fast, predictable workflow. Its interface is famously intuitive, and it applies critical optimizations right out of the box with minimal configuration required from the user.

    When to Choose LiteSpeed Cache Over WP Rocket

    The primary reason to choose LiteSpeed Cache over WP Rocket is when your hosting provider explicitly uses LiteSpeed Web Server (LSWS) or its open-source variant, OpenLiteSpeed. In this specific environment, the LiteSpeed Cache plugin can integrate directly with the server’s native caching engine, creating a uniquely powerful integration that is difficult for other plugins to match.

    This deep integration allows it to handle dynamic content, such as ecommerce or membership sites, with incredible efficiency. It also provides access to the free QUIC.cloud CDN, which is tailored for the LiteSpeed ecosystem.

    Securely managing and integrating this plugin with your server environment on traditional web hosting providers can be challenging. But if you use the OpenLiteSpeed tech stack on your RunCloud server, you can enable the LiteSpeed Cache plugin on your WordPress website with a single click.

    📖 Suggested read: LiteSpeed Cache WordPress Plugin Configuration Tutorial

    WP Rocket vs. LiteSpeed vs. RunCloud Cache

    To simplify your decision, this table compares the key aspects of each solution, including the server-level caching provided by RunCloud.

    FeatureWP RocketLiteSpeed CacheRunCloud Cache (Server-Level)
    Primary Caching MethodPlugin-Based (PHP)Server-Integrated (on LSWS)Server-Native (NGINX FastCGI)
    Server RequirementAny (NGINX, Apache, etc.)LiteSpeed Server (LSWS/OLS)RunCloud Optimized NGINX and Docker Stack
    Ease of Use⭐⭐⭐⭐⭐ (Simple)⭐⭐⭐ (Moderately Complex)⭐⭐⭐⭐⭐ (One-Click Activation)
    Performance ImpactExcellentExcellent (Only on LiteSpeed)Exceptional
    Risk of ConflictsLow (Well-coded)Moderate (Many settings)Virtually Zero (Runs before plugins)
    CostPremium (Starts at $59/yr)FreeIncluded with RunCloud Subscription
    Ideal ForUsers who want a simple, universal solution.Users on LiteSpeed hosting.Users who want maximum speed with zero complexity.

    Wrapping Up: Making Your Decision for the Best Cache Plugin for You

    Choosing the right caching solution is one of the most important decisions for your WordPress website’s performance. However, the most significant performance gains don’t come from a plugin alone, but from the server. Both WP Rocket and LiteSpeed Cache are primarily application-level solutions, meaning they work within WordPress.

    A truly exceptional performance strategy should have a server-level cache that operates before WordPress even loads to serve pages with maximum speed and efficiency.

    This is where a third option shines, RunCloud’s full-page cache, which offers a more fundamental and powerful solution to the speed problem.

    If you’ve managed a WordPress site for any length of time, you’ve likely faced these issues:

    1. The “White Screen of Death” occurs when you enable a setting like “Minify JavaScript”, and your site’s layout or functionality breaks completely.
    2. Plugin & Theme Conflicts: Your caching plugin clashes with your page builder, e-commerce plugin, or theme, causing visual glitches.
    3. Changes Not Appearing: You update a page, but the changes don’t show up for you or your visitors because of a persistent cache that’s difficult to clear.

    RunCloud’s server-level cache inherently solves these problems. Because it caches the entire fully rendered page before WordPress or any plugins are loaded, it cannot conflict with them. When you need to see an update, you simply click “Purge Cache” in your WordPress dashboard to instantly serve the fresh version of the page.

    But that’s not all – RunCloud enables you to manage your entire server workflow with unparalleled simplicity. With RunCloud, you can perform all of the following:

    • Create a new server on any cloud provider.
    • Deploy new applications with a single click.
    • Update PHP versions with a single click.
    • Perform automated backups with a single click.
    • Create staging environments with a single click.

    From server setup to full-page caching, RunCloud handles the heavy lifting so you can focus on what matters. Get started with RunCloud in minutes.

    FAQs on WP Rocket vs LiteSpeed Cache

    Is WP Rocket worth the money compared to free LiteSpeed Cache?

    WP Rocket is a good investment for its ease of use and powerful features that work on any server environment. While LiteSpeed Cache is free, its most powerful features are exclusively tied to using a LiteSpeed web server, which isn’t always an option. A better approach is to use a superior server-level cache, like the one-click RunCloud Hub, which provides a massive performance boost on WordPress websites.

    Do I need a caching plugin if my host already has server caching?

    Yes, you can benefit from both, as they perform different jobs. A server cache, like RunCloud’s NGINX FastCGI cache, handles the heavy lifting of page caching for the fastest possible load times. You can then use a plugin to handle secondary optimizations like CSS/JS minification and lazy loading, creating a comprehensive performance strategy.

    Can I use both WP Rocket and LiteSpeed Cache plugins together?

    No, you must never activate two page-caching plugins like WP Rocket and LiteSpeed Cache at the same time. This will create critical conflicts as they fight to control the same processes, almost certainly breaking your website. The correct method is to choose one plugin for its features or rely on a more powerful server-level solution like RunCloud Hub as your primary caching engine.

    How does LiteSpeed Cache compare to W3 Total Cache?

    LiteSpeed Cache is generally more user-friendly and offers unique server-level integrations when used on a LiteSpeed server. W3 Total Cache is a powerful, albeit complex, plugin that offers a high degree of customization but can be overwhelming for new users. If simplicity and power are your main objectives, RunCloud Cache provides a server-level solution that outperforms typical plugin caching and requires just a single click to enable.

    Does LiteSpeed Cache conflict with page builders like Elementor?

    LiteSpeed Cache can occasionally conflict with page builders if its asset optimization settings are configured too aggressively. A more stable solution is to use RunCloud’s server cache for raw speed, as it operates before any plugins load and is therefore inherently conflict-free with Elementor.

    Is WP Rocket easier to configure than LiteSpeed Cache?

    Yes, WP Rocket is widely considered much easier to configure, offering a “set it and forget it” experience that works great out of the box. LiteSpeed Cache, while powerful, presents a more complex interface with many settings that can be confusing for non-experts. But for ultimate simplicity, RunCloud’s server cache is enabled with a single toggle, eliminating complex plugin configurations for your primary caching needs.

    Can LiteSpeed Cache improve Core Web Vitals more than WP Rocket?

    On a LiteSpeed server, LiteSpeed Cache may have a slight edge due to its deep integration, but this advantage depends entirely on the server technology. On any other platform, like the high-performance NGINX servers managed by RunCloud, WP Rocket often performs on par or better. Ultimately, your best Core Web Vitals results will come from a fast server foundation, which is precisely what RunCloud’s optimized stack and server cache are built to provide.

  • WordPress Permalinks Not Working Here is the Easy Fix

    WordPress Permalinks Not Working Here is the Easy Fix

    Seeing “404 Page Not Found” on posts that definitely exist?

    Broken WordPress permalinks are usually to blame – and while frustrating, they’re easy to fix.

    Permalinks are your post and page URLs. When they break, visitors can’t reach your content, and your SEO suffers. This guide walks you through quick fixes that restore your links in minutes.

    Common Causes of Broken Permalinks

    Before we fix the problem, let’s look at what typically causes permalinks to fail. Here are the most common reasons why WordPress permalinks suddenly stop working:

    • Plugin or theme conflicts: A new or updated plugin/theme can interfere with your URL rules and cause 404 errors.
    • Corrupted .htaccess file: This configuration file controls your links. If damaged, it can stop your pages from loading.
    • Recent WordPress updates: Updates can sometimes break permalink settings, especially with outdated plugins.
    • Site migration or domain change: Moving to a new host or domain can leave WordPress pointing to old URLs.
    • Restoring from backup: Restored settings may not match your current server environment, leading to mismatched link paths.

    How to Fix Broken WordPress Permalinks (Step-by-Step)

    If your website links are leading to “404 Page Not Found” errors, then don’t panic! This is a very common WordPress issue, and the fix is usually surprisingly simple. Follow the steps below to fix it:

    1. Resetting Your Permalinks

    Resetting your permalinks fixes 404 errors in most cases.

    • Log in to your WordPress dashboard.
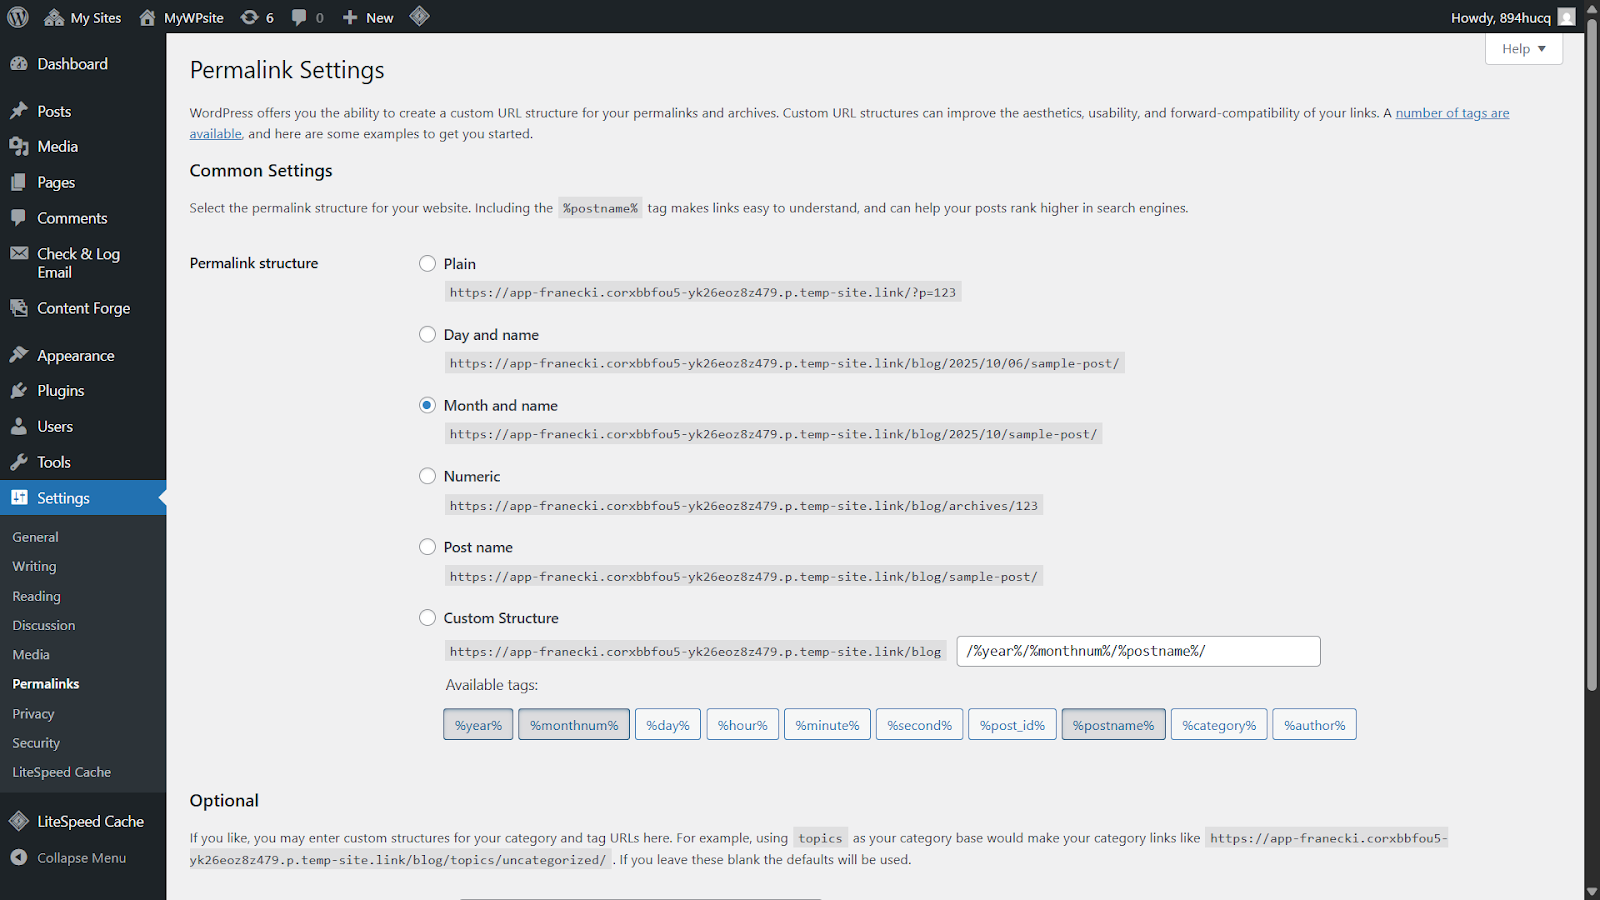
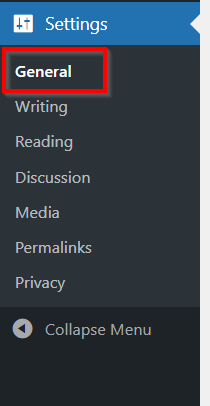
    • Go to Settings → Permalinks.
    • Without changing anything, click Save Changes.

    WordPress will refresh your link structure automatically. Check your pages again – the issue is often already fixed.

    Reset wordpress permalinks

    By just re-saving the page, you’ve prompted WordPress to fix its link structure behind the scenes. Now, go visit one of your pages to see if the error is gone. If not, proceed to the next step.

    2. Temporarily Deactivating Your Plugins

    If resetting the permalinks didn’t work, then it is possible that a plugin is misbehaving. If you are using a firewall or security plugin, then it is also possible that it isn’t configured correctly and causing an issue.

    In this step, you will need to deactivate your plugins one by one and try to identify what caused the issue. Don’t worry; deactivating a plugin won’t delete its settings or your data.

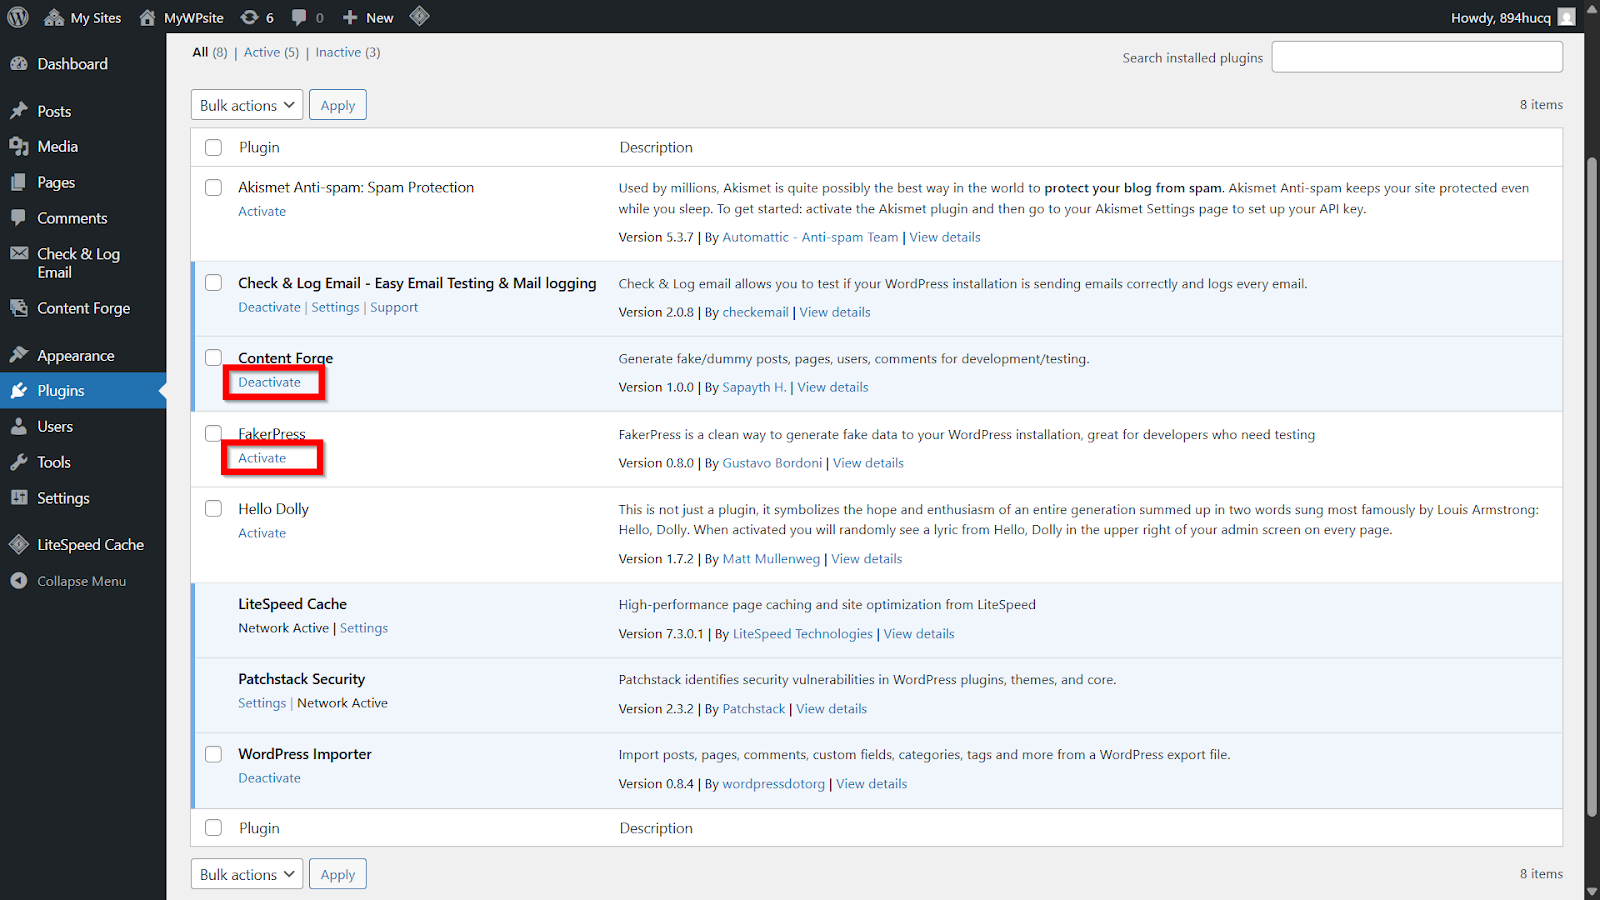
    1. Step 1: In your WordPress dashboard, go to Plugins > Installed Plugins.
    2. Step 2: From the list of active plugins, select the plugin that you want to disable temporarily and click Deactivate under it.
    3. Step 3: Now that this plugin is off, check your website. If your links work again, then you will know that this plugin was causing the issue.
    4. Step 4: Once you find the plugin causing the problems, you can either find a replacement for it or contact its developer for help.

    3. Regenerate Your .htaccess File

    This step is a bit more hands-on and requires some technical knowledge. Many WordPress hosts and themes create an .htaccess file on the server. This file stores important configuration and tells the server how to handle URLs.

    Important Note for NGINX Users: If your website runs on a pure NGINX server, you will not have an .htaccess file. NGINX handles permalinks differently. This step is only for users on Apache, LiteSpeed, or NGINX with .htaccess enabled servers. If you’re unsure, you can likely skip this and check your permissions (Step 4) or contact your host.

    WARNING: Your .htaccess file is extremely sensitive. Editing this file incorrectly can instantly break your entire website. A bad edit could also silently create security vulnerabilities. Only proceed with this step if you are comfortable editing core website files and have made a backup.

    Here’s how to safely force WordPress to generate a new, default version:

    Step 1: Access Your Website Files

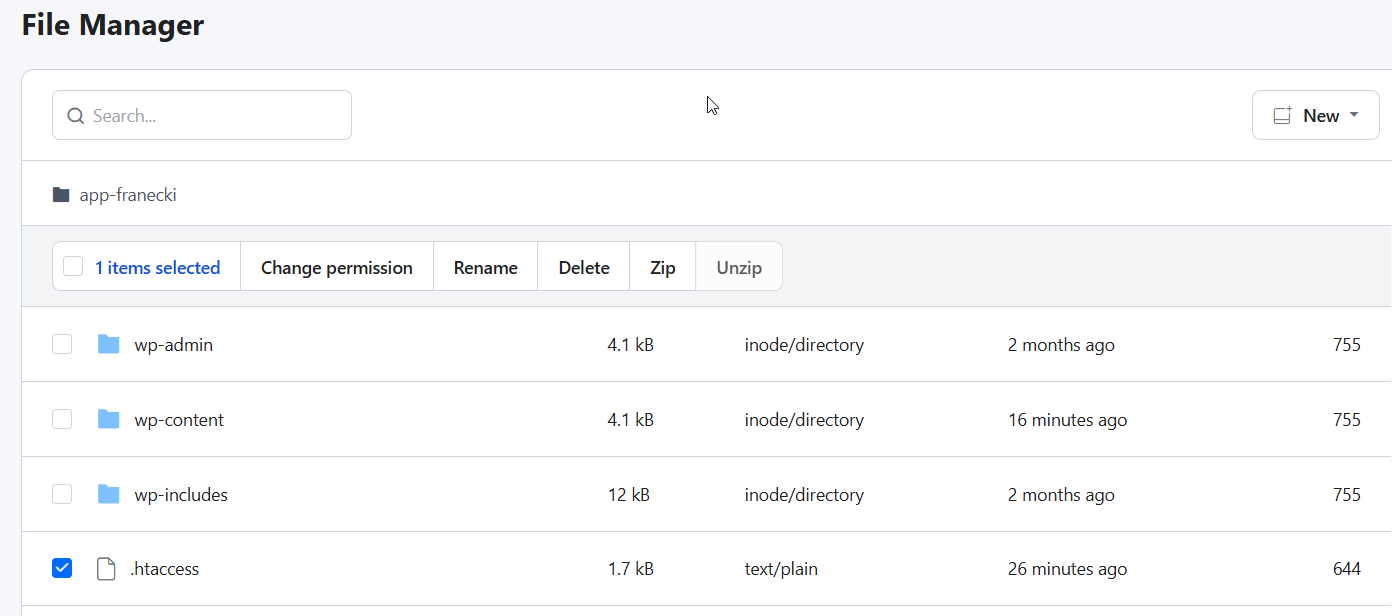
    To access your site’s core files, use either an FTP client or the RunCloud File Manager.

    In RunCloud:

    1. Log in to your dashboard.
    2. Select your server and web application.
    3. Click File Manager to open your site’s root directory.

    From here, find and back up your .htaccess file. Rename it to .htaccess_old, then go to Settings → Permalinks → Save Changes in WordPress to generate a clean version.

    Step 2: Locate the .htaccess File in Your Website’s Root Folder

    Now, you’ll need to find the .htaccess file itself. In your File Manager or FTP client, navigate to the main (or “root”) directory of your WordPress installation. This is the top-level folder that contains your core WordPress directories, such as wp-content, wp-admin, and wp-includes.

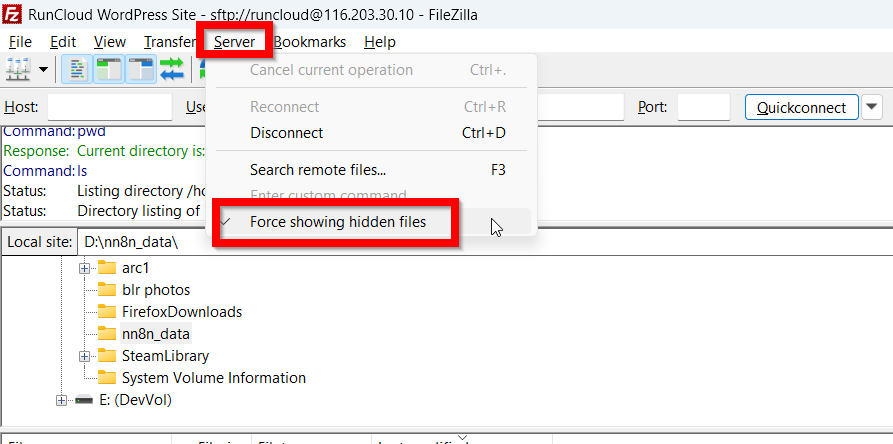
    It’s very common not to see this file at first glance. By default, files that start with a dot (like .htaccess) are treated as “hidden files” or “dotfiles” by many systems. Your file manager is likely hiding it to prevent you from making accidental changes.

    You will need to configure your tool to show these hidden files. In an FTP Client (like FileZilla): this setting is usually in the top menu bar. Look for an option under “Server” and click “Force showing hidden files”.

    After changing the setting, the file list should refresh, and your .htaccess file will now be visible.

    If you have correctly enabled hidden files and the .htaccess file is genuinely not there, it is a strong indicator that your website is not running on an Apache or LiteSpeed server. Instead, it is likely on an NGINX server, which is a popular, high-performance alternative.

    NGINX does not use .htaccess files to manage URL rules; its configuration is handled differently at the server level. If this describes your situation, then a broken or missing .htaccess file is not the cause of your permalink issue. You can safely skip the rest of this section and move on to the next potential fix.

    Step 3: Replace the Old .htaccess File

    First, you should download the existing .htaccess file to your laptop for a backup. With your backup safely downloaded, you can now proceed with resetting the file on your server.

    In your File Manager or FTP client, right-click on the original .htaccess file and choose the “Rename” option. A simple and effective name is .htaccess_old or .htaccess_backup.

    This action does two things at once: first, it preserves your original file in case you need to restore it. Second, by renaming it, you effectively deactivate the old, potentially corrupted file.

    Now, leave your File Manager open and switch back to your WordPress dashboard in your browser.

    1. On the left-hand menu, navigate to Settings > Permalinks.
    2. You do not need to change any of your permalink settings on this page. Simply scroll to the bottom and click the Save Changes button.

    If the issue was a corrupted file, this action will almost certainly fix your broken links.

    Step 4: Manually Editing .htaccess

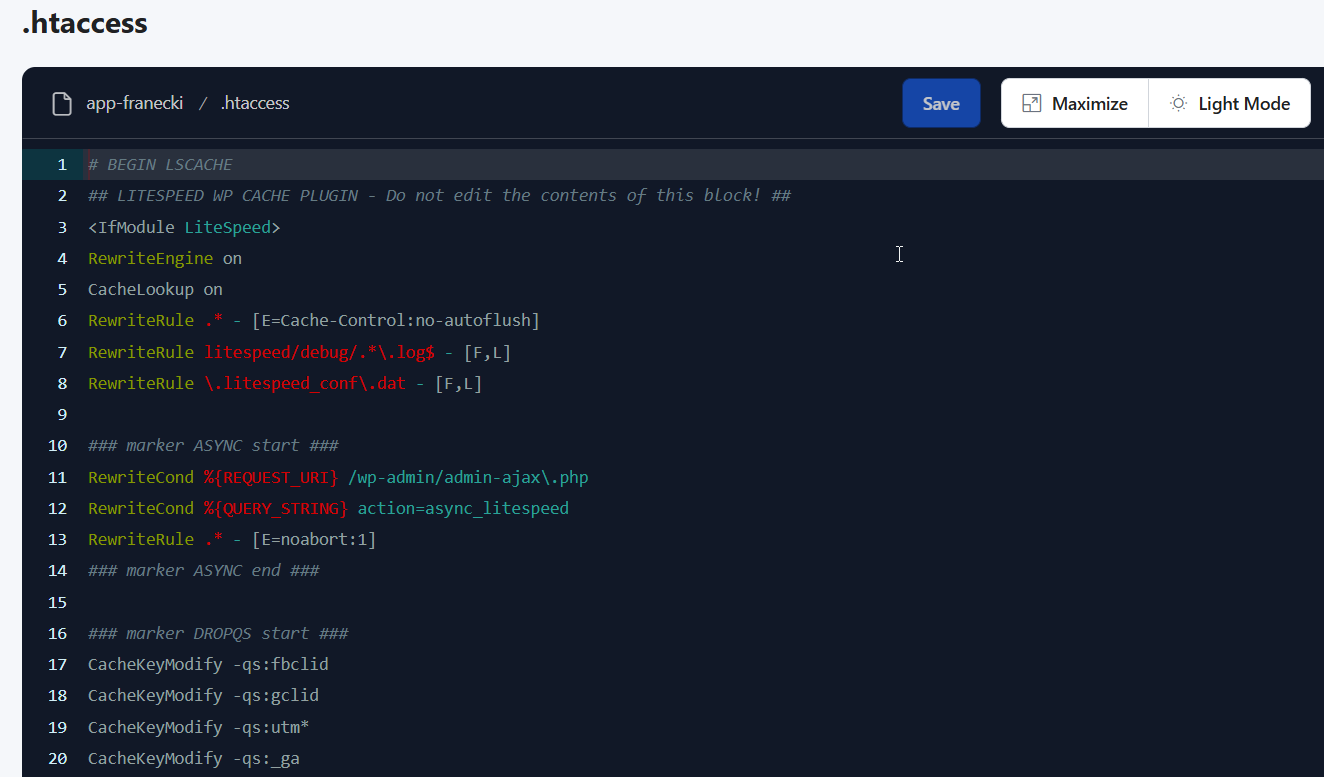
    Once you have disabled the old file, you should create a new file with the necessary rules for your website. If you use caching plugins (like WP Rocket), security plugins (like Wordfence), or custom redirects, then you might need to add custom rules or restore them from the old file.

    4. Reviewing File Permissions

    In our previous post on file permissions, we explained that file permissions in Linux are like digital locks on your website’s files. If the permissions are wrong, WordPress might be locked out and unable to work as expected.

    Your .htaccess file should have 644 permissions.

    In RunCloud, you can fix this in seconds – go to your web application’s Permissions section and click Reset File Ownership to correct all file and folder settings automatically.

    Wrapping Up: Fixing WordPress Permalinks Easily

    In this post, we have explained how to fix broken permalinks on a WordPress site. The good news is that the fix is almost always straightforward once you know where to look. By following this guide, you’ve learned how to diagnose and solve the issue quickly.

    While these fixes are effective, the real goal is to spend less time troubleshooting and more time building. Having the right tools can make all the difference as it transforms complex server tasks into simple clicks.

    Managing servers doesn’t have to be complicated.

    RunCloud gives developers full control with one intuitive panel – from NGINX caching and SSL setup to automated backups.

    Start your free RunCloud trial today and experience how effortless WordPress management can be.

    FAQs on WordPress Permalinks

    Why are my WordPress links not working?

    The most common reasons for non-functional WordPress links are plugin or theme conflicts, a corrupted .htaccess file, incorrect server configuration, or issues after a website migration or update.

    How do I fix a 404 error after changing permalinks?

    The first step is to reset your permalinks by going to Settings > Permalinks and clicking “Save Changes”. If that doesn’t work, you should check for plugin conflicts or regenerate your .htaccess file.

    Can a new plugin break my permalinks?

    Yes, a new plugin can interfere with your .htaccess file and break your permalinks. Deactivating plugins one by one is a good way to identify the culprit.

    What should my .htaccess file permissions be?

    The recommended file permission for your .htaccess file is 644.

    Is it safe to change my permalink structure on a live site?

    Changing your permalink structure on a live site can lead to broken links and a drop in SEO rankings if not done correctly. If you must change it, ensure you set up 301 redirects from the old URLs to the new ones to preserve your link equity.

  • How to Easily Change Your WordPress Site URL

    How to Easily Change Your WordPress Site URL

    Learning how to change your WordPress site URL is a common need for site owners. Whether you’re moving to a new domain, switching to HTTPS, or taking a site live from staging, updating your URL settings is essential.

    Many guides make this process sound complicated, involving database edits or risky changes to configuration files. But with RunCloud, you can update your WordPress site URL in seconds, directly from your dashboard.

    In this article, we’ll walk through the main reasons you might need to change your WordPress URL and show you the safest, simplest methods to do it.

    Why Would You Need to Change Your WordPress Site URL?

    The “WordPress Address (URL)” and “Site Address (URL)” settings tell WordPress where its files are stored and what address visitors use to reach your site.

    You won’t usually need to change them, but there are common scenarios where it’s essential:

    • Switching to HTTPS: After installing an SSL certificate, you should change your URLs from http:// to https://. If you don’t, browsers will show ‘mixed content’ warnings, which can damage trust and hurt SEO.
    • Migrating to a New Domain: If you’re moving your website from old-domain.com to new-domain.com, updating these URLs is the first and most important step to make your site functional on the new address.
    • Adding or Removing ‘www’: A common setup choice is whether to use https://www.runcloud-demo.com or https://runcloud-demo.com. Once you choose, update your WordPress settings to match.
    • Moving from a Temporary Domain: When moving a site from a temporary or staging domain (like dev.runcloud-demo.com) to its live domain, update the address before launch.

    3 Ways to Change Your WordPress URL

    Traditionally, changing these URLs meant editing wp-config.php, running WP-CLI commands, or modifying your database in phpMyAdmin. These methods are error-prone and can break your site if done incorrectly.

    With RunCloud, it’s much easier. Just edit the URL field in your dashboard, and RunCloud takes care of the backend changes automatically.

    Changing Your WordPress URL in RunCloud (Recommended)

    Follow these simple steps to update your site’s address without touching a single line of code.

    Step 1: Open WordPress Settings

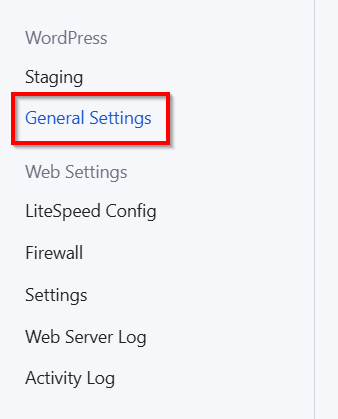
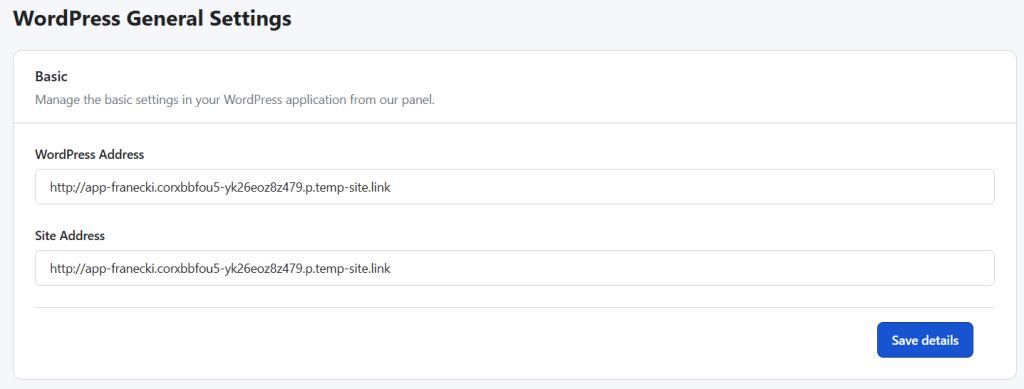
    In your Web Application’s management menu (on the left-hand side), click on General Settings. This opens your WordPress settings.

    Step 2: Edit Your URLs

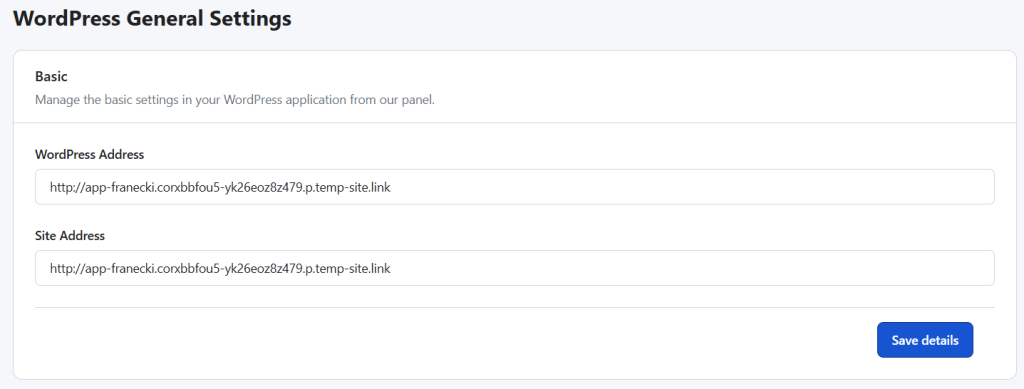
    You will land on the General Settings tab. Under the Basic section, you will see two important fields:

    • WordPress Address: This is where your core WordPress files are stored.
    • Site Address: This is the public-facing address that visitors type into their browser.

    In most cases, both URLs are the same.

    Change WordPress Site URL

    Simply click into these text fields and type in your new URL. For example, if you are moving to a live domain with SSL, you would change it to https://www.runcloud-demo.com.

    Step 3: Save Your Changes

    After entering your new URL, scroll down and click the “Save Details” button.

    That’s it! RunCloud will automatically and safely update your WordPress configuration. Your site will now respond to the new URL.

    Alternative Method 1: Change WordPress URL via the Admin Dashboard

    If your site is working correctly and you can access your dashboard, you can use the standard built-in WordPress settings. This works well for small changes, like switching to HTTPS after installing an SSL certificate.

    Step 1: Navigate to General Settings

    Log in to your WordPress site with your administrator account. In the left-hand admin menu, hover over Settings and click on General.

    Step 2: Update the URL Fields

    On the General Settings screen, you will see two fields that need to be updated: WordPress Address and Site Address (URL). For most standard installations, these two URLs should be identical. Enter your new URL into both fields.

    Step 3: Save the Changes

    Scroll to the bottom of the page and click the “Save Changes” button. After saving, WordPress updates your settings and may ask you to log in again. Your site will now be accessible via the new address.

    Alternative Method 2: Change WordPress URL in wp-config.php

    While the RunCloud panel is the most direct way to manage your core settings, RunCloud is flexible and never locks you out of traditional methods. Editing wp-config.php is useful if you’re locked out of your WordPress dashboard after a failed URL change.

    The wp-config.php file is a core WordPress configuration file in your site’s root directory. You can easily access RunCloud using the built-in File Manager or SSH/SFTP.

    Step 1: Access Your wp-config.php File

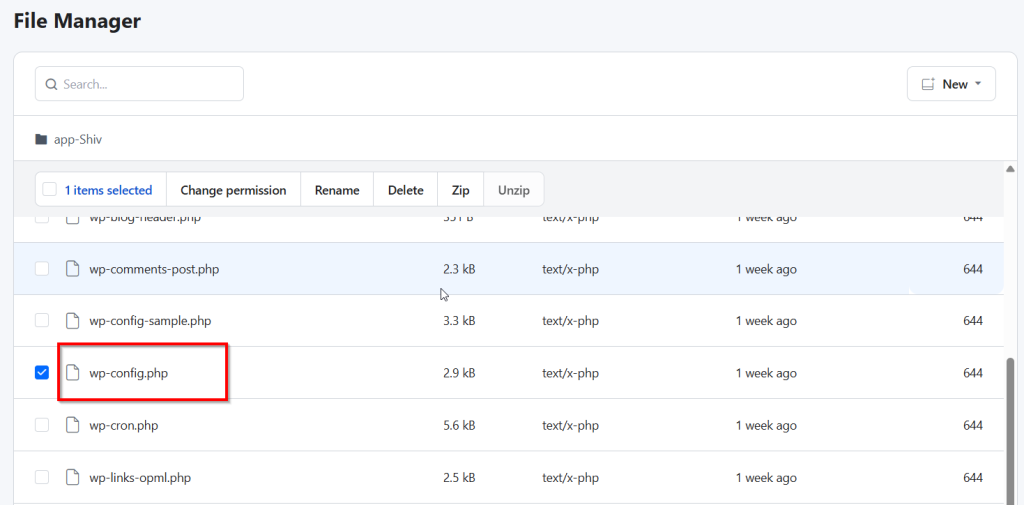
    • Using RunCloud’s File Manager: Navigate to your Web Application in RunCloud, click on File Manager, and see the wp-config.php file in the main folder list. Click to edit it.
    • Using SFTP/SSH: Connect to your server using the credentials provided in your RunCloud dashboard. Navigate to your application’s root directory, usually /home/runcloud/webapps/YOUR_APP_NAME/.

    Step 2: Add the URL Definitions

    Open the wp-config.php file and add the following two lines of code just above the /* That’s all, stop editing! Happy publishing. */ line.

    define( 'WP_HOME', 'https://www.runcloud-demo.com' );
    define( 'WP_SITEURL', 'https://www.runcloud-demo.com' );

    Important: Replace https://www.runcloud-demo.com with your actual, correct WordPress site URL. Be sure to use https if you have an SSL certificate installed.

    Step 3: Save Your Changes

    Save the file and close the editor. This method hard-codes your site URL and overrides the database settings. Your WordPress site will now load from the new address.

    Note: When you use this method, the URL fields in your WordPress admin dashboard will be grayed out and uneditable.

    Conclusion: Save Time and Avoid Headaches with RunCloud

    Changing your WordPress site URL shouldn’t require database edits or command-line work. With RunCloud, it takes less than a minute – no risk, no downtime.

    This is just one example of how RunCloud makes managing servers and WordPress easier. By handling the technical work, RunCloud frees you to focus on building your site and growing your business.

    Ready to simplify WordPress management? Sign up for RunCloud today.

  • How to Fix Error Establishing a Database Connection in WordPress [SOLVED]

    How to Fix Error Establishing a Database Connection in WordPress [SOLVED]

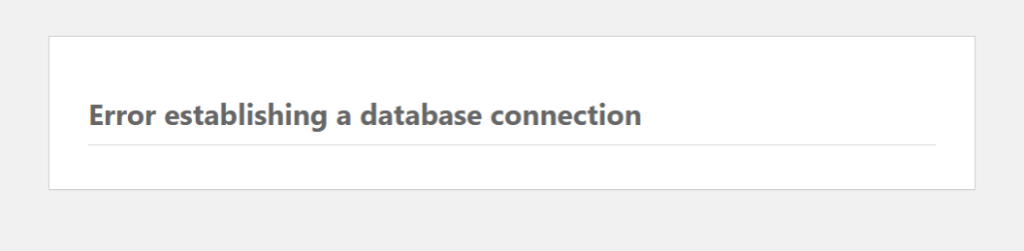
    Few WordPress errors are as frustrating as seeing the message “Error Establishing a Database Connection.” It instantly takes your site offline, blocks both visitors and admins, and can cause serious downtime if not resolved quickly.

    This error occurs when WordPress cannot connect to your MySQL database, where all your posts, pages, and settings are stored. Without that connection, WordPress has nothing to display.

    The good news is that this issue is common and almost always fixable.

    In this guide, we’ll walk through exactly how to fix the error establishing a database connection in WordPress, step by step. From checking your wp-config.php file to repairing corrupted tables and optimizing your server, you’ll learn the proven fixes that quickly get your site back online.

    Let’s get started!

    What Causes ‘Error Establishing a Database Connection’ in WordPress?

    Before we dive into the fix, it’s helpful to understand what triggers this error.:

    • Incorrect Database Credentials: This is the most common reason for this error. The wp-config.php file contains the database name, username, password, and host. If any of these are wrong, the connection will be refused.
    • Corrupted WordPress Database: Your database can become corrupted due to a faulty plugin update, a theme installation gone wrong, or a server glitch.
    • Corrupted WordPress Core Files: Although less common for this specific error, a damaged core file related to the database functions can cause the connection to fail.
    • Unresponsive Database Server: The server where your database is hosted might be down, overloaded, or experiencing technical issues. This is a problem on your hosting provider’s end.
    • Sudden Traffic Spikes: A massive surge in traffic can overwhelm your hosting server and temporarily make the database unresponsive to new connection requests.

    Suggested Read: How to Create a Database for Your Web Application | RunCloud Docs

    Step-by-Step Checklist to Fix ‘Error Establishing a Database Connection‘

    Follow these steps in order, as they are arranged from the most common and easiest fix to the least common.

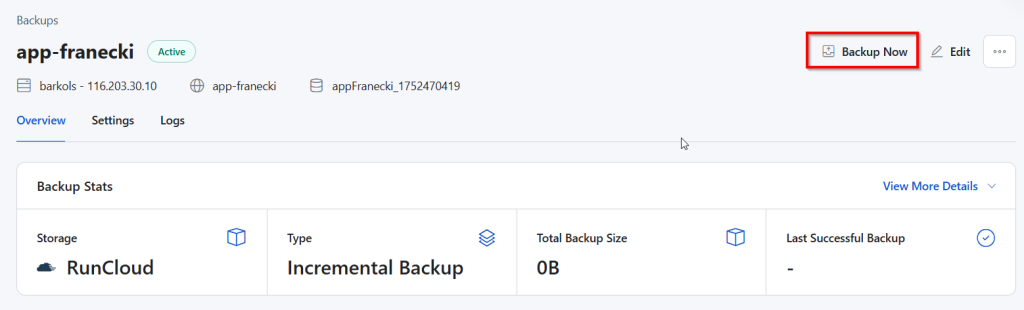
    1. Back Up WordPress Website Before Troubleshooting

    Before making any changes, always create a full backup of your website. This protects your files and database if something goes wrong. RunCloud users can do this in one click from the dashboard.

    If you’re not using RunCloud, you can:

    • Use your hosting control panel (cPanel, Plesk, etc.) to generate and download a backup.
    • Download your WordPress files via FTP and export your database through phpMyAdmin.

    Skipping this step risks turning a small fix into a much bigger problem.

    Suggested Read: How to Connect a MySQL Database to PHP (A Developer’s Guide)

    2. Check and Update wp-config.php Database Credentials

    Incorrect credentials are the most common cause of this error. To check and fix them:

    1. Connect to your site using FTP or your host’s File Manager. Open the wp-config.php file in the root WordPress folder. RunCloud users can edit this file directly from the dashboard.

    Look for these lines of code:

    // ** MySQL settings - You can get this info from your web host ** //
    /** The name of the database for WordPress */
    define( 'DB_NAME', 'your_database_name' );
    /** MySQL database username */
    define( 'DB_USER', 'your_username' );
    /** MySQL database password */
    define( 'DB_PASSWORD', 'your_password' );
    /** MySQL hostname */
    define( 'DB_HOST', 'localhost' );
    1. Find your database details in your hosting control panel (often under “MySQL Databases”).
    2. Make sure the DB_NAME, DB_USER, DB_PASSWORD, and DB_HOST values match exactly. Note: most hosts use “localhost” for DB_HOST, but some require a specific server name or IP.
    3. If anything doesn’t match, update wp-config.php, save the file, and reload your site.

    Suggested Read: SQLite vs MySQL vs PostgreSQL (Detailed Comparison)

    3. Repair WordPress Database via phpMyAdmin or WP-CLI

    If your database tables are corrupted, WordPress cannot read them. Luckily, WordPress includes a built-in repair tool. This process fixes errors without deleting your data.

    1. Open your wp-config.php file.

    Add this line just above /* That's all, stop editing! Happy publishing. */:

    define('WP_ALLOW_REPAIR', true);
    1. Save the file, then go to: http://runcloud-demo.com/wp-admin/maint/repair.php.
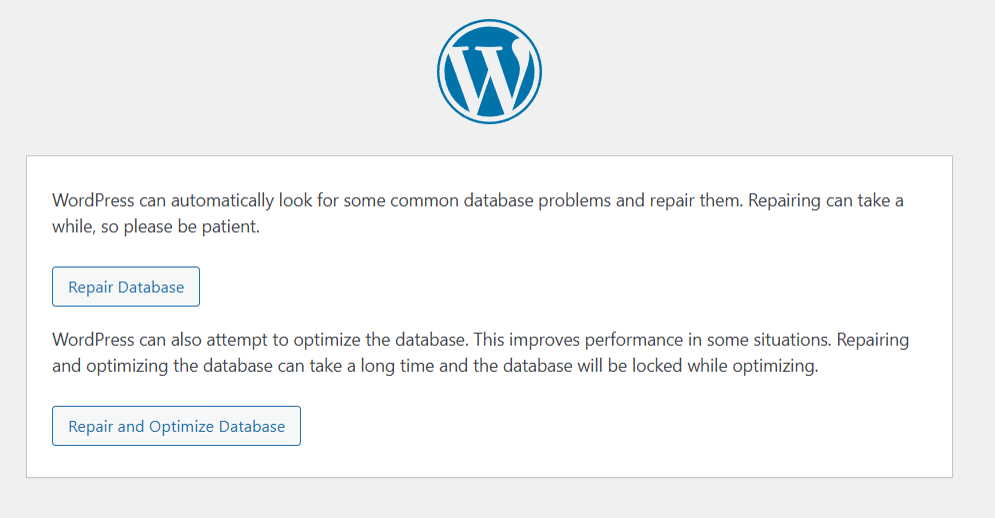
    2. On that page, click “Repair Database.”
    Fix the error establishing a database connection
    1. When it finishes, delete the line you added in wp-config.php. Leaving it in place is a security risk.

    Suggested Read: How to Install phpMyAdmin Easily Using RunCloud

    4. Reset or Update WordPress Database User and Password

    Sometimes the database user loses permissions even if the credentials are correct. To fix this:

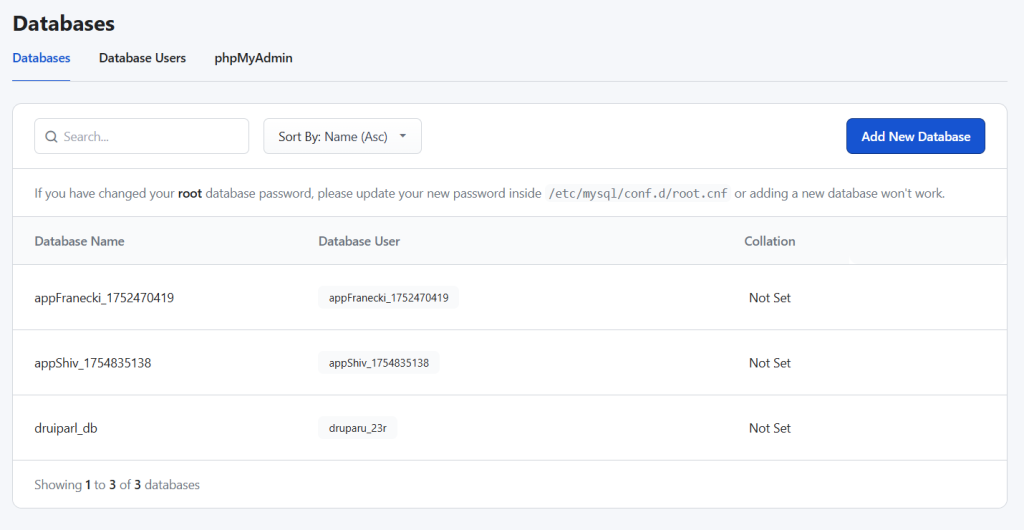
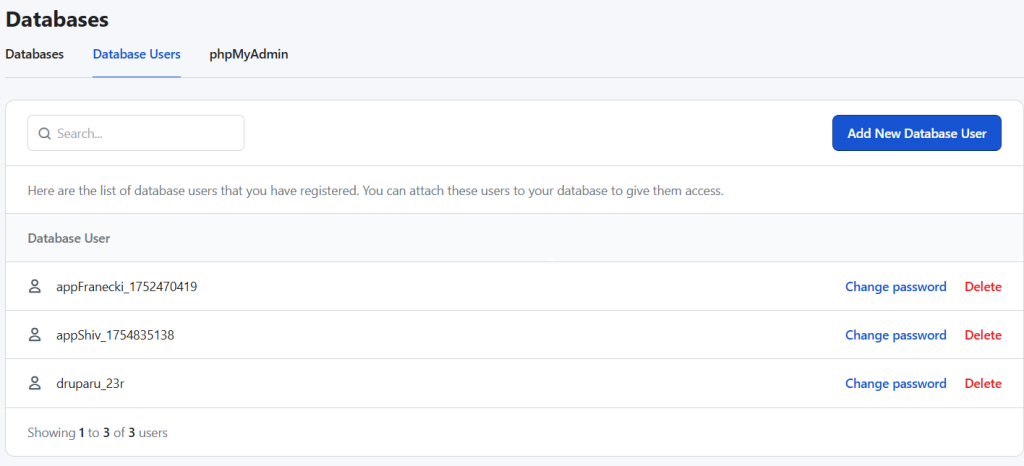
    1. Open the “MySQL Databases” section in your hosting control panel. RunCloud users can do this directly from the dashboard.
    1. Locate the database user for your WordPress site.
    2. Reset the password or create a new user with a strong password.
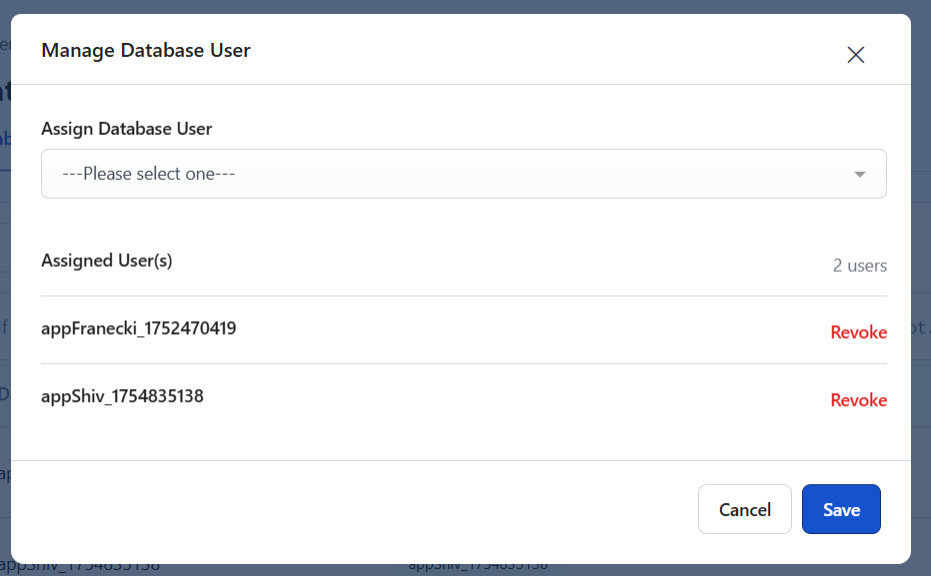
    1. Make sure this user has full privileges for your WordPress database. In RunCloud, use the “Assign and Revoke Users” option to manage this.
    1. Update the new password in your wp-config.php file under DB_PASSWORD.

    Suggested Read: How to Identify and Kill Queries with the MySQL Command-Line Tool

    5. Reinstall or Replace Corrupted WordPress Core Files

    If a WordPress core file is corrupted, replacing it with a clean copy usually fixes the issue. Don’t worry – this won’t affect your themes, plugins, or content.

    1. Download the latest version of WordPress from WordPress.org.
    2. Unzip the file on your computer.
    3. Delete the wp-content folder and wp-config-sample.php file from the unzipped package.
    4. Connect to your site via FTP and upload the remaining files, overwriting the old ones.
    5. This refreshes all core files with clean copies without touching your content.

    Suggested Read: How to Migrate Your Server with (Near) Zero Downtime

    6. Check Hosting Server Health and MySQL Service

    If the error persists, the problem may be with your hosting server rather than WordPress.

    • Check Server Status: Most hosting providers publish updates about outages or maintenance. RunCloud does not provide server status updates, so check directly with your cloud provider (e.g., AWS, Vultr, DigitalOcean).
    • Test Other Sites: If you host multiple sites on the same account, check if they are also down. If they are, it’s likely a server-wide issue.
    • Contact Support: Open a ticket with your provider. Tell them you’re seeing an “Error Establishing a Database Connection” and that you’ve already confirmed your wp-config.php credentials. Ask them to confirm that the MySQL service is running.

    7. Optimize WordPress Database and Enable Caching

    If the error followed a sudden traffic spike, it may disappear once traffic drops. But this is a clear sign your site needs optimization.

    With RunCloud, you can enable NGINX FastCGI caching in one click, or add Redis or Memcached directly from the dashboard. This helps your site handle heavy database loads without needing command-line tools. For detailed guides, see:

    Advanced Troubleshooting for WordPress Database Connection Errors

    If you’ve worked through the standard checklist and are still facing the error, it’s time to investigate deeper server-level configurations and resource limitations. These advanced steps address less common but critical issues that often require more direct control over your hosting environment.

    1. Update DB_HOST in wp-config.php

    Most setups use localhost for DB_HOST, but some hosts run the database on a separate server. In those cases, you’ll need to replace localhost with the hostname or IP address your provider gives you (e.g., mysql.yourhost.com).

    2. Increase PHP memory

    Sometimes the error appears because PHP runs out of memory while processing a heavy query. To increase it, add this line to wp-config.php:

    define('WP_MEMORY_LIMIT', '256M');

    However, server-level settings can sometimes override this change. Manually editing the php.ini file via SSH is the most reliable method, but it can be intimidating for many users.

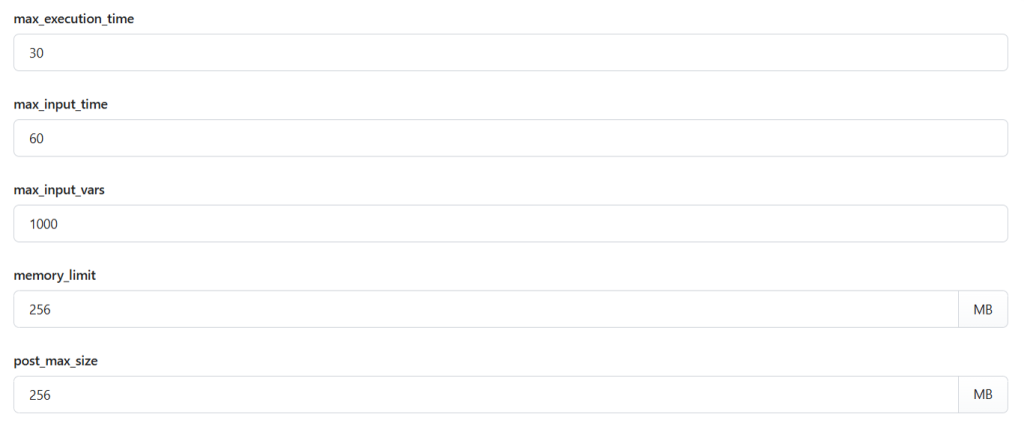
    RunCloud gives you direct, graphical control over your server’s PHP settings. From your web application’s dashboard, you can select a new memory_limit via a text box and other critical values like max_execution_time and upload_max_filesize. This removes the risk of syntax errors in configuration files and instantly applies the changes only to the selected application.

    3. Consider migrating to better hosting

    If you see this error often, the problem may be your hosting provider. Shared hosting, in particular, is prone to overloaded databases. Moving to a VPS (DigitalOcean, Vultr, AWS, etc.) provides more stability.

    The migration process can be daunting. It involves server provisioning, software installation (NGINX, PHP, MySQL), security configurations, and moving your site’s files and database.

    RunCloud is designed to make this transition seamless. You can connect it to any VPS provider, and it will automatically provision, optimize, and secure the server with a modern server stack in minutes. This makes managing and deploying a WordPress website and any web application easy.

    Wrapping Up: Preventing Database Connection Errors in WordPress

    Fixing the “Error Establishing a Database Connection” is one thing – making sure it doesn’t happen again is even more important. Regular backups, reliable hosting, proper caching, and a clean server setup reduce the chances of future downtime.

    That’s where RunCloud helps. Instead of juggling FTP clients, php.ini edits, and command-line fixes, you get a simple dashboard to manage everything – from database users to PHP settings and caching – in just a few clicks.

    If you want fewer headaches, faster performance, and a WordPress site that stays online even under heavy load, RunCloud is built for you.

    Take control of your server – start with RunCloud today and eliminate database errors for good.

    FAQs on ‘Error Establishing a Database Connection’ in WordPress

    Why is my WordPress site not connecting to the database?

    Your site cannot connect because the PHP code is blocked from accessing the MySQL database where your content is stored. This is most often due to incorrect database credentials in your wp-config.php file. 

    How do I fix database errors in cPanel?

    In cPanel, you can fix this by using the “MySQL Databases” tool to check the database username and reset its password. Then, you can use the integrated phpMyAdmin tool to select your database and run the “Repair table” command on any corrupted tables. Platforms like RunCloud offer a more modern interface for these tasks, making user management and phpMyAdmin access much quicker.

    What causes database issues on localhost XAMPP?

    MySQL is usually not running. Open the XAMPP control panel and check that the MySQL module is started (green status). Also, confirm that your wp-config.php settings match the XAMPP defaults – DB_USER is root, and DB_PASSWORD is blank.

    How do I repair a corrupted WordPress database?

    Add the define(‘WP_ALLOW_REPAIR’, true); line to your wp-config.php file to activate WordPress’s built-in database repair script. Alternatively, you can use phpMyAdmin to select all your database tables and choose the “Repair table” option. Server management panels like RunCloud provide one-click access to phpMyAdmin, simplifying the process of performing these database repairs.

    Why is my database error only happening on my iPhone?

    This is almost always a caching problem; your iPhone is likely viewing an old, cached version of the error page that no longer exists. Clear your mobile browser’s cache or purge your site’s caching plugin to resolve it. If you use server-level caching, a tool like RunCloud allows you to easily manage and purge the NGINX FastCGI cache directly from your dashboard.

    How can I check the MySQL server status in WordPress hosting?

    You’ll need to contact support on most shared hosting to confirm the MySQL server is operational. However, you can manage this using a VPS through a server panel. RunCloud provides a real-time server health monitoring dashboard that displays the status of essential services like MySQL, NGINX, and Redis.

    What should I do if database errors appear intermittently?

    Intermittent errors suggest your database server is temporarily overloaded, often due to high traffic spikes or slow database queries from a plugin. This is a resource issue, and you should enable an object caching solution to reduce the database load. With RunCloud’s server health monitoring, you can watch for spikes in CPU and memory usage to diagnose when your server is under strain.

  • A Step-by-Step Guide to Merging Individual WordPress Sites Into a Multisite Network

    A Step-by-Step Guide to Merging Individual WordPress Sites Into a Multisite Network

    Managing multiple WordPress sites can feel like playing an endless game of dashboard hop – logging in and out, repeating the same updates, and wasting time on work that could be done once.

    If your sites are related (part of the same business, organisation, or project), there’s a better way. A WordPress Multisite network lets you run them all from a single installation, with one login, shared themes and plugins, and updates that apply across the board.

    In this guide, you’ll learn exactly how to merge your existing WordPress sites into a single multisite network. We’ll cover when multisite is the right choice (and when it isn’t), how to prepare your sites for migration, and the step-by-step process for bringing all your content, themes, and media together under one roof.

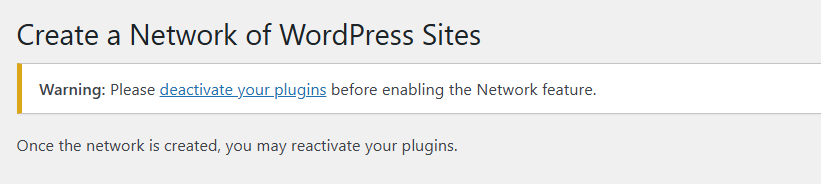
    We will also provide a detailed pre-migration checklist to prepare your sites for a smooth transition and step-by-step instructions to activate your network and migrate all your content, themes, plugins, and media files.

    Let’s get started!

    The Benefits of a Multisite Network

    Moving your individual sites into a multisite network might seem like a bit of work upfront, but the long-term benefits are definitely worth it. Here’s why it’s such a great idea:

    • Centralized Management: This is the biggest win! Instead of juggling multiple usernames and passwords, you can manage every single one of your websites from a single dashboard. With a special “Super Admin” role, you have the power to oversee everything from one convenient location.
    • Efficient Updates: We all know how important it is to keep WordPress, themes, and plugins updated. With a multisite network, you only have to perform an update once. When you update a theme or plugin, that update becomes available across all the sites in your network instantly. This saves time and ensures all your sites are secure and running the latest versions.
    • Resource Savings: Every WordPress installation takes up space on your hosting server. When you have multiple separate sites, you have multiple copies of WordPress core files. A multisite network uses just one set of these core files for all your sites, which means it uses less server space and can be more efficient to run.
    • Consistency: If you want all your sites to have a similar look and feel, then you can use Multisite Network to share themes and plugins across the network. This makes it incredibly simple to maintain a consistent brand and user experience on all of your websites.

    When Should You Not Merge Your Sites?

    While a multisite network is a fantastic tool, it’s not the perfect solution for every situation. Before you go all-in, it’s important to understand when keeping your websites separate is better.

    The most important thing to remember is that all the sites in a multisite network are fundamentally connected. They share the same core WordPress files and the same user database.

    This is why a multisite network is the perfect choice when all your websites are related to each other. For example, it’s great for a single company that needs separate sites for its different departments, office locations, or regional branches. All of these sites operate under the umbrella of one parent company.

    However, you should not use a multisite network when managing websites for two completely different companies or brands unrelated to each other. For instance, you wouldn’t want to run the website for your freelance photography business and the website for your brother’s local pizza shop on the same multisite network. Because they share a user database, it could create confusion and potential security issues. You want to keep completely separate businesses, well, separate!

    If your main goal is simply to manage multiple, unrelated sites from one convenient dashboard without having to log in and out all the time, then a multisite network isn’t the right tool for the job. You should look at our post on the “10 Best WordPress Management Tools To Easily Manage Multiple Websites” to find the perfect solution for your needs.

    While creating a multisite network is awesome, merging existing sites into it can be a bit tricky. It’s a process that requires care and attention to detail. You might run into some bumps along the way, like issues with URLs not redirecting correctly, differences in how the databases are structured, or site-specific settings that don’t initially play nicely with the network.

    It’s very common to do some manual tweaking after the main work is done, such as double-checking your website links (permalinks) or adjusting a few settings to ensure everything is compatible with the multisite setup. Don’t let this scare you, but being prepared is good!

    Additionally, your site may have some downtime, so prepare accordingly.

    Part 1: Pre-Migration Checklist

    Before you dive in, taking a few preparatory steps will save you from future headaches and make the whole process much smoother.

    • Delete Old Data: Before you pack everything up, look around your current site and see if you can tidy up anything. This is a great time to get rid of any spam comments, delete old post drafts that you’ll never use, and remove any images or media files that are no longer needed. Every piece of data on your site must be packed up, moved, and then unpacked on the new site. The less you have to move, the faster the entire merging process. Plus, it will make your backup file much smaller and easier to manage.
    • Create a Complete Backup: This is, without a doubt, the most important step. Before you change any settings, you need a complete backup of your entire website. This includes your database, all your media files, themes, and plugins. If anything goes wrong, you can restore your site to exactly how it was before you started. If you are using RunCloud, you can do this with a simple click from the RunCloud dashboard.
    • Verify Hosting Support: Not all web hosting plans are created equal. Some, especially budget-friendly shared hosting plans, may not support or allow a WordPress Multisite network. Before you begin, contact your hosting provider’s support team or check their documentation to confirm that your plan can handle a multisite installation. If you are using RunCloud, you can continue safely, as RunCloud doesn’t impose any restrictions on WordPress Multisite installations.
    • Check for Plugin and Theme Compatibility: While many plugins and themes work perfectly in a multisite network, some don’t. Take a moment to review your most essential plugins and themes to make sure they are “multisite compatible.” A quick search on the plugin or theme’s page in the WordPress repository or the developer’s website will usually give you the answer.
    • Enable Pretty Permalinks: If your website’s links look something like yourdomain.com/?p=123, it’s best to change them to a more user-friendly and SEO-friendly structure, like yourdomain.com/sample-post. These are called “pretty permalinks.” Having this structure enabled before you start can prevent link-related issues after the merge. You can find this setting in your WordPress dashboard under “Settings” -> “Permalinks.”
    • Enable Maintenance mode: It is recommended that you enable WordPress maintenance mode on your old site by executing the wp maintenance-mode activate command. This will block users from accessing your site and reduce the chances of your data getting corrupted on highly dynamic sites.
    • Deactivate All Plugins: On the individual website that you are planning to merge, it’s a smart move to deactivate all of your plugins right before you export your content. Sometimes, plugins can interfere with the export process and cause conflicts.

    Part 2: Activating Your Multisite Network

    This next part is for anyone who has not yet built a multisite network. However, if you already have a multisite network up and running, you’re ahead of the game! Feel free to jump to the next section.

    There are two main ways to create a Multisite network:

    Method 1: Creating a brand-new multisite network

    This is the perfect option if you’re starting from scratch, maybe because you’re moving to a new hosting provider or haven’t even built the main site for your network yet. The biggest advantage here is that you begin with a completely clean WordPress installation, which is a great way to ensure you don’t run into any potential conflicts from old plugins or settings.

    If you are using RunCloud, you can install a multisite network with only a few clicks from your RunCloud dashboard.

    Method 2: Converting an existing WordPress site into a multisite network

    If you already have your primary website up and running, you should follow this method. For example, if your main business website is already built and you want to add a blog or a store as separate sites within the same network, you would convert your existing site to become the “command center” of your new network.

    1. Edit Your wp-config.php File: The first step is to edit the wp-config.php file in your main WordPress folder and add the following line of code: define(‘WP_ALLOW_MULTISITE’, true);
    2. Begin the Network Setup: Once you’ve saved the change to your wp-config.php file, log in to your WordPress dashboard. A new option will have magically appeared! Navigate to Tools and then click on Network Setup to get started.
    3. Choose Your URL Structure: This is a very important step, so take a moment to think it through. WordPress will ask you to decide how the web addresses for your new sites will be formatted. You have two choices: Subdomains (which look like site1.yourdomain.com) or Subdirectories (which look like yourdomain.com/site1). This choice is permanent and difficult to change later, so pay close attention and choose the one that makes the most sense for your project’s future.
    1. Install the Network: After you’ve made your choice, simply follow the on-screen instructions provided by WordPress. It will generate two snippets of code for you to copy and paste. One snippet will go back into your wp-config.php file (the same one from Step 1), and the other will go into a file called .htaccess (a server configuration file in the same directory). Once you’ve carefully added the code and saved the files, your multisite network will be active and ready to go

    Part 3: Merging WordPress Sites

    After performing all the above steps, we are finally ready to start the merging process. You must perform the following steps for each site you want to merge into your multisite network.

    Step 1: Export Your Content

    • From the individual WordPress site you want to merge, go to “Tools” -> “Export“.
    • Select “All content” and download the XML (WXR) file. This file contains your posts, pages, comments, and other content.

    Step 2: Create a New Site in Your Network

    Next, you need to create a new site in your Multisite network. This is where you will import the data we exported in the previous step.

    • In your multisite dashboard, navigate to “My Sites” -> “Network Admin” -> “Sites”.
    • Click “Add New” and create a new, empty site for the content you are about to import.

    Step 3: Import Your Content

    • Go to the dashboard of the newly created site.
    • Navigate to “Tools” -> “Import” and run the WordPress Importer.

    On the next screen, you must upload the XML file you exported in Step 1. Depending on the size of your site, you may run into issues with max_upload_size or PHP memory limits. You might need to contact your host to temporarily increase these.

    • You will be prompted to assign the imported content to existing users or create new ones. Be sure to check the box to download and import file attachments. When you check this box, the WordPress Importer does two things:
      • It downloads the files: It reads through all your posts and pages, finds where you’ve inserted images or other media (like PDFs or audio clips), and physically downloads a copy of each file from your old, separate site to your new site’s Media Library.
      • It updates the links: After downloading the files, it automatically updates the links within your posts and pages to point to the new location of those files inside your multisite network. This ensures that all the images and media show up perfectly when you view a blog post on your new site.

    What Happens if You Don’t Check the Box?

    If you forget to check this box, only the text content of your posts and pages will be imported correctly. Your website will look like it’s full of broken images. Because the posts will still contain image links pointing back to the Media Library on your old, separate website. When you take that old site offline, all those image links will break permanently, and the images will disappear from your new site.

    Step 4: Migrate Your Themes, Plugins, and Media

    Now that you’ve successfully imported your posts and pages, you’ve brought over the “soul” of your website. The next step is to bring over its “look and feel”, i.e., your themes, plugins, etc.

    If you decided not to download and import attachments in the previous step, then you can also import them manually in this step. This is where things get a bit more technical.

    While you can upload themes and plugins through the WordPress dashboard, moving a large library of media files efficiently and correctly often requires diving into the command line. Being comfortable with basic Linux commands is a huge advantage for a smooth migration, especially when moving from one server to another.

    Migrating Your Themes and Plugins

    First, you must install all the necessary theme and plugin files on your multisite network. You can easily download new themes and plugins by navigating to “Network Admin” -> “Plugins.” Once they are installed, click on “Network Activate” to make them available for all the sites in your network.

    Installing plugins in a WordPress multisite network

    Migrating Your Media Files via The Command-Line

    Your media files (everything in your old site’s wp-content/uploads folder) must be moved to a special directory in your multisite network.

    Each network site has its unique uploads folder, located at wp-content/uploads/sites/X, where X is the unique Site ID. You can easily find the Site ID by going to your “Network Admin” > “Sites” dashboard and hovering over or clicking “Edit” on your new site; the URL will contain its ID.

    For example, in the above screenshot, the site ID is 4.

    Manually downloading and re-uploading hundreds or thousands of files is slow and prone to errors. The ideal method is to copy the files directly from your old server to the new one using the command line.

    1. Connect to Your New Server: You’ll first need to connect to your new server’s command line using SSH (Secure Shell). Your hosting provider can give you the credentials and instructions for this.
    2. Navigate to a temporary directory: Once connected, navigate to a temporary folder where you want to temporarily upload your media files. The command will look something like this:
    mkdir /tmp/myWordPressContent
    cd /tmp/myWordPressContent
    1. Pull Files from the Old Server Using rsync: Rsync is a powerful command-line tool that efficiently synchronizes or copies files between two locations. It’s fast, reliable, and perfect for this job. From inside your new site’s uploads folder, you would run a command like this:
    rsync -avz --progress username@oldserver.com:/path/to/old/site/wp-content/uploads/* .

    Let’s quickly break down that command:

    • rsync -avz --progress: This tells rsync to run in archive mode (preserves file permissions and timestamps), be verbose (show what’s happening), compress the data to speed things up, and show a progress bar.
    • username@oldserver.com:/path/to/old/site/wp-content/uploads/*: This is the source. It’s the full path to all the files (*) inside the uploads folder on your old server.
    • .: This is the destination. The single dot means “copy everything to my current directory.”

    Note: If both your old and new sites are on the same server, you don’t need to copy the files to a different folder. You can use the cd command to navigate to the /wp-content/uploads/ folder of the old site and proceed to the next step.

    Importing the Media to WordPress

    Simply copying the files onto the server isn’t enough. You’ve moved the files, but your WordPress database has no idea they exist, and they won’t appear in your Media Library. You need to tell WordPress to scan the folder and register each file.

    With WP-CLI, you can run the wp media import command. This command goes through a directory of files and properly imports each into the WordPress Media Library, creating all the necessary thumbnails along the way.

    You would run a command like this:

    wp media import --url=newsite.yourdomain.com --path=/path/to/your/multisite/ ./*

    Let’s break that down:

    • wp media import: This tells WordPress we are performing a media import operation.
    • --url=newsite.yourdomain.com: This is essential for multisite. This flag tells WP-CLI exactly which site in the network these media files belong to.
    • --path=...: This provides the full path to your multisite’s root WordPress installation, so WP-CLI knows where to find the core files.
    • ./*: This is the path of media files you want to import. The ./ means the current directory, and * means all the files in this directory.

    When you fill in all the necessary values, the final command should look like this:

    wp media import --path=/home/runcloud/webapps/app-franecki --url=https://app-franecki.corxbbfou5-yk26eoz8z479.p.temp-site.link/site2/ ./*

    Completing this final command-line step ensures that all your migrated images and files are correctly registered and will appear perfectly within your new site’s Media Library.

    Part 4: Post-Migration Checks

    The heavy lifting is done, and your site has been moved into its new home, but don’t pop the champagne just yet! To ensure a seamless transition for both you and your visitors, it’s important to run through a final checklist. These small steps will catch any potential issues and ensure your new site runs perfectly.

    • Check and Reset Your Permalinks: Sometimes, the URL structure can get a little confused after a migration. A broken link is bad for your visitors and your SEO. Fortunately, the fix is very simple: go to the dashboard of your new site, navigate to Settings > Permalinks, and without changing anything at all, just click the “Save Changes” button. This simple action forces WordPress to rebuild its link structure and fixes most common link-related issues.
    • Verify All User Roles and Permissions: You must pay close attention to this area. The standard WordPress Importer is great for content, but does not import user roles. You will need to re-assign roles manually. Go to the Users tab on your new site’s dashboard and double-check that every user has the correct role (e.g., Administrator, Editor, Author). 
    • Review Your Settings from Top to Bottom: If you performed any tweaks to your original site, they didn’t come over with the import file. You’ll need to go through your settings and configure them again. Pay special attention to:
      • Theme Options: Go into your theme’s settings panel and set up your logos, colors, fonts, and layout options.
      • Plugin Settings: Check the settings for your key plugins, like contact forms, SEO tools, and caching plugins.
      • Widgets: Your widgets will likely need to be re-added and configured. Go to Appearance > Widgets to drag and drop them back into your sidebars and footers.
    • Test Everything… and We Mean Everything!
      Put on your visitor’s hat and browse your new site thoroughly. Click through the navigation menu, read a few blog posts, and ensure all the images display correctly. Test every key functionality; submit a message through your contact form, test your search bar, and go through a test purchase process if you have a store.
    • Add Redirects from the Old Site to the New: To avoid losing your hard-earned search engine rankings and to prevent visitors from landing on a dead page, you must set up 301 redirects. A 301 redirect tells browsers and search engines that your site has moved permanently. You’ll need to redirect traffic from your old standalone site’s URL to its new address within the multisite network (e.g., from oldsite.com to yournetwork.com/newsite). This can be easily done by adding rules to your .htaccess file.

    After Action Report

    Merging your WordPress sites into a multisite network is a powerful way to streamline your workflow and efficiently manage all of your websites. While the process can have challenges and technical hurdles, careful planning and following these steps will help ensure a smooth and successful transition.

    Tired of the Command Line? Let RunCloud Handle It.

    You’re not alone if you feel overwhelmed after reading through the steps involving SSH, rsync, and WP-CLI. Managing a Linux server can be complex and time-consuming, taking you away from what you do best – running your business.

    That’s where RunCloud comes in.

    We believe server management should be simple. Our platform provides a clean, powerful control panel that makes it incredibly easy to deploy websites, manage databases, and secure your server without ever touching the command line. You can focus on growing your business and creating great content, and leave the server management to us.

    Ready to experience a faster, simpler way to manage your WordPress sites? Sign up for a 7-day free RunCloud trial today!

  • How to Send Emails From WordPress Using Your Gmail Account for FREE (Step-By-Step Guide)

    How to Send Emails From WordPress Using Your Gmail Account for FREE (Step-By-Step Guide)

    Is your WordPress site failing to send emails? Are your contact form submissions getting lost, or are users complaining they never receive password reset links?

    The default WordPress email function is somewhat unreliable, with messages landing in spam folders or never arriving.

    There are countless reasons why your website needs to send emails reliably. These automated messages are the backbone of your site’s communication, from new user registrations and e-commerce receipts to important notifications for your internal team.

    While dedicated email services are an option, they often come with a monthly fee. But what if you could fix your WordPress email problems for free?

    This is where your existing Gmail account comes in.

    Configuring your site to send emails via Gmail’s powerful SMTP server can dramatically improve deliverability without spending a dime. This method is an excellent solution for handling low-volume, essential emails.

    This guide will teach you how to set up the Check & Log Email plugin to send all your WordPress emails through your Gmail account, ensuring they reach the inbox every time.

    Let’s get started!

    Understanding Gmail SMTP Sending Limits

    It’s important to understand that a personal Gmail account is not designed for mass-mailing. Google imposes sending limits to prevent spam and reduce the server load. At the time of writing, you can send up to 2,000 emails per day when using the Gmail SMTP server. If you exceed this limit or your sending behavior appears suspicious, Google might temporarily disable your account, or your emails could be flagged as spam.

    If you plan to send a large number of emails, such as newsletters or marketing campaigns, you should consider using a dedicated transactional email service or a newsletter platform.

    How to Configure Gmail SMTP in WordPress

    Step 1: Configure an App Password in Your Google Account

    You cannot use your regular Gmail password directly in the plugin for security reasons. Instead, you need to generate an “App Password.” This is a 16-digit passcode that gives an app or device permission to access your Google Account.

    1. Go to your Google Account.
    2. Select “Security.”
    3. Under “How you sign in to Google,” select “2-Step Verification.”
    4. At the bottom of the page, select “App passwords.”
    5. Enter a name for the app (e.g., “WordPress SMTP”) and click “Generate.”
    1. Google will generate a 16-character password. Copy this password to a safe place; you will need it for the plugin configuration.

    Step 2: Install and Configure the Check & Log Email Plugin

    Now it’s time to set up the plugin in your WordPress dashboard.

    1. Install the Plugin: From your WordPress dashboard, go to “Plugins” > “Add New,” search for “Check & Log Email,” and then install and activate it.
    1. Configure SMTP Settings: Navigate to the “Check & Log Email” settings. You will need to fill in the following fields:
      • Mailer: Select “Gmail”.
      • From: Enter your Gmail address.
      • From Name: Enter the name from which your emails will be sent.
      • SMTP Host: smtp.gmail.com
      • SMTP Secure: You can choose either “SSL” or “TLS”.
      • SMTP Port: Use 465 for SSL or 587 for TLS.
      • SMTP Authentication: Select “Yes.”
      • Username: Your full Gmail address (e.g., youremail@gmail.com).
      • Password: Paste the 16-digit App Password you generated in the previous step.

    Step 3: Send a Test Email

    Once you have saved your settings, it’s time to test if everything works correctly.

    1. Go to the “Test Email” tab within the plugin’s settings.
    2. Enter a recipient email address (you can use your own).
    3. Click “Send Test Email”.

    You will receive the test email in your inbox if the configuration is correct. You can also check the “Email Log” tab in the plugin to see a record of all emails sent from your WordPress site.

    Suggested read: 10 Best Self-Hosted Email Server Platforms to Use in 2025

    Final Thoughts

    Sending WordPress emails through Gmail is a quick, free way to fix common delivery problems for low-volume needs. It works well for critical tasks like password resets, form submissions, and team notifications, without extra monthly costs.

    However, reliable email is just one part of running a stable, high-performing WordPress site. Your site’s speed, security, and uptime ultimately depend on the server it runs on – and that’s where RunCloud comes in.

    RunCloud gives you a single, easy-to-use dashboard to manage your servers and WordPress sites, no matter where they’re hosted. You can connect cloud providers like AWS, Google Cloud, DigitalOcean, and Vultr, or even manage on-premise servers. You’ll have full control over performance, security, and deployments, without spending hours on server admin.

    Take the stress out of server management.

    Start using RunCloud today and focus on building your website – while we handle the heavy lifting behind the scenes.

  • How to Get Your Website Indexed by Search Engines in 2026: A Complete Guide

    How to Get Your Website Indexed by Search Engines in 2026: A Complete Guide

    You’ve launched your new website. Now you’re hearing a flood of new terms: SEO, index, sitemap, crawlers. These are all important buzzwords in digital marketing, but they often boil down to one critical question:

    How do you get your website indexed by Google so people can find it?

    If you’re asking that question, you are in exactly the right place.

    Getting your website to appear in search results on Google and Bing is called “indexing”. In simple terms, it’s how search engines discover your web pages and add them to their massive database, making them available to searchers.

    While it’s true that search engines will eventually find your site on their own, passively waiting is a slow and uncertain process. By actively submitting your website and ensuring it’s properly prepared, you can dramatically speed up the process and improve your overall visibility from day one.

    This guide will walk you through every step to officially introduce your site to the world’s largest search engines.

    Let’s get started!

    Phase 1: Preparing Your Site for Crawlers

    Before you even think about submitting your site, you should first ensure it’s technically sound and “crawler-friendly”. Follow the steps below to make sure your site is ready to be indexed.

    1. Set a Preferred URL with Canonical Tags

    Canonicalization is selecting a single, “master” URL for a page that might be accessible through multiple addresses. For example, the following URLs could all show the exact same homepage:

    • http://example.com
    • https://example.com
    • https://www.example.com

    A canonical tag tells search engines to treat all pages as one page, which helps prevent duplicate content issues. To implement this, ensure every page on your site contains a canonical tag.

    If you are coding your site, then you would need to do this on your own by adding the <link rel="canonical" href="URL-of-the-page-itself"> tag in the HTML head, but most modern content management systems (CMS) handle this automatically.

    2. Create a robots.txt file

    A robots.txt file is a simple text file in your website’s root directory (e.g., example.com/robots.txt). It provides instructions to search engine crawlers and tells them which sections of your site they should not visit. You can use this file to hide certain website sections, such as private admin pages or user shopping carts.

    When you create this file, it is also recommended to include a line pointing to your XML sitemap, as this helps search engines efficiently discover all the important pages you want them to index.

    User-agent: *
    Disallow: /admin/
    Disallow: /cart/
    Sitemap: https://www.yourdomain.com/sitemap.xml

    📖 Suggested read: How to Edit robots.txt in WordPress (With & Without Plugin) 

    3. Control AI Bot Access

    With the rise of AI models trained on public web data, you may want to control whether companies can use your content for training. You can specify rules for these AI bots in your robots.txt file by adding directives that target their specific user-agents.

    For example, to block Google’s AI models from using your content, you can add a rule for Google-Extended, and to block OpenAI’s models, you can use ChatGPT-User.

    Add the following rules to your robots.txt file to disallow access for these common AI crawlers:

    # Block Google's AI model training
    User-agent: Google-Extended
    Disallow: /
    # Block OpenAI's AI model training
    User-agent: ChatGPT-User
    Disallow: /

    This instructs these specific bots not to crawl any part of your website, opting your content out of their data collection for model training.

    To learn more about editing your robots.txt file, read our full-length article on How to Edit robots.txt in WordPress (With & Without Plugin).

    4. Create XML Sitemap

    A sitemap is an XML file that lists all the important pages, videos, and images on your site and when they were last updated. A good sitemap makes it easy for search engines to find and understand your content.

    Most CMS platforms have plugins or built-in tools for this (e.g., Yoast SEO, Rank Math, or Squarespace’s native feature). Once your sitemap is ready, you can host it on your web server and ensure it is accessible via your robots.txt file.

    5. Add Structured Data (Schema Markup)

    Structured data, or Schema markup, is a standardized code format you add to your website to help search engines understand your content on a deeper level. While basic HTML elements like headings and lists give your page visual organization, structured data explicitly defines your content.

    For example, telling Google that a string of numbers is a phone number or that a piece of text is the name of a product allows search engines to better interpret your pages and qualify your site for “rich snippets”, which are enhanced, more detailed listings in search results.

    Depending on your site’s content, you can implement various Schema markup types. Some of the most common and beneficial types include:

    • Organization: Defines your business name, logo, address, and contact information.
    • Article: Specifies the headline, author, publication date, and featured image for blog posts or news stories.
    • Product: This section provides a product’s name, image, brand, price, and availability, often including review ratings.
    • FAQPage: Marks up a list of questions and answers, making them eligible to appear directly in search results.

    After adding the markup to your pages, you should use a tool like Google’s Rich Results Test to validate the code and confirm that it has been implemented correctly.

    6. Optimize On-Page Elements

    Optimizing your content’s core on-page elements is an important step in preparing it for search engines. Crawlers analyze these elements first to understand a page’s topic and structure, and they directly influence how your content is displayed in search results.

    To properly structure each page, you should focus on several key components. Each serves a distinct purpose in communicating what your page is about on search engine results pages and social media platforms.

    • SEO Title (<title> tag): This is your page’s main, clickable headline that appears in search results and at the top of a browser tab.
    • Meta Description: The short summary appears under the title in search results. It doesn’t directly impact ranking, but it is an advertisement to convince users to click on your link.
    • Headings (H1, H2, H3): These tags structure your content for readers and signal the information hierarchy to crawlers. An H1 tag is typically used for the page’s main title, with H2s and H3s for subtopics.
    • Open Graph (OG) Tags: These tags control how your content’s title, description, and preview image appear when shared on social media platforms like Facebook, LinkedIn, or X (formerly Twitter).

    Phase 2: Notifying Search Engines

    After preparing your website, it is time to announce its presence to the search engines. This step lets you communicate directly with search engines to ensure they can efficiently find, crawl, and index your content.

    1. Register with Webmaster Tools

    Registering your site with Webmaster Tools is the most important step in this phase. These tools provide direct communication with the major search engines, invaluable data on how search engines see your site, alerts you to critical errors, and tools to manage your site’s appearance in search results.

    • Google Search Console: This is arguably the most important tool for monitoring and managing your site’s presence in Google Search. It offers detailed performance reports, indexing status, and mobile usability feedback.
    • Bing Webmaster Tools: This is the equivalent platform for the Microsoft Bing search engine. It’s important to note that Bing also powers search results for other popular engines like DuckDuckGo and Yahoo, so registering here expands your reach beyond just the Bing ecosystem.

    2. Verify Site Ownership

    Before you can access any of this sensitive data, search engines need to confirm that you are the website’s legitimate owner or authorized manager. During the setup process, each tool will guide you through a verification procedure.

    There are several common methods to accomplish this, and you only need to choose one: you might be asked to upload a special HTML file to your server, add a unique meta tag to the code of your homepage, or verify your ownership directly through your domain name provider’s settings.

    3. Submit Your Sitemap

    After verifying ownership, your next step is to submit your sitemap. The process is straightforward in both Google Search Console and Bing Webmaster Tools.

    • You must locate the “Sitemaps” section within the tool’s interface.
    • Once there, you simply paste the full URL of your sitemap file into the submission field and click the “Submit” button.

    After receiving your sitemap, the search engine adds your URLs to its crawling queue. This doesn’t mean your site will be indexed instantly, but it ensures that the search engine’s crawlers, or bots, are aware of your pages and will schedule a visit to discover and evaluate your content for inclusion in their search results.

    Phase 3: Monitoring & Ongoing Updates

    While you only need to submit your website to search engines once, achieving and maintaining visibility in the search engines is an ongoing process that requires continuous monitoring and updating.

    The process of crawling and indexing is not instantaneous. After you submit your site, it can take a few days to several weeks for search engines to fully process your pages and begin showing them in search results.

    Additionally, submitting a sitemap or requesting indexing does not guarantee inclusion. Search engine systems are designed to prioritize high-quality, relevant, and useful content, and they will ultimately make the final decision on what to index.

    After indexing the site, you can check your site’s progress using the tools available.

    • The URL Inspection Tool in Google Search Console is your best friend for examining individual pages. You can enter any URL from your site to receive a detailed report on its current indexing status, see if it is mobile-friendly, and identify any specific issues preventing it from being shown on Google.
    • Use the Index Coverage Report in Google Search Console for a high-level overview. This report gives you a complete picture of your site, showing which pages are successfully indexed, which have warnings that may affect their performance, and which have been excluded from the index entirely, along with the specific reasons for each status.

    Phase 4: Advanced & Real-Time Indexing

    In addition to the standard sitemap submission, there are more advanced, real-time methods for notifying search engines of changes on your site. These protocols are designed for speed, allowing you to alert search engines the moment content is published, updated, or removed.

    IndexNow Protocol

    The IndexNow protocol is a simple, open-source initiative that allows website owners to instantly notify multiple search engines whenever site content is created, updated, or deleted.

    Instead of waiting for search engine crawlers to discover a change, you can proactively “ping” them, dramatically speeding up the discovery process.

    This protocol is supported by a growing list of major search engines, including Microsoft Bing, Yandex, Naver, Seznam, and Yep. While Google does not natively participate in IndexNow, it has confirmed that it is monitoring these signals to assess the protocol’s utility. The primary benefit of using IndexNow is the acceleration of content discovery on supporting search engines. Your latest updates appear in search results much faster, resulting in more relevant traffic and fresher content for users.

    Implementation is often straightforward, as many modern Content Management Systems (CMS) and Content Delivery Networks (CDNs) have integrated IndexNow via plugins or built-in features. It can also be implemented directly via a simple API key for more custom setups. You can find more details and resources at the official IndexNow website and Bing’s IndexNow portal.

    Google’s Indexing API

    Google offers its proprietary system for real-time notifications called the Indexing API. However, you should note that this API has a very strict and narrow use case, and using it for other purposes is against Google’s guidelines. The Indexing API is designed exclusively for two specific types of time-sensitive content:

    • JobPosting: Pages containing structured data for job listings.
    • BroadcastEvent: Pages with structured data for livestream videos.

    Using the Indexing API is essential for websites that feature this kind of short-lived content. It lets you directly notify Google when a job has been filled or a livestream has ended, ensuring the information remains fresh and accurate in search results.

    Implementing Google’s Indexing API is a more technical process intended for developers. It requires setting up a Google Cloud project, creating a specific service account, and managing access tokens to make API calls. The complete technical documentation and instructions are in Google’s official developer guide.

    TL;DR: How to Index Websites Instantly

    FeatureSitemap SubmissionURL Inspection ToolIndexNow ProtocolGoogle Indexing API
    Use CaseInitial site submission; bulk updatesRequesting re-index for 1-2 important URLsInstantly notify multiple engines of any changeInstantly notify Google of job/livestream changes
    Supported ByAll major search enginesGoogleBing, Yandex, etc.Google only
    Content TypeAll content typesAll content typesAll content typesJobs & Livestreams ONLY
    SpeedSlow (Days to weeks)Medium (Hours to days)InstantInstant

    Final Thoughts

    This post explains how to actively notify search engines of your site’s existence using standard and advanced methods. Following these steps gives your site the best possible start to being discovered by Google, Bing, and the audiences they serve.

    However, getting indexed is only part of running a successful website.

    Your server’s ongoing performance, speed, and security are critical in search engine rankings and user experience.

    Managing these technical elements can be a constant hassle, pulling your focus away from what you do best: creating great content and growing your business.

    To speed things up and eliminate the burden of complex server administration, consider using RunCloud. You shouldn’t have to be a server expert to run a fast, secure website. RunCloud simplifies the entire process, providing you with a powerful and intuitive dashboard to deploy, manage, and monitor your cloud servers without ever needing to touch the command line.

    Ready to take the complexity out of server management? Sign up for RunCloud today.

    Frequently Asked Questions about Website Indexing

    Why isn’t my website showing up on Google after I submitted my sitemap?

    Submitting a sitemap informs Google that your site exists, but doesn’t guarantee immediate indexing. Indexing can be delayed if Google’s systems determine your site’s quality is low or technical issues prevent its crawlers from accessing your content. Use the URL Inspection Tool in Google Search Console to check for specific page errors.

    How long does it take for a new website to be indexed?

    The timeline for indexing a new website can vary widely, from a few days to several weeks. Factors like your site’s authority, technical health, and content quality all affect how quickly search engines crawl and index your pages.

    What does “Discovered – currently not indexed” mean in Google Search Console?

    This status means Google knows your page exists but has chosen not to crawl and index it yet. This often happens when Google’s systems feel that crawling the URL might overload your server or that the content is not of high enough quality to warrant indexing at this time. Improving your overall site quality and internal linking can help resolve this over time.

    What’s the difference between blocking a page in robots.txt and using a noindex tag?

    Blocking a page in robots.txt prevents search engine crawlers from visiting or seeing the page’s content. A noindex meta tag allows crawlers to visit the page but explicitly instructs them not to include it in their search results index. Use noindex for pages you want Google to know about but keep private, and robots.txt for sections you want crawlers to ignore completely.

    Do I need to resubmit my sitemap whenever I add a new page?

    No, you do not need to manually resubmit your sitemap for every change. Modern sitemap tools automatically update a “last modified” date, and search engines will re-check your sitemap periodically to find new and updated URLs. Manually submitting is generally only necessary for the initial setup or after a major site overhaul.

    Is it worth using IndexNow if Google doesn’t officially support it?

    Yes, it is still highly recommended that most sites use the IndexNow protocol. It provides instant indexing benefits on major search engines like Bing and Yandex, which can drive significant traffic. Since implementation is often as simple as a plugin, the small effort provides a large benefit across the web, even if Google is not yet a direct participant.

    Can I use the Google Indexing API for my blog posts or e-commerce products?

    You should not use the Google Indexing API for standard content like blog posts or product pages. The API is strictly for time-sensitive JobPosting and BroadcastEvent (livestream) content. Misusing the API for other content types is against Google’s guidelines and can result in your access being revoked.

  • Server Cache vs. Browser Cache vs. Site Cache: What’s the Difference?

    Server Cache vs. Browser Cache vs. Site Cache: What’s the Difference?

    Slow websites lose visitors. If your store or site takes more than a couple of seconds to load, people leave – and they don’t come back.

    That’s where caching comes in.

    In this guide, we’ll break down the three main types of website caching:

    • Server cache
    • Browser cache
    • Site (or page) cache

    You’ll learn what each one does, how they work together, and why they matter for speed and stability. We’ll also show how tools like RunCloud Hub for WordPress make it easier to manage caching without diving into server configs.

    Let’s get into it.

    What is Caching?

    When a server handles a request, it often needs to process multiple database queries and calculations before responding. This works fine for occasional access, but with repeated requests, it wastes time and server resources by doing the same work repeatedly.

    Caching speeds up performance by storing copies of frequently used data in fast-access memory. Instead of regenerating the same content on every request, the server or browser checks the cache first and serves the stored version if available.

    On websites, this cached data can include anything from images and stylesheets to entire web pages or database query results.

    📖 Suggested read: NGINX Caching for WordPress – Complete Guide & Tutorial

    What is Server Cache?

    Server cache refers to various caching mechanisms implemented directly on the web server or dedicated caching servers in front of the origin server. This type of caching reduces the server’s processing load by storing the results of computationally expensive operations or frequently requested content.

    For instance, if generating a dynamic web page requires multiple database queries and complex calculations, the server can cache the final HTML output of that page.

    When another user requests the same page, the server can deliver the pre-generated cached version almost instantly, without re-executing all the backend processes.

    Other examples of server caching include opcode caching (storing precompiled script code), object caching (storing frequently used data objects like database query results), or CDN caching (where geographically distributed servers cache static assets closer to users). This significantly improves the server’s capacity to handle more traffic and delivers content faster.

    With RunCloud, you can enable server-side caching quickly by installing RunCloud Hub, which includes powerful options like FastCGI and object caching for WordPress.

    Read more about caching in our blog post titled How to Easily Optimize Your WordPress Website With RunCloud Hub.

    📖 Suggested read: Which is Better: Redis Full-Page Cache or NGINX FastCGI Caching?

    What is Browser Cache?

    Browser caching helps speed up return visits to a site by storing common files, like logos, styles, and scripts, directly in the user’s browser. Instead of downloading them again every time, the browser loads them from local storage.

    This process dramatically speeds up page loading times for subsequent visits because fetching files from local storage is much faster than retrieving them online. It also reduces bandwidth consumption for both the user and the web server.

    Website administrators can influence browser caching behavior by setting appropriate HTTP headers (like Cache-Control and Expires) on their server responses, telling browsers how long they should keep specific files cached.

    📖 Suggested read: Everything You Need to Know About WordPress Object Caching

    What is Site Cache (Page Cache)?

    Site cache, often called page cache, is a type of server-side caching that stores fully rendered HTML pages. When a user requests a page, instead of the server dynamically generating it by querying databases, processing templates, and running scripts every single time, it can serve a static HTML copy directly from the cache. This approach is particularly beneficial for content that doesn’t change frequently for every user, such as blog posts, product pages, or informational pages.

    For example, if a popular news article is requested, the server might generate it once, store the complete HTML page in its cache, and then serve that same static file to thousands of subsequent visitors. This bypasses almost all server-side processing, leading to incredibly fast load times and significantly reducing server resource usage.

    📖 Suggested read: How to Use Redis Full-Page Caching to Speed Up WordPress

    Server Cache vs. Browser Cache vs. Site Cache: Key Differences

    Here’s how the three main types of cache compare, based on what they store, where they’re kept, and how they help your site perform better:

    Feature

    Browser Cache

    Server Cache

    Site Cache (Page Cache)

    Storage LocationOn the individual user’s computer (within their web browser)On the web server itself or on intermediary caching servers (e.g., CDNs, reverse proxies)On the web server
    What is StoredStatic assets (images, CSS, JavaScript files, fonts)Frequently requested data, database query results, pre-compiled script code, object data, page fragmentsFully rendered HTML pages (what the user sees in the browser)
    Primary BenefitSpeeds up subsequent page loads for the specific user by loading assets locally; reduces bandwidth for repeat visitsReduces the processing load on the origin server; accelerates responses by serving pre-computed or frequently accessed dataDelivers pre-built pages almost instantaneously; bypasses most server-side processing (database queries, PHP execution) for the cached page
    Who Primarily BenefitsThe individual returning userAll users accessing the siteAll users requesting a cached page

    📖 Suggested read: The Best WordPress Caching Plugins To Speed Up Your Site (2025)

    Which Cache Type is Best for WordPress?

    For WordPress sites, page caching (also called site caching) usually gives the biggest performance boost. WordPress dynamically builds each page by running PHP scripts and querying the database, even for content that doesn’t change. Page caching skips all that by storing a fully rendered HTML version of the page and serving it instantly.

    This alone can cut load times dramatically.

    Browser caching is another must-have. It stores static assets, like logos, stylesheets, and scripts, directly in the visitor’s browser. That means repeat visits feel faster, and your server uses less bandwidth.

    For high-traffic or more dynamic sites, you can go further by enabling object caching – a type of server cache that stores the results of frequent database queries in memory using tools like Redis or Memcached. This reduces the load on your database and speeds up dynamic page generation.

    When used together, these caching layers improve speed, reduce server resource use, and keep your site stable under load.

    📖 Suggested read: LiteSpeed Cache WordPress Plugin Configuration Tutorial

    When Should You Use Each Type of Cache?

    • Use browser caching on all websites to store static assets – logos, stylesheets, JavaScript, and fonts – that rarely change. This significantly speeds up page loads for returning visitors and reduces server bandwidth.
    • Server cache (in various forms) is essential for any dynamic website to reduce server load and improve user response times.
    • Use page cache (a type of site cache) for frequently accessed pages that are identical or very similar for most users, such as blog posts, informational pages, or product category pages.
    • For highly dynamic elements or user-specific content (like a shopping cart or personalized dashboard), more granular server caching, like object caching (for database query results) or fragment caching (for parts of a page), is more appropriate to avoid serving stale or incorrect personalized data.

    📖 Suggested read: 9 Redis Alternatives Worth Keeping an Eye On

    Final Thoughts

    Caching helps your site handle more traffic without increasing server resources. Each type of cache has a specific role, and together, they create a faster, more efficient user experience.

    For WordPress users, caching setup can feel complex.

    RunCloud Hub simplifies it by handling server-side caching (like FastCGI) automatically, with smart cache purging whenever content is updated.

    When a visitor requests a page, if a cached version exists at the server level, it’s served directly by NGINX before WordPress loads or processes PHP and database queries. This bypasses the most resource-intensive parts of WordPress page generation, resulting in dramatically faster load times for your visitors.

    RunCloud streamlines the setup and management of these powerful caching mechanisms and allows you to focus on creating great content while we optimize performance. Furthermore, RunCloud intelligently interacts with WordPress to know when content is updated, so it can purge the old cache and serve fresh content, ensuring accuracy.

    Caching doesn’t have to be technical. With RunCloud Hub, you can enable server, page, and object caching in just a few clicks – no manual config needed.

    If you want your site to load faster, handle more traffic, and use fewer resources, start using RunCloud today.

    FAQs on Caching

    What is the difference between caching and compression?

    Caching stores copies of frequently accessed data (e.g., web pages, images) to serve them quickly on subsequent requests, reducing server load and latency. Compression, on the other hand, reduces the file size of data before it’s transmitted, making downloads faster by using less bandwidth.

    Does caching improve SEO rankings?

    While caching isn’t a direct ranking factor, it significantly improves website speed and user experience, which are crucial for SEO. Faster load times can lead to lower bounce rates and better engagement, directly impacting search engine rankings.

    How do I know if my cache is working?

    You can use your browser’s developer tools (Network tab) to inspect HTTP response headers like Cache-Control, Expires, or X-Cache status, which tells if a resource was served from cache. Alternatively, online cache-checking tools or observing significantly faster load times on a second page visit can also confirm its operation.

    What happens if I disable caching?

    Disabling caching means every user request will fetch fresh data directly from your origin server, significantly increasing page load times and server resource consumption. Increased processing and bandwidth usage can lead to a slower user experience and potentially higher hosting costs.