Is your WordPress website slow? Are you dreading low PageSpeed scores? If yes, then you should use Redis Full-Page Caching to supercharge your WordPress website.
In this article, we will explain what Redis Full-Page Caching is and how it improves user experience.
What Is Server-Side Page Caching?
Before we talk about Redis Full-Page Cache, let’s talk about how your website works.
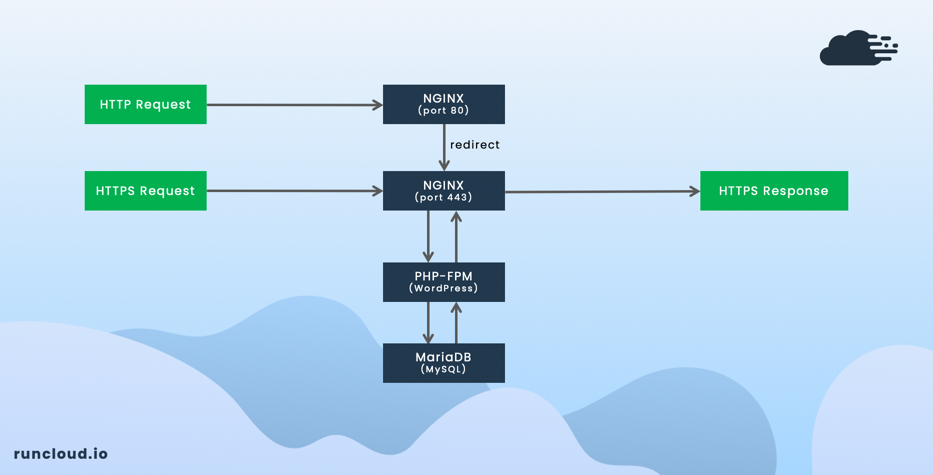
When a user visits your WordPress page, the web browser sends an HTTP/HTTPS request to Nginx.
Nginx passes the request to PHP-FPM, and Nginx will catch any PHP codes when trying to grab the page.
PHP-FPM processes the page and runs through the MariaDB/MySQL database query to retrieve the page.
PHP-FPM sends the generated “static” HTML page back to Nginx.
Nginx sends the generated HTML page to the web browser for the user.
What Are Benefits Of Using A Server-Side Cache
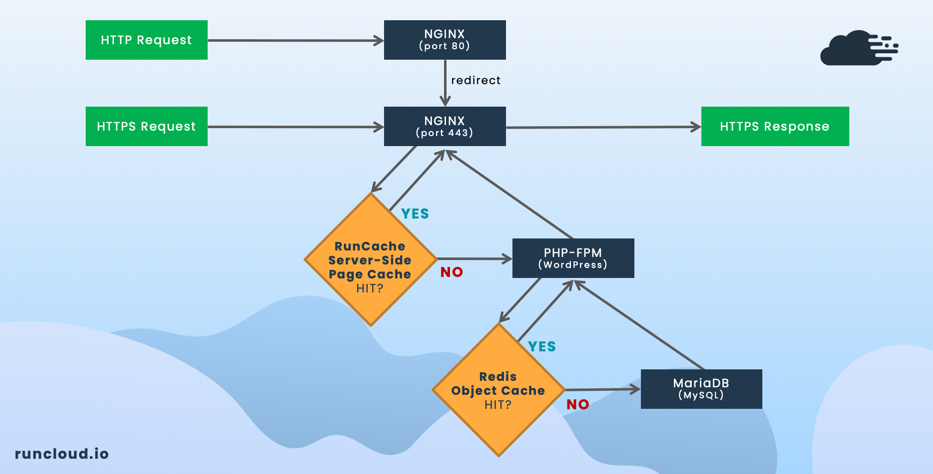
When using server-side page caching, the Nginx module will be in between Nginx and PHP-FPM and it is able to generate a cached HTML page from PHP-FPM.
When another user visits the same WordPress page, your website will not perform the same PHP and database requests again because the page is already cached and served by Nginx directly.
As a result, your server response time will be much faster after the initial load. Your PHP-FPM and MariaDB/MySQL will experience a reduced load and your server CPU resource usage will decrease.
This would mean that your server can handle more traffic with the same server specifications when using server-side page caching, ultimately allowing you to keep a more affordable server without having to scale any further.
RunCloud provides two different server-side page caching methods for Nginx – namely Redis Full-Page Cache and FastCGI Page Cache. Let’s see how Redis Caching works
What Is Redis Full-Page Caching?
Redis, which stands for Remote Dictionary Server, is a fast and open-source, in-memory data structure store used as a database, cache, and message broker.
In contrast to databases that store data on disk, all Redis data resides in memory, avoids seek time delays, and can access data super fast in microseconds.
Usually, Redis is used to cache database query results and used to enable object caching, not page caching.
Using the Nginx SRCache module, we can use Redis to serve a different purpose, to provide subrequest-based page caching as an alternative to Nginx FastCGI Cache.
Redis Full-Page Cache vs Nginx FastCGI Cache
Both Redis vs FastCGI Page Cache are a good solution for NGINX server-side page caching. Both of them can be installed easily in RunCloud without having to deal with Linux commands to setup, no complex process required.
You should try it on your WordPress site to find the one which works best for your current setup. You can even switch between Redis and FastCGI page cache in one-click.
Server-side Page Caching vs WordPress Caching Plugins
Both are good choices for your WordPress website and the answer depends on your specific needs.
If you are using regular shared hosting, Redis Full-Page Cache or Nginx FastCGI Cache might not be available. In this case, the only option available is to use the WordPress cache plugins.
If you are using a dedicated server, you can optimize your WordPress site using server-side page caching. With proper setup, server-side page caching can perform better than any WordPress cache plugin.
Who Needs Server-Side Page Caching For WordPress?
All WordPress pages can gain huge benefits when using RunCache server-side page caching.
For blogs, magazines, news, company profile websites, and all types of “static” WordPress sites, all WordPress pages can be fully cached and served faster, excluding WordPress admin pages, which are not cached for obvious reasons.
For e-commerce, membership, forum, and all types of “dynamic” WordPress sites, most WordPress pages can be fully cached and served faster, except for some pages that should stay dynamic.
For example, in the case of WooCommerce, the homepage, shop page, and single product page can be fully cached, but cart, checkout, and my account pages should be excluded. For these dynamic pages, you can use Redis Object Cache to reduce your MySQL database load and make your dynamic pages load faster, but you do not want to cache these pages fully as the latest changes will not be seen.
Performance Benchmarks Without Caching
Let us test the capacity of our server before we enable caching so we can quantify the improvement in performance.
For this test, we use a e2-medium instance on Google Cloud and default WordPress installation using Twenty Twenty-Three WordPress Theme.
We use the free Loader.io tool for stress testing.
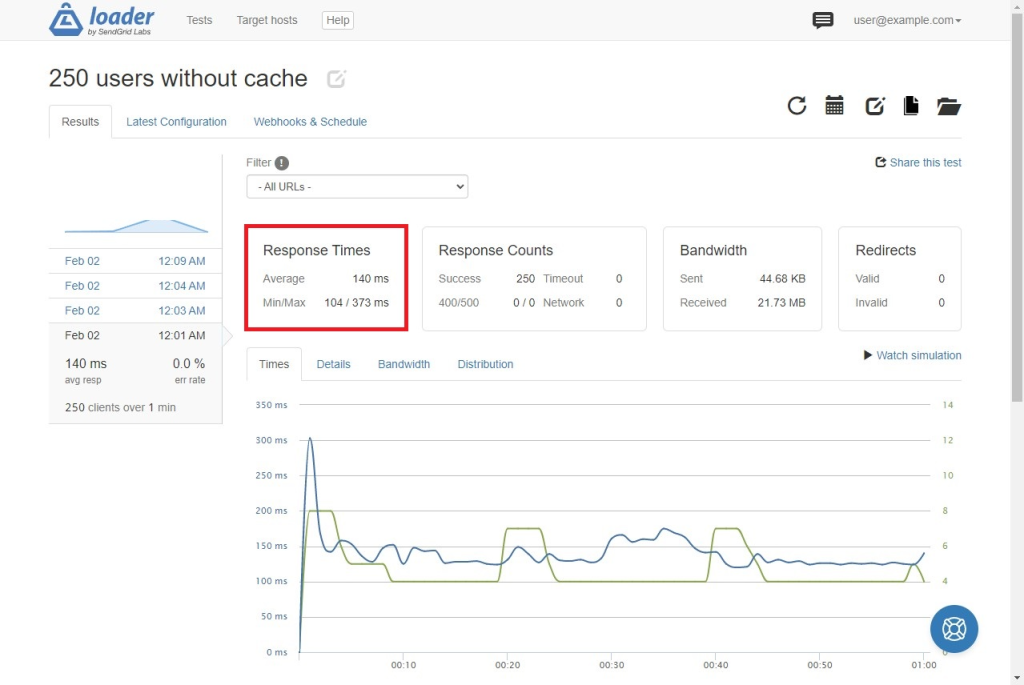
First Test – From 0 To 250 Users In 1 Minute
In the first test, we request the same web page from 250 different devices over the course of one minute. Without any caching, our server can successfully handle all 250 requests and manages an average response time of 140 ms.
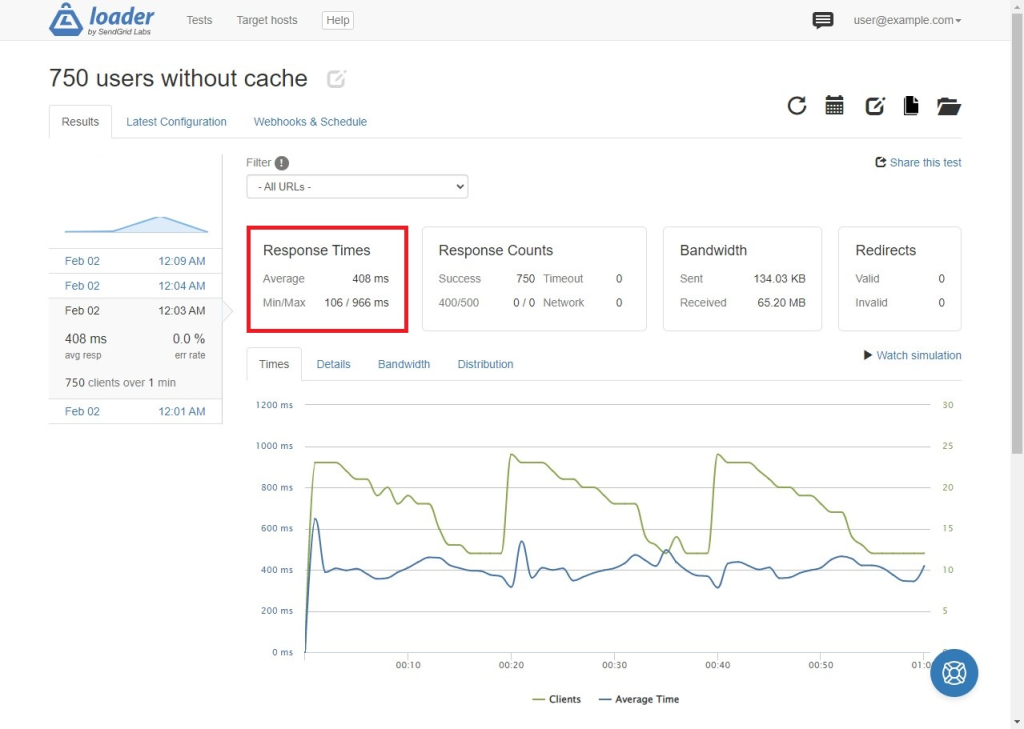
Second Test – From 0 To 750 Users In 1 Minute
In the second test, we request the same web page from 750 different devices over the course of one minute. Without any caching, our server can successfully handle all 750 requests and manages an average response time of 408 ms. This is slightly worse than the first test but still acceptable.
Third Test – From 0 To 2000 Users In 1 Minute
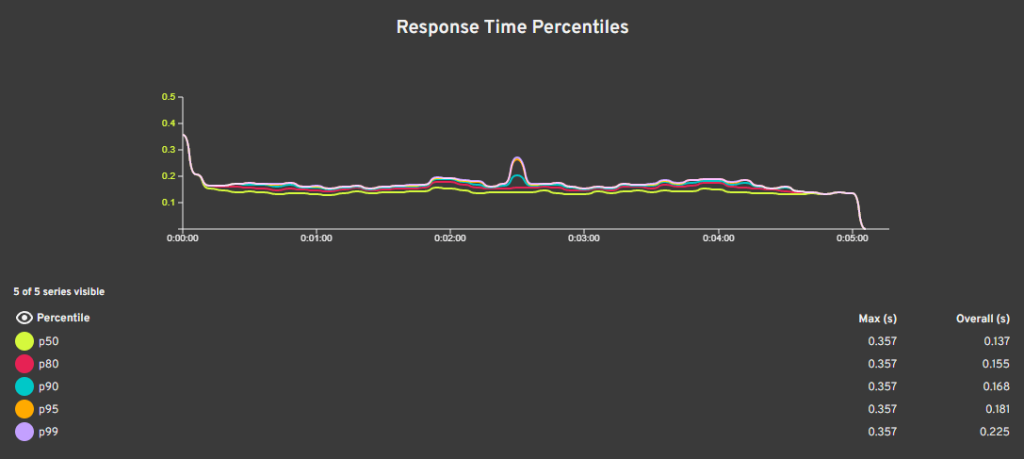
In the third test, we request the same web page from 2000 different devices over the course of one minute. In this case, our server had significantly higher response times and we observed timeout error in over 50% of requests. The successful requests had an average response time of 8028 ms which is unacceptable.
Let us see how we can improve this by enabling caching.
How To Install Redis Full-Page Cache Using RunCloud Hub
RunCloud Hub is a hub for all RunCloud plugins for WordPress. It is not only for server-side page caching but also Redis Object Cache and Server Health & Transfer Stats monitoring directly from your WordPress dashboard.
If you want to use server-side page caching, either Redis Full-Page Cache or Nginx FastCGI Cache to speed up your WordPress website, then RunCloud Hub is the perfect choice for you.
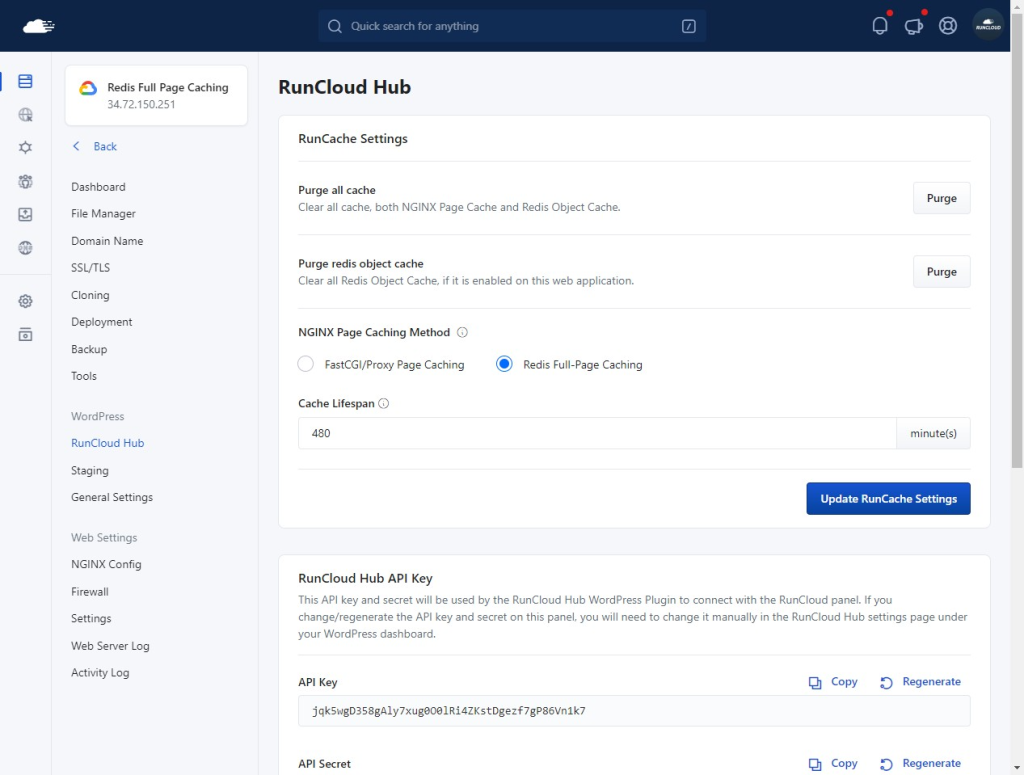
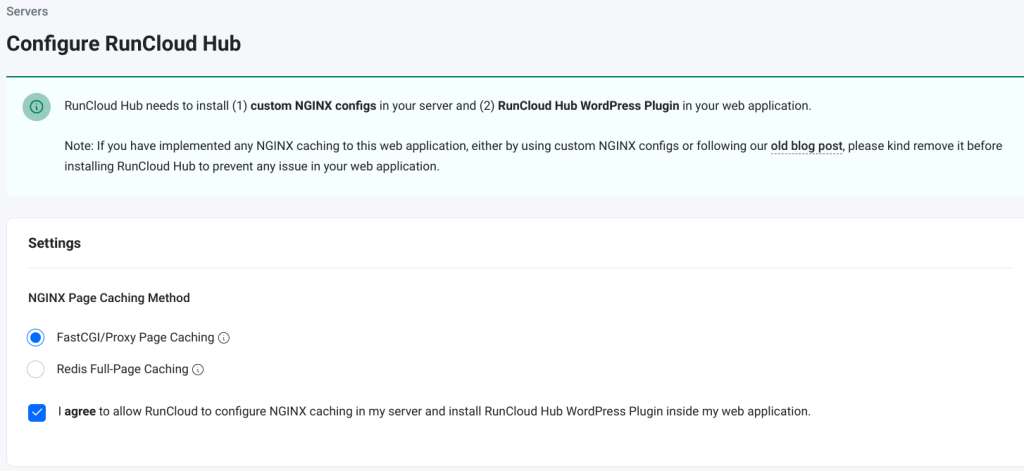
You can simply go to the RunCloud Hub menu under your web application in the RunCloud panel, choose the Nginx page caching method, and click the Install RunCloud Hub button.
Once you have installed the RunCloud Hub plugin, Redis Full-Page Cache (RunCache) is automatically installed and enabled in your WordPress website, no complex process is required.
How To Check If Redis Full-Page Cache Works
When using any cache WordPress plugin, usually the plugin adds a footprint at the of your web page source code to make it easy for you to check if your WordPress page has been cached or not.
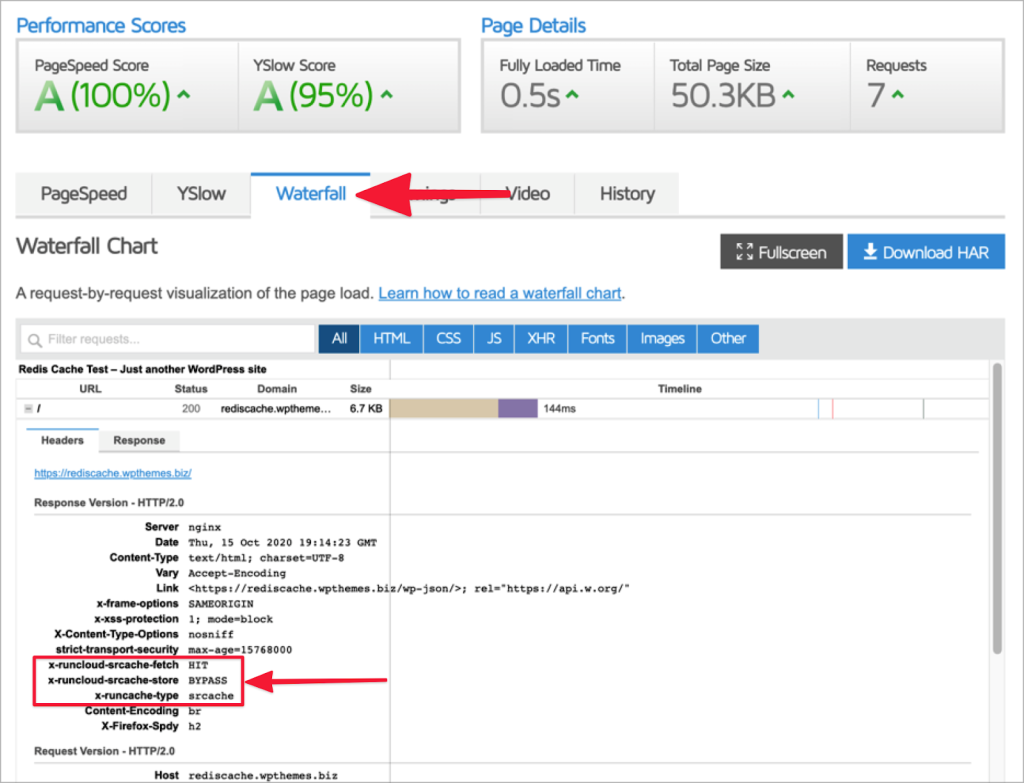
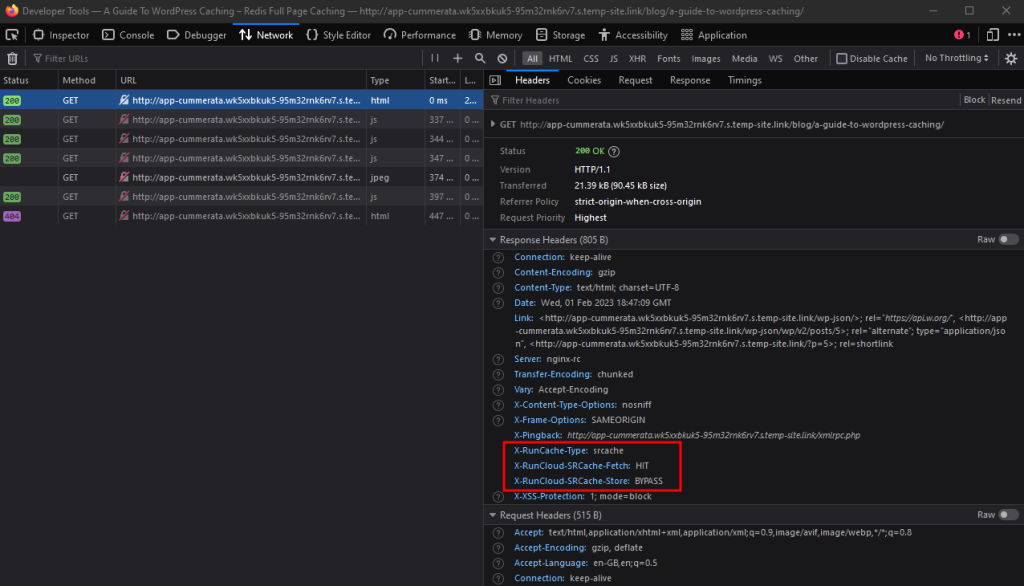
Redis Full-Page Cache (RunCache) works on the server-side, which means there is no footprint on your web page, you need to check the headers of your website to see these possible values of X-RunCloud-SRCache-Fetch and X-RunCloud-SRCache-Store.
The X-RunCloud-SRCache-Fetch header returns the status of the “fetch” phase for Redis Full-Page Cache. Three values are possible.
HIT : Page is cached and served from the cache.
MISS : Page is served dynamically from the server, not from the cache. The response might then have been cached. Refreshing this page again should change the header from MISS to HIT or BYPASS.
BYPASS : Page is served dynamically from the server, not from the cache. It is excluded from the cache, for example, WordPress dashboard admin pages or WooCommerce cart/checkout pages.
The X-RunCloud-SRCache-Store header returns the status of the “store” phase for Redis Full-Page Cache. Two values are possible.
STORE : An Nginx subrequest is issued to save the HTML output of the page into Redis.
BYPASS : An Nginx subrequest is not issued because either it has been saved to Redis or it is excluded.
To make it easier for you to understand, usually, we can see 3 common pairs of these headers, for example:
“MISS” Fetch Status and “STORE” Store Status
This is when you visit a page for the first time where this page is served dynamically from the server and the output of this page will be saved to Redis.
“HIT” Fetch Status and “BYPASS” Store Status
This is when you visit a page where the cache version is available in the Redis and served directly from the Redis cache.
“BYPASS” Fetch Status and “BYPASS” Store Status
This is when you visit a page that is excluded from the Redis cache.
To check these headers, you can use some tools, for example:
Check HTTP Headers With GTMetrix
Gtmetrix is not only for testing your performance score, you can also use it to check the response header using the Waterfall feature. You can check the response header of your tested page under the Waterfall tab to see if this page is served by Redis Full-Page Cache (RunCache).
Check HTTP Headers With Google Chrome
You can also view the response HTTP headers in your web browser without using any additional tools by following these steps:
Visit the web page that you want to test and open Web Developer Tools by pressing F12 or right-click and selecting Inspect.
When opened, click and select the “Network” tab.
Refresh the page to get fresh page data.
Select the top HTTP request on the left panel and observe HTTP headers on the right panel.
Performance Benchmark: Handling More Traffics
By eliminating PHP-FPM and MariaDB/MySQL when serving your WordPress page from Redis Full-Page Cache, the huge benefit is your server can handle more traffic with the same server specifications.
First Test – From 0 To 250 Users In 1 Minute
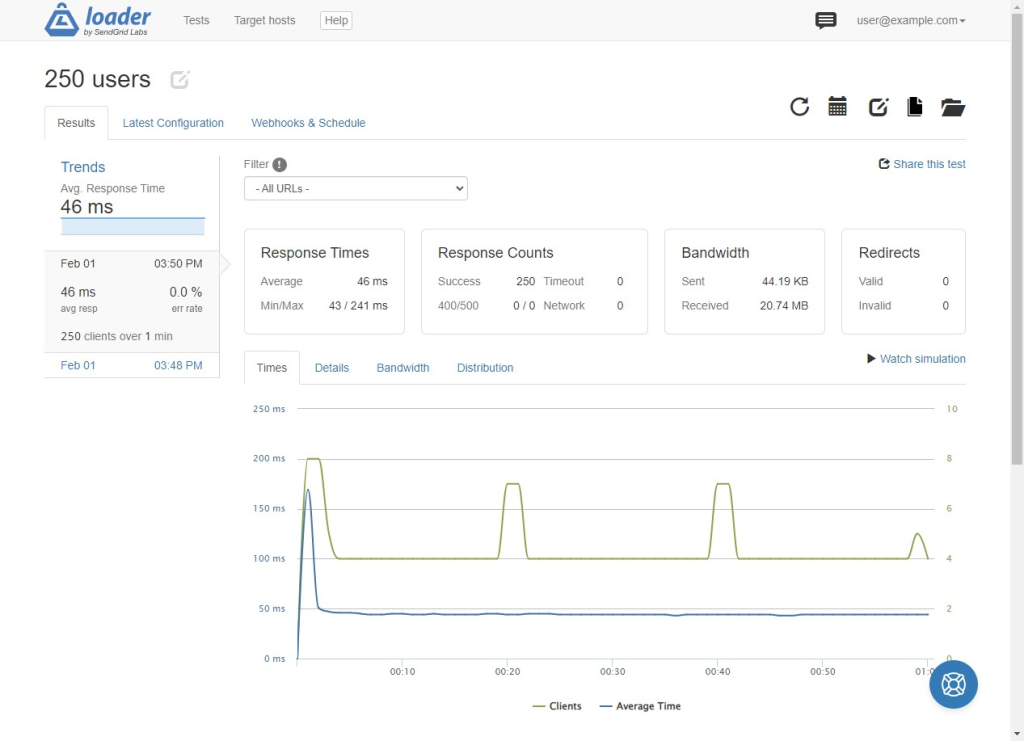
For this test, we use Loader.io to send from 0 concurrent users and increase to 250 concurrent users within 1 minute.
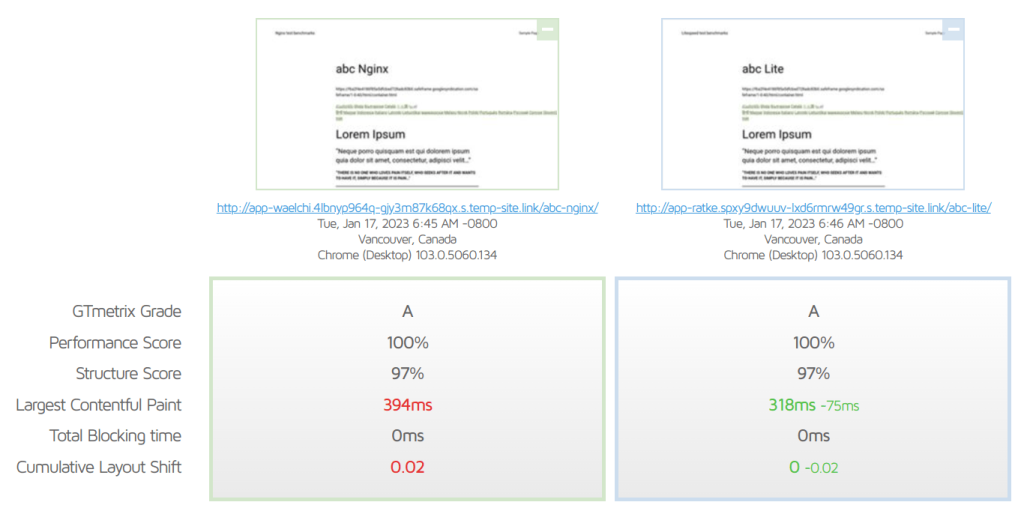
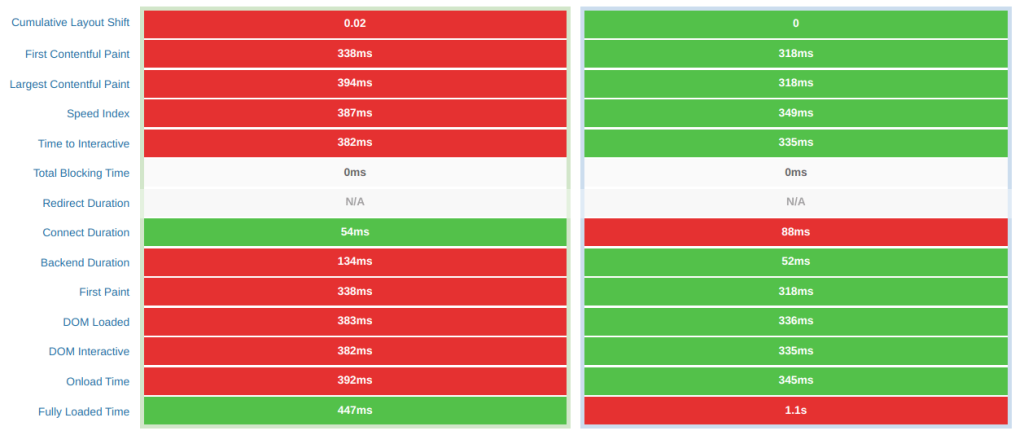
Without Redis Full-Page Cache (RunCache), the average response time was 140 ms. After enabling the cache, the average response time reduces to 46 ms. This is great as our server is responding to requests nearly 3 times faster.
Second Test – From 0 To 750 Users In 1 Minute
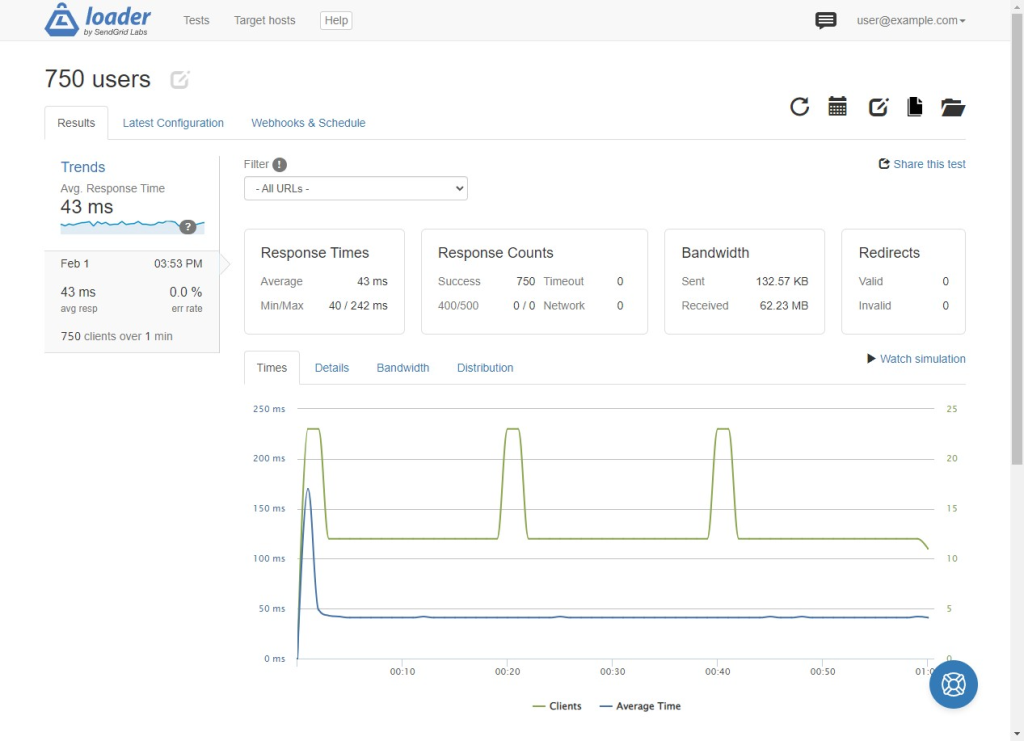
In our second test, the average response time without Redis Full-Page Cache was 408 ms. Enabling cache lowers the response time to 43 ms. Therefore, our server can handle sudden surges in requests without degrading performance.
Third Test – From 0 To 2000 Users In 1 Minute
Without Redis Full-Page Cache, the average response time was 8028 ms and we also saw timeout error in over 50% of requests when the number of concurrent users surged to 360.
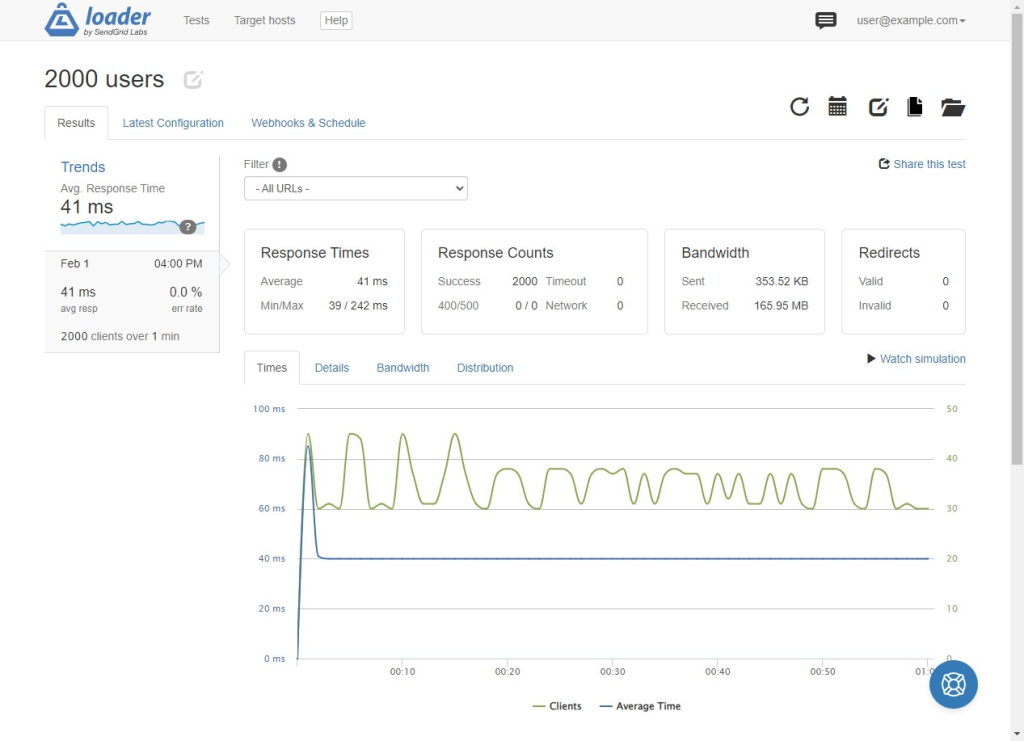
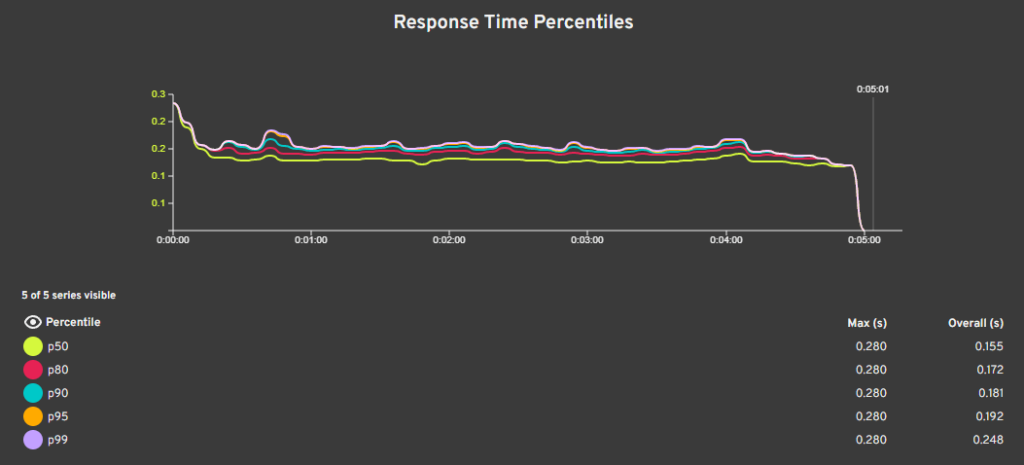
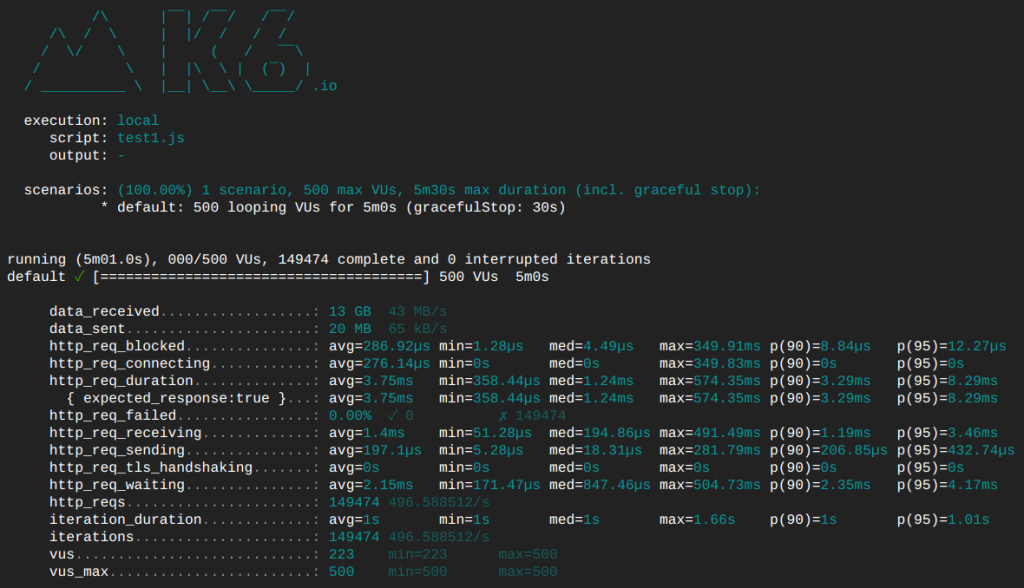
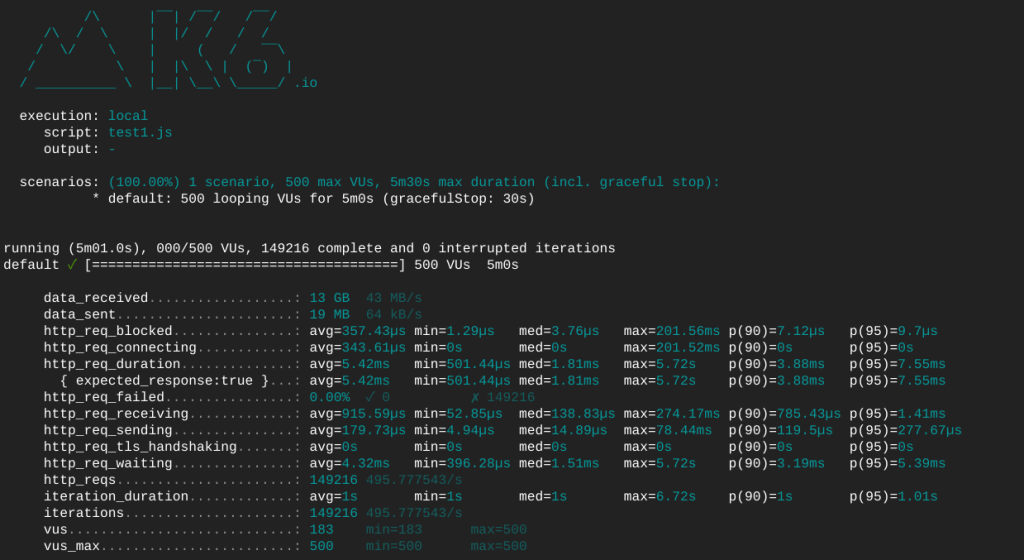
After enabling the cache, all our requests finished without error and we observed a steady response time of 41 ms. It is a clear improvement as we can handle many more concurrent requests without crashing the server.
Exploring RunCache Features
Using the RunCloud Hub WordPress plugin, you will have more controls on how RunCache works on your WordPress website.
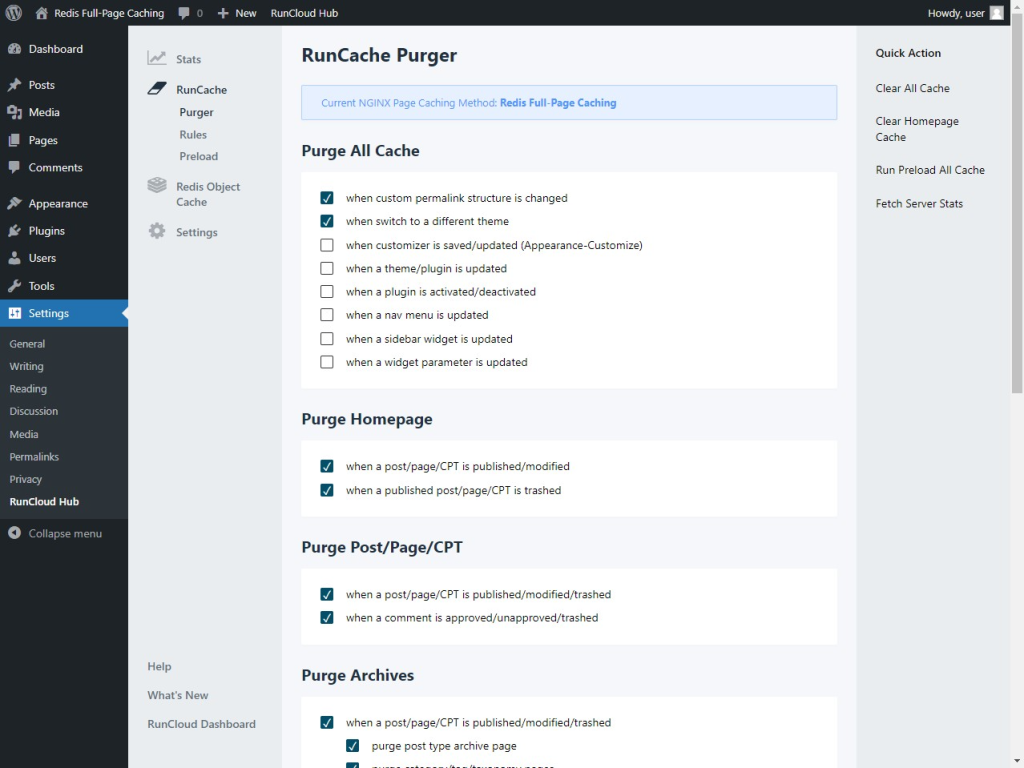
RunCache Purger
Purger settings allow you to have more control when the cache is cleared, for example:
Automatically clean cache of homepage when post is edited or has a new post.
Automatically clean cache of homepage when post removed.
Automatically clean cache of post/page/CPT when published.
Automatically clean cache of post/page/CPT when comment approved and published.
Automatically clean cache of post/page/CPT when comment removed.
RunCache Rules / Exclusion
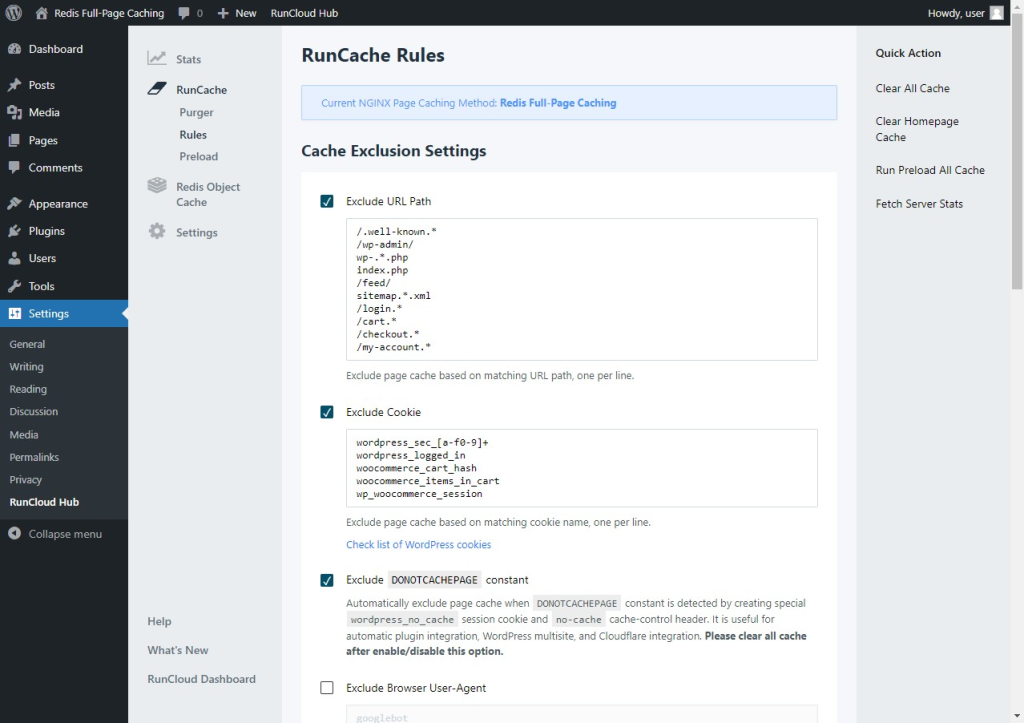
Rules settings allow you to control Cache Exclusion.
Exclude URL Path option allows you to exclude cache based on matching URL Path. This is very useful when you have dynamic pages that should not be cached in your website.
For example, in WooCommerce, you have the Cart, Checkout, and My Account page that must never be cached. For WooCommerce users, no action needed, these pages have been added by default.
Exclude Cookie option allows you to exclude cache based on matching Cookie name.
The Exclude Browser option allows you to exclude cache based on matching Browser User-Agent.
Exclude Visitor IP option allows you to exclude cache based on matching Visitor IP Address.
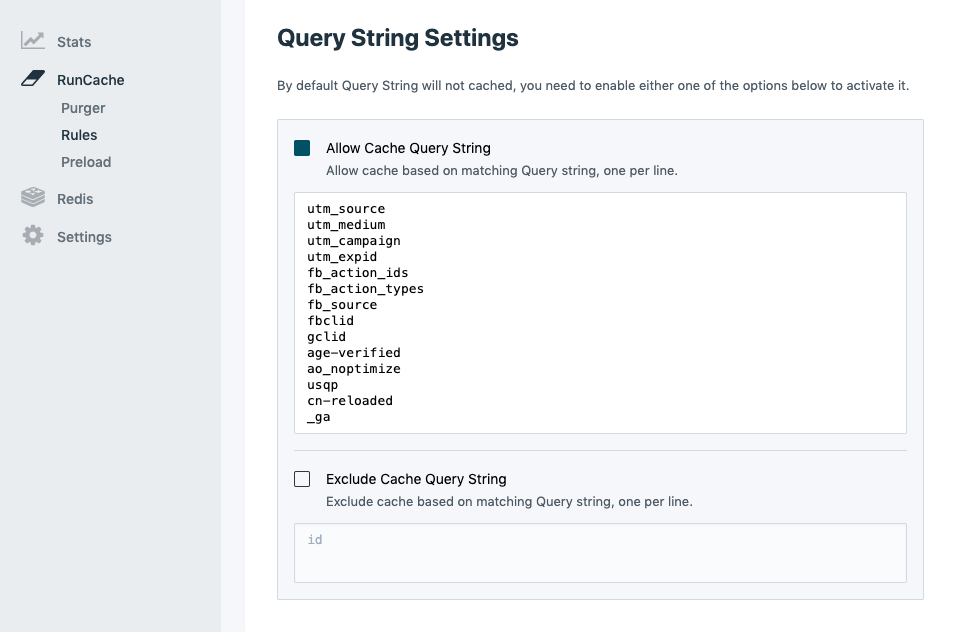
RunCache also has dedicated settings for query strings, because query strings will not cache by default.
Allow Cache Query String option makes it possible for you to allow cache based on matching query string, for example, UTM parameters (utm_source, utm_medium, utm_campaign), fbclid, gclid, etc.
Exclude Cache Query String option allows you to exclude cache based on matching Query string.
RunCache Preload
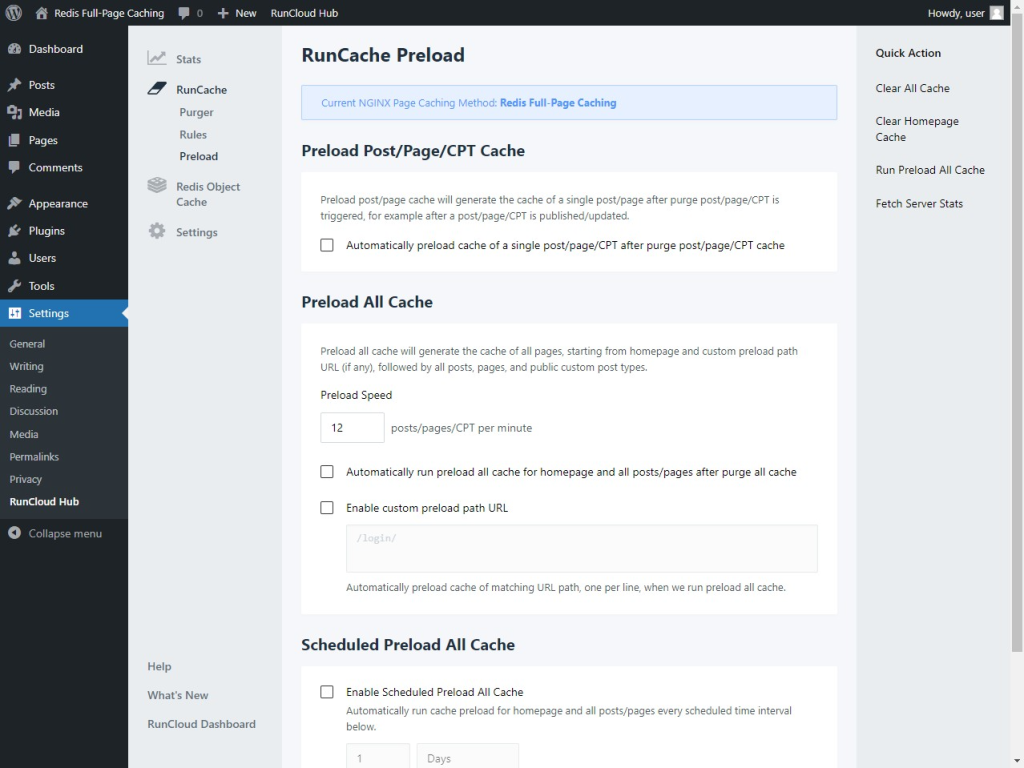
Preload settings allow you to generate caches of your pages without having to wait for a user to visit your pages. Normally, the cache is generated after a user visits a page.
You have the options to:
Preload caches automatically when any purge action is triggered.
Preload caches automatically based on schedule time (day/week/month).
Preload caches manually by clicking the “Run Cache Preload” link.
If you have a big number of posts/pages/products in your WordPress sites, the cache preload process sometimes can consume your server CPU resources. It is better to run a cache preload manually for this case.
Is It Compatible With Popular WordPress Cache / Optimization Plugins?
YES! The important thing to understand, Redis Full-Page Cache (RunCache) works on the server level and popular WordPress cache/optimization plugins work on the WordPress/application level.
They work in different spaces and it should be compatible. If needed, you can combine it with your favorite optimization plugin, for example:
Redis Full-Page Cache and Autoptimize Plugin
In fact, Autoptimize and RunCache are a perfect combination to optimize your WordPress site.
Autoptimize works on WordPress-side to optimize your Javascript / CSS / HTML files on your web page, and RunCache works on the server-side to cache the optimized version web page.
When using WP Rocket plugin, combined with Redis Full-Page Cache (RunCache), WP Rocket page caching feature is automatically disabled by RunCloud Hub.
It means Redis Full-Page Cache will handle the page caching, and you still can use other WP Rocket optimization features.
Summary
Redis full-page caching is a game-changer for WordPress websites looking to boost their performance. With its advanced caching capabilities, Redis offers a simple and effective solution for reducing server load times and delivering a smooth user experience.
If you want to apply server-side caching to one of your web applications within your server, then RunCache (RunCloud Hub) is your answer. RunCache allows you to utilize either Nginx FastCGI Cache or Redis Full-Page Cache to speed up your WordPress performance without having to deal with Linux commands to set up Nginx cache. Sign up today and see the difference for yourself.
It’s also how many helpful results Google offers in response to a search for “web development tool”.
The sheer number and range of tools available for web development is staggering.
What most of us are looking for are developer tools that you can use to optimize your workflow and improve performance, and they may be any piece of software or programming language that helps you perform better.
Web development tools can be invaluable during discovery, planning, and even the execution stage. There are various front-end and back-end technologies that developers can use to simplify their work.
Others, such as frameworks, libraries, and certain code editors, can also improve performance.
In this post, we’re going to discuss some of the most popular web development tools that you can use to level up your stack.
But before we start, let’s talk about what a web development stack is.
What Is a Web Development Stack?
A web development stack is a collection of software tools used to create a web application. The stack typically includes a programming language, a database, a web server, and a web framework.
Of course, this is generally a flexible description, and you can create different stacks based on your requirements. For instance, one of the popular web development stacks is the LAMP stack. It is short for Linux, Apache, MySQL, and PHP. Here’s how it works:
Linux is the operating system that powers the server on which a website or web application is hosted.
Apache is the web server software that serves files to visitors’ browsers.
MySQL is the database management system that stores data used by a website or web application.
PHP is the programming language used to build a website or web application.
How Web Development Tools Can Streamline Your Workflow
The right web development tools can significantly impact on your workflow, especially if you use agile project frameworks like Scrum.
The tools you use can do the heavy lifting for you, automating repetitive tasks and freeing you up to focus on more high-impact work. Tools such as JSFiddle, for example, can help you share code snippets with your team as one sprint comes to a close, helping you prepare for the next one.
Here are just some of the benefits that web development tools offer:
Improved Productivity
Web development tools can help you be more productive by automating repetitive tasks. For example, if you’re constantly formatting code or updating CSS stylesheets, you can use specific tools. This will free up your time to focus on more important tasks.
Better Collaboration
Another benefit of web development tools is improved collaboration. If you’re working in a team, web development tools can help everyone stay on the same page by sharing task lists, code snippets, and more.
Increased Efficiency
In addition to improved productivity and collaboration, web development tools can help you work more efficiently. For example, many IDEs (integrated development environments) now offer features such as code completion and real-time error checking. This means you can spend less time debugging your code and more time coding.
How to Choose the Right Development Stack For Your Project
This is a relatively subjective question since every developer has their own preferences. Here are a few key factors that can help you choose the right development stack for your project.
1. Define Your Project’s Requirements
The first step in choosing a development stack is to define your project’s requirements. What does your project need to do? What features does it need to have? Answering these questions will help you narrow down the technology options available.
2. Consider Your Team’s Skill Set
Once you’ve defined your project’s requirements, you must consider your team’s skill set. What technologies are they comfortable working with? It doesn’t make sense to choose a stack that includes technologies your team is unfamiliar with; they’ll just spend more time trying to learn the new technology than actually developing the application.
3. Determine Which Technologies Work Well Together
Not all technologies play well together. For example, if you’re using a relational database (such as MySQL), you’ll want to use a web development framework that supports model-view-controller (MVC) architecture (such as Laravel). If you’re using a non-relational database (like MongoDB), you can use any number of MVC frameworks (including Laravel).
4. Consider Your Hosting Environment
Your hosting environment – i.e., where your application will be hosted – can also influence your choice of development stack. For example, if you’re planning on hosting your application on a Linux server, you’ll want to use technologies that can run on Linux (such as Apache, PHP, and MySQL).
If you’re planning on hosting your application on a Windows server instead, you’ll want to use technologies that can run on Windows (such as IIS, ASP.NET, and SQL Server).
Alternatively, you can also consider serverless hosting. Serverless hosting can reduce costs and increase scalability by only charging for actual usage and automatically scaling resources. It can also simplify development and reduce maintenance by abstracting away server management. This lets developers focus on writing code and deploying features rather than managing servers.
Web Development Tools to Use in 2023
Here are the most popular web development tools to use in 2023.
Text Editors
VS Code
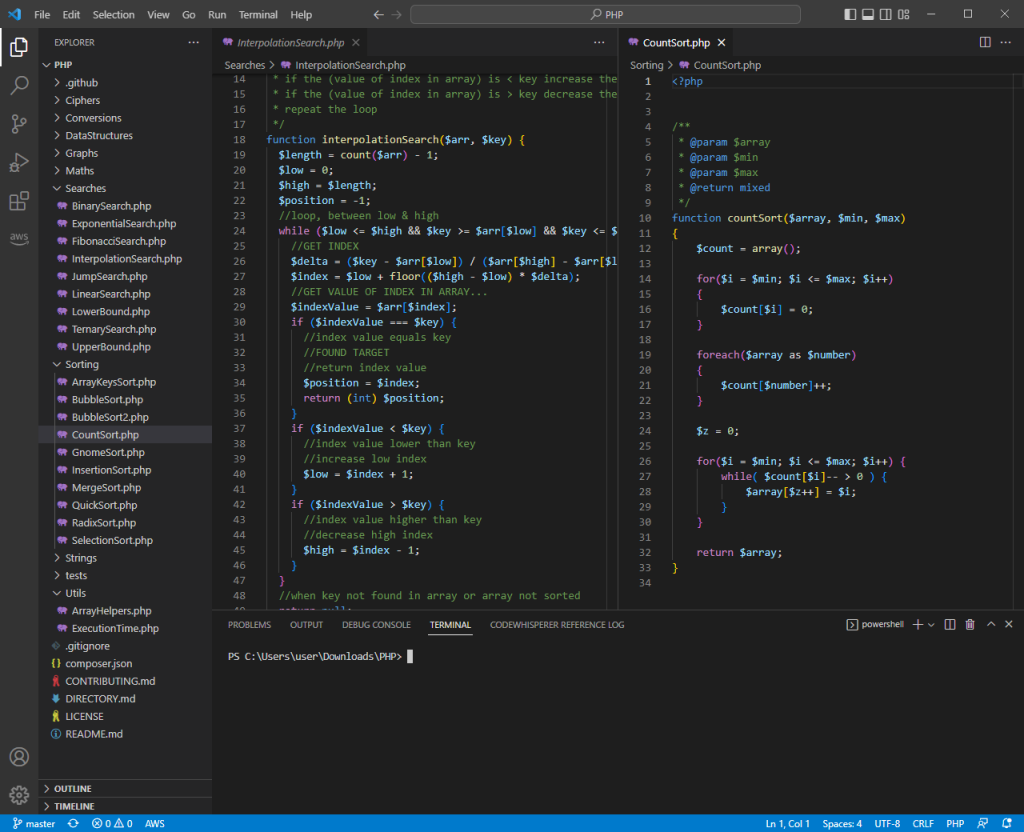
VS Code is a popular, open-source code editor that is particularly well-suited for web development. It features an intuitive, easy-to-use interface, and comes with a wide array of built-in tools and extensions for debugging, linting, and optimizing code.
One of the biggest benefits of using VS Code for web development is its wide range of extensions, which can help streamline your workflow and improve productivity. It is also available on all major platforms like Windows, Mac, and Linux, and it’s lightweight and fast.
JetBrains IDE
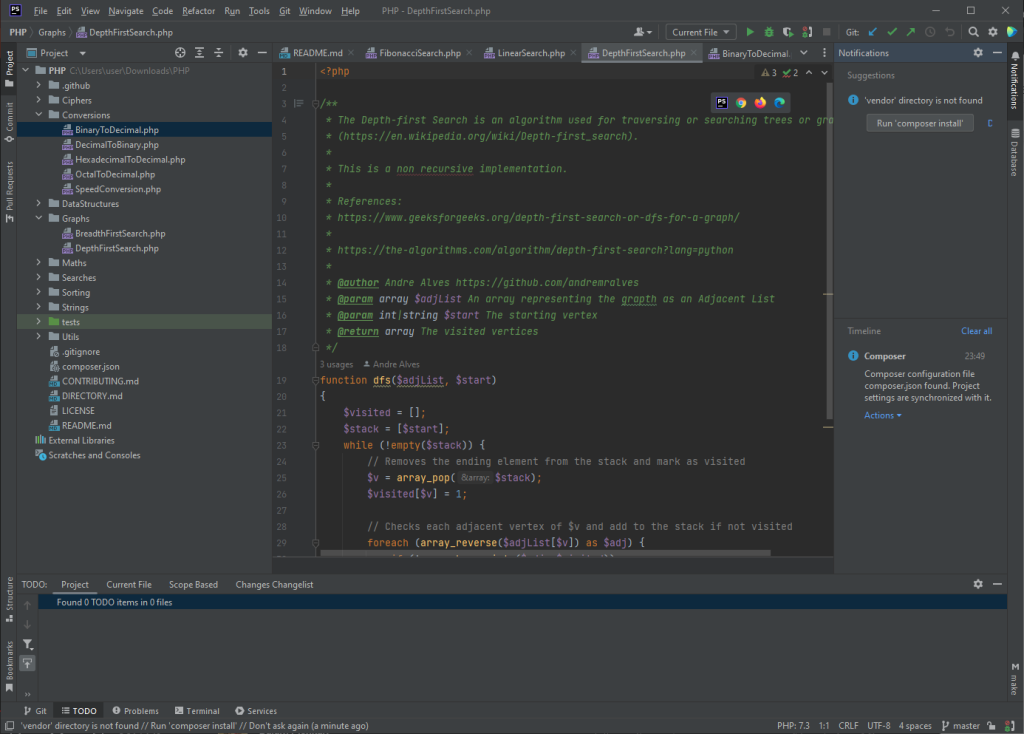
JetBrains IDEs (Integrated Development Environments) is a suite of developer tools widely used for web development. They include IDEs for several programming languages, such as IntelliJ IDEA for Java, PhpStorm for PHP, and WebStorm for JavaScript. JetBrains IDEs are known for their powerful code editing and debugging capabilities, as well as their ease of use and customization.
One of the advantages of using a JetBrains IDE is its advanced code navigation, refactoring, and code suggestion capabilities. They also provide smart Code completion and error prevention. They are widely used by many professional software developers and are continuously updated to support the latest development trends and technologies.
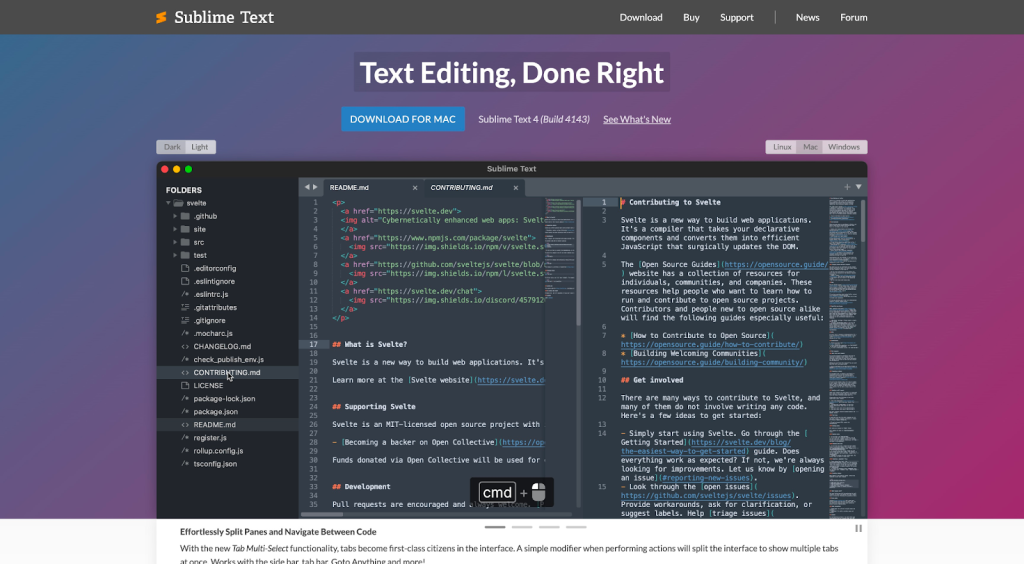
Sublime Text
Sublime Text is one of the most loved text editors of its time. It has many features that make it easier for developers to write code, including syntax highlighting and autocomplete. Additionally, Sublime Text can be customized to the developer’s preferences, making it an extremely versatile tool.
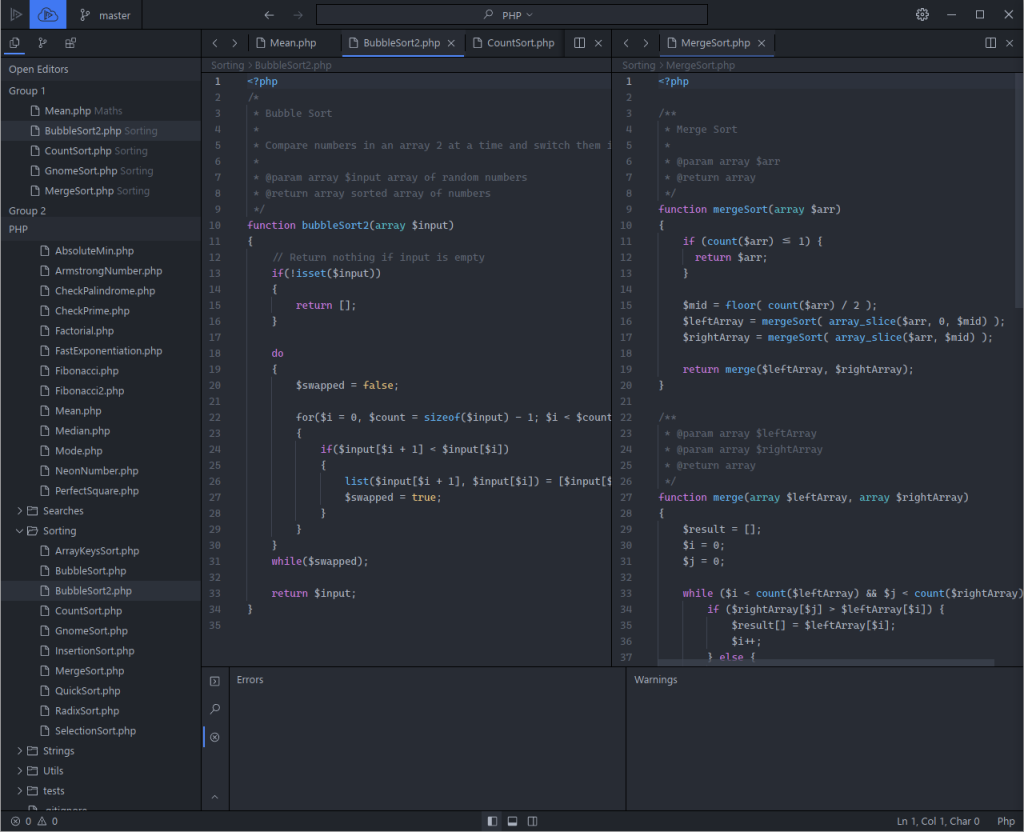
Lapce
Lapce is a relatively new, open-source code editor written in Rust that aims to provide fast performance by utilizing native GUI and GPU rendering. It has a unique feature called Code Lens, which combines folding, minimap, and code outline functionality to make navigating and understanding your code easier.
Additionally, it has a remote development feature that allows you to connect to a remote machine via SSH, which enables you to work on a remote workspace with the same experience as a local one. However, since it’s a relatively new and custom code editor, its popularity and user base may not be as large as more established editors like VS Code or JetBrains IDEs.
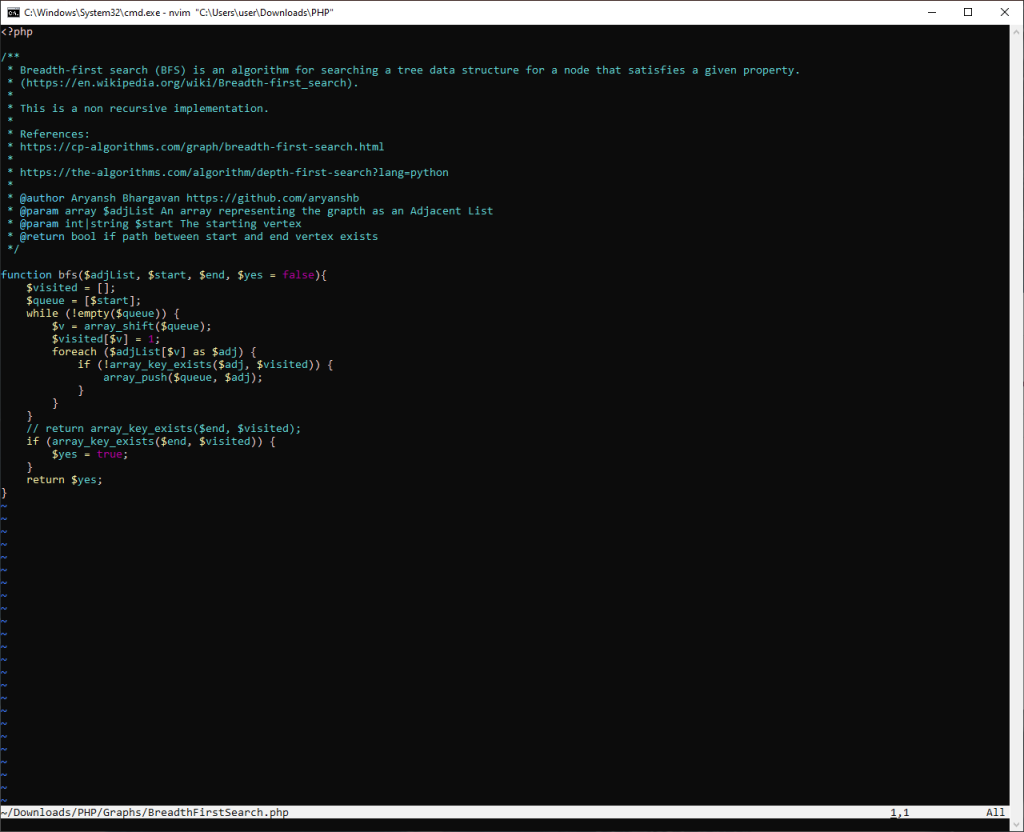
Neovim
Neovim is a free, open-source text editor designed to be a drop-in replacement for Vim. It is a fork of Vim, which aims to address some of the original editor’s shortcomings and provide a better user experience. It has a modular architecture and a new, more powerful plugin system.
It features a built-in terminal emulator, support for multiple cursors, and a built-in LSP(Language Server Protocol) client. It also has support for asynchronous job control, which allows for faster background tasks such as code completion and syntax checking. Neovim is popular among Vim users looking for more advanced functionalities and better performance.
We would recommend you to use Neovim only if you are working on a machine that does not have a desktop environment as it requires you to have a good understanding of command line interfaces.
Front-End Development Frameworks
React
React is many things – a library, a framework, and more. But at its heart, React is all about making web development faster and easier. It’s a JavaScript-based UI development library commonly used for web development. There are numerous extensions available that can be used for architecture support too, such as Flux. You can use it with libraries like Tamagui to ship cross-platform React apps faster.
Svelte
Svelte is a popular, open-source JavaScript framework for building web applications. It uses a unique approach to building user interfaces by compiling your code at build time rather than using runtime libraries. This allows for faster performance and smaller bundle sizes.
One of the biggest benefits of using Svelte is that it provides a simple and easy-to-learn syntax, making it a great choice for developers new to building web applications. Additionally, it does not require any additional tools like a virtual DOM, making it lightweight and fast; it also uses a reactive programming paradigm. Svelte also provides a powerful set of developer tools, such as a rich set of directives and a built-in animation library, that makes creating complex, interactive user interfaces easy.
Vue.js
Vue.js is another fantastic JavaScript framework popular amongst UI/UX designers. It’s incredibly easy to use, and closely resembles several CSS frameworks. It offers support for JSX declarations, though many prefer using Vue.js outside of JavaScript, thanks to its support for conventional web technologies.
Note: We’re big supporters of Vue.js and use it at RunCloud.
Vue.js makes it easy to collaborate on large projects. It is fast, lightweight, and can be easily integrated with existing tools and libraries making it a popular choice for developers with all skill levels. Vue.js is a great addition to any web developer’s toolkit and it should not be a surprise that we at RunCloud use Vue.js ourselves to build our platform.
Tailwind CSS
Tailwind CSS is a front-end CSS framework designed to help developers create applications. It offers utility classes, allowing developers to control the layout, spacing, typography, shadows, and spacing, all without ever leaving their HTML environment.
Tailwind CSS offers various benefits. For instance, you generally won’t have to write as much CSS since you can style classes using HTML only. This ensures that your CSS files remain small, and you won’t have to worry about things breaking if you make widespread changes to your site.
Bulma
Just like Tailwind CSS, Bulma lets you focus on the HTML, giving you utility classes to work with. Bulma is built using Flexbox, and is highly customizable.
Since it’s CSS only, you won’t need to worry about JavaScript. It’s an open-source, simplistic framework that lets you trim your code and introduce more productivity in your workflow.
Programming Languages
PHP
PHP is a popular scripting language widely used for developing web applications. PHP code can be embedded into HTML code, or it can be used in conjunction with various web template systems, web content management systems, and web frameworks.
PHP code is usually processed by a PHP interpreter implemented as a module in the web server or as a Common Gateway Interface (CGI) executable.
The web server combines the results of the interpreted and executed PHP code, which may be any type of data (e.g., Images, XML), with the generated web page.
PHP has been widely ported, and can be deployed on most web servers on almost every operating system and platform, free of charge.
Python
Python is an incredibly popular programming language that uses dynamic semantics. Python has been around for 30 years and continues to be one of the most popular programming languages in the world because it is powerful yet easy to learn and use.
It is also versatile enough to be used in various applications such as web development, scientific computing, data analysis, artificial intelligence, and more.
Elixir
Elixir is a modern functional language that provides an excellent toolkit for building scalable, reliable applications. Elixir runs on the BEAM virtual machine, the same virtual machine that Erlang uses.
Elixir is also a very productive language. That’s because it was designed with developer productivity in mind. For example, Elixir has excellent support for metaprogramming. Metaprogramming is a way of writing code that generates code.
TypeScript
TypeScript is a typed superset of JavaScript that compiles to plain JavaScript. It introduces support for common programming constructs such as classes and modules, and an optional type system that can help catch errors at compile time.
Since TypeScript is not a stand alone programming language, it can not be used directly in the browsers – we need to transpile TypeScript code to JavaScript before it can be executed in a browser. One great thing about this is that it will not impact the bundle size of the final Javascript code as all the extra TypeScript code is removed during the compilation.
Ruby
Ruby is a programming language created in the mid-1990s by Japanese programmer Yukihiro Matsumoto. It is based on Perl, Smalltalk, Eiffel, and Ada. It is an interpreted, high-level, general-purpose programming language.
Since its release more than 27 years ago, Ruby has undergone many iterations, and is widely renowned for being highly productive and simple to use. It treats even conventional data types as objects, making it highly versatile and portable.
Rust
Rust is a modern, open-source programming language, and it was crowned as the most-loved programming language in 2022. It is designed to be safe, concurrent, and fast. One of the biggest benefits of using Rust is its emphasis on safety, which helps to prevent common programming errors such as null or dangling pointer references. It offers a strong concurrency model based on message passing, which makes it easy to write concurrent and parallel code that is both efficient and performant for web services.
Rust is also designed to be highly expressive and readable, with a low learning curve. It is suitable for various applications, including systems programming, web assembly, game development, blockchain, and embedded systems. If this sounds interesting, the Android team at Google has created a Rust course that provides you with the material to quickly learn Rust.
Back-end Development Tools
Django
Django is a Python-based web framework that enables you to quickly create efficient web applications. Django was created to meet the fast-moving requirements of newsroom websites. It has since evolved into a powerful tool capable of powering some of the largest websites in the world.
The format is fairly straightforward, and if you’re used to creating server-side web apps using Python, Django will be a great choice. It works quite well with other languages, such as JavaScript.
NodeJS
NodeJS is a JavaScript runtime environment that allows software developers to create server-side applications. In layman’s terms, this means that NodeJS can be used to create applications that can be accessed via a web browser.
NodeJS is popular because it is relatively easy to learn and can be used to create fast and scalable applications.
Ruby on Rails
Ruby on Rails is a web application framework in the Ruby programming language. It is designed to make developing web applications easier by abstracting away much of the boilerplate code that is often required.
Ruby on Rails is commonly used as a server-side scripting language on many websites. It’s a popular choice for websites that rely on third-party services and integrations, such as cloud file storage.
Deno
Deno is a JavaScript runtime built with Rust programming language, and is an alternative to Node.js. It has built-in support for TypeScript, a powerful type system for JavaScript, and built-in libraries for HTTP and WebSocket. Deno is also more secure by default because it doesn’t require a package manager, which can introduce vulnerabilities.
Additionally, Deno’s standard library is considered more extensive and better designed than Node.js, making it easier to build complex web applications. It also is designed to run with a minimalistic setup, with no need for config files; it also has built-in test runners, formatting, and linting. All of these features make Deno a useful tool for web development.
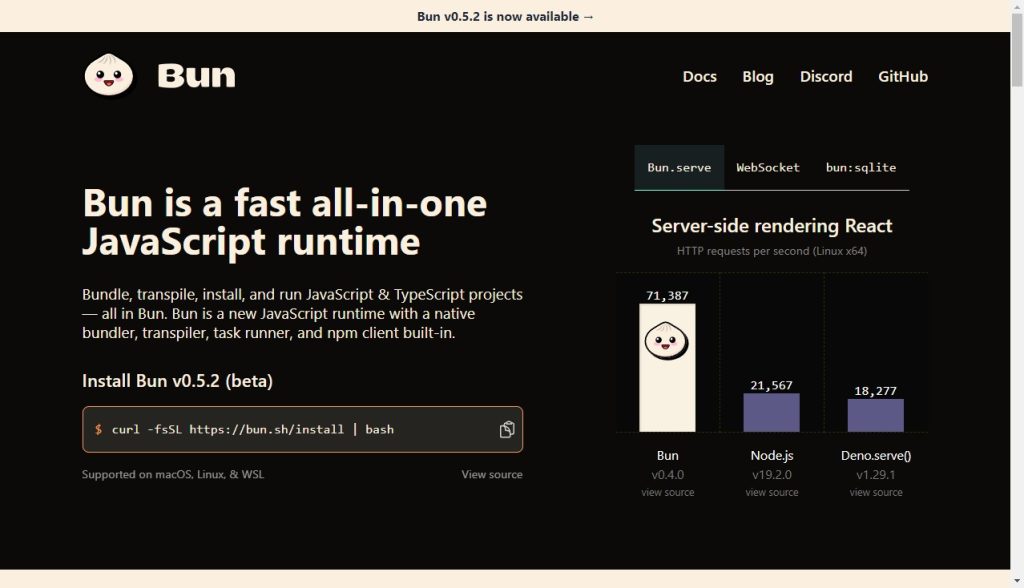
Bun
Bun is a modern JavaScript runtime, like Node or Deno, that aims to bring performance and complexity enhancements to web development, with an emphasis on starting fast, high performance, and being a great tool. It is built on the JavaScriptCore engine and written in Rust, which gives it a performance boost and low-level control over memory.
Bun has built-in support for TypeScript, JSX, and npm package manager, and it was designed as a drop-in replacement for existing JavaScript/TypeScript projects, with the aim of running most JavaScript code outside of browsers; it natively implements hundreds of Node.js and web APIs, including fs, path, Buffer and more.
Databases
MySQL
MySQL is a database management system (DBMS) that runs as a server providing multi-user access to various databases. It is an open-source project that is available under the GPL license and is developed, distributed, and supported by Oracle Corporation.
MySQL has become a leading database choice for web applications used by high-traffic websites. Wikipedia, Facebook, Twitter, and YouTube all use MySQL.
MongoDB
MongoDB is a document database. It stores data in JSON-like format making it easy for JavaScript developers to use. Moreover, it has an index on every field in a collection which makes data retrieval quick and easy. The use of dynamic schemas makes data integration in MongoDB quite simple.
PostgreSQL
PostgreSQL is a powerful, free, and open-source relational database management system. It has more than 15 years of active development and a proven architecture that has earned it a strong reputation for reliability, data integrity, and correctness.
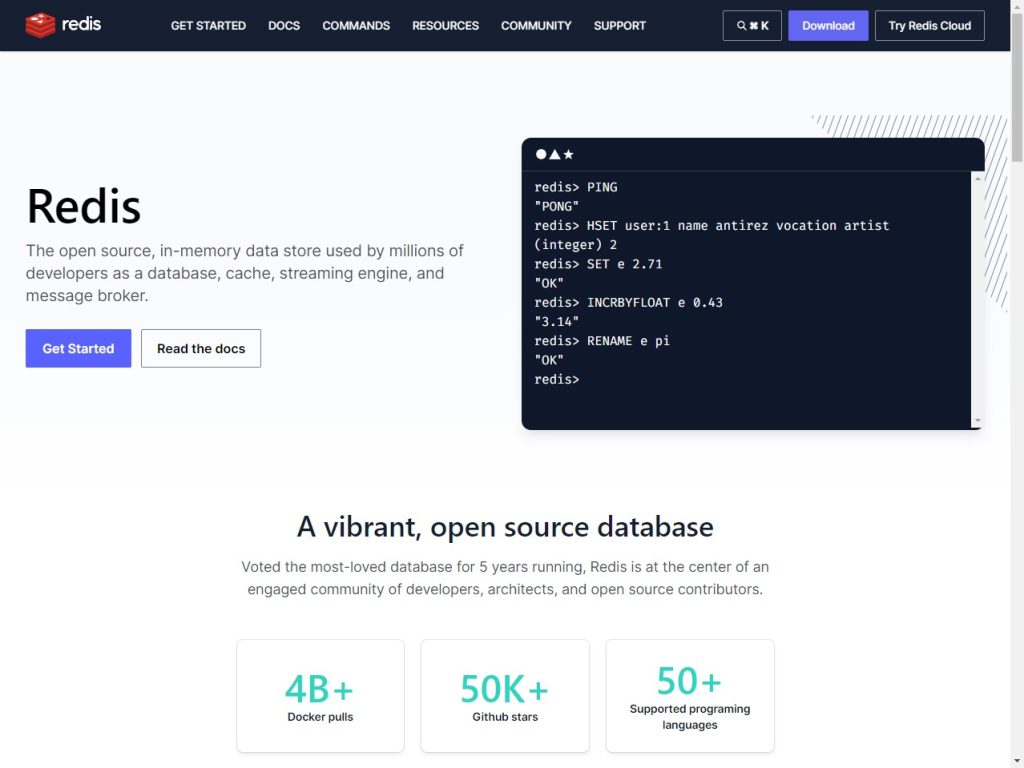
Redis
Redis is an open-source, in-memory data structure store that can be used as a database, cache, and message broker. It supports various data structures and has built-in support for replication and partitioning, making it a powerful tool for building highly available and scalable systems.
Redis is known for its speed, as it stores all data in memory, and it has the option for persistence on disk to avoid data loss. It supports Lua scripting for atomic operations on the data, making it popularly used in caching, real-time analytics, and leaderboards, session storage, full-text search, and autocomplete.
Libraries
Partytown
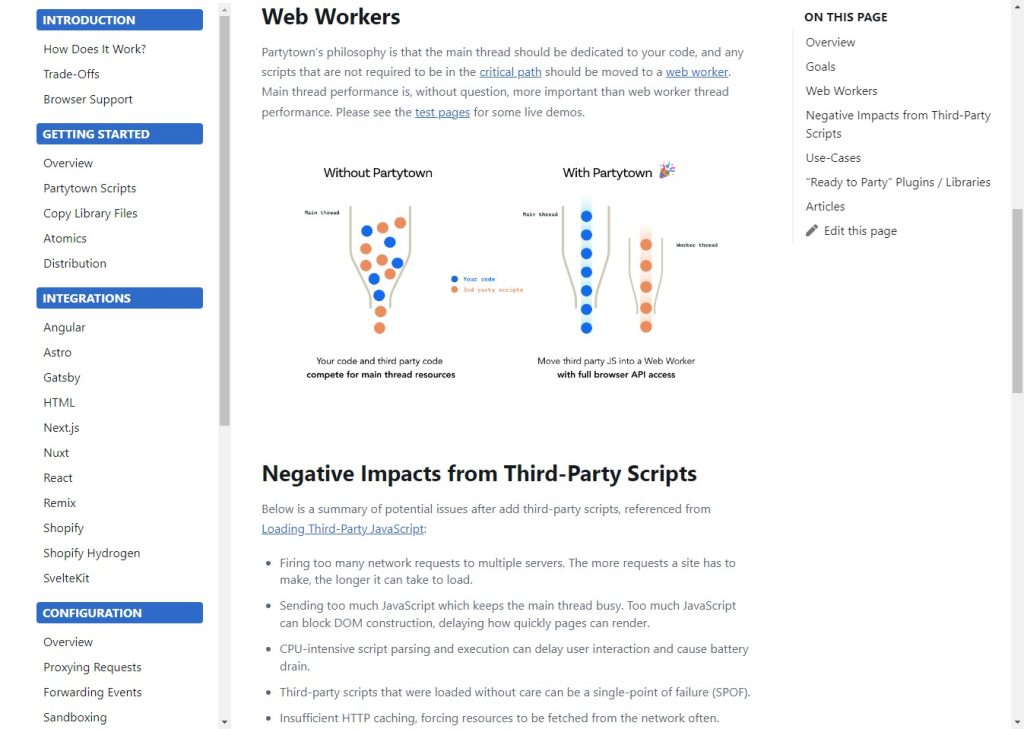
Partytown is a library that aims to speed up websites by relocating resource-intensive scripts, such as analytics and ads, into a web worker. By moving these third-party scripts off of the main thread, Partytown frees up resources for the primary web app execution and improves overall performance.
Partytown allows developers to sandbox third-party scripts, isolate long-running tasks, reduce layout thrashing, and throttle scripts’ access to the main thread. This means that web developers can continue to use third-party scripts without experiencing a significant performance hit. Partytown is currently in beta and is maintained by Builder.io.
D3.js
D3.js is a JavaScript library for creating data-driven documents, which means it’s used for manipulating and displaying data on a web page using HTML, CSS, and SVG. It’s designed to work seamlessly with web standards and doesn’t rely on any specific framework or library. Therefore, it doesn’t need specific libraries to be relocated in a web worker to improve performance.
D3.js is a very powerful and flexible library that can be used to create a wide range of visualizations, and provides a powerful API that makes it possible to create complex visualizations with just a few lines of code.
Day.js
Day.js is a lightweight JavaScript date library that provides a simple and modern API for manipulating dates. It’s designed to be fast and easy to use, and it offers a similar API to Moment.js, a more popular but heavier library. It does not require specific libraries to be relocated in web workers for performance improvements. By default, it uses the native Date object, and it’s very lightweight.
Lodash
Lodash is a JavaScript utility library that provides a wide range of functions for manipulating and manipulating objects, arrays, and strings. It’s designed to be lightweight, fast, and easy to use, and it provides a lot of functionality that’s not available in the JavaScript standard library. This allows developers to streamline their workflows and simplify math operations and other programming tasks.
Bootstrap
Bootstrap is a free and open-source front-end web framework for designing websites and web applications. It contains HTML and CSS-based design templates for typography, forms, buttons, navigation, and other interface components, as well as optional JavaScript extensions.
Bootstrap is the most popular HTML, CSS, and JavaScript framework for developing responsive, mobile-first websites.
Material-UI
For those who don’t know, Material-UI is designed in line with Google’s design language – Material Design. It’s a popular component library that you can import in React, and use the HTML tags to customize your site.
Material-UI also includes a selection of themes, both paid and free, so there are plenty of design choices available too. If your primary development is for websites or apps that follow the Material Design philosophy, this might be a great component library for you to check out.
CSS Processor
SASS
SASS (Syntactically Awesome Style Sheets) is a powerful style sheet language that enables you to write cleaner, more maintainable CSS code. It’s incredibly popular amongst front-end developers.
SASS is written in Ruby, and was first launched in 2006. Since then, it has amassed a vibrant, active community of developers, with detailed guides and resources available for those who’re interested in learning it.
LESS
LESS (Leaner Style Sheets) is a CSS preprocessor that allows you to write cleaner and more manageable code. It can run on both the client or server side.
In general, LESS is just a language extension for CSS, including a few more features, such as mixins, variable substitutions, operations, and combining functions.
Stylus
Stylus is a dynamic stylesheet preprocessor language that’s compiled in Cascading Style Sheets (CSS). The design of Stylus was heavily influenced by LESS and SASS.
Stylus launched in 2010, and was created for the Node.js ecosystem. While it’s a popular choice for Node.js developers, it doesn’t command the same share as LESS or SASS.
Package Managers and Task Runners
Grunt
Grunt is a task runner that helps you automate your workflow. It’s versatile and easy to use, making it a popular choice for web developers. Grunt can help you with several things, such as minifying code, compiling CoffeeScript files, and linting code.
npm
npm is a popular package manager that’s used with JavaScript. It’s the default package manager for Node.js, and includes a CLI, an online registry of packages.
It is free to use and widely considered as the largest software registry in the world, with open-source developers using it to share software.
Bower
Bower is a package manager for the web. It lets you install and manage front-end dependencies for your projects.
In order for Bower to work, you will need to first install Node.js, npm, and Git. It’s a command-line utility that’s fully optimized for the front-end.
Bower helps simplify workflows by finding and installing packages from the web, downloading and saving them in a manifest file.
Site Speed Tester
Chrome Developer Tools
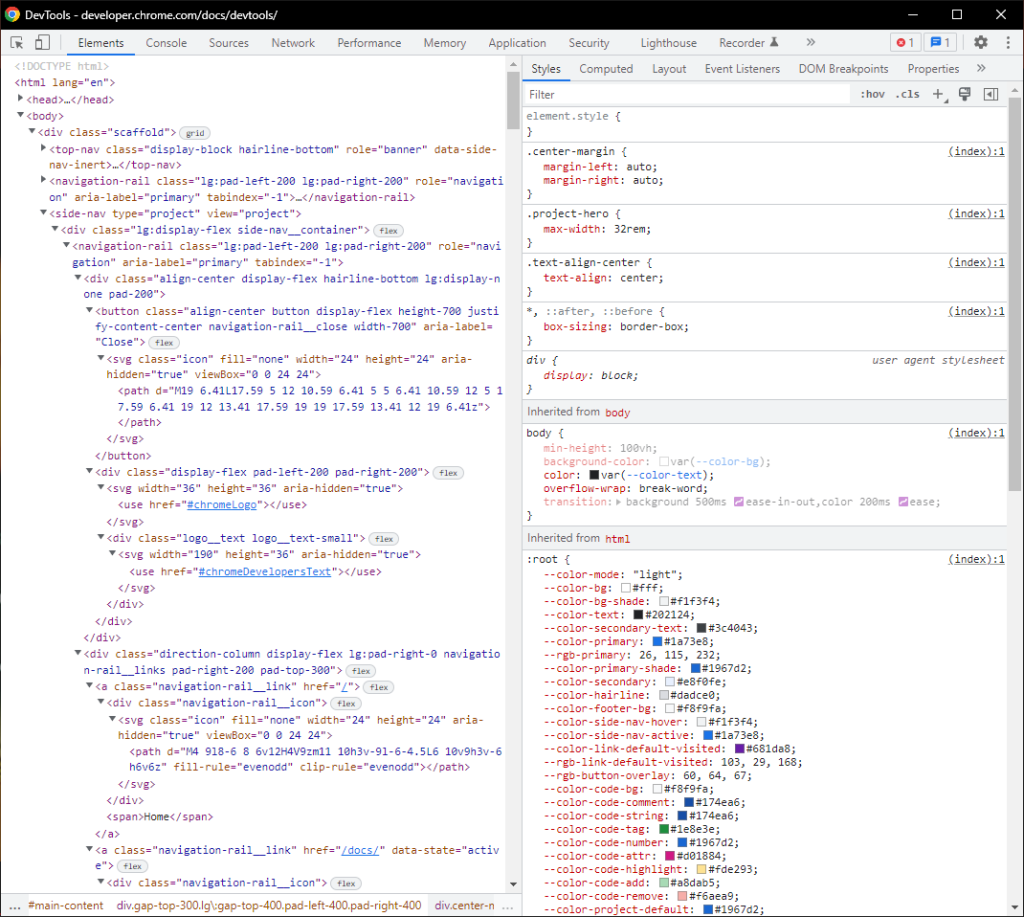
Google Chrome Developer Tools are a set of web development tools built into the Google Chrome browser. They allow you to examine, edit, and debug web pages on the fly.
You can use Chrome DevTools for basic web development tasks such as debugging errors and inspecting page elements. You can open the developer tools menu by pressing F12 key on your keyboard, right clicking a page and selecting “inspect” or using the keyboard shortcut Ctrl+Shift+i.
Google PageSpeed Insights
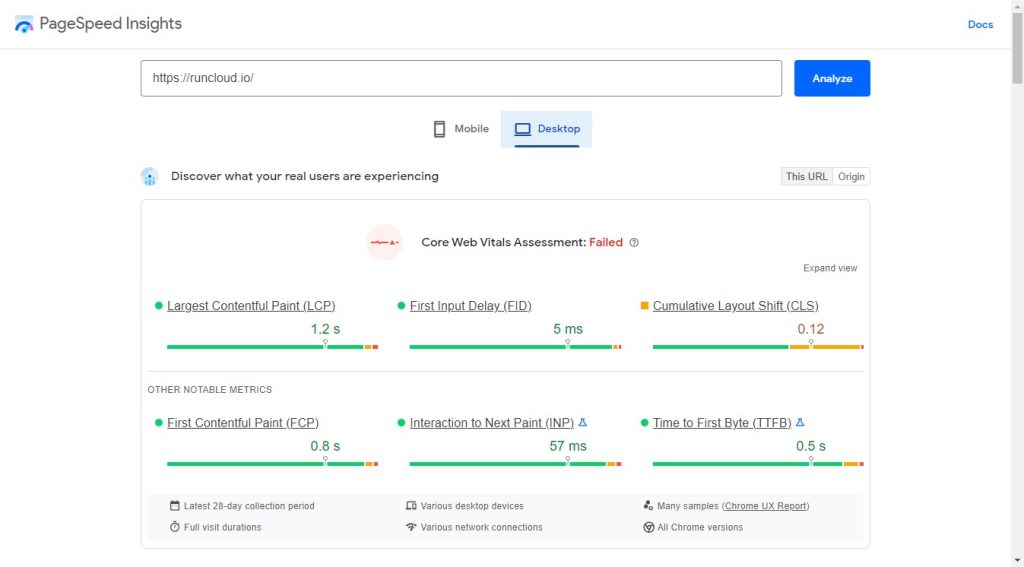
Google PageSpeed Insights is a tool that helps you measure the performance of your website and identify opportunities to improve it. It measures page load time, compression, images, and other factors that affect page speed.
Pingdom
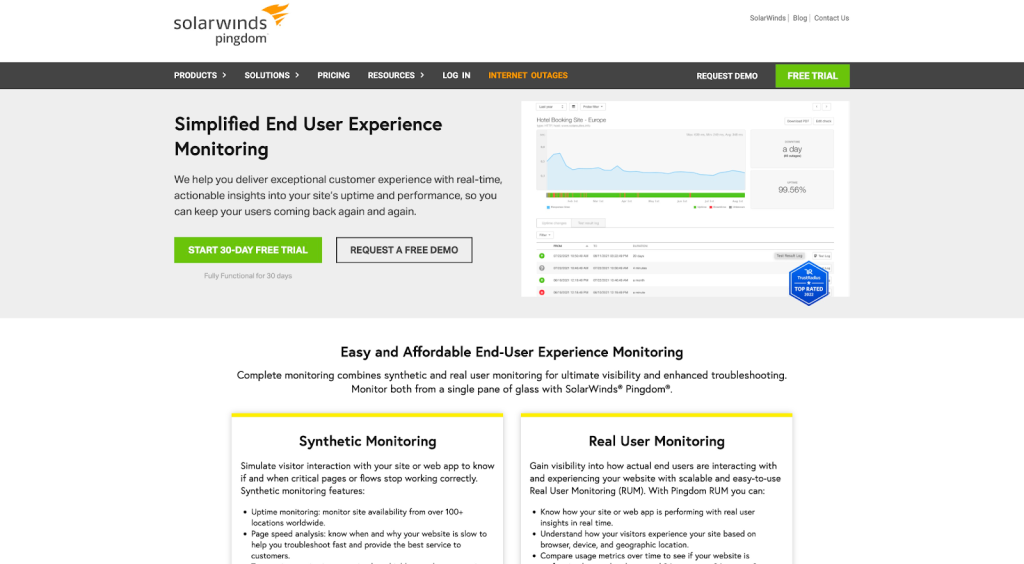
Pingdom is a website monitoring service that watches your website’s uptime and performance. They’ll send you an email or SMS notification if something goes wrong, so you can fix it before your customers start to complain.
Pingdom offers automated website status checking using a global network of data centers. It checks if your website is down and instantly sends a notification. Thanks to its massive network, it can check the status of a website from more than 100 locations every minute!
Git Services and Clients
GitHub
GitHub is a web-based hosting service for software development projects that use the Git revision control system. GitHub also provides access to a social networking site for developers.
GitHub Client is a desktop application for Windows, Mac, and Linux desktops that allows you to manage your repositories, collaborate on code with others and install things like Git from the command line.
GitLab
GitLab is a web-based Git repository manager with issue tracking and code review features. It is similar to GitHub, Bitbucket, and VSTS, but GitLab offers a few features that are unique to it, such as allowing for greater collaboration between team members.
Note: We’re big supporters of GitLab and use it at RunCloud.
GitLab is open-source, offering a collaborative environment for DevOps teams to work on different projects. It was first launched in 2014 and has since become an incredibly popular alternative to GitHub.
While it’s available for free, you will have to consider upgrading to a subscription service to access all of GitLab’s features.
JetBrains Space
JetBrains Space is a comprehensive software development platform that integrates with JetBrains IDEs, making it easy for software teams to build, deliver, and manage their projects. It features tools for Git hosting, code review, CI/CD pipelines, package management, and cloud development environments, among others.
It also includes a range of team collaboration tools, such as document storage, issue tracking, and chat functionality. It is designed to minimize distractions and allow developers to work remotely, making it a great solution for software development teams. It can store artifacts in package repositories, extend and customize via APIs, connect to external services, automate workflows using webhooks, integrate with JetBrains IDEs, and more.
Sourcetree
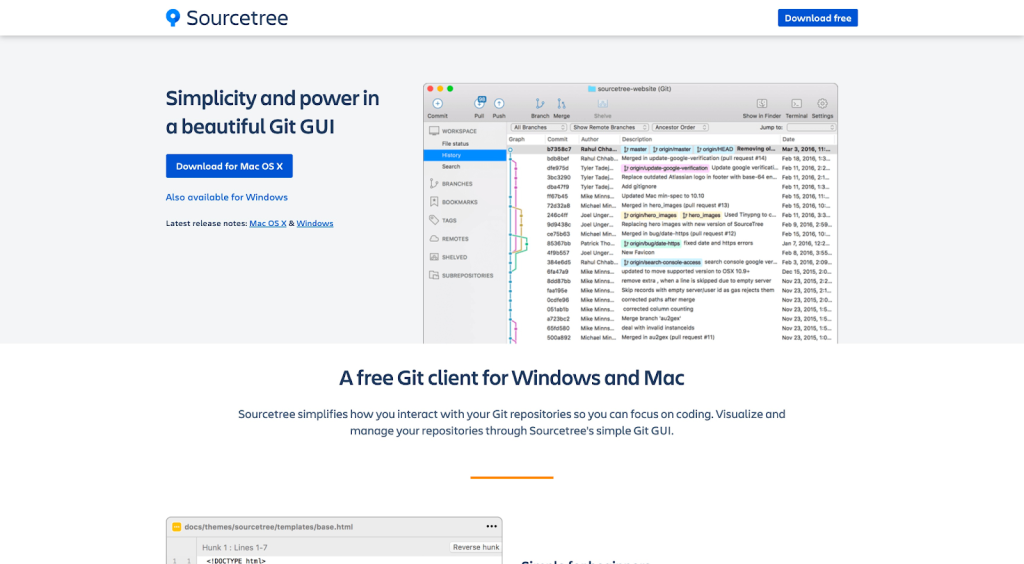
Sourcetree is a popular Git management tool that makes working with source code files much easier. It helps developers get a visual representation of their repositories, making it easier for them to sift through data.
Sourcetree is popular since it offers a GUI, allowing developers to manage their repositories more effectively. You can see information on branches or commits with just a click, and you can even review specific changesets, stashes, and even clone remote repositories.
Collaboration Tools
Slack
Slack is a communication tool used by software developers and other professionals that allows for real-time messaging, file sharing, and more. Its popularity comes from its ease of use and the numerous integrations it has with other apps.
Slack makes it easy for remote teams to collaborate through a centralized platform, allowing them to connect their work apps, create dedicated channels for each project or topic, and communicate through an accessible, streamlined messaging platform that’s also incredibly secure.
Trello
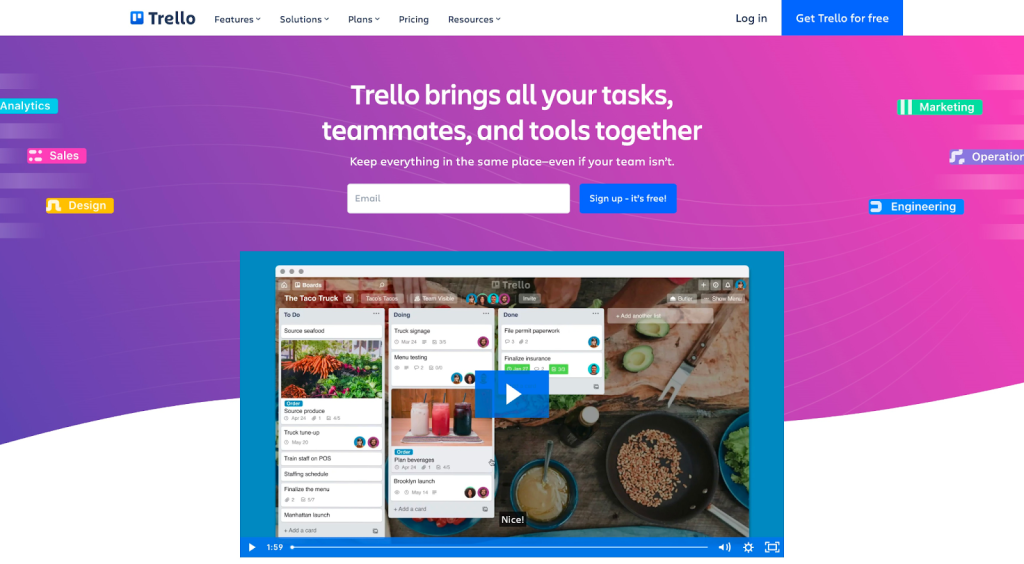
Trello is a project management system that helps you organize your to-dos, projects, and ideas. It’s simple to use, yet very powerful. Trello can be used for both personal and team projects.
You can create boards, lists, and cards, and add members to your boards. Boards can be shared with others or kept private. Cards can be assigned to specific members and dated. You can also add files, links, notes, and due dates to cards.
Web Servers
Apache
Apache is a web server software that enables websites to be hosted on a single computer. It’s the most popular web server in the world and is used by millions of websites. In addition to its popularity as a web server, Apache also has a wide range of other features that make it an attractive choice for developers.
NGINX
NGINX is a web server used by many high-traffic websites such as WordPress, Dropbox, and GitHub. It is known for its stability, flexibility, and performance. NGINX excels at serving static files and can handle large loads of traffic very easily.
Caddy
Caddy is a web server that you can use to host your websites. It’s different from other web servers because it is designed to be easy to use and configure. What makes Caddy really stand out is its built-in support for automation and security features such as HTTPS and SSL certification.
Serverless Platforms
AWS Amplify
AWS Amplify is a set of tools and services for building scalable mobile and web applications. It includes libraries for building user interfaces, back-end services, and authentication. It can be used along with App Composer, a visual application builder that allows developers to build web applications with little or no coding.
Together, these two can create and manage the back-end services needed by the application, such as authentication, storage, and APIs. By using Amplify and App Composer together, developers can quickly and easily build and deploy web applications that are scalable and secure.
Firebase
Firebase is a mobile and web development platform developed by Google. It provides a set of tools and services for building, deploying, and scaling applications. It offers features like real-time databases, authentication, hosting, cloud functions, and more.
It can be used along with Rowy to have more control over the back-end services and also be able to add more features that Firebase doesn’t provide. Rowy enables developers to create, manage and scale their back-end services with no-code or low-code. It uses a visual interface that can be used to interact with databases, authentication services, and more.
Pocketbase
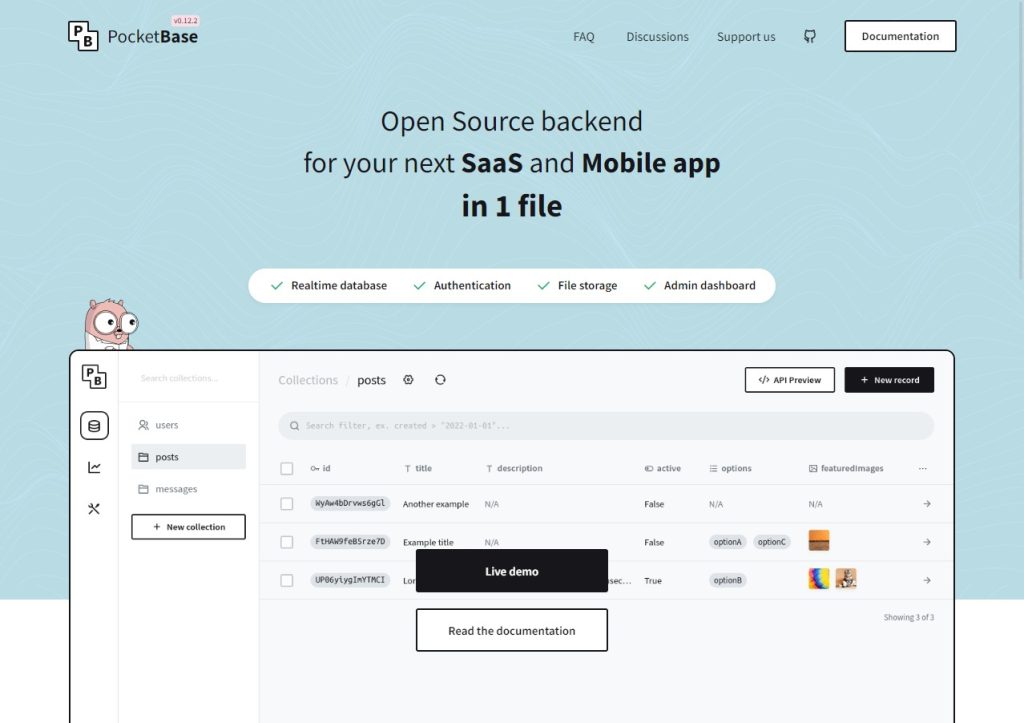
PocketBase is a platform that allows developers to create and manage a back-end for their mobile and web applications with no-code or low-code. It offers features such as database management, user authentication, and data storage.
By using PocketBase, developers can easily create and manage their back-end services, and focus on building the front-end of their applications. It is a platform that provides an easy and simple way to handle the back-end infrastructure without having to write any back-end code, and that can speed up the development process and make it easy for even non-technical people to build and manage their app’s back-end.
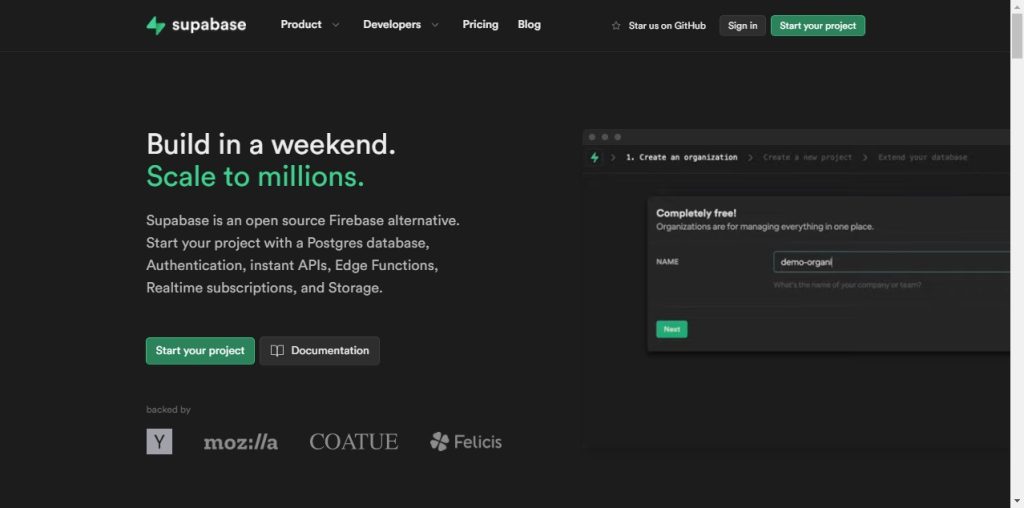
Supabase
Supabase is an open-source Firebase alternative, providing real-time databases, authentication, and hosting through a simple API. It allows developers to build web and mobile apps using the technology they are already familiar with, such as PostgreSQL and GraphQL.
With Supabase, you can create, manage and scale your back-end services with ease. It provides a simple and seamless integration with the web/mobile application allowing for easy access to the back-end services, with a user-friendly console for management and maintenance.
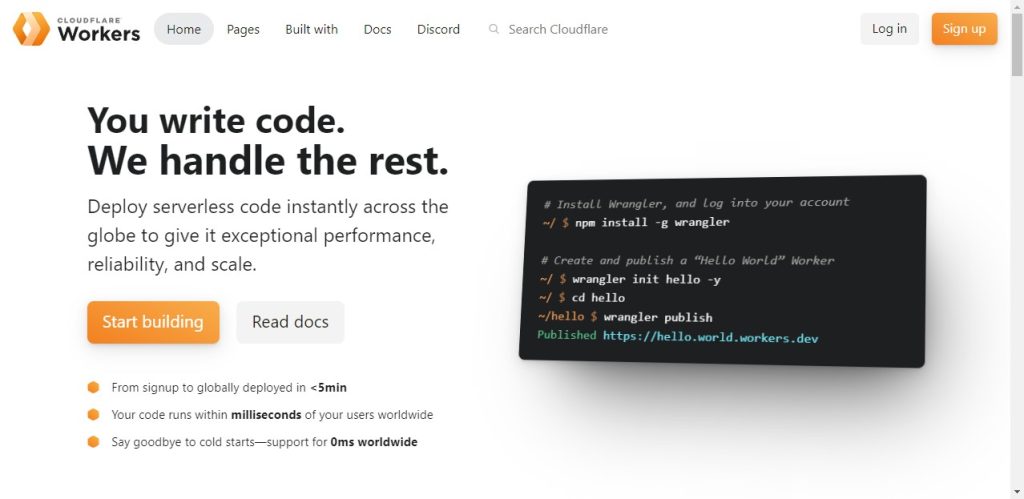
Cloudflare Workers
Cloudflare Workers is a platform that allows developers to write and run JavaScript code on Cloudflare’s edge network, allowing for the creation of serverless functions and edge logic. These scripts can be used to manipulate incoming and outgoing HTTP requests, perform caching, and more.
It can build, deploy and run code without provisioning or managing servers; it also allows for low-latency and high-performance computing at the edge of Cloudflare’s global network. It also provides a platform for creating and deploying custom logic on a global scale, which can be used to handle everything from serverless functions to route-based logic.
Captcha
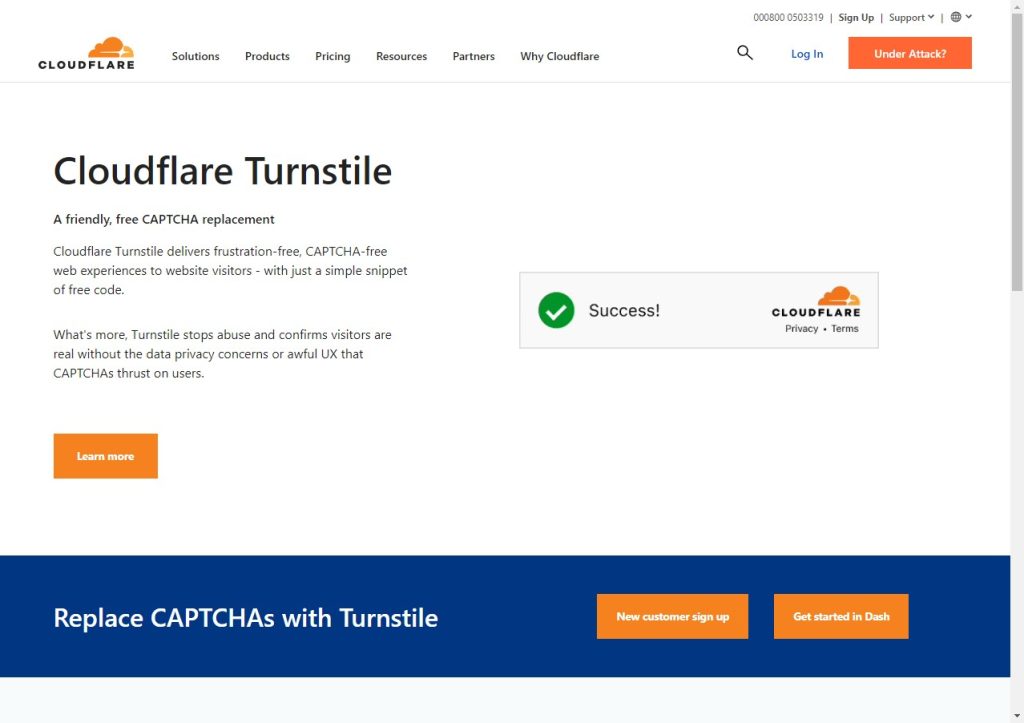
Cloudflare Turnstile
Cloudflare Turnstile is an alternative to traditional CAPTCHA that provides a more user-friendly and privacy-respectful way to verify users.
You can simply call an API and replace CAPTCHA on your sites. The aim of Turnstile is to choose non-intrusive browser challenges based on client behavior and telemetry, replacing the traditional frustrating CAPTCHA system, which was created with a poor UX. And also to minimize data collection and ask other third parties like device manufacturers, who already have the data that would help validate a device.
API testing
Httpie
HTTPie is a command line HTTP client for interacting with web services. It is designed to be easy to use and intuitive, allowing developers to easily make HTTP requests and see the responses.
It supports various features like JSON, forms, and authentication, making it a versatile tool for testing and interacting with APIs.
It also provides an AI-assisted feature that can process requests in natural languages, similar to typing a search query in a browser’s address bar. One could tell HTTPie to “fetch repo details of httpie/desktop”, and even use a different language like Spanish.
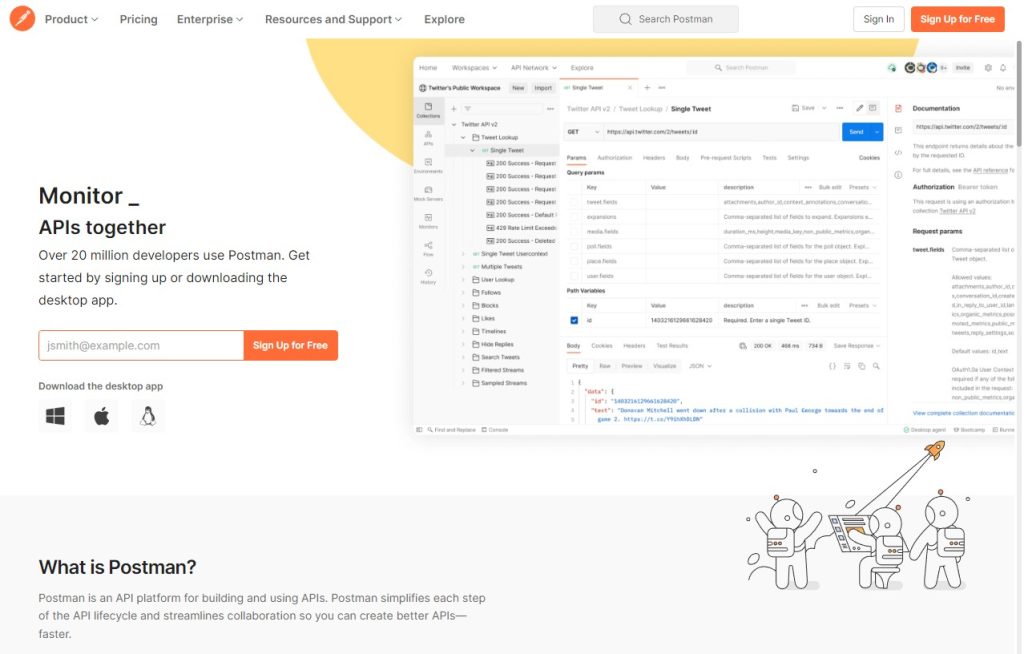
Postman
Postman is a popular tool for API development, which allows developers to test and interact with web services using various request methods like GET, POST, PUT, DELETE, and more. It provides a user-friendly interface for creating and sending requests, with support for various authentication methods and the ability to save and organize collections of requests.
It also supports a wide range of data formats such as JSON, XML, and more, and can also automatically generate code snippets in multiple programming languages that can be used to replicate the requests in an application. It speeds up the testing and debugging process.
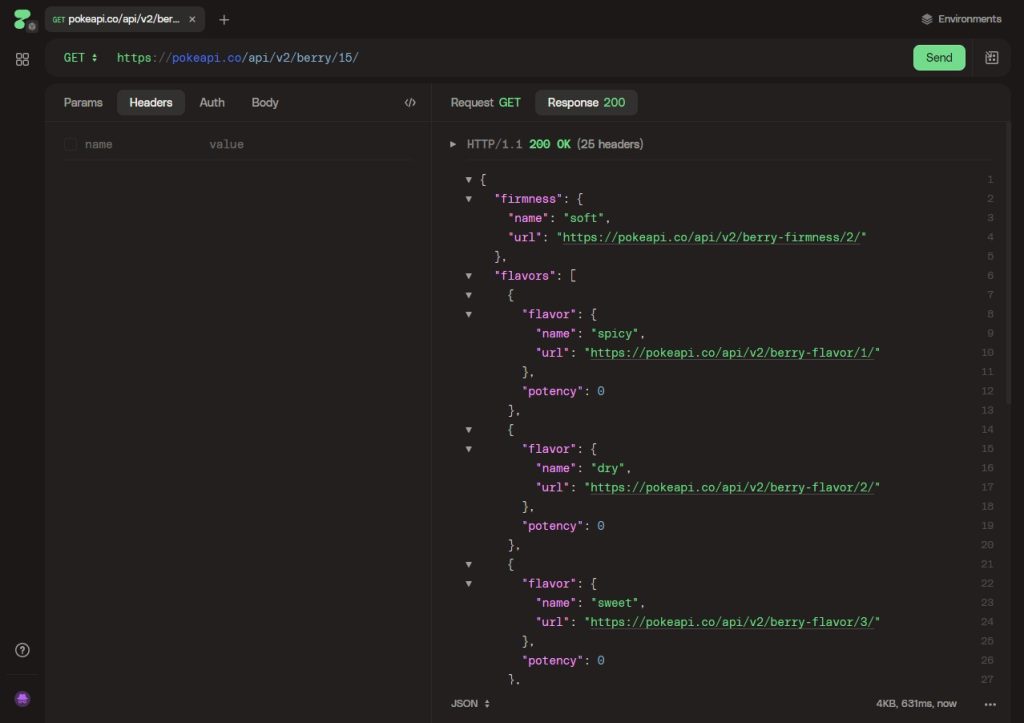
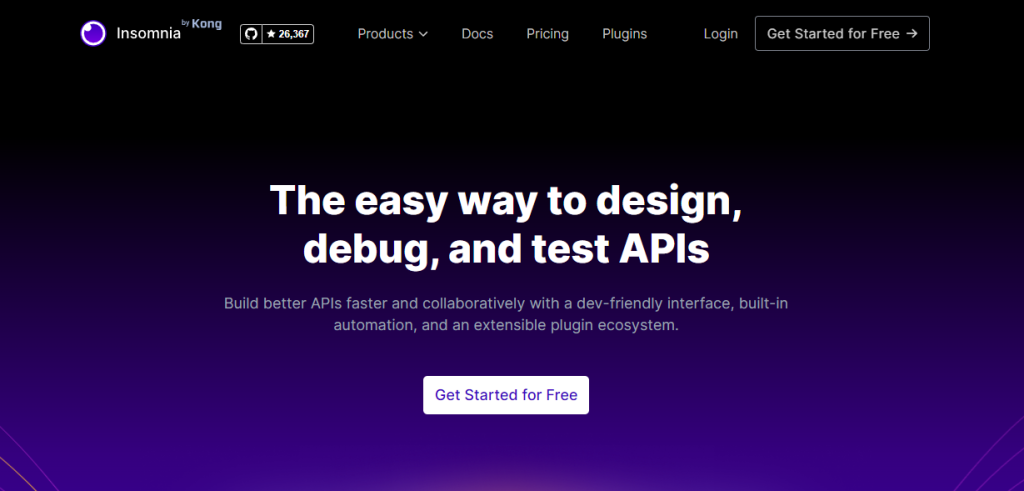
Insomnia
Insomnia is a cross-platform REST client available for Windows, Mac, and Linux. It allows developers to make and test HTTP requests, as well as save and organize them for later use. One of its main features is the ability to create requests using a user-friendly interface rather than manually typing in the request details.
It allows you to test and debug APIs. It also supports request templating, environment variables, and importing and exporting the requests.
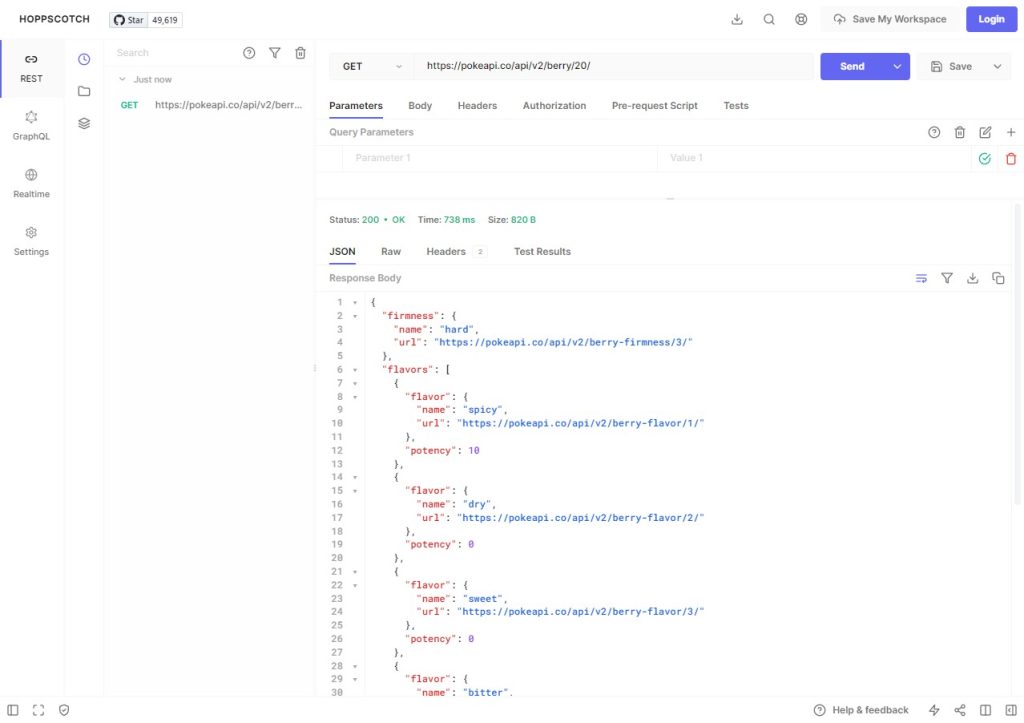
Hoppscotch
Hoppscotch is a web-based API testing and development tool that allows developers to easily make and test HTTP requests and view the responses they receive. It has a user-friendly interface that helps developers quickly create and test requests without having to manually type in the details.
It also allows users to save, organize and share requests. Hoppscotch support multiple authentication methods and also allows to define variables and environment. You can also use Hoppscotch to test RESTful and GraphQL APIs, and it also provides request history; you can check your previous requests too.
Traffic capture and analysis
Burp Suite
Burp Suite is a powerful web application security testing tool that allows developers to perform various tasks related to web security, such as penetration testing, vulnerability scanning, and web application testing.
It can be used to intercept, inspect and modify HTTP/HTTPS requests and responses between a web application and a browser. This allows developers to identify and fix security issues, such as SQL injection, cross-site scripting, and other vulnerabilities. It also automates the testing process and integrates with other security tools. Additionally, it can be used to perform manual testing and assess the security of web applications.
Wireshark
Wireshark is a network protocol analyzer that can be used to inspect network traffic and troubleshoot issues in web development. It allows developers to view the low-level details of network communication, such as the headers and payloads of packets, and can help them understand how their web applications are interacting with the network.
Wireshark can also be used to identify issues such as bottlenecks, security vulnerabilities, and compatibility problems. Hence, it is a powerful tool that can be used to optimize the performance and security of web applications.
JSON Viewer
After you get the results from the API, you need to visualize them.
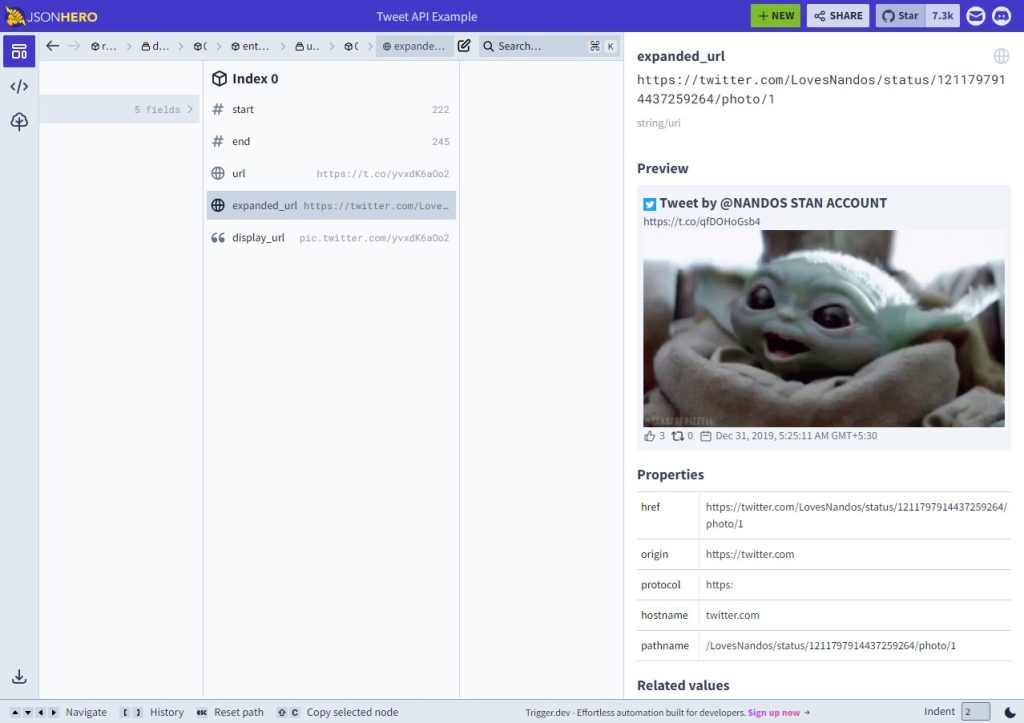
JSON Hero
JSON Hero is a tool that helps developers work with JSON data. It allows developers to view and edit JSON data in a more user-friendly format, making it easier to understand and work with. JSON Hero also provides features such as JSON validation, syntax highlighting, and conversion to/from other data formats such as XML and CSV.
It can also allow developers to merge, diff, and format JSON data, which allows them to manage and manipulate JSON files quickly and effectively. JSON Hero can be very helpful when working on web development projects that involve a lot of JSON data.
JSON CRACK
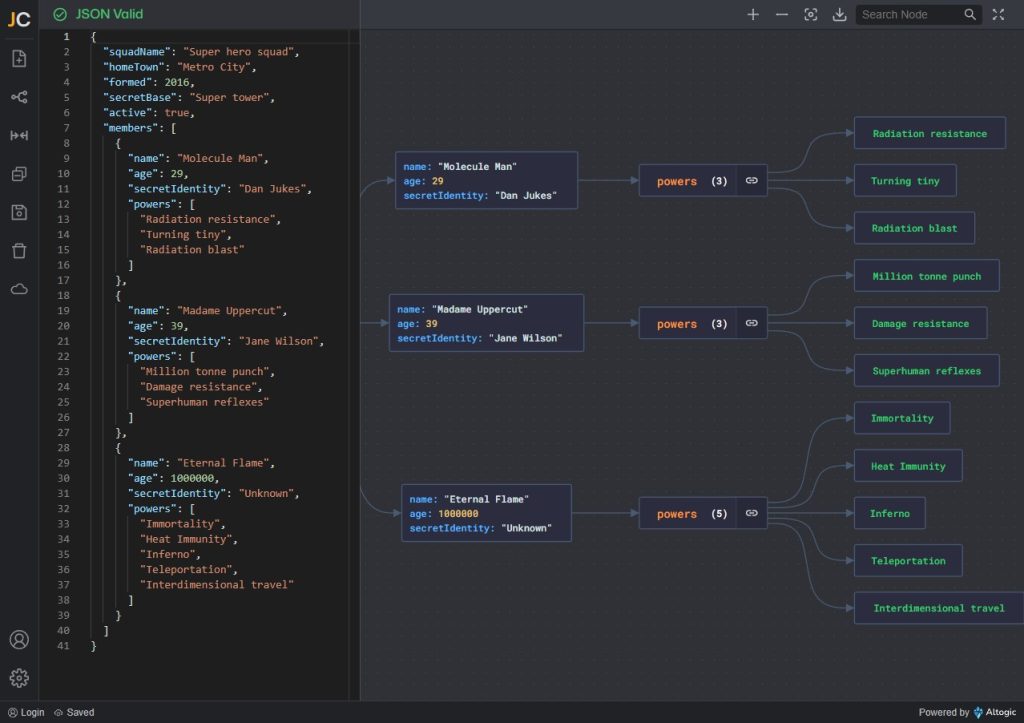
JSON Crack is a tool for analyzing and visualizing JSON data. It allows users to easily load and explore their JSON data, and provides features such as search, download, live editing, and validation to make working with JSON data more efficient.
The tool also allows users to embed the JSON Crack app into their website using an iframe, and use it to view and analyze JSON data directly on the website. JSON Crack is an open-source project and actively encourages contributions from the community.
Image optimization
Squoosh
Squoosh is a web-based image compression tool that allows developers to optimize images for web use by compressing them to reduce their file size without degrading the quality of the image.
This can improve the performance of a website by reducing the time it takes for images to load. It supports a wide range of image formats and includes various compression options, making it a versatile tool for web developers to use in their workflow.
ShortPixel
ShortPixel is an image optimization plugin and API service that can be integrated into a web development workflow to automatically optimize images as they are uploaded to a website. This helps reduce the file size of images without significantly degrading their quality, improving the website’s performance by decreasing load times.
ShortPixel supports a wide range of image formats and can optimize images in bulk, making it a convenient tool for developers to improve website performance.
Documentation and references
MDN Web Docs
MDN Web Docs is a comprehensive resource for web developers, providing documentation and guides on web technologies such as HTML, CSS, JavaScript, and web APIs. It serves as a reference for developers to look up information on specific web technologies, as well as a learning resource for those new to web development.
It provides in-depth explanations of how different technologies work, along with interactive examples and code snippets to help developers understand and implement them in their projects. It is the go-to place for the developer community for web standards and best practices.
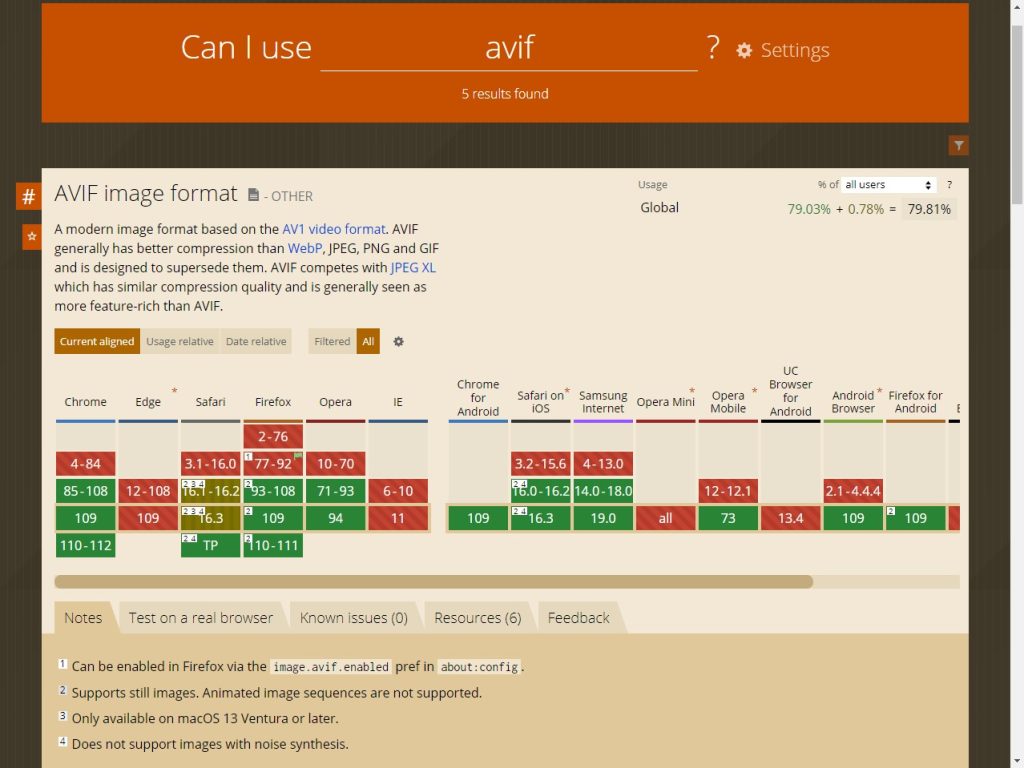
caniuse
caniuse is a web-based tool that provides information on browser support for different web technologies such as HTML, CSS, and JavaScript. It allows developers to check which features are supported in which browsers, including specific versions.
This helps developers to make sure that their website or web application works correctly across different web browsers and devices. It is widely used by web developers to check what features they can use safely, and what to do for users who have to use older browsers or different devices.
Coding assistant
GitHub Copilot
GitHub Copilot is an AI-powered code completion tool that is integrated into GitHub, which can help developers write code faster and with fewer errors. It provides context-aware suggestions for code completion, and can also recommend changes to code in real-time as it is being written.
It helps developers to focus on the problem they are trying to solve rather than getting bogged down in the details of code syntax, making it an efficient tool for writing, editing, and understanding code. Additionally, it also can provide explanations of code and suggestions for refactoring and performance improvements, making it a valuable tool for web developers.
AWS Code Whisperer
AWS Code Whisperer is an AI-powered tool developed by Amazon, which can be used to automatically improve the security, performance, and maintainability of code. It does this by using machine learning models to analyze code and provide developers with suggestions for how to improve it.
For example, it can scan for vulnerabilities and recommend fixes, find performance bottlenecks and recommend improvements, and suggest code refactorings to make it more maintainable.
It integrates with developers’ IDEs, code repos, and build systems; it can also analyze the code as it is written and provide real-time feedback to developers. It can be used with multiple programming languages and it’s integrated with other AWS services like AWS CodeCommit, AWS CodeBuild, AWS CodeDeploy, and more.
Tabnine
Tabnine is an AI code assistant that can help with web development by providing suggestions and auto-completing code. It can also assist with debugging and refactoring.
By using machine learning techniques, it can learn from a developer’s coding style and improve its suggestions over time. It can also save developers time by quickly generating boilerplate or repetitive code. Additionally, it can also assist with identifying and fixing errors, allowing developers to focus on more complex tasks.
Server Management
RunCloud
RunCloud is an incredibly useful tool for web developers as it allows them to quickly and easily deploy, manage and monitor their web applications. It provides a comprehensive suite of tools that make it easy to manage servers, databases, storage, and other infrastructure components.
It offers various features such as automated backups, application monitoring, and more. Web developers can use it to streamline their workflow and ensure their applications are secure and running efficiently, making it an ideal choice for web developers.
After Action Report — Which Web Development Tools Do You Use?
These are just some of the many web development tools that you can integrate into your workflow and improve your operations.
If you’re tired of managing your own servers – you might want to check out RunCloud (yep, that’s us!). RunCloud is built for developers that want to focus on shipping great work, not on managing their infrastructure. Painless server configuration, so you don’t need to spend hours figuring it out – get started with RunCloud today & get up and running in minutes.
Do you have any others that you’d want to add to this list? Let us know in the comments below, or join the conversation by sending us a Tweet!
InstaWP is the leading provider of what can most simply be described as disposable WordPress websites and it is used for everything from testing to staging and demos (for WordPress plugins and themes). Behind the scenes, they chose to power their platform with RunCloud using our API.
For Those Yet To Hear About InstaWP – What Is It? And What Led You To Build It?
In short, InstaWP is a WordPress sandbox service. What this means, and the use cases & scenarios that it applies to are extremely varied.
By using InstaWP, they were able to quickly create instances that enabled their team to explain installation issues to their customers with far greater ease and effectiveness.
What led us to build the platform was very much out of our own needs. We wanted an easy way to deploy single-use WordPress sandbox environments – whether that was for testing, validating an idea before pushing something to production, debugging issues, or building a site for a client, among several important needs.
We (at ExpressTech) wanted to make a platform that would simplify a whole range of processes that were taking place in our organization, and which we knew were also highly relevant to a wide range of other users in the WordPress space (as well as organizations similar to ours).
Building InstaWP – The Challenges Faced
As we began development on the platform when it was still an internal project, the biggest challenge we faced was not wanting to reinvent the wheel when it came to server deployment and management. Realistically, that would have extended the development time, increased costs, as well as raised maintenance costs of the platform as a whole to the point where we would likely not have pursued the development.
It was at this stage that we began to explore the potential ways we could use RunCloud’s API to negate the need to bake the deployment scripts into our own systems. As it turned out, this ended up being relatively straightforward to accomplish.
Shortly after finding RunCloud, we were confident that the implementation would be suitable, and would work exactly as we wanted it to. This gave us the confidence to take InstaWP to market much, much faster than we would have (and could have) prior to using RunCloud with our free offering.
What Made RunCloud The Right Solution For InstaWP
Although there are many platforms that try to accomplish something similar to what RunCloud does, we were very quickly certain about our choice to use RunCloud to build InstaWP. The fact that they’ve been a leader in the industry for years as a reliable service provider (i.e., not offering lifetime deals, compromising quality, etc.) aligned with our values, and this made us feel confident when making the choice that we would be in good hands.
Similarly, upon connecting with the team, we received great help, support, and feedback that again made the entire process of building InstaWP more enjoyable.
Upcoming Plans & Where You Can Learn More About InstaWP
RunCloud gave us the perfect start with its simple API and robust infrastructure to provision instances. We had to write some WP-specific APIs ourselves, like Magic Login, DB Editor, Code Editor, etc., but from a provisioning standpoint, RunCloud had us covered.
To scale, we are looking to create our own backend of provisioning, with the sole reason being that our systems will be designed towards having short-lived sandbox environments, whereas RunCloud is meant for production-level sites.
And eventually, the goal is to integrate with RunCloud (as well as hosting providers) to provide a way to easily push from InstaWP environments over to production sites. In a way, going full circle with an integration with the solution our platform was first powered by. The first phase of this has started:
DigitalOcean is a well-known cloud server provider that aims to simplify cloud computing so that developers and their teams can spend more time building software that changes the world. It’s designed for developers, and provides an intuitive control panel, predictable pricing, team accounts, and more.
DigitalOcean has many different plans, including Basic (Standard), General Purpose, Memory Optimized, and CPU Optimized.
You can choose the server location that is close to you or your customers to get lower latency.
In this post, we will show you how to set up the DigitalOcean server to host your websites on RunCloud.
Let’s get started!
Adding DigitalOcean API Keys to RunCloud
With RunCloud’s server provisioning feature, you can set up a server in DigitalOcean directly from the RunCloud dashboard by providing an API key from DigitalOcean to RunCloud.
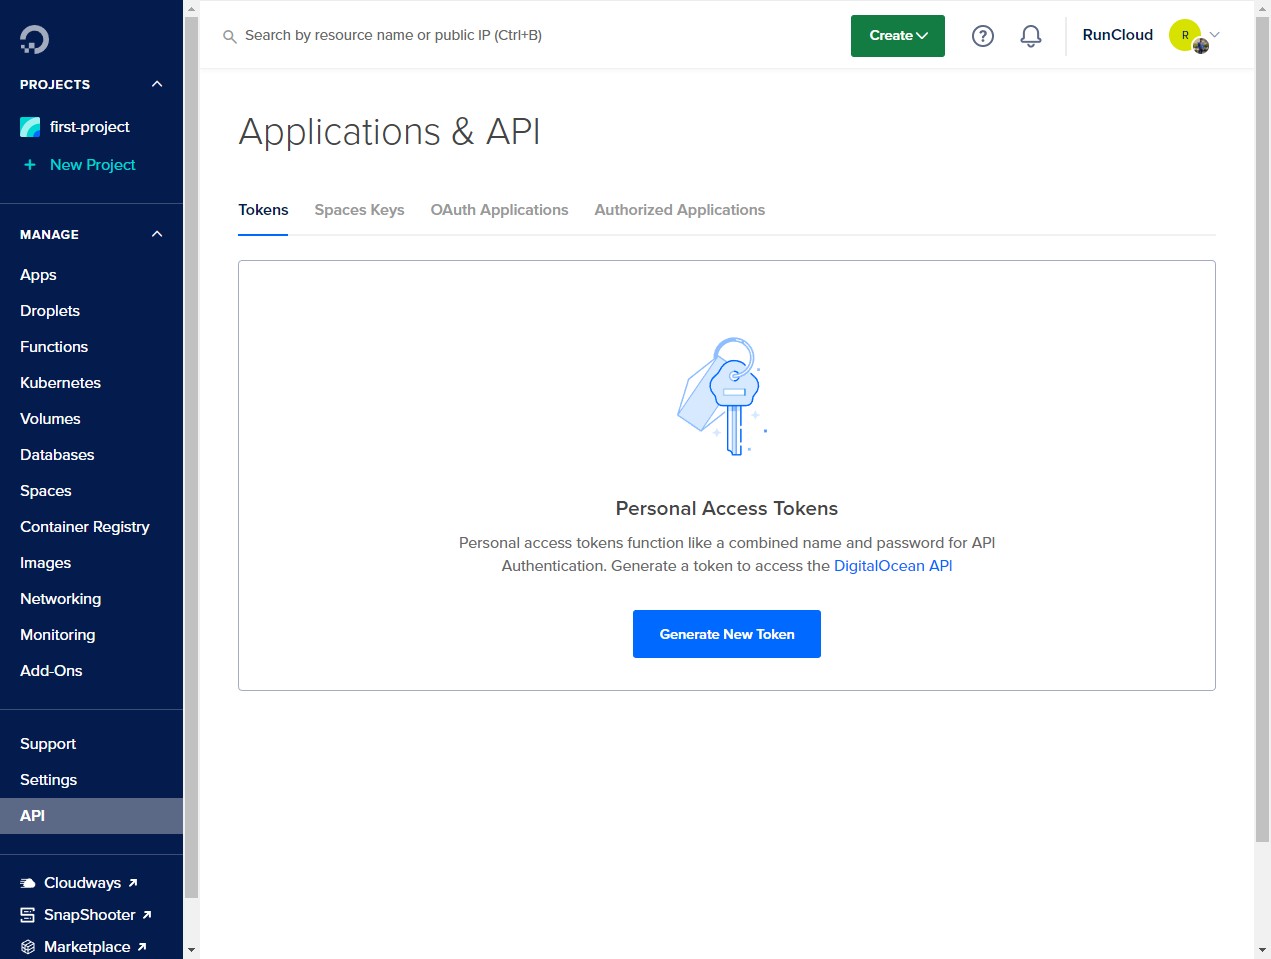
To start the integration process, open your DigitalOcean dashboard and navigate to the “API” tab on the lower left of your screen.
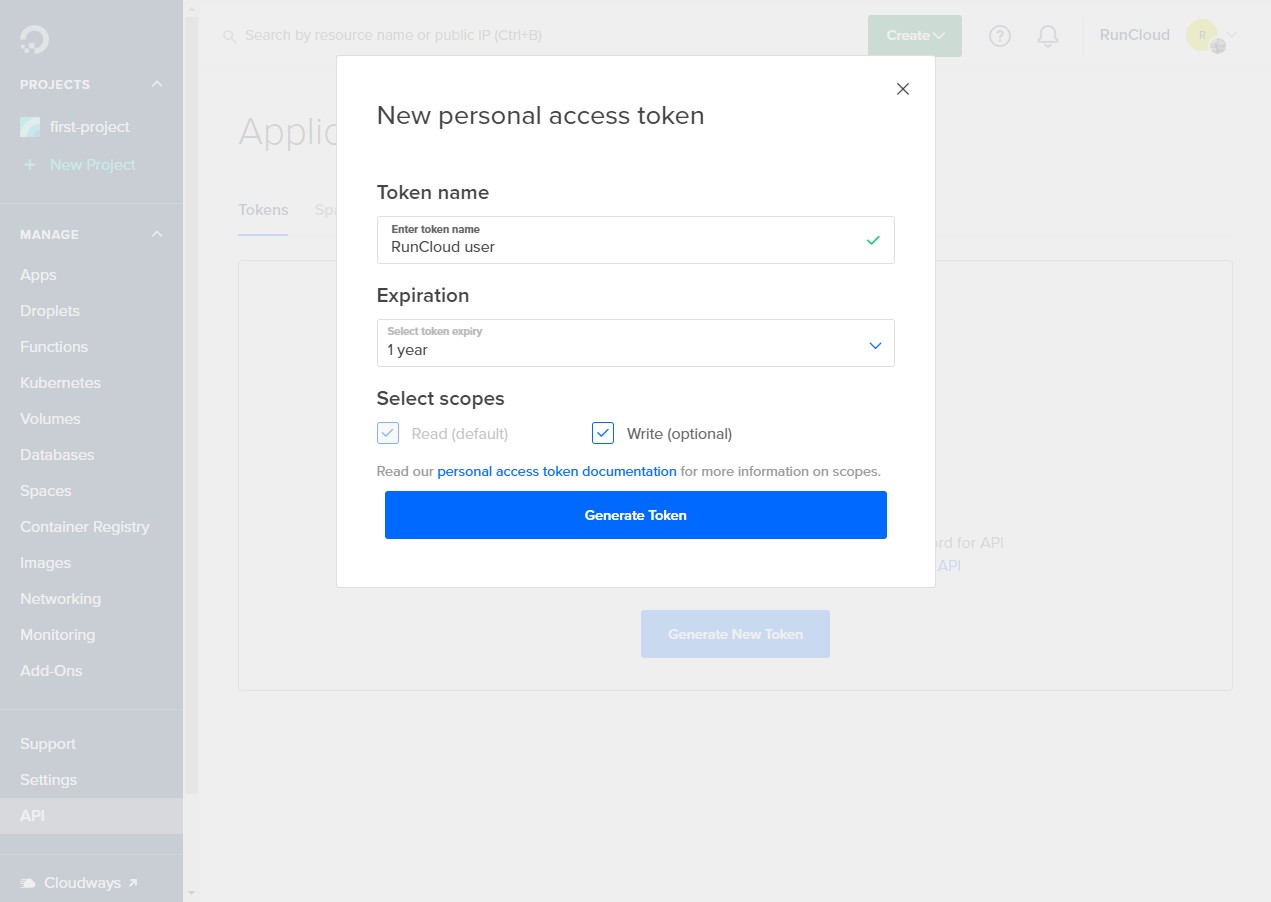
In the “Applications & API” menu, make sure that you are on the tokens tab, and click on the “Generate New Token” button to create a new key.
On the next screen, give a suitable name to your key and set the expiration date of the key. Choose the expiration period carefully, because if your key expires, you will need to integrate your server with RunCloud again.
Make sure you have granted the “Write permission”, and then click “Generate Token” to create the token.
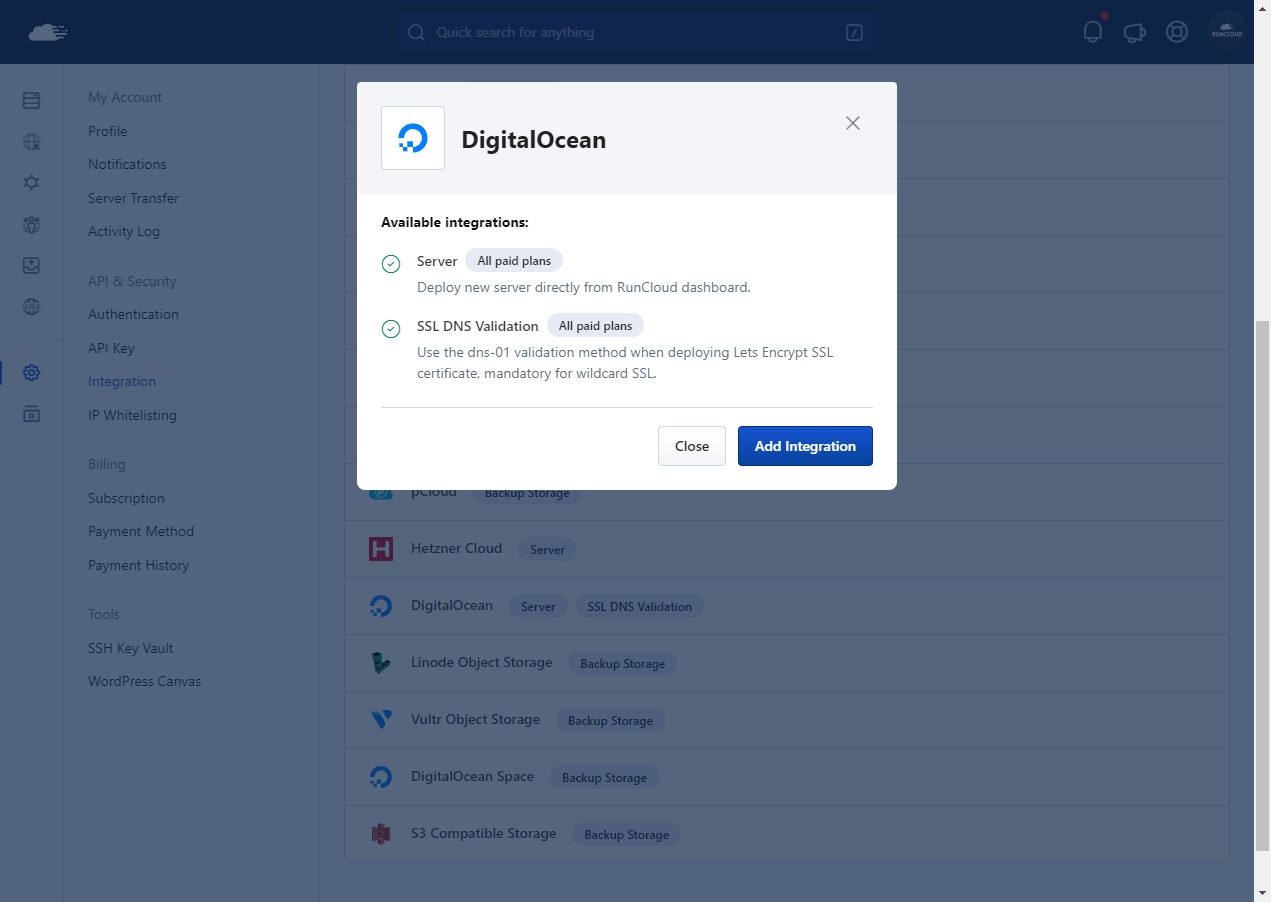
After your key has been created, you’ll need to add this key to your RunCloud account to finish the integration process. Go to your account settings and open the “Integrations” tab. Look for the “DigitalOcean” option in the list, and click on it.
Make sure you click on the right option to host the servers, and not the DigitalOcean Space option.
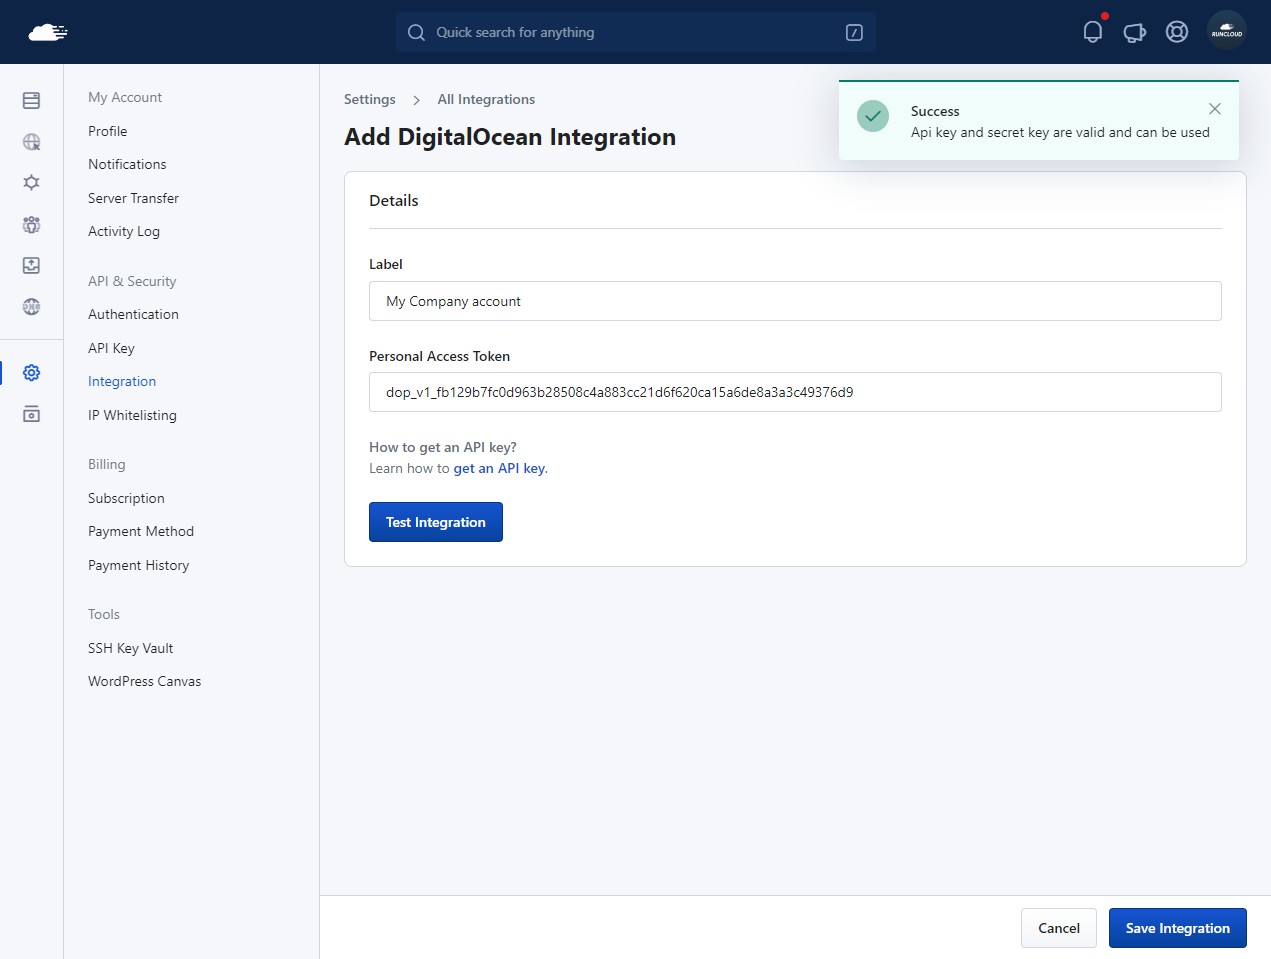
On the next screen, you can add the name of your API key to distinguish it from the rest of the keys, and then paste the key that you copied from the DigitalOcean dashboard.
After you have added the key, it’s a good idea to test the integration by clicking on the “Test Integration” button. If you follow the steps correctly, you should get a success message. Click on the “Save Integration” button to save the changes.
Deploying A Server Using RunCloud
Once you have successfully integrated RunCloud with DigitalOcean, you can start using RunCloud’s automated deployment feature to launch and delete servers automatically.
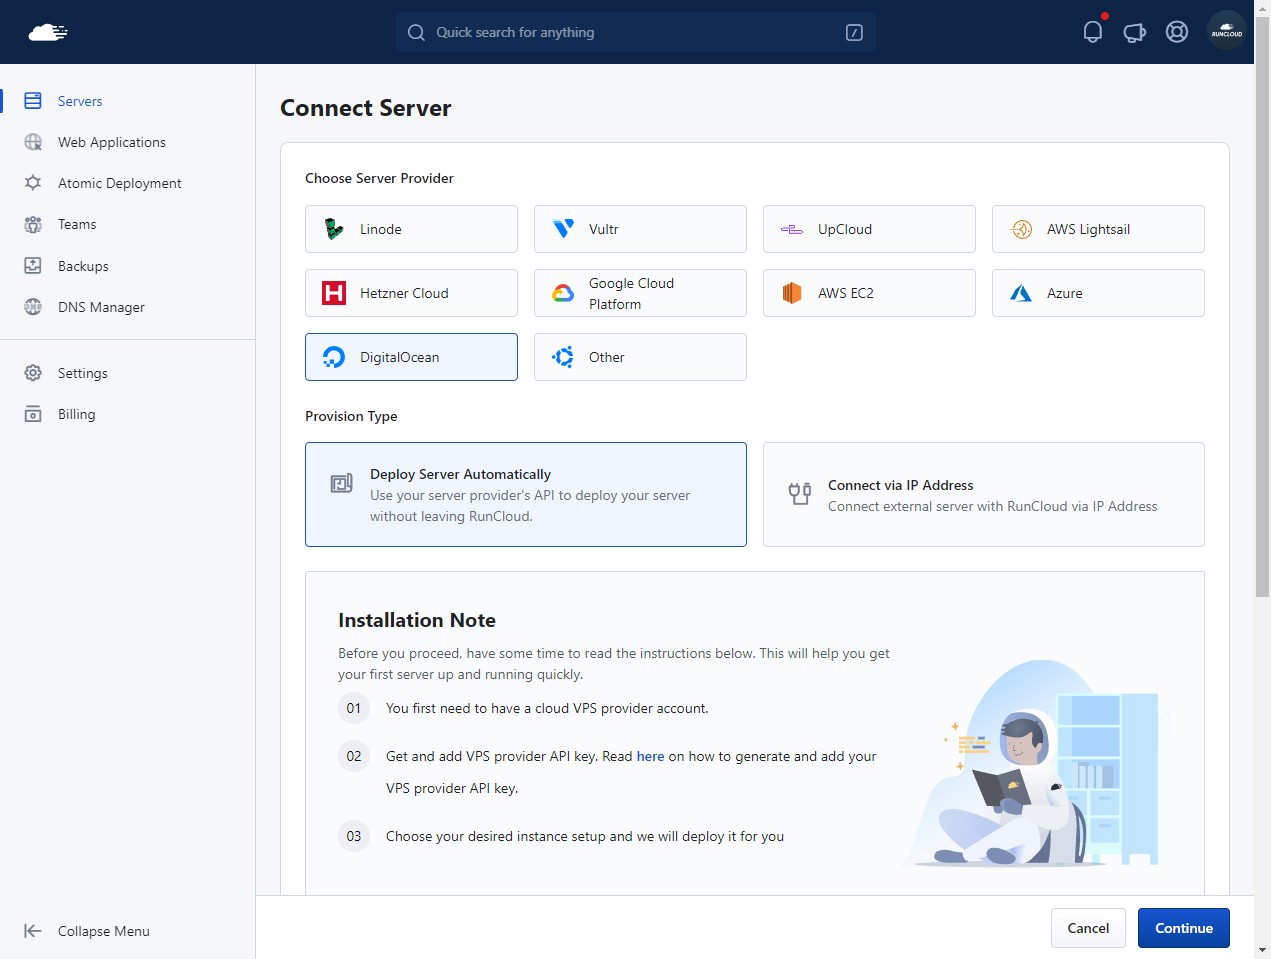
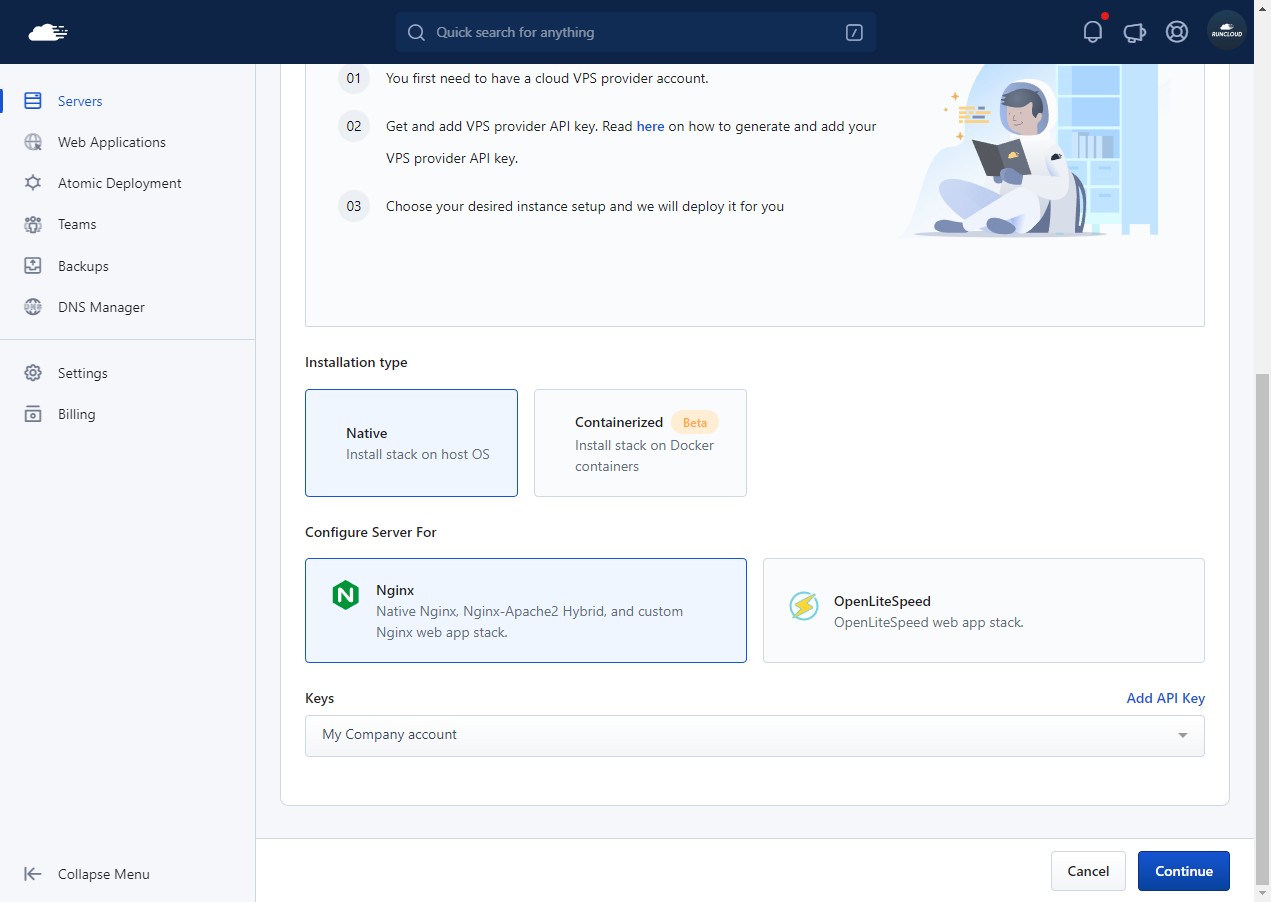
To deploy a new server simply go to your RunCloud dashboard and click on “Connect a New Server”. On the next screen, choose DigitalOcean from the list of available cloud providers and click on “Deploy Server Automatically”.
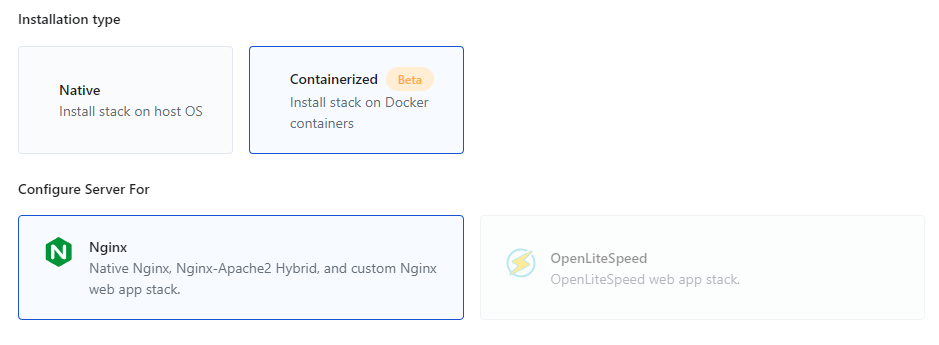
Now scroll down to the bottom of the screen and select the installation type. There are two installation options available – you can either choose a native installation or containerized. Read our blog post on containerized architecture to learn more.
Next, you can pick the server stack that you want to use. In this example we will just use the Nginx servers. Now you need to select the API key from the drop down menu – pick the API key that we just created and then click on “Continue”.
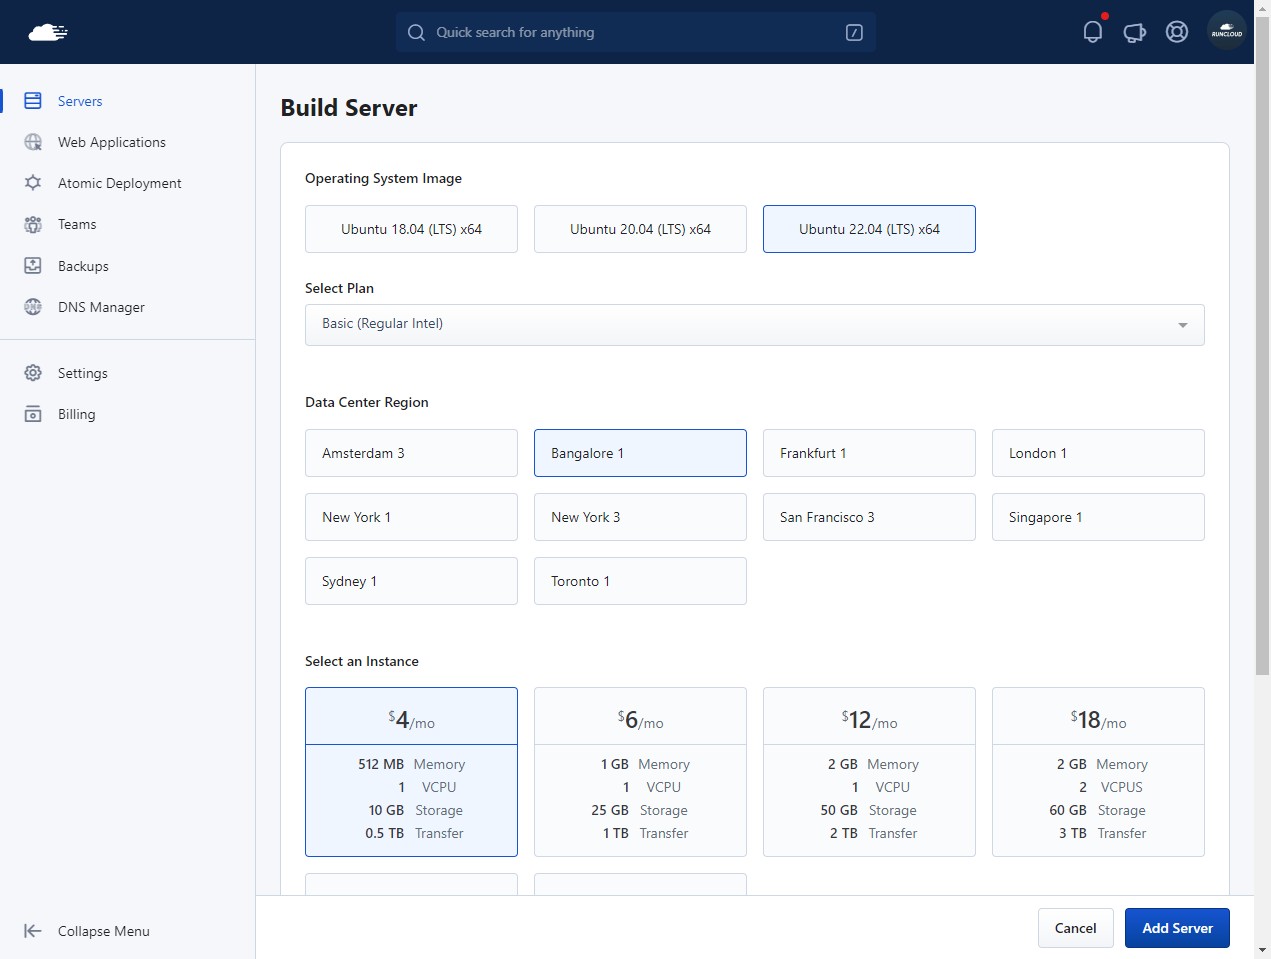
On the next screen, you will get the option to select the operating system and other server details. Pick the latest version of the cloud image available, and then select the cloud plan that you want to use. There are multiple cloud plans available with varying costs – pick the one that meets your needs best.
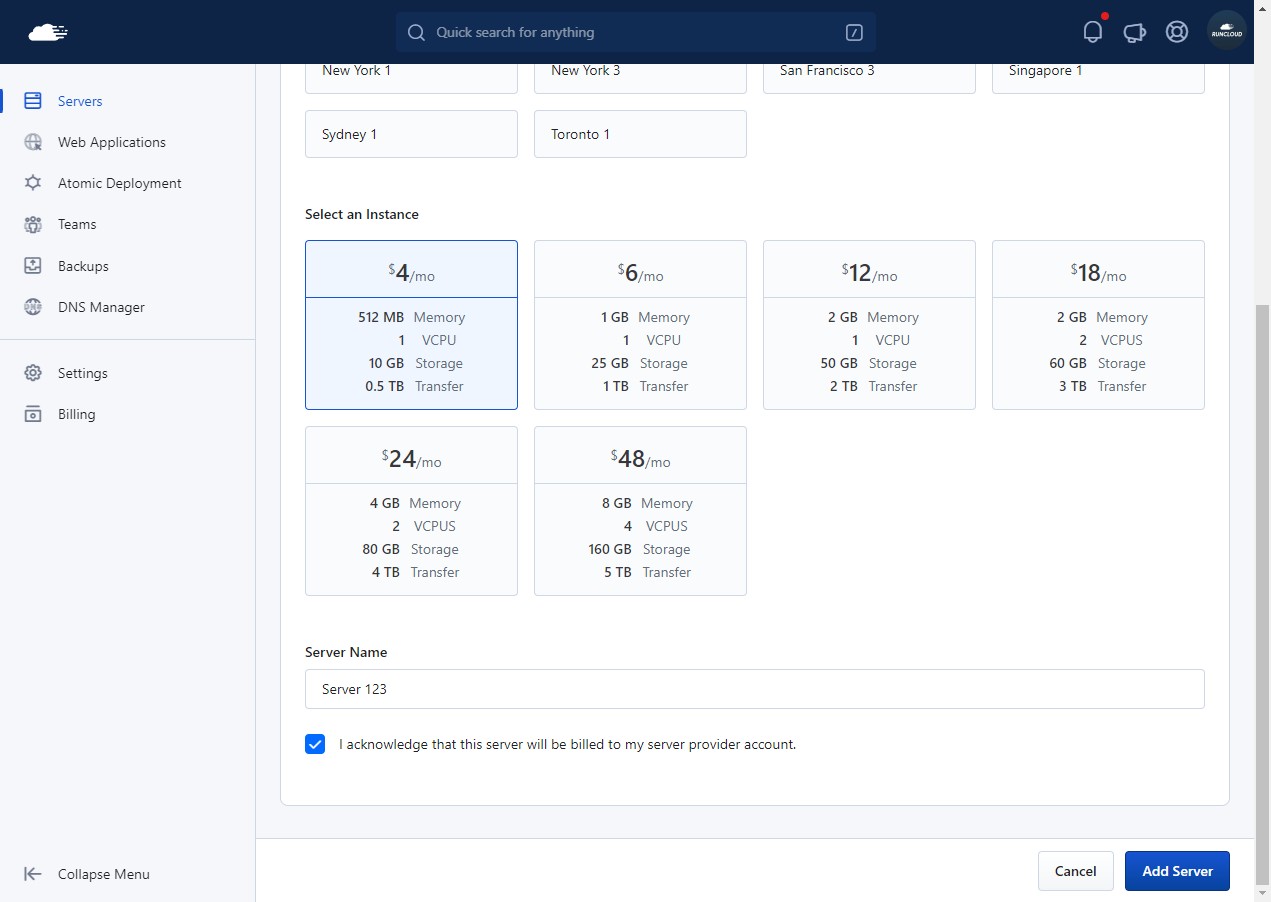
Next, select the instance size depending upon your workload. In this example, we have used the basic plan to deploy a $4 per month server in the Bangalore region.
After you have selected the cloud instance, scroll down to the bottom of the page and give your server a suitable name. Don’t forget to check the box to acknowledge that you understand you will be billed for this cloud instance, and then click on the “Add Server” button to deploy the server.
After you have created the server, RunCloud will automatically deploy a new server on your behalf in your DigitalOcean account, and then install all the necessary dependencies and other software needed to run web applications.
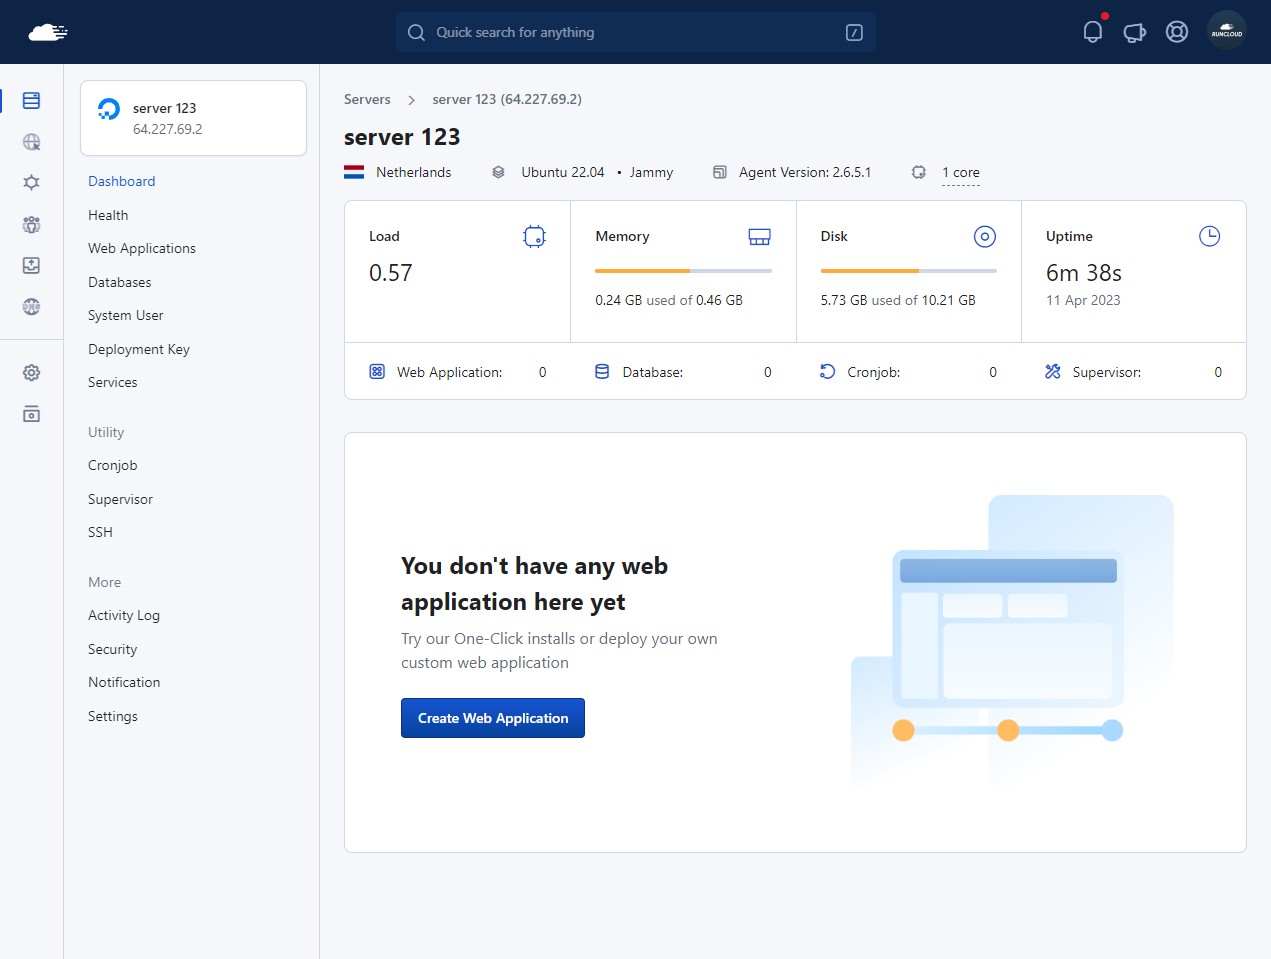
This usually takes five to ten minutes, there is no additional input required from you at this point – just sit back and wait for the installation to complete.
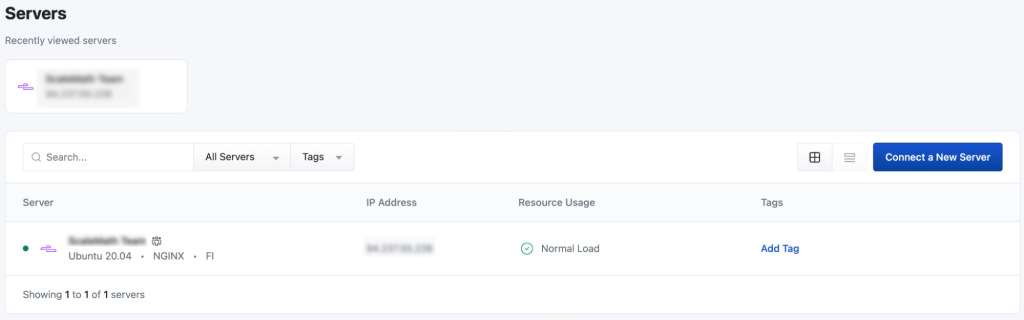
Once the installation has completed, you should see the following screen in your dashboard:
Deploying A Server Using RunCloud One-Click Droplet
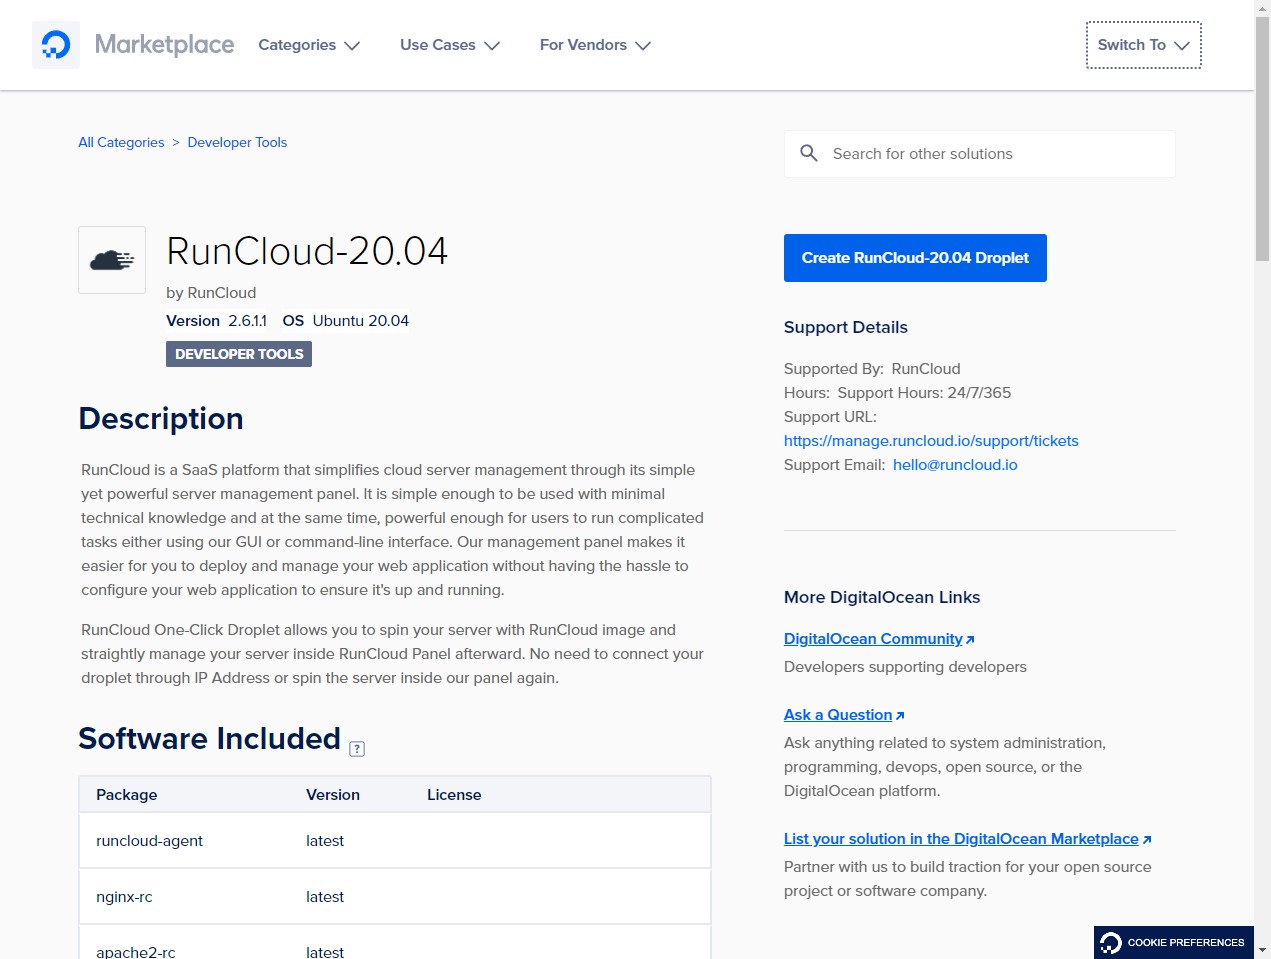
RunCloud has pre-built images on the DigitalOcean marketplace that can be used to launch new servers quickly. Go to DigitalOcean marketplace.
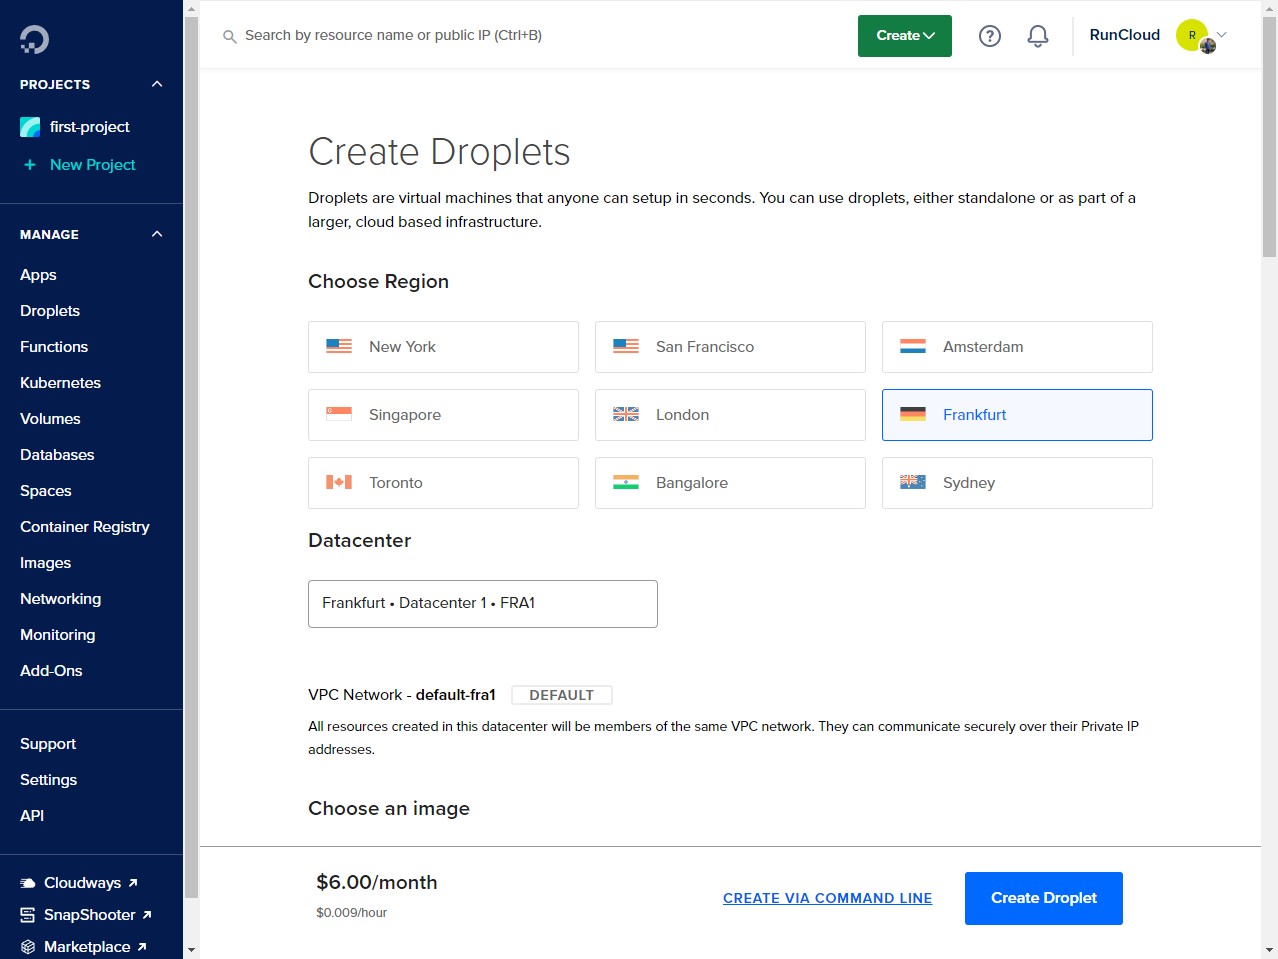
Click on the “Create RunCloudDroplet” to create a new server. This will take you to the DigitalOcean dashboard. In this dashboard, select your desired datacenter region, and server size.
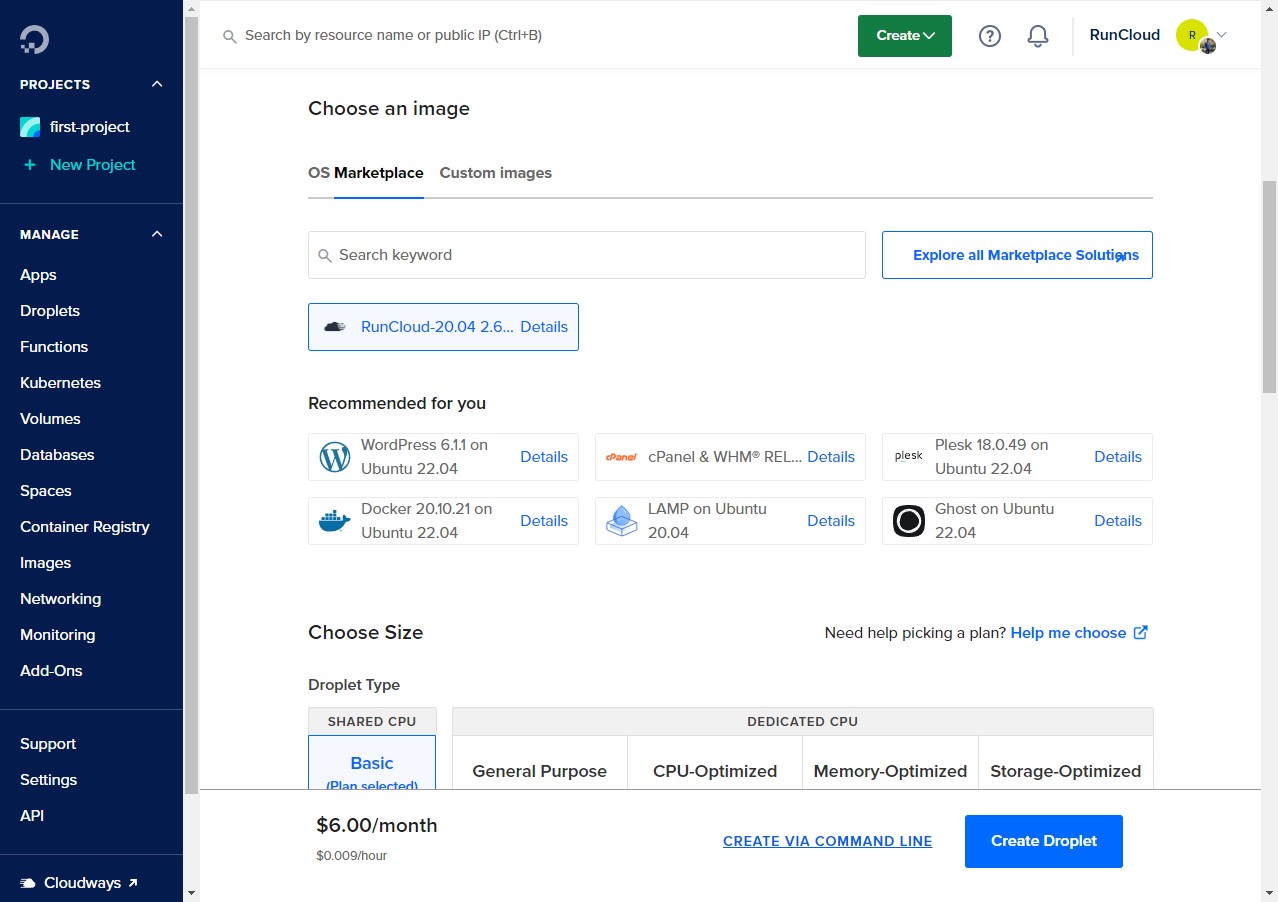
In the image section, make sure that RunCloud’s pre-built image is selected.
Tip: You can also search for RunCloud’s other images in the marketplace search box.
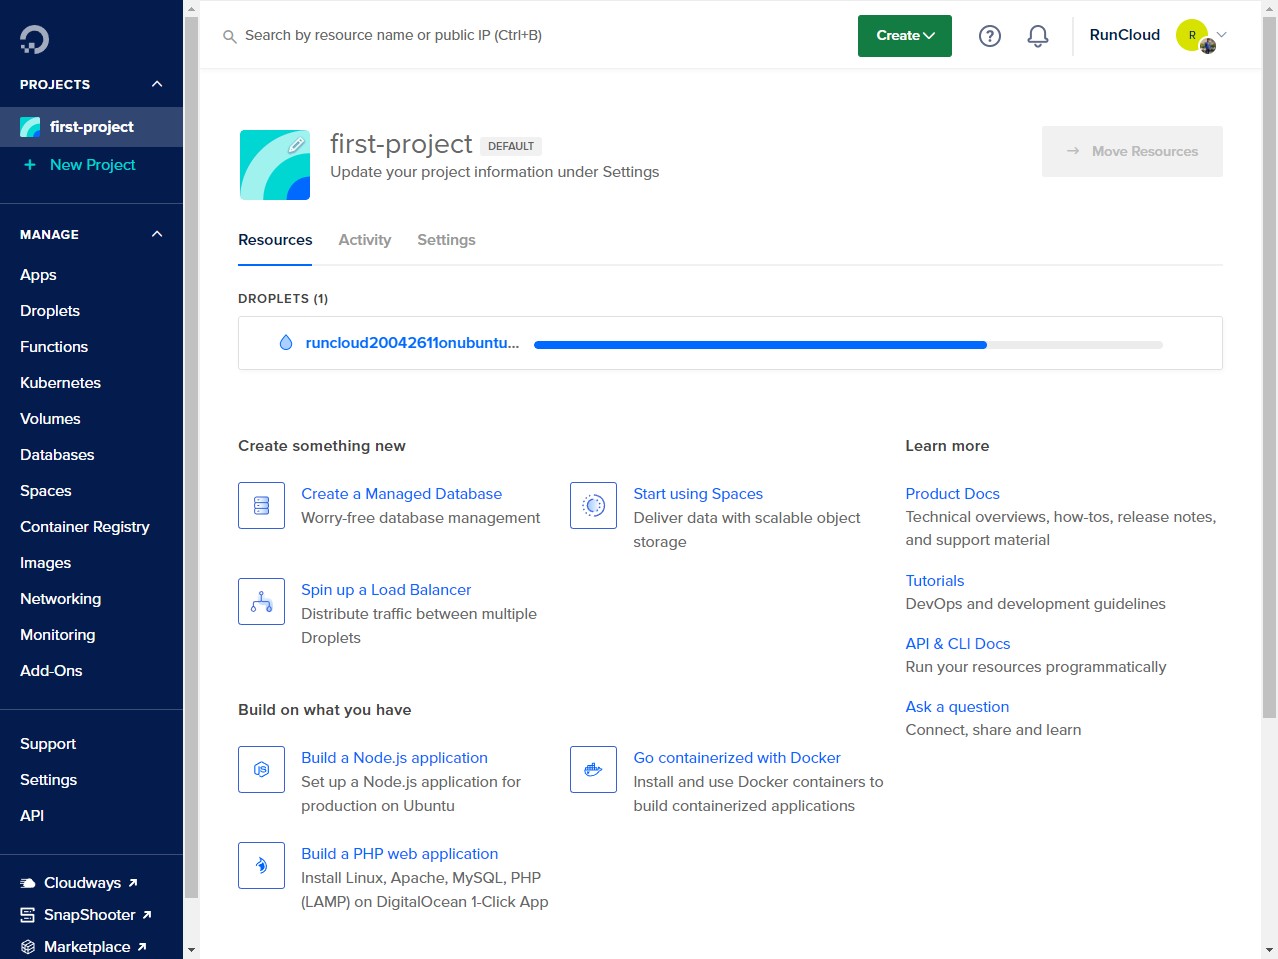
After you have configured all the necessary settings, click on “Create Droplet” to deploy the server. This should only take a few minutes.
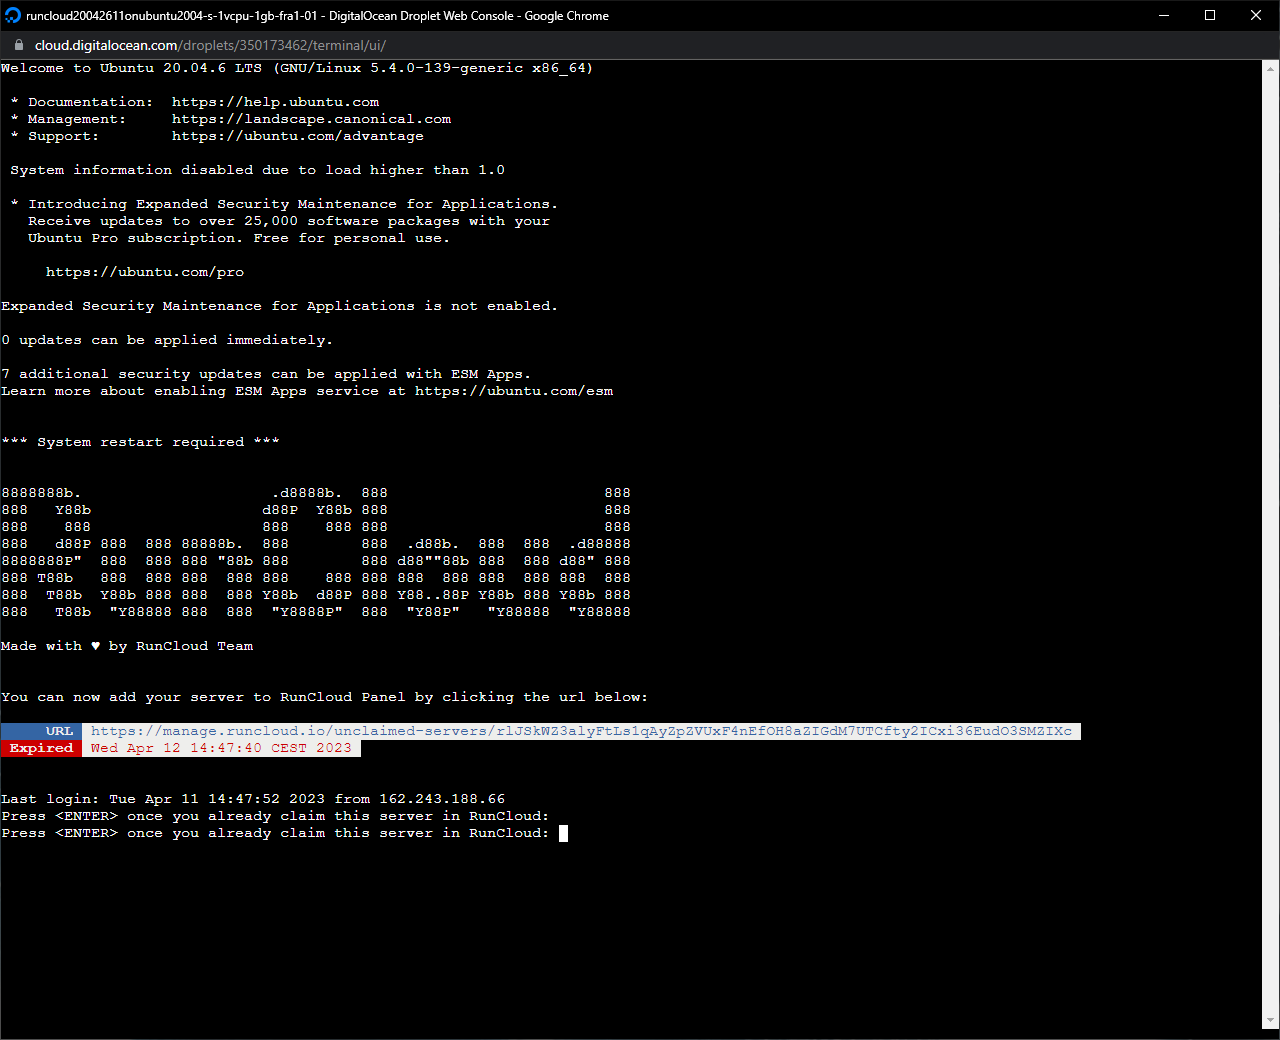
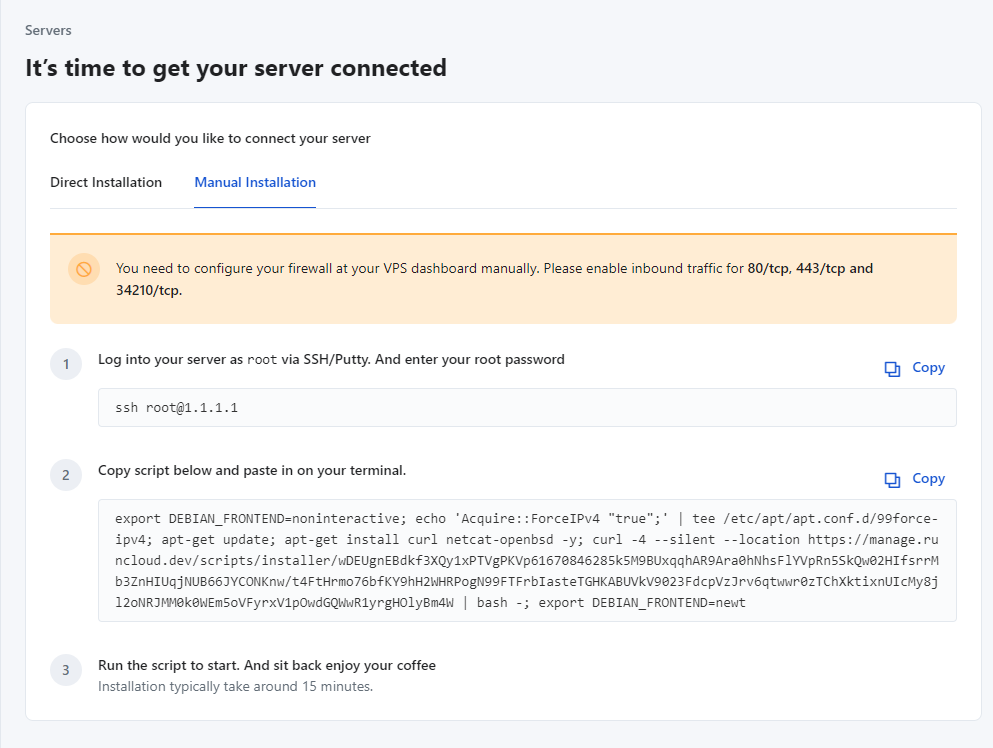
Once your server is up and running, log into it using SSH. You can use DigitalOcean’s in-built SSH feature for this. After logging into the server, click on the URL displayed to connect this server to your RunCloud account.
If clicking the URL doesn’t work, you can copy and paste the URL into your browser. You will be asked to enter the name of the server and that’s it! You can now manage this server directly from the RunCloud dashboard.
Securing Your Droplet with a DigitalOcean Cloud Firewall for RunCloud
DigitalOcean’s Cloud Firewall protects your RunCloud server from unauthorized access. In this section, we will explain to you how to create and apply a firewall with the necessary rules.
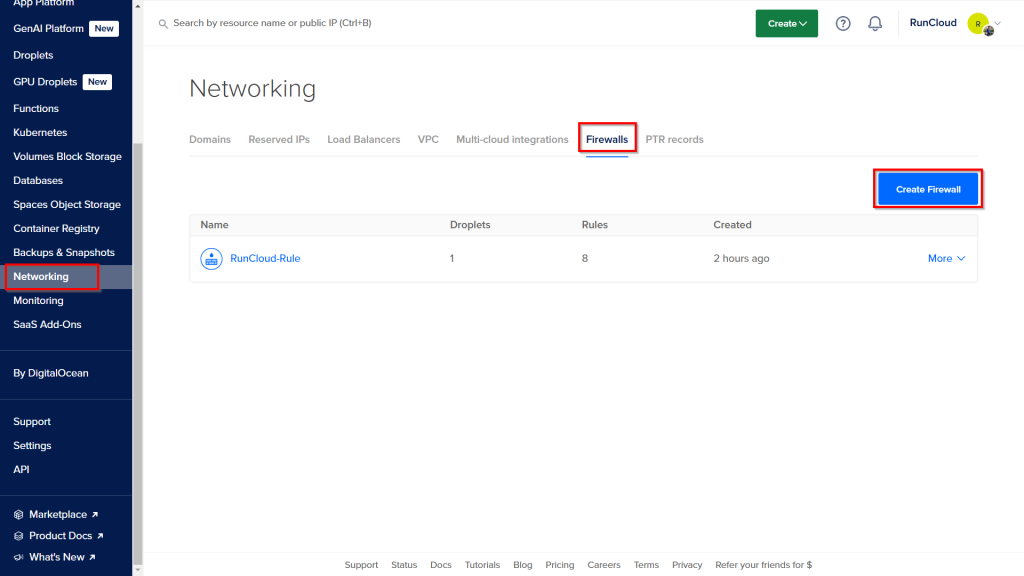
First, you need to log in to your DigitalOcean dashboard and then click on the Networking button in the main navigation menu on the left side of the screen. From there, select the Firewalls tab to access the firewall control panel.
On the Firewalls page, click the Create Firewall button to start the configuration process. You will first be prompted to provide a descriptive name for your new firewall. It is good practice to choose a name that clearly identifies its purpose, such as “runcloud-webserver-firewall,” which will help you manage it easily later on.
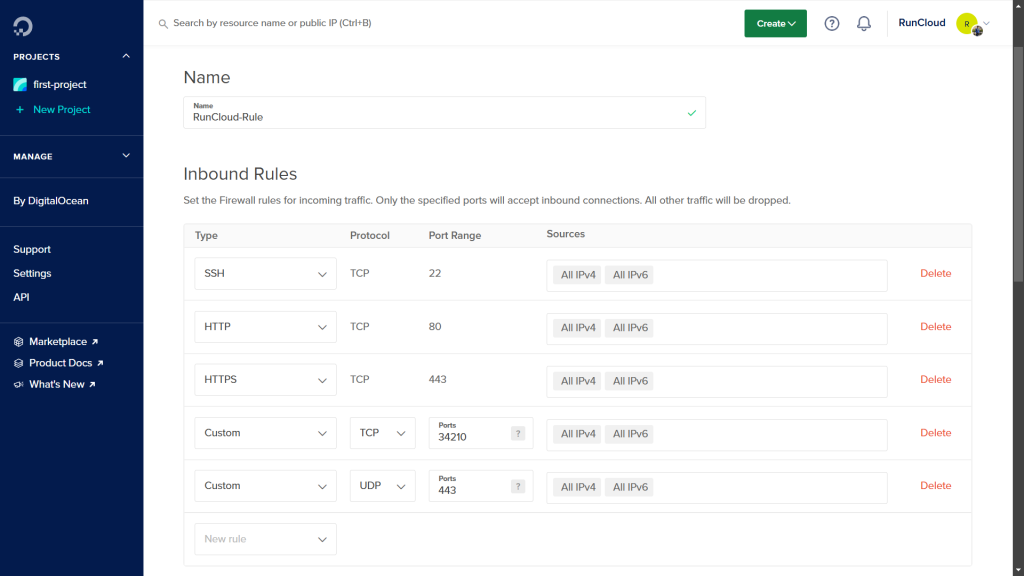
Next, you will define the specific rules for incoming traffic. You must create a set of “allow” rules to permit connections for essential services. On the firewall creation page, add the following Inbound Rules:
HTTP (TCP port 80): Add a rule to allow HTTP traffic from all IPv4 and all IPv6 addresses to enable standard, unencrypted web traffic to your sites.
HTTPS (TCP port 443): Create a rule for HTTPS to permit secure, encrypted web traffic from all IPv4 and all IPv6 sources.
HTTP/3 (UDP port 443): You can optionally add a custom UDP rule for port 443 from all sources to support the newer HTTP/3 protocol and improve performance.
RunCloud Agent (TCP port 34210): Add a custom TCP rule to allow traffic on port 34210 from all sources, as this port is required for your server to communicate with the RunCloud dashboard.
SSH (TCP port 22): Optionally, you can create a rule to allow SSH connections from all IPv4 and all IPv6 addresses, which is necessary for remote server administration. We recommend deleting this rule if you only manage your server via the RunCloud dashboard and don’t plan to connect to your server via SSH.
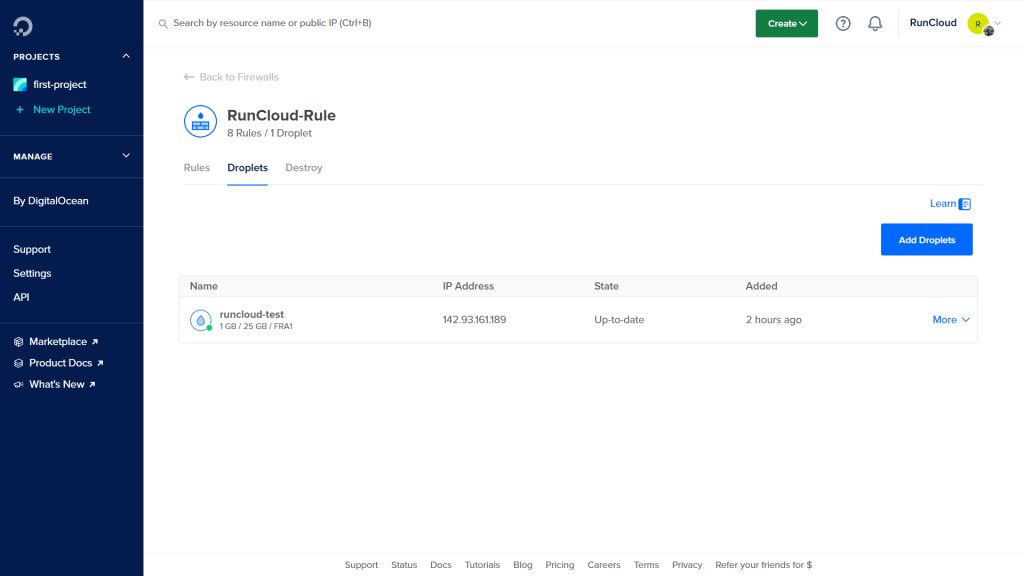
After defining the rules, you need to apply this firewall to your server, which DigitalOcean refers to as a Droplet.
On DigitalOcean, a single firewall can be used to multiple Droplets. In the “Apply to Droplets” section on the same page, you can search for and select your RunCloud server from the text area to immediately apply this set of rules to it. Later on, if you deploy new servers or decommission old ones, you can easily return to this firewall’s settings to add or remove it from those Droplets.
Finally, once you have named your firewall, configured all the necessary inbound rules, and applied it to the correct Droplet(s), click the Create Firewall button at the bottom of the page. All the changes will take place immediately, and the new firewall configuration will protect your server.
After Action Report
DigitalOcean is one of the top choices to host your websites in the cloud. You can set up your DigitalOcean servers easily using RunCloud’s automatic integration, as well as using a marketplace image.
If you’re tired of managing your own servers – you should switch to RunCloud. RunCloud is built for developers that want to focus on shipping great work, not on managing their infrastructure. We provide a painless server configuration experience, so you don’t need to spend hours figuring it out.
If your transactional emails don’t reach the inbox, your application doesn’t work as it should:
Password resets fail.
Order confirmations go missing.
Users lose trust.
Choosing a transactional email provider isn’t just about cost. It’s about deliverability, infrastructure, uptime, and how well the service integrates with your stack.
In this guide, we review 19 transactional email services for 2026, comparing their reliability, technical capabilities, scalability, and pricing to help you choose the right fit for your business.
How to Select The Best Transactional Email Service
Choosing the right transactional email provider is an important decision. When comparing providers, you should use the following criteria to assess their capabilities.
Deliverability and Sender Reputation Management
The single most important metric is deliverability. It doesn’t matter how cheap a service is if your password resets end up in the spam folder. Top-tier services offer dedicated sender-reputation management tools that monitor your domain’s health.
API and SMTP Integration
Check whether the provider allows you to send via HTTP for faster throughput than standard SMTP. A flexible SMTP relay allows for easy integration with legacy systems, while a modern, well-documented Web API is preferred for speed and advanced functionality.
Scalability and Uptime
Always check the provider’s Service Level Agreement (SLA) regarding uptime. You need a guarantee (typically 99.9% or higher) that the service will remain operational during business hours.
Analytics, Reporting, and Validation
Email providers should provide comprehensive analytics and reporting insights into open rates, click-through rates, and delivery failures.
What Are Transactional Emails, And Why Do You Need Them?
Transactional emails are automated emails triggered by a specific action or event, such as a purchase confirmation or password reset request.
These emails are sent to individual recipients and serve primarily to inform them of a specific transaction. They may also include relevant information such as confirmation numbers, shipping details, and account updates.
Transactional emails are essential for businesses because they enable them to communicate important information to customers promptly and efficiently. These emails can help to increase customer engagement and satisfaction by providing real-time updates and confirmations.
Transactional emails can also help reduce customer support inquiries by providing clear, detailed information about specific transactions. They provide an essential way to build customer trust and loyalty by demonstrating that the business is professional and responsive.
TL;DR: Quick Comparison of Top Transactional Email Services
Smart delivery rules, supports all major authentication
The Top 19 Transactional Email Services
The following list (in alphabetical order) includes the email services we consider reliable, offer a good range of features, provide the right integrations, and have a proven track record.
1. Amazon SES
Amazon SES (Simple Email Service) is a cloud-based email service from Amazon Web Services. It offers a scalable email delivery service for sending high-volume email campaigns.
Pricing: AWS is known for its complex pricing plans. There is a free tier available, but once it’s exhausted, your total spend will depend on several factors, including the number of emails sent and received, network bytes transmitted, and more.
Amazon SES integrates well with the rest of the AWS ecosystem and supports a variety of deployments, including dedicated, shared, or owned IP addresses. It also provides reports on sender statistics and a deliverability dashboard to help businesses make every email count.
It’s suitable for many use cases, such as automated transactional messages, marketing emails, timely customer notifications, and bulk email communications.
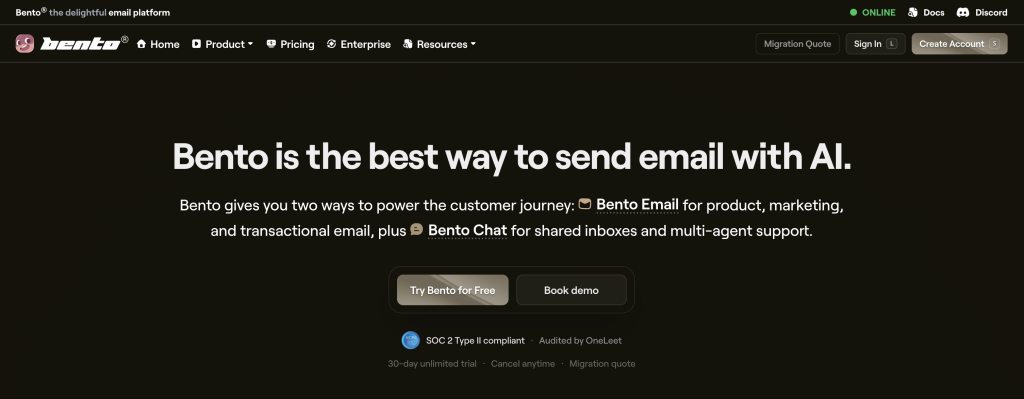
2. Bento
Bento is a new, up-and-coming email marketing company that provides a transactional email API for small and medium businesses. It has a separate infrastructure for sending transactional emails, which are prioritized over other traffic. This means it uses separate IPs for sending transactional emails, which offers better deliverability.
Pricing: Bento offers a 30-day trial. After that, you need to pay $0.01 per user per month, with a minimum charge of $30/month, for up to 3000 users.
It integrates with popular CMSs such as WordPress, Webflow, WPFusion, and LearnDash. It can also be integrated with eCommerce platforms like WooCommerce, Shopify, and Magento to send emails directly. They also provide customer support via Discord (in addition to email and phone), which can’t be said of any other tool on this list.
3. Bird
Bird offers a proprietary email infrastructure designed to maximize reliable throughput and engagement. Unlike platforms that rely on third-party aggregators, Bird owns its delivery stack, achieving a 99.3% inbox placement rate and 99.99% uptime. The system uses AI-powered routing optimization to automatically select the most efficient delivery paths based on real-time ISP data and engagement history.
This ensures that high-volume marketing blasts and critical transactional alerts land directly in the inbox, bypassing spam filters and avoiding latency issues common with standard providers.
To streamline campaign creation, Bird features a robust drag-and-drop Email Studio equipped with a library of conversion-optimized templates. This feature ensures that every email feels individually curated, significantly boosting open rates and customer engagement compared to static mass mailings.
Pricing: Bird offers a flexible pay-as-you-go model with no upfront commitment, charging a competitive base rate of 0.005 per message and 0.0005 per push notification. For larger organizations seeking predictability, Bird offers a Monthly Targeted Contacts bundle starting at 50,000 contacts, though most developers will appreciate the transparency of the consumption-based structure for API-triggered transactional traffic.
Bird uses next-generation artificial intelligence to transform email from a one-way broadcast into a two-way conversation channel. Its Intelligent Email Chatbots can answer customer queries and provide product recommendations directly within the email thread, reducing friction in the buying journey.
4. Brevo (Sendinblue)
Brevo’s transactional email service delivers more than 99% of messages without a single hiccup, ensuring critical communications like password resets, order confirmations, and shipping updates land directly in the inbox, not the spam folder.
The platform prioritizes high-performance email deliverability through a trusted infrastructure that isolates transactional traffic from marketing streams. It offers advanced features, including extended log retention and real-time analytics.
Pricing: Brevo offers a volume-based pricing model that charges users by the number of emails sent rather than the size of their contact list, with unlimited contacts across all tiers. The platform offers a generous Free plan that allows 300 emails per day, while the paid “Starter” plan starts at approximately $9 per month for 5,000 emails.
Brevo offers a robust REST API and SMTP relay that integrates seamlessly with any CMS or custom application using native libraries for PHP, Node.js, and Python. In addition to offering dynamic content personalization, it also enables you to inject user-specific details directly into responsive email templates.
5. Courier
Courier is a transactional notification platform that unifies notifications across teams, products, and channels. It supports multiple channels, including email, SMS, push, in-app, and chat – all in a single API, making it easy to launch new channels.
Pricing: Courier offers a free Developer plan that includes 10,000 notifications per month and single sign-on (SSO) via Google or GitHub. For growing needs, their Pro plan is a pay-as-you-go option starting at $0.005 per send, while the custom-priced Enterprise plan adds advanced features like a dedicated Solutions Architect and multi-tenant management.
It also offers a Preferences API that allows users to choose which notifications they want to receive. It allows for easy integration with existing communication APIs and can build a notification template in minutes.
6. Customer.io
Customer.io is a marketing and customer management platform that can send transactional emails, SMS, and in-app notifications. It is well-suited for sending password resets, order receipts, and other transactional messages. It has a separate infrastructure for sending transactional emails reliably and claims to have a 99.5% uptime.
Pricing: There are three different pricing options. Their Essentials plan starts at $100/month and allows sending email, push, in-app, and SMS notifications to 5,000 users.
Customer.io has a unique feature that sets it apart: you can get the entire messaging journey of a user. This allows you to see all the messages the user has received over time, whether they are password reset instructions or marketing promotions.
7. Elastic Email
Elastic Email is an email marketing platform offering various tools for businesses to create and send effective email campaigns. The platform includes features such as a drag-and-drop email designer, customizable templates, personalization options, advanced scheduling, automation, and detailed statistics and reports for continuous learning and development.
Pricing: There are different pricing plans for using the email marketing and email API features. You can test the integration with a limited sending capacity for free. Paid plans start at $19/month for up to 50k emails, and they include essential features for reliable sending, including Email API, Designer, verification, tracking, and support.
Elastic Email also offers tools for building a contact list, including subscription forms, pop-ups, and landing pages. The Elastic Email WordPress Sender can connect your WordPress server with the Elastic Email API to maintain all your email campaigns.
8. GetResponse
GetResponse is a comprehensive email marketing automation platform that provides powerful tools to grow online businesses. It offers a variety of features, including email marketing, autoresponders, send-time optimization, newsletter templates, marketing automation, web events, advanced triggering, multichannel engagement, signup forms, A/B testing, list management, lead magnet funnels, eCommerce marketing automation, and more.
Pricing: GetResponse offers three standard marketing tiers, Starter ($19/Mo), Marketer ($59/mo), and Creator ($69/mo), which all include unlimited monthly marketing sends but don’t include dedicated transactional features. Access to transactional emails, SMTP connections, and dedicated IPs is exclusively reserved for the Enterprise plan, which operates on a custom pricing model tailored to specific business needs.
You can use it to communicate with customers efficiently and effectively, build a mailing list, and promote and sell your products online. Additionally, it integrates with popular eCommerce platforms such as WooCommerce, Magento, and Shopify, and offers a free plan with a demo for large businesses.
9. MailerSend
MailerSend is a transactional email service designed for team collaboration. It offers features such as an intuitive user interface, dynamic email templates, a robust RESTful API with a 99.5% SLA (service level agreement), and a drag-and-drop editor for creating responsive email templates.
Pricing: The Free plan offers 500 emails per month and 10 email verification credits. The paid plans (Hobby, Starter, and Professional) offer increasing volumes of emails and SMS messages, starting at 5,000 emails per month for the Hobby plan and going up to 50,000 emails and 150 SMS messages for the Professional plan.
MailerSend has a library of pre-designed dynamic email templates that can be easily personalized and integrated with the user’s preferred programming language. It also provides tools to improve email deliverability, including email verification and analytics.
10. Mailgun
Mailgun provides powerful email-sending infrastructure via its Email API and SMTP relay services. The Email API enables easy integration and the sending of transactional or bulk emails, with 99.99% server uptime.
Pricing: You can sign up for a free plan that offers 100 emails per day. The Basic plan starts at $15 per month and allows the sending of up to 10,000 emails.
You can use the Simple Mail Transfer Protocol (SMTP) to send marketing and transactional emails, with authentication protocols such as SPF, DMARC, and DKIM. They also offer inbound email routing and send time optimization – a feature that delivers your email when the recipients view their inbox.
11. Mailtrap
Mailtrap is an email delivery platform built for both development and production. Developers can test, inspect, and debug emails in a secure sandbox and then seamlessly move to staging or live environments. Key features include spam score checking, SMTP and API support, detailed analytics, and team collaboration.
Pricing: Free tier available; paid plans start at $15/month.
It also offers Email Sandbox functionality that provides a secure environment for developers and QA teams to capture and inspect SMTP traffic from staging and development builds without risking accidental emails to real customers.
This tool speeds up the quality assurance process by allowing users to automate test scenarios via a flexible API, validate HTML and CSS for client compatibility, and analyze spam scores to ensure optimal deliverability.
12. Moosend
Moosend is an email marketing and email automation software that offers features such as email sending, newsletter editing, personalization, audience management (segmentation, CRM tools), marketing growth (landing pages, subscription forms), automation (marketing automation, e-commerce AI, product recommendations), and tracking and reporting.
Pricing: Once the 30-day free trial ends, the cheapest plan costs $9/month and allows unlimited email sends to 500 contacts.
Moosend also offers a variety of resources, such as a marketing blog, an academy, templates, webinars, and CRM tools. It also allows users to compare it with other email marketing software products such as MailChimp, ConvertKit, Constant Contact, and ActiveCampaign. The built-in integrations for WordPress, WooCommerce, and Magento make sending emails right out of the box easy.
13. Netcore Cloud Email
Netcore Cloud also offers an email marketing platform to businesses and enterprise customers. The platform uses AI to make every email more impactful through predictive segmentation, predictive engagement, send-time optimization, and subject-line optimization.
Pricing: The Basic plan costs $349, the Scale plan costs $589, and the Growth plan costs $899. A free trial is also available.
The platform also provides actionable insights to support better decision-making and offers personalized customer journeys. It also offers resources and tools for email marketing, including A/B testing, email collection, and four email marketing types.
14. Omnisend
Omnisend is a comprehensive eCommerce marketing platform that offers powerful email and SMS marketing functionality. It includes email campaigns, automation, segmentation, pop-ups and forms, reporting, and multiple channels.
Pricing: Omnisend offers a free tier for up to 500 contacts, while the Standard plan lets growing businesses start at $11.20 per month with the upfront discount. High-volume senders can opt for the Pro plan at $41.30 per month, which includes unlimited emails and monthly global SMS credits equal to the subscription price.
Omnisend offers resources such as migration tools and multi-store accounts. It also integrates with 80+ popular services, including WooCommerce, Shopify, and Wix. This integration makes it easy for businesses to create on-brand, shoppable emails, automate sales, fully leverage customer data, capture and convert new subscribers, track and learn what’s working best, and tap into omnichannel marketing.
15. Postmark
Postmark is a transactional email service that delivers emails and claims to be 4x faster than the competition. It offers a variety of features, including an email API, SMTP service, message streams, email templates, inbound email, analytics, and integrations.
Pricing: It offers a free plan with a limit of 100 emails/month. Paid plans start at $15/month for 10,000 emails, and you can pay an additional $50/month for a dedicated IP address.
Postmark also offers detailed open and delivery tracking for every email, responsive templates for sending transactional emails, and customer support. You can use a web dashboard to track bounced emails and webhooks to notify the app of any issues.
16. SendGrid
Twilio SendGrid is an email marketing service that enables businesses to manage email campaigns, design emails, automate messages, and achieve high deliverability. It claims to have an average inboxing rate of 96%.
Pricing: The free plan offers 100 emails per day. Paid plans start at $19.95/ month for 50,000 emails.
The SendGrid email platform has a modern UI and provides visibility into the entire email lifecycle. It also provides add-ons such as 30 Days of Email Activity History, Dedicated IP Address, Twilio Products and APIs, Personalized Support, and Twilio Segment products to maximize email marketing.
17. SendLayer
SendLayer is an email delivery platform that provides a reliable and easy-to-use service for sending transactional emails. It offers detailed email logs, open-and-click analytics, mailing lists, API, SMTP email relay, and email analytics.
Pricing: The cheapest plan starts at $5/month and allows sending up to 1,000 emails.
SendLayer is suitable for small businesses that are just getting started. Some of its key features include unlimited mailing lists and event-based webhooks, which automatically trigger actions based on specific events, such as an email being opened or a link being clicked.
18. SendPulse
SendPulse offers a transactional email service that lets users send email campaigns via SMTP or the API. The service offers a free plan that allows up to 12,000 emails per month.
Pricing: The free plan allows sending 12,000 emails per month. Paid plans start at $74.85/month for 100,000 emails. Alternatively, you can opt for the pay-as-you-go plan, which costs $15/year for 10,000 emails.
SendPulse supports multiple channels, including SMS, push, in-app, and chat. Their service includes automation, dedicated IP addresses, SPF and DKIM authentication, a list of unsubscribed contacts, open and click tracking, a custom tracking domain, and webhooks for tracking email status. Additionally, they offer a variety of tools for sending transactional emails, including a drag-and-drop editor, subscription forms, email templates, and a Chrome extension.
19. SocketLabs
SocketLabs is an email delivery service that provides technology, infrastructure, and expertise in order to help businesses improve their email deliverability. The company offers a range of solutions, including SMTP service, email APIs, and tailored solutions.
Pricing: The Core Email Essentials and Reporting plan offers a free first month, then costs $39.95 per month for 40,000 emails, with essential features such as SMTP/API and 10 days of insight history. For users requiring higher volume and advanced features, the Pro 100k plan is priced at $89.95 per month and includes 100,000 emails, a dedicated IP address, and extended performance history.
They also provide detailed reporting, automatic bounce processing, and advanced analytics to help customers understand and improve their email delivery performance. Additionally, they offer a free trial, with migration tools for customers looking to switch from other email service providers. It supports DKIM, SPF, DMARC, and MTA-STS. It also constructs smart delivery rules based on the ever-changing rulesets of mailbox providers.
Final Thoughts
Transactional email directly affects how your application functions. When delivery is delayed or inconsistent, password resets fail, confirmations don’t arrive, and user confidence drops.
The right provider depends on your sending volume, infrastructure, and level of technical control. Focus on deliverability, authentication support, uptime guarantees, and API flexibility. Pricing matters, but performance matters more.
Of course, reliable email delivery also depends on the environment your application runs in. Poor server configuration, mismanaged DNS, or inconsistent deployment practices can undermine even the best email provider.
If you want tighter control over your cloud servers, simplified deployment workflows, and a cleaner way to manage production infrastructure, sign up for a free trial of RunCloud and see how it fits into your stack.
When your infrastructure is stable and your email delivery is reliable, your application performs the way it should.
Frequently Asked Questions
What are the most common use cases for transactional emails?
The most frequent use cases include order confirmations, password resets, shipping notifications, account verification emails, and two-factor authentication codes. Unlike marketing emails, these are triggered one-to-one by a user’s action.
How do I ensure my emails don’t end up in spam?
To avoid deliverability issues, ensure you have proper authentication (SPF/DKIM) set up. Use email validation to verify addresses before sending, and keep your transactional traffic on a separate IP from your marketing traffic.
What is the difference between throttling and frequency caps?
Throttling is a mechanism ISPs (or your provider) use to limit the number of emails accepted from a sender over a specific period to prevent server overload. Frequency caps are rules you set to limit how many emails a specific subscriber receives in a given timeframe to prevent user fatigue.
Can I test my transactional emails before going live?
Yes. Most providers offer A/B testing for subject lines or content within your transactional flows. You should also use a sandbox environment to test prebuilt flows and templates without emailing real customers.
Are you tired of seeing your emails end up in the spam folder? Want to protect your business from phishing attacks? Then you need to know about DKIM!
Recent studies show that using DKIM (DomainKeys Identified Mail) significantly increases email deliverability and reduces the risk of phishing attacks. It really can be that easy – with just a few simple steps, you can protect your emails from being diverted to spam, and your business from the growing problem of cyber threats.
Let’s get started!
What Is DKIM?
DKIM (DomainKeys Identified Mail) is a method of authenticating the origin of an email message. It allows the person receiving the message to check that it was actually sent by the domain it claims to be sent from, and that it hasn’t been modified during transit.
Using DKIM helps to protect against spoofing and phishing attacks, in which attackers try to trick recipients into thinking that an email is from a legitimate source, when it is actually from an unauthorized or malicious source. It also helps to improve email deliverability, by allowing email servers to more easily distinguish legitimate messages from spam or other types of unwanted email.
How Does DKIM Work?
When a domain owner wants to use DKIM to authenticate their emails, they first generate a private/public key pair and publish the public key in their DNS records. The private key is used to create a digital signature, which is added to the headers of each email sent from that domain.
The signature is an encrypted message that is unique to each email, and it contains information about the email, such as the sender, the recipient, and the date and time it was sent. It also includes a hash of the email’s content, a fixed-length string of characters generated using a mathematical function.
When an email server receives an email with a DKIM signature, the server retrieves the public key from the DNS records and uses it to verify the signature. This involves decrypting the signature using the public key, and then comparing the resulting information to the email itself. If the information matches and the signature is valid, the email is considered authentic.
If the signature is invalid or cannot be verified, it could indicate that the email has either been modified in transit, or is not from the domain it claims to be. In this case, the server may mark the email as spam or block it altogether, to protect the recipient from potentially malicious or unwanted content.
Why Do Your Emails Need DKIM?
Email security is vital for protecting the confidentiality, integrity, and availability of email communication. It is essential for businesses, organizations, and individuals who rely on email as a primary means of communication, as email is often used to transmit sensitive information, such as financial data, personal information, and confidential documents.
Phishing attacks can trick recipients into disclosing sensitive information or downloading malware. These attacks often rely on spoofing the sender’s address or domain, so the email appears to be from a trusted source. The Anti-Phishing Working Group (APWG), an international coalition of counter-cybercrime responders and forensic investigators, concluded that the third quarter of 2022 was the worst quarter for phishing that APWG has ever observed. They observed a total of 1.2 million phishing attacks, a new record.
This is where DKIM can help. By allowing email servers to verify an email’s authenticity, DKIM helps protect against spoofing and phishing attacks, making it more difficult for attackers to impersonate legitimate domains.
DKIM helps the recipient verify an email’s origin, reducing the chances of getting marked as spam and increasing email deliverability. Many email servers use various filters and algorithms to identify and block spam and other unwanted emails. Having a valid DKIM signature can help increase the chances that an email will be delivered to the recipient’s inbox.
On the other hand, not using DKIM can have consequences for the security and deliverability of emails. Without a DKIM signature, emails are more vulnerable to spoofing and phishing attacks, and they may be more likely to be marked as spam or blocked by email servers. This can lead to reduced deliverability and a decreased ability to communicate effectively through email.
Setting Up DKIM for Your Domain
To set up DKIM for an email domain, follow these steps:
1. Generate a private/public key pair
The first step in implementing DKIM is to generate a private/public key pair, which will be used to create and verify the DKIM signature. Several tools and resources are available for generating a key pair, such as OpenSSL, and DKIMCore; however, you are far more likely to use an email service provider such as Gmail, Outlook, or SimpleLogin, which will generate these keys on your behalf.
2. Add the public key to your DNS records
After generating the key pair, you will need to add the public key to your DNS records, to retrieve and verify the DKIM signature. The specific steps for doing this will depend on the DNS provider you are using, but you will need to create a new TXT record and add the public key as the value.
3. Modify your email server’s configuration
Next, you will need to modify your email server’s configuration to add the DKIM signature to outgoing emails. The specific steps for doing this will depend on the email server software you are using, but usually you will need to add the private key and other necessary information to the server’s configuration file. The exact steps vary by mailing software and the version you are using. Refer to your server’s documentation for precise steps.
If you didn’t create a key in step 1, and are using an email service, then look for the option to “verify DNS records”. This will configure the required settings automatically and start signing all outgoing emails.
4. Test and troubleshoot
After completing the above steps, you should test your DKIM setup to ensure it is working correctly. Send a test email to yourself and check the email headers to verify that the DKIM tests are passing.
How To Verify The DKIM Signature Of An Email
Once you have configured the DNS records, verifying that everything is working correctly is a good idea. You can do this by following the steps given below:
Send an email from your mailbox using the custom domain to a different address.
Open the recipient’s mailbox, click on the menu icon, and look for the option to view the original message. On Gmail, this option is called “Show original”. However, in other email clients this can be called “View raw message”, or “Show email headers”.
Once you open the raw message, you can look for the line starting with “DKIM-Signature” to verify that the headers are correct. Gmail provides a handy summary table at the top of the screen which can tell you if your message passed the DKIM check.
Conclusion
DKIM is an essential email security feature already being used by 20,420 businesses to reduce the chances of email spoofing and phishing. We encourage you to configure the DKIM setting on your email server to take advantage of the additional security and decrease the chances of getting marked as spam.
If you are looking for a simple yet powerful dashboard to configure your servers, then try RunCloud, which provides an easy and convenient way to maintain your servers without needing to learn about the intricacies of Linux servers. Start with a free trial today and experience the difference yourself.
Are you wondering how OpenLiteSpeed stacks up against NGINX and Apache? In this article, we’ll be tackling a question our team gets asked frequently: How does OpenLiteSpeed compare to NGINX and Apache?
With our recent launch of OpenLiteSpeed support for everyone using RunCloud to manage their cloud infrastructure, deploying WordPress on OpenLiteSpeed is now just as easy as deploying on NGINX servers. But, how do you choose the best option for your specific needs?
Don’t worry, we’ve got you covered. In this in-depth discussion, we’ll be taking a closer look at each server stack, including benchmark and testing data, and sharing our thoughts on their performance and resource usage. And while all of these server stacks have established themselves as reliable options in terms of support and security, the real deciding factor comes down to speed and performance at scale. So, let’s get started and see which server comes out on top!
TL;DR – OpenLiteSpeed vs. NGINX vs. Apache
When it comes to performance & scalability – NGINX and OpenLitespeed are both considerably better than Apache as has already been proven by countless performance tests.
So stay tuned, in this detailed breakdown – we’ll be focusing on comparing the OpenLiteSpeed and NGINX stacks running two identical versions of a website on a virtual privateserver on Google Cloud Platform in the exact same location with identical configuration.
What is a Web Server?
A web server is a software that receives HTTP requests from clients (such as web browsers) and sends back the corresponding HTML pages or other resources. It is responsible for hosting and serving web pages and files to users over the internet or intranet.
Just like a computer, a web server has both software and hardware components working together. Fortunately, thanks to companies like UpCloud, Hetzner, Vultr, Linode & more – the hardware is taken care of for us – while still having the flexibility and freedom to customize your server to suit your needs if you’re deploying with a platform like RunCloud.
What Are The Most Widely-Used Server Stacks?
Apache HTTP Server
Since its introduction in 1995, Apache has cemented itself as the most reliable open-source web server. In fact, nearly 33% of websites around the world run on Apache because of the advantages it offers, which include stability and flexibility. Most developers still use Apache servers up to this day in implementing older applications.
NGINX
As the number of web users continuously increased over the years, various web servers also emerged. Among them was NGINX, which was introduced in 2004. NGINX’s high performance has led many developers to ditch Apache in favor of it. At present, 34% percent of websites around the world use NGINX.
Compared to Apache, NGINX is lighter and better at handling concurrent connections. Furthermore, it allows websites to run faster, which helps them achieve higher rankings on Google.
OpenLiteSpeed Web Server
Another web server that was introduced in 2003 is LiteSpeed. A free version called OpenLiteSpeed was just recently made available to the public for both personal and commercial use. What makes this web server popular is its implementation of a powerful cache engine that optimizes websites at a remarkable rate.
OpenLiteSpeed has some similarities with Apache in terms of its usability. It also uses many of the features that Apache users are already familiar with, such as .htaccess. As for the performance, OpenLiteSpeed resembles the asynchronous event-driven approach of NGINX, so it’s also fast.
Although OpenLiteSpeed is new to the market, it is quickly catching up to Apache and giving NGINX a run for their money.
Our Testing Environment
All of our tests were run using the standard, VPS server on Google Cloud that features:
Ubuntu 22.4 LTS
2 CPU Core
25 GB of Storage
4 GB of RAM
US Central Location
Before we get into the test, it’s already worth mentioning that – when running, on average – OpenLiteSpeed had lower memory usage and slightly lower disk usage for the same web application compared to NGINX.
OpenLiteSpeed Environment
The OpenLiteSpeed test site was running LiteSpeed’s official caching plugin for WordPress and was an otherwise standard, regularly deployed site with no further optimizations.
NGINX Environment
The NGINX test site was running RunCloud Hub with FastCGI Caching enabled.
NGINX vs. OpenLiteSpeed – Core Web Vitals
In case you’ve missed the news, Core Web Vitals are Google’s new performance metrics aiming to truly evaluate the user experience of websites beyond technical metrics. GTmetrix now uses some of the new Core Web Vitals metrics (as well as non-core web vital).
This distills down to the three primary performance metrics:
Largest Contentful Paint (LCP) which measures loading performance. In order to provide what is considered a good user experience, LCP should occur within 2.5 seconds of when the page first starts loading.
Total Blocking Time (TBT) which is a non-Core Web Vital that measures the total time in milliseconds between the First Contentful Paint (FCP) and Time to Interactive (TTI) where the main thread is blocked long enough to make it unresponsive to user input.
Cumulative Layout Shift (CLS) which measures visual stability. To provide a good user experience pages should maintain a CLS of 0.1 or less.
As you might have guessed & is only reasonable for performance metrics aiming to evaluate true performance for users, these are heavily dependent on the sites themselves as opposed to just the technical responses from a server. This also forms a part of why these tests were performed with the help of one of our customers so that we wouldn’t be using some demo site that isn’t truly indicative of a real business’s website hosted on a server managed by RunCloud.
NGINX & OpenLiteSpeed – GTmetrix Performance Test
In the GTmetrix performance tests, NGINX and OpenLiteSpeed had relatively similar performance. With both performing well, having the same total blocking time, and negligible difference in cumulative layout shift score – the key difference being the largest contentful paint being significantly lower/better (-75ms+) for OpenLiteSpeed.
In other web vitals like First Contentful Paint, Speed Index, Connection Duration, etc. OpenLiteSpeed generally performed better than NGINX across the board. NGINX comes on top in only two metrics – Connection Duration and Fully Loaded Time.
NGINX vs. OpenLiteSpeed – Load Testing
For this next test, we ran a website load test. The purpose of which is to evaluate website performance at scale – i.e. what happens to performance as the number of requests scales.
For these website load tests, we really pushed the limits of the servers. We launched 40 bots from north-america-7 location, playing a testing script, ramping up naturally for 1 minute, then continuing at peak load for 3 minutes, then ramping down naturally for 1 minute with no iteration limit per bot and no iteration limit total.
We also ran a load test using K6 to see if there was a difference in performance when requests come from the local network instead of the internet.
Results For OpenLiteSpeed
OpenLiteSpeed had the mean response time of 0.154s and the 90th percentile time of 0.180s – achieving an average throughput of 26748 hits during the first test.
During this test, the response time slightly fluctuated, but OpenLiteSpeed got the overall 99th percentile time of 0.248s which is pretty good.
In our second test, OpenLiteSpeed completed 149474 requests with 0 errors, thereby achieving a throughput of 496.5 requests/second.
Results For NGINX
NGINX on the other hand had the average response time of 0.142s and the 90th percentile time of 0.165s. It achieved an average throughput of 26880 hits during the first test.
We see a slight bump in the response time percentiles but except that, the graph looks pretty flat. This is good as it means almost all requests took roughly the same amount of time to finish.
In the second test, Nginx was able to serve 149216 requests which resulted in a throughput of 495.7 requests/second.
Which One Is Better?
In our two tests, OpenLiteSpeed lost one round by a margin of 0.49% and won another round by a margin of 0.17%. The difference in measurements is insignificant and the fluctuations can be attributed to randomness in the environment. After analyzing the results, there is no clear winner. Enabling the FastCGI Caching on Nginx makes it just as performant as OpenLiteSpeed.
OpenLiteSpeed
Nginx
Difference
TEST 1
26748
26880
-0.491%
TEST 2
149474
149216
0.172%
Other Factors To Consider
There are many other factors to consider besides raw performance and benchmark numbers before deciding which server to use.
Stability and reliability: NGINX and Apache have been around for a long time, and are known for their stability and reliability. They have a large user base and a proven track record of handling high traffic and large numbers of concurrent connections.
Community and support: Both NGINX and Apache have large and active communities of users and developers. This means that if you run into issues or have questions, there is a wealth of information and support available.
Compatibility: Both NGINX and Apache have large support for multiple web applications and frameworks, which means that they are compatible with a wide range of software, making it easy to integrate with other tools in your stack.
NGINX vs. OpenLiteSpeed vs Apache – Frequently Asked Questions
What does a web server store?
A web server generally stores all the resources of a website, such as HTML files, CSS, images, JavaScript files, and other assets.
What’s the fastest web server for WordPress?
According to various performance tests, OpenLiteSpeed and NGINX compete neck and neck. Both are high-performing and a go-to solution for hosting WordPress websites.
Is Apache still used?
While Apache is now considered archaic, many developers still use it because of its wide community and support. Apache is the easiest to configure among its contemporaries in a variety of usage scenarios.
Is NGINX better than Apache for WordPress?
Based on all performance testing data available from our own tests as well as other tests performed by people in the industry, NGINX came out on top, yes.
Is OpenLiteSpeed better than NGINX?
Based on all performance testing data available from our own tests as well as other tests performed by people in the industry, OpenLiteSpeed and NGINX perform equally well. Both are incredibly performant stacks, and can handle large amounts of traffic easily.
After Action Report – Finding The Best Server Stack For You
OpenLiteSpeed has a better TTFB & Largest Contentful Paint (LCP) and has demonstrated a clear ability to handle a very high number of concurrent users. NGINX has been around for longer and has a more mature ecosystem but requires additional configuration to setup caching and achieve desired performance. Not enabling the cache would impact the performance severely – a difference which could equate to infrastructure savings on a large scale.
And that’s not all – there are tons of other reasons you may prefer OpenLiteSpeed over NGINX:
Performance out of the box (very little configuration needed to get excellent results)
Lower server costs (thanks to OpenLiteSpeed’s event-driven architecture)
All in all, if you want to know for certain – our best advice is always to test for yourself! And fortunately, deploying an additional server with the help of RunCloud and cloning your existing site onto the new server is a piece of cake. Sign up for a free trial of RunCloud today.
If you have any other questions about how NGINX compares to OpenLiteSpeed and how to make your choice – feel free to leave a comment below & join the conversation.
With a quarter of all businesses relying on Docker (according to this Datadog study) and over 20% of web hosts running it – Docker’s containerization architecture is tried, tested, and relied upon from startup to enterprise.
At RunCloud, we’re pleased to announce that we are now rolling out support for Docker, making it easier for its users to deploy and manage their web applications (powered by Docker containerization architecture).
In this article, we’re going to cover exactly what this means and what you will now be able to do with the combined power of RunCloud and Docker.
Why Containerization – What Led Us Here
Firstly, a very brief bit of history.
What came before Docker, and why was Docker needed?
Most enterprise companies, by default, usually treat all users as untrusted and try to limit their access to services even if they are performing just a simple action. One technology that is commonly used for this purpose is chroot jail. This is a way of isolating a single process and its children from the rest of the system. It’s often used within VMs, resulting in a Dedicated → VM → chroot structure.
The problem with chroot jail is that it requires copying or mounting all necessary files from the host to the jail – which can be difficult to manage if multiple jails are needed.
Additionally, many applications only support a single jail, making it difficult to provide each user with their own jail. Overall, jailing users can be messy and requires careful tracking of shared objects and binaries within the jail.
When jailing users became difficult to manage, several major companies sought to create a new technology that would make it easier. This led to the development of Linux Containers (LXC), which offered a VM-like solution without the need to create a virtual machine. However, LXC was difficult for many people to use, as it required creating your own image rather than using pre-made solutions. This limited the adoption of LXC, despite its powerful capabilities.
In contrast to VMs, container images are read-only and faster to start up. This led to the creation of Docker, which was developed by Docker Inc. with a focus on security, ease of use, and portability. Docker has become one of the most popular tools in the world of DevOps and allows for easy sandboxing of servers. In 2015, Docker launched the Open Container Initiative (OCI) to provide a standard for OS-level virtualization.
The Benefits of Docker Containerization with RunCloud
1. Enhanced Security
If your web app gets hacked while running natively on RunCloud, hackers may well be able to gain access to the root shell if the server isn’t hardened properly. This is clearly bad news, as once the root user gets compromised, hackers gain access to everything on the server.
But in Docker, if your site gets compromised, you just need to clean up your web app and then restart the Docker container to roll everything back to how it should be quickly, easily, and relatively painlessly.
Using Docker allows us to better implement the rule of least privilege. Everyone with access to your server is treated as if you don’t know what their intention or capabilities are. Someone accessing your server may just want to do their job, perhaps they have bad intentions, or maybe they are a complete beginner who may inadvertently run a command that could make your server crash.
With Docker running inside RunCloud, we have `rc-shell` (RunCloud Shell) that will jail users inside their own container. Anything they do will only affect their data and their container – leaving the rest of the server unscathed.
2. Improved Performance
Although Docker may look like a virtual machine, it’s actually very different from that concept. Deleting old Docker containers and launching a fresh one takes only a couple of seconds. By using Docker to run your server, you can expect near-native performance, with improved performance when used in production at scale (as a result of isolation).
3. Better Server Management
Using containers for your server makes it much easier to manage your servers.
Firstly, since you are not installing services directly on the operating system, your server will be much cleaner, and you will encounter fewer problems in server management.
Secondly, suppose you need to use an older version of PHP on your site in the future. It will be much easier to do so with a containerized server since the version of the operating system running on the server might drop support for older PHP versions in the future.
Finally, upgrading your server will be much simpler because you won’t have to worry about compatibility issues with shared libraries or other potential causes of server crashes.
4. Same Dashboard/No Learning Curve
RunCloud aims to provide an easy-to-use interface for managing containerized servers – users migrating from native RunCloud installations will find the transition to using containers to be smooth and straightforward.
Additionally, users don’t need to have any knowledge of Docker to use RunCloud, as they won’t need to use any Docker commands. The learning curve for using Docker with RunCloud is relatively shallow, with only a few new concepts for users to learn in order to get started. Overall, using Docker inside RunCloud offers a more user-friendly experience for managing your server.
What’s New?
There are a lot of new features coming to RunCloud. Here are some of the most exciting ones.
Add Individual Services
In a native installation of RunCloud, all necessary software such as NGINX, PHP, MariaDB, Redis, and Beanstalkd are installed and can be started or stopped as needed.
In a containerized server, you now have the option to run each of these components individually – and can even choose not to run any of them if desired. Additionally, if a necessary image is not present on the server, it can automatically be downloaded from Docker Hub to ensure that everything is up to date and ready to run.
Quick and Easy Upgrades
With a native installation of RunCloud, some software, such as Redis and Beanstalkd may not be automatically updated after being installed. In order to enable automatic updates for these components, you may need to use third-party software, which can sometimes cause update failures and lead to issues such as agents not updating to the latest version.
In contrast, a containerized server automatically checks for the latest versions of all necessary components every 3 hours, ensuring that your software is always up to date and avoiding potential update & security issues.
Selectively Upgrade Services
MariaDB and Beanstalkd use exclusive locks, which means that during an upgrade, they can each cause a few seconds of downtime, as the running container must be stopped in order to start a new one. While the process of starting a new container is instantaneous, the health check process may cause a delay in reporting the status of the running service. Because of this, we have provided the option to enable or disable automatic updates for MariaDB and Beanstalkd.
However, it is generally recommended to avoid automatically updating critical software and instead has updates performed by a professional. With Docker, however, updates can be performed more easily and with minimal downtime. By default, MariaDB and Beanstalkd will not be automatically updated, but users can change this behavior if desired.
With native installations of RunCloud, updates to the agent software can sometimes result in new versions of other software being automatically installed on the server, even if the user doesn’t need or want them. For example, if an update to the agent brings PHP 8.0 to the server, it will be automatically installed whether the user wants it or not.
However, in a containerized server, the user has the ability to choose which versions of software they want to use and can easily remove any unnecessary components from the server stack. This allows for greater control over which software is installed and used on the server.
Easily Restore Passwords
In a native installation of RunCloud, the password for the MariaDB root user is stored in the /etc/mysql/conf.d/root.cnf file. If this password is accidentally changed, it must be updated in the file in order to access the MariaDB server, and it can be difficult to regain access to the server if the password isn’t known.
In a containerized server, if the password in the /etc/mysql/conf.d/root.cnf file is changed, the MariaDB server will automatically reset the root password to match the new password specified in the file, allowing you to easily regain access to the server.
Automatic Network Management
In a containerized server, the values localhost and 127.0.0.1 no longer refer to the server itself but instead indicate the location of the current container. This can cause issues when installing software, such as WordPress, that expects these values to refer to the server.
To address this, RunCloud uses the host to indicate the host machine rather than the current container. This can be used in the DB_HOST setting when installing WordPress, for example, to ensure that the database connection is established with the host machine rather than the PHP container. Additionally, the values mariadb and redis can be used to connect to the MariaDB and Redis containers, respectively, within your application.
Isolate Users
Docker is designed to run as a privileged user, such as the root, or a user with sudo access. In RunCloud, creating a system user does not automatically grant that user privileged access. Since PHP is not installed natively on the server, users will not be able to run PHP-related commands.
To overcome this limitation, RunCloud is introducing rc-shell, a jailed shell that allows users to run commands within a Docker container. Whenever a user connects to the server via SSH or SFTP, a new container is created, and the user is logged in to that container. This provides a secure environment where the user can only access their own files and has access to all necessary commands.
The only limitation is that each user can only choose one PHP version to use as their PHP command-line interface (CLI). However, users can choose whether to use the same PHP CLI version as the server or a different version for their own user account.
Run Different Versions of The Same Command
With a native installation of RunCloud, the php command refers to the PHP command-line interface (CLI) that is installed on the server. In a containerized server, this behavior is the same, and the php command refers to the default PHP CLI version that is installed on the server.
If a user wants to use a different PHP CLI version, they can use the /RunCloud/Packages/<php version>/bin/php command, where <php version> is the version of PHP they want to use.
In a containerized server, users can also use commands such as php72rc, php73rc, php74rc, etc., to run a specific PHP CLI version. However, the composer and wp commands will always use the default PHP CLI version and cannot be changed at this time. This applies to both native and containerized installations of RunCloud.
When the root user runs the php, wp, or composer command within a user’s directory, such as /home/user/webapps/mysite, these commands will automatically be run as if they were being executed by the user. This means that the root user does not need to switch to the other user in order to run these commands.
For example, if the root user runs the command composer install within /home/amir/webapps/mysite, it will be executed as if the amir user had run the command themselves. This provides a convenient and user-friendly way to manage these commands within a user’s directory.
“Run as” / Emulate / Mock User
Due to the limitations described above, cron and supervisor may not be able to run the php, composer, and wp commands as a specific user. To overcome this, RunCloud provides a feature called “fake run as” for use with cron and supervisor.
When using this feature, the specified command will be run as the root user, but it will be executed as if it were being run by the user specified in the “fake run as” field. This only applies to the php, composer, and wp commands and should not be used for any other commands. Using this feature allows cron and supervisor to run these commands as if they were being executed by a specific user, even though they are actually being run by the root user.
Restart Services Selectively
In a native installation of RunCloud, the systemctl command can be used to reload PHP-FPM for a specific PHP version. For example, to reload PHP-FPM for PHP 7.4, you can use the command systemctl reload php74rc-fpm.
In a containerized server, the <phpversion> reload command can be used instead, where <phpversion> is the specific PHP version you want to reload. For example, to reload PHP-FPM for PHP 7.4, you can use the command php74rc reload. The nginx-rc reload command can also be used to reload Nginx in a containerized server. This provides a convenient and user-friendly way to manage and reload PHP-FPM and Nginx on a containerized server.
How To Use Docker On RunCloud
It is fairly straightforward to use Docker on RunCloud.
Create a fresh Ubuntu server on your favorite public cloud, and click “Connect a New Server” in your RunCloud dashboard. Pick the “Containerized” option and complete the necessary fields.
Having done that, you can either continue via direct installation, or choose to install manually as you normally would.
Summary
The infrastructure improvements that Docker containerization allow us to deliver are incredibly powerful, and – in some ways – we’ve only really scratched the surface of what’s possible.
By rolling out support for Docker, we’re making it easier for users to deploy and manage web applications, including testing in consistent, isolated environments – also playing a role in preparing our architecture for further improvements planned in 2023 and beyond. This is an important step for RunCloud and all of our users.
With RunCloud, you don’t need to be a system administrator or Linux expert to manage your cloud infrastructure. With everything from backups, staging, cloning, atomic deployments, and more – RunCloud makes it truly enjoyable to manage your own production-grade infrastructure. Learn more & get started today.
By far the most popular content management system, WordPress powers more than 40% of the web, and of all websites globally that use a content management system, over 65% of them are powered by WordPress.
Combine RunCloud’s powerful server management capabilities with the #1 CMS in the world, and you have a winning formula. Fortunately, RunCloud’s server management console makes it extremely quick and simple to install WordPress on your server. With a one-click install, you can be up and running with a new site in just moments.
In this guide, we’re going to give you a comprehensive, step-by-step overview of how to install WordPress with RunCloud. Let’s get started!
How to Install WordPress with RunCloud
Here are the steps you need to follow to install WordPress with RunCloud.
Once you’re logged in, head to the Servers page, where you’ll be able to see all the connected servers:
You can perform a one-click install of WordPress on any listed server.
2. Deploy New Web App
If you click on Web Applications in the left sidebar, you’ll be able to see a list of all current web apps (such as WordPress) running on your servers. For instance, in the screenshot below, you can see that two WordPress installations are running on the same server:
To launch a new installation of WordPress, just click on Deploy New Web App. You’ll be prompted to select a server. Select the server you wish to deploy WordPress on, and click the Deploy Web App button.
3. Configure Your WordPress Installation
RunCloud gives you considerable flexibility when launching a new WordPress installation. For instance, you can choose the web application stack you want to use, as well as the PHP version that you wish to launch with.
RunCloud supports PHP 7.2 to PHP 8.1, and you have three options when selecting the web application stack:
During this process you can also select the site title, and set an admin username, password, and email:
4. Map Domain and Install the SSL
Security will almost certainly be a consideration, and this can also be selected during this process. RunCloud lets you install the SSL certificate before the site is launched, and you also have the option to use one SSL for all domains, or a different one for each:
Alternatively, you can enable AutoSSL, which deploys a new Let’s Encrypt SSL certificate for all new domains.
Once you’re done, the next step is to map the domain. You can either use a test domain from RunCloud, or use your own:
RunCloud also gives you the option to set your DNS records manually(through your host) or use Cloudflare. Once you’ve selected your preference, just click on Deploy Web App (in the bottom-right).
5. Review Your Newly Deployed WordPress Install
Within a few moments your new site will be installed and running, and you will be able to view traffic stats and information about your newly deployed WordPress installation within your RunCloud dashboard.
To view this information, click on Open Site from the top right of your RunCloud page to log into the WordPress dashboard automatically, as shown below:
The new WordPress installation will also appear in your Web Applications tab:
That’s it! You’ve successfully launched a new installation of WordPress using RunCloud!
After Action Report — RunCloud Makes Server Management Incredibly Easy
With RunCloud, launching a new web app, such as WordPress, is incredibly easy. RunCloud offers a 14-day money back guarantee, so you can try it out without a long-term commitment.
Have anything else to share? Join the conversation by sending us a Tweet! 💬
Are you perplexed by the complexities of the DNS system? Don’t worry, you are not alone! Even though the DNS standard was established in 1986, countless memes on the internet suggest that it still baffles people, and even the tech titans like Meta find it tricky to work with.
In this article, we will discuss what DNS propagation is, how it affects your website and how you can speed it up. Let’s dive right in!
What is DNS Propagation
DNS propagation is the time it takes for changes made to a domain’s DNS records to take effect across the internet. When you make a change to a domain’s DNS settings, it can take some time for that change to be reflected everywhere on the internet. This is because DNS records are cached on different servers all over the world, and it takes time for those servers to update their records.
Why Should I Care About DNS Propagation?
You might not need to worry about DNS propagation if you’re just a casual internet user. But if you’re responsible for managing a website or domain, then it’s important to understand how DNS propagation works, because it can affect how quickly your changes take effect.
For example, if you’re transferring a domain to a new web hosting provider, it’s important to be aware of how long the DNS propagation will take, so that you can plan accordingly. If you’re not aware of DNS propagation, you might assume that the changes you’ve made to your domain’s DNS settings will have taken effect immediately, when in reality it could take several hours – or even longer – for the changes to be fully propagated across the internet. This can lead to confusion, and potentially cause problems for your website or domain.
How To Propagate Changes Faster
Method 1: Reduce time-to-live (TTL) Value
The best way to speed up DNS propagation is to reduce the time-to-live (TTL) value for your DNS records. This tells DNS resolvers how long to cache your DNS records, so reducing the TTL value will ensure that DNS resolvers refresh your records more often, which can speed up the propagation process.
However, this comes with a few downsides:
If the DNS records for your website expire quickly, it can cause your site to appear slow to visitors, because their browsers will have to fetch new records more frequently, which takes time. This can be frustrating for users, and make them less likely to continue using your site.
It can lead to an increase in the number of requests sent to your DNS authoritative resolver. If you maintain your own servers, this can put additional strain on your system, potentially increasing hosting costs and server charges.
If you plan ahead of time, you can avoid this by temporarily reducing the TTL values of your DNS record one day before you plan to make changes. This will ensure that all the records will expire quickly when you want them to.
For example, if your DNS records have the TTL value of 1 day, then you can change it to 5 minutes the day before. On the next day, you can change the DNS records to point to new servers. This will ensure that all the new visitors will be sent to your new server within 5 minutes of making the changes. Once you are satisfied that everything works as expected, you can increase the TTL value back to 1 day.
Method 2: Request DNS Resolvers To Flush Cache
If you didn’t plan ahead of time, and you need to update your DNS records immediately, then you can request DNS resolvers to flush cache values of your records, and update them with new existing values. Here are the links for some of the major DNS providers:
Although flushing the cache from these servers will update the records for the vast majority of users on the internet, many technology enthusiasts and enterprise clients who have the time and resources to maintain their own DNS servers will still have a stale copy of your DNS records until it expires.
Check If DNS Records Were Updated Successfully
Method 1: Use A DNS Propagation Checker
You can use a DNS propagation checker to monitor the progress of your DNS changes. These tools can help you track when your changes have been picked up by different DNS resolvers around the world, so you can see how quickly the propagation process is progressing.
We recommend using Site24x7’s DNS Propagation Checker which checks the DNS records of a given address against multiple nameservers from different parts of the world.
Method 2: Use DiG Command
If you know your way around the command line, and would rather use a terminal instead of a third party service – then you are in luck. Almost all Linux distributions have the ‘dig’ tool preinstalled; you can use it to check records for any website by using the following command:
$ dig blog.runcloud.io
You can also query the records from a particular nameserver instead of using the default DNS resolver by specifying the IP address of the server:
$ dig @1.1.1.1 blog.runcloud.io
Summary
Making DNS changes (and them taking longer than usual) can be annoying to have to wrap your head around but as long you factor in changes taking time, you should be able to avoid any potential problems. If you already use RunCloud, you’ll likely know that we encourage using Cloudflare which is also what we use for all of our own systems and provides fast, global DNS propagation. Still considering making the switch? Get started with your 5-day free trial today.