Blog

  • How To Install & Run WordPress Locally on Windows or Mac

    How To Install & Run WordPress Locally on Windows or Mac

    WordPress is one of the most popular environments for building websites in the world, and one of the reasons it’s so great is because it’s incredibly flexible and you can manipulate it however you want.

    In this article, we’ll talk about installing WordPress locally on your computer (Windows and Mac) and some benefits you might have for doing it.

    Why Install WordPress Locally

    Many developers and average users have WordPress installed locally — some for business reasons, some for private reasons. In general, a local WordPress setup can be extremely beneficial on multiple levels. Here are some of the best pros.

    Learn and Develop Your Skills

    If you want to become a pro at developing websites on WordPress, you must practice using it to learn about its features. For beginner WordPress developers, using it offline is the best option as you can make any necessary changes frequently, without worrying about how it affects the site.

    Test New Features At Your Convenience

    A live environment is not suitable for testing new features, because it can have a negative impact on the reputation of your site, as well as your business. So, you’re better off testing them locally and you will get a clearer idea of the themes, plugins, and other features.

    Work Freely In Your Isolated Dev Environment

    Your isolated dev environment is your playground to play with fresh codes, new features, etc. You can use all your creativity to implement new ideas without any risk of affecting a live project. As a result, you get to enjoy great flexibility in the locally running WordPress.

    Get High Performance At Low Cost

    As all the stages are running without an internet connection, you will get a much faster experience than you would online. And, using all the free software will save you a lot of money. Therefore, a local WordPress environment is also a financially convenient option.

    Test New Updates

    A local WordPress environment allows you to test new updates from features before applying them on your live site. This will give you a clearer idea about the latest security patches and the convenience of using updated interfaces.

    How To Install WordPress Locally with XAMPP (Windows)

    WordPress is used for complete website development involving a variety of things like designing, developing, testing, and hosting. And, all these require heavy technologies like a web server, PHP, and a database (preferably MySQL). Consequently, to create a suitable environment for installing WordPress on your local machine, you need to complete the following steps:

    • Setting up the installation environment
    • Downloading a stable WordPress version
    • Installing WordPress on your localhost

    Windows is always reliable for providing a suitable environment to install and use the most popular technologies. WordPress is no exception and can be installed easily on Windows using the following steps:

    Step 1: Download and Set Up XAMPP

    WordPress needs the proper environment to run locally, and that requires setting up a server on your device. You can do that by installing XAMPP or WAMP (local server builders) on your machine. Using XAMPP is comparatively easy and advantageous so, here is a guide on installing that.

    XAMPP is an app that hosts web servers for your website. You’ll be opening this app every time you want to launch your WordPress site locally. On the Apache website, navigate to the “Download” section and select the version that works best with the latest PHP version. PHP is the language used in the back end of most websites.
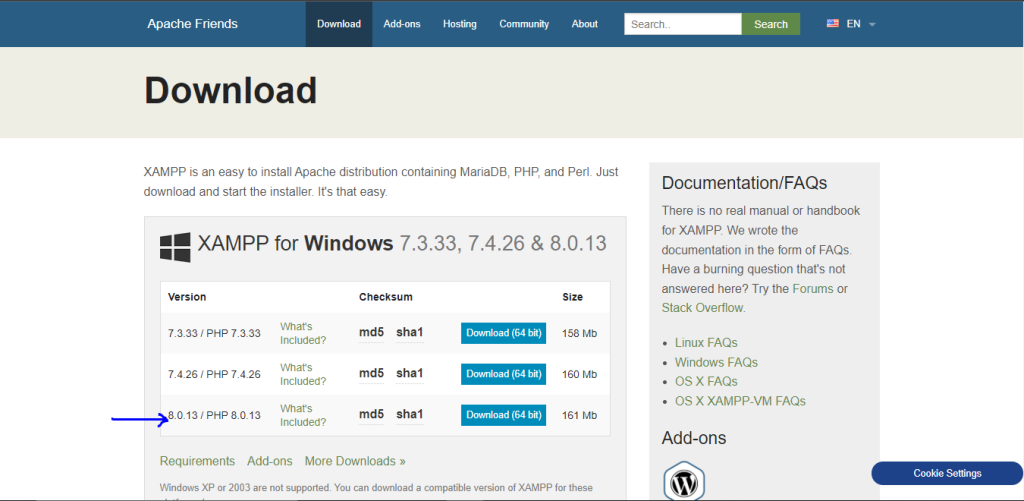
    apache website xampp download

    After the download is complete, run it to install XAMPP on your system.
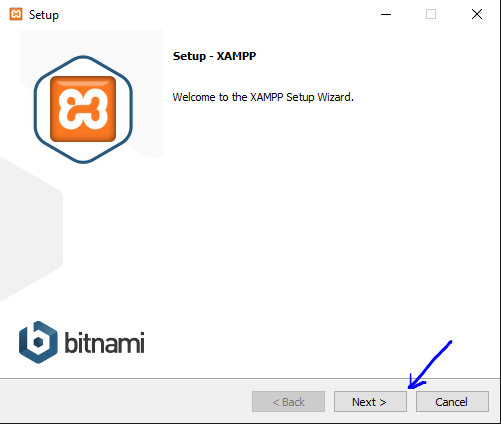
    xampp setup wizzard step 1

    After this screen, you will be prompted which features you want to install, and by default, all of them will be selected — regardless of what you need, there’s no harm in having all of them so feel free to proceed with the installation until it’s completed.

    Also, at some point of installation, your Windows Defender might ask you if you want to allow access to XAMPP to slip past firewall rules and communicate on your private and public networks — make sure to allow access. Don’t worry about why XAMPP asks for these permissions, it just needs to do so because hosting a web server for your website requires accessing network features.

    Step 2: Start required services

    After the installation is finished, launch the XAMPP control panel to set the required status for Apache and MySQL.
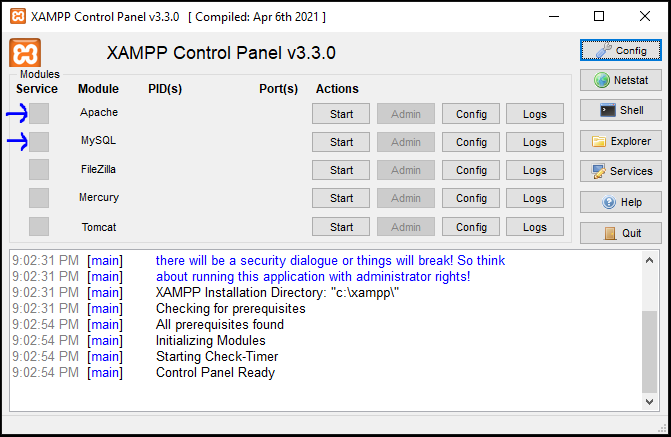
    xampp control panel apache and mysql process running

    Make sure to “Start” these two services to install WordPress locally. If the background color of Apache and MySQL changes to green, that means the modules are working properly.

    Step 3: Download and Install WordPress

    Even though this process is fairly simple, we’re going to break it down into separate steps so you can follow the process closely.

    Step 3.1.: Download WordPress

    Once you’ve finished setting up the webserver and database through XAMPP, download the WordPress setup from the official website.
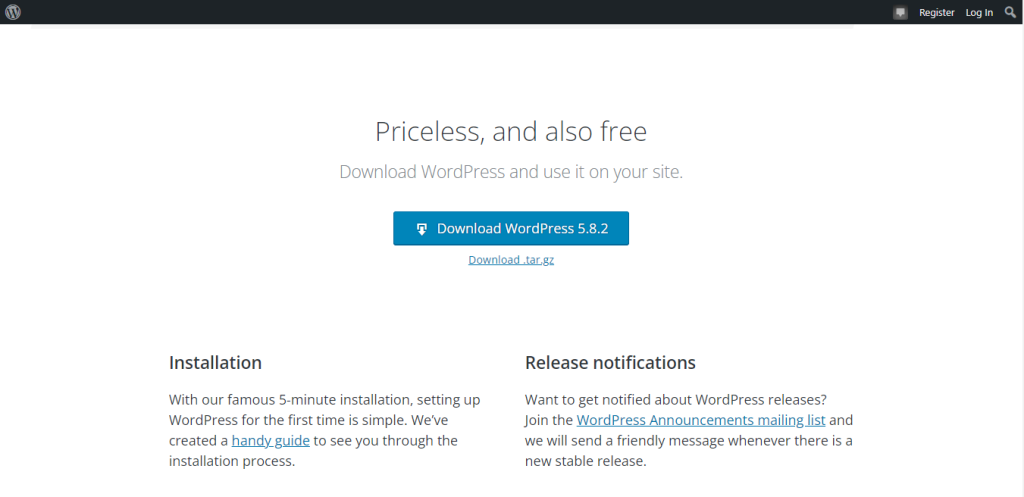
    wordpress download page

    Step 3.2.: Move and extract the downloaded file

    When the download is finished, move the zip file to the /htdocs folder in the XAMPP directory. Unzip it there and navigate to the project directory.
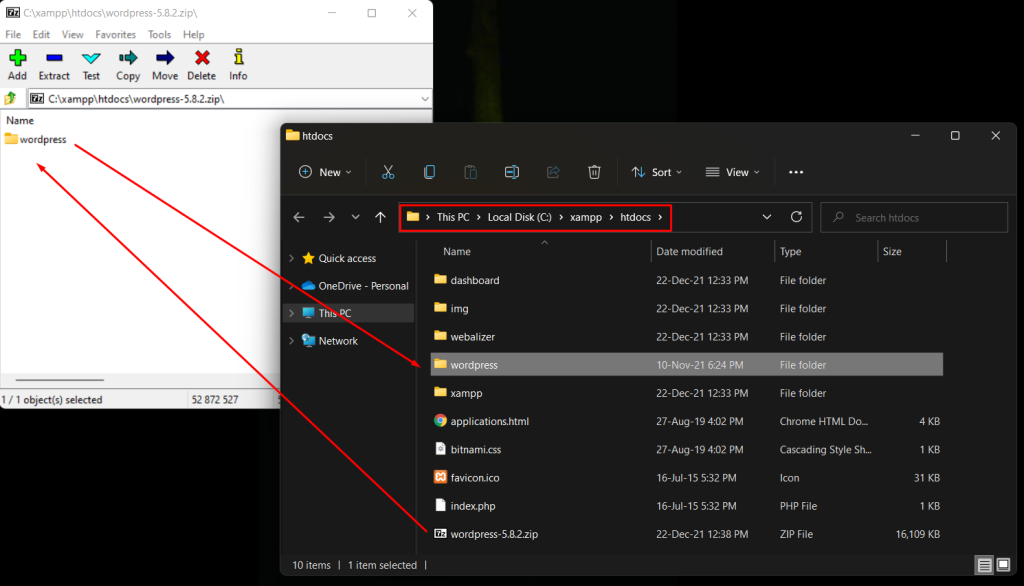
    extracted files to htdocs

    Important Notes:

    1. Confirm the Apache and MySQL services in the XAMPP control panel are properly set and normally running.
    2. Rename the “wordpress” folder to the name of your new website.

    Step 3.3.: Create a database in the phpMyAdmin portal

    Now, for creating the database of your new WordPress site, visit the phpMyAdmin portal. Though this depends on your port configuration, most likely you will get the portal on the following URL.

    http://localhost:80/phpmyadmin/

    After opening the phpMyAdmin portal, go to New, name the database however you want, and then click Create. This will create the database your WordPress website will use.
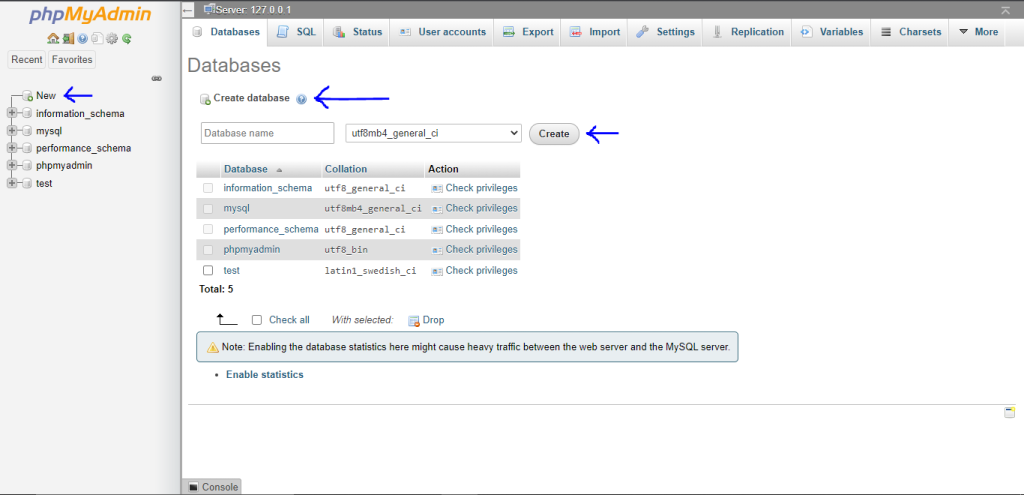
    creating database in phpmyadmin portal

    Once you are done with creating the database, you will have to create a new User.

    Step 3.4.: Create a new User

    Go to the “User accounts” tab and click on “Add new user”.
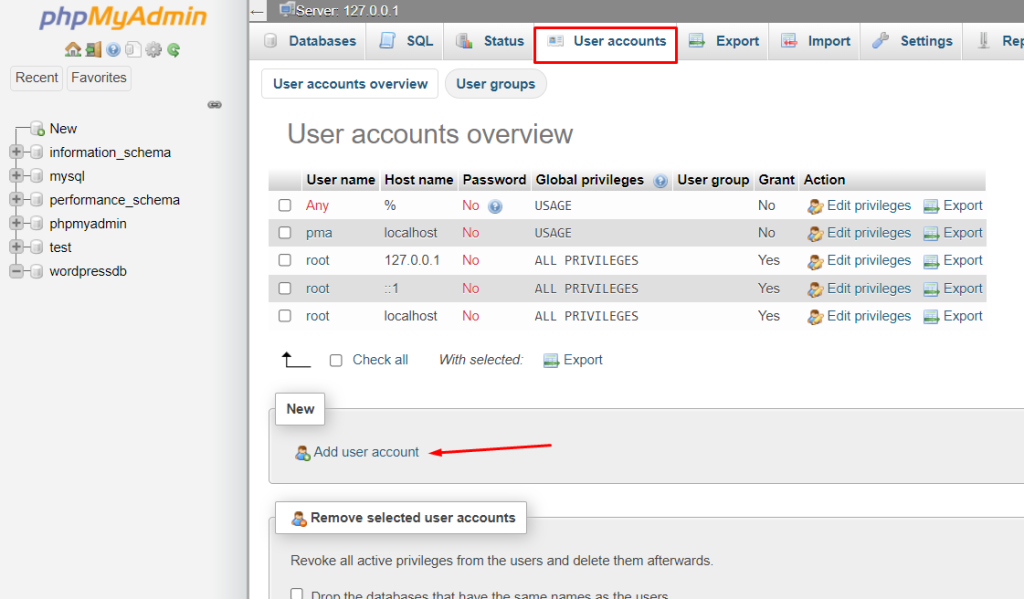
    adding new user to phpmyadmin

    A new window will open where you get basic information about the new user.

    For this tutorial, the credentials we chose are:

    Username: wpuser
    Password: qwerty12345

    Make sure to set the Host name to Local as we’re installing WordPress locally.
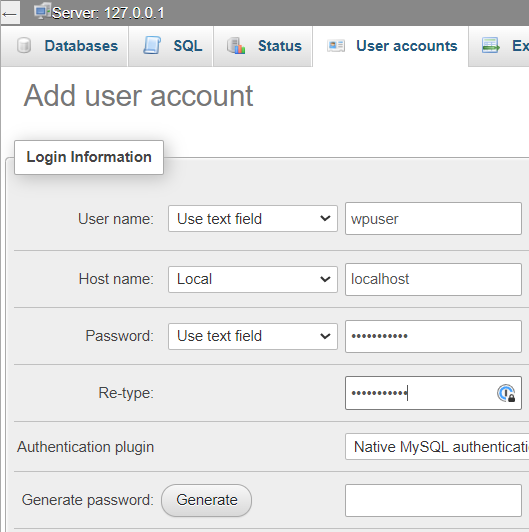
    adding new user in phpmyadmin step 2

    Below, you will need to grant permissions to the new user — make sure to click on “Check all” under “Global privileges”
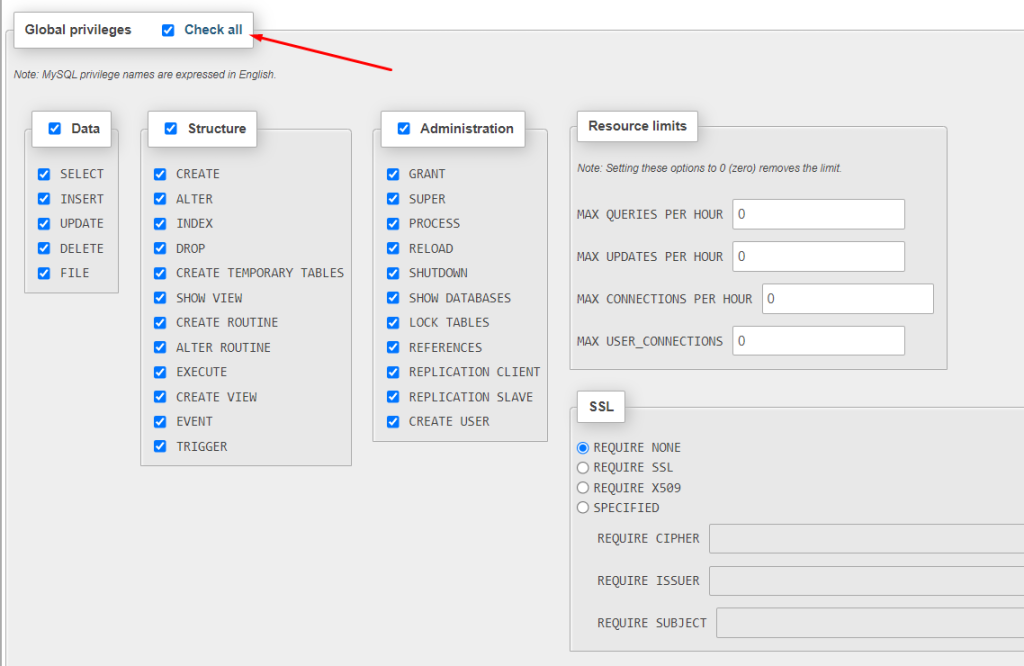
    setting global privileges to all checks

    After that, on the bottom of the page click “Go” — your new user should be created successfully.

    Step 3.5.: Launch WordPress Installation

    Now you can proceed with installing WordPress. Before you do so, don’t forget to rename the folder you extracted (from the zip file you downloaded from WordPress) to the actual name of your website.

    For this guide, we decided to name the folder “newwpsite”.
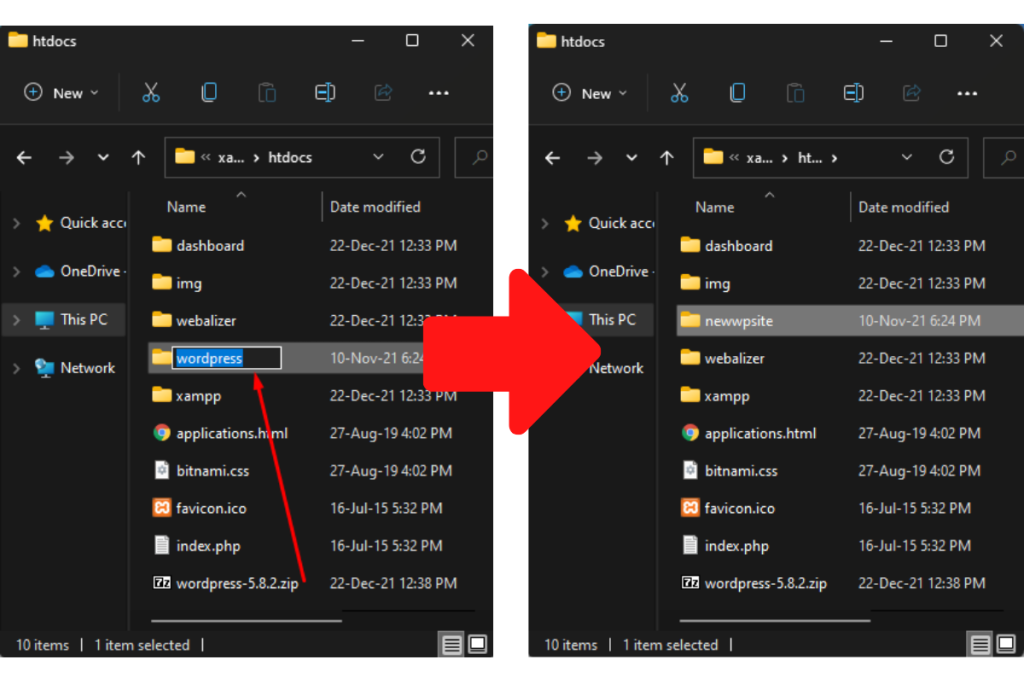
    changing wordpress folder to website name

    Launch the WordPress installation setup by visiting the following URL in your web browser.

    http://localhost:80/newwpsite/wp-admin/setup-config.php

    There you will get the option to select your preferred language. Select it and click “Continue”.
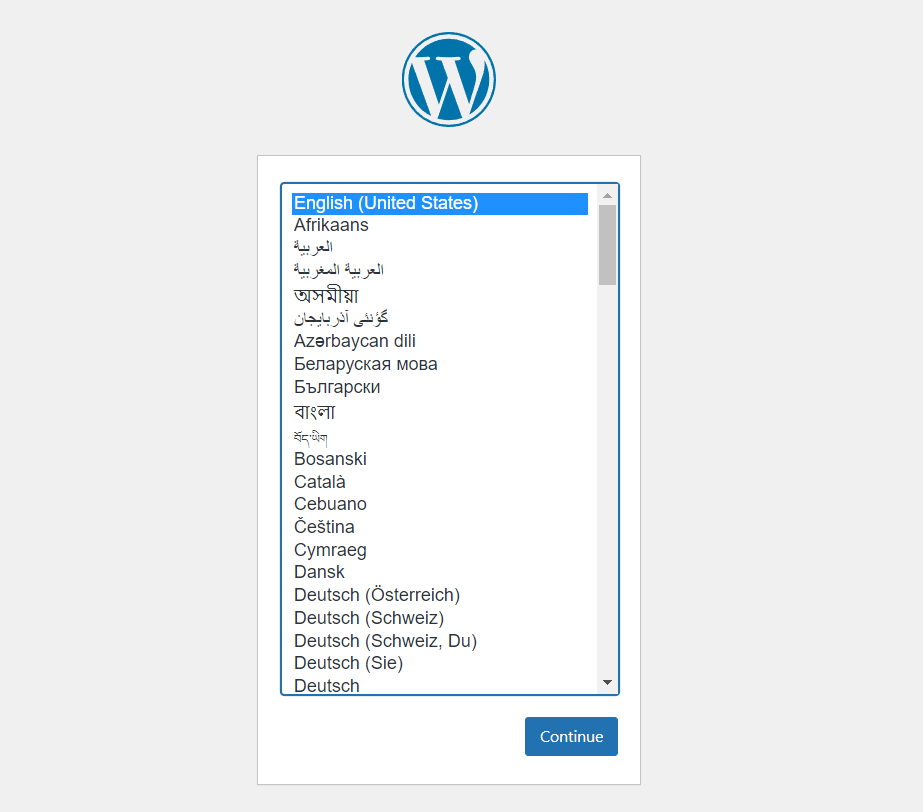
    setting language during wordpress installation

    Important note: In the “wordpress” folder or “newwpsite folder” (that’s how we named it) there is no wp-config.php file, only wp-config-sample.php if you’re choosing other installation methods. This method doesn’t involve editing the wp-config-sample.php file and making wp-config.php — WordPress installation should create it by itself.

    Step 3.6.: Enter credentials

    After you select the language you will be using, A prompt will appear asking for the information you previously created — Database Name, Username, and Password.
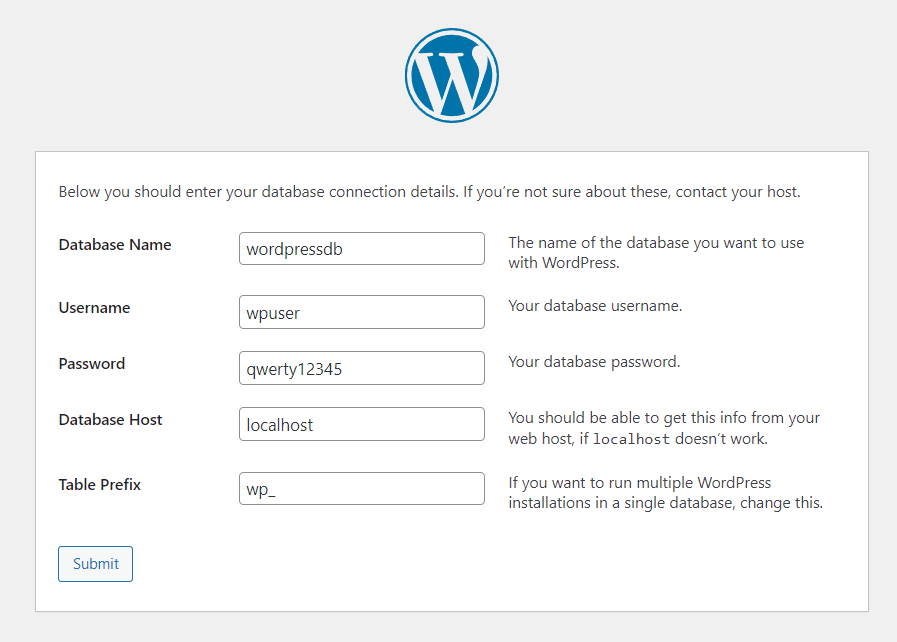
    setting up credentials during wordpress installation

    Since you are installing WordPress locally, Database Host can remain “localhost”.

    Table Prefix is by default “wp_” and should be left like that.

    Step 3.7.: Run the Installation and set up your login information

    After you submit it, you should be able to run the installation successfully.
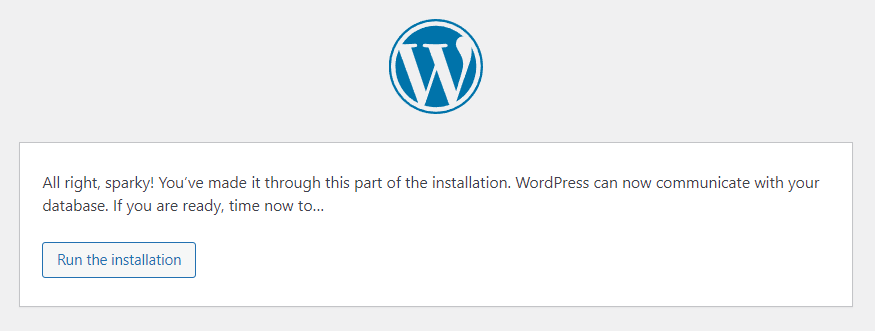
    final stage of running wordpress installation

    In case you didn’t enter proper information in the credentials section, you will face an error message, and will not be able to proceed to installation — doublecheck all information from previous steps to troubleshoot possible errors.

    After you click Run the Installation, WordPress will have more information to enter for a successful installation.
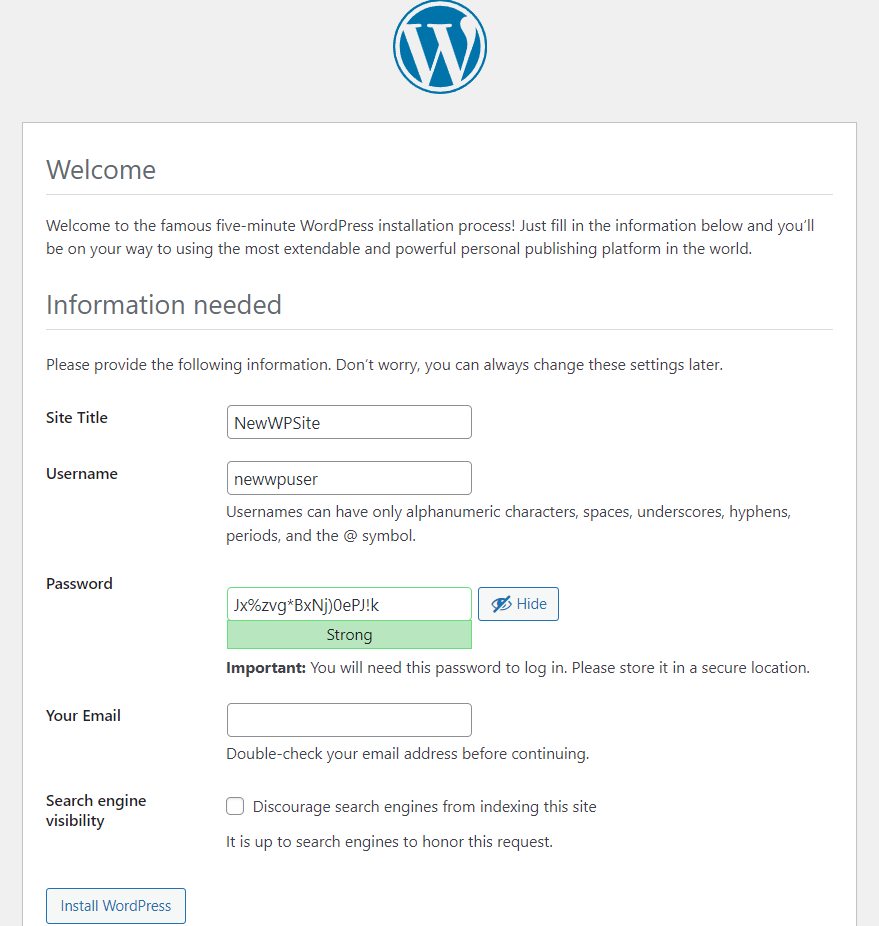
    setting up site name and wordpress user

    This information is not related to the information you entered in phpMyAdmin so choose your WordPress login credentials and the name of your website. As the note in the installation guide suggests: you can always change these later.

    Click on Install WordPress after filling in all necessary information.

    Now you will see the page with the success message for WordPress installation and the button to launch the WordPress dashboard login page.
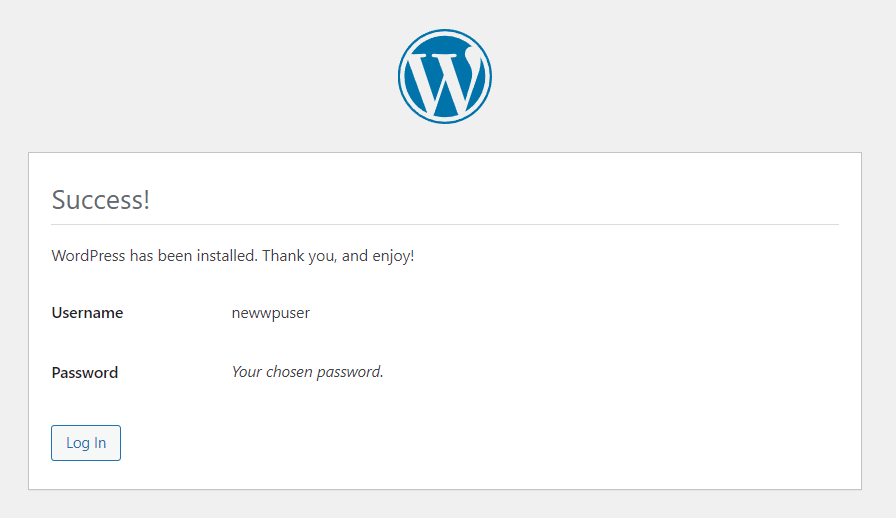
    wordpress installation completed

    This will take you to the end of installing WordPress on your local Windows machine.

    How To Install WordPress Locally with MAMP (Mac)

    When it comes to performance, hardly anyone can ignore macOS. For Mac installation, we’ll be using a program called MAMP. It works similarly to XAMPP, except that it’s simpler and has fewer customizations available. If you want to try using XAMPP instead, you can still follow the process below as the installation process is very similar between both apps.

    Step 1: Download and Set Up MAMP

    Similar to windows, WordPress needs a server to run locally on Mac. And, that’s where MAMP will get a local server and database ready for you.

    So, go to the MAMP official website and download the setup for macOS.
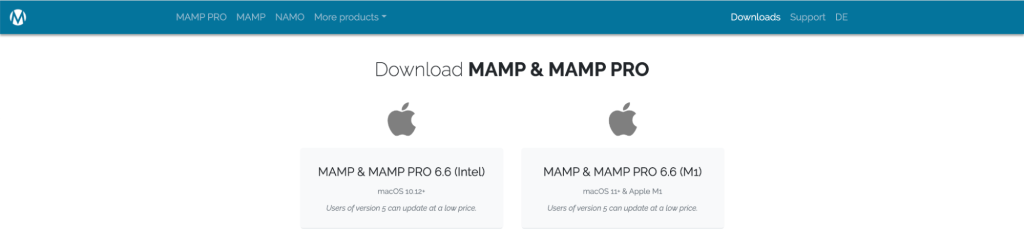
    downloading MAMP & MAMP PRO

    After the download is finished, proceed with running the installation wizard. It may ask you to install the pro version. However, the free version is good enough for your purpose. So, click on the grey folder to begin installing the free version.
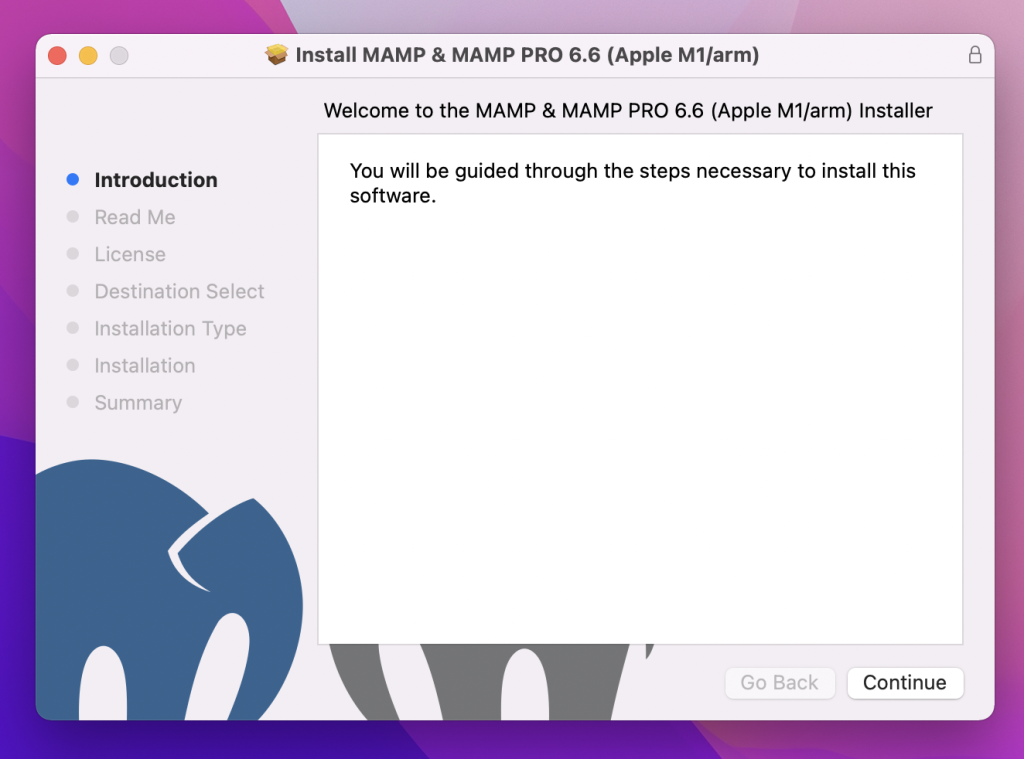
    MAMP installation step 1

    Once the installation is complete, which will look like this:
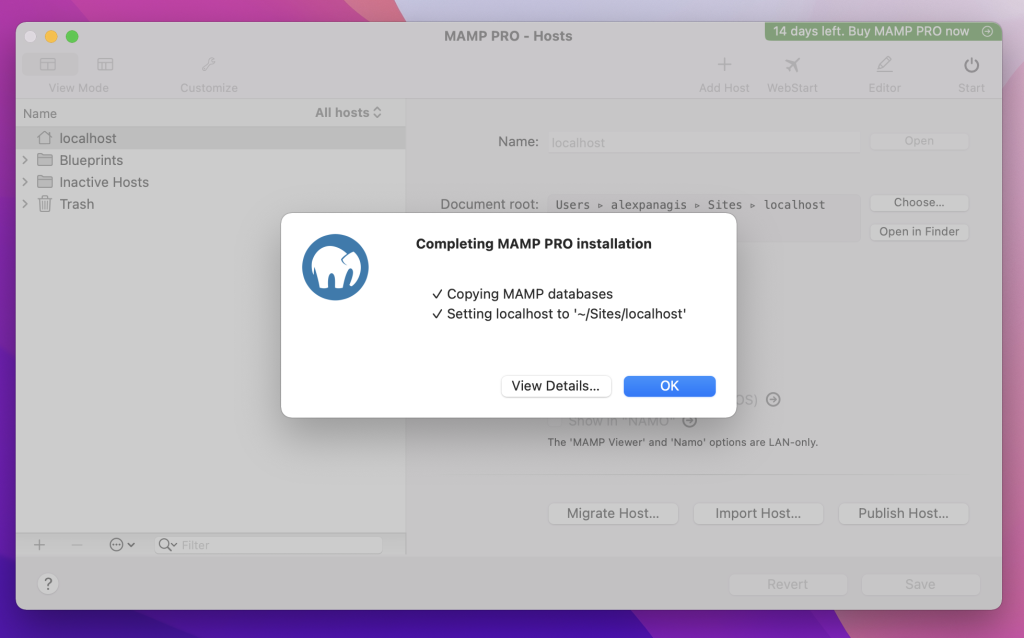
    MAMP installation complete

    Simply open the MAMP controller and start the server.
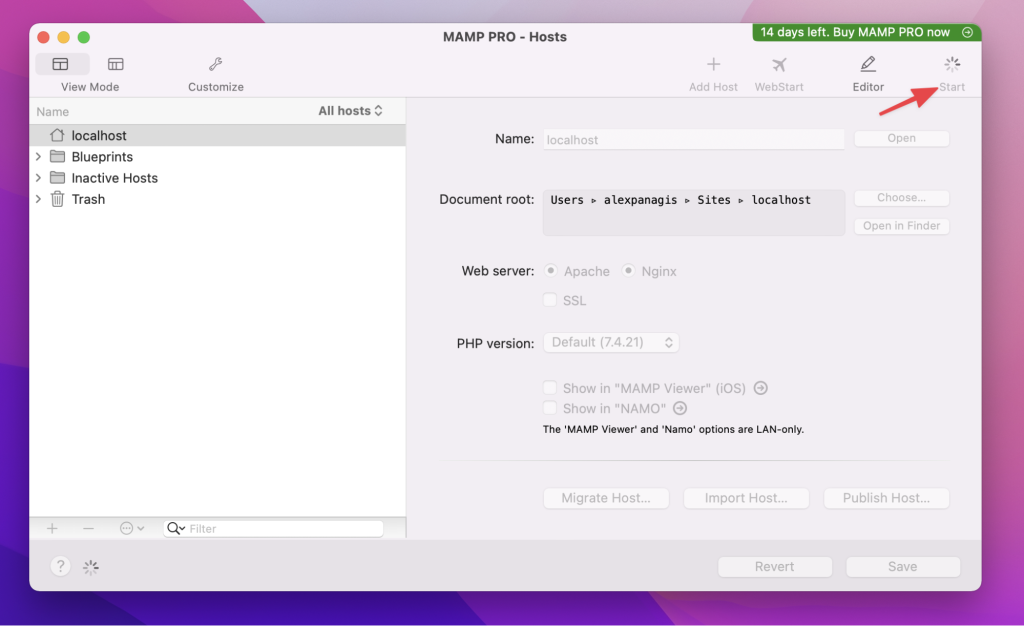
    starting server in MAMP

    When the server is up and running smoothly, click “Open WebStart page”. It will launch phpMyAdmin.

    Step 2: Download and Install WordPress

    The official website to download WordPress provides a specific setup file for Mac. You can download it from there.
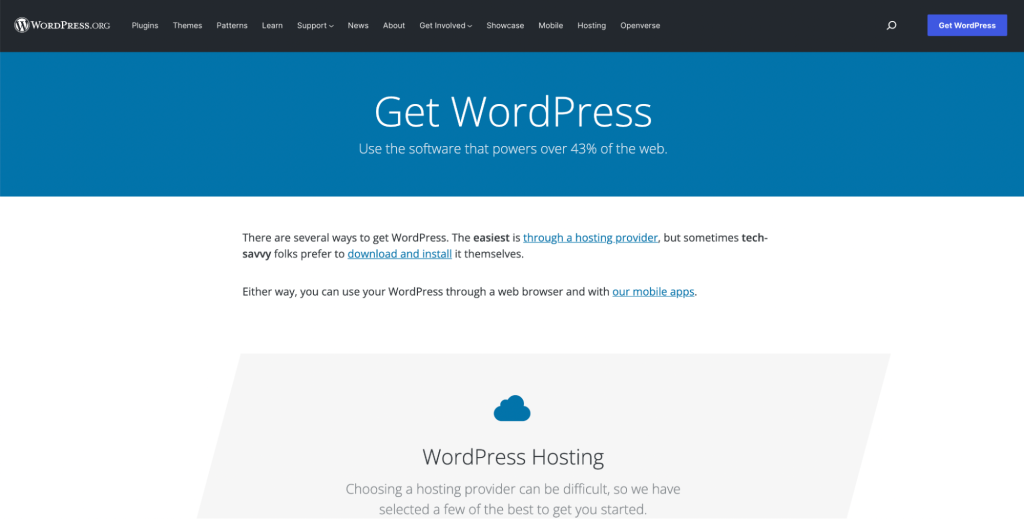
    download wordpress for mac

    When the download is finished, proceed with unzipping the file and placing the folder inside the MAMP document root folder. It is a useful idea to name the folder as the name of the WordPress site.

    Now, from the MAMP control panel, create the database using phpMyAdmin. The good news is that phpMyAdmin works the same in Mac and Windows. Next, you can proceed with adding the name of the database and navigating to the wp-config.php file to add database credentials.

    Now, visit the following URL to run the WordPress installation wizard.

    http://localhost/newwpsite

    Select the language and the rest of the steps are the same as Windows installation. Follow the steps and you are ready to use WordPress on your Mac PC.

    How To Install WordPress Locally Using Local (Windows and Mac)

    You have already seen methods of installing WordPress locally on Windows and Mac using XAMPP and MAMP local servers. Now it’s time for you to know about the simplest method of building a WordPress site on your local machine using “Local”. It is pretty much the same for both Windows and Mac.

    Step 1: Install and Set Up Local On Your Machine

    Though the local servers provide a nice dev environment, they can be a bit of a hassle. On the other hand, localwp.com is the easiest, most efficient local WordPress development tool. You can start the short and straightforward journey by installing “Local” from localwp.com according to the OS you use. You have to enter your name and email ID so that you can be contacted for future products and updates.
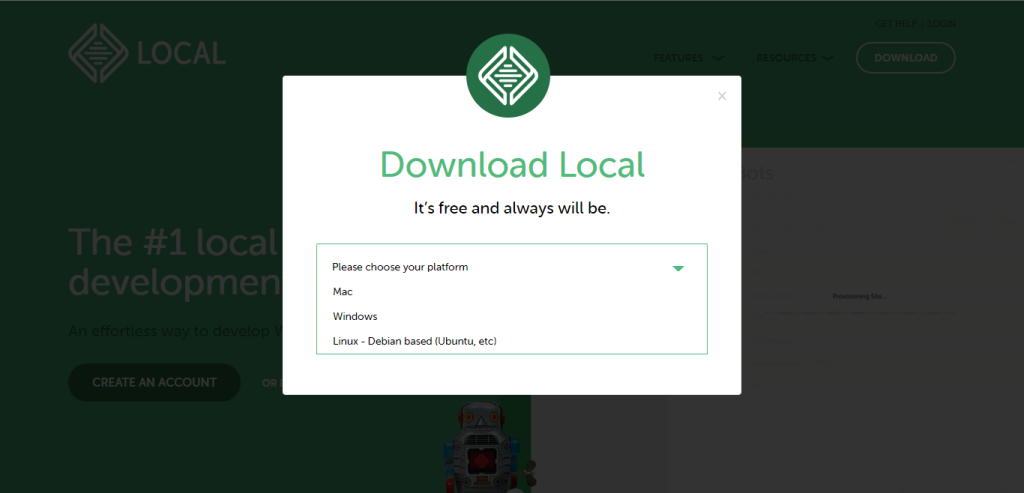
    download local

    When the download is complete, run the installer file. Then you will be redirected to a start-up screen. Just click the “Let’s Go!” button there.

    A few programs will be installed in order to run Local smoothly. You have to agree to the terms & conditions and click “Next” whenever prompted during the installation process.

    When the installation is complete, you will find yourself on the Local dashboard.
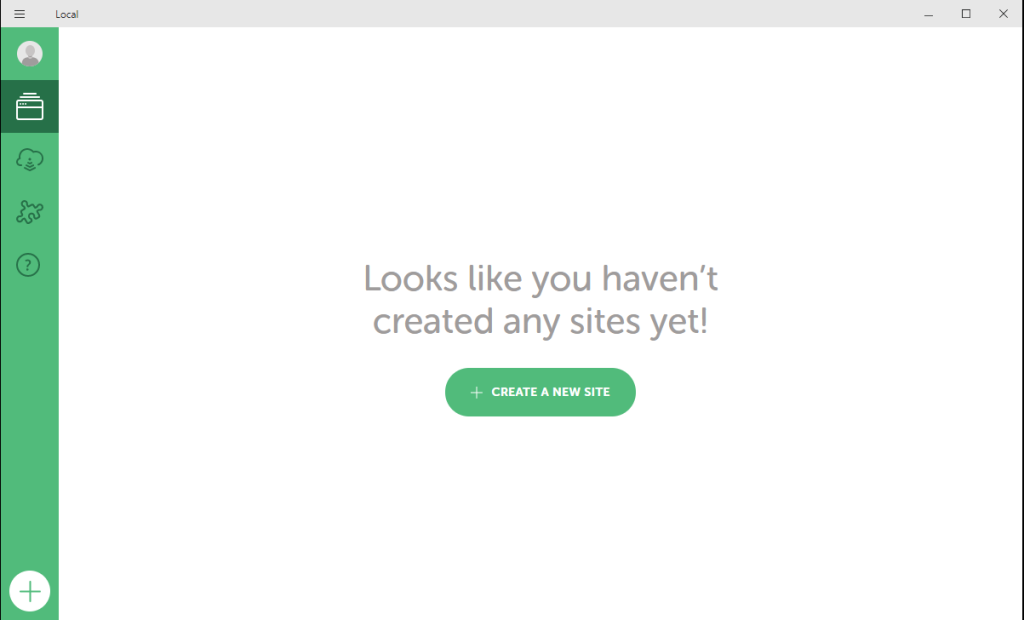
    local dashboard after installation

    LocalWP offers a wide range of choices — by selecting the cloud icon, you can connect to managed WordPress hosting services and make copies of existing sites or push local sites live.

    Using the “Options” menu in the top-left corner, you can configure various settings and preferences. For now, we’ll focus on creating your first local site.

    Step 2: Create Your Local WordPress Site

    Now when you click “CREATE A NEW SITE” on the Local dashboard, you will be asked to set a name for your site.
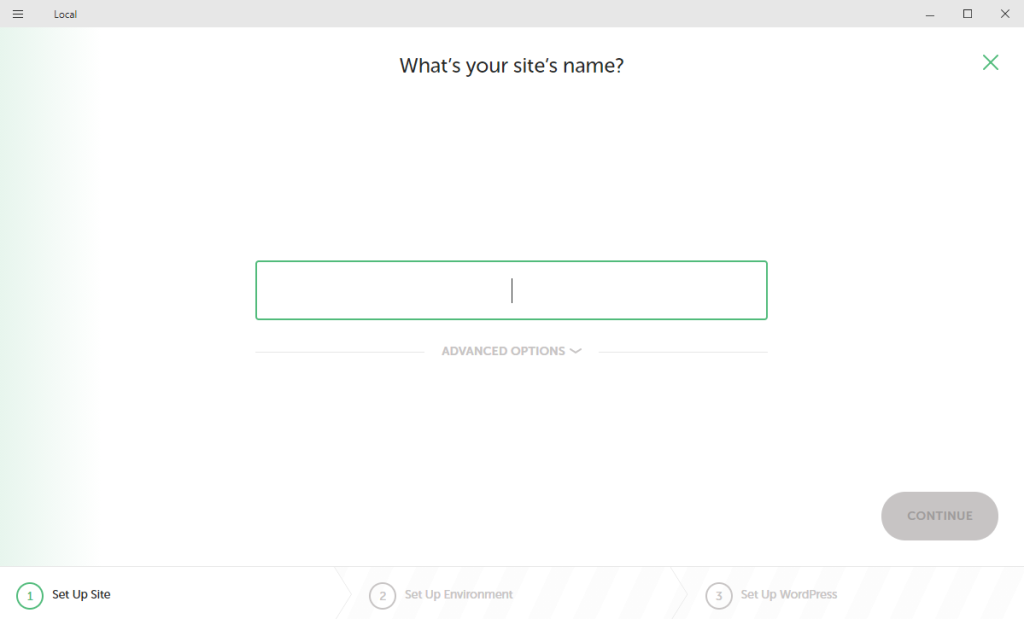
    setting up site's name

    Consider setting a unique and descriptive name for your site. It will help you to maintain multiple local sites in the future.

    The “Advanced Options” tab allows you to set some optional settings and configurations.
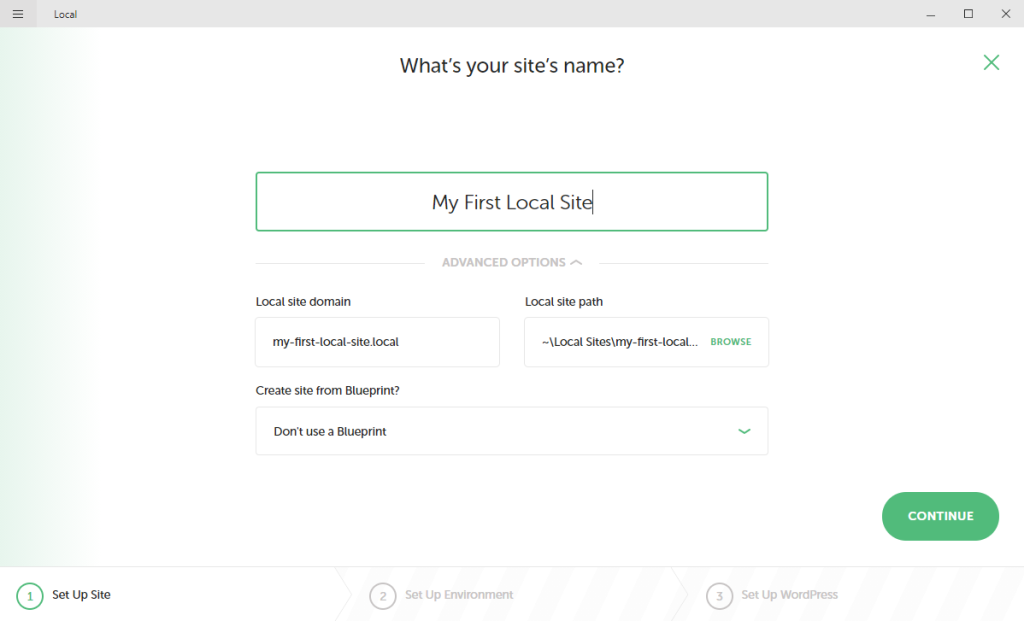
    advanced option on setting up site's name

    This tab allows you to set a domain and path for your site. You don’t need to worry about choosing a domain name and suffix. Whatever domain name and suffix you choose, Local will modify your hosts file to make it work. Here the choice is

    my-first-local-site.local

    Though Local will automatically create a directory to store your site’s files, you can set it to your preferred folder.

    When you are done with entering your site’s name, continue to the next screen.
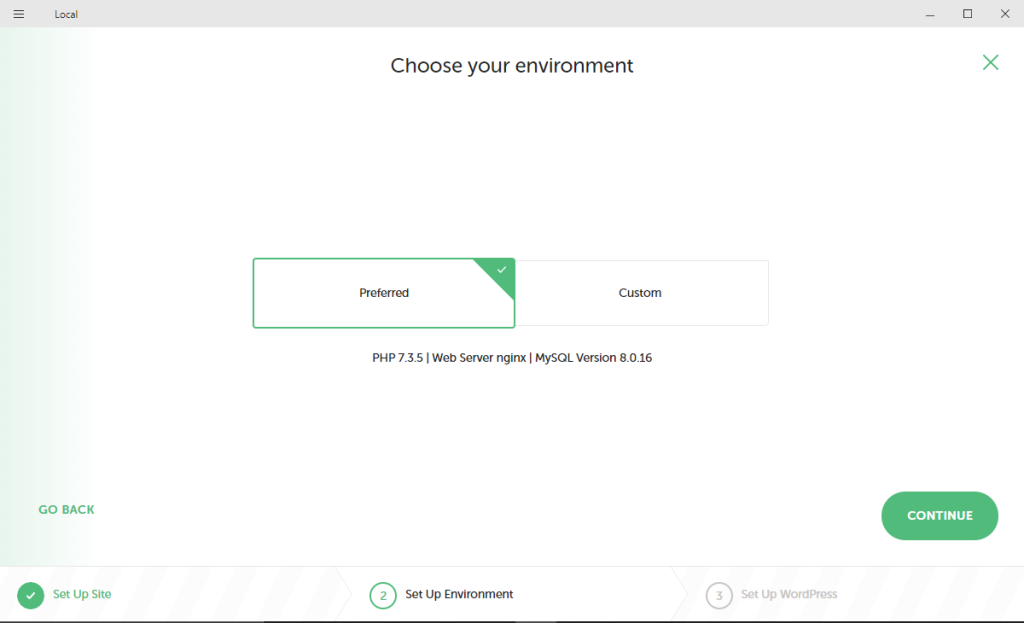
    choosing environment in local

    This page provides you with two options. One is selecting Preferred to set up your local site with a recommended set of tools. Another is Custom, in which you can choose to set specific configurations for your environment.

    Preferred is the better option for beginners. And, Custom is a more advanced option that is most suitable for developers, because it allows you to set more specific requirements. However, remember that choosing the Custom option will exempt you from connecting your site to Flywheel (if you want to publish it). You will need to download some additional files for that.

    Whatever option you choose, now you move to the last step.
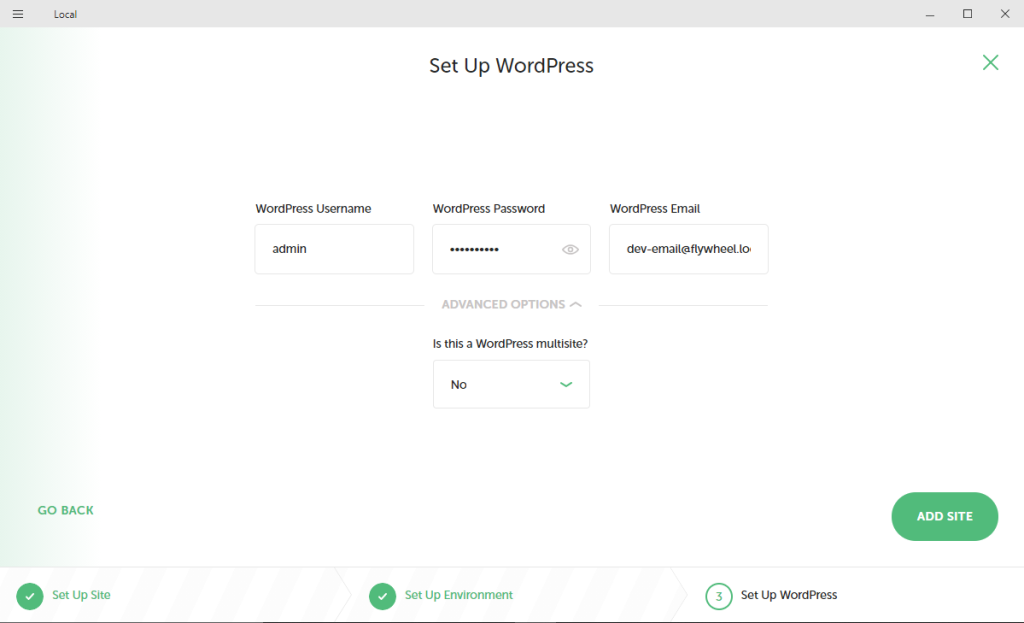
    last step in local, setting up wordpress credentials

    On this page, you can set a WordPress username, a strong & secure password, and an admin email address. In the “Advanced Options” tab, you can select if you want to make it a multisite setup. When you are done with entering the credentials, hit the “Add Site” button.

    Within a few seconds, your site will get listed in the dashboard. You can see all of its information there.
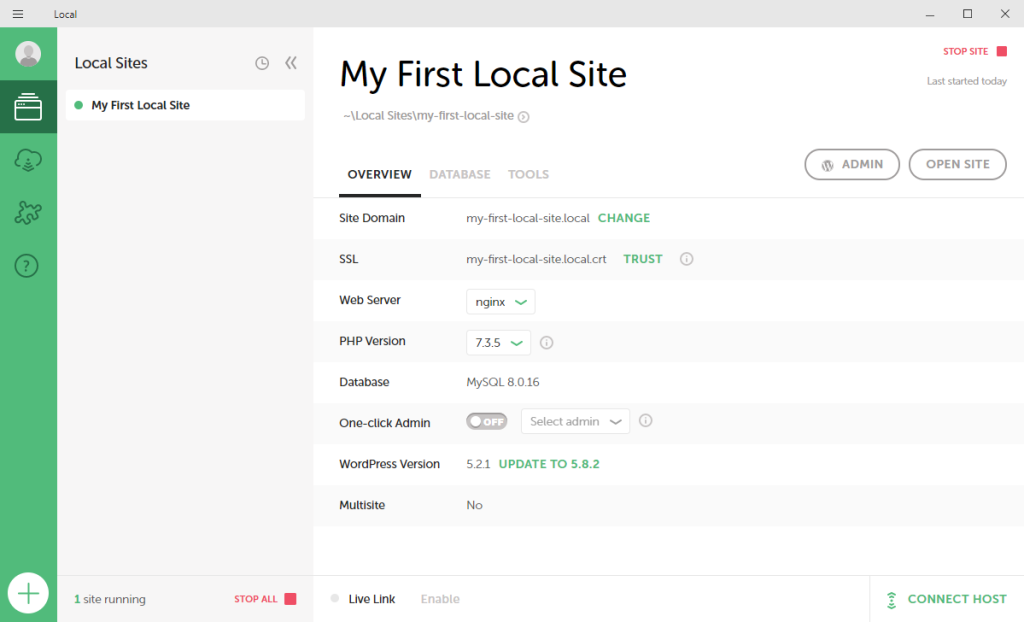
    new local site overview dashboard

    This page confirms that your site is ready and you can click the Admin button to log into your site and work on it. Additionally, this dashboard will always allow you to make changes to your local site’s setup or domain.

    Finally, your fully-featured WordPress site is now ready. It is open for doing any experiment with installing plugins, adding custom themes, breaking the site, fixing it again, etc. Conduct all your creative experiments here without any fear of hampering a live site.

    After Action Report — Run WordPress Locally To Simplify Your Development Workflow

    We went through the relatively simple processes of installing and running WordPress on your Windows or Mac PC. Being able to use such an amazing tool locally on your device is indeed a great opportunity for you to learn a lot.

    If you followed the steps carefully, we’re certain you installed WordPress successfully on your machine. Any questions about the process? Let us know in the comments below! 💬
  • 23 Best Chrome Extensions To Protect Your Privacy

    23 Best Chrome Extensions To Protect Your Privacy

    Are you looking for extensions to enhance your security and privacy?

    Although Incognito Mode aims at making your browsing experience secure, sometimes it just isn’t enough. Chrome may be the world’s most popular web browser, but it isn’t the most private one. It does, however, provide a number of Chrome extensions that you can freely add and manage in the browser.

    With the help of these extensions available in the Chrome Web Store, you can do a lot, such as blocking ads, disabling IP leakage, managing cookies, hiding your IP address, and ensuring site URLs are safe.

    With this in mind, here are 23 of what we think are the best Chrome extensions that you could get to protect your privacy. 

    How to Add and Manage Extensions to Chrome

    Adding extensions is an easy process, and we will explain it to you so you know how to do it.

    The Chrome Web Store provides access to all extensions. While you may find links elsewhere from the services, they will redirect you to an extension page. When you click download, Chrome will add the extension to the top right corner of your browser, and you can pin them to see them at all times.

    How to install and manage a Chrome extension in six steps:

    1. Visit the Chrome Web Store, then click Extensions. This is at the top of the left-hand side, highlighted in blue.
    2. Find the extension you need through the search function.
    3. When you find the extension you want, select Add to Chrome.
    4. You will see a pop-up telling you what permissions the extension requires, i.e., to read and change your browsing data. If you accept this, you should then click Add extension.
    5. For extension management, select the More menu on the right, which is displayed by three vertical dots, select More Tools, and then Extensions.
    6. You can turn on or off the extension on the Extensions page or click Details to find out about the extension and what permissions it has.

    We explained how to install an extension, so now we give you a list of 23 security and privacy extensions that you should consider. 

    What Are The Best Privacy Extensions?

    To maximize security and privacy, Chrome offers a multitude of browser add-ons known as ‘extensions’ to address online privacy issues. Anti-tracking, phishing, ad-blocking, password managers, proxy, and VPN are made all available conveniently when you use Chrome.

    If you’re concerned with your online privacy, safety, and security, consider acquiring one or more of these services.

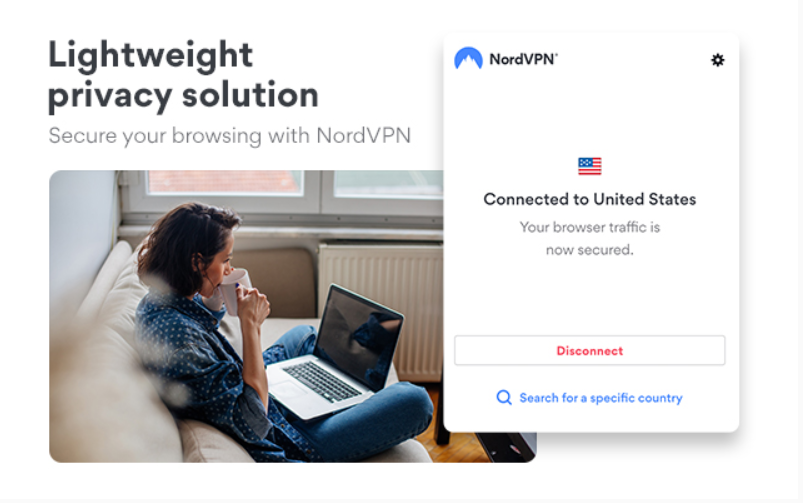
    1. Nord VPN

    nord vpn privacy extension homepage

    VPN has always been a first (and often the best) line of defense when it comes to protecting your privacy. And we’ve chosen NordVPN to be the first one on this list for many reasons.

    The way VPN works is that VPN first connects to a remote server before you connect to the webserver that you’re trying to access. At that remote server, your IP address is masked, protecting your personal IP as you browse.

    Nord VPN offers you the ability to use the VPN directly in the browser without logging into the app, making it considerably more convenient.

    Features:

    • Military encryption — AES-256-CBC
    • Can access content from any location
    • You can use it on up to 6 devices
    • No log creation to protect privacy
    • Quality streaming.

    It’s important to emphasize that NordVPN has a no-log policy, which means that in case anyone requests from NordVPN your browsing data through their VPN servers, they are genuinely unable to provide it as they record no logs about users activity.

    There is no free version; however, there is a free trial, and the most basic option comes in under 5 USD a month for a yearly subscription, or you can pay more for a month-to-month subscription. It is nonetheless one of the most widely known and popular VPN services. If you want a VPN provider, which easily integrates into your Chrome, this is perfect for you.

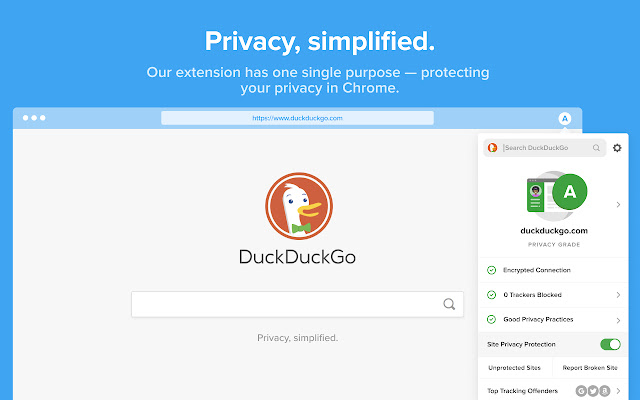
    2. DuckDuckGo Privacy Essentials

    duckduckgo privacy essentials homepage

    DuckDuckGo is another anti-tracking extension for Chrome. It protects your privacy online with private search, tracker blocking, and secure browsing. What makes it unique is that it defaults your search query to its own encrypted search engine, protecting your privacy.

    Features:

    • Defaults browser connections to their own secure one
    • Enforces encryption
    • Provides website’s summary of privacy practices
    • Gives a privacy grade to each website.

    DuckDuckGo is ideal if you are concerned about your data and privacy when browsing and you want to know how trustworthy sites are to make better choices.

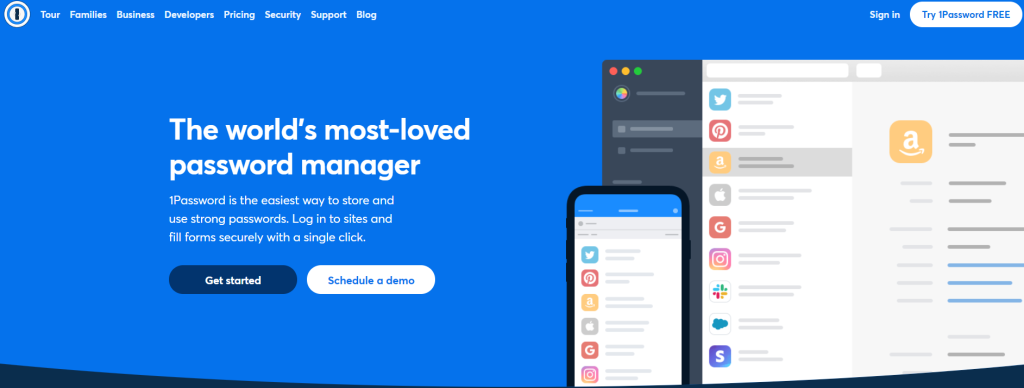
    3. 1Password

    1password privacy extenstion homepage.

    1Password is a dedicated password manager. It handles all passwords and valuable information, stores it, keeps it safe, and allows you to use this information for auto-filling. Password managers, in general, are helpful, as they better protect your data than default programs.

    Features:

    • Provides an alternative secure password manager to the default Chrome autofill feature
    • Handles all passwords and user accounts you use with Chrome
    • Stores valuable information for you such as credit cards, passport info, etc.
    • Automation for improved company infrastructure

    If you’re not too comfortable using the autofill feature, which Google may well use to collect personal information about you, given Google’s reputation, it’s a good choice. In general, it’s a secure and efficient way to store passwords and other valuable information and to enter them when online quickly.

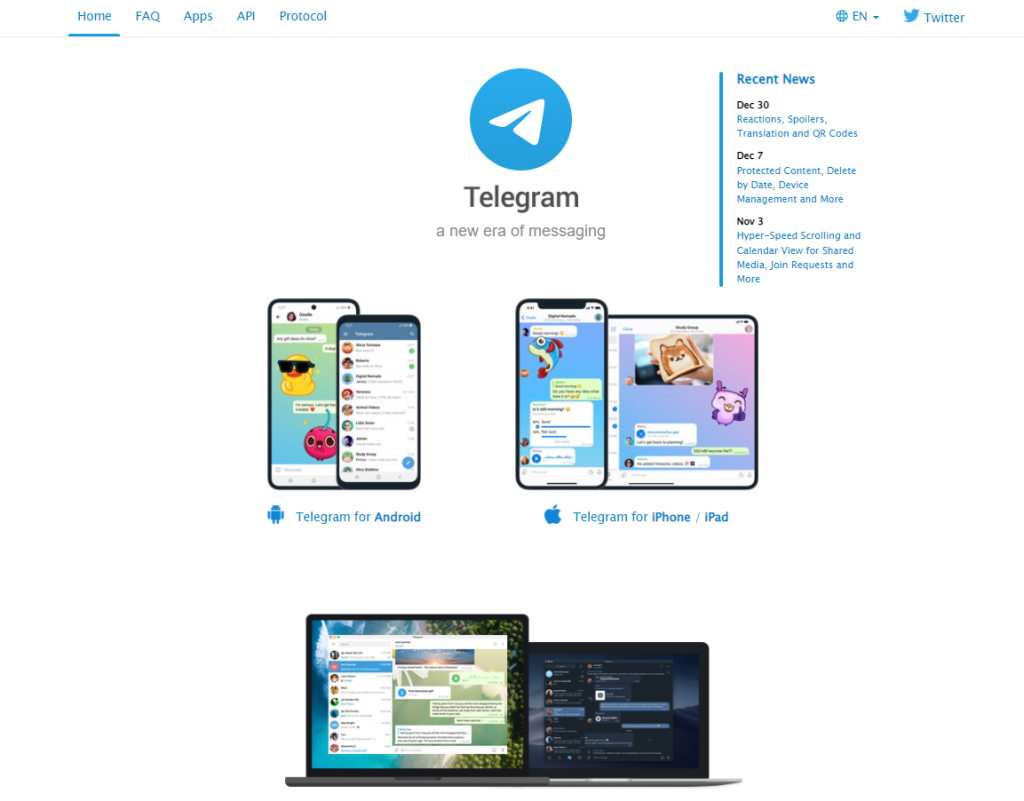
    4. Telegram

    telegram homepage

    Privacy in most major messaging applications remains to be an issue to consider. Applications like WhatsApp may have addressed this problem before, but it has become harder to trust these days ever since its acquisition by Facebook. One messaging application that has genuinely secure end-to-end encryption is Telegram.

    Features:

    • Secure end-to-end encryption
    • Has all the functionalities a messaging application would need
    • Data is protected through sandboxing.

    Telegram, unlike other messaging apps, has no relation to other programs. For example, WhatsApp can communicate with other applications, which can be risky for your privacy and security.

    Telegram, conversely, cannot send data between other applications, and it always encrypts conversations. You can also ensure that no one sees more than you want to share. With this level of security, it still has the features you’d normally expect from a messaging application: fun stickers, group chats, video calls, etc., so Telegram seems to be the perfect choice for an alternative to online messaging.

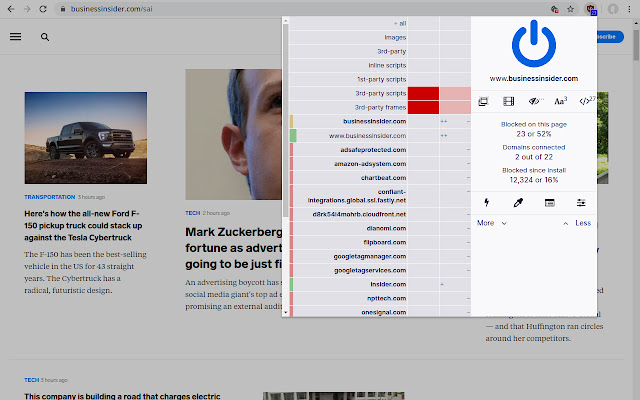
    5. uBlock Origin

    ublock origin privacy extension homepage

    uBlock Origin is a great free privacy extension. uBlock Origin blocks ads and prevents trackers from accessing your information. You can use it on various browsers, it is entirely free, and it is very efficient in terms of CPU and memory usage. It also displays information about what is being blocked.

    Features:

    • Origin filter lists and blocklists
    • Blocks ads
    • Prevents tracking
    • Oriented to being CPU friendly.

    It also offers a lot of customization options, more lists, the ability to block JavaScript locally or globally, create your own global or local rules, and more.

    Alternative: Even though it’s not actually the Chrome Extension, this same concept of enhanced security and performance is what the Brave browser offers. It’s 3 times faster than Google Chrome, has a built-in Ads Blocker, and has a lot of features specially designed to protect your privacy. So if you’re looking for protection even better than the uBlock Origin Chrome extension, then the Brave browser might just be what you’re looking for.

    6. Click&Clean

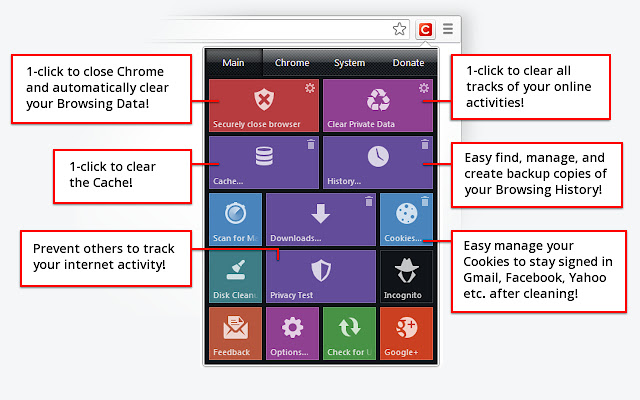
    This extension is straightforward, designed for quickly cleaning your browsing history. You can clear your browsing history, typed URLs, cookies, and cache with one button. You can also clear download history and remove client-side Web SQL Databases.

    Features:

    • Simple user interface and function
    • Provides easy management to browser history, cookies, cache, and other data
    • Removes downloads and can create space on your hard drive
    • Scan PC for malware.

    There is also an option to clean one portion at a time rather than deleting all information. Separate delete buttons are available for each option that you can choose as you see fit—generally, it’s a valuable and simple tool to consider.

    7. Unshorten.link

    unshorten.link privacy extension homepage

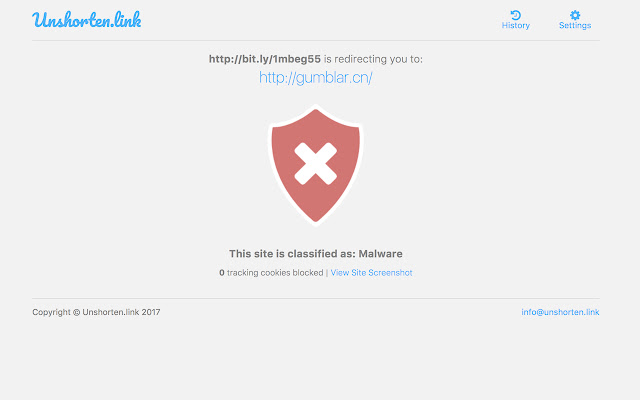
    Unshorten.link has a primary purpose, and as the name suggests, it un-shortens any shortened link. Shortened links are one way for cybercriminals to lure unsuspecting users onto their websites. Although that’s not always the case when you see a shortened link, there’s no way to tell without actually clicking on the link first.

    Features:

    • Un-shortens shortened links and exposes possible hidden malware
    • Fast and easy to use
    • Keeps a regularly updated list of 300 popular link shortening services
    • Directs you to their link expansion page whenever you click a shortened link, so you know what the link is sending you to.
    • Malware protection
    • Blocks 15 common tracking cookies.

    With this extension, you can be sure to know if a shortened link is hiding any malicious intent or not. The extension also boasts additional security features against malware and tracking and ensures that you cannot click a nefarious link. Other programs may offer tracking blockers, but this service is a great tool to know what is behind a link and prevents you from getting caught out.

    8. Ghostery

    ghostery privacy extension homepage

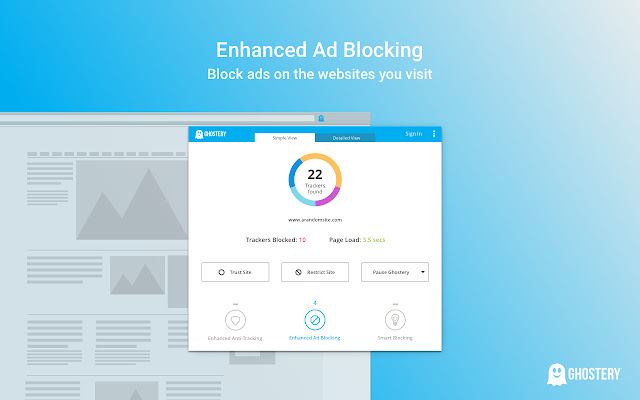
    Ghostery app is ideal for protecting your data and privacy when browsing. The free version is extensive as well. Depending on how strict you want it to be, you can configure the extension to four different levels. You may opt to block default, block nothing, block everything, or block specific sites.

    Ghostery provides all these functionalities for free, but there is a Pro plan you can subscribe to for $2 per month.

    Features:

    • Ability to view and block trackers
    • Anonymizes your data
    • Smart blocking automatically blocks and permits trackers for an optimized experience
    • (Paid version) Customer support priority
    • (Paid version) Private ad-free internet search
    • (Pro version) Detailed analytics.

    While the paid plan gives you more options, it doesn’t protect you any more than the free plan; instead, it provides additional tools for a better online experience. It is, in general, an excellent choice for a range of security and privacy measures.

    9. Dashlane

    dashlane privacy extension

    Dashlane is another password manager. It safely stores and logs all your passwords for easy use. It can work with various browsers, has two-stage authentication to maintain the security of your passwords, and makes filling in forms considerably easier.

    Features:

    • Free version allows you to save 50 passwords
    • Auto filling
    • Authentication protocols
    • Password generator
    • (Premium version) Up to 5 devices
    • (Premium version) Store encrypted files.

    Dashlane’s premium version offers many other features beyond simple password management. However, password management is a crucial security measure, as passwords can be stolen by malware without adequate protection. Dashlane makes creating and using complex passwords easier while saving you time.

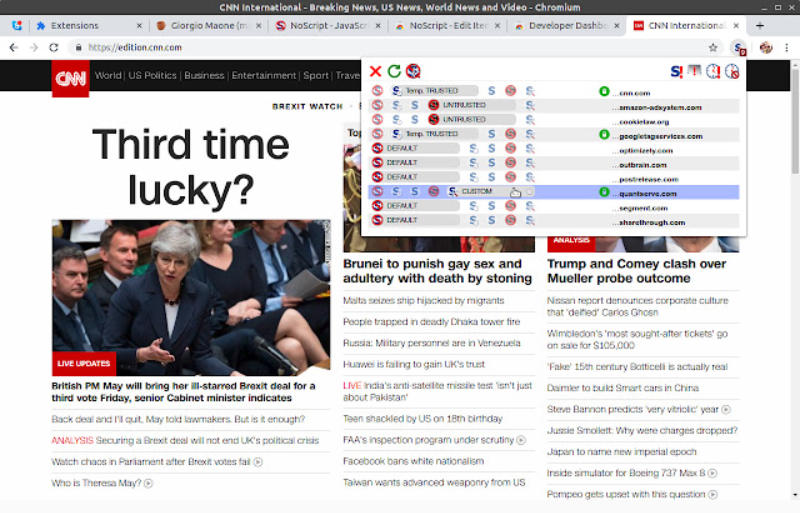
    10. NoScript

    noscript prigvacy extension

    NoScript aims at making browsing considerably safer. It protects you from various cross-script attacks. These attacks are when “bad” code is added into “good” sites for undesirable purposes. NoScript can also protect you from clickjacking attempts when questionable sites masquerade as others. It also allows you to control what sites can run executable JavaScript, Flash, and Java content. So, for example, you can let your bank run Java, but no one else.

    Features:

    • Default whitelist of popular, trustworthy sites
    • The first and one of the most powerful anti-cross-scripting filters
    • Can work on mobile devices.

    In the settings panel, it will give you an overview of everything blocked on the current webpage and allow you the option to allow or trust a particular script. The extension to Chrome is relatively new but is easily integrated into your Chrome security measures. It does not conflict with adblockers, so use it for extra security against script-based attacks.

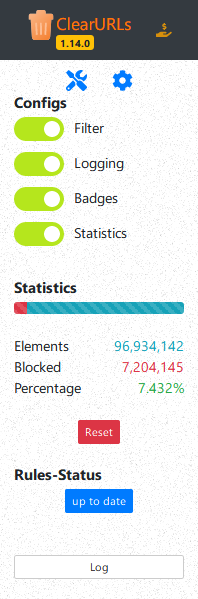
    11. ClearURLs

    clearurls privacy extension

    Contrary to adblockers that target the website or the scripts itself and much like Unshorten.link, ClearURLs targets tracking elements planted within URLs. This add-on is based on new WebExtensions technology and is optimized for Firefox and Chrome-based browsers.

    Features:

    • Automatic removal of URL tracking elements
    • Optimized for Firefox and Chrome.

    The extension automatically removes tracking elements from URLs to protect your privacy when browsing through the Internet. So at the end of the day, it’s simply added security to the links you use.

    12. Privacy Badger

    privacy badger privacy extension homepage

    Privacy Badger blocks trackers, which usually come from third-party ads. However, unlike most adblockers, this extension has a unique approach.

    It does not consult filter lists—which are lists that adblockers refer to, to know which sites to block. Privacy Badger automatically detects trackers from their behavior, sends the Global Privacy Control signal to prevent your data from being shared or sold, and also sends a Do Not Track signal to block trackers.

    Features:

    • Generates a list of sites to block as you browse through the web
    • Prevents third parties from taking your data
    • Informs you which websites are tracking you and which ones aren’t
    • Allows useful cookies and third-party applications if necessary, but screens out trackers and referrers.

    To a degree, it works as an ad blocker, but this is not its primary function. It aims to prevent you from being tracked, to better protect your privacy. It just so happens that a lot of ads do this, so it has a two in one appeal. It is compatible with other adblockers, so it is a useful additional tool for your use.

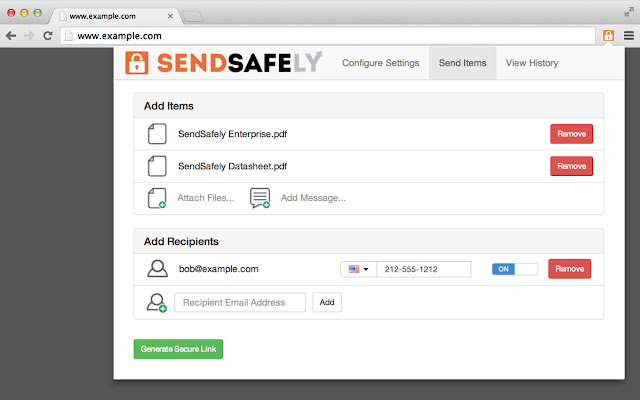
    13. SendSafely Encryption for Chrome and Gmail

    SendSafely Encryption for Chrome and Gmail

    This extension is a useful tool for safe communication. It provides end-to-end email encryption. It can ensure that no one else can see your email, even the extension provider. It also allows you to send encrypted files through both Gmail and their own Chrome pop-up window.

    Features:

    • Encryption of emails
    • File encryption
    • Multi-factor authentication.

    There is a free version of SendSafely, and there are various paid versions with extra plugins and a lot more features. Generally, this extension is particularly useful for protecting emails. It is built on OpenPGP, which is the most popular encryption standard, and held as the best encryption method.

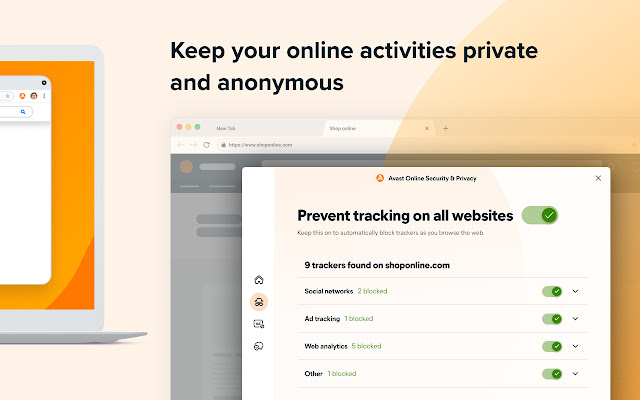
    14. Avast

    avast homepage

    While Avast is antivirus software, it has a standalone Chrome extension. This extension protects you from malware, blocks ads, and can prevent tracking.

    Features:

    • Analysis and report of website’s safety
    • Corrects errors in website names
    • Adblocking
    • Automatically scans websites to see if they are genuine
    • Do not track mode.

    Whether or not you want Avast’s whole program, the free extension can add an extra layer of security. It also serves as a way to protect your data from being accessed with a do not track mode. It is one of the most popular extensions and is widely recommended.

    15. WOT Website Security and Browsing Extension

    WOT Website Security and Browsing Extension

    This extension helps you browse the web more safely. It uses community feedback to assess the security of a site, so before you visit, you can check how wise it is to click. As you search, it will tell you the security rating of sites, so you can avoid or be more cautious when visiting. It uses algorithms of millions of user ratings to gauge how safe it is.

    Features:

    • Safer browsing, protecting you from tracking
    • Ratings of site’s security risks
    • Link inspection
    • Free online security
    • Real-time protection mode, which constantly notifies you of threats
    • (Premium version) Pop-up blocker
    • (Premium version) Content-control
    • (Premium version) Data breach monitoring
    • (Premium version) Email protection.

    They have both a free version and premium, the latter offering extra security features. In addition, a business version is available with even more features. Nonetheless, the free version offers excellent security and privacy protection.

    16. Blur

    blur privacy extension homepage

    Blur offers multiple features for your security needs. It’s both a secure password manager, suggesting and storing secure passwords, and a privacy extension, as it blocks trackers and protects your data. Furthermore, it can help make online purchases safer by encrypting your valuable information.

    Features:

    • Protects and stores passwords with encryption
    • Suggests secure passwords
    • Autofill valuable information
    • Masked emails
    • Private browsing
    • Tracking protection
    • (Premium version) Masked payment information
    • (Premium version) Support.

    The free version gives many useful features, but the premium features offer a great degree of security, particularly for online payments. It is relatively affordable for a paid extension, between 2-5 USD per month. Nonetheless, this is a solid choice if you want a password manager, which also doubles as a privacy extension.

    17. uMatrix

    umatrix privacy extension

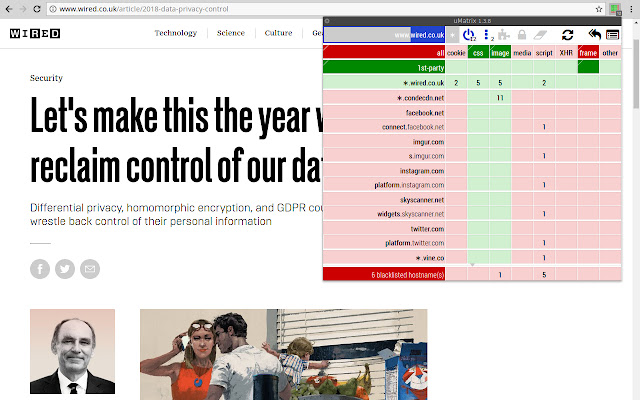
    uMatrix gives you control over your security while browsing. Unlike other blockers, you make the decisions on what is permitted or not. Due to its interface, it may not be for everyone, but this is a well-suited extension for others with better technical knowledge. In simple terms, you select whether you allow or forbid requests, block scripts, ads, and iframes, and have access to a firewall with privacy tools.

    Features:

    • A matrix of requests to manage what is permissible or not
    • Blacklist or whitelist requests of all kinds
    • See all remote connections
    • Blacklist all or whitelist all as default modes, as you prefer.
    • Understand what websites are doing behind the scenes
    • Can speed up browsing by blocking image requests.

    This isn’t the most intuitive extension; however, if you take security seriously and can understand the table nature of the extension, it can offer a great security solution where you are in full control.

    18. Pixel Block or Pixel Block 2

    pixel block privacy extension

    Both of these extensions are Chrome exclusive and serve a key purpose. They both block people from tracking you when you open their emails. Companies and more questionable parties often use email tracking pixels to see how long someone has spent on an email and find out location activity. Pixel Block 2 was a “fork” of the original to work with the new Gmail interface; however, it appears that the original has a more recent update and a wider user base.

    Features:

    • Blocks tracking attempts in emails
    • Does not communicate with any remote servers, is locally based on your browser.

    Whichever you choose, you will have a simple, one-purpose extension that can be useful in your arsenal of tools to protect your privacy and data.

    19. J2Team Security

    j2 team security homepage

    J2Team Security is mainly an anti-phishing extension with a focus on Facebook. An updated version of an app made primarily for Facebook security, J2Team Security has a few additional features beyond Facebook. It works by protecting you from clickjacking, phishing attempts, malware, and works well for Facebook security.

    Features:

    • Real-time protection
    • Blocks ‘seen’ feature on Facebook messenger
    • Anti clickjacking
    • Blocks fake Facebook log-ins
    • Protect against Blogspot vulnerabilities
    • Protects against Facebook Self-XXS exploits.

    If you spend a lot of time on Facebook but want to have a more secure presence and protection against phishing attacks, it is an ideal extension to get. The main site is in Vietnamese; however, it has a global audience.

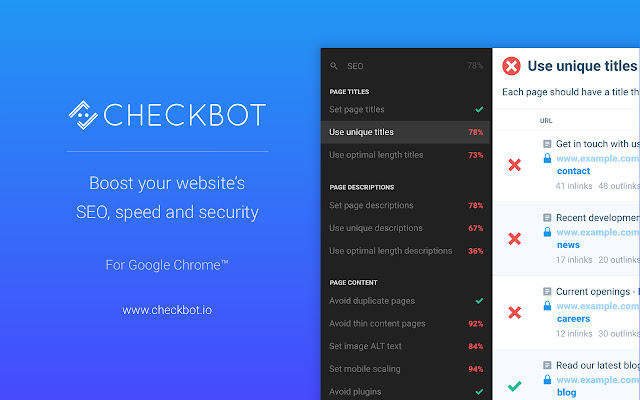
    20. Checkbot Web Speed & Security Tester

    checkbot privacy extension homepage

    Checkbot has three main functions: check the Search Engine Optimization (SEO) of sites, security, and speed. This gives you a lot of useful information if you are creating your own site. While most of the other extensions here are about you safely visiting other sites, you need to know how to ensure that your own site guarantees the end-users security and useability.

    Features:

    • SEO check, by testing many aspects of the site
    • Site speed checker
    • Site security checking.

    If you are creating your own site or sites and regularly need to check SEO, security, and speed, this is an absolutely essential tool to have.

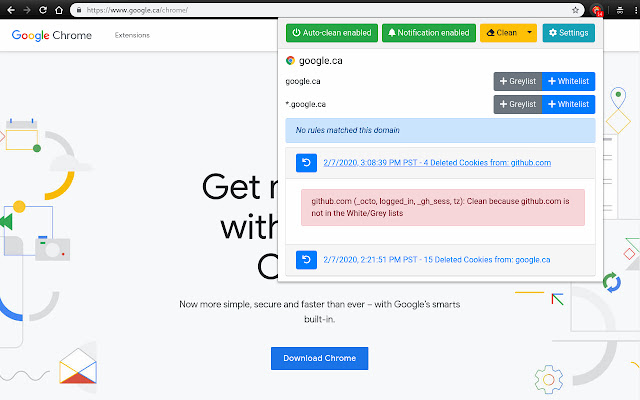
    21. Cookie AutoDelete

    cookie auto delete privacy extension

    If you want to take control of your cookies, this is the extension for you. You can automatically remove cookies from closed tabs you do not want yet keep any you do want. Add sites to the whitelist, and enable auto-clean to remove anything else if you know the sites you want to keep.

    Features:

    • Auto delete cookies from closed sites
    • Whitelist for sites you want to keep
    • Greylist sites you want to keep the cookies until you restart your browser
    • Clear all site data for a domain.

    Unlike other programs which can remove all cookies, this extension allows you to choose what cookies you want to keep and for how long—a very simple extension to use alongside others to boost your security and regain control.

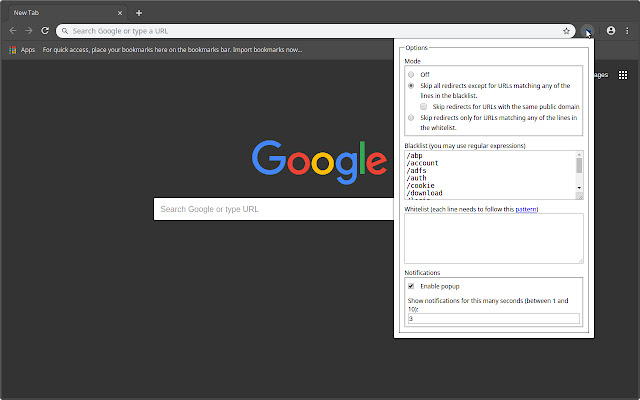
    22. Skip Redirect

    skip redirect privacy extension

    Another extension with a pure and simple function, Skip Redirect, removes any sites you visit before getting to your intended destination. Ever clicked a link, and you ended up somewhere else for a brief moment before going to the desired site? This is what this extension deals with.

    Skip intermediary websites when clicking links is the only feature it has.

    This extension is a valuable and simple tool to help keep yourself safe. Many sites use this redirect practice, and your data and security become at risk, as you do not know what the intermediary site is or what it does. This extension removes all worry!

    23. MinerBlock

    miner block privacy extension homepage

    The final entry of our list also serves a particular purpose. It blocks people from accessing your CPU for cryptocurrency mining. As crypto-mining uses a lot of processing power, some use illegal algorithms to access your computer’s CPU to mine for them, sometimes without your knowledge. This extension prevents this from happening, both in cases of inline scripts or when the miners work through proxies.

    Features:

    • A blacklist to block requests and scripts
    • Detecting and stopping potential mining through examining scripts.

    If you are worried about miners accessing your device, which is a very reasonable concern in 2021, this is an ideal extension for you.

    Frequently Asked Questions

    How do I stop Chrome from tracking me?

    On your Chrome browser:

    1. Click the Chrome menu in the top-right corner of the browser
    2. Select Settings.
    3. Under Privacy and security, click Cookies and other site data.
    4. Toggle Send a ‘Do not track’ request with your browsing traffic on or off.

    Why do I get privacy errors in Chrome?

    Privacy errors occur when the SSL certificate of the site cannot be verified by Google. SSL is a data encryption method utilized to ensure the safety and privacy of transmitted data. Sometimes, however, errors incorrectly occur when there is an issue with an extension, antivirus software, or computer settings.

    Can Chrome extensions steal passwords?

    Extensions can steal your passwords only if the extension itself has been compromised or replaced by a malware version that steals login credentials to access other sites, including Amazon, Microsoft, GitHub, etc.

    Are my Google searches being monitored?

    Your Google searches and voice searches are all tracked and stored by Google so that the advertisements can be as tailored-fit and accurate as possible. While this practice is solely for commercial purposes for Google and various other social media sites, cybercriminals may do the same, resulting in severe harm and unfortunate circumstances.

    How do I stop Google from spying on me?

    You can do a few things to protect your privacy and data.

    One is to stop using Google altogether. However, this is quite difficult for many of us, and you probably wouldn’t be reading this article if you wanted to stop using Chrome.

    The second approach, which is preferable, is to use extensions that we mentioned to protect your data, prevent tracking, block ads, store data not on Google, and use private search engines.

    You can also limit what Google “sees” by doing the following:

    1. Head to history.google.com/history.
    2. Select Activity controls.
    3. Under Web & App activity, you should see a blue toggle. Switch it off, and this should stop Google from storing your data.

    What is a privacy blocker?

    Privacy blockers usually refer to comprehensive apps that protect user data and privacy in a variety of ways, such as ad-blocking, tracking blockers, and so on. They can vary with their primary function or specializations but generally aim to prevent third parties from accessing data, blocking tracking cookies and scripts, and stopping ads interfering with your internet experience.

    Is AdBlock illegal for YouTube?

    No. This idea is a rumor that misinterpreted a change in YouTube’s policy. While YouTube bypasses AdBlock, so you have to watch their ads if you do not subscribe to premium, it is not illegal to have AdBlock or download additional apps to bypass YouTube’s ads.

    After Action Report — Remember to stay safe!

    We provided you with 23 different extensions for you to use to protect your privacy when using Chrome. Some of these extensions serve the same function, or overlap considerably, so by no means do you need all of them. On the other hand, some serve specific functions that are best to use alongside others, whereas others offer more comprehensive protection. Adjust accordingly to your needs.

    However, we hope you have an idea of how to protect your privacy and can find a combination of extensions that work best for you. It is essential to be aware of the risks you face and take appropriate measures against them. It is not wise to not have any security measures in place. With constantly evolving risks when browsing, security extensions are essential.

    While many people do not trust Google when it comes to privacy, and Chrome by default doesn’t have the best privacy policy, you can significantly improve your privacy and security with the right extensions.

    What are your favorite privacy extensions for Chrome? Join the conversation & let us know in the comments. 💬
  • How to Fix ERR_SSL_VERSION_OR_CIPHER_ MISMATCH

    How to Fix ERR_SSL_VERSION_OR_CIPHER_ MISMATCH

    If you’ve come across the ERR_SSL_VERSION_OR_CIPHER_MISMATCH error on someone’s site and are wondering what it is or, better yet, are experiencing it on your own site and want to know what you can do to fix the issue – you’ve come to the right place.

    What Is ERR_SSL_VERSION_OR_CIPHER_MISMATCH Error?

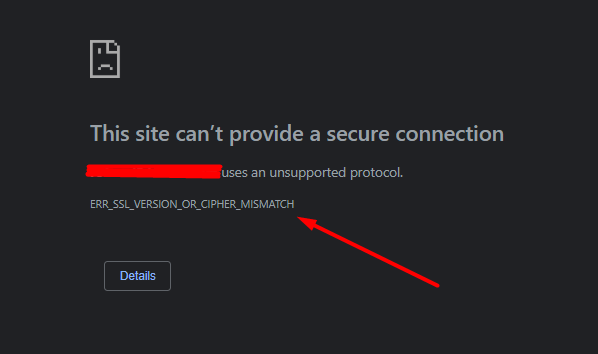
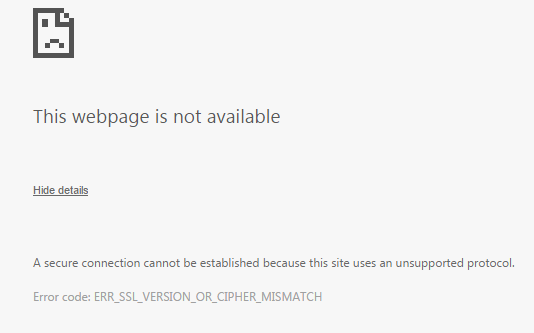
    ERR_SSL_VERSION_OR_CIPHER_MISMATCH is a relatively common SSL error that occurs when the web browser fails to establish a secure connection with the website.

    ERR_SSL_VERSION_OR_CIPHER_MISMATCH display error

    The error can occur in any web browser – regardless of whether it’s Firefox, Google Chrome, or Microsoft Edge.

    When a website visitor attempts to connect to your website by connecting to the server that hosts your website using SSL/HTTPS – various steps take place to ensure that this connection is established securely:

    If any of the steps mentioned above doesn’t happen properly, it can lead to the ERR_SSL_VERSION_OR_CIPHER_MISMATCH error.

    So, what could cause the ERR_SSL_VERSION_OR_CIPHER_MISMATCH error on your site or someone else’s site?

    What Causes the ERR_SSL_VERSION_OR_CIPHER_MISMATCH Error?

    The ERR_SSL_VERSION_OR_CIPHER_MISMATCH error only occurs on websites that use HTTPS encryption and SSL certificates to secure access and information exchange. These websites usually have a lock icon in the URL bar.

    Another reason why ERR_SSL_VERSION_OR_CIPHER_MISMATCH error usually happens is due to the use of old web browsers or operating systems.

    To break this down even more, let’s break down the name of the error:

    • SSL has had multiple versions since its creation
    • Cipher is a set of rules, instructions, or algorithms that determines how the secure connection will be established

    Therefore, when the error occurs, it’s pretty self-explanatory where is the actual problem — either the SSL version doesn’t match, or the cipher has no way to establish a secure connection between you and the webserver because you’re not using the same cipher.

    Other causes that can lead to ERR_SSL_VERSION_OR_CIPHER_MISMATCH error are:

    • Server-side issues
      • The problem with your SSL certificate
      • Certificate name mismatch
      • The latest version of TLS is not being used
      • Use of RC4 Cipher Suite
    • Client-side issues
      • Using an old version of the Operating system or web browser
      • Use of QUIC Protocol
      • Settings of your antivirus software interfere with your browser’s default security settings.
      • SSL state not being updated

    All the issues, as mentioned earlier, become a cause of the ERR_SSL_VERSION_OR_CIPHER_MISMATCH error. However, they can be easily fixed, which will be discussed in the next section.

    How To Fix the ERR_SSL_VERSION_OR_CIPHER_MISMATCH Error?

    Let’s see each one of the causes and what you can do to fix them.

    Server-side Issues

    To check if the error is from the server-side, you will need to look at the following things:

    Check The SSL certificate

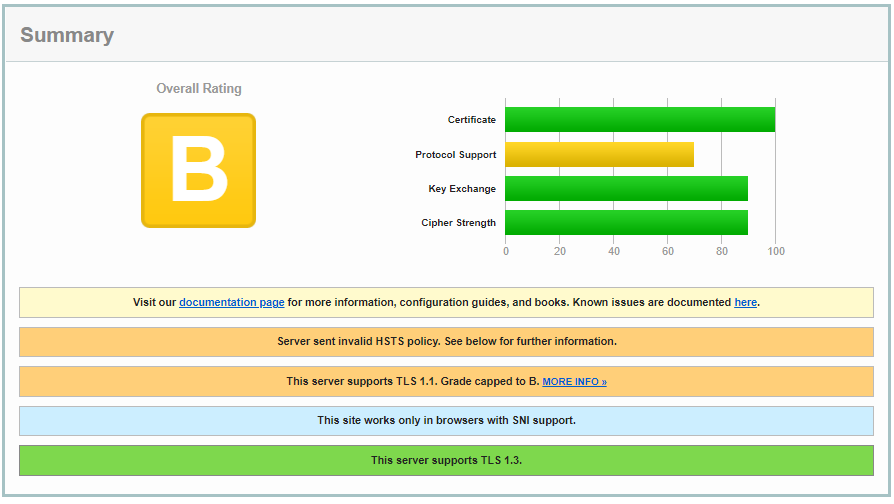
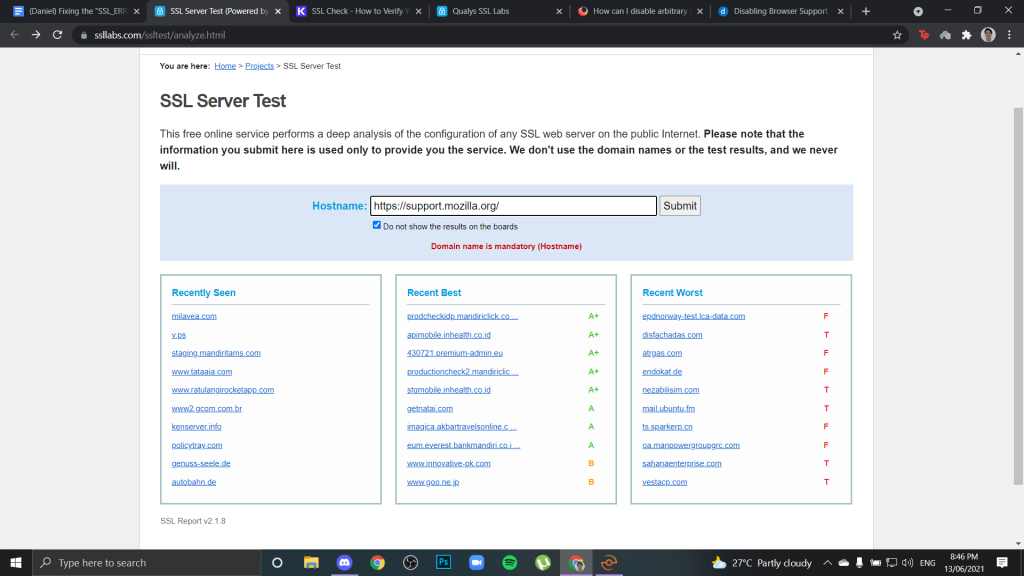
    Ensure your SSL certificate is correct and is issued by a trusted CA, which you can check from the free SSL certificate checker, and it takes only a few minutes to scan your website’s SSL/TLS configuration on your web server.

    You can use Qualys SSL Labs to check your SSL certificate.

    • Go to the website and click on ‘Test your server’.
    • In the given field, type your hostname and press enter.

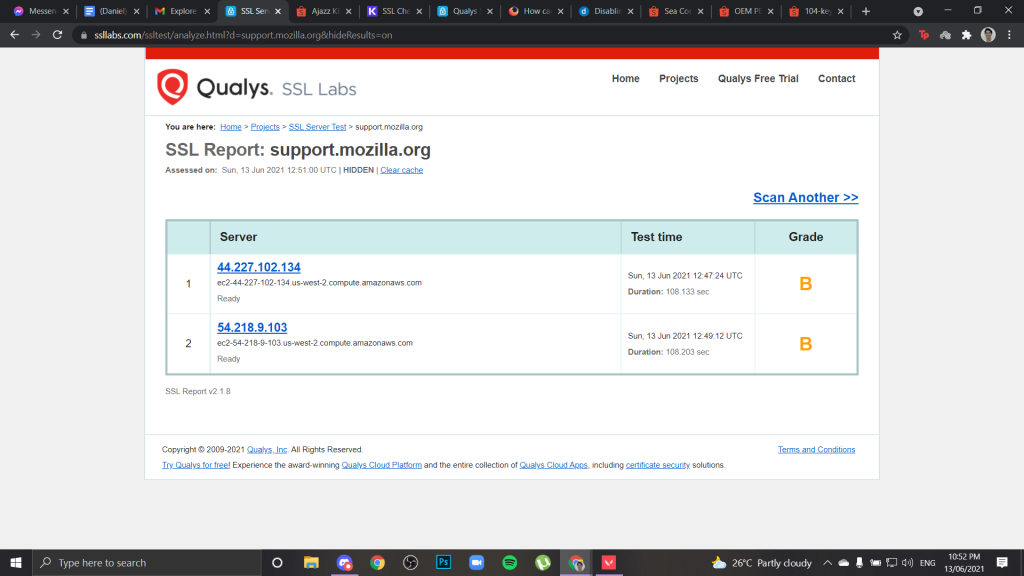
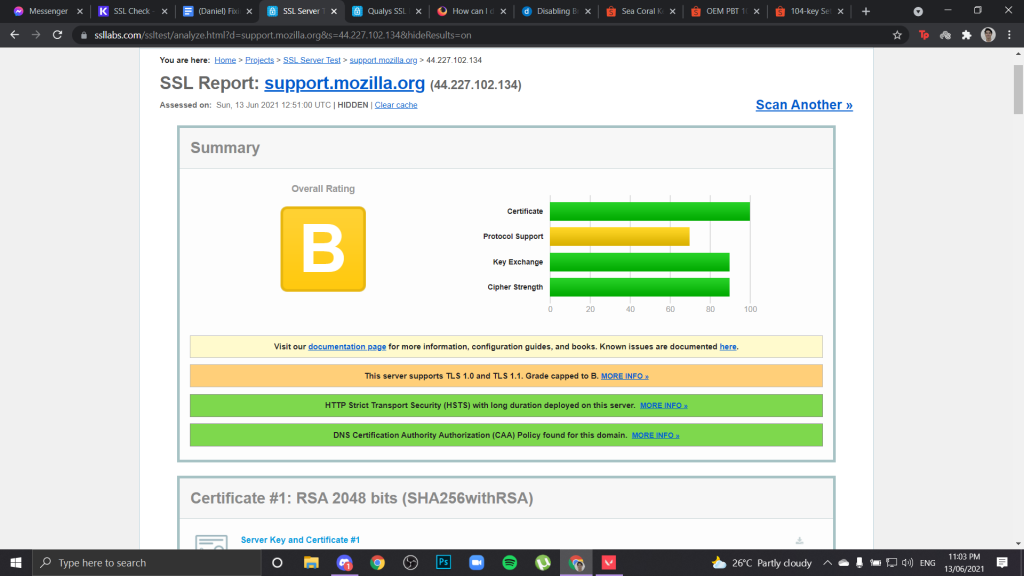
    After a few seconds, you can see all the information about your SSL certificate to ensure that everything with the certificate is okay.

    qualys ssl labs server test results

    If something turns out to be a problem and your SSL certificate is incorrect, we advise switching to an SSL certificate from a trusted CA.

    Certificate Name Mismatch

    Check if the name in the certificate is incorrect. It’s important to see if the domain name and the name on the certificate are the same. According to SSL labs, other reasons for mismatch are:

    • The website uses a content delivery system that doesn’t support SSL.
    • The website doesn’t use SSL, though the IP address is shared with a different site.
    • The website is unavailable, but the domain still mentions the old IP address, where there is some other website.

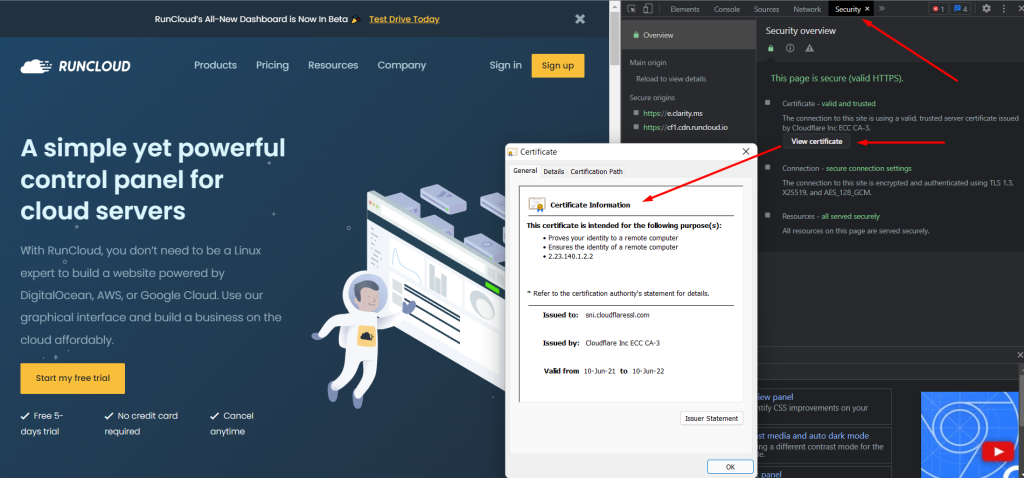
    One way to check for certificate name mismatch is through Chrome DevTools, which you can do so by:

    • Right-click on the website.
    • Go to Inspect → Security Tab → View Certificate.

    This will show all the required details of the certificate. If the information doesn’t match, then there is an issue with the certificate.

    certificate mismatch fix

    Sometimes, the error will not allow you to let in the Chrome DevTools, further confirming the issue in the certificate.

    Use The Latest Version Of TLS

    Whether an old or unsupported version of TLS is being used, the hosting service providers will generally use TLS version 1.2 or higher. Regardless, check the TLS version and look at the backward compatibility because some users might be using an old operating system that supports the older version of TLS.

    The latest TLS version can be checked by going to the server test results from your SSL labs. Just under the site score, you can see what TLS version your site supports.

    Also, it can happen that TLS 1.3 is supported by your server, but it is not enabled. You can find the same by entering ‘chrome://flags’ into the address bar of the Chrome browser. It will show you the Chrome Experimental Page, where enter ‘TLS 1.3’ into the search bar. The search results will show TLS 1.3 hardening for local anchors, where you need to select the enable button in the dropdown menu. Restart your browser and visit the website again.

    Verify The RC4 Cipher Suite

    RC4 cipher is an old encryption tool that modern browsers don’t support. If your website is still configured for RC4, you will likely face the ERR_SSL_VERSION_OR_CIPHER_MISMATCH error on the latest browsers.

    To avoid the error, move your website from RC4 or disable it and add the TLS 1.3 protocol, which you can do so by going to the configuration page of your SSL Labs and checking what is listed under the Cipher Suites. Generally, TLS 1.3 protocol should be listed there instead of RC4. But if RC4 is listed, it will be shown in red that you can disable it under the Protocol details section.

    Client-side Issues

    In case your client is using an old web browser or operating system, they are likely to face the ERR_SSL_VERSION_OR_CIPHER_MISMATCH error. The error can be avoided by:

    Updating Web Browser And Operating System

    Old web browsers or operating systems do not support the TLS 1.3 version, and because of that, SSL error occurs. Hence, it’s recommended to use the latest operating system and web browser.

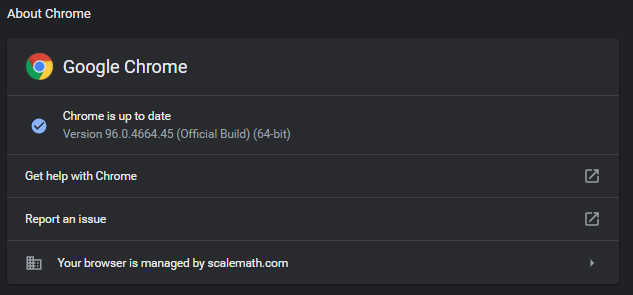
    Here we will show you how to update the Chrome browser. The steps will be similar if you’re using a different browser.

    update google chrome

    To update the Chrome browser:

    • Click on the three vertical dots → Help → About Chrome
    • The About Chrome page will show you whether you’re using the latest web version or if it needs an update
    • If it needs an update, click on the update button. After Chrome gets updated, restart the web browser and visit the website again

    Disable QUIC Protocol

    The QUIC (Quick UDP Internet Connections) protocol is a popular alternative to HTTP2, TLS/SSL, and other security protocols. It is Google’s experimental project that sends simple data packages via User Datagram Protocol (UDP) without using any connection.

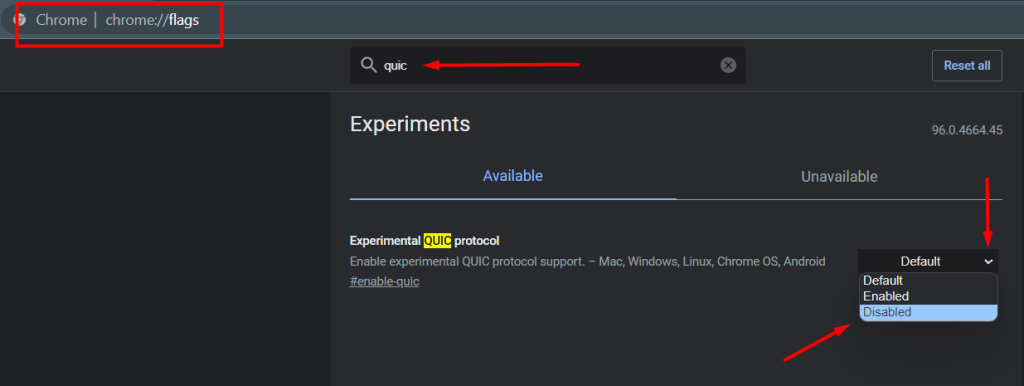
    However, using a QUIC protocol can cause ERR_SSL_VERSION_OR_CIPHER_MISMATCH error, which you can avoid by turning it off. You can disable the QUIC protocol by following the given steps:

    • In the address bar of the new Chrome Tab, type ‘chrome://flags’, which will take you to the experimental page
    • There, enter ‘quic’ in the search bar, which will show you all the searches related to ‘quic’
    • On the first few searches, you will find ‘Experimental QUIC Protocol’. Next to it, click on the disable button from the dropdown menu
    • Reboot your computer. The changes will be applied, and you can visit the website.
    disable quic protocol

    Turning Off Antivirus Software Temporarily

    Antivirus software creates a layer between the web and your browser with their certificates, creating issues with the website’s settings. Additionally, they have their SSL/HTTPS protection function that becomes a cause for the ERR_SSL_VERSION_OR_CIPHER_MISMATCH error. Thus, to avoid the issue, you can temporarily turn off your antivirus software.

    Disable your antivirus for a few minutes or for an hour, just so you can test this. Once you disabled it, try opening the website where you encountered the issue.

    If the problem persists, then your antivirus is not causing the issue. If you are, however, able to open the website without encountering this error, consider disabling the HTTPS scanning feature or selecting a different antivirus program.

    Clearing the SSL State of Your Computer.

    Sometimes your computer SSL state stores old SSL certificates that aren’t necessary anymore, which can also become a case of ERR_SSL_VERSION_OR_CIPHER_MISMATCH error.

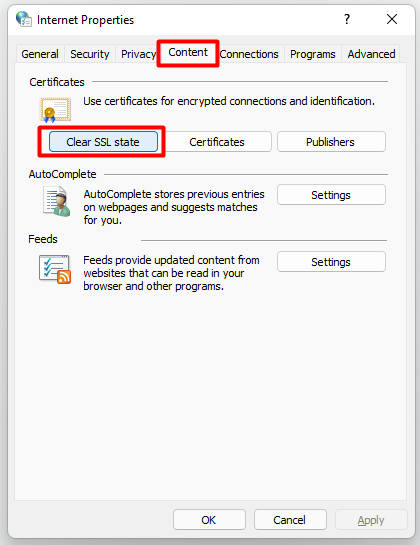
    You can clear the SSL state in Windows by following the given steps:

    • Type in “Internet Properties” in your search bar
    • Once you open the Internet Properties or Internet Options box go to the Content tab
    • Click “Clear SSL State”
    clear ssl state

    This will clean the old SSL certificates and obtain a new one once you go back to Chrome, visiting websites.

    What If the ERR_SSL_VERSION_OR_CIPHER_MISMATCH Error Persists?

    Even after checking through all the above-mentioned solutions, if you still face the ERR_SSL_VERSION_OR_CIPHER_MISMATCH error, then try:

    • Resetting your computer’s date and time.
    • Delete all the cookies and cache from your web browser.
    • Upgrade your operating system.
    • Or, try using a different device.

    Sometimes, not having a system up-to-date also contributes to the issue. But upgrading your web browser and resetting your computer’s date/time will fix the error.

    Conclusion

    Running into SSL errors is without a doubt not enjoyable – especially if it’s for your own site. We hope this guide has helped you get to the bottom of the SSL error you ran into today.

    If you have any other questions about the ERR_SSL_VERSION_OR_CIPHER_MISMATCH SSL error and how to fix it – join the conversation & leave a comment below!

  • The 15 Best Performance Testing Tools to Improve Your Site

    The 15 Best Performance Testing Tools to Improve Your Site

    In May of 2021, Google made Core Web Vitals a direct ranking factor which means website performance and user experience has never been more important.

    In order to figure out how the website performs, there are numerous performance testing tools that you can use and get all kinds of data. Also, it’s important to know for what are you actually using testing tools.

    Performance testing tools can be speed tests, load tests, stress tests, pretty much any tool that simulates real-life situations and provides you with data you can use to optimize your processes and performance in general.

    Eventually, you will need the knowledge to read the data, but for this article, we’re going to cover the best performance testing tools to improve your site.

    The Best 15 Best Website Performance Testing Tools

    Let’s take a look at some of the best performance testing tools that can help you to decide which to choose based on your testing needs.

    1. Google PageSpeed Insights

    google pagespeed insights new performance testing tool homepage

    Unsurprisingly, one of the first solutions comes straight from Google — Google PageSpeed Insights.

    With this amazing software, you can see exactly how Google sees your website in terms of loading time, overall performance, and issues that may occur.

    Also, don’t find it surprising if results from Google PageSpeed Insights don’t match other testing tools’ results. The reason for this is that Google PageSpeed Insights is testing your website using a 3G connection so results may vary. Given that website, performance has a big impact on SEO, the most useful way to gauge how Google views your site’s performance (which is no longer just loading time will be using Google PageSpeed Insights and the Core Web Vital metrics it produces).

    Pricing: Google PageSpeed Insights is a completely free tool with no membership plans.

    2. GTMetrix

    gtmetrix performance testing tool homepage

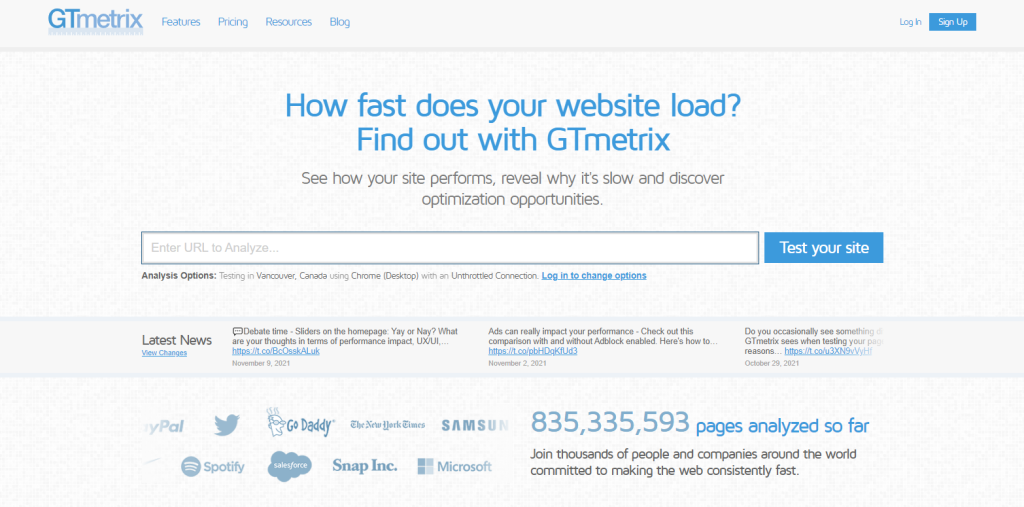
    GTMetrix is an amazing and very popular website testing tool and with it, you will be able to get a ton of insight into how your site is performing.

    The most popular option GTMetrix has is definitely “waterfalls” which can show you the exact process of what’s happening when someone is opening your site and that way you can actually see what’s slowing down your website.

    Pricing: GTMetrix has a free plan that can satisfy the needs of most users. However, if you need even more data, they have a lot of plans starting from $10 per month.

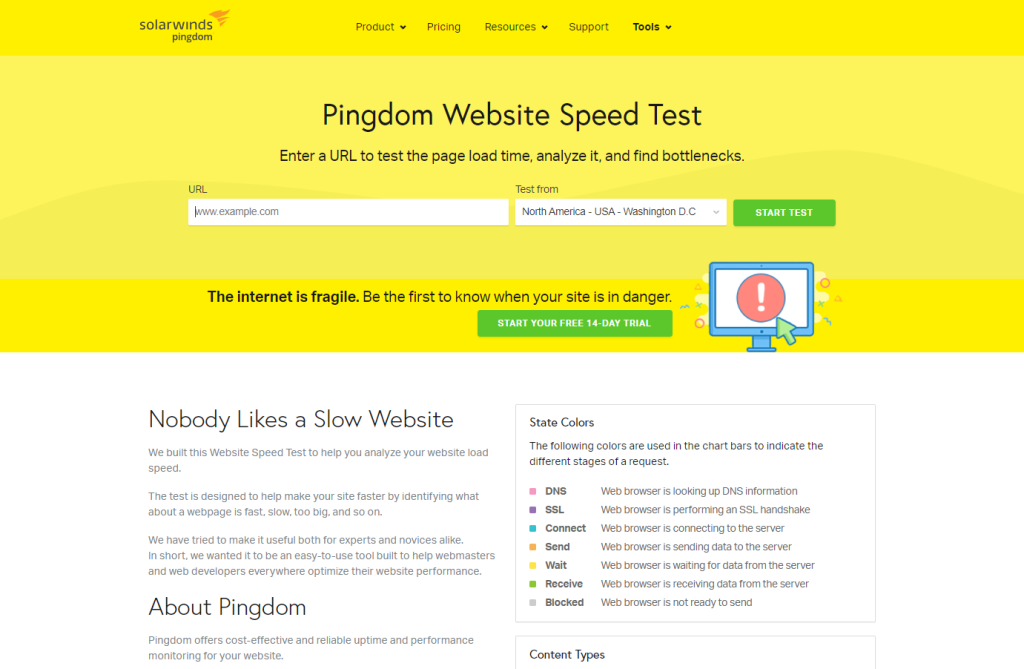
    3. Pingdom

    pingdom performance testing tool homepage

    So, Pingdom also analyses load speeds, and just like with its successors you can use it to learn how to make your website load faster.

    The special thing that Pingdom has is that it automatically traces your performance history. So every month when you go and test your website, you can see whether the changes you’ve made have increased the performance of that webpage, and the loading speeds for it.

    What you can also do with Pingdom is choose different locations around the world to test your website from.

    So, if you’re based in the US, you’re looking at your website from Austin, it’s hosted in Houston, the page load speed are naturally gonna be quicker than if somebody’s looking at your website in London, for example, because it’s gotta cover that extra distance.

    Pricing: They offer free testing, but if you require a monitoring tool or simply more data, you can choose some of their paid plans.

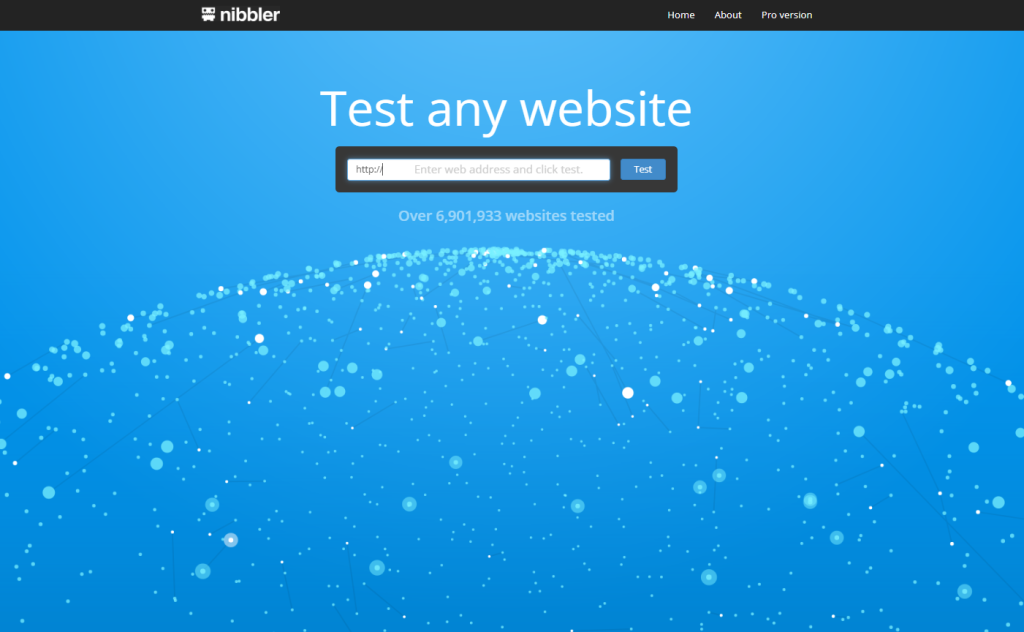
    4. Nibbler

    nibbler performance testing tool homepage

    Nibbler is run by a company called Silktide, and they’ve also got a

    The premium version of it is called InSites.

    Their report is quite different from Google PageSpeed Insights, GTMetrix, and Pingdom as they tend to focus on digesting the entire website and providing you with tips and tricks on how to improve.

    They are not just testing performance in terms of speed but also in terms of SEO, where they review links that your website is getting and grade them accordingly.

    Pricing: Nibbler allows you to run up to 17 free tests, and after that, you’ll have to switch to their premium version called InSites, which starts at $99 per month.

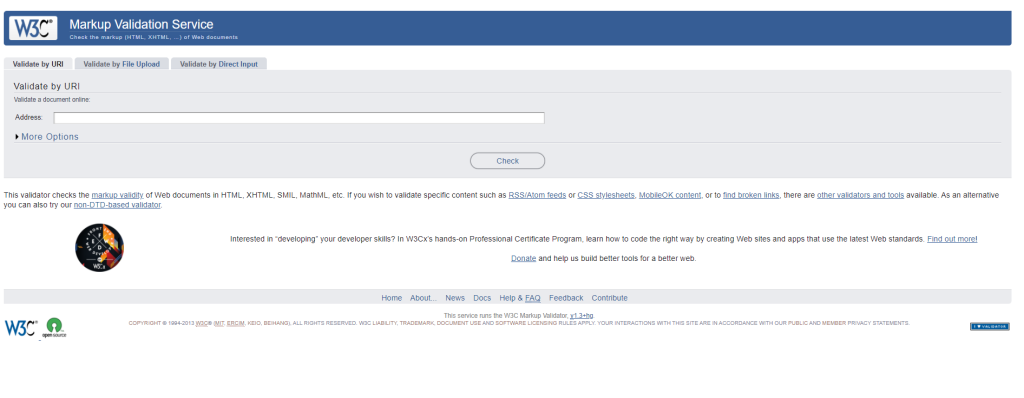
    5. W3C Validation Tool

    w3c performance testing tool homepage

    Indifference to other performance testing tools, W3C Validation Tool will check your website’s code in order to make sure that your website complies with formatting standards.

    Benefits of validating your website with W3C Validation Tools may be but are not limited to:

    • Improved SEO rankings
    • Better coding practices
    • Improved user experience
    • Making your website browser friendly
    • Detecting coding errors

    Pricing: W3C Validation tool is free to use.

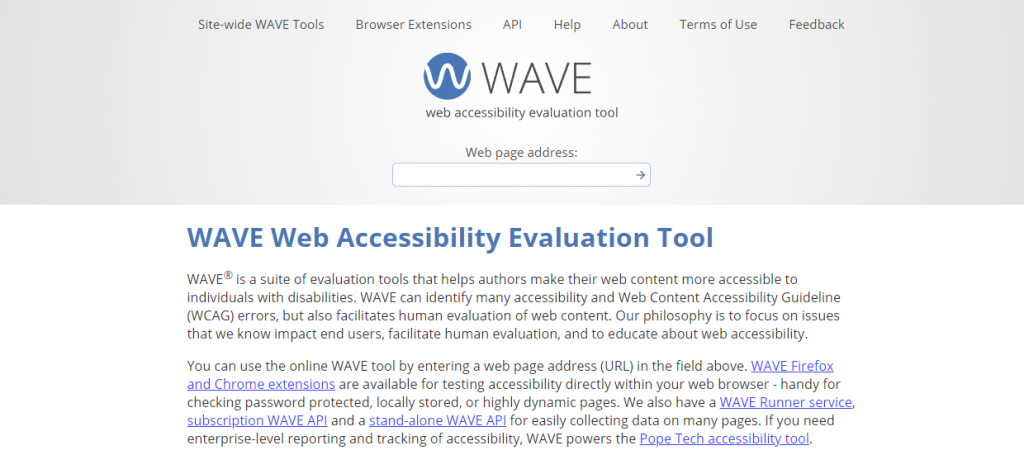
    6. WAVE Accessibility Tool

    wave accessbility tool performance testing tool homepage

    WAVE is a free web accessibility evaluation tool that identifies ways to make your website more accessible to people with disabilities.

    While it is true that WAVE can identify many accessibility errors automatically, you should identify any accessibility issues manually.

    Even though this tool may not be important as speed and load performance testing tools, it will most certainly help you improve the user experience for users with disabilities.

    Pricing: WAVE is completely free to use.

    7. WebLOAD

    radview webload performance testing tool homepage

    WebLOAD is an enterprise-scale load testing tool that can create proper and real-life scenarios, even in complex use cases. It is mostly used by performance testing services with complex and heavy user load requirements.

    You can use WebLOAD to conduct stress and load testing on any web-based software by generating load from on-premise systems and the cloud. It supports different technologies including web protocols to enterprise applications. It can work with different integrations like Jenkins, Selenium, and other applications that support continuous load testing for DevOps.

    • WebLOAD offers website load testing, cloud load testing, continuous load testing, etc.,
    • You can test heavy traffic loads, constraints, performance bottlenecks, report weak points in your web application.
    • It offers analysis reports for performance data that help users to identify bottlenecks.
    • WebLOAD supports XML, HTTPS, and HTTP network protocol.
    • Automatically enters dynamic values such as enable scripts and session IDs and enable scripts to execute with different virtual clients.

    Pricing: They offer a free trial option for up to 50 users. You will have to contact their sales team to get a quote.

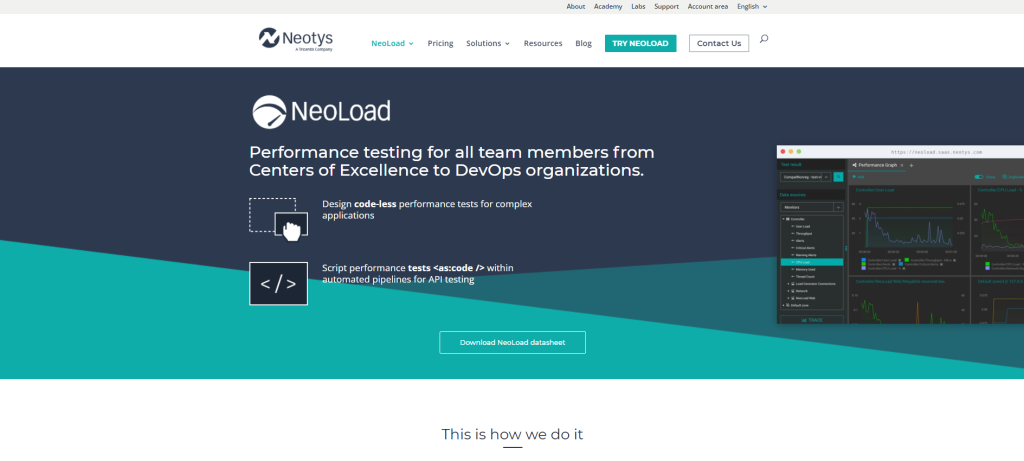
    8. Neoload

    neotys neoload performance testing tool homepage

    Neoload is a performance testing tool that will help you with test design automation, maintenance, and analysis for Agile and DevOps teams. Neo load integrates with continuous delivery pipelines to support performance testing across the life cycle, from component to the full system-wide load tests.

    • Automated test design enables 10 times faster test creation and updates than traditional solutions
    • Integration with CI servers for automated test runtime
    • Collaboration that is shared test scripts and reports in real-time and after test completion through an on-premise web interface
    • 70 different localizations available for hybrid on-premise and cloud load generation
    • Protocols supported are HTTP, HTTPS, SOAP, REST, Flex push, AJAX push

    Pricing: Neo load offers a wide range of subscription-based licensing and their policy is pay-as-you-grow. For exact numbers, you’ll have to reach out to them.

    9. Load Runner

    loadrunner performance testing tool homepage

    Load runner is a software testing tool from Micro Focus that is used to test applications, measure system behavior, and performance under load.

    • it lowers the cost of distributed load testing
    • scale from single projects to a full-scale testing Center of Excellence that consolidates hardware, standardizes best practices, and leverages global testing resources
    • Reducing the risk of deploying systems that do not meet performance requirements through the use of effective enterprise load testing
    • Lowering hardware and software costs by predicting system capacity
    • Fast and accurate identification of the root cause of app performance problems
    • effective tool utilization tracking is also available
    • the browser-based access to global test resources an optimal usage of low generate the farm is also present
    • all protocols supported

    Pricing: Load Runner has a free trial on all solutions.

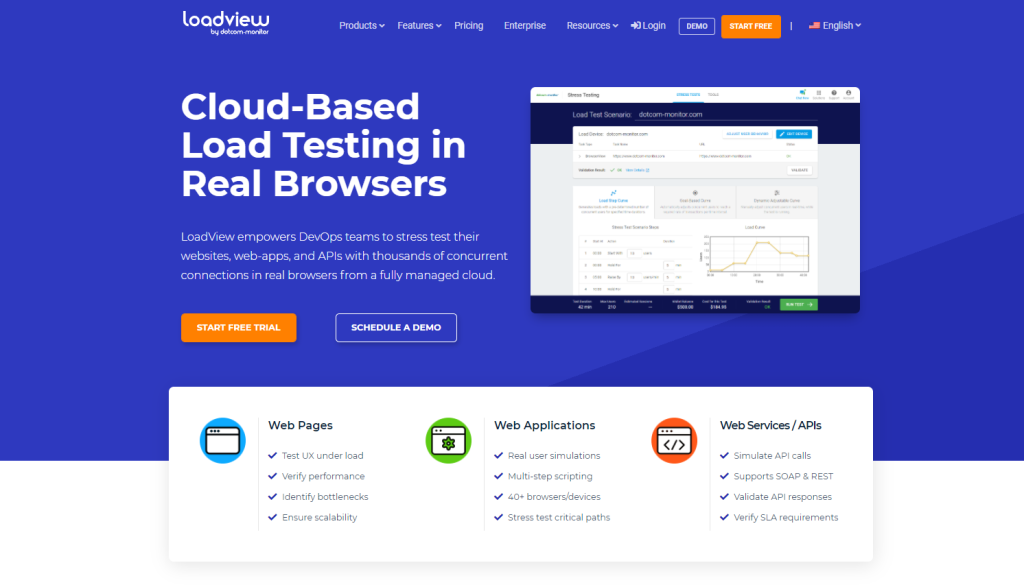
    10. LoadView

    loadview performance testing tool homepage

    LoadView is one of the most popular performance testing sites. It works on the basis of on-demand and is a fully-managed load testing and stress-testing tool. The testing done by the LoadView is performed in real browsers, which totally separates it from all other common performance testing tools. And the result you get after testing is real close to what the actual user will do and is highly accurate.

    LoadView is a fully cloud-based testing tool that can be deployed within minutes. It also lets you create multi-step scripts simulating user interaction with your website or application.

    • In LoadView, you can define duration, users, behavior in various scenarios and simulate users with load injectors from 30 different global locations.
    • It offers three load curves: Dynamic Adjustable curve, Goal-based curve, and Load Step curve, to check infrastructure limits, scalability, and check traffic spikes.
    • All the run tests are performed behind a firewall as LoadView provides secure IPs which you can use and configure.
    • Supports different internet applications like Silverlight, HTML5, Java, PHMP, and Flash.
    • You can easily share performance metrics and reports.

    Pricing: Basic pricing starts at $199 for 1000 concurrent users.

    11. StressStimulus

    stress stimulus performance testing tool homepage

    StressStimulus is another popular performance testing tool as it can handle complex testing scenarios that is not possible for other performance tools. Usually, it works automatically by fixing playback errors through its autocorrelation feature. StressStimulus records users’ actions before replaying them to emulate changing usage patterns.

    • Keeps track of load impact on the responsiveness of the software and the server infrastructure.
    • Provides in-depth performance metrics.
    • Detects hidden concurrency errors.
    • It can be used as a Fiddle independent or add-on tool.
    • It has an end-to-end test wizard which covers all steps and reduces the learning curve.

    Pricing: Basic pricing starts at $0 and goes up depending upon the number of users.

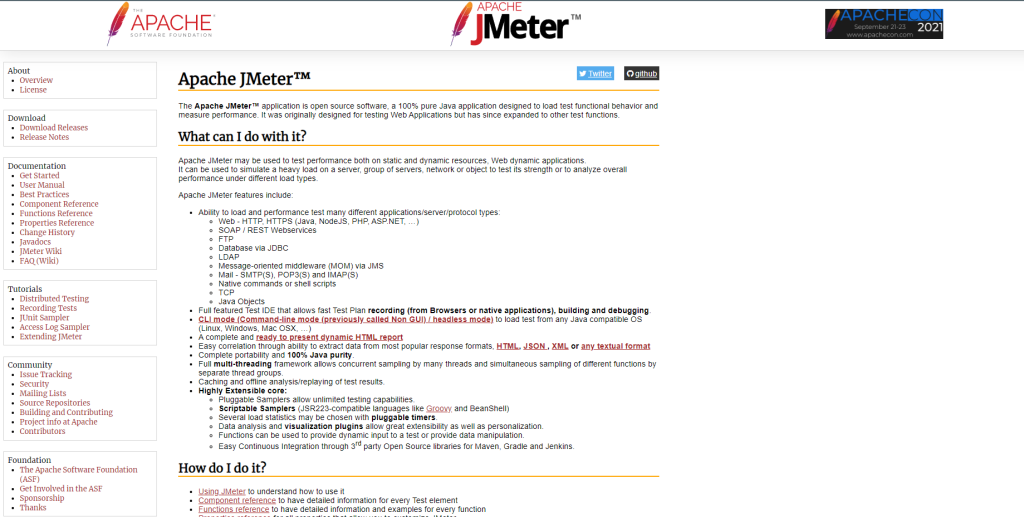
    12. Apache JMeter

    apache jmeter performance testing tool homepage

    Apache JMeter is an open-source tool, which is used for load and performance testing. It allows you to analyze and measure the performance of different web applications including networks and servers.

    Apache JMeter is based on Java that is mainly used to test web performance.

    • It has a user-friendly GUI which makes it easy to use and needs less scripting as compared to other performance testing tools.
    • It has a fully-featured IDE which allows easy creation of tests, debugging, and recording.
    • It supports Java, HTTP, HTTPS, SOAP, XML, FTP, and other different protocols.
    • It can integrate with different open-source libraries, like, Maven, Gradle, etc.,

    Pricing: Apache JMeter is an open-source tool and is free to use.

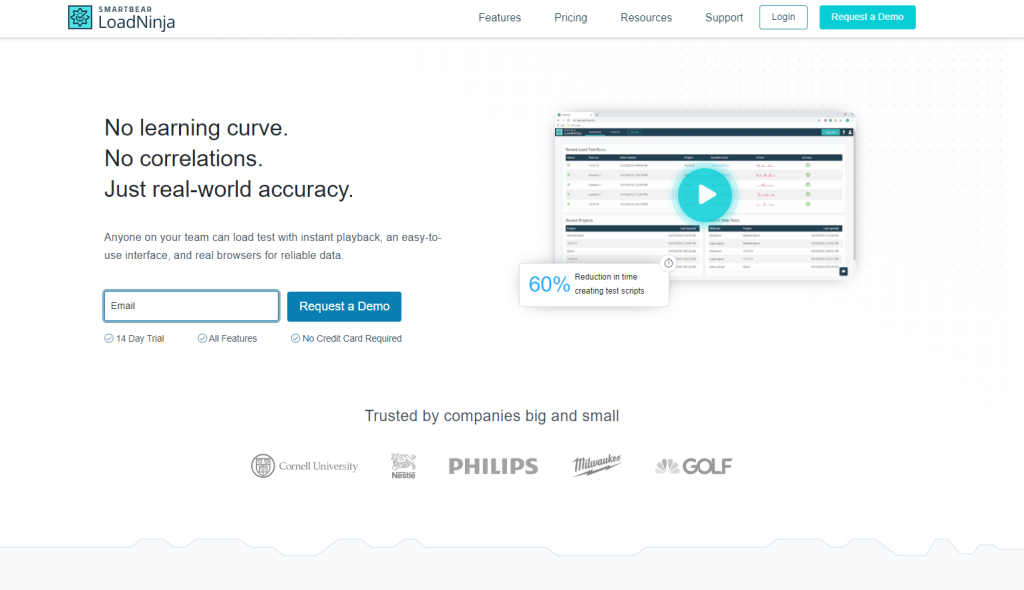
    13. LoadNinja

    loadninja performance testing tool homepage

    LoadNinja lets you check out app performance issues with highly actionable and accurate data. It is pretty easy to use and gives results that are easy to read. It figures out and analyzes application performance data like asynchronous calls, navigation timings, processed resources, and strep times on your web interface and identifies problems using a machine learning assistant.

    • LoadNinja is useful for testers, engineer teams, and product teams so that they can pay attention to developing their tool without spending all of their time creating scripts.
    • It lets you record client-side interactions, figure out performance issues, and correct them in real-time without losing text quality by removing translation, test scrubbing, and dynamic correlation efforts.
    • You can perform automated tests by using their Rest API or CI/CD plugins.

    Pricing: Basic pricing starts at $1,439/year for 100 load hours and 100 virtual users.

    14. SmartMeter.io

    smartmeter io performance testing tool homepage

    If you want to address the drawbacks of Apache JMeter, then SmartMeter.io will be a good choice. You don’t even need a proxy setup or browser plugin tool that helps you to create and record test scripts easily. It gives in-depth test reports and provides test run trends, test criteria assessment, and comparison analysis.

    • Supports CI/CD integration.
    • It provides an advanced response body extractor.
    • Gives GUI test runs and real-time results.
    • Develop numerous virtual users from different global locations using load generators.

    Pricing: Basic pricing starts at $39/month.

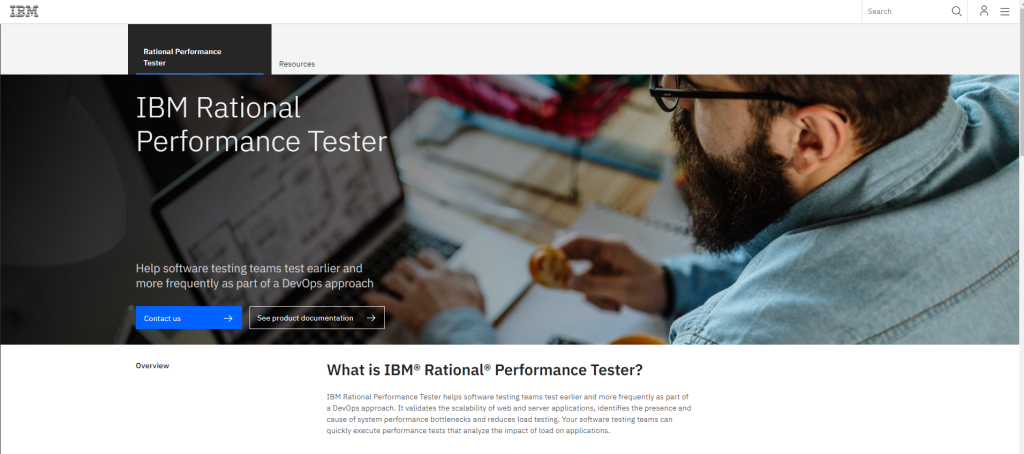
    15. Rational Performance Tester

    IBM Rational performance tester performance testing tool homepage

    Developed by IBM, it is an automated performance testing tool for web-based and server-based applications. It lets you conduct full environment analysis by identifying slowdown causes for J2EE interfaces and apps by using a product of IBM Tivoli.

    • It supports different protocols like Citrix, Web HTTP, SOA, Weblogic, etc.,
    • Supports scriptless testing.
    • Large testing can be done easily by including different users.

    Pricing:

    You’ll have to contact them to get a quote.

    Frequently Asked Questions

    What are the benefits of Performance Testing?

    Performance testing plays an essential role in any type of development – a simple website or complex application. Some benefits of performance testing are:

    • Measuring speed, accuracy, and stability of your software/website
    • Identifying issues and discrepancies
    • Knowledge of what exactly needs to be optimized
    • Drastically improved user experience
    • Reduced cost of maintenance in the aftermath

    What are the different types of performance testing?

    These are the types of performance testing:

    • Load testing – check applications ability to perform under anticipated user loads
    • Endurance testing – make sure your software can handle the expected load over a long period of time
    • Volume testing – monitor overall system behavior when a large number of data is populated in the database
    • Scalability testing – determine software application effectiveness in scaling app to support an increase in user load
    • Spike testing – monitor software reaction to sudden large spikes in load generated by users
    • Stress testing – test the application for handling high traffic or data processing

    What is the best performance grade for a website?

    Depending on the tool you’re using, you should always aim for the highest possible score in order to achieve maximum performance.

    All tools have different evaluation criteria, so it’s impossible to tell you the exact number you should aim for as some use 0-100 scale, others A-F, etc.

    How can you test a website’s performance?

    Depending on your needs and type of performance, there are multiple tools you can use to test a website’s performance.

    When it comes to the performance of the simple website you can use tools like Google PageSpeed Insights, GTMetrix, Pingdom, Which Loads Faster, etc.

    If you have an app going on your website you can use SmartMeter, WebLOAD, LoadNinja, SmartMeter, etc.

    Basically, any of these tools will help you. You just have to figure out what you need help with!

    Is Google PageSpeed Insights accurate?

    Yes, in terms of website performance, Google PageSpeed Insights is considered an accurate performance testing tool. And this is especially true as it relates to user experience as it uses the Core Web Vitals metrics that are a confirmed Google ranking factor.

    Why is my website so slow?

    There are multiple reasons why your website might be slow and some of them are

    • Bad (i.e. unreliable) hosting/webserver
    • Poor site development
    • Large, uncompressed images
    • No caching in place

    We suggest using some of the tools mentioned above to identify true causes of bad website speed – GTMetrix and Google PageSpeed Insights will definitely help with pointing out problems and providing you with a detailed waterfall chart.

    If you’re looking to take complete control of your cloud infrastructure & ditch the busy work of managing servers – that’s exactly what we built RunCloud for. So that you can deploy with confidence, knowing your stack is constantly kept up-to-date, secure, and as fast as possible.

    Learn more & start your 5-day, free trial today.

    After Action Report — Start Using Performance Testing Tools

    We’ve covered the very best performance testing tools there are — so now, the ball is in your court. It’s time to get started. We suggest focusing on a handful at a time because each of them assesses your site’s performance in different ways and therefore provides insights that require different types of work to be done (allowing different types of improvements to be made to your site’s performance and user experience).

    What performance testing tools do you currently use? Join the conversation & let us know in the comments. 💬

  • How to Fix the 504 Gateway Timeout Error

    How to Fix the 504 Gateway Timeout Error

    You may have encountered the 504 Gateway Timeout Error a few times while trying to visit websites.

    It can be frustrating as the 504 Gateway Timeout Error is one of the most common errors faced by users and site owners. Unfortunately, it’s also a mysterious error because it doesn’t specify what the issue is.

    If you own a website or a blog, it will be helpful to understand what the 504 Gateway Timeout Error is, find out what is causing it, and ultimately fix it.

    This article will help explain all you need to know about the 504 Gateway Timeout Error.

    What is the 504 Gateway Timeout Error?

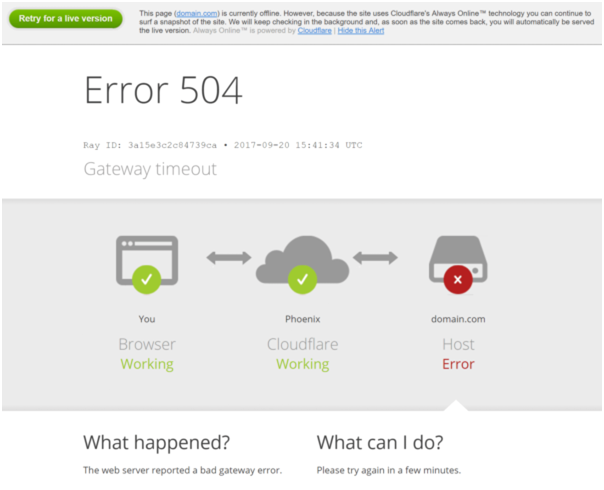
    In simple terms, the 504 gateway timeout error happens when the website doesn’t receive a timely response from a server. Each time you visit a website, the browser will send a request to the server where the site is hosted. The server processes the requests and responds to the website with the requested resources.

    The 504 gateway timeout error is mysterious and can be challenging to fix. It indicates the server was unable to process the request, but it doesn’t tell you why it was unable to do so. It also tells you the server is aware it couldn’t carry out the request but was unable to fix the issue in time.

    Variations of the 504 Gateway Timeout Error

    Depending on your operating system and browser, the 504 gateway timeout error can appear in various ways.

    Some of the common 504 error messages may look like this:

    • HTTP 504
    • HTTP Error 504
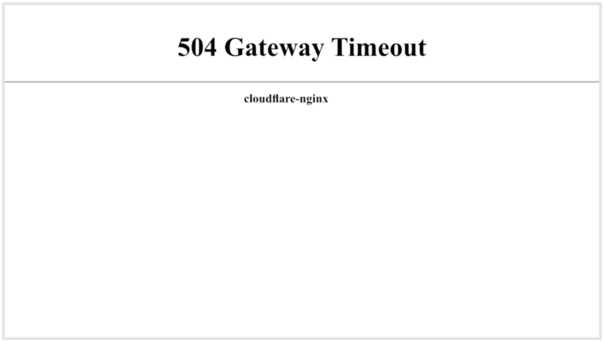
    • 504 Gateway Timeout
    • The page isn’t working – Domain took too long to respond

    Your browser and certain websites can customize how the error message is displayed. Though the message can be worded in different ways, it points to the same server error.

    Potential Causes of the 504 Gateway Timeout Error

    So, what could cause the 504 gateway timeout error? Since the error refers to the server timing out on a request, it usually points to an issue with the network rather than with the device.

    server overheating causing 504 gateway timeout error

    Some of the possible causes could be:

    • Server is currently not working or under maintenance
    • Server is not functioning properly
    • Connection between server and internet was interrupted
    • Server may be overloaded with requests

    Now that you understand the issue sits with the server and not the client-side, you can eliminate your device or internet connection when trying to fix the 504 gateway timeout error.

    How to Fix the 504 Gateway Timeout Error: 5 Ways

    It can be a challenge to figure out what is causing the timeout error. Since this is considered a network error in the server and not with your computer, there are many reasons why the error message popped up, which we’ll talk about later in this article. Here are a few things you can do to try fixing the issue.

    1. Reloading Your Website

    You can try reloading the website you’re trying to visit. If you’re trying to visit the website on your computer, you can click the refresh button or the F5 key to see if it was just a temporary interruption with the connection. Otherwise, you can also try some of these suggestions.

    • Turn off your VPN, then refreshing the website
    • Try another browser
    • Restart your browser

    Some 504 gateway timeout errors happen when the server is temporarily overloaded. By clicking refresh or reload, the website will send out a new request to the server. If it was just a temporary overload or connection issue, the website should load in your browser.

    2. Restart All Network Devices

    A temporary disruption in your network connection can cause the gateway timeout error. You can try restarting all your network devices, including your modem and router to see if it will fix the issue.

    It’s as easy as unplugging both your router and modem, then waiting for 30 seconds before plugging it back in. You’ll have to wait another 60 seconds to start everything up and see if the issue persists.

    3. Check The Proxy Server Settings

    Check the proxy settings in your browser and application, and make sure they’re correct. Incorrect proxy settings can cause 504 errors. Some computers don’t have proxy settings at all.

    If you have Windows 10 or Windows 11, you don’t have to set your proxy settings in each browser. You can check and change the settings directly in Windows 10 or Windows 11, and it’ll apply to Google Chrome, Opera, Microsoft Edge, and Firefox.

    Here are the steps:

    1. Open the Start menu and select the gear icon (Settings).
    2. In Settings, select Network and Internet.
    3. In the left-hand pane, click Proxy.
    4. You’ll be able to view all the proxy settings in Windows. Everything should be set to off. If there is something turned on, it means your web traffic is going through a proxy.

    The steps are similar if you are using macOS. This will apply to the settings in Safari as well:

    1. Open System Preferences and select Network.
    2. On the left tab, make sure to select the active network connection.
    3. Then click Advanced at the bottom
    4. Select Proxies.
    5. You’ll see a list of proxy servers you’ll be able to configure.

    You can follow these steps if you’re using Internet Explorer:

    Open Internet Explorer, then click Internet Options.

    1. Click on the Connections tab, then LAN settings to open the LAN settings window.
    2. If you’re using a proxy server with a URL, check the box for “use automatic configuration script”.
    3. Then in the Address field, type the URL.
    4. If you’re using a proxy server with an IP address, check the box for “use a proxy server for your LAN”.
    5. When you’ve made your selections, click OK to save your changes

    In most cases, everything in your proxy settings should be set to off, or to “automatically detect settings”. This allows your computer to automatically select the best proxy settings for you.

    4. Change DNS Servers

    If you’ve tried connecting to the website on other devices but you’re still getting the same error message, you can consider changing your DNS servers. The Google Public DNS server provides a secure DNS connection. You can change your DNS server to some of the free public DNS servers listed below.

    • Google DNS – 8.8.8.8
    • Cloudflare – 1.1.1.1
    • OpenDNS – 208.67.222.222

    It’s possible the DNS server you’re using is causing the issue with the 504 gateway timeout error. We’ve listed the steps you can take to change your DNS server.

    Changing DNS server on Windows:

    1. Open the Start menu and select the gear icon (Settings).
    2. Once you’re in settings, click Network and Internet.
    3. Select Change adapter options.
    4. Right-click your chosen internet connection and select Properties.
    5. Click Internet Protocol Version 4, then click the Properties button.
    6. Click the item labeled Use the following DNS server addresses.
    7. Enter your two chosen addresses.
    8. Click OK to save your changes.

    Changing DNS server on macOS:

    1. Select Preferences from the Apple Menu.
    2. Launch the Network app.
    3. Select your internet connection and click the Advanced button.
    4. In the Advanced window, select the DNS tab.
    5. Use the plus-sign on the right to add your chosen DNS addresses.
    6. Click OK to save your changes.

    If you decide to change the DNS server on your router, just remember that this will affect all your connected devices. This also includes smart appliances and home security. Before starting, search “how to change DNS” for the make and model of your router. You’ll need instructions that are specific to your router’s model.

    5. Temporarily Disable Your Site’s Content Delivery Network

    The content delivery network you’re connecting to can sometimes cause the error message. If the website’s origin server is unreachable, the CDN will try to load the website from its cache. However, some CDNs don’t have this feature enabled as it can be complicated to cache certain assets on websites. An easy way to do this is to temporarily disable your CDN.

    The WordPress Popup plugin uses a CDN server to store files like images, and CSS libraries. You can temporarily disable this with the following steps:

    • Head to the WordPress admin area of your website.
    • Under the Settings tab, select the Popup plugin.
    • Activate the “Disable CDN usage” option.
    • Save changes.

    If you’re using the Onyx CDN, you can follow these steps:

    • Login to your Onyx dashboard.
    • Select the website you want to disable the CDN for.
    • In the left-hand menu, select CDN.
    • Select the Disable CDN button.

    WP Engine utilizes MaxCDN in their CDN offering. It only offloads wp-content directory files including images, CSS and Javascript. If you’re using WP Engine’s CDN, you can use these steps to temporarily disable the CDN:

    1. Log in to the User Portal.
    2. Click Sites.
    3. Select the production environment name.
    4. Select CDN.
    5. Uncheck the box on the right to indicate you’re disabling CDN.
    6. Be sure to save your changes.

    Various Examples of 504 Gateway Timeouts (How the Errors Look/What the Differences Are)

    There are two main ways the 504 gateway timeout error can show up on your screen. It can be helpful to differentiate between the two to find out where the issue lies.

    Certain CDNs, like Cloudflare that provide full proxy services, have additional firewalls between their servers and yours. This may cause you to encounter the error message more frequently.

    The error message above usually occurs when the issue is caused by Cloudflare itself. If you see this message, it’s advisable to contact their user support or check their status page.

    A custom error message like the one above indicates the issue is with the webserver and not Cloudflare. You can see from the diagram where the issue lies. If you own a website and encounter this message, you can get in touch with your hosting provider for support.

    In Windows-based programs, the 504 gateway timeout error might pop up in a small dialog box with a message saying HTTP_STATUS_GATEWAY_TIMEOUT. A Windows update will generate an error code 0x80244023 or display an error message WU_E_PT_HTTP_STATUS_GATEWAY_TIMEOUT.

    Why Are You Seeing The 504 Gateway Timeout Error Message?

    There are many reasons why you would encounter the 504 bad gateway timeout error message. We’ve listed some of the more common reasons below.

    1. Server Issues (Check With Your Host)

    One of the reasons why you would encounter the 504 gateway timeout error message is server issues. This is especially common with high-traffic websites like WordPress blogs, e-commerce sites, or online stores.

    There are a few steps you can take to troubleshoot the issue and decide if you should contact your host.

    1. Try accessing the website from other devices, for example, your mobile phone. If you are able to view the website on your mobile phone, but not your computer, it tells you the problem lies with the settings in your computer and not the server. However, if it does not work on all your devices, you should call your hosting provider for assistance.
    2. Websites like Downdetector will also be able to tell you if the website is currently experiencing technical issues and if other people are having problems connecting to it.
    3. You can also do a Google search “is abc.com down” or check Twitter to see if other people are experiencing the same issue.
    4. It’s recommended for you to check your WordPress host’s status page as well.

    You should check with your host if they have plans or resources to fix this issue if it happens regularly. However, there can be other reasons for the error message.

    2. Firewall Issues

    Improper configuration can cause your server’s firewall to have some errors. It could be that a few of the firewall’s rules are preventing the server from establishing a proper connection.

    You can check your server’s error logs to see if your firewall is the one causing the issues. To view the raw access and WordPress error logs via FTP, you can follow these steps.

    1. Connect your site via SFTP.
    2. You’ll see a folder named “logs” in the root folder.
    3. Your access and error logs will be in that folder.

    3. Slow Server Infrastructure

    The server you’re using to host your website may not have enough resources to handle the traffic. This happens when the server is overloaded, causing it to timeout while trying to load the website. You can fix this by upgrading to a server with better and stronger infrastructure.

    4. Network Connectivity problems

    Issues with the connection between the proxy server and your web server can be the cause of not responding to requests. A load balancer can also cause network connection issues.

    5. HTTP Timeouts

    HTTP timeouts happen when the connection between the web server and the client is kept open for too long. If you’re using WordPress websites, this can happen with WordPress imports. One easy way to solve this is to just switch to a better internet connection.

    6. Needs more PHP Workers

    Each website requires different resources. An online business website will require more resources than a blog because it receives more traffic. PHP workers are used to executing your website’s code. If the PHP workers are busy, a queue will build up. If the queue gets too large, the server will forgo old requests for new ones, which causes the 504 gateway timeout error. You can request more PHP workers from your host to avoid this.

    7. Spam, Bots, or DDoS Attacks

    If your website has been attacked by DDoS or spammed by bots, it can overload the server. You can troubleshoot this by requesting a report from your host provider. 

    spam, bots and ddos attacks cause 504 error

    There are three reports you can look at. The first is the top-end customer’s IP addresses which is useful if you notice your website is suddenly generating a lot of traffic. You can use this to distinguish if the traffic is genuine or if your website has been attacked by bots.

    The second is the requests and bots report. You can compare the number of people visiting your website versus the number of bots. The third report is the cache analysis report. In this report, you can see what requests are missing in the cache. You should try to cache as many requests as possible to provide the best stability for your website.

    8. Corrupted WordPress Database

    A corrupted WordPress database or files can cause 504 gateway timeout errors. This can also happen if your website is experiencing security issues or has been hacked. Repairing the database will depend on the problem it’s having. Certain plugins like WP-DBManager can help you diagnose any issues with the database and repair them.

    Troubleshooting (Health Mode)

    There are a few ways you can tell if there is a problem with your WordPress database. One of them is the “error establishing a database connection” message. You can troubleshoot the database issues by understanding the common problems we’ve listed for databases.

    • Connection problems
    • Incorrect credentials
    • Corrupted database tables or files
    • Limited or exceeded PHP Memory
    • Your website has been hacked

    Check Your Site’s Plugins, Theme, and Server Error Logs

    There is a small chance that third-party plugins can cause server timeouts by queuing up one too many uncached requests. This takes up a lot of PHP workers and can cause the 504 gateway timeout error to occur.

    You can simply troubleshoot this problem by deactivating all your plugins and checking if your site is working properly.

    If it does, you’ll then have to enable each plugin and test the site after each plugin has been enabled. You should also ensure your WordPress core, including the plugins and themes, are updated.

    1. Configure Apache or Nginx Settings Properly

    Bugs and faulty plugins in the Apache or Nginx can cause the 504 bad gateway timeout error. You’ll need to analyze the error logs to find out if this is the case.

    2. 504 Gateway Timeout Error on Nginx + FastCGI (PHP-FHM)

    The 504 gateway timeout error is common when using Nginx with PHP-FHM. This usually means the PHP-FHM took a longer time to generate the response. Some of the reasons for this to happen could be:

    • The web server was overloaded and it took longer than usual to process requests.
    • The database behind the PHP application was slow
    • Nginx timeout configuration included small values

    A great way to fix this is to increase the PHP maximum_execution_time, and PHP-FHM request termination time.

    3. 504 Gateway Timeout Error on Nginx Proxy

    To fix the 504 gateway timeout error on Nginx proxy, you can try adding these variations to the nginx.conf file:

    • proxy_connect_timeout 600;
    • proxy_send_timeout 600;
    • proxy_read_timeout 600;
    • send_timeout 600;

    4. Other HTTP Errors Like 504 Gateway Timeout

    There are other HTTP errors similar to the 504 gateway timeout error. Some of these include:

    • 500 Internal Server Error
    • 502 Bad Gateway Error
    • 503 Service Unavailable

    Conclusion

    Troubleshooting and fixing a 504 gateway timeout can seem difficult and overwhelming. But there are many ways to fix the error message as long as you know what could be causing it. If you suspect it’s the server causing the issue, you can always contact your host provider to help you.

    Potential topics:

    • Troubleshooting and repairing WordPress database issues
  • How to Fix a 502 Bad Gateway Error

    How to Fix a 502 Bad Gateway Error

    The 502 bad gateway error is one of the many status codes a WordPress site may experience from time to time.

    Though the error message is also popular with other platforms like Twitter or Cloudflare, it is one of the more common errors for WordPress. The 502 bad gateway error can have an impact on your site’s SEO.

    There are many reasons why you’re seeing the 502 error message. It can be caused by issues with your DNS server settings or PHP timeout settings. It can be frustrating trying to troubleshoot the exact problem causing the error message.

    In this article, we’ll explain what is a 502 bad gateway error, what could be causing the error, and the different ways to fix it.

    What is a 502 Bad Gateway Error?

    Your browser sends a request to the webserver every time you visit a website. The web server receives the request and processes it. It then sends the requested resources back to the browser.

    Simply put, the 502 bad gateway error occurs when the server has received an invalid response from the inbound server. The error message tells you the request was accepted, but an issue occurred while trying to fulfill the request.

    502 Bad Gateway Error Examples

    The 502 bad gateway error message can appear in a number of ways. You may see a blank white screen or some of these variations in the error message.

    • Error 502
    • 502 Proxy Error
    • 502 Service Temporarily Overloaded
    • 502 Bad Gateway
    • HTTP Error 502 – Bad Gateway
    • HTTP 502
    • 502 server error

    Your browser and certain websites are able to customize how the error message is shown. How the message is displayed to you depends on your browser, web server, and operating system.

    502 Errors Impact on SEO

    A 502 error can have a negative impact on your SEO if it’s not fixed soon. If your website is experiencing this issue for only a few minutes and it’s consistently being crawled, the crawler may just get the page delivered from the cache folder. There may be a chance Google will not be able to re-crawl before the site is working again. If this is what you’re experiencing, it won’t impact your SEO rankings.

    However, if your website has not been fixed for more than a few hours, Google might consider the 502 error as a site-level issue that needs to be addressed immediately. This can affect your SEO rankings.

    How to Fix the 502 Bad Gateway Error: 5 Ways

    The 502 bad gateway error is usually an issue with the network or server. While it can also be an issue on the client side, it’s not very common. Here are some ways you can use to try fixing the 502 bad gateway error.

    1. Try Reloading the Page

    One of the simplest first steps you should try is to wait a while before reloading the website. There is a possibility the host or server is overloaded, or there was a temporary connection problem.

    To reload your browser, click the refresh button or the F5 key to prompt the website to send another request. If it was a temporary interruption, the page will start loading after the refresh. Alternatively, you can try some of these other suggestions.

    • Turn off your VPN, then refresh the website again
    • Try a different browser
    • Restart your browser

    If the 502 bad gateway error was caused by a temporary connection issue, these steps will help you fix it, and load your website. Refreshing a page sends the server a new request asking for the latest version of the website you’re viewing. It’s possible you’ve encountered a temporary connection issue, especially if the server was maintenance.

    2. Restart Your Network Devices

    Any temporary disruption in your network connection can cause the gateway timeout error. A simple way to troubleshoot this is to restart all your network devices, including your modem and router.

    All you have to do is unplug both your modem and router. Then wait at least 30 seconds before plugging it back in. After that, you’ll have to wait for at least 60 seconds before starting everything back up to see if the issue is still there.

    3. Clearing Your Browser Cache

    The second easiest step is to clear your browser cache. Your browser saves certain information from the website you’re visiting. This is helpful as it speeds up the time it takes to look for that information and removes the need to constantly download the same resources.

    But sometimes, the saved cache can be corrupted, which will cause the 502 bad gateway error. There are different ways to clear your cache, depending on the browser you’re using.

    For Google Chrome:

    1. Head to the three-dot menu at the upper-right corner of Chrome.
    2. From there, click on More tools at the bottom area of the pop-up menu.
    3. Then select Clear browsing tools.
    4. This will then open a dialog box to delete all your browsing and download history.
    5. Check the box with Cached images and files.
    6. Select All time.
    7. Click Clear data.

    For Microsoft Edge:

    1. Head to the three-dot Menu at the upper-right corner of Microsoft Edge.
    2. Select Settings from the list.
    3. Click on Privacy, search and services.
    4. Select Clear Browsing Data.
    5. Select what you would like to clear and then click Clear now.

    For Internet Explorer:

    1. Select the gear icon on the upper left of Internet Explorer.
    2. From the menu, select Internet Options.
    3. Alternatively, you can click the Delete button to delete all your history, cookies, and cached data.

    You’ll want to restart your browser once you’ve cleared the cache as well, just to make sure your browser is in order. If you’re using a browser like Brave, Opera, or something else, you can easily Google the steps to delete your browser cache. You should find the steps fairly easily after that.

    4. DNS Issue

    The 502 gateway error can also happen when the domain is not providing the correct IP address or if the DNS server is not responding. DNS servers are assigned by your ISP by default, but you can change this yourself to see if it will fix the issue. You can try third-party DNS servers, which might solve the problem.

    Some of the best free public DNS servers can be found below:

    • Google DNS – 8.8.8.8
    • OpenDNS – 208.67.222.222
    • Cloudflare – 1.1.1.1

    There are two ways to change your DNS settings. The first is to change your router settings, and the second is to add the new DNS right into your device.

    To change the DNS server on Windows:

    1. Open the Start menu and select the gear icon (Settings).
    2. Once you’re in settings, click Network and Internet in the Settings menu.
    3. From there, select Change adapter options.
    4. After that, right-click your chosen internet connection and select Properties.
    5. Click Internet Protocol Version 4, then click the Properties button.
    6. Next, select the item labeled Use the following DNS server addresses.
    7. Enter your two chosen addresses.
    8. Click OK to save your changes.

    Changing DNS Server on macOS:

    1. Select Preferences from the Apple Menu.
    2. Launch the Network app.
    3. Select your internet connection then click the Advanced button.
    4. In the Advanced window, select the DNS tab.
    5. Use the plus sign on the right to add your chosen DNS addresses.
    6. Click OK to save your changes.

    Changing the DNS server directly on your router will affect all your connected devices, including home security and smart appliances. To do this, we recommend doing a web search on “how to change DNS” followed by the make and model of your router. This will provide you with instructions that are specific to the router you’re using.

    This might help solve the 502 bad gateway error message. When you change the assigned DNS server on your router or devices, you’re prompting your devices to use a different domain to search for the IP addresses. This might help you access sites your ISP has chosen to block for any reason, which can cause the 502 bad gateway error.

    5. Check With Your Host

    One of the main reasons for a 502 bad gateway error is an issue with the web host. A request may take too long, resulting in it being canceled by the server. Certain hosts implement a “kill script” feature that terminates a request after some time, so it doesn’t affect the main site or other users.

    Here are a few steps you can take to see if there are issues with the server and if you should contact your host.

    1. Try accessing the website from other devices, for example, your mobile phone. If you are able to view the website on your mobile phone, but not your computer, it tells you the problem lies with the settings in your computer and not the server. However, if it does not work on all your devices, you should call your hosting provider for assistance.
    2. You can also do a Google search “is abc.com down” or check Twitter to see if other people are experiencing the same issue.
    3. Websites like Downdetector will also be able to tell you if the website is currently experiencing technical issues and if other people are having problems connecting to it.
    4. It’s recommended for you to check your WordPress host’s status page as well.

    If you’re experiencing the 502 bad gateway on a regular basis, it’s a good idea to contact your host to find out if that is the reason or if the site is just under maintenance.

    6. Temporarily Disable CDN or Firewall

    The content delivery network (CDN) or firewall you’ve selected could also be causing the 502 bad gateway error. If the original server of the website cannot be reached, the CDN will automatically load the website from its cache folder. However, this feature isn’t enabled in some CDNs.

    If you’re using WordPress, the website provides a Popup plugin that uses a CDN server to store files including images, Javascript, and CSS libraries. Here’s how you can disable the CDN temporarily:

    1. Go to the WordPress admin dashboard.
    2. In the Settings tab, select the Popup plugin.
    3. Activate the ‘Disable CDN usage’ option.
    4. Make sure to save your changes.

    If you’re using WP’s Engine CDN, these are the steps you need to take to temporarily disable CDN:

    1. Login to WP Engine’s User Portal.
    2. Select Sites.
    3. Click on the production environment name.
    4. Click CDN.
    5. Make sure to uncheck the box on the right to indicate you disable CDN.
    6. Save your changes.

    While it isn’t usually recommended, you can also try disabling your firewalls to check if it’s interfering with opening the website. Certain host providers offer full proxy services that may include extra firewalls, which could cause a 502 bad gateway error.

    If you’re using Windows 10, you can disable your firewall with the following steps. This will also disable the firewall in Google Chrome, Opera, Microsoft Edge, and Firefox.

    1. Open Control Panel.
    2. Click on System and Security.
    3. Select Windows Firewall.
    4. Select Turn Windows Firewall on or off.
    5. Check the icon next to Turn Off Windows Firewall (not recommended).
    6. Click OK to save the changes.

    You can follow these steps if you’re using macOS:

    1. Open the Apple Menu.
    2. Select System Preferences.
    3. Click Security & Privacy.
    4. Click Firewall.
    5. Select Firewall Options to disable the firewall temporarily.

    Temporarily disabling the CDN or firewall may fix the issue of the 502 bad gateway error message. If it doesn’t, you can always refer to these steps to change your settings to their original form.

    Cloudflare 502 Bad Gateway Error

    The Cloudflare 502 bad gateway error occurs when the server you were trying to connect to receives a bad response from another server. This can happen when a server is overloaded or experiencing some network issues between the two servers. There are two variations to the Cloudflare 502 bad gateway error.

    502 Bad Gateway Cloudflare (Variation 1)

    The below image indicates the problem that occurred on Cloudflare’s end. If you see this error message, you can reach out to them for support. It’s also helpful to check Cloudflare’s status page for assistance or to see if they are experiencing an outage.

    502 bad gateway error variation 1 example

    502 Bad Gateway Cloudflare (Variation 2)

    The next variation, as described in the image below, indicates the problem is with the hosting provider. If this happens, you can either follow the steps we’ve listed earlier in the article or get in touch with your host provider for support.

    502 bad gateway error variation 2 cloudflare example

    Check Your Plugins and Themes (Troubleshooting Mode)

    Using third-party plugins or themes in your WordPress website can sometimes cause queries to be canceled by the server. This happens when there’s bad code on your site. You can troubleshoot this by simply disabling all your plugins and checking if your website is loading properly.

    If it is, you’ll know there’s a bad plugin somewhere. You’ll need to find which one by enabling each plugin one at a time and seeing if the website loads after each one. You should always ensure your WordPress core, plugins, and themes are updated.

    Take A Look At Your Error Logs

    If the problem persists, you may need to further investigate what’s causing it. Error logs can be helpful when troubleshooting problems on your WordPress site. You can access your error logs by using a logging tool. In the error log, you’ll be able to see how often the 502 bad gateway error is happening to see if it is a one-time occurrence or if it requires further attention.

    You can use the following steps to view the raw access and WordPress error logs via FTP:

    1. Connect your site via SFTP.
    2. You’ll see a folder named “logs” in the root folder.
    3. Your access and error logs will be in that folder.

    If the host does not have a logging tool, you can enable this in your wp-config.php file to allow logging. WordPress features its built-in debug tool that is useful for debugging WordPress. All you have to do is enable the WordPress debug mode and WordPress debug log, then specify a custom file path where you’ll be able to access it later.

    Restart PHP and Rebuild Web Application in RunCloud

    You can try restarting PHP through your host settings. If your host doesn’t provide this, you can request a support ticket.

    Many people also manage their servers through RunCloud, a control panel for cloud servers. It’s an easy way to build and manage web servers. If you’re encountering the 502 bad gateway error regularly, especially when you’re in the process of building your website, you can choose to rebuild your web application in RunCloud or simply reach out to us and we’ll help you out!

    PHP Timeout Issue

    PHP timeouts happen when one PHP process runs longer than the max_input_time or max_execution_time that has been set in your server’s PHP configuration. This is a common issue, especially when you’re conducting large WordPress imports. If you encountered the 502 bad gateway error because of PHP timeouts, then you’ll need to check and evaluate the values set in your server.

    Conclusion

    There are many issues that can cause the 502 gateway error, but there are also many ways for you to troubleshoot the issue. Most of the time, the issue will be with your host and not with the client. It’s important to remember that third-party plugins with bad codes are also common causes for the 502 gateway error. Lastly, if you’re still receiving the error after running through all the necessary steps, it may be a good idea to rebuild your web application in RunCloud.

  • Website Load Testing – How To Test Website Performance At Scale

    Website Load Testing – How To Test Website Performance At Scale

    Ever wondered how much your $5/month Digital Ocean Droplet or VPS with UpCloud can handle? Well, in this guide – we’ll show you how to run website load tests with loader.io.

    1 – Register For A Loader.io Account

    The registration process is super simple, simply navigate over to loader.io and then click Sign Up Now on their homepage.

    2 – Choose A Suitable Loader.io Plan

    You’ll then be prompted to choose your preferred Loader.io plan. You’ll be pleased to hear that, for the purposes of this guide and initial testing, you can use their generous free plan:

    3 – Enter Your Account Details

    Once you’ve selected your plan of choice, all you need to do is create your account by enter your company name, email address and creating a password:

    4 – Verify Your Email Address

    And once you’ve created your account, before you’ll be able to run any tests, you’ll have to verify your email address.

    Navigate to the email address used during the registration process and look for an email from Loader.io that looks like this one right here:

    And simply click Verify me to verify your account & email address are valid.

    Once verified, this is what you’ll see:

    5 – Create A New Target Host For Your Load Test

    Now, it’s time to start setting up your first test. To get started, you’ll first need to create a New Host. To do so, simply click + New Host as highlighted below:

    6 – Enter The Domain Name of the Web Application You Wish To Test

    A host is simply the domain that you wish to test as a part of this website load test. So, for example, if we’d be testing the scalability of the RunCloud Blog – we’d enter blog.runcloud.io here:

    Note: This has to be a website that you actually own as otherwise, you will not be able to run a load test as the next step will require that you verify ownership of this domain.

    7 – Verify Ownership of That Web Application/Domain

    Next, you’ll need to verify that you’re the actual owner and operator of this domain name. This is simply to avoid anyone & everyone from being able to run load tests against websites they don’t actually own (which with some setups could result in taking sites offline).

    If you’re on the free plan you’ll only be eligible to verify over HTTP which is super simple. Simply navigate to the web application in your RunCloud dashboard (or your server management dashboard of choice) and upload the file to the root folder of the site. In the case of WordPress sites, this is the same folder that contains the folders: wp-admin, wp-content, etc.

    Once uploaded, hit the blue Verify button and you’ll see the following confirmation:

    This means you can now start creating your first website load test for this target host.

    8 – Create & Run Your Website Load Test

    Once ready, proceed to the next step by clicking New Test.

    This will then take you to the following test configuration settings page where you can adjust the type of requests you want to use in this load test as well as how many clients and what the duration of the test itself should be.

    For the purposes of this demonstration, we recommend only setting a suitable test name and leaving the other settings unchanged. If you’re performing improvements or want to evaluate the difference between servers, be sure to perform tests both before & after changes are made so that you actually have data for comparison (again using suitable names so they are easy to refer back to but not changing other settings as this would otherwise create variance in the test data that would need to be accounted for).

    Once you’re ready to run this test – click Run Test as shown below:

    And that’s it, your website load test is now underway! 🎉

    Once the test completes (i.e. for the standard settings after one minute), you’ll be able to review the results and see how your website performance (i.e. response time) was affected as the number of clients hitting your site/making requests to your server increased throughout the one minute period.

    And that’s it – if you have any other questions about website load testing you’d like us to cover in this guide, feel free to leave a comment below & join the conversation. 💬

  • RunCloud’s All-New Dashboard UI Is Now In Beta

    RunCloud’s All-New Dashboard UI Is Now In Beta

    Today, we’re proud to announce that our all-new interface with a fresh new look to make managing your servers not only effortless but also more enjoyable than ever is now in beta.

    We’re super excited to hear what you all think! Please note that this is an early-stage beta but that’s exactly why we’re inviting you to jump in, try it out and let us know what you think now already. You can switch from classic dashboard (manage.runcloud.io) to new dashboard (new.runcloud.io), and vice versa, anytime from the top-right profile dropdown menu. You can switch back to the classic RunCloud dashboard at any time and it will still be available during this beta.

    Let’s dive into some of the specific improvements this release includes:

    General Improvements

    • Our all-new dashboard that is fully accessible from any device, including your mobile device.
    • Global Search (beta) – you can quickly search anything in your RunCloud account (servers, web applications, database, etc.). We have a number of improvements planned to Global Search during this beta.
    • Server Tags – you can add tag(s) to your servers to help organize your servers and make managing them easy as you grow.
    • Web Applications top level menu. You can see the list of all web applications from all of your servers. This is extremely useful as you have a number of web applications across a growing number of servers that you manage.
    • Shortcut to edit .env file and deployment script
    • Better view for your activity logs, sorted by date
    • Recently viewed servers & web apps feature.
    • Improved Billing/Subscription flow.
    • Improved Team flow when creating team and invite team member with email notification
    • Improved activity logs, sorted by date.

    Server Management Improvements

    RunCloud New Server Management
    • Central SSH utilities. SSH key, login notification, session and config are in page with tabs.
    • Laravel web app type. For Laravel users, you can edit web app settings and change web app type from Custom to Laravel to unlock some Laravel features.
    • Laravel Octane. Yes, you can run your web app with Laravel Octane in RunCloud with Nginx server easily.
    • Server settings have been simplified by moving other settings to respective group.

    Web Application Improvements

    RunCloud Web Application New
    • Improved flow for creating a web application to help users start deploying web applications smoothly.
    • Creating git web app are now more informative for easy integration.
    • New interface for managing databases.
    • New float for creating cron
    • Artisan Commands – you can run some common artisan commands directly from RunCloud dashboard

    Notable WordPress-related improvements include:

    • RunCloud Hub, WordPress Staging, Cloning, and General Settings (update home URL) is fully compatible with most WordPress web app types, including:
      • Regular Individual WordPress Installations
      • WordPress Multisite subdomain
      • WordPress Multisite subdirectory
      • WordPress Bedrock
      • Custom WordPress with WordPress files in a subdirectory but served from the website’s root
    • Improved WordPress Canvas flow, you can choose to activate plugin and also custom theme (ZIP).
    • Generate .htaccess automatically when cloning from Native NGIN to OpenLiteSpeed to prevent 404 issues.
    • Fulll support for Wordfence’s WAF during staging & cloning.
    • Regenerate Elementor CSS cache files during staging, cloning, and general settings update.

    Profile Improvements

    • Cleaner API key interface.
    • Rework on WordPress Canvas interface.
    • Simplified billing interface.

    Team Improvements

    RunCloud Teams
    • New flow for creating teams and team invitation now with email notification.

    Atomic Deployment Improvements

    • Various improvements to the atomic deployment interface.

    Other Miscellaneous Improvements & Bug Fixes

    • Added: File manager zip/unzip feature
    • Updated: RunCloud Agent version 2.4.8 iteration 7
    • Updated: WAF Modsec CRS version 3.3.2
    • Updated: NodeJS version 14 LTS for new server
    • Fixed: team member can not manage domain and ssl on shared team server
    • Fixed: invoice/receipt print issue

    Remember, this is a beta – but that’s exactly why we’re inviting you to try it out today! During the beta, you’ll be able to leave direct feedback by using the Report Bug option in the menu, as shown below:

  • How to Easily Fix The “SSL_ERROR_NO_CYPHER_OVERLAP” in Firefox

    How to Easily Fix The “SSL_ERROR_NO_CYPHER_OVERLAP” in Firefox

    Currently experiencing an “SSL_ERROR_NO_CYPHER_OVERLAP” error code in the Mozilla Firefox web browser?

    You’ve come to the right place – in this guide, we’ll show you exactly how to fix it.

    What Is The “SSL_ERROR_NO_CYPHER_OVERLAP” Error?

    The “SSL_ERROR_NO_CYPHER_OVERLAP” error occurs when your browser is unable to obtain the security data for a website you’re trying to access. Unlike other browser errors, the SSL_ERROR_NO_CYPHER_OVERLAP error happens specifically with Firefox. Google Chrome has a similar but slightly different version of it, with its message reading “ERR_SSL_VERSION_OR_CIPHER_MISMATCH“.

    SSL_ERROR_NO_CYPHER_OVERLAP Error code

    SSL stands for Secure Sockets Layer and is responsible for providing privacy, authentication, and integrity to internet communications. The “SSL_ERROR_NO_CYPHER_OVERLAP” error typically occurs when Firefox fails to get the proper security information from the website your browser is attempting to establish a connection with. This can happen for a variety of reasons…

    What Causes the SSL_ERROR_NO_CYPHER_OVERLAP Error in Firefox?

    It may be due to the website itself (something server-side) or a locally misconfigured setting in your Firefox browser. If many different websites give you the same error, it is far more likely to be your own Firefox browser settings.

    An outdated version of Firefox is also a potential cause of Firefox error “SSL_ERROR_NO_CYPHER_OVERLAP” appearing. In any case, it’s best to always keep Firefox up-to-date to avoid errors like this in the future.

    3 Ways to Fix SSL_ERROR_NO_CYPHER_OVERLAP Error

    Coming across errors is never a great experience, and we try our best to make it a learning one. With each problem, there’s bound to be a solution. The “SSL_ERROR_NO_CYPHER_OVERLAP” error is no exception.

    So, without further ado, let’s dive right in and fix this error…

    1. Update Firefox Browser

    Update your Firefox Web Browser. An outdated Firefox version is prone to the “SSL_ERROR_NO_CYPHER_OVERLAP” error appearing This is because older Firefox versions might support outdated cypher suites and obsolete TLS versions, which are kept up-to-date for a reason.

    Installing the latest update for your Firefox web browser is a fairly simple task.

    To update Firefox – open your browser, and:

    1. Select the Menu button at the top-right corner of your screen. This is the icon with three lines.
    2. Click Help and select About Firefox.
    3. The About Mozilla Firefox window opens. Firefox will check for updates and download them automatically.
    Firefox error code SSL_ERROR_NO_CYPHER_OVERLAP
    1. When the download is complete, select Restart to update Firefox.
    screenshot of firefox updating

    Note: As mentioned in the official Firefox support website, if you had any problems with updating, simply download the latest version of Firefox. You can do so by heading to the Systems & Languages page or you can also use their official download page.

    2. Reset SSL3 and TLS Settings

    If you’re already using the latest version of Firefox or updating didn’t help, the next step is resetting your SSL3 and TLS settings. Not all websites require these protocols to make a connection, but some do. Therefore, if these settings in your Firefox browser are disabled, it might be the reason you’re running into the “SSL_ERROR_NO_CYPHER_OVERLAP” error.

    To reset your SSL3 & TLS Settings:

    1. Open a new tab in your Firefox browser and type “about:config” in the address bar. You may see a message saying, “This might void your warranty!” or “Proceed with Caution”.

    This warning is Firefox’s way of preventing users, such as yourself, from accidentally making critical changes to your browser’s settings. But we know what we’re doing, so click on Accept the Risk and Continue to proceed.

    1. The “Advanced Preferences” screen should appear. In the search bar, type “tls”.
    advanced preferences error code solution

    This generates the list of all your TLS configurations.

    1. Values that are bolded indicate that they have been changed. Right-click on them and select Reset to restore them to the default settings.
    2. Afterward, repeat the same process for SSL3. Type “ssl3” in the search bar, and reset any changed value.
    how to fix error code SSL_ERROR_NO_CYPHER_OVERLAP

    Additionally, make sure that the following two items are set to false.

    • security.ssl3.dhe_rsa_aes_128_sha
    • security.ssl3.dhe_rsa_aes_256_sha

    Setting these to false disables Firefox from using these low-encryption cyphers. This is essential for security purposes.

    3. Bypass Security Protocols and Configurations of Your Browser

    It’s generally not recommended to bypass browser security protocols as their job is to keep you from accessing unsafe websites. That being said, if you know the site you’re trying to access is secure, manually entering a cypher validation should help bypass this error.

    To bypass browser security protocols:

    1. Navigate again to the “about:config” screen of your Firefox browser and type “tls” into the search bar.
    2. From the list, navigate to “security.tls.version.min”.
    1. Select the pencil icon on the far right to edit the item, then input “0” as the value. Next, repeat the same process for ”security.tls.version.fallback-limit”.

    Another way to bypass encryption protocols in your browser is by changing your browser’s privacy settings.

    To change your Firefox Privacy & Security Settings::

    1. Open your Firefox menu, then navigate to Options and then Privacy & Security.
    privacy setting firefox
    1. Under the Security section, deselect ”Block dangerous and deceptive content”.

    If the error still hasn’t been resolved, chances are it’s a server-related issue. Most often, this happens when a site is using the RC4-only cipher suite.

    Some ciphers, such as the RC4, are no longer supported by major browsers due to vulnerabilities. You can run an SSL check to verify that your SSL certificate isn’t using outdated ciphers.

    To perform an SSL Check, you can use the free SSL check tool Qualys SSL Labs. Here’s a link to the SSL Check tool to get you started.

    ssl server test

    Enter your domain into the Hostname field then click on “Submit”. You also have the option to hide public results if that’s what you prefer. It could take a minute or two to scan the site’s SSL/TLS configuration on your web server.

    qualys ssl report

    Once scanned, SSL Labs will assign you an SSL server rating, any grade from an A to an F. You should always be aiming for an A. This means both the SSL and intermediate certificates are set up correctly. It also shows that the webserver host, like WordPress, that you might be using is up to current specifications.

    If you click on the IP address, you’ll be shown a brief summary of that server’s rating.

    ssl error code report

    For more information on SSL Labs SSL checks, their official guide can be found here.

    That’s about it in bypassing encryption protocols through your privacy settings. Generally, if you aren’t the site owner, the only other course of action is to contact them to let them know about the problem you’ve experienced on their site – and, helping them get to the bottom of it by sharing this guide with them. 😊

    You might also be interested in SSL/TLS certificate errors.

    Check If It’s A Server Side Problem

    In the case that the error is only appearing on one website, this is likely a server-side issue. Only the server admin can resolve this issue.

    Usually, this only happens when a website is still using RC4-Only Cipher Suite, and the settings with the server “security.tls.unrestricted_rc4_fallback” preference is toggled to false.

    Frequently Asked Questions (You Might Also Ask)

    What does error code SSL_error_no_cypher_overlap mean?

    The “SSL_ERROR_NO_CYPHER_OVERLAP” is an error code unique to Firefox. Other browsers have these errors as well but typically use different codes. This error happens when Firefox fails to get the proper security information from the website you tried to connect to. This can happen for reasons of an outdated browser version, misconfigured SSL3 and TLS web browser settings, or it could be completely server-sided.

    What does Pr_end_of_file_error mean?

    The PR_END_OF_FILE_ERROR (Secure Connection Failed) appears when some Mozilla Firefox users attempt to visit a certain website. This error essentially means that the browser wasn’t able to establish a secure connection because all cypher suites failed.

    What is a cypher mismatch?

    This issue means that your browser cannot establish a secure connection with a web server that uses HTTPS and SSL.

    How do I bypass “secure connection failed”?

    To fix this, you need to visit the settings option of whichever security software that you are using and locate the SSL scanning feature of the software. 

    Once you find it, uncheck the box that indicates if it is enabled. Once the feature is disabled on your security software, you should try revisiting the website.

    What causes “secure connection failed”?

    Sometimes the ‘Secure Connection Failed’ error may occur on Firefox if Firefox finds the website to be dangerous or untrustworthy. That is why Firefox browser testing is so critical. If Firefox approves the website, it means that there’s a problem with the SSL connection.

    Sometimes the ‘Secure Connection Failed’ error may occur on Firefox if Firefox finds the website to be dangerous or untrustworthy. A website that uses HTTPS:// at the start of its URL indicates that it is a secure website. When Firefox doesn’t find a website secure, it will trigger an error displaying “Secure Connection Failed”.

    What is “secure connection failed”?

    Secure Connection Failed error is typically related to the security certificate (otherwise known as SSL) not being valid, expired, or simply missing. This notification quite often has merit, as the browser tries to warn that the connection is not secure, and you might suffer from serious issues if you proceed.

    How do you solve not connecting a potential security problem?

    To fix the “Secure Connection Failed” error in Mozilla Firefox:

    1. Select “Continue With an Insecure Connection”.
    2. Add the site to your List of Trusted Sites.
    3. Temporarily disable your Antivirus and Firewall.
    4. Clear the SSL State.
    5. Clear Your Browsing History.
    6. Permit Firefox to Trust Root Authorities.
    7. Change Your Security Settings.


    Summary – Easily Managing SSL Certificates & Resolving Errors

    Running into issues especially with SSL certificate validation is not something anyone enjoys waking up to especially because getting to the bottom of what’s causing it can take some time. Fortunately, since you made it to the end of this guide – you should have been able to confidently ensure that you & your website visitors no longer encounter this error.

    Here at RunCloud, we’re on a mission to make server management and deployments easier. Part of this, of course, naturally has to include SSL certificates. That’s why we offer AutoSSL to automatically handle deploying new SSL certificates for new domains that are added to your web applications (perfect for WaaS or SaaS businesses).

    Have any additional questions about fixing this SSL error or just want to join the conversation? Leave a comment below or Tweet at us (we’re @runcloud) 💬

  • Choosing the Ideal Server Location & Does It Even Matter?

    Choosing the Ideal Server Location & Does It Even Matter?

    Ready to deploy a new server but unsure how to choose the ideal server location?

    Server providers like Digital Ocean, UpCloud, Linode, and AWS have made it incredibly easy to deploy a server virtually anywhere, so you can pick the ideal server location.

    But how should you choose your server locations? And how do professional SysAdmins choose the locations for their servers?

    Why Does Server Location Matter?

    The server that hosts your website can be physically situated at one of the thousands of available locations in different data centers across the globe (depending on your server provider of choice).

    When you load up a website, a signal is sent from your computer to the server, and then onto the destination. If the server is far away, it’s going to take longer for that connection to happen.

    Therefore, the location of your host server can play a crucial role when it comes to your website’s load speed, and by extension, its SEO.

    One study conducted by KISSmetrics claims that 47% of internet users expect a web page to load in 2 seconds or less. This percentage is even bigger among mobile users, who make up over 50% of Google’s users. Hardly surprising given the attention span of people today.

    Google has indicated that site load speed is one of their algorithm’s main signals to rank pages. So, having visitors leave your page before it is even fully loaded is bad for SEO and results in lower conversion rates – drastically decreasing your business’ earning potential.

    cables connected to a server

    What Is Network Latency & TTFB?

    Before choosing your ideal server location, there are various other factors that play an important role in selecting your ideal server location. Two of these factors are network latency and TTFB.

    What Is Network Latency?

    Network Latency is the time taken by the site visitor to connect to a web server, their request to be processed and the server to begin sending data. It is measured in milliseconds. Network latency is affected by several factors, including:

    Round trips: It is the journey taken by an object request (script files, HTML files, etc) to your web server and back to the user. Round trip is generally affected by the distance between the web server and user along with the number of intermediary points through which the connection travels.

    Server performance: The correlation between server performance metrics — including server speed, available RAM, the hardware used and site latency.

    Any small change in the latency can have some effect on the page load time and user experience. This becomes more important for eCommerce websites where high latency can improve the speed and user experience of the website.

    Measuring Latency through TTFB

    Time to First Byte (TTFB) is the time taken by the user’s browser to begin loading a webpage after your server reaches an initial request. TTFB can be affected by three main factors:

    • The total amount of time it takes for your request to reach the network through the server.
    • The total amount of time it takes for the server to process the request and generate the response.
    • The total amount of time it takes for the response to propagate back to the web browser.

    There are two ways to measure TTFB:

    Actual TTFB: The total time it takes for the web browser to receive the first byte of data from a server. Network speed and connectivity can affect actual TTFB.

    Perceived TTFB: The time taken by the user to notice that the page has started to load. It is important UX and SEO metrics and is mostly influenced by the time it takes for an HTML file to parse.

    Choosing Your Ideal Server Location

    Choosing the ideal server location is sure not a child’s play. First, let’s see how others choose server locations.

    How Do People Server Location?

    When was the last time you put some thought into where your server is? We ran a survey among RunCloud customers and here’s what they had to say:

    • 66.7% chose a server in proximity to their own customers;
    • 11.8% chose a server that’s physically close to themselves;
    • 3.9% didn’t really consider the location of their servers;
    • 17.6% said they are global and use CDNs.
    Runcloud Survey on choosing ideal server location
    Screenshot of our Twitter poll
    facebook poll - ideal server location
    Screenshot of our Facebook poll

    So, what should you have in mind when choosing the ideal location for your server?

    How To Choose Your Server Location?

    Around 66.7% of the people in the above surveys preferred to choose the server location closest to the majority of the site’s audience. While choosing the ideal server location you should consider the important factor surrounding where your server should be located. For most people locating their server near to the majority of their users is the first choice. Perhaps, you should consider that while making your choice.

    How To Reduce Latency?

    There are different steps you can take at different points across the network to improve network latency. Like, making sure that the people on your network aren’t increasing your latency with lots of downloads or using up all the bandwidth. Also, check out the application performance to make sure that no applications are acting up in weird ways and putting pressure on the network. You can also subnet by grouping together endpoints that communicate frequently with each other. Using traffic shaping and bandwidth allocation measures also helps to reduce network latency.

    Use A Content Delivery Network To Reduce Latency:

    One way to reduce your website latency is to use CDNs, thus improving your overall website’s performance and UX. Website latency can be reduced by any one of the following methods:

    Content caching: CDNs cache and compress mirror versions of the web pages are stored in strategically placed data centres. Later, content is delivered to your users based on their geolocation, thus reducing round trip times and latency.

    Connection optimization: CDNs can optimize connections between users and origin servers through session reuse, network peering and TCP pre-pooling. Premium CDNs speed up the communication process further by routing traffic through a tier 1 network backbone that has the least amount of hops.

    Along with reducing latency, CDNs can also improve your site’s page load times through front-end optimization like image optimization, minification and file compression.

    Which Server Location Is Right for You?

    Price plays a large part when choosing a server, especially when you’re on a budget. Or, you may be tempted to get a server close to your location.

    However, investing in a server that’s close to the majority of your site’s visitors can be a real game-changer, especially if you’re running an online business. After all, how fast your end-users can access the site, find an item, and make a purchase, is what can make or break its success.

    How the Server’s End-User Proximity Affects Your Website’s Success

    If your target audience resides in a particular area or country, then it makes sense to host your website on a server as near to them as possible. Right?

    Having it hosted further away can be a serious obstacle, as the geographical distance between your server and your site’s end-users can exponentially increase the time it takes for them to access the website. This can lead to your site loading slower for its users, and, as a consequence, you could be losing visitors and conversions.

    With that in mind, we recommend you consider the server’s proximity to your clients and site visitors as a priority when choosing your ideal server location.

    Using a CDN to Change Your Server Location

    What happens if your hosting provider doesn’t let you change your server’s location?

    In this case, you have a couple of options:

    • Change hosting provider
    • Use a Content Delivery Network (CDN)

    It can be a hassle to switch web hosting, so using a CDN like Cloudflare can be an easy workaround.

    A CDN is a collection of servers placed in strategic geographical locations, acting as a network for caching internet content.

    A cached version of your site is stored at each location, so when someone tries to visit your website they’ll be connected to the nearest server on the CDN instead of having to go directly to yours.

    Using one can significantly shorten load time by increasing the delivery speed of your site’s data that’s cached on the CDN. This is not the same as web hosting, however, since the CDN is used only for caching your site’s data to improve its delivery speed, not hosting it.

    Ideally, you want to combine well-placed servers with a good CDN to get the fastest load speed for your site. There are also many CDN providers to choose from ― Cloudflare, Imperva, StackPath, and Sucuri, to name just a few.

    Cloudflare is by far the biggest and most popular solution, and integrates seamlessly with RunCloud, making it easier than ever to manage your servers and moving them to your most ideal server location.

    ideal server location

    In Summary – Choosing Your Ideal Server Location

    Choosing the ideal server location plays a crucial role in its success.

    If you can afford it, host your website on servers as close to your target audience as possible. This will lead to more conversions, fewer visitors abandoning your site, and better SEO.

    Secondly, getting a good CDN will also improve your site’s load speed significantly. CDNs cache your site’s content on a group of servers in important geographic locations, so that your site can be accessed much faster even if the server it’s hosted on is far away from the site’s visitor.

    Lastly, if you’re looking for a way to easily manage your websites, servers, and connections in one intuitive dashboard, you’ll love working with RunCloud.

    Hundreds of agency owners, business owners as well as experienced developers rely on RunCloud to build, deploy and operate their servers so they can focus on growing their business. Freedom to host servers with your server provider of choice, giving you full control of server location while managing them all in one centralized dashboard – RunCloud.

    Get started with RunCloud today.