Blog

  • How to Set Up WooCommerce Caching: The Ultimate Guide in 2025

    How to Set Up WooCommerce Caching: The Ultimate Guide in 2025

    Enabling caching on a WooCommerce store is an important but delicate process that balances performance with functionality.

    Unlike a static blog, an e-commerce site is highly dynamic, managing user-specific data like shopping carts, account information, and personalized content.

    A misconfigured cache can lead to serious issues, such as showing one customer’s cart to another or displaying incorrect order information, ultimately destroying user trust and costing sales.

    When we configure the cache, our goal is to aggressively cache static content and anonymous user page views while intelligently bypassing the cache for dynamic elements and logged-in users.

    This guide will walk you through how to properly implement caching for your WooCommerce store. By following these principles, you can significantly reduce server load, decrease page load times, and provide a faster, more reliable shopping experience for your customers without compromising the dynamic nature of your e-commerce operations.

    Let’s get started!

    What is WooCommerce Caching?

    Caching instructs your server to build a web page only once and then save a static, ready-to-go copy. Instead of repeating the resource-heavy process of running code and fetching data from the database for every visitor, the server can instantly deliver this pre-made version, dramatically accelerating your site’s performance.

    The most important part of building a good cache is being smart about what to save. Modern CMSs such as WooCommerce intelligently create copies of static pages that are the same for everyone, like product pages or category listings, to make them load incredibly quickly. At the same time, it knows to exclude dynamic pages unique to each user, such as the shopping cart and checkout pages, ensuring that customers only see their items and personal information.

    📖 Suggested read: How to Easily Optimize Your WordPress Website With RunCloud Hub

    Benefits of WooCommerce Caching

    The primary benefit of caching your WooCommerce store is a massive boost in website speed. Faster-loading pages create a significantly better user experience, which keeps shoppers from getting frustrated and leaving your site. This leads directly to more sales and a lower cart abandonment rate.

    In addition to improving conversions, the website speed is an important factor for search engine optimization (SEO). Google and other search engines favor fast websites, so a well-cached store will rank higher in search results, bringing you more free, organic traffic.

    Finally, caching reduces the workload on your server and allows your store to handle many more visitors at once without slowing down or crashing, which is essential for surviving busy shopping seasons like Black Friday.

    📖 Suggested read: How to Use Redis Full-Page Caching to Speed Up WordPress

    Step-by-Step Guide: How to Set Up WooCommerce Caching

    Follow the steps below to develop an effective caching strategy for your WooCommerce site.

    1. Choosing the Right Caching Solution

    The first (and arguably the most important) decision is selecting the appropriate caching technology for your hosting environment. Your options fall into two broad categories: plugin-based caching and server-level caching.

    Caching plugins such as WP Rocket or W3 Total Cache are user-friendly options that allow you to edit and manage your caching settings from the WordPress application. Although convenient, this adds processing overhead, as WordPress must still load to serve a cached page.

    You should consider using server-level caching, a superior approach to achieve maximum performance. Modern caching plugins, such as LiteSpeed’s LSCache, operate at the web server level, before WordPress is even loaded. This allows them to serve cached pages with minimal latency and resource consumption, resulting in significantly faster response times.

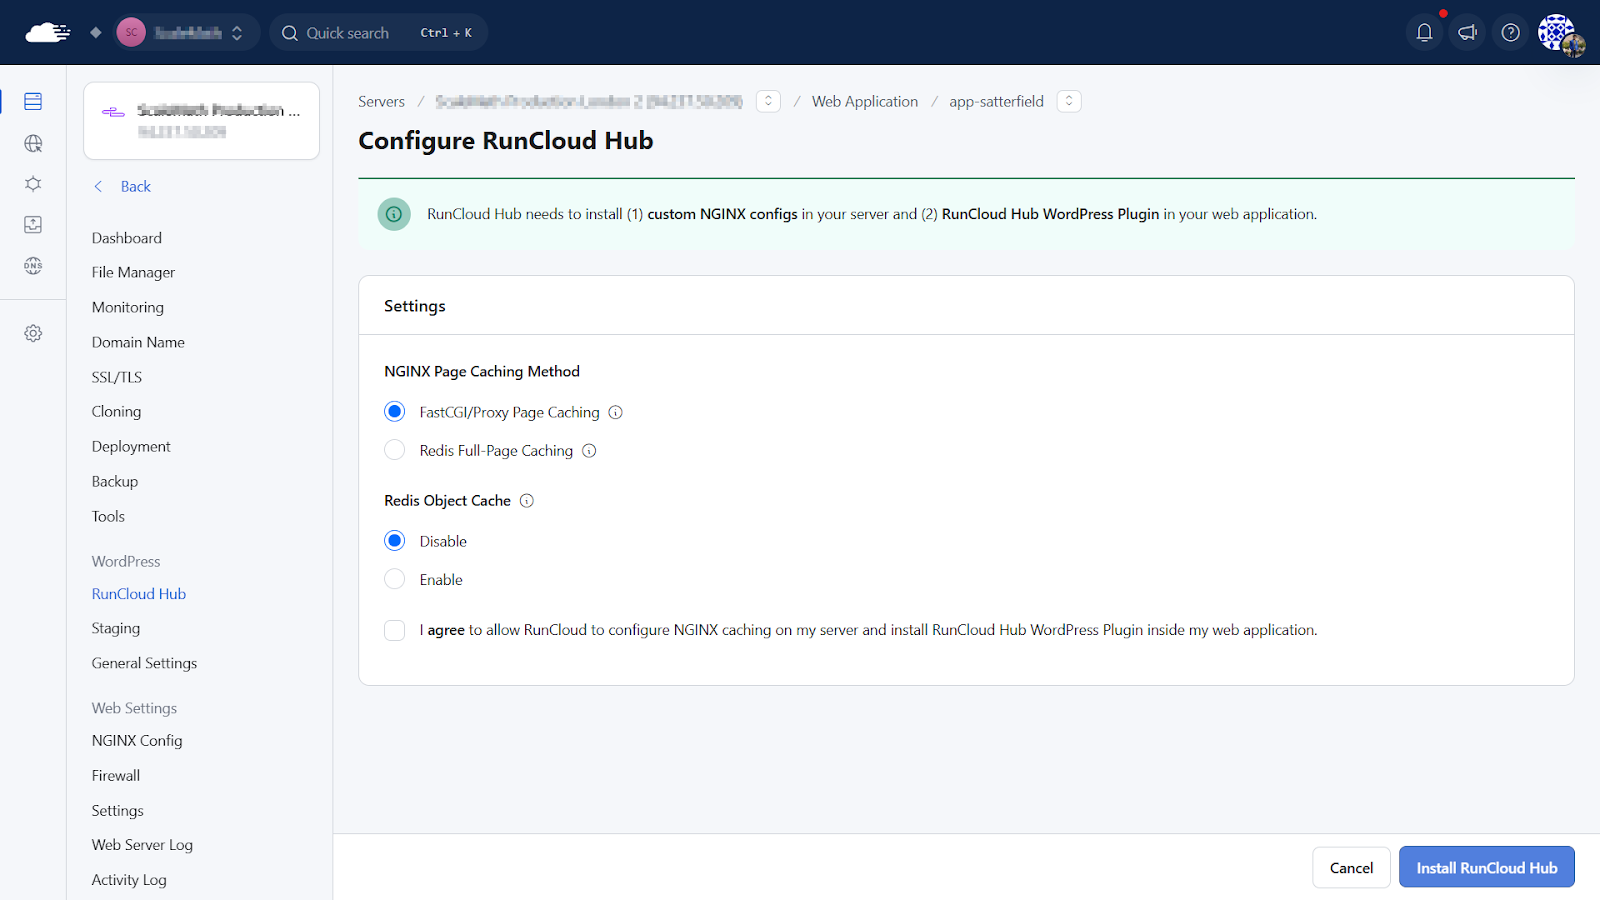
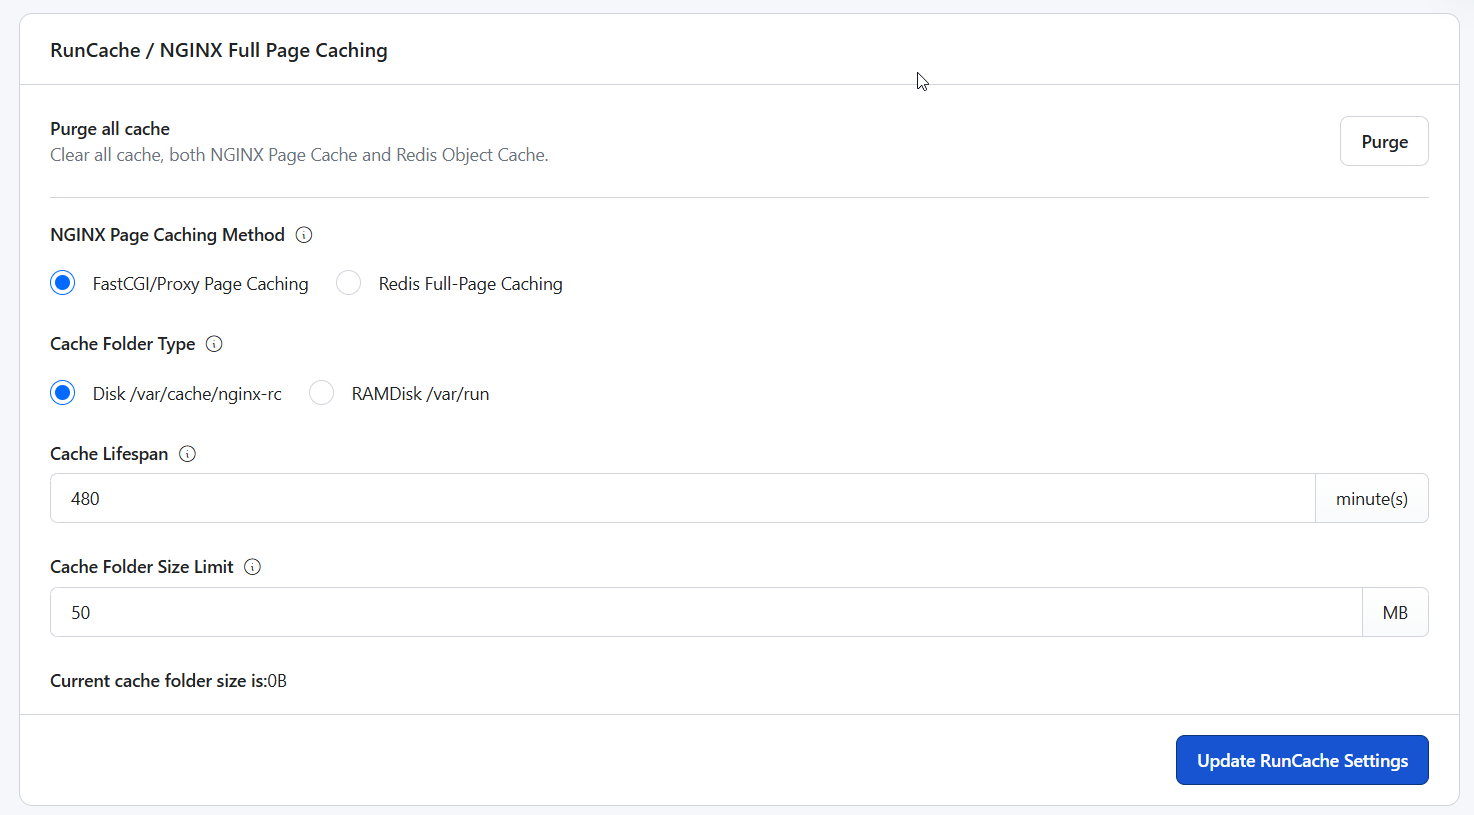
    However, if you are using RunCloud, you can consider using the RunCloud Hub, which provides a good balance between the two by offering both native NGINX FastCGI cache (RunCache) and Redis Page caching. For RunCloud users, RunCloud Hub is the most efficient approach as it is specifically optimized for the server stack.
    📖 Suggested read: The Best Free eCommerce Platforms for Selling in 2025

    2. Installing and Configuring Your Caching Plugin

    Once you have chosen your caching solution, the next step is installation and initial configuration. If using a plugin like WP Rocket, installation is straightforward via the WordPress dashboard. After activation, most modern caching plugins automatically detect that WooCommerce is active and apply a default set of safe exclusion rules. These presets typically prevent the caching of critical pages like Cart, Checkout, and My Account, providing a solid baseline to prevent major functional issues.

    If you are using RunCloud, you don’t need to leave your RunCloud dashboard, as you can enable RunCloud Hub within your RunCloud dashboard and your WordPress web application.

    During the initial setup, you should avoid enabling every performance feature simultaneously. Start by enabling the core page caching feature for logged-out users. After confirming the site still functions correctly, you can incrementally enable other options like CSS or JavaScript minification, testing thoroughly after each change.
    📖 Suggested read: How to Fix WordPress High CPU Usage (10 Instant Solutions)

    3. Excluding Dynamic WooCommerce Pages from Cache

    The single most important rule of WooCommerce caching is never to cache pages that display user-specific information publicly.

    Caching these pages would result in one user’s private data being served to other visitors, a catastrophic failure for any online store.

    The primary pages that must be excluded from any page caching mechanism are the Cart, Checkout, and My Account pages. By default, their URL slugs are /cart/, /checkout/, and /my-account/, respectively.

    To prevent this scenario at a technical level, the server sends specific instructions to browsers and intermediate caches through HTTP headers. This is handled by using the Cache-Control: private header. This HTTP header specifies that the response is intended for a single user’s browser and must not be stored by any shared cache, such as a CDN or a server-level cache like RunCache. This is often accompanied by a no-store directive for maximum security.
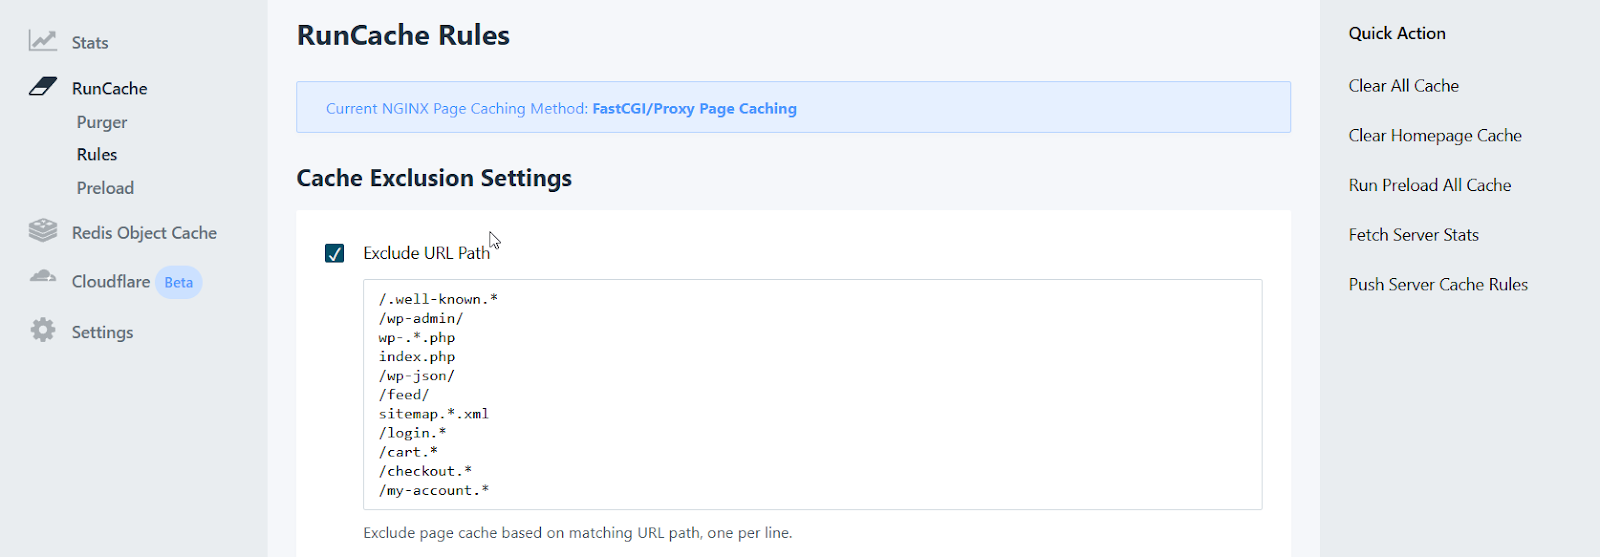
    Almost all caching plugins and server-level configurations provide a setting labeled “Never Cache URLs” or “Exclude URLs”. You must add the relative paths for these private pages in this section. It is best practice to use wildcards to ensure all sub-pages are also excluded from the cache. For example, adding /my-account/* will ensure that account-specific pages, such as order history and address management, are excluded from the cache.

    📖 Suggested read: Server Cache vs. Browser Cache vs. Site Cache: What’s the Difference?

    4. Excluding WooCommerce Sessions and Cookies from Cache

    In addition to excluding specific URLs, you must be aware of WooCommerce cookies. WooCommerce uses cookies to track user sessions and cart contents, even for guests who are not logged in.

    For example, the woocommerce_cart_hash cookie tracks changes to the shopping cart, and the wp_woocommerce_session_ cookie contains a unique code corresponding to the customer’s session data in the database. When these cookies are present in a visitor’s browser, it signifies that the user has an active, personalized session.
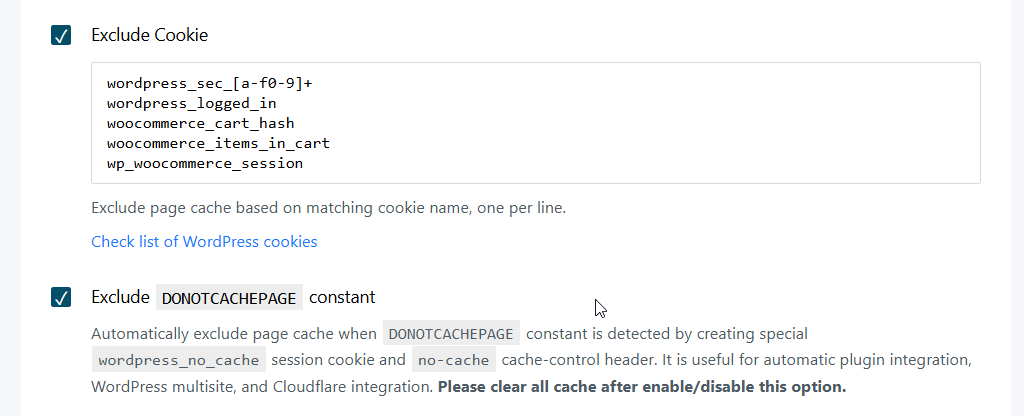
    To ensure your website works as expected, you must configure your caching system to bypass the cache entirely whenever these specific WooCommerce cookies are detected. This ensures that any user who has added an item to their cart or is logged in receives a fresh, non-cached page from the server. It also ensures that dynamic elements like the mini-cart and user-specific pricing function correctly.

    📖 Suggested read: Everything You Need to Know About WordPress Object Caching

    5. Configuring Minification Settings

    Minification is removing unnecessary characters (like whitespace and comments) from CSS and JavaScript files and combining them to reduce the number of server requests.

    The minification process can improve load times and cause unexpected errors and conflicts, particularly with the complex JavaScript used by WooCommerce and its many extensions. When enabling minification, proceed cautiously and test rigorously after each change is recommended.

    We recommend enabling CSS minification first and thoroughly testing the site’s layout and design. Once satisfied, you can enable JavaScript minification and test all interactive elements, paying close attention to the add-to-cart functionality, image galleries on product pages, and checkout. If you encounter a broken feature, you can configure your caching plugin to exclude specific CSS or JavaScript files from minification.

    📖 Suggested read: LiteSpeed Cache WordPress Plugin Configuration Tutorial

    6. Integrating CDN and Edge Caching with WooCommerce

    A Content Delivery Network (CDN) is a set of computers that can distribute your static assets, such as images, CSS, and JavaScript, across a worldwide network of servers. This drastically reduces latency for international visitors by serving files from a location geographically closer to them.

    Using a CDN to serve static assets is highly recommended for WooCommerce. Most caching plugins provide a dedicated section for rewriting asset URLs to point to the CDN. Modern caching solutions, such as Cloudflare or Bunny.net Accelerator, take this a step further by caching the full HTML of your pages at the CDN level.

    The edge cache must be configured to respect the same exclusion rules as your on-site cache, bypassing the cache for dynamic URLs (cart, checkout) and any visitor with a WooCommerce session cookie.
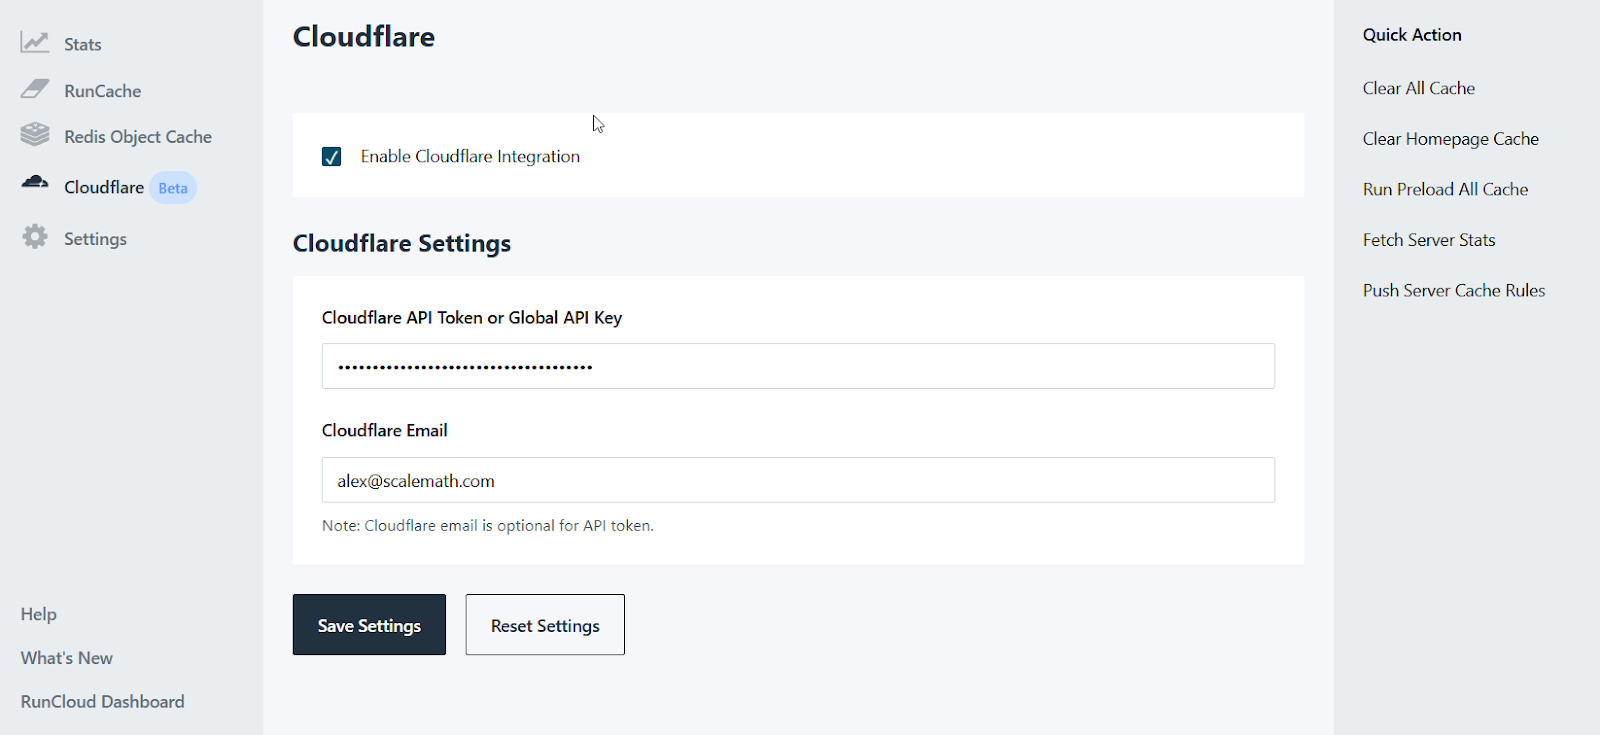
    This ensures the CDN edge doesn’t serve a stale, generic page to an active shopper. Proper integration ensures your origin server sends the correct Cache-Control headers, which a well-configured caching plugin will manage for you.

    📖 Suggested read: How to Use Redis Object Cache To Speed Up a Dynamic WordPress Site

    7. Setting Up Object Caching (Redis/Memcached) for WooCommerce

    Caching web pages allows you to store and serve fully rendered HTML pages, but that’s not the only thing you can cache. Loading a web page launches several repetitive and complex database queries that take a long time to execute. An object cache, such as Redis or Memcached, can store the results of these database queries in the server’s fast-access RAM.

    This Object caching functionality can provide a massive performance boost for a query-heavy application such as WooCommerce, which constantly checks product stock, sale prices, user permissions, and session data. This is especially useful for logged-in users and during backend operations where page caching is not active.

    Enabling object caching can be tricky if you do it manually, but using RunCloud Hub allows you to configure it with a single click. Simply navigate to the RunCloud Hub page in your RunCloud dashboard and select Enable next to the Redis Object Cache setting.
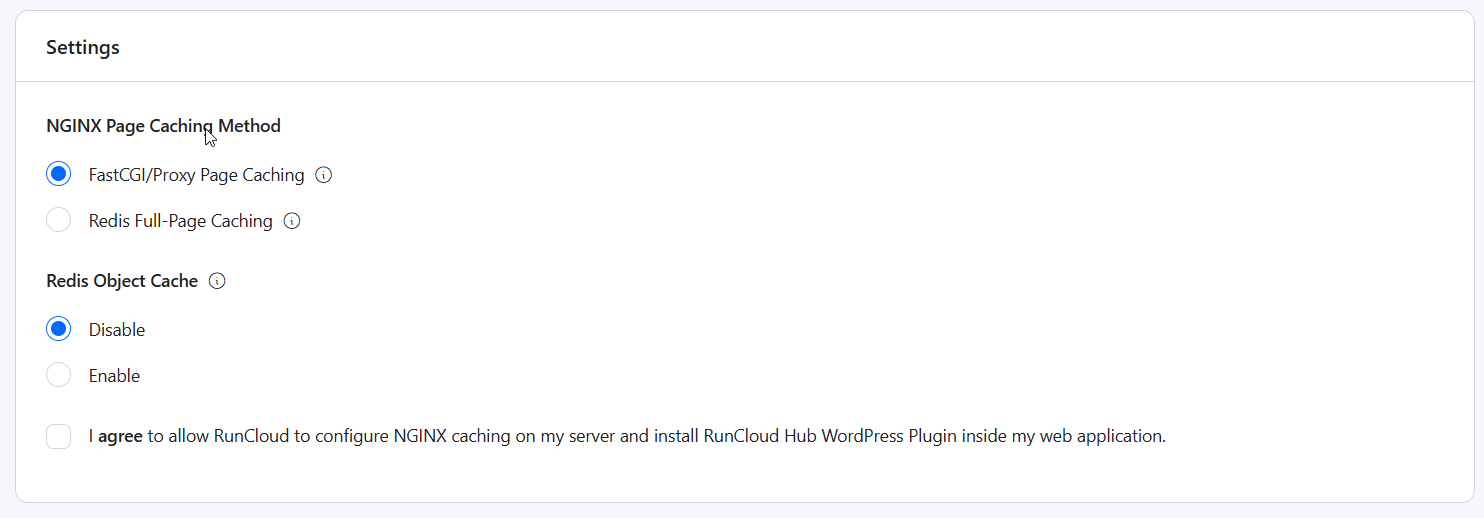
    Enabling this optimization significantly reduces the load on your MariaDB/MySQL database, which leads to faster dynamic page generation, a more responsive WordPress admin area, and a snappier experience for active shoppers navigating your store.

    📖 Suggested read: How to Easily Optimize Your WordPress Website With RunCloud Hub

    8. Enabling Redis ACL for Object Caching

    When you enable caching for your WooCommerce store, you inherently handle sensitive personal data and Personally Identifiable Information (PII). If you host multiple WordPress websites on the same server, this can create a security risk.

    In the case of a breach, if one of the websites gets infected, the attacker can access the cached data of other sites.

    To protect this data, it’s recommended that you enable Redis Access Control Lists (ACLs). This ensures that each website can only access its own cached data. It will also prevent a malicious plugin on one site from accessing the Redis data of your other sites.

    However, correctly configuring and maintaining this security can be challenging. That’s why we’ve pre-configured it in RunCloud Hub. When you install our plugin, Redis ACLs are automatically set up for your website, providing robust security with no extra effort.

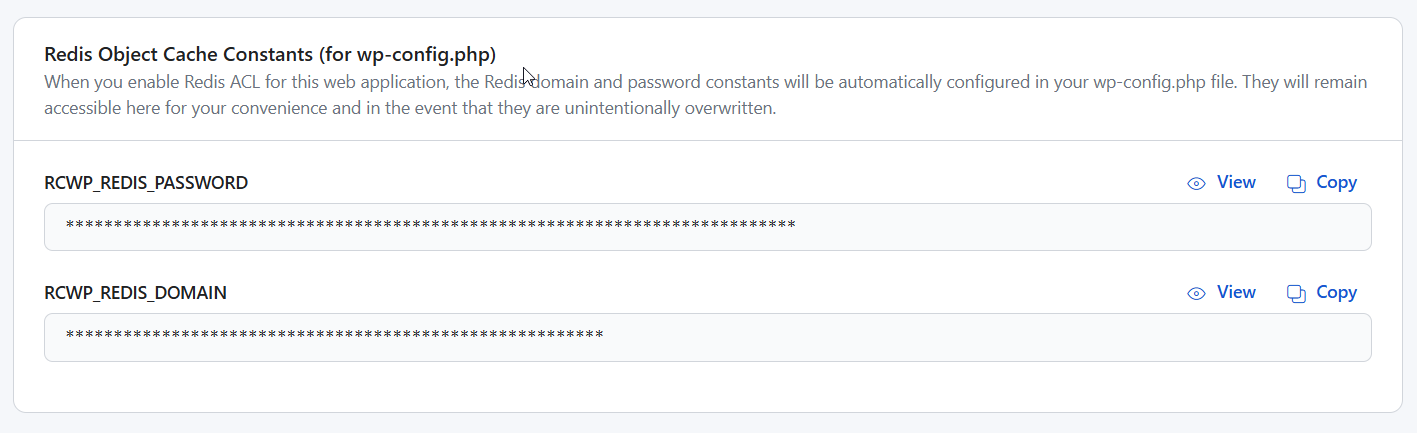
    You can verify this setting by navigating to the “Redis Object Cache Constants” section in the RunCloud Hub settings menu. If you see the following screen, then it is configured correctly.
    9. Testing and Troubleshooting Your Cache

    Creating a caching system is one thing, but running it is another. A flawed cache configuration can go unnoticed while silently costing you sales. After you deploy your cache, you should use two different web browsers or a regular and an incognito window to test it.

    Browse the site in the incognito window (representing a new, logged-out visitor) to ensure you are being served fast, cached pages. In the regular browser, log in as a test customer to verify that all dynamic functionality works correctly.

    During the tests, you should perform a complete test transaction: add a product to the cart, view the cart page, proceed to checkout, and check the mini-cart widget on various pages to ensure it updates correctly.

    Check that personalized content for logged-in users appears as it should. If you encounter an issue, the first step is to clear all caches, the plugin’s cache, any server-level cache, your CDN cache, and your browser cache, before re-testing.

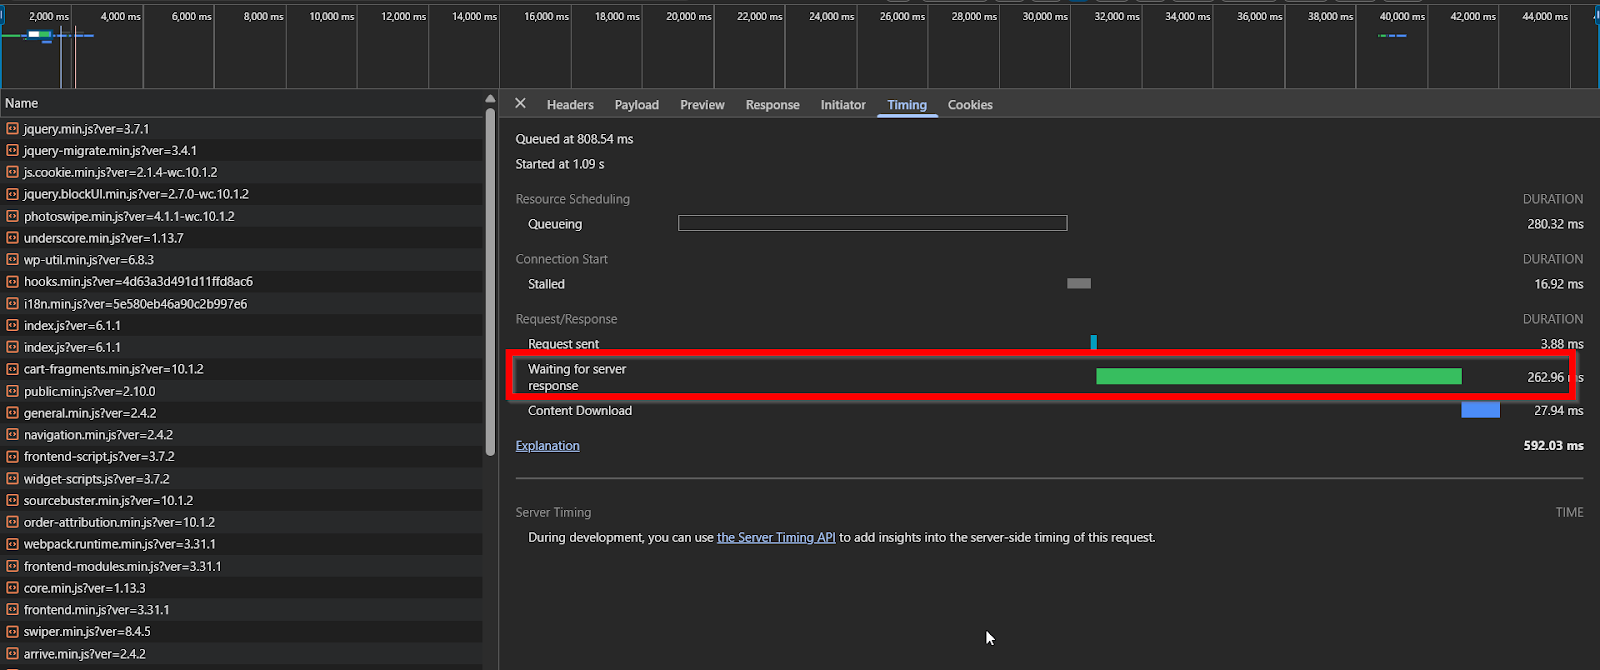
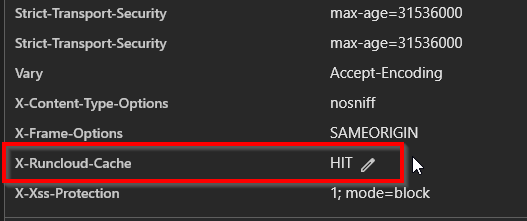
    If a problem persists, disable your most recently changed setting (e.g., JS minification) and test again, working backward to isolate the source of the conflict. You can also use your browser’s developer tools to inspect page response headers. This lets you see cache status codes in HTTP headers like X-Cache: HIT or X-RunCache-Status: BYPASS to confirm your rules are working as intended.
    Final Thoughts: Achieving Peak WooCommerce Performance with RunCloud

    In this guide, we have shown you that properly configuring cache for a WooCommerce store is a multi-layered process that requires a deep understanding of how static and dynamic content interact.

    Although manual configuration offers granular control, it also introduces multiple potential failure points that can be time-consuming to troubleshoot and disastrous if implemented incorrectly.

    This is precisely why we developed RunCloud Hub, our all-in-one optimization and management plugin.

    Built to integrate seamlessly with the RunCloud platform and eliminate these complexities, RunCloud Hub handles the actions mentioned above automatically and provides WooCommerce-aware caching out of the box with no manual rules required.

    Want WooCommerce caching without the headaches? Try RunCloud Hub, which is built for store owners.

    One of the most impactful optimizations for a busy WooCommerce store is Redis Object Caching, which dramatically speeds up backend operations and dynamic requests for logged-in users. This process can be tedious and complex, requiring the deployment of a Redis instance, installing a connector plugin, and manually configuring the connection.

    However, RunCloud Hub transforms this complex task into a single click. It automatically detects your RunCloud-managed Redis server and enables you to do object caching.

    By combining the raw power of RunCloud’s server-level caching with the intelligent, WooCommerce-aware optimizations of RunCloud Hub, you can achieve fast performance without needing to be a caching expert.

    This allows you to focus on what truly matters: growing your business, managing your products, and serving your customers.

    Ready to boost your store’s speed, stability, and conversions?

    Get started with RunCloud Hub and let your caching configure itself.

    FAQs on WooCommerce Caching

    What is the best caching plugin for WooCommerce?

    RunCloud Hub is one of the best caching plugins for WooCommerce. It automatically detects and excludes cart and checkout pages to prevent issues.

    Does WooCommerce work with Redis?

    Yes, WooCommerce works extremely well with Redis, primarily using it as a persistent object cache to efficiently handle database queries. This dramatically speeds up the WordPress admin area, user-specific content, and complex store operations, reducing server load. Enabling Redis caching with a single click on a managed server platform like RunCloud Hub is extremely easy.

    How can I use Memcached with WooCommerce?

    To use Memcached with WooCommerce, you must first ensure it is installed and running on your server, then use RunCloud Hub to integrate it as an object cache. Enabling cache stores repetitive database query results in memory, accelerating your site’s backend and dynamic functions.

    How do I exclude the cart and checkout from the cache?

    Leading caching plugins like WP Rocket and FlyingPress automatically exclude the default /cart/, /checkout/, and /my-account/ pages from the cache to ensure they remain dynamic. If you need to do this manually, find the “Do Not Cache URLs” or “Exclude Pages” section in your plugin’s settings and add the slugs for these critical pages. This is essential for a functioning e-commerce store.

    Can I use object caching in WooCommerce?

    Object caching is highly recommended for WooCommerce as it significantly reduces the number of database queries required for each page load. By storing query results in a fast-access system like Redis or Memcached, everything from product filtering to order processing in the backend is sped up.

    Why is my product search not updating?

    If your product search results are not updating with new products or price changes, the cause is almost always a stale page cache. Your caching system serves an old, static HTML version of the search results page instead of generating a new one. Clearing your site-wide cache or excluding the search results page will resolve this.

    Does caching affect WooCommerce search results?

    Yes, aggressive page caching can negatively affect WooCommerce search results by serving outdated or irrelevant content to users. To avoid this, you should exclude your search results page from the page cache so that it is always generated dynamically. Implementing an object cache can still speed up the search function by optimizing the underlying database queries.

    What is the difference between a caching plugin and server-level caching?

    A caching plugin runs within your WordPress installation, while server-level caching operates before WordPress loads, making it significantly faster and more efficient. It intercepts requests at the server level, delivering a cached page without engaging PHP or your database. RunCloud Hub provides this superior server-level caching functionality, which you can enable with one click for a performance boost that plugins alone cannot match.

    How do I choose the best hosting for a high-traffic WordPress site?

    For high-traffic sites, you need a scalable cloud server (from providers like Vultr, DigitalOcean, or AWS) paired with an expert server management panel. This combination provides raw power and fine-tuned control over your server environment. Using RunCloud Hub on your server allows you to easily manage resources and deploy critical performance features like single-click caching, ensuring your site remains fast and responsive under heavy load.

  • 8 Best cPanel Alternatives in 2026 (Ranked by Use Case)

    8 Best cPanel Alternatives in 2026 (Ranked by Use Case)

    For over 20 years, cPanel has been the default control panel for web hosting. But in 2026, default doesn’t always mean best.

    Rising licensing costs and changing hosting requirements have led many developers and agencies to consider server management tools with different pricing models, technology stacks, and workflows. 

    To help you navigate the options, we’ve analyzed 10 alternatives to cPanel based on performance, usability, cost efficiency, and scalability. 

    TL;DR: Which Alternative is Right for You?

    If you don’t have time to review every tool on this list, here is the cheat sheet based on your specific goals:

    • Best Overall for Developers & Agencies: RunCloud.
      • It combines a relatively accessible interface with support for multiple server stacks. It is suited to developers and agencies that manage multiple servers and want support for NGINX, OpenLiteSpeed, and Docker-based workloads. 
    • Best for Shared Hosting Resellers:Plesk.
      • If your business model relies on providing non-technical users with hosting accounts, built-in email, and a traditional graphical interface, Plesk is one of the closest direct alternatives to cPanel. 
    • Best for WordPress-Only Hosting:SpinupWP.
      • A solid, streamlined choice if you only ever host WordPress sites and don’t need to support other frameworks like Laravel or custom PHP apps.
    • Best Free Open-Source Solution:Virtualmin.
      • If you have zero budget and are comfortable with the Linux command line, this offers the most control without a monthly fee.

    How We Ranked These Alternatives

    We evaluated these 10 tools based on the four criteria that matter most to modern server administrators in [YEAR]:

    1. Performance Stack: Which web servers, caching technologies, application runtimes, and deployment options does the panel support? 
    2. Usability vs. Control: Can you perform complex tasks (like managing Cron jobs, firewall rules, or SSL deployment) without needing to open a command line?
    3. Cost at Scale: How does the price change as you add servers, websites, applications, or hosting accounts? 
    4. Multi-Server Management: How easy is it to manage 1, 5, or 50 servers from a single dashboard?

    Top cPanel Alternatives to Manage Servers

    There are many good server management solutions available in [YEAR]. In this section, we will review and analyze our 10 top picks: 

    cPanel alternativeFree/PaidEase of useNGINX supportOpenLiteSpeed supportDocker supportPricing
    RunCloudPaidVery easy to useYesYesYesFrom $9/month
    ApisCPPaidRequires technical knowledgeNoNoNoFrom $30/year
    SpinupWPPaidEasy to useYesNoNoFrom $12/month
    ServerPilotPaidStraightforwardYesNoNoFrom $5/server + $0.50/app/month
    VirtualminFree and paidRequires technical knowledgeYesNoNo native managementFree or from $7.50/month
    AjentiFreeRequires technical knowledgeLimitedNoNo native managementFree
    FroxlorFreeRequires some technical knowledgeYesNoNo native managementFree
    PleskPaidEasy to useYesNo native supportYes, via an extensionCheck current pricing
    ISPConfigFreeRequires technical knowledgeYesNoNo native managementFree
    CyberPanelFree with paid optionsModerateNoYesYesFree with paid options

    1. RunCloud

    RunCloud is a powerful and developer-focused alternative to cPanel, built from the ground up to support modern web application workflows. It’s a cloud-based server management panel that gives you full control over your infrastructure without the complexity and bloat of legacy solutions.

    Whether you’re hosting a personal project or managing dozens of client sites, RunCloud provides a central platform for deploying and maintaining websites on supported cloud servers and VPS instances.

    Unlike cPanel, which was built in a different era and retrofitted over time, RunCloud is engineered for developers, startups, and agencies that prioritize performance, flexibility, and ease of use. It integrates seamlessly with multiple cloud providers, including DigitalOcean, Vultr, Linode, AWS, and Hetzner, and supports both x86 and ARM architectures.

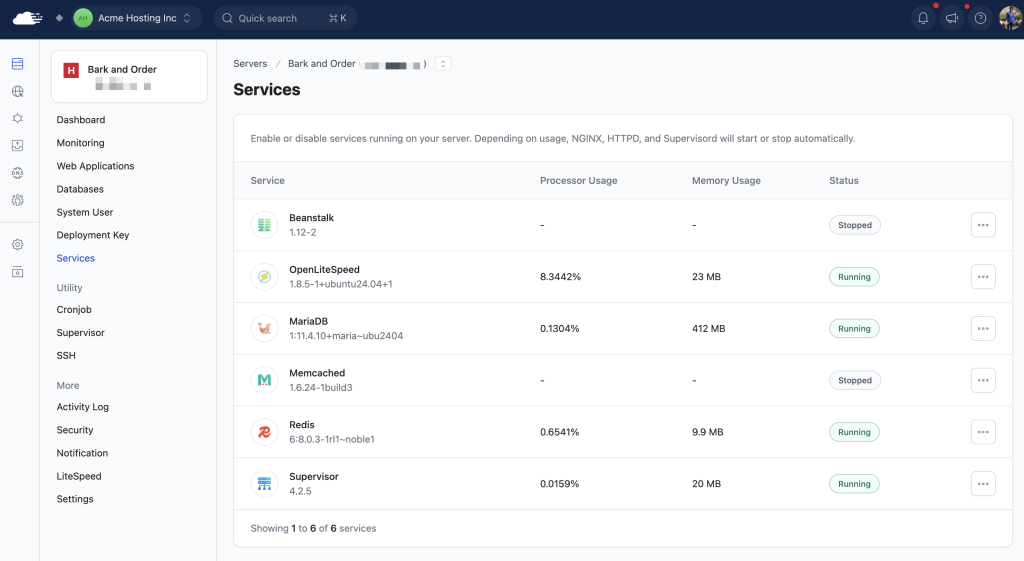
    RunCloud services dashboard

    Core Features and Advantages

    • One-Click Application Installation: RunCloud lets you deploy essential applications like phpMyAdmin and WordPress with a single click.
    • Comprehensive Resource Monitoring: You can use it to monitor server performance metrics directly from the RunCloud dashboard. This allows you to track CPU usage, memory consumption, and disk space without installing additional tools.
    • Automated Backup System: RunCloud protects your valuable data with scheduled automated backups that can be configured to store critical files and databases locally or in remote storage solutions of your choice.
    • Flexible Server Stack Options: RunCloud lets you choose between multiple NGINX and Apache server configurations on x86 and ARM servers, allowing you to select a stack that suits your application’s performance and compatibility requirements. 
    • Advanced Caching Solutions: Boost website performance with support for multiple caching technologies, including NGINX full-page caching, Redis object caching, and LS Cache for lightning-fast content delivery.
    • Streamlined Development Workflow: RunCloud lets you deploy applications from Git repositories and create WordPress staging environments. Eligible plans also include Cloudflare DNS management features. 

    Why Developers Choose RunCloud Over cPanel

    • RunCloud provides full control of your server (no abstraction or black-box configurations).
    • RunCloud has a clean, fast, and purpose-built UI for developers.
    • RunCloud works across all major cloud platforms, with simple onboarding for each.
    • Backups, staging, caching, and automation tools are included in RunCloud from day one.

    RunCloud is designed as a focused productivity platform for developers and agencies who want greater control over their infrastructure and deployment workflows.

    Who is RunCloud NOT for?

    To be transparent, RunCloud is not designed to be a “shared hosting” panel for selling $5/month hosting accounts to beginners. Unlike cPanel, we do not bundle email hosting directly on your web server.

    Keeping email separate from the web server can reduce resource contention and simplify email security and deliverability management. RunCloud therefore focuses on web application hosting, while services such as Google Workspace or Zoho can handle business email. 

    Pricing

    RunCloud offers straightforward, flat-rate pricing that scales with your needs. You won’t find hidden fees or pay-per-site charges here. There are no per-app costs, and all plans include full access to the platform’s core features:

    • Essentials ($9/month): Provides foundational infrastructure, including 1 server, unlimited web applications, backups (2GB free storage, unlimited external to S3/SFTP), domain management, 1-click SSL, Git deployment, server-side caching, and 1 staging environment.
    • Professional ($19/month): Increases capacity to 50 servers, 10GB of free backup storage (with Dropbox support), 10 staging environments, and adds features such as application cloning, custom NGINX configurations, and a 6G/7G firewall.
    • Business ($49/month – Best Value): Aimed at teams with mission-critical workloads, enhancing Professional with 100 servers, 30GB free backup storage, atomic (zero-downtime) deployment, advanced SSL, advanced user management (10 seats), Cloudflare DNS, unlimited staging, support for all external backup providers, a ModSecurity WAF, and API access (120 req/min, 10k/month).
    • Enterprise ($399/month): Caters to large businesses that need scale, SLA, or compliance, expanding on Business with 500 servers, 100GB of free backup storage, 50 team seats, and significantly higher API limits (300 req/min, 400k/month).

    2. ApisCP

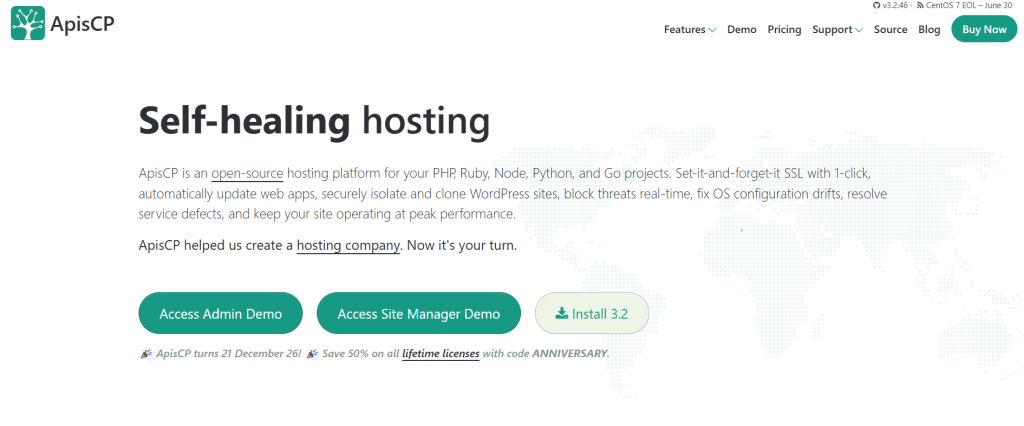
    ApisCP is an open-source hosting control panel built with PHP, Ruby, Node.js, Python, and Go, tailored for managing web applications. It’s engineered to provide a high degree of automation and includes built-in self-maintenance features. The goal is to offer server administrators and hosting providers a “set-it-and-forget-it” experience.

    This automation can reduce routine administration, although administrators must still understand the underlying configuration and review changes in production environments. 

    ApisCP includes a robust set of automated features, including one-click SSL certificate deployment and renewal via Let’s Encrypt, automatic updates for common web applications such as WordPress, Joomla, and Drupal, and mechanisms for securely isolating individual websites. These are particularly useful for hosting providers managing many WordPress installs. There are also proactive security measures, such as real-time threat blocking and automated remediation of system misconfigurations.

    That said, the learning curve with ApisCP is noticeably steeper, and its ecosystem is more niche. While technically robust, its interface and workflow may be less intuitive for developers looking for immediate usability and broad community familiarity. Compared with platforms designed around a simpler graphical workflow, ApisCP is more likely to appeal to experienced administrators comfortable with its command-line tools, Bootstrapper, and server configuration model. 

    Apis CP website homepage

    Pricing

    ApisCP offers licensing primarily on a per-server basis and allows users to host numerous domains and accounts, limited only by the server’s resources. The standard recurring options include:

    • Pro License: $20 per server per month. It hosts unlimited domains and accounts, includes panel updates, provides Bronze-level support (one free incident per year), and is transferable.
    • Startup License: $50 per server per year. Allows up to 30 domains or accounts, with unlimited subdomains, users, and databases.
    • Mini License: $30 per year per server. Supports up to 10 domains or accounts, with the same unlimited subdomains, users, and databases.

    ApisCP offers value to those who want to customize their stack deeply and prefer an open-source foundation.

    Who is ApisCP NOT for?

    While ApisCP is highly praised for its strict security features and performance-focused architecture, its unique design choices mean it isn’t the right fit for everyone. 

    • Users who require Debian or Ubuntu: ApisCP’s documented installation requirements currently specify RHEL-based systems, including Rocky Linux, AlmaLinux, and RHEL. It is therefore unsuitable for administrators who need to retain a Debian- or Ubuntu-based server environment. 
    • Beginners looking for a purely point-and-click experience: Unlike cPanel, which handles almost everything through a graphical interface, ApisCP heavily relies on its command-line helper (cpcmd), Ansible playbooks (Bootstrapper), and “Scopes” for advanced server management. Users who lack basic Linux system administration skills or feel intimidated by terminal-based configuration will likely find the platform’s learning curve steep.

    3. SpinupWP

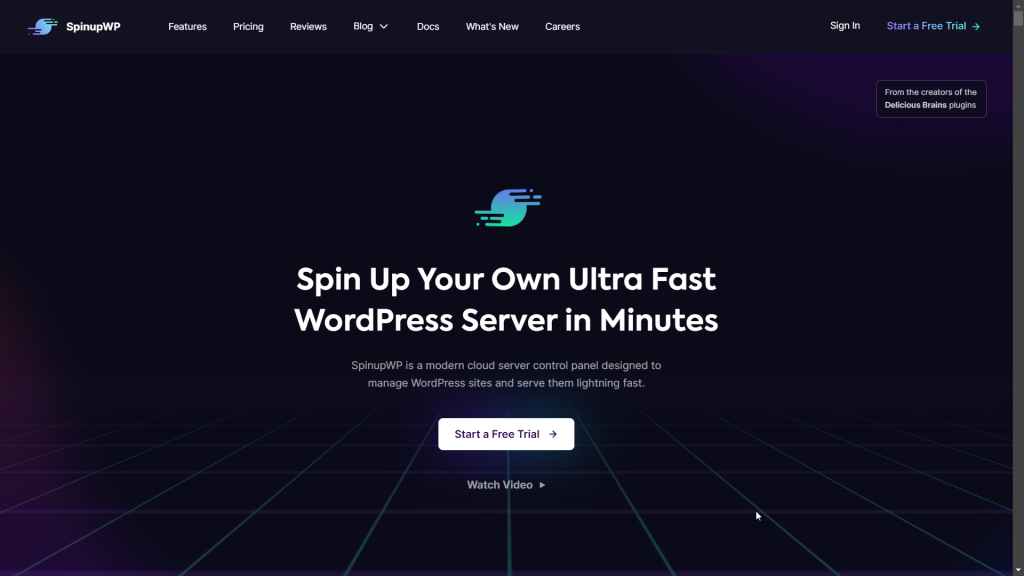
    SpinupWP is a modern, cloud-based server control panel optimized for hosting and managing WordPress websites. Unlike traditional control panels that install extensive software packages directly on the server, SpinupWP connects to servers remotely via SSH to configure and manage servers hosted with providers such as DigitalOcean, AWS, Vultr, Linode, Hetzner, or on-premises hardware.

    The SpinupWP platform automates many best practices for WordPress hosting right after site creation. This includes configuring NGINX with recommended caching rules (browser caching, full-page caching, and Redis object caching), obtaining and automatically renewing free Let’s Encrypt SSL certificates, setting up server-side cron jobs essential for WordPress scheduled tasks, and optimizing server configurations to maximize WordPress performance.

    In addition, SpinupWP offers integrated backup functionality, allowing scheduled or on-demand backups to various cloud storage providers. Restoration is straightforward, ensuring that sites can be recovered quickly if something goes wrong.

    📖 Recommended Read: What is Managed WordPress Hosting?

    SpinupWP website homepage

    Pricing

    • Essentials Plan: Starts at $12 per month for one server. Designed for a single user, it includes daily backups per site, standard email support, and unlimited staging sites.
    • Advanced Plan: Starts at $19 per month for one server. This plan offers more flexible backup schedules (up to four daily, weekly, and monthly options), priority email support, multi-user access with permissions management, integrated site monitoring, and a “magic login” feature for WordPress sites.

    SpinupWP is a strong choice if your hosting needs are purely WordPress-focused. It removes much of the manual configuration work and makes it easy to deploy fast, well-optimized WordPress sites with best practices preconfigured out of the box.

    However, this WordPress-specific optimization also comes with certain limitations. SpinupWP doesn’t cater to broader use cases, such as managing PHP applications beyond WordPress, customizing server stacks, or deploying Node.js apps. If your projects grow beyond WordPress or require flexibility across different frameworks and languages, you may quickly find SpinupWP’s focus too narrow.

    Who is SpinupWP NOT for?

    SpinupWP is widely praised for bringing managed hosting speeds to unmanaged cloud servers. However, its highly specialized nature means it isn’t a universal cPanel replacement. 

    • Users hosting diverse, non-WordPress applications: SpinupWP is explicitly purpose-built for WordPress. If your infrastructure relies on Node.js, Python, or complex non-WordPress frameworks, you will find its focus far too narrow and lacking in broader multi-stack deployment tools.
    • Agencies requiring traditional, all-in-one client hosting features: Administrators who need to provide clients with traditional webmail, or who require granular, white-labeled multi-tenant dashboards for reselling, will find the platform overly restrictive.

    4. ServerPilot

    ServerPilot is built to manage cloud servers, particularly for PHP applications like WordPress. It focuses on offering a lightweight panel that enables users to set up and manage cloud instances without needing extensive server administration knowledge. ServerPilot supports modern protocols such as HTTP/3 and handles multiple PHP versions concurrently via PHP-FPM, optimizing server performance by automatically scaling PHP processes based on demand.

    One of ServerPilot’s strengths is its straightforward access to server and application logs through the web interface. This eliminates the need for SSH access for basic diagnostic tasks, which is useful for developers or site owners who prefer to work in a browser-based dashboard. ServerPilot also automates the deployment and renewal of free Let’s Encrypt SSL certificates and, by default, configures servers with modern security protocols, such as TLS 1.3.

    ServerPilot charges separately for each connected server and each deployed application. This can make it less cost-effective than flat-rate alternatives for users managing many applications, so prospective users should calculate the combined server and application charges before choosing a plan. 

    Another limitation is that ServerPilot’s feature set is deliberately minimal. It does not include integrated backup management or native Git deployment, and it offers less control over the underlying web server stack than platforms that offer a choice of server configurations. Monitoring features also depend on the selected plan. These are critical tools for modern workflows that developers increasingly expect as standard.

    ServerPilot website homepage

    Pricing

    • Economy Plan: Starting at $5 per server plus $0.50 per application monthly (billed hourly).
    • Business Plan: Starting at $10 per server plus $1 per application monthly (adds log viewing, server resource metrics, and priority support).
    • First Class Plan: Starting at $20 per server plus $2 per application monthly (adds detailed MySQL metrics and higher-priority support).

    Who is ServerPilot NOT for?

    Here is a look at who ServerPilot is NOT for:

    • Administrators requiring diverse OS support and non-PHP stacks: ServerPilot is rigidly designed to host PHP and WordPress applications exclusively on Ubuntu cloud servers. If your infrastructure relies on RHEL-based distributions (like AlmaLinux or CentOS) or Debian, you will find this platform entirely incompatible with your needs.
    • Agencies hosting a massive volume of small, low-traffic applications: ServerPilot uses a subscription-based pricing model that charges a base monthly fee per server, plus an additional fee per deployed application (e.g., a website). For freelancers or agencies attempting to pack dozens or hundreds of small, low-budget client sites onto a single cloud server, this per-app pricing structure scales poorly. It becomes significantly more expensive than flat-rate or one-time license alternatives.

    📖 Recommended Read: Website Backups

    5. Virtualmin

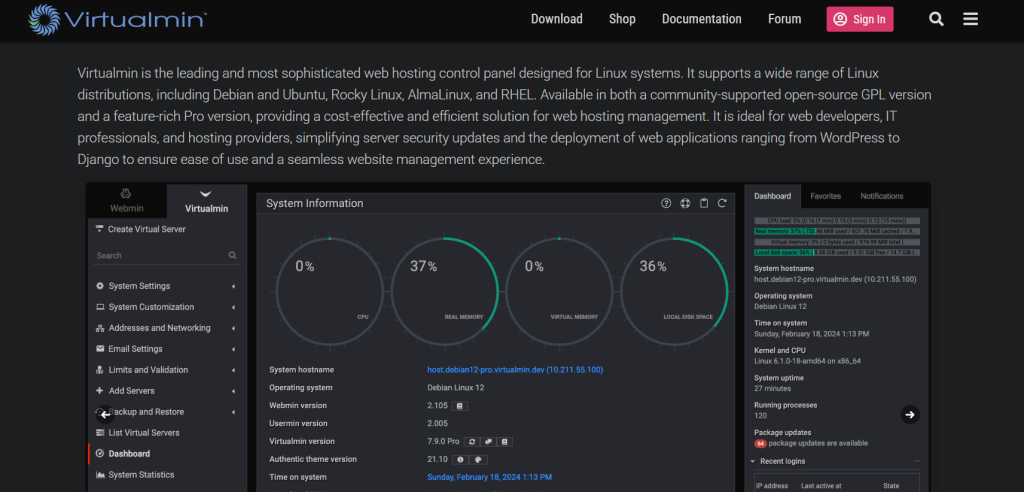
    Virtualmin is a comprehensive web hosting control panel engineered specifically for Linux systems. It is broadly compatible and supports major distributions, including Debian, Ubuntu, and RHEL derivatives such as Rocky Linux and AlmaLinux. For developers and system administrators who prefer a Linux-first, command-line-centered environment, Virtualmin offers a robust foundation.

    The platform offers two distinct flavors: a community-supported, open-source, GPL version and a Pro version with additional features and commercial support. This flexibility allows users to choose based on their budget and level of technical expertise.

    Both versions of Virtualmin aim to simplify server administration. Users can handle essential tasks such as applying security updates, managing user accounts, deploying web applications, and configuring services like email and databases through a web-based control panel.

    Virtualmin also provides robust backup capabilities, supporting cloud storage destinations such as Amazon S3, Google Drive, and Dropbox. Migration tools allow users to transfer websites between servers, and detailed logging and monitoring are available for those who want to examine system metrics. It also includes one-click installers for popular applications like WordPress and phpMyAdmin, and even features a built-in terminal for command-line access via the browser.

    Virtualmin website homepage

    Pricing

    • Virtualmin GPL: Free, open-source version with community support.
    • Virtualmin Professional: $7.50 per month, allowing management of up to 10 domains, with enhanced features and commercial support.

    Who is Virtualmin NOT for?

    Here are a few reasons why Virtualmin might not be right for you:

    • Beginners expecting a modern, streamlined user interface: Users looking for a simple, intuitive, point-and-click dashboard will likely find the massive array of technical menus and steep learning curve overwhelming.
    • Administrators wanting a lightweight, minimalist server stack: A standard Virtualmin installation can include DNS, email, spam filtering, and database services. This broader shared-hosting feature set may consume more resources than a web-only panel, making it less suitable for low-resource servers or users hosting only one application.

    6. Ajenti

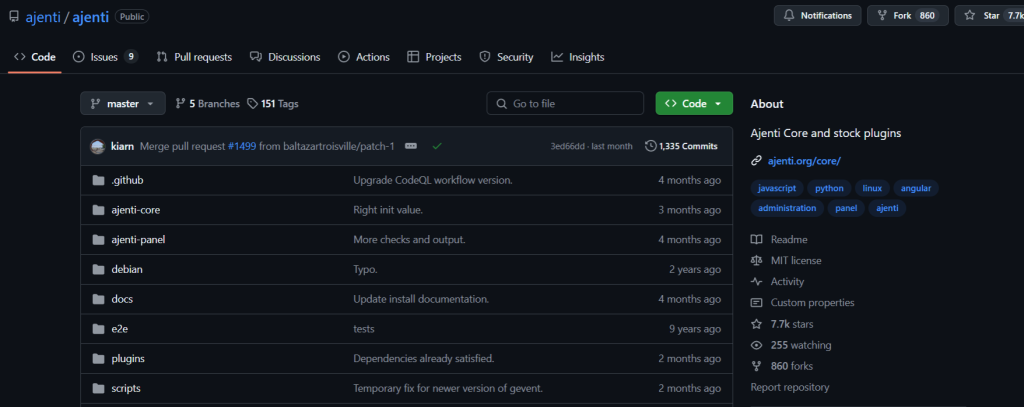
    Ajenti is a modular web interface platform built on the Python library Ajenti Core. This foundational component provides the essential infrastructure, including an event-loop-based HTTP server, a socket engine supporting WebSockets (with XHR polling as a fallback), and a container system for managing plugins and modular functionality.

    Ajenti Panel, the default distribution, bundles a startup script and a collection of standard administrative plugins, such as a file manager, network configuration tools, and service management utilities. This creates a lightweight, ready-to-use control panel experience for users who want to manage basic server functions without relying on heavyweight alternatives like cPanel.

    Ajenti’s architecture is highly modular. Virtually any component can be replaced or extended via its Python API, offering developers the flexibility to customize routing, file handling, SSL implementation (including client certificate authentication), and server features through custom plugins. Dependency injection is used throughout the platform to manage services and plugins efficiently.

    Ajenti provides its web interface platform at no cost under the permissive MIT license. As an open-source project, Ajenti does not provide the same guaranteed release schedule or dedicated support agreements as a commercial control panel. Users may therefore need to rely on its documentation, community resources, and their own Linux knowledge when maintaining plugins or troubleshooting problems. 

    Ajenti github repository

    Pricing

    • Ajenti: Free and open-source under the MIT License.

    Who is Ajenti NOT for?

    Here are a few reasons why Ajenti might not be right for you:

    • Agencies needing a highly integrated, production-ready shared hosting ecosystem: Its web hosting extensions do not provide the same breadth of integrated reseller and multi-tenant hosting features as established commercial control panels. 
    • Administrators looking for premium, 24/7 official technical support: Ajenti is a free, open-source tool maintained by a relatively small team of developers, so it lacks the guaranteed enterprise support networks of commercial panels. 
    • Beginners who expect a fully automated, point-and-click server setup: While the dashboard is visually modern, Ajenti requires a steeper learning curve and foundational Linux administration skills to configure server components effectively. 

    📖 Recommended Read: Host Multiple Websites on One Server

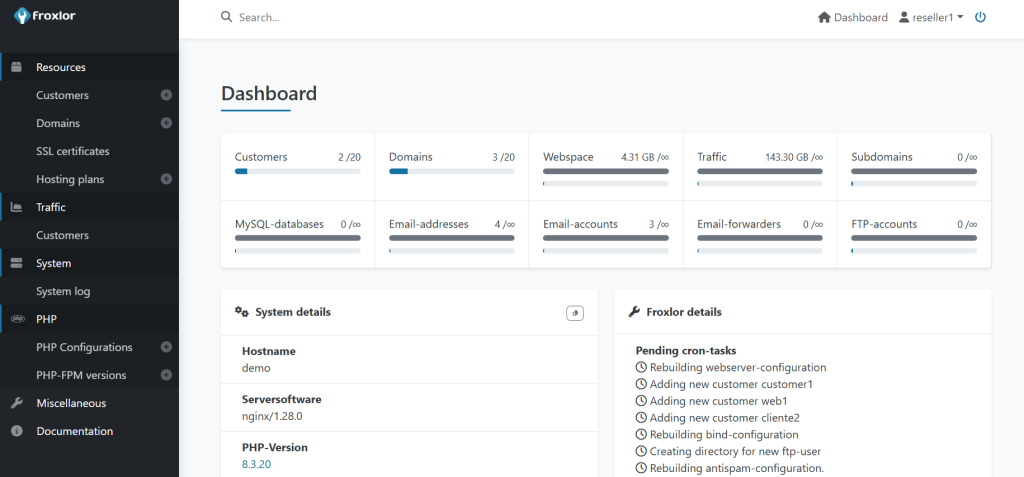
    7. Froxlor

    Froxlor is a lightweight, open-source (GPL) server management panel designed to simplify the administration of hosting platforms. It focuses on providing a straightforward interface for managing domains, databases, email accounts, and server configurations without the heavy resource overhead associated with larger control panels like cPanel.

    The latest major release of Froxlor introduced significant improvements to modernize the platform. Notably, the user interface has been revamped to offer a fully responsive, mobile-friendly experience, with both light and dark modes and expanded customization options via Twig templates. These updates make the panel more approachable and flexible, allowing users to tailor the look and feel to their preferences.

    Froxlor continues to maintain compatibility with major operating systems, including Debian 12 (Bookworm) and Ubuntu 24.04 (Noble). However, upgrading from older versions can present serious challenges. Unlike commercial solutions that offer migration assistance or automated upgrade paths, Froxlor relies heavily on community support and documentation. Managing upgrades manually can be risky and technically demanding, and in some cases, mistakes during an upgrade can result in significant downtime, potentially affecting all websites hosted on the server.

    Froxlor website homepage

    Pricing

    • Froxlor: Free and open-source under the GPL license.

    Froxlor’s open-source, no-cost model makes it attractive for technically skilled users managing their own environments on a tight budget. It provides enough functionality for personal servers, development environments, or non-critical projects to get basic hosting tasks done without licensing fees.

    Who is Froxlor NOT for?

    Froxlor is a lightweight, customizable, and free open-source control panel. Its lightweight philosophy means it is not a direct, feature-for-feature drop-in for everyone:

    • Beginners seeking an all-inclusive, point-and-click hosting environment: Because Froxlor is designed as a lightweight configuration manager, it does not include some features found in larger hosting suites, such as a built-in graphical file manager, drag-and-drop site builder, or extensive one-click application catalog. 
    • Enterprises demanding guaranteed, 24/7 commercial technical support: As a community-driven open-source project, Froxlor does not include the guaranteed service-level agreements or dedicated technical support offered by commercial control panels.

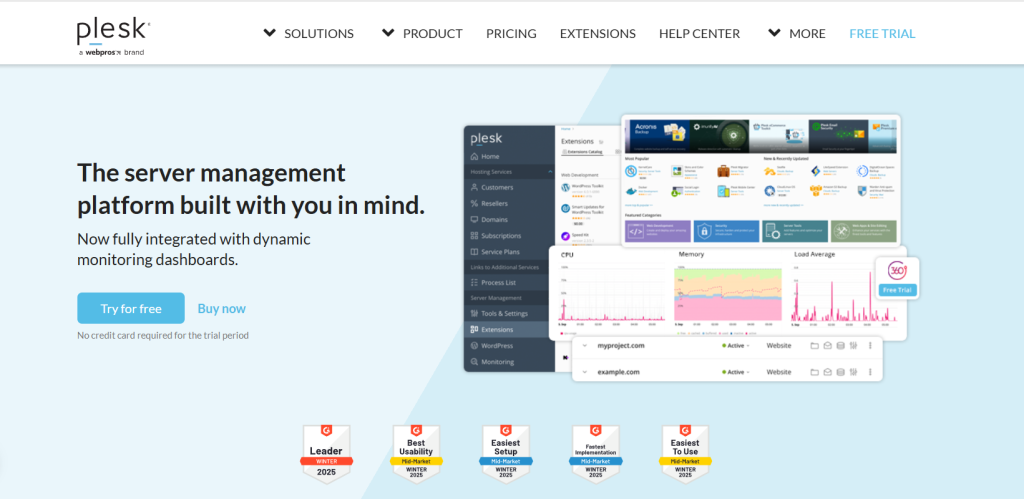
    8. Plesk

    Plesk is a WebOps platform that manages user accounts, hosting resources, and service plans. Administrators can use it to create individual accounts, assign specific roles and permissions, and group users under subscriptions tied to pre-defined service plans that govern resource allocations such as disk space and bandwidth.

    Its broad, all-in-one feature set may require more server resources than narrower web application management panels, making it less suitable for some low-resource VPS environments. For a detailed breakdown of how Plesk compares to other control panels and a list of competing products, see our article on Plesk Alternatives.

    Plesk website homepage

    Pricing

    • Web Admin Edition: Supports up to 10 domains and includes WP Toolkit SE.
    • Web Pro Edition: Supports up to 30 domains and includes the full WP Toolkit.
    • Web Host Edition: Supports unlimited domains and includes the full WP Toolkit.

    Plesk prices vary by server type, billing period, region, and current offer, so check its pricing page for the current rate.

    Plesk has long been a popular choice among shared hosting providers and businesses that need to manage multiple user accounts under a single server or cluster. It provides powerful administrative tools and a familiar environment for users coming from the traditional web hosting world.

    Who is Plesk NOT for?

    Plesk supports both Linux and Windows and offers an extensive extension marketplace, but its pricing and broad feature set will not suit every use case: 

    • Budget-conscious freelancers and small agencies: Plesk has undergone several price increases over the past few years. Its tier-based licensing may be less cost-effective than flat-rate or open-source alternatives for users who host only a few websites or operate on narrow margins.
    • Administrators running low-resource, minimalist cloud servers: Plesk includes a broad range of services and background processes to support its hosting, email, security, and account-management features. This can require more server resources than a narrower web-only panel, so users running low-resource VPS instances should check the system requirements before choosing it. 

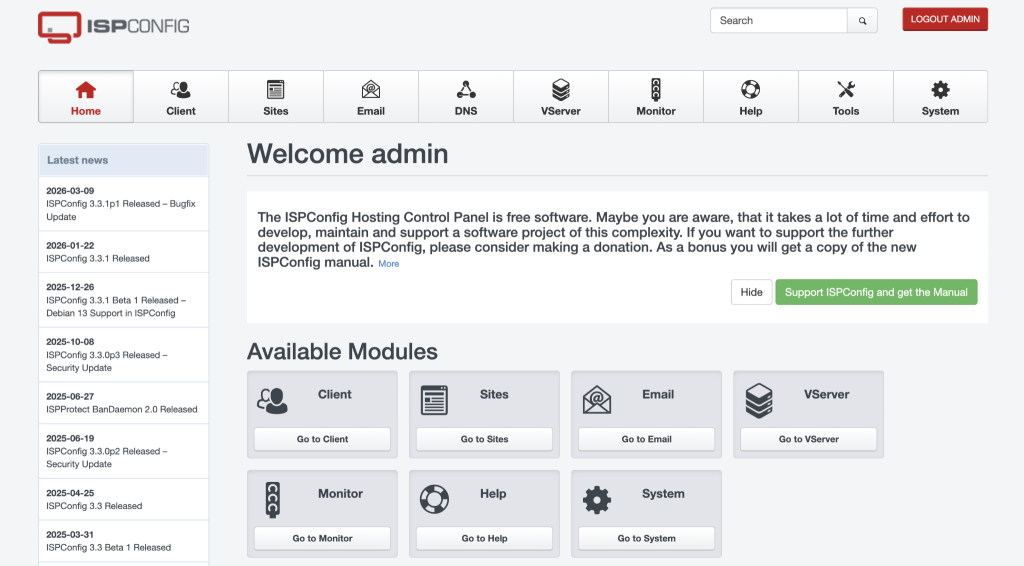
    9. ISPConfig

    ISPConfig is an open-source, multi-server control panel for hosting providers and system administrators to manage a distributed hosting infrastructure from a centralized dashboard. It uses a secure, multi-level user hierarchy that clearly segregates administrators, resellers, clients, and email users, allowing system owners to delegate administrative tasks safely without giving away root-level operating system access.

    ISPConfig website homepage

    System administrators can choose to install ISPConfig in single-server mode, which combines all services on one machine, or distribute dedicated roles (such as a standalone mail node or a dedicated database cluster) across separate nodes to prevent resource contention.

    It also offers granular resource-limiting tools that let you cap disk space, databases, cron jobs, and email traffic per client or reseller. However, it lacks native OpenLiteSpeed support and does not include an integrated graphical file manager, meaning users must handle file transfers via FTP or SSH.

    Pricing

    The developers distribute ISPConfig under the open-source BSD license, which makes the platform completely free with no paid version, licensing costs, or feature gating. While the core software costs nothing, the ISPConfig support partner network offers paid, enterprise-level consulting, remote installation assistance, and server migration services for businesses that require guaranteed technical support.

    Who is ISPConfig NOT for?

    ISPConfig is not for beginners or less-technical users who want a completely hands-off, “point-and-click” hosting setup. The installation process is somewhat complex and relies on command-line scripts and manual configuration, so skipping a single dependency or misconfiguring the system hostname can break the setup.

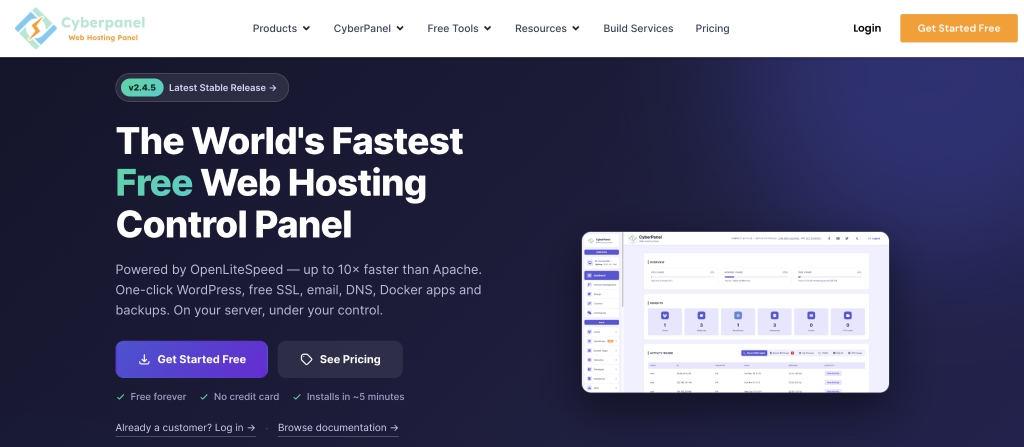
    10. CyberPanel

    CyberPanel is a modern web control panel and high-performance OpenLiteSpeed web server that delivers a lightweight, speed-optimized hosting platform primarily tailored for WordPress users. The system runs on unmanaged virtual private servers running Ubuntu (20.04, 22.04, or 24.04), AlmaLinux (8 or 9), or CloudLinux.

    By integrating natively with OpenLiteSpeed, CyberPanel processes web traffic efficiently while maintaining full compatibility with Apache .htaccess rewrite rules and using the LiteSpeed Cache (LSCache) engine to accelerate dynamic web pages. It also includes a built-in email server which runs Postfix and Dovecot, local DNS server management, an FTP server, and a graphical file manager.

    CyberPanel website homepage

    It also offers modern features such as a Git Manager to set up auto-deployments directly from GitHub or GitLab repositories, one-click WordPress staging environments, and a basic Docker Manager to deploy and pull containerized applications. 

    Pricing

    The core CyberPanel platform, configured with the OpenLiteSpeed web server, is completely free and imposes no artificial limits on the number of domains, databases, or accounts you can host. If your organization requires the commercial LiteSpeed Enterprise web server, license tiers range from $15 to $35 per month. Some optional CyberPanel services and dashboard features require separate paid plans or add-ons. Check CyberPanel’s current pricing information before publication, as prices and packaging may change. These features can include: 

    • WordPress Manager (advanced staging, backup, and theme controls)
    • Root File Manager
    • Google Drive Backup Retention
    • Rspamd Manager (spam and virus protection for mailboxes) 

    Who is CyberPanel NOT for?

    Security-conscious administrators should review CyberPanel’s vulnerability history and update practices carefully before using it in production. Several versions were affected by critical remote-code-execution vulnerabilities in 2024, including vulnerabilities that were exploited in the wild. Users should run a supported, fully patched release and maintain independent off-server backups.

    Final Thoughts: Choosing the Right cPanel Alternative 

    Throughout this guide, we’ve explored a range of suitable alternatives for server and website management. Each platform brings something valuable to the table, from open-source flexibility to WordPress-focused simplicity. But after comparing features, pricing structures, scalability, and real-world usability, one conclusion becomes clear:

    For many developers and agencies, RunCloud offers one of the most balanced combinations of usability, performance, and infrastructure control among modern server management platforms.

    Unlike traditional control panels designed primarily for shared hosting environments, RunCloud focuses on modern development workflows and cloud-based infrastructure management. It offers full access to your servers without compromise, enabling you to manage, monitor, and scale projects with confidence. Whether you’re deploying WordPress sites, custom PHP applications, Laravel projects, or scaling agency workloads across multiple servers, RunCloud gives you the tools you need, with the efficiency and control you deserve.

    Instead of layered licensing models or extension-heavy architectures, RunCloud provides a unified platform that simplifies server management, deployment workflows, and infrastructure monitoring.

    If you are exploring alternatives to cPanel, RunCloud is worth considering for your shortlist.

    You can start a free trial of RunCloud to see how it fits your workflow and infrastructure needs.

    Frequently Asked Questions About cPanel Alternatives

    What are the best free and open-source alternatives to cPanel?

    There are several open-source alternatives, including Virtualmin, Froxlor, and Ajenti. These options offer core server management features without licensing fees, but typically require more technical expertise. They often lack the polished interfaces, integrated security, and responsive support systems that platforms like RunCloud provide.

    Can I host a website without using cPanel?

    Yes, you can. Many developers now prefer modern cloud panels such as RunCloud, SpinupWP, or ServerPilot, or even manage servers manually via SSH. Tools like RunCloud offer better performance, lower resource usage, and more streamlined workflows compared to traditional control panels.

    What are the benefits of using RunCloud over traditional control panels?

    RunCloud was built for modern developers. It offers fast deployments, Git integration, performance monitoring, caching solutions, automated backups, and multi-server management – all without the clutter and limitations typical of traditional panels like cPanel and Plesk.

    Is RunCloud a good alternative to cPanel for beginners?

    Yes, RunCloud is beginner-friendly without sacrificing power. The dashboard is intuitive, the setup processes are automated, and tasks like SSL setup, backups, and app deployment are simplified, making it accessible for newcomers and time-saving for experienced users.

    How easy is it to migrate from cPanel to an alternative like RunCloud?

    Migrating from cPanel depends on the size and complexity of your setup, but RunCloud simplifies the process with tools like Git-based deployments, database importers, and one-click WordPress installations. With proper planning, many sites can be moved with minimal downtime.

    Can I migrate my WordPress site from cPanel to RunCloud?

    Yes, easily. You can use manual backup/restore methods or RunCloud’s Git deployment and database management tools to handle the migration. RunCloud also provides a professional website migration service. After you migrate your website, you can use RunCloud’s staging environments to test your migration before going live.

    Does RunCloud support both NGINX and Apache server stacks?

    Yes. RunCloud lets you choose between an NGINX-only stack for maximum performance or an NGINX+Apache hybrid stack for broader compatibility. You can configure your server stack based on your specific application requirements. In addition to this, RunCloud also supports OpenLiteSpeed and Docker. 

    Does RunCloud include automated backup options?

    Yes. RunCloud allows you to schedule backups to local storage or remote services like Amazon S3 or Google Drive. Backup and restore processes are simple, fully integrated, and don’t require separate plugins or tools.

    Is RunCloud more affordable than cPanel?

    For most developers and businesses, yes. RunCloud charges a flat monthly fee based on the server, not per domain or user account. Unlike cPanel’s layered pricing model, RunCloud lets you deploy unlimited applications on a single server without extra fees.

    📖 Recommended Read: Website Backups Without the Headache

  • How To Migrate Away from cPanel Hosting (The Escape Guide)

    How To Migrate Away from cPanel Hosting (The Escape Guide)

    Tired of cPanel’s limits? You’re not alone.

    If you’ve ever been frustrated by slow performance during traffic spikes, blocked from switching PHP versions, or forced to file support tickets just to tweak server settings, you’ve already outgrown cPanel.

    RunCloud is the next step.

    It gives you full control over your own cloud server, with a clean, intuitive dashboard that makes server management simpler, not harder. No more waiting on support. No more working around arbitrary limits.

    This guide walks you through exactly how to migrate your WordPress site from a traditional cPanel setup to a cloud server managed by RunCloud. Step by step.

    No guesswork. No wasted time.

    Let’s get started.

    Note: If you’re not confident handling the migration yourself, RunCloud offers free expert migration for your first site. You’ll find more details at the end of this guide.

    Why Migrate From cPanel to RunCloud?

    You might be satisfied with your current server management platform, but RunCloud solves problems that you may not even know you have.

    Developers using cPanel can find themselves constrained. Switching PHP versions for specific projects, installing necessary extensions (like imagick or redis), or fine-tuning web server configurations (NGINX vs. Apache) can be slow, require support tickets, or simply be unavailable. This friction slows down development cycles and innovation.

    • RunCloud gives you complete control over the underlying cloud server infrastructure, unlike some cPanel hosts that might limit your access. You are not locked into a specific provider’s way of doing things and have the freedom to manage your server directly. This level of control allows for deeper customization and optimization specific to your needs.

    • Creating a testing version of your WordPress website, known as a WordPress staging environment, is incredibly simple with RunCloud’s one-click feature. This allows you to safely test updates, plugins, or design changes without affecting your live visitors.

    • Changing your website’s PHP version is very easy within the RunCloud dashboard. This allows you to upgrade for better performance or switch versions for compatibility testing with themes and plugins.

    • RunCloud provides a secure method to run websites requiring older, outdated PHP versions without jeopardizing the security of other sites on the same server. This is possible using the RunCloud Docker stack, which has built-in isolation that allows legacy applications to function safely alongside modern, secure websites.

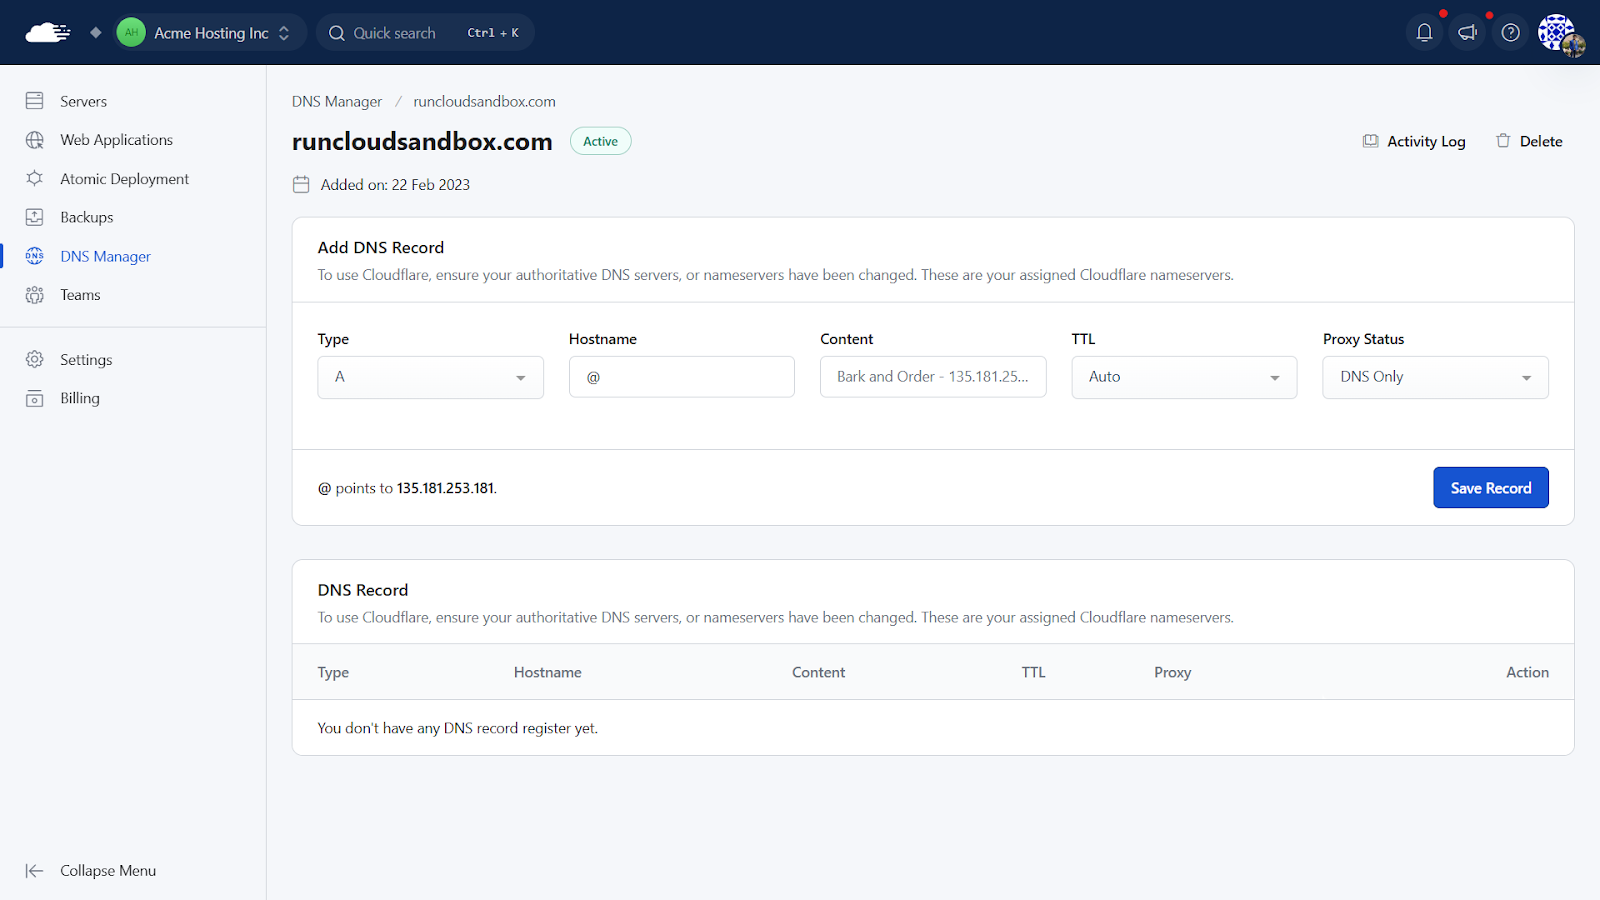
    • RunCloud includes built-in integration with Cloudflare and simplifies how you manage your website’s DNS records. This connection lets you handle DNS updates and configurations more efficiently directly through the RunCloud panel, making linking your domain via Cloudflare much smoother.


      This integration allows you to manage DNS records from within the RunCloud dashboard – no need to switch between tools. It also speeds up record updates and helps prevent misconfigurations when pointing your domain to your server.

    • RunCloud uses modern, high-performance stacks (e.g., NGINX + PHP-FPM, support for caching like Redis or Memcached) that can significantly improve load times and Core Web Vitals.

    • RunCloud allows you to conveniently manage websites hosted on servers with different processor types, like ARM and x86, all from one central dashboard. This is useful if you use different kinds of cloud servers for cost or performance reasons.

    • RunCloud supports both widely used database systems, MySQL and MariaDB, giving you flexibility in choosing the right one for your web applications.

    • Managing multiple users or client sites within a single cPanel account can be insecure or inefficient. Granting specific, limited access to developers or team members is often not granular enough, leading to over-sharing of credentials or cumbersome separate accounts. RunCloud is built with teams and agencies in mind, giving you the ability to:

      • Invite team members and assign them specific roles and access to particular servers. Developers can manage their projects without needing full server admin rights.

      • Manage all your servers and client websites from a single, intuitive dashboard, regardless of the underlying cloud provider (AWS, DigitalOcean, Vultr, etc.).

      • Maintain clear separation of duties and access logs to enhance security and make it easier to track changes.

    • On traditional shared cPanel hosting, your site’s performance is often at the mercy of “noisy neighbors” and pre-defined server configurations that may not be optimal for your specific application. Therefore, scaling resources can be limited or require a complete account upgrade. RunCloud provides flexibility in how you manage and upgrade your server resources:

      • When you manage your cloud server with RunCloud, you have the option to use a dedicated server. This means its CPU, RAM, and storage are exclusively allocated to you. It will ensure that your website’s performance is consistent and not affected by other users, a common issue on traditional shared hosting.

      • As your website traffic grows or your application needs change, you can easily scale up or down your cloud server’s resources (CPU, RAM, storage). Most cloud providers (like DigitalOcean, AWS, Vultr, etc.) allow these adjustments with minimal or no downtime.

    • RunCloud ensures you retain full root access to your underlying cloud server. This gives you the ultimate freedom to install custom software, fine-tune configurations, and manage your server environment precisely as your projects require, far beyond the limitations of typical shared hosting panels.

    Is Migrating From cPanel the Right Move for You?

    Before diving into the “how“, let’s address the “why” and “if“.

    Migrating your WordPress site from a cPanel environment to a cloud server managed by RunCloud can unlock significant advantages, but it’s not necessarily the ideal path for everyone. Understanding the trade-offs will help you make an informed decision.

    cPanel is often a good fit if:

    • You manage just one or a few simple websites with stable traffic.

    • You have no immediate plans to host additional sites or require complex server configurations.

    • You don’t need advanced developer tools, deep server customization, or the specific performance benefits of a dedicated cloud environment.

    • You prefer an all-in-one solution that includes email hosting directly within your web hosting panel (even if you don’t always use it).

    If this describes your situation, your current cPanel setup might still be the most straightforward and cost-effective solution.

    However, consider migrating if you’re experiencing these cPanel pain points:

    • Rising Licensing Costs: Per-account cPanel licensing fees can add up, especially if you manage multiple sites or offer hosting to clients. RunCloud’s pricing model, combined with affordable cloud servers, can offer better value at scale.

    • Bundled Services & Bloat: You might be paying for services bundled with cPanel (like integrated email hosting, specific site builders) that you don’t use or prefer to handle with specialized third-party providers.

    • Lack of Modern Automation & Developer Workflows: If you’re struggling with manual deployment processes, limited or clunky Git integration, insufficient API access for custom workflows, or restrictive SSH access, RunCloud offers a more developer-centric environment.

    • Performance Bottlenecks & Control: If your site is outgrowing shared hosting resources, or you need fine-grained control over server software (specific PHP versions, NGINX vs. Apache, caching mechanisms like Redis/Memcached), a cloud server managed by RunCloud provides this power.

    Key Considerations Before Choosing RunCloud & Cloud Hosting

    Moving to RunCloud means managing your cloud server instance. While RunCloud dramatically simplifies this, it’s a different paradigm than traditional cPanel shared hosting:

    • Comfort with Cloud Infrastructure (Basic): You’ll choose a server from a cloud provider (like DigitalOcean, Vultr, AWS, Linode, etc.). RunCloud makes managing it easy, but you’re still responsible for the underlying server instance.

    • DNS Management: You will be responsible for pointing your domain’s DNS records (A records, CNAMEs, MX records for email) to your new cloud server’s IP address and your external email provider. This is typically managed at your domain registrar or a specialized DNS hosting service (like Cloudflare).

    What Happens to Your Email After Migrating?

    Before moving your website files, let’s talk about email.

    One of the most significant differences is moving from an all-in-one cPanel environment to a cloud server managed by RunCloud.

    RunCloud Manages Your Web Server, Not Your Email Server.

    RunCloud excels at configuring, managing, and securing the server that hosts your website. However, it does not provide email hosting services. This is intentional, and it aligns with modern best practices. Separating web hosting from email hosting generally improves reliability, deliverability, and security.

    If Your Email is Currently Hosted on your cPanel Account

    When you switch your domain’s DNS records to point your website to your new RunCloud-managed server, any email accounts hosted on that same cPanel server will stop receiving new emails. Your old emails might still be on the cPanel server (until decommissioned), but new mail will not arrive.

    Why Self-Hosting Email on Your Web Server is Discouraged

    While it might seem convenient to try to set up an email server on your new cloud instance, it’s strongly discouraged for several reasons:

    1. Deliverability Issues: Maintaining a good sender reputation to avoid your emails landing in spam folders is a complex, ongoing task. Dedicated email providers have teams and infrastructure focused solely on this.

    2. Security Risks: Email servers are frequent targets for attackers. Managing their security requires specialized expertise.

    3. Maintenance Overhead: Running an email server involves updates, blacklist monitoring, spam filtering configuration, and troubleshooting, which divert focus from your website.

    4. Resource Consumption: An email server can consume significant server resources that are better allocated to your website.

    While we strongly recommend using a dedicated, external email hosting provider for the above reasons, we understand that some users may wish to explore other options or have specific needs for services like transactional email.

    For reliable email hosting, we recommend:

    • Zoho Mail (free for personal domains)

    • Google Workspace (business-grade email and tools)

    • MXRoute (affordable plans for bulk or agency use)

    If you’re interested in learning more about the complexities of email servers or related services, RunCloud has published several articles that cover these topics:

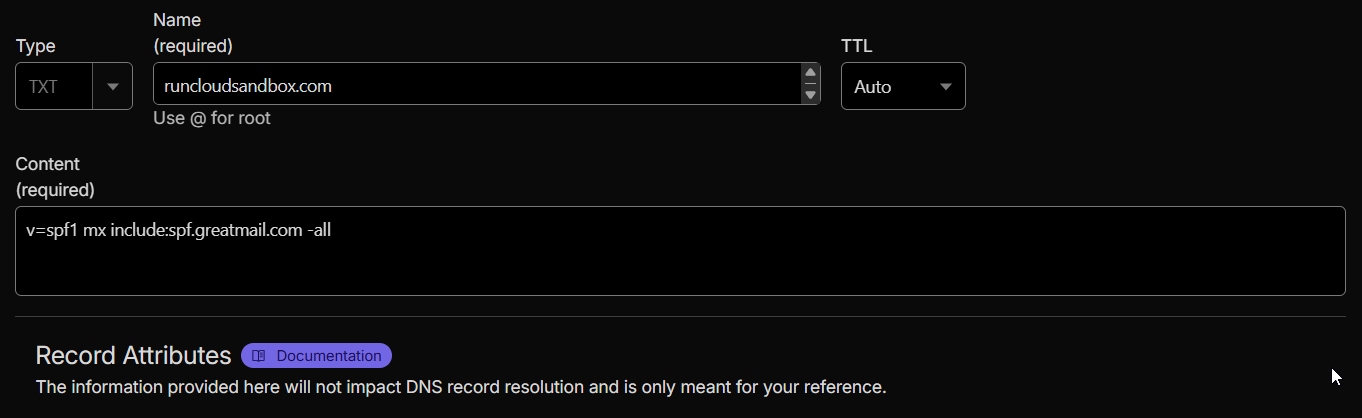
    However, you should remember that when you update your email server, it’s best to set up your new email hosting and configure the necessary DNS records (MX, SPF, DKIM, etc.) with your DNS provider before or at the same time you update the A records that point your website to the new RunCloud-managed server. This careful timing is key to minimizing the chance of losing any incoming emails during the transition period.

    Moving Your WordPress Site From cPanel to RunCloud: A Step-by-Step Guide

    Before You Begin

    • Back Up Your Existing Site: This is the most important step. Before you touch anything, create a full backup of your current website on cPanel. This includes your website files and your database. Most cPanel hosts have a backup tool. Download this backup file and keep it somewhere safe. You can never have too many backups!

    • Choose Your Cloud Server Provider: RunCloud doesn’t host your site directly; it helps you manage a server from providers like DigitalOcean, AWS, Google Cloud, Vultr, Linode, UpCloud, etc.

      Not sure which provider to choose? Here’s a quick overview:
    1. DigitalOcean & Vultr: Great for beginners. Easy setup, predictable pricing.

    2. AWS & Google Cloud: Ideal for larger, complex projects but slightly more advanced.

    3. Linode & UpCloud: Balance of performance and affordability with strong global coverage.

    Choose based on your budget, location, and technical comfort. RunCloud works seamlessly with all of them.

    • Lower Your DNS TTL: TTL stands for “Time To Live”. It tells servers how long to store your website’s DNS information. Lowering this before you migrate (e.g., to 300 seconds or 5 minutes) means the change will happen much faster across the internet when you finally switch your domain name to point to the new server. You change this where your domain’s nameservers are pointed (your domain registrar or a service like Cloudflare).

      For example, if your domain is registered with Namecheap or GoDaddy, log in to your account, go to DNS settings, and set the TTL value for your A record to 300 seconds (5 minutes). This ensures faster propagation when switching servers.

      Read our blog post on How to Speed Up DNS Propagation to learn more.

    Step 1: Set Up Your New Server with RunCloud

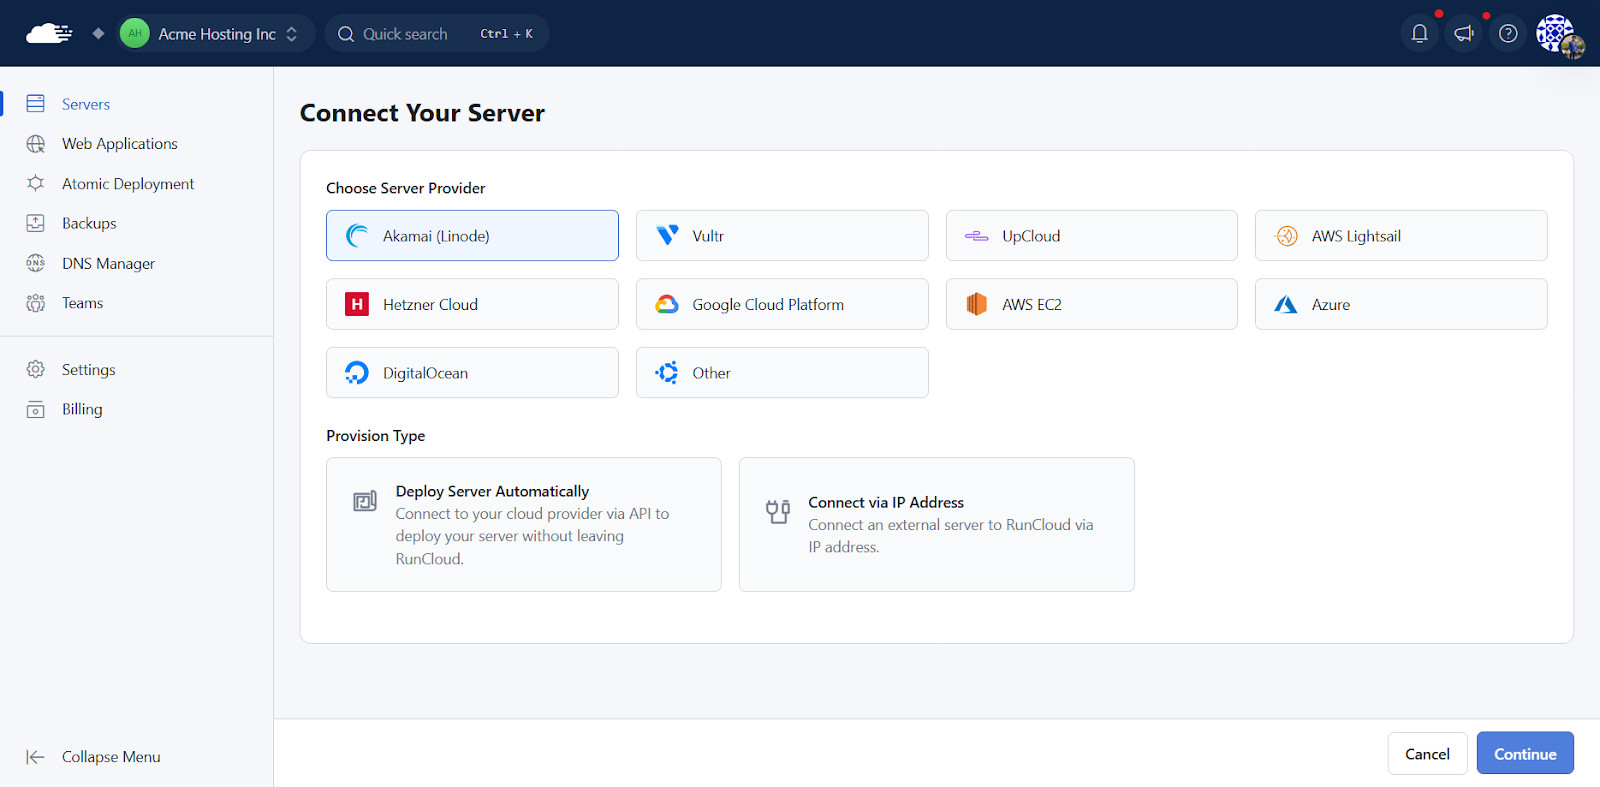
    If you haven’t already done so, create a RunCloud account. Inside your RunCloud dashboard, connect to your chosen cloud provider (like DigitalOcean, Vultr, etc.) using your API key. RunCloud has a simple process for launching a new server directly from its dashboard. It will automatically install and configure the necessary software (like NGINX, Apache, MySQL/MariaDB, PHP).

    Read our documentation on connecting to cloud providers via API to get instructions for your cloud provider.

    Step 2: Create Your Website Space in RunCloud

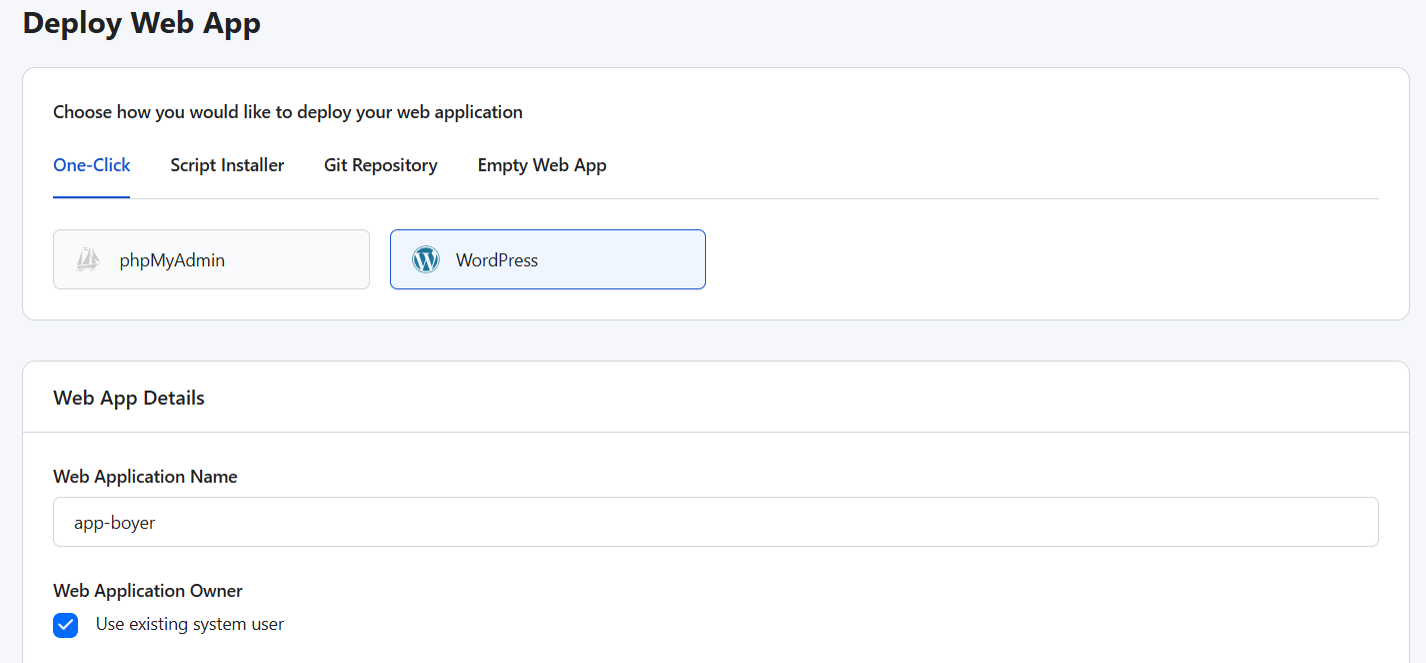
    Once your server is ready in RunCloud, go to the “Web Application” section and click “Create Web Application”.

    On the next screen, use RunCloud’s “Script Installer” within the Web Application settings to install a fresh, clean copy of WordPress on this new space.

    For now, you don’t need to use your real domain name. RunCloud provides a free test domain that you can use for testing purposes. If you want, you can use this test domain for the migration process. You’ll find this domain listed in your Web Application settings, and can use it to preview your site before making DNS changes.

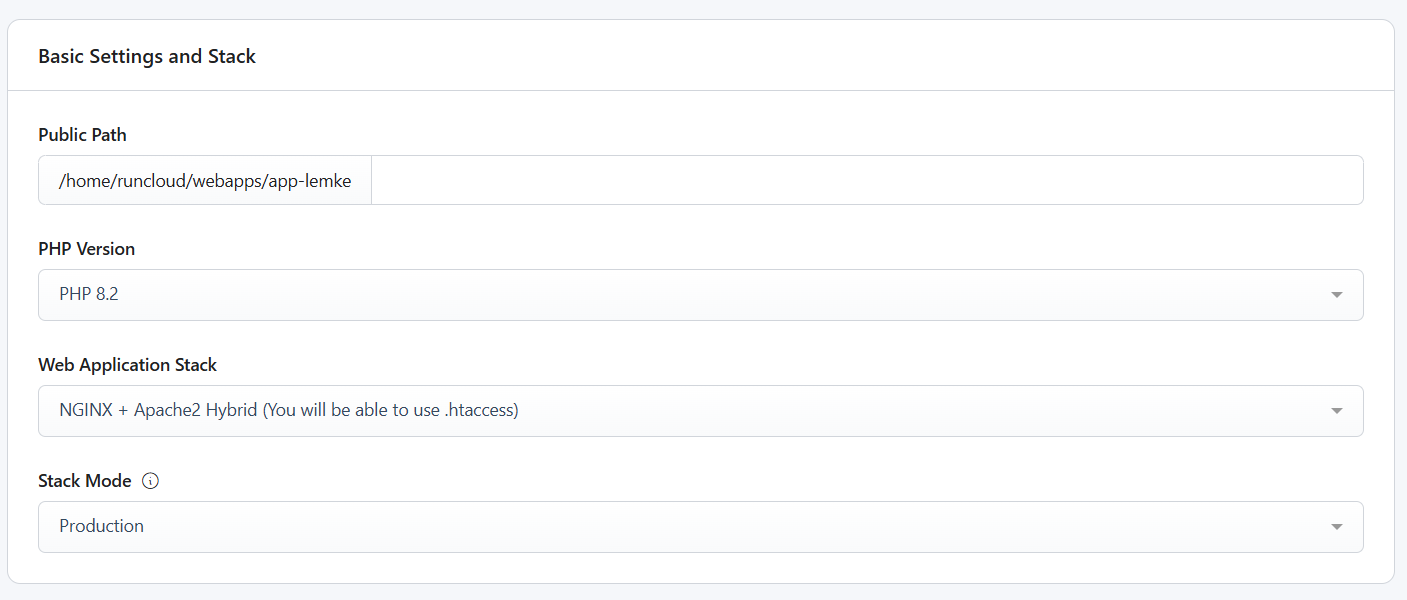
    Select the correct PHP version (try to match your old cPanel site if possible). RunCloud will set up the necessary folders and configuration for your site.

    📖 Suggested read: 10 Best Self-Hosted Email Server Platforms to Use in 2025

    Step 3: Migrate Your Website Content

    In this section, we’ll guide you through using the popular “All-in-One WP Migration” plugin, known for its ease of use. However, this plugin has file size restrictions in its free version, potentially requiring a paid extension for larger websites.

    As an alternative, especially for sites exceeding the free upload limit, refer to our post on 3 Free Ways to Migrate WordPress from Shared Hosting To Cloud Server. This post offers more flexibility and handles larger migrations effectively, although with a slightly more technical process.

    Note: If you’re migrating between different MySQL or MariaDB versions (e.g., MySQL 5.7 to 8.0), some plugins or exports may throw errors. If you run into issues during import, try exporting only content (not plugins/themes) and manually reinstall them post-migration.

    1. On Your OLD cPanel Site:

      • Log in to your WordPress dashboard and navigate to Plugins > Add New. Next, search for “All-in-One WP Migration”, install it, and activate it.

      • Find “All-in-One WP Migration” in the left-hand menu and click “Export“.

      • Click “Export To” on the next screen and choose “File“.

      • Wait for the plugin to bundle your entire site (files, database, plugins, themes) into a single .wpress file.

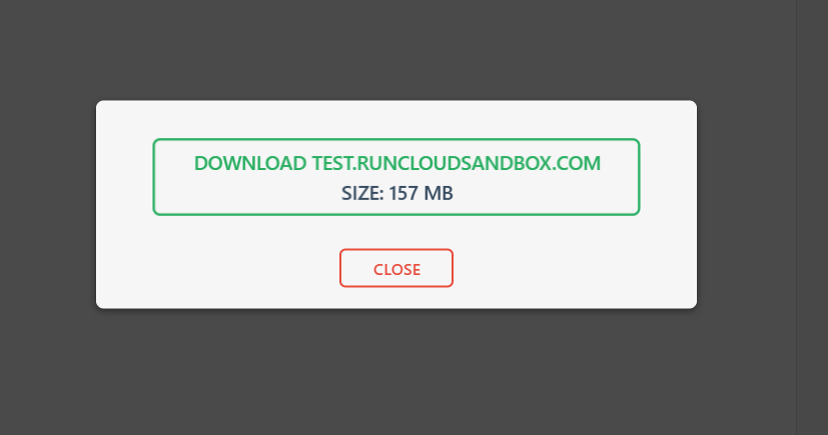
      • Once the file has been generated, download this .wpress file to your computer.
    1. On Your NEW RunCloud Site (using the test domain):

      • Log in to the fresh WordPress installation you created in Step 2.

      • Go to Plugins > Add New, then search for “All-in-One WP Migration”, install it, and activate it (the same plugin).

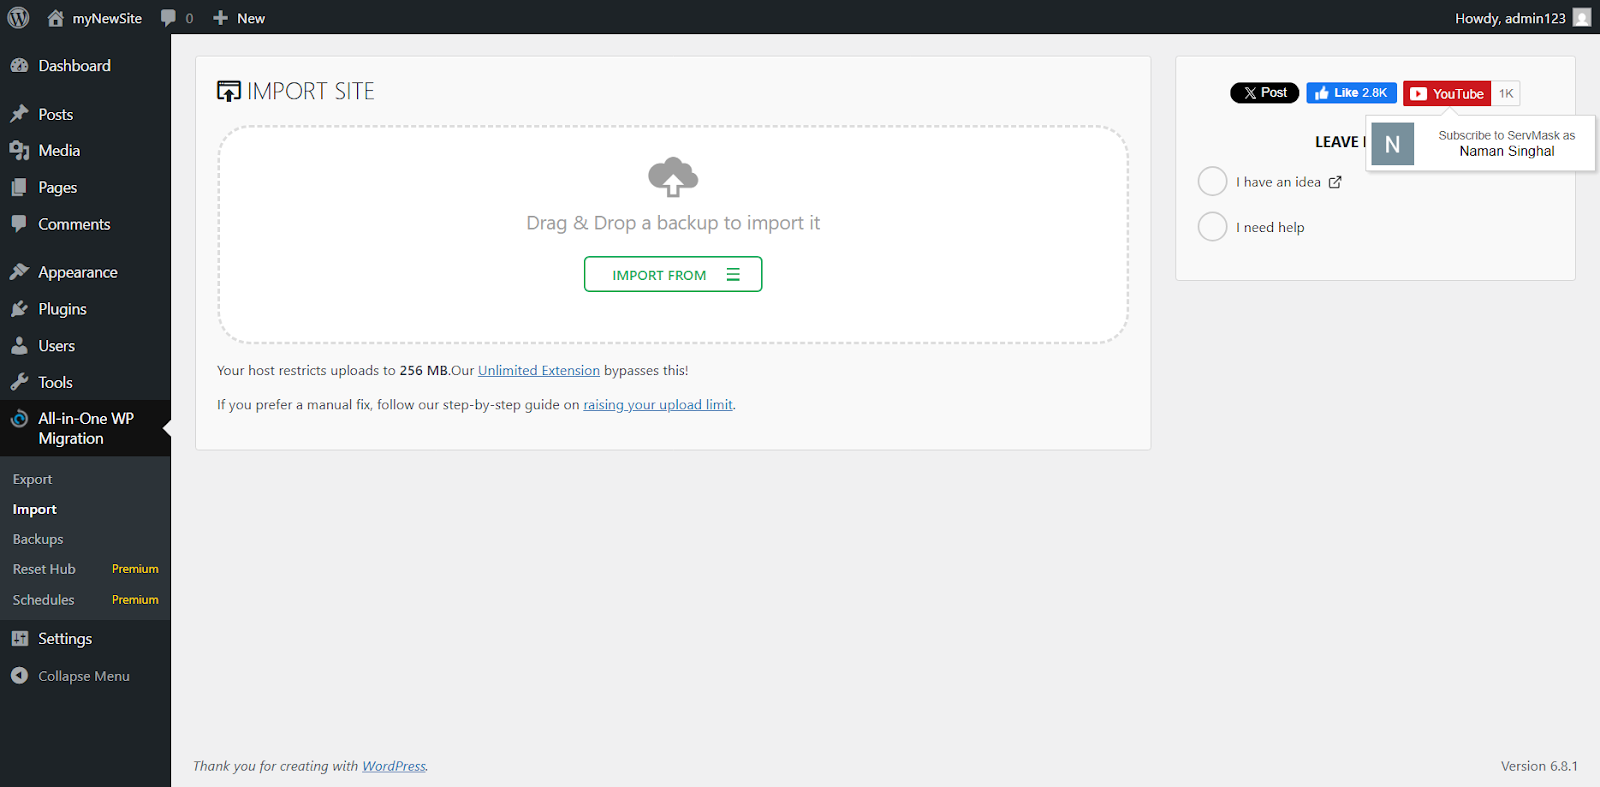
      • Find “All-in-One WP Migration” in the left-hand menu and click “Import“.

      • Click “Import From” and choose “File“.
    • Select the .wpress file you downloaded from your old site.

    • The plugin will start uploading and then processing the file. Free versions of this plugin might have upload size limits. If your site file is too large, you might need the plugin’s paid extension or explore other methods, like manually migrating files/databases or using a different plugin.

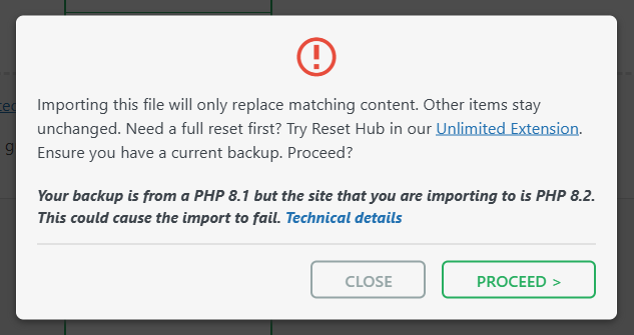
    Follow the on-screen prompts and proceed when ready. The plugin will warn you that it’s about to overwrite the site.

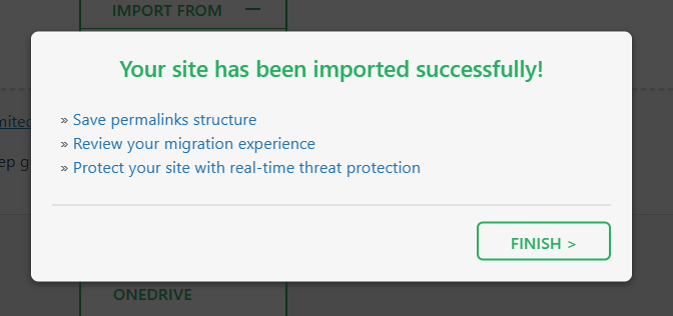
    Once the import is finished, the plugin will ask you to save your permalink structure. Log in using your old site’s username and password and rebuild your site’s URL structure.

    📖 Suggested read: How to Install & Set Up FreeScout on Your Personal Server

    Step 4: Test Your Migrated Site

    After the migration, open the RunCloud test domain in your browser. Click around your website to check pages, posts, images, forms, and special features. Make sure everything looks and works exactly like your old site, and fix any small issues you find.

    Step 5: Point Your Domain to the New Server

    Once you’re happy with the migrated site on the test domain, it’s time to make your real domain name point to the new RunCloud server.

    Before we go any further, planning for potential issues and having a strategy to minimize disruption during your migration is essential. While the goal is a seamless transition, some downtime during the DNS propagation phase is often unavoidable; however, you can reduce this by lowering your domain’s DNS TTL (Time To Live) values well before the switch and flushing DNS cache immediately after.

    Before making the final DNS change, thoroughly test your migrated site on the new RunCloud server using its IP address or by modifying your local hosts file to ensure everything functions correctly.

    If you notice any significant problems after the switch, revert your DNS records to your old cPanel server’s IP address (assuming it’s still active). This will allow you to restore service quickly while troubleshooting the new setup.

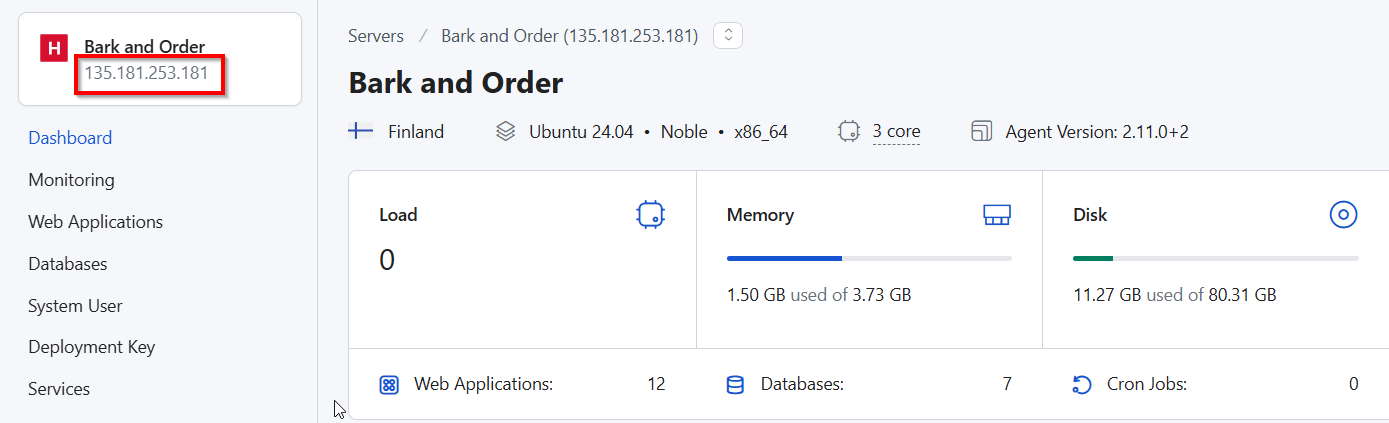
    1. Find Your Server IP Address: In your RunCloud dashboard, go to your server details. Your server’s public IP address will be listed there. Copy it.
    1. Update DNS Records:

      • Log in to your Cloudflare/Namecheap/Porkbun account (or wherever your domain’s DNS is managed) and find the DNS settings for your domain.

      • You’ll need to update the ‘A’ record for your main domain. Change its value (the IP address) to the new IP address you copied from RunCloud.

      • If you use ‘www’ (e.g., www.example.com), check its record too. You don’t need to change it if it’s a CNAME pointing to your main domain (yourdomain.com). If it’s another ‘A’ record, update its IP address as well.

      • Save the changes.

    2. Review Imported Records: Double-check all the DNS records in Cloudflare to ensure they are correct and that no old IP addresses are present for your web traffic.

    If you are using Cloudflare, you can also use RunCloud’s built-in DNS manager to set up and update records without leaving the dashboard.

    1. Wait for DNS Propagation: DNS changes can take a few minutes to several hours (though usually faster if you lowered the TTL earlier). You can use online tools like whatsmydns.net to check the progress.

    📖 Suggested read: What is DNS & How Does It Work? Everything You Need to Know.

    Step 6: Final Checks and Configuration on RunCloud

    Once DNS has updated, your domain should load the site from your new RunCloud server.

    1. Final Website Test: Browse your live website using your actual domain name. Here’s what to review carefully before going live:

      • Forms (contact, login, checkout)

      • Plugin functionality (especially caching, security, and SEO tools)

      • Theme-specific features and widgets

      • Custom post types or shortcodes

      • License activation for premium plugins/themes

    2. Review Robots.txt and Sitemap: Make sure your robots.txt file (e.g., yourdomain.com/robots.txt) isn’t blocking important pages from search engines. Check that your XML sitemap is working correctly. You might need to resubmit it to Google Search Console.

    3. Enable Caching: Use the RunCloud Hub dashboard for your Web Application to enable server-level caching (like NGINX FastCGI cache). This will significantly speed up your site.

    4. Enhance Security:
      • Fail2Ban: RunCloud configures fail2ban out of the box. Ensure it’s active for services like SSH and WordPress login attempts to block brute-force attacks.

      • Security Headers: Consider adding security headers (like HSTS and Content Security Policy) for better protection. RunCloud provides ways to add custom NGINX configs, and you can use it to manually configure these records in your web server configuration.

    5. Check Cron Jobs: If your WordPress site relies on scheduled tasks (like publishing, updates, or backups), confirm that cron jobs are working after the migration. You can:

      • Use the WP Crontrol plugin to view/edit scheduled events.

      • Disable WP-Cron and set up a real server-level cron job in RunCloud for better reliability. To do this, go to the RunCloud dashboard and navigate to Server Settings > Cron Jobs.

    6. Secure Your Site with an SSL Certificate (HTTPS): RunCloud makes it incredibly easy to install a free Let’s Encrypt SSL certificate for your domain(s) with just a few clicks, or you can deploy a custom SSL certificate if preferred. Once the SSL certificate is active, you can also force HTTPS with a single toggle inside the RunCloud dashboard to ensure all traffic uses the secure version.

    7. Configure Automated Backups: Use RunCloud’s built-in backup features to schedule automated daily or weekly backups of your web application files and databases to an off-server location (like S3, DigitalOcean Spaces, etc.).

    8. Monitor Server Health and Performance: RunCloud provides server health monitoring tools directly within its dashboard. You can track key metrics like CPU load, memory usage, and available disk space, and set up alerts to catch problems early.

    📖 Suggested read: The Best Email Marketing Plugins for WordPress in 2025

    Final Thoughts

    Congratulations! If you followed along, you’ve successfully navigated the migration process and moved your WordPress site from cPanel to your new RunCloud-managed server. Take a moment to appreciate the smoother, faster experience and the powerful control you now have over your hosting environment.

    After reading this guide, you’re now equipped with the knowledge to migrate your WordPress site from cPanel to a RunCloud-managed cloud server. We’re confident that these detailed steps will help you successfully transition.

    However, if you prefer expert assistance for your initial migration or manage multiple sites and value a streamlined process, you can use the RunCloud migration support. Our team can manage your first web application migration for free, ensuring a smooth start to your RunCloud experience. This allows you to see the benefits firsthand with professional guidance.

    Our dedicated paid migration service is also available for subsequent migrations or more intricate setups, starting from $350 per site. Simply provide your site details to receive a quote, and our team will handle the rest, allowing you to focus on your core business.

    Whether you take advantage of the free offer or handle it yourself using this guide, moving to RunCloud opens up a world of better performance, tighter security, and simpler server management.

    Manage your server with less hassle – and more power. Try RunCloud today.

  • How to Reduce the Impact of Third-Party Code (With/Without Plugins)

    How to Reduce the Impact of Third-Party Code (With/Without Plugins)

    You can optimize images, install caching plugins, and follow every speed guide out there – and still end up with a slow site.

    The usual culprit is third-party scripts adding hidden delays.

    This guide shows you how to find them, assess their impact, and fix the problem with simple tools.

    What Are Third-Party Scripts?

    Third-party scripts are bits of code that you add to your site but are not hosted by you. When you copy-paste a tracking code from Google Analytics or a snippet for your Facebook Pixel, you are adding a third-party script. These scripts run from someone else’s server, completely outside of your control.

    Most sites load several of these without thinking about the cost. They usually fall into a few groups:

    1. Analytics: Scripts that track your visitors, like Google Analytics, Matomo, or heatmap services like Hotjar.
    2. Advertising: Code that displays ads or tracks ad conversions, such as Google AdSense, Media.net, or the Facebook Pixel.
    3. Customer Interaction: Tools that engage your users, including live chat widgets (Tawk.to, Intercom) or third-party comment systems like Disqus.
    4. Content & Social Media: Embeds that pull in content from other platforms, like YouTube/Vimeo videos, Google Fonts, and social media share button plugins.

    Each of these adds value, but together they can create a performance nightmare. Later in this post, we’ll show you how to identify which ones are causing the most damage.

    Why Are Third-Party Scripts a Problem?

    We add new tools and scripts to our sites because they provide valuable features, but they often come with a hidden performance cost. Understanding why they slow things down will help us fix the problem.

    The External Wait

    Your website’s server quickly prepares your content, but the user’s browser must wait for a response from every other server you’ve linked to. For example, Google’s server for Analytics, Facebook’s server for the Pixel, your chat widget’s server, and so on.

    You have zero control over how fast those other servers are. If one of them is slow or temporarily down, your entire website is forced to wait.

    Render-Blocking

    When a visitor arrives at your site, their browser begins parsing the HTML document of your site from top to bottom. The parser works its way down the HTML file, and suddenly it encounters a standard <script> tag, like this:

    <script src="https://example.com/en_US/script.js"></script>

    A normal script tag loads in strict order. When the browser hits it, everything else stops until the file is fetched and executed. That pause is what creates the blank-screen delay users see.

    1. Halt DOM Construction: The parser immediately stops reading any more HTML. It cannot build any more of the page’s “skeleton” until this script is fully handled.
    2. Initiate Network Fetch: The browser must now make a completely new network request to the third-party server (in this case, example.com). This process alone has multiple potential delays, including DNS lookup, establishing a secure connection, and waiting for the external server to respond.
    3. Download the File: The browser waits to download the entire JavaScript file. If the user is on a slow connection or the external server is sluggish, this can take a significant amount of time.
    4. Execute the Script: Once the script is downloaded, the browser’s JavaScript engine must execute it from start to finish immediately. This consumes your visitor’s device CPU and memory. The browser must do this before continuing because the script could theoretically contain code (such as the old document.write() command) that alters the very structure of the DOM.
    render blockig javascript

    For the visitor, this entire sequence happens while they are staring at a blank white screen. Nothing can be painted or “rendered” for them to see because the browser’s main thread is completely tied up. This directly delays crucial performance metrics, such as First Contentful Paint (FCP), which measures the moment the first tangible content appears on the screen.

    Code Bloat

    Each additional script adds extra JavaScript and CSS files that your visitors’ browsers must download, unpack, and process. This “code bloat” consumes more of your visitors’ mobile data, drains their device’s battery, and forces their browser’s processor to work overtime, leading to a sluggish experience, especially on less powerful mobile devices.

    How to Optimize Third-Party Scripts on WordPress

    The problems mentioned above sound technical and intimidating, but we have great news: you don’t need to be a developer to fix them.

    We will guide you through a straightforward, step-by-step process to identify, audit, and optimize these scripts.

    Step 1: Finding Your Slow Script Offenders

    Before we can start optimizing a script, we need to identify it first. You need a reliable tool that can scan your website and report back exactly which third-party services are running, and more importantly, which ones are causing the biggest delays.

    Step 1.1: Choose Your Speed Test Tool

    You have several great options, but for beginners, we recommend starting with one primary tool.

    • Our Top Recommendation: Google PageSpeed Insights
      This is the industry standard. It’s free, run by Google, and focuses on Core Web Vitals.
    • A Great Alternative: GTmetrix
      GTmetrix provides incredibly detailed reports. Its most helpful feature for our purpose is the “Waterfall” chart, which provides a powerful visual timeline of every file loading on your page. This helps you literally see the scripts that are taking the longest to load. We’ll start with PSI, but it’s good to know GTmetrix is there if you want to dig deeper.
    If you are looking for more recommendations, consider reading our previous article, 8 Best GTmetrix Alternatives for Website Performance Testing (Includes Free). 

    Step 1.2: Running the Test

    This is the easiest part of the entire process.

    1. Open your web browser and navigate to the Google PageSpeed Insights website.
    2. In another tab, go to your website and copy the full URL from the address bar (e.g., https://www.example.com/).
    3. Paste your URL into the analysis box on the PageSpeed Insights page and click the “Analyze” button.

    The tool will take 30-60 seconds to scan your site and generate a comprehensive report.

    Step 1.3: Reading the Report

    The PageSpeed Insights report can look overwhelming, with scores and technical terms everywhere. If you want to learn more about this, then you can read our full-length article on How to Optimize Your Site for Google’s Core Web Vitals.

    However, if you just want to improve the scripts, you can ignore all that for now and scroll down the page past the colored circles and the sections labeled “Opportunities” and “Diagnostics.”

    You need to look for a specific diagnostic heading called “Reduce the impact of third-party code.” This is your goldmine.

    When you click to expand this section, you will see a list of all the external domains loading resources on your site. For example:

    • googletagmanager.com or google-analytics.com (Google Analytics)
    • connect.facebook.net (Facebook Pixel)
    • fonts.gstatic.com (Google Fonts)
    • youtube.com (Embedded videos)

    The report also indicates the “Main-Thread Blocking Time,” which is the duration each script delays the construction of your page. Write down the top 3–5 scripts causing the longest main-thread blocking time. These are the ones to fix first.

    Step 2: Decide Which Scripts You Actually Need

    Now that you have your list of script offenders, your first instinct might be to look for a technical solution. But before you touch any settings, you should perform the single most effective optimization step: a strategic audit.

    The fastest script is the one you don’t load at all.

    We will approach this audit with a simple but powerful question for every third-party script you identified in your speed test. Look at each one and ask yourself:

    “Is this script helping my site reach its goals?”

    If the answer is not a clear and immediate “yes,” it’s just digital clutter that is slowing you down. It’s time to thank it for its service and let it go.

    Let’s walk through the most common scripts you found and apply this question.

    • Google Analytics
      This script tracks your website traffic, tells you where visitors come from, and shows which pages are most popular. Without this data, you will have very few insights into your user patterns.

      Verdict: KEEP. This provides essential value for making informed decisions about your site, but you may want to consider switching to alternatives, such as Plausible or Matomo Analytics.
    • Facebook Pixel / Other Ad Pixels
      These scripts track conversions from paid advertising campaigns. Ask yourself: Am I currently spending money on Facebook, Google, or other ads that rely on this pixel? If you are actively running campaigns, this script is crucial for measuring your return on investment. If you are not, it’s doing nothing but slowing down your site for every single visitor.

      Verdict: KEEP only if you are running active ad campaigns. If not, remove it for now. You can always add it back when you launch your next campaign.
    • Heatmap/Recording Scripts (e.g., Hotjar, Crazy Egg)
      These are powerful tools for understanding user behavior, but they are incredibly resource-intensive.

      Verdict: USE SPARINGLY. Turn these scripts on when you are actively running a specific test (like analyzing a new landing page), gather your data for a week or two, and then turn them off. Do not leave them running continuously.
    • Chat Widgets
      A live chat box can be a fantastic tool for lead generation, but only if people use it. Review your widget’s dashboard to determine the number of meaningful conversations it has initiated in the past month. Is it a vital part of your sales process, or is it just a slow-loading box that most visitors ignore?

      Verdict: EVALUATE. If it consistently generates leads and sales, keep it. If it sits unused, remove it and free up that performance. A simple “Contact Us” page is much faster.
    • Social Sharing Button Plugins
      Allowing visitors to share your content is great, but many plugins that do this are notoriously slow. The primary performance killer is often the “share count” feature. To display those numbers, the plugin must make separate, slow requests to Facebook, Twitter, Pinterest, and others for every single page load.
      Verdict: BE WARY. Consider switching to a modern, lightweight plugin that provides simple sharing links without the counters. The slight social proof you gain from the numbers is rarely worth the significant speed loss.
    • Comment Systems (e.g., Disqus)
      Third-party comment systems, such as Disqus, offer enhanced features like social login and improved spam filtering. However, they are often very heavy, loading many extra scripts and ads. Compare this to the default WordPress comment system, which is built in and significantly faster.

      Verdict: EVALUATE. If you have a highly active community that relies on Disqus’s features, the speed trade-off might be worth it. However, if you only get a few comments here and there, you are sacrificing critical loading speed for a feature you barely use. Choosing the right comment system is a big decision with significant performance implications. For a deeper dive into the fastest options, we highly recommend reading this detailed analysis on WordPress comment plugins.

    Step 3: Optimizing Third-party Scripts with a Plugin

    Once you have removed the unnecessary scripts, you can then use a WordPress plugin to do all the technical heavy lifting for you. We will focus on the single most impactful technique for third-party scripts: Delaying JavaScript.

    Defer vs. Delay in JavaScript

    To understand how performance plugins work, you need to know the difference between two powerful techniques for handling JavaScript. Both are designed to solve the render-blocking problem, but they do so in different ways.

    • Defer: When the browser’s HTML parser encounters a script with this attribute, it changes its default blocking behavior. Instead of stopping everything, the browser starts downloading the script file asynchronously in the background while it continues to parse the rest of the HTML and build the Document Object Model (DOM). The browser executes the deferred script only after the entire HTML document has been fully parsed.

      This is beneficial because the script’s download no longer blocks the initial rendering of the page.
    • Delay (Better for non-essential content): In this method, the target third-party script is not loaded during the initial page load. Instead, a lightweight listener script waits for the first sign of user interaction, such as scrolling down the page, moving the mouse, clicking a button, or touching the screen on a mobile device. Once that first interaction is detected, the listener dynamically injects the third-party script into the page, triggering its download and execution.
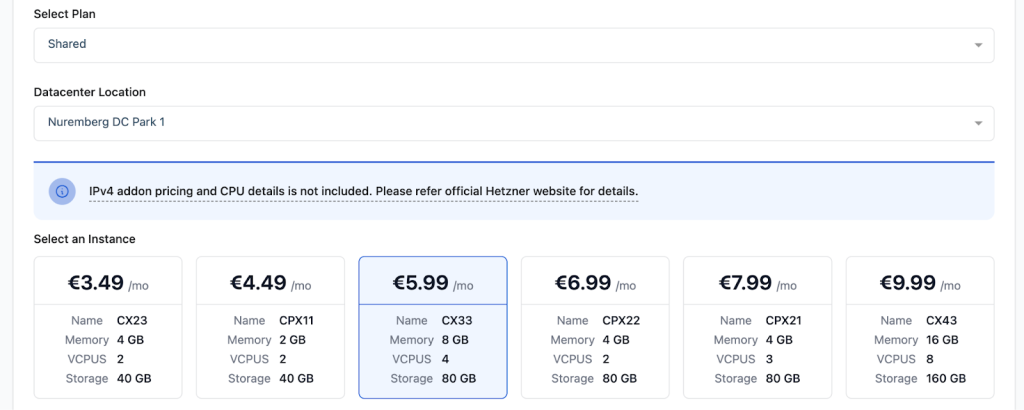
      This ensures that the page becomes interactive almost instantly, and the non-critical scripts load a few seconds later when they are least likely to impact the user’s perception of speed.

    Our Recommended Tool: WP Rocket or FlyingPress (Paid)

    You can fix these issues with free or paid tools. Paid plugins make things easier, free ones give you more manual control. Tools like WP Rocket or FlyingPress combine dozens of complex optimizations into a simple, user-friendly dashboard.

    Here is how you can implement a JavaScript delay in just a few clicks.

    1. Install and activate the WP Rocket plugin on your WordPress site.
    2. From your WordPress dashboard, navigate to Settings -> WP Rocket.
    3. In the left-hand menu, click on the “File Optimization” tab.
    4. Scroll down the page until you see the “JavaScript Files” section. Find the option labeled “Delay JavaScript execution“ and check the box to enable it.
    5. Save Changes and Clear the Cache. Click the “Save Changes” button at the bottom of the page. After it saves, you should see an option to “Clear Cache” in your top admin bar; click it to ensure your changes are live for all visitors.

    That’s it! WP Rocket is pre-configured to automatically delay many common third-party scripts. Your site should now load significantly faster on initial load. If you notice that a specific feature (such as your chat widget) has stopped working, you can add its script’s domain to the “Excluded JavaScript Files” box to have it load normally.
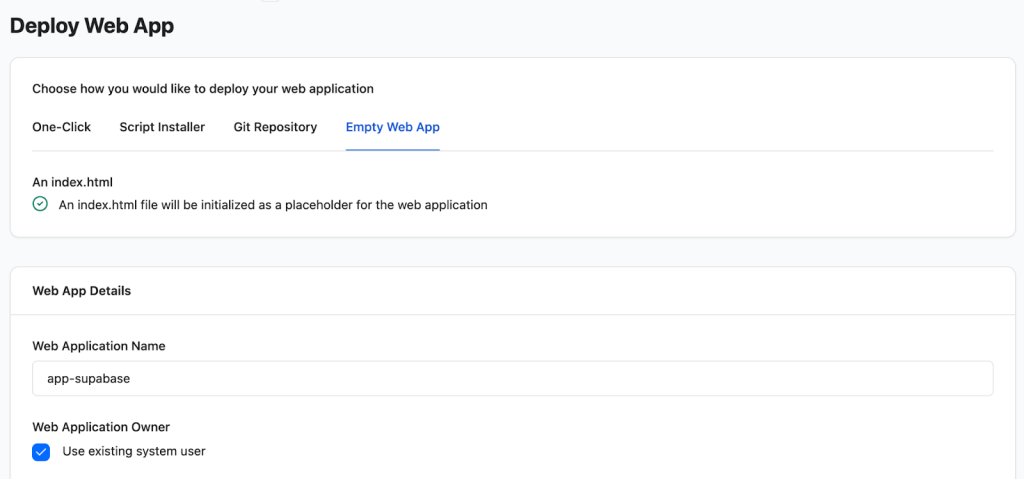
    Free Alternative Mention

    If you are on a tight budget, you can achieve similar results with a more hands-on approach using free plugins.

    • Flying Scripts: This is a simple, lightweight plugin designed specifically to delay JavaScript execution. You will need to manually add the keywords of the scripts you want to delay (e.g., ga, gtag, and Facebook).
    • Asset Cleanup: This is a powerful plugin that provides granular control. Its most useful feature is the ability to disable scripts on pages where they are not needed. For example, you can use it to stop your contact form plugin from loading its script on every single blog post, which is a fantastic optimization.
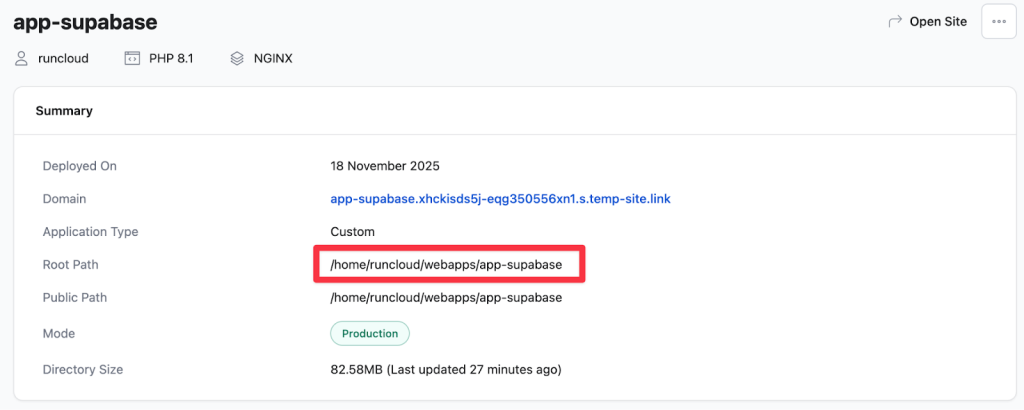
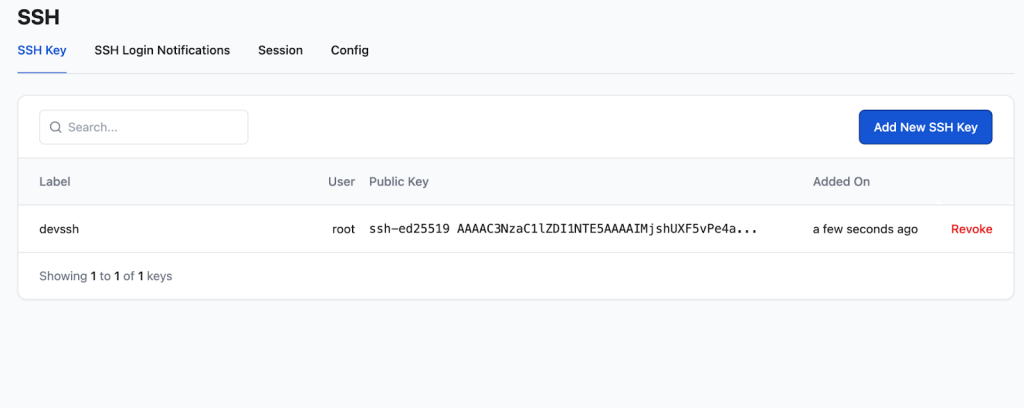
    Step 4: Pro-Level Tricks (That Are Still Easy for Beginners)

    By delaying JavaScript, you’ve already made a massive improvement. Now, let’s look at a couple more ways to speed up your third-party scripts:

    Technique 1: Host Google Fonts on Your Own Server

    When you use Google Fonts, your visitors’ browsers must make an extra trip to another server (fonts.googleapis.com) to download the font files. This introduces an external request and another point of failure, which can slow down your site.

    You can download those font files and host them directly on your own server. This eliminates the external request, allowing the browser to load everything from a single website.

    You don’t even need to do this manually! Many performance plugins can automate this process with a single click. In performance optimization plugins like WP Rocket, you will find an option under “File Optimization” called “Optimize Google Fonts“ or “Localize Google Fonts.” Simply check the box.

    For a free, dedicated solution, the OMGF plugin works equally well.

    Technique 2: Replace Heavy Embeds with Preview Images

    Heavy embeds, such as YouTube, Vimeo, and Maps, often add dozens of external requests before the visitor interacts with them, which can significantly impact performance. Before your visitor even interacts with them, their browser is forced to download significant amounts of data from YouTube, Twitter, or Google’s servers.

    You can replace this heavy initial load with a lightweight preview image, often referred to as a “facade.” When the page first loads, the visitor sees a static placeholder such as a thumbnail of the video, a screenshot of the map, or a stylized image of the tweet. The resource-intensive, interactive content only loads when the visitor actually clicks on the placeholder.

    In WP Rocket, this feature is enabled automatically when you check the box for “LazyLoad for iframes & videos” under the “Media” tab. This single setting will apply not just to YouTube but also to Vimeo videos and other content loaded in an iframe.

    Upgrade Your Server for Even Better Performance

    Optimizing scripts helps, but your server still carries most of the load. Third-party scripts can hit slower servers harder, especially those on shared hosting. A faster server provides more room for these tools without slowing down your site.

    If you feel like you’ve hit the limits of what shared hosting can offer, but the idea of managing your own server sounds complex and intimidating, that’s where a tool like RunCloud changes the game.

    RunCloud makes managing powerful and affordable cloud servers (from providers like DigitalOcean, Vultr, or AWS) incredibly easy, even for non-developers.

    • No Command-Line Needed: It gives you a beautiful, user-friendly control panel to manage your server, deploy websites, and configure settings without ever touching a complex command line.
    • Optimized for Speed: RunCloud automates the entire server setup process, installing a highly optimized software stack (like NGINX and the latest PHP) that is built from the ground up for speed and stability.
    • Effortless WordPress Management: You can deploy new, secure WordPress sites with a single click, complete with security features like free SSL certificates and automated backups.

    Move your site to a faster stack. RunCloud lets you manage powerful cloud servers with ease, so your site stays fast even with the tools you rely on.

    Start your free RunCloud account and see the difference.

  • Effortless n8n Hosting with RunCloud, Docker, and NGINX

    Effortless n8n Hosting with RunCloud, Docker, and NGINX

    n8n is an open-source automation platform that connects apps and services to streamline repetitive tasks – all under your control.

    If you want full control over your setup, self-hosting n8n is the way to go. But managing your own infrastructure doesn’t have to be complicated.

    In this guide, you’ll learn how to deploy n8n using Docker, configure it securely with NGINX and SSL, and use RunCloud to handle the heavy lifting – from server setup to backups.

    Let’s get started.

    Why Host n8n with RunCloud & Docker?

    Why Use RunCloud and Docker to Host n8n?

    • Full control – Keep your data and workflows on your own terms.
    • Simplified management – RunCloud handles your domain, SSL, and NGINX config.
    • Efficient setup – Docker keeps n8n isolated and updates easy.
    • Multi-app support – Run multiple apps on one server with ease.

    Let’s explore how to get your n8n instance running smoothly with RunCloud.

    Step-by-Step Instructions to Install n8n

    Follow these steps to create your own n8n instance on your server:

    You’ll need:

    • A cloud server (e.g., DigitalOcean, Vultr) connected to RunCloud
    • A domain or subdomain pointed to your server IP

    If you use RunCloud’s Cloudflare integration, DNS setup takes just a few clicks during web app creation.

    Step 1: Create a New Web Application in RunCloud

    RunCloud makes it very easy to manage domain names, SSL certificates, and backups for your web applications. But before we can configure all that, you will need to create a dedicated web application for n8n:

    1. Log in to your RunCloud dashboard, navigate to “Web Applications“, and click “Create Web Application“.
    2. Application Name: Give it a descriptive name, e.g., “n8n-app”.
    3. Web Application Owner: Select your system user. For maximum security, it is recommended that you create a new user account for each web application.
    4. Domain Name: Enter the custom domain you’ll use for n8n (e.g., n8n.example.com). If you are using RunCloud’s Cloudflare integration, you can easily update necessary DNS records with a single click.
    1. PHP Version: You can select any PHP version; n8n itself doesn’t use it directly as it’s containerized, but RunCloud requires one to be set. The default is fine.
    2. Web Application Stack: For this setting, select “Native NGINX + custom config” as we will be using this as a proxy to connect to the n8n Docker container.
    3. After configuring all settings, click “Create Web Application” to deploy the web application.
    1. SSL/TLS: Once the app is created, go to its SSL/TLS section in RunCloud. Use Let’s Encrypt to get a free SSL certificate. If you skip this step, you will get the following error later in the process:

    Step 2: SSH into Your Server and Navigate to Your Web App Directory

    After creating the web application, connect to your server via SSH. If you don’t know how to do this, read our documentation on How to Connect to Your Server via SSH to learn more.

    After connecting to your server, navigate to the web application’s root directory you just created in RunCloud using the ‘cd’ command. Make sure to replace the path in the following command with the actual root path of your web application:

    cd /home/runcloud/webapps/<app-name>

    Step 3: Create the local-files Directory

    In this directory, you can create a new directory that will be mapped to the Docker container. This will contain the web application data of your n8n instance. Execute the following command to create this directory:

    mkdir n8n_data
    sudo chown -R 1000:1000 n8n_data

    This will store your n8n data and assign the correct ownership permissions so that the data is accessible from the Docker container.

    Step 4: Create the Docker Application

    Now, let’s define and launch our n8n application using Docker. You have two ways to approach this. For a very quick start, you could use the following Docker run command:

    docker run -d --rm \
      --name n8n \
      -p 5678:5678 \
      -e GENERIC_TIMEZONE="UTC" \
      -e TZ="UTC" \
      -e N8N_HOST="app-n8n.EXAMPLE.com" \
      -e N8N_EDITOR_BASE_URL="https://app-n8n.EXAMPLE.com/" \
      -e N8N_PROTOCOL="https" \
      -e N8N_ENFORCE_SETTINGS_FILE_PERMISSIONS=true \
      -e N8N_RUNNERS_ENABLED=true \
      -e N8N_LICENSE_ACTIVATION_KEY="EXAMPLE" \
      -e N8N_EMAIL_MODE="smtp" \
      -e N8N_SMTP_HOST="smtp.EXAMPLE.com" \
      -e N8N_SMTP_PORT="25" \
      -e N8N_SMTP_USER="EXAMPLE" \
      -e N8N_SMTP_PASS="EXAMPLE" \
      -e N8N_SMTP_SENDER="N8N <n8n@EXAMPLE.com>" \
      -e N8N_SMTP_SSL=true \
      -e N8N_SMTP_STARTTLS=true \
      -v ./n8n_data:/home/node/.n8n \
      docker.n8n.io/n8nio/n8n

    Once you run the above command, Docker will download and run the required containers for your application.

    For more flexibility (custom env settings, time zones), use Docker Compose instead. See n8n’s Docker documentation for advanced setups.

    Step 5: Configure NGINX Reverse Proxy via RunCloud

    After enabling the Docker container, you must configure a reverse proxy to route traffic to your container.

    1. In RunCloud, go to your n8n-app
    2. Under “NGINX Config“, click “Create NGINX Config“
    3. Select: Proxy – Turn NGINX into a proxy server
    4. Name it n8n-proxy
    1. In the Content box, paste the following NGINX configuration:
    proxy_pass http://host:5678;
    # > uncomment below line if you want to disable proxy buffering
    # proxy_buffering off;
    proxy_set_header X-Real-IP $remote_addr;
    proxy_set_header X-Forwarded-Host $host;
    # > websocket support. if you want to proxy websockets, uncomment 3 lines below
    proxy_http_version 1.1;
    proxy_set_header Upgrade $http_upgrade;
    proxy_set_header Connection "upgrade";
    1. After configuring the required settings, click “Create NGINX Config“. RunCloud will test and apply this configuration on your server immediately.

    Step 6: Access Your Secure n8n Instance

    After enabling the proxy, open your web browser and go to the domain you configured for your web application (e.g., https://n8n.example.com).

    If you use RunCloud’s built-in SSL manager, you will see the following n8n setup screen to create your account:

    Step 7: Enable Backups

    Don’t skip this. Backups protect your data and save time if anything breaks.

    In your RunCloud dashboard, set up automated backups for your n8n-app. You can create daily snapshots of your files and easily restore them if needed.

    Learn more in our backup guide.

    Final Thoughts: Your Automation Journey and Beyond with RunCloud

    You now have a secure, fully self-hosted n8n setup – managed through RunCloud and running in Docker.

    But setting up n8n is just scratching the surface of what RunCloud can simplify for you. You can also use RunCloud to effortlessly host other applications without diving deep into complex server configurations. With RunCloud, you can easily deploy and manage:

    • Nextcloud: Your private cloud for files, calendars, and contacts.
    • WHMCS: The leading web hosting automation platform.
    • WordPress: The world’s most popular content management system.
    • FreeScout: A powerful open-source help desk and shared inbox.
    • Ghost CMS: A sleek and modern platform for professional publishing.
    • And much more…

    RunCloud takes the hassle out of server administration, allowing you to focus on what you do best → building, creating, and automating.

    Ready to simplify your server management? Sign up for RunCloud today.

  • How to Deploy Supabase to Hetzner, UpCloud & More

    How to Deploy Supabase to Hetzner, UpCloud & More

    Supabase is the most popular open-source Backend-as-a-Service (BaaS) platform, which offers developers the freedom and control of self-hosting.

    By combining the power of Supabase with the simplicity of RunCloud’s server management panel, you can deploy a scalable and private backend for your applications without vendor lock-in.

    In this tutorial, we will guide you through every step of deploying a containerised Supabase instance on a server managed by RunCloud.

    We will demonstrate how RunCloud’s flexibility enables you to run complex Docker applications with ease, providing you with full control over your infrastructure.

    Let’s get started!

    How To Self-Host Supabase on RunCloud

    Before we begin, ensure you have the following three prerequisites in place. This guide assumes you have already completed these initial steps.

    1. A RunCloud Account: You can sign up for a free or paid plan on the RunCloud website.
    2. A Cloud Server Provider: You’ll need an account with a cloud provider like Hetzner, DigitalOcean, Vultr, or AWS.
    3. Basic SSH Knowledge: You will need to connect to your server via SSH. We highly recommend setting up an SSH key for secure access. RunCloud’s documentation provides a clear guide on how to manage SSH keys.

    Step 1: Choosing and Provisioning the Right Server

    Supabase offers a comprehensive suite of tools, including a PostgreSQL database, authentication services, storage, and more. These services are resource-intensive. To ensure a smooth experience, you’ll need to provision a server with adequate resources.

    For this tutorial, we recommend a server with at least 8GB of RAM and four vCPUs. This provides sufficient headroom for all backend services to run smoothly. Depending on your specific use case and expected traffic, you may need to scale this up or down.

    If you want to learn more about this process, read our dedicated guides, which cover the process of connecting a new server in great detail:

    Regardless of what server size you pick, your RunCloud subscription provides you with the ability to create an unlimited number of web applications.

    This flexibility allows you to deploy as many applications on your server as its hardware resources can physically handle, making it an extremely cost-effective solution for developers and agencies managing multiple projects.

    Step 2: Creating a Web Application in RunCloud

    Next, we need to create a “container” or placeholder within RunCloud for our Supabase installation. This web application will define the directory structure and the domain that will point to our Supabase instance.

    1. From your RunCloud dashboard, navigate to your server and click on Web Applications.
    2. Click Add Web Application.
    3. Choose the Empty Web App option. This is important because we will be deploying a custom Docker setup, not a standard PHP application.
    4. Fill in the Web App Details:
      • Web Application Name: Give it a descriptive name, such as ‘app-supabase’.
      • Web Application Owner: You can use the default system user.
      • Domain Name: It’s highly recommended to use a real domain or subdomain (e.g., supabase.yourdomain.com). This will make accessing your instance much easier. For guidance on pointing your domain, please consult your domain provider’s documentation and the RunCloud DNS settings guide.
    1. Select the Web Application Stack: Select Native NGINX + Custom config. This stack gives us the raw power to configure NGINX as a reverse proxy later, which is essential for routing traffic to our Docker containers.
    2. Deploy the Application: After configuring the basic settings, you can deploy the application on your server by clicking “Deploy”. 
    3. Note down the Project Root: After the application is created, take note of the Web Root Path, which is displayed on the dashboard. This will be something like /home/runcloud/webapps/app-supabase. You will need this exact path in a later step.

    Step 3: Connecting to Your Server via SSH

    After creating your web application, we will begin the process of installing Supabase on the server. For this, we need to run several commands directly on the server. You’ll need to SSH into your server using the SSH credentials provided by your cloud provider.

    For enhanced security and convenience, we recommend adding your public SSH key to RunCloud Vault. This allows you to log in without typing a password, and is more secure.

    Once your key is added to the RunCloud vault, open your terminal and run the following command to connect to the server via SSH: 

    ssh-i ~/.ssh/your_private_key runcloud@<YOUR_SERVER_IP>

    After successful login, you’ll see a welcome message from RunCloud:

    Step 4: Cloning and Preparing the Supabase Docker Files

    Now that you’re inside the server, it’s time to download the official Supabase Docker configuration and move it into the web application directory we created. Run the following commands one by one:

    Navigate to a temporary directory. This is a safe place to clone the repository before moving the files.

    cd /tmp

    Clone the official Supabase repository. The –depth 1 flag performs a shallow clone, downloading only the latest version to save time and space.

    git clone --depth 1 https://github.com/supabase/supabase

    Copy the Docker files to the root of your project. Replace <runcloud project root> with the actual path you noted in Step 2.

    cp -rf supabase/docker/* <runcloud project root> 

    Copy the example environment file. This file contains all the configuration variables Supabase needs. We will edit this in the next step.

    cp supabase/docker/.env.example <runcloud project root>/.env

    Step 5: Configuring Your Supabase Environment

    After copying the files, you need to configure your environment. The .env file you just created contains default, insecure passwords and secret keys. You must change these before launching your Supabase installation.

    Navigate to your project root directory:

    cd <runcloud project root>

    Open the file for editing using nano: If you are not comfortable with nano, you can use any other text editor that you like, or read our blog post on How to Edit Files on Remote Servers with SSH and Nano

    nano .env

    Update Passwords and Secret Keys: After opening the file, carefully review its contents. At a minimum, you must change the following values to strong, randomly generated strings. You can use an online password generator for this.

    1. POSTGRES_PASSWORD: This is the password for the superuser account in your PostgreSQL database. Change this to a very long, complex, and unique password.
    2. JWT_SECRET: This secret is used to sign JSON Web Tokens (JWTs) for user authentication and authorisation. Update this with a long, randomly generated token, ideally 32 characters or more.
    3. ANON_KEY and SERVICE_ROLE_KEY: These JWTs are used for the anon (public) and service_role (admin/backend) users, respectively. While they are full tokens, the underlying signing secret (JWT_SECRET) is the primary vulnerability if unchanged. While changing the JWT_SECRET effectively invalidates the default keys, it is best practice to generate new, unique keys for both the ANON_KEY and SERVICE_ROLE_KEY after updating the JWT_SECRET.
    4. DASHBOARD_USERNAME and DASHBOARD_PASSWORD: These credentials control access to the Supabase management dashboard. Change both the default username and the default password to strong, unique values.
    5. SECRET_KEY_BASE: This is a cryptographic key used for various internal security features within the application framework (often related to cookie signing or encryption). Replace the current value with a long, random, and unique cryptographic key.
    6. VAULT_ENC_KEY and PG_META_CRYPTO_KEY: These are encryption keys used for encrypting secrets and other sensitive data stored within the database vault and the metadata store. Update both keys with unique, randomly generated encryption keys that are at least 32 characters long.

    The file also contains optional settings for sending emails, analytics, and logging. You can leave these blank for now unless you plan to use those services. After you have made the necessary changes, press Ctrl+X, then Y, and then Enter to save your changes in nano.

    Step 6: Launching the Supabase Services with Docker

    Once you have updated your .env file, you are now ready to launch your Supabase instance. This process is very simple, and it requires you to run just two commands:

    Pull the latest Docker images

    This command downloads all the necessary container images for each Supabase service (database, auth, storage, etc.). This may take several minutes, depending on your server’s network speed.

    docker compose pull 

    Start Supabase Services in detached mode

    The ‘up’ command starts the containers, and the ‘-d’ flag runs them in the background, so they continue to run after you log out of your SSH session.

    docker compose up -d

    You will see output indicating that all the services have started successfully.

    Your Supabase instance is now running inside Docker on your server! However, it’s not yet accessible from the internet. For that, we need to set up a reverse proxy.

    Step 7: Configuring an NGINX Reverse Proxy

    The Supabase stack listens for traffic internally on port 8000. We need to tell NGINX to take all incoming web traffic (on ports 80 and 443) for your domain and forward it to this internal port. This is a classic reverse proxy setup, and RunCloud makes it very simple.

    1. Go back to your RunCloud dashboard and navigate to your app-supabase web application.
    2. Go to the NGINX Config section and click Create NGINX Config.
    3. From the “Predefined Config” dropdown, select “Proxy – Effortlessly turn NGINX…”
    1. Delete all the default content in the text editor and paste the following configuration into the editor:
    proxy_pass http://host:8000;
    proxy_set_header X-Real-IP $remote_addr;
    proxy_set_header X-Forwarded-Host $host;
    proxy_http_version 1.1;
    proxy_set_header Upgrade $http_upgrade;
    proxy_set_header Connection "upgrade";
    1. Click “Save Config” to apply the new configuration.

    Step 8: Access Your Supabase Dashboard

    Your self-hosted Supabase instance is fully deployed and accessible on the internet. You can now open your web browser and navigate to the domain you configured in Step 2 (e.g., https://supabase.yourdomain.com). When you visit this site, you should see the Supabase Studio login screen.

    Enter the credentials you configured in the .env file from the previous step, and you will be logged in to your own Supabase dashboard, ready to create tables, manage users, and build your next great application.

    installing a self-hosted supabase instance on runcloud

    Final Thoughts & Your Next Steps

    Congratulations on taking control of your backend by deploying a fully self-hosted Supabase instance! This tutorial shows more than just how to deploy Supabase; it showcases the true power and flexibility of RunCloud as a central hub for all your server management needs.

    But your journey with RunCloud doesn’t have to end here. The same platform that now runs your complex Dockerized Supabase application is perfectly equipped to manage all your other projects.

    Whether you’re running a high-traffic WordPress site, a modern Laravel application, a content-rich Ghost CMS, an n8n instance for your automation workloads, or even a private cloud with Nextcloud, RunCloud provides the tools to manage it all effortlessly.

    If you are a developer who needs a professional workflow, RunCloud provides features such as Git integration for atomic deployments, creating a smooth CI/CD pipeline directly from your repository.

    Perhaps one of the most compelling advantages of using RunCloud is its predictable, resource-independent pricing model. RunCloud does not charge you based on your server’s specifications or resource consumption. Whether you choose a small 2GB RAM server or a powerful 64GB machine to run your Supabase instance, your RunCloud subscription cost remains the same, offering predictable expenses as you grow.

    Sign up for RunCloud today.

    Frequently Asked Questions About Self-Hosting Supabase with RunCloud

    How do I scale my server if my Supabase application grows?

    RunCloud is completely cloud-provider agnostic, meaning it doesn’t lock you into a specific hardware provider. When you need more power, you can simply resize your server at Hetzner, DigitalOcean, or any other provider, and RunCloud will continue to manage it seamlessly.

    How does RunCloud help secure my self-hosted Supabase instance?

    Security is a primary concern with self-hosting, and RunCloud automates the most critical tasks for you. It configures an isolated web application environment, sets up a server firewall with a single click, and provides timely notifications for security updates, ensuring your server remains up-to-date and protected from common threats.

    What’s the easiest way to back up my database?

    Manually scripting database backups is tedious and prone to errors. RunCloud offers a straightforward, off-server backup solution that allows you to schedule backups for your database and files with just a few clicks. This ensures that your critical user data is always secure and can be easily restored in the event of an emergency.

    How do I add an SSL certificate to my Supabase domain to secure API calls?

    RunCloud offers free, auto-renewing Let’s Encrypt SSL certificates for any domain associated with your web application. You can secure your Supabase API endpoints and dashboard with a trusted HTTPS connection with a single click, eliminating the complexity of manual certificate generation and renewal.

    Supabase has many services. How can I monitor my server’s health and resource usage?

    RunCloud’s dashboard provides a real-time health monitoring system for your server. You can instantly check CPU, RAM, and disk usage to ensure your server has enough resources to run smoothly. This visual overview helps you anticipate scaling needs and troubleshoot performance issues before they impact your users.

  • How to Transfer a Domain to a New Registrar Without Downtime

    How to Transfer a Domain to a New Registrar Without Downtime

    Many website owners stay with their first domain registrar for years, assuming that moving a domain will break everything.

    Stories of websites disappearing and emails bouncing around during transfers make that fear understandable – but downtime isn’t inevitable.

    With the right setup, you can safely transfer your domain without losing a single visitor or email.

    In this guide, RunCloud’s team shares the exact process we use to transfer domains smoothly and confidently.

    Why Your Domain Registrar Shouldn’t Handle Your DNS

    Most people think that a Domain registrar and a DNS Host are the same thing, but they are very different:

    • A Domain Registrar is the company you pay to register and renew your domain name (e.g., yourbusiness.com). They are like the city hall that holds the deed to your property.
    • A DNS Host (or Provider) is the service that holds your domain’s records. It acts as the internet’s phonebook, directing browsers to your website, email servers, and other services. This is the GPS that directs traffic to your property.

    Often, the registrar from which you buy a domain also provides DNS hosting by default. This is convenient but creates a single point of failure.

    If you transfer your domain while the old registrar still manages your DNS records, those records are often deactivated or deleted, which can cause immediate downtime.

    The solution is to move your DNS to a dedicated, high-performance DNS provider before you start the transfer. This allows your registrar to be interchangeable without affecting live traffic.

    For this, we recommend using Cloudflare. Their free tier is more than enough for most users and offers world-class performance, security, and reliability. This strategy works regardless of which registrars you are moving between.

    However, it’s worth noting that some modern registrars have started offering their own tools to facilitate smoother transfers. For example, if you are migrating your domain to Namecheap, then you can use Namecheap’s FreeDNS, which allows you to move your DNS records to them before initiating the transfer, achieving a similar result. While this is a great feature, it isn’t universally available, and relying on a dedicated DNS provider is still the best option.

    Best Domain Registrars to Use

    You may want to consider transferring for better pricing, a cleaner user interface, improved support, or to consolidate your domains. Whatever your reason, choosing a reputable registrar is very important. We recommend one of the following DNS registrars for their fair pricing, excellent features, and developer-friendly approach:

    • Cloudflare Registrar: The best choice if you’re already using their DNS. They offer wholesale pricing (with no markup on domain registration), making them one of the most affordable options.
    • Porkbun: A community favorite known for its incredibly competitive pricing, clean UI, and excellent set of free features like WHOIS Privacy and email forwarding.
    • Spaceship: A modern registrar with a fantastic user experience, competitive pricing, and a strong focus on making domain management simple and intuitive.
    • Namecheap: A long-standing, reliable option known for its good support, frequent promotions, and a solid feature set, including free WHOIS privacy.

    Before You Transfer: Check Registrar Compatibility

    Before you start a transfer, you must first confirm that your new registrar supports your domain’s specific extension (TLD), such as .io, .store, or .ai.

    Some registrars offer excellent pricing, but only for a few common TLDs, such as .com. Others, with features like premium DNS, may be more expensive. If your new registrar doesn’t support your TLD, the transfer will fail, so always conduct thorough research to avoid a dead end.

    How Long Does a Domain Transfer Take?

    The Domain transfer process is governed by ICANN (the organization that manages domain policies) to protect you from domain theft, which is why it isn’t instant and can take anywhere from a couple of days to a few minutes.

    These official guidelines allow the current registrar a period to process the request and give the domain owner time to cancel it if it was initiated fraudulently.

    Shortly after initiating the transfer with your new registrar, your old registrar will typically send a verification email or display a notification in your account dashboard asking you to explicitly approve the “transfer out”; by confirming this request, you can speed up the transfer process.

    We strongly recommend that you not wait until your domain is close to its expiration date to begin this process. Initiating a transfer at the last minute introduces significant risks, as potential issues like a locked domain, outdated contact information, or other delays could cause the transfer to stall within the 5-7 day window. If your domain expires while the transfer is pending, it will likely fail, causing your website and email services to go offline as it enters a costly and complicated redemption period. To ensure a smooth transition, it is highly recommended to initiate the domain transfer at least two weeks before its expiration date.

    Why Your Domain Transfer Might Be Denied

    A registrar can’t deny a transfer just because they don’t want to lose you as a customer. They must follow strict ICANN rules. A denial will happen for very specific, legitimate reasons.

    Your transfer request can be denied if:

    • The Domain is Locked: You must disable the “Registrar Lock” at your current registrar before proceeding with the transfer, as described below.
    • The Domain is Too New: A domain cannot be transferred within the first 60 days of its initial registration.
    • The Domain Was Recently Transferred: A domain cannot be transferred again within 60 days of a previous transfer.
    • You Have an Unpaid Bill: The transfer can be denied if there’s an outstanding balance for a previous registration period.
    • There’s an Identity Dispute: If there is reasonable evidence of fraud or a legitimate dispute over who the true owner of the domain is.
    • There is an active legal dispute: The domain is subject to a court order or a formal domain dispute proceeding.
    • It’s under the “60-Day Change of Registrant” lock: If you have recently changed the First Name, Last Name, Organization, or email address of the official domain registrant, ICANN rules require a mandatory 60-day lock on transfers.

    Step-by-Step: How to Transfer a Domain Safely

    Now that we have discussed the prerequisites for a domain transfer, let’s proceed with the process.

    Phase 1: Setting Up DNS Server for Zero Downtime

    Before transferring the domain to a new registrar, we will migrate our DNS server to a third-party DNS provider. Do not skip these steps, as this will guarantee a smooth transfer.

    1. Sign up for a Third-Party DNS Provider: In this tutorial, we will use Cloudflare for this process. Go to Cloudflare and sign up for a free account to follow along.
    2. Add Your Domain to the New DNS Provider: Cloudflare will prompt you to add a site. Enter your domain name. It will scan your existing DNS records from your current registrar.
    1. Verify All DNS Records Have Been Copied: This step is crucial. Cloudflare’s scan is good, but you must manually double-check that every single record has been imported.
      • Open a new tab and log in to your current registrar’s DNS management panel.
      • Compare the records side by side with what Cloudflare has imported. Pay close attention to:
        • A and AAAA records (your website’s IP address)
        • CNAME records (aliases, like www pointing to your main domain)
        • MX records (your email servers)
        • TXT records (for things like SPF, DKIM email authentication, and site verification)
        • Any other custom records you may have.
    2. Manually add any missing records in the Cloudflare DNS dashboard.
    3. Update Your Nameservers at Your Current Registrar: Cloudflare will provide you with two nameserver addresses (e.g., aragorn.ns.cloudflare.com and daphne.ns.cloudflare.com).
      • Go to your current registrar’s domain management panel.
      • Find the section for “Nameservers” or “DNS Servers”.
      • Select the option to use “Custom Nameservers”.
      • Delete the existing nameservers and replace them with the two provided by Cloudflare.
      • Save your changes.
    Doman name transfer
DNS
    1. Wait for DNS Propagation: It can take anywhere from a few minutes to 24 hours for this change to be recognized across the internet. You can monitor the progress using a tool like DNSChecker.org. Enter your domain name and select “NS” from the dropdown to see the nameserver propagation status. Once you see the new nameservers that you configured in the previous step, you’re all set.

    If you have completed the above steps, then your website and email are now being served by Cloudflare’s DNS. Your old registrar is essentially a billing entity. You are now free to transfer your domain without any risk of downtime.

    Phase 2: The Pre-Transfer Checklist (At Your CURRENT Registrar)

    Now, prepare the domain itself for the move. Log in to your current registrar and complete the following:

    1. Verify Admin Contact Info: Ensure the administrative contact email address listed for the domain is current and accessible. The transfer approval link will be sent to this address.
    2. Disable WHOIS/Domain Privacy: You’ll need to temporarily disable any privacy protection service. This allows the new registrar to see the official contact information. You can re-enable it after the transfer is complete.
    3. Unlock Your Domain: Domains are locked by default to prevent unauthorized transfers. Find the “Registrar Lock” or “Domain Lock” setting and disable it.
    4. Get the EPP/Authorization Code: This is a unique password for your domain. Look for an option like “Get EPP Code,” “Auth Code,” or “Transfer Code.” Copy this code to a safe place.

    Phase 3: The Transfer Process

    Once you have obtained your EPP code and transferred your DNS to a new DNS provider, it’s time to initiate the transfer.

    1. Sign Up at Your NEW Registrar: Create an account with your new Domain registrar.
    2. Initiate the Transfer: Find the “Transfer Domain” section and enter the domain name you wish to transfer.
    3. Provide the EPP Code: You will be prompted to enter the Authorization/EPP code you got from your old registrar.
    4. Complete the Purchase: A domain transfer almost always includes a one-year renewal of your domain registration. Complete the checkout process.
    5. Approve the Transfer via Email: Check the admin contact email inbox for an email from your registrar. It will contain a link to approve or deny the transfer; approve the transfer request to finalize the transfer.
    6. Wait for Confirmation: You will receive a final “Transfer Complete” email from your new registrar once the process is finished.

    Phase 4: Post-Transfer Cleanup

    Your domain is now safely at its new home. Let’s do a quick final checkup at your new registrar.

    • Verify Nameservers: Double-check that your domain’s nameservers are still pointing to Cloudflare (or your chosen DNS provider). They should have carried over, but it’s always a good idea to check.
    • Re-enable Registrar Lock: Lock your domain at the new registrar to prevent unauthorized transfers.
    • Re-enable WHOIS Privacy: Turn your domain privacy protection back on.
    • Check Auto-Renewal: Ensure auto-renewal is set to your preference to avoid accidentally losing the domain next year.

    Final Checks and Next Steps

    Once your domain transfer is complete, make sure the rest of your setup is just as dependable.

    RunCloud makes managing servers and domains effortless. If you’re using Cloudflare, RunCloud automatically syncs DNS records whenever you create or update an application – so your sites stay online without manual work.

    Keep your sites fast, secure, and always available. Sign up for RunCloud today.

    Frequently Asked Questions About Domain Transfers

    How long does the entire transfer process take?

    The transfer itself typically takes 5-7 days, as dictated by ICANN rules. However, if your old registrar allows you to explicitly approve the transfer, it can be completed in under an hour.

    Will my email or website go down?

    Not if you follow this guide. By moving your DNS to a third-party provider before starting (Phase 1), you decouple your live services from the registrar transfer. Your traffic never misses a request.

    I just registered or transferred this domain. Why can’t I transfer it again?

    ICANN, the governing body for domains, imposes a 60-day “Transfer Lock” on any domain that has been newly registered or recently transferred. You must wait for this period to end.

    What about my website hosting? Does this affect it?

    No. This process only changes your domain registrar. Your hosting provider, where your website’s files are stored, is completely unaffected.

  • How to Fix the WordPress White Screen of Death (Step by Step)

    How to Fix the WordPress White Screen of Death (Step by Step)

    Have you ever opened a website and been greeted with a blank page instead of the content you expected?

    This is known as the infamous WordPress White Screen of Death (WSOD). It is a frustrating error that only happens when something has gone critically wrong behind the scenes.

    If this has happened to you, don’t panic. This guide provides a step-by-step process for diagnosing and resolving the WordPress White Screen of Death. By following these proven steps, you’ll be equipped to pinpoint the exact cause and bring your website back online quickly.

    Let’s get started!

    What is the WordPress White Screen of Death?

    The WordPress White Screen of Death (WSOD) is a blank white screen that appears when you attempt to access your website. It usually means a fatal PHP error or database issue has occurred.

    On most live websites, PHP error reporting is disabled by default for security reasons. This means that when a script-breaking error occurs, the server stops rendering the page but has no instructions to display an error message, which results in a blank output.

    The issue can be site-wide, affecting both the public-facing site and the admin dashboard (/wp-admin), or it can be isolated to a specific page, post, or just the admin area.

    Despite the intimidating name, the WSOD is a code execution failure. Your website’s data, including posts, pages, and user information stored in the database, is almost always safe and unaffected.

    Suggested read: How to Fix WordPress High CPU Usage (10 Instant Solutions)

    Common Causes of the WordPress White Screen of Death

    Several things can cause this error:

    • Plugin Incompatibility: This is the most frequent cause. A plugin may conflict with another plugin, your active theme, or a recent WordPress core update, leading to a fatal error.
    • Theme Functionality Errors: Your active theme can cause a WSOD due to poorly written code, a syntax error in its functions.php file, or an incompatibility after an update.
    • Exhausted PHP Memory Limit: A script or process may require more memory than your server has allocated to PHP. When this memory limit is reached, the script is terminated, often leaving a blank page.
    • Corrupted Core Files: A failed or interrupted WordPress core update can leave you with missing or corrupted files, which prevent WordPress from loading correctly.
    • File Permission Issues: Incorrect read/write permissions on core WordPress files and folders can prevent the server from accessing them, leading to a failure to load.

    Suggested read: How to Fix WordPress Stuck in Maintenance Mode? [100% WORKING]

    How to Fix the WordPress White Screen of Death: 7 Proven Steps

    The White Screen of Death is a common WordPress issue that can usually be resolved by following a logical troubleshooting process. Work through these steps in order, starting with the most likely culprits, such as plugins and themes, to efficiently diagnose and resolve the error.

    Step 1: Check for Plugin Conflicts

    Plugin conflicts are the most common cause of this error, so your first step is to deactivate all plugins at once. You can do this by using the RunCloud File Manager to navigate to your wp-content directory and rename the plugins folder to something like plugins_disabled. If your site comes back online, then you can rename the folder and reactivate your plugins one by one to find the one causing the error.

    Suggested read: How to Fix WordPress Revisions Not Showing [SOLVED]

    Step 2: Switch to a Default WordPress Theme

    If plugins aren’t the problem, then your active theme might be causing an issue, especially after an update or code modification. Just as we did above, use the RunCloud File Manager and navigate to /wp-content/themes/. Rename the folder of your active theme; this forces WordPress to fall back to a default theme, such as Twenty Twenty-Five. If this resolves the issue with your site, you will need to troubleshoot the theme or contact its developer for a fix.

    Step 3: Increase PHP Memory Limit

    A blank screen can occur if a WordPress process exceeds the memory allocation your server has provided. To fix this, use the RunCloud File Manager to edit your wp-config.php file and add the line just before the /* That’s all, stop editing! */ line.

    define('WP_MEMORY_LIMIT', '256M');

    This simple change often resolves memory exhaustion issues. If you are using RunCloud, then you can simply modify this setting from your dashboard without ever needing to FTP into your server. For detailed, step-by-step instructions on this topic, we recommend reading our full-length article, ‘How to Fix WordPress Memory Exhausted Error: Increase PHP‘.

    Step 4: Enable WordPress Debug Mode

    To view the specific error causing the blank screen, you must enable WordPress’s debug mode. You can do this by using the RunCloud File Manager to edit the wp-config.php file and change define('WP_DEBUG', false); to true to display the errors on the page itself.

    Additionally, you can use RunCloud’s Error Log Monitoring to see PHP and NGINX errors directly from your dashboard. This will often point you to the exact problematic file and line number.

    Suggested read: How to Easily Fix Leverage Browser Caching Warning in WordPress

    Step 5: Clear WordPress and Browser Cache

    Sometimes, all your plugins and themes are correctly configured, but some parts of your site serve stale cached content. This can sometimes break a site and mask a fix you’ve already applied.

    If you have performed all the above actions, you should clear your browser cache. If you use a caching plugin or server-level caching, such as RunCloud’s RunCache, be sure to purge that cache as well. This ensures you are viewing the live, non-cached version of your site.

    Suggested read: How to Fix WordPress HTTP Error When Uploading Images (Quick Guide)

    Step 6: Fix File Permissions and Ownership Issues

    If you recently modified or created a new file on your server via CLI, then you need to make sure that you set the correct file permissions and ownership. Incorrect file and folder permissions can prevent WordPress from accessing the necessary files, resulting in a blank screen. The standard permissions are 755 for directories and 644 for files; you can check and correct these using your RunCloud File Manager or an SFTP client.

    After fixing the file permissions, you can fix the file ownership issues by simply clicking the “Fix Ownership” button in the Tools menu.

    Suggested read: 10 Best WordPress Management Tools To Easily Manage Multiple Websites

    Step 7: Remove the .maintenance File or Restore a Backup

    In this step, you should first check your site for a stuck “.maintenance” file in your root directory using the RunCloud File Manager, and delete it if it exists. If all else fails or you need an immediate fix, the safest and fastest solution is to restore your website from a recent backup.

    With RunCloud Backups & Incremental Restore, you can revert your entire web application to a stable state in just a few clicks, ensuring no data is lost and your site is back online instantly.

    Wrapping Up: Preventing the WordPress White Screen of Death in the Future

    While knowing how to fix the White Screen of Death is a valuable skill, the best strategy is to implement practices that prevent it from happening in the first place. A proactive approach to site management can save you from downtime and stress by identifying potential issues before they escalate into critical failures. Here’s how you can do this:

    Enable a Staging Environment

    The most effective way to prevent the White Screen of Death is never to let a breaking change reach your live site. A staging environment is an exact, private clone of your production website where you can safely test plugin updates, theme modifications, and new code. If an update causes a WSOD on your staging site, your live site remains completely unaffected, giving you a risk-free space to troubleshoot the conflict.

    In the future, you can use the WordPress staging environment feature directly within the RunCloud dashboard to create and manage these test sites with just a few clicks. To learn how to implement this process, we recommend referring to our comprehensive article on creating a WordPress staging environment.

    Install and Manage WordPress with Git

    Git is a version control system that tracks every change made to your files, allowing you to instantly roll back to a previous, working version if a new deployment causes a WSOD. This eliminates the need to manually hunt for syntax errors or faulty code after an update.

    RunCloud supports atomic deployment for Git and WordPress, making this process seamless and error-free. When you deploy, RunCloud ensures the new version is fully in place before it goes live, preventing partial-update errors that often result in a blank screen. To explore this advanced, reliable deployment method, refer to our detailed guide on:

    And finally, the most important safety net is a reliable, recent backup. Instead of relying on manual processes, use a service like RunCloud Backups & Incremental Restore to automatically save versions of your site. This ensures you can revert to a working state in seconds if an update or change causes a fatal error.

    Try RunCloud’s smart server management today.

    WordPress White Screen of Death FAQs

    How do I fix a white screen after updating WordPress?

    An update likely created an incompatibility with a plugin or your theme. Access your site via FTP or your host’s file manager, navigate to the wp-content folder, and temporarily rename the plugins folder to deactivate all plugins. If this resolves the issue, reactivate them one by one to identify the cause.

    How can I access my dashboard when the site is blank?

    If /wp-admin is also blank, you must use FTP or a file manager to access your site’s files. By renaming the active theme or plugin folders within the /wp-content/ directory, you can force WordPress to disable them and regain access to your dashboard.

    Does a plugin conflict cause a blank screen?

    Yes, plugin conflicts are one of the most frequent causes of the white screen. This occurs when two plugins are incompatible with each other or with your version of WordPress, leading to a fatal error.

    Can low PHP memory make my site go blank?

    Absolutely. If a WordPress script or plugin needs more memory than is allocated on your server, it will fail to execute and result in a blank white screen. You can often fix this by increasing the PHP memory limit in your wp-config.php file.

    How do I debug a blank WordPress page?

    The most effective method is to enable WordPress’s built-in debug mode. Edit your wp-config.php file and change define( 'WP_DEBUG', false ); to true to display the specific error message that is causing the blank screen.

    How can I restore my site without losing data?

    The white screen is a code-level issue, so your content, users, and posts in the database are generally safe. Restoring a recent backup is the safest option, but fixing the issue by deactivating the faulty plugin/theme will also bring your site back without data loss.

    What should I do if only the admin area is blank?

    If the public-facing site works but /wp-admin is blank, the issue is specific to the admin dashboard. This is often caused by a plugin or a custom function in your theme’s functions.php file, so start troubleshooting there.

  • How to Host Professional Email with Greatmail

    How to Host Professional Email with Greatmail

    As a RunCloud user, you already know how to manage high-performance websites and servers efficiently.

    But if you’re still using a personal address like mybusiness@gmail.com, you’re missing a key element of professionalism.

    While services such as Google Workspace and Microsoft 365 offer robust email solutions, their per-user costs can be high for small teams or side projects.

    In this guide, you’ll learn how to host professional, domain-branded email using Greatmail – an affordable alternative that integrates easily with your domain managed through RunCloud.

    Why Use a Dedicated Email Host Like Greatmail

    Using a dedicated email hosting provider like Greatmail offers several clear benefits:

    • Cost efficiency: Greatmail is considerably more affordable than enterprise platforms such as Google Workspace or Microsoft 365, especially if you only need core email functionality.
    • Professional image: An address that matches your domain instantly builds trust and brand credibility.
    • Simplified management: You don’t need to install or maintain your own mail server, which avoids deliverability, security, and spam blacklisting problems.
    • Improved reliability: Keeping your email separate from your website hosting ensures that email continues to function even if your web server experiences downtime.

    How to Set Up a Professional Email with Greatmail

    Let’s walk through the steps to configure your Greatmail instance.

    Step 1: Sign Up and Add Your Domain to Greatmail

    Before we touch anything in RunCloud or your DNS settings, you need to tell Greatmail that you want it to handle your email.

    1. Navigate to the Greatmail website and sign up for an account.
    2. Once you are logged into your new Greatmail admin dashboard, the first step is to add your domain name. For this, you will need to contact Greatmail support via their contact form or email. During normal business hours, they typically provision domains within 2 hours.
    3. Once it is configured, Greatmail will provide you with a specific set of DNS records. These records tell the Internet where to send your domain’s email. You’ll need these records in the next step.

    Step 2: Configure DNS Records

    Next, you will need to edit the DNS records for your domain to connect it to Greatmail’s servers. You can do this at the company where you registered your domain (e.g., Namecheap, GoDaddy, Google Domains) or a service like Cloudflare if you use one.

    You’ll need to add or update the following DNS records exactly as provided in your Greatmail dashboard.

    1. MX (Mail Exchanger) Records: Direct incoming email for your domain to Greatmail’s mail servers. These records tell other mail servers where to deliver messages for addresses like user@yourdomain.com.
    1. SPF (Sender Policy Framework) Record: Add a TXT record authorizing Greatmail’s servers to send mail on your behalf. This helps prevent spoofing and improves deliverability.
    1. DKIM (DomainKeys Identified Mail) Record: Add the unique TXT record string provided by Greatmail to authenticate outgoing mail. This confirms to recipient servers that messages sent from your domain are genuine.

    Once these records are added, allow DNS propagation time (typically a few minutes to several hours) before proceeding.

    Step 3: Manage Email from the Greatmail Admin Panel

    Once your DNS is set up and verified by Greatmail, you can manage everything from their easy-to-use admin panel. Here’s a tour of the main features:

    List Your Domains

    This section provides an overview of all the domains you have added to your Greatmail account. From here, you can select a domain to manage, add new ones, or delete those you no longer need.

    Create a New Email Forward

    An email forward is an alias. This email address won’t have its own inbox but simply forwards all incoming mail to another address. This is perfect for roles like sales@yourdomain.com or info@yourdomain.com that you want to direct to your personal inbox.

    Create a New Mailbox

    A mailbox is a full email account with its own username, password, and storage space. You can access it via webmail or connect it to an email client like Outlook, Apple Mail, or Thunderbird.

    When you select Create a new mailbox, fill in the following fields to create your professional address (for example, john@example.com):

    • Username: Enter only the part before the @ symbol (e.g., john).
    • Domain: Choose your domain (e.g., example.com).
    • Password: Enter a strong, unique password. This will be used for both webmail and email client access.
    • Name: The display name shown in recipients’ inboxes (e.g., John Doe).
    • Quota: Specify mailbox storage in MB (1000 MB = 1 GB; maximum 10240 MB).
    • Active: Keep checked to enable the account immediately.
    • Send Welcome Mail: Recommended. Sends a setup guide and server details to your alternate email.
    • Other Email: Add a recovery address for password resets (e.g., johns.personal.email@gmail.com).

    Once complete, click Add Mailbox. Your new mailbox will be created instantly.

    Step 4: Access and Use Your Email

    Once you create your email mailbox, you can access your messages, send emails, and manage your account from virtually any device. Here’s a summary of what you can do with your new mailbox:

    • Connect to Desktop & Mobile Apps: For a seamless, native experience, you can integrate your account directly into email clients like Microsoft Outlook, Apple Mail, Thunderbird, and various mobile mail apps on iOS and Android.
    • Integrate with Your Existing Gmail Account: If you love the Gmail interface, you can configure it to both send and receive emails from your new professional address, keeping everything in one place.

    How to Connect Your Account

    No matter which application you choose, the setup process follows the same basic principle. During a manual setup, you will simply need to enter the core server details for your account.

    To connect your Greatmail account, open your email client’s Add Account settings:

    • Outlook: File → Add Account
    • Apple Mail: Mail → Add Account
    • Gmail: Settings → Accounts and Import

    Then follow these steps:

    1. Choose Manual Setup, Advanced Setup, or Add Other Account instead of provider presets.
    2. Enter your full email address and password.
    3. Use the following server settings provided by Greatmail:

    Server Type

    Server Name

    Port

    Encryption

    IMAP (Incoming Mail)

    secure.greatmail.com

    993

    SSL / TLS

    POP3 (Incoming Mail)

    secure.greatmail.com

    995

    SSL / TLS

    SMTP (Outgoing Mail)

    secure.greatmail.com

    465 or 2500, 587, 2525

    SSL / TLS or STARTTLS

    Choose IMAP to sync mail across multiple devices or POP3 to download messages to one device.

    Save the configuration and allow your client to verify the connection. Your client will test the connection, and once verified, your mailbox will be ready to use.

    Wrapping Up: Host Professional Email the Easy Way

    You are now fully equipped to host your own email solution, sending and receiving messages from a credible address that builds trust with your customers and strengthens your brand. With this setup, you’re ready to grow your business without worrying about expensive per-user email fees.

    This guide shows how the right tools can simplify even complex technical workflows.

    RunCloud helps you do the same for your entire web infrastructure – from deploying applications to managing servers and securing your sites.

    Start your free RunCloud trial today and manage your websites, servers, and email with confidence.

    Frequently Asked Questions About Hosting Email with Greatmail

    Can I use Greatmail with my existing Gmail or Outlook account?

    Yes. You can connect your Greatmail address to Gmail, Outlook, or any IMAP/SMTP-compatible client.
    In Gmail, go to Settings → Accounts and Import and add your Greatmail credentials under “Send mail as” and “Check mail from other accounts.”
    In Outlook, use the manual setup option and enter Greatmail’s server settings exactly as provided in your dashboard.

    Does Greatmail support both IMAP and POP3?

    Yes. Greatmail supports both protocols.
    IMAP keeps your messages and folders synced across all devices.

    POP3 downloads emails to a single device and removes them from the server after retrieval.
    IMAP is recommended for most users who access their email from multiple devices.

    How long does DNS propagation take after adding Greatmail records?

    DNS propagation usually completes within a few minutes, but can take up to 24 hours depending on your domain registrar or DNS provider.
    You can track progress using a DNS-checking tool to confirm that the MX, SPF, and DKIM records have fully updated.

    Can I host multiple domains under one Greatmail account?

    Yes. You can manage multiple domains from the Greatmail admin panel.
    Each domain can have its own mailboxes, forwarding rules, and quotas. This is especially useful for agencies or businesses operating several brands.

    How secure is Greatmail compared to self-hosting email?

    Greatmail uses SSL/TLS encryption for all connections and enforces authentication with SPF and DKIM.
    Because Greatmail manages its own infrastructure, you benefit from maintained mail servers, spam protection, and security updates without having to run your own mail system.

    What happens to my email if I move my website to another host?

    Your email will continue to function normally as long as your DNS MX records still point to Greatmail’s servers.
    Keeping email hosting separate from web hosting ensures continuous email service, even if your website is migrated or temporarily offline.

    Does Greatmail work with RunCloud servers directly?

    Yes. You can continue managing your domain, web applications, and SSL certificates in RunCloud while Greatmail handles all mail delivery. They operate independently, which keeps your email reliable and unaffected by any changes to the web server.

  • How to Fix WordPress Memory Exhausted Error Increase PHP Memory

    How to Fix WordPress Memory Exhausted Error Increase PHP Memory

    Have you ever encountered the “memory size exhausted” message on your website? If yes, then you’ll probably know that this single issue can bring your entire site to a halt.

    If you are seeing this message, don’t panic. It’s one of the most common issues WordPress users face – and is completely fixable.

    This fatal error simply means that a script on your site (usually from a plugin or theme) required more server memory (RAM) than your web hosting environment was configured to provide.

    In this guide, we will walk you through everything you need to know to solve the “memory size exhausted” problem for good.

    You’ll learn how to check your current WordPress memory limit and discover proven methods to increase it, whether by editing the wp-config.php file, the .htaccess file, or the master php.ini file.

    Let’s get started!

    How to Check Your Current PHP Memory Limit in WordPress

    Before you can fix a memory exhausted error, you first need to identify your current limit. There are several ways to do this.

    1. Using the Site Health Tool in the WordPress Dashboard

    The easiest and safest way for any user to check the PHP memory limit is directly within the WordPress dashboard. WordPress has a built-in “Site Health” tool that reports your website’s configuration and server environment.

    To access it:

    • Navigate to your WordPress admin area and go to Tools > Site Health.
    • Click on the “Info” tab at the top of the page, which will reveal a series of expandable sections.
    • Click on the “Server” dropdown, and you will see a detailed list of your server’s configuration.
    • Look for the “PHP memory limit” entry to see the value configured for your site.

    Suggested read: How to Fix WordPress High CPU Usage (10 Instant Solutions)

    2. Checking PHP Info or Server Configuration Files

    If you want more information or can’t access the WordPress dashboard, you can create a phpinfo file. This method queries the server directly and displays the master PHP configuration.

    To do this, you just need to create a new file named info.php in your website’s root directory using an FTP client or a file manager, and place the following single line of code inside it:

    <?php phpinfo(); ?>

    Save the file, then visit yourwebsite.com/info.php in your browser. You will see a detailed page with all PHP settings; search for memory_limit to find the current value.

    fix WordPress Memory Exhausted in phpinfo

    Note: for security reasons, you must delete the info.php file from your server immediately after you are finished, as it exposes sensitive server configuration details.

    Suggested read: How to Fix WordPress Stuck in Maintenance Mode? [100% WORKING]

    3. Identifying Memory Limit via Hosting Control Panel (cPanel, RunCloud, etc.)

    Most modern hosting environments provide a graphical interface to view and manage server settings. In traditional control panels like cPanel, you might find this information under a “MultiPHP INI Editor” or “Select PHP Version” tool.

    On a more powerful platform like RunCloud, this information is even more accessible and transparent. Simply navigate to your Web Application > Settings within the RunCloud dashboard.

    Here, you will see your current PHP version and its associated memory limit clearly displayed:

    Suggested read: How to Fix WordPress Revisions Not Showing [SOLVED]

    How to Fix the WordPress Memory Exhausted Error (7 Proven Methods)

    There are several ways to fix the WordPress Memory Exhausted error, ranging from simple configuration file edits to leveraging your hosting control panel. Let’s explore these methods in detail to help you get your WordPress site back on track.

    1. Increase PHP Memory Limit via wp-config.php File

    This is the standard WordPress method for increasing the memory available to your application. The wp-config.php file contains your site’s base configuration and is located in the root directory of your WordPress installation.

    (Before editing, it is recommended that this file be backed up.)

    First, you need to open the wp-config.php file either using your FTP client or the RunCloud File Manager. In this file, add the following line of code just before the line that says /* That’s all, stop editing! Happy publishing. */:

    define('WP_MEMORY_LIMIT', '256M');

    If needed, you can change 256 MB to a higher value, like 512 MB. This command instructs WordPress to override the default PHP memory limit for its own processes.

    Suggested read: How to Check Linux CPU Usage or Utilization (5 Ways)

    2. Edit the .htaccess File to Raise Memory Limit

    If editing wp-config.php doesn’t work, it may be because your hosting provider has locked that setting at the server level. In some Apache servers, you can also edit the .htaccess file, which is also located in your site’s root directory. This file controls server configurations for your specific directory.

    Again, ensure you have a backup before proceeding. Open the .htaccess file and add the following line at the very end of the file:

    php_value memory_limit 256M

    Save the file and check if the error is resolved.

    Suggested read: How to Find the Most Used Disk Space Directories and Files in Linux

    3. Modify the php.ini File on Your Server

    The php.ini file is the master configuration file for PHP on your server. Modifying this file changes the memory limit for all PHP applications, not just WordPress, which makes it the most powerful method. However, on shared hosting, you typically do not have access to this file, so this method is primarily for users on a VPS or dedicated server where you have root or sudo privileges.

    If you have server access, you must first locate the correct php.ini file, as its location varies significantly by Linux distribution and PHP version. For instance, on a server running Ubuntu or Debian with PHP 8.1 and Apache, the path is /etc/php/8.1/apache2/php.ini. If you’re using NGINX with PHP-FPM, the path would instead be /etc/php/8.1/fpm/php.ini. On distributions like CentOS or AlmaLinux, a common location is simply /etc/php.ini.

    The most reliable way to find the exact path your web server is using is to check the “Loaded Configuration File” line within a phpinfo() page, as explained above. Once you have located and backed up the correct file, you will find and change the following line:

    memory_limit = 256M

    Suggested read: The 10 Best PHP Frameworks (Complete Guide)

    4. Use the Hosting Control Panel or the RunCloud Dashboard to Increase Memory

    The safest and most recommended method for novice users is to use the tools provided by your hosting provider or server management panel. These interfaces are designed to prevent the configuration errors that can occur when editing files manually. Most control panels have a section for managing PHP settings where you can select your domain and choose a new memory limit from a dropdown menu.

    RunCloud excels at this, and it provides a dedicated and intuitive control for each web application. From your dashboard, go to Web Application > Settings, where you can easily adjust the PHP memory_limit with a simple input field.

    change wordpress memory limit

    After you make the necessary changes, you can save the settings without any need for SSH or FTP.

    Suggested read: How to Fix WordPress HTTP Error When Uploading Images (Quick Guide)

    5. Deactivate Heavy or Poorly Coded Plugins

    Sometimes, the problem isn’t the memory limit itself, but a single plugin consuming an excessive amount of resources. A poorly coded plugin or a feature-heavy one (like a page builder or a complex backup solution) can easily trigger a memory error by creating a memory leak or simply by performing a task that is too resource-intensive for your server’s configuration.

    In this case, increasing the memory limit will not solve the issue, and you will need to identify the specific component causing the issue without disrupting your live site.

    Instead of resorting to the time-consuming method of deactivating all plugins on your live site, your first step should be to check the server logs. The NGINX error logs, for instance, often contain the exact PHP script path that triggered the fatal error.

    Furthermore, a plugin that exhausts memory is frequently a slow-performing one; this is where RunCloud’s built-in slow script monitoring becomes invaluable. It helps you identify scripts that are taking too long to execute and are likely candidates for high memory usage.

    Once you have identified a suspect, the safest way to confirm your diagnosis is in a non-production environment. Instead of deactivating plugins on your live site and risking further downtime, use RunCloud’s one-click staging functionality. This creates an identical, isolated copy of your site where you can safely deactivate the suspected plugin and test thoroughly without impacting your visitors. If the error disappears on the staging site, you’ve found your culprit and can proceed with deactivating or replacing it on your live production site.

    Suggested read: Everything You Need To Know About the wp-config.php File

    6. Optimize Images and Media Files to Reduce Memory Usage

    One of the most common reasons for memory exhaustion is uploading large, high-resolution images. When you upload a picture, WordPress doesn’t just store it directly; it uses PHP to process it and create multiple smaller versions (thumbnails). This image processing is a very memory-intensive task, and a large file can easily push PHP past its limit.

    To prevent this, always optimize and resize your images before uploading them to WordPress using a tool like Photoshop or an online image compressor. You can also use a WordPress plugin that optimizes images on the fly, but be mindful that the optimization plugin itself will also consume resources. By reducing the initial file size, you significantly decrease the amount of memory needed for processing.

    Suggested read: Scaling RAM & CPU Cores – How They Affect WordPress Performance

    7. Upgrade Your Hosting Plan for Higher PHP Memory Allocation

    If you have tried all the above methods and are still hitting memory limits, especially on a shared hosting plan, it may be time to upgrade. Shared hosting environments place strict, and often low, caps on resources like RAM to ensure stability for all users on the server. No amount of configuration file editing can overcome a hard limit imposed by your provider.

    Upgrading to a VPS (Virtual Private Server) gives you dedicated resources and full control over your server environment. With RunCloud managing your VPS, you can easily set your PHP memory limit to 512 MB, 1GB, or whatever your applications require.

    Wrapping Up: Best Practices to Prevent the WordPress Memory Exhaustion Error

    In this post, we have shown you not only how to fix the WordPress memory exhausted error but also how to build a resilient and high-performing website. After fixing the error, you can optimize your site by implementing a couple of best practices to prevent this in the future.

    One of the most powerful preventative measures is to reduce your server’s overall workload. Every time a visitor loads a page on your site, WordPress executes PHP scripts and queries the database, all of which consume memory. Caching drastically reduces this workload by storing and serving a static HTML version of your page, bypassing the need for most PHP executions.

    With RunCloud, you can enable a highly optimized server-level solution like RunCache (NGINX FastCGI cache) with a single click. This immediately lowers your server’s memory and CPU usage and makes your site significantly faster. 

    This is just one example of how RunCloud transforms server management from a reactive chore into a proactive strategy.

    Sign up for RunCloud today and experience a faster, more stable WordPress site.

    FAQs on WordPress Memory Exhausted Error

    How do I increase PHP memory in WordPress?

    The most effective method is to edit your wp-config.php file by adding the line define('WP_MEMORY_LIMIT', '256M'); just before the “That’s all, stop editing!” comment. If this doesn’t work, your host may be overriding it, so you can try setting the memory_limit value in your .htaccess or php.ini file.

    What causes memory limit errors in WordPress?

    Memory limit errors occur when a WordPress script, typically from a plugin or theme, requires more RAM than the server has allocated for PHP. This exhaustion is often triggered by resource-intensive functions, poorly coded components, or complex database queries that push the process beyond its allowed memory threshold.

    Why does my site crash when uploading images?

    Image uploads are a memory-intensive process because WordPress must not only receive the file but also process it to create multiple smaller sizes (thumbnails). If the original image is very large or your PHP memory limit is low, this process can easily exceed the allocated memory and trigger a fatal error.

    How do I find my current PHP memory limit?

    The easiest way is to navigate to “Tools > Site Health” in your WordPress dashboard, click the “Info” tab, and expand the “Server” section. Alternatively, a more direct server-level approach is to create a file named info.php in your root directory containing <?php phpinfo(); ?> to view the master memory_limit value.

    Can plugins cause memory exhaustion?

    Yes, plugins are the most frequent cause of memory exhaustion errors in WordPress. A single poorly coded plugin or too many plugins running complex operations simultaneously (like page builders, backup solutions, or security scanners) can quickly consume all available memory.

    What is the ideal PHP memory limit for WordPress?

    A baseline of 128M is a good starting point for a modern website, but 256M is a safer and more common recommendation. For robust sites, especially those running e-commerce platforms like WooCommerce or numerous plugins, setting the limit to 512 MB is often ideal for preventing memory-related errors.

    How do I fix fatal errors in WordPress?

    First, enable WP_DEBUG in your wp-config.php file to see a more detailed error message that often points to the culprit plugin or theme. If it’s a memory issue, increase the PHP memory limit; otherwise, the standard troubleshooting procedure is to deactivate all plugins and switch to a default theme to isolate the problem.

    Does changing themes affect memory usage?

    Absolutely, themes can have a significant impact on memory usage, as modern themes often bundle complex features and functionality. A lightweight, well-optimized theme will consume far less memory than a large, multipurpose theme packed with page builders, sliders, and extensive integrations.