Author: RunCloud Team

  • How to Edit robots.txt in WordPress (With & Without Plugin)

    How to Edit robots.txt in WordPress (With & Without Plugin)

    Not having a strong web presence is like not existing at all. Your website is your storefront, your portfolio, and your voice.

    Controlling how search engine crawlers discover and interact with it is crucial for its success.

    In this guide, we will discuss the robots.txt file, a critical tool for managing your WordPress robots.txt file and optimizing your site for SEO. We’ll cover everything from the basics of robots.txt rules and directives (like Disallow and Allow) to editing your file using popular SEO plugins or even directly via FTP or cPanel.

    But that’s not all! We’re going beyond traditional search engines.

    In the age of AI, we’ll show you how to manage your website’s presence in tools like ChatGPT and Claude using specific robots.txt user-agent configurations.

    You will also learn to control whether your content is used to train these powerful AI models, giving you unprecedented control over your digital footprint. This feature has become increasingly important with the advancement of AI, so understanding your robots.txt file and web robots in general is more powerful than ever.

    By the end of this guide, you’ll be a robots.txt expert!

    What is robots.txt?

    The robots.txt file is a plain text file in your website’s root directory (e.g., yourwebsite.com/robots.txt). It is a set of instructions for search engine crawlers (also known as bots or spiders) that tells them which parts of your site they shouldn’t access. It’s a tool for controlling how search engines interact with your website, but it’s not a security mechanism. It is a public file that any human or bot can see.

    📖 Suggested read: 15 Best Performance Testing Tools to Improve Your Site

    Purpose of robots.txt

    The primary purpose of robots.txt is to manage crawler traffic, not to hide pages from search results entirely. While it strongly suggests which areas to avoid, it doesn’t guarantee exclusion from search indexes. Here’s a breakdown of its key functions:

    • Preventing Crawling of Duplicate Content: Websites often have multiple URLs that lead to the same content (e.g., with and without “www” or with different URL parameters). robots.txt can help you indicate which version you prefer search engines to crawl and avoid duplicate content penalties.
    • Blocking Access to Sensitive Directories: You might have areas of your website that are not intended for public consumption, such as your admin panel (/wp-admin/ on WordPress), staging environments, or directories containing internal files. robots.txt can tell crawlers to steer clear of these. However, remember that this is a suggestion, not an enforced restriction; for true security, use proper authentication and authorization methods.
    • Conserving Crawl Budget: Large websites, especially e-commerce sites, can have thousands or even millions of pages. Search engines have a limited “crawl budget” – the amount of time and resources they’ll dedicate to crawling a particular site. You can ensure that crawlers prioritize indexing your most valuable content by strategically disallowing less important or dynamically generated pages (like certain search result filters).
    • Specifying the Location of Sitemaps: robots.txt can include a directive pointing search engines to your XML sitemap(s). Sitemaps are lists of all the important URLs on your site, helping search engines discover and index your content more efficiently.

    📖 Suggested read: 10 Best WordPress Management Tools To Easily Manage Multiple Websites

    How Search Engines Use robots.txt

    When a search engine crawler (like Googlebot) visits a website, it typically checks for the robots.txt file first. It parses the file and looks for instructions specifically targeted at it (via the User-agent directive).

    1. User-agent: This line specifies which crawler the following rules apply to. User-agent: * means the rules apply to all crawlers. You can also target specific crawlers, like User-agent: Googlebot.
    2. Comments: Lines starting with # are considered comments and will be ignored by web crawlers.
    3. Disallow: This is the core directive. It tells the crawler not to access the specified URL path. For example, Disallow: /private/ would instruct crawlers to avoid the /private/ directory and everything within it.
    4. Allow: This directive is used to override a Disallow rule. It’s helpful if you want to block an entire directory but allow access to a specific file or subfolder within it. For instance:
    User-agent: *
    Disallow: /images/
    Allow: /images/logo.png

    The above code snippet blocks access to the /images/ directory, except for the logo.png file. You should note that robots.txt is based on a cooperative system. Reputable search engines (like Google, Bing, etc.) generally respect the instructions in robots.txt. However, malicious bots or scrapers might ignore them completely.

    Therefore, robots.txt should not be relied upon for security; use proper authentication and .htaccess rules for sensitive areas. Also, a disallowed page may still appear in search results if it is linked from other pages.

    📖 Suggested read: How To Install WordPress With RunCloud | Step-By-Step Guide

    Importance of robots.txt For AI Crawlers

    While robots.txt has always been important for managing traditional search engine crawlers, its importance has grown significantly with the rise of AI-powered crawlers. These AI crawlers, used by companies like OpenAI, are designed to gather vast amounts of data from the web, often to train large language models (LLMs) and other AI systems. This introduces new considerations for website owners regarding data usage, privacy, and control.

    Why is robots.txt More Important Now?

    • Data Usage Control: AI models require massive datasets for training. Your website’s content, if crawled, could potentially be used to train these models. robots.txt allows you to express your preference regarding this usage. You can choose to allow AI crawlers to access your content, disallow them entirely, or selectively control access to specific parts of your site.
    • Performance and Bandwidth: AI crawlers can be very aggressive and potentially overload your server. robots.txt can help you manage this by limiting their access or specifying crawl delays (though not all crawlers respect crawl-delay directives).
    • Ethical Considerations: There are ongoing discussions and debates about the ethics of using publicly available data to train commercial AI models. robots.txt allows website owners to participate in this discussion by making their preferences known.
    • Search Indexing: Some AI crawlers enhance search experiences within specific AI products. Controlling access to these can directly impact whether your content is discoverable through these AI-powered search interfaces.

    How to Edit the robots.txt in WordPress

    Two primary ways to edit your robots.txt file in WordPress are using a plugin (generally recommended for ease of use and safety) or editing the file directly (which requires more technical knowledge).

    Method 1: Editing robots.txt with a Plugin

    This is the recommended method for most users, especially beginners. Many SEO plugins offer built-in robots.txt editors, which provide a user-friendly interface and reduce the risk of syntax errors.

    1. Install and Activate an SEO Plugin: You can use popular plugins such as Yoast SEO, Rank Math, All in One SEO Pack, SEOPress, etc. These plugins offer a wide range of SEO features, including robots.txt management.
    2. Locate the robots.txt Editor: The exact location of the editor varies depending on the plugin. Refer to the official documentation of your WordPress plugin to follow along:
    3. Edit the File: The plugin will typically provide a text area where you can view and edit the contents of your robots.txt file. Make your desired changes and exclude any unnecessary paths from crawling.
    4. Save Changes: Click the “Save Changes” or similar button to apply your modifications.
    5. Test your Changes: Use the Google search console’s robots.txt tester to ensure your edits work correctly.

    Advantages of using a plugin:

    • User-Friendly Interface: Simplifies and streamlines the editing process.
    • Syntax Validation: Many plugins will check for basic syntax errors, reducing the risk of accidentally blocking important parts of your site.
    • Integrated with SEO Tools: Often provides seamless integration with other SEO features within the plugin.
    • Reversion Options: Some plugins offer version history or backup options, allowing you to revert to previous versions if needed.

    Method 2: Editing robots.txt without a Plugin

    If you don’t want to use an additional plugin, you can directly access and modify the robots.txt file on your server. However, this requires more technical expertise and, if not done carefully, carries a higher risk of errors.

    1. Access Your Server: You’ll need to connect to your server using one of the following methods:
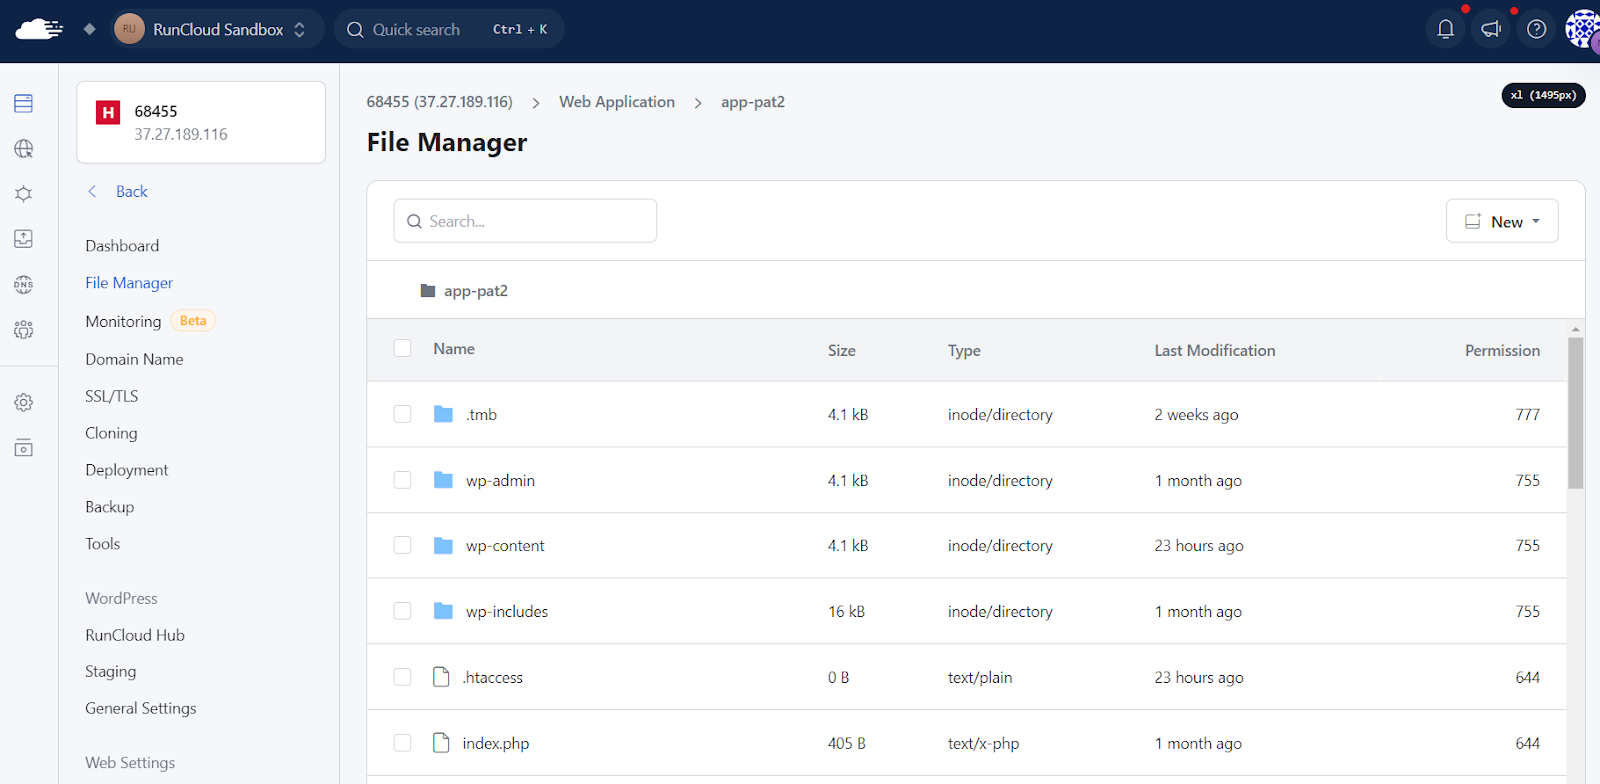
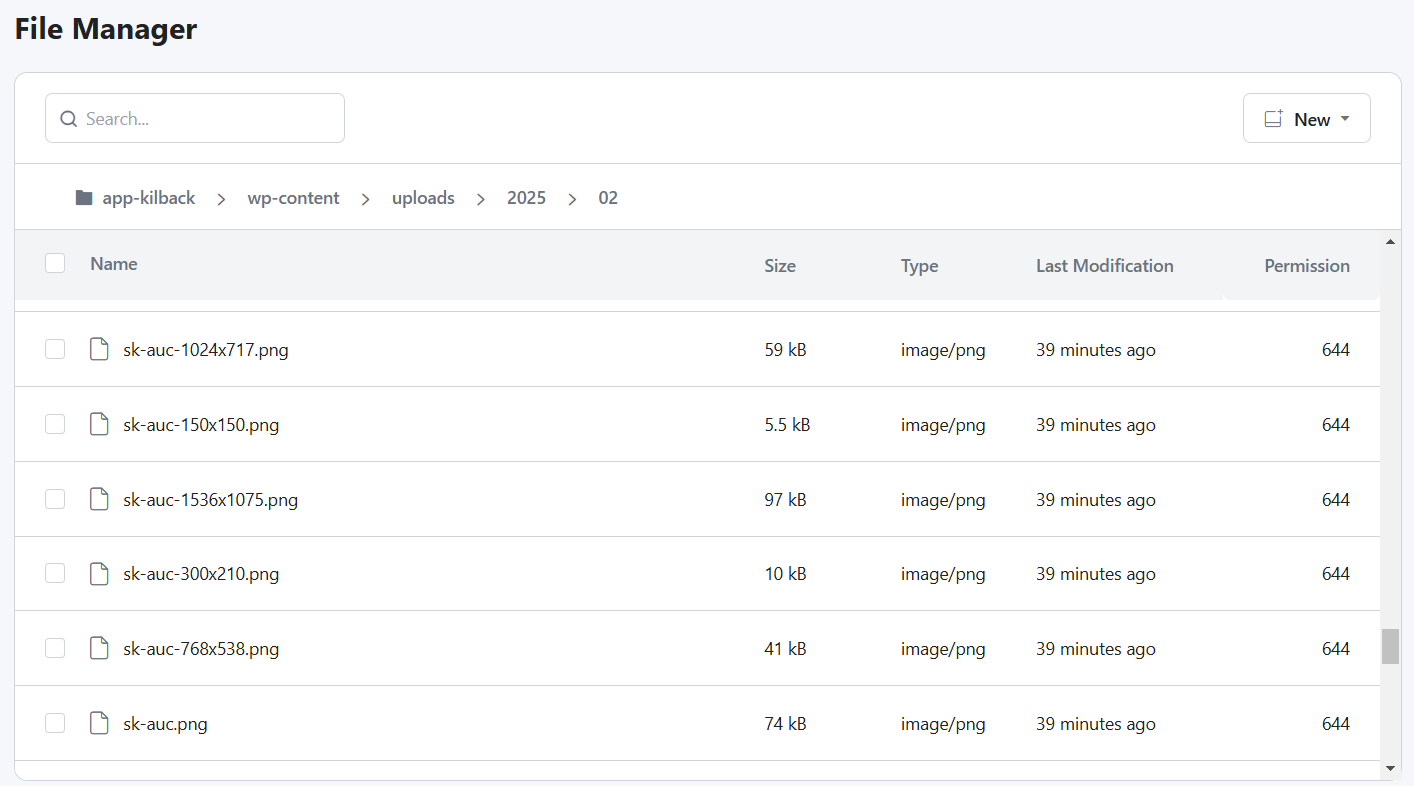
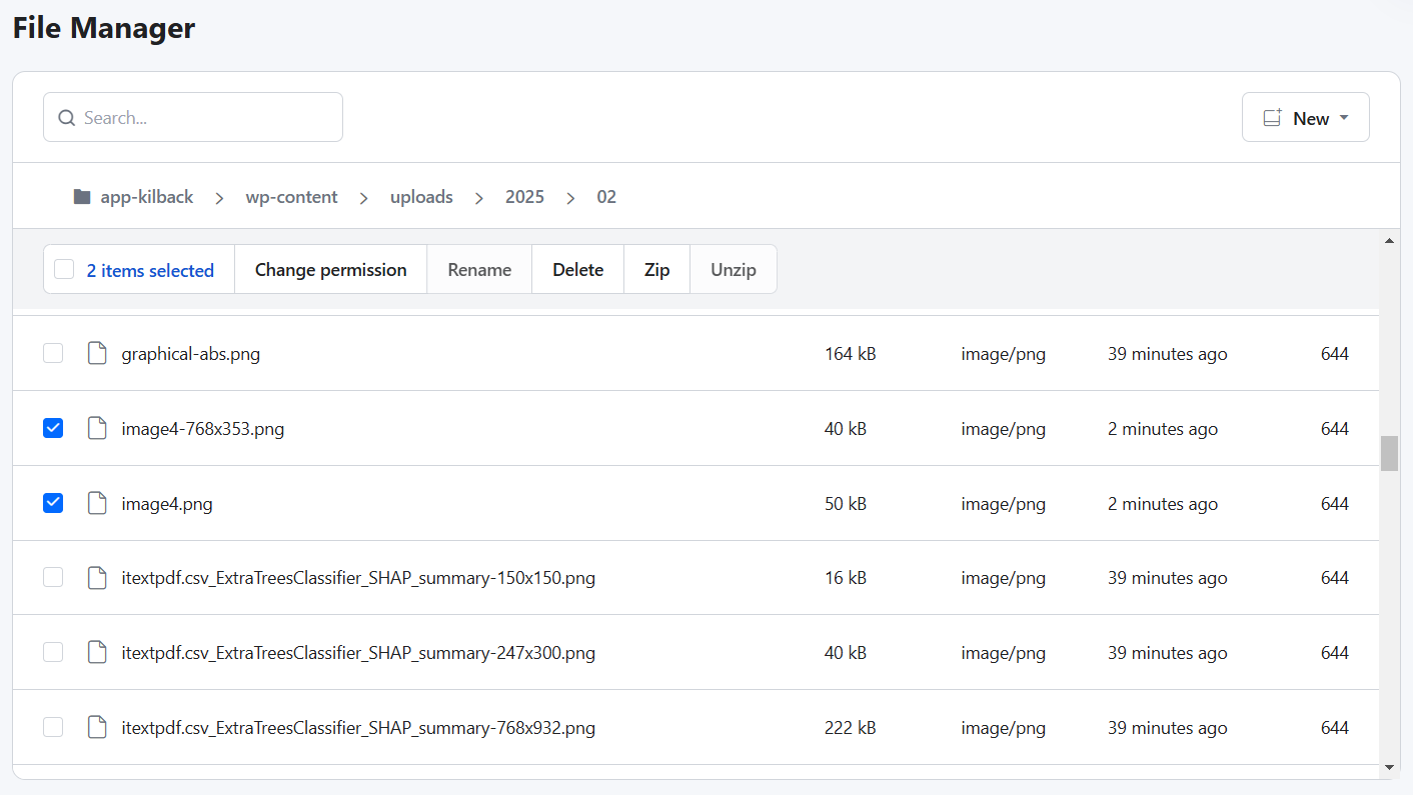
      • RunCloud File Manager: RunCloud provides a built-in file manager for creating and modifying text files on your server.
      • FTP (File Transfer Protocol): Connect to your server using an FTP client such as FileZilla. Your web hosting provider usually provides your FTP credentials (hostname, username, and password).
      • cPanel File Manager: Most web hosting providers offer cPanel, which includes a web-based File Manager. Log in to your cPanel account and navigate to the File Manager.
      • SSH (Secure Shell): Advanced users can use SSH to obtain command-line access to the server. This requires SSH credentials and familiarity with command-line tools.
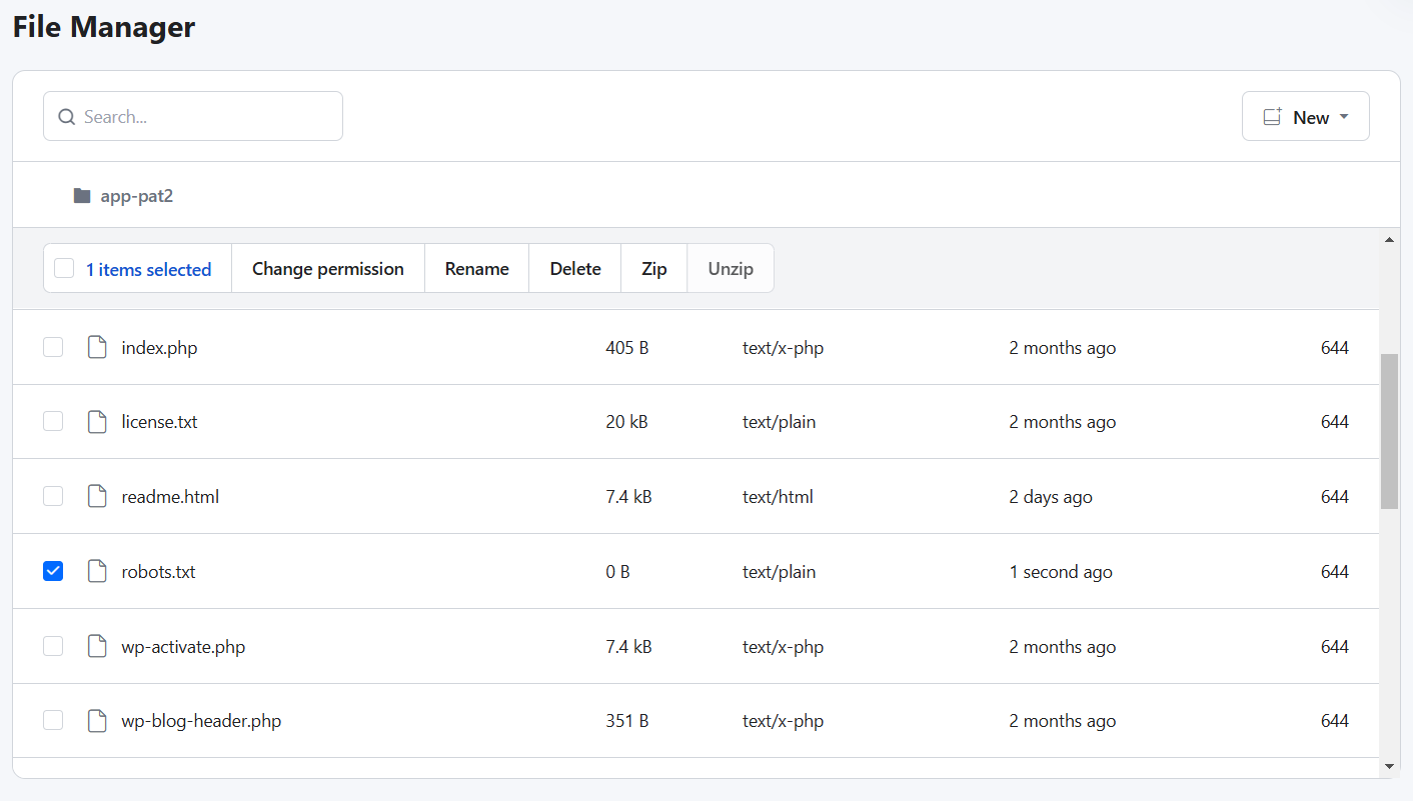
    1. Locate the robots.txt File: Navigate to the root directory of your WordPress installation. This is typically the directory where your wp-config.php file is located. If it doesn’t exist, you can create a new plain text file named robots.txt.
    2. Edit the File:
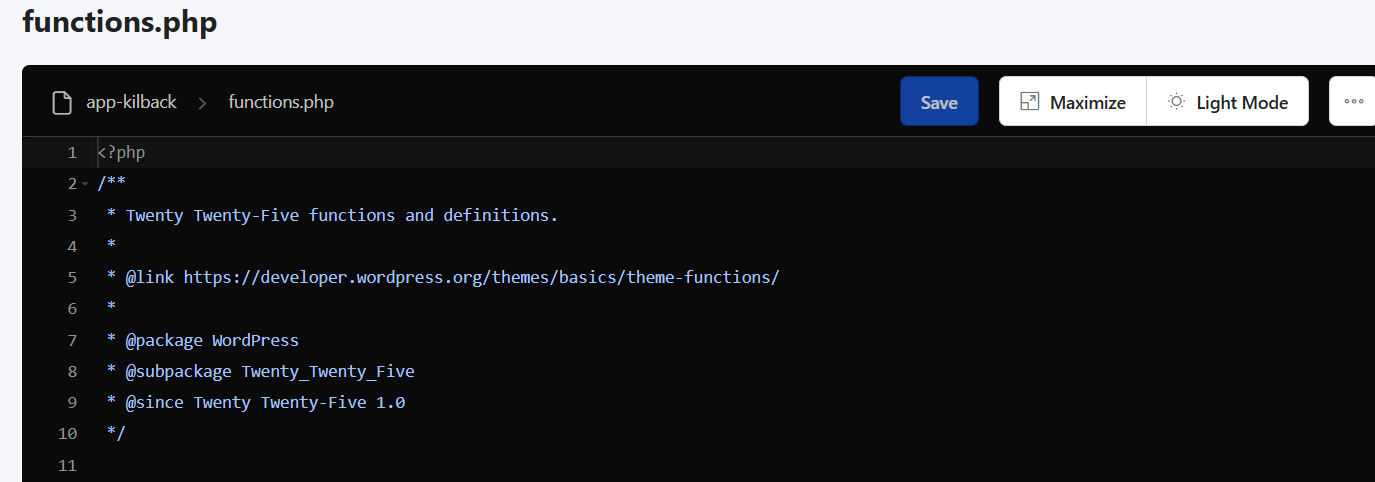
      • RunCloud File Manager: Locate the file and click on it; this will open a text editor in a new browser window.
      • FTP: Download the robots.txt file to your computer and edit it using a plain text editor such as Notepad++, Sublime Text, or VS Code. You can’t use a word processor like Microsoft Word. After editing the file, save it and upload the modified file back to the server, overwriting the existing file.
      • cPanel File Manager: Right-click on the robots.txt file and select “Edit” or “Code Edit” (depending on your cPanel version). Make your changes directly in the web-based editor.
      • SSH: Use the nano or vim command-line text editors to edit your robot.txt file.
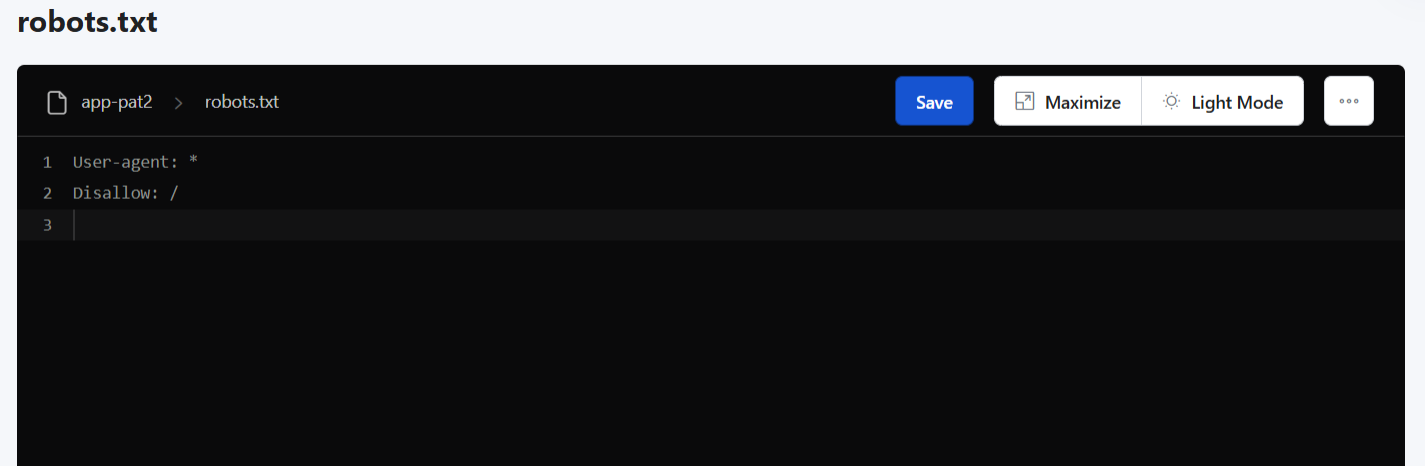
    Editing robots.txt in runcloud
    1. Save Changes: Ensure you save the changes you’ve made to the file. If using FTP, ensure the updated file is uploaded and overwrites the old one.
    2. Test Your Changes: After editing your file directly, it is essential to test it. Use Google Search Console’s robots.txt Tester tool to verify that your changes are working as intended and that you haven’t accidentally blocked important content.

    While editing the robots.txt file directly without a plugin can be more technically involved, it offers some distinct advantages for advanced users and those who prefer greater control over their website’s settings.

    📖 Suggested read: How Google Interprets the robots.txt Specification

    This approach ensures that all the necessary features and tools are built directly into the core system. You have complete autonomy over the file’s content and structure without depending on external plugins or add-ons. This eliminates compatibility issues, potential security risks, and the need for additional software installations.

    However, it does have a few disadvantages:

    • Higher Risk of Errors: Requires careful attention to syntax; mistakes can have significant negative consequences.
    • Less User-Friendly: Requires technical knowledge of FTP, cPanel, or SSH.
    • No versioning: If you make a mistake, it will be difficult to revert.

    Unless you are comfortable with server-side file management, a plugin is strongly recommended for editing your robots.txt file in WordPress. If you do choose to edit directly, always test your changes thoroughly using Google Search Console’s robots.txt Tester.

    📖 Suggested read: How to Fix WordPress Revisions Not Showing [SOLVED]

    If you aren’t comfortable with command line tools but still want to edit your configuration files manually, then you should note that RunCloud users can manage and edit their robots.txt through a clean, intuitive interface, offering a safer alternative to direct FTP or SSH access while maintaining control.

    📖 Suggested read: 3 Free Ways To Migrate WordPress From Shared Hosting To Cloud Server

    Managing AI Crawlers with robots.txt

    This section will focus on managing AI crawlers using robots.txt, specifically for OpenAI crawlers. By understanding these crawlers and their user agents, you can control their access to your website’s content.

    OpenAI provides clear documentation on its crawlers, allowing you to make informed decisions about how you want them to interact with your site.

    • GPTBot: This is OpenAI’s primary crawler for training its generative AI foundation models (like those powering GPT-3, GPT-4, etc.). Disallowing GPTBot signals that you do not want your website’s content used for training these models.
    User-agent: GPTBot
    Disallow: /

    This example blocks GPTBot from crawling your entire site.

    • OAI-SearchBot: This crawler specifically displays websites in search results within ChatGPT’s search features. Allowing OAI-SearchBot can help your site appear in these results.
    User-agent: OAI-SearchBot
    Allow: /

    This allows OAI-SearchBot to crawl your site. You might combine this with a “disallow” command for GPTBot to appear in search results but prevent model training.

    • ChatGPT-User: It is not used to crawl the web automatically. It is a proxy through which a user’s request is sent. It is not used for general training purposes.
    User-agent: ChatGPT-User
    Allow: /

    You can combine rules for different crawlers in a single robots.txt file. For example:

    User-agent: *
    Disallow: /wp-admin/
    Disallow: /private/
    User-agent: GPTBot
    Disallow: /
    User-agent: OAI-SearchBot
    Allow: /

    The above example will:

    1. Blocks all crawlers (including traditional search engines) from /wp-admin/ and /private/.
    2. Blocks GPTBot from the entire site (preventing training data collection).
    3. Allows OAI-SearchBot to crawl the entire site (enabling appearance in ChatGPT search).

    While we provided an overview of OpenAI’s crawlers and user agents, we recommend reading AI / LLM User Agents: Blocking Guide to learn more.

    📖 Suggested read: How to Easily Create a WordPress Staging Site in RunCloud

    After Action Report: Mastering Your robots.txt File

    Throughout this guide, we’ve shown you why robots.txt is a small but mighty file that manages how search engines and, increasingly, AI crawlers interact with your website. We discussed its core purposes: managing crawl traffic, conserving crawl budget, and specifying sitemap locations. We also explained that robots.txt is a suggestion, not a security mechanism.

    Controlling your site’s interaction with crawlers is essential for a healthy web presence. You want search engines to index your valuable content efficiently, avoid duplicate content issues, and protect sensitive areas. With the advent of AI crawlers, you also need to consider how your content might be used for training AI models, and robots.txt gives you a voice in that process.

    But managing files directly on your server, especially for tasks like editing robots.txt, can be intimidating. Traditional methods such as FTP clients and cPanel’s File Manager can feel clunky and risk errors if you’re not experienced.

    This is where RunCloud shines.

    RunCloud’s intuitive dashboard provides a built-in File Manager that simplifies server-side file management. No more juggling FTP clients or navigating complex cPanel interfaces!

    • Direct Access: Access your website’s root directory and locate your robots.txt file.
    • Built-in Text Editor: RunCloud’s File Manager includes a powerful yet easy-to-use text editor directly within the dashboard. You can make changes to your robots.txt file, save them, and then be done – all without leaving your browser.
    • Secure and Streamlined: RunCloud’s interface provides a secure and streamlined way to manage server files, minimizing the risk of accidental errors.
    • One-Click Staging: Create a staging environment to experiment with before pushing changes to the live server.

    Ready for Effortless WordPress Management? Choose RunCloud.

    RunCloud isn’t just about simplifying robots.txt management. It’s a complete WordPress hosting platform designed for speed, security, and ease of use. From deploying new sites with a single click to managing server configurations, backups, and security settings, RunCloud empowers you to take control of your WordPress hosting without headaches.

    Here’s why RunCloud is the best choice for your WordPress site:

    • Blazing Fast Performance: Optimized server configurations and caching mechanisms ensure your site loads incredibly quickly, improving user experience and SEO.
    • Robust Security: Built-in security features, including firewalls and regular security updates, protect your site from threats.
    • Effortless Management: An intuitive dashboard makes server management a breeze, even for non-technical users.
    • Scalability: Easily scale your server resources as your website grows.
    • Expert Support: RunCloud’s support team can assist you with any questions or issues.

    Start your free trial today and see how easy WordPress hosting can be.

    FAQs on robots.txt in WordPress

    What is the difference between robots.txt and meta tags?

    Robots.txt is a site-wide file instructing search engine crawlers which directories to avoid. At the same time, meta tags are placed within individual page HTML and control how that specific page is indexed and displayed. Meta tags offer finer-grained control.

    Can I block specific pages with robots.txt?

    In your robots.txt file, you can use the Disallow: directive followed by the specific page’s URL path. For example, Disallow: /private-page/ will block that URL.

    How do I test my robots.txt file?

    Use Google Search Console’s robots.txt Tester tool. This tool validates your syntax and shows if any URLs you intend to block are accessible.

    Is it safe to edit robots.txt?

    Editing robots.txt can impact your site’s search visibility, so proceed cautiously; mistakes can block important content. Platforms such as RunCloud make managing and editing your robots.txt easier and safer through a user-friendly interface.

    What happens if I disallow all in robots.txt?

    Using User-agent: * and Disallow: / in your robots.txt file will instruct all search engines not to crawl any part of your website, effectively removing it from search results.

    Can plugins affect my robots.txt file?

    Yes, some WordPress SEO plugins can create or modify your robots.txt file. Review plugin settings carefully to avoid conflicts or unintended disallow rules.

    How often should I update my robots.txt?

    Update your robots.txt file whenever you make significant changes to your website’s structure or want to adjust which sections are accessible to search engines. Regular reviews are recommended, but not frequent updates.

    What is the correct syntax for robots.txt?

    The basic syntax uses User-agent to specify the crawler (e.g., User-agent: * for all) and Disallow to specify paths to block (e.g., Disallow: /wp-admin/). Allow can override Disallow for specific files or folders within a disallowed directory.

  • 8 Best Cheap Web Hosting Services in 2025

    8 Best Cheap Web Hosting Services in 2025

    Looking for reliable web hosting that won’t break the bank in 2025? We’ve analyzed and compared the top 8 affordable hosting providers to help you make an informed decision.

    From shared hosting plans starting at just $2.99/month to scalable cloud solutions, this comprehensive guide covers everything you need to know about budget-friendly hosting options that don’t compromise quality.

    Whether you’re launching your first blog or managing multiple high-traffic websites, we’ll show you how to get the best value for your money with features like free SSL certificates, unlimited bandwidth, and 24/7 customer support.

    Let’s find the best cheap web hosting options for 2025 – and the perfect solution for your needs.

    What is Web Hosting?

    Web hosting is a service that makes websites accessible online by storing website files on powerful servers connected to the global network. When you purchase web hosting, you’re essentially renting space on a server that maintains your website’s files, databases, and other essential resources needed for your site to function properly.

    These specialized computers (servers) are maintained in secure data centers with redundant power supplies, cooling systems, and high-speed internet connections to ensure your website remains accessible 24/7.

    Modern web hosting providers offer additional services beyond simple storage, including:

    • Automated backups
    • Security features
    • Content delivery networks (CDN)
    • Easy-to-use control panels for website management

    Suggested read: Top 8 Popular Web Hosting Control Panels in 2024

    Types of Web Hosting

    Web hosting services come in several distinct varieties, each designed to meet different needs, budgets, and technical requirements for websites of varying sizes and complexities.

    Shared Hosting

    Shared hosting is the most economical and beginner-friendly option. In this hosting, multiple websites share resources on a single server. This hosting type is perfect for small businesses, personal blogs, and startups just beginning their online journey and don’t require extensive server resources.

    Modern shared hosting plans often include features such as one-click installers, managed security updates, and user-friendly control panels that make website management accessible to non-technical users. Shared hosting is affordable because of the economy of scale, where server maintenance and management costs are distributed among many users.

    VPS Hosting

    Virtual Private Server (VPS) hosting is a significant step up from shared hosting. It offers dedicated resources within a virtualized server environment that provides better performance and reliability. With VPS hosting, your website operates in an isolated container with guaranteed CPU, RAM, and storage allocations, ensuring consistent performance regardless of other users on the physical server.

    VPS hosting offers root access and the flexibility to customize your server environment, install specific software, and configure security settings according to your needs. This makes it ideal for growing websites, e-commerce stores, and applications that need more resources and control than shared hosting can provide. The scalability of VPS hosting allows you to adjust resources as your needs change, making it a future-proof solution for evolving websites.

    Suggested read: Self-Managed or Managed Hosting: Which One is Right for You?

    Dedicated Hosting

    Dedicated hosting provides the best performance by allocating an entire physical server exclusively to your website or application. This premium hosting solution offers maximum resources, complete server customization options, and the highest level of security since no other users share your server hardware.

    Dedicated hosting is ideal for high-traffic websites, resource-intensive applications, and organizations with specific compliance requirements that necessitate complete server control. With dedicated hosting, you have the freedom to choose your server’s operating system, install any required software, and configure the server exactly to your specifications.

    Cloud Hosting

    Cloud hosting is the most flexible and scalable hosting solution. You can use a network of connected servers to host websites and applications with good reliability and resource scalability. You can also structure your services so that websites use resources from multiple servers, providing better redundancy and the ability to handle traffic spikes without service interruption.

    Cloud hosting platforms typically offer pay-as-you-go pricing models, ensuring you only pay for the resources you use while being able to scale up or down instantly based on demand. Cloud hosting is particularly well-suited for websites with variable traffic patterns, e-commerce sites that need to scale during peak seasons, and applications that require high availability and performance. Most cloud hosting providers offer advanced features such as load balancing, automated scaling, and global content delivery networks (CDN) to enhance website performance and user experience.

    Suggested read: 10 Best Self-Hosted Email Server Platforms to Use in 2024

    Top 8 Cheap Web Hosting Services in 2025

    The web hosting landscape continues to evolve in 2025, offering more features and better performance at increasingly competitive prices. We’ve tested and analyzed these services to help you make an informed decision based on your specific hosting requirements and financial constraints.

    RunCloud + Cloud VPS

    RunCloud transforms how developers and businesses manage their cloud servers by providing an intuitive server control panel that works seamlessly with all the major cloud providers such as DigitalOcean, Vultr, Linode, and many more. This powerful combination delivers enterprise-level features at a fraction of the cost of traditional managed hosting solutions.

    RunCloud provides automated server setup, enhanced security, and streamlined deployment processes, significantly reducing the technical overhead of managing cloud servers. Its server management capabilities make it ideal for developers and agencies managing multiple websites.

    Suggested read: The 7 Best Node.js Hosting Platforms for 2024 (Free + Paid)

    Key Features

    RunCloud offers a comprehensive suite of features to streamline server management and website deployment. You can use RunCloud’s one-click server provisioning, automated SSL certificate management, and advanced security features that protect your websites from common threats.

    RunCloud provides complete access to your server resources and doesn’t put arbitrary restrictions on the number of websites, size of your website, PHP workers, etc., to upsell you expensive subscriptions and add-ons. If your server can handle it, you can deploy it using RunCloud.

    You can take advantage of its integrated Git deployment, staging environments, and in-house caching solutions that enhance website performance. Furthermore, automated backup systems with easy restore options make disaster recovery straightforward and reliable. The best part is that these features work seamlessly on multiple servers regardless of your cloud platform.

    Cost

    • Essentials Plan ($9/month): The Essentials plan offers management for one server with unlimited web applications. This entry-level plan includes crucial features including full backups, Git deployment, and server-side caching, making it ideal for those who need professional-grade hosting management without complexity.
    • Professional Plan ($19/month): The Professional plan expands capacity to 50 servers and includes advanced features such as custom NGINX configurations and enhanced firewall protection. The 10 GB increase in backup storage and the ability to clone web applications make this plan perfect for agencies managing multiple client websites.
    • Business Plan ($49/month): The Business plan represents the best value for established agencies. It offers management for up to 100 servers, advanced features including zero-downtime deployments, and a comprehensive WordPress toolkit. This plan includes powerful team collaboration tools with 10 team seats, unlimited staging environments, and robust API access, making it ideal for mission-critical workloads and larger organizations.
    • Enterprise Plan ($399/month): The Enterprise plan provides management for up to 500 servers with 100GB of backup storage and enhanced API capabilities. This comprehensive solution includes 50 team seats and significantly higher API request limits, making it perfect for businesses requiring extensive resources, strict SLAs, and enterprise-grade support.

    Suggested read: Cloud Hosting vs VPS Hosting – Which One Should You Choose in 2024?

    Hostinger

    Hostinger has established itself as a market leader in affordable web hosting. It offers good performance and features that rival more expensive providers. Their infrastructure uses cloud technology and SSD storage across all plans, which provides fast and reliable website performance.

    Hostinger’s proprietary control panel, hPanel, provides an intuitive interface that simplifies website management tasks and offers a smoother learning curve than traditional cPanel interfaces.

    Suggested read: 15 Best Email Hosting For Small Business (2024)

    Key Features

    Hostinger delivers a comprehensive hosting package that includes a website builder, one-click WordPress installation, and free SSL certificates across all plans. Furthermore, Hostinger’s LiteSpeed web servers and custom-built caching solutions provide exceptional speed and performance optimization.

    You can use its weekly backups, 24/7 customer support through live chat, and robust security suite, including automated updates and malware scanning. It also includes a free domain name with annual plans, unlimited bandwidth on higher-tier packages, and integrated Git support for developers.

    Suggested read: How To Setup Amazon EC2 (AWS) To Host Your Websites

    Cost

    Hostinger’s shared hosting plans start at an incredibly competitive pricing of $2.99 per month with a 48-month commitment, making it one of the most affordable quality hosts available. The mid-tier plans range from $3.99 to $7.99 monthly, offering additional resources and features suitable for growing websites. Premium plans include cloud hosting options starting at $15.99 monthly, providing dedicated resources and enhanced performance.

    Bluehost

    Bluehost is a top-tier hosting provider recommended by WordPress.org. The company’s extensive experience in the hosting industry is shown through its robust infrastructure and comprehensive feature set.

    Bluehost provides a complete website solution, from domain registration to advanced hosting features. Bluehost’s integration with WordPress makes it exceptionally easy to launch and manage WordPress sites, while their resource allocation ensures stable performance even during traffic spikes.

    Suggested read: What Is Managed WordPress Hosting & Do You Need It?

    Key Features

    Bluehost provides a feature-rich hosting environment with a custom-designed control panel, integrated website builder, and automated WordPress installation tools. Higher-tier plans offer unlimited website hosting, free domain registration for the first year, and comprehensive email hosting capabilities. The Bluehost platform also offers advanced security features, including SSL certificates, spam protection, and domain privacy options. It offers robust e-commerce features, such as WooCommerce integration and shopping cart functionality.

    Cost

    The Basic plan is $2.95/month for single websites, scaling up to the Pro plan at $13.95/month for enhanced performance and resources. The Plus plan at $4.95/month and the Choice Plus plan at $5.45/month cater to users needing multiple websites and additional security features, with all plans requiring a 12-month commitment. The renewal rates increase significantly after the initial term, with Basic renewing at $11.99/month, Plus at $16.99/month, Choice Plus at $21.99/month, and Pro at $28.99/month, making it important to consider long-term hosting costs.

    SiteGround

    SiteGround distinguishes itself in the web hosting industry through superior performance, innovative technology, and exceptional customer support. The company uses Google Cloud infrastructure and proprietary speed optimization tools to deliver outstanding website performance. Its development team regularly implements cutting-edge features like ultrafast PHP, advanced caching mechanisms, and automated WordPress updates.

    SiteGround’s proactive security measures, including AI-powered anti-bot systems and real-time monitoring, protect websites from various threats. Furthermore, their custom-built Site Tools control panel offers a modern, efficient interface for managing hosting services.

    Key Features

    SiteGround delivers enterprise-level features across all plans, including its proprietary SuperCacher technology for enhanced performance. The platform provides automated daily backups, free SSL certificates, and advanced security features, including custom WAF rules. It also offers advanced features such as staging environments, Git integration, and collaboration tools perfect for development teams. It also includes free email hosting, unlimited databases, and unmetered traffic, making it an excellent deal for people looking for a one-stop solution.

    Cost

    For the first subscription period, SiteGround offers three comprehensive hosting tiers: StartUp at $2.99/month for single websites, GrowBig at $4.99/month for unlimited websites, and GoGeek at $7.99/month for high-traffic sites. These promotional rates require a 12-month prepaid commitment, and it’s important to note that subsequent renewals will be billed at regular rates: StartUp at $17.99/month, GrowBig at $29.99/month, and GoGeek at $44.99/month.

    A2 Hosting

    A2 Hosting has built a strong reputation for delivering blazing-fast hosting services through their turbo servers and optimized hosting environment. The servers use NVMe SSD storage, server-side caching, and optimized hardware configurations that significantly reduce page loading times. Their developer-friendly approach provides support for multiple programming languages and frameworks.

    A2 Hosting implements features such as KernelCare for automatic kernel updates and dual firewall protection, which enhance its security. Its “Guru Crew” support team offers knowledgeable assistance 24/7/365. It is strongly committed to environmental sustainability, which is evident because it offers green hosting initiatives through carbon offset programs.

    Key Features

    A2 Hosting claims it offers Turbo Servers that deliver up to 20X faster page loads than standard hosting solutions. It also offers perpetual security features, including HackScan protection and dual firewall implementation. If you sign up for A2 Hosting, you can use its A2 Optimized Site Accelerator, free site migration, and automatic backup systems functionality to manage your WordPress website. It also supports multiple PHP versions, Python, Ruby, and other programming languages, making it ideal for developers.

    Cost

    A2 Hosting provides comprehensive hosting solutions to match different website needs and budgets. It starts with shared hosting at $11.99/month (renewing at $25.99) for beginners, WordPress hosting at $18.99/month (renewing at $35.99) for content creators, VPS hosting at $28.99/month (renewing at $51.99) for growing businesses, and dedicated hosting at $41.99/month (renewing at $61.99) for high-performance requirements.

    DreamHost

    DreamHost is a reliable and user-friendly hosting provider that offers unique features and pricing structures that set it apart from competitors. Their custom control panel provides a streamlined experience compared to traditional cPanel interfaces.

    DreamHost offers transparent pricing without aggressive upselling tactics, maintaining consistent rates even during renewal periods. Its infrastructure includes solid-state drives, unlimited bandwidth, and automated daily backups across all plans. Its commitment to privacy and security includes free domain privacy protection and enhanced SSL certificate options.

    Key Features

    DreamHost provides a comprehensive hosting package with unlimited storage and bandwidth across most plans. The platform offers automated WordPress installation and updates, custom control panel access, and free domain privacy protection.

    You can manage and create your WordPress websites using DreamHost’s automated daily backups, free SSL certificates, and unlimited email accounts. DreamHost also provides advanced features like shell access, Python support, and unlimited MySQL databases.

    Cost

    The Shared Starter plan begins at an affordable $2.95/month (renewing at $6.99). It includes essential features such as unlimited traffic, WordPress installation, and free domain registration, making it ideal for new websites and small projects.

    The mid-tier DreamPress plan, specifically optimized for WordPress, starts at $16.95/month (renewing at $19.99) and supports up to 100k monthly visitors with advanced features including staging environments, priority migration, and essential CDN services.

    InMotion Hosting

    InMotion Hosting provides business-focused hosting solutions and is known for its exceptional technical support capabilities. Their infrastructure supports advanced features like SSH access, multiple Python environments, and Ruby support, which makes it an excellent choice for developers and growing businesses.

    InMotion’s BoldGrid website builder and pre-installed WordPress features make it easier for businesses to establish their online presence quickly. Their commitment to customer education includes an extensive knowledge base and tutorial system.

    Key Features

    InMotion Hosting delivers comprehensive hosting solutions and advanced security features, including hack and malware protection, automatic backups, and free SSL certificates. It also offers professional email accounts, website builder tools, and a suite of marketing tools useful for developing and growing websites. Advanced users can also use advanced features such as SSH access, Git support, and optional root access on VPS plans, all from a single dashboard.

    Cost

    InMotion Hosting offers comprehensive hosting solutions for different business needs and technical requirements. Their WordPress hosting starts at an affordable $2.75/month (renewing at $10.99). It includes valuable features such as a free domain, SSL, premium themes, and unlimited email addresses. At the same time, their VPS hosting begins at $2.85/month (renewing at $11.49) with high-availability servers and cloud-powered reliability.

    For more demanding applications, their dedicated hosting starts at $5.99/month (renewing at $26.99) with configurable server options, and their premium dedicated solutions begin at $35.00/month (renewing at $69.99), offering maximum flexibility and control.

    HostGator

    HostGator is a popular choice for affordable web hosting. It offers reliable services with comprehensive features suitable for both beginners and experienced users. HostGator’s infrastructure supports unlimited websites, storage, and bandwidth while maintaining strong uptime performance through redundant server systems. Their user-friendly approach includes one-click installations for over 75 popular applications.

    HostGator excels in offering scalable solutions that grow with your business, from shared hosting to dedicated servers. HostGator’s comprehensive support system includes 24/7/365 customer service through multiple phone, live chat, and email channels.

    Key Features

    HostGator provides a robust hosting environment with unmetered bandwidth and storage, which is useful when hosting a high-traffic website. Like many other hosting providers, HostGator includes a free website builder, one-click WordPress installation, and free SSL certificates. HostGator offers comprehensive security features, including regular server monitoring, firewall protection, and DDoS prevention to protect your website from automated attacks.

    Cost

    The Baby Plan starts at an affordable $4.50/month (renewing at $16.49) for basic hosting needs. In comparison, the Business Plan provides enhanced features at $6.25/month (renewing at $21.99), and the Pro Plan delivers premium capabilities at $13.95/month (renewing at $29.69).

    Final Thoughts

    Choosing the right web hosting provider is crucial for your website’s success. While all the providers listed above offer excellent services, your specific choice should align with your technical requirements, budget, and growth expectations.

    For personal blogs and hobby websites, Hostinger and Bluehost offer exceptional value. However, combining RunCloud with cloud VPS providers for growing businesses and agencies presents a more scalable and cost-effective solution.

    While traditional hosting providers charge premium rates for managing multiple high-traffic websites, RunCloud’s innovative approach allows you to manage unlimited websites across multiple servers for a fraction of the cost.

    By combining RunCloud’s server management platform with affordable cloud VPS providers, you can achieve enterprise-level performance at budget-friendly prices.

    Ready to transform how you manage your web hosting? Start your journey with RunCloud today!

    FAQs on Cheap Web Hosting Services

    Is shared hosting suitable for my website?

    Shared hosting is ideal for small to medium-sized websites that receive moderate traffic (up to 10,000 monthly visitors) and don’t require extensive server resources. It’s particularly well-suited for personal blogs, small business websites, and portfolio sites that don’t have complex database requirements or heavy server-side processing needs. However, if your website experiences sudden traffic spikes or requires specialized software, you might consider VPS hosting instead.

    Can I upgrade my hosting plan later?

    Most reputable hosting providers offer seamless upgrading options that allow you to scale your resources without significant downtime or technical complications. The upgrade process typically involves a few clicks in your hosting control panel, and providers such as RunCloud make it especially easy to manage resources across different hosting plans. Your website files and databases are usually automatically migrated to the new server environment during the upgrade.

    What is the difference between VPS and shared hosting?

    VPS hosting provides dedicated server resources (CPU, RAM, storage) that are exclusively yours, offering better performance and reliability than shared hosting. Shared hosting places multiple websites on the same server with shared resources, making it more affordable but potentially less stable if other sites on the server consume excessive resources. VPS hosting also offers root access and more customization options, while shared hosting is more restricted but easier to manage.

    Are cheap hosting services reliable?

    Reputable budget hosting providers can offer reliable service by optimizing their infrastructure and automating many processes to reduce costs. However, you should research provider reviews, uptime guarantees, and support quality before choosing a cheap host.

    What features should I look for in a cheap hosting service?

    Essential features should include free SSL certificates, automated backups, 24/7 customer support, and a user-friendly control panel. The host should also provide adequate storage and bandwidth for your needs, basic security features such as malware scanning, and a one-click installer for popular applications like WordPress.

    How do I transfer my website to a new hosting provider?

    Many hosting providers offer free migration services, especially for WordPress sites, and tools like RunCloud can significantly simplify the process. After the transfer, updating your DNS settings and verifying that all website functionality works correctly before pointing your domain to the new host is important.

  • Full vs Incremental vs Differential Backup: Backup Types & Differences

    Full vs Incremental vs Differential Backup: Backup Types & Differences

    Are you confused between different backup types, wondering which strategy offers the best protection for your valuable data? Deciding between incremental and differential backup, or even where a full vs. incremental vs. differential backup fits into your plan, can be confusing.

    Understanding the differences between data backup strategies is essential for implementing backup best practices.

    In this article, we’ll explore the advantages and disadvantages of incremental backups and compare them against different backup and recovery methods.

    Whether you’re evaluating cloud backup options, seeking backup solutions for businesses, or simply trying to determine which is better, differential or incremental backup for your specific needs, this guide will clarify these complex concepts and help you make informed choices about your incremental data storage.

    Let’s get started!

    What are Backups?

    Backups are one of the most important components of any system administration strategy. We actively create copies of our critical data from individual files and databases to complete server images, and store them in a secure, separate location. This proactive measure ensures we can recover our systems and information following data loss events, such as hardware failures, accidental deletions, or malicious attacks.

    However, most people think just making a copy of data is enough to protect it.

    A well-planned backup strategy is not just about having copies of data but about having a reliable path to recovery, which also means testing the restores. If you cannot restore a backup, it is useless.

    What is a Full Backup?

    A full backup is a comprehensive copy of all selected data. This includes every file, database record, configuration setting, and other relevant data within a specified system or application. Think of it as taking a complete snapshot of your system at a given time.

    System administrators initiate full backups to ensure they have a complete, independent version of the data readily available for restoration. This type of backup does not rely on any previous backup, making it self-contained and simple to restore from. This is often the most important backup in your entire system.

    RunCloud’s Full Backup Options for Web Apps

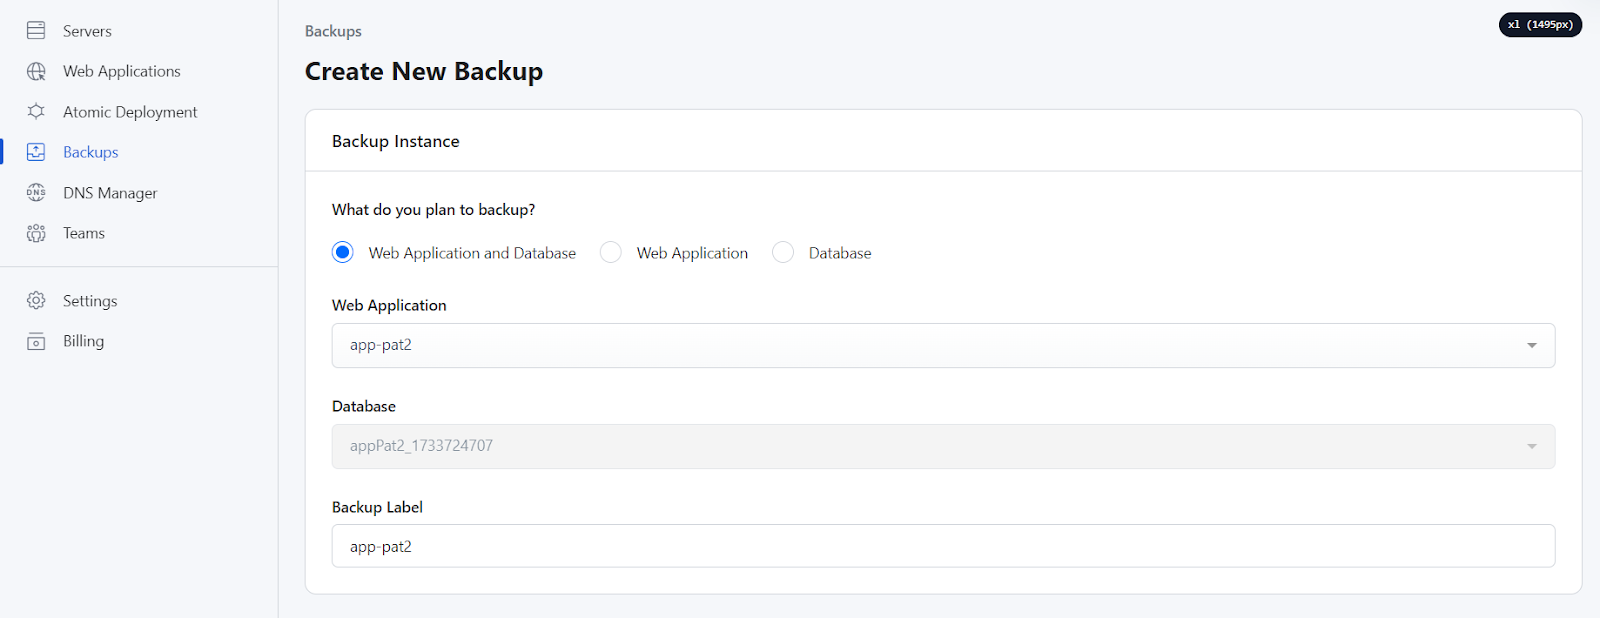
    RunCloud provides a user-friendly interface for initiating full backups of web applications.

    In the RunCloud dashboard, you can navigate to the specific web application, and in the “Backup” section, you’ll find options for triggering on-demand backups. These backups can save all of the app’s components, including the web application files, the database (if one is associated), and any related NGINX configurations. RunCloud allows you to specify the backup destination, including local server storage or an off-site location.

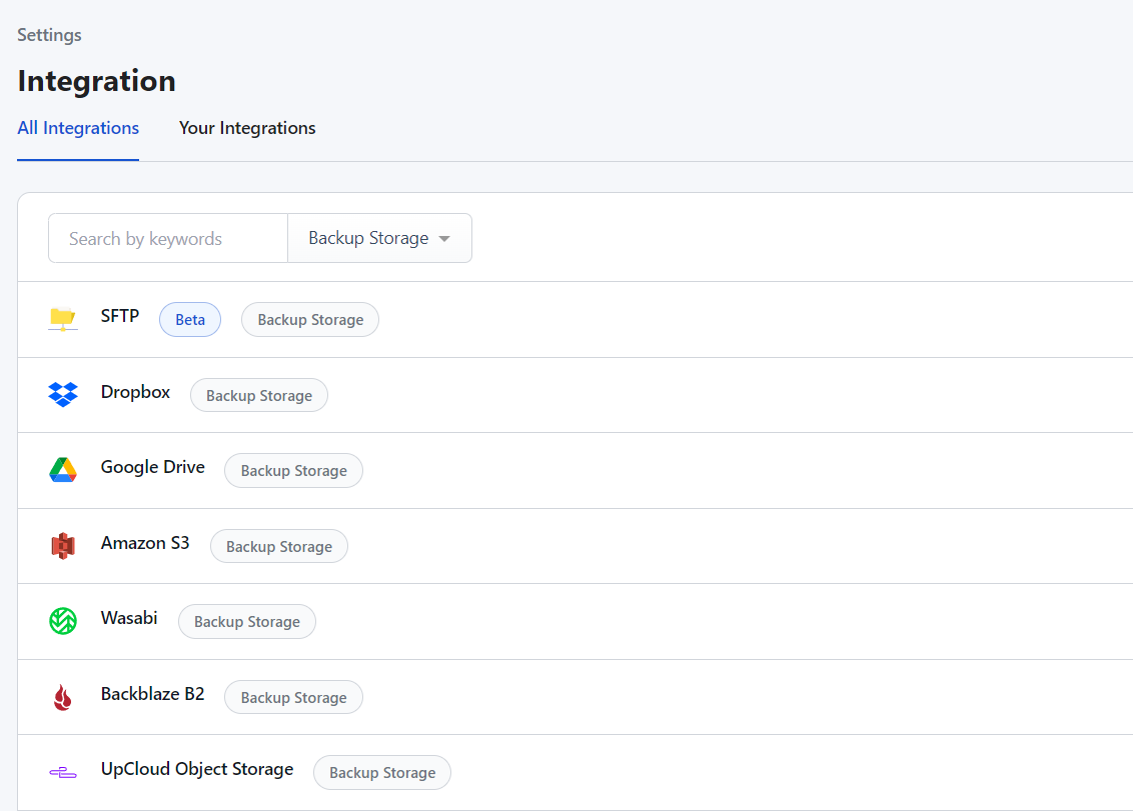
    Moreover, you can create schedules for automated full backups by setting the day of the week and the time to run them without intervention. The easy integration with external storage providers such as Amazon S3, Google Cloud Storage, and DigitalOcean Spaces allows for convenient off-site storage of full backups.

    Suggested read: 3 Free Ways To Migrate WordPress From Shared Hosting To Cloud Server

    Pros of Full Backup

    Full backups offer several significant advantages. First, they guarantee the simplest restoration process. Since we have a complete data snapshot within a single backup set, we don’t need to worry about locating previous backups or reconstructing data from multiple sources. We simply restore the full backup, and the system is back to its state when the backup was taken.

    The complete nature of full backups also reduces the risk of inconsistencies when recovering, providing a high degree of confidence that the restored system is functionally identical to the backup state. In addition, full backups can be independently moved and copied to different locations without any other files needed. This self-contained nature facilitates offsite storage for disaster recovery purposes.

    Cons of Full Backup

    While full backups are indispensable, they also have drawbacks. The most notable con is the substantial amount of storage space they consume. Since every file is copied each time, the full backup size can rapidly grow, especially with large databases or web applications with extensive media content. This also directly leads to the second major drawback: backup time.

    Backing up entire systems takes significantly longer than incremental backups, which just track changes. Longer backup times can mean longer backup windows, potentially interfering with production workloads and increasing resource consumption on the server.

    For example, when full backups are performed too frequently, they may overwhelm the network and require more time for restoration in an emergency. Therefore, we must be mindful of optimizing the schedule and location for the most effective use of full backups.

    Suggested read: How Long Does a DigitalOcean Snapshot Take?

    What is an Incremental Backup?

    An incremental backup is an advanced type of backup strategy that focuses on capturing only the changes made since the most recent backup, regardless of whether that was a full or incremental backup. This method differs significantly from a full backup, which copies everything each time. We use incremental backups to quickly and efficiently capture the data alterations made to our systems and applications after an initial baseline is established through a full backup.

    This incremental approach allows for significantly faster backup times and reduces storage consumption as we do not copy the same unchanged data repeatedly. The main idea is to keep our backup window short and minimize resources during the backup process.

    RunCloud’s Incremental Backup Options for Web Apps

    RunCloud streamlines the process of scheduling and managing incremental backups for web applications.

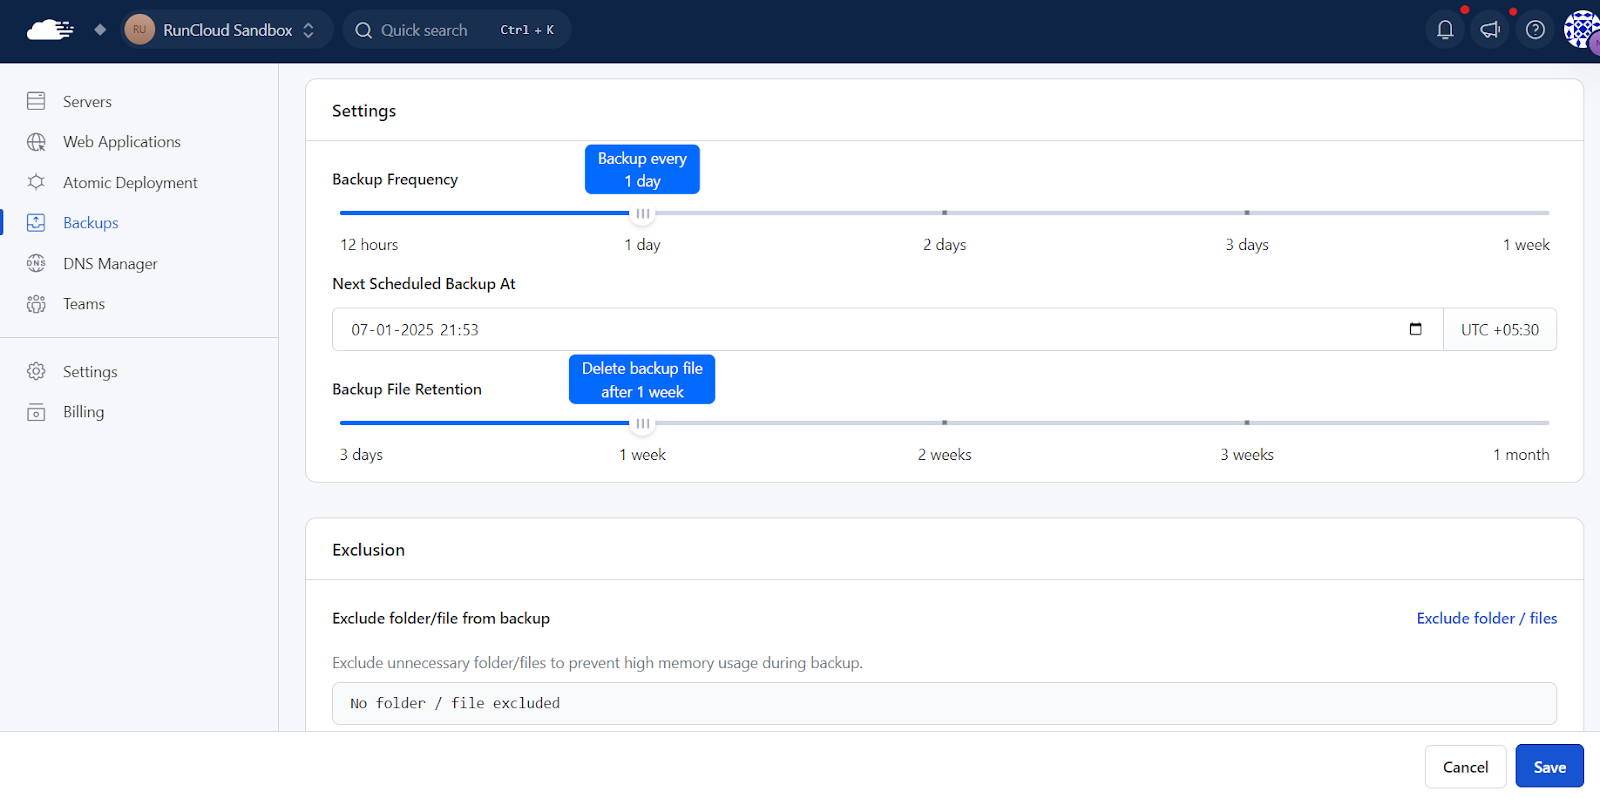
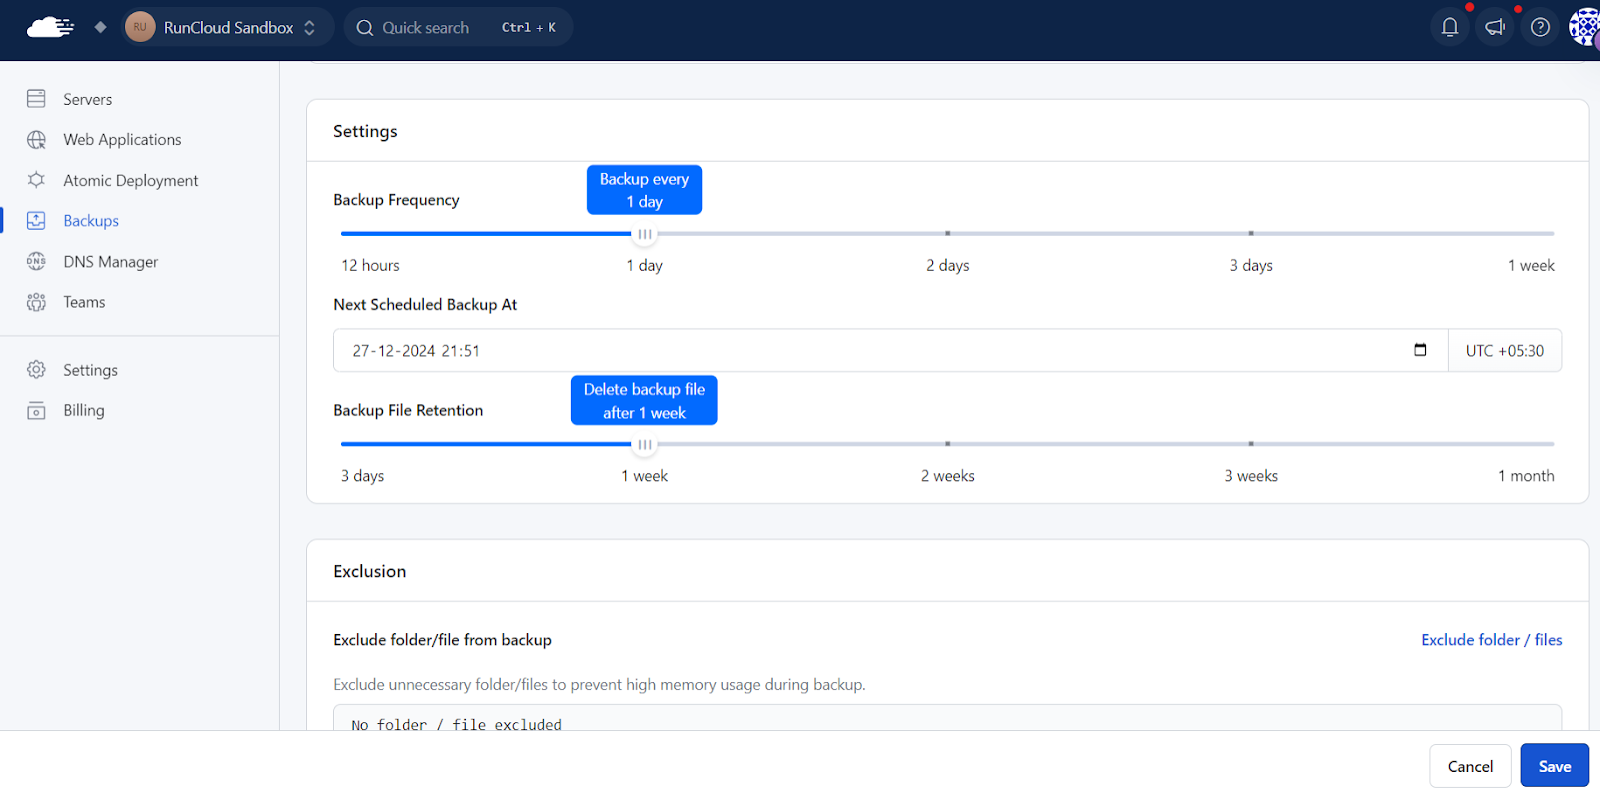
    In the RunCloud dashboard, you can configure the backup settings for a specific web application. The “Backup Frequency” dropdown menu lets us choose how often we want to initiate incremental backups, typically on a daily or hourly schedule.

    RunCloud also displays the “Next Scheduled Backup At” time, allowing precise backup planning and timing.

    The “Backup File Retention” field dictates how long we store each incremental backup, which is important for planning storage usage. RunCloud automatically keeps track of the last full backup and builds subsequent incremental backups.

    Suggested read: How to Copy Files in Linux and Overwrite without Confirmation

    Pros of Incremental Backup

    Incremental backups offer several compelling advantages, particularly for busy web applications. First and foremost, they are far more resource-efficient than full backups in terms of time and space. Because we are only copying changed data, the backup operation completes much faster, placing less load on the server, which means less impact on live web applications.

    This results in a much shorter backup window, which is critical for maintaining system availability. In addition, the smaller size of incremental backups translates directly into reduced storage requirements, saving valuable disk space and associated costs. This makes incremental backups ideally suited for daily or even more frequent backups and allows you to use more backups for smaller RPOs (Recovery Point Objectives).

    Suggested read: How to Easily Clone a Web Application in RunCloud

    Cons of Incremental Backup

    While incremental backups offer great efficiency, they come with some potential downsides. The primary disadvantage lies in the complexity of the restoration process. To restore a system from an incremental backup, you typically must first restore the initial full backup and then apply each subsequent incremental backup in the correct sequence. This recovery process can be more time-consuming and intricate than restoring from a single full backup.

    We must also be aware that if one incremental backup is lost or corrupted, all subsequent backups may become unusable. Therefore, regular verification of the backup integrity and reliability is important. Additionally, the restore process can be harder to troubleshoot in the event of corrupted or lost files in incremental sets. We must weigh these considerations carefully when planning a complete backup strategy and choose the best approach for balancing speed and convenience.

    Suggested read: The 7 Best WordPress Staging Plugins to Create a Test Site

    What is a Differential Backup?

    A differential backup, like an incremental backup, focuses on saving changes, but it does so in a different way. Instead of recording changes since the last backup (regardless of type), a differential backup captures all the changes made since the last full backup. This means that each subsequent differential backup will contain all modifications since the initial full backup.

    For example, if you have a full backup on Monday, the differential backup on Tuesday will include changes since Monday, the differential backup on Wednesday will also include changes since Monday, and so on. We use differential backups as a middle ground between the size efficiency of incremental backups, and the restoration simplicity of full backups. These are generally larger than incremental backups, but they simplify the restore process since we need only one full and the latest differential set.

    Pros of Differential Backup

    Differential backups offer a balance between efficiency and ease of recovery. They are less space-intensive and faster to create than full backups since they don’t always copy all the data. However, unlike incremental backups, we only need two backup sets to complete a restore: the initial full backup and the most recent differential backup.

    This makes the restoration process simpler and faster than using a long chain of incremental backups. Also, because differential backups are based on the last full backup, the set of differential backups is not dependent on each other, creating a more resilient backup approach. This can be especially useful when we require a restore in a time-sensitive manner.

    Cons of Differential Backup

    While offering several benefits, differential backups have some drawbacks. One key disadvantage is that each differential backup grows in size until the next full backup is completed. This can result in differential backups significantly larger than the first differential backup, making them slower to complete as the week progresses.

    Differential backups occupy more disk space than incremental backups because they contain the accumulated changes since the last full backup. This can lead to higher storage costs and longer backup windows. In addition, while the restore process is simpler than incremental, it is still more complex than a full backup alone. We must restore the initial full backup before applying the latest differential backup.

    Difference Between Full vs. Incremental vs. Differential Backup: Which One Should You Choose?

    FeatureFull BackupIncremental BackupDifferential Backup
    Backup SizeLargestSmallestMedium
    Backup SpeedSlowestFastestMedium
    Restore ComplexitySimplestMost Complex (requires multiple restore sets)Medium (requires one full and latest diff)
    Storage UsageHighestLowestMedium (grows with each backup until full backup)
    FrequencyLeast Frequent (e.g., Weekly, Monthly)Most Frequent (e.g., Hourly, Daily)Medium Frequency (e.g., Daily)
    DependencyIndependent, self-containedDependent on Previous full & Incremental setsDependent on the Last Full Backup

    Which Backup is Better for You?

    There is no one size fits all, and each organization or user should adjust as per their needs and requirements. But here are our recommendations:

    • High-Traffic E-commerce Websites:
      • Best Choice: A combination of weekly full backups with daily differential backups.
      • Reasoning: This allows for a balance of faster backups for frequent recovery points and a simpler restore process.
    • Small Blogs or Static Websites:
      • Best Choice: Weekly full backups with daily incremental backups.
      • Reasoning: These websites tend to have fewer daily changes, making incremental backups efficient and easy to manage.
    • Large Databases with High Transaction Volume:
      • Best Choice: Full backups less frequently, with differential and transaction log backups for better recovery points.
      • Reasoning: Large data stores benefit from less frequent full backups and more frequent differential and transaction log backups, which are efficient and can be restored more easily than multiple incremental backups.
    • Budget-Conscious Users:
      • Best Choice: Full backups are less frequently combined with incremental backups as they are the most storage efficient.
      • Reasoning: This approach minimizes storage costs while still having backups to recover from.

    Final Thoughts

    Throughout this guide, we’ve explored different types of backups and discussed the intricacies of full, incremental, and differential strategies. We’ve compared their strengths and weaknesses and shared the knowledge needed to choose the right approach for your specific needs.

    But it’s worth knowing how to put this knowledge into action with RunCloud.

    RunCloud simplifies the entire backup process by offering an intuitive interface for scheduling and managing all types of backups for your web applications.

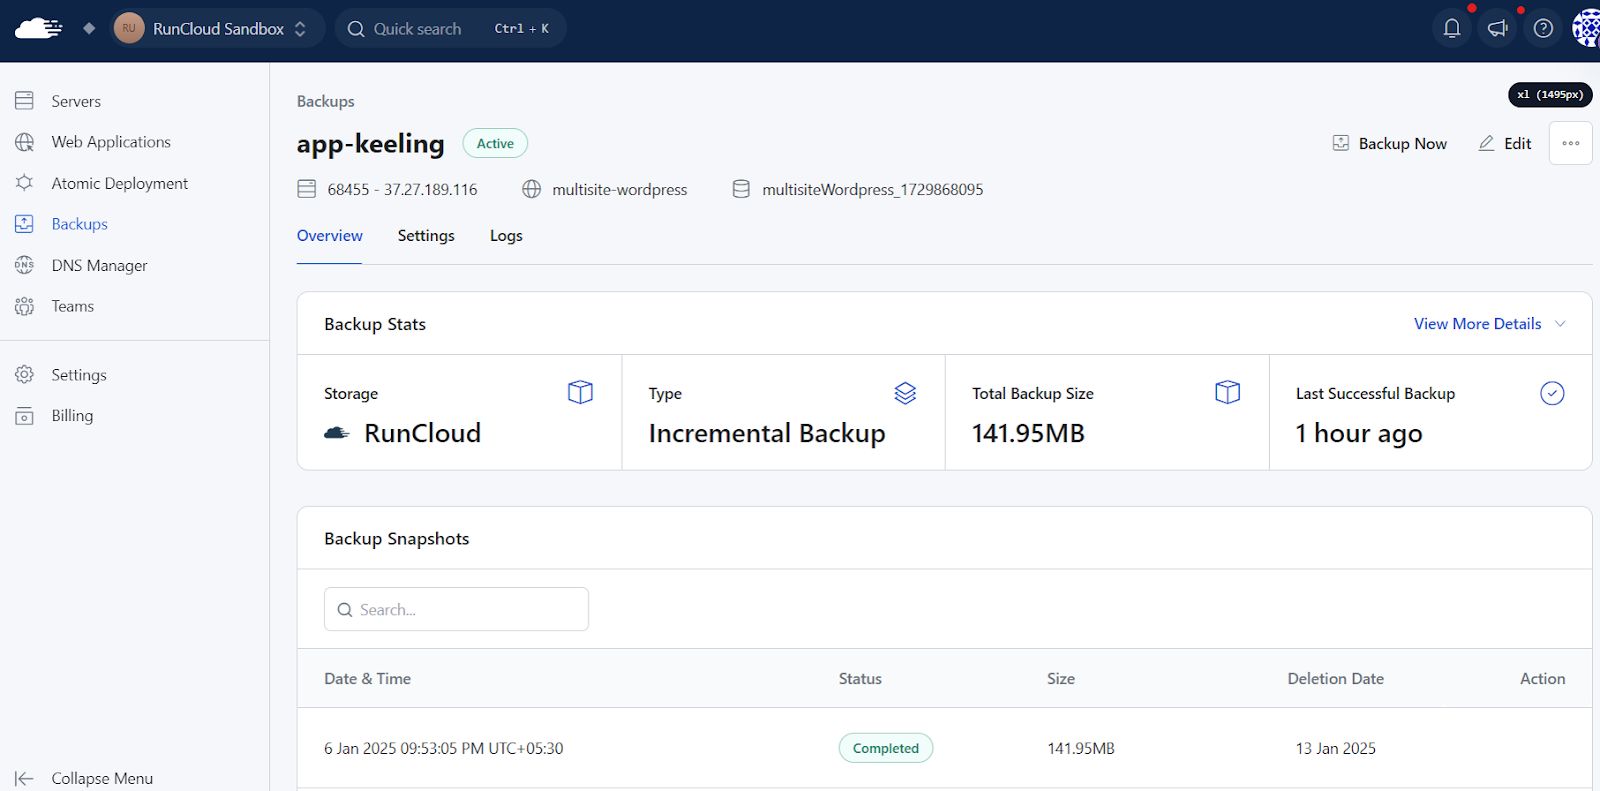
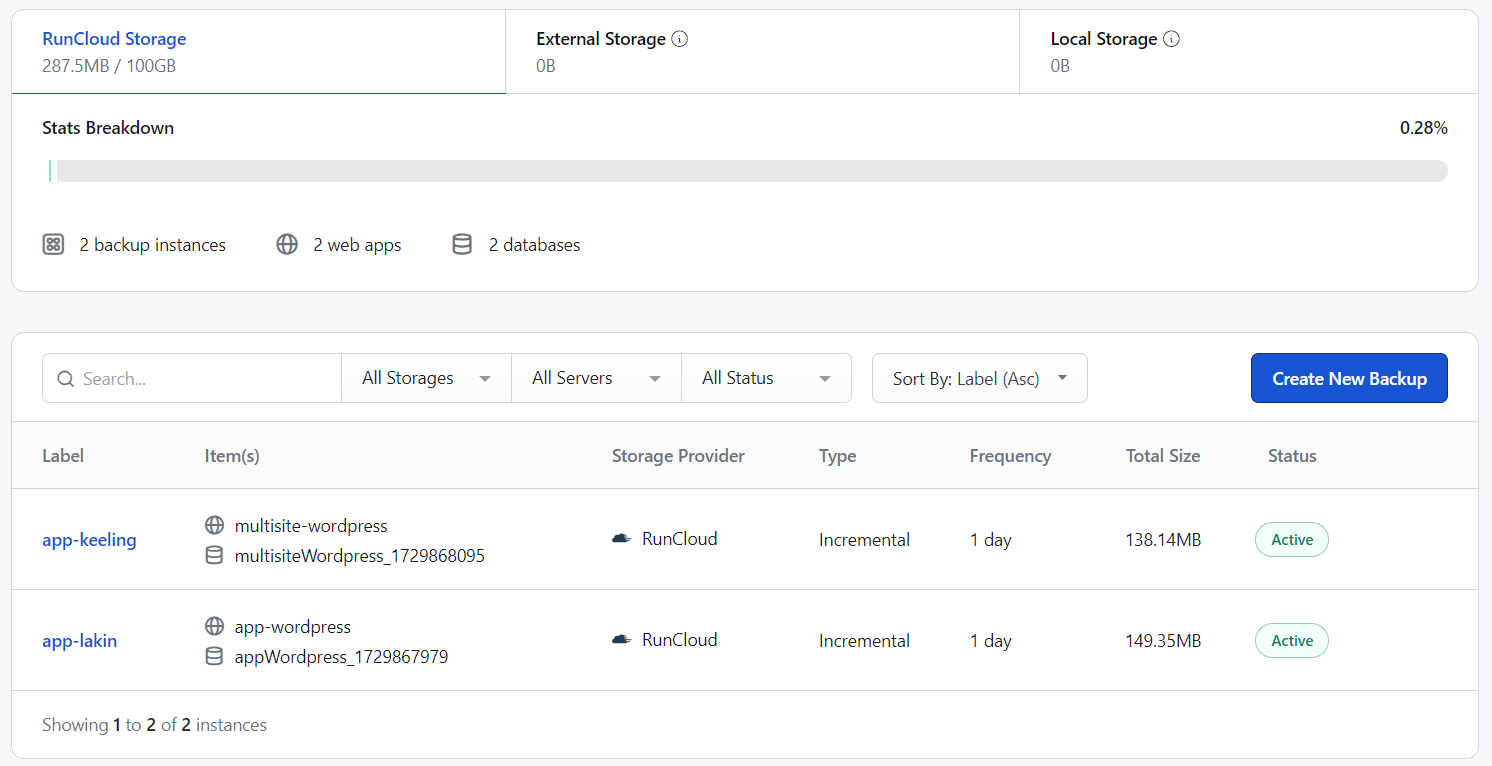
    Below is a glimpse into RunCloud’s backup dashboard. RunCloud enables you to configure both, full as well as incremental backups for individual web applications and databases with a few clicks.

    It’s easy to schedule backups daily, hourly, weekly, or monthly. You can also define a retention policy that will manage storage for backups. Furthermore, you can store them on local or remote storage with providers such as Amazon S3, Google Cloud Storage, DigitalOcean Spaces, or even your own S3-compliant bucket.

    With RunCloud, you can be confident that your data is protected, accessible, and readily available when you need it, as RunCloud handles all the complex tasks behind the scenes to ensure your backups are taken securely, automatically, and reliably.

    Start using RunCloud today.

    FAQs on Backups

    How often should you do a full backup vs an incremental?

    You should perform full backups weekly as a baseline and incremental backups daily, at minimum, to save frequent changes on your website. RunCloud allows you to easily schedule both types of backups directly from its dashboard.

    What are the pros and cons of full database backups?

    A full database backup offers the simplest restoration path since you have all the data simultaneously. However, full backups can consume considerable storage space and time, particularly for large databases. You can set up “Backup Retention” in RunCloud’s backup management dashboard to streamline this process for optimized efficiency.

    What is a mirror backup?

    A mirror backup is a replica of your data, kept on a separate storage device and immediately available. This type of backup gives near real-time redundancy and minimizes downtime during failures.

    What is the main reason for using incremental backups?

    We use incremental backups to drastically reduce backup times and storage usage. They only save the changes since the last backup. RunCloud supports efficient incremental backups that save valuable server resources. This is critical for high-traffic web applications needing frequent backups.

    What are the four types of backups?

    Full, incremental, differential, and mirror backups are common types of backups. Each of them serves distinct recovery needs.

    What is the 4-3-2 backup rule?

    The 4-3-2 backup rule means you should have four copies of your data across three different media, two of which should be off-site. RunCloud provides storage capabilities to store your backups in different locations (including multiple cloud providers), ensuring a resilient and layered backup strategy.

    What is the 3-2-1-0 backup rule?

    The 3-2-1-0 backup rule means having at least three copies of your data on two different media, with one copy stored offsite. Additionally, you should periodically verify your backups and ensure that they have zero errors.

    Which backup is most efficient?

    Incremental backups are most efficient in speed and storage as they only back up what changed since the last backup. RunCloud simplifies managing incremental backups with ease and offers the optimal balance between speed and storage utilization.

  • 8 Best GTmetrix Alternatives for Website Performance Testing (Includes Free)

    8 Best GTmetrix Alternatives for Website Performance Testing (Includes Free)

    Website speed matters – if your site loads slowly, people will leave.

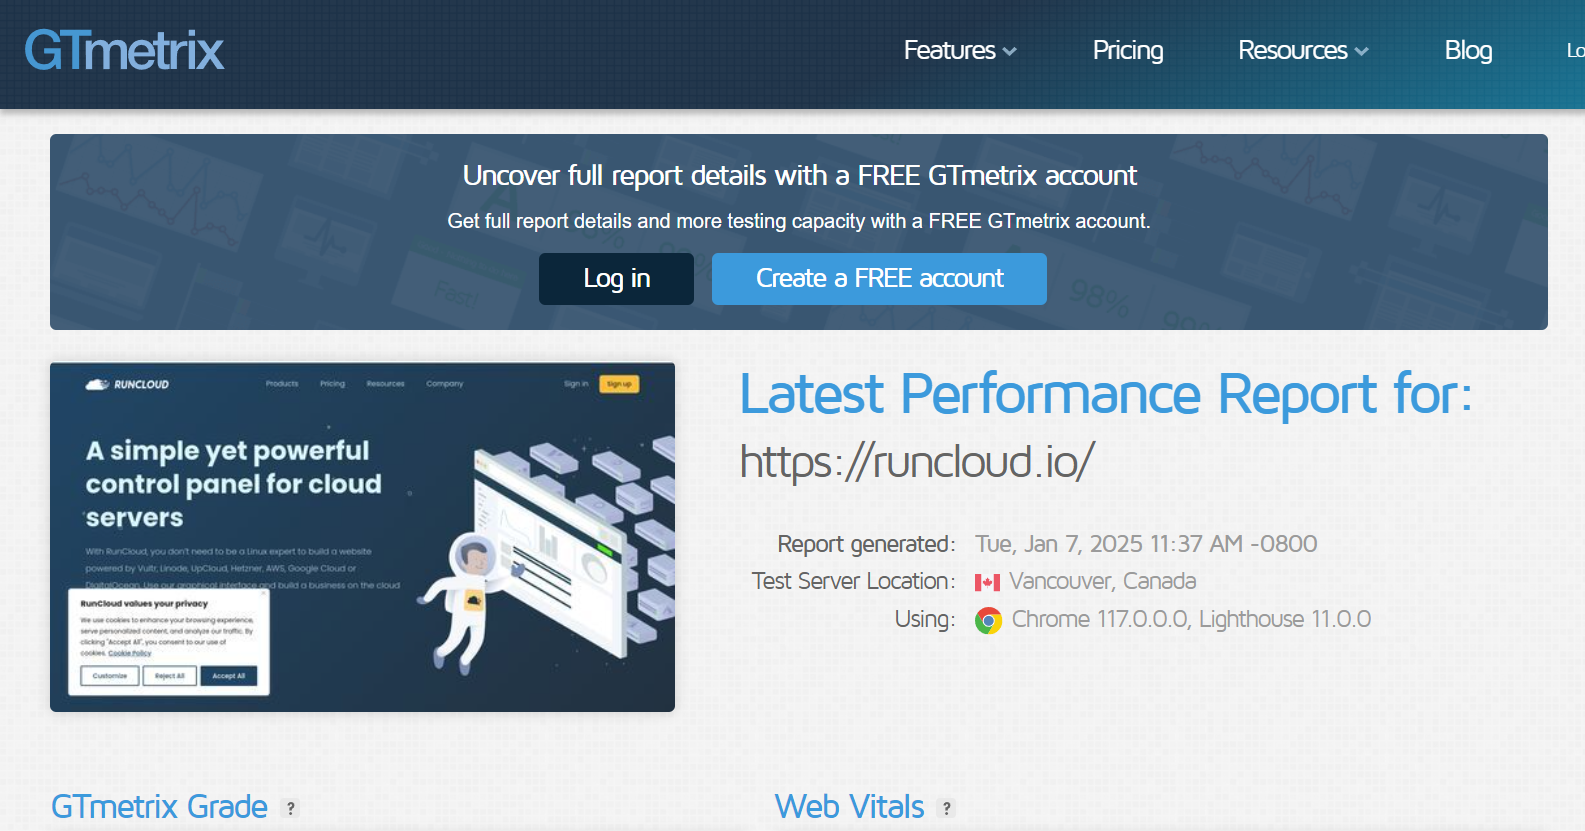
    GTmetrix is a common tool for checking website performance, but it’s not the only one.

    This post examines different ways to test your website’s performance, including exploring several GTmetrix alternatives we recommend considering. We’ll also cover options if you’re looking for a free website performance evaluation tool or just want to find the best website performance analyzer for your specific needs.

    Let’s get started!

    What is GTmetrix?

    GTmetrix is a powerful and widely used online performance analysis tool for websites. It is a virtual performance auditor that examines your website’s loading behavior and provides you with a detailed breakdown of its strengths and weaknesses. It goes beyond a simple page load timer and dives deep into the mechanics of how your site interacts with a user’s browser.

    Here are a few reasons why people use GTmetrix to evaluate their web performance:

    • Simulated User Experience: GTmetrix simulates a real user accessing your website from various locations and using different browser configurations (Chrome, Firefox). This allows you to understand how your site performs under different conditions and for a global audience.
    • Performance Audits: GTmetrix runs a series of performance audits based on Google PageSpeed Insights and its own recommendations. These audits identify areas that need optimization and provide clear, actionable suggestions.
    • Historical Data Tracking: You can save and track reports over time to monitor the impact of code changes and server configurations on performance. This allows you to detect regressions and fine-tune your website over time.
    • Multiple Testing Options: GTmetrix allows you to run tests from different locations, simulating various user experiences. You can also specify connection speeds and devices.
    • Integration and Automation: GTmetrix provides API access for integration with other tools and for automating performance testing as part of your CI/CD pipeline. This allows for continuous and repeatable testing.

    GTmetrix provides a rich data set to help developers understand why a website is performing the way it is and guide them to specific areas for performance optimization, but it still has a few limitations.

    Suggested read: 15 Best Performance Testing Tools to Improve Your Site in 2021

    Limitations of GTmetrix

    While GTmetrix is incredibly useful, it’s essential to understand its limitations to ensure you interpret results accurately and use the tool effectively.

    • Synthetic Tests are Not Real: GTmetrix relies on synthetic testing, which simulates a user experience through a virtual browser. This is great for controlled experiments and consistent measurements but doesn’t always perfectly represent real user behavior. Factors like network conditions, device capabilities, and user interactions affecting page load vary significantly. To get a complete picture, you should complement GTmetrix data with RUM tools (Real User Monitoring) that capture actual usage data.
    • Focus on Front-End Performance: GTmetrix is heavily focused on front-end performance, which is how the browser delivers and renders the page. While it will identify server performance issues (like slow TTFB), it won’t provide insight into server-side bottlenecks, database performance, or application-specific code.
    • Test Server Variation: While the tests are controlled, variations in test server load or network conditions may occasionally affect results. Run tests multiple times to verify consistency. Having highly variable results might indicate an external problem with the test or the tested website’s server.
    • Limited Device Emulation: GTmetrix emulates a limited set of mobile devices and browsers. For in-depth testing on a wide range of devices, you still need to rely on other tools, such as browser device emulators and real device testing.

    Suggested read: The Complete WordPress Speed Optimization Guide

    Top 8 GTmetrix Alternatives

    Here are some of the most popular alternatives to GTmetrix, which can be used to evaluate the performance of websites and web applications.

    1 – DebugBear

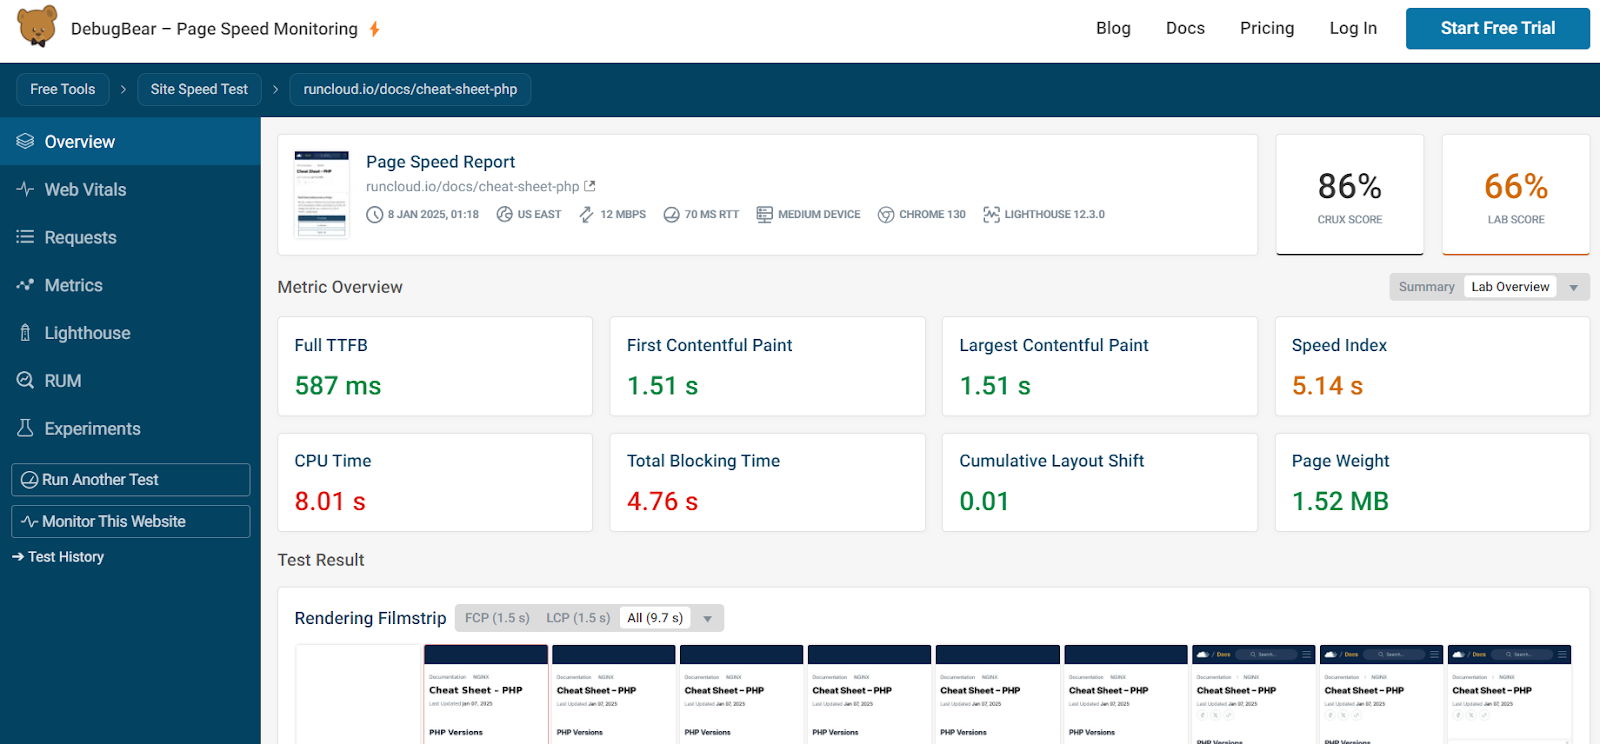
    DebugBear is a performance auditing suite focusing on real-user data and lab-based tests. It can pinpoint areas where a website is underperforming by providing a multi-faceted view. First, it gathers data from Google’s Chrome User Experience Report (CrUX), which tests represent actual user experiences. It shows the distribution of core web vital metrics including First Contentful Paint (FCP), Largest Contentful Paint (LCP), Cumulative Layout Shift (CLS), and Interaction to Next Paint (INP).

    DebugBear is best for projects that require ongoing, in-depth performance analysis and tracking, and is especially well suited for sites that must keep up with Core Web Vitals and performance regressions. DebugBear excels at providing a more detailed and actionable approach to performance monitoring.

    It produces real-world data, which is vital for understanding how your site performs for actual users. For example, in the above report we can see metrics are categorized as “Good”, “Needs Improvement”, and “Poor”, with a percentage breakdown to show the distribution. It also provides a 25-week trend graph for these metrics.

    Why it’s a great alternative: While GTmetrix is more of a point-in-time audit, DebugBear is useful for continuous monitoring and offers a complementary approach to the same problem. DebugBear provides historical tracking data, allowing us to analyze site performance improvements over time.

    Suggested read: How To Optimize Laravel for Performance (8 Expert Tips)

    2 – SpeedVitals

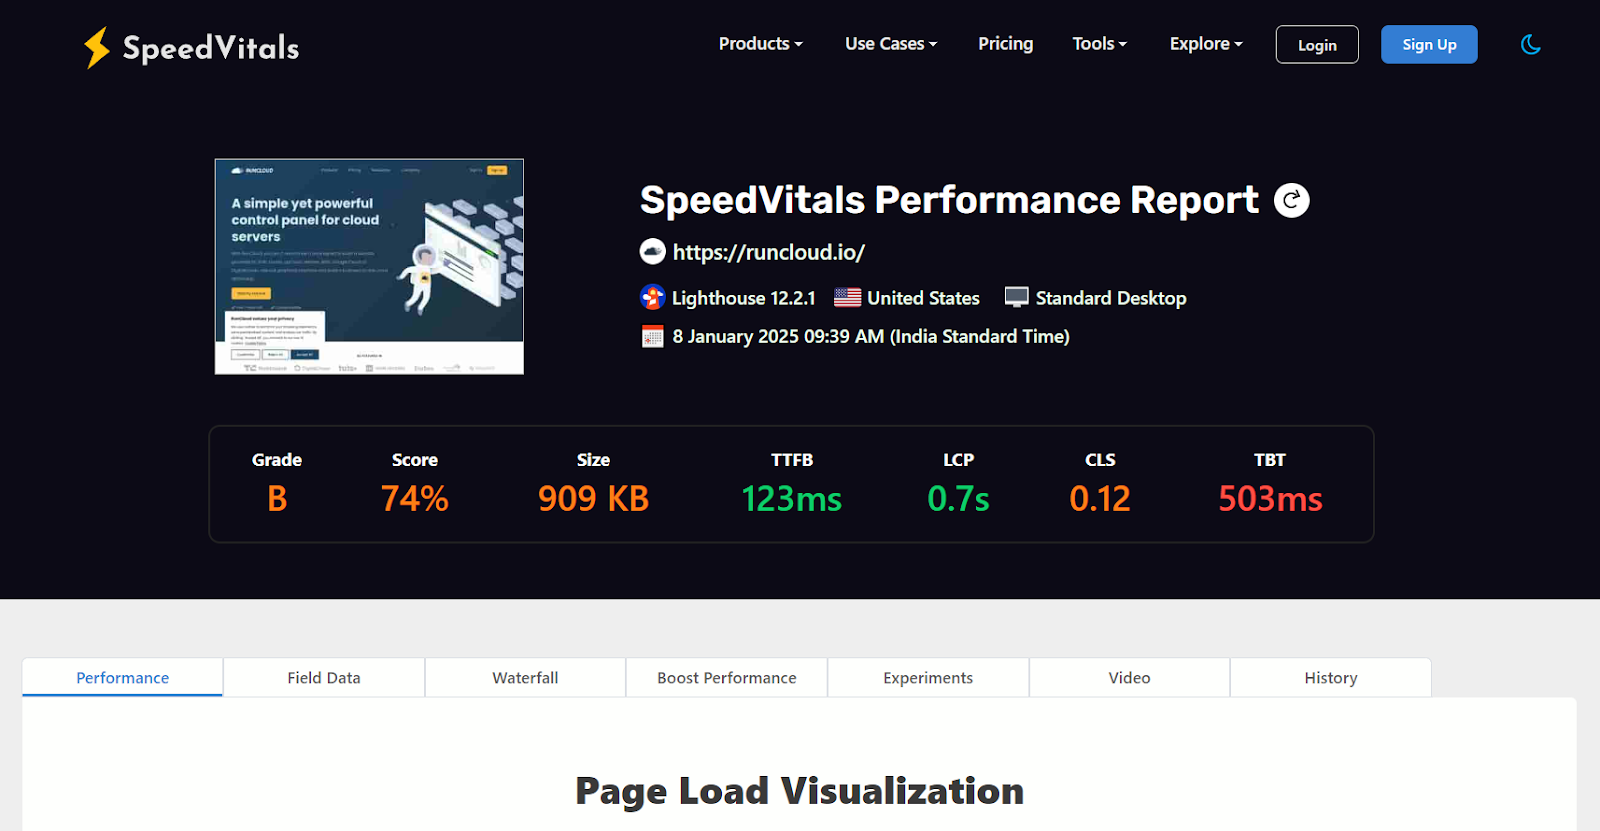
    SpeedVitals is a performance testing tool that provides a user-friendly interface with in-depth performance analysis. It takes a visual approach to analyzing metrics such as FCP, LCP, and CLS. Additionally, it provides core web vitals and page speed scores. It also includes real user monitoring and continuous monitoring.

    It is well-suited for users who want a tool that offers a very rich visual representation of page performance and an easy-to-grasp summary of common metrics. The SpeedVitals report gives a good overview of how well a website performs, using a combination of easy-to-understand grades and numbers alongside technical analysis for those who want more details.

    Why it’s a great alternative: SpeedVitals combines GTmetrix’s performance tracking features with easier visual analytics and in-depth monitoring for real users. The report provides a visual timeline showing how the website appears to the user during load, which helps identify performance bottlenecks.

    It also uses data to measure specific metrics for elements on the page to further understand how the user experiences the site. For example, we can track how long it takes for the first piece of text or image to show up, how fast the page feels like it’s loading, and how long before the user can fully interact with the page. The report also breaks down the size of different types of files, like JavaScript, images, and CSS, to show which ones take up the most space and slow down the website.

    Experts can dive even deeper to analyze which part of the page is the last to load, and it even shows animations of where page elements might shift around to help pinpoint the root of the problem. One of the best sections of the report is the “Code Coverage” area, which shows parts of the website’s code that aren’t even being used. This is helpful because eliminating unused code can make the site much faster.

    Suggested read: Website Load Testing – How To Test Website Performance At Scale

    3 – Google PageSpeed Insights

    As the name suggests, PageSpeed Insights was developed by Google, and it uses the same technology as Google crawl bots to track your website. It offers scores, audits, and specific recommendations based on Google’s web performance best practices, particularly relevant for SEO.

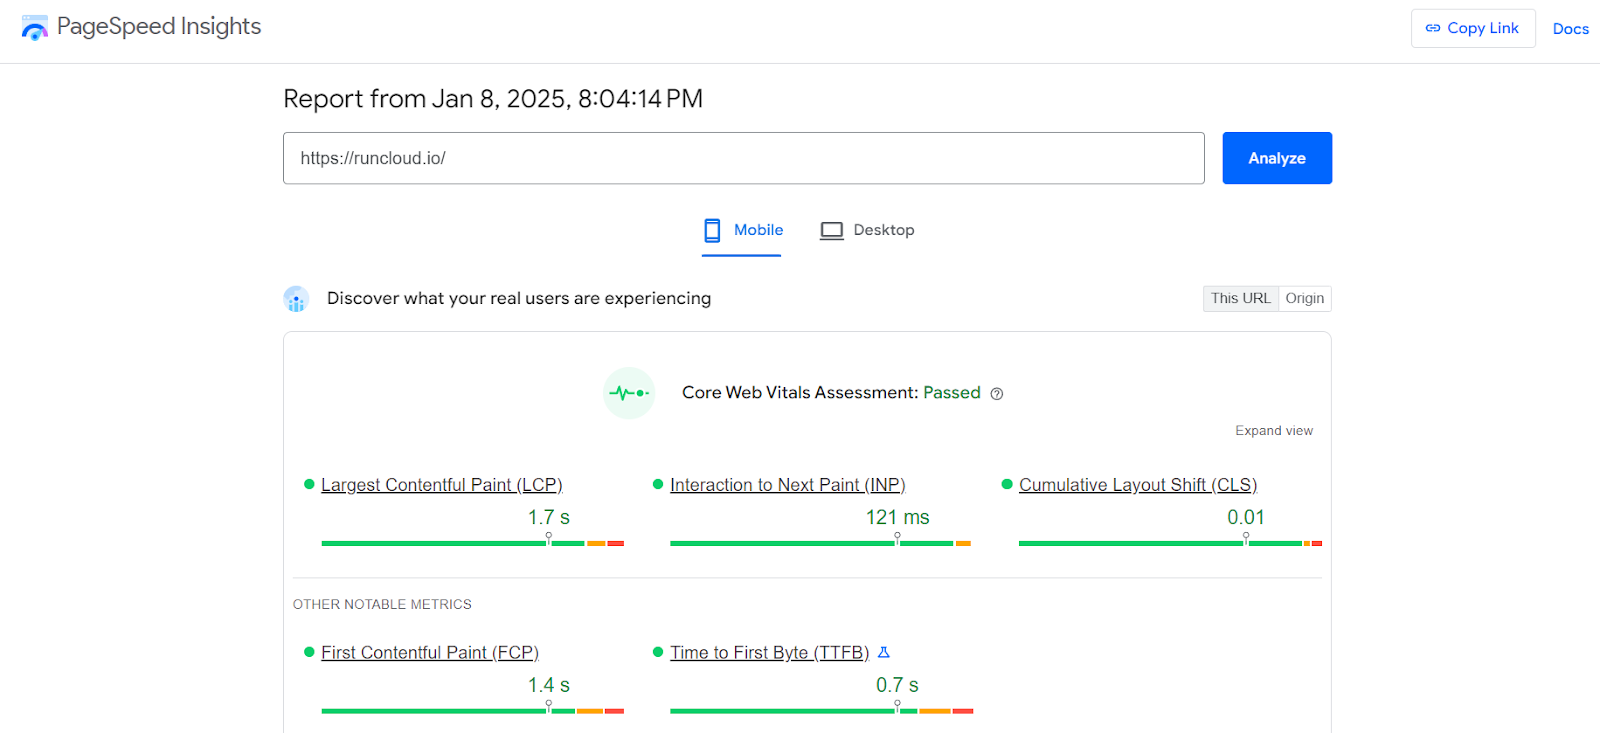
    Google PageSpeed Insights provides both real-world user experience data and lab-based diagnostic information. At the top of the report, it presents a clear summary of “Core Web Vitals” based on real user data from the Chrome UX Report (CrUX). It also shows some additional user metrics, such as FCP and TTFB, which are useful in measuring the quality of user experience and provide a benchmark for performance improvements. It is important to note that this data is gathered from real Chrome users and will not be available for every website.

    Why it’s a great alternative:It provides a perspective on what impacts SEO rankings and offers actionable guidance. Although GTmetrix has PageSpeed Insights data, using it directly allows for more frequent updates.

    Suggested read: How to Optimize Your Site for Google’s Core Web Vitals

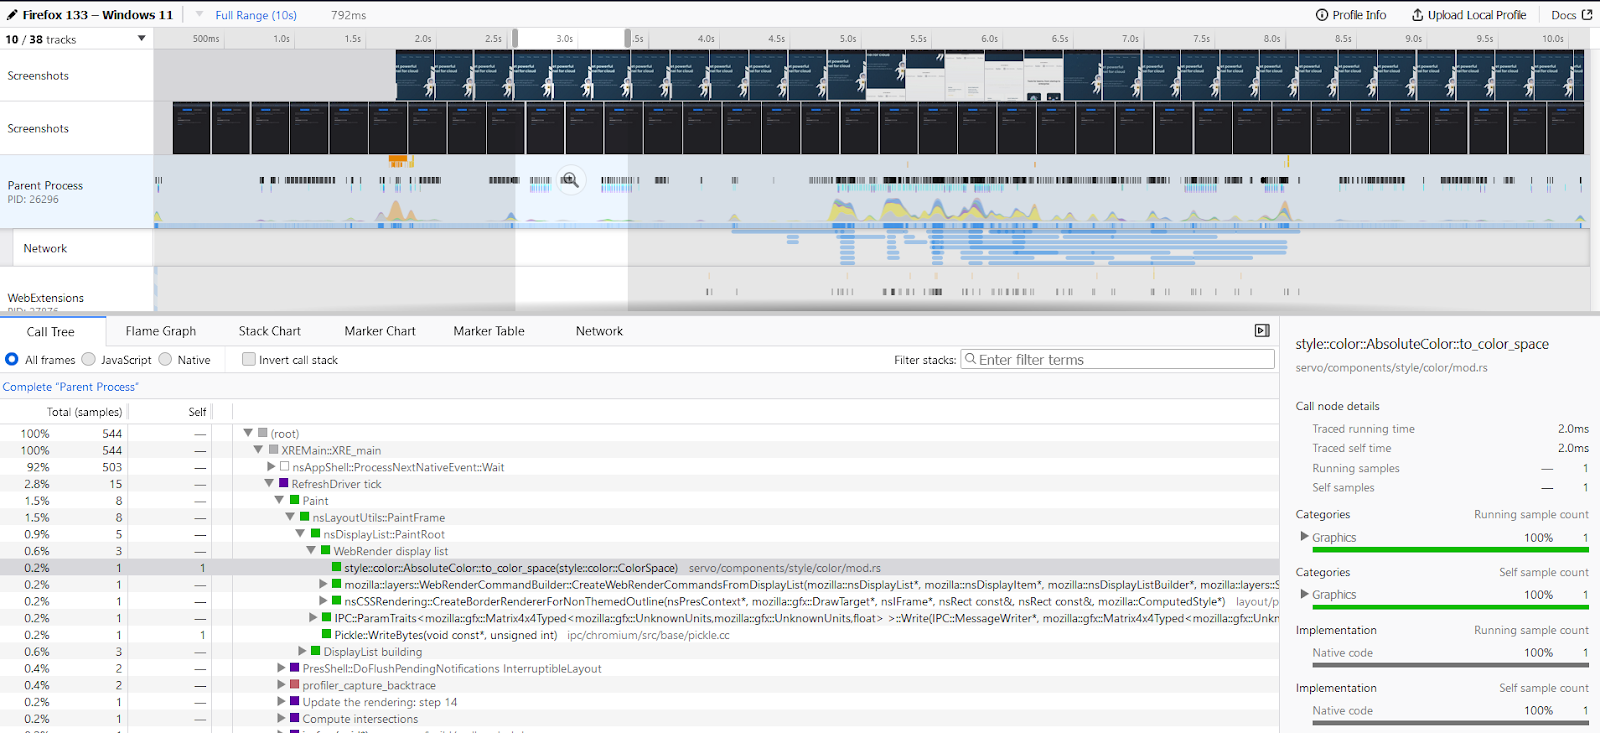
    4 – Firefox Profiler

    The Firefox Profiler is a remarkably powerful yet often overlooked performance auditing tool directly integrated into the Firefox browser. Unlike many other profiling solutions that require external installations or complex setups, it’s readily accessible, making it an incredibly convenient option for developers.

    What truly sets it apart is its ability to provide a holistic view of a website’s performance from your own network on your own computer. This is different from most other tools that use virtual machines on the cloud to test your website.

    By testing the website on your own computer, you can test not just network activity but also intricate details of JavaScript execution, rendering processes, and even interactions with the browser’s internal systems. The profiler’s data is presented across multiple interactive visualizations.

    The “Call Tree” provides a hierarchical breakdown of function calls, allowing developers to pinpoint exactly where the code spends its time. The “Flame Graph” visually represents these calls as stacked bars, making it easy to identify performance bottlenecks at a glance.

    The “Stack Chart” provides insight into the call stack and functions. The “Marker Chart” provides an overall timeline with specific markers for rendering, javascript execution, and other key processes, allowing developers to visualize how these different processes interact.

    Why it’s a great alternative:The depth of information offered by the Firefox Profiler goes beyond simple performance metrics. It captures low-level browser operations, which enable developers to diagnose issues that might not be apparent through other tools. This feature is especially useful for tracking how efficiently data is handled within a web application.

    Suggested read: Uptime Monitoring Tools: Why You Need Them, and What to Look for

    5 – WebPageTest

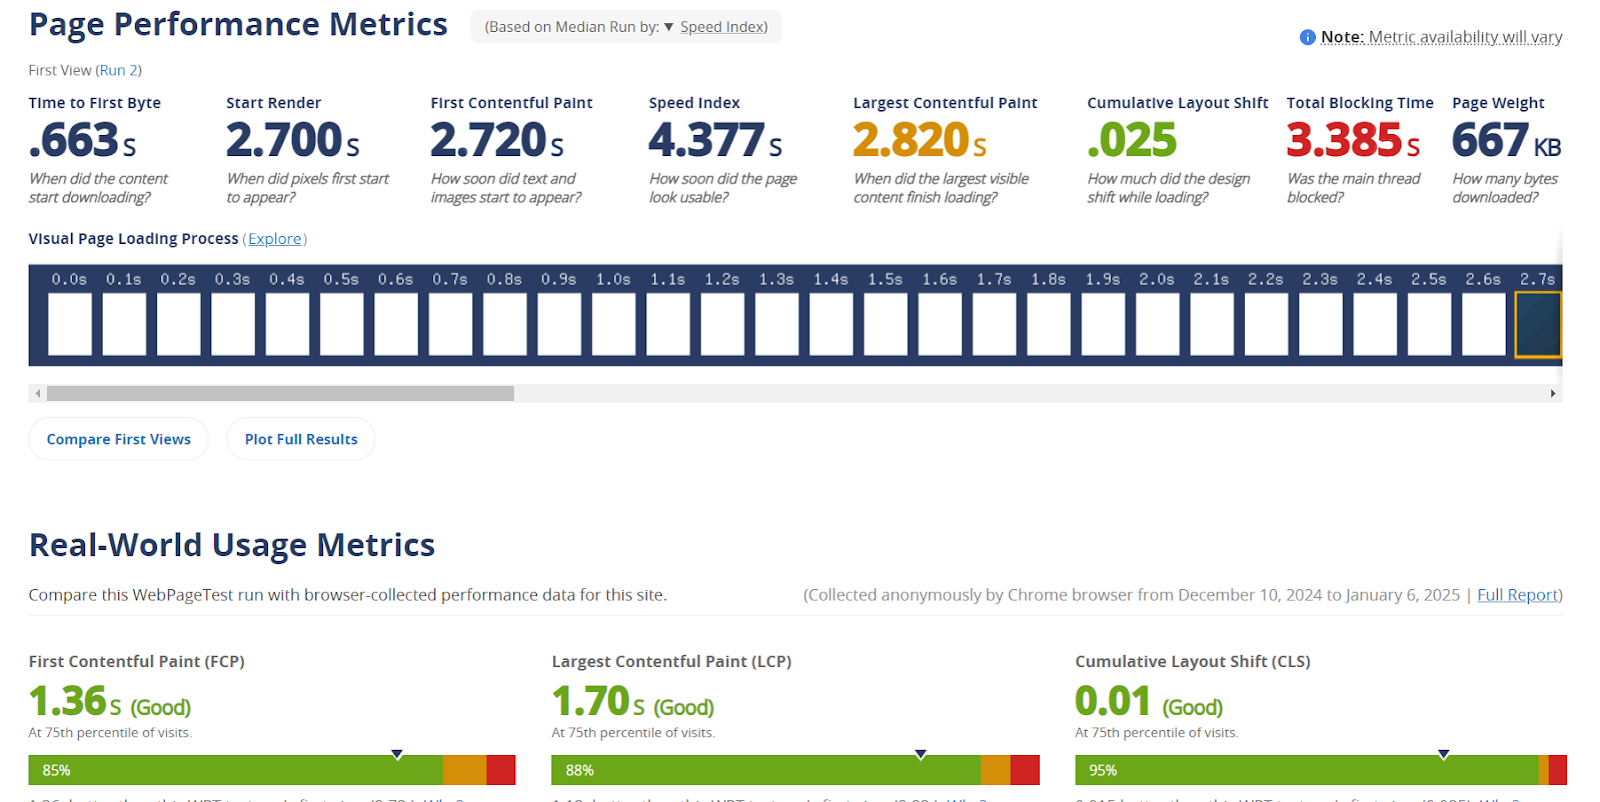
    Catchpoint’s WebPageTest is a customizable testing tool that allows deep control over test conditions such as geographic locations, connection speeds, and device types. It is also well known for its advanced waterfall charts and visual rendering metrics.

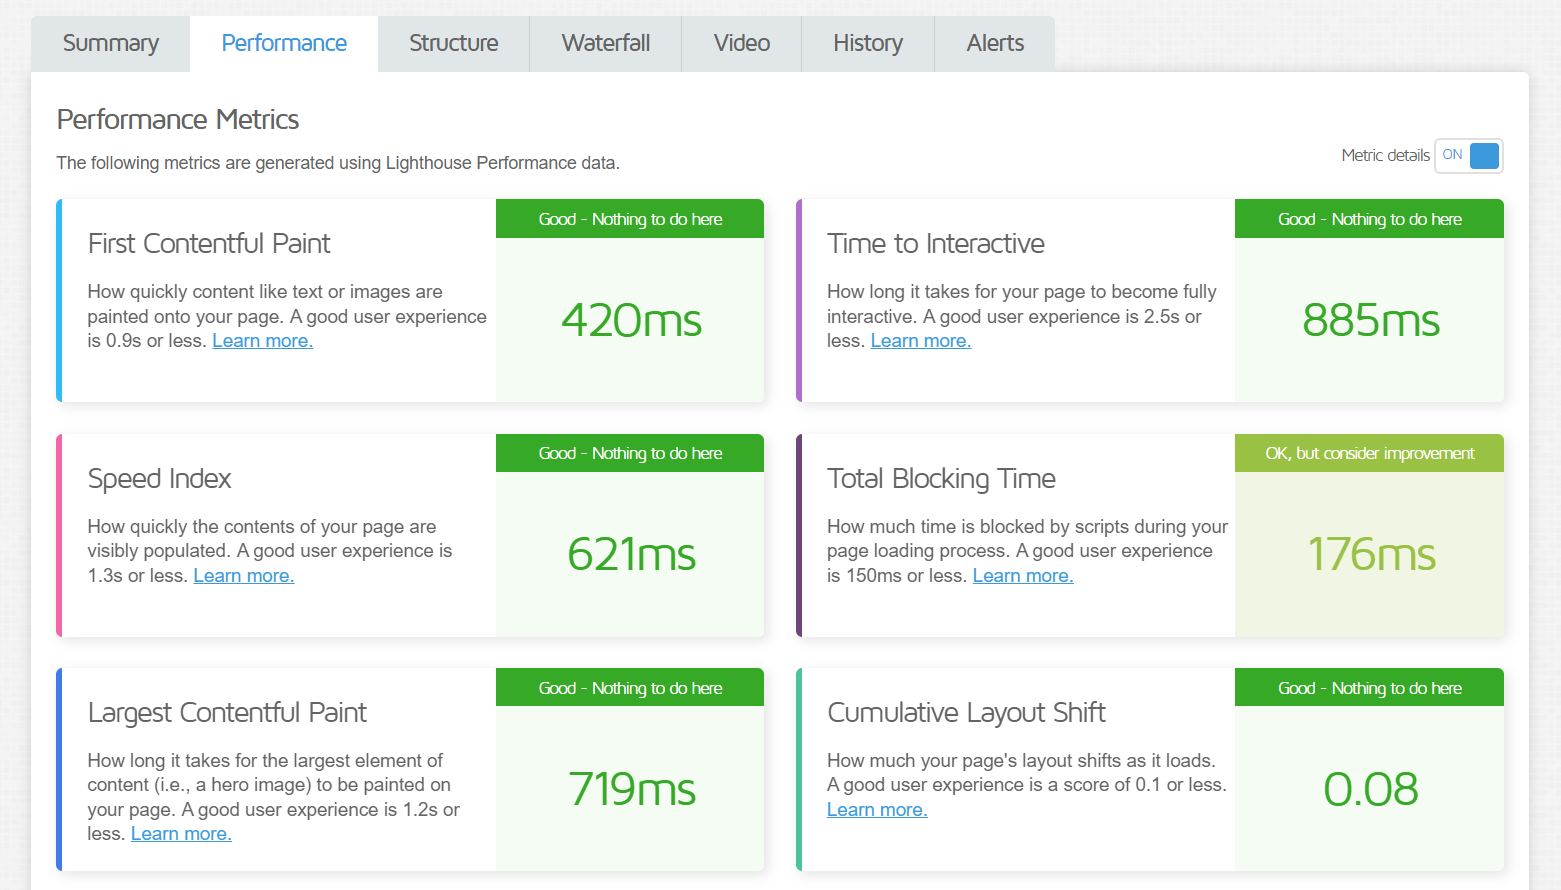
    A clean and concise interface provides developers insights into critical metrics such as TTFB, FCP, Speed Index, LCP, CLS, and TBT. These metrics are further enriched by an “Is it Quick?” assessment, which highlights key aspects like render-blocking requests and identifies if the largest content is rendered too late.

    This allows technical users to target specific performance challenges, such as optimizing resource loading, image delivery, and JavaScript processing. The platform also generates a detailed filmstrip showing page load progression, which lets developers visualize the website’s rendering over time.

    WebPageTest is best for developers who need highly granular control over testing environments and for in-depth debugging of performance issues. It presents both synthetic test results and real-user metrics. Furthermore, users can even inspect videos of each test run to identify any visual issues during page load. By breaking down the resources by type and size, WebPageTest makes it easy for developers to identify areas that need to be optimized. This powerful set of features gives developers all the tools they need to find performance bottlenecks.

    Why it’s a great alternative:It offers advanced configuration options for more complex testing requirements. Additionally, WebPageTest provides practical recommendations categorized into “Opportunities”, “Tips”, and “Pro” experiments. The “Is it Usable?” and “Is it Resilient?” sections give performance metrics for these key web factors often missed by other tools.

    6 – Lighthouse (Chrome DevTools)

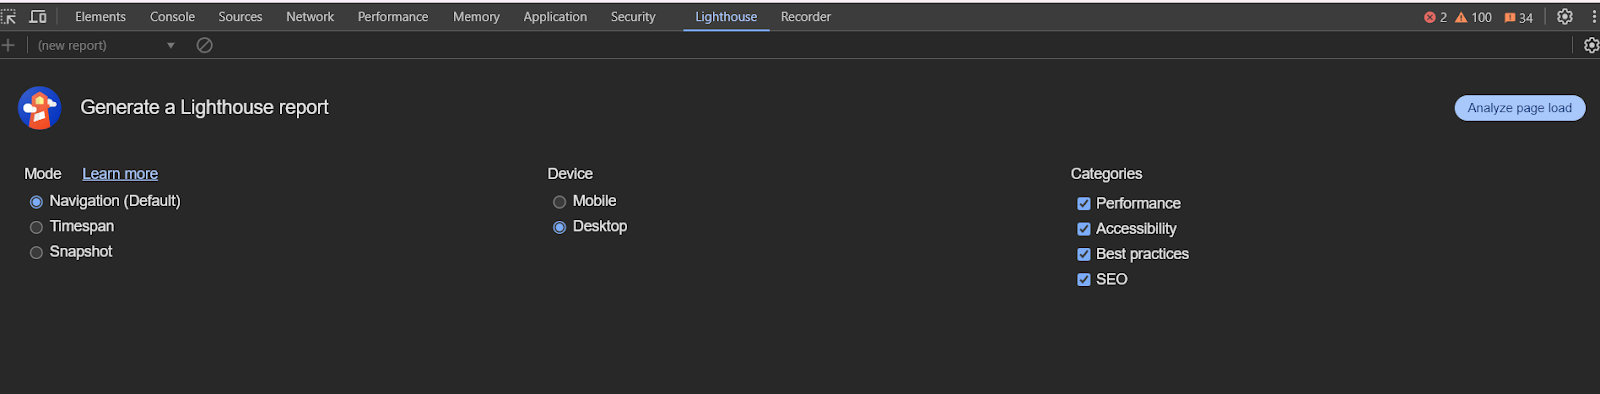
    The Lighthouse analyzer is built into Chromium browsers and provides a comprehensive website performance audit. You can open it by navigating to the desired URL in your browser and switching to the Lighthouse tab in the Developer tools menu.

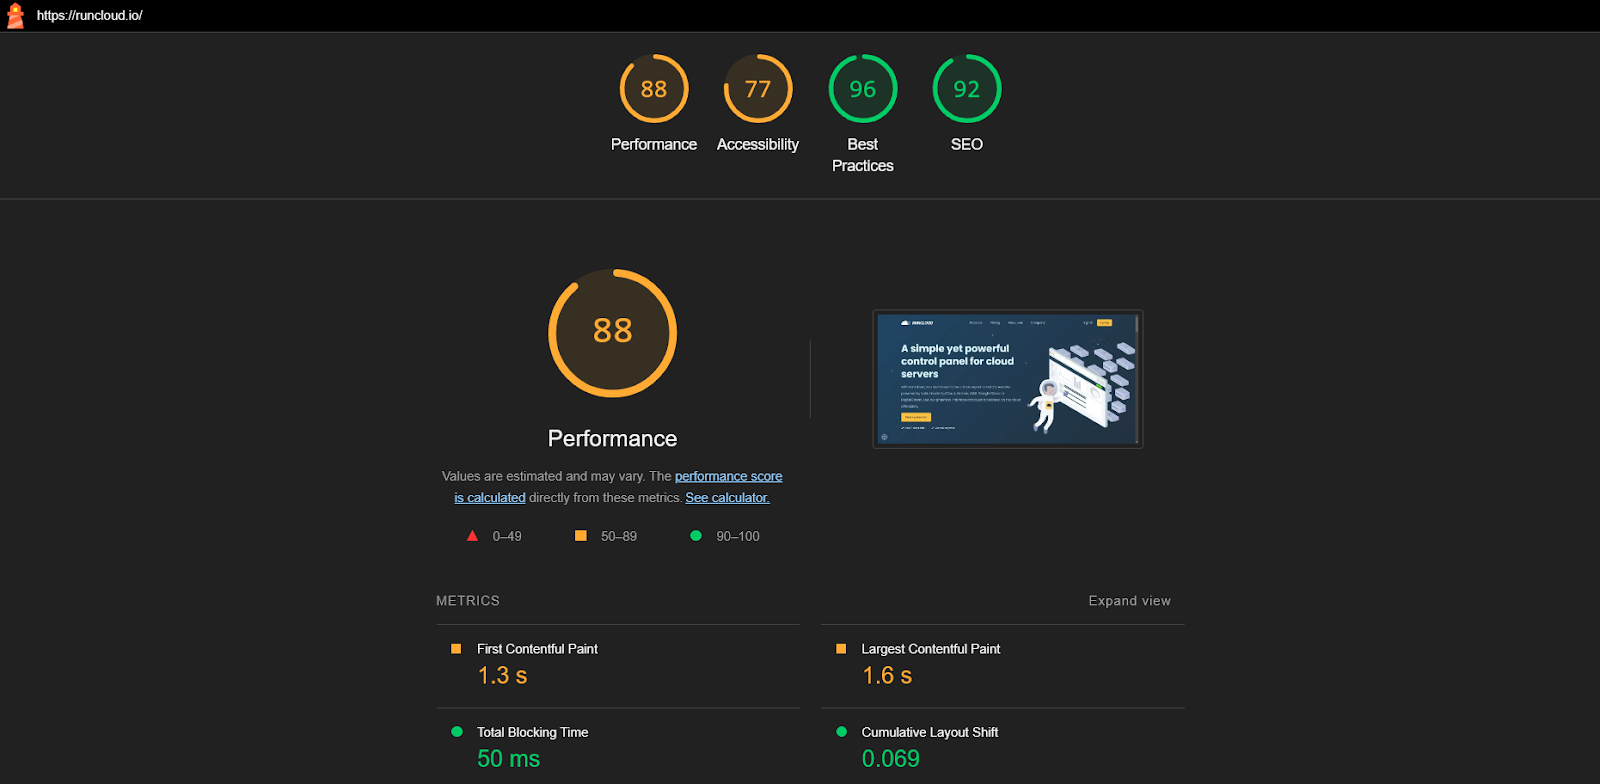
    The Lighthouse report breaks down the performance analysis into four key categories: Performance, Accessibility, Best Practices, and SEO. The report begins with an overall performance and individual scores for each performance metric. It provides both numeric values and a visual grade indicating whether the metric is considered good, needs improvement, or is poor.

    It also flags issues related to initial server response time, JavaScript execution, and network payloads, giving a full look at the site’s performance. For accessibility, the report identifies issues with names and labels, ARIA attributes, contrast, tables and lists, and navigation using headings, which developers can use to ensure a website is usable to everyone.

    Why it’s a great alternative: It is integrated directly into Google Chrome and provides instant performance audits without leaving the browser. This is especially useful during development for iterative feedback loops.

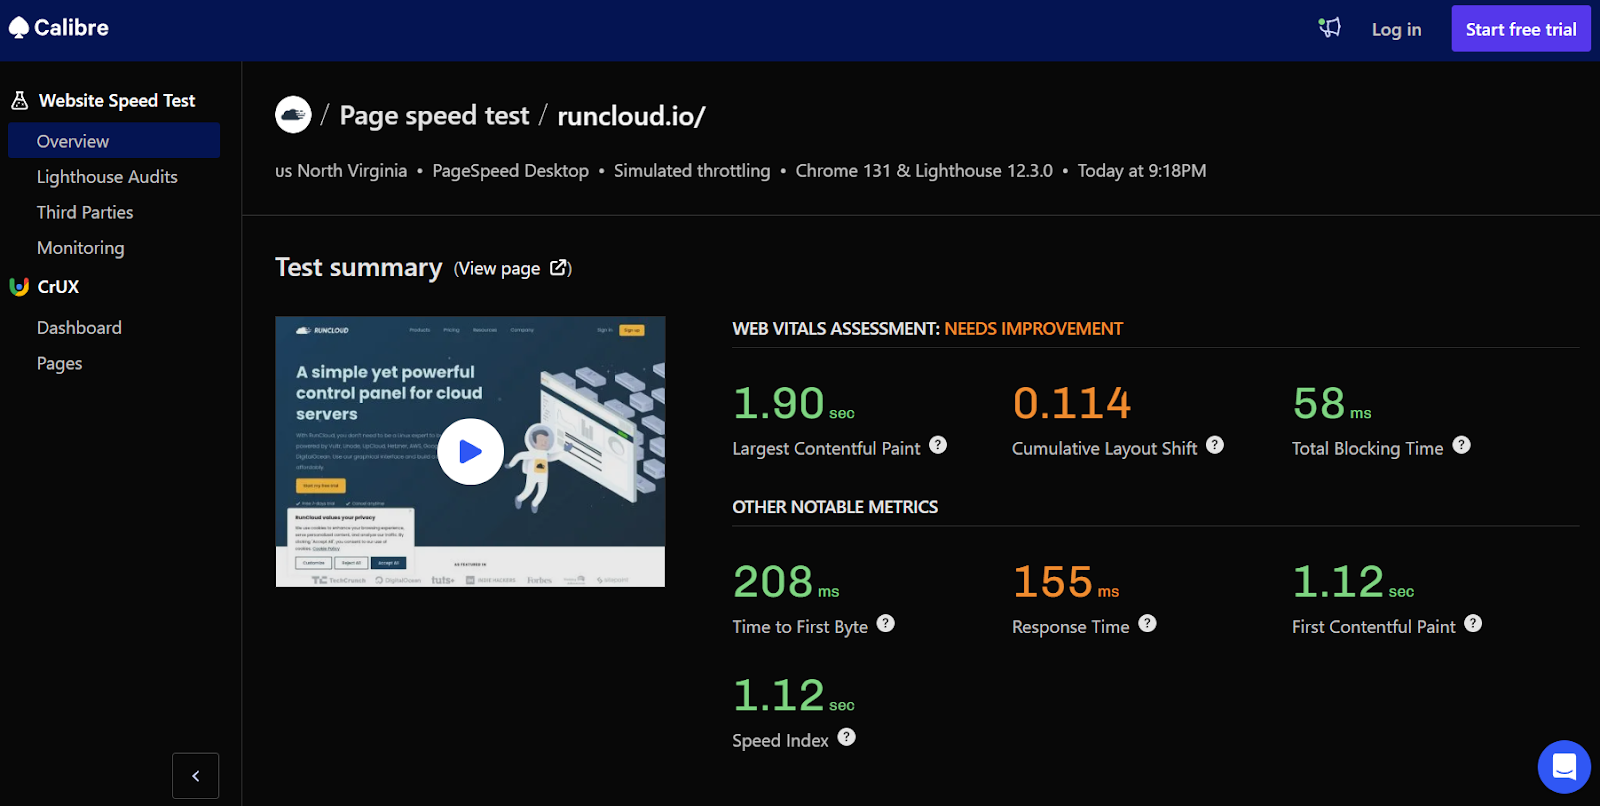
    7 – Calibre

    The Calibre website audit tool offers a compelling suite of features for web developers and comes with real-user data and long-term monitoring capabilities. You can use its Chrome User Experience Report (CrUX) functionality to accurately view how real users experience a website across different devices (desktop, tablet, and phone).

    It presents this data not just as a single data point but provides a view of how the metrics change over time. This long-term perspective allows developers to detect changes in performance over the long term and make informed optimization decisions. Additionally, a clear indication of whether the site is passing the core web vitals assessment provides a quick, high-level overview of the website’s status.

    By offering a 75th percentile view, Calibre reliably represents the user experience rather than relying on averages that outliers can skew. The histogram visualization gives developers a clear idea of the metric’s distribution, highlighting the range of user experiences.

    Why it’s a great alternative: Calibre offers granular data over time and alerts you to performance regressions. It’s designed for teams that need to integrate performance testing into their CI/CD pipelines. This allows developers to observe trends, identify regressions after updates, and ensure long-term site health. This long-term trend analysis is particularly valuable because it allows you to make strategic decisions based on real user data. This continuous monitoring and integration approach complements GTmetrix’s ad-hoc analysis.

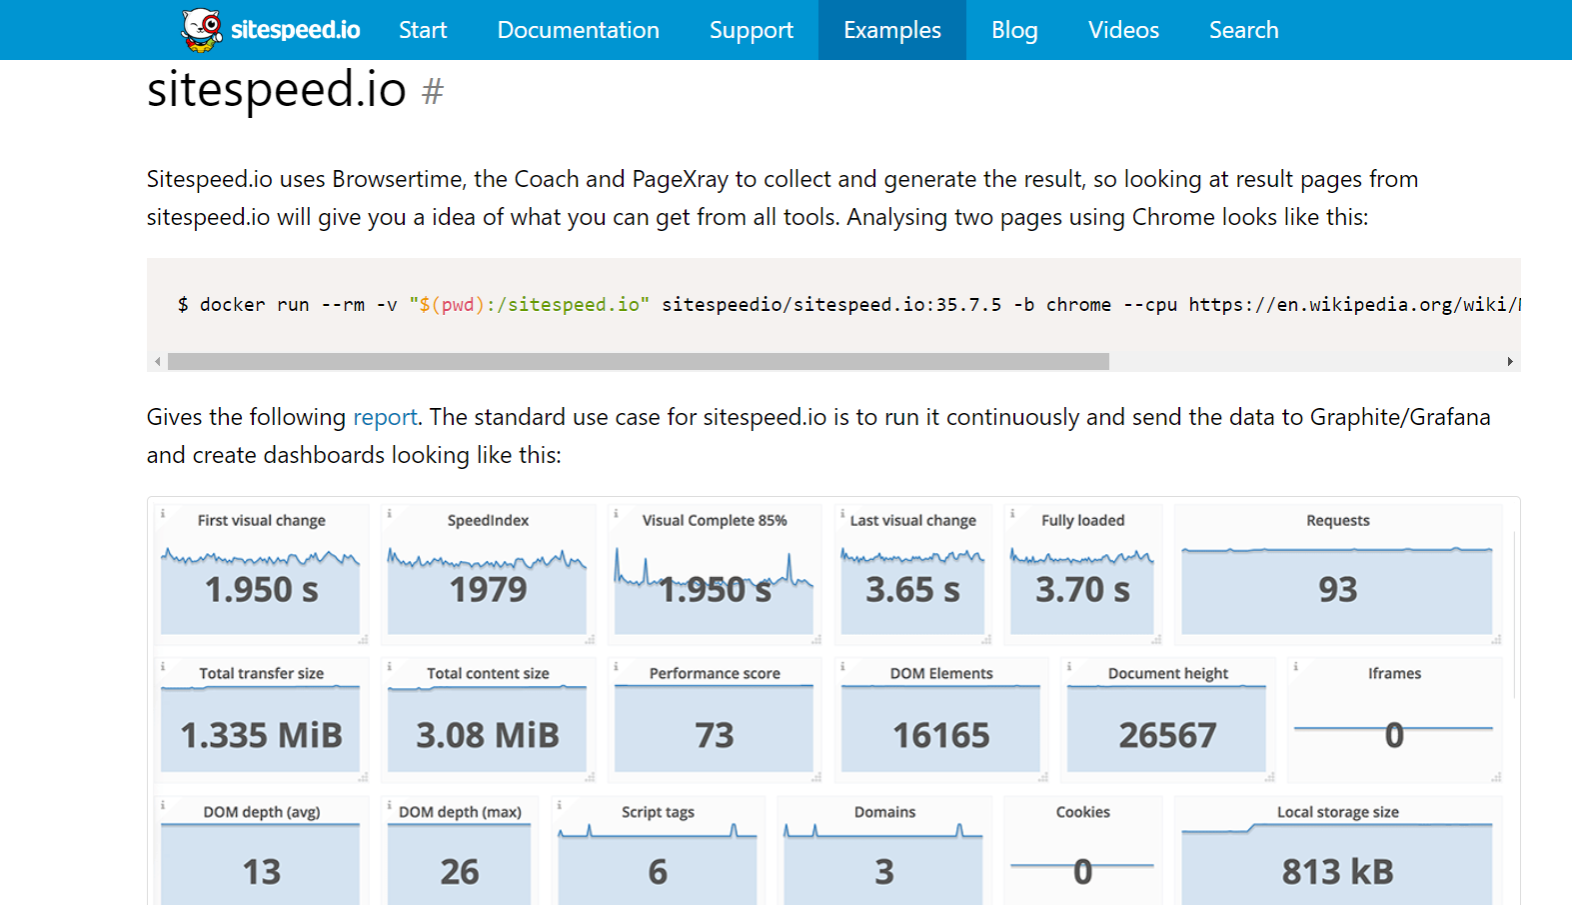
    8 – SiteSpeed.io

    Sitespeed.io is a comprehensive, open-source web performance monitoring and testing platform that prioritizes user control and data ownership. Unlike many commercial offerings, it allows users to run their own performance tests, store their own data, and customize the analysis process. This commitment to transparency and flexibility is a core differentiator.

    The platform is not just a single tool but a collection of modular components, including Browsertime (for timing metrics), Coach (for best practice analysis), PageXray (for page resource analysis), and Throttle (for network emulation), all managed and unified by the primary sitespeed.io tool. This modular design enables users to assemble a performance analysis workflow that precisely meets their needs, making it suitable for both simple tests and complex, large-scale monitoring.

    Further, it emphasizes not being a “black box” solution by allowing the end user to configure different parameters through its command-line interface. This flexibility and control extend to deployment and integration – Sitespeed.io can be easily deployed using Docker, which provides a ready-to-go environment with necessary browsers and dependencies, drastically simplifying the setup process. It also offers traditional installation using npm, which opens up usage for many developers.

    It supports visualization integrations with time-series databases such as Graphite, InfluxDB, and Grafana. These are industry-standard tools that allow the creation of custom performance dashboards and long-term trend analysis. Additionally, the ability to run tests on Android phones and through custom scripting means sitespeed.io adapts to different testing needs.

    Why it’s a great alternative: Sitespeed.io provides a developer-friendly approach to performance monitoring, which makes it ideal for those who want the flexibility of an open-source tool and the ability to customize their performance testing pipelines. This dedication to privacy and open-source principles sets it apart from many commercial solutions, making it an attractive option for developers and organizations that value data security and transparency.

    Final Thoughts

    Throughout this post, we’ve discussed various web performance analysis tools and explored the strengths and unique benefits each offers. We have compared and evaluated various tools, and whether you are looking for a one-time audit, ongoing monitoring of site speed and core web vitals, or debugging locally with browser tools, you can find something that fits your needs.

    If you are building a website, good website performance isn’t just about using the right analysis tools – it begins with a solid foundation, and having a well-configured and responsive server is essential.

    A powerful hosting environment can significantly improve TTFB and reduce the time it takes for your site to begin loading.

    This is where RunCloud comes in.

    RunCloud gives you control over server configurations and optimizes your server-side processes. This can drastically reduce your site’s load time and improve the user’s experience.

    Ready to take your site’s performance to the next level?

    Start building lightning-fast websites today with RunCloud!

    FAQs on GTmetrix Alternatives

    Is GTmetrix now paid?

    While GTmetrix offers a free version with many features, it also offers paid plans that unlock more advanced capabilities, such as increased test limits, monitoring, and detailed historical analysis. The free version is still functional but has limitations compared to the paid versions.

    What is a good website loading speed?

    Generally, a good website loading speed is under 3 seconds for the initial page load, with under 2.5 seconds being optimal; however, Core Web Vitals metrics such as LCP should be under 2.5 seconds.

    Is PageSpeed Insights reliable?

    PageSpeed Insights is a reliable tool for measuring web performance because it is based on the same methodology Google uses to assess website performance. The provided data and recommendations align with Google’s SEO ranking factors and best practices, making it a key tool for SEO optimization.

    Is GTmetrix better than PageSpeed Insights?

    GTmetrix offers more granular detail with its waterfall analysis and is generally more flexible for testing various parameters. At the same time, PageSpeed Insights provides scores and recommendations directly relevant to Google’s ranking criteria. Which is better depends on your specific needs, such as deep performance debugging or general compliance with Google’s guidelines.

    Does GTmetrix use Lighthouse?

    Yes, GTmetrix incorporates Lighthouse data into its reports. It runs a Lighthouse audit to generate its PageSpeed and other associated performance scores. GTmetrix is a wrapper around Lighthouse and other performance analysis tools, providing additional metrics and functionality.

    What is the difference between DebugBear and GTmetrix?

    DebugBear focuses more on continuous monitoring and detailed performance tracking over time, making it excellent for catching performance regressions. GTmetrix is primarily used for point-in-time performance analysis, offering detailed waterfall charts and audits.

  • Postfix vs Exim vs Sendmail Email MTA – Which One to Use in 2025?

    Postfix vs Exim vs Sendmail Email MTA – Which One to Use in 2025?

    If you send emails from your Linux server, you’ll need a Mail Transfer Agent (MTA) to process them, but choosing the right one can feel like navigating a complex technological labyrinth.

    There are a few popular MTAs available in the market: Postfix, Exim, and Sendmail. However, selecting the right one can be challenging, as each has its own set of pros and cons.

    Whether you’re a startup looking to establish your first email infrastructure or an enterprise seeking to optimize your existing systems, understanding the nuanced differences between these Mail Transfer Agents is necessary to build an effective infrastructure.

    In this comprehensive guide, we’ll dive deep into the functions and features of Mail Transfer Agents. We will share detailed comparisons of Postfix, Exim, and Sendmail, along with the pros and cons of each MTA.

    Let’s get started!

    What are Mail Transfer Agents?

    A Mail Transfer Agent (MTA) is like a digital postal service for email. It’s software in Linux systems that handles email message routing, delivery, and transmission across different computer networks. Think of an MTA as a specialized postal worker who knows how to pick up an email from one computer and deliver it to the correct destination, no matter how far away it might be.

    How Do Mail Transfer Agents Work?

    Mail Transfer Agents work through a series of systematic steps:

    1. Message Reception: When you send an email, the MTA first receives the message from your email client. It examines the recipient’s email address to determine where the message needs to go.
    2. Routing: The MTA then decides the best path to deliver the email. It uses Domain Name System (DNS) lookups to find the correct mail server for the recipient’s domain.
    3. Message Queuing: If the destination server is temporarily unavailable, the MTA doesn’t give up. It places the email in a queue and will attempt delivery multiple times over a set period.
    4. SMTP Protocol: Most MTAs use the Simple Mail Transfer Protocol (SMTP) to communicate between email servers. This is like a standardized language that ensures emails can be understood and transferred correctly.
    5. Delivery: Once the recipient’s mail server is reached, the MTA hands off the message to the Mail Delivery Agent (MDA), which places the email in the recipient’s mailbox.

    Suggested read: How to Send Email from PHP (With Guided Walkthrough)

    Why are Mail Transfer Agents Required in Linux?

    Mail Transfer Agents are essential in Linux systems for several reasons:

    1. Reliable Communication: MTAs ensure that emails are delivered reliably, even with network interruptions or temporary server issues. They can retry delivery and provide detailed error reporting.
    2. Security: Many MTAs include robust security features like spam filtering, virus scanning, and encryption support. Popular Linux MTAs like Postfix and Sendmail offer advanced security mechanisms.
    3. Flexibility: Linux MTAs can handle complex routing scenarios, support multiple domains, and integrate with various authentication methods.

    Suggested read: How To Resolve The “Email Address is Not Verified” Error With AWS SES

    Comparing Postfix vs. Exim vs. Sendmail Email MTA

    Let’s examine some of the most popular MTAs available and understand their pros and cons.

    What is Postfix?

    Postfix is a powerful, open-source Mail Transfer Agent (MTA) designed to efficiently route and deliver electronic mail across complex network environments. It was designed to provide robust email routing capabilities while maintaining exceptional security standards. It is popular for its modular architecture, which allows system administrators to configure and customize email transmission with granular control and enhanced protection against potential security vulnerabilities.

    Postfix supports multiple operating systems, including AIX, BSD, Linux, MacOS X, and Solaris, which makes it a highly adaptable solution for diverse computing environments. It also ensures seamless communication across different email systems and supports advanced features such as SMTP authentication, encryption, and internationalized email addressing.

    Suggested read: Using Mailgun To Send Transactional Email From WordPress

    Pros of Postfix

    Postfix offers an impressive array of advantages, making it a preferred choice for system administrators and organizations. Its modular design enables extensive customization through support for multiple databases, including LDAP, MySQL, PostgreSQL, and MongoDB. This allows seamless integration with existing authentication and directory services.

    It also provides robust security features, including advanced access controls, spam filtering capabilities, and support for encryption protocols like TLS, which help protect email communications from unauthorized access and potential threats.

    Cons of Postfix

    Despite its numerous strengths, Postfix presents certain challenges that organizations must carefully consider during implementation. The configuration complexity can be intimidating for less experienced system administrators as it requires deep technical knowledge to fully leverage its advanced features and customize its numerous parameters effectively.

    Some organizations might find the initial setup and fine-tuning process time-consuming, especially when integrating Postfix with existing email infrastructure or implementing complex routing and filtering rules.

    Additionally, it has a huge feature set, which can sometimes translate into increased resource consumption. This can potentially impact system performance on lower-powered hardware configurations.

    Suggested read: What are Linux Logs? What Are They & How To Use Them

    What is Exim?

    Exim is a mail transfer agent (MTA) used in Unix-like operating systems. The first version of EXIM was developed in 1995 for use in the University of Cambridge Computing Service’s e-mail systems. Exim is distributed under the GPL and is free to download, use, and modify.

    Exim follows the Sendmail design model, where a single main binary controls all the MTA facilities. This monolithic design is considered by some to be inherently less secure and slower, but despite this, Exim’s security record is much better than Sendmail and comparable with Qmail and Postfix, as is its speed. In advanced areas such as queue handling, address routing, and testing, it exhibits excellent performance.

    Suggested read: How To Flush DNS Cache — A Full Guide

    Pros of EXIM

    Exim is a highly versatile Mail Transfer Agent with robust message transport capabilities. It is an SMTP and LMTP email transport solution and provides comprehensive incoming and outgoing email handling mechanisms across multiple transport protocols. EXIM MTA supports RFC 2821 SMTP and RFC 2033 LMTP standards, enabling flexible message transmission through various methods, including TCP/IP, standard input/output, and daemon-based configurations.

    Additionally, its incoming server capabilities are particularly impressive, as it supports SMTP over multiple interfaces, including direct TCP/IP connections, inetd (internet service daemon) integration, and standard input processing. It also has advanced features such as encrypted and authenticated connections on specific ports like 587. EXIM also provides advanced routing controls that enable message redirection, quarantine, and delivery through multiple transport mechanisms.

    Suggested read: Uptime Monitoring Tools: Why You Need Them, and What to Look for

    Cons of Exim

    Exim isn’t a Mail Transport Agent, so there are some features that you won’t get. For example, it will not store emails and doesn’t support IMAP or POP protocols. However, it can deliver messages to mailstores that do, either using SMTP or LMTP message delivery or, in some cases, by saving messages directly into mailboxes.

    Exim doesn’t have a Graphical User Interface (GUI) to help you configure it, but some Linux distributions add one. Various tools are available to give you graphical views of Exim’s mail queues, traffic, and logs.

    What is Sendmail?

    Sendmail is an established Mail Transfer Agent that has been used for email communication in Unix and Unix-like operating systems for decades. It has become the de facto standard for routing and delivering email across complex network environments.

    Sendmail is critical in managing email transmission by interpreting email addresses, determining the most efficient routing path, and ensuring messages reach their intended destinations across different computer networks.

    Pros of Sendmail

    Sendmail offers numerous advantages that have established its reputation in the world of email infrastructure. Its extraordinary flexibility allows system administrators to create highly customized email routing configurations, making it adaptable to complex network environments. Sendmail supports extensive configuration options through its powerful configuration file, enabling precise control over email processing, routing, and security mechanisms.

    Being open-source, Sendmail benefits from continuous community improvements and has robust support for various authentication methods, encryption protocols, and integration with modern security technologies. Its long-standing presence in the market means it has weathered numerous technological shifts and continues to provide reliable email transmission services for organizations worldwide.

    Cons of Sendmail

    Despite its historical significance, Sendmail has several notable challenges that have prompted many organizations to explore alternative Mail Transfer Agents. The configuration process is notoriously complex, requiring deep technical expertise and extensive knowledge of its configuration syntax, which can be intimidating for less experienced system administrators.

    Its monolithic design has been criticized for potential security vulnerabilities, as a single binary controls multiple email processing functions. The default configuration can be less secure if not carefully managed, and the learning curve for proper implementation is steep. Performance can be slower than that of more modern MTAs, and the configuration complexity makes routine maintenance and troubleshooting time-consuming. These limitations have led many organizations to migrate to more contemporary and user-friendly email transfer agents such as Postfix and Exim.

    Postfix vs. Sendmail vs. Exim – Feature Comparison Table

    FeaturePostfixSendmailExim
    Open Source StatusFully open-source, actively maintainedOpen-source, less actively developedFully open-source, GPL licensed
    Configuration ComplexityModerate, more intuitiveHigh, complex configurationModerate to high, flexible but detailed
    Security ModelModular, security-focused designMonolithic, historically more vulnerableFlexible, strong security controls
    Performance ScalabilityHigh, efficient routingModerate, can be slowerGood, advanced queue handling
    Database IntegrationExtensive (LDAP, MySQL, PostgreSQL)Limited native supportModerate database connectivity

    Wrapping Up – Which Transfer Agent Should You Choose: Postfix, Exim, or Sendmail Mail?

    In this post, we have provided you with the pros and cons of some of the most popular MTAs; however, selecting the right MTA is critical and will depend on your specific organizational requirements, technical expertise, and infrastructure complexity.

    Postfix is the recommended solution for most scenarios as it offers an optimal balance between security, performance, and ease of configuration. However, if your organization works with legacy systems or complex email routing requirements, Sendmail remains a viable option, though it demands more advanced technical skills. Exim is also a good option for those seeking a highly customizable solution with robust routing capabilities.

    Implementing and managing Linux servers can be complex and time-consuming – that’s where RunCloud comes to the rescue.

    Our platform simplifies server management, offering one-click DNS configurations, automated security updates, and intuitive monitoring tools that take the complexity out of infrastructure management.

    Ready to simplify your server management? Sign Up for RunCloud Today.

    FAQs on Mail Transfer Agents

    Does Sendmail need an SMTP server?

    Sendmail is an SMTP server itself, functioning as both a Mail Transfer Agent (MTA) and an SMTP server simultaneously. It natively handles email routing, transmission, and delivery using the SMTP protocol without requiring a separate SMTP server.

    Does PHP use Sendmail?

    PHP can use Sendmail as a default method for sending emails on Unix and Linux systems by leveraging the built-in mail() function. The PHP configuration allows developers to specify the Sendmail path for email transmission, enabling seamless integration with the system’s mail transfer infrastructure.

    What is the main difference between postfix and prefix operators?

    This question seems unrelated to Mail Transfer Agents and more like a programming concept. In programming, prefix operators modify a variable before its value is used, while postfix operators modify a variable after its current value is used.

    What are the two roles of Simple Mail Transfer Protocol?

    Simple Mail Transfer Protocol (SMTP) primarily serves two critical roles: transferring email messages between email servers, and routing emails from a sender’s email client to the recipient’s mail server. SMTP ensures reliable, standardized communication for email transmission across different network infrastructures.

    What is the message transfer agent SMTP?

    SMTP is not a message transfer agent but a communication protocol MTAs use to send and receive email messages between servers. It defines the rules and procedures for transmitting emails, ensuring consistent and reliable communication across different email systems.

    What are the two types of user agents in email?

    The two primary types of user agents in email are the Mail User Agent (MUA), the email client interface users interact with (like Thunderbird or Outlook), and the Web-based Email User Agent, which allows users to access and manage emails through web browsers.

    What is the difference between MTA and MUA?

    A Mail Transfer Agent (MTA) is responsible for routing and delivering emails between servers using protocols such as SMTP, acting like a postal service for electronic messages. In contrast, a Mail User Agent (MUA) is the email client software that users directly interact with to compose, read, and manage their emails.

  • How to Partition and Format Disk Drives on Linux? (Detailed Guide)

    How to Partition and Format Disk Drives on Linux? (Detailed Guide)

    Disk, partitions, ext4, mkfs, /dev/sda, filesystem – these are common keywords when working with Linux servers, but what do they really mean?

    Managing storage is a fundamental aspect of server administration, and it can initially seem intimidating. Terms like formatting, mounting, partition table (GPT, MBR), and choosing the right file system type (NTFS, FAT32, exFAT) can quickly become overwhelming.

    This guide explains the essential concepts of disk partitioning and disk formatting in Linux. We’ll start by explaining what disk partitioning and disk formatting are – and why they’re necessary. Then, we’ll explore different types of file systems and help you understand their strengths and weaknesses. Finally, we’ll provide step-by-step instructions for both partitioning and formatting your disk on Linux systems.

    So let’s get started!

    What is a Disk Drive?

    A disk drive, also known as a storage drive, is a non-volatile storage device for a computer. This device retains data even when the system loses power. The drive stores the operating system, applications, and user data, and the computer uses it to both read and write data.

    Suggested read: 9 Best Linux Distros in 2024

    What is a disk drive

    Types of Disk Drives

    Disk drives come in all shapes and sizes, each with its own speed and storage capabilities. Knowing their differences can help you pick the right one for your needs.

    • Hard Disk Drives (HDDs): HDDs store data on spinning magnetic platters and use a read/write head that moves across the surface. They are a cost-effective option for large storage capacities, but their mechanical nature results in slower access times.
    • Solid-State Drives (SSDs): SSDs use flash memory to store data, eliminating moving parts and providing significantly faster read/write speeds than HDDs. This results in faster boot times, application loading, and overall system responsiveness, although typically at a higher cost per gigabyte.
    • NVMe SSDs (Non-Volatile Memory Express SSDs): NVMe SSDs are a type of SSD that uses a high-speed PCIe interface. They deliver even greater performance than standard SATA SSDs. This interface allows for much higher bandwidth and lower latency, making them ideal for demanding workloads.

    Suggested read: How to Check Running Processes in Linux Using ps, top, htop, and atop Commands

    What is Disk Partitioning?

    Disk partitioning is a fundamental aspect of storage management that divides a physical hard drive (or other storage device such as an SSD) into multiple logical sections. System administrators perform this division to organize data, isolate operating systems, or improve system performance.

    Each partition functions as an independent unit, almost as if it were a separate physical disk. The operating system then treats each partition as a distinct volume. This separation allows multiple file systems and operating systems to coexist on a single physical drive and simplifies backup and recovery processes.

    Suggested read: How to Kill a Process in Linux From the Command Line

    How to Partition Disk Drive on Linux

    Here’s a step-by-step guide to partitioning a disk drive on Linux:

    Step 1: Identify the Disk

    Before partitioning a disk, you need to identify the correct device name. Use the lsblk command in your terminal to list all block devices (disks and partitions) connected to your system.

    After executing the command, carefully examine the output and pay attention to the NAME, SIZE, TYPE, and MOUNTPOINT columns.

    You’re looking for a disk (indicated by TYPE being “disk”) that is not currently mounted (has no MOUNTPOINT) or is a disk you are sure you want to repartition (which results in losing all data stored on it). The NAME will typically be something like /dev/sda, /dev/sdb, /dev/nvme0n1, etc.

    Be absolutely certain you have the correct device name – partitioning the wrong disk will result in data loss.

    If in doubt, do not proceed!

    To minimize risk, disconnect any non-essential external drives.

    Step 2: Choose a Partitioning Tool

    Linux offers several tools for partitioning disks, each with its own strengths. For command-line interaction, fdisk and parted are popular choices. fdisk is a classic, menu-driven utility suitable for most tasks, especially on disks using the older MBR partition scheme. On the other hand, parted supports both MBR and the newer GPT (GUID Partition Table) scheme and is often preferred for disks larger than 2TB.

    The cfdisk utility offers a text-based interface that provides a middle ground between fdisk’s simplicity and parted’s power. GParted is a widely used and user-friendly option for a graphical interface, but it is not useful for Linux servers as they don’t have a GUI.

    We’ll focus on using parted for this guide due to its versatility. To start the interactive partitioning session, we’ll use parted /dev/sdX (replacing /dev/sdX with the actual disk name).

    Step 3: Create a New Partition

    Once you’ve started parted with the correct disk (e.g., sudo parted /dev/sdb), you’ll be at the parted prompt. First, print the current partition table using the print command to double-check the device.

    • Select Partition Table Type (if needed): If the disk is brand new or you want to change the partition table type, use the mklabel command. For example, (parted) mklabel GPT.
    • Create the Partition: Use the mkpart command. You’ll be prompted to enter the following:
      • Partition type: primary, extended (only on MBR), or logical (only within an extended partition). With GPT, you’ll almost always choose the primary.
      • File system type: This is a hint for later formatting; it doesn’t actually format the partition. Choose ext4, fat32, ntfs, etc., as appropriate.
      • Start: Specify the partition’s starting point, either in megabytes (MB) or gigabytes (GB) or as a percentage of the disk (e.g., 0%).
      • End: Specify the partition’s ending point using the same units as the start (e.g., 100GB or 100%).
      • Example: (parted) mkpart primary ext4 0% 100% (creates a primary partition using the ext4 formatting that takes the entire disk).
    • Repeat (if needed): Repeat the mkpart command for each additional partition you want to create.

    Step 4: Verify the Partition

    After creating the partition(s), you can verify the changes using the print command within the parted prompt. This command displays the current partition table, showing the partition number, start and end points, size, file system type (hint), and any flags. Carefully review this output to ensure the partitions are as you intended.

    If anything looks incorrect, you can use rm <number> (e.g., rm 1 to remove partition number 1) to delete a partition within parted and recreate it.

    Once satisfied, type quit to exit parted and save the changes to the disk.

    What is Disk Formatting?

    Disk formatting prepares a storage device (the whole disk or a partition) for use by an operating system. This process creates a specific file system – a structured method for organizing and storing files. The operating system uses this file system to manage data on the device. Formatting lays the groundwork that defines how the operating system will track files, directories, and free space.

    Suggested read: How to Check Linux CPU Usage or Utilization? (5 Ways)

    What is a File System?

    A file system is the underlying structure that an operating system uses to manage data on a storage device. It determines how files are named, stored, organized, and accessed. Think of it as the librarian of your hard drive, keeping track of where everything is located and how to retrieve it. Without a file system, a storage device would just be a collection of unorganized data.

    There are multiple popular file system formats:

    • ext4 (Fourth Extended Filesystem): The ext4 file system is the standard and most widely used file system for Linux distributions. It’s a journaling file system that records changes before they are written to disk. This improves reliability and reduces the risk of data corruption in case of power failures or system crashes. ext4 offers excellent performance, supports large files and volumes, and is generally the best choice for Linux server environments. It also includes delayed and multiblock allocation features to enhance write performance.
    • NTFS (New Technology File System): NTFS is the primary file system used by Windows operating systems. Like ext4, it’s a journaling file system with improved reliability and data recovery capabilities. NTFS supports features such as file permissions, encryption (BitLocker), disk quotas, and shadow copies (for backups and restoring previous versions of files). It also supports much larger file and partition sizes than older FAT systems.
    • FAT32 (File Allocation Table 32): FAT32 is an older file system known for its broad compatibility. It’s commonly used on USB flash drives and SD cards because it can be read and written by virtually any operating system, including Windows, macOS, and Linux. However, FAT32 has significant limitations: it supports a maximum file size of only 4GB and a practical maximum volume size of 2TB. This makes it unsuitable for storing large files like modern video files.
    • exFAT (Extended File Allocation Table): exFAT is a Microsoft-developed file system designed to overcome the limitations of FAT32 while maintaining good cross-platform compatibility. It supports very large file and partition sizes, making it suitable for storing large media files and using large external drives. exFAT is often used on SDXC cards and large USB drives when compatibility with Windows and macOS is needed. It is often the preferred filesystem for USB thumb drives.

    Suggested read: How do you check if the TCP port is open, closed, or in use on Linux?

    How to Format a Disk Drive on Linux

    Here’s a step-by-step guide to formatting a disk drive (or, more accurately, a partition) on Linux:

    Step 1: Identify the Partition to Format

    Before formatting, you must know the exact device name of the partition you want to format. Formatting the wrong partition will result in irreversible data loss.

    Use the lsblk command in your terminal to list all block devices and their partitions. Carefully examine the output, paying attention to the NAME, SIZE, TYPE, and MOUNTPOINT columns.

    You’re looking for the specific partition (e.g., /dev/sda1, /dev/sdb2, /dev/nvme0n1p1 – the “p” and number indicate a partition, not the whole disk). The TYPE column will show “part” for partitions. Double-check the SIZE to ensure it matches the partition you intend to format.

    Step 2: Unmount the Partition

    If the partition you intend to format is currently mounted (meaning it’s accessible as a directory), you must unmount it before formatting. Use the umount command followed by either the device name or the mount point. For example:

    • sudo umount /dev/sdX1 (replace /dev/sdX1 with the actual partition name)
    • sudo umount /mnt/mydirectory (if the partition is mounted at /mnt/mydirectory)

    If the umount command reports that the device is busy, it means a process is still using the partition. You must identify and stop that process before you can unmount it.

    Step 3: Format the Partition

    Use the mkfs command (make file system) with the appropriate option for your chosen file system. The general format is: sudo mkfs -t [filesystem type] [options] /dev/sdX1. The -t option specifies the filesystem type. Here are the specific commands:

    • For ext4: sudo mkfs -t ext4 /dev/sdX1
    • For FAT32: sudo mkfs -t vfat -F 32 /dev/sdX1 (the -F 32 specifies FAT32; you can also use -F 16 for FAT16, but this is rarely needed)
    • For NTFS: sudo mkfs -t ntfs /dev/sdX1
    • For exFAT: sudo mkfs -t exfat /dev/sdX1

    Remember to replace /dev/sdX1 with the actual partition name in the above examples.

    Step 5: Verify the Format

    After formatting the partition, you can verify the result using several methods:

    • lsblk -f: This command shows each partition’s file system type (FSTYPE) and UUID. Check that the FSTYPE matches what you intended.
    • blkid /dev/sdX1: This command specifically shows the specified partition’s UUID and TYPE (file system).
    • Mount and check: Mount the partition (e.g., sudo mount /dev/sdX1 /mnt) and then use df -h to check the disk space and file system type. This confirms that the partition is usable. After testing, you can unmount the partition with the command sudo umount /dev/sdX1 or sudo umount /mnt if that is where it is mounted.

    Suggested read: How to Find Most Used Disk Space Directories and Files in Linux

    Wrapping Up: Disk Partitioning and Formatting

    Understanding the different file systems, choosing the right tools, and, most importantly, double-checking every command before execution are critical for maintaining data integrity and system stability. Remember to always back up important data before making any changes to partitions.

    Managing Linux servers, especially tasks like disk partitioning and monitoring, can seem daunting. However, with tools such as RunCloud, the process becomes significantly easier and more streamlined.

    RunCloud provides a user-friendly web interface that simplifies server management tasks, including monitoring disk usage, managing services, and deploying applications. Instead of wrestling with the command line for every operation, you can use RunCloud’s intuitive dashboard to oversee your server’s health and performance. This allows you to focus on your applications and websites rather than getting bogged down in the complexities of server administration.

    Ready to experience the ease of Linux server management? Start your free trial with RunCloud today!

    FAQs on Partitioning and Formatting Disk Drives on Linux

    What is the difference between partitioning and formatting?

    Partitioning divides a physical hard drive or storage device into logical sections. Each section, a partition, functions like an independent disk. On the other hand, formatting prepares a partition (or an entire unpartitioned disk) by creating a specific file system (e.g., ext4, NTFS, FAT32). This file system allows an operating system (such as Linux or Windows) to organize, store, and retrieve files. Partitioning divides the disk while formatting prepares a partition for data.

    How do I know which file system to choose?

    The best file system depends on system compatibility and your specific needs. Ext4 is generally recommended for Linux servers due to its performance, reliability, and features. If you require compatibility with Windows, NTFS or exFAT are good choices, especially for USB drives. FAT32 offers broad compatibility but has limitations on maximum file size and max volume size. Consider factors like journaling (for data recovery) and support for large files when selecting.

    Can I resize partitions without losing data?

    Yes, but it’s risky and requires careful planning. Tools like parted, GParted, and GNOME Disks allow resizing, but always back up your data first. Shrinking a partition is generally safer than expanding it, especially if the partition being expanded is at the end of the disk. If free space isn’t directly adjacent to the partition you’re expanding, data movement is required, increasing the risk of data loss if interrupted.

    What tools are recommended for disk management on Linux?

    For command line (CLI) use, fdisk, parted, and cfdisk are powerful for partitioning.
    mkfs (e.g., mkfs.ext4, mkfs.vfat) is used for formatting.
    For a GUI, GParted and GNOME Disks offer user-friendly interfaces for both partitioning and formatting.
    lsblk displays information about block devices (disks and partitions).
    blkid shows UUIDs and file system types.
    df helps monitor disk space usage.

    Is it safe to format a disk drive?

    Formatting is safe for the drive but permanently erases all data on the selected partition or disk. Always double-check that you’ve selected the correct partition (using lsblk, for example) before formatting. Ensure you have backups of any important data.

    How do I recover data from a formatted drive?

    Data recovery after formatting is possible but not guaranteed, and it becomes increasingly difficult the more the drive is used after formatting. Specialized data recovery software (often commercial) attempts to reconstruct file system structures. To maximize recovery chances, immediately stop using the drive after accidental formatting. Professional data recovery services are often the best option for critical data.

    What are primary, extended, and logical partitions?

    These terms relate to the older MBR (MS-DOS) partition table scheme. An MBR disk can have a maximum of four primary partitions. To overcome this limitation, one primary partition can be designated as an extended partition, which can then be subdivided into multiple logical partitions. GPT (GUID Partition Table), the modern standard, doesn’t have these limitations and supports many more partitions directly.

    How do I check disk space usage on Linux?

    The df (disk free) command is the primary tool. df -h displays usage in human-readable format (e.g., GB, MB). You can also use du (disk usage) to see the size of specific directories and files. GNOME Disks provides a graphical view of disk space.

    Can you partition a drive without formatting?

    Yes, you can. Partitioning simply creates the divisions on the disk. Formatting is a separate step that creates a file system within a partition to make it usable by an operating system. You might partition a disk and leave some partitions unformatted for later use or different purposes.

  • How to Restrict WordPress Admin Access by IP Address (Easy Guide)

    How to Restrict WordPress Admin Access by IP Address (Easy Guide)

    Open access to your wp-admin directory and wp-login.php makes it a prime target for brute-force attacks and unauthorized access.

    By whitelisting specific IP addresses and implementing WordPress admin access control, you can effectively stop hackers, block automated bots, and significantly reduce failed login attempts.

    This WordPress tutorial will show you how to restrict WordPress admin access by IP address by either editing the .htaccess file directly, applying NGINX configurations, or using a security plugin.

    Whether you use NGINX, Apache, or rely on a managed server provider, this guide will teach you how to whitelist (and blacklist) specific IP addresses.

    Let’s get started!

    What is IP Address Restriction?

    IP Address Restriction, also known as IP whitelisting, is a security measure that limits access to a specific resource, such as your WordPress admin area (/wp-admin), to only a pre-approved list of IP addresses.

    Simply put, it is like a digital security guard that allows only those with the correct “address” to enter. It says, “Only connections from these specific IP addresses are allowed to access this website area”.

    Why Restrict Admin Access by IP Address?

    Restricting admin access by IP address adds another layer of security to your WordPress site. By default, the admin login page is accessible to anyone on the internet, which makes it a prime target for malicious actors.

    IP restriction makes it exponentially more difficult for attackers to access the WordPress backend. Even if an attacker obtains valid login credentials (through phishing, malware, or other means), they will still be blocked if their IP address is not on the approved list. This is especially useful if you and your team work from fixed locations with static IPs.

    Additionally, brute force attacks involve repeatedly attempting to guess login credentials. Limiting access to only trusted IP addresses reduces the possibility of brute-force attacks originating from other locations. Although you can also use security plugins to stop brute force attempts, IP restriction stops them before they even start. If rate limiting is in place, this significantly reduces the load on your server and prevents potential account lockouts for legitimate users.

    Suggested Read: How to Unban IP Address in Fail2Ban? (Step-By-Step Guide)

    How To Restrict WordPress Admin Access by IP Address

    There are several ways to restrict access to your WordPress admin area, each with advantages and disadvantages. Here are three common methods:

    Method 1: Using .htaccess File

    The .htaccess file is a configuration file used by Apache web servers. You can directly edit it to restrict access based on IP addresses. Follow the steps below to do this:

    1. Access the .htaccess file: The .htaccess file is usually located in the root directory of your WordPress installation (the same directory where wp-config.php resides). RunCloud provides convenient access to your server’s filesystem. Log in to your RunCloud dashboard, select your server, and then the web application you want to modify. Here, you’ll find a “File Manager” in the left menu that you can use to edit files.
    1. Edit the .htaccess file:

    Important: Before making any changes, always download a copy of your .htaccess file to your computer and make a backup.

    • In the RunCloud File Manager, click on the .htaccess file to open the file in a text editor.
    • Add the following code block to the beginning of the file but after the “# BEGIN WordPress” section (if it exists). If there is no WordPress section, place it at the beginning:
    <Files wp-login.php>
        order deny,allow
        deny from all
        allow from YOUR_IP_ADDRESS
        allow from ANOTHER_IP_ADDRESS
    </Files>
    <Directory /wp-admin>
        order deny,allow
        deny from all
        allow from YOUR_IP_ADDRESS
        allow from ANOTHER_IP_ADDRESS
    </Directory>

    Replace YOUR_IP_ADDRESS and ANOTHER_IP_ADDRESS with the actual IP addresses from which you want to allow access. You can add as many ‘allow from‘ lines as needed. Place the <Files …> section above the <Directory> section if you have no WordPress section.

    1. Save and Upload: Save the changes to the .htaccess file by clicking the Save button on the top right.
    2. Test: Try accessing /wp-admin or /wp-login.php from an IP address on the allowed list. You should be able to log in. After that, try accessing it from an IP address not on the list. You should be denied access.

    Suggested Read: How to Block IP Address Using WordPress .htaccess File to Stop Bad Visitors

    Method 2: Using NGINX Config

    If you use an NGINX web server, you’ll need to modify the NGINX configuration file instead of using .htaccess. RunCloud significantly simplifies this process.

    1. Access the NGINX Configuration: Log in to your RunCloud dashboard, select your server, and then the web application you want to modify. You should see “NGINX Config” in the left menu on this screen.
    2. Edit the NGINX Configuration: RunCloud provides a user-friendly interface for editing NGINX configurations, eliminating the need for SSH access and manual configuration. On the next screen, click “Create a New Configuration”, and select “Block XML-RPC” from the dropdown menu. This predefined configuration isn’t necessary, but it is recommended as it automatically fills most fields and makes it harder for novice users to make mistakes.
    1. Add configuration: Copy the code snippet below and paste it into the text field in your RunCloud dashboard. Replace YOUR_IP_ADDRESS and ANOTHER_IP_ADDRESS with the actual IP addresses you want to allow. You can add multiple allow lines as needed. The deny all line ensures that any IP address not explicitly allowed is blocked.
    location /wp-admin/ {
        allow YOUR_IP_ADDRESS;
        allow ANOTHER_IP_ADDRESS;
        deny all;
    }
    location /wp-login.php {
        allow YOUR_IP_ADDRESS;
        allow ANOTHER_IP_ADDRESS;
        deny all;
    }
    1. Save and Apply: In RunCloud, simply save the changes you’ve made to the NGINX configuration within the editor. RunCloud automatically checks the configuration for errors before applying it, preventing common mistakes that could break your website.
    2. Test: As with the .htaccess method, test access from both allowed and disallowed IP addresses to ensure it works correctly. Any attempt to access the website from a disallowed IP address should result in the following message being displayed:

    Suggested Read: What is DNS & How Does It Work? Everything you need to know.

    Method 3: Using a WordPress Security Plugin

    Several WordPress security plugins offer IP address restriction features. This is often the easiest method for those less comfortable with server configuration files. In this tutorial, we will explain how to block IP addresses using Patchstack.

    1. Install and Activate Patchstack: Install and activate the Patchstack security plugin from the WordPress plugin repository. You can do this directly through your WordPress dashboard by navigating to “Plugins” > “Add New“, searching for “Patchstack“, and clicking “Install Now“, followed by “Activate“.
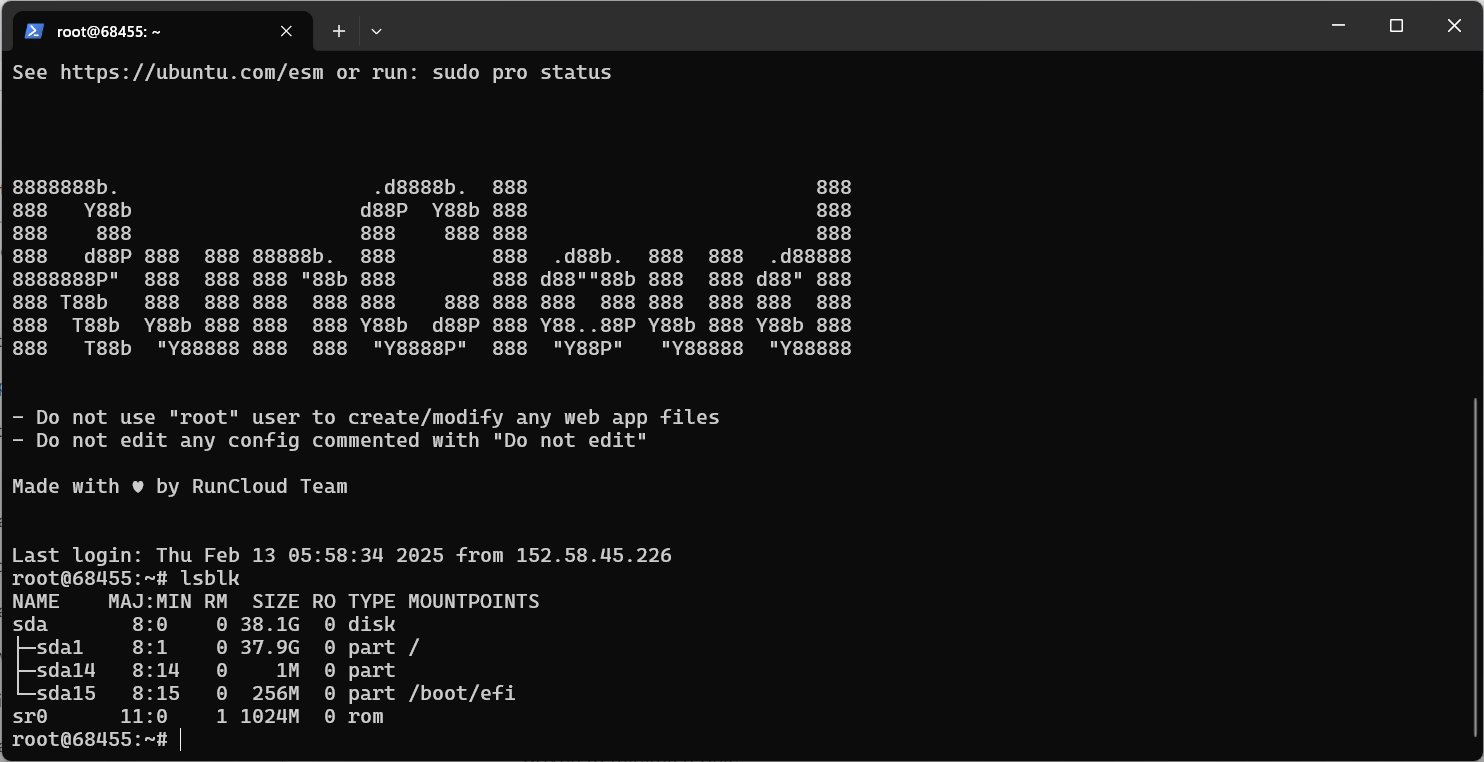
    2. Access Patchstack Options: Once activated, you must integrate your WordPress website with your Patchstack account. In your Patchstack dashboard you can access the Patchstack configuration options by navigating to “Hardening” > “Login Protection” within your Patchstack dashboard. This section provides various settings related to login security, including the IP whitelisting feature.
    1. Add IP Addresses to Whitelist: Within the “Login Protection” settings, locate the section dedicated to whitelisting IP addresses. Here, you can enter the IP addresses you wish to allow access to your WordPress admin area, ensuring they are never blocked due to failed login attempts or other security measures. Each IP address must be entered on its own line, and Patchstack supports several formats for defining IP ranges.
      The following formats are accepted:
      • 127.0.0.1: A specific IP address.
      • 127.0.0.*: A wildcard, allowing all IP addresses within the 127.0.0 range.
      • 127.0.0.0/24: CIDR notation specifies a range of IP addresses (in this case, 127.0.0.1 to 127.0.0.255).
      • 127.0.0.0-127.0.0.19: An IP range using a hyphen to define the start and end of the range.
    2. Save Changes: After adding the desired IP addresses to the whitelist, click the “Save Changes” button at the bottom of the page. This action will save your configurations and activate the IP whitelisting, ensuring that only the specified IP addresses can access your WordPress admin area without being subject to blocking rules.

    Suggested Read: How to Set or Change System Hostname in Linux

    Wrapping Up: Who Should Restrict Admin Access by IP Address?

    The short answer: nearly everyone running a WordPress site should strongly consider restricting admin access by IP address. While it might seem like an advanced security measure, the risk of leaving your admin area wide open to brute-force attacks and unauthorized logins far outweighs the perceived complexity.

    Protecting your WordPress backend is very important whether you’re a small business owner, a blogger, or a large enterprise.

    RunCloud’s intuitive interface significantly simplifies blocking unwanted IPs and managing server configurations. Editing your .htaccess file (for Apache servers) or your NGINX configuration becomes a breeze within the RunCloud panel.

    Compared to restrictive hosting panels, RunCloud offers limitless flexibility. You have complete control over your server environment, and RunCloud allows you to optimize your WordPress site for maximum security and performance.

    Speaking of performance, RunCloud’s optimized server configurations, combined with the added security of IP restriction, can lead to a faster, more responsive website. By blocking malicious traffic before it even reaches your server, you reduce the load on your resources, which improves page load times and enhances the overall user experience.

    Sign up for RunCloud today.

    FAQs on Restricting WordPress Admin Access by IP Address

    Can I restrict access to multiple IP addresses?

    You can restrict access to the WordPress admin area (/wp-admin) to multiple specific IP addresses by adding multiple Allow from lines in your .htaccess file. This allows trusted team members or developers from different locations to access the backend. RunCloud’s robust server management features and built-in web firewalls can complement this by providing additional layers of security beyond IP restrictions.

    What happens if my IP address changes?

    If your IP address changes, you will be locked out of your WordPress admin area. You’ll need to update the .htaccess file with your new IP address. Consider using a static IP address or a dynamic DNS service if your IP changes frequently to avoid constant updates.

    Is it safe to edit the .htaccess file?

    Editing the .htaccess file can be risky if done incorrectly, as it can potentially cause website errors or make it inaccessible entirely.

    What security plugins work best for IP restriction?

    Patchstack provides a user-friendly interface and additional security features beyond simple IP restrictions. These features work well with RunCloud’s server-level security and built-in firewalls.

    How do I know if my site is secure after making changes?

    After implementing IP restrictions, test the configuration by attempting to access the WordPress admin area from an IP address that is not allowed. If you are blocked, the restriction is working correctly.

    What are the risks of not restricting admin access?

    Failing to restrict access to your WordPress admin area significantly increases the risk of brute-force attacks, unauthorized access, and potential website compromise. Hackers can exploit vulnerabilities or use stolen credentials to gain control of your site, leading to data breaches, malware injection, and reputational damage. RunCloud’s web application firewall helps mitigate some of these risks, but IP restriction adds a crucial layer of defense.

    How can I temporarily allow access from another location?

    To temporarily allow access from another location, you can add appropriate rules to whitelist the new IP address in the .htaccess file. Remember to remove it when access is no longer needed to maintain security.

  • Introducing Support for MySQL on RunCloud

    Introducing Support for MySQL on RunCloud

    We’re excited to announce that RunCloud now supports MySQL alongside MariaDB, giving you more freedom to choose the database that best fits your web applications.

    This addition reflects our commitment to providing flexible, enterprise-grade solutions for developers and businesses of all sizes.

    Starting today, when deploying a server on RunCloud, you can choose between MariaDB or MySQL as your preferred database system. This feature is available for all RunCloud users running Agent 2.9.6 and above.

    Why MySQL Support Matters

    While MariaDB has served our users well, we recognize that many developers and organizations have specific requirements or preferences for MySQL, including:

    • Direct MySQL Compatibility: Some applications are specifically optimized for MySQL
    • Enterprise Familiarity: Many teams have existing MySQL expertise and tooling
    • Ecosystem Integration: Certain tools and frameworks work best with MySQL
    • Migration Flexibility: Easier transitions for projects moving from other platforms

    Getting Started

    To start using MySQL on your RunCloud servers, ensure your RunCloud Agent is updated to version 2.9.6 or higher. The easiest way to do this is to deploy a new server (or restore backups of existing web applications to a new server that is configured to use MySQL).

    Migration Support

    We understand that many users may want to transition their existing web applications from MariaDB to MySQL.

    Here’s what you need to know about migration options:

    Server Migration

    • New Servers Required: To use MySQL, you’ll need to deploy new servers. Existing MariaDB servers cannot be converted to MySQL.
    • Clean Installation: This approach ensures optimal performance and reliability by avoiding potential compatibility issues.

    Application Migration Options

    • Full Backup Migration: You can successfully migrate web applications using full backup restoration
      • Clone existing MariaDB sites to MySQL servers
      • Restore from full backups of MariaDB sites
      • Bidirectional support: Migration works both from MariaDB to MySQL and vice versa
    • Incremental Backups: Please note that incremental backup restoration is not supported for cross-database migrations

    Best Practices

    • Test migrations in a staging environment first
    • Schedule migrations during low-traffic periods
    • Create full backups before attempting any migration

    Try MySQL on RunCloud Today

    Whether you’re launching a new project or managing existing applications, RunCloud’s new MySQL support gives you more freedom to choose the right database for your needs.

    To get started:

    1. Log in to your RunCloud dashboard
    2. Deploy a new server
    3. Select MySQL as your database system

    Need help getting started? Our support team is ready to assist you at support@runcloud.io.


    Note: MySQL support requires RunCloud Agent 2.9.6+4 or higher. Please ensure your agent is updated before attempting to use MySQL features.

  • How to Remove WordPress Default Image Sizes? (EASY GUIDE)

    How to Remove WordPress Default Image Sizes? (EASY GUIDE)

    Is your WordPress site bloated with unnecessary image sizes, slowing down your performance and hogging precious server space?

    WordPress automatically creates multiple default image sizes when you upload images. These default WordPress image sizes can quickly become a burden if you have a lot of media files on your server.

    This guide will teach you how to remove default image sizes using code snippets in your functions.php file and convenient plugins.

    What are WordPress’s Default Image Sizes?

    WordPress automatically generates several sizes of each image you upload to your media library by default. This allows the WordPress engine to use a custom image with appropriate image quality to cater to various display scenarios across your website. Different use cases often have vastly different image quality requirements. For example, you can get away with serving users low-quality thumbnail images on mobile devices, but if you are displaying a photo album on a large screen, then you would most likely want to use a higher-resolution image.

    WordPress automatically creates default size formats for different scenarios, which act as pre-defined variations of the original image. This approach allows WordPress to serve the most appropriate version based on the context, such as thumbnails, featured images, or larger displays within the content.

    Suggested read: How To Install ImageMagick PHP Extension (Imagick)

    While this system is designed to be helpful, it can sometimes create unnecessary image files, especially if your theme or website design doesn’t use all of these default sizes. This problem is exacerbated if you have a great many images on your website.

    List of Default Image Sizes in WordPress:

    In your WordPress dashboard, navigate to “Settings” > “Media” to view the current media settings configured on your WordPress website.

    media image size in WordPress
    • Thumbnail: Typically, a square image (default is 150×150 pixels) is intended for use in galleries, widgets, and other small display areas.
    • Medium: A mid-sized image (default maximum width and height are 300 pixels) is used in content areas where a larger thumbnail is needed.
    • Large: A larger image size (default maximum width and height are 1024 pixels) is suitable for displaying images within articles or pages requiring more detail.
    • Full Size: The dimensions of the original uploaded image. This is not technically a “default size” in the same sense as the others, as WordPress doesn’t resize the original upload, but it’s always available.

    In addition to the above-mentioned image sizes, themes and plugins can register their own custom image sizes, which can further increase the number of images generated when uploading.

    In the above screenshot, we can see multiple copies of the same image stored in the wp-content folder, each with a different resolution.

    Suggested read: What Are Docker Images And How To Use Them

    Why Remove Default Image Sizes?

    While the automatic creation of multiple image sizes is helpful for most people, there are several compelling reasons to remove or disable some of the default sizes in WordPress.

    The primary reasons are to reduce server storage consumption and improve website performance. Each image uploaded results in multiple saved versions, which can quickly fill up valuable disk space, especially for sites with an extensive media library or frequent image uploads. This excessive storage usage can impact server performance and increase hosting costs, especially with providers that charge based on storage usage.

    Additionally, generating unnecessary image sizes can negatively affect website loading times. Even though WordPress only serves the appropriate-sized image, the server still has to process and create all the various sizes during the upload process, which can consume valuable server resources. Less efficient hosting setups exacerbate this slowdown.

    Moreover, if your theme or design doesn’t use all of these default sizes, you’re essentially creating files that are never used, adding unnecessary weight to your website and potentially impacting user experience.

    By removing unused default image sizes, you can conserve storage space, improve website speed, and enhance overall performance, directly leading to a better experience for visitors and website administrators.

    Suggested read: 10 Best WordPress Management Tools To Easily Manage Multiple Websites

    How to Remove Default Image Sizes in WordPress

    There are primarily two methods for removing default image sizes in WordPress: using plugin settings (if available) or code snippets within your theme’s functions.php file. The code snippet method offers more granular control but requires a basic understanding of PHP and should be approached with caution.

    From WP Admin Settings (Plugin Method)

    The simplest way to remove default image sizes is through a plugin. Many plugins offer this functionality directly within their settings panel; if you’re unsure which plugin to pick, we recommend reading a deep dive into image optimization plugins written by security experts at Patchstack.

    We will use the EWWW Image Optimizer for this tutorial to show you how to do this. Follow the instructions below to change the default image generation behavior of WordPress:

    1. Install and Activate the Plugin: Search for the “EWWW Image Optimizer” plugin and install it through your WordPress admin dashboard.
    2. Access Plugin Settings: In the WordPress admin panel, navigate to the plugin’s settings page and select “Save storage space” during initial installation.

    Suggested read: WordPress.com vs. WordPress.org – The Differences & Which To Choose

    1. Configure Plugin: On the next screen, you will be asked to configure the basic settings for this plugin. Leave these settings to their default value and click “Save Settings”.
    1. Disable Unwanted Sizes: After configuring the plugin, navigate to the “Resize” tab in the plugin’s interface. On this screen, simply uncheck the boxes next to the sizes you wish to disable.

    Suggested read: 3 Free Ways To Migrate WordPress From Shared Hosting To Cloud Server

    1. Save Changes: Save the changes to apply the new settings. From this point forward, WordPress will no longer generate the disabled image sizes upon uploading new images.

    Using Code Snippets (functions.php Method)

    This method involves adding code directly to your theme’s functions.php file.

    We strongly recommend using a child theme to prevent these changes from being overwritten during theme updates. Also, incorrect code can break your site, so proceed cautiously and always back up your functions.php file.

    1. Access your functions.php file: Access this file through your WordPress admin panel by going to Appearance > Theme File Editor. Alternatively, you can access the file directly using an FTP client or “File Manager” from your RunCloud dashboard.
    1. Add code to remove image sizes: To remove specific default image sizes, add the following code snippets to your functions.php file:
    function remove_default_image_sizes( $sizes ) {
        unset( $sizes['thumbnail'] );   // Remove thumbnail size
        unset( $sizes['medium'] );      // Remove medium size
        unset( $sizes['large'] );       // Remove large size
        return $sizes;
    }
    add_filter( 'intermediate_image_sizes_advanced', 'remove_default_image_sizes' );
    1. Save the functions.php file: After adding the code, save the changes to your functions.php file. This will prevent WordPress from generating the specified image sizes for future uploads. In the following screenshot, we can see that WordPress only created one copy of the image (as we configured) – no additional copies of the image were created.

    Suggested read: The Complete WordPress Speed Optimization Guide

    Best Practices After Removing Default Image Sizes

    After removing default image sizes, following these best practices is recommended to ensure your website displays correctly and remains optimized.

    1. Regenerating Thumbnails: Removing default image sizes only affects future image uploads. Existing images will still have the previously generated sizes. You must regenerate thumbnails to clean up your media library and reclaim storage space.
    2. Checking for Broken Images: After removing image sizes and regenerating thumbnails, it’s recommended to thoroughly check your website for broken images.
    3. Manually Review Pages: Visit your website’s pages and posts, paying close attention to areas where images are displayed, such as galleries, featured images, and within content.
    4. Use a Broken Link Checker: Consider using a broken link checker plugin or online tool to scan your website for broken image links. These tools can identify images that are no longer accessible due to the removal of their corresponding sizes.
    5. Address Broken Images: If you find broken images, replace them with correctly sized versions or adjust your theme’s code to use the appropriate image sizes. WordPress may automatically try to use a similar image size in some cases, so you may not notice broken images unless the appropriate sizes have been completely removed.

    Suggested read: The Best WordPress Caching Plugins To Speed Up Your Site (2025)

    Final Thoughts

    Optimizing your WordPress image handling is a powerful way to improve your website’s performance and user experience. Understanding the default image sizes can significantly reduce server load, conserve storage space, and deliver a faster, more responsive website to your visitors.

    Managing and optimizing a WordPress website can feel overwhelming, but that’s where RunCloud comes in.

    We offer a powerful, intuitive platform to simplify WordPress hosting and unlock peak performance. Forget about complex server configurations and technical headaches. RunCloud empowers you with easy-to-use tools to deploy, manage, and scale your WordPress sites on the cloud infrastructure of your choice.

    We handle the server-side optimizations so you can focus on what matters most: creating amazing content and growing your audience.

    With RunCloud, you get:

    • Blazing-Fast Performance: Optimized server stacks, built-in caching, and easy Cloudflare integration.
    • Simplified Server Management: Our intuitive control panel allows you to easily manage your servers and WordPress sites.
    • Automatic Backups: Rest easy, knowing your website is safe and secure with automated backups.
    • Enhanced Security: Robust security features protect your website from threats, including firewalls and malware scanning.

    Sign up for RunCloud today!

    FAQs on Removing WordPress Default Image Sizes

    Why should I remove default image sizes?

    WordPress generates multiple image sizes by default, bloating your server space and slowing down your website. Removing unused sizes streamlines your media library, leading to faster loading times.

    Will removing default sizes affect my existing images?

    Removing default image sizes only prevents future uploads from generating those specific sizes. Your already uploaded images will remain untouched.

    How can I restore default image sizes if needed?

    You can restore default image sizes by re-enabling the corresponding code in your functions.php file (if you used that method) or deactivating/reactivating the plugin that removed them.

    What plugins can help with image size management?

    Several plugins, like “ThumbPress” or “Disable Generate Thumbnails”, offer user-friendly interfaces for managing and disabling default WordPress image sizes.

    Is it safe to modify the functions.php file?

    Modifying the functions.php file is generally safe if done correctly and carefully. Always back up your functions.php file or use a child theme before making changes. Incorrect code can break your site, so proceed with caution.

    How do I know which image sizes to keep?

    Analyze your theme’s code and website’s layout to identify which image sizes are used in your design. Only keep the image sizes actively displayed on your pages; this will ensure the best performance when delivering images to users.

    What is the impact on SEO when removing image sizes?

    Removing unnecessary image sizes can positively impact SEO by improving your website’s page speed, a key ranking factor for search engines. Faster loading times enhance user experience and reduce bounce rates, potentially boosting your search engine rankings.

  • SQLite vs MySQL vs PostgreSQL – The Search For The “Best” Relational Database Management System

    SQLite vs MySQL vs PostgreSQL – The Search For The “Best” Relational Database Management System

    Choosing the right relational database management system (RDBMS) is like picking the foundation for a skyscraper: get it wrong, and your entire application could wobble under pressure.

    Buzzwords such as SQLite, MySQL, and PostgreSQL are dominating the open-source RDBMS communities, but many developers want to know one simple thing:

    Which one aligns with their project’s scale, security, and performance needs?

    This guide discusses these three database management systems to help you make an informed decision. You’ll explore their advantages and disadvantages, from SQLite’s serverless architecture for embedded applications to MySQL’s client-server model powering multi-user web applications and PostgreSQL’s ACID-compliant engine built for complex queries and enterprise-grade scalability.

    By the end, you’ll understand:

    1. When to leverage SQLite’s lightweight portability vs. MySQL’s replication or PostgreSQL’s extensibility.
    2. How security features such as user authentication vary across platforms.
    3. Why scalability demands differ: horizontal scaling vs. cluster.

    Let’s get started!

    What Is SQLite?

    SQLite is a serverless, self-contained RDBMS designed for simplicity and portability. Unlike traditional databases, SQLite operates differently from conventional databases you might be familiar with. Instead of running as a separate service that your application talks to, SQLite integrates directly into your application’s code. Its lightweight architecture makes it ideal for scenarios where minimal setup and resource usage are critical.

    When building a mobile app, SQLite becomes part of your application package, requiring no additional installation or configuration steps for your users.

    Let’s explore what makes SQLite unique through a real-world scenario. Imagine you’re developing a note-taking app. With SQLite, you can create a database that’s just a single file on the user’s device. Here’s how you might initialize a connection:

    import sqlite3
    # Creates a new database file or connects to existing one
    conn = sqlite3.connect('notes.db')
    # Create a table for storing notes
    conn.execute('''
        CREATE TABLE IF NOT EXISTS notes (
            id INTEGER PRIMARY KEY,
            title TEXT NOT NULL,
            content TEXT,
            created_at TIMESTAMP DEFAULT CURRENT_TIMESTAMP
        )

    Advantages of SQLite

    SQLite solves several problems that junior developers commonly encounter. Its ACID compliance ensures your data remains consistent even if your application crashes unexpectedly. This means if your user is saving a note and their battery dies, they won’t lose their data.

    The database is incredibly portable – it’s just a single file that you can copy, back up, or move between devices. This makes development and testing straightforward. You can even email the entire database to a colleague for debugging!

    Finally, the best part is that you don’t need to configure anything. Once you integrate the library into your application code, you can start using it without needing to start a separate database daemon.

    Suggested read: How to Connect a MySQL Database to PHP (A Developer’s Guide)

    Disadvantages of SQLite

    SQLite is a great tool, but it isn’t suitable for every scenario. It can become a bottleneck when multiple users need to write to the database simultaneously. This is because it implements database-level locking rather than table – or row-level locking.

    For example, if you’re building a multi-user chat application where hundreds of messages might be written per second, SQLite would struggle because it can only handle one write operation at a time. In such cases, a client-server database like PostgreSQL would be more appropriate.

    SQLite’s lack of built-in user management means you’ll need to handle authentication and authorization at the application level rather than relying on database-level security features. This security model relies entirely on file system permissions, which means anyone with access to the database file can potentially read or modify its contents without any authentication.

    Regarding scalability, SQLite starts showing its limitations once your dataset grows beyond a few gigabytes or when you need to handle multiple concurrent users making frequent write operations. The single-file architecture that makes SQLite so portable becomes a bottleneck in complex environments where multiple users need to perform simultaneous write operations, as the entire database file gets locked during writes.

    When to Use SQLite?

    SQLite excels in specific scenarios that you’ll often encounter as a developer. It’s perfect for:

    • Creating local data stores in mobile applications where you need to cache data for offline use. Consider how video games store your game progress offline – SQLite would be ideal.
    • Developing prototypes or proof of concepts where you need a quick database setup without infrastructure overhead. You can later migrate to a more robust solution if required.
    • Building embedded applications where installing and maintaining a separate database server would be impractical or impossible. Think of IoT devices or desktop applications that need to store structured data locally.

    Suggested read: How to Change/Reset MySQL Root Password on Ubuntu Linux?

    What Is MySQL?

    MySQL is an open-source RDBMS renowned for its speed, reliability, and ease of use. For these reasons, it has become the backbone of modern web applications and powers many websites and applications you use daily.

    MySQL operates on a client-server architecture, which means it runs as a separate service that your applications connect to rather than being embedded within them. This architecture creates a clear separation between your application and the database, allowing multiple applications to access the same data source securely.

    To help you visualize this, imagine a restaurant where waiters (your applications) take customer orders and communicate with the kitchen (MySQL server) to store and retrieve information.

    Here’s an example of how you might connect to MySQL in a Python application:

    import mysql.connector
    # Establish connection to MySQL server
    connection = mysql.connector.connect(
        host="localhost",
        user="your_username",
        password="your_password",
        database="your_database"
    )
    # Create a cursor to execute queries
    cursor = connection.cursor()
    # Create a table for storing user data
    cursor.execute('''
        CREATE TABLE IF NOT EXISTS users (
            id INT AUTO_INCREMENT PRIMARY KEY,
            username VARCHAR(50) NOT NULL UNIQUE,
            email VARCHAR(100) NOT NULL,
            created_at TIMESTAMP DEFAULT CURRENT_TIMESTAMP
        )
    ''')

    Advantages of MySQL

    MySQL’s strength lies in its ability to handle complex data relationships while maintaining impressive performance. When building a web application, MySQL’s transactional support ensures that your data remains consistent even during high-traffic periods. For instance, in an e-commerce system, MySQL can handle thousands of simultaneous orders while ensuring that product inventory stays accurate and customer data remains secure.

    MySQL provides a rich set of data types that help you store information efficiently. These data types are specialized containers: you wouldn’t store soup in a shopping bag or groceries in a thermos. Similarly, MySQL offers specific data types for different kinds of information. For numerical data, you have options like INT for whole numbers and DECIMAL for precise financial calculations. VARCHAR allows for flexible strings for text, while TEXT handles larger documents.

    Security is another strong point of MySQL’s design. Unlike simpler databases, MySQL implements a sophisticated user management system that lets you control exactly who can access what data. You can grant specific permissions to different users, much like how a building’s security system might give different access cards to employees based on their roles.

    MySQL database credentials in RunCloud dashboard

    Disadvantages of MySQL

    Unlike other database systems that strictly follow SQL standards, MySQL takes a more flexible approach that can sometimes create unexpected challenges. For example, if you’re writing a query that works perfectly in PostgreSQL, you might find that the same query fails or behaves differently in MySQL because it handles certain SQL functions and features uniquely. This becomes particularly important when you’re working on projects that might need to switch database systems in the future, as you’ll need to review and potentially rewrite your queries to ensure compatibility carefully.

    Furthermore, while you can scale MySQL server vertically by adding more resources such as RAM or CPU to your existing server, it faces challenges when you need to scale horizontally by adding more servers.

    If you’re building an application that needs to store and query complex JSON documents, you’ll find that MySQL’s JSON support, while improved in recent versions, still lacks some of the powerful features you might find in MongoDB or PostgreSQL. Similarly, if you’re working with location-based services, MySQL’s GIS capabilities might require additional workarounds or external tools to achieve what other databases offer out of the box.

    Suggested read: MariaDB vs MySQL – A Detailed Comparison in 2024

    When to Use MySQL

    MySQL shines brightest in scenarios where you need a reliable, well-supported database for web applications. It’s particularly well-suited for:

    • Building content management systems where you need to handle multiple users accessing and modifying content simultaneously. Consider how a news website manages numerous editors updating articles while thousands of readers access the content.
    • Maintaining transactional integrity through its robust ACID compliance. This becomes particularly valuable in scenarios like financial systems or e-commerce platforms, where MySQL can maintain a reliable audit trail of all transactions while guaranteeing that related operations (like deducting money from one account and adding it to another) remain consistent even if system failures occur during the process.

    Pro Tip: Use RunCloud to simplify MySQL or PostgreSQL management. Our platform offers one-click PHPMyAdmin installation, automated backups, and real-time monitoring (ideal for WordPress sites and high-traffic apps). Explore RunCloud’s database tools to streamline your workflow.

    What Is PostgreSQL?

    PostgreSQL, often called Postgres, is an open-source object-relational database management system (ORDBMS) that provides relational database principles and object-oriented features. This means you can store data in traditional tables while also defining custom data types, operators, and functions tailored to your application’s needs. For example, a logistics app might create a location data type to natively handle latitude and longitude coordinates.

    PostgreSQL is renowned for its extensibility and strict adherence to SQL standards, making it one of the best choices for applications demanding precision and scalability. It offers advanced features such as multi-version concurrency control (MVCC), which allows multiple users to read and write data simultaneously without locking conflicts.

    This feature is immensely useful for large e-commerce platforms where hundreds of users browse products while admins update inventory. Additionally, its support for JSONB (a binary JSON format) enables efficient querying of unstructured data, such as user profiles with varying attributes.
    Suggested read: How To Install phpMyAdmin Easily Using RunCloud

    Advantages of PostgreSQL

    PostgreSQL provides unmatched flexibility and performance for complex workloads. It supports advanced data types, such as geometric shapes for mapping apps, network addresses for IP management, and JSONB for semi-structured data. This allows developers to model diverse datasets without workarounds. For instance, a ride-sharing app can store and query GPS coordinates directly using PostgreSQL’s POINT data type.

    Unlike some databases that sacrifice consistency for speed, PostgreSQL maintains reliability even during high concurrency. Developers can also use its extensible catalog system, which stores metadata about tables, functions, and data types to build customizations and modify default behavior. For example, you could build a custom indexing method to optimize search queries for a niche use case.

    Furthermore, PostgreSQL is part of a thriving open-source community that provides extensive documentation and plugins. This ecosystem allows teams to implement features like real-time analytics or full-text search without relying on external tools.

    Disadvantages of PostgreSQL

    While PostgreSQL is powerful, it does have its own set of trade-offs. Its memory usage can challenge resource-constrained environments as each connection allocates ~10 MB of RAM. For example, a server with 1 GB of memory might struggle with over 100 concurrent connections. In these cases, scaling vertically (upgrading hardware) often becomes necessary, which can increase costs.

    Additionally, newcomers may find PostgreSQL’s advanced features overwhelming. Setting up replication or configuring write-ahead logging (WAL) requires deeper expertise than MySQL’s more straightforward replication tools. Furthermore, while cloud providers such as AWS and Google Cloud offer managed PostgreSQL services, these options are fewer than MySQL’s widespread integrations, potentially complicating DevOps workflows.

    Suggested read: How to Install WordPress with Apache on Ubuntu (2025)

    When to Use PostgreSQL

    PostgreSQL is often not recommended for beginner-friendly projects. You should choose PostgreSQL when your project demands rigorous data integrity, complex queries, or specialized data types. Consider using PostgreSQL if you plan to use one of its advanced features, such as:

    1. Data Analytics: Use window functions or JSONB aggregation for business intelligence tools.
    2. Geospatial Applications: Leverage PostGIS to manage location data for mapping services.
    3. Enterprise Systems: Ensure ACID compliance for banking or healthcare software where audit trails are mandatory.
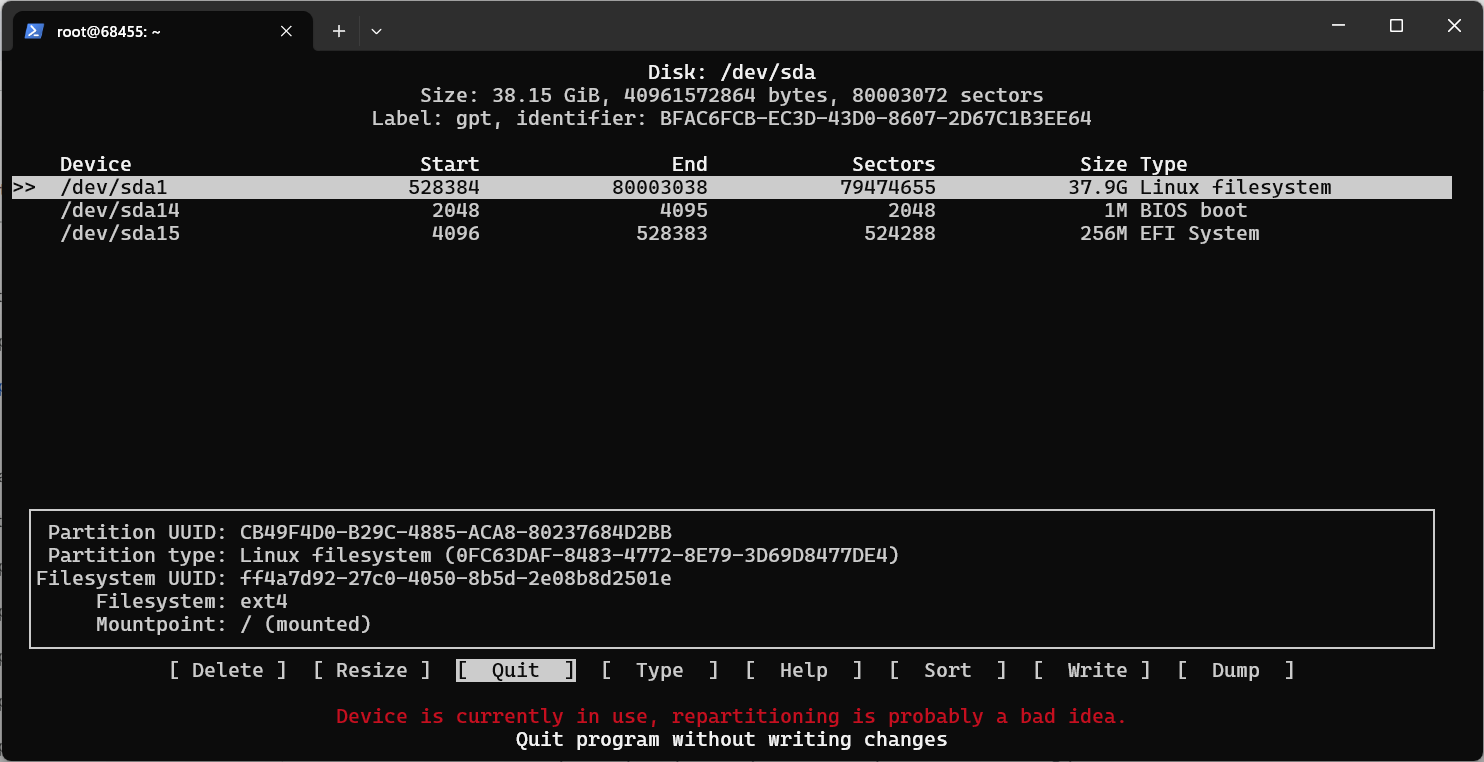
    SQLite vs. MySQL vs. PostgreSQL: Detailed Comparison Table

    FeatureSQLiteMySQLPostgreSQL
    ArchitectureServerless, embeddedClient-serverClient-server
    ConcurrencySingle-writerRow-level lockingMVCC for high concurrency
    ScalabilityLimited to local useVertical scalingHorizontal/vertical scaling
    SecurityFile system-dependentAdvanced user roles, SSL supportRow-level security, Transparent Data Encryption options
    Data TypesBasic (TEXT, INTEGER, BLOB)Standard + extensionsAdvanced (JSONB, UUID, Geometry, etc.)
    Use CaseEmbedded apps, testingWeb apps, CMSEnterprise systems, analytics

    Wrapping Up: Which One Should You Choose?

    This guide has provided an overview of the most popular database management tools available. If you are in a rush, you should just note the following:

    • SQLite excels in simplicity for small projects or environments with limited resources.
    • MySQL strikes a balance for web apps needing speed and ease of management.
    • PostgreSQL shines in complex, data-intensive applications requiring flexibility and compliance.

    If you need a modern web hosting platform for your business, you should look no further than RunCloud.

    RunCloud simplifies MySQL and PostgreSQL management with intuitive dashboards, security hardening, and automated backups. Learn how to connect MySQL to PHP or install WordPress with Apache seamlessly.
    Start using RunCloud today

    FAQs on SQLite vs. MySQL vs. PostgreSQL
    Why is SQLite so popular?

    SQLite’s serverless design and portability are perfect for embedded systems and lightweight apps. It is ACID compliant and requires zero-configuration setup, which reduces development overhead, especially for mobile or IoT projects.

    Can SQLite replace MySQL?

    Yes, but only for small-scale, single-user applications. SQLite lacks MySQL’s concurrency and security features, which makes it unsuitable for web apps or high-traffic environments.

    What are the limitations of SQLite?

    SQLite struggles with multi-user access, large datasets (>1 TB), and concurrent write operations. Additionally, it doesn’t handle security, and access control depends entirely on file system permissions.

    Is PostgreSQL better than MySQL for data analysis?

    Yes. PostgreSQL supports advanced JSONB queries, window functions, and custom aggregates. This makes it superior for analytics. MySQL focuses on transactional speed rather than complex analytics.

    Which database is best for scalability?

    PostgreSQL leads with horizontal scaling via partitioning and sharding. MySQL requires tools like NDB Cluster for similar scalability, while SQLite is not designed for distributed setups.