Author: RunCloud Team

  • WordPress Multisite & WaaS Platforms – Everything You Need To Know

    WordPress Multisite & WaaS Platforms – Everything You Need To Know

    If you run an agency in the WordPress industry, the chances are you’ve heard of & even considered the WaaS (website as a service) business model as a part of your growth strategy.

    So, in this guide, we’ll cover everything from what WaaS & WordPress Multisites are, to how you can plan, launch and run a successful website as a service business yourself.

    What’s the biggest challenge you face while setting up your WaaS business? Is it setting up a proper ‘Website as a Service’ business model that can help you to host 100s, if not thousands, of blogs and websites together that generate recurring revenue, creating a smooth onboarding experience, or knowing the framework and platforms you need to develop dynamic web applications?

    Whatever the challenge might be, this article will tell you everything you need to know about WaaS and how WordPress Multisite can be used as a business model for WaaS.

    What Is WordPress Multisite & WaaS?

    In short, WordPress Multisite is a way of adding multiple websites to a single WordPress installation. Activating it is super simple, not dissimilar to installing WordPress the normal way (which we’ll cover later), and once enabled, it’ll let you create sites that belong to your multisite network.

    It’s a powerful piece of tech, and many big businesses have been built on top of this technology using what is commonly referred to as the WaaS (or, website as a service) business model.

    WordPress Multisite & Website As A Service Examples

    Let’s take a look at some of the most successful WordPress Multisite & WaaS examples:

    The WordPress.com Platform
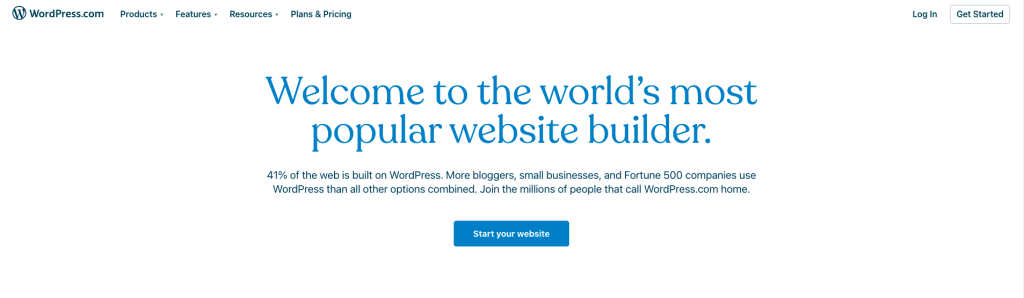
    The WordPress.com WaaS Platform

    A perfect example to reference when discussing the power and scope of the website as a service business model is WordPress.com. Built on top of the self-hosted WordPress.org content management system, it uses WordPress multisite to power millions of blogs and websites in their multisite network.

    WordPress acquires its users by offering free accounts to anyone who wants to set up a website with a free, branded subdomain included. And then, once you’re in, some features are limited in order to tempt people into upgrading to a paid account.

    WordPress.com launched back in 2005 and continues to build on a solid reputation on the back of this WaaS model. It worked then and it still works to this day. Of course, if you were to launch your own WaaS, chances are you’ll choose a slightly more specific market to cater to (at least, initially) to fuel your growth – we’ll cover strategy in a separate section later in this article.

    Incsub’s CampusPress & Edublogs Platforms

    Incsub's Edublogs WaaS Multisite Platform

    Another well-known example of a business that built and seriously profited off of the WaaS & multisite model is WPMU DEV’s parent company – Incsub.

    Incsub owns CampusPress & Edublogs, both of which are great examples of WordPress multisites. They’re great examples of how other businesses can still launch a WaaS platform and profit off of it today; provided they carve out a section of the market that they know how to approach, sell, & market to.

    Normal WordPress Installations vs. WordPress Multisite – What Are The Key Differences?

    To run a profitable WaaS business, your success depends on a constant stream of clients needing to get work done.

    However, this kind of workload is impossible to manage when you have to build a completely new website from scratch – complete with plugins and installations.

    This is where WordPress Multisite comes in, and provides a huge quality of life boost compared to doing things manually.

    The top three advantages of WordPress Multisite are:

    1. The number of individual websites – You can run/update any number of websites through WordPress Multisite easily, without having to micromanage each one individually.
    2. User roles – Activating WordPress Multisite enables the network and super admin roles, meaning you can delegate a portion of your workload to someone else.
    3. Easy access to the whole network – All the sites that you create in the network are under your control, and you can manage/customize them according to your requirements.

    Also, with WordPress Multisite, a single click can update common plugins across all websites.

    How To Create Your Own Website As A Service Platform With RunCloud (New 🎉)

    Both deploying & managing your website as a service (WaaS) platform as you grow has never been easier than it is with RunCloud thanks to our all-new Domain & SSL V2 support.

    Today, we’re beyond excited to announce a range of improvements to our domain & SSL functionality as well as our integration with WP Ultimo – the best solution for businesses looking to launch their own WaaS today.

    So, without further ado – let’s dive right in to have a closer look at all the changes. To do so, we’ll kick things off by deploying a web application on this existing server we’ve added to this account.
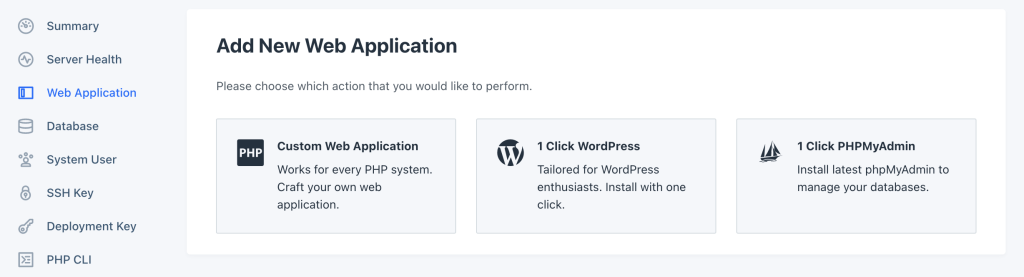
    RunCloud New Web Application

    When doing so – you’ll now notice three new options:

    #1 – The ability to automatically enable the www version of this domain to redirect to your preferred domain version (i.e. www to non-www or vice versa)
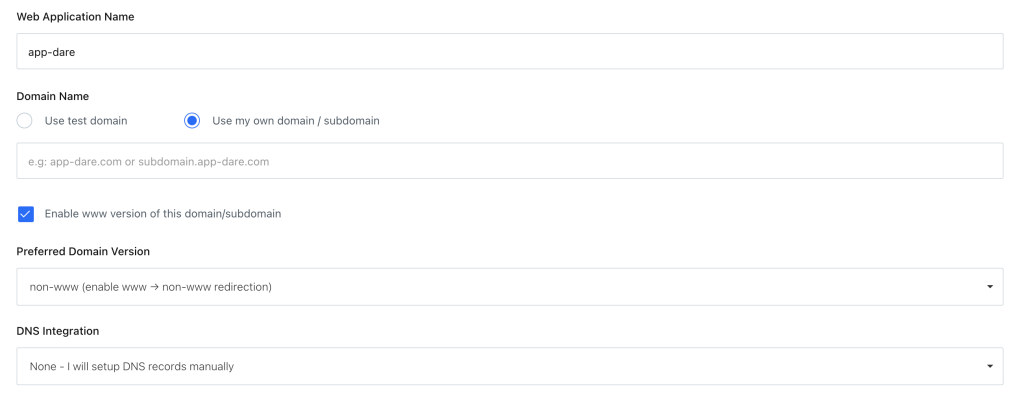
    This first new setting is simply designed to let you decide as well as easily configure which domain version you wish to use right as you create your web application (to automate the process and make sure it’s just that one additional thing you no longer have to take into consideration).

    #2 – The ability to choose your SSL/TLS method

    The new option to select SSL/TLS Encryption methods has two modes. Advanced and Basic. The advanced mode issues a different SSL certificate for every domain added to this web application while when set to basic, a single SSL certificate is issued and used for every single domain on this web application.

    And #3 – the ability to enable AutoSSL…

    And, when using the Advanced method – you’ll also be able to take advantage of RunCloud’s AutoSSL functionality to automatically deploy an SSL certificate for every domain added to this web application.

    Thanks to the Advanced method and AutoSSL, you no longer need to worry about hitting the Let’s Encrypt 100-domain limit, all while still enjoying the benefits of SSLs on all of the domains and subdomains that are attached to this web application.

    And while for most use-cases, doing so is perfectly fine – issuing a single certificate and private key for multiple domains/subdomains can become messy at scale when new domains are attached wherein an issue can arise if the SSL certificate fails to be re-issued affecting all websites that relied on that certificate.

    And last but not least, this also improves security as people snooping around SSL certificate records for all the sites that you handle the hosting for won’t have a field day when they can just scrape all of the people they know are in your WaaS (for example) by looking at the SSL certificate. This is perfect for WordPress WaaS and multisite platforms with multiple domains as well as custom SaaS platforms that use RunCloud to manage their servers and let customers connect their own domains so that they can always automatically issue an SSL certificate for those added domains.

    How To Enable WordPress Multisite

    WordPress Multisite is built-in, but always disabled by default. So to get started with your own multisite network on RunCloud, simply use our 1-click WordPress installation on OpenLiteSpeed (or NGINX).

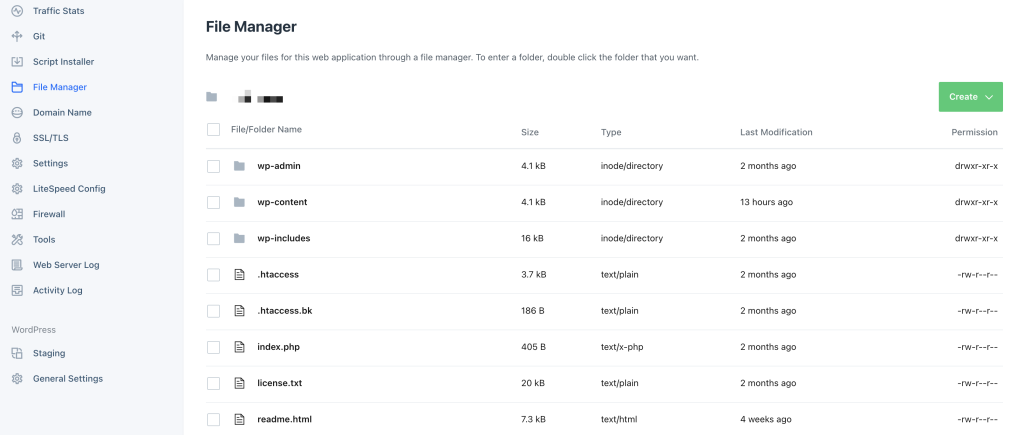
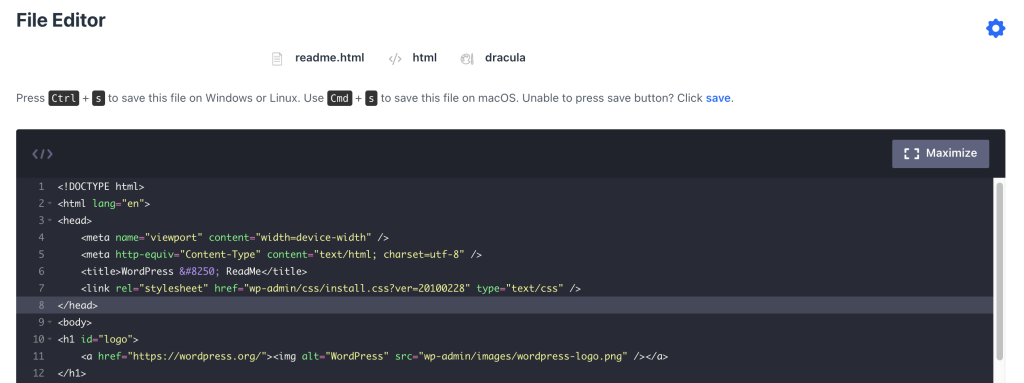
    After which, simply navigate to our file manager to edit your wp-config.php file to enable multisite.

    To do so, you simply need to add the following code to your wp-config.php file just before the /* That’s all, stop editing! Happy blogging. / line.

    /* Multisite */

    define('WP_ALLOW_MULTISITE', true); */

    Once you’re done simply save the changes using RunCloud’s file manager and the change will automatically be propagated and deployed to your server instantly.

    Once enabled, you will still need to set up the multisite network. WordPress walks you through the process step-by-step, to get started simply head to Tools > Network Setup.

    What Makes A Successful WaaS (And The Benefits)?

    The website’s design, trusted website signals, website security, marketing, and effective SEO come together to form the perfect recipe needed to build a successful WaaS business.

    The Benefits Of WordPress Multisite & Websites as a Service

    There are three key benefits of using WordPress multisite networks as opposed to just maintaining multiple individual WordPress installations, which are:

    1. More efficient management
    2. Better development workflow
    3. Easier to host (especially with RunCloud)

    These are the fundamental benefits that you as a WaaS owner can experience if you go with this business model. Let’s take a closer look at the offering as a whole & how you can use it at your agency to cater to a whole new market of people looking to build websites.

    Smaller Initial Investment & Premium Add-Ons

    Instead of having customers pay the typical $3,000-5,000+ (at the very least) for a custom-built website, WaaS is an excellent downsell to welcome the client until they decide to move forward with your agency for a larger website build.

    The client will invest less at the start, from $400 – $1,000, coupled with a monthly fee that ranges from $150 – $600 per month. The monthly can range based on how many new requests and changes per month are included, advanced functionality like integrations, chat, eCommerce, scheduling and anything else that you could possibly need your website to do, including social media sites, bookings, events, multi-vendor eCommerce websites, and more.

    Offer Ongoing Support & Never Let Sites Go Out Of Date

    Even with big clients, when something isn’t on retainer the work stops at some point. It may be after they pay the final deposit or when the site gets approved. Generally, this means there is no recurring element to the work either.

    However, design preferences change. A brand new site might no longer be truly reflective of a business down the line.

    If a client paid 5k for a website, and 6 months later it makes their company look like it is outdated – this is less-than-ideal. Designs that were in yesterday, might not be in a week’s time and clients want to be able to make changes, access their site and get your help when they need it.
    WP Buffs WordPress Support

    With Websites As A Service and Multisite you’re able to forego these issues and easily keep websites up-to-date – which is a tried and tested business model that’s worked for a whole host of businesses in the WordPress industry alone including, most notably WP Buffs & GoWP.

    GoWP WordPress Support

    Launching & Growing Your WaaS – Next Steps

    Niche Down & Specialize In What You Can Outperform In

    Launching a platform exactly like WordPress.com on the average budget for a WaaS isn’t going to be easy. They’ve got huge amounts of money to outcompete you in what they’re building. While that certainly doesn’t mean building something that targets a broad market with a WordPress Multisite platform is impossible, it just tends to be better to start with a specialization in an industry where you have something unique to offer.

    For example, let’s say your agency at the moment mostly works with agencies across the country where you’re based – building a solution that specifically targets and helps those types of clients will be easier to sell.

    The next time you have a lead come to you which fits the demographic and doesn’t have the budget for a $5,000 website (or whatever you end up quoting them), you can refer them to your WaaS platform which was built exactly for dental professionals like them that are looking for something that’s much easier to get going and working right out of the box.

    As Matthew Rodela of KeyPress Media puts it:

    “The WaaS business model is a great way to provide an option for your clients that may not be able to afford your regular web design/development services. It’s also a pretty reliable source of recurring revenue. And finally, it’s a way to get paying customers to the top of your funnel easily. Customers who have already paid you for something are MUCH more likely to buy your other services. I’ve built a six-figure agency off the back of my WaaS…”

    Matthew Rodela, KeyPress Media

    An excellent example of this which we mentioned earlier is Edublogs – although their market is also huge, they’ve niched down to the teacher, educator and student demographic. One which commonly interacts and shares information (such as a platform like Edublogs with each other). At the time of writing, it hosts almost 4,500,000 sites. The basic package is free and pricing beyond that starts at just $7.95 which is incredibly low considering it is exceptional value – removing all of the technical headaches beginners face of getting started and hosting the self-hosted version of WordPress.

    Marketing & Growing Your Website As A Service (WaaS) Platform

    A WaaS is like any digital product and requires a large audience that is interested in it (like courses, plugins, etc.). So you do need to be good at reaching out to that audience via the typical marketing techniques like content marketing, SEO, and PPC.

    But, a great shortcut to revenue is to partner with someone who has already established an audience in the niche you’re targeting. Almost any industry has at least one “guru” that has become known as the go-to person online. Reach out to that person (or people) and let them know about your WaaS and see if you can work out some sort of referral partnership.

    What to Include in Your WaaS

    There’s a lot of money in additional add-ons and premium services that can be sold on top of your website as a service platform – if done right.

    As long as they all add value and are designed in such a way that they wouldn’t make sense to include in the original monthly price of your WaaS, customers will benefit & you can turn a profit.

    Here are some ideas:

    • Initial website design

    Instead of just letting them handle their own website design with a DIY page builder that you include in your WaaS, you can charge a relatively small setup fee to take care of that for them to make sure it’s all working and in perfect shape. A lot of WaaS owners actually enforce this setup fee for all customers as it ensures that they get up and running and have a better experience all-round after their site is ready to go.

    • Security

    Anything from server updates, comment spam protection, SSL certificates and more. Everything that they no longer have to worry about because they’re hosting their website with you.

    • Updates

    Regular updates and testing for ongoing functionality improvements.

    • Hosting

    The server environment that your website and all of its files and database live.

    • Backups

    Regular backups and a recovery plan to get you back up quickly if something goes wrong.

    • Support

    Ongoing support to help ensure that the website matches the level of service and quality you provide.

    Have any questions about launching, growing or running a WaaS platform of your own with the help of RunCloud? Let us know & join the conversation by leaving a comment below. 💬

  • FTP vs. SFTP – What’s The Difference & Why It Matters

    FTP vs. SFTP – What’s The Difference & Why It Matters

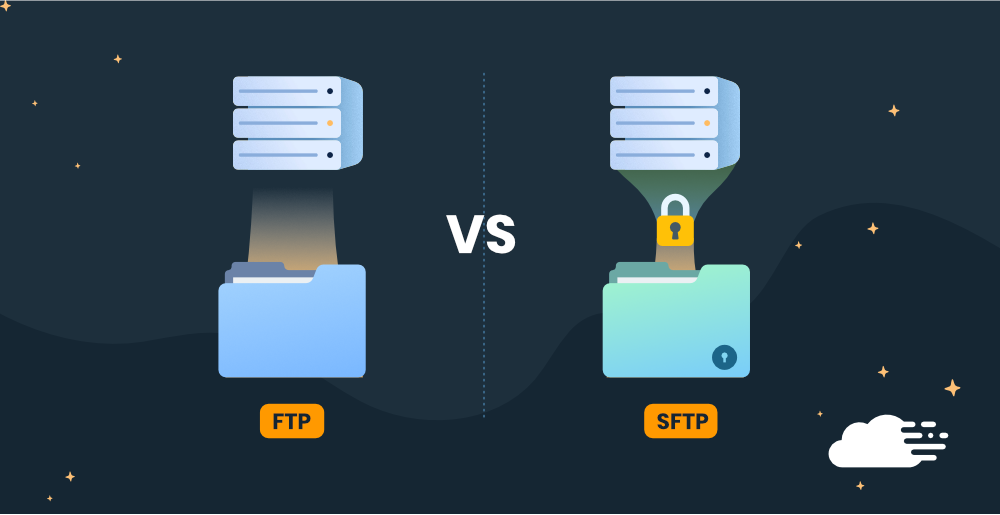
    Trying to understand the difference between FTP and SFTP? Using FTP (or SFTP) is the easiest way to connect directly to your server – but what are the differences between the two protocols & which should you use?

    In this article, we’ll compare FTP vs. SFTP as commonly used data transfer protocols, go through their advantages and disadvantages, and discuss the importance of choosing the best protocol for protecting your personal and professional information.

    In short, SFTP is better – it’s a lot more secure than FTP which is why we highly recommend using SFTP whenever possible. But, if you’re interested in learning more about the differences – keep reading and we’ll compare FTP vs. SFTP, discuss their advantages & disadvantages, and more…

    FTP vs. SFTP – The Differences Explained

    To understand how FTP and SFTP are different, we must first explain what each of these file transfer protocols are and how they work.

    What is FTP?

    FTP, or file transfer protocol, is a network protocol that has been around since the 70s – it predates the modern internet. Made as a secure file transfer protocol that prevents the most common security breaches, FTP transfers data through two channels: the command channel and the data channel. Unlike other protocols, FTP’s channels aren’t encrypted, which is a disadvantage for security.

    How does FTP work?

    FTP uses two separate channels; the command channel and the data channel.

    The command channel is responsible for accepting client connections and executing other simple commands. Generally, it uses server port 21. Clients can connect to this port to initiate a conversation for file transfer and authenticate themselves by sending a username and password. The command channel will remain open until the client disconnects or the server ends the connection due to inactivity or other reasons.

    After the authentication is done, the client and server can negotiate a new common server port for the data channel over which the file will be transferred. Once the file transfer is complete, the data channel is shut down, then the control channel takes over and reports whether the file transfer was successful or not.

    Advantages of FTP

    • There are many desktop tools like FileZilla, Cyberduck, WinSCP that make FTP easy to use.
    • FTP lets you transfer multiple files at a time. It also resumes file transfer if the connection is lost, and enables you to add items to an upload and download queue and schedule transfers.
    • You can create scripts to automate file transfers.
    • Many FTP clients provide the ability to synchronise files so all your files will be up to date.

    Disadvantages of FTP

    • FTP is not safe to use as usernames, passwords, and files, are sent in plain text, so hackers can easily access your information.
    • FTP requires a block of ports to remain open for the data channel to be created. Due to security reasons, companies are limiting the number of server ports that are publicly accessible, which can bring about some complications.
    • Servers can be tricked to send data to random ports on an incorrect computer.

    All these security reasons make FTP a non-starter for many companies.

    When should you use FTP?

    To quickly share and transfer files where security measures aren’t needed, FTP can be a good option. But if security is a major concern, then you should avoid using FTP.

    ethernet cables connected to a server

    What is SFTP and How Does It Work?

    SFTP stands for Secure File Transfer Protocol and is one of the most common alternatives to FTP. Unlike other alternatives like FTPS, which adds an extra layer of safety to the FTP protocol, SFTP is a different protocol altogether.

    One important feature of SFTP is that it uses the Secure Shell cryptographic network protocol, more commonly known as SSH. The SSH protocol works by establishing a secure channel over an unsecured network.

    SSH encrypts data during its transfer, hiding it from potentially malicious third parties. It’s essentially a more secure upgrade to the basic client-server protocol that FTP uses.

    Along with usernames and passwords, SSH also provides public-key authentication, which uses computer-generated cryptographically-secure keys that act as a replacement for a user’s password. The keys can be much longer than a regular password, making it impossible for hackers to replicate during brute-force attacks.

    When the recipient connects to the sender’s SFTP server, their client software gives the sender’s public SSH key to the server as part of the authentication process. If the SFTP determines that the public key matches the sender’s private key, as well as the username and password, it will consider the authentication successful.

    Advantages of SFTP

    • SFTP is a very secure method for file transfer.
    • Similar to FTP/FTPS, you can use usernames and passwords to authenticate. With SFTP, the credentials are encrypted, making it more secure.
    • You can combine key-based authentication with usernames and passwords, making SFTP more secure.
    • SFTP only uses one server connection to transfer data, and no other server ports need to be open, which increases security and firewall-friendliness.
    • You can obtain much more metadata about the files being transferred, such as date, time and size, which is helpful for logging and analysis purposes.

    Disadvantages of SFTP

    • It isn’t easy to manage SSH keys.
    • The private keys need to be stored on the device from which you want to transfer files, which needs to be protected against theft or loss.
    • SSH keys take work for administrators to set up for employees.
    • Some training is also required on how SSH keys work.

    When should you use SFTP?

    SFTP should be used when you want to send or receive sensitive data. It doesn’t matter how big your company is, no one is immune to a data breach. With cyber-hacking on the rise, it’s important that you’re doing everything you can to prevent a catastrophe in case something ever happens to you.

    Many companies use cloud-based SFTP file sharing solutions. There are two methods through which you can share file:

    Public Cloud – Public cloud-based solutions are hosted by large companies, like AWS or Azure, and server space can be purchased to facilitate your company’s file storage and sharing needs.

    Private Cloud – A private cloud can be built and manage the network in the house. Private cloud solutions can also be hosted and managed by outside vendors. The vendor creates a virtual private data centre (VPDC) for each client, which is not on a shared network environment like public cloud options.

    So, if your sensitive data does get stolen, having SFTP in place will stop anybody from using it maliciously.

    Why Does This Difference Matter?

    FTP and SFTP are two entirely different protocols for sharing files, and the difference can have a real impact on users. To see why this matters, we’ll go through the main aspects of these differences that are important for individual users and businesses alike.

    Channels

    FTP uses two different channels for data and control, both of which are unencrypted, whereas data transferred through SFTP is divided into small packets and uses only one channel of communication for data and control.

    The difference in channel usage between these two network protocols is essential for security. FTP causes the client firewall to open multiple ports which can leave the firewall vulnerable to breaches as there are many points of entry.

    SFTP provides a more secure option when it comes to channel usage, as it only requires port 22 to be open to transfer data.

    Ease of Use And SSH Keys

    FTP is a simpler method of transferring data, which is why it is still being used very often, even though it’s less secure. SFTP’s SSH keys are more difficult to manage and validate, which is why users who don’t have a particular need for them tend to opt for FTP more often.

    Vulnerabilities

    SFTP is safer as compared to FTP in terms of potential vulnerabilities. Any vulnerability has the potential to get exploited and turn into a data breach. During the file transfer process, FTP has a lot of exposure to inherent vulnerabilities.

    The first vulnerability is that FTP is prone to human error. Accidentally sending a file to the wrong address or sending the wrong file can lead to some severe problems for your company. You can take potential steps to promote a culture of security awareness within your business to reduce the potential for human error. You can easily intercept data with FTP. With the help of the right tools and knowledge, it becomes easy to take advantage of these vulnerabilities.

    SFTP uses host keys to verify a recipient’s identity before a transfer occurs, which FTP doesn’t do.

    SFTP is more preferred in terms of security data transfers. The encryption measures are up to compliance standards, and you’re avoiding the inherent vulnerabilities of FTP transfers. Plus, it makes you feel confident when you find a secure SFTP cloud file sharing solution, ensuring that you are taking appropriate steps to protect your data.

    Summary –  Should You Use FTP or SFTP?

    While FTP is still commonly used because it’s easier to work with, it’s significantly inferior to SFTP when it comes to security. The risk of your personal information or business data falling into the wrong hands is very real. If you’re transferring sensitive files, choose SFTP. Its encryption will get rid of most vulnerabilities that the original FTP comes with.

    If the data you’re transferring is neither sensitive nor very important to you, and you want to transfer it as fast as possible, go for FTP.

    And, fortunately, if you already manage your servers with RunCloud – you can also take advantage of our built-in file manager which is perfect for most day-to-day file management needs so you wouldn’t need to worry about setting up and configuring an FTP client for simple changes.

    Let us know & join the conversation in the comments (or by Tweeting @RunCloud_io) what your preferred server file management process currently looks like! 💬

  • The World’s 22 Best Newsletters for Developers

    The World’s 22 Best Newsletters for Developers

    Whether you’re new in tech or a seasoned developer curious about AI or love hearing about the latest rumblings in the world of crypto, this list of newsletters we curated is perfect for developers looking to keep up with all the news and everything that’s changing in the industry…

    How to Filter Newsletters and Clean Up Your Inbox

    Newsletters are the most effective way to follow developer insights, but subscribing to too many of them may be a bit heavy on your email inbox. To work around this issue, you can set your subscription up by going through the following steps:

    • If your email address is your.address@domain.com, add +newsletter before the @ like so: your.address+newsletter@domain.com. Doing this will still result in the newsletters ending up in your regular inbox, but lets you set up a filter.
    • Next up, create a filter or a rule in your email inbox that indicates all emails you receive at your.address+newsletter@domain.com end up in a particular folder.
      • If you use Gmail, go to Settings -> See all settings, and then to the Filters and Blocked Addresses section. Then, click on Create a new filter, go to the To section and paste your.address+newsletter@domain.com in it.
      • Next up, click on Create filter, choose to Skip the Inbox (Archive it), Apply the label, and add a custom label called “Newsletter”. Finally, save your changes by clicking on the Create filter button. Note that the procedure is similar but slightly different for other email providers.

    With that said, let’s dive right into our list of newsletters that every developer needs:

    1. Changelog Weekly

    Changelog Weekly signup form

    You may have heard about Changelog from their podcasts. Apart from those, they also feature a curated newsletter, complete with editorial comments.

    The Changelog team provides a weekly highlight of news in the open-source and software development field, along with informational content about JavaScript.

    Frequency: Weekly

    What is it best for: Everything you could want to know about tech. From AI to Java, you’ll find everything you need to brush up on your tech knowledge.

    Signup Form: https://changelog.com/weekly

    2. Hackernewsletter

    hackernewsletter signup form

    Hacker News is a news website that focuses on computer science and entrepreneurship. Hackernewsletter talks about information technology, coding, and startups in the IT field. The team also curates all the links to ensure it remains high quality.

    Frequency: Weekly

    What is it best for: Tech enthusiasts who want to read the best articles on startups, technology, programming, and more.

    Number of subscribers: > 60,000

    Signup Form: https://www.hackernewsletter.com/

    3. No CS Degree

    no cs degree newsletter for developers homepage

    No CS Degree focuses on interviewing successful self-taught developers, or developers who learned how to code in boot camps. In general, they are making a community of developers who don’t have a four-year Computer Science degree.

    No CS Degree is a great resource if you’re not planning to educate yourself through the traditional schooling system, as the developers they are interviewing were probably at the point in their life where you are currently, so solutions they found to certain problems can definitely inspire you to get on the next level.

    Frequency: Weekly

    What is it best for: Self-taught developers, or tech-savvy individuals looking to learn how to make it in coding.

    Signup Form: https://www.nocsdegree.com/

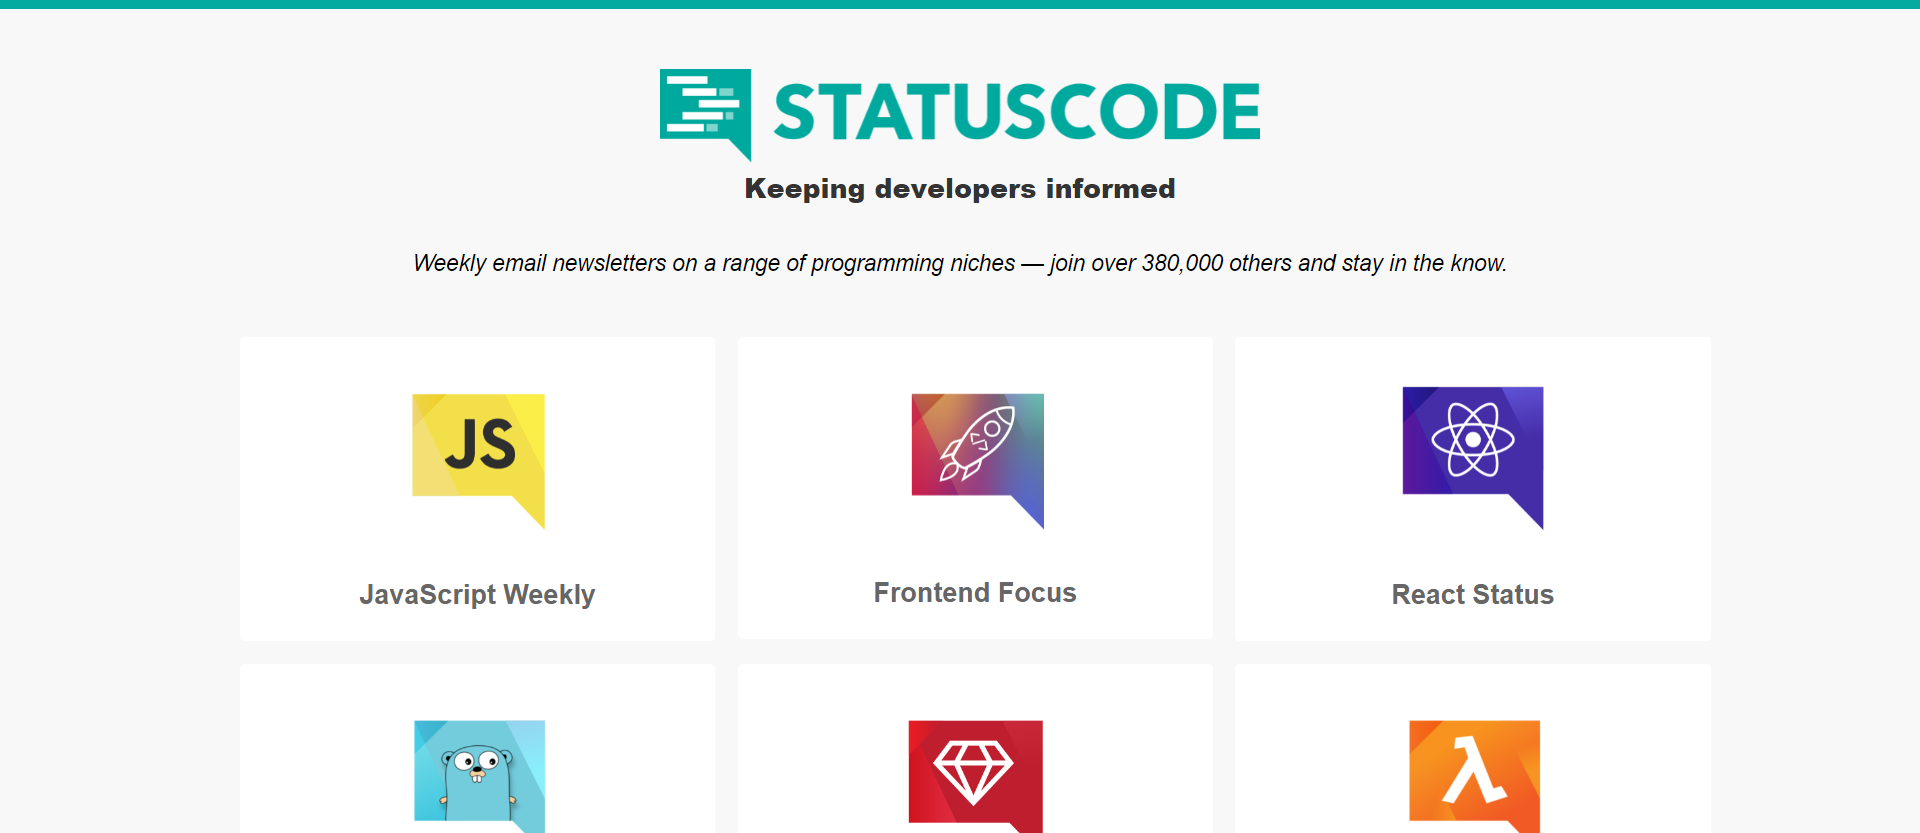
    4. All of Status Code’s Newsletters

    list of statuscode newsletters

    Curated by Peter Cooper with the assistance of his team of software development analysts, Status Code issues multiple weekly newsletters, all of which you can find on their main page.

    Status Code’s newsletters primarily cater to programming apprentices, but they’ll keep you updated on all the latest articles, trends, ideas, releases, and events related to coding, with a special focus on UNIX, C, and algorithms.

    Frequency: Weekly

    What is it best for: It’s best known for curated articles in a variety of programming niches.

    Number of subscribers: > 380,000

    Signup Form: https://statuscode.com/

    5. Versioning

    SitePoint Weekly newsletter

    The SitePoint website already enjoys a reputation among the web developer and designer community for the quality articles, courses, and books they post. With their newsletter, Versioning, you can get all the knowledge this site provides by email.

    SitePoint’s Versioning comes out weekly and provides its readers with a hand-curated pick of relevant web development and design content. It even includes a fun section.

    Frequency: weekly

    What is it best for: Gives the latest information on writing better code, designing better interfaces, tools, and tips.

    Number of subscribers: > 288,740

    Signup Form: https://www.sitepoint.com/versioning/

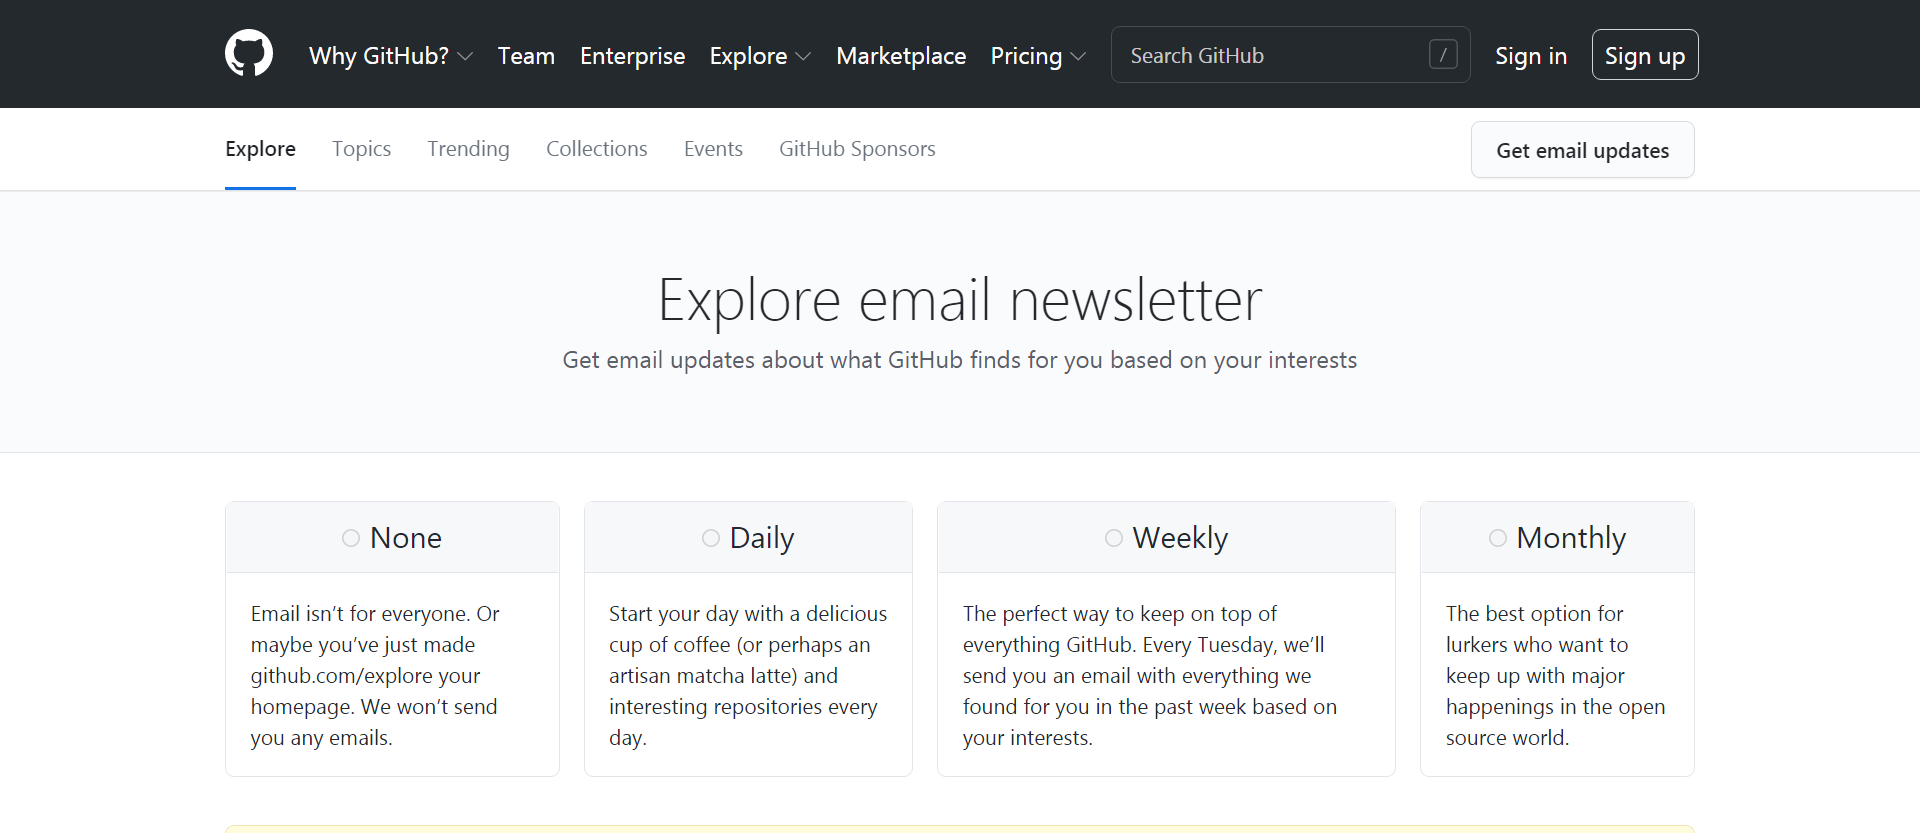
    6. GitHub Explore

    GitHub Explore newsletter signup

    GitHub, the most popular repository provider that hosts developers’ code, also issues a newsletter. GitHub Explore requires a GitHub account that is free to create.

    This newsletter lets you choose between a daily, weekly, or monthly issue. You’ll find it helpful if you’re searching for your next open source project, trying to stay informed on what’s going on in the open-source community, or if you’re just looking for curated articles on a related subject.

    Frequency: Daily/weekly/monthly

    What is it best for: Latest news and happenings in the open-source world

    Signup Form: https://github.com/explore/email

    7. Software Lead Weekly

    software lead weekly signup form

    Software Lead’s weekly newsletter is made for dedicated professionals who wish to remain informed about software development culture and the people behind it. Its main target audience is IT entrepreneurs, managers, and tech leaders.

    Software Lead Weekly also sends you inspiring management stories to help you improve your tech leadership skills. Whether you’re a manager or aim to become one, you’ll find this newsletter useful for learning about management and working with people committed to software development.

    Frequency: Weekly

    What is it best for: It’s all about tech, culture, and leadership.

    Number of subscribers: > 27,250

    Signup Form: https://softwareleadweekly.com/

    8. Console DevTools newsletter

    If you are a developer who wants to stay on top of the latest trends and tools in the tech world, you should subscribe to Console devtools newsletter. Console devtools newsletter is a weekly digest of the best developer tools that will help you improve your skills, productivity, and creativity.

    You will get a curated list of the most useful and innovative dev tools, devops, cloud, and APIs that are released or updated every week as well as interviews with industry leaders in tech who share their insights, tips, and best practices on how to use these tools effectively.

    Frequency: Every Thursday

    What is it best for: Anyone who wants to try out new tools and technologies before they become mainstream.

    Signup Form: https://console.dev/latest

    9. Code Project Newsletter

    The Code Project community issues their weekly newsletter with coding tutorials. It aims to provide useful information to web developers and engineers.

    Code Project’s newsletter sends you weekly articles and updates covering different subjects including quality assurance, software testing, reviews, and more. It also gives you access to libraries related to programming languages, including C++, PHP, and JavaScript.

    Frequency: Daily

    What is it best for: Everyone in tech. It lets you customize your topics and the frequency at which you receive them based on your preferences.

    Signup Form: https://www.codeproject.com/Feature/Insider/

    10. Android Weekly

    android weekly newsletter for developers

    The Android Weekly newsletter focuses on developers for the Android OS. It sends you all the latest tutorials, screencasts, and news relevant to the Android developing community.

    Frequency: Weekly

    What is it best for: Android/mobile devs. Sends out weekly tutorials, screencasts, news, and everything else surrounding android development.

    Signup Form: https://androidweekly.net/

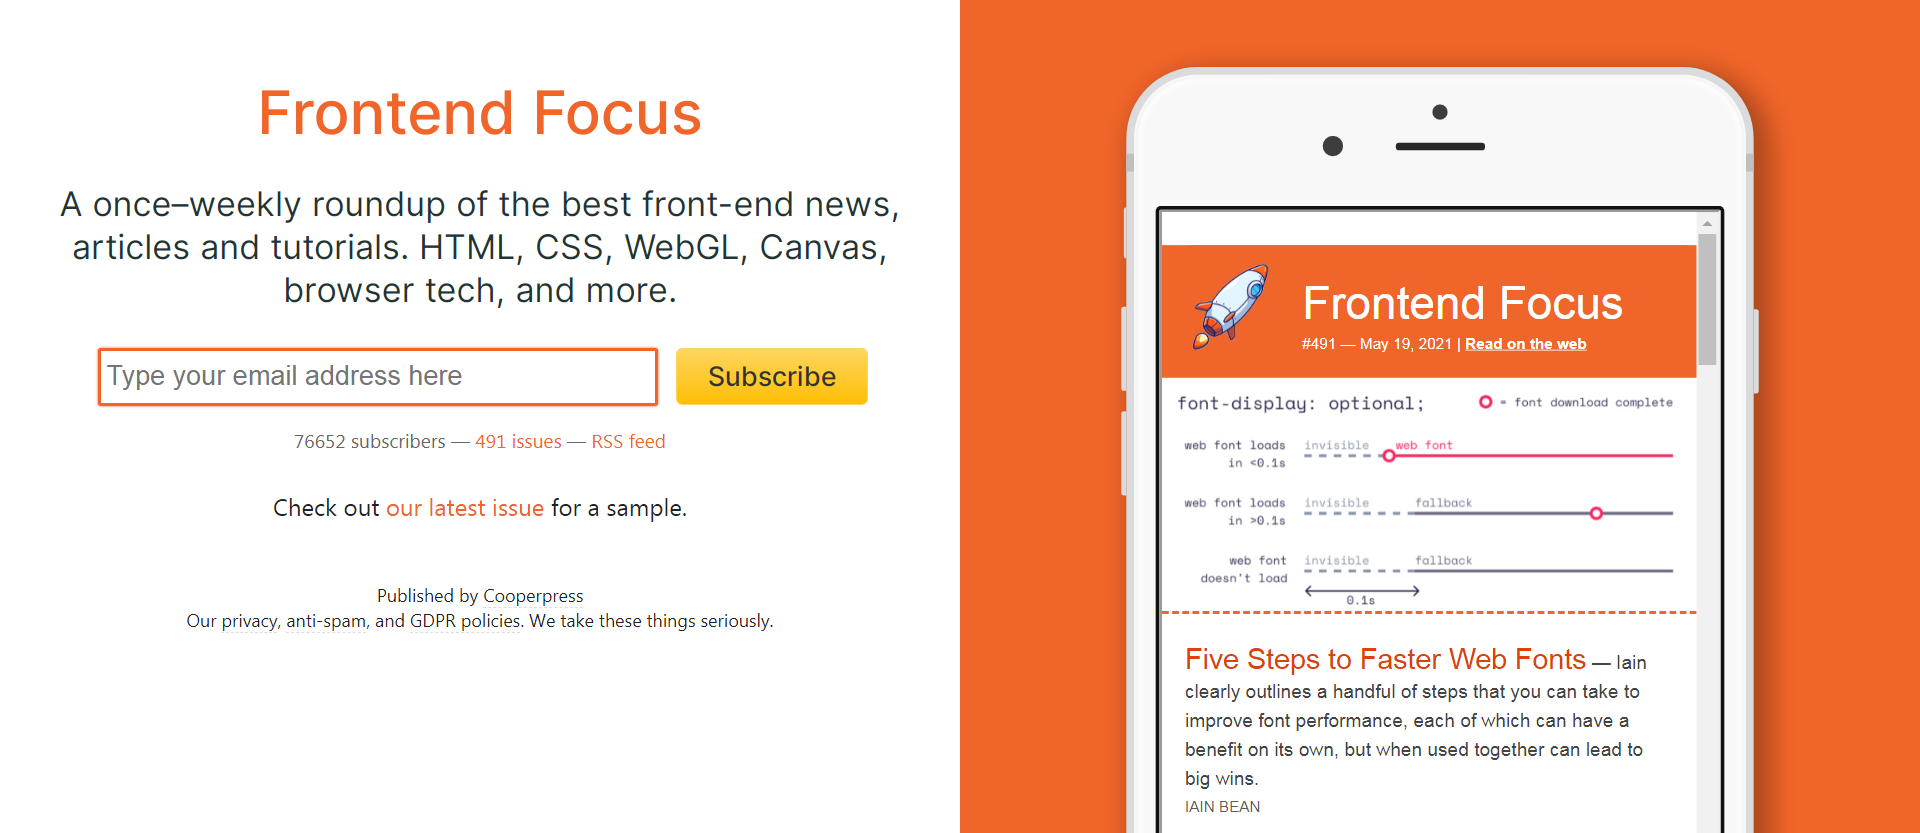
    11. Frontend Focus

    Frontend Focus newsletter signup

    The Frontend Focus newsletter, formerly known as HTML5 Weekly, is sent weekly, curating the most important and interesting news in the field of HTML5. A super-interesting read for staying up-to-date with the latest HTML developments.

    Frequency: Weekly

    What is it best for: Weekly round-up news about HTML5, CSS, browser tech and more.

    Number of subscribers: > 76580

    Signup Form: https://frontendfoc.us

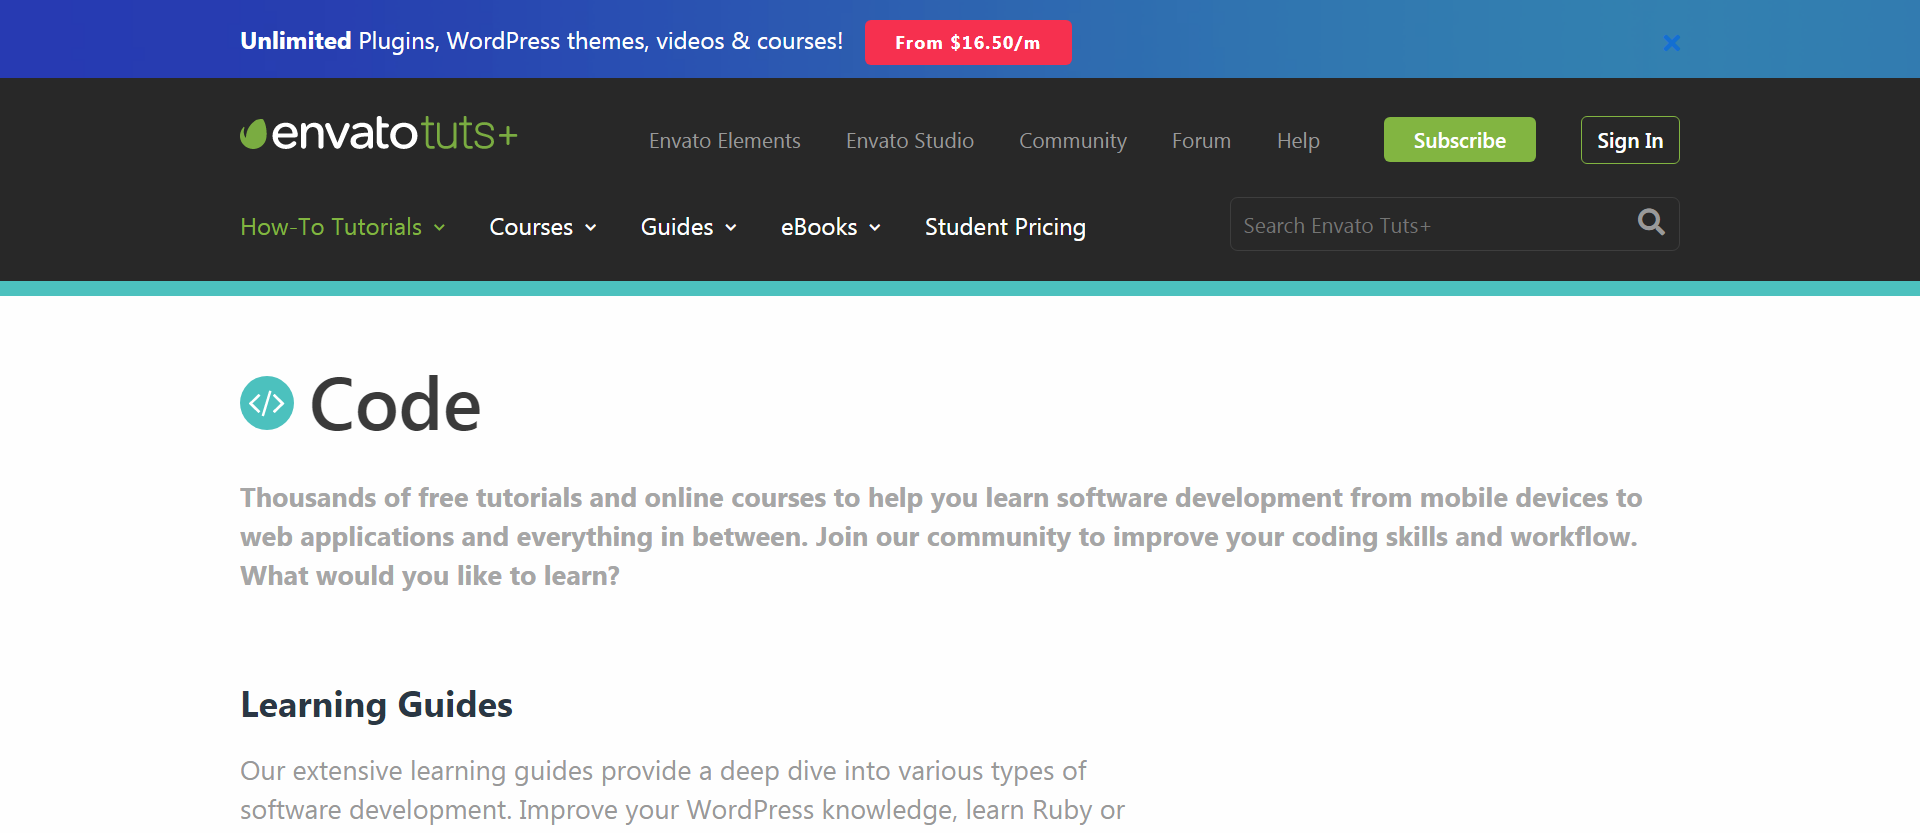
    12. code tuts+ newsletter

    codetuts+ newsletter from envato

    tuts+ provides a plethora of in-depth tutorials, along with software reviews and news on web development topics.

    By subscribing to their newsletter, you’ll receive weekly updates on new code courses and web development tutorials.

    Frequency: Weekly

    What is it best for: Sending weekly online courses that will help you learn software development, helping you to improve your code and web applications.

    Signup Form: https://code.tutsplus.com

    13. TechRepublic Daily Digest

    TechRepublic Daily Digest newsletter

    If you’re interested in the latest industry news, the TechRepublic Daily Digest is your go-to newsletter. TechRepublic sends you a summary of the best IT and tech articles on the regular.

    Frequency: Daily/weekly/bi-weekly – depending upon the topic

    What is it best for: Selecting topics of your choice and staying up-to-date with all the current happenings.

    Signup Form: http://techrepublic.com/newsletters

    14. CSS Weekly

    cssweekly newsletter signup

    CSS Weekly is a weekly round-up containing the best tutorials, experiments, and tools for CSS. Besides Frontend Focus, it’s a great resource for front-end developers and those who want to learn more about CSS.

    Frequency: Weekly

    What is it best for: All things CSS; articles, tutorials, experiments, and tools.

    Number of subscribers: > 32,500

    Signup Form: http://css-weekly.com

    15. Investing.io Newsletter

    investing.io newsletter from smash.vc

    This one isn’t a web development newsletter but a much broader newsletter for tech startups. The newsletter calls itself a newsletter for startup founders. However, it’s an excellent subscription for developers and techies since it provides some great resources on work productivity, growth, and scaling your tech business.

    Frequency: Weekly

    What is it best for: Full of tech news, tech startups info.

    Signup Form: https://smash.vc/startup-newsletter/

    16. CSS Tricks

    CSS Tricks newsletter

    CSS Tricks is a must-have newsletter for any developer who wants to stay up-to-date about front-end development and web design. It also covers tutorials, tips, and CSS tricks.

    Frequency: Weekly

    What is it best for: Everything you want to know about CSS.

    Signup Form: https://css-tricks.com/

    17. Smashing Magazine

    Smashing Magazine newsletter

    Smashing newsletter sends out useful techniques on front-end development and user experience straight to your inbox.

    Frequency: Weekly

    What is it best for: Anyone with an interest in UX design and building great websites.

    Number of subscribers: > 190,000

    Signup Form: https://www.smashingmagazine.com/the-smashing-newsletter/

    18. Sidebar

    Sidebar newsletter signup form

    Sidebar is the newsletter equivalent of a podcast. Every day you’ll get curated links and discussions on a variety of tech-related topics. It allows you to stay up to date with design news, without getting overwhelmed by noise.

    Frequency: Daily

    What is it best for: Staying updated on news related to the tech field.

    Signup Form: https://sidebar.io/

    19. TL;DR

    TL;DR newsletter signup form

    TLDR will deliver you a daily dose of interesting stories related to tech, science and coding. They market themselves as “bite-sized news for busy techies”. So, if you feel like you never have enough time to get through your daily newsletters, this could be a great option for you.

    Frequency: Daily

    What is it best for: Sends out a daily newsletter with interesting stories on tech, science and coding.

    Number of subscribers: Over 4,000,000 across their 10-interest based newsletters

    Signup Form: https://tldr.tech

    20. Pointer

    Pointer newsletter for software developers

    Pointer is known as the reading club for software developers. They send out curated content related to software development with links, summaries, and digestible stories every week.

    Frequency: Weekly

    What is it best for: Everything related to software development, such as Ruby, DevTools, management and much more.

    Signup Form: http://www.pointer.io/

    21. Programming Digest

    Programming Digest newsletter

    Programming Digest is a minimalist newsletter that showcases the five most interesting stories in programming and tech, with a small summary for each one.

    Frequency: Weekly

    What is it best for: Great for people who want a bite-sized newsletter without any fluff.

    Number of subscribers: > 13,800

    Signup Form: https://programmingdigest.net/

    22. Frontend Weekly

    And last but certainly not least, Frontend Weekly is a great newsletter that roundups the best articles, links and news in frontend development every single week.

    Frequency: Weekly

    What is it best for: Staying up-to-date with the latest in frontend development.

    Signup Form: https://www.frontendweekly.co/

    What’s your favorite newsletter? Let us know in the comments! 💬

  • Amazon Route 53 vs. Cloudflare DNS – Which Is Better?

    Amazon Route 53 vs. Cloudflare DNS – Which Is Better?

    A Domain Name System, or DNS, acts as a bridge between your device and the website you want to visit. Without it, you’d have to manually input the IP address of every site you want to visit instead of using a human-readable domain name.

    Slow DNS servers can result in poor load times, and, in worst-case scenarios, if the DNS server happens to go down, accessing websites won’t be possible at all. This is why it’s crucial to choose a good DNS server.

    In this guide, we’ll compare two of the bests DNS providers out there – Amazon Route 53 and Cloudflare. We’ll go through the pros and cons of each service so that you can make a more informed decision about which one better suits your needs.

    Amazon Route 53

    Amazon Route 53 DNS

    Amazon Route 53 prides itself on being “a highly available and scalable cloud Domain Name System (DNS) web service”. Not only does it route users to the different AWS services – such as Elastic Load Balancing and Amazon EC2 instances – but also, it can route users to non-AWS infrastructure.

    Let us look at some of its key features in more detail below.

    Amazon Route 53 – Pricing

    Amazon Route 53 charges you for “what you use”, as they state on their website. In other words, you pay as you go, depending on the number of DNS queries answered by Amazon Route 53, with some exceptions, like queries for qualifying alias records, which don’t incur additional charges.

    Basically, you don’t pay in advance or commit to anything, which can be an advantage depending on your needs.

    Route 53’s price varies according to the type and quantity of queries.

    Query TypeUp to the first billion per month

    ($ per million queries)

    After the first billion per month

    ($ per million queries)

    Standard$0.40 $0.20
    Latency-based routing $0.60 $0.30
    Geo DNS & Geo Proximity$0.70 $0.35

    With standard queries, for the first 1 billion queries a month, you are charged $0.40 per million queries. Once you have over 1 billion queries a month, the price is $0.20 per million queries.

    With latency-based routing queries, the prices are slightly higher, starting with $0.60 per million queries for the first billion queries per month and $0.30 per million queries for over 1 billion queries per month.

    Finally, with Geo DNS and Geo Proximity Queries, for the first 1 Billion queries a month, you are charged $0.70 per million queries. Again, the price decreases after you have over 1 billion queries monthly, at which point you incur charges of $0.35 per million queries.

    Of course, the final price will depend on what kind of other Amazon Route 53 features you are using as well – such as health checks, Route 53 Resolver, etc. – and can quickly add up if you’re running a large-scale operation.

    Amazon Route 53 – Reliability

    One feature that makes Amazon Route 53 stand out is its high reliability. With this service, you have four DNS servers: .com, .net, .co.uk, and .org. This means that if the root server goes down for some reason, you still have three DNS servers operating smoothly.

    Moreover, since the four DNS servers are geographically distributed, even if some kind of accident were to happen to one of the data centers, the other DNS servers would still be up and running. Finally, all four servers are on different Anycast IPs, which ensures high reliability but comes at the expense of performance.

    Amazon Route 53 – Speed

    Route 53’s query speed is one of its main shortcomings. Amazon’s DNS service is actually better than many of its competitors but still stays far behind Cloudflare’s DNS.

    It doesn’t matter which of their four DNS servers are closest, you have the same chance to hit this one or any of the others. This is the price that’s paid for Route 53’s increased reliability.

    Amazon Route 53 – Privacy

    With Route 53, you have privacy protection for contact information on a domain enabled by default. It hides most of your contact information, preventing spam, and blocking anyone who would otherwise be able to see your personal information by sending a WHOIS query.

    However, Amazon doesn’t issue a guarantee that they won’t use your information themselves, for company or data purposes. This will be a big red flag for many of you.

    Amazon Route 53 – Flexibility

    Amazon Route 53 is very flexible. Thanks to the Amazon Route 53 Traffic Flow, traffic is routed according to several criteria such as geographic location, endpoint health, and latency.

    Various traffic policies can be configured, after which you can choose which ones should be active at a certain time. The simple visual editor also enables you to create and edit traffic policies easily. What’s more, you have a history of changes to your traffic policies with Traffic Flow’s versioning feature. This way, you are free to roll back to a previous version if needed.

    Cloudflare DNS

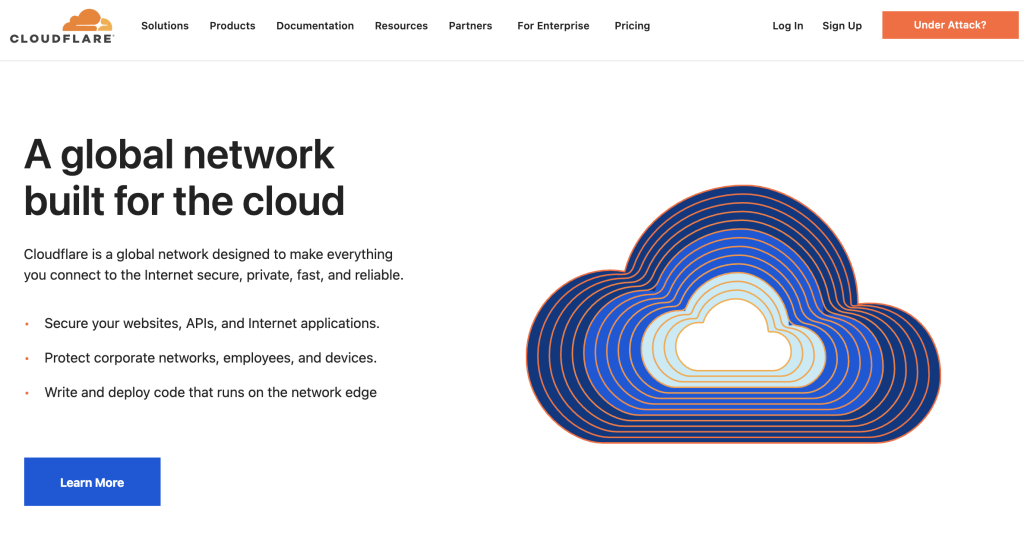
    Cloudflare DNS

    Primarily popular for its high-quality content delivery network, Cloudflare also features a DNS service called 1.1.1.1. They describe their DNS as the “Internet’s fastest, privacy-first consumer DNS service”.

    Below we’ll examine some key features of this DNS service.

    Cloudflare DNS – Pricing

    1.1.1.1 is free of charge for ordinary users. However, if you are a developer or an enterprise with a professional website, you might want to make use of the Geo DNS feature, i.e. the Cloudflare Load Balancing feature. This means that you have to sign up for a monthly subscription.

    The prices vary per server (origin), where a server can be an IP address or CNAME:

    • $15/month for 2 origins (servers),
    • $25/month for 4 origins (servers)
    • $30/month for 5/6 origins (servers)

    In contrast to Amazon Route 53 where you pay as you go, the downside of Cloudflare DNS is that you have to sign up for a monthly subscription if you are running one or several websites.

    Cloudflare DNS – Reliability

    Compared to Amazon’s Route 53, Cloudflare’s infrastructure is less reliable.

    In case your server goes down, Cloudflare DNS will keep redirecting users to it anyway. Unlike Route 53, it won’t redirect them to a different, functioning server while the issue is being solved.

    Cloudflare DNS – Speed

    Query speed is no doubt the best feature of Cloudflare. This DNS is much faster than other competitors such as Amazon Route 53, Cisco Open DNS, Google Public DNS, or Verisign.

    DNSPerf, the independent DNS monitor, ranks 1.1.1.1 as the fastest DNS service worldwide. Ranking way lower on the same list, Amazon’s Route 53 pales in comparison speed-wise.

    Cloudflare DNS – Privacy

    Privacy is another advantage for Cloudflare DNS. Not only does the company promise that it will never use your browsing data to sell it or to target ads, but it also guarantees that it won’t log your IP address. If there are any potential logs, they are deleted within a period of 24 hours.

    And they mean it: they even claim they retained a big four accounting company to audit their practices on an annual basis.

    You can read more about their motivations regarding privacy here.

    Cloudflare DNS – Flexibility

    Cloudflare DNS is significantly less flexible compared to Route 53. It just doesn’t hold up against the dozens of servers with geolocation-based routing that Amazon boasts.

    Unfortunately, configurability and flexibility are some of the tradeoffs that come with the top-notch speed of Cloudflare DNS.

    Related: Cloudflare R2 vs AWS S3 – Full Comparison

    Conclusion – Cloudflare or Route 53?

    So which one is better for you, Amazon Route 53 or Cloudflare’s 1.1.1.1 DNS?

    In terms of performance, Cloudflare has the upper hand with its incredible speed of 12.52ms. Their commitment to privacy concerns is also a big plus. However, if you’re an avid AWS user – Route 53 might make more sense because you can run health checks against load balancers and easily use geo-routing for specific resources in your Amazon Web Services account.

    All in all, it’s safe to say that both of these are solid premium DNS providers – and you’ll be very happy with your choice either way.

    We at RunCloud use & highly recommend Cloudflare. This is why, with RunCloud’s built-in Cloudflare DNS integration – you can also enjoy its benefits. Deploying websites and managing servers for your web applications has never been easier. It’s one of the many reasons RunCloud is the server management solution trusted by industry-leading system administrators, yet accessible to everyone. Start your 7-day free trial today.

    Which DNS provider do you use & recommend? Let us know & join the conversation by leaving a comment below. 💬
  • How To Install WordPress On OpenLiteSpeed

    How To Install WordPress On OpenLiteSpeed

    WordPress is the world’s leading (and by far the most popular) content management system (CMS) – currently powering over 40% of all websites on the internet & continuing to gain market share year after year.

    After all, it’s trusted by prestigious brands like Bloomberg, the BBC, and TechCrunch – just to name a few – for good reason.

    In this guide, we’ll walk you through how to deploy a WordPress website on OpenLiteSpeed – a server stack built for speed, security, and scalability – using RunCloud as well as manually. So, without further ado – let’s dive in:

    Getting Started – Server Requirements

    To Deploy WordPress on OpenLiteSpeed, you will need:

    1. A server with a fresh, clean installation of Ubuntu 18.04/20.04 x86_64 LTS
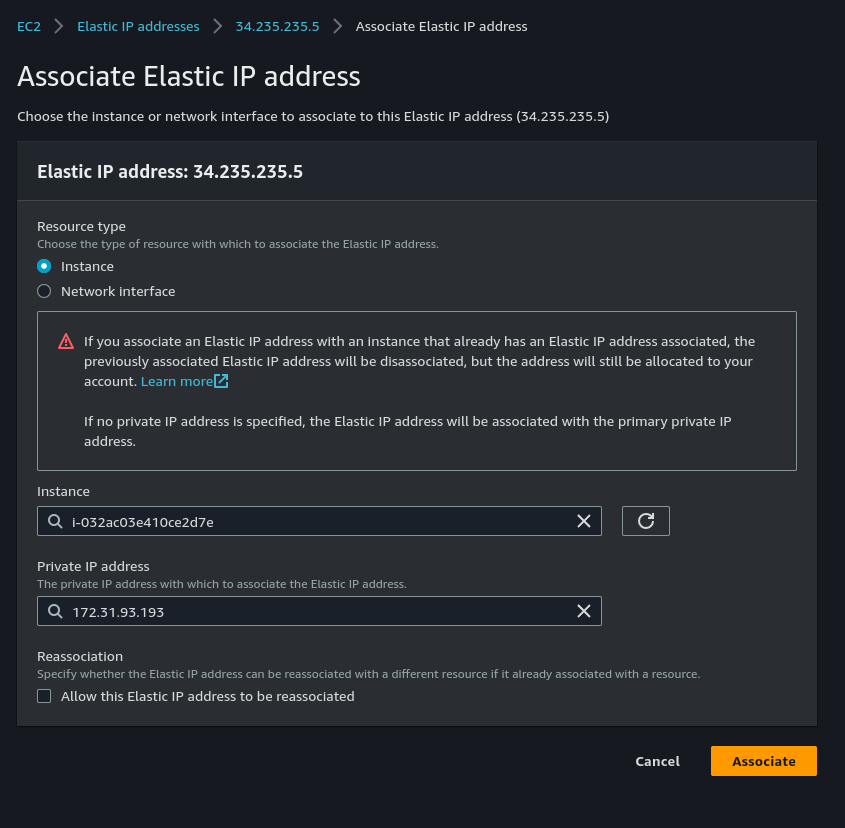
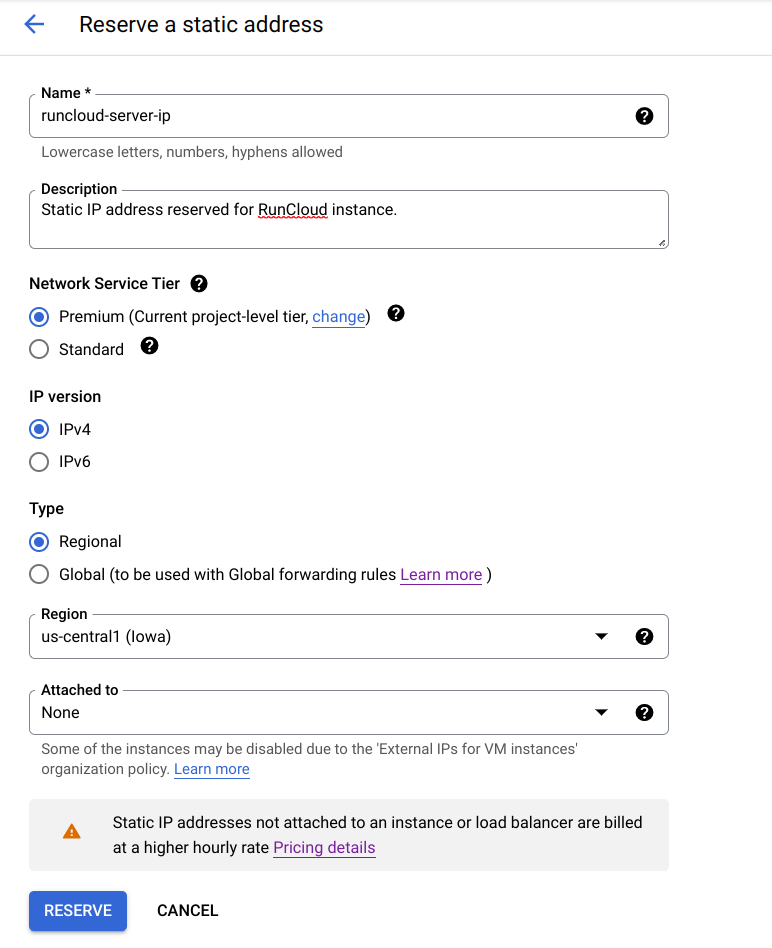
    2. You will need at least one static public IP Address (especially for Google Cloud and AWS users where an additional step is required to set up a static public IP Address for your server).
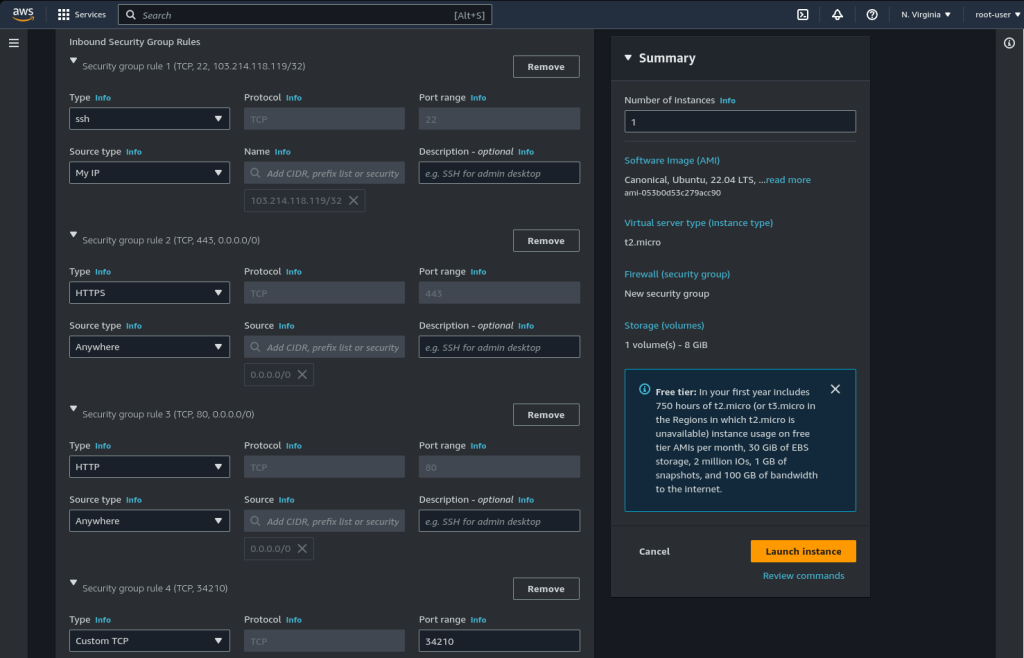
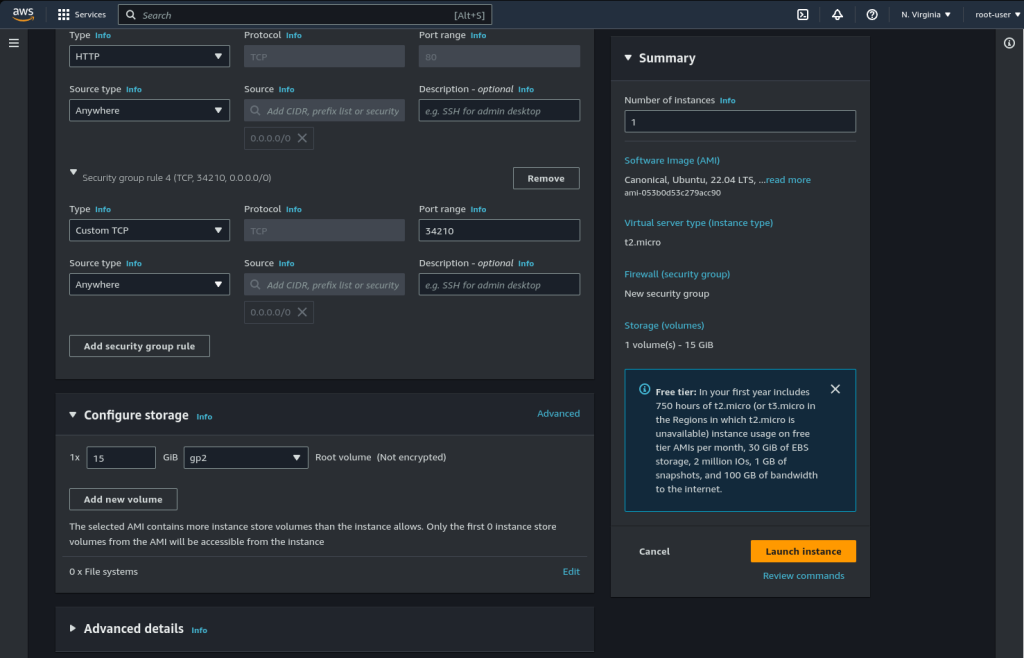
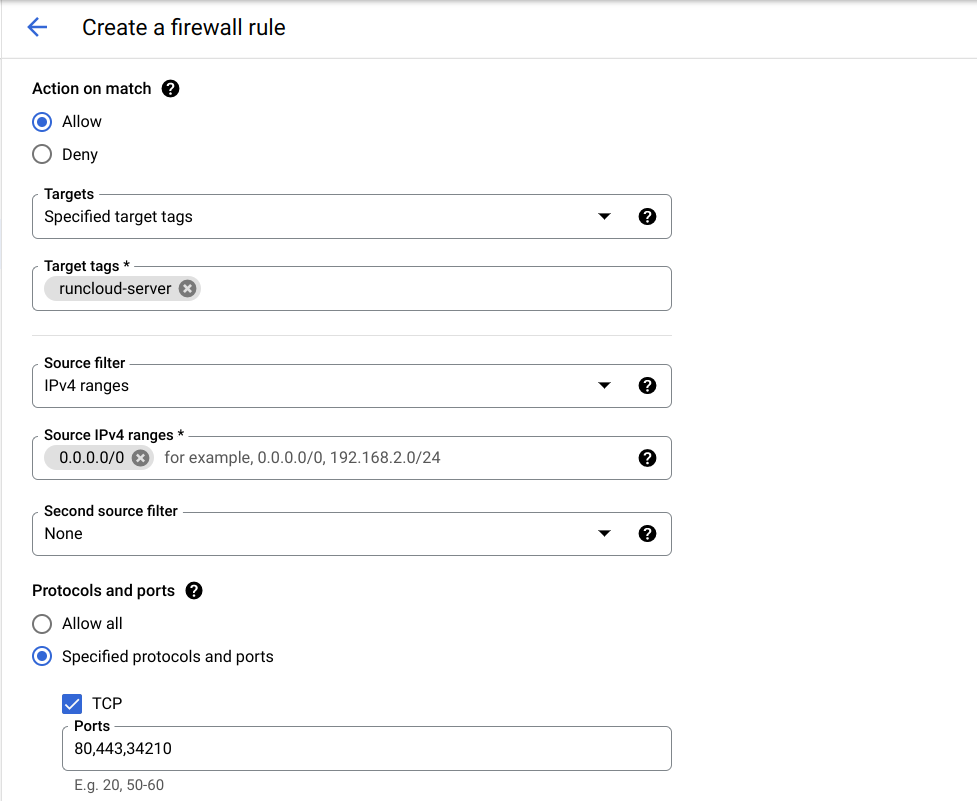
    3. Make sure ports 22, 80, 443, and 34210 are open (especially for Google Cloud, AWS, Azure, and Alibaba Cloud users where an additional step is required to open these necessary ports for your server).

    How To Deploy WordPress on OpenLiteSpeed (Recommended)

    The easiest & therefore recommended way to deploy WordPress on OpenLiteSpeed is using RunCloud. Let’s see how you can get both your server and site up and running in 3 simple steps…

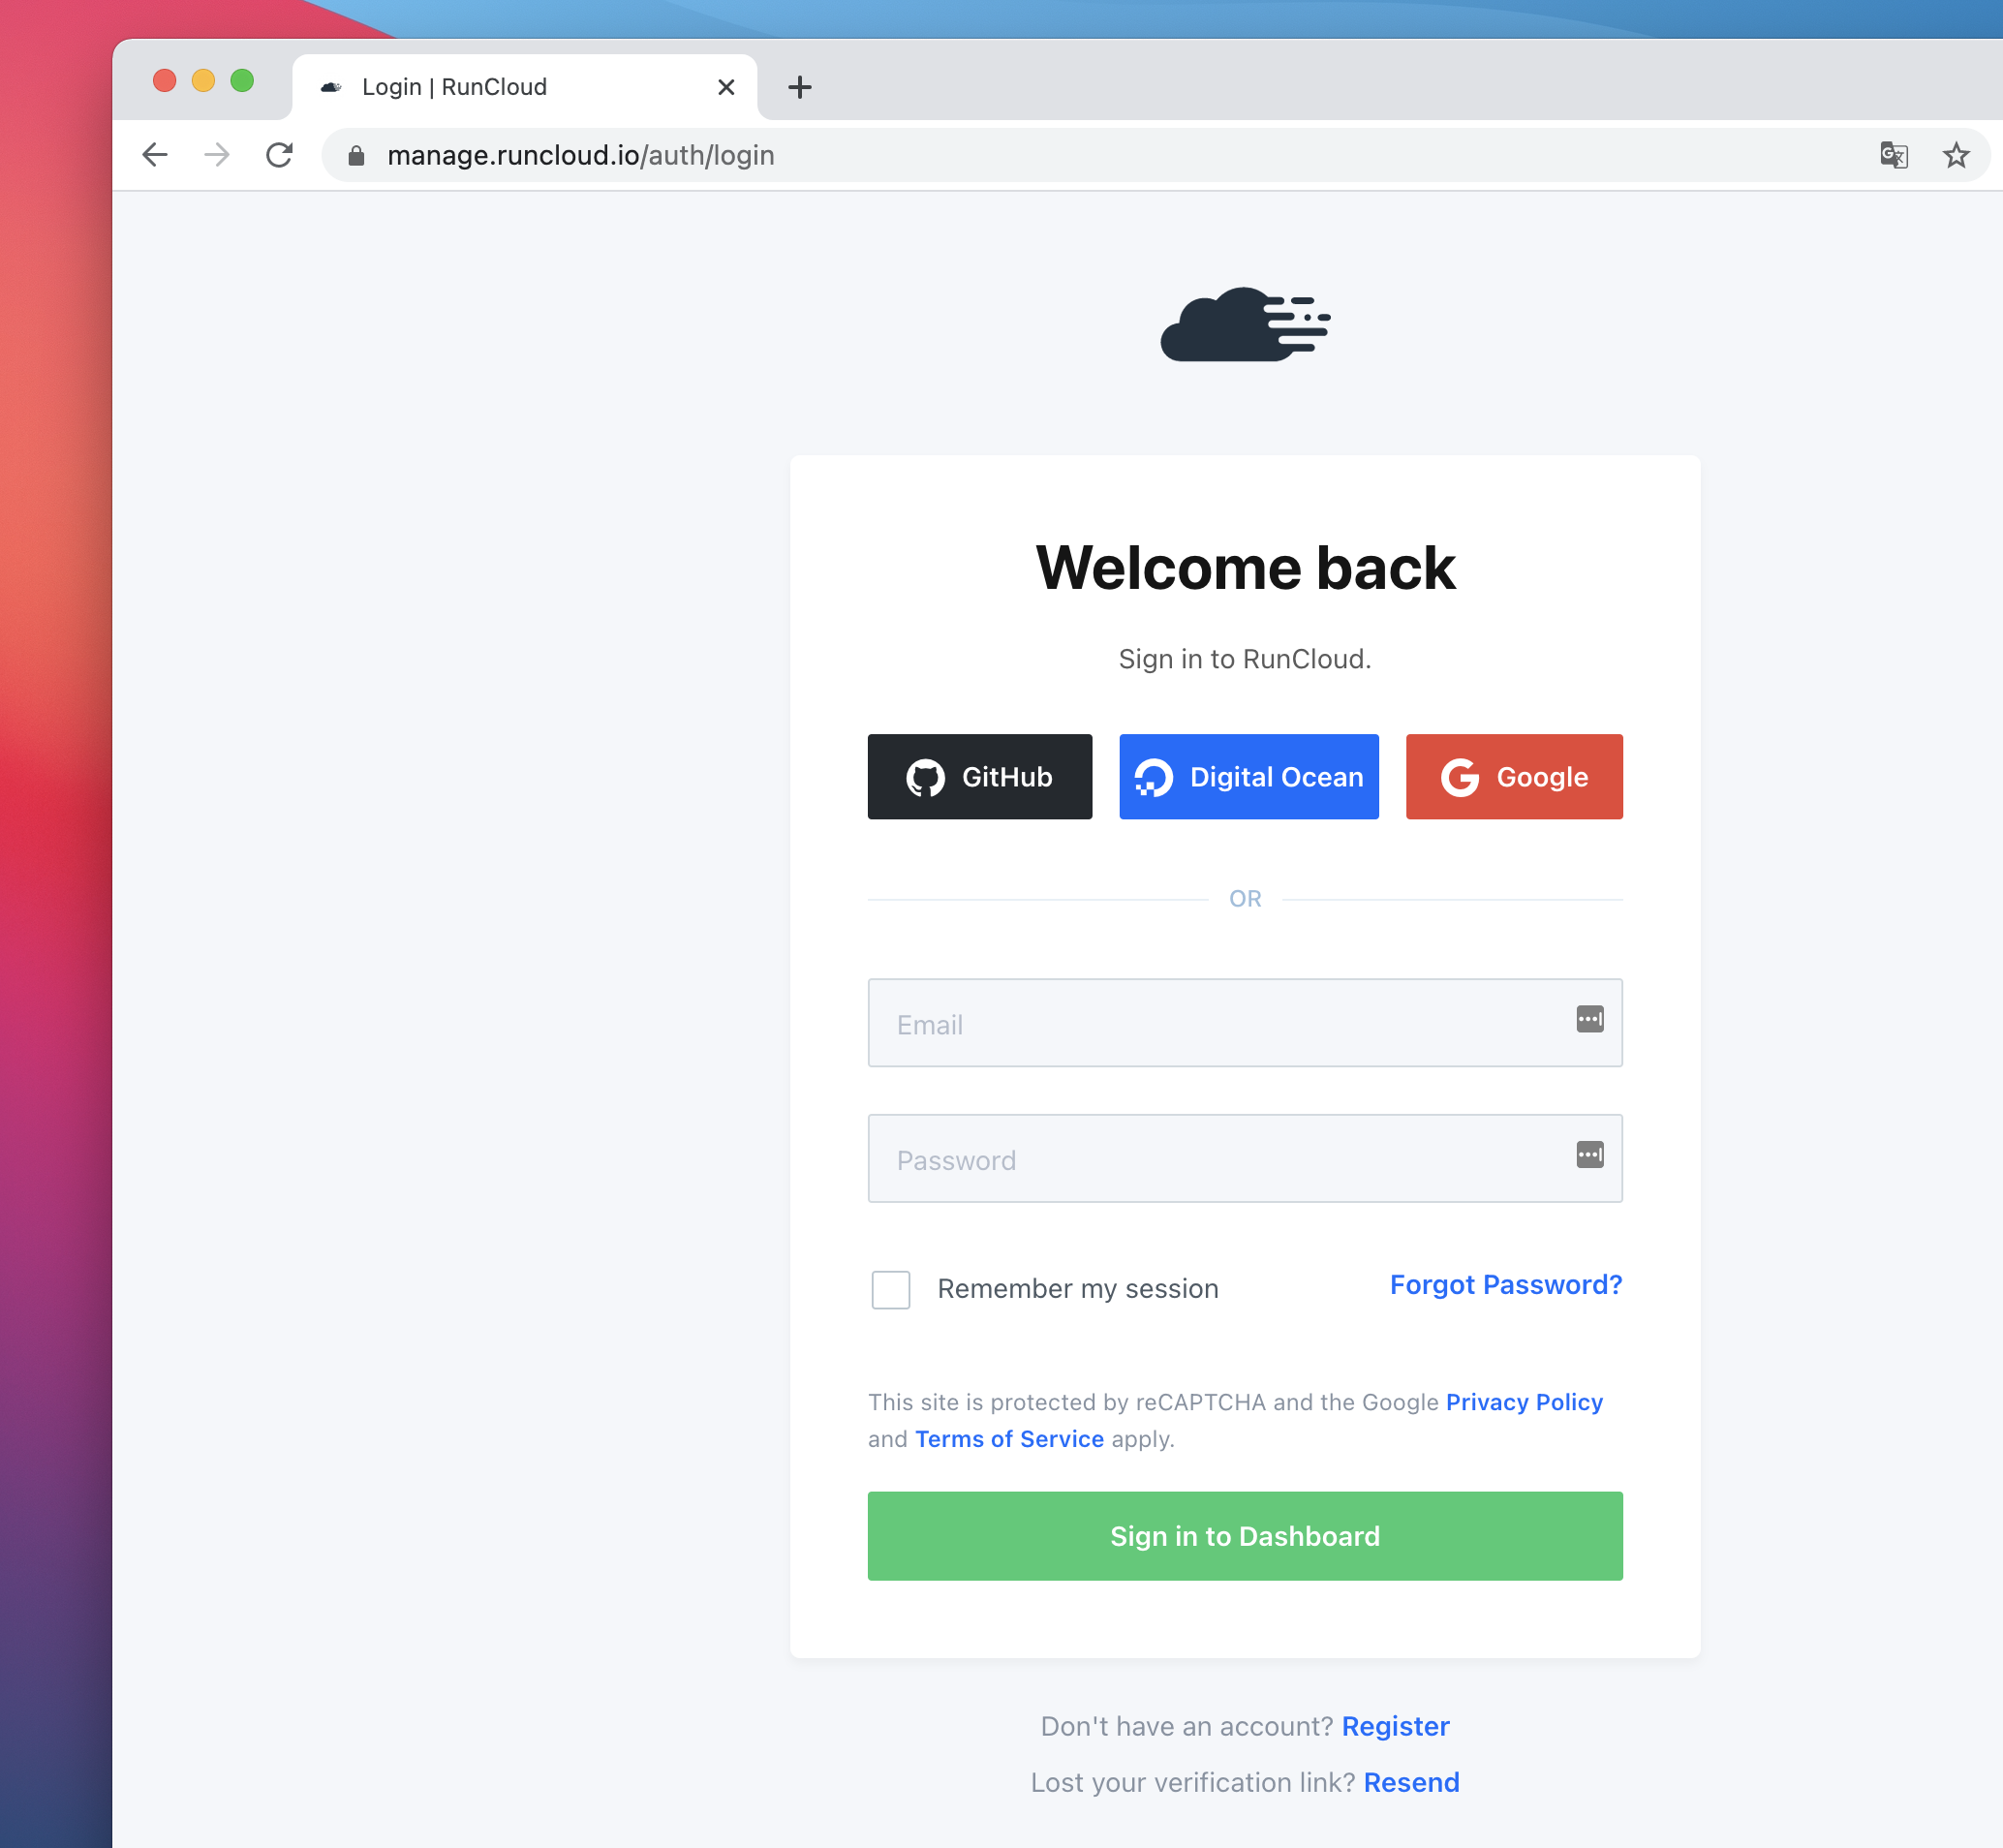
    1. Create or Log Into Your RunCloud Account

    The first step is to log into your RunCloud account. If you don’t have a RunCloud account we’ll recommend you to create one:

    RunCloud Dashboard

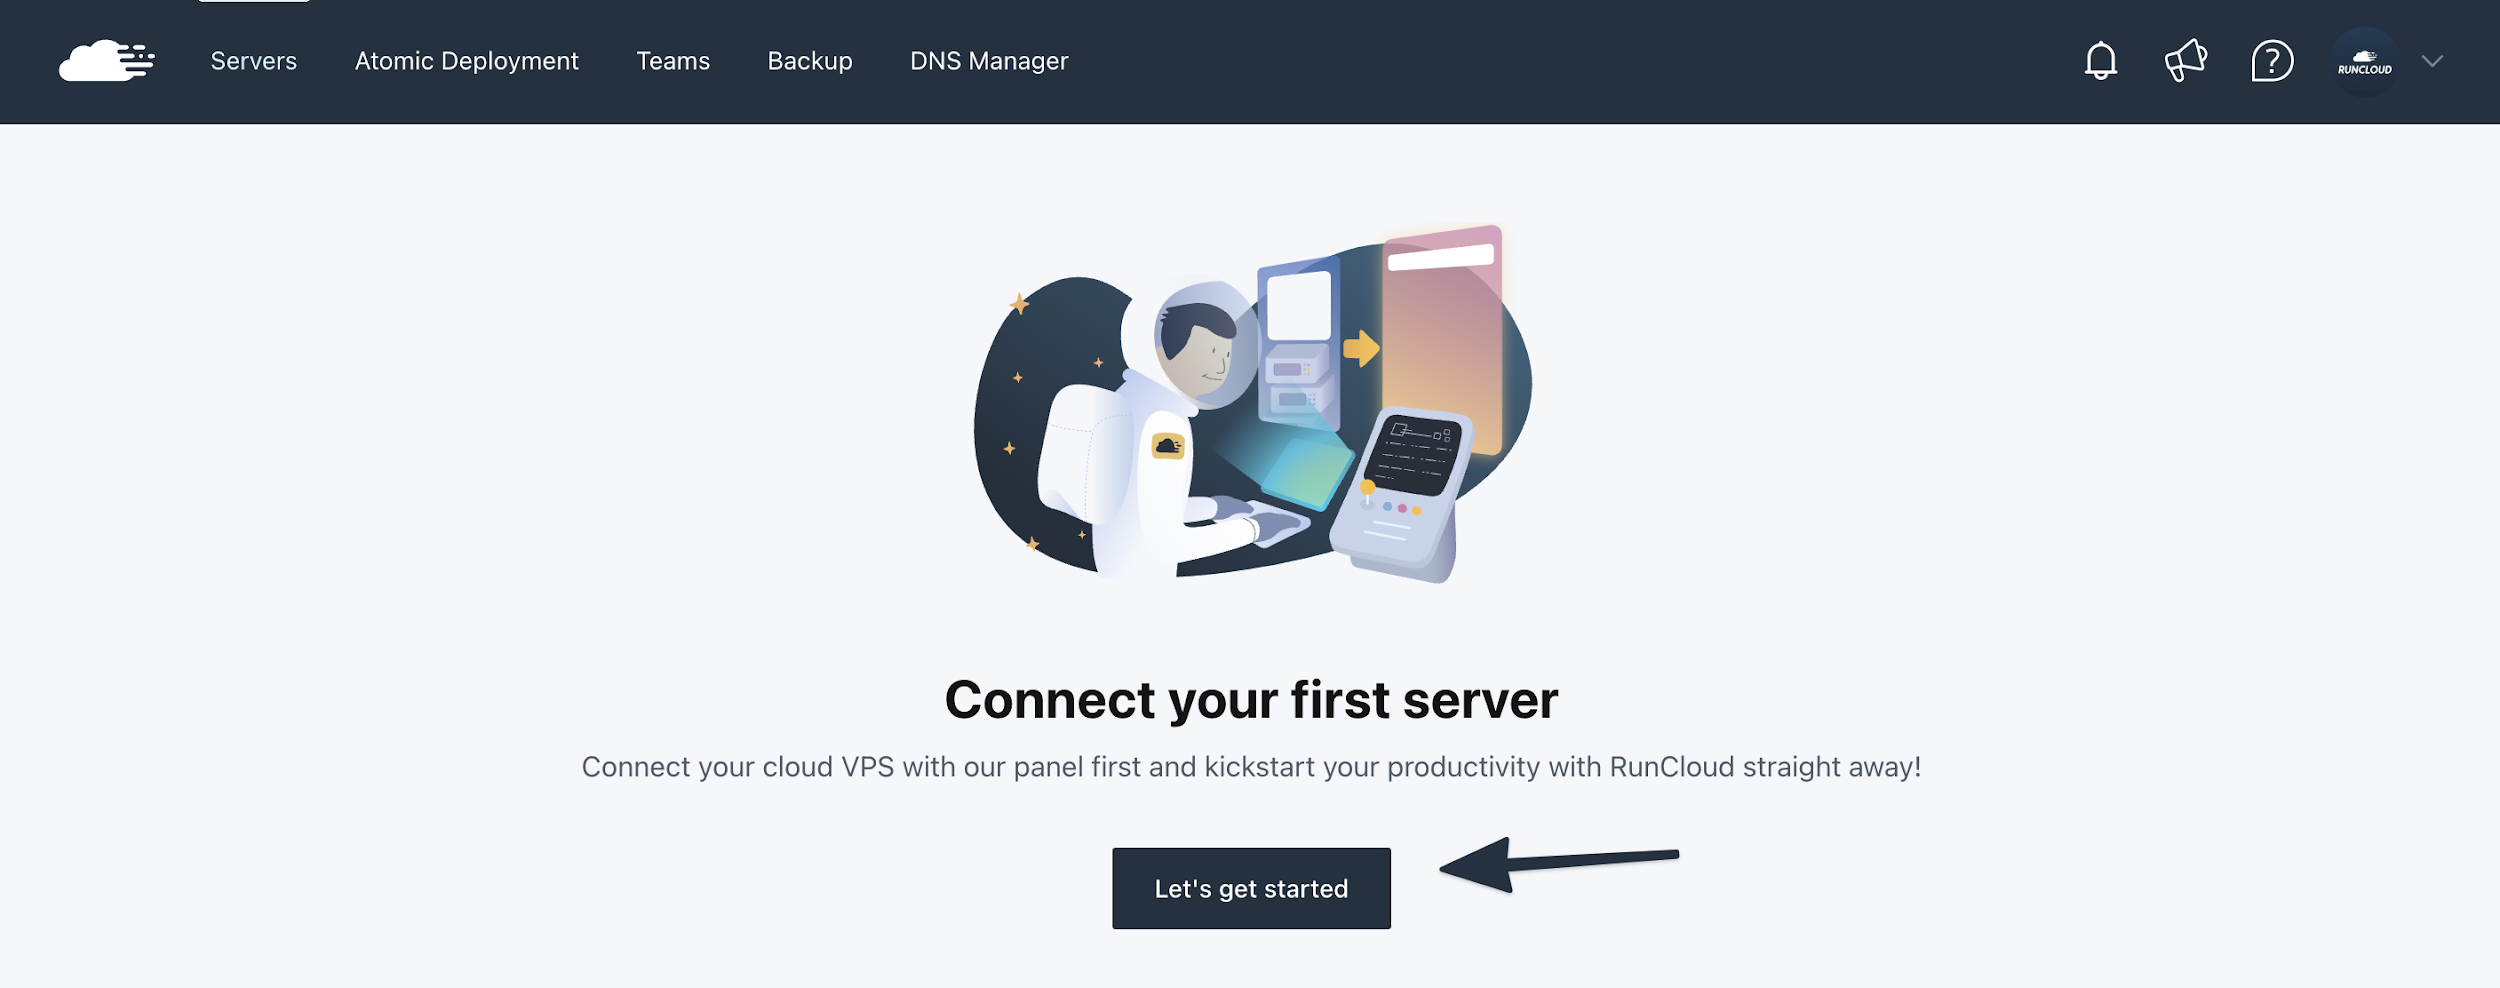
    2. Connect Your Server

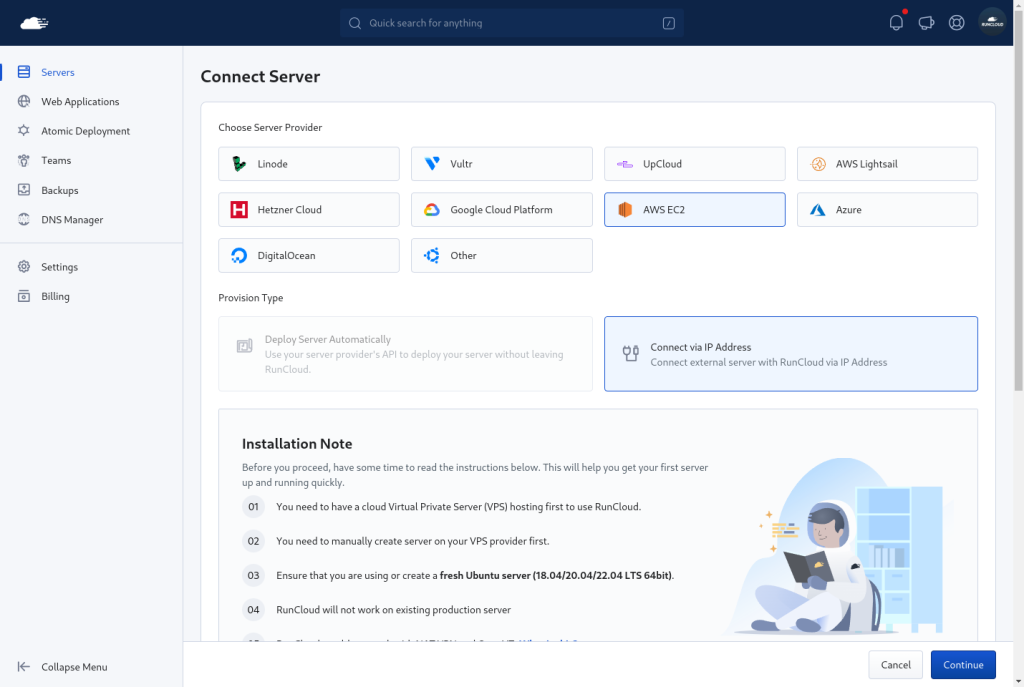
    Now that you’re logged into your account – you’ll need to go ahead and connect your first server to RunCloud. This only takes a few minutes, to get started, click Let’s get started as shown below:

    Connect Server RunCloud

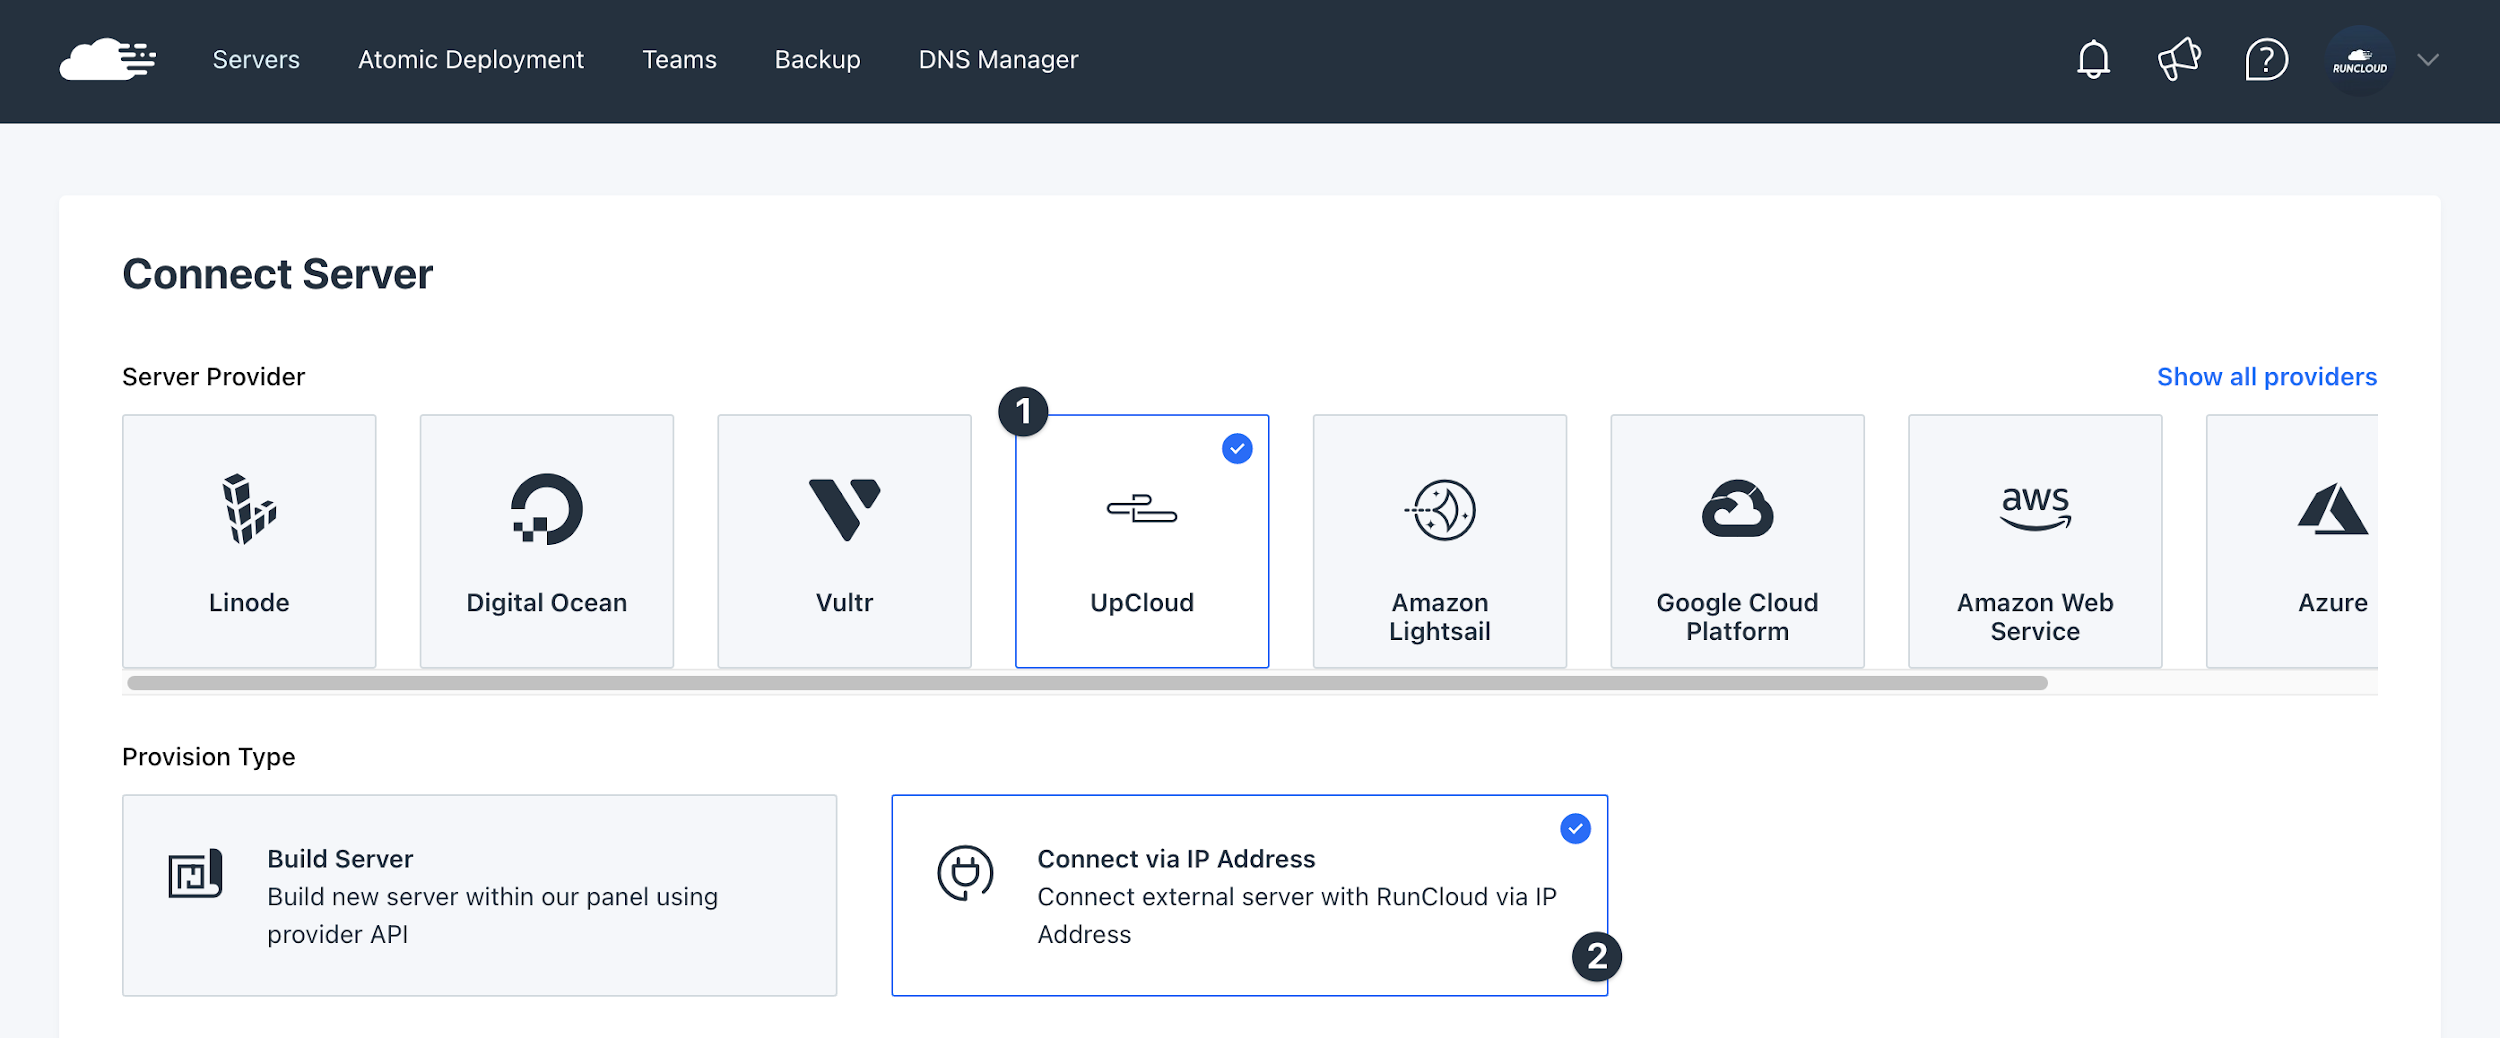
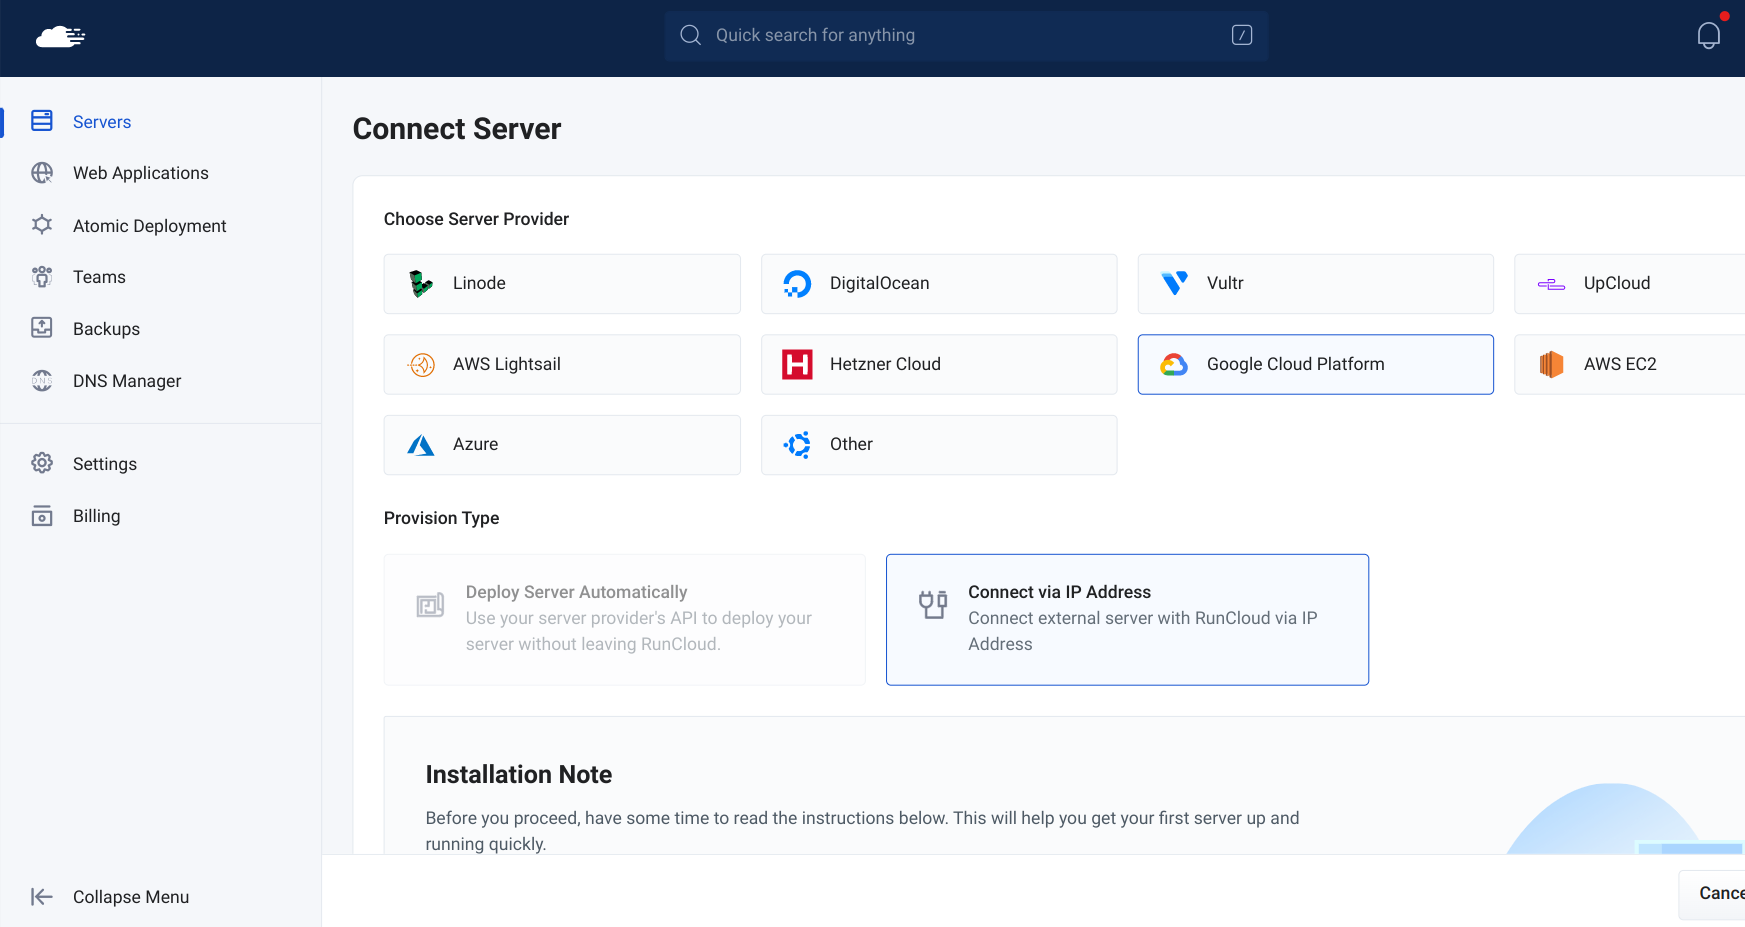
    Next, you’ll see a list of compatible cloud hosting providers. Go ahead and make your choice (for example, UpCloud) and choose the Connect via IP Address option if you’ve already deployed a new server with your cloud hosting provider:

    Select Server Provider UpCloud

    You can alternatively use our integrations for Vultr, Digital Ocean, Linode, and UpCloud’s APIs to automate the entire server build & deployment process.

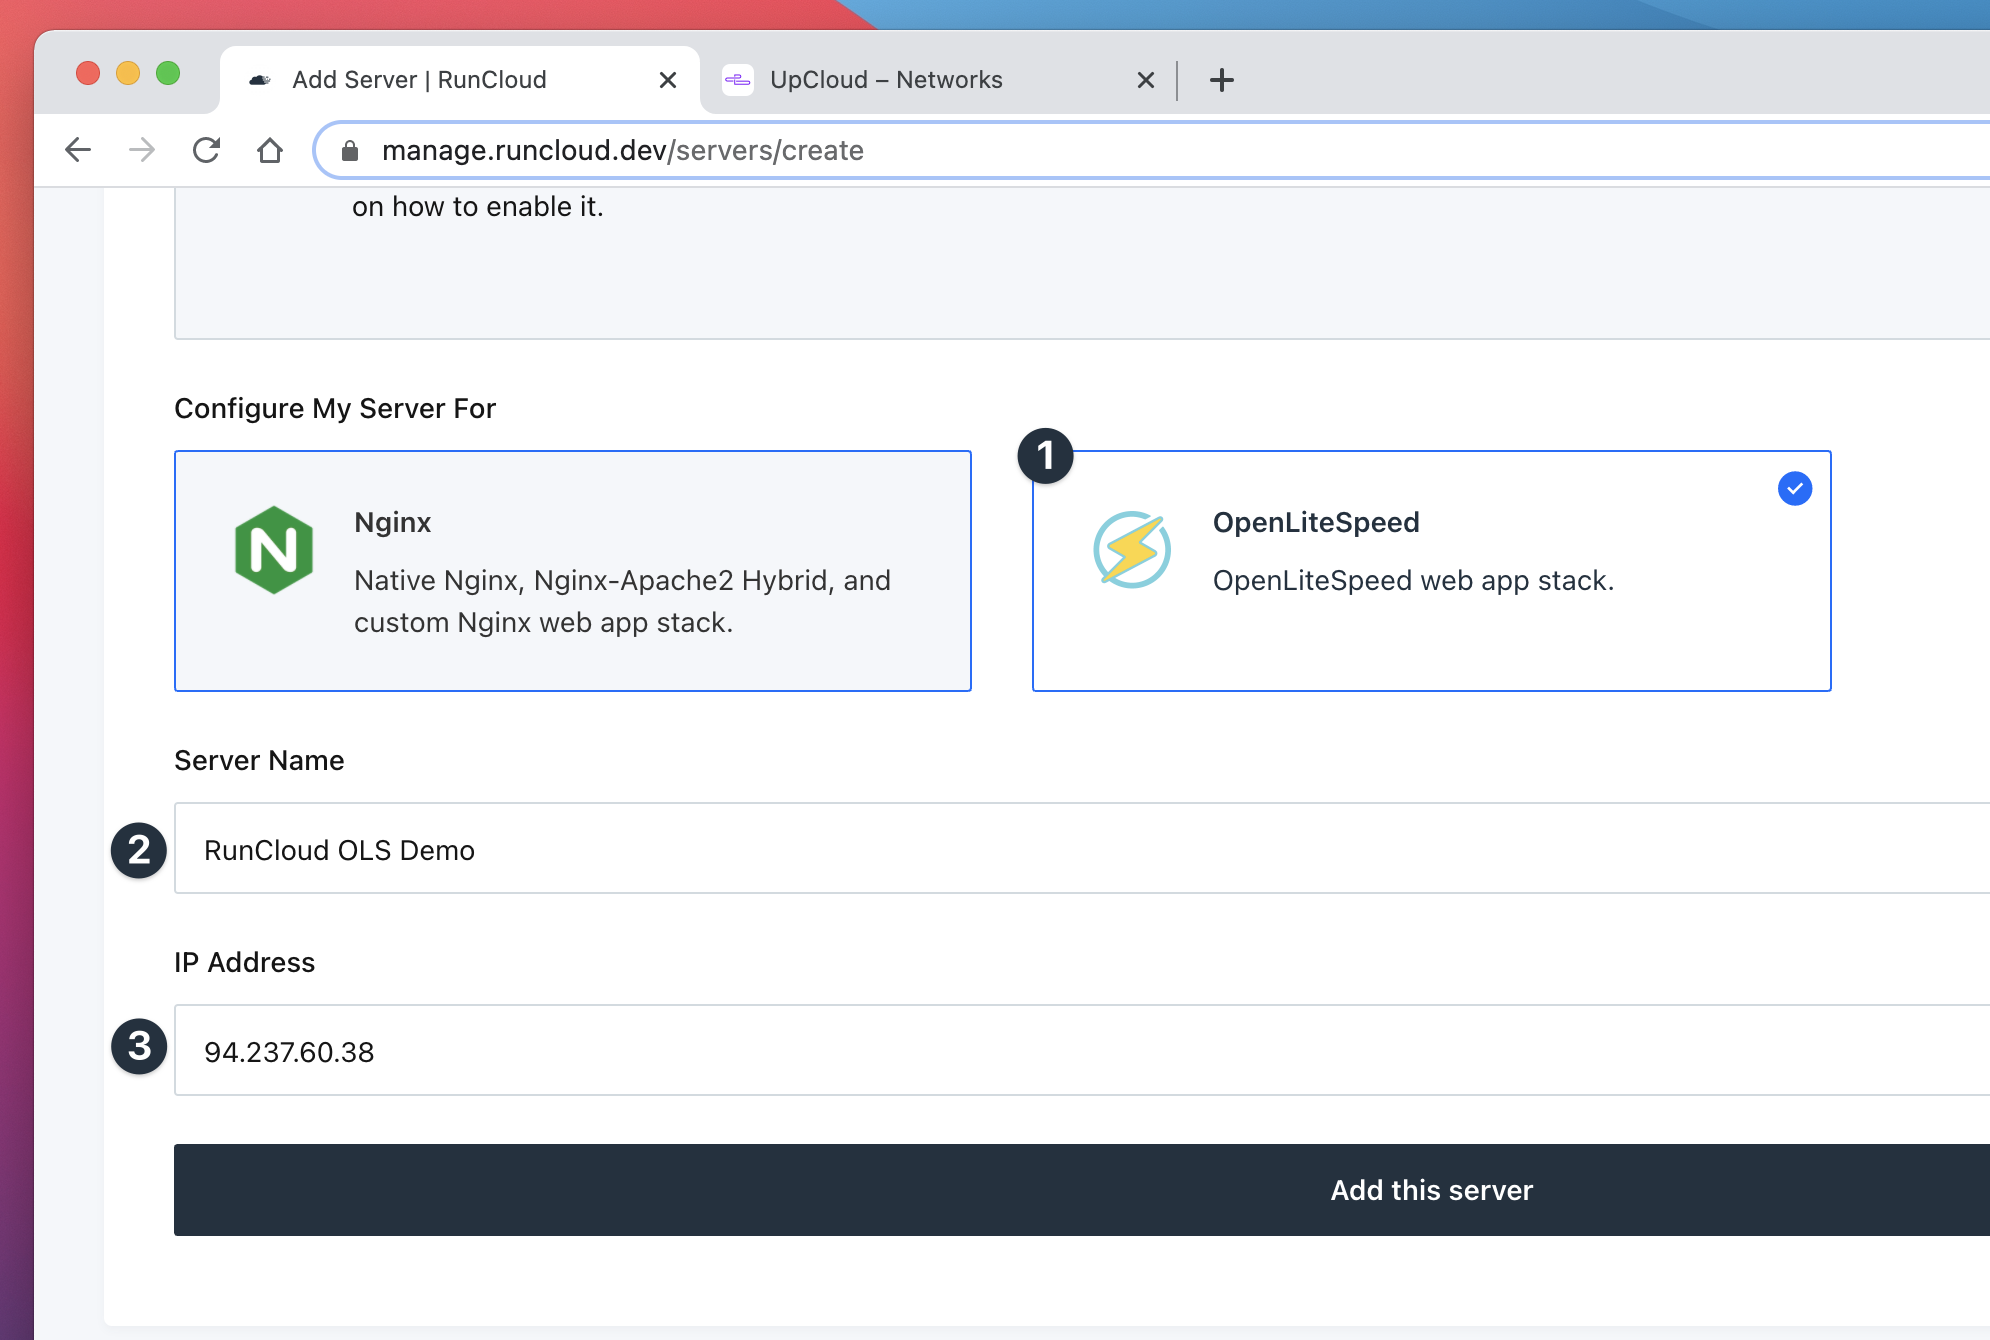
    Once selected, scroll down and select OpenLiteSpeed as your preferred server stack:

    OpenLiteSpeed Server Stack RunCloud

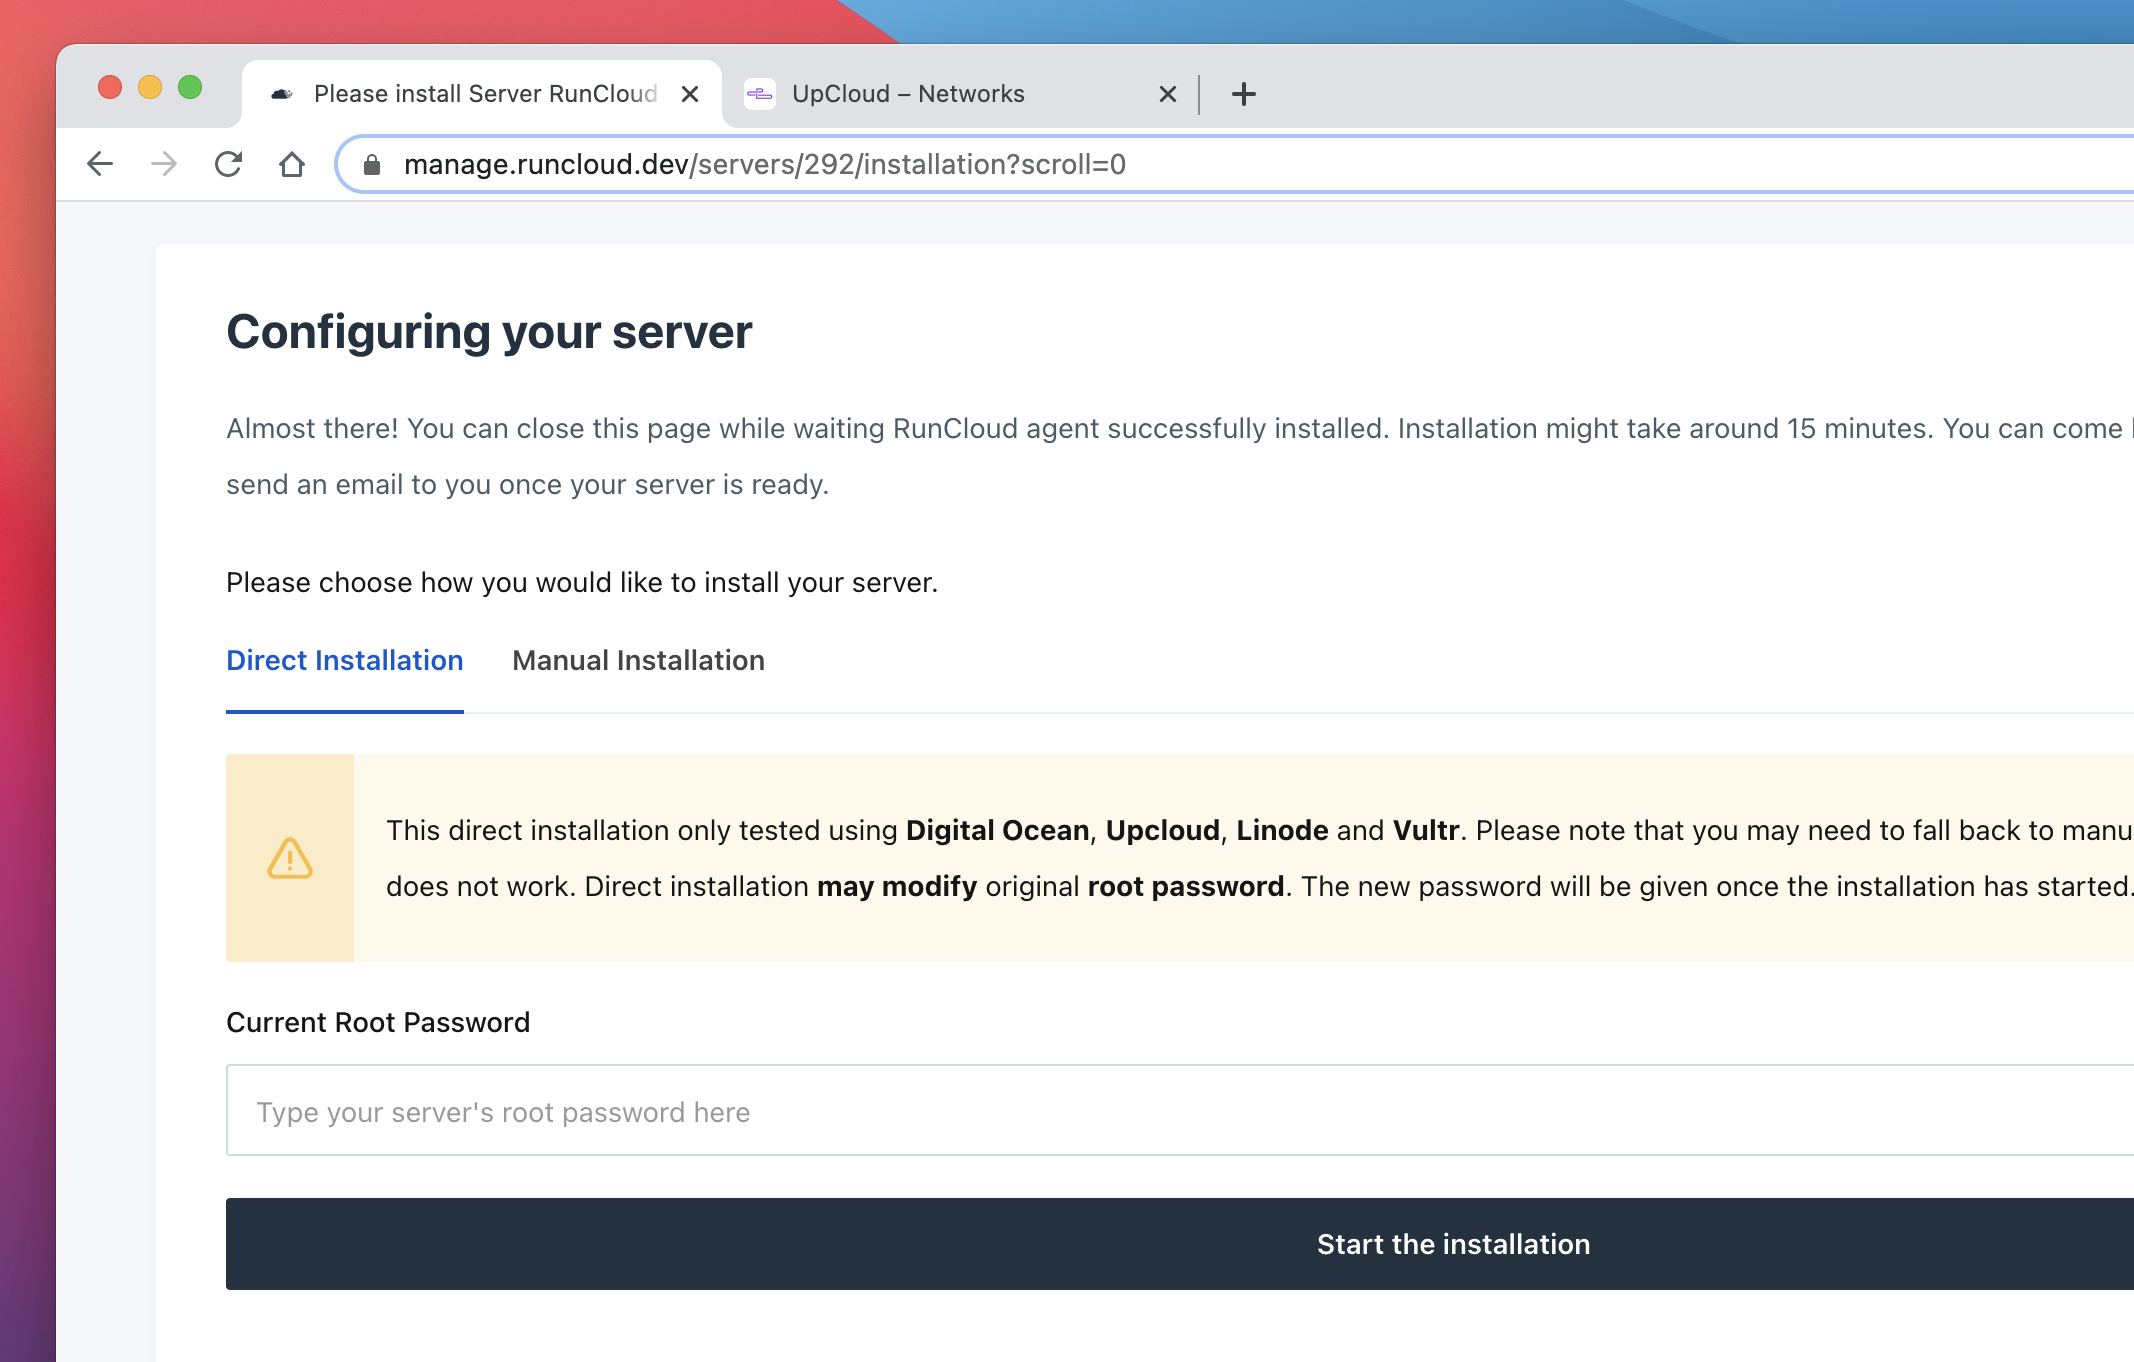
    Then, give your server a suitable name (so it’s easy to locate later), enter the server’s IP address, and click Add this server. You’ll then be taken to the following page where you’ll be asked to enter your server’s root password:

    Server Credentials

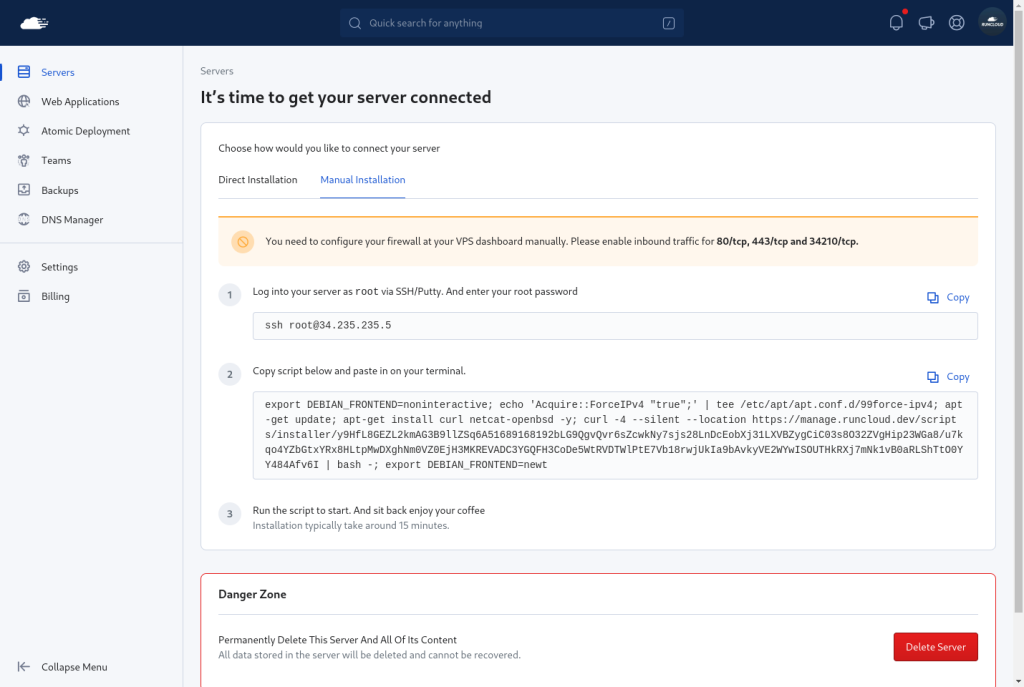
    You’ll then be prompted to enter your server’s root password, which will be automatically emailed to you by UpCloud once your server has finished deploying. And with other server providers, it’s typically quite easy to locate in their respective account areas. Once entered, click Start the installation.

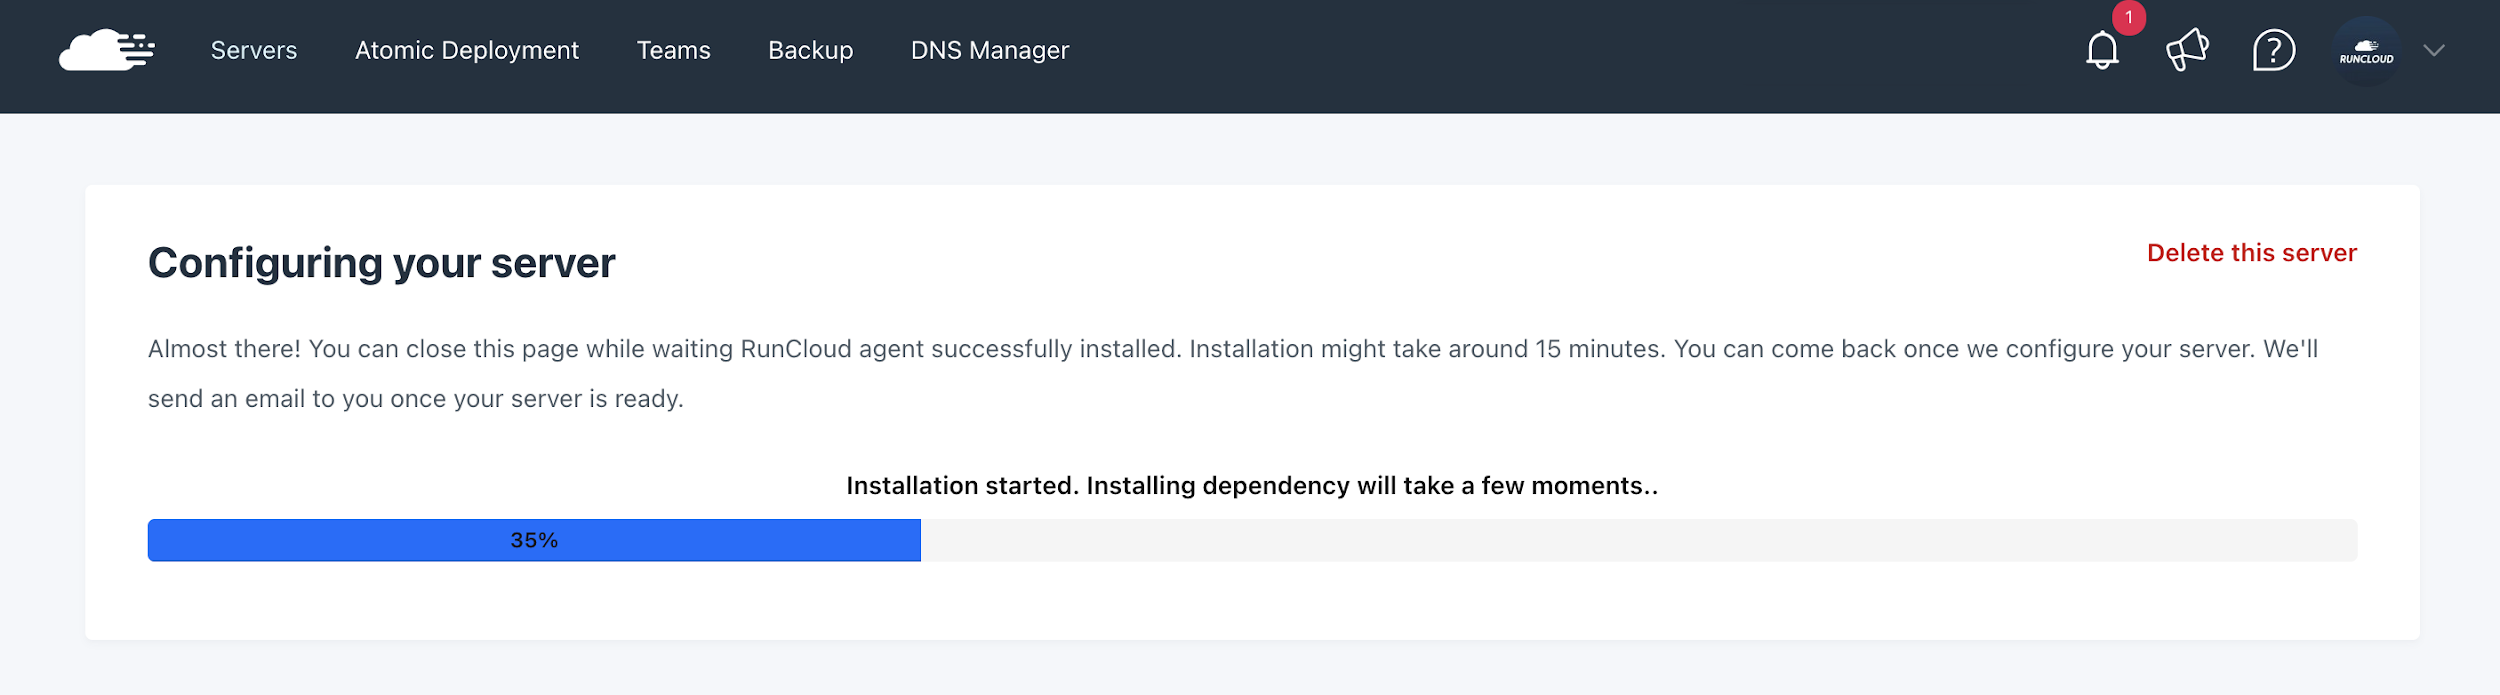
    As RunCloud configures your server – this is what you’ll see:

    RunCloud Server Configuration

    And once complete, OpenLiteSpeed will have been successfully installed and configured which means you can now deploy WordPress using RunCloud’s easy 1-Click WordPress installation.

    RunCloud Server Dashboard

    3. Deploy WordPress With RunCloud’s 1-Click Install

    Now that your server is connected to RunCloud, the last step is to create your brand-new web application (in this case, WordPress) using our easy, one-click WordPress installation.

    • Select your server and navigate to the Web Application tab – as shown below:
    Create Web Application
    • In the top right corner, click Create Web App and proceed to select RunCloud’s 1-Click WordPress option:
    1-Click WordPress Installation

    There are a few standard WordPress-related settings that you can configure here such as your first user account as well as the site administrator email address – as well as enabling the automatic installation of LiteSpeed’s official caching plugin for WordPress (which we highly recommend leaving enabled).

    For reference, the officially LiteSpeed Caching plugin paired with LSCache is an incredible combination. The plugin is one of (if not) the best & most well-maintained caching plugins for WordPress – here’s a quick preview of what it’ll look like in your WordPress dashboard when you’re done following this tutorial to install OpenLiteSpeed:

    LiteSpeed Cache Plugin WordPress

    And once you’re done entering your credentials, simply click confirm and that’s it. RunCloud will take care of the entire WordPress installation process.

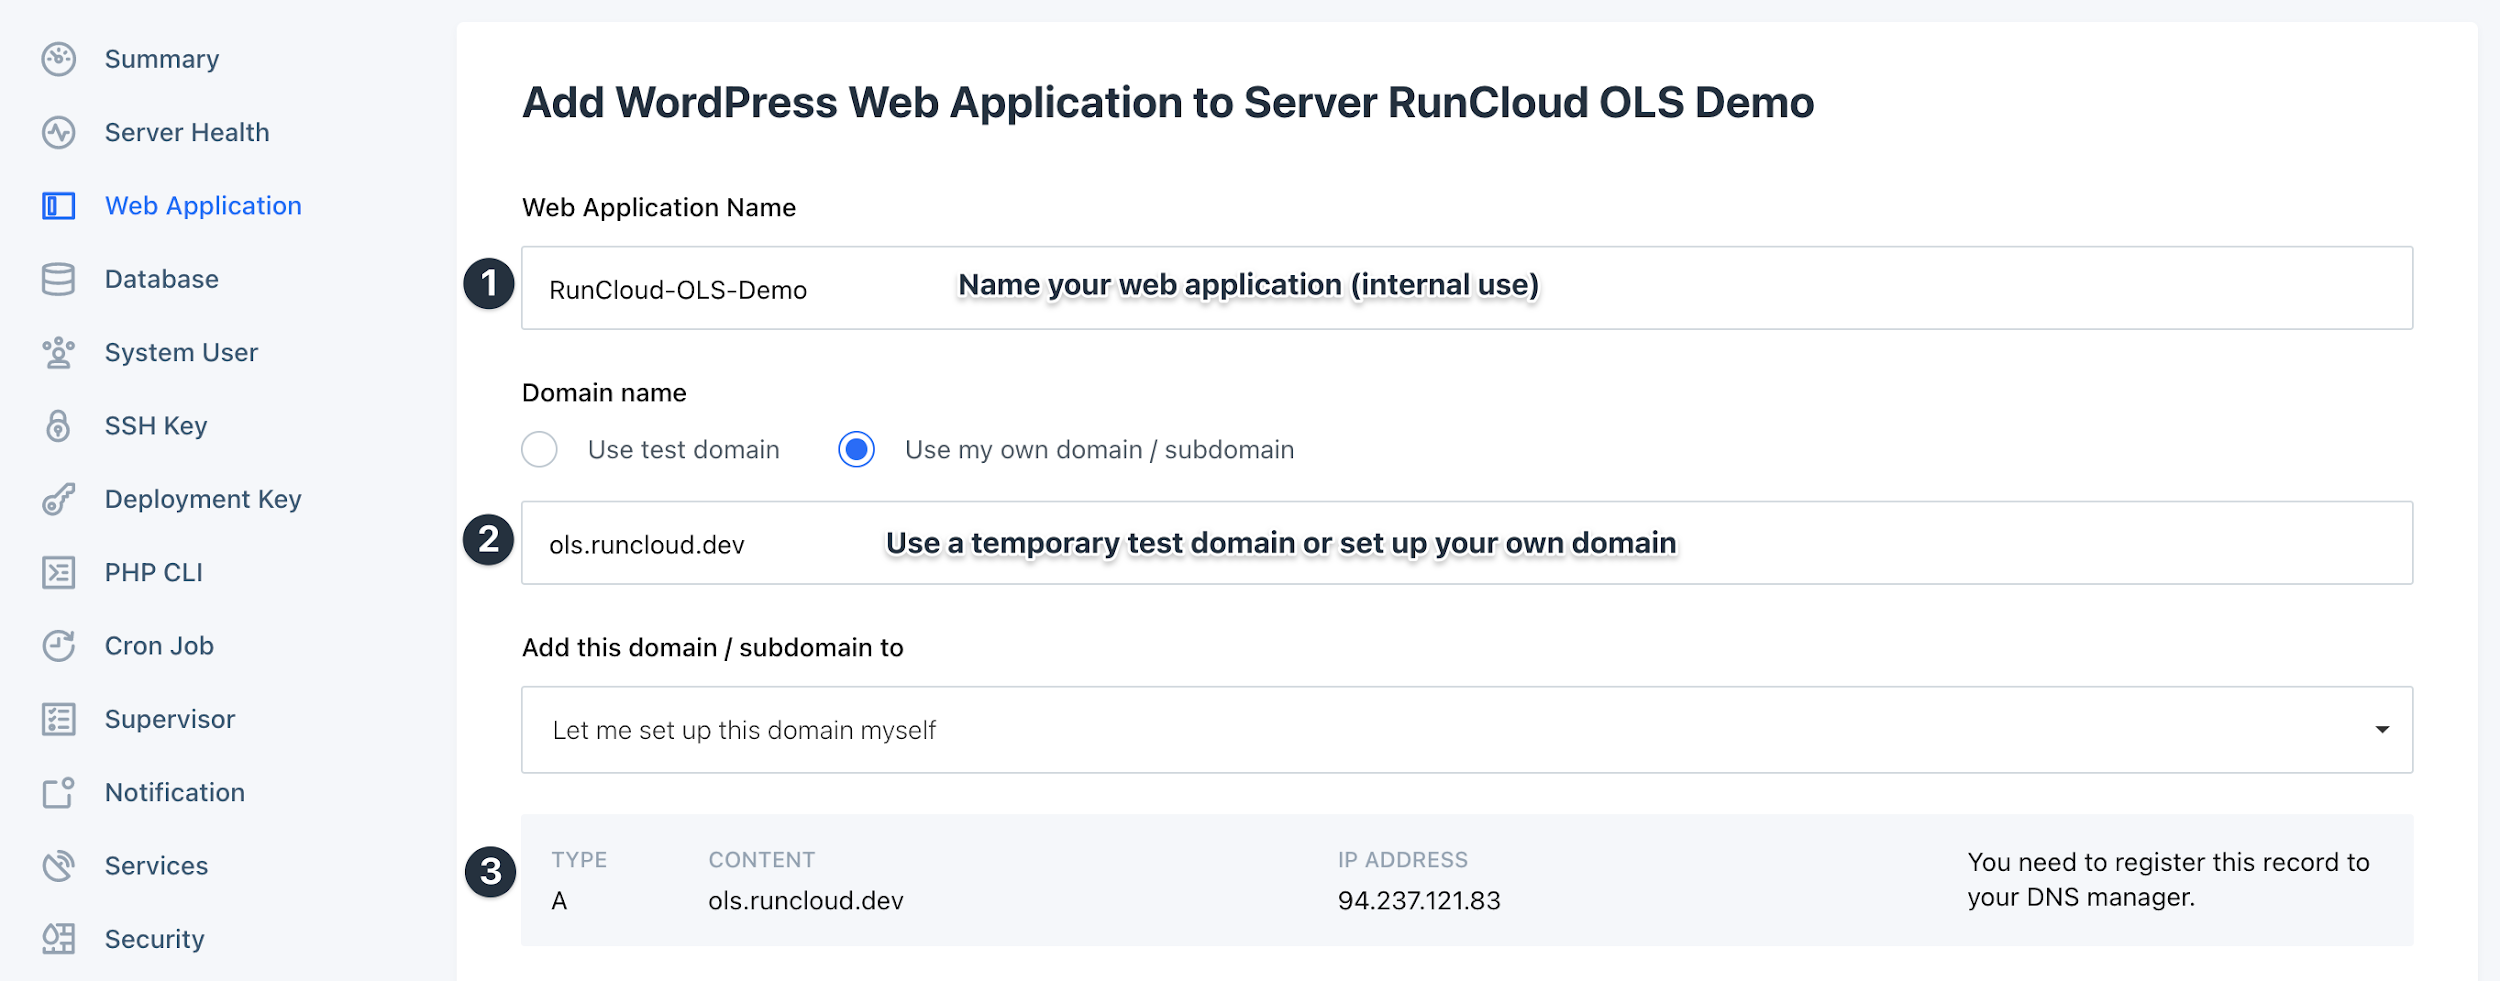
    Add Domain Name

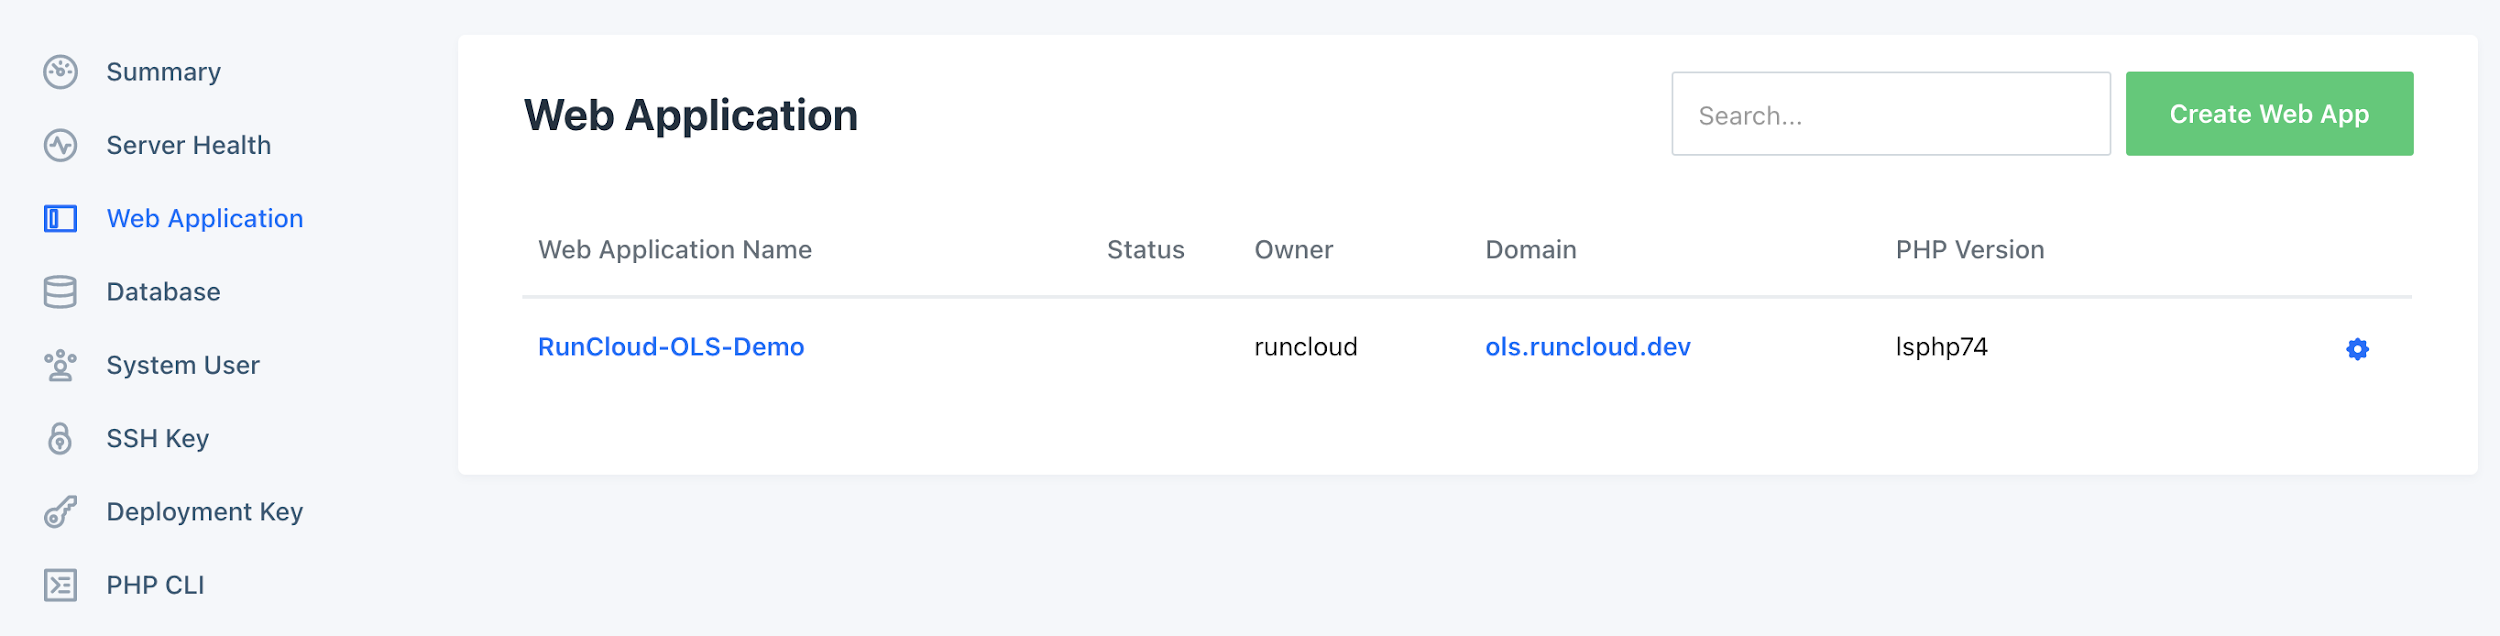
    Once RunCloud finishes deploying WordPress on your brand-new server, here’s what you’ll see:

    Manage Web Applications

    Now you can manage your WordPress installation right here from your RunCloud dashboard. In order for your site to be accessible from a URL of your choice, you’ll need to navigate to your web application’s Domains options where you’ll be able to connect a domain and then be prompted to create the necessary A record to point to this IP address with your DNS provider. Once you’ve connected a domain, you’ll be able to deploy a free Let’s Encrypt SSL certificate in the SSL tab or alternatively install a custom certificate from another service such as Cloudflare.

    With RunCloud, you can finally enjoy hosting and managing servers with features like cloning, staging, atomic deployment, built-in backups, and more…

    As you’ll quickly notice when you begin to take a look around your newly installed WordPress website, just clicking around the WordPress admin area on your new site, you’ll feel a noticeable difference in how snappy pages are loading in comparison to what you’re likely accustomed to. Websites running on NGINX on RunCloud can benefit from the RunCloud Hub as well as RunCache, while sites using OpenLiteSPeed can instead take advantage of the official LiteSpeed Caching plugin.

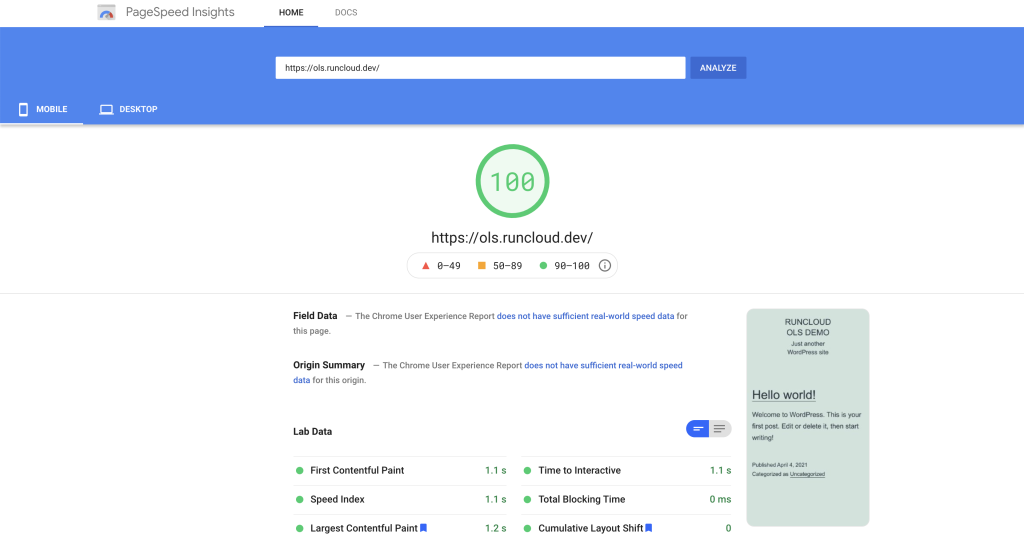
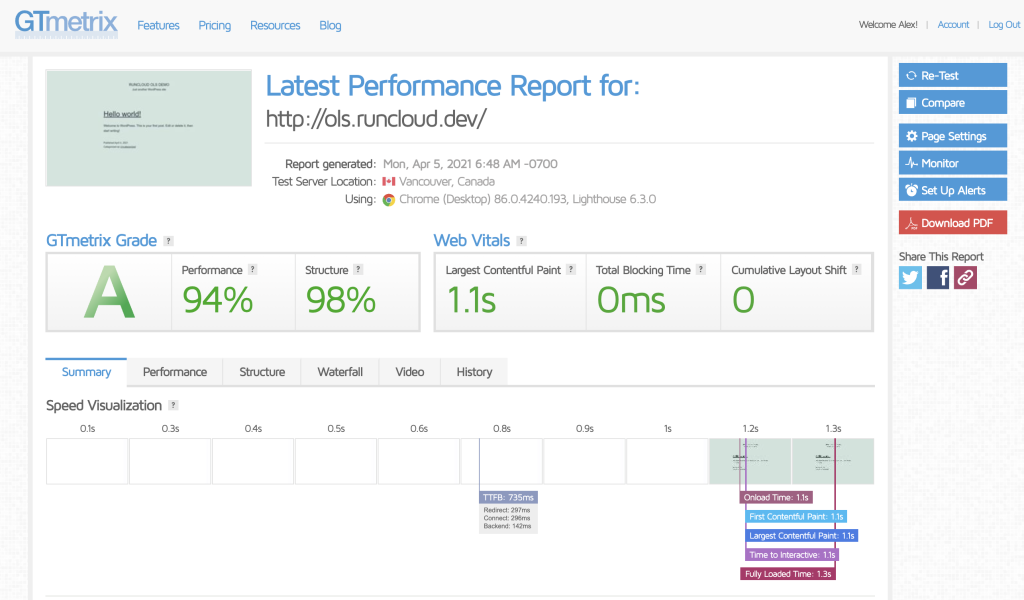
    So now, let’s actually drop in the demo site we set up for this tutorial to run a quick performance test with GTMetrix and Google PageSpeedInsights.

    Google PageSpeed Insights OpenLiteSpeed
    GT Metrix Performance Test OLS

    With no optimization of any kind done, this is quite impressive & truly a result of OpenLiteSpeed’s highly performant server stack as well as RunCloud’s configuration and UpCloud’s rock-solid infrastructure. Though it is worth noting that most benchmarks begin to observe the more notable differences when comparing OpenLiteSpeed and other server stacks under heavier load so we look forward to you deploying your sites and enjoying the benefits of the OpenLiteSpeed server stack which was built for speed, security, and scalability!

    Migrating Sites from NGINX to OpenLiteSpeed

    If you already have sites hosted on servers running NGINX that you’d like to move over to OpenLiteSpeed servers, the process couldn’t be easier with RunCloud.

    1. Deploy a new server with OpenLiteSpeed (as outlined above)
    2. Clone the web app from the NGINX server to your new OpenLiteSpeed server
    3. Test and if you run into any issues, simply rebuild the web application
    4. Point your domain to your new server

    Ready to get started? Create your RunCloud account today.

    How To Deploy WordPress on OpenLiteSpeed (Manual)

    However, for those of you who are just looking to test OpenLiteSpeed on a sandbox server – here’s how you can manually install WordPress on OpenLiteSpeed:

    1. Installing MariaDB server:

    MariaDB server is a popular open-source alternative to MySQL database. It’s easily available in the standard repositories. The first step is to update the packages list on the server, using the following command:

    sudo apt update

    After the packages list has been updated, run the below command to install the MariaDB server and MariaDB client on your server. There, you will be asked to confirm to use storage space. Type Y and press the Enter key to proceed with the installation.

    sudo apt install mariadb-server

    Use the below command to conduct the secure installation of MySQL on your server.

    sudo mysql_secure_installation

    The command prompt will take you through the wizard, including the following questions. Answer them as shown below:

    • Change the root password: N
    • Remove anonymous user: Y
    • Disallow root login remotely: Y
    • Remove test database and access to it: Y
    • Reload Privilege Table Now: Y

    The MariaDB server has been installed and configured. You can proceed to create the first database.

    Go into the MySQL client by running the following command.

    sudo mysql

    Enter the below commands to build a database and grant all permissions on that database to a new database user account.

    • mysql > CREATE DATABASE wordpress;
    • mysql > GRANT ALL ON wordpress.* TO ‘wordpress’@’localhost’ IDENTIFIED BY ‘password’;

    Flush the privilege table and exit from the mysql shell.

    • mysql > flush privileges;
    • mysql > exit;

    Now, your database is ready to install WordPress.

    The next step is to install all the required PHP extensions.

    1. Installing required PHP extensions

    WordPress works with both PHP and SQL. Before installing WordPress, you will need to install the following PHP extensions to ensure that WordPress runs on the server seamlessly.

    sudo apt install lsphp74-common lsphp74-curl lsphp74-imap lsphp74-json lsphp74-mysql lsphp74-opcache lsphp74-imagick lsphp74-memcached lsphp74-redis

    3. Configuring OpenLiteSpeed

    You will need to configure the OpenLiteSpeed server to host your WordPress site. Here, you are required to set the correct version of the PHP processor, allow the rewrite module and various other features.

    Configure your server to use Isphp74 as a PHP server instead of the default PHP processor.

    • Go to Server Configuration > External App and click the edit icon.
    • OpenLiteSpeed SAPI app
    • Replace lsphp with lsphp74
    • Replace uds://tmp/lshttpd/lsphp.sock with uds://tmp/lshttpd/lsphp74.sock
    • Replace lsphp73/bin/lsphp with $SERVER_ROOT/lsphp74/bin/lsphp

    Once you make the changes, click on the save icon on the top right corner of the panel. The next step is to configure the rewrite module, an important part of the WordPress feature. Go to the Virtual Hosts and click on the view icon.

    Click on the General tab. Edit the General options with the edit icon at the top right corner.

    In the Document Root field, type $VH_ROOT/html/wordpress and click the save button at the top right corner.

    Again click on the General tab of virtual hosts configuration. And click the edit icon next to the Index Files section.

    In the Index Files Field, add index.php at the beginning of the section. Click on the Save button at the top right corner.

    Go to the Rewrite tab of the Virtual Hosts configuration view and edit the Rewrite Control Options.

    Set Enable Rewrite and Auto Load from .htaccess to Yes. Click on the save icon at the top right corner.

    Click on the restart icon to apply the changes once the configuration is done on the OpenLiteSpeed server.

    4. Downloading and extracting WordPress

    Your server is ready to host WordPress. Now, you can download and install WordPress.

    Navigate to the virtual host root which is /usr/local/lsws/Example/html

    cd /usr/local/lsws/Example/html/

    Download the latest version of WordPress using the wget command below.

    wget https://wordpress.org/latest.tar.gz

    Extract the zip files, which will create a directory called ‘wordpress’ in /usr/local/lsws/Example/html

    tar xvfz latest.tar.gz

    5. Setting up the ownership and permissions of the file

    By setting up the right ownership of files and folders, you will not come across any problems while installing or downloading any new themes or plugins. Let’s check how you can set up the ownership of the files and folders.

    Firstly, remove ownership from the WordPress directory through the below command.

    sudo chown -R nobody:nogroup /usr/local/lsws/Example/html/wordpress

    Using the below command, set 750 permissions to the directories and 640 to the files.

    sudo find /usr/local/lsws/Example/html/wordpress/ -type d -exec chmod 750 {} \;
    sudo find /usr/local/lsws/Example/html/wordpress/ -type f -exec chmod 640 {} \;0

    6. Installing WordPress

    Through the IP address of your OpenLiteSpeed server or your domain (if set), you can open the WordPress installation wizard in your web browser.

    In the first screen, you will be asked to choose your preferred language. Select your language and click on the Continue button.

    Next, WordPress prompts you to keep the database server information and credentials ready. Click on the “Let’s Go!” button. Fill up the details as shown below:

    • Database name: the database you created through the MySQL shell, wordpress in this example.
    • Username: Here, you need to input the database user
    • Password: Type in the password of your database user
    • Database Host: localhost
    • Table Prefix: wp_ is the default table prefix. However, you can type something else to enhance the security of your website.

    Click on the Submit button to confirm.

    Up till now, the configuration of the database connection for the WordPress installation has been done. Next, click on the “Run the Installation” button to set up your WordPress site.

    You will be asked to enter your website’s details, create an administrator account, and create a password.

    When you have filled up all the details, click on the Install button.

    On successful installation, you will be able to see the login screen. Log in using the username and password that you created earlier in the installation wizard. Once logged in, you can see the WordPress website’s admin dashboard.

    7. Creating and configuring SSL certificates

    Now, WordPress is successfully installed on your web server. To add a security layer between your website server and your audience, you will have to obtain and install SSL certificates.

    If you already use Certbot to obtain SSL certificates for your OpenLiteSpeed server, you can use the already installed Certbot client. Then, you can skip the installation step and check out the steps to obtaining certificates for your WordPress site.

    If you do not have the Certbot installed, use the steps here to get the client.

    Update the packages installed on the server using the following commands:

    sudo apt update

    Install the Certbot client with the following command.

    sudo apt install certbot

    Now you can obtain the SSL certificates for your server with the below command.

    sudo certbot certonly --webroot

    Note: Before you can obtain SSL certificates, you will need to have a domain name: A record pointing to your OpenLiteSpeed server’s public IP address.

    Then, you will have to answer the following questions.

    • Enter Email address: Type in your email address
    • Accept the terms of service: A
    • Share your Email Address with EFF: Type Y for yes and N for No.
    • Enter Domain name: Type your FQDN (fully qualified domain name) here
    • Input the Web root: /usr/local/lsws/Example/html/wordpress/

    The validation process will be completed, once you are done answering the above questions. The certificate files will be saved in /etc/letsencrypt/live/<your-domain>/ directory.

    Configure the WordPress site on your OpenLiteSpeed server to use the SSL certificate. Navigate to the Virtual Host configuration and open the SSL tab. Edit the SSL Private Key & Certificate.

    Type the fields as follows:

    • Private Key File: /etc/letsencrypt/live/<your-domain>/privkey.pem
    • Certificate File: /etc/letsencrypt/live/<your-domain>/fullchain.pem
    • Chained Certificate: Yes
    • CA Certificate Path: /etc/letsencrypt/live/<your-domain>/fullchain.pem
    • CA Certificate File: /etc/letsencrypt/live/<your-domain>/fullchain.pem

    Once completed, go to Listeners and add a new listener.

    Fill in the fields as follows:

    • Listener Name: SSL
    • IP Address: ANY
    • Post: 443
    • Binding:
    • Enable REUSEPORT: Not Set
    • Secure: Yes

    Apply the new settings by clicking the save icon on the right.

    Next, view the SSL listener to configure the Virtual host mapping.

    Add a row in Virtual Host Mappings.

    Choose the virtual host and type in your domain name. Save the settings from the save button on the top right corner.

    Once you’ve configured the SSL with your OpenLiteSpeed server, click on the restart icon to apply the changes.

    You can now visit your website on https protocol as well.

    Now, you are all set to work on your newly installed website.

    Given how time-consuming the manual installation of OpenLiteSpeed (as well as the deployment of WordPress) is, this isn’t recommended for those of you who aren’t system administrators or don’t have significant experience managing servers.

    This is actually exactly why we built RunCloud.

    Painless server configuration that automates all of this so you don’t need to spend hours figuring it out – get started with RunCloud today & get up and running in minutes.

    Already deployed your WordPress website on OpenLiteSpeed? Or, have any other questions or already deployed your WordPress website on OpenLiteSpeed? Let us know & join the conversation by leaving a comment below. 💬
  • How To Properly Back Up Your Website (Disaster Recovery) with RunCloud

    How To Properly Back Up Your Website (Disaster Recovery) with RunCloud

    A proper backup and disaster recovery solution is an absolute necessity for anyone running a website. Whether it’s something going wrong with a server/infrastructure provider or a change on the application level that takes your site down, you need to be ready to handle it fast.

    Fortunately, setting a backup solution that’s actually usable and reliable doesn’t have to be a hassle. So, in this guide, we’re going to walk you through how you can set up website backups with RunCloud Backup – a built-in backup solution designed to bring you peace of mind without slowing down your sites.

    An Introduction to RunCloud Backups

    Most backup solutions run at the application level, such as in the form of a plugin if you’re using a CMS like WordPress which is great in theory because it’s very easy to set up. Unfortunately, some solutions like this can significantly slow down your websites and tend not to be reliable for large sites.

    With RunCloud Backups – both backups & restores are performed at the server level which means you’re not relying on any compatibility or size limitations not getting in the way. In fact, we also continue to closely monitor user feedback on backups ensuring their efficiency and reliability across the board on the hundreds of thousands of web applications that rely on RunCloud.

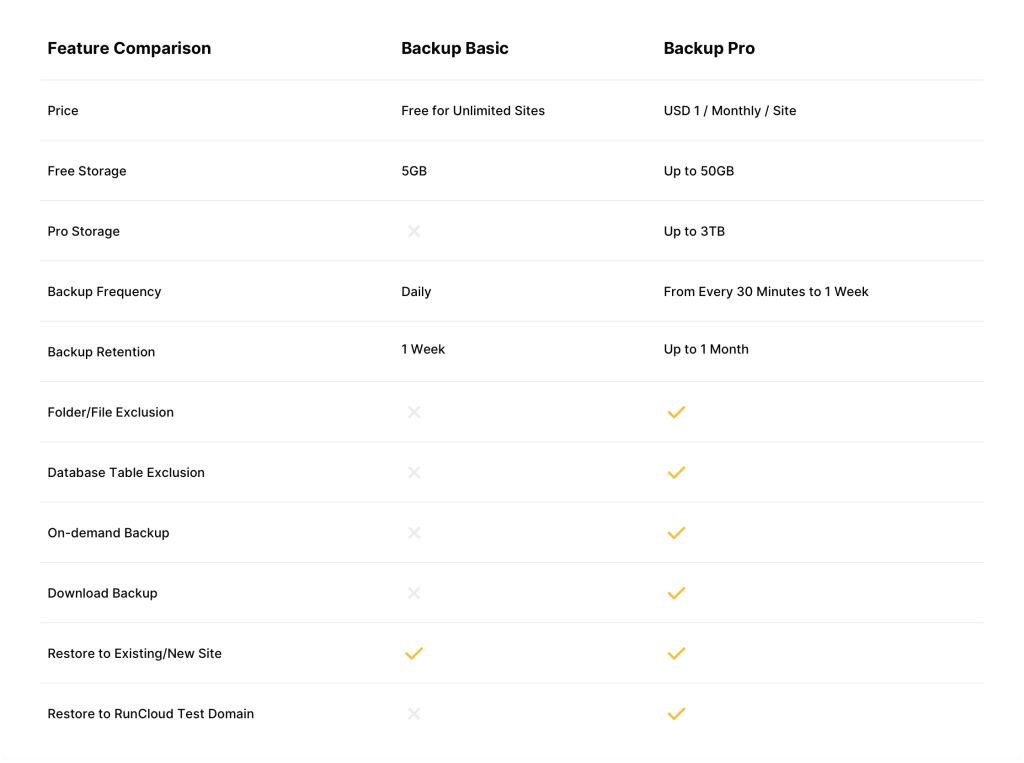
    RunCloud Backup Pricing

    RunCloud Backup Features

    • Incremental Backup
    • Backup WordPress site (both Web App & Database)
    • Folder/File exclusion
    • Database Table exclusion
    • Backup Frequency (12 hours – 1 week)
    • Schedule Backup
    • On-demand Backup
    • Download Backup

    How To Back Up Web Applications (The Easiest Way)

    1. Log In To Your RunCloud Dashboard

    The first step is to log in to your RunCloud account. If you don’t have a RunCloud account we’ll recommend you create one:

    RunCloud Login

    2. Create Your First Backup

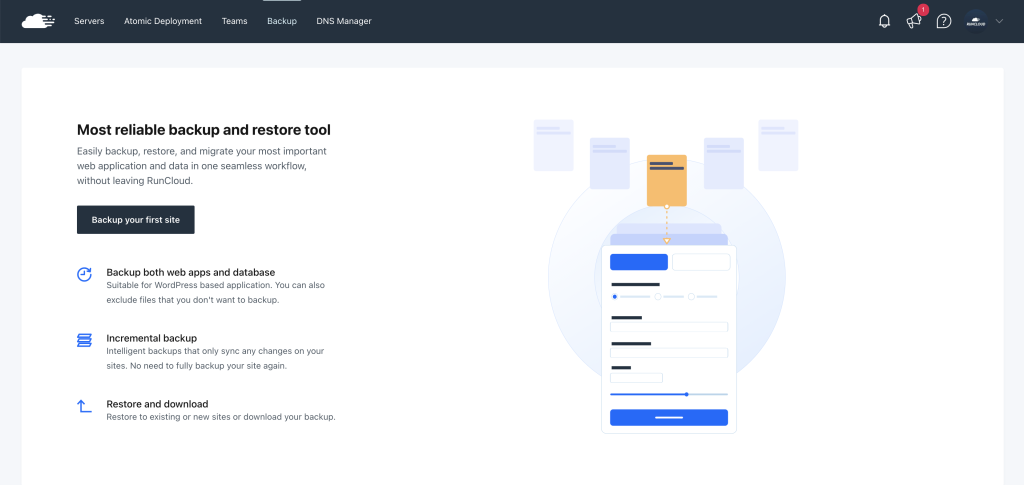
    Navigate to the RunCloud Backup page in your dashboard using the navigation. You’ll see the following (if this is your first time creating a backup with RunCloud).

    To get started, simply click Backup your first site.

    3. Configure Your Backup’s Settings

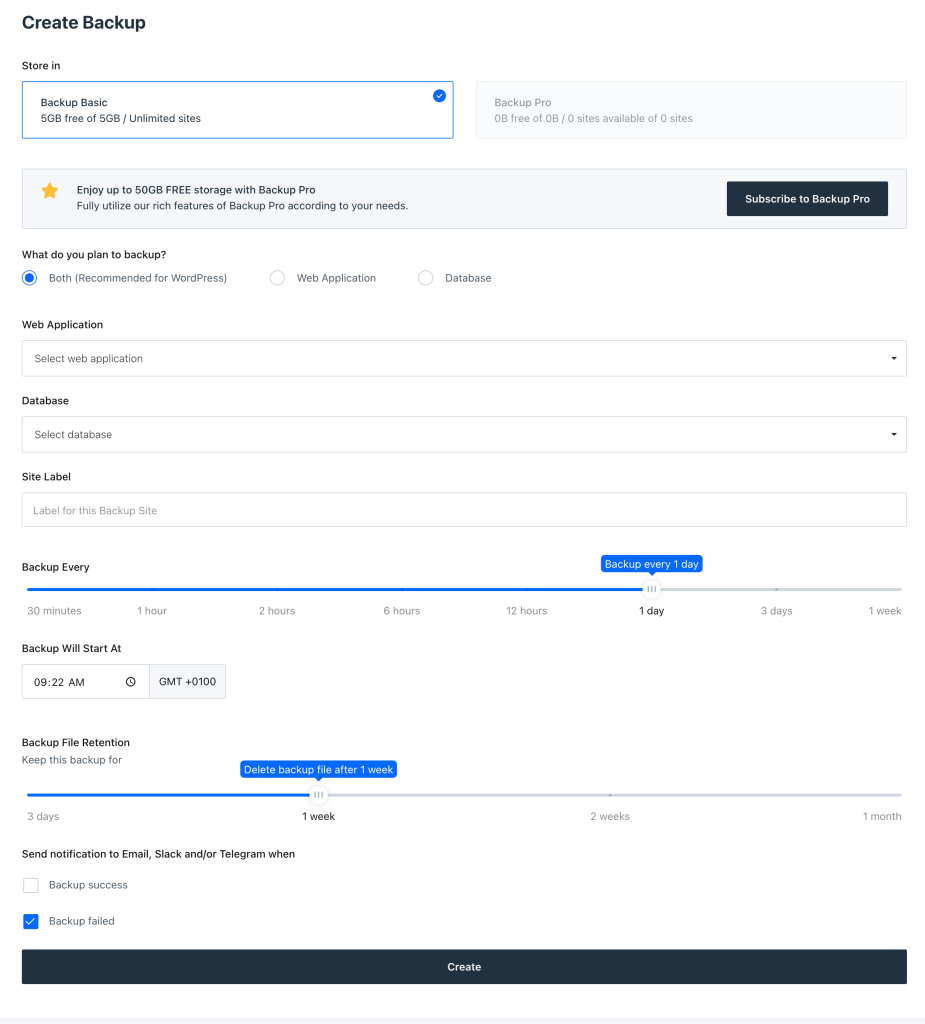
    You’ll then be able to configure your backup’s settings, which is where you set the following:

    • Backup Plan – Backup Basic or Backup Pro
    • Backup Method: Web Application, Database, or Both

      Note: We highly recommend backing up both your web application and database if you use WordPress as the database is crucial for your website to work.

    • Select your web application
    • Select your database
    • Name this backup
    • Choose your backup frequency
    • Choose your backup retention (how long do you want to store backup files?)
    • Configure notifications for successful & failed backups

    All RunCloud users get 5GB of storage included with their existing plans that can be used with RunCloud’s free backup service. However, if you feel that you’d benefit from advanced functionality such as custom file exclusion, on-demand backups, flexible backup retention & more – you can upgrade to RunCloud Backup Pro starting at just $1 USD per month for up to 50GB of storage.

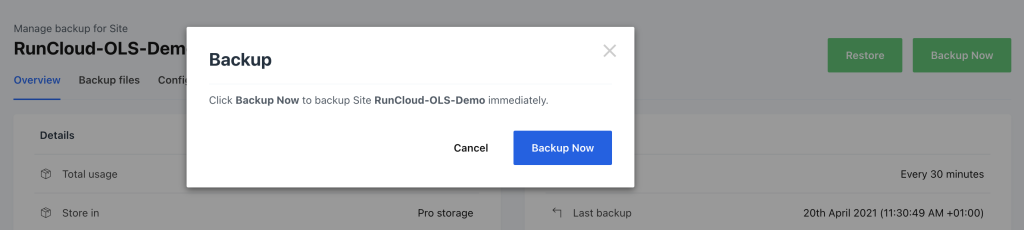
    RunCloud On-Demand Backups

    Restoring Your Backups – Disaster Recovery

    If you can’t rely on actually being able to use your backups when it comes to disaster recovery – then there’s not much point in having them there in the first place. You need a solid restore process in place so that if a server or site ever needs to be restored, you know how to get it back up & running in no-time.

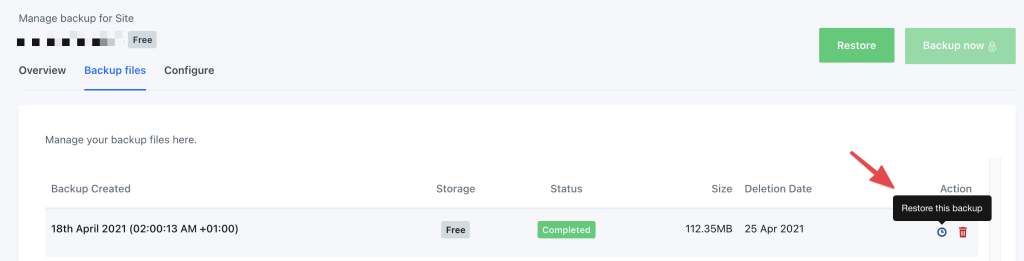
    This couldn’t be easier than it is with RunCloud Backups. Simply navigate to your backup instance and then view your Backup files. From this list of all backups – choose which one you wish to restore and then click Restore this backup:

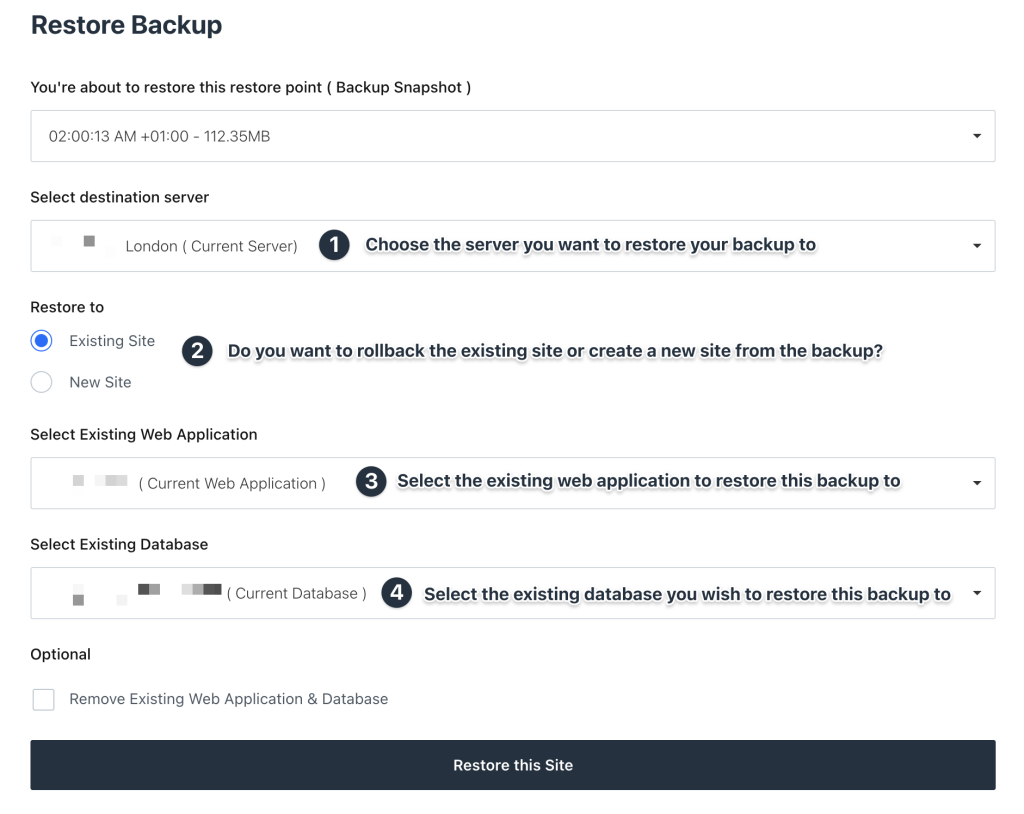
    You’ll then be able to select how you wish to restore this backup. What server you wish to restore it to, whether you wish to rollback the existing site or create a new site from the backup and more.

    Backup Restore

    And once you’ve made your selection, simply click Restore this Site and that’s it! 👏

    RunCloud Backups – Frequently Asked Questions

    Can I only restore database or web application files?

    If you chose only to backup files, then files that were backed up will be restored. If you chose only to backup the database, then only the database will be restored. And if you backup both web application and database, both will be restored. You cannot restore one or the other.

    What happens to my backups after my trial?

    Before your trial is up, you will need to select which sites you want to move over to Backup Basic. Any sites on Backup Pro will be deleted unless you purchase a Backup Pro plan. You will notified three times to migrate your data and choose a plan: 1 week, 3 days, and 1 day.

    What if I delete my web application?

    We do not delete any of your data unless requested to do so. Therefore, if you have backups and you delete your web application, the backups will be saved and can still be restored to an existing website or a test site (Pro).

    Are all my files backed up?

    All files are backed up as incremental backups meaning your first backup will be a full backup and each backup afterwards will be incremental backups, which mean that only files that have changed will be backed up. If you selected to retain backups for a week, then once the full backup is deleted, another full backup will be made, and after that, each backup will be incremental.

    Our backup service is smart enough to understand the difference between a full backup and incremental backups, so you need not worry. This new service was designed like this to maximize the amount of space before files are deleted.

    What happens if I reach my backup limit?

    Once you have reached the maximum limit of your plan, your backups will be paused until space is cleared or you upgrade your plan.

    Conclusion – RunCloud Backup, A Built-In Backup Solution You Can Actually Rely On

    While we highly recommend having a backup solution such as RunCloud’s built-in Backup service in place, for more advanced sites with multiple people making changes to your codebase, we highly recommend using version control with GitHub for Continuous Integration and Deployment.

    And with RunCloud working in the background to ensure backups are taken on the server level, you don’t have to worry about having a reference point to restore to – no matter what happens. For instance, if you were one of the millions affected, our free solution that couldn’t be easier to get started with could have saved your data from being lost in OVH’s data center fire in France.

    The last thing you want to deal with is data loss on a service your customers rely on in production. And at RunCloud, we’re driven to make it easier for you to run your business giving you everything you need to manage your servers. If you have absolutely any questions, comments, or suggestions – feel free to leave a comment below! 💬

  • Google FLoC – What You Need to Know & How To Opt Out

    Google FLoC – What You Need to Know & How To Opt Out

    There has been a lot of talk lately surrounding Google’s Federated Learning of Cohorts (FLoC) initiative, which is quickly becoming a hot-button topic both in the tech community and major mainstream publications.

    In this blog post, we’ll cover what Google FLoC is, why it matters, and how we’ve made it easy to disable it in RunCloud.

    What Is Google FLoC & Why It Matters

    FLoC is a proposed feature by Google that lets browsers collect, profile, and store usage patterns based on a user’s browsing habits over time.

    This new type of tracking, which is done directly within the browser, would then be used by Google and its advertising partners for widespread tracking and personalization of ads.

    FLoC is part of a larger response by Google to the slow decay (and increased blocking) of third-party cookies on the web. Why? Because as users become more privacy-aware, the ease of tracking and identifying them across multiple websites for the purposes of advertising and surveillance has become much more difficult in recent years.

    With the proposed FLoC feature enabled, the browser will create “cohorts” that group users with similar browsing habits together. This cohort ID will grow in size and relevance as it continually gathers information about the sites that users visit, the ads that they view, their behavioral patterns, how often they browse, etc.

    Each individual cohort is then combined with other cohort IDs when sent to Google, who will then display ads to individual users based on the relevancy of the data that has been collected within their shared cohort.

    Why FLoC Is Considered Premature

    In the acronym for FLoC, the word cohort was carefully chosen. A cohort is defined as a “group of individuals having a statistics factor in common”.

    Google’s promise is that FLoC cohort IDs will be anonymous data points in a larger network and that each cohort’s data will be sent to advertisers without them knowing the identity of individual users.

    The problem with FLoC however is two-fold, both in principle and in practice.

    Principally, the user’s browser is supposed to be sacred. It’s simply a tool to interact with the larger web. FLoC aims to turn the browser into a real-time tracking mechanism that collects the most sensitive information about an individual user’s browsing habits without the user being able to circumvent or opt out of this data collection.

    In practical terms, it’s not difficult for advertisers to understand and identify patterns once the FLoC data set becomes large enough. For example, cohorts comprised of users that share the same location data, shop in the same neighborhood, are active in the same time zone, etc. can be easily grouped together by demographic.

    To make matters worse,, if FLoC data is used in combination with other tracking mechanisms such as social media analytics, existing third-party cookies, or data sets purchased from data brokers, it becomes a trivial task to fingerprint users based on age, class, ethnicity, political parties, etc.

    Why FLoC Sets A Dangerous Precedent

    Google announced that in Chrome version 89 they will forcibly enable and trial their FLoC data-collection initiative without the consent of users or webmasters.

    The Electronic Frontier Foundation was one of the first privacy advocates to bring to light the dangers of this announcement. They correctly pointed out that instead of reducing the overreach of personalized tracking in the ad-tech industry, Google is now seeking to leverage it’s Chrome browser to do the data mining itself.

    Google Chrome’s market share is currently pegged at almost 70%. That represents more than two-thirds of the entire user base of the web. Once the FLoC rollout has exited it’s current beta stage and is mainlined into the Chrome codebase, it immediately begins profiling the majority of Internet users and sends that information straight to Google.

    Other browser vendors such as Mozilla Firefox, Brave, Microsoft Edge, Vivaldi, and Opera have recently weighed in on FLoC, some of them making broader statements as they wait to see how the situation unfolds, while others have already chosen not to support any such data aggregation efforts whatsoever.

    The most notable response is that of Brave, with an entire blog post that opens with this clear statement:

    Brave opposes FLoC, along with any other feature designed to share information about you and your interests without your fully informed consent. The privacy-affecting aspects of FLoC have never been enabled in Brave releases […] Brave is also disabling FLoC on our websites, to protect Chrome users learning about Brave.

    How to Opt Out of FLoC Data Collection

    For end-users, the easiest choice when it comes to opting out of FLoC’s data collection is simply not to use Chrome. However, a Chrome Extension was released by DuckDuckGo that disables FLoC tracking within the browser. If this extension will be disabled by Google or simply ignored by the browser itself is yet to be seen.

    The larger point of contention however lies with webmasters and web server administrators. FLoC requires that a website provide an explicit HTTP response header if it wants to opt out of the program. This suggests that Google is counting on webmasters to not be bothered with this task.

    The Easiest Way To Opt Out of FLoC (with RunCloud)

    Manually inserting the necessary FLoC header in your web server configuration, and then reproducing this for multiple applications is quite time-consuming. Fortunately, RunCloud makes this easier than ever – we’ve integrated the necessary pre-defined HTTP headers for all users so they can disable FLoC in less than a minute.

    Once logged in, navigate to your server, and under Web Applications > NGINX Config you’ll be able to select and add the required config rule. After adding the required headers, the next step is to clear your NGINX FastCGI cache (RunCache) and then test your website or web application to ensure the headers are being delivered.

    We’re currently implementing a similar feature to support websites and applications using the OpenLiteSpeed web server and will be rolling it out in the coming days.

    If you choose not to opt out of FLoC as a website owner, you are helping Google to add more profiling data on your visitors by leveraging your website as a data point that adds to the user’s fingerprint on the web. Opting out of Google’s new FLoC initiative & protect your users in a matter of less than a minute with the help of RunCloud – here’s how:

    So if you’re a RunCloud user and currently using a server that runs on NGINX, opting out couldn’t be easier – in just a few clicks.

    Alternatively, in order to opt your website out of the FLoC network, webmasters need to add a custom HTTP response header to their website to be served with each request. This comes in the form of a Permissions-Policy header, with the following syntax:

    Permissions-Policy: interest-cohort=()

    For the popular NGINX web server, this can be achieved with the add_header directive, which needs to be added to each website’s configuration file. The following code snippet shows the syntax that’s required:

    server {
        location / {
          add_header Permissions-Policy interest-cohort=();
        ...
        }
    }

    After adding the snippet to your configuration file, you’ll need to reload NGINX in order for the changes to take effect.

    NGINX has built-in syntax checking that should be used in combination with a reload or restart, the following command will do both:

    nginx -t && service nginx reload

    Once enabled in NGINX, the Permissions-Policy header will be respected by Chrome and disables FLoC data collection for users that visit your website — in other words, your website will not be used as a profiling data point for your users’ browsing habits.

    Opting Out of Google FLoC on OpenLiteSpeed (RunCLoud)

    If you’re using the similarly popular OpenLiteSpeed web server, you can add the necessary FLoC header by editing your vHost configuration file (vhost.conf) which is located in the /usr/local/lsws/conf/MY_VHOST/ directory.

    OpenLiteSpeed uses what are called Contexts for adding custom headers and other functionality to a web application. In the example below, we’ll be adding the following code to the root context in an example WordPress configuration located at /usr/local/lsws/conf/vhosts/wordpress/vhconf.conf:

    context / {
      location                $DOC_ROOT
      allowBrowse             1
      note                    This header disables FLoC
      extraHeaders            set Permissions-Policy interest-cohort=()
    }

    If you use RunCloud to manage your OpenLiteSpeed servers, adding the above snippet to your configuration file is as easy as navigating to your server and under LiteSpeed Server Config:

    The Context snippet can be placed after your Index directive. And, fortunately – with RunCloud, there’s no need to manually restart OpenLiteSpeed. After you’ve inserted the snippet and click Update Config, we automatically enable the configuration changes under the hood.

    Otherwise, after saving the changes to your configuration file – you’ll need to do a graceful restart of OpenLiteSpeed in order for the changes to take effect. The following command will achieve that:

    systemctl restart lsws

    Opting Out of Google FLoC on OpenLiteSpeed (Non-RunCloud Method)

    If you prefer to use the graphical OpenLiteSpeed WebAdmin Console instead, you can achieve the same functionality with the following steps outlined in the screenshots below.

    The OpenLiteSpeed WebAdmin runs on port 7080, which would be closed by default in your firewall.

    To enable access to that port via UFW, use the following command:

    ufw allow 7080

    UFW stands for Uncomplicated Firewall and is an extremely popular and easy-to-use wrapper around IPTables firewall rules. Most Linux distributions come with it pre-installed, but you can manually install it for your distribution.

    For Debian/Ubuntu run the following command:

    sudo apt install ufw -y

    For servers using CentOS, run the following command:

    yum install ufw -y

    UFW will not be immediately active by default. But before activating it, it’s important to set the necessary default rules:

    ufw default deny incoming
    
    ufw default allow outgoing

    And then use UFW’s syntax to add common ports that you’ll need on your server:

    ufw allow ssh
    
    ufw allow http
    
    ufw allow https

    Those rules take care of SSH (else you’ll be locked out when you try to reconnect), as well as HTTP and HTTPS web traffic.

    You can now enable UFW by running:

    ufw enable

    You can check the status of your firewall by running ufw status

    Finally, add the custom rule for OpenLiteSpeed WebAdminwhich will be active immediately:

    ufw allow 7080

    Next, login to your WebAdmin Console which is located at http://YOUR_SERVER_IP:7080 and navigate to the list of Virtual Hosts:

    Next, select the Virtual Host that you wish to edit. In this case we’ll be editing “wordpress”. Select the + icon to add a new Context:

    Choose Static as the context type and press the Next icon:

    There are a number of fields available when adding Contexts from within the WebAdmin console. For the purposes of disabling FLoC, only the following fields need to be populated:

    The URI scheme and whether it’s Accessible or not are mandatory fields.

    The $DOC_ROOT is not strictly needed, but it’s better to utilize this variable as OpenLiteSpeed uses it internally to match your website’s document root.

    The Notes field is optional as well but is useful for displaying what the rule does in the WebAdmin list of Contexts.

    Finally, the Header Operations is where we set the FLoC header.

    As with the CLI, you’ll need to do a graceful restart of OpenLiteSpeed for these changes to take effect. You can do so by clicking on the green Restart button located next to the process ID (PID) of OpenLiteSpeed:

    When you’re finished in the WebAdmin Console, remember to restrict access to this port by denying connections in your firewall using UFW:

    ufw deny 7080

    How To Disable/Opt Out of Google FLoC (WordPress Plugin Method)

    If you use WordPress & wish to go the less technical route º there’s an open-source plugin that will add the necessary Permissions-Policy headers to your website.

    In your dashboard, head to Plugins > Add New and search for Disable FLoC by Roy Tanck. This plugin author has developed numerous plugins and is also a core contributor to WordPress.

    More importantly, this plugin will not overwrite or otherwise interfere with any existing Permissions-Policy or other security headers you’ve configured…

    Verifying FLoC protections in RunCloud

    After enabling your custom RunCloud headers to disable FLoC, you can verify the existence of the headers in a number of ways.

    The easiest method is to test your website online using securityheaders.com, which should display the Permissions-Policy interest-cohort=() string in the list of headers.

    If you’re comfortable on the command line, you can use the curl utility to inspect your website’s headers, with the following command:

    curl -I https://mywebsite.com

    The output should contain the string permissions-policy: interest-cohort=()

    Lastly, you can use your browser’s DevTools to inspect headers. Visit your website and open your browser’s DevTools with the shortcut CTRL + Shift + C. Navigate to the Network tab and you’ll be prompted to Reload your page to inspect the requests and responses.

    Once you’ve reloaded your page the first item in the list is the HTML of the page itself (with a GET/200 request/response code). Click on that entry, and on the right-side panel under the Headers tab you’ll be able to view all the response headers; of which permissions-policy: interest-cohort=() should be there.

    Summary – Say No To FLoC, Protect Your Users

    Following the announcement of Google FLoC, our team was excited to be able to provide our users an effortless opt-out process because we believe privacy should always be an option, control should belong to the website owner – if not the users themselves…

    Want to share your thoughts on Google’s FLoC intiative or have any other questions about opting out? Let us know & join the conversation by leaving a comment below. 💬

  • PHP 8.0 Now Available On RunCloud

    PHP 8.0 Now Available On RunCloud

    Introducing The Latest Version Of PHP 8.x

    PHP 8.x was released on December 23, 2020 and RunCloud has been working hard to ensure compatibility with its servers. Several weeks later, today, RunCloud is ready to introduce to its users that PHP 8.x which is now available to all accounts located in the web application settings, existing and new. While we highly encourage you keep your PHP version up to date, we do not yet recommend you upgrade to PHP 8.x on your live production servers, especially if you are using WordPress. If you are creating a new web app without WordPress, you may freely give PHP 8.x a try.

    There are still many WordPress plugins that are not yet compatible with PHP 8.x and will cause your server or website to error. While PHP 8.x does have good backwards-compatibility with PHP 7.x, we do recommend slowly updating your web applications over time. Currently, RunCloud Support can only offer technical support for errors and bugs that are directly related to the RunCloud dashboard and your web application. If you still choose to update your RunCloud’s PHP version to 8.x, here are some of the latest fixes, bugs, and new features, as well as features that may have been removed.

    PHP 8.0.1 is now available with more bug fixes and updates in RunCloud

    RunCloud always runs after new updates of PHP and always has been forward to embrace all the most recent updates of PHP. Recently, PHP has officially released the most updated version, 8.0.1 on the 7th January of 2021. So we always look forward to providing you with the most details of PHP, while you have the choice to upgrade or continue with your current version of PHP 7.x. We always recommend the latest version of PHP 7.x to you, as the latest versions are the fastest and most secure.

    There is no doubt, PHP is one of the most popular and dominant languages on the Internet. And we need to learn and cope up with the new features to get most out of this language. Lets get started on a review of the latest features.

    What’s new in Version 8.0?

    PHP Version 8.0 has come up with some great new features like the following:

    • Named Parameters: PHP 8.0 allows named parameters during function or method calls in addition to traditional positional parameters, which helps a lot for new and experienced programmers. This will certainly make the function or method parameter names part of the public API. The non-standardized DocBlock @no-named-arguments expresses that the library does not provide backwards-compatibility for named parameters.
    • Attributes: In PHP 8.0,  Attributes allows declaring meta-data for functions, classes, properties, and parameters. Attributes map to PHP class names (declared with an Attribute itself), and they can be fetched programmatically with PHP Reflection API, which is a great feature of PHP 8.0.
    • Constructor Properties:  In the constructor, PHP 8.0 enables declaring the visibility (public, private, or protected) and type. Those properties will be registered as class properties with the same visibility and type they are declared in the constructor.This backwards-incompatible feature can help reduce boilerplate code when declaring value-object classes.
    • Just-in-Time Compilation: The Just-in-time (JIT) Compilation is a great feature of PHP. PHP Opcache supports JIT. It’s been disabled by default, and if you enable it, JIT compiles and caches native instructions. It does not make a noticeable difference in IO-bound web applications, but provides a performance boost for CPU-heavy applications.
    • Union Types: Union Types extend type declarations (return types, parameters, and class properties) to declare more than one type.
    • Null-safe Operator: Null-safe operator provides safety in method or property chaining when the return value or property can be null.

    • Matching expressions: Match expressions are similar to switch blocks, but match blocks provide type-safe comparisons, supporting a return value that does not require break statements to break-out, and supports multiple matching values. Also it guarantees that at least one branch is matched, ensuring all cases are accounted for.

    • Weak-Maps: A WeakMap is another new feature of PHP 8.0, which allows to store and associate arbitrary values for object keys, but without preventing the garbage collector from clearing it the object falls out of scope everywhere else. A WeakMap is similar to SplObjectStorage, as in both WeakMap and splObjectStorage use objects as the key, and allows storage of arbitrary values. However, a WeakMap does not prevent the object from collecting the garbage.

    New Functions and Classes of version 8.0:

    PHP 8.0 introduces a few new functions to ease string inspections which contain or starts with substring, or ends with substring to replace the meticulous strpos() !== false calls that are less readable, and error-prone due to weak type comparisons.

    PHP 8.0 also brings functions such as fdiv, get_resource_id, get_debug_type, and preg_last_error_msg

    Apart from that, the new Stringable interface has been added and the new PhpToken class has been included which provides a more fluent Object-Oriented interface as an alternative to the legacy array-based to token_get_all function.

    Deprecations: The following deprecations are being occurred in 8.0

    • PostgreSQL: Several aliased functions 
    • Deprecate required parameters after optional parameters in function/method signatures
    • `ReflectionParameter::getClass())`, `::isArray()`, and `::isCallable()` methods 
    • Disabled functions: Reflection and `get_defined_functions()` 
    • `libxml_disable_entity_loader` function 

    Apart from that  two functionality or features have been adjusted. They are-

    • XMLRPC extension is moved to PECL and 
    • `FILTER_FLAG_SCHEME_REQUIRED` and `FILTER_FLAG_HOST_REQUIRED` flags are removed

    Functionality or Syntax Changes in PHP 8.0: 

    There have been some changes in 8.0 with previous versions and they are mentioned below-

    • Default error reporting is set to `E_ALL`
    • Inheritance rules are not applied to `private` class methods
    • Calling non-static class methods statically result in a fatal error
    • Apache Handler: Module name and file path changes
    • Locale-independent `float` to `string` casting
    • Class magic method signatures are strictly enforced
    • `substr`, `iconv_substr`, `grapheme_substr` return empty string on out-of-bound offsets
    • PHP Startup Errors are displayed by default
    • GD Extension: Windows DLL file name changed from `php_gd2.dll` to `php_gd.dll`
    • `crypt()` function requires `$salt` parameter
    • PDO: Default error mode set to exceptions
    • `@` Error Suppression operator does not silent fatal errors
    • Trailing commas are allowed in parameter lists and closure `use` lists
    • Implicit negative array key increments do not skip negative numbers
    • `XMLWriter` objects replace `xmlwriter` resources
    • OpenSSL: `resource` to object migration
    • `XMLParser` objects replace `xml` resources
    • String to number comparisons no longer coerce string to a number
    • Strict type checks on arithmetic operators
    • Sorting functions maintain positions of equal value items
    • Internal function warnings now throw `TypeError` and `ValueError` exceptions
    • Expressions can now `throw` Exceptions
    • JSON extension is always available
    • `catch` exceptions only by type
    • `+`/`-` operators take higher precedence when used with concat (`.`) operator
    • `CurlHandle` class objects replace curl handlers
    • Fatal errors on incompatible method signatures
    • Disabled functions behave as if they do not exist
    • `GdImage` class objects replace GD image resources
    • Assertions throw exceptions by default
    • Sockets extension resources (`Socket` and `AddressInfo`) are class objects

    The difference between version 8.0 and 8.0.1: 

    In version 8.0.1 some of the bugs of version 8.0 have been fixed, which makes the newer version more capable and flexible for the users. Some of the major bug fixings are -White space not unfolded for CC/BCC headers, Iterable not co-variant to mixed, Build of PHP extension fails due to configuration gap with libtool, stream filter loses final block of data, and so on.

    Last, but not the least, RunCloud support can assist you in the update should you need any additional help, although RunCloud cannot offer any support for individual plugins that may be experiencing a conflict with the new PHP 8.0 or 8.0.1 version.

    Switching PHP versions on RunCloud:

    Located within your Web Application, scroll down the Navigation menu and click on Settings. Right at the very top is the setting for PHP version which you can switch from PHP 7.x to PHP 7.8. If you encounter any errors, you may switch it back immediately. It is highly recommended that if you are running a WordPress website or a live website, you do not upgrade at this time. If you are starting a new web application without WordPress or running a website that is not running on WordPress, you should be okay to upgrade, but please proceed with caution.

    After selecting your PHP version, click the Update button and you will be on the new PHP version! Please check your website to make sure there are no errors. Should you encounter any issues with your upgrading to PHP 8.0 from your dashboard, do not hesitate to open a ticket to RunCloud support! If you have any suggestions or ideas for RunCloud, we are always happy to hear from you!

  • How to Set Up an Amazon EC2 (AWS) Server to Host Your Websites

    With AWS, Amazon’s cloud computing platform, you can create virtual servers in the cloud using either Amazon EC2 or Amazon Lightsail.

    Amazon EC2 is for highly configurable and performant environments, while Amazon Lightsail is for easy-to-use and affordable ones.

    This tutorial will guide you through hosting your web applications on Amazon EC2. You can also follow a short video tutorial at the end.

    Note: If you want to use Amazon Lightsail, please check our other tutorial – how to setup Amazon Lightsail to host your websites.

    Video Tutorial: How to Set Up Amazon EC2 (AWS)

    Prefer watching a video over reading? We’ve got you covered.

    You can watch this companion video tutorial while following this written guide.

    Step 1. Create an Amazon EC2 Instance

    To use AWS, you need to sign up or log in to your account.

    Tip: You can try out AWS services for free up to certain limits with the AWS Free Tier. The Free Tier has three types of offers: a 12-month Free Tier, an Always Free offer, and short term trials. Refer to AWS documentation for more details.

    Choose An AWS Region

    Before you create your Amazon EC2 instance, you need to pick a region from the top-right menu. Different regions have different Amazon EC2 dashboards.

    AWS has many regions around the world, such as N. Virginia, Cape Town, Hong Kong, Mumbai, Seoul, Tokyo, etc. You should pick a region that is near you or your customers. This way, your users will experience less delay when accessing your web applications.

    Launch Instance

    Search for “EC2” in the search bar at the top of your screen. Go to your Amazon EC2 dashboard and click the “Instance” menu on the left sidebar.

    Then click the “Launch Instance” button to start setting up your server.

    On the next screen, you can provide a descriptive name for your server. This name will be displayed in AWS dashboard.

    Choose Ubuntu Server Image

    Next, you need to choose an Amazon Machine Image (AMI) for your instance. If you use RunCloud, we support Ubuntu 20.04, 22.04 and later LTS versions.

    To pick the latest LTS release, just Click on the “Ubuntu” button in the quick start tab under the OS section.

    Choose Amazon EC2 Instance Type

    Under the “Instance Type” option, select one of the predefined instance types for your instance. Each type has a certain number of vCPUs (virtual Central Processing Unit) and memory.

    For example, you can choose the t2.micro instance with 1 vCPU and 1GB Memory that is free for AWS Free Tier users. Each instance type in different AWS region is priced differently. Refer to the AWS pricing chart for up to date information on this topic.

    Create and Download a SSH Key

    Next, you will need to specify the SSH key that you want to use to log into this server. If you already have an existing key-pair, you can either use that, or use the built-in utility to create a new key pair and save it to your local computer. You will not be able to download the file again after it’s created.

    Configure Security Group (Open Required Ports)

    Next, you need to open the required ports on your EC2 instance. This step is very important to make your Amazon EC2 instance reachable on the internet.

    You need open the following 4 ports:

    • SSH – TCP Port 22
    • HTTP – TCP Port 80
    • HTTPS – TCP Port 443
    • Custom – TCP Port 34210

    Additionally, you can also allow incoming UDP traffic on port 443 to enable HTTP3 traffic.

    To add the above rules, click on “Edit” next to the “Network Settings” sub menu and fill in the following details:

    • Auto-assign public IP: Disable (we will assign a static IP in next step)
    • Firewall (security groups): Create New security Group
      • Security group name: runcloud-security-group
      • Description: RunCloud needs these ports to function properly

    Next, you need to add the rules to open required TCP ports and allow connections from anywhere. For the SSH rule, we recommend setting the source type to “My IP“. This will block any connection requests that originate from outside your network.

    You should note that most residential internet connections do not have a permanent IP address, which means that your IP address will change roughly every 24 hours. Due to this, if you try to log in to your server in future, your SSH connection will be blocked.

    To fix this, you can just log back into your AWS account and edit the runcloud-security-group again to use your new IP.

    After adding all of the rules, just leave it and scroll down to the Storage section. Your configuration is temporarily saved in your browser and it will be deployed to AWS when we launch the instance.

    Add Storage

    Within the Storage option you can configure the storage of your server. There are 3 volume types: General Purpose SSD, Provisioned IOPS SSD, and Magnetic storage. Pick the storage type and size that you want, but keep in mind that you will be billed for storage separately.

    Moreover, you will continue to get billed even if you don’t use the storage. For example, if you allocate 200 GB of storage and your server only uses 5 GB then you will be billed for the whole 200 GB every month.

    After adding the storage, you can click on the “Launch Instance” button on the right. This will create a new server with the required settings.

    Step 2. Create A Static Public IP Address

    After creating the server, you will notice that the “Public IPv4 address” filed does not have any value. This is because we disabled the automatic assignment of public IP.

    Why You Need a Static IP Address

    • The public IP address that Amazon EC2 assigns to your instance automatically changes every time you stop and start the instance.
    • If you host your website on Amazon EC2, you should use a static IP address for your server. This way, your website will always be accessible at the same IP address.

    Amazon EC2 provides an Elastic IP address feature for this purpose. An Elastic IP address is a static IP address that stays the same after you stop and start your instance. Please keep in mind that if you use an Elastic IP address, you will not be charged separately. However, if you reserve an IP address and do not use it, then you will be charged for it.

    Moreover, if you terminate (delete) your EC2 instance, your Elastic IP will not be deleted automatically. You will need to go back to Elastic IP dashboard and manually release the IP address.

    Note: AWS limits each account to five (5) Elastic IP addresses per region by default. If you need more than 5 Elastic IP addresses in your AWS account, you can request a quota increase from the AWS Service Quotas console.

    Allocate An Elastic IP Address

    To reserve a new static IP address, go to the “Elastic IPs” section under the “Network & Security” tab in the left menu.

    On the next screen, click on “Allocate Elastic IP address“. This will open up a new screen – select the default values, and click “Allocate“, which will reserve a new IP address. Click on the newly allocated IP address to view its summary.

    After creating an Elastic IP address, you can continue to click the “Associate Elastic IP address” button. This will open up a new page – select the instance you wish to use this Elastic IP address from the drop down menu, and also select its corresponding private IP address.

    Click on “Associate“. Now your Amazon EC2 instance has a static IP address and is ready to be used to host your websites.

    Step 3. Connect Amazon EC2 Instance To RunCloud

    RunCloud lets you connect your cloud servers using three different methods. For Amazon EC2, you can use the manual server installation method.

    Log in to the RunCloud dashboard and click the “Connect a new server” button.

    Select “AWS EC2” from the Server Provider list, and then enter a server name and the static IP address that you created in Step 2. Then click the “Add this server” button.

    On the next screen, choose “Manual Installation” and you will see the script that you have to run on your Amazon EC2 instance.

    Connect to Your Amazon EC2 Instance Using SSH

    Go back to the Amazon EC2 dashboard and find your server under the Instances menu. Select the instance and click on the “Connect” button at the top.

    On the next screen, switch to the “SSH Client” tab. There you will see the commands that you need to execute to connect to your server.

    Open an SSH client and go to the directory where you saved the SSH key that you downloaded when creating the server. To verify that you are in the correct directory, you can run ls <key name> to see if the key is present in the current directory.

    For example, is the name of your key is my-SSH-Key.pem, you will run ls my-SSH-Key.pem. If this shows you the name of your key, then you are in the right place. If you don’t get anything then you need to change the directory using cd command.

    From this directory, run the following command to change the permissions of the SSH key:

    chmod 400 <SSH Key name>.pem

    You can copy the exact command from your AWS dashboard. After changing the permissions, you can run the example command provided in AWS dashboard:

    ssh -i <SSH Key name>.pem ubuntu@myamazonec2-public-dns

    After running the above command, you will get a warning that the authenticity of the server can’t be established when you connect to this server for the first time. Type ‘yes‘ and press “Enter“.

    Run the RunCloud Installation Script

    Finally, we will install the RunCloud agent. We need to run the RunCloud installation script command as the “root” user. Run this command to start a “root” shell.

    sudo -s

    Then, paste and run the RunCloud installer script command. You can find this script in in your RunCloud dashboard. The RunCloud installation will take a few minutes to complete.

    You can check the installer progress on the RunCloud panel too.

    If successful, data about your server will appear, and you will have successfully set up your Amazon EC2 server with RunCloud.

    Once it is completed, you will see the MySQL root password for your database management and the “runcloud” system user password. Please save this information in a secure place.

    Next Steps

    In this article, we have shown you how to set up Amazon EC2 (AWS) to host your websites on RunCloud.

    RunCloud makes it easy to deploy and manage web applications on any cloud server, including AWS. RunCloud and AWS work in tandem to provide you with a fast, secure, and scalable hosting solution for your websites.

    RunCloud is a fantastic tool that saves you a lot of time and hassle when you don’t want to manage your server or don’t have Linux expertise. With RunCloud, you can easily deploy and manage your web applications on any cloud server.

    Continue your journey and learn how to Create Your First Website on RunCloud.

  • How To Set Up Google Cloud Server To Host Your Websites

    The Google Cloud Platform (GCP) is a suite of cloud computing services offered by Google. All GCP data centers are connected through Google’s backbone network – one of the biggest and fastest in the world.

    RunCloud is a cloud server management tool that allows you to maintain full control of your server, and host multiple WordPress, WooCommerce, Laravel, and PHP applications with fast and easy configuration. With RunCloud, you don’t need to be a Linux expert to host your website on Google Cloud Platform servers.

    In this tutorial, we will show you how to set up a Google Cloud server to host your website using RunCloud.

    Step 1. Create a Firewall Rule to Allow Incoming Traffic

    Your server needs to allow incoming TCP connections on ports 80 and 443 to server traffic from the internet. RunCloud also requires TCP port 34210 to communicate with the server. We will make a firewall rule to allow incoming traffic on all these ports.

    Go to the “VPC network” > “Firewall” menu and click on “Create Firewall Rule”.

    Enter the following details, and click “Create Firewall Rule” to create a firewall rule:

    • Name: runcloud-firewall-rule
    • Description: Required by RunCloud to function properly.
    • Network: default
    • Priority: 1000
    • Direction of traffic: Ingress
    • Action on match: allow
    • Targets: Specified target tags
    • Tag: runcloud-server
    • Source filter: IP ranges
    • Source IP ranges: 0.0.0.0/0
    • Protocols and ports: Specified protocols and ports then select TCP and enter “80,443,34210”

    Additionally, you can also allow incoming UDP traffic on port 443 to enable HTTP3 traffic.

    Step 2. Reserve a Static IP Address (Optional)

    By default, Google Cloud instances are assigned an ephemeral external IP address. This means a new ephemeral IP address will be assigned to your instance whenever it is stopped and started again.

    If an instance is stopped, any ephemeral external IP addresses assigned to the instance are released back into the general Compute Engine pool, and become available for use by other projects, (GCP Documentation).

    If the IP address of the cloud instance changes, you will need to manually update it in your RunCloud Dashboard. It is highly recommended to use a static IP address for your server. This static IP is dedicated to you and will not be changed when you stop and restart the server, however you will incur additional charges for a static IP.

    Go to the “Reserve Static IP” option and enter the following details:

    • Name: runcloud-server-ip
    • Description: Static IP address reserved for RunCloud instance.
    • IP version: IPv4
    • Type: Regional
    • Region: Select your region, if you’re unsure then find out the region most suitable for you
    • Attached to: None

    Step 3. Create A Google Cloud Compute Engine Instance

    RunCloud needs a fresh Ubuntu server to function properly, and will not work on an existing production server. Go to the “VM Instances” tab in the “Compute Engine” menu, and click on “CREATE INSTANCE”.

    Select Name and Region

    Give your instance a name, and select the region picked in step 2. We recommend you use a region and zone that is nearest to your target users/visitors. The closer your server location is to your users, the less latency they will experience. This setting is permanent and cannot be changed later.

    Select Machine Type

    Under the “Machine configuration” option, select one of the predefined GCP machine types for your instance. Each machine type gives you a certain number of vCPUs (virtual Central Processing Unit), and a fixed amount of memory.

    After selecting your machine series, you can click on the drop-down menu to select the machine type and configure the number of CPU cores as well as RAM for your server. We recommend starting with the “e2-small” machine type, and scale up to match your workload at a later stage.

    Select Boot Disk and OS

    Next, you need to attach an Ubuntu LTS boot disk to your instance. RunCloud supports Ubuntu 20, 22, and 24 LTS 64-bit at the moment. Click the “Change” button under Boot disk, then select “Ubuntu 22.04 LTS Minimal” for x86/64 architecture.

    For the “Boot disk type” option, select “Balanced persistent disk”. Alternatively, you can choose “SSD persistent disk” for better performance, or “Standard persistent disk” to reduce the storage costs. The boot disk size is customizable from 10 GB to 65,536 GB.

    Apply A Custom Firewall Rule

    We will leave both “Allow HTTP traffic” and “Allow HTTPS traffic” unchecked under the Firewall option because we have already created a custom firewall rule to allow internet traffic. Click on the “Advanced Options” to reveal advanced settings.

    Look for “Network tags” under the Networking section and enter the “runcloud-server” tag created in step 1.

    Assign the Static IP

    Now we will assign the static IP reserved in step 2. If you are not using a static IP, you can skip this step.

    Scroll down to “Network Interfaces” and edit the default interface settings. Leave all the settings to default, and scroll down to the “External IPv4 addresses” option. Change this from “Ephemeral” to “runcloud-server-ip”:

    Click the “Create” button to start your Google Cloud server.

    Step 4. Connect Google Cloud VM To RunCloud

    Connect Your Server

    Begin by logging in to the RunCloud dashboard, and clicking the “Connect a new server” button.

    Next, select “Google Cloud Platform” from the Server Provider list. Enter the name and external IP address of your server, then click “Continue”.

    Install RunCloud Agent

    On the next screen, choose “Manual Installation”, and you will see the script that you have to run on your Google Cloud instance.

    Go to “VM instances” on your Google Cloud dashboard, and click “SSH” next to the instance that you just created. This will launch a web browser-based terminal to log in to your server.

    We need to run the RunCloud installer script command as a “root” user. Run the “sudo su” command to start a “root” shell, and then paste and run the RunCloud installer script command. This should only take a few minutes to complete.

    Once it’s completed, you will see the MySQL root password for your database management, and the “runcloud” system user password. Please save this information securely in a password manager.

    If successful, data about your server will appear in your RunCloud dashboard, and you will have successfully set up your Google Cloud server with RunCloud.

    Video Tutorial – Setup Google Cloud Server With RunCloud

    You can watch this short video tutorial to show you all steps that we have explained above in less than 3 minutes.

    Final Thoughts

    You can use RunCloud with Google Cloud to simplify server management experience. RunCloud agent needs to be installed on a Ubuntu LTS release and requires TCP port 80, 443, and 34210 to function properly. After a successful install, you can manage the server and monitor its performance metrics from the RunCloud dashboard.

    After setting up your Google Cloud server, you can continue to: