Category: Content Management System

  • Best Free and Paid Plesk Alternatives for Web Hosting in 2026

    Best Free and Paid Plesk Alternatives for Web Hosting in 2026

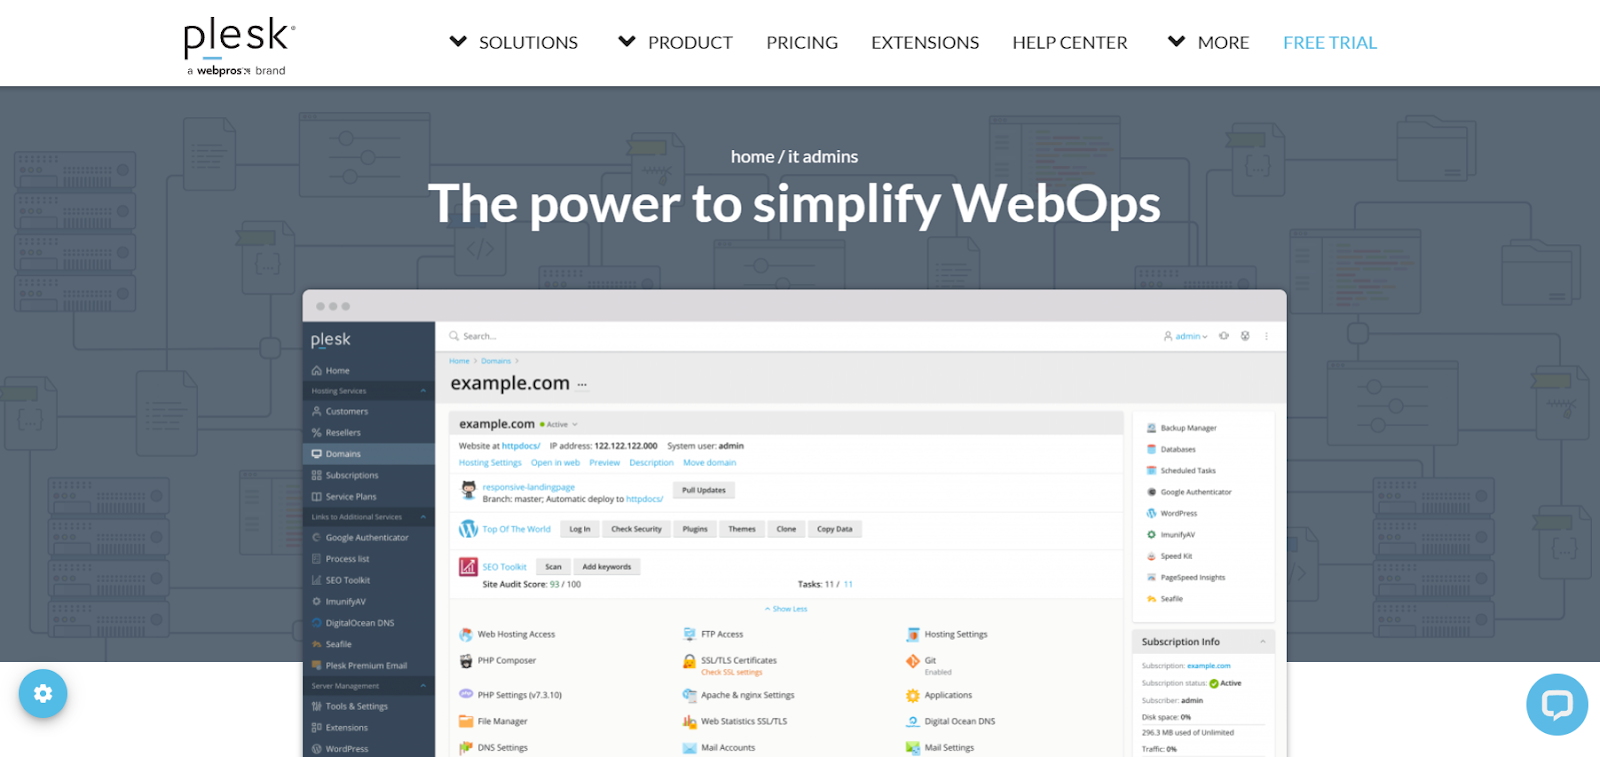
    Plesk remains a capable server management platform, but its pricing, architecture, and feature set will not suit every developer or agency. Some users may prefer a lower-cost panel, a lighter server footprint, stronger multi-server management, or a platform designed more directly for cloud infrastructure. 

    The available alternatives range from traditional hosting panels to managed cloud platforms, developer provisioning tools, and decoupled server management services.

    In this article, we compare the strengths, limitations, pricing models, and intended users of several Plesk alternatives. This will help you identify whether a traditional control panel, managed service, developer tool, or cloud server management platform best fits your needs. 

    Best Plesk Alternatives in 2026

    The following options cover several product categories, including traditional hosting panels, managed cloud hosting, developer provisioning platforms, and cloud server management tools. 

    cPanel

    cPanel is a widely used web hosting control panel and, like Plesk, is owned by WebPros. It is designed primarily for shared hosting, reseller hosting, and account-based server management, although its structure may be less suitable for development teams seeking a unified cloud management workflow. 

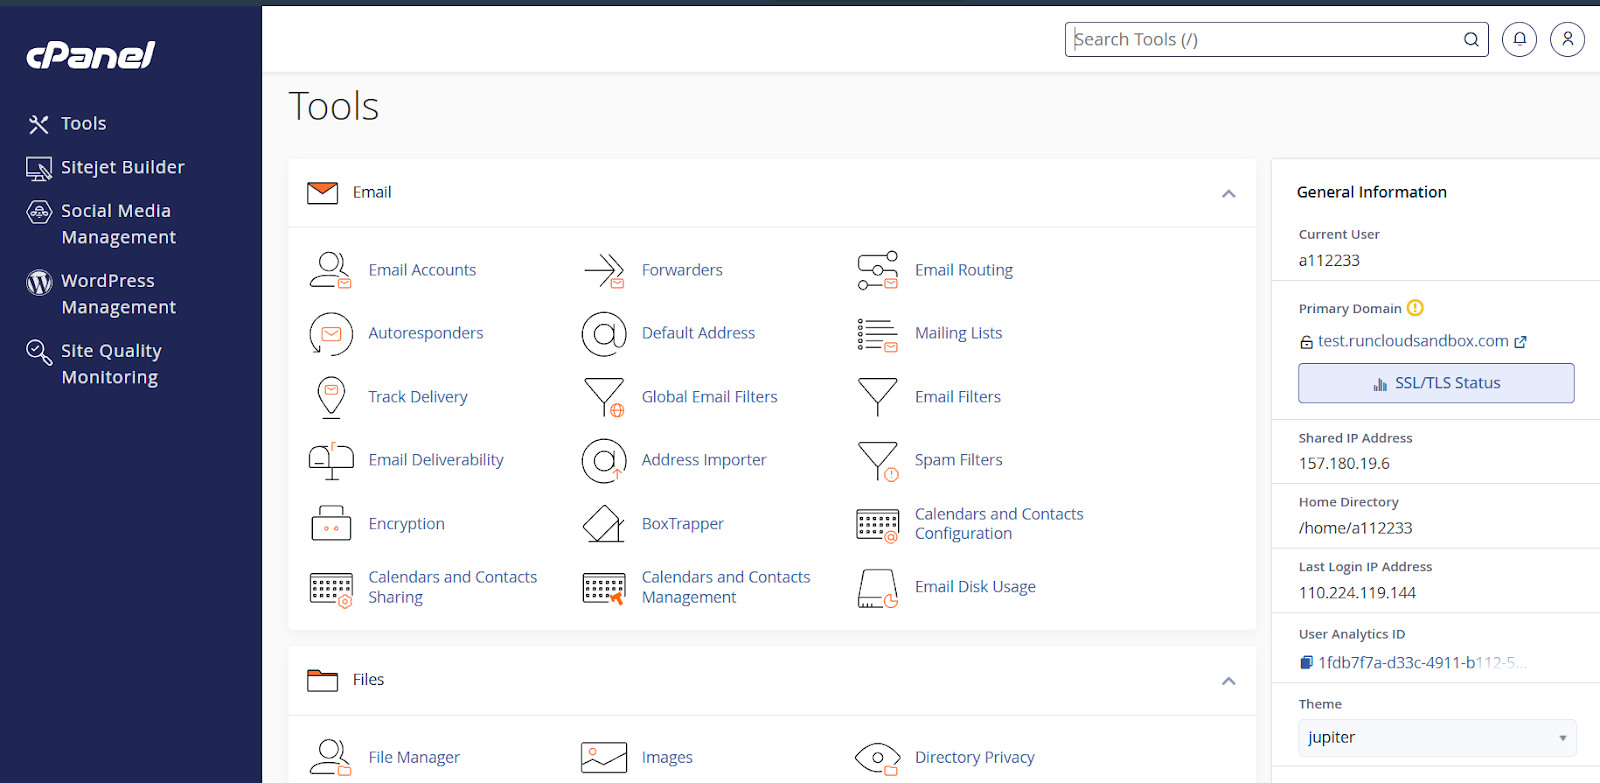
    cPanel provides a graphical platform for managing websites, hosting accounts, databases, email, domains, and common server administration tasks.

    cPanel is widely known for its extensive ecosystem of third-party plugins and integrations. Its interface will be familiar to many hosting customers, which can reduce the learning curve for users moving between providers. It also includes tools for managing databases through phpMyAdmin, installing applications, creating email accounts, and administering common hosting services.

    WebHost Manager (WHM) allows administrators to create and manage multiple hosting accounts, customize branding, assign packages, and control account-level resources. Depending on the license, configuration, and installed extensions, cPanel can support automated backups, SSL management, malware protection, and WordPress administration through WP Toolkit. 

    cPanel website homepage

    One limitation for hosting providers is cPanel’s account-based licensing model. Costs increase as more hosting accounts are added, which can make pricing less predictable for providers managing a growing number of customer accounts. 

    cPanel also lacks Plesk’s multi-OS flexibility, as it runs exclusively on Linux distributions. This limitation makes it unusable for teams requiring native ASP.NET or MSSQL support. cPanel separates customer-level hosting management from server administration through WebHost Manager. This supports distinct administrator, reseller, and customer roles, but teams accustomed to a single multi-server dashboard may find the workflow less unified than newer cloud management platforms. 

    Cloudways

    Cloudways is a managed cloud hosting platform that sits between users and infrastructure providers such as DigitalOcean, AWS, and Google Cloud. It combines the underlying server with platform management, support, monitoring, backups, security maintenance, and deployment tools. As a result, its plans cost more than purchasing the same infrastructure directly from the provider. 

    Key Features

    Cloudways is strongest in the following areas:

    • Managed performance stack: Cloudways provides caching and performance tools such as Varnish, Redis, and Memcached, depending on the selected server and application configuration. 
    • Choice of cloud providers: Users can deploy servers through supported providers such as DigitalOcean, AWS, and Google Cloud without managing each provider’s infrastructure directly.
    • Managed security features: Cloudways provides tools such as SSL certificate installation, IP allowlisting, platform-level security updates, and account security controls.

    Cloudways website homepage

    For agencies managing many servers, the difference between Cloudways’ pricing and the costs of the underlying infrastructure can be substantial. Teams should compare the added management and support services with the cost and responsibility of managing servers directly. 

    Cloudways does not provide root access to the underlying server. This reduces the amount of system administration required from the user, but it also prevents low-level operating system changes, custom system packages, and unsupported server stacks. It is therefore better suited to teams that value managed infrastructure than to administrators who need unrestricted server control.

    CyberPanel

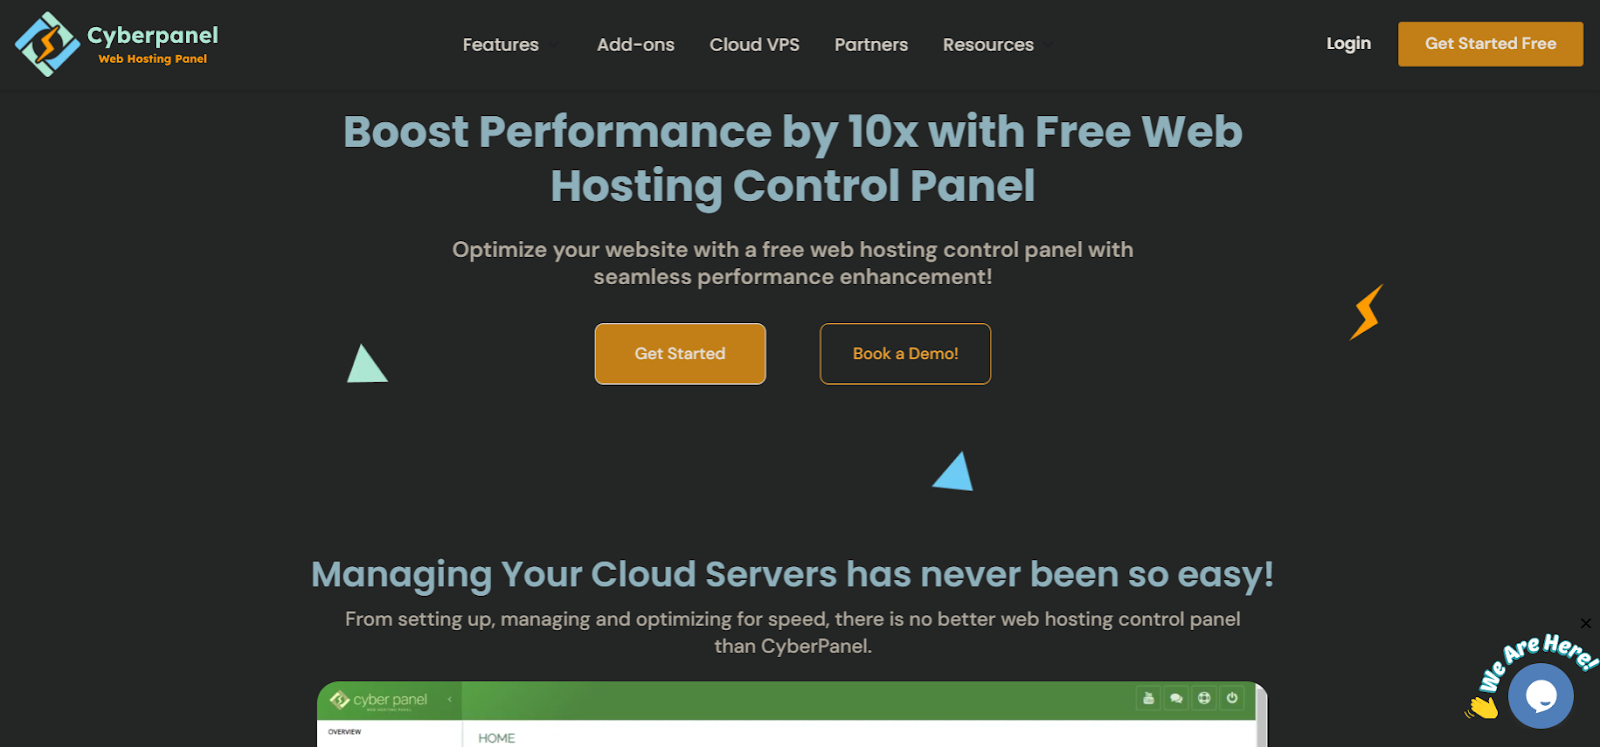
    CyberPanel is an open-source, local-first web hosting control panel that integrates with the LiteSpeed web server engine. The biggest feature of CyberPanel is its native integration with LSCache (LiteSpeed Cache) at the server level. This integration provides WordPress and other supported applications with access to server-level caching, which can improve page load times and Time to First Byte when configured correctly. 

    CyberPanel also includes a WordPress staging environment, which allows developers to test changes separately before pushing them to a live site. The panel also provides tools for managing DNS, email services, databases, and FTP accounts. 

    CyberPanel offers a free core version that includes many of the features needed to host and manage websites. It may suit individual developers, small hosting providers, and users who specifically want an OpenLiteSpeed-based stack. This gives users a way to try an OpenLiteSpeed-based hosting stack without paying a panel license fee. 

    Enterprise users can also upgrade to LiteSpeed Enterprise directly through the panel. Users can begin with OpenLiteSpeed and upgrade to LiteSpeed Enterprise when they require its commercial features or support model.
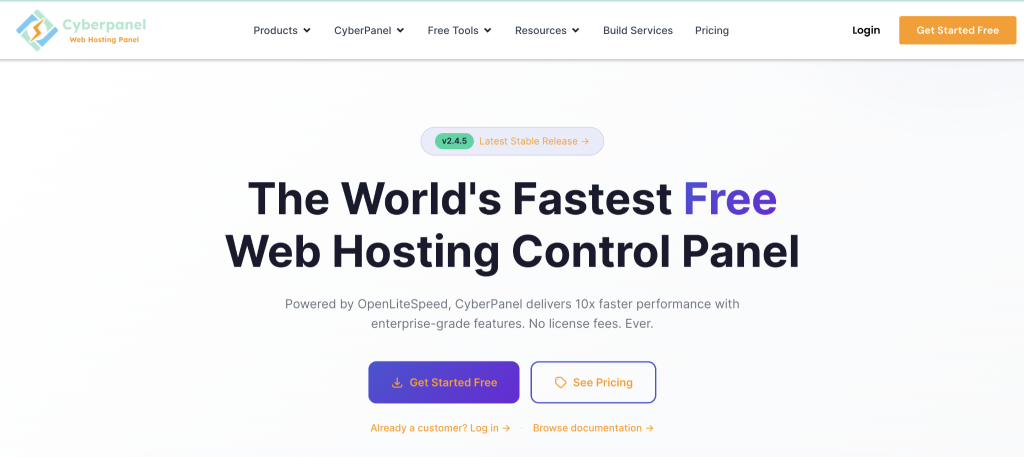
    CyberPanel website homepage

    CyberPanel users should assess the quality of its documentation, update process, and available support before using it for production workloads. As with any self-hosted panel, administrators remain responsible for testing updates, maintaining backups, and resolving compatibility issues. 

    OpenLiteSpeed and LiteSpeed Enterprise use different licensing and worker-process models, so teams expecting high concurrency should compare the available editions carefully. CyberPanel is most closely associated with PHP and WordPress hosting, and users running other application stacks should confirm that its deployment model meets their requirements. 

    DirectAdmin

    DirectAdmin is an efficient web hosting control panel designed to streamline server and website management. It offers a clean interface for Administrators, Resellers, and Users, making it easy to manage accounts, DNS records, and email services.

    It includes an integrated ticketing system to support customers directly, fully customizable dashboard themes, anti-spam tools, and usage statistics. Its automatic crash recovery feature can detect certain failed services and attempt to restart them, helping reduce downtime when supported services stop unexpectedly. DirectAdmin supports FreeBSD and several Linux distributions, giving administrators a choice of supported operating systems. 

    These features make DirectAdmin suitable for hosting providers that want the account, reseller, email, DNS, and support functions of a traditional control panel while keeping panel overhead relatively low.

    DirectAdmin offers several license tiers based on account and domain limits, including plans for small servers and larger hosting environments. Its pricing and relatively modest server requirements can make it a practical option for providers that do not need the broader ecosystem associated with cPanel or Plesk. 
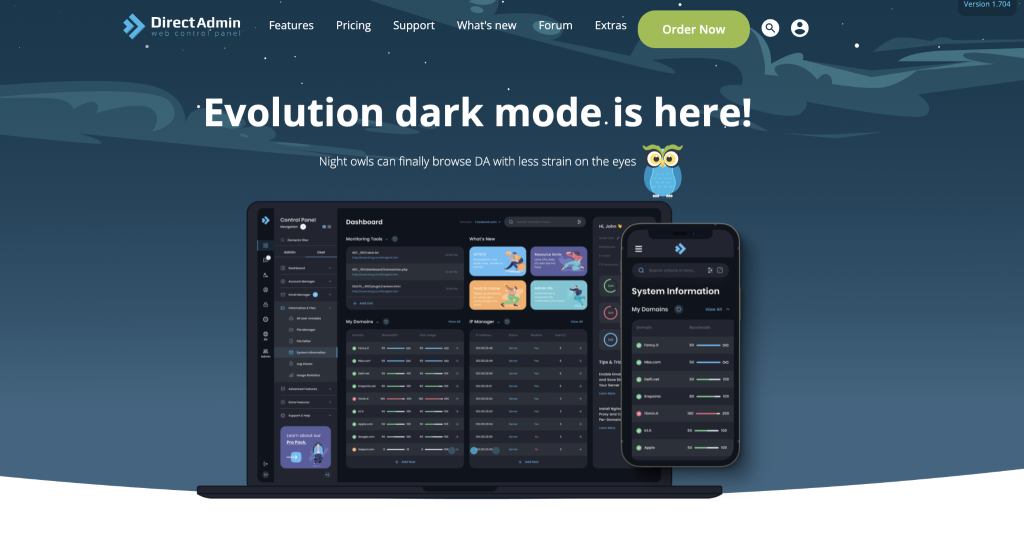
    DirectAdmin website homepage

    DirectAdmin is a strong option for hosting providers that want a traditional multi-user control panel with lower licensing and server requirements than some larger commercial platforms. DirectAdmin does not provide the same first-party WordPress management experience as panels with an integrated WordPress toolkit. Administrators may need third-party software for installation, staging, cloning, and update management, depending on their chosen configuration. 

    DirectAdmin is primarily installed and managed on individual servers. Providers operating a large server fleet may therefore need separate management processes or third-party tooling, rather than a single native dashboard that covers every server. 

    Laravel Forge

    Laravel Forge is a server provisioning and deployment platform designed primarily for Laravel and PHP developers. It simplifies tasks such as server provisioning, Git-based deployments, SSL setup, queue worker management, scheduled jobs, and application deployment.

    Forge’s lower-cost plans are aimed mainly at individual developers, while team access and wider collaboration features require a higher-tier plan. Agencies should compare the available user permissions and server limits with the number of developers who need access. 
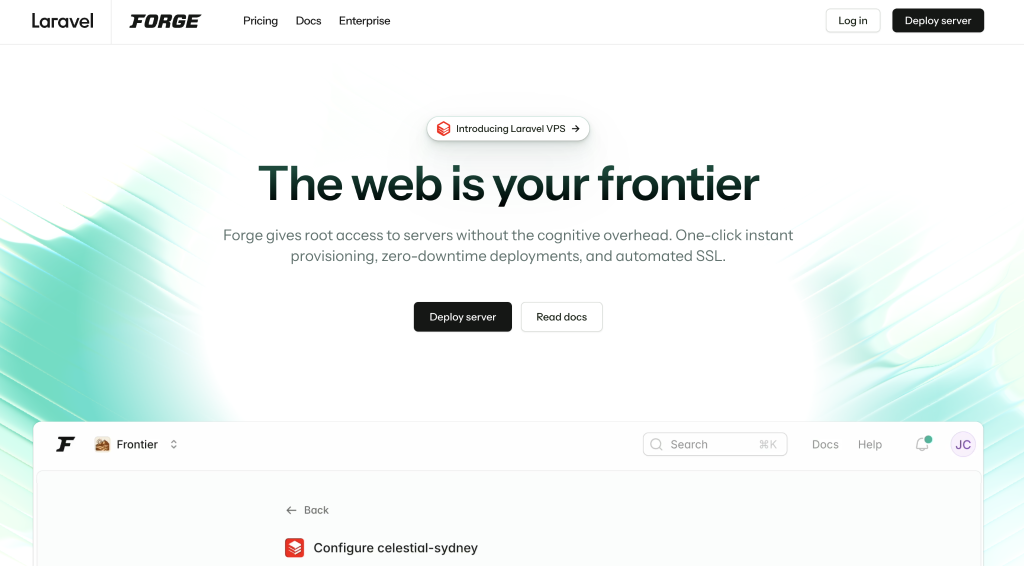
    Laravel Forge website homepage

    Forge assumes that users are comfortable working with SSH, Git, and external database tools. It does not attempt to reproduce the file, email, and database management interfaces found in traditional hosting panels, so it is less suitable for non-technical users.

    Forge does not include traditional email hosting and is most useful within PHP-focused development workflows. Agencies managing a broad mix of CMS platforms, application runtimes, and customer hosting accounts may prefer a more general server management platform.

    Forge is best suited to Laravel developers who want fast server provisioning and deployment tools without the broader hosting features of Plesk. It is less suitable for teams that need email hosting, reseller accounts, visual file management, or support for non-technical customers. 

    CloudPanel

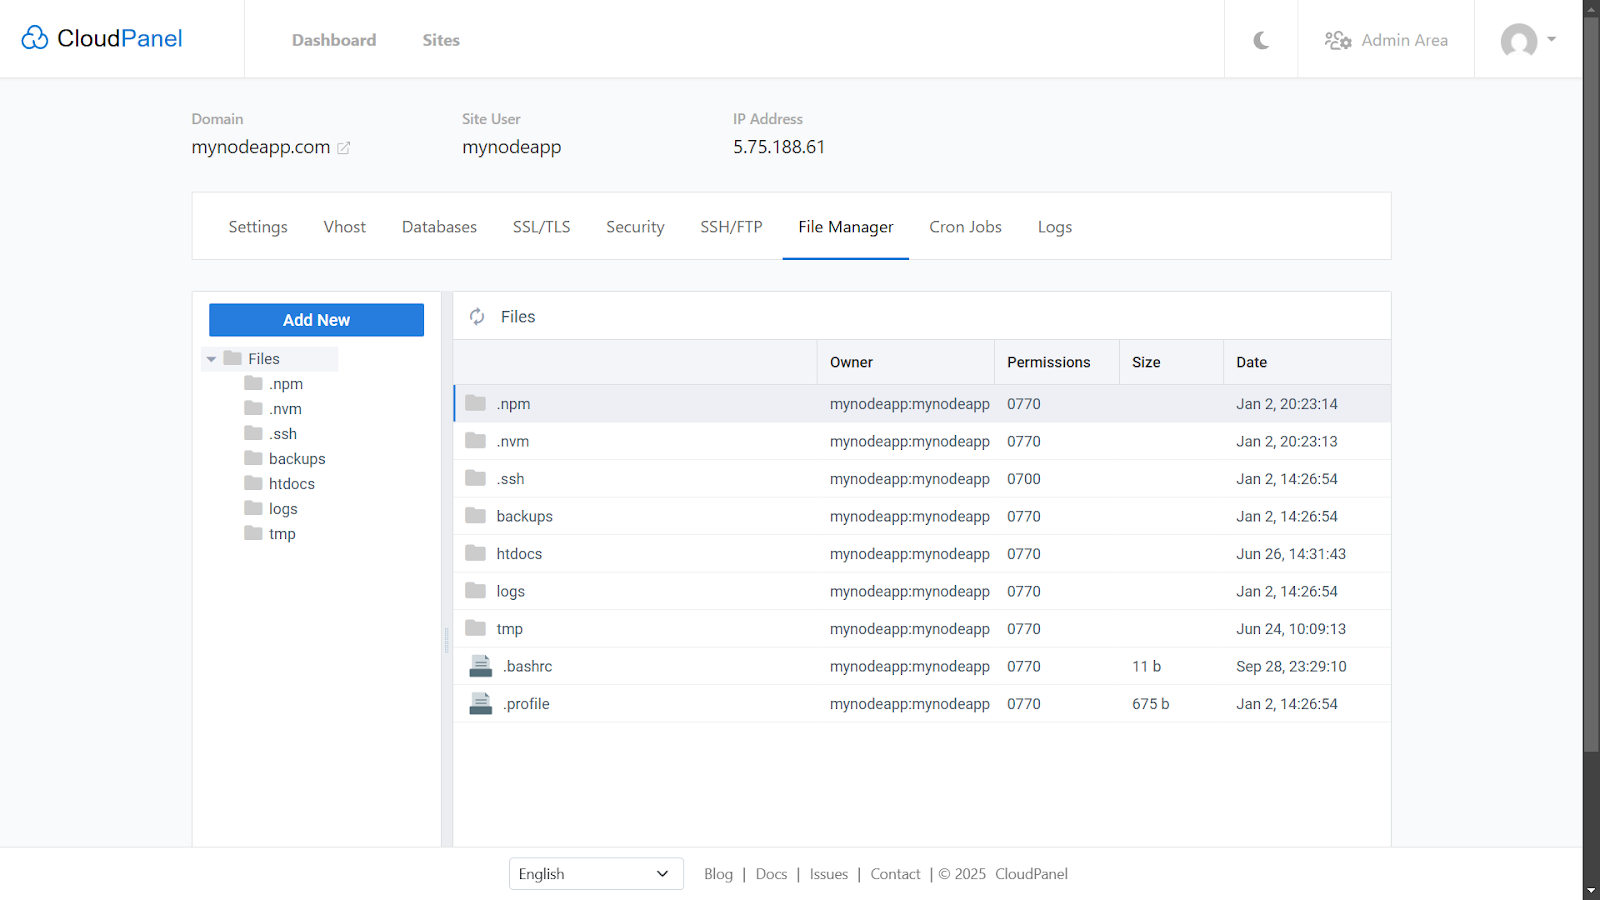
    CloudPanel is a free server control panel designed for cloud-hosted Debian and Ubuntu servers. It uses an NGINX-based stack and supports PHP, Node.js, Python, and static websites. 

    Its graphical interface provides access to server metrics such as CPU and memory usage, helping administrators monitor resource consumption and investigate performance issues. CloudPanel includes Cloudflare-related controls, IP and bot blocking, two-factor authentication, Let’s Encrypt certificate management, and a graphical virtual host editor for modifying NGINX configuration. 

    CloudPanel does not charge a panel license fee, although users must still pay for the server, backups, monitoring, email services, support, and any third-party security tools they require. It may be a cost-effective choice for technical users managing a small number of servers.
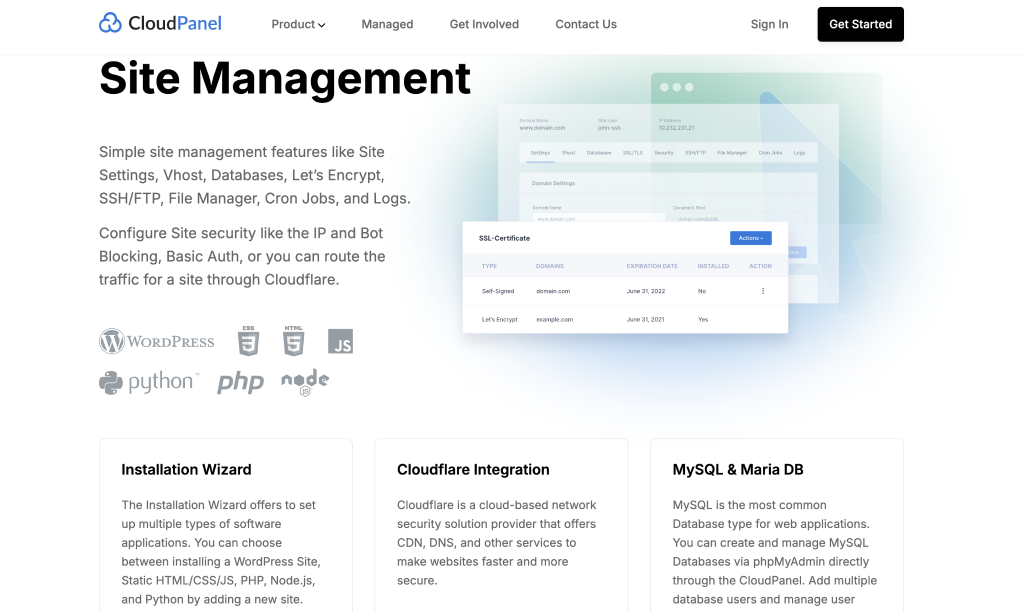
    CloudPanel website homepage

    CloudPanel is optimized for high-performance NGINX setups on Debian or Ubuntu systems, but its simplified structure introduces several operational limitations. CloudPanel operates as an isolated, single-server panel with no native support for multi-server management or centralized cluster coordination. Teams that require malware scanning, managed security monitoring, or preconfigured Web Application Firewall rules may need additional software or services. 

    Additionally, the panel does not support running Apache alongside NGINX in a hybrid configuration, which limits compatibility with legacy client sites that rely on custom .htaccess directives and requires manual translation of rewrite rules.

    CloudStick

    CloudStick is a SaaS server control panel aimed at web agencies, hosting resellers, and developers managing multiple client websites and servers. While many modern panels strip away traditional hosting features in favor of pure app deployment, CloudStick provides a comprehensive suite. It combines developer-focused deployment tools with features commonly found in traditional hosting panels, using an NGINX and PHP-FPM stack.

    It offers built-in email hosting, a visual database manager, and firewall rule controls within the panel. Its WordPress management features include plugin controls, automated updates, debug settings, Magic Link login, and reusable templates for deploying sites. CloudStick supports automated off-server backups to compatible object storage with configurable retention settings. Users should still test restoration procedures and maintain a backup policy suited to their risk requirements. 
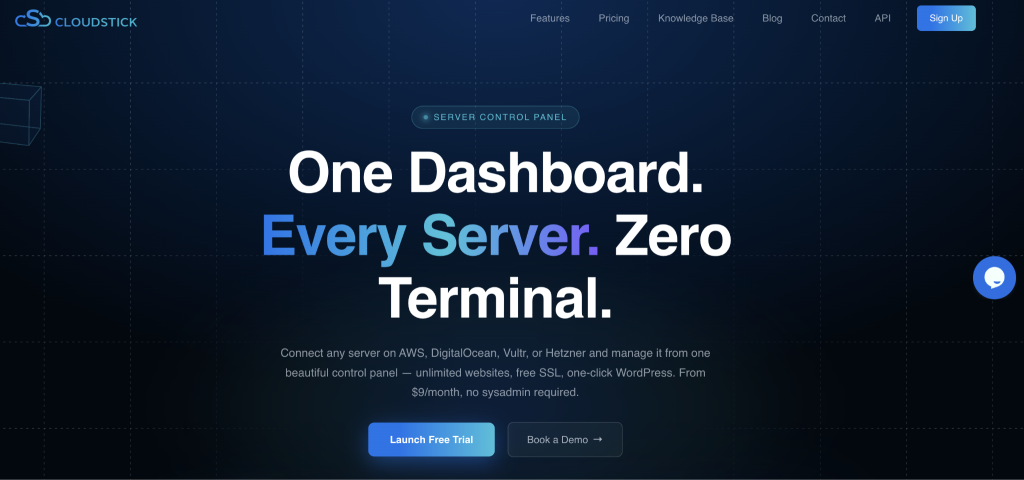
    CloudStick website homepage

    CloudStick uses a pricing model that may appeal to agencies managing multiple servers. While the Basic plan starts at $9 per month for a single server, the Pro plan costs $19 per month and supports unlimited servers and websites, as well as team collaboration seats. 

    CloudStick is a hosted management service rather than a self-contained local panel, so users depend on the continued availability and support of the SaaS platform. Teams should also confirm that CloudStick’s supported operating systems, application stacks, backup options, and plan limits match their requirements before migrating a large server fleet. 

    ispmanager

    ispmanager is a commercial hosting control panel that combines website, database, DNS, email, file, and server management tools within a graphical interface. It sits between large hosting suites and narrower developer provisioning tools.

    Its graphical interface is intended to make common server and hosting tasks accessible without requiring every action to be completed through the command line. It supports Docker, Node.js, Python, and several database engines, including MySQL, MariaDB, Percona, and PostgreSQL. 

    The panel simplifies security and maintenance through built-in integrations with Cloudflare, DDoS Guard, and Fail2ban, as well as automated Let’s Encrypt certificate renewals. It also provides a file editor with syntax highlighting and supports backups to compatible external storage, giving users access to common maintenance tools from within the panel.
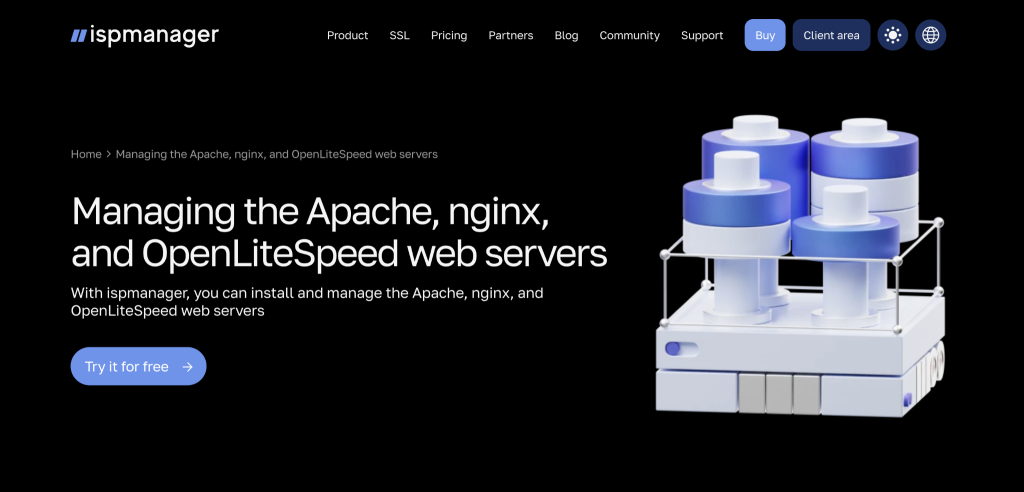
    ispmanager website homepage

    ispmanager offers tiered plans based on site limits and included features. Its entry-level pricing may make it a lower-cost commercial alternative to Plesk for users who still want vendor updates and support. Current prices, site limits, addons, and support terms should be checked before choosing a plan.

    Prospective users should confirm operating system support, language and regional support, multi-server management requirements, and any separately priced extensions. Teams already familiar with cPanel or Plesk may also need time to adapt their workflows and customer documentation. 

    HestiaCP

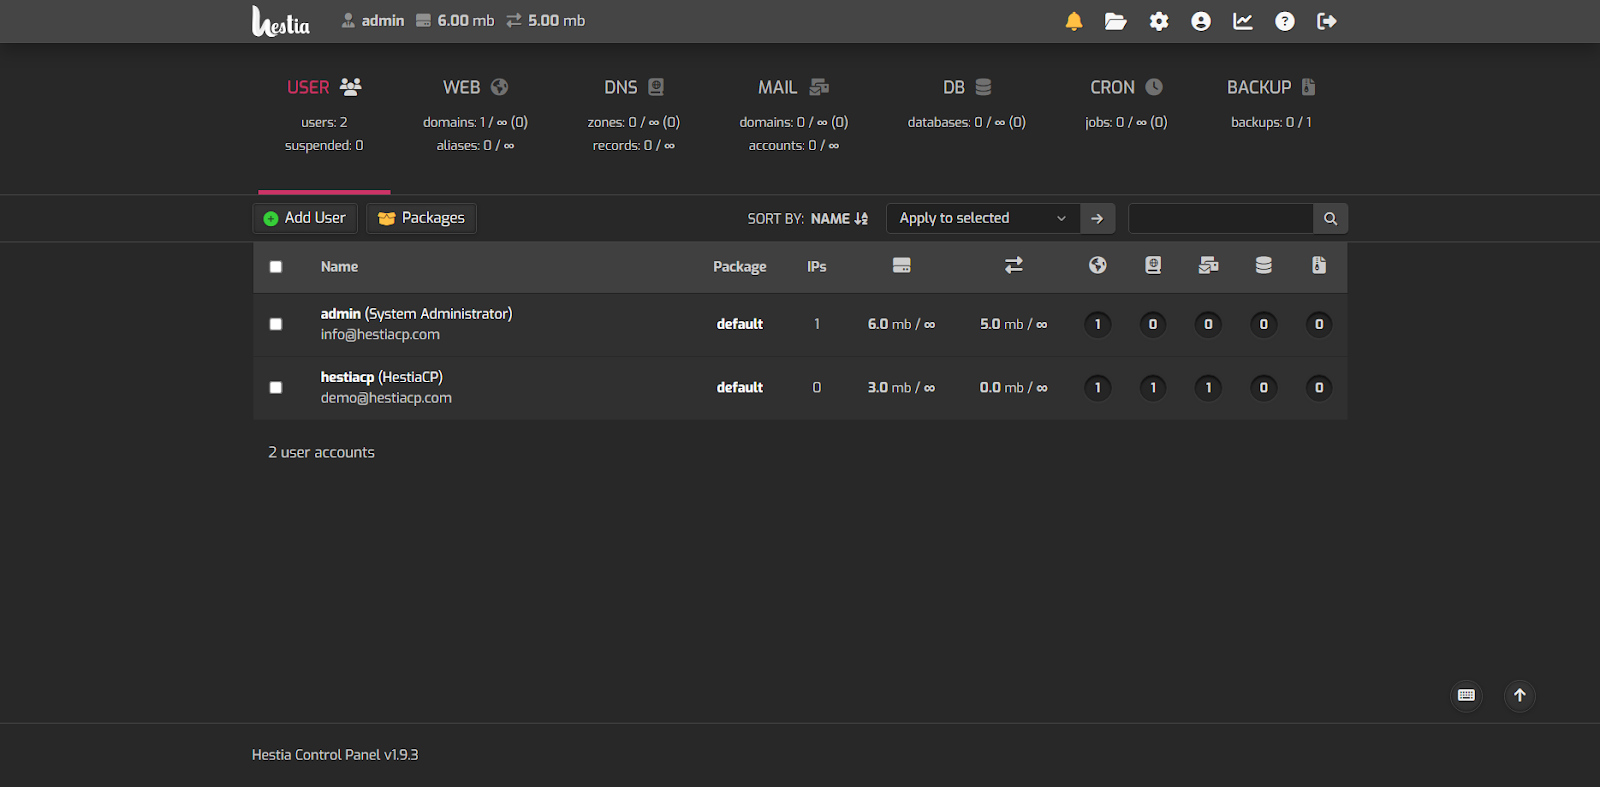
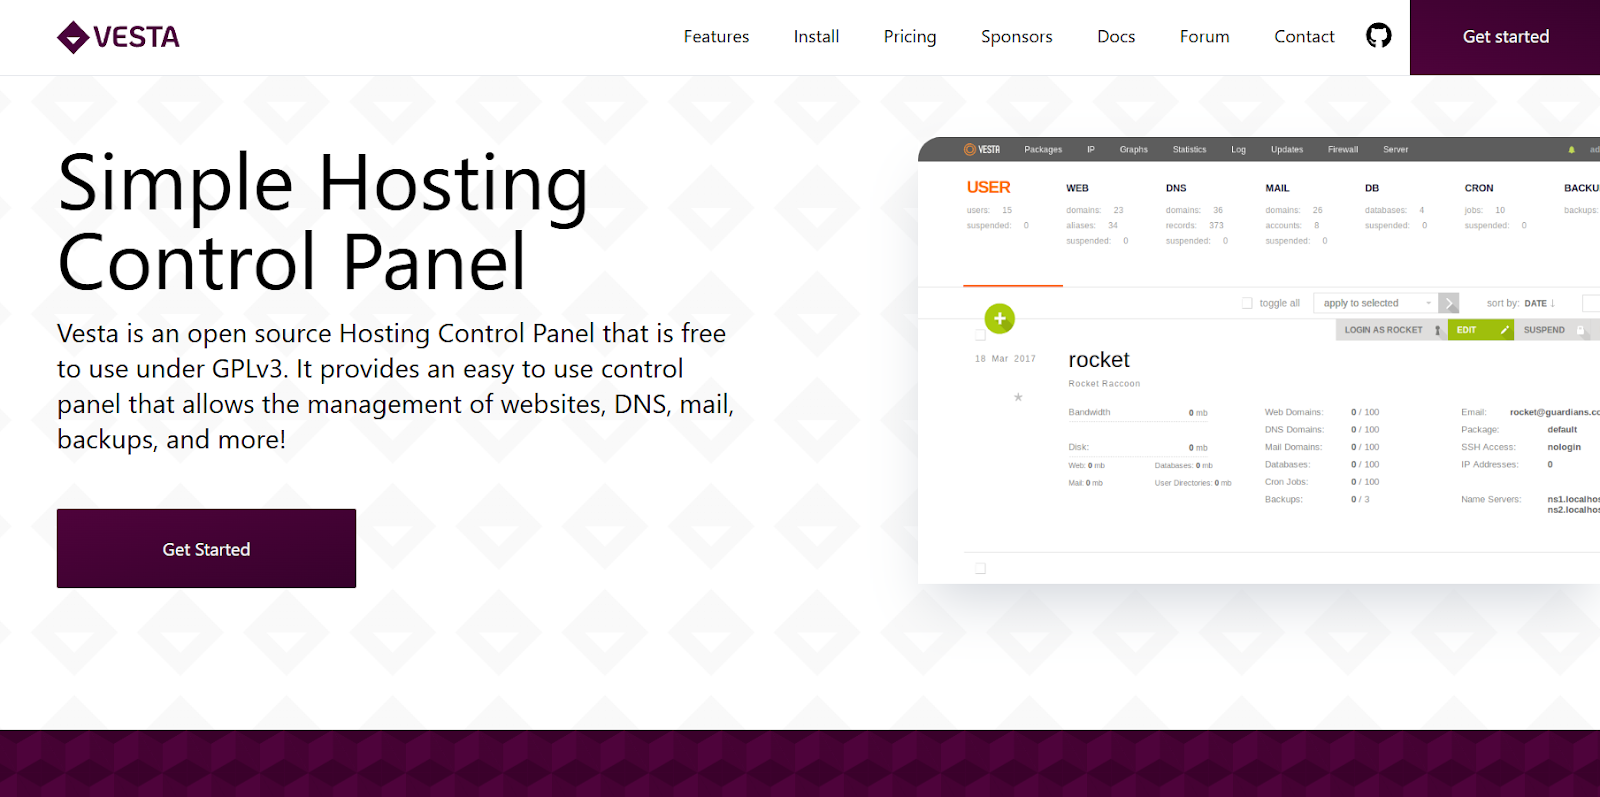
    Hestia Control Panel, commonly known as HestiaCP, is a free and open-source hosting control panel that began as a fork of VestaCP. It provides a graphical interface for users who want to manage websites, DNS, databases, email, users, and backups on a self-hosted server. 

    HestiaCP offers a comprehensive stack that supports multiple web servers, giving users the choice between NGINX and Apache architectures. HestiaCP includes email hosting alongside its web, DNS, database, and backup tools. This may suit users who want these services on the same server, although running email introduces added security, deliverability, and maintenance responsibilities. It also features a mobile-friendly interface, built-in backup tools, and controls intended to support server security and maintenance. It supports basic administrator and reseller roles and provides essential multi-tenant capabilities.
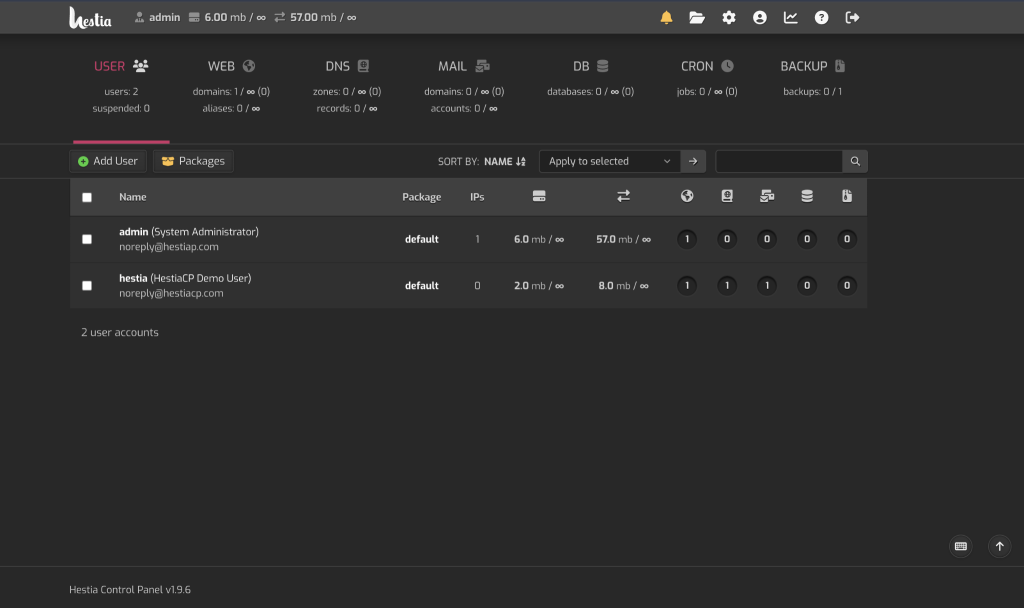
    Hestia Control Panel server management dashboard

    HestiaCP has no panel license fee. Users remain responsible for infrastructure costs, backups, monitoring, updates, security maintenance, and technical support. Because it is self-hosted, users must maintain both the panel and the underlying server. Community development provides transparency, but production users should assess release history, documentation, support, and update procedures for themselves. 

    HestiaCP may suit technical users who want a self-hosted panel with traditional web and email hosting features, but without a recurring license fee. It is less suitable for teams that require vendor-backed support, native fleet management, or a fully managed service. 

    Webuzo

    Webuzo is a hosting control panel focused on website and application deployment. Its available editions and plans support different account and hosting requirements, so readers should confirm whether they need its single-user or multi-user offering. Its different editions can support users who host their own applications as well as providers who manage multiple hosting accounts. It can be installed on supported virtual private servers and dedicated servers across a range of hosting providers. 

    One of Webuzo’s main features is its application installer, which supports a large catalog of scripts and content management systems, including WordPress, Joomla, and Magento. This can reduce the manual effort required to deploy supported applications. Webuzo is designed to run with relatively modest server requirements, which may make it suitable for smaller VPS instances. It supports both Apache and NGINX web servers. 
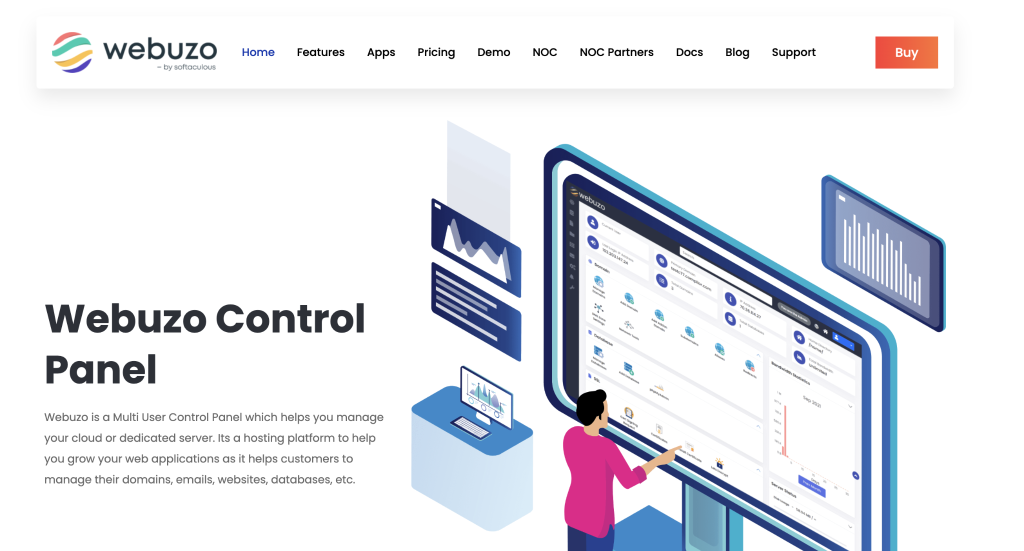
    Webuzo website homepage

    Webuzo offers lower-cost plans for users who want application installation and server management tools on a VPS. Pricing and included account limits vary by license, so readers should compare the current plans with their hosting requirements.

    Webuzo may suit personal site owners, small businesses, and developers who value rapid application installation. Users should choose the appropriate edition based on whether they need a single-user environment, multiple hosting accounts, reseller functions, or broader team access. 

    Enhance

    Enhance is a hosting control panel designed for multi-server and clustered environments. It uses container-based isolation and allows services to be distributed across multiple servers. Its central interface allows hosting providers to manage websites and services across a cluster, which may suit growing hosting businesses and agencies operating several servers. 

    It allows roles such as web, database, and email services to be distributed across different physical or virtual servers. This architecture can support redundancy and horizontal scaling when configured appropriately. This architecture allows businesses to add servers and distribute service roles as their requirements grow. 
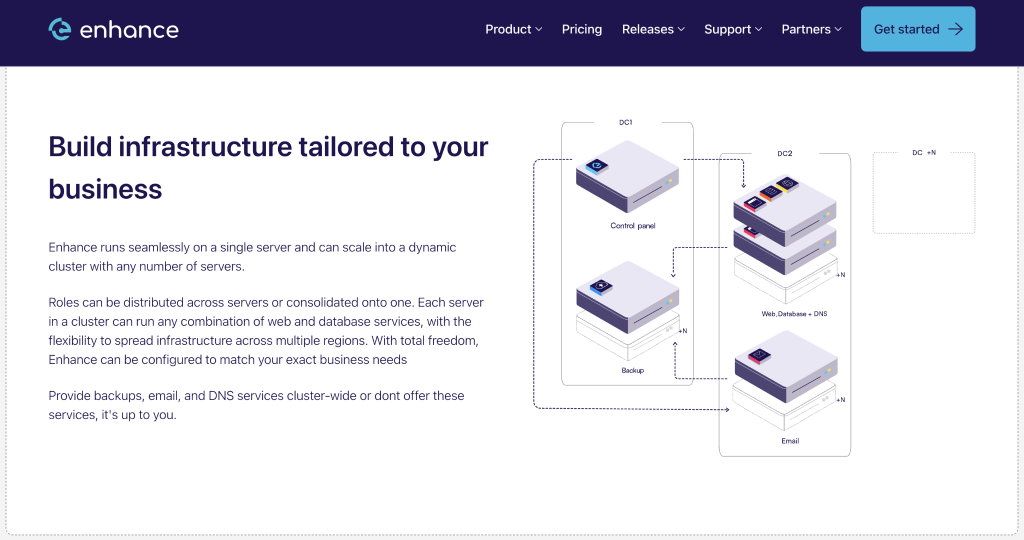
    Enhance website homepage

    Enhance uses a usage-based pricing model calculated from the number of billable websites hosted on the cluster. It charges users at the end of each month based on the number of billable websites hosted on the cluster. Pricing is tiered, meaning websites are billed based on the tier they fall into. For example, under the pricing tiers described at the time of writing, a provider hosting 25,000 billable websites would pay the applicable rate for each pricing band.

    At the time of writing, Enhance does not count servers, staging sites, or soft-deleted websites as billable websites. Additionally, there are no charges for addon domains (additional domains mapped to a website), subdomains, aliases, or service websites, which include the control panel, webmail, and phpMyAdmin.

    Enhance is primarily aimed at hosting providers and teams building multi-server environments. Its cluster model and usage-based pricing may be more complex than necessary for users managing one or two servers, and monthly costs can vary as the number of billable websites changes. 

    RunCloud 

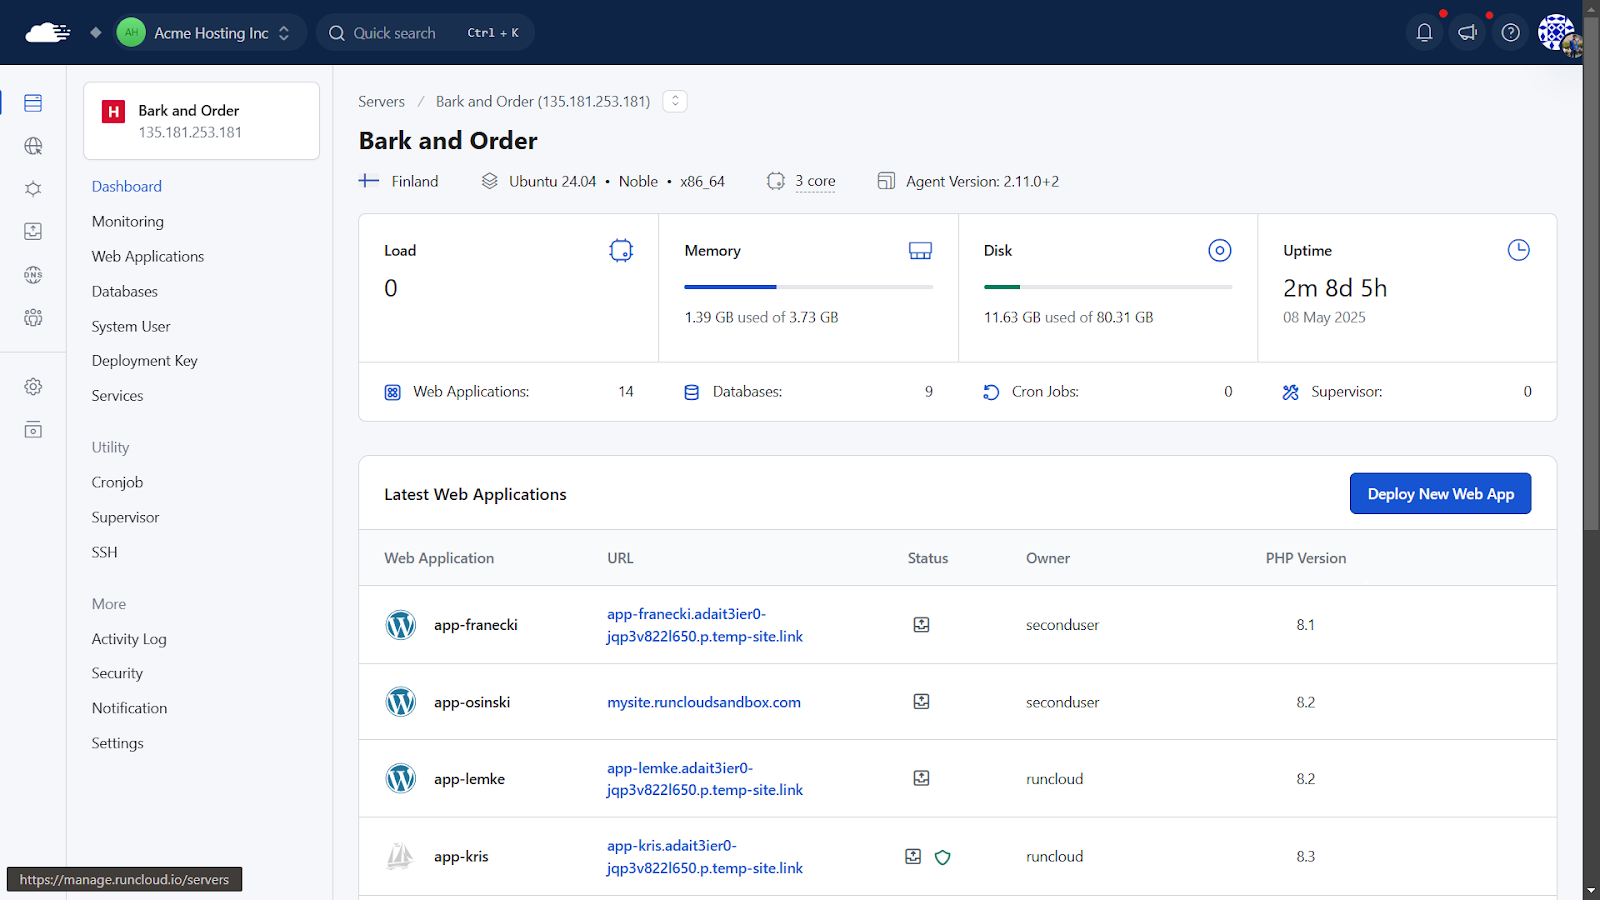
    RunCloud is a server management platform that uses a decoupled SaaS architecture rather than hosting its full management interface on each managed server. An agent installed on the virtual machine connects it to RunCloud’s browser-based console.

    Most of the management interface remains outside the server, while the agent handles communication and server operations. This can reduce the local resources required by the panel itself. RunCloud uses plan-based SaaS pricing rather than an account-based hosting panel license. This may provide more predictable costs for developers and agencies, depending on the number of servers, team members, and paid features they require. 
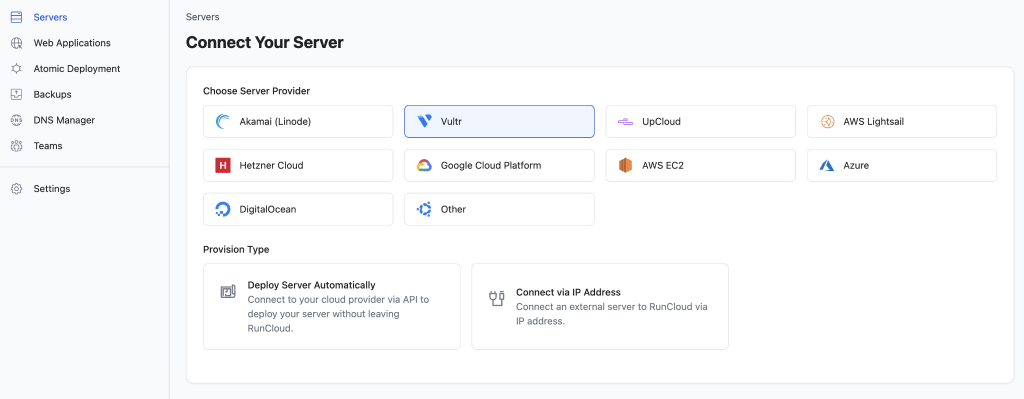
    RunCloud server deployment dashboard

    One of the primary barriers to using unmanaged cloud servers is the technical expertise required to configure and secure them. RunCloud reduces the amount of command-line work required for many routine tasks by providing a browser-based interface. Users still benefit from an understanding of Linux servers, DNS, networking, security, and application deployment. 

    This visual approach makes many administrative tasks available through browser-based controls. The interface lets users start, stop, and restart system services, manage multiple PHP versions on one server, map domains, and configure databases.
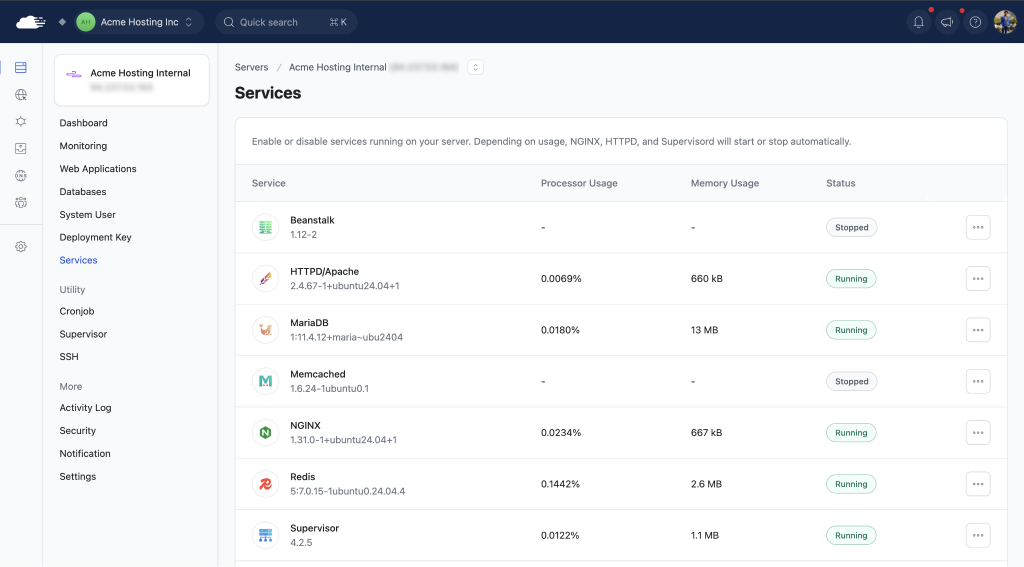
    RunCloud services dashboard as plesk alternative

    Security management is also simplified. RunCloud provides controls that assist with several common server-hardening tasks. Depending on the server configuration and plan, users can manage SSH settings, root login access, SSH key authentication, UFW firewall rules, and ModSecurity controls from the dashboard. These tools simplify configuration, but users remain responsible for maintaining the security of their servers and applications. 

    RunCloud integrates with Git hosting providers, including GitHub, GitLab, and Bitbucket. Users can connect to supported Git repositories, configure branch-based deployments, and run custom deployment scripts to perform tasks such as installing dependencies or clearing caches. 
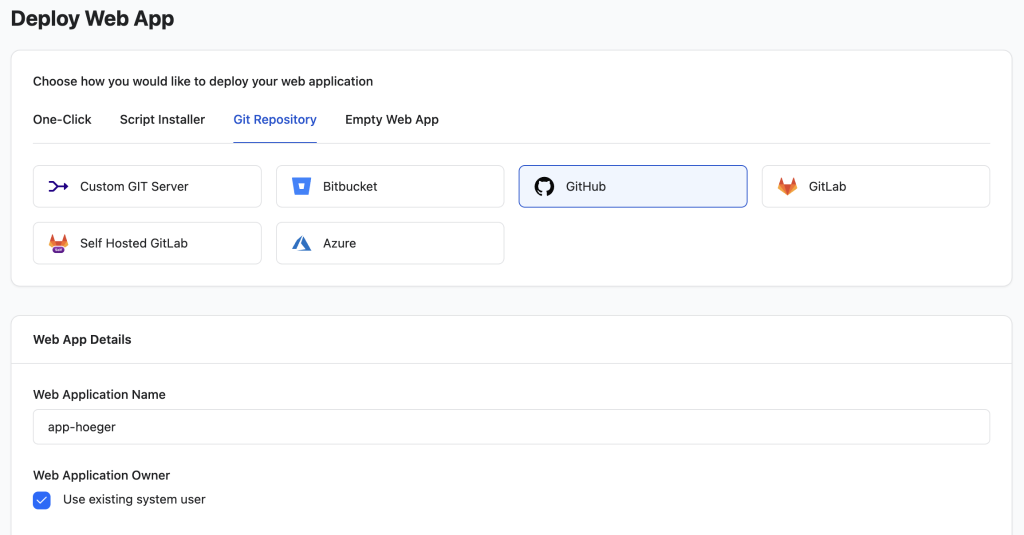
    Deploying application via RunCloud Dashboard

    RunCloud is designed primarily for Linux cloud servers and developer-led hosting workflows. It does not replace every feature of a traditional panel, such as Plesk, particularly for users who need Windows hosting, built-in mail hosting, reseller account structures, or a fully managed hosting service. Users also remain responsible for choosing, paying for, and maintaining the underlying server infrastructure. 

    Plesk Alternatives at a Glance 

    PlatformProduct typeStarting price at time of writingBest suited toMain limitation
    cPanelTraditional hosting control panel$29.99/monthShared hosting and reseller environmentsAccount-based pricing and no Windows support
    CloudwaysManaged cloud hosting$11/monthTeams wanting managed infrastructure and supportHigher cost than buying infrastructure directly, and no root access
    CyberPanelSelf-hosted hosting panelFree core versionOpenLiteSpeed and WordPress hostingUsers must manage the server, updates, and much of the troubleshooting
    DirectAdminTraditional hosting control panel$5/monthHosting providers seeking a lower-cost traditional panelNo native unified multi-server dashboard
    Laravel ForgeDeveloper provisioning platform$12/monthLaravel and PHP development teamsNot a complete hosting panel and less accessible to non-technical users
    CloudPanelSelf-hosted cloud control panelFreeTechnical users managing individual cloud serversNo native fleet management or built-in email hosting
    CloudStickSaaS server control panel$9/monthAgencies managing PHP and WordPress serversSome multi-server benefits require the higher-tier plan
    ispmanagerCommercial hosting control panel€6.49/monthUsers wanting a lower-cost traditional hosting panelPlan limits and available features vary by tier
    HestiaCPSelf-hosted open-source panelFreeTechnical users wanting web and email hosting without license feesNo vendor-managed service or native server fleet dashboard
    WebuzoHosting and application control panel$2.50/monthSmall hosting environments and rapid application deploymentFeatures and account limits vary between editions
    EnhanceCluster hosting control panelFrom $0.15 per billable websiteHosting providers building multi-server clustersUsage-based costs vary with the number of hosted websites
    RunCloudSaaS cloud server management platform$9/monthDevelopers and agencies managing Linux cloud serversDoes not replace every traditional hosting panel or managed hosting feature

    Conclusion

    The right Plesk alternative depends on the type of hosting environment you manage. Traditional panels such as cPanel and DirectAdmin provide familiar account, reseller, email, and DNS tools, while platforms such as Cloudways, Forge, Enhance, and RunCloud address different managed hosting, deployment, and multi-server requirements. 

    When comparing these platforms, consider the operating systems you need to support, the number of servers and websites you manage, your team’s technical experience, and whether you require email hosting, reseller accounts, managed support, or root access. RunCloud is a strong choice for developers and agencies that want to manage Linux cloud servers through a central browser-based platform while retaining control over their chosen infrastructure. 
    Start managing your first server with RunCloud.

  • Effortless n8n Hosting with RunCloud, Docker, and NGINX

    Effortless n8n Hosting with RunCloud, Docker, and NGINX

    n8n is an open-source automation platform that connects apps and services to streamline repetitive tasks – all under your control.

    If you want full control over your setup, self-hosting n8n is the way to go. But managing your own infrastructure doesn’t have to be complicated.

    In this guide, you’ll learn how to deploy n8n using Docker, configure it securely with NGINX and SSL, and use RunCloud to handle the heavy lifting – from server setup to backups.

    Let’s get started.

    Why Host n8n with RunCloud & Docker?

    Why Use RunCloud and Docker to Host n8n?

    • Full control – Keep your data and workflows on your own terms.
    • Simplified management – RunCloud handles your domain, SSL, and NGINX config.
    • Efficient setup – Docker keeps n8n isolated and updates easy.
    • Multi-app support – Run multiple apps on one server with ease.

    Let’s explore how to get your n8n instance running smoothly with RunCloud.

    Step-by-Step Instructions to Install n8n

    Follow these steps to create your own n8n instance on your server:

    You’ll need:

    • A cloud server (e.g., DigitalOcean, Vultr) connected to RunCloud
    • A domain or subdomain pointed to your server IP

    If you use RunCloud’s Cloudflare integration, DNS setup takes just a few clicks during web app creation.

    Step 1: Create a New Web Application in RunCloud

    RunCloud makes it very easy to manage domain names, SSL certificates, and backups for your web applications. But before we can configure all that, you will need to create a dedicated web application for n8n:

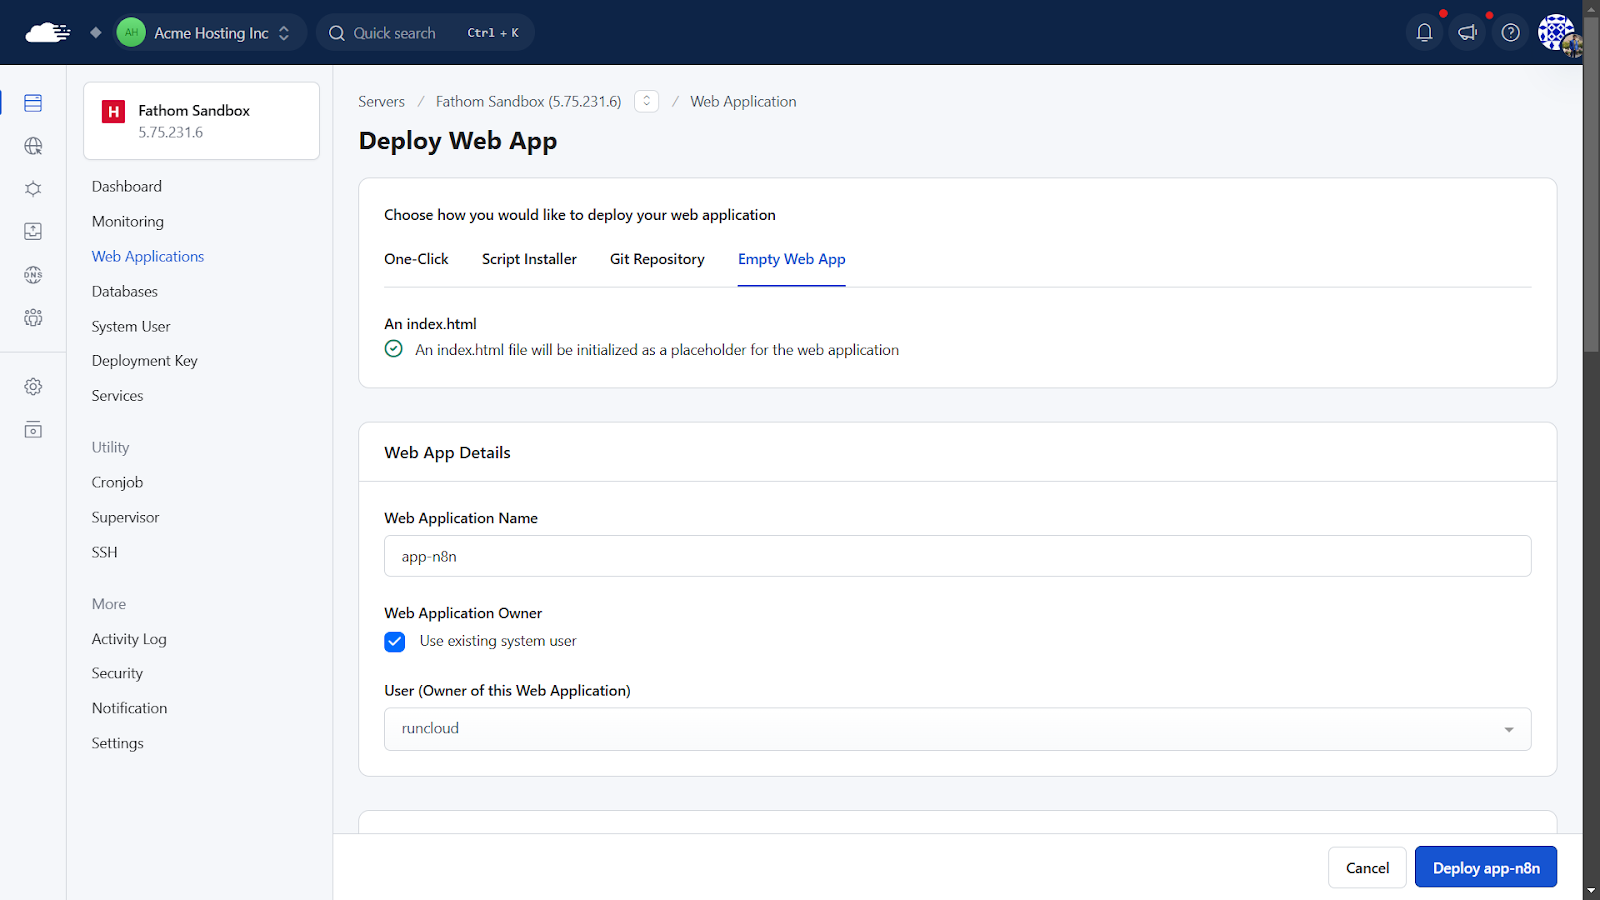
    1. Log in to your RunCloud dashboard, navigate to “Web Applications“, and click “Create Web Application“.
    2. Application Name: Give it a descriptive name, e.g., “n8n-app”.
    3. Web Application Owner: Select your system user. For maximum security, it is recommended that you create a new user account for each web application.
    4. Domain Name: Enter the custom domain you’ll use for n8n (e.g., n8n.example.com). If you are using RunCloud’s Cloudflare integration, you can easily update necessary DNS records with a single click.
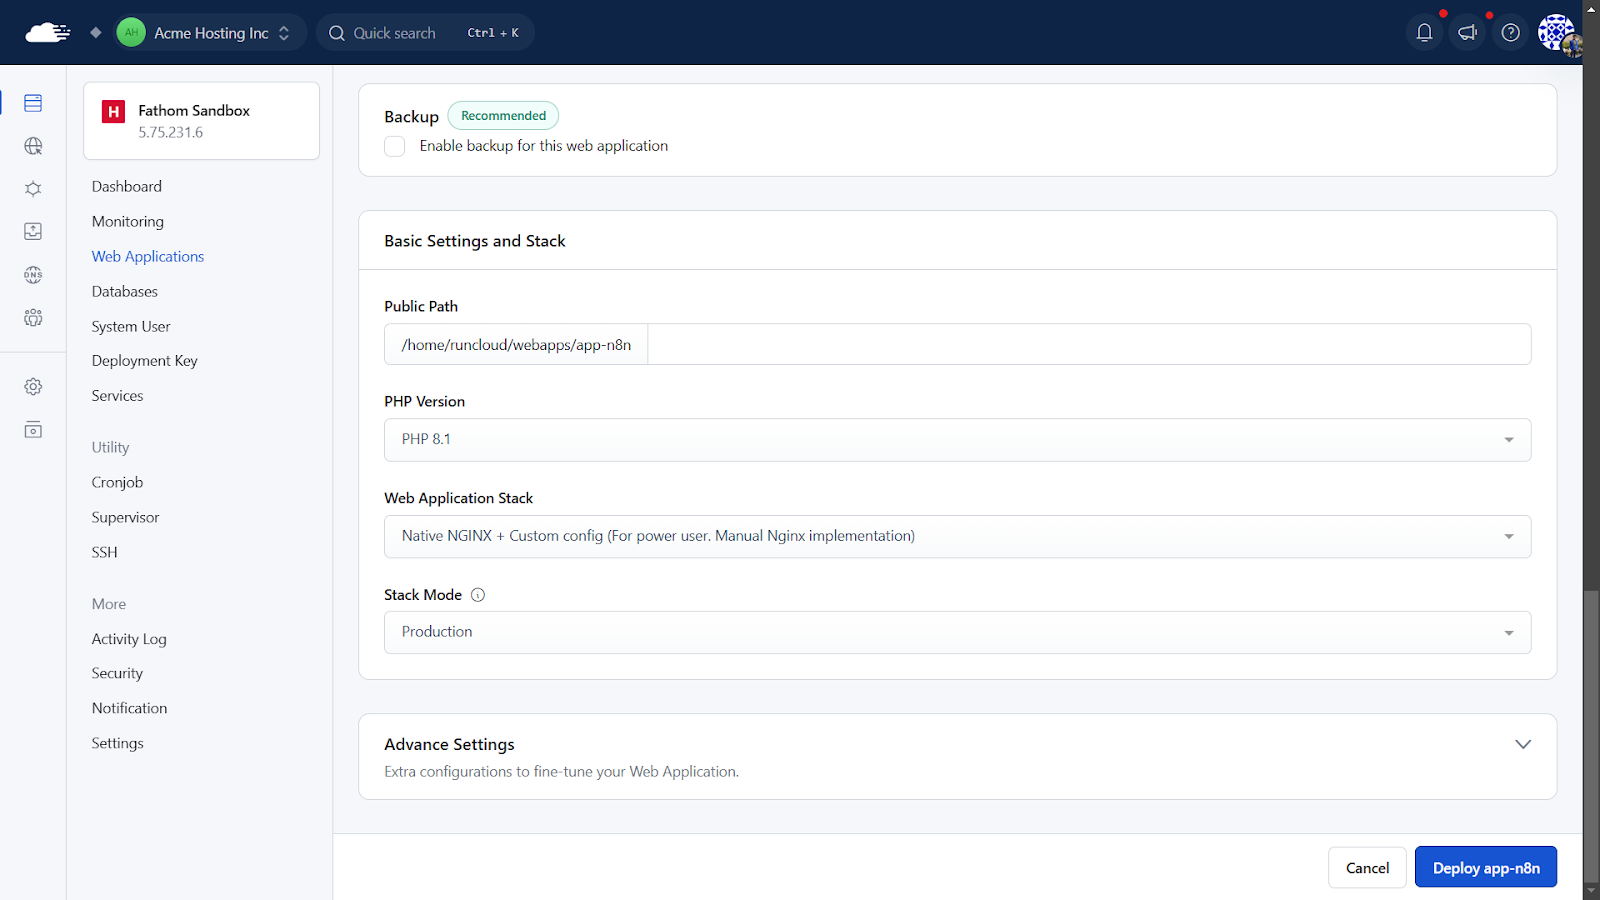
    1. PHP Version: You can select any PHP version; n8n itself doesn’t use it directly as it’s containerized, but RunCloud requires one to be set. The default is fine.
    2. Web Application Stack: For this setting, select “Native NGINX + custom config” as we will be using this as a proxy to connect to the n8n Docker container.
    3. After configuring all settings, click “Create Web Application” to deploy the web application.
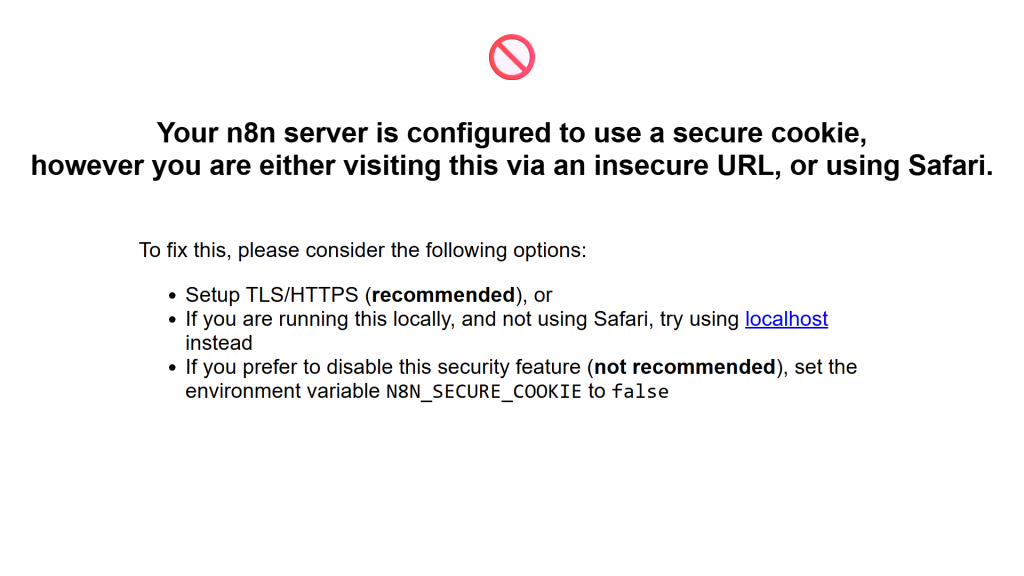
    1. SSL/TLS: Once the app is created, go to its SSL/TLS section in RunCloud. Use Let’s Encrypt to get a free SSL certificate. If you skip this step, you will get the following error later in the process:

    Step 2: SSH into Your Server and Navigate to Your Web App Directory

    After creating the web application, connect to your server via SSH. If you don’t know how to do this, read our documentation on How to Connect to Your Server via SSH to learn more.

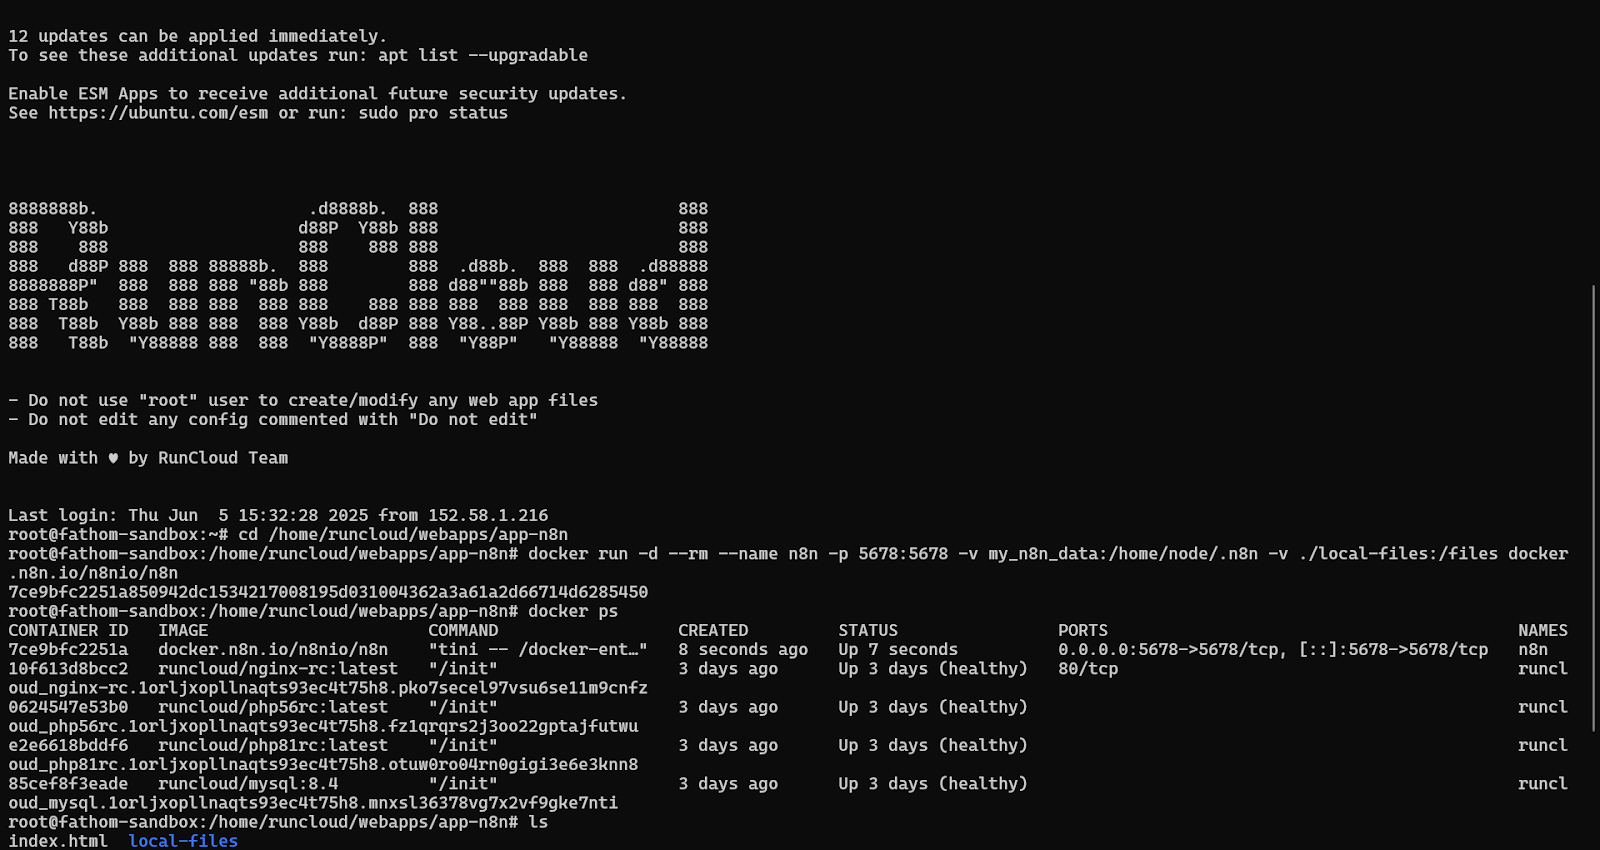
    After connecting to your server, navigate to the web application’s root directory you just created in RunCloud using the ‘cd’ command. Make sure to replace the path in the following command with the actual root path of your web application:

    cd /home/runcloud/webapps/<app-name>

    Step 3: Create the local-files Directory

    In this directory, you can create a new directory that will be mapped to the Docker container. This will contain the web application data of your n8n instance. Execute the following command to create this directory:

    mkdir n8n_data
    sudo chown -R 1000:1000 n8n_data

    This will store your n8n data and assign the correct ownership permissions so that the data is accessible from the Docker container.

    Step 4: Create the Docker Application

    Now, let’s define and launch our n8n application using Docker. You have two ways to approach this. For a very quick start, you could use the following Docker run command:

    docker run -d --rm \
      --name n8n \
      -p 5678:5678 \
      -e GENERIC_TIMEZONE="UTC" \
      -e TZ="UTC" \
      -e N8N_HOST="app-n8n.EXAMPLE.com" \
      -e N8N_EDITOR_BASE_URL="https://app-n8n.EXAMPLE.com/" \
      -e N8N_PROTOCOL="https" \
      -e N8N_ENFORCE_SETTINGS_FILE_PERMISSIONS=true \
      -e N8N_RUNNERS_ENABLED=true \
      -e N8N_LICENSE_ACTIVATION_KEY="EXAMPLE" \
      -e N8N_EMAIL_MODE="smtp" \
      -e N8N_SMTP_HOST="smtp.EXAMPLE.com" \
      -e N8N_SMTP_PORT="25" \
      -e N8N_SMTP_USER="EXAMPLE" \
      -e N8N_SMTP_PASS="EXAMPLE" \
      -e N8N_SMTP_SENDER="N8N <n8n@EXAMPLE.com>" \
      -e N8N_SMTP_SSL=true \
      -e N8N_SMTP_STARTTLS=true \
      -v ./n8n_data:/home/node/.n8n \
      docker.n8n.io/n8nio/n8n

    Once you run the above command, Docker will download and run the required containers for your application.

    For more flexibility (custom env settings, time zones), use Docker Compose instead. See n8n’s Docker documentation for advanced setups.

    Step 5: Configure NGINX Reverse Proxy via RunCloud

    After enabling the Docker container, you must configure a reverse proxy to route traffic to your container.

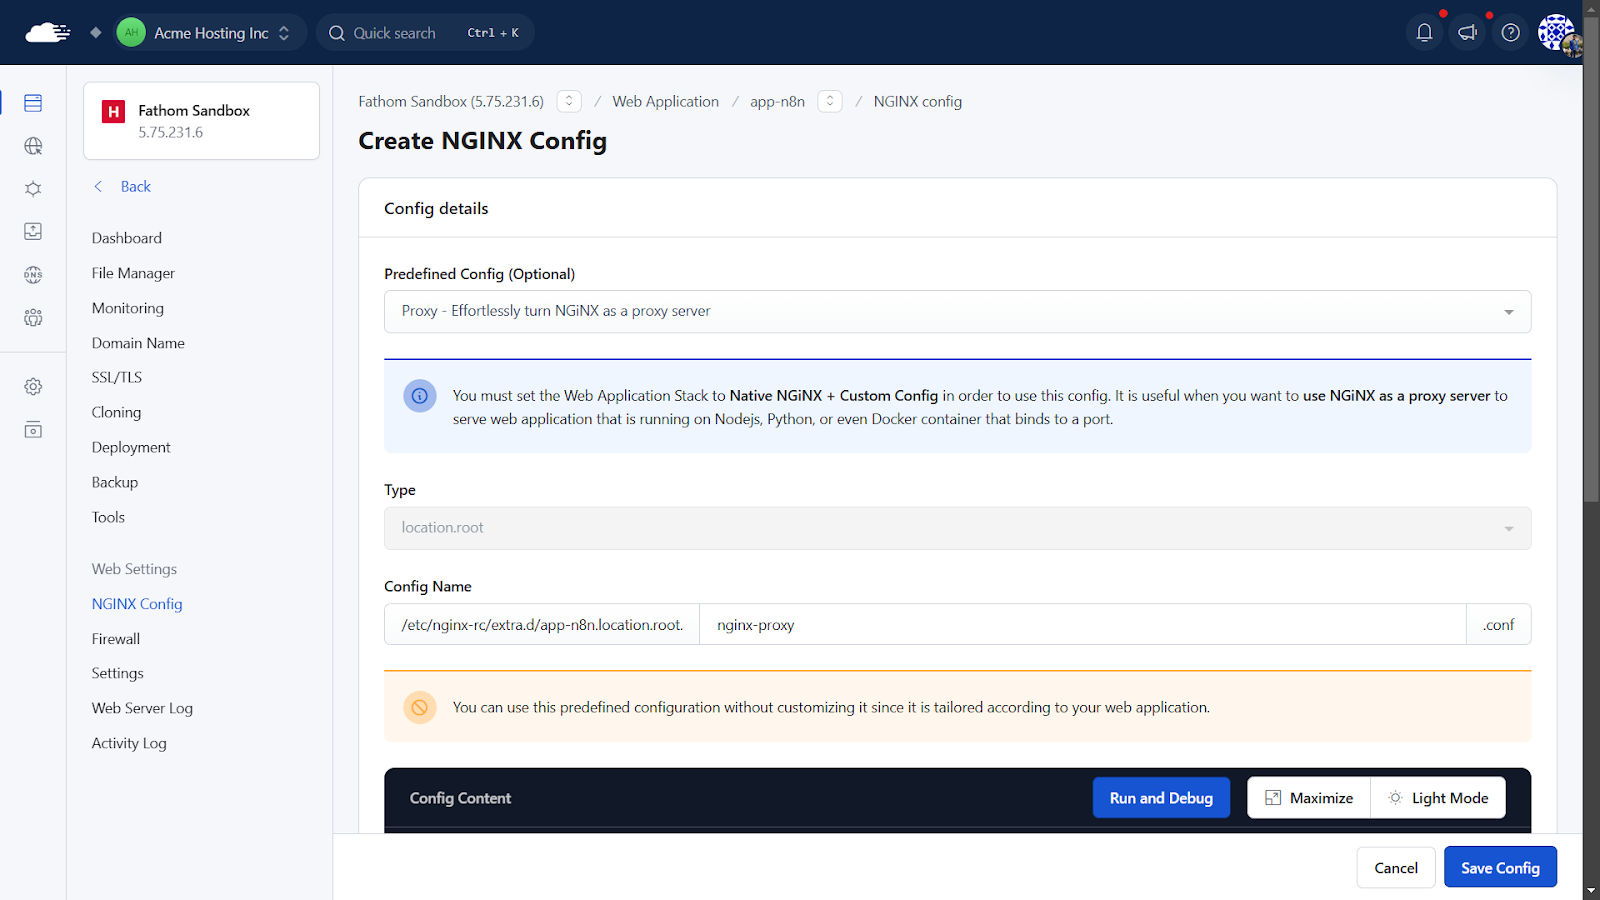
    1. In RunCloud, go to your n8n-app
    2. Under “NGINX Config“, click “Create NGINX Config“
    3. Select: Proxy – Turn NGINX into a proxy server
    4. Name it n8n-proxy
    1. In the Content box, paste the following NGINX configuration:
    proxy_pass http://host:5678;
    # > uncomment below line if you want to disable proxy buffering
    # proxy_buffering off;
    proxy_set_header X-Real-IP $remote_addr;
    proxy_set_header X-Forwarded-Host $host;
    # > websocket support. if you want to proxy websockets, uncomment 3 lines below
    proxy_http_version 1.1;
    proxy_set_header Upgrade $http_upgrade;
    proxy_set_header Connection "upgrade";
    1. After configuring the required settings, click “Create NGINX Config“. RunCloud will test and apply this configuration on your server immediately.

    Step 6: Access Your Secure n8n Instance

    After enabling the proxy, open your web browser and go to the domain you configured for your web application (e.g., https://n8n.example.com).

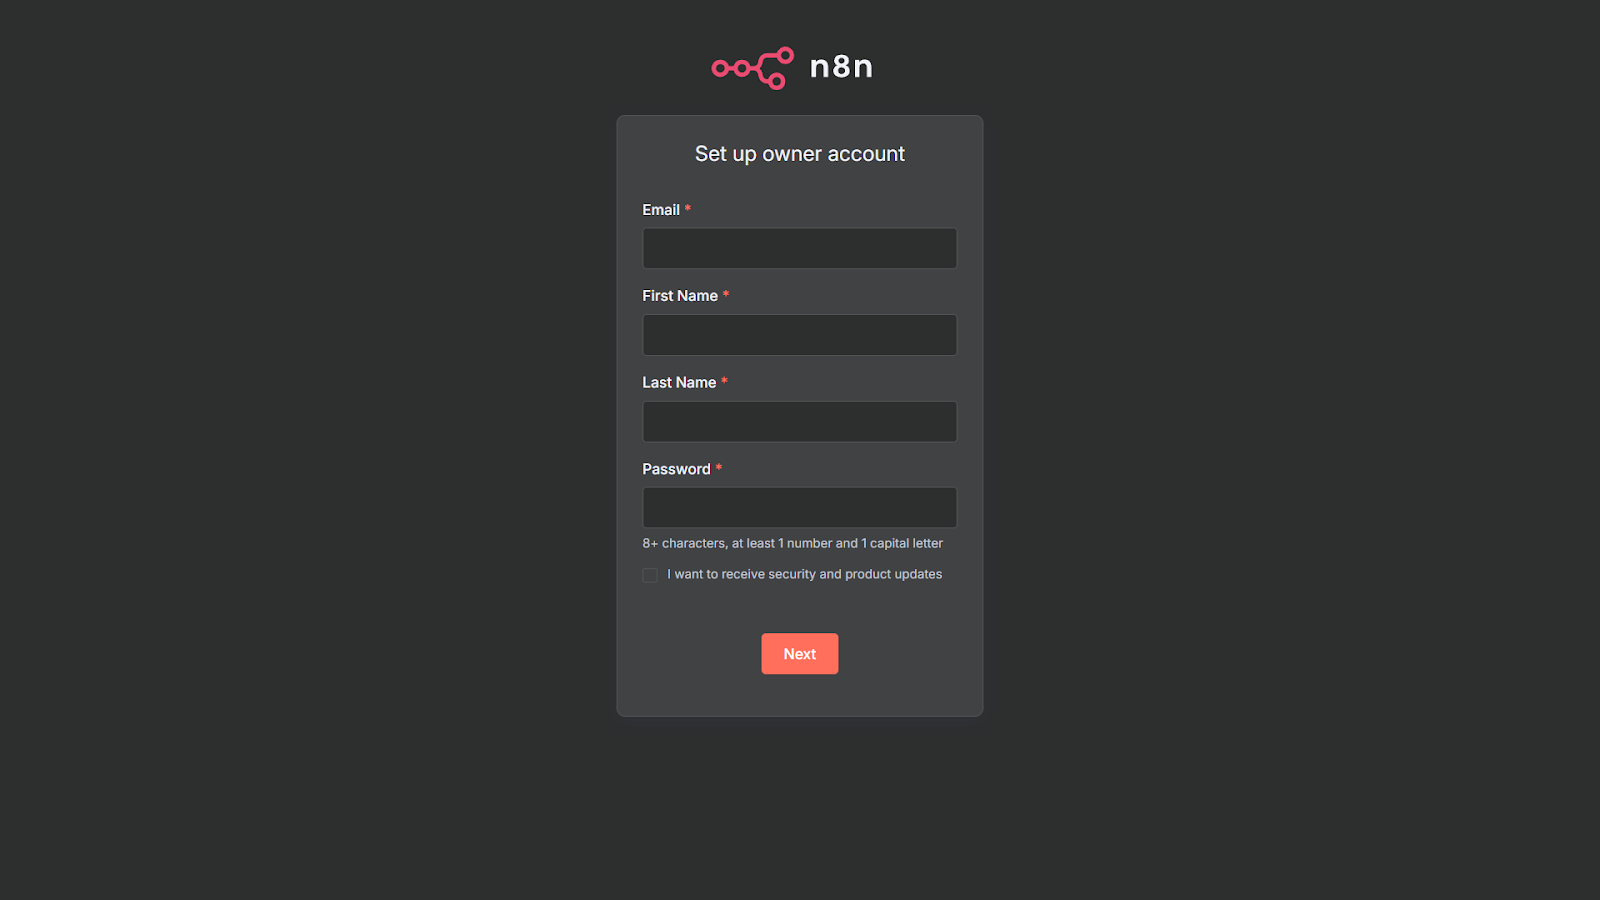
    If you use RunCloud’s built-in SSL manager, you will see the following n8n setup screen to create your account:

    Step 7: Enable Backups

    Don’t skip this. Backups protect your data and save time if anything breaks.

    In your RunCloud dashboard, set up automated backups for your n8n-app. You can create daily snapshots of your files and easily restore them if needed.

    Learn more in our backup guide.

    Final Thoughts: Your Automation Journey and Beyond with RunCloud

    You now have a secure, fully self-hosted n8n setup – managed through RunCloud and running in Docker.

    But setting up n8n is just scratching the surface of what RunCloud can simplify for you. You can also use RunCloud to effortlessly host other applications without diving deep into complex server configurations. With RunCloud, you can easily deploy and manage:

    • Nextcloud: Your private cloud for files, calendars, and contacts.
    • WHMCS: The leading web hosting automation platform.
    • WordPress: The world’s most popular content management system.
    • FreeScout: A powerful open-source help desk and shared inbox.
    • Ghost CMS: A sleek and modern platform for professional publishing.
    • And much more…

    RunCloud takes the hassle out of server administration, allowing you to focus on what you do best → building, creating, and automating.

    Ready to simplify your server management? Sign up for RunCloud today.

  • How to Fix the WordPress White Screen of Death (Step by Step)

    How to Fix the WordPress White Screen of Death (Step by Step)

    Have you ever opened a website and been greeted with a blank page instead of the content you expected?

    This is known as the infamous WordPress White Screen of Death (WSOD). It is a frustrating error that only happens when something has gone critically wrong behind the scenes.

    If this has happened to you, don’t panic. This guide provides a step-by-step process for diagnosing and resolving the WordPress White Screen of Death. By following these proven steps, you’ll be equipped to pinpoint the exact cause and bring your website back online quickly.

    Let’s get started!

    What is the WordPress White Screen of Death?

    The WordPress White Screen of Death (WSOD) is a blank white screen that appears when you attempt to access your website. It usually means a fatal PHP error or database issue has occurred.

    On most live websites, PHP error reporting is disabled by default for security reasons. This means that when a script-breaking error occurs, the server stops rendering the page but has no instructions to display an error message, which results in a blank output.

    The issue can be site-wide, affecting both the public-facing site and the admin dashboard (/wp-admin), or it can be isolated to a specific page, post, or just the admin area.

    Despite the intimidating name, the WSOD is a code execution failure. Your website’s data, including posts, pages, and user information stored in the database, is almost always safe and unaffected.

    Suggested read: How to Fix WordPress High CPU Usage (10 Instant Solutions)

    Common Causes of the WordPress White Screen of Death

    Several things can cause this error:

    • Plugin Incompatibility: This is the most frequent cause. A plugin may conflict with another plugin, your active theme, or a recent WordPress core update, leading to a fatal error.
    • Theme Functionality Errors: Your active theme can cause a WSOD due to poorly written code, a syntax error in its functions.php file, or an incompatibility after an update.
    • Exhausted PHP Memory Limit: A script or process may require more memory than your server has allocated to PHP. When this memory limit is reached, the script is terminated, often leaving a blank page.
    • Corrupted Core Files: A failed or interrupted WordPress core update can leave you with missing or corrupted files, which prevent WordPress from loading correctly.
    • File Permission Issues: Incorrect read/write permissions on core WordPress files and folders can prevent the server from accessing them, leading to a failure to load.

    Suggested read: How to Fix WordPress Stuck in Maintenance Mode? [100% WORKING]

    How to Fix the WordPress White Screen of Death: 7 Proven Steps

    The White Screen of Death is a common WordPress issue that can usually be resolved by following a logical troubleshooting process. Work through these steps in order, starting with the most likely culprits, such as plugins and themes, to efficiently diagnose and resolve the error.

    Step 1: Check for Plugin Conflicts

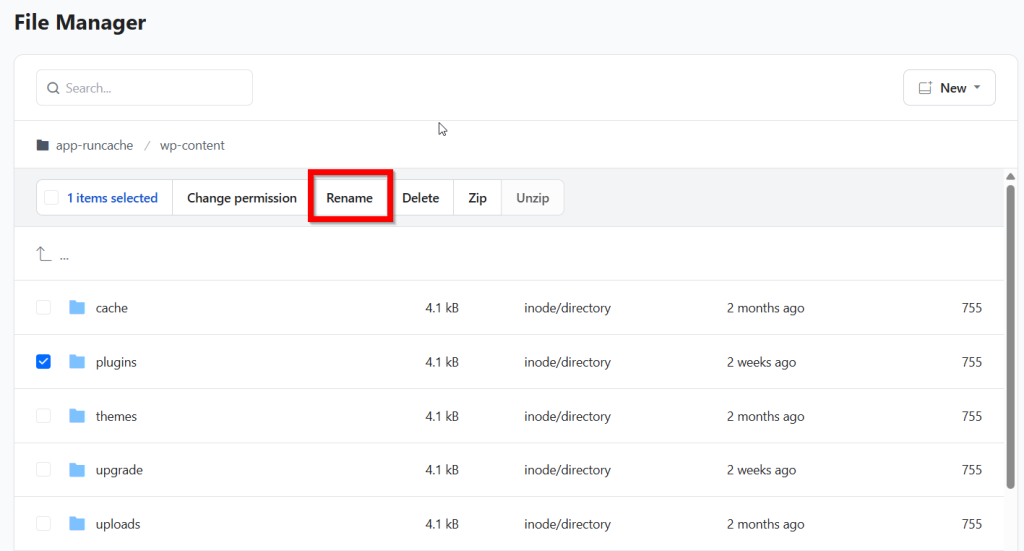
    Plugin conflicts are the most common cause of this error, so your first step is to deactivate all plugins at once. You can do this by using the RunCloud File Manager to navigate to your wp-content directory and rename the plugins folder to something like plugins_disabled. If your site comes back online, then you can rename the folder and reactivate your plugins one by one to find the one causing the error.

    Suggested read: How to Fix WordPress Revisions Not Showing [SOLVED]

    Step 2: Switch to a Default WordPress Theme

    If plugins aren’t the problem, then your active theme might be causing an issue, especially after an update or code modification. Just as we did above, use the RunCloud File Manager and navigate to /wp-content/themes/. Rename the folder of your active theme; this forces WordPress to fall back to a default theme, such as Twenty Twenty-Five. If this resolves the issue with your site, you will need to troubleshoot the theme or contact its developer for a fix.

    Step 3: Increase PHP Memory Limit

    A blank screen can occur if a WordPress process exceeds the memory allocation your server has provided. To fix this, use the RunCloud File Manager to edit your wp-config.php file and add the line just before the /* That’s all, stop editing! */ line.

    define('WP_MEMORY_LIMIT', '256M');

    This simple change often resolves memory exhaustion issues. If you are using RunCloud, then you can simply modify this setting from your dashboard without ever needing to FTP into your server. For detailed, step-by-step instructions on this topic, we recommend reading our full-length article, ‘How to Fix WordPress Memory Exhausted Error: Increase PHP‘.

    Step 4: Enable WordPress Debug Mode

    To view the specific error causing the blank screen, you must enable WordPress’s debug mode. You can do this by using the RunCloud File Manager to edit the wp-config.php file and change define('WP_DEBUG', false); to true to display the errors on the page itself.

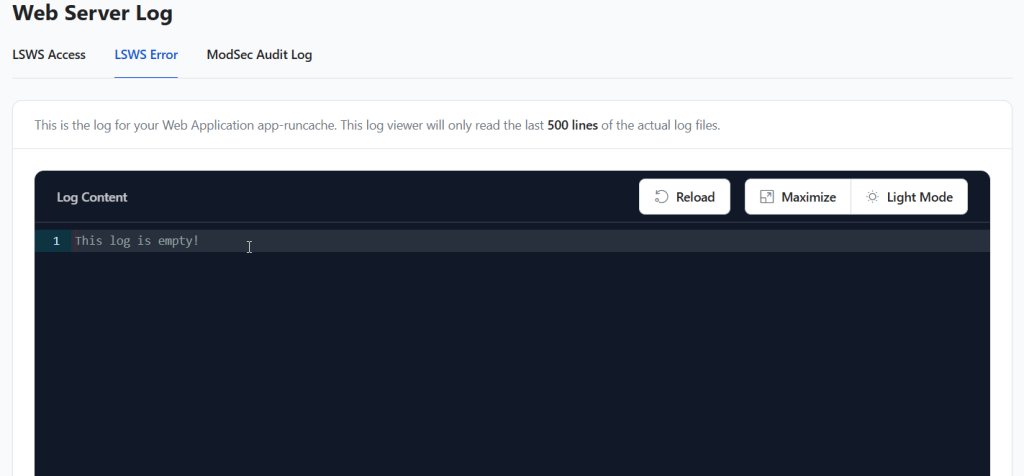
    Additionally, you can use RunCloud’s Error Log Monitoring to see PHP and NGINX errors directly from your dashboard. This will often point you to the exact problematic file and line number.

    Suggested read: How to Easily Fix Leverage Browser Caching Warning in WordPress

    Step 5: Clear WordPress and Browser Cache

    Sometimes, all your plugins and themes are correctly configured, but some parts of your site serve stale cached content. This can sometimes break a site and mask a fix you’ve already applied.

    If you have performed all the above actions, you should clear your browser cache. If you use a caching plugin or server-level caching, such as RunCloud’s RunCache, be sure to purge that cache as well. This ensures you are viewing the live, non-cached version of your site.

    Suggested read: How to Fix WordPress HTTP Error When Uploading Images (Quick Guide)

    Step 6: Fix File Permissions and Ownership Issues

    If you recently modified or created a new file on your server via CLI, then you need to make sure that you set the correct file permissions and ownership. Incorrect file and folder permissions can prevent WordPress from accessing the necessary files, resulting in a blank screen. The standard permissions are 755 for directories and 644 for files; you can check and correct these using your RunCloud File Manager or an SFTP client.

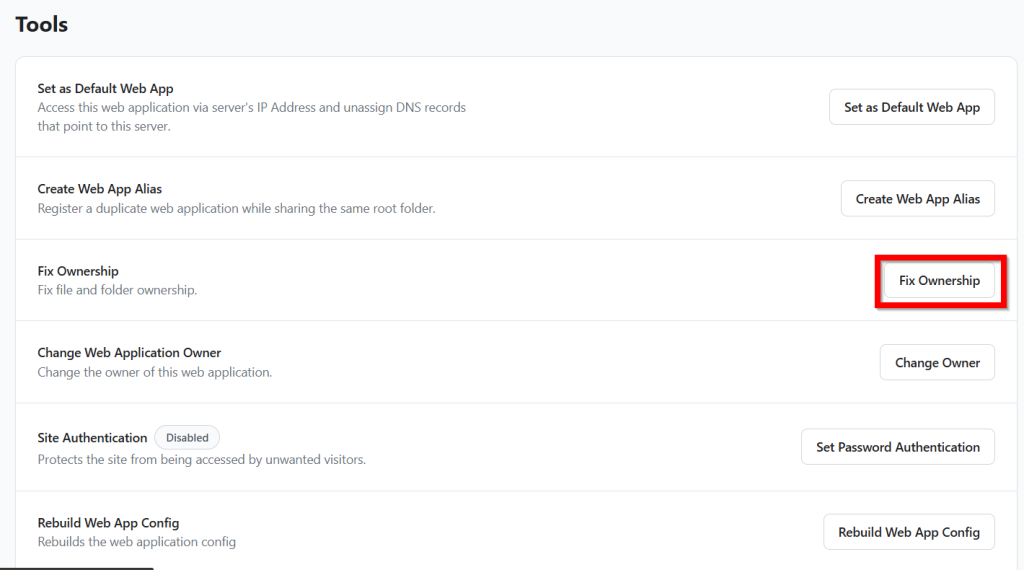
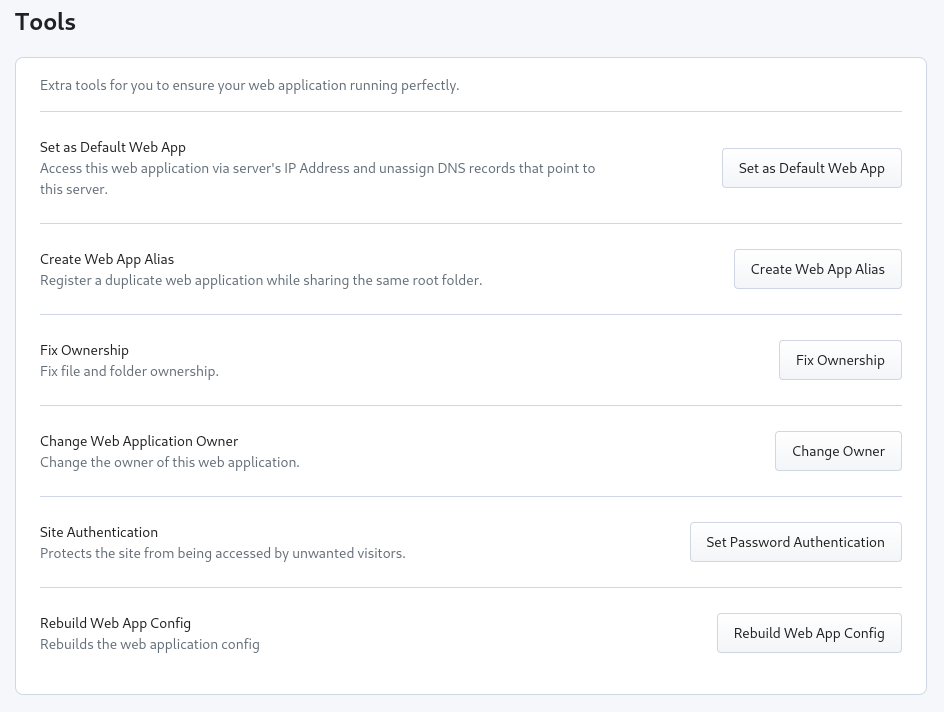
    After fixing the file permissions, you can fix the file ownership issues by simply clicking the “Fix Ownership” button in the Tools menu.

    Suggested read: 10 Best WordPress Management Tools To Easily Manage Multiple Websites

    Step 7: Remove the .maintenance File or Restore a Backup

    In this step, you should first check your site for a stuck “.maintenance” file in your root directory using the RunCloud File Manager, and delete it if it exists. If all else fails or you need an immediate fix, the safest and fastest solution is to restore your website from a recent backup.

    With RunCloud Backups & Incremental Restore, you can revert your entire web application to a stable state in just a few clicks, ensuring no data is lost and your site is back online instantly.

    Wrapping Up: Preventing the WordPress White Screen of Death in the Future

    While knowing how to fix the White Screen of Death is a valuable skill, the best strategy is to implement practices that prevent it from happening in the first place. A proactive approach to site management can save you from downtime and stress by identifying potential issues before they escalate into critical failures. Here’s how you can do this:

    Enable a Staging Environment

    The most effective way to prevent the White Screen of Death is never to let a breaking change reach your live site. A staging environment is an exact, private clone of your production website where you can safely test plugin updates, theme modifications, and new code. If an update causes a WSOD on your staging site, your live site remains completely unaffected, giving you a risk-free space to troubleshoot the conflict.

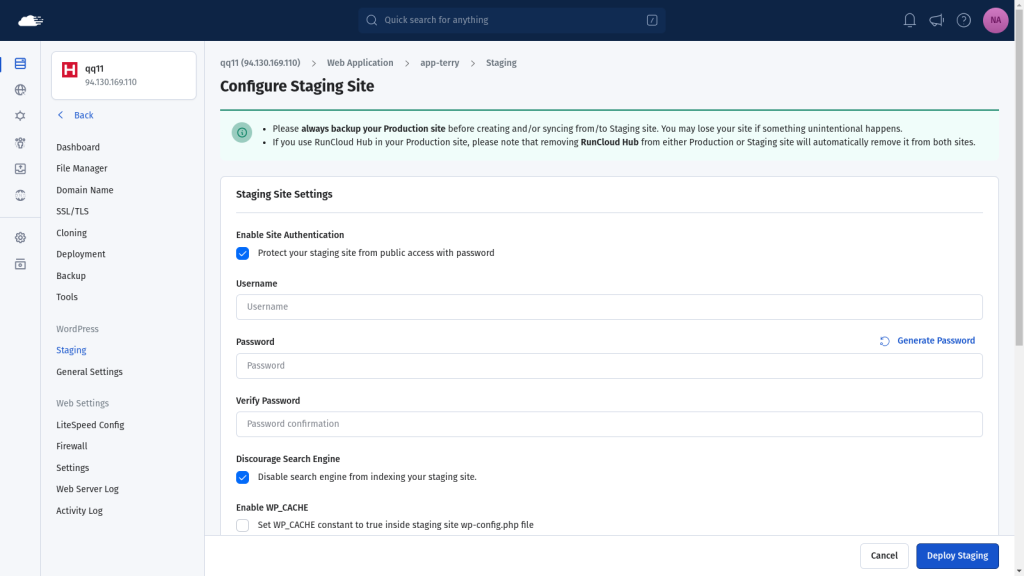
    In the future, you can use the WordPress staging environment feature directly within the RunCloud dashboard to create and manage these test sites with just a few clicks. To learn how to implement this process, we recommend referring to our comprehensive article on creating a WordPress staging environment.

    Install and Manage WordPress with Git

    Git is a version control system that tracks every change made to your files, allowing you to instantly roll back to a previous, working version if a new deployment causes a WSOD. This eliminates the need to manually hunt for syntax errors or faulty code after an update.

    RunCloud supports atomic deployment for Git and WordPress, making this process seamless and error-free. When you deploy, RunCloud ensures the new version is fully in place before it goes live, preventing partial-update errors that often result in a blank screen. To explore this advanced, reliable deployment method, refer to our detailed guide on:

    And finally, the most important safety net is a reliable, recent backup. Instead of relying on manual processes, use a service like RunCloud Backups & Incremental Restore to automatically save versions of your site. This ensures you can revert to a working state in seconds if an update or change causes a fatal error.

    Try RunCloud’s smart server management today.

    WordPress White Screen of Death FAQs

    How do I fix a white screen after updating WordPress?

    An update likely created an incompatibility with a plugin or your theme. Access your site via FTP or your host’s file manager, navigate to the wp-content folder, and temporarily rename the plugins folder to deactivate all plugins. If this resolves the issue, reactivate them one by one to identify the cause.

    How can I access my dashboard when the site is blank?

    If /wp-admin is also blank, you must use FTP or a file manager to access your site’s files. By renaming the active theme or plugin folders within the /wp-content/ directory, you can force WordPress to disable them and regain access to your dashboard.

    Does a plugin conflict cause a blank screen?

    Yes, plugin conflicts are one of the most frequent causes of the white screen. This occurs when two plugins are incompatible with each other or with your version of WordPress, leading to a fatal error.

    Can low PHP memory make my site go blank?

    Absolutely. If a WordPress script or plugin needs more memory than is allocated on your server, it will fail to execute and result in a blank white screen. You can often fix this by increasing the PHP memory limit in your wp-config.php file.

    How do I debug a blank WordPress page?

    The most effective method is to enable WordPress’s built-in debug mode. Edit your wp-config.php file and change define( 'WP_DEBUG', false ); to true to display the specific error message that is causing the blank screen.

    How can I restore my site without losing data?

    The white screen is a code-level issue, so your content, users, and posts in the database are generally safe. Restoring a recent backup is the safest option, but fixing the issue by deactivating the faulty plugin/theme will also bring your site back without data loss.

    What should I do if only the admin area is blank?

    If the public-facing site works but /wp-admin is blank, the issue is specific to the admin dashboard. This is often caused by a plugin or a custom function in your theme’s functions.php file, so start troubleshooting there.

  • WordPress Permalinks Not Working Here is the Easy Fix

    WordPress Permalinks Not Working Here is the Easy Fix

    Seeing “404 Page Not Found” on posts that definitely exist?

    Broken WordPress permalinks are usually to blame – and while frustrating, they’re easy to fix.

    Permalinks are your post and page URLs. When they break, visitors can’t reach your content, and your SEO suffers. This guide walks you through quick fixes that restore your links in minutes.

    Common Causes of Broken Permalinks

    Before we fix the problem, let’s look at what typically causes permalinks to fail. Here are the most common reasons why WordPress permalinks suddenly stop working:

    • Plugin or theme conflicts: A new or updated plugin/theme can interfere with your URL rules and cause 404 errors.
    • Corrupted .htaccess file: This configuration file controls your links. If damaged, it can stop your pages from loading.
    • Recent WordPress updates: Updates can sometimes break permalink settings, especially with outdated plugins.
    • Site migration or domain change: Moving to a new host or domain can leave WordPress pointing to old URLs.
    • Restoring from backup: Restored settings may not match your current server environment, leading to mismatched link paths.

    How to Fix Broken WordPress Permalinks (Step-by-Step)

    If your website links are leading to “404 Page Not Found” errors, then don’t panic! This is a very common WordPress issue, and the fix is usually surprisingly simple. Follow the steps below to fix it:

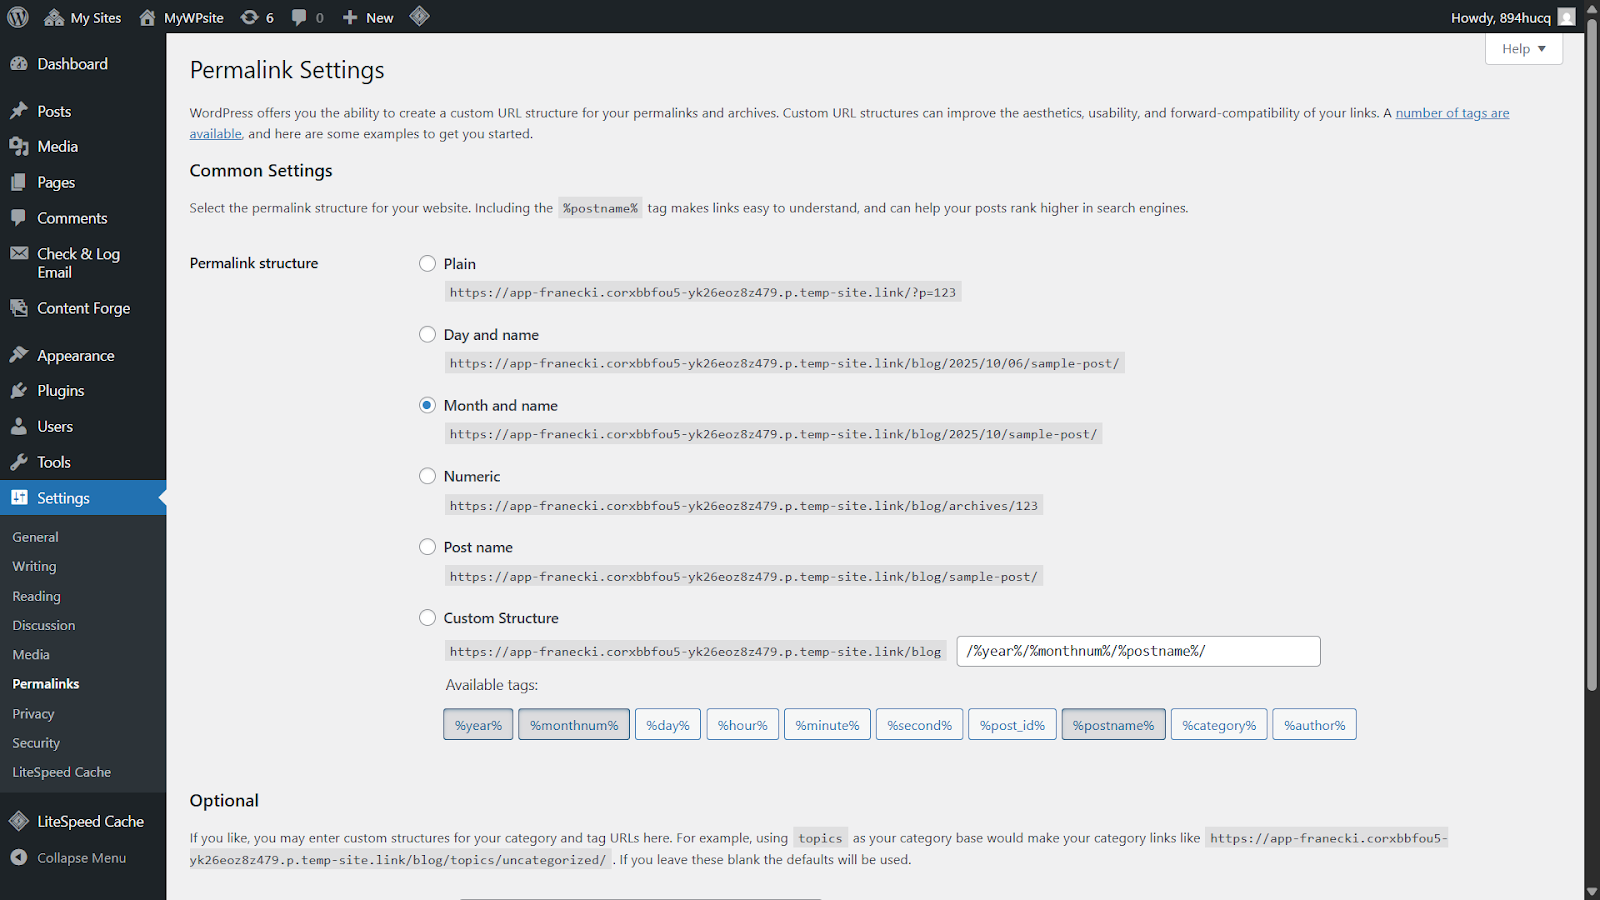
    1. Resetting Your Permalinks

    Resetting your permalinks fixes 404 errors in most cases.

    • Log in to your WordPress dashboard.
    • Go to Settings → Permalinks.
    • Without changing anything, click Save Changes.

    WordPress will refresh your link structure automatically. Check your pages again – the issue is often already fixed.

    Reset wordpress permalinks

    By just re-saving the page, you’ve prompted WordPress to fix its link structure behind the scenes. Now, go visit one of your pages to see if the error is gone. If not, proceed to the next step.

    2. Temporarily Deactivating Your Plugins

    If resetting the permalinks didn’t work, then it is possible that a plugin is misbehaving. If you are using a firewall or security plugin, then it is also possible that it isn’t configured correctly and causing an issue.

    In this step, you will need to deactivate your plugins one by one and try to identify what caused the issue. Don’t worry; deactivating a plugin won’t delete its settings or your data.

    1. Step 1: In your WordPress dashboard, go to Plugins > Installed Plugins.
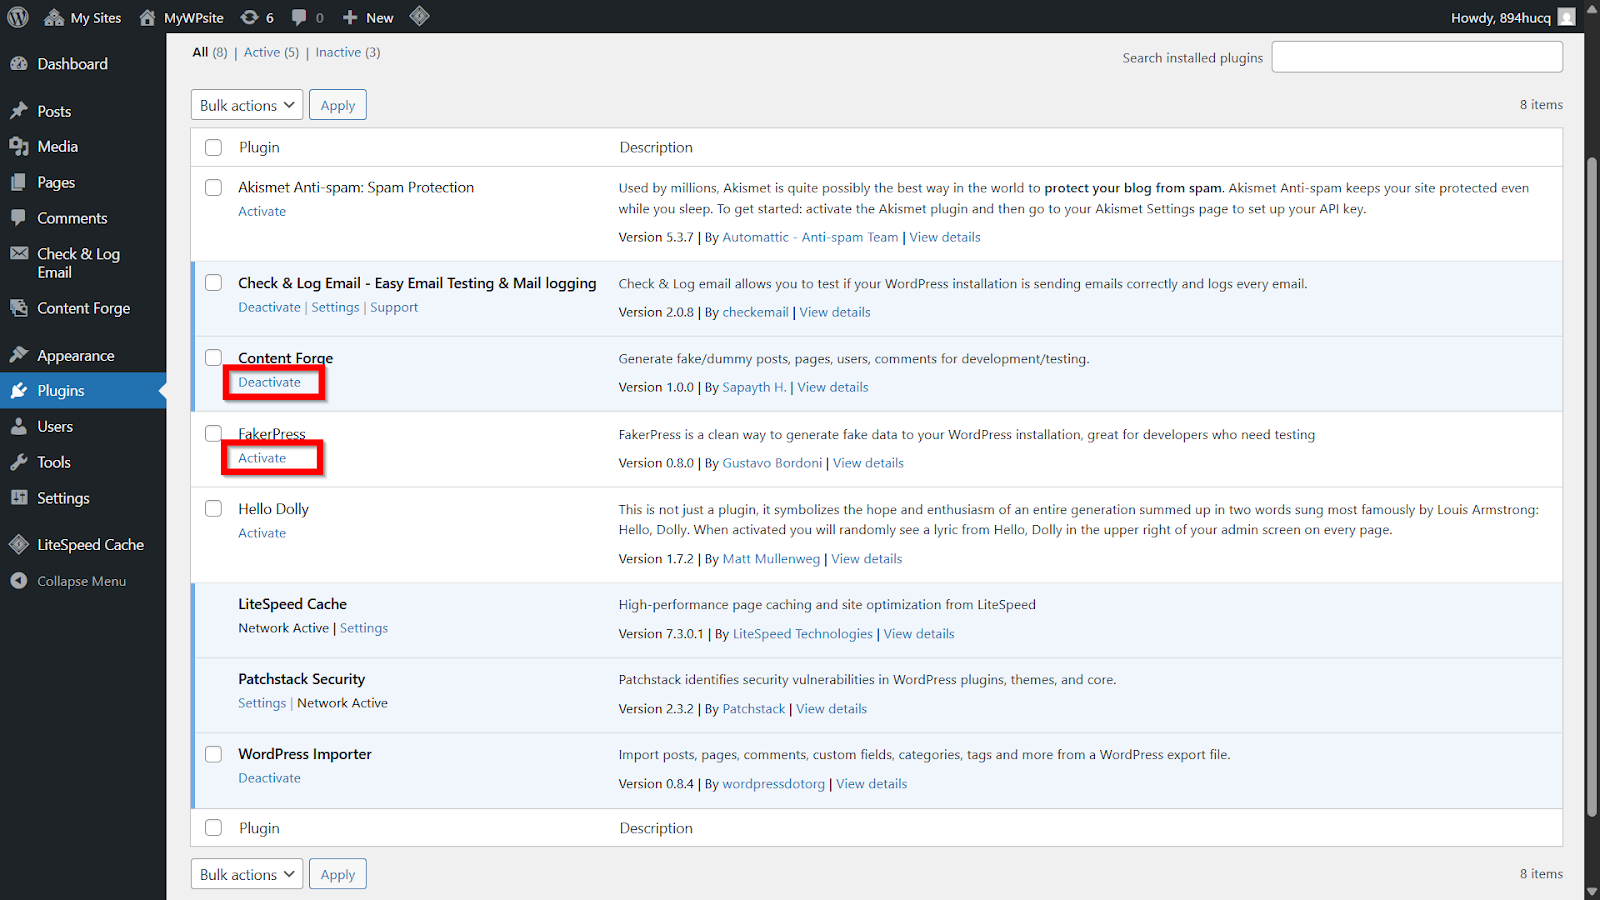
    2. Step 2: From the list of active plugins, select the plugin that you want to disable temporarily and click Deactivate under it.
    3. Step 3: Now that this plugin is off, check your website. If your links work again, then you will know that this plugin was causing the issue.
    4. Step 4: Once you find the plugin causing the problems, you can either find a replacement for it or contact its developer for help.

    3. Regenerate Your .htaccess File

    This step is a bit more hands-on and requires some technical knowledge. Many WordPress hosts and themes create an .htaccess file on the server. This file stores important configuration and tells the server how to handle URLs.

    Important Note for NGINX Users: If your website runs on a pure NGINX server, you will not have an .htaccess file. NGINX handles permalinks differently. This step is only for users on Apache, LiteSpeed, or NGINX with .htaccess enabled servers. If you’re unsure, you can likely skip this and check your permissions (Step 4) or contact your host.

    WARNING: Your .htaccess file is extremely sensitive. Editing this file incorrectly can instantly break your entire website. A bad edit could also silently create security vulnerabilities. Only proceed with this step if you are comfortable editing core website files and have made a backup.

    Here’s how to safely force WordPress to generate a new, default version:

    Step 1: Access Your Website Files

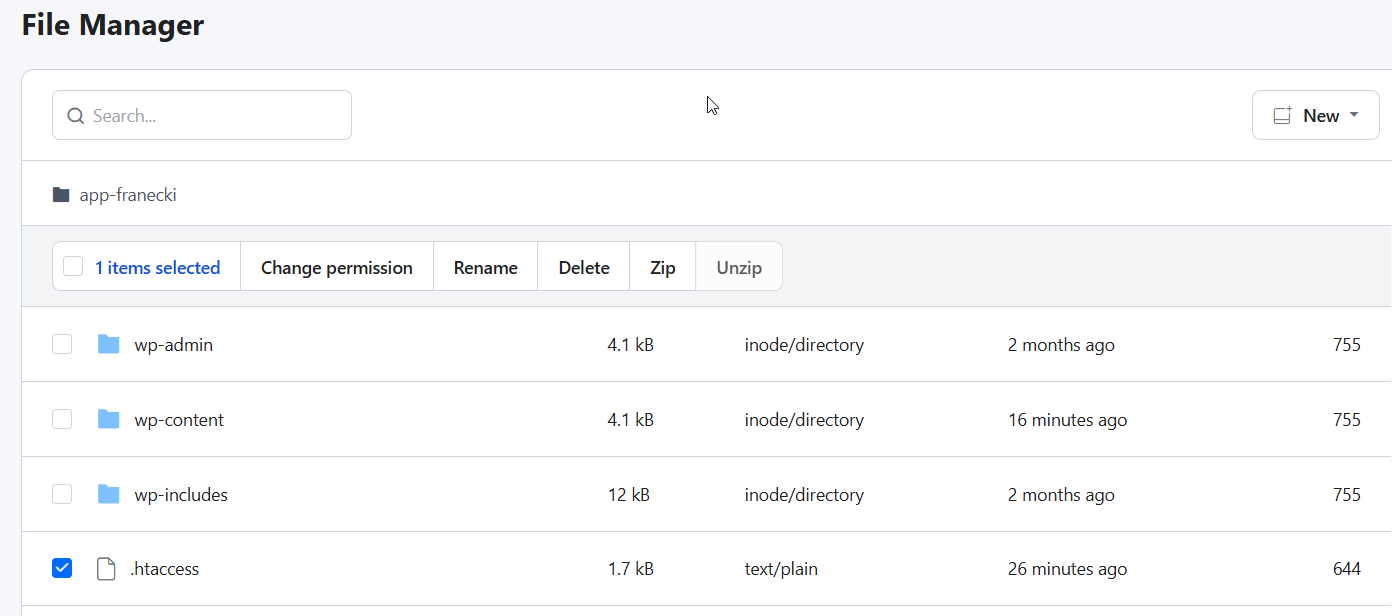
    To access your site’s core files, use either an FTP client or the RunCloud File Manager.

    In RunCloud:

    1. Log in to your dashboard.
    2. Select your server and web application.
    3. Click File Manager to open your site’s root directory.

    From here, find and back up your .htaccess file. Rename it to .htaccess_old, then go to Settings → Permalinks → Save Changes in WordPress to generate a clean version.

    Step 2: Locate the .htaccess File in Your Website’s Root Folder

    Now, you’ll need to find the .htaccess file itself. In your File Manager or FTP client, navigate to the main (or “root”) directory of your WordPress installation. This is the top-level folder that contains your core WordPress directories, such as wp-content, wp-admin, and wp-includes.

    It’s very common not to see this file at first glance. By default, files that start with a dot (like .htaccess) are treated as “hidden files” or “dotfiles” by many systems. Your file manager is likely hiding it to prevent you from making accidental changes.

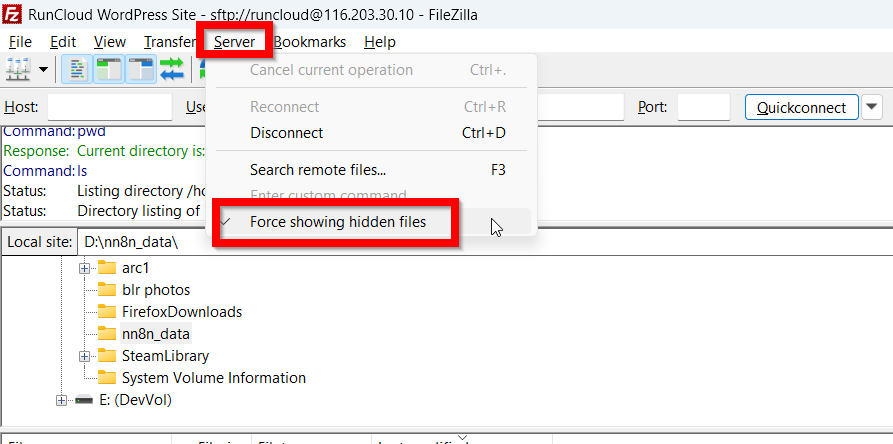
    You will need to configure your tool to show these hidden files. In an FTP Client (like FileZilla): this setting is usually in the top menu bar. Look for an option under “Server” and click “Force showing hidden files”.

    After changing the setting, the file list should refresh, and your .htaccess file will now be visible.

    If you have correctly enabled hidden files and the .htaccess file is genuinely not there, it is a strong indicator that your website is not running on an Apache or LiteSpeed server. Instead, it is likely on an NGINX server, which is a popular, high-performance alternative.

    NGINX does not use .htaccess files to manage URL rules; its configuration is handled differently at the server level. If this describes your situation, then a broken or missing .htaccess file is not the cause of your permalink issue. You can safely skip the rest of this section and move on to the next potential fix.

    Step 3: Replace the Old .htaccess File

    First, you should download the existing .htaccess file to your laptop for a backup. With your backup safely downloaded, you can now proceed with resetting the file on your server.

    In your File Manager or FTP client, right-click on the original .htaccess file and choose the “Rename” option. A simple and effective name is .htaccess_old or .htaccess_backup.

    This action does two things at once: first, it preserves your original file in case you need to restore it. Second, by renaming it, you effectively deactivate the old, potentially corrupted file.

    Now, leave your File Manager open and switch back to your WordPress dashboard in your browser.

    1. On the left-hand menu, navigate to Settings > Permalinks.
    2. You do not need to change any of your permalink settings on this page. Simply scroll to the bottom and click the Save Changes button.

    If the issue was a corrupted file, this action will almost certainly fix your broken links.

    Step 4: Manually Editing .htaccess

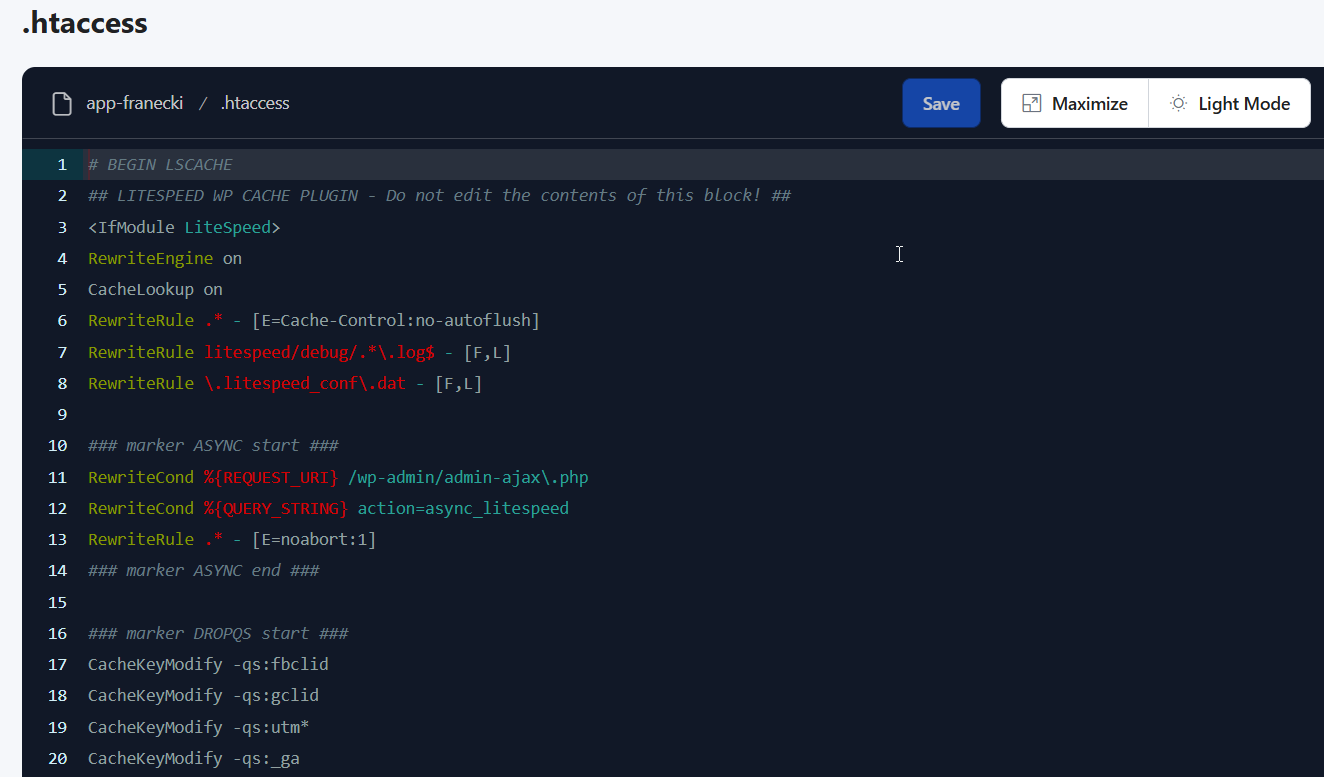
    Once you have disabled the old file, you should create a new file with the necessary rules for your website. If you use caching plugins (like WP Rocket), security plugins (like Wordfence), or custom redirects, then you might need to add custom rules or restore them from the old file.

    4. Reviewing File Permissions

    In our previous post on file permissions, we explained that file permissions in Linux are like digital locks on your website’s files. If the permissions are wrong, WordPress might be locked out and unable to work as expected.

    Your .htaccess file should have 644 permissions.

    In RunCloud, you can fix this in seconds – go to your web application’s Permissions section and click Reset File Ownership to correct all file and folder settings automatically.

    Wrapping Up: Fixing WordPress Permalinks Easily

    In this post, we have explained how to fix broken permalinks on a WordPress site. The good news is that the fix is almost always straightforward once you know where to look. By following this guide, you’ve learned how to diagnose and solve the issue quickly.

    While these fixes are effective, the real goal is to spend less time troubleshooting and more time building. Having the right tools can make all the difference as it transforms complex server tasks into simple clicks.

    Managing servers doesn’t have to be complicated.

    RunCloud gives developers full control with one intuitive panel – from NGINX caching and SSL setup to automated backups.

    Start your free RunCloud trial today and experience how effortless WordPress management can be.

    FAQs on WordPress Permalinks

    Why are my WordPress links not working?

    The most common reasons for non-functional WordPress links are plugin or theme conflicts, a corrupted .htaccess file, incorrect server configuration, or issues after a website migration or update.

    How do I fix a 404 error after changing permalinks?

    The first step is to reset your permalinks by going to Settings > Permalinks and clicking “Save Changes”. If that doesn’t work, you should check for plugin conflicts or regenerate your .htaccess file.

    Can a new plugin break my permalinks?

    Yes, a new plugin can interfere with your .htaccess file and break your permalinks. Deactivating plugins one by one is a good way to identify the culprit.

    What should my .htaccess file permissions be?

    The recommended file permission for your .htaccess file is 644.

    Is it safe to change my permalink structure on a live site?

    Changing your permalink structure on a live site can lead to broken links and a drop in SEO rankings if not done correctly. If you must change it, ensure you set up 301 redirects from the old URLs to the new ones to preserve your link equity.

  • 12 reCAPTCHA Alternatives To Protect Your Site from Spam

    12 reCAPTCHA Alternatives To Protect Your Site from Spam

    You’ve probably encountered CAPTCHA at some point while browsing the web. It’s that annoying test that asks you to prove you’re human by solving a puzzle, typing some letters, or clicking on some images.

    Captcha is supposed to protect your website from spam and abuse, but it can also drive away your visitors and customers.

    It can be frustrating, time-consuming, and discriminatory for some users, especially those with disabilities or low internet speed.

    In fact, CAPTCHA can reduce your website’s conversion rate by up to 3.2%!

    But what if we told you there’s a better way?

    A way to protect your website from bots without annoying your users. A way to improve your website’s user experience, security, and accessibility. A better way to distinguish between bots and real users.

    In this article, we will show you some of the top alternatives of Google’s reCAPTCHA service that you can use on your website today. These alternatives are easy to implement, effective, and user-friendly.

    Read on to find out more!

    Top Alternatives to reCAPTCHA for Web Developers

    Cloudflare Turnstile

    Cloudflare Turnstile is a strong contender against Google’s reCAPTCHA. It is easy to use, mobile-friendly, and customizable, and it can be easily integrated into your website using a simple JavaScript snippet.

    The best part is that Turnstile can validate users without any visual puzzle – significantly improving the user experience. It is also WCAG 2.1 Level AA compliant, making it accessible for users with disabilities. Cloudflare promises to protect the privacy of your users and never harvests data for ad targeting – similar can’t be said for other providers.

    Pricing: Cloudflare Turnstile is currently free for up to 10 widgets. If you want to use more than that, you need to sign up for Cloudflare’s Enterprise plan.

    Turnstile is Cloudflare's alternative to Google's reCAPTCHA

    hCaptcha

    hCaptcha uses image-based challenges to verify human users. Users need to select the images that match a given criterion, such as “select all the cars”. hCaptcha claims to collect zero personally identifiable information, and so it automatically satisfies all privacy standards such as GDPR, CCPA, and HIPAA – making it more secure and privacy-friendly than reCAPTCHA, as it doesn’t track user data or serve ads.

    Although visual tests are convenient tools for distinguishing bots, not everyone can solve a visual challenge. hCaptcha provides advanced accessibility options for serving not just people with visual impairments but also those with auditory processing issues. It is WCAG 2.1 Level AA compliant and offers features such as an accessibility cookie to help users bypass challenges. You can change the difficulty level of each challenge to make it easier or harder for your visitors to solve CAPTCHAs.

    Pricing: It is free for up to one million requests per month. Beyond that, you need to contact customer support for custom pricing.

    CAPTCHA service

    Friendly Captcha

    Friendly Captcha is a CAPTCHA solution that uses proof-of-work to verify human users. Instead of asking visitors to solve puzzles, a small computation runs in the browser to generate a proof-of-work token in the background. This makes the process invisible to users and removes the need for visual or audio tests.

    It supports a range of frameworks, including React, Node.js, and Vue, and can be integrated with a simple JavaScript widget. For organisations prioritizing privacy, Friendly Captcha is fully GDPR-compliant and operates EU-based data centres to ensure that personal data is not tracked or stored.

    The service also meets accessibility standards such as WCAG, meaning it works with screen readers and other assistive technologies, and can be used without creating additional barriers for people with disabilities.

    Pricing: Friendly Captcha offers four paid plans starting at €9 per month, with different options for security, scalability, and support. Plans vary in the number of protected domains, monthly request limits, and available features. A free non-commercial plan is also available for low-traffic websites.

    Altcha

    ALTCHA is more than just a CAPTCHA alternative. It is a complete solution for protecting your website and online services from spam and abuse, while respecting your users’ privacy and experience. Instead of asking users to select the correct image, it uses a proof-of-work mechanism to validate users. With ALTCHA, you can:

    • Reduce server load and bandwidth by preventing bots and malicious actors from accessing your website and online services.
    • Enhance security and privacy by using a self-hosted, open-source solution that does not rely on third-party servers, cookies, or fingerprinting, and does not track your users or their behavior. ALTCHA is also WCAG 2.2 Level AA compliant, offering accessible alternatives to visual challenges.
    • Customize and brand the widget to match your website’s look and feel, and adjust the difficulty of the proof-of-work challenge to suit your needs and preferences.
    • Support humans and robots by using a machine-to-machine (M2M) verification system that allows automated systems to access your APIs and online services in a controlled and secure manner.

    Pricing: Thanks to its permissive MIT license, ALTCHA is free to use and free to modify. You can use it without charge on unlimited websites and online services, with no restrictions or limitations.

    Private Captcha

    Private Captcha is a modern CAPTCHA service focused on privacy. It’s designed for easy integration and can be implemented without the need for cookie banners. We particularly like it because it provides smart difficulty scaling, which allows you to increase or decrease CAPTCHA difficulty using a slider.

    Additionally, it has EU-only endpoints for data privacy and extensive widget customization. It also offers an invisible challenge option and can be self-hosted, allowing deployment on a company’s own infrastructure.

    The service boasts a strong ecosystem with a variety of integrations for both server-side and client-side applications. It supports a number of integrations, including a WordPress plugin and libraries for Go, PHP, Python, .NET, and JavaScript on the server side. For client-side implementation, a React component is available, and an OpenAPI definition is provided for backend integrations. This range of options allows developers to incorporate Private Captcha into their existing technology stacks.

    Pricing: Private Captcha costs €108/year, comes with a 14-day free trial, and does not require a credit card to get started. Additionally, it also has a self-hosted license, which starts at €29/month.

    SVG Captcha

    If you want a simple solution or if you’re a fan of older-style CAPTCHA, SVG Captcha is a great option for blocking automated traffic. It uses scalable vector graphics (SVG) to generate text-based challenges.

    Although this is one of the simplest forms of CAPTCHAs, it is still pretty useful, and you can use it in multiple ways. For example:

    • You can challenge users to type the text they see in the SVG image.
    • You can ask users to come up with the next character in a predictable sequence, such as multiples of 2.
    • You can ask visitors to compute the results of simple math problems.
    • Alternatively, if your visitors are fluent in English, you can ask them puzzles such as “how many vowels are present in the given word.”
    • You can also present visitors with simple math equations, such as “3 + 2 = 9,” and ask them whether they are true or false.

    SVG Captcha is more lightweight, flexible, and creative than CAPTCHA, which doesn’t use bitmap images or fonts. It also supports various options, such as noise, size, color, and style. You can integrate SVG Captcha into your website using a Node.js module.

    Pricing: It is open source and available under the MIT license.

    AWS WAF Captcha

    AWS WAF can deliver and validate CAPTCHA challenges for web requests that match your firewall rules. It is WCAG-compliant and supports accessibility features such as an audio CAPTCHA option. You can integrate AWS WAF Captcha into your website using Application Load Balancer, Amazon API Gateway, or AWS AppSync resources.

    AWS WAF Captcha allows you to customize the behavior and appearance of the CAPTCHA challenges, such as the difficulty level, the expiration time, the retry limit, and the theme. You can also use AWS WAF Managed Rules, such as AWS WAF Bot Control or the Amazon IP Reputation list, to trigger CAPTCHA challenges for suspicious requests. It can be a good solution if you already use AWS to manage your cloud resources.

    Pricing: AWS WAF charges you for two events: CAPTCHA attempts and challenge responses. A CAPTCHA attempt occurs when a user solves a CAPTCHA and sends it to AWS WAF for verification, and it costs $4.00 per ten thousand attempts analyzed. A challenge response occurs when a user is shown a challenge page by AWS WAF due to a suspicious request, and it costs $0.40 per million responses served.

    GeeTest Adaptive CAPTCHA

    Geetest adaptive CAPTCHA is a powerful and user-friendly online security and verification solution. It offers a variety of CAPTCHA challenges that can adapt to different scenarios and preferences. The WCAG-compliant service works with major screen readers, including ChromeVox, VoiceOver, NVDA, and JAWS.

    You can customize the interface style, language (78 different languages supported), and animation style of the CAPTCHA. You can also easily customize the type and difficulty of the CAPTCHA challenge that you want to use.

    We particularly like Slide CAPTCHA, a classic and popular option that requires users to drag a slider to match a puzzle piece. Icon CAPTCHA is another fun and interactive option that challenges users to select icons in the correct order.

    Pricing: Sign up for a free trial, and a sales representative will contact you.

    reCAPTCHA alternative

    Lemin Captcha

    Lemin Captcha is a CAPTCHA service that uses games and puzzles to verify users and secure websites. It is fun, easy, and accessible for users, and it also prevents bots, fraud, and spam on websites.

    Unlike other CAPTCHA services that ask users to click on images or type words, Lemin Captcha makes security enjoyable and engaging. Users can solve puzzles that are suitable for their skill level and preference. You can customize the style and theme color of the CAPTCHA to match your website or app design. It also respects users’ privacy and security by generating anonymized user IDs.

    Pricing: First 5,000 images are free every month, beyond which you will be charged $0.001 per puzzle image.

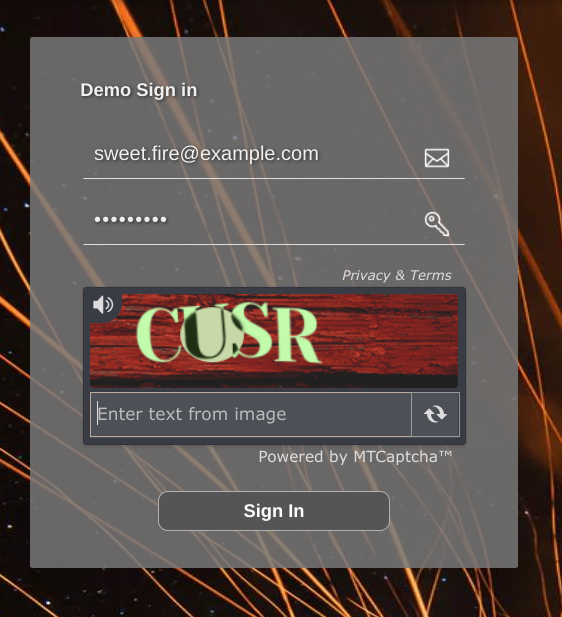
    MTCaptcha

    MTCaptcha is a CAPTCHA service that uses proof of work to prevent automated attacks on websites. Proof of work is a computation that makes attacks more difficult, expensive, and slow. MTCaptcha’s proof of work is adaptive, meaning that it adjusts to the risk level of the user and the network.

    For most users, proof of work is invisible and fast, but for suspicious users or regions, it becomes harder and longer. Proof of work can protect against brute-force attacks on passwords, keys, or IDs, but not against network-layer attacks.

    MTCaptcha is also compliant with GDPR and WCAG 2.0/2.1 AAA standards and offers features such as invisible CAPTCHA, adaptive CAPTCHA complexity, multi-user account management, and automated regression test support.

    Pricing: It is free for one fully qualified domain name, after which you need to pay $85 per site, per month.

    DataDome’s Device Check

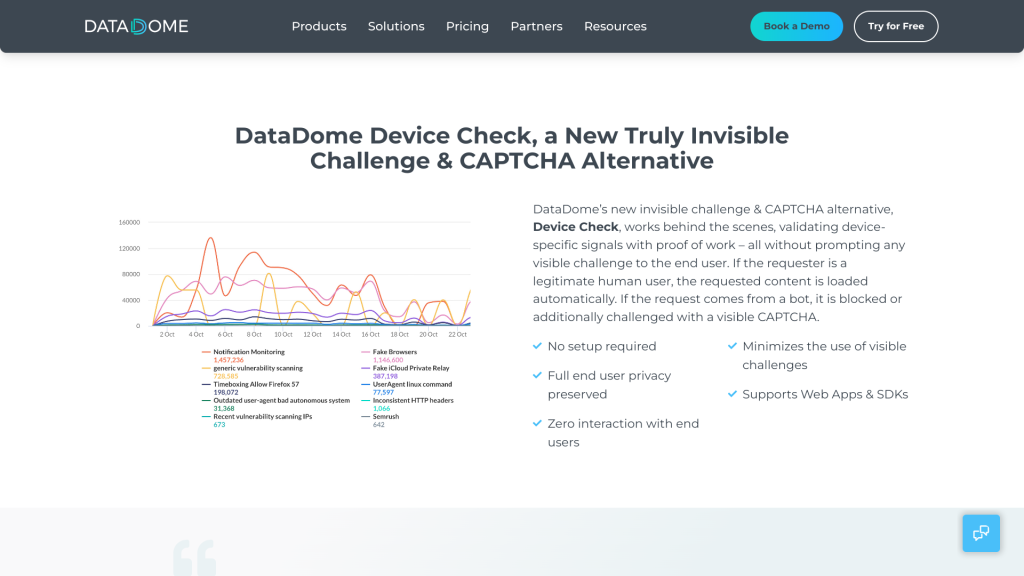
    DataDome offers Device Check, a tool that verifies the end user’s device and environment without any user interaction. Device Check can detect and block automation frameworks, spoofed environments, and programmatic access to user interfaces. It can also ensure the device’s authenticity by executing a proof of work and a fingerprinting challenge.

    Device Check runs on web browsers and mobile applications and respects the end user’s privacy by minimizing data collection. It is also advertised as WCAG 2.2 AA compliant. Device Check is like a CAPTCHA but without any challenge to the end user. It only challenges the requester if the check’s result is inconclusive.

    Pricing: There is no free plan – the business plan starts at $3,690 per month for up to 100 million requests.

    Capy Puzzle CAPTCHA

    Capy offers a product called Capy Puzzle CAPTCHA, which is designed to protect websites from brute-force attacks and spam bots that attack passwords. Capy Puzzle CAPTCHA uses a puzzle-based mechanism that is easy for humans to solve but hard for computers to crack. It also allows website owners to customize the appearance and style of the puzzle and monitor the website’s security status with statistical data.

    It claims to reduce the user termination rate by 10% compared to conventional text-based CAPTCHA. Capy offers six different levels of security. You can choose the most appropriate level to strengthen the security or make it easier for users to pass the challenge.

    Pricing: Capy offers a 30-day free trial, and you can request an estimate by emailing them a monthly page view count or by providing an estimate of the number of CAPTCHA displays.

    Other Alternatives

    Although using CAPTCHA is one way to solve your bot problem, it is not the only solution. Besides the above-mentioned alternatives, there are some other ways to prevent bots from accessing or submitting web forms, such as:

    • Use passkeys: You can generate a unique passkey for each user session and embed it in a hidden field in your web form. You can then validate the passkey on the server side before processing the form data.
    • Send SMS/email: You can send a verification code to the user’s phone number or email address and ask them to enter it in your web form. You can then verify the code on the server side before processing the form data.
    • Hidden field detection: You can add a hidden field in your web form that is not visible to human users but can be filled by bots. You can then check if the hidden field is empty or not on the server side before processing the form data.

    Final Thoughts

    Differentiating between automated users and humans is essential to protect your website. In this post, we highlighted that Google’s reCaptcha is not the only way to protect your website from bots. There are many alternatives that offer better user experience, security, and accessibility. You can choose the one that suits your needs and preferences.

    However, CAPTCHA alternatives are not the only thing you need to consider when developing your website. You also need to think about how to manage your cloud infrastructure, which can be complex and time-consuming.

    That’s why we recommend using RunCloud, a cloud-based platform that makes it easy to deploy, manage, and scale your websites. With RunCloud, you can:

    • Create and launch your websites in minutes, using any PHP framework or CMS of your choice.
    • Monitor and optimize your website performance, security, and reliability, using a simple and intuitive dashboard.
    • Scale your websites with confidence, using features like Atomic Deployment, Firewalls, and backups.

    RunCloud is the trusted solution for web developers who want to focus on shipping great work, not managing their cloud infrastructure. Whether you are a beginner or an expert, RunCloud can help you create and manage your websites faster and better. We support all major cloud providers, such as AWS, DigitalOcean, Google Cloud, and more.

    Don’t waste time and money on complicated and expensive cloud infrastructure. Try RunCloud today for 7-days – free of charge!

  • How to Easily Change Your WordPress Site URL

    How to Easily Change Your WordPress Site URL

    Learning how to change your WordPress site URL is a common need for site owners. Whether you’re moving to a new domain, switching to HTTPS, or taking a site live from staging, updating your URL settings is essential.

    Many guides make this process sound complicated, involving database edits or risky changes to configuration files. But with RunCloud, you can update your WordPress site URL in seconds, directly from your dashboard.

    In this article, we’ll walk through the main reasons you might need to change your WordPress URL and show you the safest, simplest methods to do it.

    Why Would You Need to Change Your WordPress Site URL?

    The “WordPress Address (URL)” and “Site Address (URL)” settings tell WordPress where its files are stored and what address visitors use to reach your site.

    You won’t usually need to change them, but there are common scenarios where it’s essential:

    • Switching to HTTPS: After installing an SSL certificate, you should change your URLs from http:// to https://. If you don’t, browsers will show ‘mixed content’ warnings, which can damage trust and hurt SEO.
    • Migrating to a New Domain: If you’re moving your website from old-domain.com to new-domain.com, updating these URLs is the first and most important step to make your site functional on the new address.
    • Adding or Removing ‘www’: A common setup choice is whether to use https://www.runcloud-demo.com or https://runcloud-demo.com. Once you choose, update your WordPress settings to match.
    • Moving from a Temporary Domain: When moving a site from a temporary or staging domain (like dev.runcloud-demo.com) to its live domain, update the address before launch.

    3 Ways to Change Your WordPress URL

    Traditionally, changing these URLs meant editing wp-config.php, running WP-CLI commands, or modifying your database in phpMyAdmin. These methods are error-prone and can break your site if done incorrectly.

    With RunCloud, it’s much easier. Just edit the URL field in your dashboard, and RunCloud takes care of the backend changes automatically.

    Changing Your WordPress URL in RunCloud (Recommended)

    Follow these simple steps to update your site’s address without touching a single line of code.

    Step 1: Open WordPress Settings

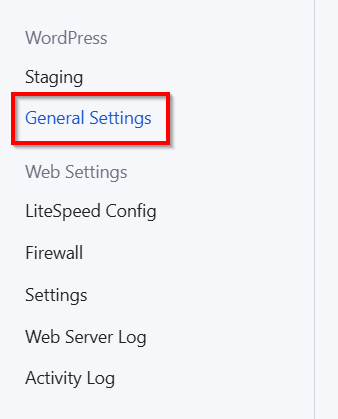
    In your Web Application’s management menu (on the left-hand side), click on General Settings. This opens your WordPress settings.

    Step 2: Edit Your URLs

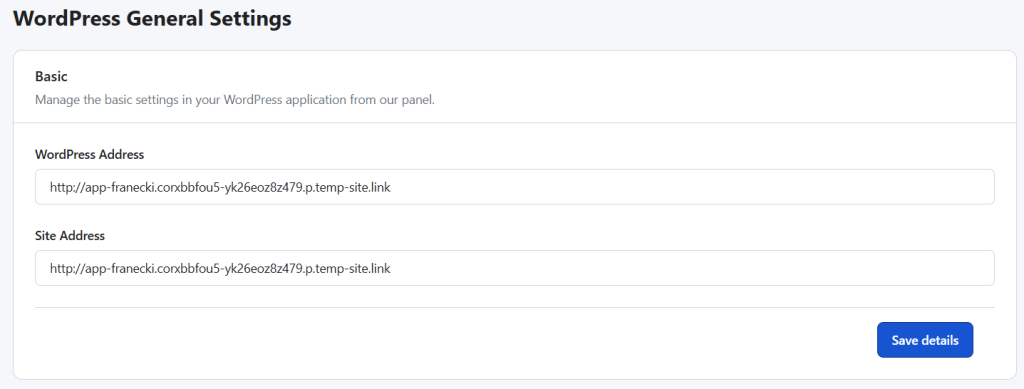
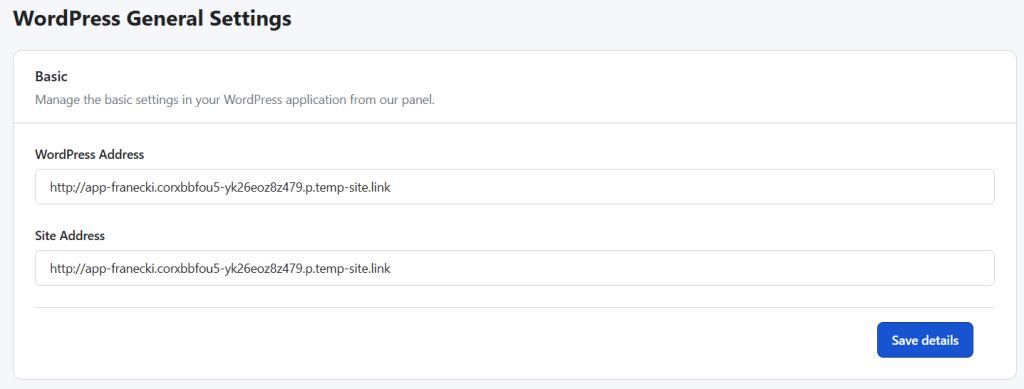
    You will land on the General Settings tab. Under the Basic section, you will see two important fields:

    • WordPress Address: This is where your core WordPress files are stored.
    • Site Address: This is the public-facing address that visitors type into their browser.

    In most cases, both URLs are the same.

    Change WordPress Site URL

    Simply click into these text fields and type in your new URL. For example, if you are moving to a live domain with SSL, you would change it to https://www.runcloud-demo.com.

    Step 3: Save Your Changes

    After entering your new URL, scroll down and click the “Save Details” button.

    That’s it! RunCloud will automatically and safely update your WordPress configuration. Your site will now respond to the new URL.

    Alternative Method 1: Change WordPress URL via the Admin Dashboard

    If your site is working correctly and you can access your dashboard, you can use the standard built-in WordPress settings. This works well for small changes, like switching to HTTPS after installing an SSL certificate.

    Step 1: Navigate to General Settings

    Log in to your WordPress site with your administrator account. In the left-hand admin menu, hover over Settings and click on General.

    Step 2: Update the URL Fields

    On the General Settings screen, you will see two fields that need to be updated: WordPress Address and Site Address (URL). For most standard installations, these two URLs should be identical. Enter your new URL into both fields.

    Step 3: Save the Changes

    Scroll to the bottom of the page and click the “Save Changes” button. After saving, WordPress updates your settings and may ask you to log in again. Your site will now be accessible via the new address.

    Alternative Method 2: Change WordPress URL in wp-config.php

    While the RunCloud panel is the most direct way to manage your core settings, RunCloud is flexible and never locks you out of traditional methods. Editing wp-config.php is useful if you’re locked out of your WordPress dashboard after a failed URL change.

    The wp-config.php file is a core WordPress configuration file in your site’s root directory. You can easily access RunCloud using the built-in File Manager or SSH/SFTP.

    Step 1: Access Your wp-config.php File

    • Using RunCloud’s File Manager: Navigate to your Web Application in RunCloud, click on File Manager, and see the wp-config.php file in the main folder list. Click to edit it.
    • Using SFTP/SSH: Connect to your server using the credentials provided in your RunCloud dashboard. Navigate to your application’s root directory, usually /home/runcloud/webapps/YOUR_APP_NAME/.

    Step 2: Add the URL Definitions

    Open the wp-config.php file and add the following two lines of code just above the /* That’s all, stop editing! Happy publishing. */ line.

    define( 'WP_HOME', 'https://www.runcloud-demo.com' );
    define( 'WP_SITEURL', 'https://www.runcloud-demo.com' );

    Important: Replace https://www.runcloud-demo.com with your actual, correct WordPress site URL. Be sure to use https if you have an SSL certificate installed.

    Step 3: Save Your Changes

    Save the file and close the editor. This method hard-codes your site URL and overrides the database settings. Your WordPress site will now load from the new address.

    Note: When you use this method, the URL fields in your WordPress admin dashboard will be grayed out and uneditable.

    Conclusion: Save Time and Avoid Headaches with RunCloud

    Changing your WordPress site URL shouldn’t require database edits or command-line work. With RunCloud, it takes less than a minute – no risk, no downtime.

    This is just one example of how RunCloud makes managing servers and WordPress easier. By handling the technical work, RunCloud frees you to focus on building your site and growing your business.

    Ready to simplify WordPress management? Sign up for RunCloud today.

  • The Best Invoice Management Software for 2026: Features, Pricing & Expert Picks

    The Best Invoice Management Software for 2026: Features, Pricing & Expert Picks

    If you’re still sending invoices from Word documents, chasing late payments with awkward follow-up emails, or juggling endless spreadsheets, you’re wasting time you could spend on actual client work.

    The right invoice management software can handle all that for you – creating professional invoices in minutes, tracking when they’re opened and paid, and sending polite reminders automatically.

    In this guide, we’ll compare leading options, including QuickBooks, Xero, and FreshBooks, with strong alternatives such as Zoho Invoice, Wave, and others. You’ll see the key features, pricing, and differences that matter so you can choose the tool that will save you time, help you get paid faster, and keep your finances in order.

    Let’s get started!

    What is Invoice Management Software?

    Invoice management software replaces the messy mix of spreadsheets, manual invoices, and payment-chasing emails with one streamlined system.

    Instead of building each invoice from scratch and tracking payments in a separate file, you can create branded invoices in minutes, send them directly to clients, and see exactly when they’re viewed or paid.

    The goal is simple: cut down on admin, speed up payments, and give your business a more professional edge.

    How Invoice Management Software Works

    Here’s how most platforms handle the process from start to finish:

    1. Create – Pick a template, add your logo, enter client details, and list products or services. The system calculates totals, taxes, and discounts automatically.
    2. Send & Track – Email the invoice straight from the platform and see when it’s sent, opened, and paid.
    3. Remind – Set up automatic reminders for upcoming or overdue payments.
    4. Get Paid – Add a “Pay Now” button linked to gateways like Stripe, PayPal, or Square for instant payment.
    5. Report – View real-time data on revenue, outstanding invoices, and tax collected.

    Suggested read: 10 Best WordPress Management Tools To Easily Manage Multiple Websites

    Top Features to Look for in the Best Invoice Management Software

    When evaluating different invoice management platforms, not all are created equal. To ensure the software meets your business needs and can scale with you, focus on these essential features:

    • Customizable Invoice Templates: Look for the ability to easily add your logo, adjust colors, and modify the layout to create professional invoices that reflect your brand identity.
    • Automation Capabilities: The best software automates key tasks. This includes setting up recurring billing for retainer clients, scheduling future invoices, and, most critically, sending automated late-payment reminders.
    • Online Payment Gateway Integration: This is an important feature for getting paid quickly. Ensure the software integrates with popular and trusted payment gateways so clients can pay you with a single click.
    • Real-Time Invoice Tracking: The ability to see the status of an invoice (e.g., Sent, Viewed, Paid, Overdue) in real-time provides clarity and helps you manage your cash flow more effectively.
    • Robust Reporting and Analytics: Your software should provide clear, easy-to-understand reports on your income, expenses, outstanding invoices, and payment history to help you make informed business decisions.
    • Integrations with Other Tools: Check for compatibility with your existing software, such as accounting platforms (like QuickBooks or Xero), CRM systems, or project management tools, to create a seamless workflow.
    • Mobile Accessibility: A dedicated mobile app or a mobile-responsive web interface is essential for managing your business on the go. These apps allow you to send invoices and check payment statuses from anywhere.
    • Multi-Currency and Multi-Language Support: This feature is non-negotiable if you work with international clients. It allows you to bill clients in their local currency and language, simplifying the process for everyone.

    Suggested read: How to Get Your Website Indexed by Search Engines in 2026: A Complete Guide

    The 15 Best Invoice Management Solutions for 2026 (Features + Pricing)

    #1 – Rossum

    Rossum provides an e-invoicing platform as a single solution designed to handle the complexities of modern businesses, particularly for companies operating across multiple regions. It uses sophisticated AI to automate the entire document lifecycle, from initial receipt to final processing. It also allows businesses to manage a hybrid reality where they receive both traditional PDF invoices and structured e-invoices.

    The system is engineered to be more than a simple data entry tool. It automatically validates invoices against country-specific regulations, such as FatturaPA, XRechnung, and PEPPOL, and ensures compliance with evolving government mandates. This is particularly relevant for companies navigating the rollout of new e-invoicing requirements across Europe.

    Additionally, the platform can convert machine-readable e-invoices into human-readable PDFs for auditing purposes and integrates with major ERP and business systems, including SAP, NetSuite, and Workday, to ensure data flows smoothly into your existing financial ecosystem.

    Pricing and Subscription Plans

    Rossum uses a customized pricing model based on factors like invoice volume, number of users, required integrations, and feature set. They encourage potential customers to request a free demo or start a 14-day trial to experience the platform firsthand.

    Suggested read: How To Migrate Away from cPanel Hosting (The Escape Guide)

    #2 – Tipalti Invoice Management

    Tipalti offers a comprehensive invoice management solution as part of its broader accounts payable automation platform. The platform is designed primarily for mid-market and enterprise-level businesses that manage high volumes of invoices. It offers multiple methods for invoice capture, including email, a supplier portal, and OCR scanning, which can read and process invoice data with high accuracy.

    Tipalti also offers an advanced validation and approval system. The platform can perform two- and three-way PO matching and uses a powerful business rules engine to enforce internal controls, automatically routing invoices to the correct approvers. It also includes built-in compliance features, such as validating tax information (like W-9s and VAT IDs) before processing payments.

    Pricing and Subscription Plans

    Tipalti offers three plans: the “Select” plan is priced at €99 per month and includes unlimited user access, a supplier portal for self-onboarding, automated VAT ID collection and validation, AI Smart Scan for invoice processing and auto-coding, an AI Smart Report builder, and seamless integrations with leading ERPs. For more complex requirements, the “Advanced” plan, at €219 per month, contains all “Select” features while adding capabilities such as 2/3 way PO Matching, flexible bill approval rules, domestic multi-entity infrastructure, global Tax ID collection and validation, etc.

    Suggested read: How to Edit robots.txt in WordPress (With & Without Plugin)

    #3 – Yooz AP

    Yooz is a “pure cloud” solution for accounts payable that emphasizes speed and simplicity in its end-to-end invoice and payment processing. The platform uses advanced technologies like AI, deep learning, and robotic process automation (RPA) to minimize manual intervention from invoice capture to final payment. One of its primary highlights is its sophisticated data extraction capability. It can accurately capture relevant information from any document format, including emails, PDFs, and scanned paper, without prior template configuration.

    The platform is designed to provide a complete workflow. After capturing an invoice, Yooz automatically handles GL coding, identifies duplicates, and initiates multi-level approval workflows that can be managed from any device, including a dedicated mobile app.

    It has integrations for over 250 ERP and financial software packages, including popular systems like Sage, Xero, and QuickBooks. This means Yooz can serve many businesses, from small companies to larger enterprises, looking to streamline their AP processes.

    Pricing and Subscription Plans

    Although specific costs are customized, Yooz offers a more transparent pricing structure than many enterprise-level competitors. The company provides a tailored quote based on the client’s needs but frames its plans around clear tiers.

    Yooz structures its pricing based on the yearly invoices you expect to process (e.g., up to 1,200, up to 6,000, etc.). This makes it scalable, allowing businesses to choose a plan that fits their current size and adjust as they grow.

    Suggested read: How to Set Up a Hetzner Server with RunCloud

    #4 – Stampli

    Stampli offers an Accounts Payable automation platform emphasizing centralizing communication and collaboration directly on top of the invoice. Its core philosophy is eliminating the need for external email threads and disjointed conversations when resolving invoice-related queries.

    Once an invoice is in the system, it becomes the central hub for all activities, including questions for approvers, stakeholder clarification, and related documentation. This ensures that the entire history of an invoice’s lifecycle, from receipt to approval, is contained in one auditable location.

    Stampli is designed to be flexible, managing various invoice types, including those with or without purchase orders. It integrates seamlessly with leading ERP systems like NetSuite, Sage Intacct, QuickBooks, and Microsoft Dynamics.

    Pricing and Subscription Plans

    Stampli uses a customized pricing model based on factors like invoice volume, number of users, required integrations, and feature set. Contact the provider for a tailored quote.

    The factors that influence the final subscription cost include:

    • Invoice Volume: The number of invoices your business processes monthly or annually.
    • Number of Users: The quantity of user seats required for your AP team, approvers, and other stakeholders.
    • ERP Integration: The specific ERP system being used and the complexity of the integration.
    • Feature Set: Access to specific advanced features or modules within the Stampli platform.

    #5 – Paylocity

    Paylocity’s AP Automation solution is an integrated module within its comprehensive Human Capital Management platform. It is primarily designed for businesses seeking to unify their finance and HR operations under a single vendor, creating a seamless connection between employee data and financial workflows. The tool automates the standard accounts payable lifecycle, from invoice capture using OCR technology to setting up customizable, multi-step approval workflows that route invoices to the correct stakeholders.

    It securely processes vendor payments via ACH, virtual card, or check and ensures that all data syncs with the general ledger in real time. By linking AP processes directly with its core HR and payroll systems, Paylocity provides businesses with enhanced visibility and a single source of truth. This improves data consistency and streamlines overall administrative tasks across departments.

    Pricing and Subscription Plans

    Paylocity operates on a customized, quote-based pricing model and does not publicly list standard rates for its AP Automation module. As the tool is part of a larger HCM suite, its cost is bundled with other core services like Payroll, HR, and Time & Labor. This means pricing is not offered on a standalone basis for just the AP tool.

    The final cost is calculated per employee, per month (PEPM), with the AP Automation functionality added to a company’s main service package.

    #6 – QuickBooks Invoicing

    QuickBooks Invoicing is not a standalone product but an integrated feature within the comprehensive QuickBooks accounting software ecosystem. It is designed primarily for freelancers, small businesses, and mid-sized companies needing a unified billing and bookkeeping solution. The platform allows users to create professional, customized invoices with their own branding, send them directly to clients, and track their status in real time to see when they have been viewed and paid.

    The main strength of QuickBooks Invoicing lies in its seamless integration with the rest of the accounting suite. When a client pays an invoice online via the built-in payment gateway, the transaction is automatically recorded, categorized, and reconciled within the user’s books, drastically reducing manual data entry and potential errors.

    Additionally, it can set up recurring invoices for retainers, send automated payment reminders for overdue accounts, and directly convert estimates into invoices, streamlining the entire sales cycle from proposal to payment.

    Pricing and Subscription Plans

    The invoicing functionality is not sold separately but is included in all QuickBooks Online subscription plans. Therefore, the pricing is tied directly to the cost of the overall accounting software package. QuickBooks offers several tiered plans, which start at $19/month and go as high as $76/month.

    #7 – Vyapar E-Invoicing

    Vyapar is a business accounting application designed to meet the needs of small and medium-sized businesses in India. Its e-invoicing functionality is built to simplify compliance with the Indian government’s Goods and Services Tax (GST) e-invoicing mandate. The platform enables users to generate GST-compliant invoices and seamlessly register them on the government’s Invoice Registration Portal (IRP) to obtain the required Invoice Reference Number (IRN) and QR code.

    It is an all-in-one solution for Indian SMEs as it integrates this compliance feature into a broader ecosystem that includes inventory management, payment reminders, expense tracking, and generating various GST reports (like GSTR-1 and GSTR-3B).

    Pricing and Subscription Plans

    Vyapar operates on a freemium model, one of its key market differentiators. The core e-invoicing functionality is available as part of its free business accounting software, making it highly accessible for freelancers, sole proprietors, and small businesses needing GST compliance without an upfront investment.

    The pricing structure is as follows:

    • Free Plan includes essential features like creating GST-compliant invoices, managing inventory, and generating e-invoices. It is a fully functional offering designed to cover the basic needs of a small business.
    • Premium Subscriptions: Vyapar offers paid subscription plans starting at INR ₹3999/year (approximately USD $45) for businesses that require more advanced capabilities. These premium tiers unlock features such as multi-device synchronization (for using the app on both mobile and desktop), support for managing multiple businesses from a single account, and other advanced functionalities.

    #8 – Swipe Invoicing & Business Management

    Swipe is a mobile-focused application designed to serve as an all-in-one business management tool for freelancers, solopreneurs, and small businesses in India. It is mainly built to create and manage GST-compliant invoices quickly. The platform is distinctly tailored to the Indian market, integrating natively with ubiquitous payment and communication channels in the region.

    Users can send invoices, payment links, and reminders directly to clients via WhatsApp, a feature that aligns closely with common small business workflows in India. Additionally, it facilitates instant payment collection through embedded UPI invoice payment links.

    In addition to invoicing, Swipe offers a suite of complementary features, including inventory management, expense tracking, business reporting (including GSTR-1), and the ability to create a simple “online store” to showcase products.

    $

    Pricing and Subscription Plans

    Swipe uses a clear, tiered subscription model with a free plan, making it highly accessible for new and emerging businesses. The pricing structure is transparently listed on their website and is designed to be affordable.

    The model is structured as follows:

    • Free Plan: This entry-level plan allows users to test the core functionality, but with limitations on the number of invoices, products, and clients that can be managed monthly. It is well-suited for businesses with very low transaction volumes.
    • Paid Subscriptions: Swipe offers several paid tiers starting at ₹250/month (approximately USD $2.90). These plans significantly increase or remove the limits on invoices and products and unlock more advanced features. Advanced compliance tools like e-invoicing and e-way bill generation are reserved for these premium tiers.

    #9 – Wave Invoicing

    Wave offers a suite of features designed to streamline the billing process for small businesses. Its software allows users to create and send customized, professional invoices using professional templates, with options to add a business logo and brand colors. Wave supports recurring invoices and automatic credit card payments for businesses with repeat customers to ensure timely billing without manual intervention.

    It also allows customers to accept online payments directly through invoices. Customers can pay via credit card, bank payment (ACH/EFT), or Apple Pay by clicking a “Pay now” button on the invoice. The platform also includes features to improve cash flow management, such as notifications tracking when an invoice is viewed, due, or paid.

    Pricing and Subscription Plans

    Wave uses a freemium model with two tiers: “Starter” and “Pro”:

    The Starter Plan is free and allows users to create and send unlimited invoices and estimates. This plan includes the option to accept online payments, with transaction fees of 2.9% + $0.60 per transaction for most credit cards and 3.4% + $0.60 for American Express. Bank payments are charged at 1% per transaction with a $1 minimum fee.

    The Pro Plan costs $190/year and includes advanced automation and customization features. Subscribers can automatically import bank transactions, capture unlimited receipts digitally, and automate late payment reminders. This plan also offers discounted online payment processing fees for the first ten monthly transactions.

    #10 – Refrens Invoice Generator

    Refrens offers a free online invoice generator for freelancers, consultants, and small agencies. The platform allows users to quickly create professional, customized invoices, with options to add a company logo, signature, and attachments. A significant highlight of the free tool is that the invoices generated do not carry any Refrens branding, a feature often reserved for paid tiers in other tools.

    In addition to simple invoice creation, the tool is part of a broader freelance business management suite. When you create an invoice, the client is automatically saved in a simple client management system, and the platform also includes features for expense tracking and report generation.

    Pricing and Subscription Plans

    Refrens operates on a freemium model, with its core online invoice generator and associated business management tools completely free. The pricing structure is structured as follows:

    • Free Plan includes essential features like creating GST-compliant invoices, managing inventory, and generating e-invoices. It is a fully functional offering designed to cover the basic needs of a small business.
    • Accounts GST Lite: This plan costs INR ₹6,400 per year (approximately USD $73) per business and includes everything in the free plan, template customization, payment gateway integration, 1-click WhatsApp sharing, email tracking and scheduling, recurring invoices, etc.
    • Accounts GST: This plan costs INR ₹16,800 per year (approximately USD $192) per business and includes everything in the Accounts GST Lite plan, plus automated GSTR-1 Reports, e-way bill generation, e-invoices, and bulk IRN generation, e-way bills with IRN, the ability to verify and auto-fill clients GST details, emails from your own domains, GSTR-2B reports download and auto-reconciliation, and more.

    #11 – Odoo Invoicing

    Odoo Invoicing is not a standalone tool – it’s a module within Odoo’s suite of open-source business management applications. The biggest advantage of using Odoo is its native integration with other Odoo apps like Accounting, Sales, and CRM. These integrations create a deeply connected workflow from a sales quote to a reconciled payment.

    When an invoice is created, it directly impacts inventory levels and accounting ledgers in real-time. The system also features a customer portal where clients can view their invoices, track payment status, and pay online through integrated payment gateways like Stripe and PayPal. This holistic approach makes it a powerful option for businesses looking for a single, scalable system that can grow with them from a simple invoicing tool into a full-fledged Enterprise Resource Planning solution.

    Pricing and Subscription Plans

    Odoo’s unique and flexible pricing model sets it apart from many competitors. The Invoicing app is part of the broader Odoo Accounting app.

    The pricing structure is as follows:

    • One App Free Plan: Odoo offers a plan to use a single application for free with unlimited users. Since Invoicing is part of the Accounting app, you can use the full Accounting suite (including invoicing) at no cost. This makes it an incredibly compelling option for small businesses and startups.
    • Paid Plans (Standard and Custom): Odoo offers paid plans for businesses that need to use more than one Odoo application (e.g., combining Accounting with CRM, Inventory, and Project Management). These plans start at $19.90 per month, and they have a per-user, per-month fee that grants access to all of Odoo’s applications.

    #12 – Xero

    Xero’s online invoicing capability is one of the best features of its comprehensive cloud accounting platform, which is designed for small to medium-sized businesses. The tool enables users to create professional, customized invoices from a desktop or a dedicated mobile app and send them directly to clients.

    Once an invoice is sent, businesses can set up automatic reminders to chase late payments without manual effort. Additionally, when a client pays via an integrated payment gateway like Stripe or GoCardless, the payment is automatically matched against the invoice and reconciled with the corresponding bank transaction. This significantly reduces administrative work and ensures that financial records are always up-to-date.

    Pricing and Subscription Plans

    Xero’s invoicing feature is not available as a standalone product but is a core component across all its subscription plans. Xero offers three tiered pricing plans: “Starter” at USD $29 per month, “Standard” at USD $46 per month, and “Premium” at USD $69 per month. Each plan includes the core invoicing features, with higher tiers offering additional accounting functionalities.

    #13 – FreshBooks

    FreshBooks offers invoicing software along with its all-in-one accounting software. This software is designed for service-based small businesses, freelancers, and agencies. The platform is widely recognized for its user-friendly interface, simplifying the creation of professional, customized invoices in minutes.

    FreshBooks also offers a unique time tracking feature that calculates the time spent on a project. This feature makes it easy for you to bill clients fairly. The system also automates follow-ups with late payment reminders. It allows clients to pay directly from the invoice via integrated payment gateways, which are automatically recorded and reconciled within the accounting system.

    Pricing and Subscription Plans

    The invoicing functionality is not sold as a separate product but is a core feature included in all FreshBooks subscription plans.

    The Lite plan starts at USD $2.10 per month, the Plus plan is USD $3.80 per month, and the Premium plan is USD $6.50 per month. These prices reflect a 90% discount for the first three months. After the initial three months, the prices will increase to $21, $38, and $65 per month.

    #14 – Zoho Invoice

    Zoho Invoice is a dedicated invoicing application that’s part of the extensive business software suite. Unlike many other tools discussed in this article, Zoho Invoice is a standalone. It is specifically designed for freelancers and small to medium-sized businesses, and offers a comprehensive set of features to automate and manage the entire billing cycle.

    Users can create highly customized invoices from a gallery of templates, set up recurring billing for repeat customers, and automatically send payment reminders to reduce manual follow-up.

    One of its most valued features is the self-service client portal. It allows customers to view all their past and present invoices, approve estimates, and make bulk payments in one place, enhancing transparency and client relations.

    The platform integrates with numerous online payment gateways and enables instant payment collection directly from the invoice. While it works independently, it seamlessly integrates with other Zoho apps, such as Zoho CRM and Zoho Analytics.

    Pricing and Subscription Plans

    Zoho Invoice’s most significant and compelling feature is its pricing model: the software is completely free to use. This is not a limited-time trial or a freemium plan with major restrictions on core features.

    The pricing structure is as follows:

    • Free Plan: The standard Zoho Invoice plan is free and allows businesses to manage a substantial number of customers (up to 1,000) and send unlimited invoices. It includes access to customizable templates, automated reminders, time tracking, expense management, and payment gateway integrations, making it one of the most robust free invoicing solutions available on the market.
    • Zoho Books: While Zoho Invoice is free, businesses that require more advanced, double-entry accounting features (like a full balance sheet, bank reconciliation, and in-depth financial reporting) are encouraged to upgrade to a paid subscription of Zoho Books, which includes all the functionality of Zoho Invoice and much more.

    #15 – Sage Intacct

    Sage Intacct is a cloud financial management and accounting platform designed for mid-market and enterprise-level organizations that have outgrown simpler accounting software.

    Unlike other tools discussed in this article, Sage Intacct isn’t merely an invoicing tool but a full-fledged cloud ERP system focused on automating complex financial processes. The platform excels in areas where businesses face significant complexity. For example, its multi-entity management capabilities allow companies with multiple business units, locations, or legal entities to automate financial consolidation in real-time.

    Sage Intacct also provides powerful, dimensional reporting and dashboards that give finance leaders deep visibility into performance metrics across various business drivers. This allows for sophisticated analysis without relying on cumbersome spreadsheets.

    Pricing and Subscription Plans

    Sage Intacct uses a customized pricing model based on factors like invoice volume, number of users, required integrations, and feature set. Contact the provider for a tailored quote.

    Wrapping Up: Who Should Invest in Invoice Management Software in 2026

    Any freelancer, agency, or service-based business that wants to get paid faster and spend less time on admin should invest in invoice management software. If you’re still sending invoices manually or juggling spreadsheets, switching to a dedicated platform will save time, improve accuracy, and make your business look more professional.

    For agencies, though, invoicing is only half the picture. You also need to manage the technical side of client work – hosting, performance, and security.

    That’s where RunCloud fits in.

    While your invoicing software handles the money, RunCloud takes care of the servers and websites behind your client projects.

    With features like Workspaces, backups, server monitoring, and SSL management, you can manage all your client sites from one place while keeping costs under control. Combine the right invoicing tool with RunCloud, and you’ve got a complete operations setup – from sending the first invoice to maintaining the last website.

    Ready to take control of your agency’s technical operations? Sign up for RunCloud today.

    FAQs on Invoice Management Software

    What is the difference between invoice management software and accounting software?

    Invoice management software focuses on creating, sending, and tracking invoices. Accounting software includes invoicing but also handles the rest of your financial operations – bookkeeping, expense tracking, reporting, and tax preparation.

    Can invoice management software integrate with my ERP or CRM?

    Yes, most modern invoice management platforms are designed to integrate seamlessly with other business systems, such as Enterprise Resource Planning (ERP) or Customer Relationship Management (CRM) software.

    Is cloud-based invoice management secure?

    Yes – leading platforms use encryption, secure infrastructure, multi-factor authentication, and regular audits. This means your client and payment data is protected from interception or unauthorised access, reducing both security and compliance risks.

    How much does invoice management software cost in 2025?

    In 2025, the cost of invoice management software varies widely, from free plans with basic functionality to enterprise solutions costing several hundred dollars per month. For small to mid-sized businesses, typical monthly plans range from approximately $15 to $60 per user. Pricing is often tiered based on the number of clients, invoices, users, and access to advanced features like payment gateways.

    What is the best free invoicing app?

    The “best” free invoicing app depends on your needs, but businesses often recommend Wave, Zoho Invoice’s free plan, and PayPal Invoicing. These tools offer core invoice creation, sending, and tracking at no cost but may have limitations on the number of clients or access to advanced features. They are an excellent starting point for freelancers and new businesses before scaling to a paid plan.

  • 7 Best Control Panels for VPS Management (Free & Paid)

    7 Best Control Panels for VPS Management (Free & Paid)

    Using a VPS to host your websites provides both control and seamless scalability. However, many people find it difficult to work with command-line systems.

    Tasks like configuring web servers, database setups, installing SSL certificates, patching vulnerabilities, and updating software stacks suddenly become challenging.

    This is where the best VPS control panels become invaluable.

    These tools provide a graphical interface to handle all those critical server tasks, which makes VPS hosting accessible and efficient for everyone from solo developers to growing businesses.

    In this guide, we’ll explore some of the market’s most popular server control panels, looking at options for every budget. We’ll dive into what makes a great panel, compare popular choices such as cPanel, Plesk, CyberPanel, and CloudPanel, and ultimately show you why we believe RunCloud is leading the pack.

    Let’s get started!

    What Makes a “Good” VPS Control Panel?

    Before we explore and compare different web panels, let’s first understand what makes a “good” VPS control panel:

    • Easy to Use (Good UI/UX): The panel should be simple to understand and navigate, even if you’re not a server expert. You shouldn’t need to spend ages learning how to do basic tasks.
    • Fast Performance: It should help your websites load quickly by using server resources efficiently, and support modern web technologies like NGINX and the latest PHP versions.
    • Strong Security: A good panel offers easy ways to manage firewalls, install SSL certificates (for HTTPS), and protect against common attacks.
    • Simple App Management: Installing popular applications like WordPress or phpMyAdmin should be easy with just a few clicks.
    • Helpful Server Tools: You need tools to monitor your server’s performance, set up automatic backups, schedule tasks (cron jobs), and manage your databases – all without any hassle.
    • Good Support & Clear Guides: When you run into trouble or have questions, you need to be able to find clear instructions or get help from a reliable support team.
    • Fair Price & Good Value: Whether free or paid, you want to feel like you’re getting good features and benefits for the cost (or your time, if it’s free).

    A Quick Look at Popular VPS Control Panels

    Let’s see some of the well-known VPS control panels available today for managing servers and deploying web applications.

    cPanel

    cPanel has been around for a long time (nearly thirty years), and for good reason. It has provided a wide array of tools for managing websites and servers, making it a popular choice, especially for traditional web hosting companies that manage many client accounts. It offers a familiar interface for users who need to handle everything from email accounts to database management.

    However, this comprehensive nature comes with a few considerations. cPanel can sometimes use a significant amount of your server’s resources, potentially impacting performance, and its licensing fees can make it a more expensive option compared to some modern alternatives. While it aims to simplify server tasks, the sheer number of features can feel overwhelming for users new to server management or those who prefer a more streamlined approach.

    Additionally, if you are using WHM (WebHost Manager), you’ll typically need to handle the initial server setup yourself, and getting the most out of cPanel often requires a certain level of server knowledge.

    This contrasts with solutions such as RunCloud, which are designed to simplify server setup from the start and offer a more focused, modern experience, particularly for developers and performance-conscious users.

    Plesk

    Plesk is well-regarded for its ability to simplify what’s often called “WebOps”. This makes it easier for IT administrators and web professionals to manage their servers and websites.

    Plesk works smoothly with various operating systems, including popular Linux versions such as Ubuntu and AlmaLinux, as well as Windows Server. This flexibility makes it an attractive option for those with specific OS needs or managing diverse server environments. It also supports different web servers like Apache and NGINX, giving users choices in setting up their sites.

    Plesk provides a user-friendly web interface for managing your web server. From here, you can set up new websites, manage email accounts, and even control how much server power (like CPU and RAM) each site can use.

    It also includes security tools to help you defend against common online threats and offers extensions for things like WordPress management and SSL certificate installation.

    While Plesk offers a good set of features and is a viable choice for those who need Windows support or a traditional panel experience, it still operates by being installed directly onto your server.

    This approach differs from modern SaaS platforms such as RunCloud, which only installs a small agent on your server to manage it. This results in a lighter footprint on your server’s resources and a more streamlined dashboard, which allows you to deploy or delete server instances with only a few clicks.

    CyberPanel

    CyberPanel is a control panel that has gained attention for its promise of high performance. One of CyberPanel’s biggest draws is its integration with LiteSpeed web server technology, both the open-source OpenLiteSpeed and the commercial LiteSpeed Enterprise. This focus on LiteSpeed, along with features like built-in caching (LSCache for WordPress is a notable one), is central to its claims of making websites run much faster.

    It also offers everyday conveniences, including one-click installers for popular applications like WordPress and Joomla, and free SSL certificates. As an open-source project, it has a thriving community, and many users appreciate the support they can get, especially for a free tool.

    While having a free trial and offering potential speed benefits with LiteSpeed is very appealing, it’s worth noting that, like other panels you install directly on your server, managing everything effectively might still require some technical know-how.

    Although many open-source projects are powerful, they can sometimes have a steeper learning curve for specific advanced configurations or might not always offer the same polished user experience across all features compared to commercially developed SaaS platforms.

    CyberPanel can undoubtedly manage your server and websites. However, if you prefer a solution that handles more of the server management heavy-lifting from a separate, streamlined interface, you should consider RunCloud. It supports OpenLiteSpeed servers and native NGINX, hybrid NGINX (NGINX + Apache), and containerized Docker applications.

    CloudPanel

    CloudPanel is a modern control panel with a clean user interface. It’s designed with developers in mind and offers support for popular technology stacks like PHP, Node.js, and Python. If you’re looking for a lightweight solution that doesn’t try to be everything to everyone, CloudPanel might catch your eye.

    It provides essential site management tools such as database management (MySQL/MariaDB), easy Let’s Encrypt SSL certificate integration, cron job scheduling, and a built-in file manager – all presented in a straightforward way.

    We picked CloudPanel for this post because it focuses on simplicity and automation. It aims to streamline the process of setting up new sites and deploying applications, and even offers a command-line interface (CLI) for users who want to automate these tasks. The dashboard provides a quick overview of server health, showing important stats including CPU, memory, and disk usage.

    CloudPanel is a good option if you are looking for a simple interface to interact with your web server. However, if you want to manage multiple servers across different cloud providers and grant restricted access to your team members, RunCloud offers far more flexibility and management capability.

    Hestia Control Panel

    HestiaCP is an open-source control panel recommended by users looking for a free, self-managed solution. HestiaCP offers a solid range of features for managing web domains, including support for multiple domains, easy app installations (like WordPress, Joomla, and Laravel), and NGINX caching options to help speed up websites.

    It allows users to manage their own DNS servers, which can be helpful for those who want more control over their domain name configurations. Additionally, it has built-in mail server capabilities that allow you to host your own email accounts, complete with TLS encryption and support for popular webmail clients like Roundcube. This can be a cost-saver for those who don’t want to pay for a separate business email provider.

    While HestiaCP provides a comprehensive set of free tools and is quite configurable, you must install and maintain it directly on your server. This means you’re responsible for server updates and troubleshooting.

    Also worth bearing in mind is that if you want an option to create and manage different workspaces from a single dashboard to manage server resources for multiple clients, then HestiaCP might not be right for you.

    VestaCP

    VestaCP is another great control panel released under open-source licenses. It offers all of its core functionality for free. However, many of its advanced features are available as add-ons or plugins that are sold separately.

    You can use VestaCP to manage your domain names and easily set up DNS records. It integrates with Let’s Encrypt to provide free SSL/TLS certificates, essential for secure websites today. It also handles database management, allows you to manage your website files directly, and schedule tasks using cron jobs.

    In addition to basic site management, VestaCP includes server administration features. You can manage user accounts with different permission levels, configure backups to protect your data, and monitor your server’s resource usage, such as CPU, memory, and disk space, to monitor performance. It also includes a firewall to help secure your server, with plans for additional security such as a Web Application Firewall (WAF) in future versions.

    While VestaCP offers a broad suite of tools at no cost, it’s important to remember that it does not have a dedicated support team. Since it is open-source software, you will not get a dedicated support assistant to look into your problems, and instead, you’ll have to rely on community forums to resolve your issues.

    Additionally, you can also expect slow updates and sparse documentation. When a vulnerability is discovered, it might not get patched for days, which makes it a huge security risk if you plan to host a website that needs to follow specific regulations and protect customer data.

    RunCloud

    RunCloud is the premier choice for modern cloud server management. What sets RunCloud apart is its intelligent architecture.

    Unlike traditional control panels that install directly onto your server and consume its precious resources, RunCloud securely connects to and manages your server remotely.

    This is a better approach as your server’s power is dedicated solely to your applications, not to running a heavy panel.

    Plus, you gain a single, elegant dashboard to oversee all your servers, which is incredibly efficient. This modern design is complemented by an exceptionally user-friendly and sleek interface, which makes complex server tasks feel intuitive, whether you’re a seasoned developer or just starting with a VPS.

    In addition, RunCloud is engineered for top-tier performance and robust security. It provides an NGINX stack optimized for speed right from the start, supports various advanced caching mechanisms like Redis and Memcached, and allows you to switch PHP versions effortlessly.

    RunCloud comes with sensible security features that are enabled out of the box. For example, it contains:

    • A one-click Let’s Encrypt SSL certificate that auto-renews
    • Integrated firewall management
    • Proactive server hardening.

    Developers and agencies should pay special attention to features such as Git deployment, atomic (zero-downtime) updates, and dedicated staging environments.

    These features make it easier to deploy new WordPress sites with one click, and manage databases, cron jobs, server health, and even team collaboration – all of which are streamlined and efficient.

    Key Features of RunCloud:

    • SaaS-Based Architecture: Manages your server remotely, keeping it lean and fast.
    • Optimized Performance: Native NGINX, advanced caching (Redis, Memcached), and the latest PHP versions.
    • One-Click WordPress Deployment: RunCloud simplifies deploying new WordPress sites, installs necessary plugins, and configures DNS records – all with a single click.
    • WordPress Staging Environments: Before going live, you can safely test changes on WordPress sites. RunCloud provides free test domains for this purpose, so you don’t need to worry about DNS configuration either.
    • Modern Security: Automated Let’s Encrypt SSL, firewall management (Fail2Ban), server hardening.
    • Server Health Monitoring & Alerts: RunCloud keeps you informed about your server’s resource usage.
    • Reliable Backup Solutions: Automated and on-demand off-server backups.
    • Team Collaboration Features: Manage server and web application access for your team.
    • Developer-Centric Tools: Git deployment, atomic updates, WP-CLI, Composer, Docker support.
    • RunCloud API: For custom automation and integrations.

    Why Paying for RunCloud is a Smart Investment for Your Business

    While many VPS control panels offer a free tier to get you started, RunCloud can transform your server management and, by extension, your business. RunCloud allows you to manage more servers, access advanced features such as staging environments and backup options, use team collaboration tools, and receive priority support.

    But perhaps the real value lies in the immense amount of time you save.

    Think about the hours spent on command lines, configuring security, manually updating software, or troubleshooting performance issues. RunCloud automates and simplifies these tasks to an incredible degree.

    Instead of being bogged down with server administration, you can focus on developing new products, serving your clients, marketing your services, and innovating. When considering the cost of your time or the potential expense of hiring a dedicated server administrator, a RunCloud subscription is exceptionally good value.

    Conclusion: Use RunCloud to Manage your VPS

    Choosing the right VPS control panel can feel like a major decision, and as we’ve seen, several capable options exist. While other panels have their merits and serve specific needs, RunCloud truly stands out by offering an exceptional balance of ease of use, raw power, blazing-fast performance, and a suite of genuinely modern features.

    What makes RunCloud particularly compelling is its universal appeal. If you’re a beginner just dipping your toes into the world of VPS hosting, RunCloud’s intuitive user interface and generous free tier make it incredibly welcoming, removing the fear factor from server management. You can get started, deploy your first WordPress site, and learn the ropes all without feeling overwhelmed.

    But for seasoned developers, agencies, and businesses, RunCloud scales beautifully. Its developer-centric tools, like Git deployment, staging environments, API, and team features, allow you to efficiently build, deploy, and manage complex applications.

    Ultimately, RunCloud simplifies the complexities of server administration so you can focus on what you do best: building amazing things online.

    Ready to experience the RunCloud difference firsthand? Sign up for your free account today.

    Have questions or need a little guidance getting started?
    Dive into our comprehensive documentation or talk to us directly in our friendly community.

  • How to Install WordPress on Ubuntu

    How to Install WordPress on Ubuntu

    Most Ubuntu servers can handle far more than a single website. Hosting multiple sites on the same server helps you use resources more efficiently and cut costs.

    This guide will walk you through the essential steps for installing and configuring multiple WordPress websites using the popular NGINX (LEMP) stack.

    Why Host Multiple Sites on a Single Server?

    Before diving into the technical steps, let’s clarify why consolidating websites onto one server using NGINX is such a good strategy:

    1. Significant Cost Savings: This is often the most compelling benefit. Instead of paying for multiple hosting plans or servers, you use the hardware or VPS plan you already have, drastically reducing monthly hosting costs.
    2. Optimized Resource Utilization: Make full use of your server’s CPU, RAM, and storage. Many websites, especially those with low-to-moderate or complementary traffic patterns (e.g., one busy during the day, another at night), can coexist happily without demanding excessive individual server resources.
    3. Easier Maintenance: Managing updates and configurations on a single server is often simpler than maintaining multiple separate environments.
    4. Centralized Infrastructure: Server-wide tasks like backups, security scanning, or performance monitoring become more streamlined when focused on a single machine hosting multiple WordPress sites.

    Steps for Hosting Multiple WordPress Sites on Ubuntu via NGINX

    Follow these steps to host multiple WordPress sites on a single Ubuntu server using the NGINX stack.

    For enhanced security and easier management down the line, we’ll follow the best practice of creating a separate database and a dedicated database user for each WordPress site. This isolates each site’s data, preventing potential issues on one site from affecting others.

    Step 1: Install the LEMP Stack (NGINX, MariaDB/MySQL, PHP)

    First, install the LEMP stack (Linux, NGINX, MariaDB, and PHP) which provides the foundation for your WordPress sites:

    • (L)inux: The operating system (Ubuntu, in our case).
    • (E)NGINX: (Pronounced “Engine-X”) Our high-performance web server. This software listens for incoming connections from visitors’ browsers and serves the appropriate web pages or passes requests to other processes (like PHP).
    • (M)ariaDB/MySQL: The database system that stores WordPress content. WordPress needs a database to store posts, pages, user information, settings, theme/plugin options, and more. We’ll install MariaDB, a widely used, community-developed fork of MySQL, which functions as a seamless replacement.
    • (P)HP: WordPress uses the PHP scripting language.
      • php-fpm (FastCGI Process Manager): This library serves web requests with NGINX.
      • php-mysql: WordPress uses this library to communicate with the database.

    Execute the following commands on your Ubuntu server to install the necessary software:

    sudo apt update
    sudo apt install nginx php8.3-cli php8.3-fpm php8.3-mysql mariadb-server -y

    In addition to this, WordPress also relies on several specific PHP extensions to perform various tasks such as handling images (php-gd), managing international characters (php-intl, php-mbstring), dealing with XML data (php-xml, php-xmlrpc), working with zip files (php-zip), and making external requests (php-curl). We need to install these alongside PHP-FPM.

    Install these PHP extensions now to avoid errors later:

    sudo apt install php8.3-curl php8.3-gd php8.3-intl php8.3-mbstring php8.3-soap php8.3-xml php8.3-zip -y

    With the core LEMP stack installed, our server now has the essential building blocks ready.

    Step 2: Secure MariaDB/MySQL Installation

    After installing the database server, you need to run the included security script to initialize your database.

    Run the security script and follow the prompts to:

    • Set a root password
    • Remove anonymous users
    • Disallow remote root login
    • Delete the test database
    • Reload privileges
    sudo mysql_secure_installation

    This process is fairly simple, just follow the on-screen prompts and select the default options.

    📖 Suggested read: How to Change/Reset MySQL Root Password on Ubuntu Linux?

    Step 3: Create Database and User for the First WordPress Site

    Create a separate database and user for each site to isolate data and improve security. If you create multiple websites on the same server, you must execute the following commands separately for each site you create, and with unique credentials.

    Log in to the MariaDB/MySQL shell as root:

    sudo mysql -u root -p

    Enter the root password you set during mysql_secure_installation in Step 2 and then create the database using the following command (use a descriptive name, e.g., runcloud_site1_db):

    CREATE DATABASE runcloud_site1_db CHARACTER SET utf8mb4 COLLATE utf8mb4_general_ci;

    Create a dedicated database user (replace runcloud_site1_user and YourStrongRunCloudPassword):

    CREATE USER 'runcloud_site1_user'@'localhost' IDENTIFIED BY 'YourStrongRunCloudPassword';

    Using ‘localhost’ means this user can only connect from the server, which is more secure.

    Grant privileges to this newly created user only on their specific database:

    GRANT ALL PRIVILEGES ON runcloud_site1_db.* TO 'runcloud_site1_user'@'localhost';

    Apply the changes and exit the MariaDB/MySQL shell:

    FLUSH PRIVILEGES;
    EXIT;

    Step 4: Download and Prepare WordPress Files for the First Site

    Next, you need to download and extract the WordPress core files on your server. Before doing that, you must decide where to keep these files. Most website administrators keep these files in the /var/www/ directory. You can do this using the following command:

    sudo mkdir -p /var/www/runcloud_site1.com/public_html

    In the above command, replace runcloud_site1.com with the actual domain or a descriptive name for the site.

    Download and extract WordPress into your site’s root folder:

    cd /tmp
    wget https://wordpress.org/latest.tar.gz

    Extract the archive into the correct folder. Once again, make sure to replace the runcloud_site1.com with the name of the folder that you created earlier.

    sudo tar -xzf latest.tar.gz -C /var/www/runcloud_site1.com/public_html/ --strip-components=1

    Set the correct ownership and permissions so NGINX and PHP-FPM can access them. To do this, replace the runcloud_site1.com in the following command with your domain name and run it in your terminal:

    sudo chown -R www-data:www-data /var/www/runcloud_site1.com/public_html

    Step 5: Configure NGINX Server Block for the First Site

    NGINX uses server block files (similar to Apache’s Virtual Hosts) to manage individual sites. Inside each block, we will define important details about how to handle web requests for this website.

    1. server_name: This tells NGINX which domain name(s) (like yourdomain.com or www.yourdomain.com) this block is responsible for.
    2. root: This specifies the exact directory on your server where the website’s files (your WordPress installation) are located.

    By creating a separate server block for each website, NGINX knows precisely where to direct incoming traffic based on the requested domain.

    Create a new NGINX configuration file for your site in sites-available using the following command:

    sudo nano /etc/nginx/sites-available/runcloud_site1.com.conf

    In this config file, paste the configuration below, making sure you first replace the following placeholders:

    1. runcloud_site1.com and www.runcloud_site1.com with your actual domain(s) or any subdomain you configure in step 6.
    2. /var/www/runcloud_site1.com/public_html with the correct path to your site’s files.
    3. php8.3-fpm.sock with the correct PHP-FPM socket path if you are using a different PHP version.

    If you are unsure how to do this, refer to our blog post, which explains how to edit files on remote servers with SSH and Nano.

    server {
        listen 80;
        listen [::]:80; # For IPv6
        server_name runcloud_site1.com www.runcloud_site1.com; # Your domain(s) here
        root /var/www/runcloud_site1.com/public_html; # Path to WP files
        index index.php index.html index.htm;
        # Handle requests - try file, then directory, then pass to WordPress
        location / {
            try_files $uri $uri/ /index.php?$args;
        }
        # Pass PHP scripts to PHP-FPM
        location ~ \.php$ {
            include snippets/fastcgi-php.conf;
            # Make sure the socket path matches your PHP version
            fastcgi_pass unix:/run/php/php8.3-fpm.sock;
            fastcgi_param SCRIPT_FILENAME $document_root$fastcgi_script_name;
            include fastcgi_params;
        }
        location = /wp-config.php {
            deny all;
        }
        # Add caching headers for static files (optional but recommended)
        location ~* \.(css|js|jpg|jpeg|png|gif|ico|svg|woff|woff2)$ {
            expires 1M;
            access_log off;
            add_header Cache-Control "public, max-age=604800";
        }
        # Handle favicon/robots.txt directly (optional)
        location = /favicon.ico { log_not_found off; access_log off; }
        location = /robots.txt { log_not_found off; access_log off; allow all; }
    }

    Save and close the file (Ctrl+X, then Y, then Enter).

    After this, you need to enable the site by creating a symbolic link from sites-available to sites-enabled:

    sudo ln -s /etc/nginx/sites-available/runcloud_site1.com.conf /etc/nginx/sites-enabled/

    After creating the configuration, you can deploy it immediately. However, it is always a good idea to test this configuration before deploying.

    Run the following command to check the syntax of your configuration file:

    sudo nginx -t

    If you get a message that says “test is successful”, you can proceed to the next step. Otherwise, you will need to review your config file for typos.

    Finally, reload NGINX to load the new site configuration using the following command:

    sudo systemctl reload nginx

    Step 6: Configure DNS Records

    Ideally, you should configure your DNS records first, and then install WordPress on your server. DNS propagation is a slow process, and it can take anywhere between 30 seconds and 48 hours for the changes to propagate.

    The exact steps to do this will vary depending on your VPS provider and DNS registrar. For example, if you are using DigitalOcean to host your server and purchased your domain from Cloudflare, then you will need to log in to your Cloudflare account and create an A record for your domain (runcloud_site1.com) pointing to your server’s public IPv4 address.

    Also, create a CNAME record for www pointing to runcloud_site1.com, or a separate A record if you prefer. Add AAAA records if using IPv6.

    If you are hosting multiple websites on the same server, then you will need to create a separate DNS record for each domain name and point them to the same IP address.

    If you face any errors or want to learn more, then we recommend visiting the RunCloud blog, where we have already published in-depth articles on the following topics:

    Step 7: Run the WordPress Installation

    After creating your DNS records, wait a couple of minutes. Once the DNS records have propagated, open your web browser and navigate to your domain name (e.g., http://runcloud_site1.com).

    You should see the WordPress setup screen. Select your language.

    installing WordPress on ubuntu linux server

    In the next step, you’ll be asked for database information. Enter the details you created in Step 3:

    • Database Name: runcloud_site1_db
    • Username: runcloud_site1_user
    • Password: YourStrongRunCloudPassword
    • Database Host: localhost
    • Table Prefix: wp_ (or change if desired)

    WordPress will attempt to connect to the database and create the wp-config.php file. Once the database connection is successful, click “Run the installation“.

    On the next screen, provide your site title, create an administrator username with a strong password, and enter your email address.

    Finally, click “Install WordPress“. Once the installation is complete, you will be greeted with the following screen:

    Now you can log in to your new WordPress dashboard!

    Step 8: Setting Up Additional WordPress Sites (Optional)

    To host more websites (e.g., site2.org), repeat the relevant steps for each new site:

    1. Database: Repeat Step 3 to create a new, separate database (e.g., site2_db) and a new, dedicated user (e.g., site2_user) with a unique, strong password, granting privileges only on site2_db.
    1. Files: Repeat Step 4 to create a new directory (e.g., /var/www/site2.org/public_html), download/extract WordPress into it, and set the correct www-data ownership.
    2. NGINX Config: Repeat Step 5 to create a new NGINX server block file (e.g., /etc/nginx/sites-available/site2.org.conf). Make sure to update the server_name directive to site2.org www.site2.org and the root directive to /var/www/site2.org/public_html. Remember to use the correct fastcgi_pass socket path. Enable the new site (sudo ln -s …), test, and restart NGINX using the commands provided above.
    3. DNS: Repeat Step 6, pointing the DNS records for site2.org (and www.site2.org) to your server’s IP address.
    4. WordPress Install: Repeat Step 7, navigating to http://site2.org (once DNS propagates) and using the database credentials created specifically for site2 during the web setup.

    NGINX uses the Host header from the incoming HTTP request (which contains the domain name the user typed) to match against the server_name directives in your enabled configuration files. This is how it routes traffic to the correct website’s document root and configuration block.

    Final Thoughts & Your Next Steps

    You’ve now installed and configured the LEMP stack to host multiple WordPress sites on Ubuntu using NGINX.

    While your sites are technically up and running, getting them truly production-ready requires additional steps:

    1. Handling Direct IP / Unmatched Domain Visits: What should happen if someone tries to access your server via its IP address directly, or uses a domain name you haven’t configured in an NGINX server block? You should configure a default NGINX block to catch these requests, perhaps redirecting them to your primary website’s homepage or showing a specific landing page.
    2. Optimizing Performance:
      • Image Processing: Installing the imagick PHP extension can significantly improve how WordPress handles image manipulation and optimization, leading to faster load times.
      • Caching: Enabling caching can significantly speed up your website. This can involve several layers: NGINX caching for static assets, PHP opcode caching (like OPcache), and WordPress-level caching plugins (e.g., W3 Total Cache, WP Super Cache).
    3. Securing Your Sites with SSL: In today’s web, HTTPS is non-negotiable. You must configure SSL/TLS certificates for all your domains to encrypt traffic, protect user data, improve SEO, and build trust.
    4. Implementing Automated Backups: What happens if something goes wrong? You must configure regular, automated backups of your website files (/var/www/) and databases.
    5. Adopting a Safe Workflow with Staging: Making changes directly on a live site is risky. Setting up a staging environment allows you to safely test updates (WordPress core, themes, plugins) or new features before deploying them to the public-facing site.

    As you can see, moving from a basic setup to fully managed, secure, and optimized hosting involves considerable ongoing effort. Manually configuring default server behavior, tuning performance, managing SSL certificates for multiple domains, scheduling reliable backups, and setting up staging environments are complex and time-consuming and leave significant room for error, especially as you add more sites.

    This is exactly why we built RunCloud.

    You’ve seen how much time and effort it takes to manually set up and manage multiple WordPress sites on a single server.

    RunCloud does the heavy lifting for you.

    • Deploy WordPress sites in minutes, not hours.
    • Automate SSL, backups, and server configs.
    • Monitor performance and security from a single dashboard.
    • Manage PHP, databases, and firewalls without touching the terminal.
    • Create staging environments with one click.

    Start building faster with RunCloud.

  • How to Build a CI/CD Pipeline with GitHub Actions and Docker

    How to Build a CI/CD Pipeline with GitHub Actions and Docker

    Are you tired of manually building, testing, and deploying your applications?

    Modern Continuous Integration (CI) and Continuous Deployment (CD) approaches can automatically trigger a deployment pipeline to build your Docker image, run tests, push it to a container registry like GHCR or Docker Hub, and deploy it to your server.

    The best part is that you can complete all of this in less than a minute after pushing code to your GitHub repository.

    By combining Docker with the automation capabilities of GitHub Actions, you can create a fast and effective DevOps pipeline. Docker ensures your application runs the same way everywhere by packaging it with its dependencies in a portable Docker container based on instructions in your Dockerfile. GitHub Actions then automates the build and push steps, securely manages secrets like access tokens, and handles the final deployment to your infrastructure.
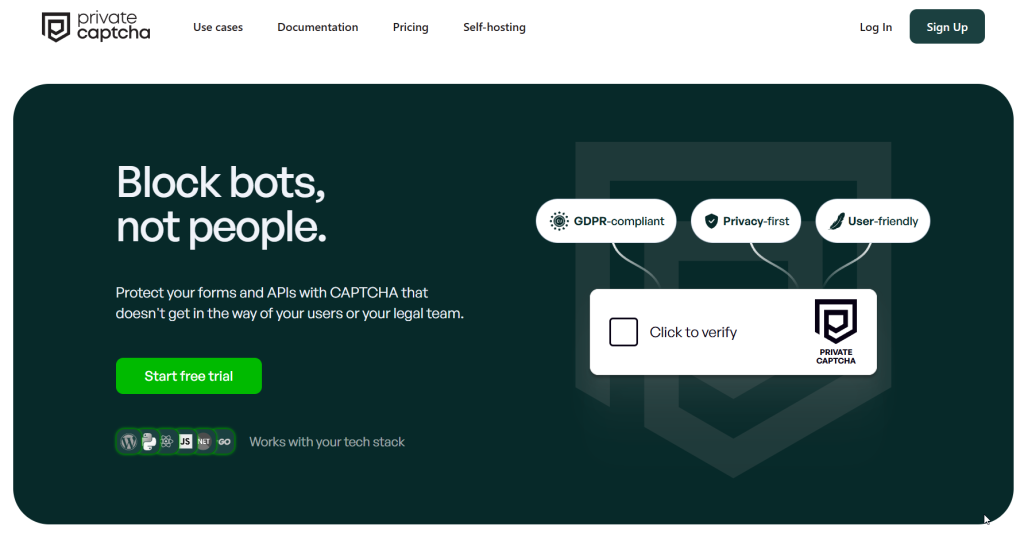
    In this guide, we’ll walk you through configuring your GitHub Actions workflow step-by-step, from publishing a container to deploying it on your server without third-party tools or subscriptions.

    By the end of this tutorial, you will be able to configure a deployment pipeline that updates your live server in under a minute after you push changes to it.

    Let’s get started!

    What are GitHub Actions?

    GitHub Actions is a powerful automation tool built directly into the GitHub platform. It listens for specific events happening in your repository, like someone pushing new code, creating a pull request, or even on a set schedule, and then automatically performs tasks you’ve defined. These tasks form a workflow, which is essentially a sequence of steps designed to achieve a specific goal. You can use this functionality to create a Continuous Integration (CI) and Continuous Deployment (CD) pipeline.

    This means you can automate the entire process of building your software, running tests to ensure quality, and even deploying it to servers (perhaps managed through tools such as RunCloud) without manual intervention.

    Key Features of GitHub Actions

    GitHub Actions has several useful features that make it a compelling choice for automation. Firstly, its event-driven nature allows workflows to trigger automatically in response to a wide variety of GitHub events. Secondly, matrix builds let you efficiently test your code across different environments simultaneously; you can define combinations of operating systems (like Linux, macOS, and Windows), software versions (like different Node.js or Python versions), or other variables, and GitHub Actions will run a job for each combination.

    Furthermore, GitHub provides hosted runners, which are virtual machines managed by GitHub that can execute your workflow jobs without requiring you to manage any infrastructure. If you have very specific needs, then you can also consider using self-hosted runners on your own servers or cloud infrastructure.


    All the actions and workflows on GitHub can be reused. You can even configure pre-built steps created by the community (available in the GitHub Marketplace) and save significant development time. Lastly, GitHub Actions includes integrated secrets management for securely handling sensitive information like API keys and passwords. It provides live logs for monitoring workflow progress in real time and the ability to store artifacts like build outputs or test reports.

    📖 Suggested read: What is Docker And How Does it Work

    Steps to Deploy Docker Container with GitHub Actions for CI/CD

    Let’s walk through the steps to automate building your application’s Docker image, pushing it to a registry, and then deploying it to your server every time you push changes to your repository.

    Prerequisites:

    • GitHub Repository: You need a GitHub repository containing all your application code. Make sure you have committed and pushed your latest code changes to GitHub.
    • Dockerfile: You must have a Dockerfile in the root of your repository. This file contains the step-by-step instructions Docker uses to build an image of your application. The specific commands inside the Dockerfile depend heavily on your application’s language, framework, and dependencies (e.g., installing packages, copying code, setting entry points), so we assume you have already created a functional Dockerfile.

    Step 1: Connect to Linux Server via SSH

    First, ensure you can connect to the target Linux server where your Docker container will run. You’ll need SSH access for this.

    ssh your_server_user@your_server_ip

    In the above command, replace your_server_user with your username and your_server_ip with the server’s IP address. If you manage your server with RunCloud, you can use the simplified SSH key management to store SSH keys. We recommend reading the RunCloud documentation to learn how to easily create and manage SSH keys for secure server access.

    📖 Suggested read: What Are Docker Images And How To Use Them

    Step 2: Verify Docker Installation on the Server

    Once connected to your server via SSH, you need to confirm that Docker is installed and running correctly. The Docker Command Line Interface (CLI) is required to pull images and run containers. You can test this by running the standard Docker test image:

    docker run hello-world

    If Docker is installed and working, you will see a message starting with “Hello from Docker!”. This message indicates that your installation appears to be working correctly.

    If the command fails or Docker is not found, you must install Docker Engine on your Linux server before proceeding. Follow the official Docker installation documentation specific to your server’s Linux distribution (e.g., Ubuntu, RHEL).

    📖 Suggested read: How To Create a Docker Image For Your Application

    Step 3: Add GitHub Action Secrets for SSH Access

    To allow your GitHub Actions workflow to securely log in to your server and execute deployment commands, you must store your server’s connection details as encrypted secrets in your GitHub repository. You should never hardcode sensitive information directly into your workflow file – we recommend using GitHub’s built-in secret management system for this.

    Navigate to your GitHub repository > Settings > Secrets and variables > Actions. Click “New repository secret” for each of the following:

    1. SERVER_IP: The public IP address of your Linux server.
    2. SERVER_PORT: The SSH port for your server (usually 22, but might be different if customized).
    3. SERVER_USER: The username you use to log in to your server via SSH. We strongly recommend creating a new user account specifically for this deployment step and giving it appropriate permissions for better security.
    4. SERVER_PRIVATE_SSH_KEY: The entire content of the private SSH key file that corresponds to a public key authorized on your server. Your private SSH key should look something like this:
    -----BEGIN OPENSSH PRIVATE KEY-----
    b3BlbnNzaC1rZXktdjEAAAAABG5vbmUAAAAEbm9uZQAAAAAAAAABAAABlwAAAAdzc2gtcn
    ...
    UV7ErwUhELMZFrAAAAE3RhdHRpY29kZXJAc3Rhcmx1c3QBAgMEBQYH
    -----END OPENSSH PRIVATE KEY-----

    Using secrets prevents exposing your server credentials in your codebase. The workflow will reference these secrets securely during execution. We strongly recommend creating a dedicated SSH key pair specifically for automation.

    Again, consulting the RunCloud documentation can be very helpful in generating and managing SSH keys securely, especially regarding best practices for SSH security.

    📖 Suggested read: Understanding Docker Services | RunCloud Docs

    Step 4: Configure GitHub Actions Workflow

    Now, define the CI/CD pipeline using a GitHub Actions workflow file. This file tells GitHub what steps to perform when triggered (e.g., on a push to your main branch).

    Create a YAML file named docker-publish.yml inside your repository’s .github/workflows/ directory. You can create this directory and file directly via the GitHub web interface or in your local repository using a text editor, and then commit and push the changes.

    Storing secrets for GitHub Actions

    Paste the following code into .github/workflows/docker-publish.yml:

    name: Publish & Deploy Docker container
    
    # This workflow uses actions that are not certified by GitHub.
    # They are provided by a third-party and are governed by
    # separate terms of service, privacy policy, and support
    # documentation.
    
    
    on:
      push:
        # Adjust branch name if needed (e.g., master, production)
        branches: [ "main" ]
        # Publish semver tags as releases.
        tags: [ 'v*.*.*' ]
    env:
      # Use docker.io for Docker Hub if empty
      REGISTRY: ghcr.io
      # github.repository as <account>/<repo>
      IMAGE_NAME: ${{ github.repository }}
    jobs:
      build:
        runs-on: ubuntu-latest
        permissions:
          contents: read
          packages: write
          # This is used to complete the identity challenge
          # with sigstore/fulcio when running outside of PRs.
          id-token: write
    
    
        steps:
          - name: Checkout repository
            uses: actions/checkout@v4
    
    
          # Install the cosign tool except on PR
          # https://github.com/sigstore/cosign-installer
          - name: Install cosign
            if: github.event_name != 'pull_request'
            uses: sigstore/cosign-installer@59acb6260d9c0ba8f4a2f9d9b48431a222b68e20 #v3.5.0
            with:
              cosign-release: 'v2.2.4'
    
    
          # Set up BuildKit Docker container builder to be able to build
          # multi-platform images and export cache
          # https://github.com/docker/setup-buildx-action
          - name: Set up Docker Buildx
            uses: docker/setup-buildx-action@f95db51fddba0c2d1ec667646a06c2ce06100226 # v3.0.0
    
    
          # Login against a Docker registry except on PR
          # https://github.com/docker/login-action
          - name: Log into registry ${{ env.REGISTRY }}
            if: github.event_name != 'pull_request'
            uses: docker/login-action@343f7c4344506bcbf9b4de18042ae17996df046d # v3.0.0
            with:
              registry: ${{ env.REGISTRY }}
              username: ${{ github.actor }}
              password: ${{ secrets.GITHUB_TOKEN }}
    
    
          # Extract metadata (tags, labels) for Docker
          # https://github.com/docker/metadata-action
          - name: Extract Docker metadata
            id: meta
            uses: docker/metadata-action@96383f45573cb7f253c731d3b3ab81c87ef81934 # v5.0.0
            with:
              images: ${{ env.REGISTRY }}/${{ env.IMAGE_NAME }}
    
    
          # Build and push Docker image with Buildx (don't push on PR)
          # https://github.com/docker/build-push-action
          - name: Build and push Docker image
            id: build-and-push
            uses: docker/build-push-action@0565240e2d4ab88bba5387d719585280857ece09 # v5.0.0
            with:
              context: .
              push: ${{ github.event_name != 'pull_request' }}
              tags: ${{ steps.meta.outputs.tags }}
              labels: ${{ steps.meta.outputs.labels }}
              cache-from: type=gha
              cache-to: type=gha,mode=max
    
    
          # Sign the resulting Docker image digest except on PRs.
          # This will only write to the public Rekor transparency log when the Docker
          # repository is public to avoid leaking data.  If you would like to publish
          # transparency data even for private images, pass --force to cosign below.
          # https://github.com/sigstore/cosign
          - name: Sign the published Docker image
            if: ${{ github.event_name != 'pull_request' }}
            env:
              # https://docs.github.com/en/actions/security-guides/security-hardening-for-github-actions#using-an-intermediate-environment-variable
              TAGS: ${{ steps.meta.outputs.tags }}
              DIGEST: ${{ steps.build-and-push.outputs.digest }}
            # This step uses the identity token to provision an ephemeral certificate
            # against the sigstore community Fulcio instance.
            run: echo "${TAGS}" | xargs -I {} cosign sign --yes {}@${DIGEST}
    
    
      deploy:
        needs: build
        runs-on: ubuntu-latest
        steps:
          - name: SSH and Deploy to Server
            uses: appleboy/ssh-action@v1
            with:
              host: ${{ secrets.SERVER_IP }}
              username: ${{ secrets.SERVER_USER }}
              key: ${{ secrets.SERVER_PRIVATE_SSH_KEY }}
              port: ${{ secrets.SERVER_PORT }}
              script: |
                echo ${{ secrets.GITHUB_TOKEN }} | docker login ${{ env.REGISTRY }} -u ${{ github.actor }} --password-stdin
                echo "--- Pulling latest Docker image ---"
                docker pull ghcr.io/tatticoder/terraform-get-time:main
                echo "--- Stopping existing container (if running) ---"
                docker stop my_container 
                echo "--- Removing existing container ---"
                docker rm my_container 
                echo "--- Starting new container ---"
               # Adjust ports (-p host:container) 
               # Add any necessary environment variables (-e)
                docker run -d --name my_container -p 3000:80 ghcr.io/tatticoder/terraform-get-time:main

    Let’s understand the important sections of the above code snippet:

    • name: Sets the display name for your workflow in the GitHub Actions tab.
    • on: push: branches: [ main ]: This triggers the workflow every time code is pushed to the main branch. You can change main to your default or production branch name (e.g., master).
    • Build Job: This section handles the process of creating and publishing the Docker container.
      • Checkout code: Uses the standard actions/checkout action to get your repository code onto the runner.
      • Log in to GHCR: Uses docker/login-action to authenticate with GitHub Container Registry using the automatically generated GITHUB_TOKEN.
      • Build and push: Uses docker/build-push-action.
    • Deploy via SSH Job: This job uses the popular SSH Remote Commands action to connect to your server using the secrets you configured and execute commands.
      • host, username, key, port: These fields use the secrets you created in Step 3.
      • script: This block contains the shell commands which will be executed on your target server.

        ❗Very Important – please read the following points very carefully:
        • The first command logs into GHCR on the server. Pulling public GHCR images might not require login. For private images, you can just use the provided command without any modifications.
        • The subsequent command pulls the latest tagged image from GHCR. Make sure to edit this command and replace ghcr.io/tatticoder/terraform-get-time:main with the name of your container image and its corresponding tag.
        • The subsequent command stops and removes any container with the name ‘my_container’ to avoid conflicts. Make sure to temporarily remove these commands to prevent the workflow from failing if the container doesn’t exist yet.
        • The final command runs a new container in detached mode (-d) using the pulled image. Make sure to replace the image’s name with the one you want to use and configure any additional parameters as per your requirements.

    ⚠️ Warning: The deployment script uses docker stop and docker rm before docker run. This means there will be a brief moment of downtime while the container is replaced. For zero-downtime deployments, more advanced strategies like blue-green deployments or using orchestration tools like Kubernetes are needed, which are beyond this basic setup.

    To minimize the impact of downtime, you can consider deploying once a day on weekdays outside of peak hours. This schedule can be configured easily using the GitHub action itself.

    📖 Suggested read: Docker Security: Best Practices to Secure a Docker Container

    Step 5: Commit Workflow and Trigger Deployment

    Finally, save the docker-publish.yml file. If you created it locally, commit it and push it to your GitHub repository using the following commands:

    git add .github/workflows/docker-publish.yml
    git commit -m "Add GitHub Actions workflow for Docker build and deploy"
    git push 
    Deploying and running a GitHub Actions for CI/CD

    Once you push this commit (or any future code changes) to the specified branch (main in this example), GitHub Actions will automatically detect the workflow file and start executing the defined steps.

    You can monitor the progress by going to the “Actions” tab in your GitHub repository. If all steps succeed, your code will be built into a Docker image, pushed to GHCR, and then pulled and run as a container on your designated Linux server.

    Once you have published your Dockerfile to GHCR, you will see a new tab in the bottom right of your GitHub dashboard. You can click on the name of your package to view your recently published packages.

    Step 6: Remove Unused Docker Resources (Optional)

    When you use a CI/CD pipeline, you will quickly end up with a large number of old obsolete containers on your server. These containers are often not needed and can slowly fill your disk space. If you are running low on disk space, then you can add an optional cleanup step to your deployment script to prevent your server’s disk space from filling up with old, unused Docker images, containers, and ‘build cache’.

    The following command will automatically remove any Docker resources (like stopped containers and images not associated with a running container) that haven’t been used in the last 24 hours without requiring confirmation. Running this periodically helps maintain server health and efficiently reclaim storage:

    docker system prune --filter "until=24h" --force

    If your deployment process takes a long time, consider optimizing the build stage of your container by using a caching layer within Docker to cache dependencies.

    Wrapping Up: Who Should Use Docker with GitHub Actions for CI/CD?

    Whether you’re a solo developer or part of a large team, automating builds and deployments saves invaluable time and reduces the potential for human error inherent in manual processes.

    While GitHub Actions handles the automation of building your Docker images and triggering deployment scripts, manually configuring, securing, monitoring, and updating servers can be complex and time-consuming.

    RunCloud provides a clean, efficient way to manage servers without the usual hassle. From provisioning and security hardening to database setup and app deployment, it streamlines the tasks that slow developers down. You stay in control of your infrastructure, but without getting buried in configuration files or command-line firefighting.

    That means more time building, testing, and shipping better software.
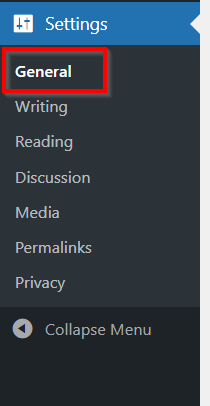
    Ready to take the work out of server management? Start with RunCloud today.
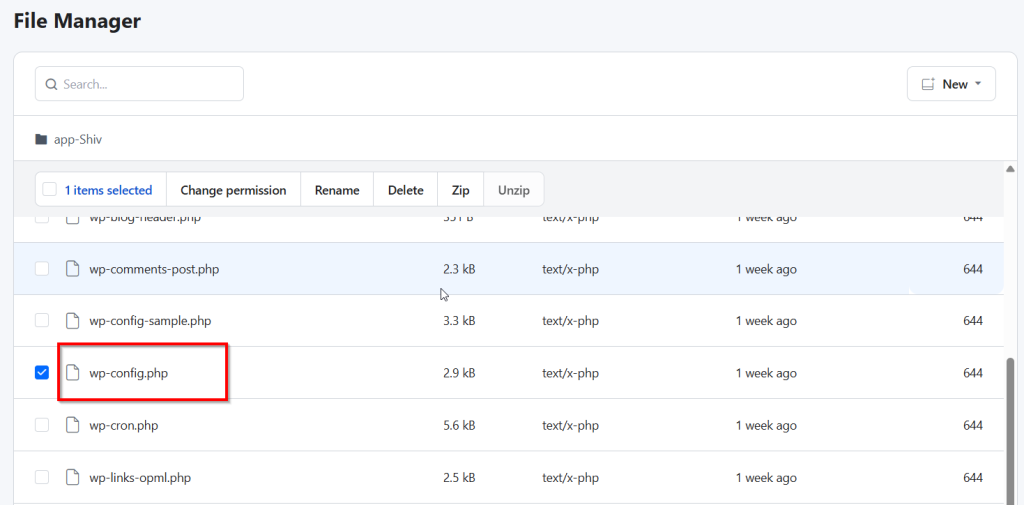
    FAQs on Docker with GitHub Actions for CI/CD

    What are the advantages of using Docker for CI/CD?

    Docker ensures consistent environments from development through production. It provides process isolation and ensures that builds and tests don’t interfere with each other or the host system dependencies. 

    How do I secure my Docker images in GitHub Actions?

    Start by scanning your images for vulnerabilities using container scanning tools directly within your GitHub Actions workflow. To reduce the attack surface, use minimal, trusted base images and avoid installing unnecessary packages. Always configure containers to run as non-root users and manage secrets securely using GitHub Secrets, never embedding them in the image layers.

    Can I use Docker Compose with GitHub Actions?

    Yes, Docker Compose can be effectively used within GitHub Actions workflows to manage multi-container setups. You simply need to ensure Docker Compose is installed on the runner, then use standard docker-compose commands to build images or spin up services like databases for integration testing.

    What is the best way to manage secrets in GitHub Actions?

    The most secure and recommended method is using GitHub Actions encrypted secrets, which are configured at the repository or organization level. These secrets can then be safely accessed within your workflow as environment variables or passed to specific actions needing credentials. Never hardcode sensitive information directly in your workflow files or application code checked into version control.

    Is Docker necessary for CI/CD?

    While not strictly mandatory, Docker offers substantial benefits that make it a highly popular choice for modern CI/CD pipelines. While alternative options are available, Docker provides reproducible and isolated build/test environments that are useful for reliable continuous integration and delivery.

    How does Docker improve CI/CD pipelines?

    Docker drastically improves CI/CD pipelines by guaranteeing environment consistency across all stages, from developer laptops to production servers. Its containerization isolates dependencies, preventing conflicts and simplifying the configuration of build agents. 

    Can I use self-hosted runners with Docker in GitHub Actions?

    You can absolutely use self-hosted runners with Docker in GitHub Actions. This approach gives you complete control over the build environment and resources.

    What is the difference between Docker and Kubernetes for CI/CD?

    Docker is primarily used within the CI/CD pipeline to build application images, run tests in isolated containerized environments, and consistently package dependencies. Kubernetes is a container orchestrator typically acting as the deployment target after the CI pipeline, responsible for managing the runtime, scaling, and health of containers in a cluster. Docker creates the portable application packages used in CI, while Kubernetes manages fleets of those packages in production or staging environments (CD).