Category: Security

  • Docker Security — Best Practices to Secure a Docker Container

    Docker Security — Best Practices to Secure a Docker Container

    Docker has quickly become one of the most popular platforms for software developers and teams that wish to streamline software development, shipping, and execution. However, most developers don’t secure their containers properly.

    According to security analysis by Prevasio, of around 4 million Docker images, more than 2 million had critical vulnerabilities. That’s a damning statistic, and really underscores the importance of security for your Docker containers. 

    In the following article, we discuss the 14 best practices that you can follow to secure your Docker containers.

    Understanding Docker Concepts and Containerization

    Docker containers are essentially software units that isolate each instance of an application and all dependencies to allow the application to run faster and without any hiccups. Container images are simply standalone executables that package everything needed to run an application.

    All software in Docker containers runs exactly the same, regardless of changes in infrastructure. The reason why software developers prefer Docker containers is because they help isolate software from the environment, and ensures uniform performance even if differences exist, such as between the development or staging environments.

    While you may be tempted to compare Docker containers with VMs (virtual machines), there’s an important difference: the former simply virtualize the operating system, and pay no attention to the hardware. As a result, they’re more efficient and portable.
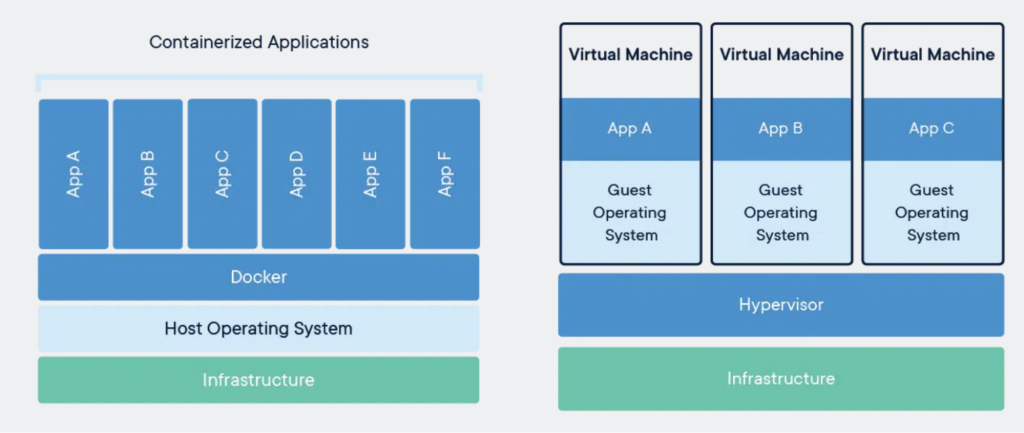
    docker concept
    Source: Docker.com

    What Is Docker Container Security?

    Since containerized environments are considerably more complex than traditional development environments, securing them is critically important. It is typical that in every production environment, a significant number of Docker containers are deployed.

    More importantly, it’s imperative that security experts reevaluate their approach, as containerized environments often have more moving parts (such as resource quotas, container registries, firewall rules, etc.) that need to be secured than a conventional deployment environment.

    Docker container security simply refers to the use of different practices and the implementation of effective security controls to protect the components within a Docker container, including the code, any system tools, libraries, or custom settings.

    The 14 Best Ways To Secure a Docker Container

    Container security should be taken seriously, as vulnerabilities could cause significant delays and lead to cost overruns throughout the development process. More importantly, traditional security methods are not always viable when securing Docker containers, as containerized environments aren’t as visible as traditional development environments.

    Here are 14 best practices we highly recommend you follow to secure Docker containers.

    1. Regularly Update Docker and the Host OS

    Security breaches in obsolete versions of Docker often pose the biggest risk for developers. Updating your Docker version regularly is very important, as these updates often include bug fixes, and patches to improve performance and fix vulnerabilities.

    But, that’s not all. You also need to update the host operating system. Should an attacker exploit a vulnerability within the host operating system, your container safeguards won’t be of much use.

    That’s because containers generally run on top of the kernel as it’s more efficient. Make sure you update the base system as well as keeping Docker up to date. You can also subscribe to security updates or news, so you’re always in the know when a new security patch is released.

    2. Reduce Default Privileges for Docker Containers

    One of the many security threats that you need to be wary of is a “container breakout.” This occurs when the Docker container fails to abide by isolation checks and ends up accessing privileged information from the host.

    The best way to mitigate the chances of this happening is to limit the default privileges granted to your containers. For instance, the daemon generally has root access, but you can always change that, or create another namespace with specific privileges.

    You can drop any access control capabilities that you feel are not required by the application. Ideally, it’s best to revoke access to CAP_SYS_ADMIN, since it grants access to a range of root-level permissions that can be exploited by malicious actors.

    And, more importantly, be very careful when running a sensitive container that requires root-level access. You can verify the Container image authenticity first before you run it. 

    3. Reduce Your Attack Surface with Lean Containers

    By default, Docker containers are generally quite lightweight. However, in some cases, developers tend to treat them like servers. When you start adding files constantly to the containers, or stop updating them on a regular basis, you’re essentially increasing your attack surface.

    A good practice is to try to reduce the number of components within each container as much as you can. Aim to keep the containers as lightweight as possible, so the attack surface is relatively narrow.

    And, in case a vulnerability is detected in any Docker image, you should resolve the problem as quickly as possible and deploy a new container, instead of leaving it for later.

    4. Monitor Container Activity

    Since there are often multiple instances running in each Docker container image, it’s important that you take a viable approach to monitoring container activity. The dynamic nature of Docker containers often makes this difficult.

    New versions and images are often launched at breakneck speeds, making tracking complicated. Another downside to this fast-paced approach is that should an issue arise, it can spread relatively quickly across different applications and containers.

    That’s one of the main reasons why tracking container activity is crucial. It’s also essential to create internal controls that help you identify images that may contain vulnerabilities or faults. This way, administrators can quickly fix the issue and deploy new containers instead.

    Ideally, you’d want to monitor activity across master nodes, workloads, and container engines. Third-party tools like Calico are an excellent choice for tracking container activity.

    5. Set Volumes and File System Permissions to Read-Only

    Instead of giving write access to containers, it might be a wise idea to run containers with a read-only file system. This can prevent malware from causing harm, such as propagating across the network or modifying the internal configuration of your network.

    To set Docker containers to read-only, run the code below:

    
    docker run -read-only alpine sh -c 'echo "running as read only" > /tmp'
    

    6. Regularly Scan and Verify Each Container Image Before Use

    Before you start using container images, it’s imperative that you scan and verify each image to detect vulnerabilities. This is all the more important if you’ve pulled an image from a public repository.

    Should a vulnerability exist in a single component of your image, it’s going to propagate to all other containers that are created using that image. The vulnerability in the base image will likely spread to all other images, which could lead to harmful consequences.

    Scanning container images is an excellent practice that can help you identify security issues and vulnerabilities. Unsafe images should never be added to the container registry that production systems can tap.

    Most tools that focus on container scanning rely on the CVE (Common Vulnerability and Exposure) database, and test images to identify any CVEs. Regular scanning is a great way to ensure that threat levels remain low.

    7. Tighten Security with Container Registries

    Container registries are commonly used by development teams as they allow them to quickly download container images with a single click. This is great when they have to work with multiple images. You can also configure registry access management permissions.

    While it saves a lot of time, it leads to an elevated security risk. How can you be confident about whether the image you’re pulling is trustworthy and free from malware or other vulnerabilities?

    To prevent any issues, it’s best if you use a private registry that’s protected by your own firewall. Also, implement RBAC (Role Based Access Control) so that only authorized users are able to access and download images from the registry.

    8. Avoid Exposing the Docker Daemon Socket

    The Docker daemon socket is a Unix network socket that is used by the Docker API to allow for seamless communication. The root user has ownership of the Docker daemon socket, but if someone else is given access to the daemon socket, they’ll also have root-level permissions.

    To avoid such an issue, it’s best that you avoid making the daemon socket available for remote connectivity. If you absolutely have to, always make sure that you use the encrypted HTTPS socket that Docker has.

    9. Reduce Resources Available to Containers

    If an attacker gains access to a container, they may try to use the host resources to perform malicious operations. A simple way to protect against this problem is to reduce CPU usage limits and Docker memory consumption so that breaches don’t lead to serious harm.

    By default, Docker containers are given full access to all the underlying CPU and RAM resources available on the host. You can, however, set quotas so that each container only has a specific number of resources available to them. This ensures that other services running on the host aren’t affected.

    10. Prevent Direct Access to Core Container Files

    Because containers are regularly upgraded and bug fixes are implemented, files are often exposed every time they’re accessed by a user. Ideally, you don’t want to maintain container logs within the container itself.

    If you keep the logs outside, it prevents users from accessing the container files directly. This means that team members can troubleshoot problems, if any arise, without directly accessing the container directory.

    11. Only Use Base Images That You Trust

    Supply chain attacks pose a serious risk, so it’s important that you avoid using base images that you can’t trust. Untrusted base images pose a serious issue, so it’s important that you avoid using them.

    Thankfully, you can find a host of Docker Official Images for most operating systems. Ideally, you will want to avoid using unofficial and untrusted base images as much as possible.

    12. Avoid Upgrading System Packages

    There’s always a risk that things might go sideways when you upgrade your system packages since you’ll end up upgrading the latest version of all your software dependencies.

    It’s best to pin them so you can cut down on the unpredictability as much as possible.

    13. Avoid Using the ADD Command Unless Necessary

    The ADD can be used when you want to copy files into a Docker image. However, you can also point it to a remote URL to allow it to fetch content when you’re building an image.

    Ideally, you’d want to get the content first and inspect it carefully before you copy it instead of copying data remotely.

    14. Steer Clear of Curl Bashing

    Curl is a popular command line tool that’s used to copy content to and from a server. As you can imagine, it carries a significant amount of risk, especially if you aren’t copying data from a trusted source, or can’t authenticate the content that you’ve downloaded.

    Frequently Asked Questions

    Is Docker a Security Risk?

    Docker doesn’t have to be a security risk as long as you update the platform and the host operating system and make sure you take proper steps to secure your containers.

    Does Docker Help Security?

    If used correctly, Docker can significantly improve security performance, especially since containerization greatly improves security when running isolated applications.

    Can Docker Images Be Encrypted?

    Yes, Docker images can be encrypted using containers or other tools. However, encrypting Docker images is not a straightforward process; it requires considerable expertise.

    Can You Password Protect a Docker Container?

    Since Docker containers don’t generally have conventional users, and you can’t log into a container, there’s no way to set passwords. Users simply run a command instead of accessing a container the conventional way.

    What Is Docker Bench Security?

    The Docker Bench for Security is simply a script that inspects for different best practices that focus on deploying Docker containers that are currently in production. All of the inspections are fully automated.

    After Action Report – Secure Your Docker Containers

    It’s very important for organizations to take security seriously, especially within a cloud-native development framework.

    From taking simple steps such as enforcing encrypted communication, and using TLS Certificates to restricting container capabilities, it’s important that you review security practices regularly.

    Always factor in vulnerabilities and discuss with your security experts how to mitigate the risk as much as possible. By creating a security policy that focuses mainly on container integrity and the infrastructure, organizations can reduce their threat levels by a significant margin.
  • 23 Best Chrome Extensions To Protect Your Privacy

    23 Best Chrome Extensions To Protect Your Privacy

    Are you looking for extensions to enhance your security and privacy?

    Although Incognito Mode aims at making your browsing experience secure, sometimes it just isn’t enough. Chrome may be the world’s most popular web browser, but it isn’t the most private one. It does, however, provide a number of Chrome extensions that you can freely add and manage in the browser.

    With the help of these extensions available in the Chrome Web Store, you can do a lot, such as blocking ads, disabling IP leakage, managing cookies, hiding your IP address, and ensuring site URLs are safe.

    With this in mind, here are 23 of what we think are the best Chrome extensions that you could get to protect your privacy. 

    How to Add and Manage Extensions to Chrome

    Adding extensions is an easy process, and we will explain it to you so you know how to do it.

    The Chrome Web Store provides access to all extensions. While you may find links elsewhere from the services, they will redirect you to an extension page. When you click download, Chrome will add the extension to the top right corner of your browser, and you can pin them to see them at all times.

    How to install and manage a Chrome extension in six steps:

    1. Visit the Chrome Web Store, then click Extensions. This is at the top of the left-hand side, highlighted in blue.
    2. Find the extension you need through the search function.
    3. When you find the extension you want, select Add to Chrome.
    4. You will see a pop-up telling you what permissions the extension requires, i.e., to read and change your browsing data. If you accept this, you should then click Add extension.
    5. For extension management, select the More menu on the right, which is displayed by three vertical dots, select More Tools, and then Extensions.
    6. You can turn on or off the extension on the Extensions page or click Details to find out about the extension and what permissions it has.

    We explained how to install an extension, so now we give you a list of 23 security and privacy extensions that you should consider. 

    What Are The Best Privacy Extensions?

    To maximize security and privacy, Chrome offers a multitude of browser add-ons known as ‘extensions’ to address online privacy issues. Anti-tracking, phishing, ad-blocking, password managers, proxy, and VPN are made all available conveniently when you use Chrome.

    If you’re concerned with your online privacy, safety, and security, consider acquiring one or more of these services.

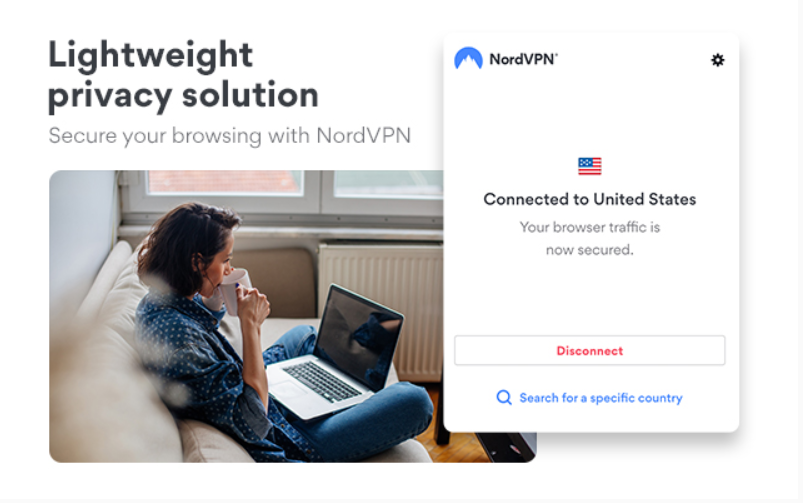
    1. Nord VPN

    nord vpn privacy extension homepage

    VPN has always been a first (and often the best) line of defense when it comes to protecting your privacy. And we’ve chosen NordVPN to be the first one on this list for many reasons.

    The way VPN works is that VPN first connects to a remote server before you connect to the webserver that you’re trying to access. At that remote server, your IP address is masked, protecting your personal IP as you browse.

    Nord VPN offers you the ability to use the VPN directly in the browser without logging into the app, making it considerably more convenient.

    Features:

    • Military encryption — AES-256-CBC
    • Can access content from any location
    • You can use it on up to 6 devices
    • No log creation to protect privacy
    • Quality streaming.

    It’s important to emphasize that NordVPN has a no-log policy, which means that in case anyone requests from NordVPN your browsing data through their VPN servers, they are genuinely unable to provide it as they record no logs about users activity.

    There is no free version; however, there is a free trial, and the most basic option comes in under 5 USD a month for a yearly subscription, or you can pay more for a month-to-month subscription. It is nonetheless one of the most widely known and popular VPN services. If you want a VPN provider, which easily integrates into your Chrome, this is perfect for you.

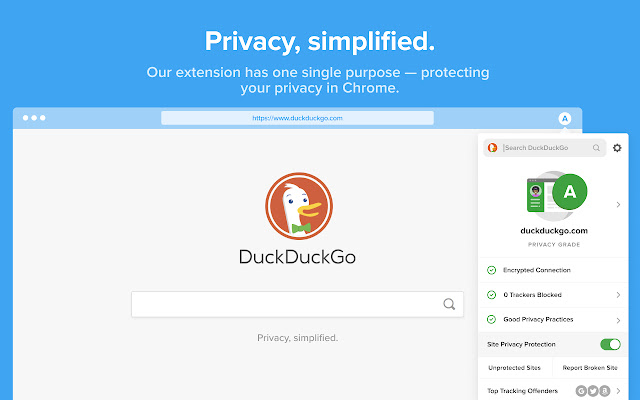
    2. DuckDuckGo Privacy Essentials

    duckduckgo privacy essentials homepage

    DuckDuckGo is another anti-tracking extension for Chrome. It protects your privacy online with private search, tracker blocking, and secure browsing. What makes it unique is that it defaults your search query to its own encrypted search engine, protecting your privacy.

    Features:

    • Defaults browser connections to their own secure one
    • Enforces encryption
    • Provides website’s summary of privacy practices
    • Gives a privacy grade to each website.

    DuckDuckGo is ideal if you are concerned about your data and privacy when browsing and you want to know how trustworthy sites are to make better choices.

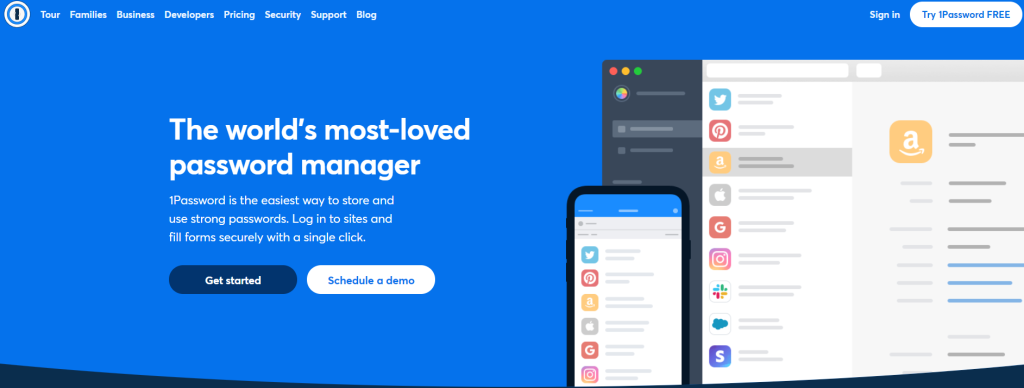
    3. 1Password

    1password privacy extenstion homepage.

    1Password is a dedicated password manager. It handles all passwords and valuable information, stores it, keeps it safe, and allows you to use this information for auto-filling. Password managers, in general, are helpful, as they better protect your data than default programs.

    Features:

    • Provides an alternative secure password manager to the default Chrome autofill feature
    • Handles all passwords and user accounts you use with Chrome
    • Stores valuable information for you such as credit cards, passport info, etc.
    • Automation for improved company infrastructure

    If you’re not too comfortable using the autofill feature, which Google may well use to collect personal information about you, given Google’s reputation, it’s a good choice. In general, it’s a secure and efficient way to store passwords and other valuable information and to enter them when online quickly.

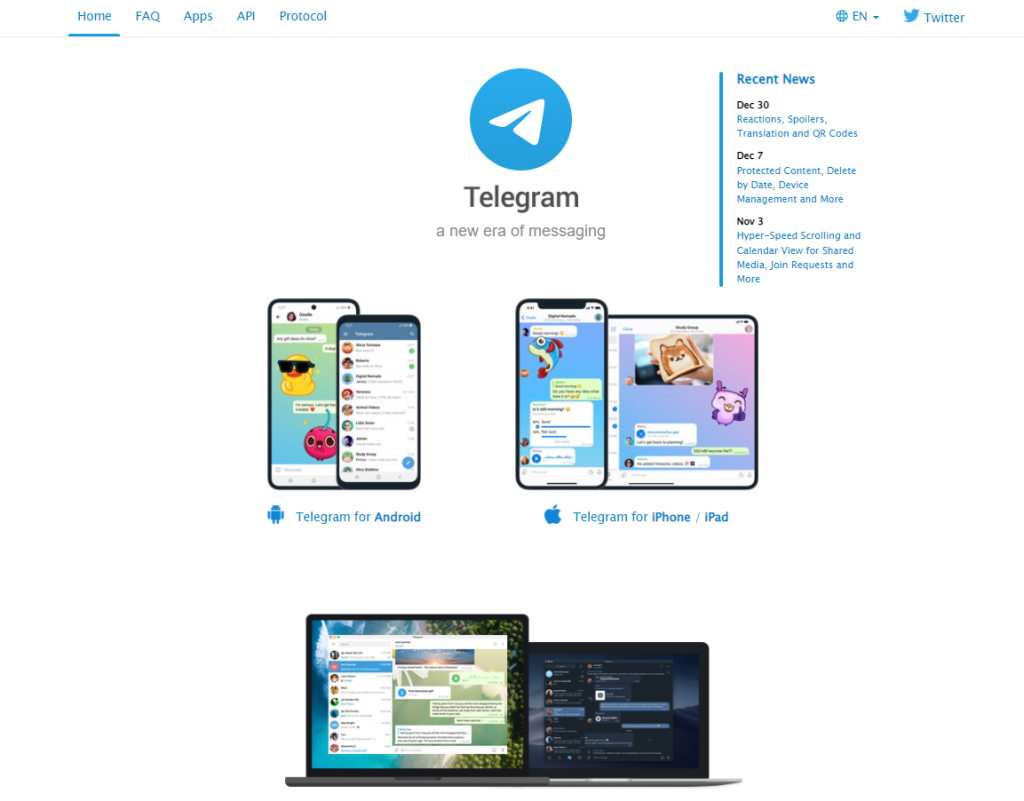
    4. Telegram

    telegram homepage

    Privacy in most major messaging applications remains to be an issue to consider. Applications like WhatsApp may have addressed this problem before, but it has become harder to trust these days ever since its acquisition by Facebook. One messaging application that has genuinely secure end-to-end encryption is Telegram.

    Features:

    • Secure end-to-end encryption
    • Has all the functionalities a messaging application would need
    • Data is protected through sandboxing.

    Telegram, unlike other messaging apps, has no relation to other programs. For example, WhatsApp can communicate with other applications, which can be risky for your privacy and security.

    Telegram, conversely, cannot send data between other applications, and it always encrypts conversations. You can also ensure that no one sees more than you want to share. With this level of security, it still has the features you’d normally expect from a messaging application: fun stickers, group chats, video calls, etc., so Telegram seems to be the perfect choice for an alternative to online messaging.

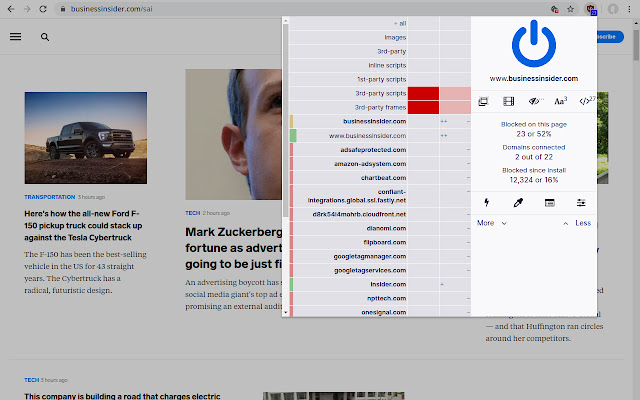
    5. uBlock Origin

    ublock origin privacy extension homepage

    uBlock Origin is a great free privacy extension. uBlock Origin blocks ads and prevents trackers from accessing your information. You can use it on various browsers, it is entirely free, and it is very efficient in terms of CPU and memory usage. It also displays information about what is being blocked.

    Features:

    • Origin filter lists and blocklists
    • Blocks ads
    • Prevents tracking
    • Oriented to being CPU friendly.

    It also offers a lot of customization options, more lists, the ability to block JavaScript locally or globally, create your own global or local rules, and more.

    Alternative: Even though it’s not actually the Chrome Extension, this same concept of enhanced security and performance is what the Brave browser offers. It’s 3 times faster than Google Chrome, has a built-in Ads Blocker, and has a lot of features specially designed to protect your privacy. So if you’re looking for protection even better than the uBlock Origin Chrome extension, then the Brave browser might just be what you’re looking for.

    6. Click&Clean

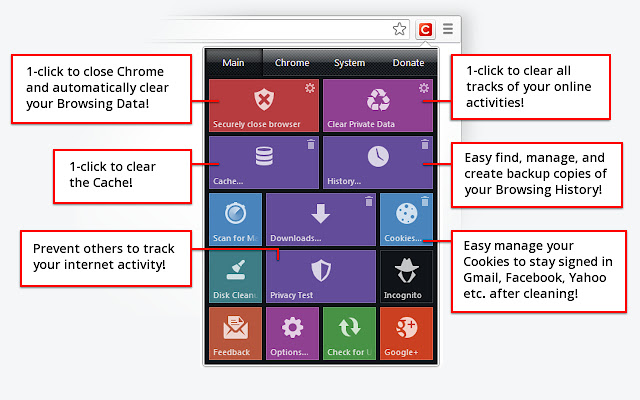
    This extension is straightforward, designed for quickly cleaning your browsing history. You can clear your browsing history, typed URLs, cookies, and cache with one button. You can also clear download history and remove client-side Web SQL Databases.

    Features:

    • Simple user interface and function
    • Provides easy management to browser history, cookies, cache, and other data
    • Removes downloads and can create space on your hard drive
    • Scan PC for malware.

    There is also an option to clean one portion at a time rather than deleting all information. Separate delete buttons are available for each option that you can choose as you see fit—generally, it’s a valuable and simple tool to consider.

    7. Unshorten.link

    unshorten.link privacy extension homepage

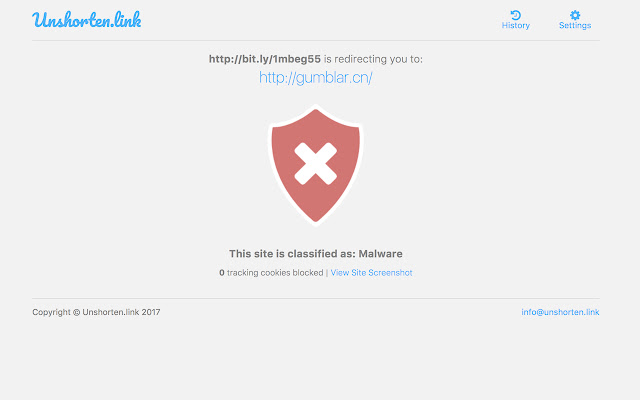
    Unshorten.link has a primary purpose, and as the name suggests, it un-shortens any shortened link. Shortened links are one way for cybercriminals to lure unsuspecting users onto their websites. Although that’s not always the case when you see a shortened link, there’s no way to tell without actually clicking on the link first.

    Features:

    • Un-shortens shortened links and exposes possible hidden malware
    • Fast and easy to use
    • Keeps a regularly updated list of 300 popular link shortening services
    • Directs you to their link expansion page whenever you click a shortened link, so you know what the link is sending you to.
    • Malware protection
    • Blocks 15 common tracking cookies.

    With this extension, you can be sure to know if a shortened link is hiding any malicious intent or not. The extension also boasts additional security features against malware and tracking and ensures that you cannot click a nefarious link. Other programs may offer tracking blockers, but this service is a great tool to know what is behind a link and prevents you from getting caught out.

    8. Ghostery

    ghostery privacy extension homepage

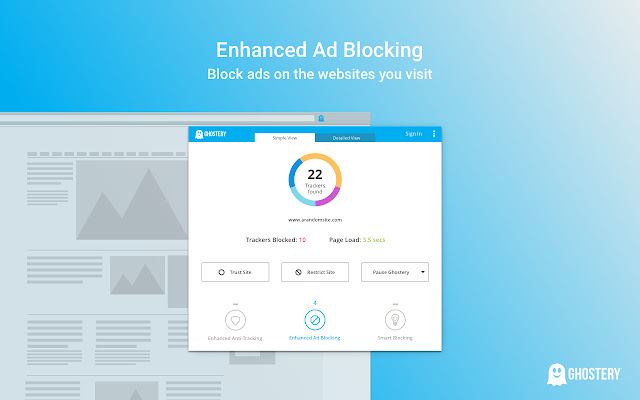
    Ghostery app is ideal for protecting your data and privacy when browsing. The free version is extensive as well. Depending on how strict you want it to be, you can configure the extension to four different levels. You may opt to block default, block nothing, block everything, or block specific sites.

    Ghostery provides all these functionalities for free, but there is a Pro plan you can subscribe to for $2 per month.

    Features:

    • Ability to view and block trackers
    • Anonymizes your data
    • Smart blocking automatically blocks and permits trackers for an optimized experience
    • (Paid version) Customer support priority
    • (Paid version) Private ad-free internet search
    • (Pro version) Detailed analytics.

    While the paid plan gives you more options, it doesn’t protect you any more than the free plan; instead, it provides additional tools for a better online experience. It is, in general, an excellent choice for a range of security and privacy measures.

    9. Dashlane

    dashlane privacy extension

    Dashlane is another password manager. It safely stores and logs all your passwords for easy use. It can work with various browsers, has two-stage authentication to maintain the security of your passwords, and makes filling in forms considerably easier.

    Features:

    • Free version allows you to save 50 passwords
    • Auto filling
    • Authentication protocols
    • Password generator
    • (Premium version) Up to 5 devices
    • (Premium version) Store encrypted files.

    Dashlane’s premium version offers many other features beyond simple password management. However, password management is a crucial security measure, as passwords can be stolen by malware without adequate protection. Dashlane makes creating and using complex passwords easier while saving you time.

    10. NoScript

    noscript prigvacy extension

    NoScript aims at making browsing considerably safer. It protects you from various cross-script attacks. These attacks are when “bad” code is added into “good” sites for undesirable purposes. NoScript can also protect you from clickjacking attempts when questionable sites masquerade as others. It also allows you to control what sites can run executable JavaScript, Flash, and Java content. So, for example, you can let your bank run Java, but no one else.

    Features:

    • Default whitelist of popular, trustworthy sites
    • The first and one of the most powerful anti-cross-scripting filters
    • Can work on mobile devices.

    In the settings panel, it will give you an overview of everything blocked on the current webpage and allow you the option to allow or trust a particular script. The extension to Chrome is relatively new but is easily integrated into your Chrome security measures. It does not conflict with adblockers, so use it for extra security against script-based attacks.

    11. ClearURLs

    clearurls privacy extension

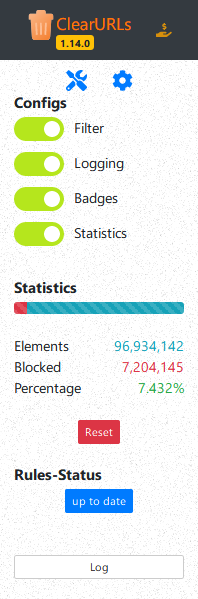
    Contrary to adblockers that target the website or the scripts itself and much like Unshorten.link, ClearURLs targets tracking elements planted within URLs. This add-on is based on new WebExtensions technology and is optimized for Firefox and Chrome-based browsers.

    Features:

    • Automatic removal of URL tracking elements
    • Optimized for Firefox and Chrome.

    The extension automatically removes tracking elements from URLs to protect your privacy when browsing through the Internet. So at the end of the day, it’s simply added security to the links you use.

    12. Privacy Badger

    privacy badger privacy extension homepage

    Privacy Badger blocks trackers, which usually come from third-party ads. However, unlike most adblockers, this extension has a unique approach.

    It does not consult filter lists—which are lists that adblockers refer to, to know which sites to block. Privacy Badger automatically detects trackers from their behavior, sends the Global Privacy Control signal to prevent your data from being shared or sold, and also sends a Do Not Track signal to block trackers.

    Features:

    • Generates a list of sites to block as you browse through the web
    • Prevents third parties from taking your data
    • Informs you which websites are tracking you and which ones aren’t
    • Allows useful cookies and third-party applications if necessary, but screens out trackers and referrers.

    To a degree, it works as an ad blocker, but this is not its primary function. It aims to prevent you from being tracked, to better protect your privacy. It just so happens that a lot of ads do this, so it has a two in one appeal. It is compatible with other adblockers, so it is a useful additional tool for your use.

    13. SendSafely Encryption for Chrome and Gmail

    SendSafely Encryption for Chrome and Gmail

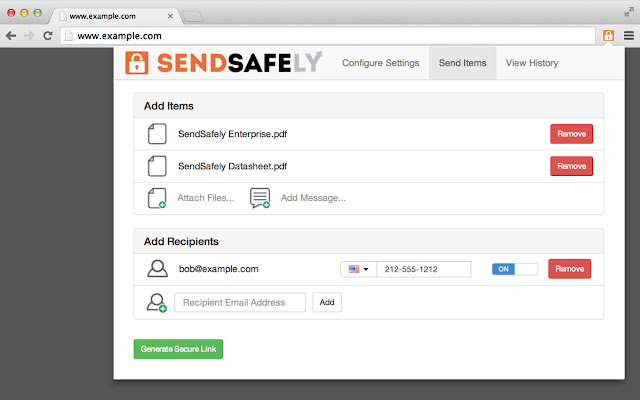
    This extension is a useful tool for safe communication. It provides end-to-end email encryption. It can ensure that no one else can see your email, even the extension provider. It also allows you to send encrypted files through both Gmail and their own Chrome pop-up window.

    Features:

    • Encryption of emails
    • File encryption
    • Multi-factor authentication.

    There is a free version of SendSafely, and there are various paid versions with extra plugins and a lot more features. Generally, this extension is particularly useful for protecting emails. It is built on OpenPGP, which is the most popular encryption standard, and held as the best encryption method.

    14. Avast

    avast homepage

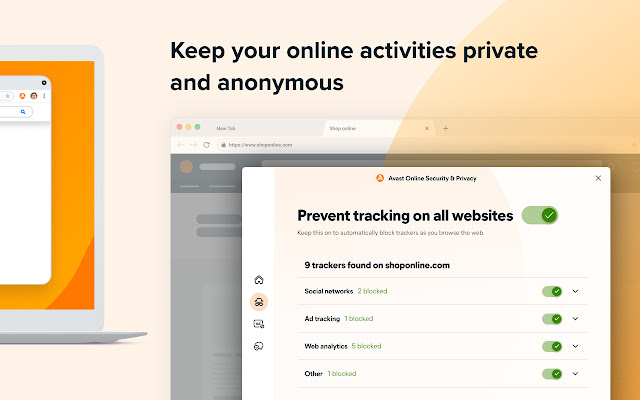
    While Avast is antivirus software, it has a standalone Chrome extension. This extension protects you from malware, blocks ads, and can prevent tracking.

    Features:

    • Analysis and report of website’s safety
    • Corrects errors in website names
    • Adblocking
    • Automatically scans websites to see if they are genuine
    • Do not track mode.

    Whether or not you want Avast’s whole program, the free extension can add an extra layer of security. It also serves as a way to protect your data from being accessed with a do not track mode. It is one of the most popular extensions and is widely recommended.

    15. WOT Website Security and Browsing Extension

    WOT Website Security and Browsing Extension

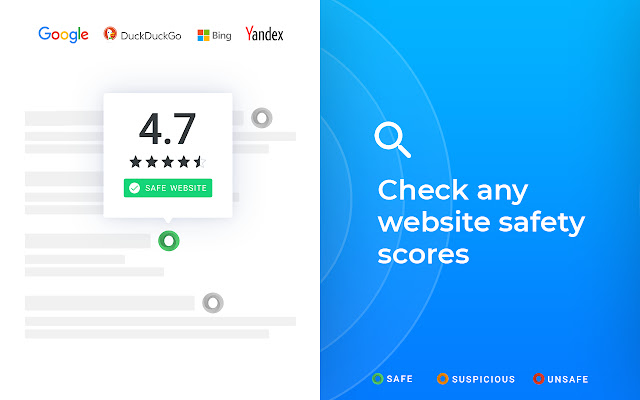
    This extension helps you browse the web more safely. It uses community feedback to assess the security of a site, so before you visit, you can check how wise it is to click. As you search, it will tell you the security rating of sites, so you can avoid or be more cautious when visiting. It uses algorithms of millions of user ratings to gauge how safe it is.

    Features:

    • Safer browsing, protecting you from tracking
    • Ratings of site’s security risks
    • Link inspection
    • Free online security
    • Real-time protection mode, which constantly notifies you of threats
    • (Premium version) Pop-up blocker
    • (Premium version) Content-control
    • (Premium version) Data breach monitoring
    • (Premium version) Email protection.

    They have both a free version and premium, the latter offering extra security features. In addition, a business version is available with even more features. Nonetheless, the free version offers excellent security and privacy protection.

    16. Blur

    blur privacy extension homepage

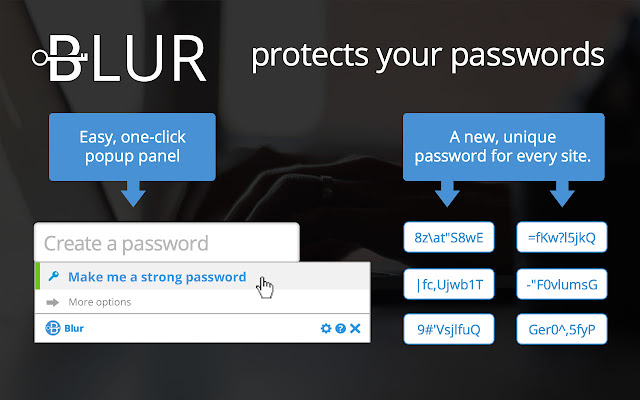
    Blur offers multiple features for your security needs. It’s both a secure password manager, suggesting and storing secure passwords, and a privacy extension, as it blocks trackers and protects your data. Furthermore, it can help make online purchases safer by encrypting your valuable information.

    Features:

    • Protects and stores passwords with encryption
    • Suggests secure passwords
    • Autofill valuable information
    • Masked emails
    • Private browsing
    • Tracking protection
    • (Premium version) Masked payment information
    • (Premium version) Support.

    The free version gives many useful features, but the premium features offer a great degree of security, particularly for online payments. It is relatively affordable for a paid extension, between 2-5 USD per month. Nonetheless, this is a solid choice if you want a password manager, which also doubles as a privacy extension.

    17. uMatrix

    umatrix privacy extension

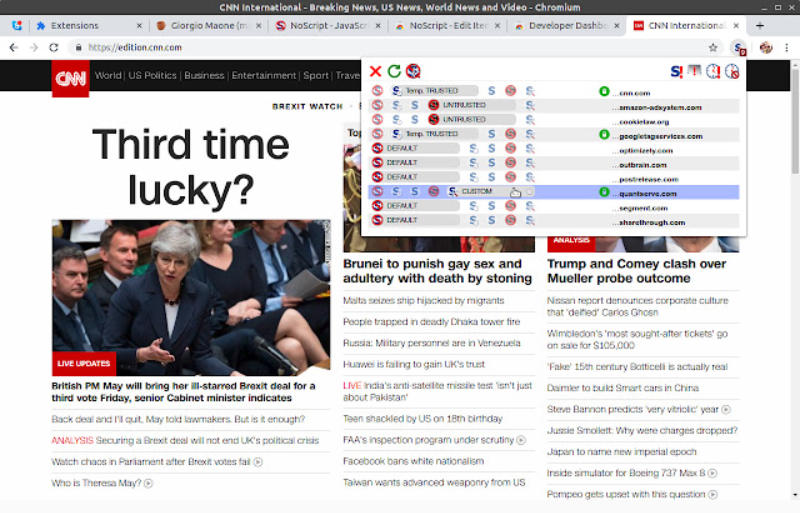
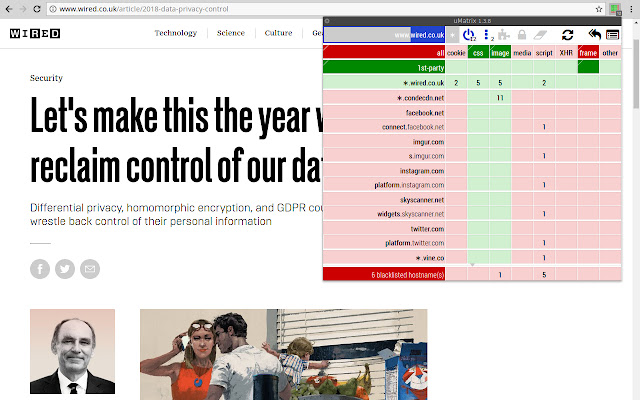
    uMatrix gives you control over your security while browsing. Unlike other blockers, you make the decisions on what is permitted or not. Due to its interface, it may not be for everyone, but this is a well-suited extension for others with better technical knowledge. In simple terms, you select whether you allow or forbid requests, block scripts, ads, and iframes, and have access to a firewall with privacy tools.

    Features:

    • A matrix of requests to manage what is permissible or not
    • Blacklist or whitelist requests of all kinds
    • See all remote connections
    • Blacklist all or whitelist all as default modes, as you prefer.
    • Understand what websites are doing behind the scenes
    • Can speed up browsing by blocking image requests.

    This isn’t the most intuitive extension; however, if you take security seriously and can understand the table nature of the extension, it can offer a great security solution where you are in full control.

    18. Pixel Block or Pixel Block 2

    pixel block privacy extension

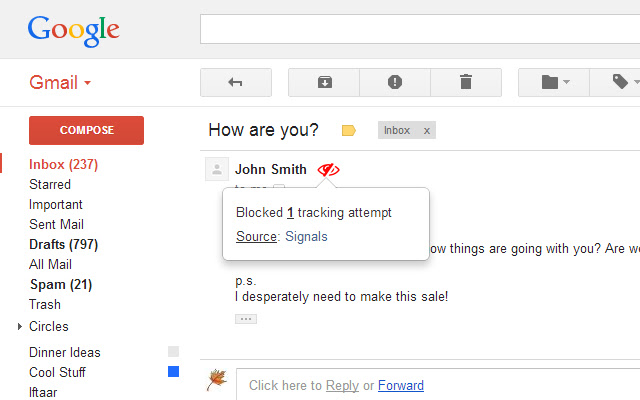
    Both of these extensions are Chrome exclusive and serve a key purpose. They both block people from tracking you when you open their emails. Companies and more questionable parties often use email tracking pixels to see how long someone has spent on an email and find out location activity. Pixel Block 2 was a “fork” of the original to work with the new Gmail interface; however, it appears that the original has a more recent update and a wider user base.

    Features:

    • Blocks tracking attempts in emails
    • Does not communicate with any remote servers, is locally based on your browser.

    Whichever you choose, you will have a simple, one-purpose extension that can be useful in your arsenal of tools to protect your privacy and data.

    19. J2Team Security

    j2 team security homepage

    J2Team Security is mainly an anti-phishing extension with a focus on Facebook. An updated version of an app made primarily for Facebook security, J2Team Security has a few additional features beyond Facebook. It works by protecting you from clickjacking, phishing attempts, malware, and works well for Facebook security.

    Features:

    • Real-time protection
    • Blocks ‘seen’ feature on Facebook messenger
    • Anti clickjacking
    • Blocks fake Facebook log-ins
    • Protect against Blogspot vulnerabilities
    • Protects against Facebook Self-XXS exploits.

    If you spend a lot of time on Facebook but want to have a more secure presence and protection against phishing attacks, it is an ideal extension to get. The main site is in Vietnamese; however, it has a global audience.

    20. Checkbot Web Speed & Security Tester

    checkbot privacy extension homepage

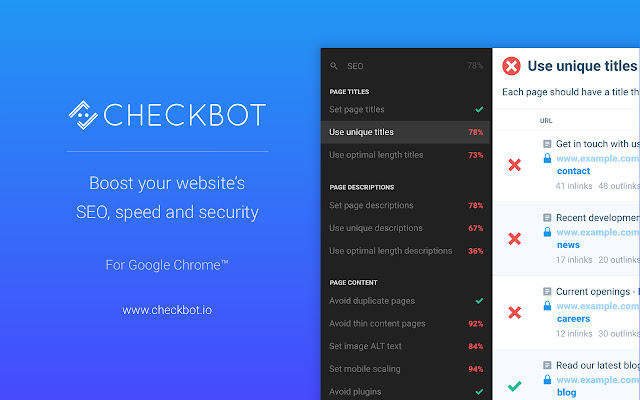
    Checkbot has three main functions: check the Search Engine Optimization (SEO) of sites, security, and speed. This gives you a lot of useful information if you are creating your own site. While most of the other extensions here are about you safely visiting other sites, you need to know how to ensure that your own site guarantees the end-users security and useability.

    Features:

    • SEO check, by testing many aspects of the site
    • Site speed checker
    • Site security checking.

    If you are creating your own site or sites and regularly need to check SEO, security, and speed, this is an absolutely essential tool to have.

    21. Cookie AutoDelete

    cookie auto delete privacy extension

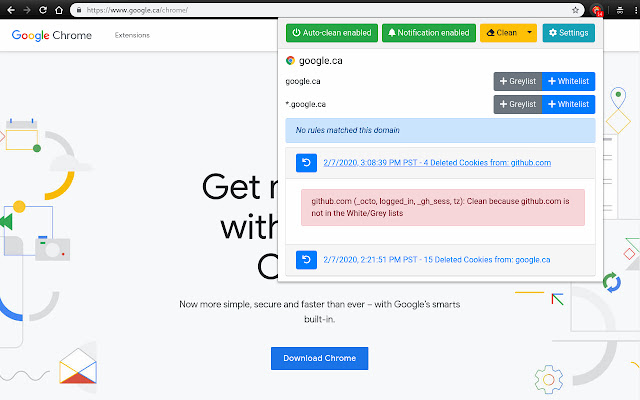
    If you want to take control of your cookies, this is the extension for you. You can automatically remove cookies from closed tabs you do not want yet keep any you do want. Add sites to the whitelist, and enable auto-clean to remove anything else if you know the sites you want to keep.

    Features:

    • Auto delete cookies from closed sites
    • Whitelist for sites you want to keep
    • Greylist sites you want to keep the cookies until you restart your browser
    • Clear all site data for a domain.

    Unlike other programs which can remove all cookies, this extension allows you to choose what cookies you want to keep and for how long—a very simple extension to use alongside others to boost your security and regain control.

    22. Skip Redirect

    skip redirect privacy extension

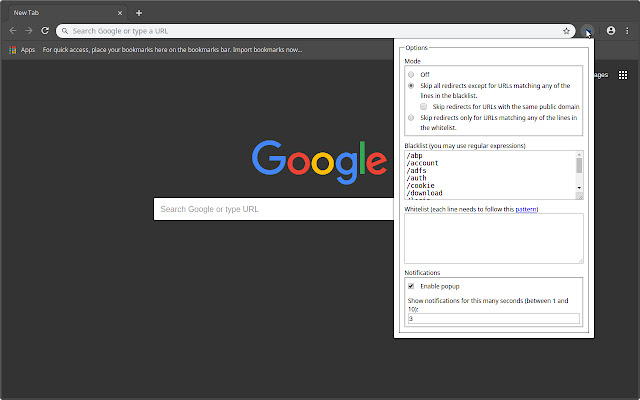
    Another extension with a pure and simple function, Skip Redirect, removes any sites you visit before getting to your intended destination. Ever clicked a link, and you ended up somewhere else for a brief moment before going to the desired site? This is what this extension deals with.

    Skip intermediary websites when clicking links is the only feature it has.

    This extension is a valuable and simple tool to help keep yourself safe. Many sites use this redirect practice, and your data and security become at risk, as you do not know what the intermediary site is or what it does. This extension removes all worry!

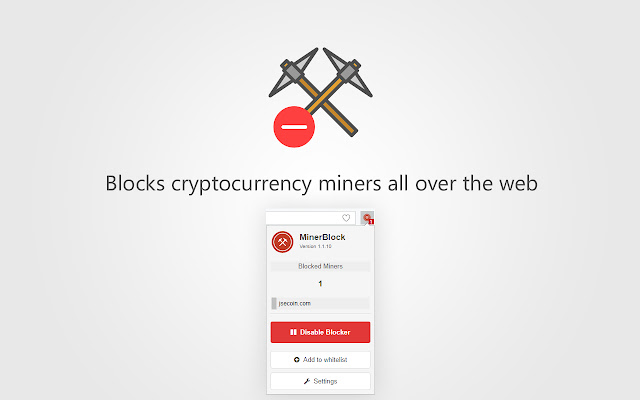
    23. MinerBlock

    miner block privacy extension homepage

    The final entry of our list also serves a particular purpose. It blocks people from accessing your CPU for cryptocurrency mining. As crypto-mining uses a lot of processing power, some use illegal algorithms to access your computer’s CPU to mine for them, sometimes without your knowledge. This extension prevents this from happening, both in cases of inline scripts or when the miners work through proxies.

    Features:

    • A blacklist to block requests and scripts
    • Detecting and stopping potential mining through examining scripts.

    If you are worried about miners accessing your device, which is a very reasonable concern in 2021, this is an ideal extension for you.

    Frequently Asked Questions

    How do I stop Chrome from tracking me?

    On your Chrome browser:

    1. Click the Chrome menu in the top-right corner of the browser
    2. Select Settings.
    3. Under Privacy and security, click Cookies and other site data.
    4. Toggle Send a ‘Do not track’ request with your browsing traffic on or off.

    Why do I get privacy errors in Chrome?

    Privacy errors occur when the SSL certificate of the site cannot be verified by Google. SSL is a data encryption method utilized to ensure the safety and privacy of transmitted data. Sometimes, however, errors incorrectly occur when there is an issue with an extension, antivirus software, or computer settings.

    Can Chrome extensions steal passwords?

    Extensions can steal your passwords only if the extension itself has been compromised or replaced by a malware version that steals login credentials to access other sites, including Amazon, Microsoft, GitHub, etc.

    Are my Google searches being monitored?

    Your Google searches and voice searches are all tracked and stored by Google so that the advertisements can be as tailored-fit and accurate as possible. While this practice is solely for commercial purposes for Google and various other social media sites, cybercriminals may do the same, resulting in severe harm and unfortunate circumstances.

    How do I stop Google from spying on me?

    You can do a few things to protect your privacy and data.

    One is to stop using Google altogether. However, this is quite difficult for many of us, and you probably wouldn’t be reading this article if you wanted to stop using Chrome.

    The second approach, which is preferable, is to use extensions that we mentioned to protect your data, prevent tracking, block ads, store data not on Google, and use private search engines.

    You can also limit what Google “sees” by doing the following:

    1. Head to history.google.com/history.
    2. Select Activity controls.
    3. Under Web & App activity, you should see a blue toggle. Switch it off, and this should stop Google from storing your data.

    What is a privacy blocker?

    Privacy blockers usually refer to comprehensive apps that protect user data and privacy in a variety of ways, such as ad-blocking, tracking blockers, and so on. They can vary with their primary function or specializations but generally aim to prevent third parties from accessing data, blocking tracking cookies and scripts, and stopping ads interfering with your internet experience.

    Is AdBlock illegal for YouTube?

    No. This idea is a rumor that misinterpreted a change in YouTube’s policy. While YouTube bypasses AdBlock, so you have to watch their ads if you do not subscribe to premium, it is not illegal to have AdBlock or download additional apps to bypass YouTube’s ads.

    After Action Report — Remember to stay safe!

    We provided you with 23 different extensions for you to use to protect your privacy when using Chrome. Some of these extensions serve the same function, or overlap considerably, so by no means do you need all of them. On the other hand, some serve specific functions that are best to use alongside others, whereas others offer more comprehensive protection. Adjust accordingly to your needs.

    However, we hope you have an idea of how to protect your privacy and can find a combination of extensions that work best for you. It is essential to be aware of the risks you face and take appropriate measures against them. It is not wise to not have any security measures in place. With constantly evolving risks when browsing, security extensions are essential.

    While many people do not trust Google when it comes to privacy, and Chrome by default doesn’t have the best privacy policy, you can significantly improve your privacy and security with the right extensions.

    What are your favorite privacy extensions for Chrome? Join the conversation & let us know in the comments. 💬

  • How to Use Cloudflare Firewall Rules to Protect Your Web Application

    How to Use Cloudflare Firewall Rules to Protect Your Web Application

    For more than ten years, the Cloudflare team has provided security services to website creators worldwide and is currently helping thousands of businesses maintain and secure their online resources.

    Since its creation, Cloudflare has released many strong firewall utilities, such as IP rules, CIDR rules, ASN rules, country rules, and HTTP user-agent blocking, to name a few, and Cloudflare Firewall Rules are a recent addition to these. These rules combine how firewall utilities are used, and provide users with more flexibility and control over how their firewall works.

    In this article, you’ll learn everything you need to know about firewalls, how to start implementing and editing Cloudflare Firewall Rules on your website, and why security is so important.

    What Are Cloudflare Firewall Rules?

    Cloudflare Firewall Rules are a flexible and intuitive framework website owners can use to filter HTTP requests – giving you complete control of which requests are able to reach your application.

    Firewall rules integrate well with existing Cloudflare tools, as they allow you to combine multiple techniques into a cohesive set of rules. For example, you can create one rule to block traffic from users matching a particular pattern, instead of having to use three or four different rules in as many places to accomplish the same result.

    They also give you the advantage of continuously checking the site traffic and responding accordingly to threats. You can define expressions that inform Cloudflare of what or what not to look at and what kind of action should be taken when those particular requirements are satisfied.

    Why Are Firewalls Necessary for Your Website?

    Cloudflare is mainly used to decrease web page load speed and protect your site from online threats. It also fights against spammers, malware injections, and DDoS attacks.

    Around 70% of WordPress installations are prone to hackers, making it more necessary to use Firewalls from Cloudflare to protect your site from unwanted threats. Some of the reasons why firewalls are required for your website are:

    • Cloudflare utilizes three different types of minification, JavaScript, CSS, and HTML, to reduce file size and increase load speeds by removing unwanted white spaces, newline delimiters, and unnecessary characters.
    • With the introduction of HTTP/3, Cloudflare supports multiple page elements parallelly over a single TCP connection along with push technology and header compression.
    • Cloudflare WAF protects your site from many vulnerabilities that popular CMS tools (WordPress, Joomla, etc.) are prone to. Cloudflare WAF has more than 145 rules to protect your site from all types of web application attacks.
    • Cloudflare has a rate-limiting function that helps mitigate DOS attacks, brute force login attempts, and other malicious intent against the application layer. The rate-limiting function allows you to configure thresholds, define responses, and gain insights on websites.

    As you can see, Cloudflare not only improves SEO by speeding up your website, it provides a whole host of advanced security features to protect your site from attacks.

    Cloudflare Firewall Rules – Matching & Actions

    Cloudflare Firewall Rules are made up of two main functionalities: Matching, which lets you define a filter to precisely match your traffic, and Actions, through which you determine the action Cloudflare will take after you set the matching filter.

    Matching

    Matching lets you filter out any incoming traffic to your website. For example, if you wanted to restrict certain countries, redirect visitors to a location-specific page, or filter out particular IP addresses, then you would use matching rules to do this.

    Among the most important features Cloudflare is introducing is the known bots (cf.client.bot) field. It provides you with a Cloudflare-approved list of good bots obtained through reverse DNS lookups. You will find a comprehensive list of bots approved by sites such as Google, Yahoo, Bing, Linkedin, Apple, and more.

    Note: Since the “allow listing” function has been removed, it’s recommended that you include cf.client.bot in an Allowed rule. This would prevent Cloudflare Firewall Rules from unintentionally blocking good crawlers.

    What’s more, Cloudflare Firewall Rules also come with an algorithm that gives a threat score to IPs by measuring their online reputation. The threat score ranges from 0 to 100 and is divided into the following categories:

    • High – for scores from 0 to 13;
    • Medium – for scores from 14 to 23;
    • Low – for scores from 24 to 48;
    • Essentially Off – for scores greater than 49.

    However, setting up matching rules alone won’t achieve much. This is where Actions come in.

    Actions

    With matching filters set up, you can instruct Cloudflare Firewall Rules to apply the standard Cloudflare actions (Block, JavaScript Challenge, and Challenge) as well as the new Allow action.

    • Block: used for blocking traffic from getting access to your web application.
    • JavaScript Challenge: used to block traffic from visitors who don’t have JavaScript support, which is usually bots.
    • Challenge (Captcha): used to set up a Captcha challenge to block potential bots.
    • Allow: used for allowing visitors access to your web application.

    Three Examples of Cloudflare Firewall Rules In Action

    In this section, you’ll find three ways to set up Cloudflare Firewall Rules by using the dashboard and why they might be helpful.

    We’ll be covering:

    • How to block particular countries from visiting your site
    • How to make your WordPress site more secure with captcha
    • How to prevent bad bot traffic from coming to your site

    Note: Another way to set up these rules is by using API and Terraform.

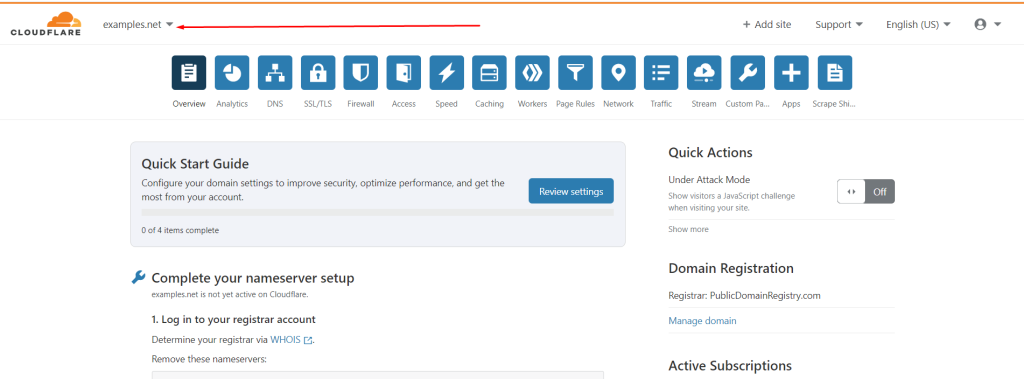
    To begin, log into your Cloudflare dashboard. From there, choose the domain name for which you want to set up Cloudflare Firewall Rules.

    cloudflare firewall rules in action step 1

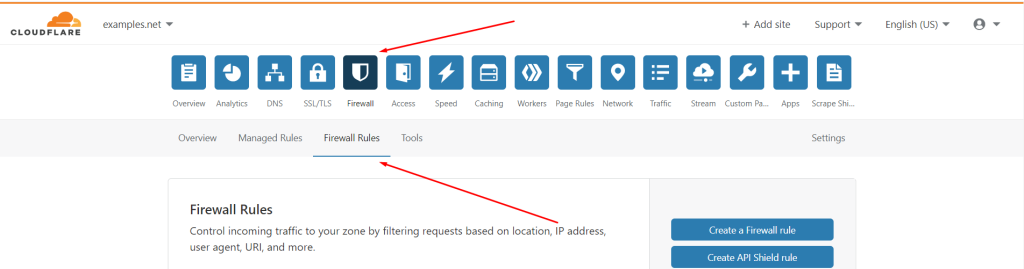
    Next, click on Firewall from the top sections and then on Firewall Rules.

    cloudflare firewall rules in action step 2

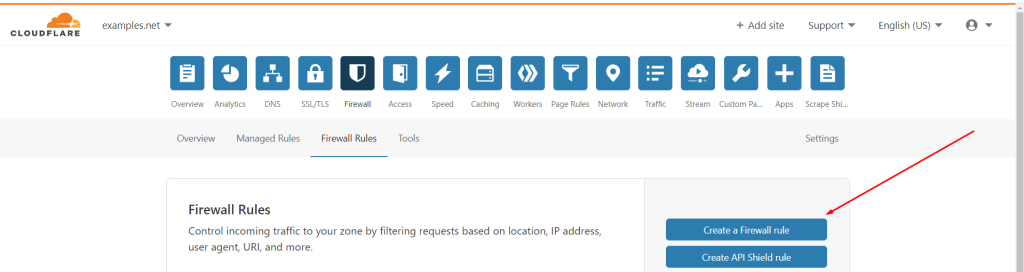
    This section lets you set up a new firewall rule, browse and filter existing rules, activate, deactivate, modify, and delete rules. To try out the below examples, click on Create a Firewall rule.

    cloudflare firewall rules in action step 3

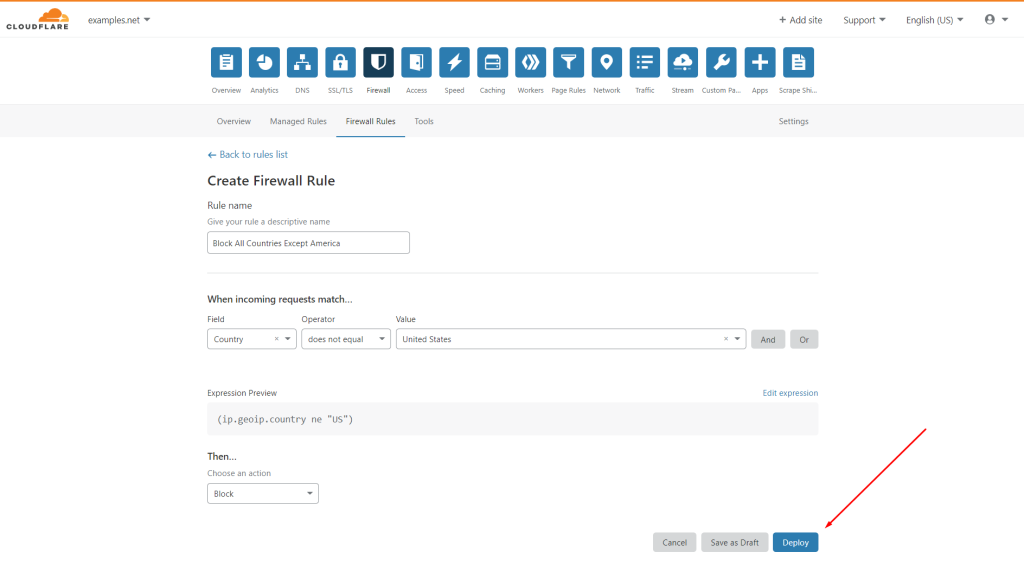
    Example 1 – Block All Countries Except the USA

    To block all countries except a single one (in our example, it will be the United States of America), follow the steps below:

    1. First, give your rule a name.
    2. From the Field drop-down, choose Country.
    3. Next, from the Operator drop-down, choose does not equal.
    4. In the Value drop-down, choose the United States.
    5. Finally, choose an action drop-down, select Block, and then click on the blue Deploy button in the lower right-hand corner.
    cloudflare firewall rules block all countries

    Conversely, if you would like to block a single country, pick equals from the Operator drop-down and then follow the procedure as mentioned above.

    Expression Editor:

    (ip.geoip.country ne “US”)

    Example 2 – WordPress Security

    WordPress security is an important thing that site owners don’t think much about. Every day, Google blacklists about 10,000+ websites for malware and around 50,000+ websites every week for phishing. It’s essential to keep your WordPress site secure from malware and threats and avoid getting your site blocked.

    Why Is WordPress Security Important?

    Whether your website is big or small, hackers don’t care about it. One way or the other, they can find different ways to use the information against you. They typically look for your personal and financial information and then try to cause damage to you and your company with the collected info.

    Mark Ronso, Marketing Manager at Top Writers Review, said, “a business’s reputation can be seriously damaged due to a hacked website. Hackers commonly install malicious software or viruses to extract the data in the background, which can result in a loss of trust in your business and customers turning to a competitor.”

    Hence, to keep your business safe and secure, you’ll need to protect your site through WordPress plugins or a Cloudflare firewall. So, which one is the best, and what’s the difference between the two?

    WordPress Plugins vs. Cloudflare Firewall – Which Is Better?

    A lot of people choose to install free plugins to handle the security of their site, instead of having to use a third-party tool like Cloudflare – usually, because it’s too complicated or to save money. In reality, Cloudflare doesn’t take long to install and provides you with much more functionality than any other WordPress plugin.
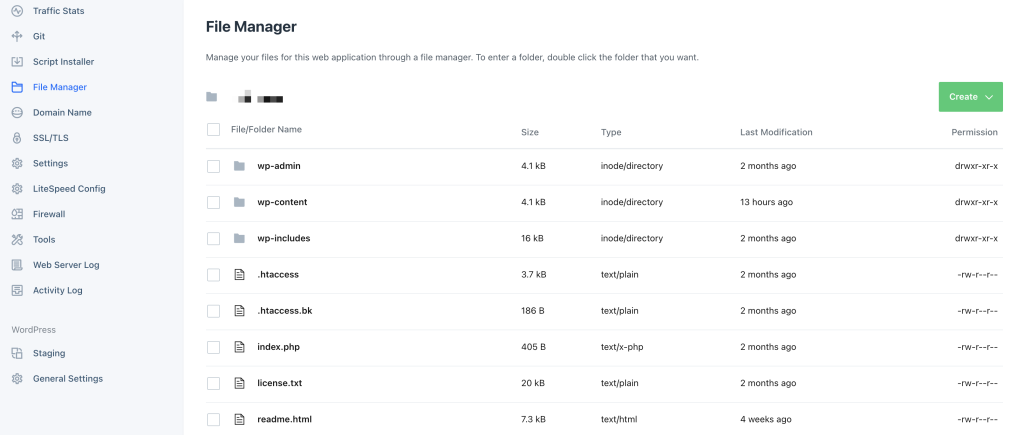
    Here are the key differences you should know about:

    Cloudflare firewall:

    • Cloudflare firewall seamlessly integrates with CDNs like WordPress
    • Cloudflare’s Automatic Platform Optimization (APO) caches your site and optimizes the assets, increasing your site’s speed.
    • Cloudflare firewall offers a free SSL certificate and DNS service, along with powerful DDoS protection.

    • Increases the speed and performance of your site by rewriting insecure URLs dynamically to their secure counterparts.
    • Free to get started

    WordPress Security Plugins:

    • Regularly scans your site for malware code and has a real-time firewall feature that protects your site from known and unknown threats.
    • Many free plugins don’t offer features like IP blocking, country blocking, and protection from brute-force logins.
    • Some WordPress plugins allow you to rename the login gateways to avoid potential attacks.
    • You never know what permissions you’re giving up to the plugin developer.

    All things considered, most WordPress plugins don’t increase your site’s speed or offer as many advanced features that Cloudflare firewall provides. Cloudflare firewall is recommended over free security plugins to protect your website from any attacks.

    How to Secure Your WordPress Site With Cloudflare Firewall

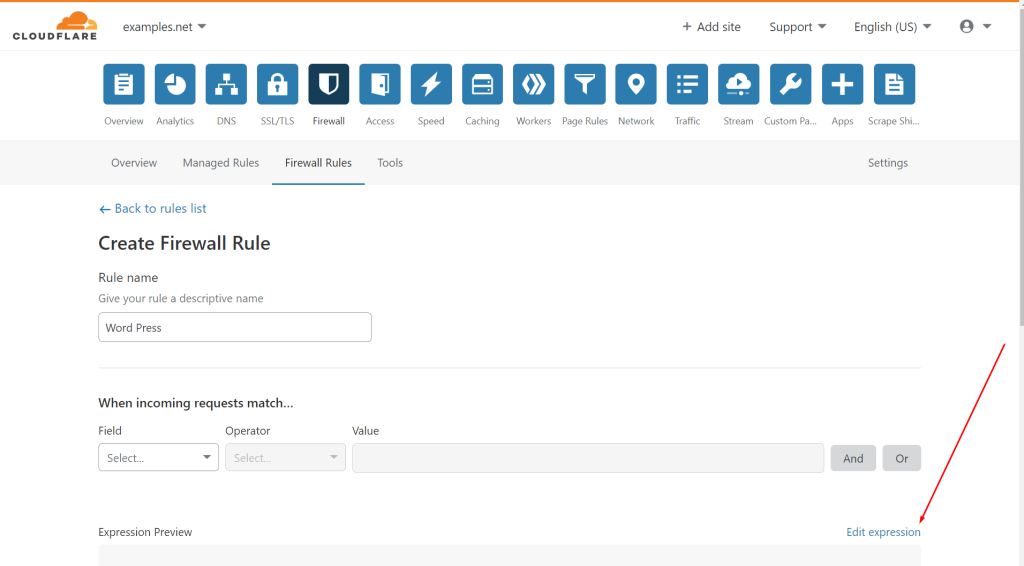
    Repeat the process mentioned above of creating a new firewall rule and naming it, but this time, click on the Edit expression.

    Secure Your WordPress Site With Cloudflare Firewall edit expression

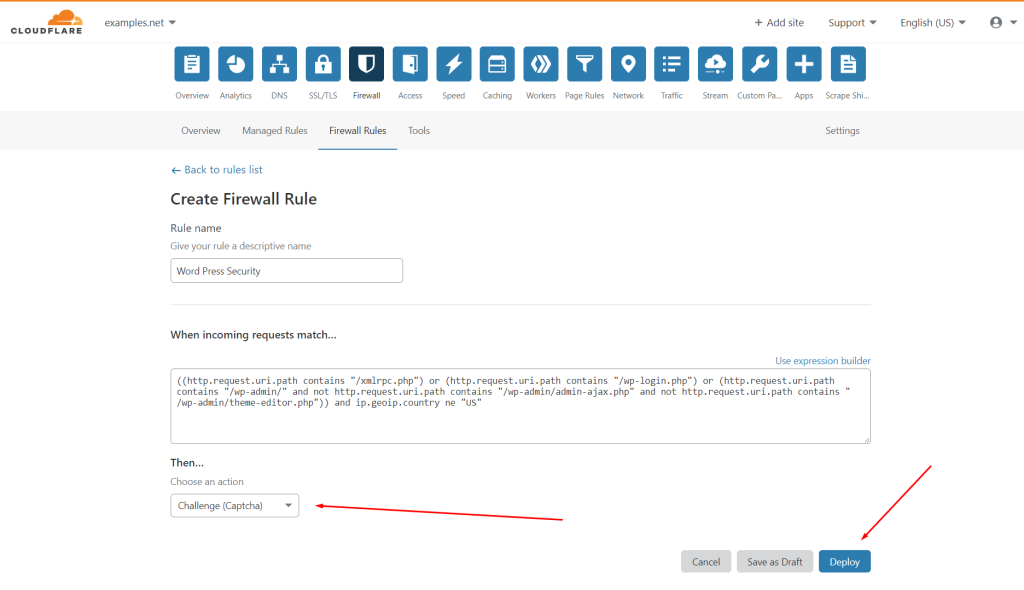
    By doing so, you are directly accessing the Expression Editor. In the field, paste the following:

    ((http.request.uri.path contains “/xmlrpc.php”) or (http.request.uri.path contains “/wp-login.php”) or (http.request.uri.path contains “/wp-admin/” and not http.request.uri.path contains “/wp-admin/admin-ajax.php” and not http.request.uri.path contains ” /wp-admin/theme-editor.php”)) and ip.geoip.country ne “US”

    After that, pick Challenge (Captcha) from the Choose an action drop-down, and then click Deploy.

    Secure Your WordPress Site With Cloudflare Firewall challange captcha and deploy

    Now you will have set up a Captcha challenge for all visitors outside the US who attempt to reach WordPress xmlrpc.php, wp-login.php, and /wp-admin (except admin-ajax.php and theme-editor.php), in order to block potential hackers from accessing your WordPress website.

    If your login or admin URLs have been changed, feel free to edit the original expression to match.

    Example 3 – Block Bad Bot Traffic

    Bad bots are assigned to do a number of fraudulent practices and malicious activities like ad scams, malware attacks, and data theft. Around 40% of internet traffic consists of bad bot traffic, and, during the pandemic, there was a 788% increase in bad bot traffic to retail websites globally between September and October 2020, resulting in a loss of $82 million during peak season.

    Blocking out bad traffic helps avoid attackers trying to launch a DDoS attack on your site. Most DDoS attacks slow down your site by directing a large amount of traffic towards your site, overloading the server, and making it go offline. 

    While the list of user agents to block may vary based on your specific needs, here are some common ones to consider:

    • Yandex: A Russian search engine bot.
    • muckrack: Associated with media monitoring services.
    • Qwantify: A bot from the Qwant search engine.
    • Sogou: A Chinese search engine bot.
    • BUbiNG: A web crawler.
    • CFNetwork: Associated with Apple’s networking framework. While legitimate Apple users utilize CFNetwork, some malicious bots or scrapers may also impersonate it.
    • Scrapy: A Python-based web crawling framework.
    • SemrushBot: Associated with the Semrush SEO tool.
    • AhrefsBot: A bot from the Ahrefs SEO tool.
    • Baiduspider: A bot from the Baidu search engine.
    • python-requests: A Python library for making HTTP requests.
    • Various “crawl” and “spider” user agents: These may include legitimate search engine bots, but it’s essential to filter out excessive or suspicious crawling behavior.

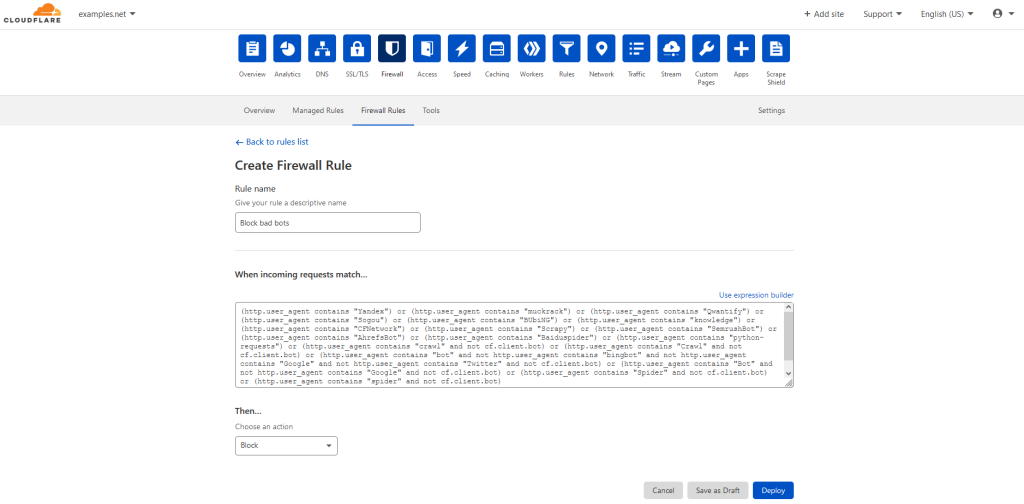
    The procedure here is similar to the previous example. The only difference is that you should choose Block from the Choose an action drop-down and paste the following in Expression Editor:

    (http.user_agent contains "Yandex") or (http.user_agent contains "muckrack") or (http.user_agent contains "Qwantify") or (http.user_agent contains "Sogou") or (http.user_agent contains "BUbiNG") or (http.user_agent contains "CFNetwork") or (http.user_agent contains "Scrapy") or (http.user_agent contains "SemrushBot") or (http.user_agent contains "AhrefsBot") or (http.user_agent contains "Baiduspider") or (http.user_agent contains "python-requests") or (http.user_agent contains "crawl" and not cf.client.bot) or (http.user_agent contains "Crawl" and not cf.client.bot) or (http.user_agent contains "bot" and not http.user_agent contains "bingbot" and not http.user_agent contains "Google" and not http.user_agent contains "Twitter" and not cf.client.bot) or (http.user_agent contains "Bot" and not http.user_agent contains "Google" and not cf.client.bot) or (http.user_agent contains "Spider" and not cf.client.bot) or (http.user_agent contains "spider" and not cf.client.bot)

    This rule will block bot traffic with user agents containing the strings “crawl,” “bot,” “spider,” and some other custom user agents.

    cloudflare firewall rules example 3 block bad bot traffic

    Remember that blocking user agents should be done thoughtfully. Regularly review your website logs and adjust your blocking rules as needed to strike a balance between security, performance, and user experience.

    How To Test That Your Firewall Rules Work

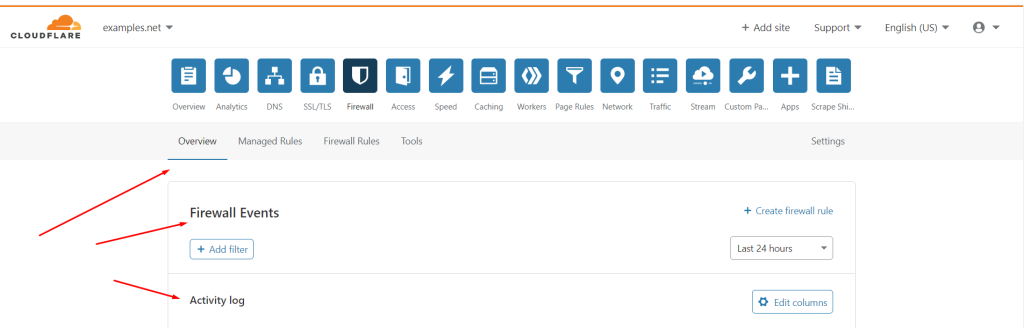
    Once you’re all set up, you should check to see if your Cloudflare Firewall Rules work. To do this, you can access the Firewall Event Activity Log by going back to the Overview section of the firewall. There, you can see a list of firewall events and details related to them.

    test that your firewall works

    Note, checking your Firewall Rules can take some time to do if you don’t get much traffic. If this is the case, wait a couple of days and monitor Google Analytics to make sure there are no abnormalities before returning to Cloudflare and checking the activity log.

    The most important thing to look out for are challenge and block events.

    When challenge and block events appear on the list, take your time to go through them and see if any good bots were blocked when they shouldn’t have been, or if any known bad bots made it through. You need to make sure no positive traffic gets denied access to your site because of an error in setting up firewall rules.

    Summary – Use Cloudflare Firewall Rules To Your Advantage

    RunCloud lets you easily manage your server and web application, and seamlessly integrates with Cloudflare. We hope you’ve found this guide useful in setting up & effectively implementing Cloudflare firewall rules to improve the security and performance of your web application.

    Get started with RunCloud today.

    What firewall rules are you currently deploying via Cloudflare? Let us know & join the conversation in the comments below! 💬

  • FTP vs. SFTP – What’s The Difference & Why It Matters

    FTP vs. SFTP – What’s The Difference & Why It Matters

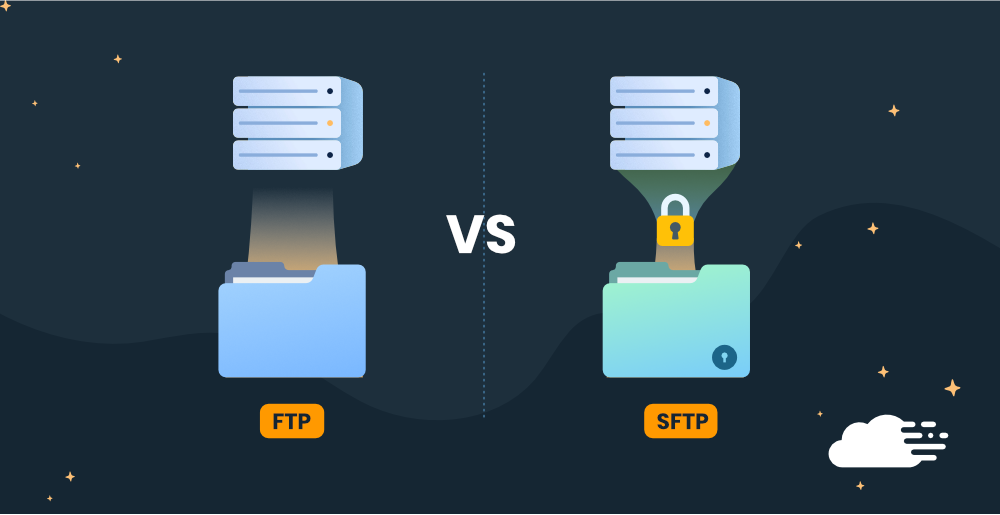
    Trying to understand the difference between FTP and SFTP? Using FTP (or SFTP) is the easiest way to connect directly to your server – but what are the differences between the two protocols & which should you use?

    In this article, we’ll compare FTP vs. SFTP as commonly used data transfer protocols, go through their advantages and disadvantages, and discuss the importance of choosing the best protocol for protecting your personal and professional information.

    In short, SFTP is better – it’s a lot more secure than FTP which is why we highly recommend using SFTP whenever possible. But, if you’re interested in learning more about the differences – keep reading and we’ll compare FTP vs. SFTP, discuss their advantages & disadvantages, and more…

    FTP vs. SFTP – The Differences Explained

    To understand how FTP and SFTP are different, we must first explain what each of these file transfer protocols are and how they work.

    What is FTP?

    FTP, or file transfer protocol, is a network protocol that has been around since the 70s – it predates the modern internet. Made as a secure file transfer protocol that prevents the most common security breaches, FTP transfers data through two channels: the command channel and the data channel. Unlike other protocols, FTP’s channels aren’t encrypted, which is a disadvantage for security.

    How does FTP work?

    FTP uses two separate channels; the command channel and the data channel.

    The command channel is responsible for accepting client connections and executing other simple commands. Generally, it uses server port 21. Clients can connect to this port to initiate a conversation for file transfer and authenticate themselves by sending a username and password. The command channel will remain open until the client disconnects or the server ends the connection due to inactivity or other reasons.

    After the authentication is done, the client and server can negotiate a new common server port for the data channel over which the file will be transferred. Once the file transfer is complete, the data channel is shut down, then the control channel takes over and reports whether the file transfer was successful or not.

    Advantages of FTP

    • There are many desktop tools like FileZilla, Cyberduck, WinSCP that make FTP easy to use.
    • FTP lets you transfer multiple files at a time. It also resumes file transfer if the connection is lost, and enables you to add items to an upload and download queue and schedule transfers.
    • You can create scripts to automate file transfers.
    • Many FTP clients provide the ability to synchronise files so all your files will be up to date.

    Disadvantages of FTP

    • FTP is not safe to use as usernames, passwords, and files, are sent in plain text, so hackers can easily access your information.
    • FTP requires a block of ports to remain open for the data channel to be created. Due to security reasons, companies are limiting the number of server ports that are publicly accessible, which can bring about some complications.
    • Servers can be tricked to send data to random ports on an incorrect computer.

    All these security reasons make FTP a non-starter for many companies.

    When should you use FTP?

    To quickly share and transfer files where security measures aren’t needed, FTP can be a good option. But if security is a major concern, then you should avoid using FTP.

    ethernet cables connected to a server

    What is SFTP and How Does It Work?

    SFTP stands for Secure File Transfer Protocol and is one of the most common alternatives to FTP. Unlike other alternatives like FTPS, which adds an extra layer of safety to the FTP protocol, SFTP is a different protocol altogether.

    One important feature of SFTP is that it uses the Secure Shell cryptographic network protocol, more commonly known as SSH. The SSH protocol works by establishing a secure channel over an unsecured network.

    SSH encrypts data during its transfer, hiding it from potentially malicious third parties. It’s essentially a more secure upgrade to the basic client-server protocol that FTP uses.

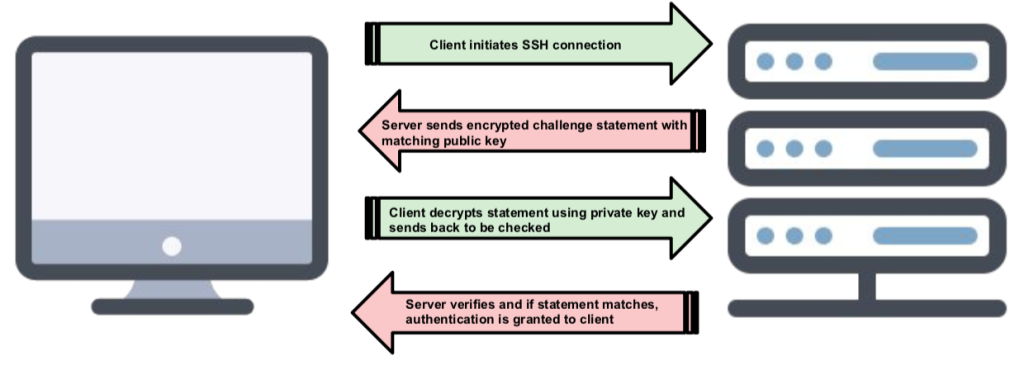
    Along with usernames and passwords, SSH also provides public-key authentication, which uses computer-generated cryptographically-secure keys that act as a replacement for a user’s password. The keys can be much longer than a regular password, making it impossible for hackers to replicate during brute-force attacks.

    When the recipient connects to the sender’s SFTP server, their client software gives the sender’s public SSH key to the server as part of the authentication process. If the SFTP determines that the public key matches the sender’s private key, as well as the username and password, it will consider the authentication successful.

    Advantages of SFTP

    • SFTP is a very secure method for file transfer.
    • Similar to FTP/FTPS, you can use usernames and passwords to authenticate. With SFTP, the credentials are encrypted, making it more secure.
    • You can combine key-based authentication with usernames and passwords, making SFTP more secure.
    • SFTP only uses one server connection to transfer data, and no other server ports need to be open, which increases security and firewall-friendliness.
    • You can obtain much more metadata about the files being transferred, such as date, time and size, which is helpful for logging and analysis purposes.

    Disadvantages of SFTP

    • It isn’t easy to manage SSH keys.
    • The private keys need to be stored on the device from which you want to transfer files, which needs to be protected against theft or loss.
    • SSH keys take work for administrators to set up for employees.
    • Some training is also required on how SSH keys work.

    When should you use SFTP?

    SFTP should be used when you want to send or receive sensitive data. It doesn’t matter how big your company is, no one is immune to a data breach. With cyber-hacking on the rise, it’s important that you’re doing everything you can to prevent a catastrophe in case something ever happens to you.

    Many companies use cloud-based SFTP file sharing solutions. There are two methods through which you can share file:

    Public Cloud – Public cloud-based solutions are hosted by large companies, like AWS or Azure, and server space can be purchased to facilitate your company’s file storage and sharing needs.

    Private Cloud – A private cloud can be built and manage the network in the house. Private cloud solutions can also be hosted and managed by outside vendors. The vendor creates a virtual private data centre (VPDC) for each client, which is not on a shared network environment like public cloud options.

    So, if your sensitive data does get stolen, having SFTP in place will stop anybody from using it maliciously.

    Why Does This Difference Matter?

    FTP and SFTP are two entirely different protocols for sharing files, and the difference can have a real impact on users. To see why this matters, we’ll go through the main aspects of these differences that are important for individual users and businesses alike.

    Channels

    FTP uses two different channels for data and control, both of which are unencrypted, whereas data transferred through SFTP is divided into small packets and uses only one channel of communication for data and control.

    The difference in channel usage between these two network protocols is essential for security. FTP causes the client firewall to open multiple ports which can leave the firewall vulnerable to breaches as there are many points of entry.

    SFTP provides a more secure option when it comes to channel usage, as it only requires port 22 to be open to transfer data.

    Ease of Use And SSH Keys

    FTP is a simpler method of transferring data, which is why it is still being used very often, even though it’s less secure. SFTP’s SSH keys are more difficult to manage and validate, which is why users who don’t have a particular need for them tend to opt for FTP more often.

    Vulnerabilities

    SFTP is safer as compared to FTP in terms of potential vulnerabilities. Any vulnerability has the potential to get exploited and turn into a data breach. During the file transfer process, FTP has a lot of exposure to inherent vulnerabilities.

    The first vulnerability is that FTP is prone to human error. Accidentally sending a file to the wrong address or sending the wrong file can lead to some severe problems for your company. You can take potential steps to promote a culture of security awareness within your business to reduce the potential for human error. You can easily intercept data with FTP. With the help of the right tools and knowledge, it becomes easy to take advantage of these vulnerabilities.

    SFTP uses host keys to verify a recipient’s identity before a transfer occurs, which FTP doesn’t do.

    SFTP is more preferred in terms of security data transfers. The encryption measures are up to compliance standards, and you’re avoiding the inherent vulnerabilities of FTP transfers. Plus, it makes you feel confident when you find a secure SFTP cloud file sharing solution, ensuring that you are taking appropriate steps to protect your data.

    Summary –  Should You Use FTP or SFTP?

    While FTP is still commonly used because it’s easier to work with, it’s significantly inferior to SFTP when it comes to security. The risk of your personal information or business data falling into the wrong hands is very real. If you’re transferring sensitive files, choose SFTP. Its encryption will get rid of most vulnerabilities that the original FTP comes with.

    If the data you’re transferring is neither sensitive nor very important to you, and you want to transfer it as fast as possible, go for FTP.

    And, fortunately, if you already manage your servers with RunCloud – you can also take advantage of our built-in file manager which is perfect for most day-to-day file management needs so you wouldn’t need to worry about setting up and configuring an FTP client for simple changes.

    Let us know & join the conversation in the comments (or by Tweeting @RunCloud_io) what your preferred server file management process currently looks like! 💬

  • Google FLoC – What You Need to Know & How To Opt Out

    Google FLoC – What You Need to Know & How To Opt Out

    There has been a lot of talk lately surrounding Google’s Federated Learning of Cohorts (FLoC) initiative, which is quickly becoming a hot-button topic both in the tech community and major mainstream publications.

    In this blog post, we’ll cover what Google FLoC is, why it matters, and how we’ve made it easy to disable it in RunCloud.

    What Is Google FLoC & Why It Matters

    FLoC is a proposed feature by Google that lets browsers collect, profile, and store usage patterns based on a user’s browsing habits over time.

    This new type of tracking, which is done directly within the browser, would then be used by Google and its advertising partners for widespread tracking and personalization of ads.

    FLoC is part of a larger response by Google to the slow decay (and increased blocking) of third-party cookies on the web. Why? Because as users become more privacy-aware, the ease of tracking and identifying them across multiple websites for the purposes of advertising and surveillance has become much more difficult in recent years.

    With the proposed FLoC feature enabled, the browser will create “cohorts” that group users with similar browsing habits together. This cohort ID will grow in size and relevance as it continually gathers information about the sites that users visit, the ads that they view, their behavioral patterns, how often they browse, etc.

    Each individual cohort is then combined with other cohort IDs when sent to Google, who will then display ads to individual users based on the relevancy of the data that has been collected within their shared cohort.

    Why FLoC Is Considered Premature

    In the acronym for FLoC, the word cohort was carefully chosen. A cohort is defined as a “group of individuals having a statistics factor in common”.

    Google’s promise is that FLoC cohort IDs will be anonymous data points in a larger network and that each cohort’s data will be sent to advertisers without them knowing the identity of individual users.

    The problem with FLoC however is two-fold, both in principle and in practice.

    Principally, the user’s browser is supposed to be sacred. It’s simply a tool to interact with the larger web. FLoC aims to turn the browser into a real-time tracking mechanism that collects the most sensitive information about an individual user’s browsing habits without the user being able to circumvent or opt out of this data collection.

    In practical terms, it’s not difficult for advertisers to understand and identify patterns once the FLoC data set becomes large enough. For example, cohorts comprised of users that share the same location data, shop in the same neighborhood, are active in the same time zone, etc. can be easily grouped together by demographic.

    To make matters worse,, if FLoC data is used in combination with other tracking mechanisms such as social media analytics, existing third-party cookies, or data sets purchased from data brokers, it becomes a trivial task to fingerprint users based on age, class, ethnicity, political parties, etc.

    Why FLoC Sets A Dangerous Precedent

    Google announced that in Chrome version 89 they will forcibly enable and trial their FLoC data-collection initiative without the consent of users or webmasters.

    The Electronic Frontier Foundation was one of the first privacy advocates to bring to light the dangers of this announcement. They correctly pointed out that instead of reducing the overreach of personalized tracking in the ad-tech industry, Google is now seeking to leverage it’s Chrome browser to do the data mining itself.

    Google Chrome’s market share is currently pegged at almost 70%. That represents more than two-thirds of the entire user base of the web. Once the FLoC rollout has exited it’s current beta stage and is mainlined into the Chrome codebase, it immediately begins profiling the majority of Internet users and sends that information straight to Google.

    Other browser vendors such as Mozilla Firefox, Brave, Microsoft Edge, Vivaldi, and Opera have recently weighed in on FLoC, some of them making broader statements as they wait to see how the situation unfolds, while others have already chosen not to support any such data aggregation efforts whatsoever.

    The most notable response is that of Brave, with an entire blog post that opens with this clear statement:

    Brave opposes FLoC, along with any other feature designed to share information about you and your interests without your fully informed consent. The privacy-affecting aspects of FLoC have never been enabled in Brave releases […] Brave is also disabling FLoC on our websites, to protect Chrome users learning about Brave.

    How to Opt Out of FLoC Data Collection

    For end-users, the easiest choice when it comes to opting out of FLoC’s data collection is simply not to use Chrome. However, a Chrome Extension was released by DuckDuckGo that disables FLoC tracking within the browser. If this extension will be disabled by Google or simply ignored by the browser itself is yet to be seen.

    The larger point of contention however lies with webmasters and web server administrators. FLoC requires that a website provide an explicit HTTP response header if it wants to opt out of the program. This suggests that Google is counting on webmasters to not be bothered with this task.

    The Easiest Way To Opt Out of FLoC (with RunCloud)

    Manually inserting the necessary FLoC header in your web server configuration, and then reproducing this for multiple applications is quite time-consuming. Fortunately, RunCloud makes this easier than ever – we’ve integrated the necessary pre-defined HTTP headers for all users so they can disable FLoC in less than a minute.

    Once logged in, navigate to your server, and under Web Applications > NGINX Config you’ll be able to select and add the required config rule. After adding the required headers, the next step is to clear your NGINX FastCGI cache (RunCache) and then test your website or web application to ensure the headers are being delivered.

    We’re currently implementing a similar feature to support websites and applications using the OpenLiteSpeed web server and will be rolling it out in the coming days.

    If you choose not to opt out of FLoC as a website owner, you are helping Google to add more profiling data on your visitors by leveraging your website as a data point that adds to the user’s fingerprint on the web. Opting out of Google’s new FLoC initiative & protect your users in a matter of less than a minute with the help of RunCloud – here’s how:

    So if you’re a RunCloud user and currently using a server that runs on NGINX, opting out couldn’t be easier – in just a few clicks.

    Alternatively, in order to opt your website out of the FLoC network, webmasters need to add a custom HTTP response header to their website to be served with each request. This comes in the form of a Permissions-Policy header, with the following syntax:

    Permissions-Policy: interest-cohort=()

    For the popular NGINX web server, this can be achieved with the add_header directive, which needs to be added to each website’s configuration file. The following code snippet shows the syntax that’s required:

    server {
        location / {
          add_header Permissions-Policy interest-cohort=();
        ...
        }
    }

    After adding the snippet to your configuration file, you’ll need to reload NGINX in order for the changes to take effect.

    NGINX has built-in syntax checking that should be used in combination with a reload or restart, the following command will do both:

    nginx -t && service nginx reload

    Once enabled in NGINX, the Permissions-Policy header will be respected by Chrome and disables FLoC data collection for users that visit your website — in other words, your website will not be used as a profiling data point for your users’ browsing habits.

    Opting Out of Google FLoC on OpenLiteSpeed (RunCLoud)

    If you’re using the similarly popular OpenLiteSpeed web server, you can add the necessary FLoC header by editing your vHost configuration file (vhost.conf) which is located in the /usr/local/lsws/conf/MY_VHOST/ directory.

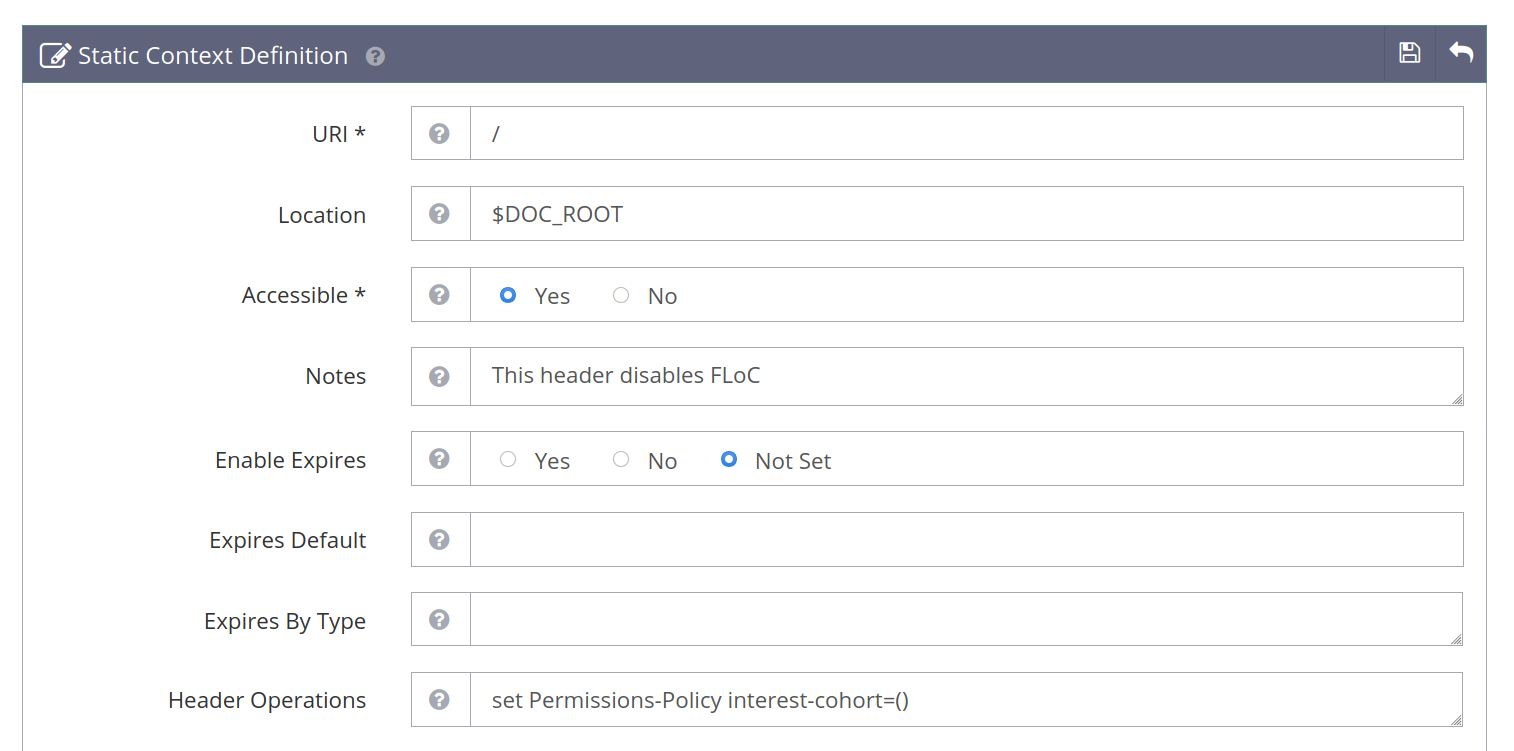
    OpenLiteSpeed uses what are called Contexts for adding custom headers and other functionality to a web application. In the example below, we’ll be adding the following code to the root context in an example WordPress configuration located at /usr/local/lsws/conf/vhosts/wordpress/vhconf.conf:

    context / {
      location                $DOC_ROOT
      allowBrowse             1
      note                    This header disables FLoC
      extraHeaders            set Permissions-Policy interest-cohort=()
    }

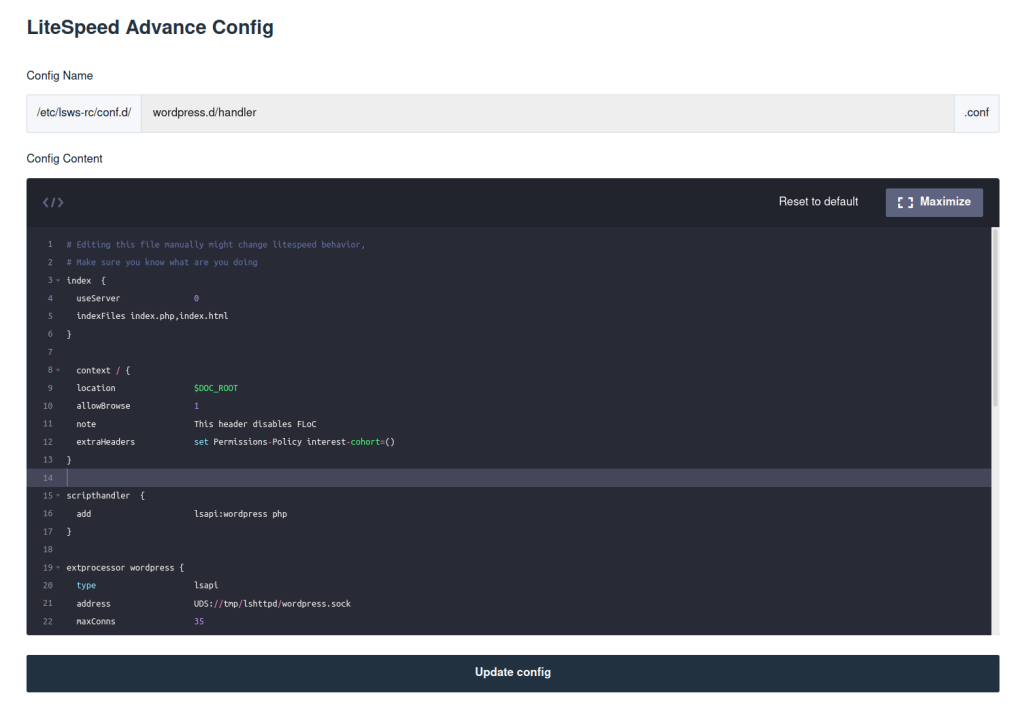
    If you use RunCloud to manage your OpenLiteSpeed servers, adding the above snippet to your configuration file is as easy as navigating to your server and under LiteSpeed Server Config:

    The Context snippet can be placed after your Index directive. And, fortunately – with RunCloud, there’s no need to manually restart OpenLiteSpeed. After you’ve inserted the snippet and click Update Config, we automatically enable the configuration changes under the hood.

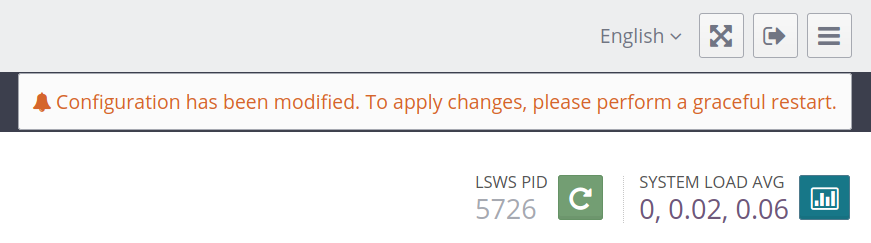
    Otherwise, after saving the changes to your configuration file – you’ll need to do a graceful restart of OpenLiteSpeed in order for the changes to take effect. The following command will achieve that:

    systemctl restart lsws

    Opting Out of Google FLoC on OpenLiteSpeed (Non-RunCloud Method)

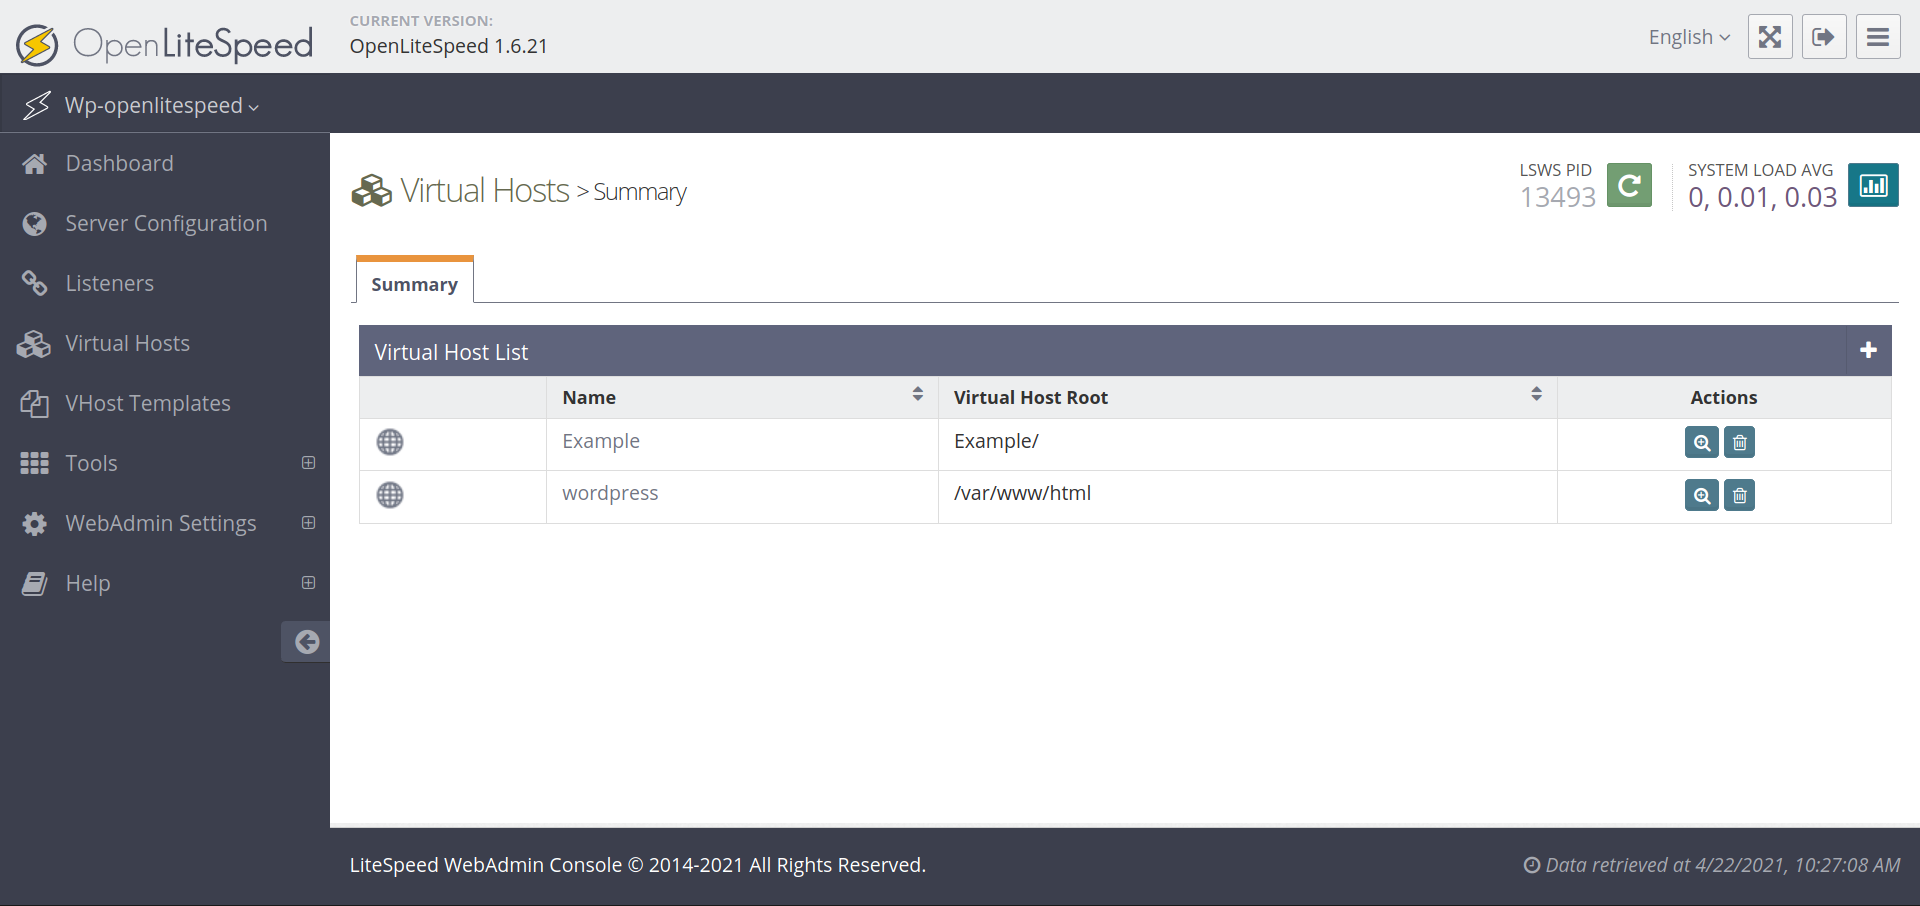
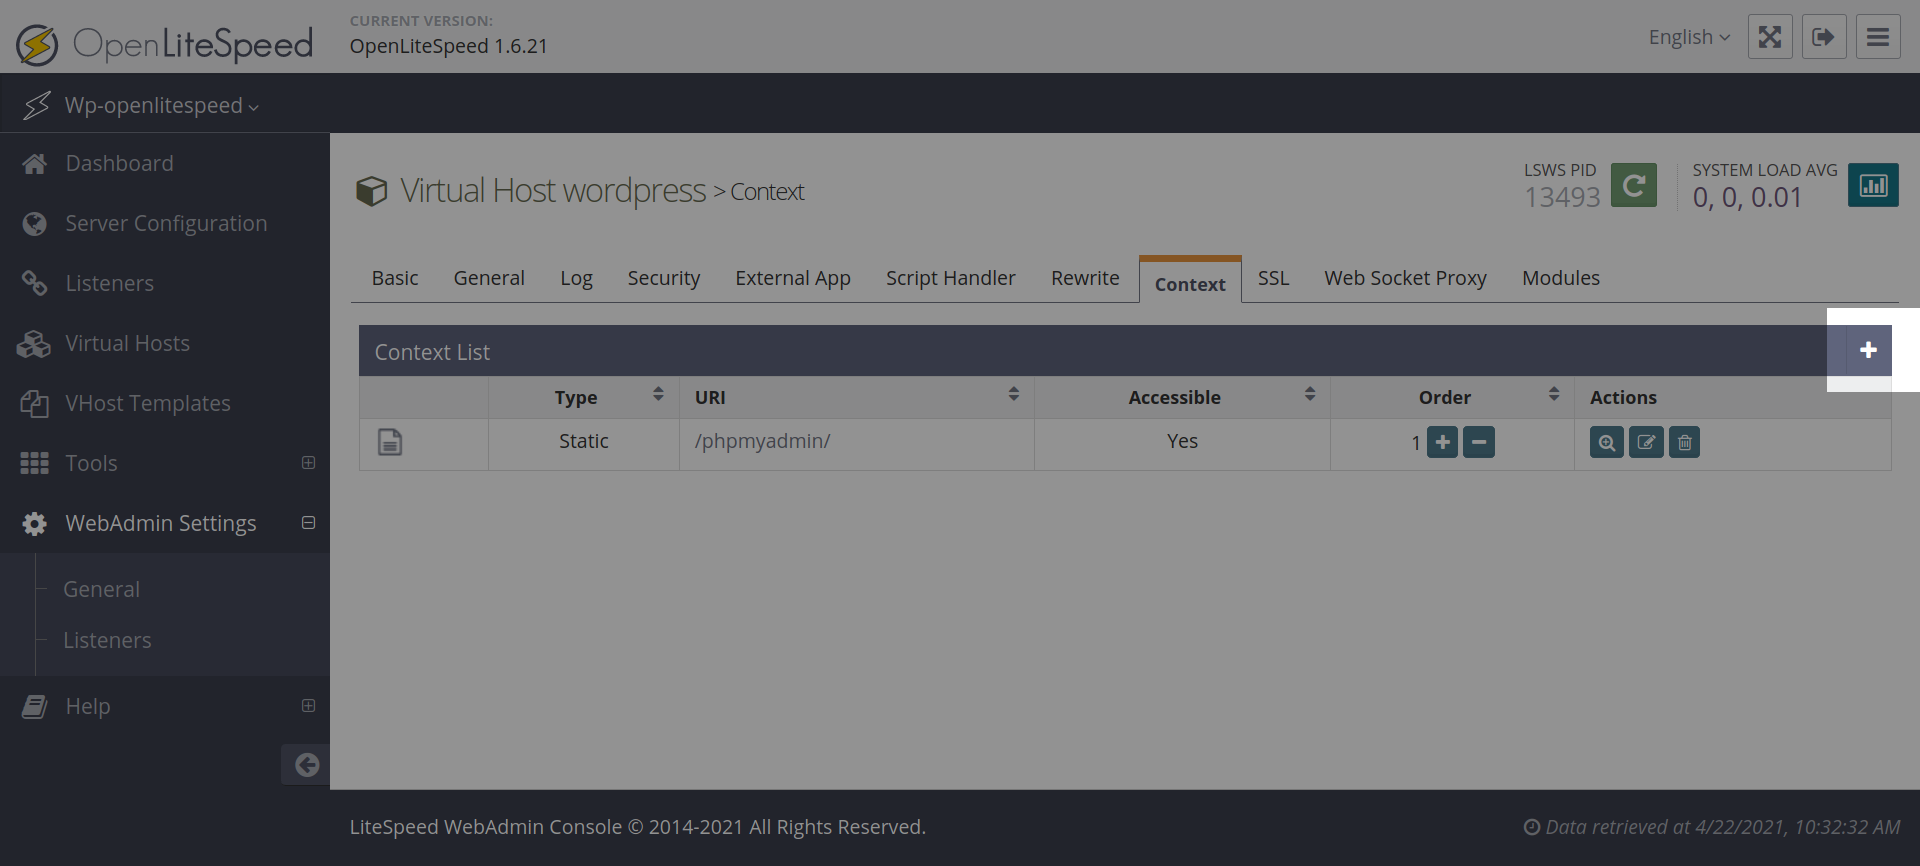
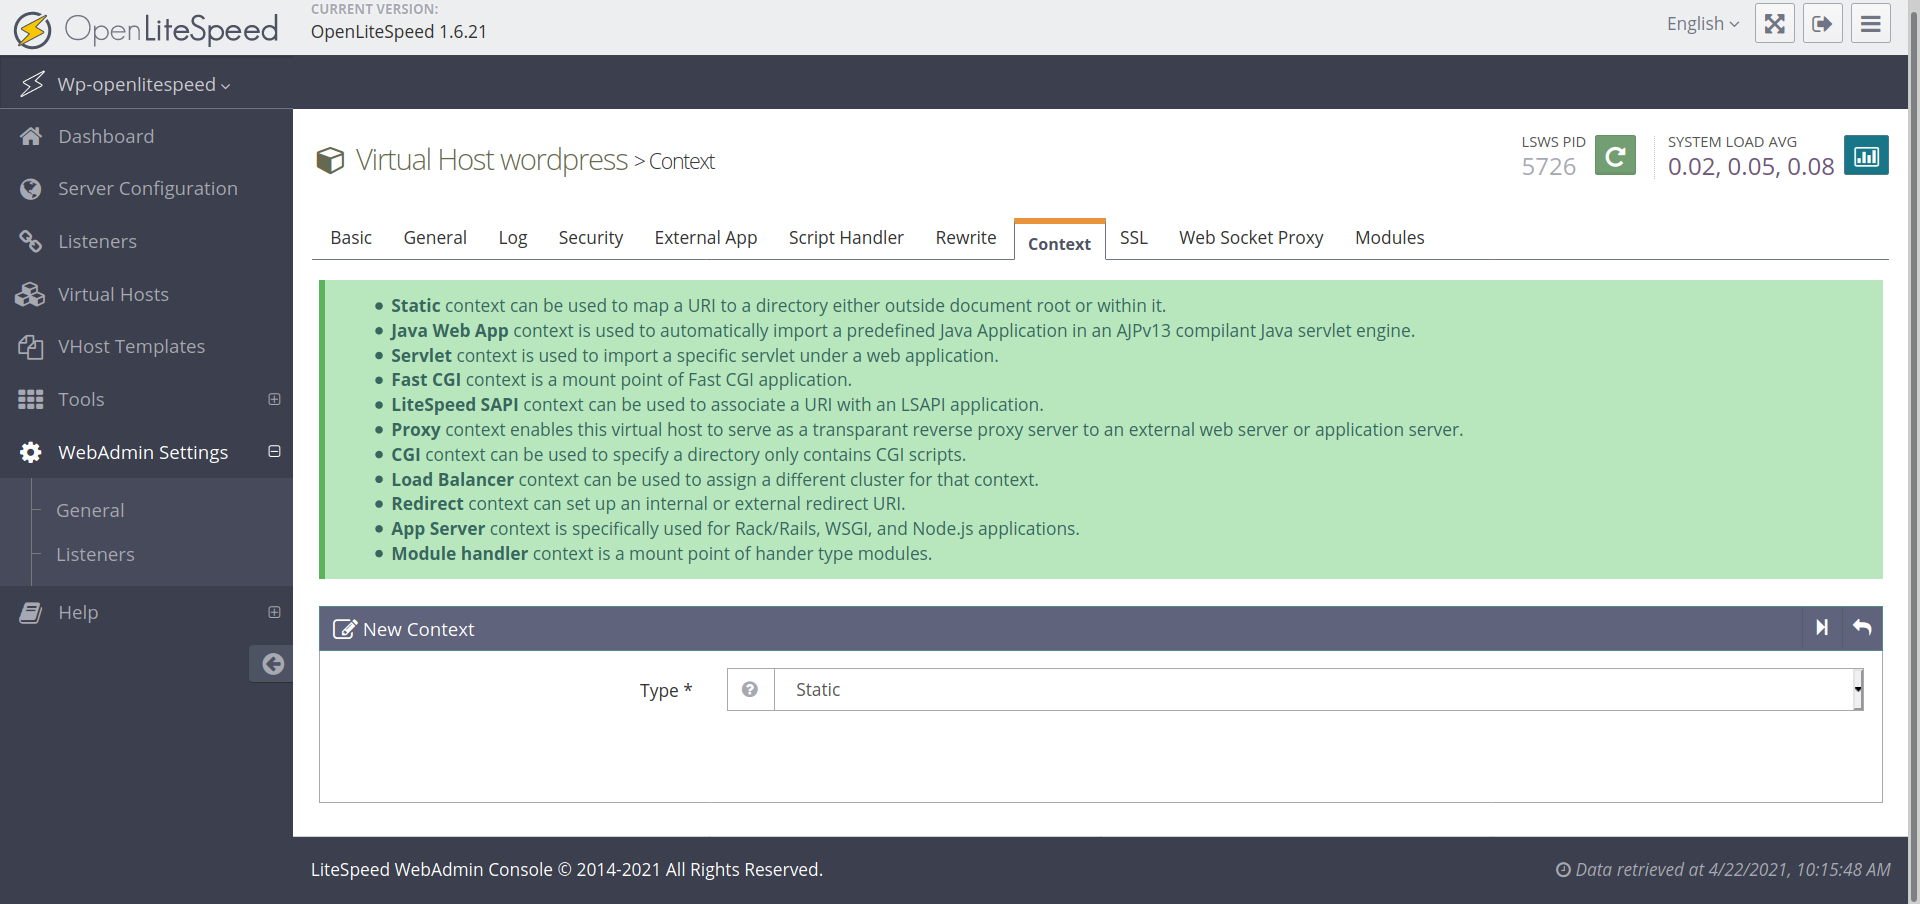
    If you prefer to use the graphical OpenLiteSpeed WebAdmin Console instead, you can achieve the same functionality with the following steps outlined in the screenshots below.

    The OpenLiteSpeed WebAdmin runs on port 7080, which would be closed by default in your firewall.

    To enable access to that port via UFW, use the following command:

    ufw allow 7080

    UFW stands for Uncomplicated Firewall and is an extremely popular and easy-to-use wrapper around IPTables firewall rules. Most Linux distributions come with it pre-installed, but you can manually install it for your distribution.

    For Debian/Ubuntu run the following command:

    sudo apt install ufw -y

    For servers using CentOS, run the following command:

    yum install ufw -y

    UFW will not be immediately active by default. But before activating it, it’s important to set the necessary default rules:

    ufw default deny incoming
    
    ufw default allow outgoing

    And then use UFW’s syntax to add common ports that you’ll need on your server:

    ufw allow ssh
    
    ufw allow http
    
    ufw allow https

    Those rules take care of SSH (else you’ll be locked out when you try to reconnect), as well as HTTP and HTTPS web traffic.

    You can now enable UFW by running:

    ufw enable

    You can check the status of your firewall by running ufw status

    Finally, add the custom rule for OpenLiteSpeed WebAdminwhich will be active immediately:

    ufw allow 7080

    Next, login to your WebAdmin Console which is located at http://YOUR_SERVER_IP:7080 and navigate to the list of Virtual Hosts:

    Next, select the Virtual Host that you wish to edit. In this case we’ll be editing “wordpress”. Select the + icon to add a new Context:

    Choose Static as the context type and press the Next icon:

    There are a number of fields available when adding Contexts from within the WebAdmin console. For the purposes of disabling FLoC, only the following fields need to be populated:

    The URI scheme and whether it’s Accessible or not are mandatory fields.

    The $DOC_ROOT is not strictly needed, but it’s better to utilize this variable as OpenLiteSpeed uses it internally to match your website’s document root.

    The Notes field is optional as well but is useful for displaying what the rule does in the WebAdmin list of Contexts.

    Finally, the Header Operations is where we set the FLoC header.

    As with the CLI, you’ll need to do a graceful restart of OpenLiteSpeed for these changes to take effect. You can do so by clicking on the green Restart button located next to the process ID (PID) of OpenLiteSpeed:

    When you’re finished in the WebAdmin Console, remember to restrict access to this port by denying connections in your firewall using UFW:

    ufw deny 7080

    How To Disable/Opt Out of Google FLoC (WordPress Plugin Method)

    If you use WordPress & wish to go the less technical route º there’s an open-source plugin that will add the necessary Permissions-Policy headers to your website.

    In your dashboard, head to Plugins > Add New and search for Disable FLoC by Roy Tanck. This plugin author has developed numerous plugins and is also a core contributor to WordPress.

    More importantly, this plugin will not overwrite or otherwise interfere with any existing Permissions-Policy or other security headers you’ve configured…

    Verifying FLoC protections in RunCloud

    After enabling your custom RunCloud headers to disable FLoC, you can verify the existence of the headers in a number of ways.

    The easiest method is to test your website online using securityheaders.com, which should display the Permissions-Policy interest-cohort=() string in the list of headers.

    If you’re comfortable on the command line, you can use the curl utility to inspect your website’s headers, with the following command:

    curl -I https://mywebsite.com

    The output should contain the string permissions-policy: interest-cohort=()

    Lastly, you can use your browser’s DevTools to inspect headers. Visit your website and open your browser’s DevTools with the shortcut CTRL + Shift + C. Navigate to the Network tab and you’ll be prompted to Reload your page to inspect the requests and responses.

    Once you’ve reloaded your page the first item in the list is the HTML of the page itself (with a GET/200 request/response code). Click on that entry, and on the right-side panel under the Headers tab you’ll be able to view all the response headers; of which permissions-policy: interest-cohort=() should be there.

    Summary – Say No To FLoC, Protect Your Users

    Following the announcement of Google FLoC, our team was excited to be able to provide our users an effortless opt-out process because we believe privacy should always be an option, control should belong to the website owner – if not the users themselves…

    Want to share your thoughts on Google’s FLoC intiative or have any other questions about opting out? Let us know & join the conversation by leaving a comment below. 💬

  • How To Use ModSecurity and OWASP CRS For Web App Firewall (WAF) To Secure Your Website

    How To Use ModSecurity and OWASP CRS For Web App Firewall (WAF) To Secure Your Website

    With security as a primary focus this year, we are happy to bring ModSecurity and OWASP CRS for your Web Application Firewall (WAF) in RunCloud.

    This feature helps protect your website from many types of attacks against your web application.

    You can easily enable or disable ModSecurity WAF to each web application in your RunCloud servers and adjust Paranoia Level and Anomaly Threshold parameters.

    Our ModSecurity WAF comes with OWASP ModSecurity Core Rule Set (CRS) and allows you to add Rule Modification easily from the RunCloud dashboard.

    What is ModSecurity

    ModSecurity is an open source, cross platform web application firewall (WAF) engine for Apache, IIS and Nginx that is developed by Trustwave’s SpiderLabs.

    WAF can be enabled in your website to provide an external security layer that increases security, detects, and prevents attacks before they reach web applications, because over 70% of all attacks are now carried out over the web application level.

    It can help detect and prevent many attacks against your web application by checking all HTTP(s) requests you are willing to allow or block (e.g., request methods, request headers, content types, etc.) against its set of rules.

    If the check fails, the visitor will not see the content of your website, predefined actions are performed, usually the visitor will get 403 Forbidden screen.

    What is OWASP CRS

    ModSecurity only is not enough to protect your website. You need to configure an additional rule set to make web protection work.

    The OWASP ModSecurity Core Rule Set (CRS) is a set of generic attack detection rules for use with ModSecurity or compatible web application firewalls.

    The CRS aims to protect web applications from a wide range of attacks, with a minimum of false alerts, including:

    • SQL Injection (SQLi)
    • Cross Site Scripting (XSS)
    • Local File Inclusion (LFI)
    • Remote File Inclusion (RFI)
    • PHP Code Injection
    • Java Code Injection
    • HTTPoxy
    • Shellshock
    • Unix/Windows Shell Injection
    • Session Fixation
    • Scripting/Scanner/Bot Detection
    • Metadata/Error Leakages

    How To Install ModSecurity and OWASP CRS

    If you are very familiar with Linux and want to do it by yourself, you can check Netnea Apache / Modsecurity Tutorial to install ModSecurity & OWASP in your Apache server. Please do so at your own risk, because there will be no support when you have issues on this manual setup.

    In RunCloud, we want to make it very easy for everyone, from beginner to expert, to enable or disable ModSecurity and OWASP CRS in each of your web applications on your servers easily, instead of having to log into the linux terminal to do it.

    Please login to your RunCloud Dashboard, choose your server, go to Web Applications menu and click one of your web applications, and you will see the Firewall menu.

    Click “Enable” to to enable Web Application Firewall (WAF) to your current web application, and click “Save Changes”.

    That’s all. It is very easy!

    You can customize WAF Settings by configuring paranoia level, anomaly threshold, and common rule exclusion.

    Paranoia Level

    Using paranoia level, you can choose the desired level of rule check to protect your web application.

    Higher paranoia levels will strengthen web security, but will also increase the possibility of blocking some legitimate traffic due to false alarms (also named false positives or FPs).

    From OWASP CRS website, there is a detailed explanation about the difference of paranoia levels.

    A paranoia level of 1 (PL1) is default. At this level, most core rules are enabled. PL1 is advised for beginners, installations covering many different sites and applications, and for setups with standard security requirements.

    Paranoia level 2 (PL2) includes many extra rules, for instance, enabling many regexp-based SQL and XSS injection protections, and adding extra keywords checked for code injections.

    PL2 is advised for moderate to experienced users who desire more complete coverage, and for all installations with elevated security requirements.

    Paranoia level 3 (PL3) enables more rules and keyword lists that cover less common attacks. PL3 also tweaks limits on all special characters used, which provides high coverage against unknown attack types, obfuscated attacks, and attempted WAF bypasses.

    PL3 is aimed at users who are experienced at the handling of FPs and at installations with high security requirements.

    Paranoia level 4 (PL4) further restricts special characters.

    PL4 is advised for experienced users protecting installations with very high security requirements.

    Recommended level for most use cases is 1 (default) or 2.

    Anomaly Threshold

    ModSecurity assigns a score for each security risk found in a request (Critical: 5, Error: 4, Warning: 3, Notice: 2).

    Anomaly threshold determines the accumulated score for a request to be blocked.

    Recommended level for production website is 5-10.

    Common Rule Exclusion

    OWASP CRS provides common rule exclusions for some popular Content Management System (CMS), including WordPress, Drupal, NextCloud, DocuWiki, and Xenforo.

    If your current web application uses any of those CMS, please tick in the checkbox to reduce false positives and it will be automatically applied to your firewall.

    Bonus: Custom Firewall Rule Modification

    We also bring firewall rule modification to allow you to have more control on allow or block some traffic, or disable any ModSecurity rule ID.

    Note: This special custom firewall rule modification feature is available only for Business plan users.

    Using this feature, you can control incoming traffic by filtering requests based on Cookie, Country, Hostname, IP Address, URI and more.

    First example, you can use custom firewall rules to block traffic from any country.

    Second example, you can use a custom firewall rule to disable a rule when you see any legitimate traffic get blocked in your server (false positive). You can get CRS Rule ID from Nginx Error Log or ModSec Audit Log.

    You can create multiple custom firewall rule and enable/disable it by toggling ON/OFF button, without having to delete this rule.

    How To Test ModSecurity In Your Website?

    After enabling Web Application Firewall (WAF) in your website, you probably want to know if this firewall works for your website or not.

    You can try to visit this link on your website.

    http://yourawesomedomain/?abc=../../

    Visit this page twice, and you will see 403 Forbidden screen page.

    It means that this visit is blocked by ModSecurity successfully.

    If you use a higher paranoia level and get a lot of 403 Forbidden screen, please change Paranoia Level to 1.

    Nginx Error Log and ModSec Audit Log

    ModSecurity will log any blocked traffic in your website.

    You can check it on Nginx Error Log and ModSec Audit Log in your server.

    In RunCloud, you do not need to login to your server via terminal to check these logs.

    You can simply go to the Web Server Log menu under your Web Application in RunCloud dashboard.

    All blocked traffics will get listed on Nginx Error Log.

    You can check ModSec Audit Log to see the details

    Developer Tips: Custom Nginx Config

    If you are an experienced developer and want to see the custom Nginx config that is applied on your web application when enabling Web Application Firewall, you can go to Nginx Config menu under your web application in RunCloud.

    RunCloud adds two custom Nginx config for Web Application Firewall.

    You can click it to see the configs, but you cannot edit or delete it. It will be automatically deleted when you disable WAF for this web application.

    Summary

    At RunCloud, we are all about making your dev life easier, delivering a fast service, and ensuring your server is managed properly.

    Whether beginner or expert developer, we’ve made enabling or disabling Web Application Firewall (WAF) using ModSecurity and OWASP CRS easy for you.

    ModSecurity and OWASP CRS helps protect your website from many types of attacks against your web application.

    This feature is available to all paid plans (Basic, Pro, Business) for a limited time, and only available for Business plan after.

    This feature has been a requested feature that we knew would be useful to you. Never hesitate to suggest new features that you want to see, and we will make it happen.

  • Why Authentication Using SSH Public Key is Better than Using Password and How Do They Work?

    Why Authentication Using SSH Public Key is Better than Using Password and How Do They Work?

    What is SSH?

    SSH, or Secure Shell, is a network protocol that allows users to remotely manage their servers or computers over the Internet, in which the communication between the two machines are strongly encrypted and protected from being eavesdropped. The user runs a client on his or her machine and the network connection carries the user’s keystrokes and commands from the user’s local machine to the remote server. The network connection then carries back the server’s responses to the user.

    Compared to the older method of remotely managing the computers using a non-protected network protocol like telnet and rlogin, SSH presents a secure alternative over an unsecured network connection (like Internet). Nowadays SSH comes shipped in mostly (if not all) servers.

    A user can connect to the remote server by keying in the username and password through SSH by running the puTTY client, Terminal, Bash or any other clients. However, there is another option that is safer and less cumbersome then keying in your password every time you want to connect to your remote server, which is to authenticate using SSH public key on the said SSH server.

    What is SSH public key authentication and how do they work?

    An SSH server can authenticate a user in several ways, where the most commonly used method would be through passwords and public key authentication.

    Normally, how a user would securely connect to their server would be to open up  puTTY/Terminal/Bash and initiate an SSH connection either by logging in using a GUI or typing in a terminal ssh username@IPAddress and then proceed to key in the password when prompted.

    But instead of keying in your password in the puTTY/Terminal client when you want to login to your remote server, another way to safely authenticate would be to authenticate using an SSH public key, which is authenticating without keying in the password.

    SSH key authentication works in pairs: private key and public key. Unlike symmetric encryption (which uses the same key to encrypt and decrypt), SSH key authentication employs asymmetric encryption algorithm, where the encryption and decryption use different keys.

    A user (or an authorised person) needs to generate both private key and a public key. The private key must be kept safely and confidential, to the extent of not sharing it with anybody else. If the private key is compromised, it is almost as good as gone, as the malicious user may gain access to the remote server using the private key, moreover if the private key is unprotected by any passphrase.

    The public key which was generated together with the private key can be shared with any server. The public key is then uploaded to the remote server that the user wants to log in using the SSH protocol. Hence, a relation may also be such that; one private key to one public key placed in many servers.

    Another person having access to a public key does not mean that he/she can decrypt the messages. Only a user with the private key can decrypt the messages. The public key is only there as a means to encrypt the messages where the messages can only be decrypted by the person with the private key. It is safe to say that private key cannot be derived from the public key. Hence, the public key does not have the ability to decrypt the messages that it sends out, or even decrypt the messages that the private key has encrypted.

    ssh authentication protocol

    SSH Public Key Authentication simplified

    So in the case where a user is authenticating using the SSH keys (instead of manually keying in the password), the server will then send an encrypted challenge statement back to the user and the user will then decrypt the message with the private key and then send it back to the remote server to be checked. The server will then verify that that the message is correctly decrypted and if it matches the challenge statement earlier, then the client is authenticated.

    Basically, the remote SSH server is testing the client whether the client has the right private key that is associated with the public key on that remote server. If the client can prove that it has the right private key, then the client is authenticated.

    Why authenticate using SSH key instead of password?

    Undeniably, the main advantage of authentication using SSH public key over authentication using password would be security. No matter how long or complex a password is, it can never equate with the cryptographic strength that SSH public key offers.

    A password is susceptible to brute-force attack by a malicious user or worse, a password can even be guessed by someone who knows about the user’s personal information that can be used to retrieve the password.

    Additionally, using SSH public key also would eliminate the need for users having to remember complicated passwords or writing them down.

    Public key authentication also allows for a non-interactive login should a user need to access a remote server multiple times without needing to key in the password multiple times every time he or she logs in (or when session is disconnected due to idle time) as well as to automate processes that need to be authenticated which come from a remote machine.

    Best Practices

    However, all the above advantages are meaningless if the private key is not kept in a safe place. To increase the security, instead of storing the private key on a hard drive, it is recommended that that it is stored on a cryptographic device like a smart card or a usb token, so that it is not accessible by malicious users should an unauthorized user gains access to the computer. Additionally, the private key can be encrypted with a passphrase. But this is only applicable for interactive logins (for non-automated tasks) as it may require a person to key in the passphrase in order to use the private key.

    Since creating a pair of SSH keys requires minimal effort, often times, keys are generated or re-generated (and in many cases, self-provisioned) unnecessarily just to solve minor issues. If left unchecked, this can lead to unmanaged chaos where there are many public keys without knowing who they are attached to, or whether the person is still authorized to access the servers. As such, policies and rules must to be implemented to regulate the usage of private and public keys in any organisation, like keeping an inventory,

    RunCloud servers support the use of SSH public key authentication and it can be done easily and quickly.

    Wrapping Up

    RunCloud is a powerful and easy-to-use platform that helps you manage your websites on any cloud server. With RunCloud, you don’t need to be a Linux expert to set up, secure, and optimize your web applications. You can do everything from a simple and intuitive dashboard, saving you time and hassle.

    RunCloud supports various web servers, PHP versions, databases, and frameworks. You can also monitor your server performance, back up your data, and automate your tasks with RunCloud. Whether you are a developer, a freelancer, or a business owner, RunCloud can help you run your websites faster and smoother.

    What are you waiting for? Join RunCloud today and enjoy the best web hosting solution for your websites. It’s free for 7 days, no strings attached!

  • Cloudflare DNS for RunCloud (Security & Performance)

    Cloudflare DNS for RunCloud (Security & Performance)

    Cloudflare DNS is one of best DNS providers in the world. It offers free accounts so everyone can not only manage their domain names, but also benefit from the additional security and performance enabled by their integrated features. In this article, we will share some tips to enable you to use Cloudflare with RunCloud and improve your server and web application’s security and performance.

    What is Domain Name System (DNS)?

    Domain Name Servers (DNS) are the Internet’s equivalent of a phone book. They maintain a directory of domain names and translate them to IP addresses. They are important so that you do not need to memorize a domain’s IP address, a string of numbers, for every website you wish to visit. Essentially, “runcloud.io” is far easier to remember than 45.56.94.252.

    Most domain name registrars include DNS management tools with their domain registration service. In addition, there are also free DNS services available if your domain registrar does not include DNS hosting, or if you prefer to manage your DNS elsewhere.

    Cloudflare, the Best DNS for Everyone

    Cloudflare is a U.S. company that provides DNS services, a Content Delivery Network (CDN), DDoS protection, and other Internet security services.

    Cloudflare DNS is one of the top 3 domain name services in the world and the fastest performance DNS provider.

    Cloudflare, DNS updates only take a few seconds, so no more waiting for DNS propagation that could take up to 48 hours with other services.

    Best of all, Cloudflare is available for absolutely everyone. You can sign up for a free Cloudflare account, and benefit from extra add security and performance features with no extra cost.

    Using Cloudflare on RunCloud

    RunCloud offers an easy way to manage your server and web application. You still need a DNS service to resolve your domain name to your RunCloud managed server’s IP address and load your web application.

    The following are some tips for RunCloud customers who are using Cloudflare’s DNS service for their servers:

    1. Restore visitor’s real IP addresses

    Cloudflare acts as a proxy to your RunCloud server, thus all visitors will appear from Cloudflare IP addresses. This is a hindrance to visitor tracking or identifying attackers.

    In order to restore a visitor’s IP address, we need to retrieve the visitor’s originating IP address in the HTTP header from all Cloudflare’s IP addresses.

    Login to your RunCloud server by SSH as root. Then, edit /etc/nginx-rc/main-extra.conf :
    # nano /etc/nginx-rc/main-extra.conf

    Add the following lines in the file:

    set_real_ip_from 103.21.244.0/22;
    set_real_ip_from 103.22.200.0/22;
    set_real_ip_from 103.31.4.0/22;
    set_real_ip_from 104.16.0.0/12;
    set_real_ip_from 108.162.192.0/18;
    set_real_ip_from 131.0.72.0/22;
    set_real_ip_from 141.101.64.0/18;
    set_real_ip_from 162.158.0.0/15;
    set_real_ip_from 172.64.0.0/13;
    set_real_ip_from 173.245.48.0/20;
    set_real_ip_from 188.114.96.0/20;
    set_real_ip_from 190.93.240.0/20;
    set_real_ip_from 197.234.240.0/22;
    set_real_ip_from 198.41.128.0/17;
    set_real_ip_from 199.27.128.0/21;
    set_real_ip_from 2400:cb00::/32;
    set_real_ip_from 2606:4700::/32;
    set_real_ip_from 2803:f800::/32;
    set_real_ip_from 2405:b500::/32;
    set_real_ip_from 2405:8100::/32;
    set_real_ip_from 2c0f:f248::/32;
    set_real_ip_from 2a06:98c0::/29;
    real_ip_header X-Forwarded-For;
    

    Make sure you check your NGINX configuration files syntax for errors after editing them:
    # nginx-rc -t

    Then, reload the NGINX service:
    # systemctl reload nginx-rc

    Now your visitors will be shown with their real IP addresses.

    2. Stop Cloudflare’s HTTPS redirect loop

    If you are combining Cloudflare Flexible SSL option and SSL (Let’s Encrypt or Custom SSL) on your Web Application, it can cause a redirect loops, causing the browser to display “The page isn’t redirecting properly’ or “ERR_TOO_MANY_REDIRECTS”.

    The solution would be using Cloudflare Full SSL or Full (Strict) SSL. Or, use only the Cloudflare SSL and remove the RunCloud generated SSL certificate from your Web Application’s Management panel in the RunCloud dashboard.

    3. Protect Your Web Application using CloudFlare Page Rules

    Cloudflare offers Page Rules to control your Cloudflare settings by URL. It is useful to add custom settings to certain web paths, for example you may wish to set higher security on your application login page. The following are the Page Rules to protect a WordPress application’s login page and admin panel:

    Protect WordPress login page
    cloudflare dns for runcloud
    URL: domain.tld/wp-login.php*

    Page Rule Settings:

    • Browser Integrity Check: On
    • Security Level: I’m Under Attack
    • Cache Level: Bypass

    Protect WordPress admin panel
    cloudflare dns for runcloud
    URL: domain.tld/wp-admin*

    Page Rule Settings:

    • Browser Integrity Check: On
    • Security Level: I’m Under Attack
    • Cache Level: Bypass

    Cloudflare “I’m Under Attack” mode adds an additional set of protections to a site to stop potentially malicious HTTP traffic from being passed to your server. When activated, your visitor will receive an interstitial page for about 5 seconds while Cloudflare check to make sure it is a legitimate human visitor.

    4. Improve Web Performance

    By default, Cloudflare only caches specific static file types and not HTML and other resources. You can use the Cache Everything mode in a Page Rule to achieve maximum performance by caching other non-static file extensions (full page cache).
    cloudflare dns for runcloud
    URL: domain.tld/*
    Page Rule Settings:

    • Cache Level: Cache Everything
    • Edge Cache TTL: 2 hours

    “Cache Everything” will cache whole web page contents on Cloudflare. The “Edge Cache TTL” controls the refetch time, setting how often Cloudflare checks the origin server for updated content. 2 hours means Cloudflare will check for updates for Cache Everything’s cache every 2 hours.

    Now you know some Cloudflare tips to improve your RunCloud server’s security and performance. Are you a Cloudflare user? What is your best tip? Please share in the comment.

    RunCloud provides the perfect platform for hosting your web applications in the cloud, and works seamlessly with other cloud leaders such as Cloudflare. Sign up today for a free trial and you can explore and enjoy all the benefits RunCloud has to offer.