Category: Web Design and Development

  • The Best Project Management Software (Expert Picks)

    The Best Project Management Software (Expert Picks)

    Managing projects across multiple tools and messages can quickly become chaotic. The right project management software keeps everything in one place – tasks, communication, files, and timelines.

    In this guide, we’ll show you the best tools for 2025, including both free and paid options. You’ll learn what features matter most and which platforms suit different types of teams – from freelancers to large agencies.

    You will be able to:

    • Identify the key features that matter most to your team, such as task management, resource allocation, workflow automation, and time tracking.
    • Recognize which software is best for your specific needs, whether you’re an Agile development team, a client-focused agency, a large enterprise, or a startup looking for the best free project management software.

    Let’s get started!

    What is Project Management Software?

    Project management software is a specialized application designed to help teams plan, execute, and monitor a project’s entire lifecycle from initiation to completion. It provides a centralized platform for organizing tasks, assigning responsibilities, setting deadlines, and tracking the progress of different goals.

    These tools ensure that all team members and stakeholders have access to the same up-to-date information, which significantly reduces miscommunication and streamlines workflows.

    Modern project management software includes simple task tracking as well as a suite of tools for advanced collaboration and resource management. These include features for communication, file sharing, budget tracking, and generating detailed performance reports.

    Suggested read: How To Migrate Away from cPanel Hosting (The Escape Guide)

    Why Businesses Need Project Management Software in 2026

    You would think that your team doesn’t need project management software, but in 2026, it will be more necessary than ever. This is mainly due to the complexities of the modern workplace and a steep rise in the number of remote work options.

    These tools bridge geographical gaps by creating a unified digital environment where collaboration can happen seamlessly. This ensures that all team members remain aligned on priorities and progress regardless of their physical location.

    Key Features to Look For in Project Management Tools

    When comparing tools, focus on features that boost both individual and team productivity:

    • Task creation, assignment, and deadlines
    • Multiple views like Kanban, Gantt, and calendar
    • Built-in collaboration through comments, mentions, and file sharing

    Suggested read: How to Get Your Website Indexed by Search Engines in 2025: A Complete Guide

    Top 10 Project Management Software for 2025

    Sl No.

    Project Management Software

    Pricing

    Best For

    1.AsanaStarts with a free plan; paid plans from £9.49/user/month.Team Collaboration
    2.Monday.comStarts with a free plan; paid plans from $9/seat/month.Customizable Workflows
    3.ClickUpStarts with a free plan; paid plans from $7/user/month.All-in-One Workspace
    4.JiraStarts with a free plan; paid plans from $8.60/user/month.Agile Teams & Developers
    5.PlutioStarts at $19/month.Client Management & Invoicing
    6.Adobe WorkfrontCustom pricing by quote.Enterprise Project Management
    7.TrelloStarts with a free plan; paid plans from $5/user/month.Simple Kanban Boards
    8.NotionStarts with a free plan; paid plans from $10/member/month.Knowledge + Project Management Hybrid
    9.BasecampStarts at $15/user/month.Small Teams & Startups
    10.Zoho ProjectsStarts with a free plan; paid plans from $5/user/month.Budget-Friendly Project Management

    Asana – Best for Team Collaboration

    Asana is a leading project management tool often praised for its exceptional design, which makes it easy to collaborate. Its intuitive interface ensures that all team members, regardless of their technical skill, can easily track their responsibilities and understand how their individual tasks contribute to the larger project goals.

    The platform is built around the principle of transparency and provides multiple ways to visualize project progress and maintain open lines of communication. This helps to keep entire teams aligned and focused on their objectives.

    Key Features

    Asana is equipped with an extensive set of features designed to enhance teamwork and streamline project execution. Users can manage workflows through various perspectives, including simple to-do Lists, visual Kanban Boards, timeline-based Gantt charts, and shared Calendars to keep track of important deadlines.

    It also includes a powerful Workflow Builder to automate routine processes, which saves time and reduces manual effort. If you want a higher-level view, then you can use the Project Dashboards and Universal Reporting, which provide real-time insights into progress.

    Pricing Plans

    Asana offers multiple pricing plans to accommodate different team sizes and needs.

    • Personal: This free plan is ideal for individuals or small teams of up to 10 members. It includes unlimited tasks, projects, and messages, along with list, board, and calendar views.
    • Starter: At £9.49 per user per month (billed annually), the Starter plan is designed for growing teams. It includes everything in Personal, plus features like a timeline view, project dashboards, a workflow builder, and automations to help manage and track projects more effectively.
    • Advanced: For larger companies that need to manage work across multiple departments, the Advanced plan is available for £20.99 per user per month (billed annually). This tier adds advanced capabilities such as Portfolios for managing groups of projects, Workload for resource management, native time tracking, and integrations with tools like Salesforce and Tableau.
    • Enterprise: This custom-priced plan is tailored for large organizations that require advanced security, control, and support. It includes all Advanced features plus enhanced administrative controls like SAML, guest invite permissions, custom branding, and dedicated 24/7 support.

    monday.com – Best for Customizable Workflows

    monday.com has earned its reputation as a top-tier project management tool due to its exceptional flexibility and highly customizable workflows. It is almost a Work Operating System (Work OS) that allows teams to build and adapt their own applications and work management tools to fit their exact processes.

    Its visually appealing and color-coded interface makes it easy to see the status of various tasks at a glance, which helps teams manage everything from simple to-do lists to complex, multi-stage projects with clarity and precision.

    Key Features

    This platform is built around highly configurable boards, items, and columns, which makes it very flexible. monday.com offers a wide array of column types (over 8 in the free plan alone) and more than 200 templates to get teams started quickly. It also includes multiple project views, such as Timeline, Gantt, and Calendar views, which enable teams to visualize their work in a way that makes the most sense for them.

    monday.com is one of the few tools that offer first-party MCP support, which enables secure integration of AI tools like Claude and Cursor directly into your workflows. This allows AI to perform tasks across projects, sales, and marketing by connecting through the monday.com marketplace, receiving commands, and instantly updating data or creating tasks.

    Suggested read: Best Invoice Management Software for 2025: Features, Pricing & Expert Picks

    Pricing Plans

    monday.com provides a range of plans suitable for different organizational sizes and complexities.

    • Free: This forever-free plan is designed for individuals and very small teams (up to 2 seats). It includes up to 3 boards and docs, access to over 200 templates, and the use of iOS and Android apps.
    • Basic: At $9 per seat per month (billed annually), the Basic plan is aimed at teams needing to manage all their work in one place. It includes unlimited items and free viewers, 5GB of file storage, and the ability to create a dashboard based on a single board.
    • Standard: It costs $12 per seat per month (billed annually). It adds Timeline & Gantt views, guest access, and a significant increase in automations and integrations (250 actions per month for each), plus dashboards that can combine up to 5 boards.
    • Pro: For $19 per seat per month (billed annually), the Pro plan is built for streamlining more complex workflows. It introduces private boards, chart views, time tracking, and a massive jump in automation and integration actions (25,000 per month), with dashboards that can synthesize data from up to 20 boards.
    • Enterprise: This plan is custom-priced for large organizations and includes advanced features like portfolio management, enhanced security, and enterprise-grade automations and reporting.

    ClickUp – Best All-in-One Workspace

    ClickUp is designed to be the ultimate all-in-one productivity platform. It aims to replace multiple disparate applications by consolidating them into a single, cohesive workspace. It brings together tasks, documents, chat, goals, whiteboards, and more, making it an ideal solution for teams looking to streamline their toolset and boost efficiency.

    Suggested read: 7 Best Control Panels for VPS Management (Free & Paid)

    Key Features

    ClickUp is packed with an extensive range of features that cater to nearly every aspect of project and work management. It includes useful tools such as unlimited tasks, collaborative Docs for knowledge bases, and various project views like Kanban Boards, Calendar View, and Gantt Charts for flexible workflow visualization.

    It also supports agile methodologies with Sprint Management and offers unique collaboration features such as In-App Video Recording, unlimited Chat, and interactive Whiteboards.

    Pricing Plans

    ClickUp offers several tiers to support teams as they grow.

    • Free Forever: This plan is best for individual users and includes unlimited tasks and members, 60MB of storage, collaborative docs, Kanban boards, and 24/7 support.
    • Unlimited: This plan is aimed at small teams and costs $7 per user per month. It includes everything in the free plan, unlimited storage, integrations, Gantt charts, custom fields, and resource management.
    • Business: At $12 per user per month, this popular plan is best for mid-sized teams. It adds advanced features like Google SSO, unlimited mind maps and dashboards, workload management, and more sophisticated automations.
    • Enterprise: This custom-priced plan is for large organizations needing advanced control and security. It includes features like white labeling, HIPAA compliance, custom roles, a dedicated customer success manager, and live onboarding training.

    Jira – Best for Agile Teams & Developers

    Jira is the industry-standard project management tool for software development teams. It is renowned for its powerful features tailored specifically for Agile methodologies. It provides an unmatched framework for running Scrum and Kanban workflows, allowing developers to plan sprints, track bugs, and manage releases with precision and deep technical context.

    Its entire ecosystem is designed to integrate seamlessly with the developer toolchain, making it the definitive choice for teams focused on building, testing, and deploying software.

    Suggested read: The Best WordPress Caching Plugins To Speed Up Your Site (2025)

    Key Features

    Jira’s feature set is deeply customized to meet software development needs. It offers multiple project views, including a timeline for roadmapping, calendars, and summary views, alongside advanced reporting and dashboards to track team velocity and burndown charts.

    Jira also includes powerful automation rules to handle repetitive tasks, and its advanced features in higher tiers support cross-team planning and dependency management, which are necessary for large-scale development projects.

    Pricing Plans

    Jira offers a scalable pricing model to support teams from small startups to large enterprises.

    • Free: This plan is available for up to 10 users and is free forever. It is a great starting point, offering unlimited projects and tasks, various project views (including backlog, board, and timeline), basic reports, and 2 GB of storage.
    • Standard: At $8.60 per user per month, the Standard plan is ideal for growing teams. It includes everything from the Free plan, user roles and permissions, a significant increase in automation runs (1,700 per month), 250 GB of storage, and standard business-hour support.
    • Premium: The Premium plan costs $17.00 per user per month and introduces advanced features like cross-team planning, customizable approval processes, unlimited storage, and 24/7 support for critical issues, backed by a 99.9% uptime SLA.
    • Enterprise: This custom-priced tier is for large organizations requiring advanced analytics, security, and scale. It includes everything in Premium plus cross-product insights with Atlassian Analytics, advanced admin controls, unlimited automation, and the highest level of support with a 99.95% uptime SLA.

    Plutio – Best for Client Management & Invoicing

    Plutio is a highly versatile, all-in-one business management platform that is particularly well-suited for freelancers, contractors, and small agencies that work directly with clients. It can seamlessly integrate project management with essential client-facing tools, such as proposals, contracts, invoicing, and a built-in client portal.

    This unified approach eliminates the need to juggle multiple subscriptions and allows users to manage the entire client engagement lifecycle, from initial proposal to final payment, all within a single ecosystem.

    Key Features

    Plutio offers an extensive suite of features to manage internal projects and external client relationships. It offers several basic project management tools such as customizable task lists, time tracking, and visual Kanban boards.

    However, Plutio excels in its client management features, such as professional proposals, legally binding contracts that clients can sign electronically, and an advanced invoicing system that supports recurring payments, subscriptions, and multiple payment gateways. It also provides a white-labeled client portal where clients can log in to view project progress, access files, pay invoices, and collaborate directly with the team.

    Pricing Plans

    Plutio offers straightforward pricing plans that are not based on a per-user fee, which makes it very cost-effective for teams.

    • Solo: At $19 per month, this plan is designed for a single user. It includes all the important features, allowing an individual to manage unlimited projects and clients.
    • Studio: For $39 per month, the Studio plan is ideal for small teams. It includes everything in the Solo plan and allows you to invite up to 10 contributors to collaborate on projects.
    • Agency: At $99 per month, the Agency plan is built for larger teams and growing businesses. It includes all features and supports up to 30 contributors, along with the ability to download invoices as PDFs.

    Adobe Workfront

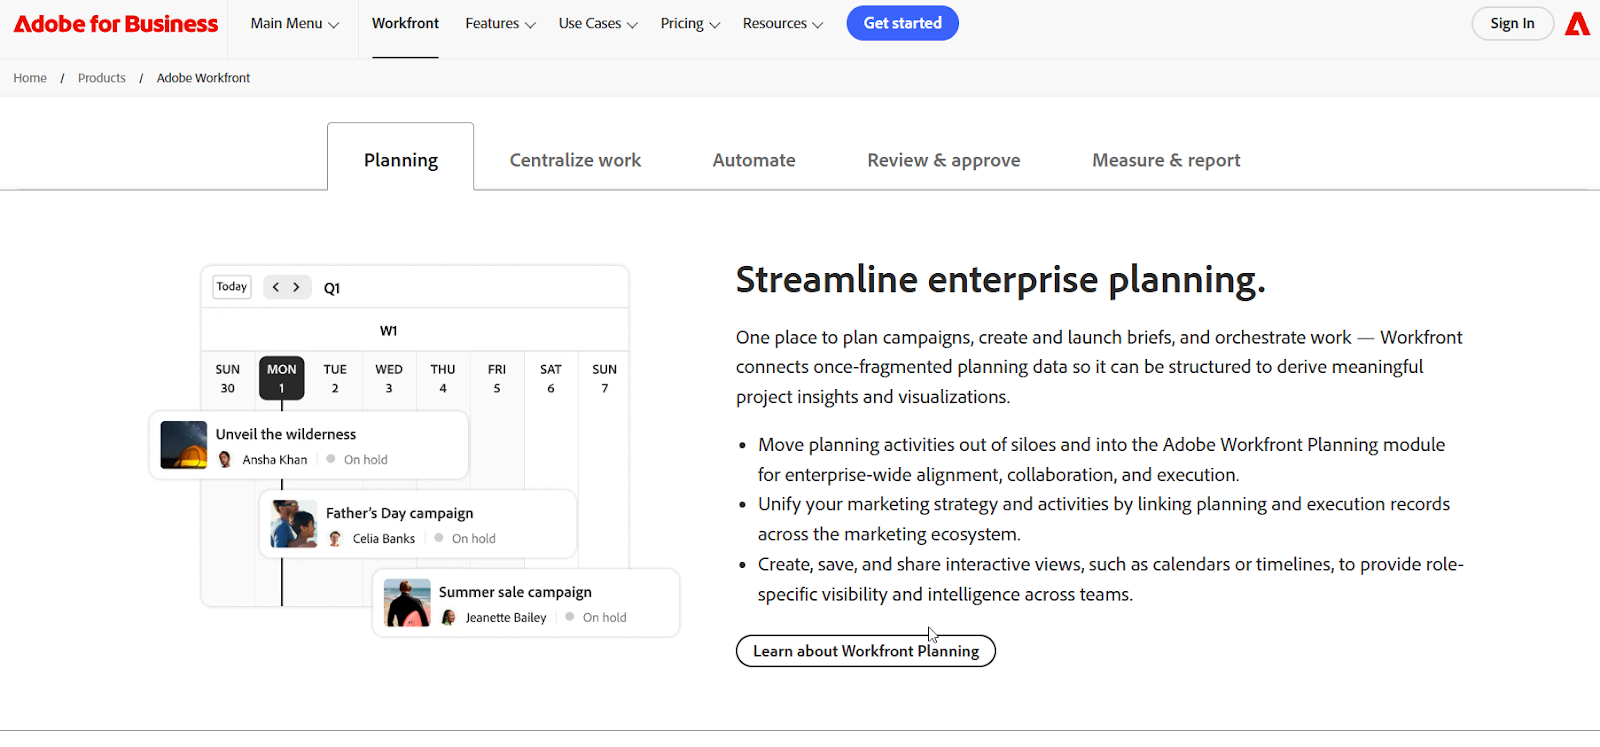
    Adobe Workfront is an enterprise-grade work management solution that is designed to handle the scale and complexity of large organizations. It excels at connecting strategic planning with day-to-day execution, providing a centralized platform that gives leaders visibility across entire portfolios of projects and programs.

    This makes it ideal for enterprises that need to manage complex, cross-functional workflows, align global teams to strategic objectives, and ensure governance and compliance across all workstreams.
    Key Features

    Workfront is equipped with an advanced set of features designed for enterprise-level challenges. It includes features such as strategic Portfolio Management to prioritize high-value projects and Resource Management to optimize team capacity and workload balancing on a global scale.

    Additionally, it offers sophisticated Workflow Automation, advanced review and approval processes for multimedia content, and dynamic dashboards for extensive reporting. As you might expect, it has strong integration with the Adobe Experience Cloud and Creative Cloud.

    Pricing Plans

    Adobe Workfront does not offer publicly listed prices, but provides custom quotes based on an organization’s specific needs.

    Trello – Best for Simple Kanban Boards

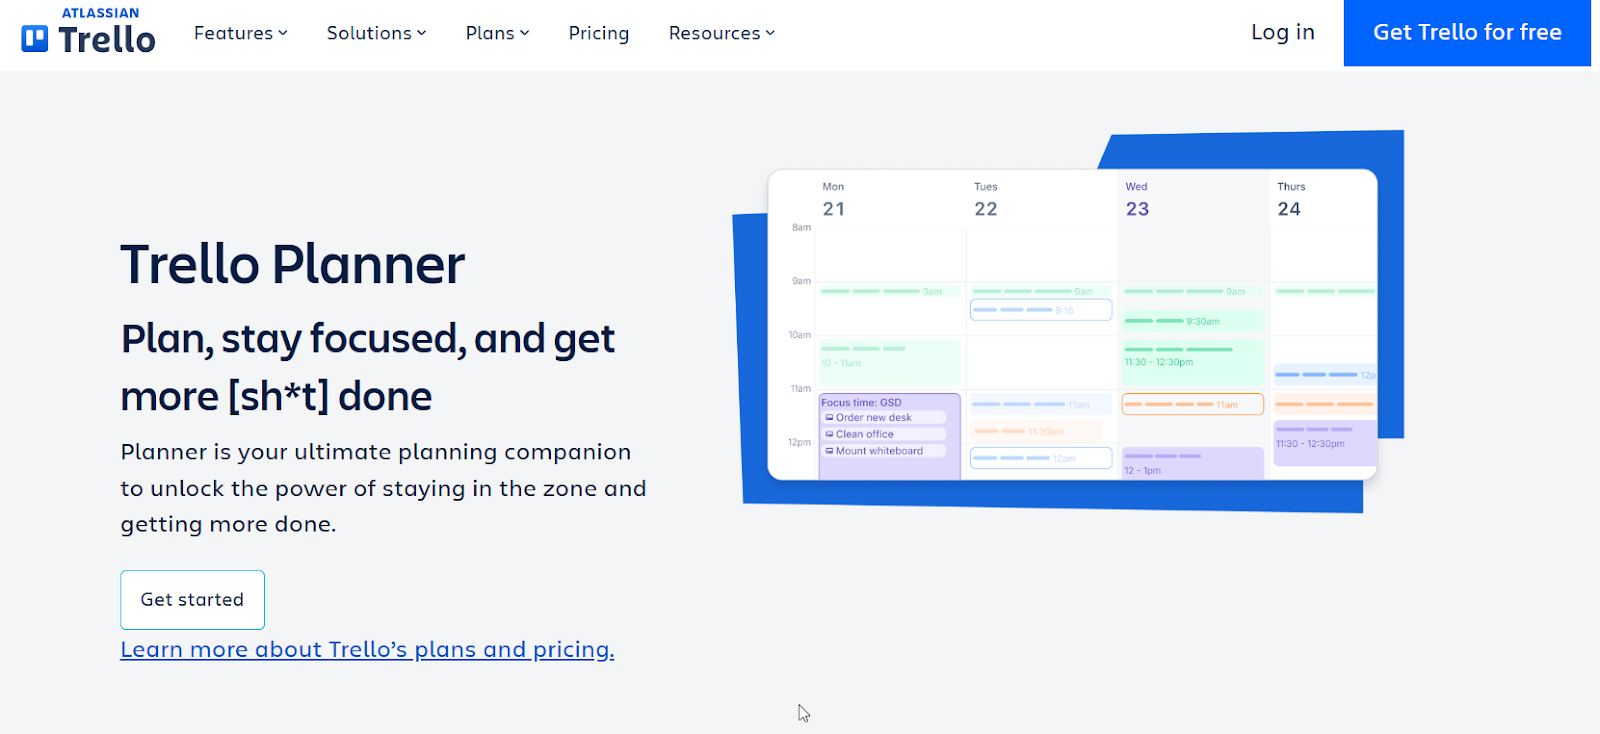
    Trello is renowned for its simplicity and mastery of the Kanban board methodology, which makes it one of the most intuitive and visually accessible project management tools available.

    It uses a straightforward system of boards, lists, and cards that allows individuals and teams to organize tasks, track progress, and collaborate in a highly flexible, drag-and-drop environment. This visual-first approach makes Trello an excellent choice for managing linear workflows, brainstorming ideas, and tracking personal to-do lists without the steep learning curve associated with more complex software.
    Key Features

    Trello allows you to move an unlimited number of cards across customizable lists on a board. It also includes features for adding assignees, due dates, checklists, and attachments to each card.

    Trello’s standout feature is its “Power-Ups,” which allow users to integrate their boards with a vast library of third-party apps and add new functionalities like custom fields, calendar views, and voting. Higher-tier plans expand on this with advanced features like multiple project Views (Calendar, Timeline, Table, Dashboard), enhanced automation through “command runs,” and AI-powered assistance.

    Pricing Plans

    Trello offers several plans to accommodate different needs, from individual users to large enterprises.

    • Free: This plan is free forever for up to 10 collaborators per Workspace. It includes unlimited cards, up to 10 boards, unlimited Power-Ups per board, and 250 automation command runs per month.
    • Standard: At $5 per user per month (billed annually), this plan is for teams that need more organizational power. It includes everything in Free, plus unlimited boards, advanced checklists, custom fields, and 1,000 command runs per month.
    • Premium: For $10, this plan offers enhanced views and administrative controls per user per month (billed annually). It also offers different project views (Calendar, Timeline, Dashboard), unlimited command runs, admin and security features, and Atlassian Intelligence (AI) capabilities.

    Notion – Best for Knowledge + Project Management Hybrid

    Notion is a household name that is already known for its note-taking app, but it also functions as a powerful hybrid of a project management tool and an extensive knowledge base.

    Unlike traditional project managers, which are structured solely around tasks, Notion is built on a flexible, modular system of pages and databases. This allows teams to create interconnected wikis, documents, and task boards all within the same environment, making it the ideal solution for teams that want to keep their project plans, documentation, meeting notes, and company policies in one centrally located and easily accessible place.

    Key Features

    Notion’s biggest strength lies in its highly adaptable databases, which can be customized with properties like subtasks, dependencies, and various field types to function as advanced task managers or project trackers.

    These databases can be visualized as boards, lists, timelines, or calendars to suit different workflows. In addition to project management, Notion serves as a collaborative workspace with features like Notion Calendar, Notion Mail (which syncs with Gmail), and the ability to build basic custom websites and forms. The recent addition of Notion AI provides intelligent assistance for summarizing notes, drafting content, and automating tasks directly within your workspace.

    Pricing Plans

    Notion offers several plans designed to scale from individual use to large business needs.

    • Free: This plan is ideal for individuals looking to organize their personal projects and is free for individual usage. It includes full access to Notion’s powerful databases, Notion Calendar, Notion Mail, and a trial of Notion AI.
    • Plus: At $10 per member per month, the Plus plan is designed for small teams and professionals. It includes everything in the Free plan, plus unlimited collaborative “blocks,” unlimited file uploads, and the ability to create custom forms and sites.
    • Business: This plan is recommended for growing businesses, and it costs $20 per member per month. It includes all the features of the Plus plan and adds enterprise-grade security features like SAML SSO for single sign-on and more granular control over database permissions.

    Basecamp – Best for Small Teams & Startups

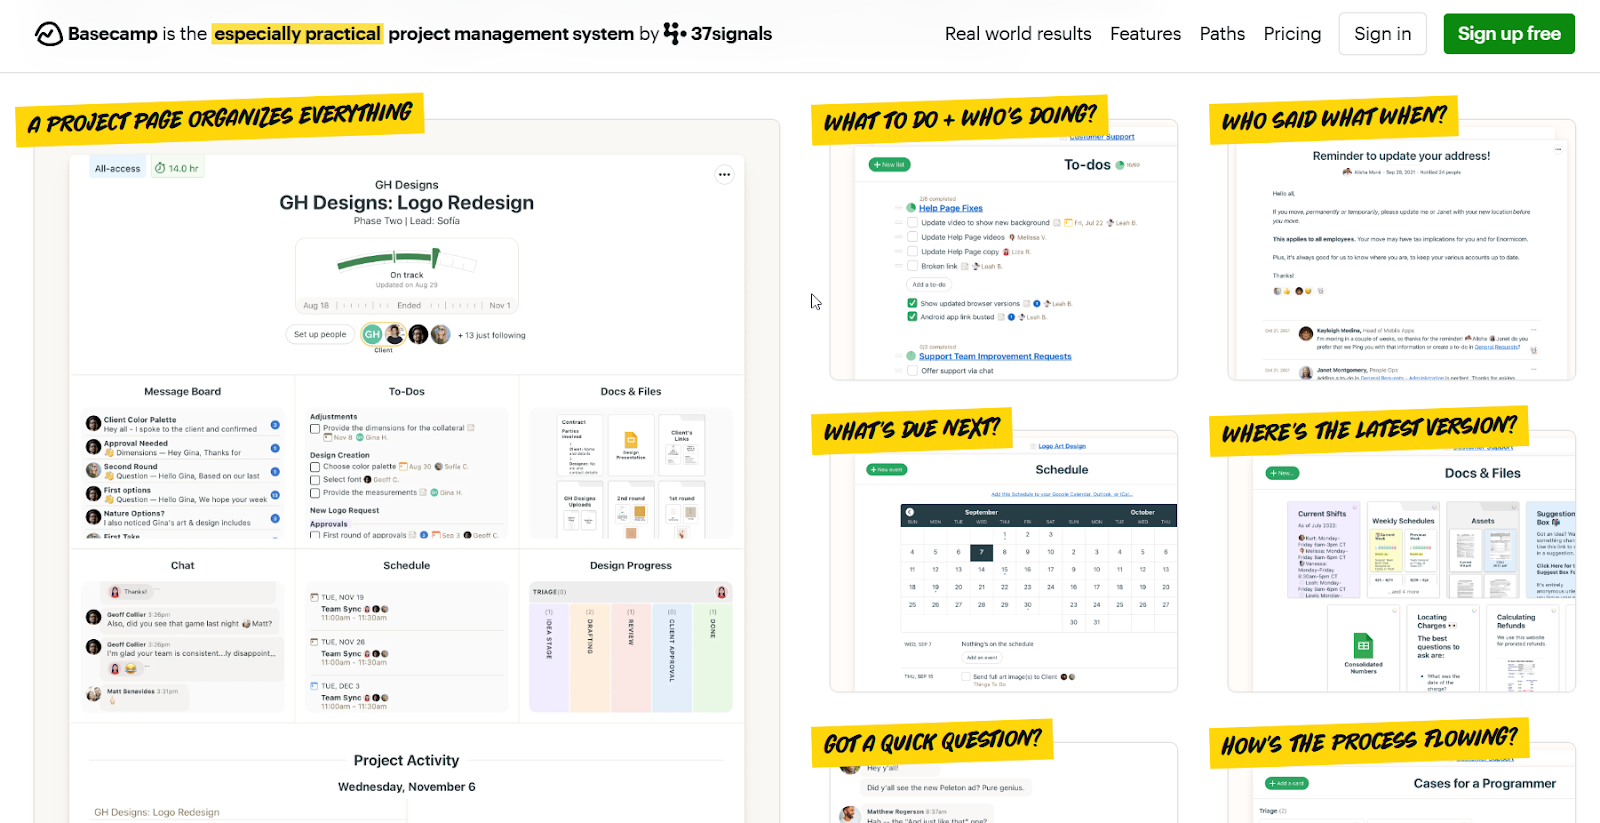
    Basecamp is designed with a strong focus on simplicity and clarity, which makes it an excellent choice for small teams, startups, and freelancers who need a straightforward way to manage projects without being overwhelmed by excessive features.

    It is built to provide a single, organized place for all project-related communication, tasks, and files, reducing the reliance on scattered tools like email, chat apps, and file storage services. This all-in-one approach helps teams stay on the same page and fosters a more organized and less chaotic work environment.
    Suggested read: What Is Managed WordPress Hosting & Do You Need It?

    Key Features

    Basecamp organizes work into distinct projects, each containing a dedicated suite of tools to keep everything in one place. These include To-Do Lists for tracking tasks, deadlines, and responsibilities; a central Message Board for important announcements and discussions; a real-time group Chat for quick conversations; and a Schedule to keep track of key dates and milestones.

    It also includes a Docs & Files section for storing all project-related assets, and a unique “Doors” feature that allows you to link to other essential tools right from your project homepage, ensuring everything your team needs is easily accessible.

    Pricing Plans

    Basecamp offers a simple, user-based pricing model that is easy to understand and scale.

    • Basecamp FREE: This plan allows you to run a single project at a time. It’s a great starting point for those wanting to try out the platform on a small scale.
    • Basecamp Plus: At $15 per user per month, this plan is ideal for freelancers, startups, and growing teams. It includes unlimited projects, 500 GB of storage space, and 24/7 customer support. A significant benefit of this plan is that you are only billed for your internal team members; you can invite an unlimited number of clients and guests to collaborate on projects for free.
    • Basecamp Pro Unlimited: This plan costs $299 per month (regardless of the number of users) when billed annually (or $349/month if paid monthly) and offers a comprehensive solution for entire organizations. It includes unlimited projects and 5 TB of storage, priority 24/7/365 customer support, a Timesheet upgrade for tracking hours, and an Admin Pro Pack for enhanced control, along with personal onboarding.

    Zoho Projects – Best Budget-Friendly Project Management Tool

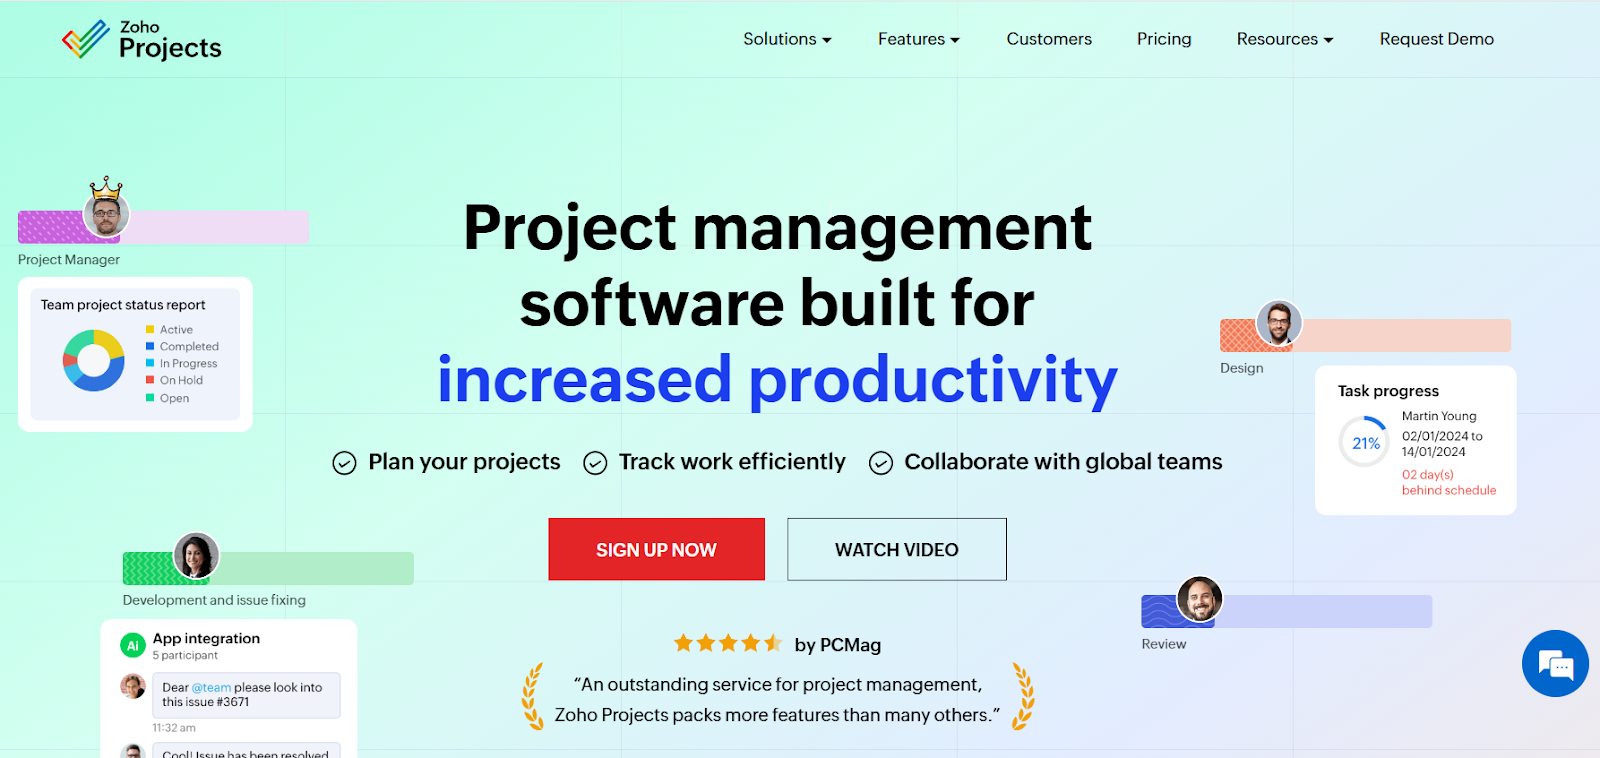
    Zoho Projects is a powerful and extensive project management solution that offers exceptional value, making it one of the best budget-friendly options on the market. It is part of the extensive Zoho ecosystem of business apps. It provides a feature-rich platform that can handle everything from simple tasks to complex projects without the high price tag of many competitors.

    This combination of affordability and advanced functionality makes it ideal for small to mid-sized businesses looking for a scalable and cost-effective way to manage their work.
    Suggested read: How to Edit robots.txt in WordPress (With & Without Plugin)

    Key Features

    Zoho Projects is equipped with a wide array of features to cover the entire project lifecycle. Its important functionalities include Task Management with customizable views like Classic, Plain, and Kanban, along with dependencies and subtasks.

    The platform excels at Time Management and offers built-in timesheets, a calendar, and both planned vs. actual time tracking. For collaboration, it includes Charts and Reporting for in-depth analytics, Issue Tracking to manage bugs and resolve problems, and seamless Integrations with other Zoho apps and popular third-party services.

    Pricing Plans

    Zoho Projects offers a very competitive pricing structure, including a solid free plan.

    • Free: This plan is available for up to 3 users and supports two projects. It includes basic features like task management and a Gantt chart viewer, making it a great starting point for small teams.
    • Premium: At $5 per user per month, this plan is designed for growing teams. It supports unlimited projects, offers 100 GB of storage, and includes key features like subtasks, time tracking, and project templates.
    • Enterprise: For $10 per user per month, this plan provides advanced features for larger businesses. It includes everything in Premium, plus enhanced capabilities like portfolio management, resource management, custom roles, and a 120 GB storage capacity.

    Wrapping Up: Take Control of Your Projects and Your Infrastructure

    Choosing the right project management software is an important step toward streamlining your workflows and ensuring you deliver projects successfully and on time. Whether you need Trello’s simple Kanban boards, Jira’s agile power, or ClickUp’s all-in-one workspace, the perfect tool is out there to give you complete control over your tasks and timelines.

    However, for digital agencies and businesses, managing the project is only half the battle; managing the final deliverable, the client’s website, is just as important.

    Project management software keeps your team’s work organized. RunCloud does the same for your websites.

    With auto-healing, server automation, and performance monitoring, RunCloud simplifies complex hosting tasks and reduces the risk of downtime. You can manage client sites as efficiently as you manage projects – without constant manual intervention.

    If you are an agency looking to elevate your brand, RunCloud’s Arch functionality (coming soon) allows you to offer high-performance hosting under your own name, just as you would white-label a project report for a client. This is complemented by RunCloud Hub caching, which ensures WordPress websites remain blazing-fast and reliable, keeping your project deliverables online and performing flawlessly even under heavy traffic.

    Take control of your servers the same way you manage your projects – with clarity and confidence.

    Get started with RunCloud and simplify how you host, deploy, and manage every client website.

    FAQs on Project Management Software 2025

    What is the most popular project management software in 2025?

    Tools like Jira, Asana, and Monday.com are the most popular choices due to their scalability and rich feature sets. Jira continues to dominate among software development teams, as its workflow management is a perfect match for tracking projects deployed and managed through platforms like RunCloud.

    Which project management tool is best for remote teams?

    Asana and ClickUp are excellent for remote teams because they offer superior collaboration, communication, and real-time visibility features.

    What is the difference between project management and task management software?

    Task management software focuses on individual to-do lists and tracking simple tasks, whereas project management software handles the entire project lifecycle, including timelines, budgets, and resource allocation. For example, a task might be to “restart Apache,” while a project would be to “launch the new web application,” a process managed efficiently using RunCloud’s deployment and server configuration tools.

    What is the easiest project management software to use?

    Trello and Asana are widely regarded as the easiest project management tools to use thanks to their intuitive, visual-first interfaces that require very little training. This focus on user-friendliness mirrors our philosophy at RunCloud, where we turn complex command-line server tasks into a simple, easy-to-navigate graphical interface.

  • How to Fix the “ERR_NAME_NOT_RESOLVED” Error

    How to Fix the “ERR_NAME_NOT_RESOLVED” Error

    The ERR_NAME_NOT_RESOLVED is a frustrating error message that prevents you from browsing the web. The good news is that this error is almost always fixable, and you don’t need to be a tech expert to do it.

    This post will show you exactly how to fix the ERR_NAME_NOT_RESOLVED error. We will walk you through a series of proven, step-by-step solutions, starting with the simplest checks that take less than a minute.

    Let’s get started!

    What is the ERR_NAME_NOT_RESOLVED Error in Simple Terms?

    When you type a website address like www.google.com, your browser needs to find its actual location online, which is a number called an IP address. This is done using the internet’s phonebook, known as the DNS (Domain Name System), which handles this lookup for you.

    When you get the ERR_NAME_NOT_RESOLVED error, it means your browser looked for the website name you typed but couldn’t find its IP address in the phonebook. Because your browser can’t find the website’s address, it cannot make a connection and shows you this error instead.

    What Causes the ERR_NAME_NOT_RESOLVED Error?

    This DNS lookup can fail for several reasons. Here are the most common reasons:

    • The website you are trying to visit is actually down.
    • Your browser has stored old, outdated information (an outdated cache).
    • Your computer’s own record of website addresses is corrupt.
    • Your router or Wi-Fi modem needs to be restarted.
    • The internet provider’s DNS servers are having problems.
    • Your firewall or antivirus software is accidentally blocking the connection.
    • Your device has an incorrect network setting.

    Check to See if the Website is Down for Everyone

    Before changing any settings on your computer, you first need to find out whether the problem is on your end or the website’s. If the website is offline for everyone, none of the fixes on your computer will work. This simple check can save you a lot of time and frustration.

    A quick way to find this is by using a free online tool called a “down detector.”

    Here’s how to check:

    1. Open a new tab in your web browser.
    2. Go to a site like DownForEveryoneOrJustMe.com or IsItDownRightNow.com.
    3. Type or paste the address of the website giving you the error and press Enter.

    The tool will give you a clear answer in seconds.

    • If it says the site is down for everyone, the problem is with the website’s server. Your only option is to wait for them to fix it and try again later.
    • If it says the site is up and it’s just you, then the problem is with your device or network. Follow the quick fixes below to solve it.

    Simple Fixes to Solve the ERR_NAME_NOT_RESOLVED Error

    If the website is working for others, the ERR_NAME_NOT_RESOLVED error is most likely caused by a simple glitch on your side. Start with these easy methods, as one of them will often solve the problem right away.

    Step 1: Check the URL for Typos

    The simplest solution is often the one we overlook. Your browser cannot resolve a domain name that doesn’t exist, and a small spelling mistake is a common cause of this error.

    Look closely at the address you typed in the browser’s address bar. For example, a common typo is typing gogle.com instead of google.com. Double-check the spelling and make sure it is exactly right, then press Enter again.

    Step 2: Clear Your Browser’s Cache and Cookies

    Your browser saves bits of information from websites to help them load faster next time. This saved information is called the “cache.” Sometimes, this cache can become outdated or corrupt, causing your browser to use a “bad address” for a website.

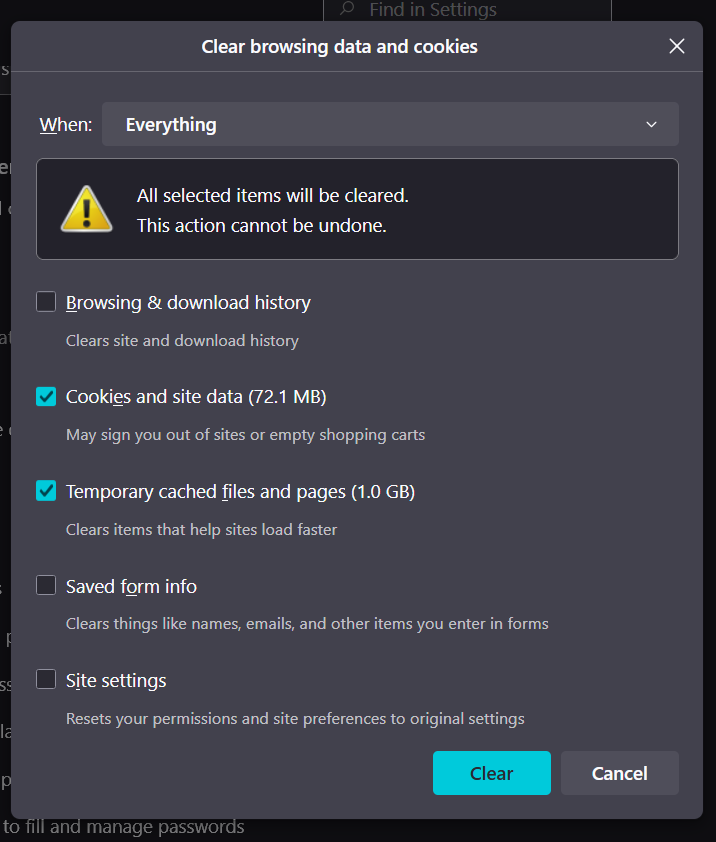
    Clearing your browser’s cache forces it to get the newest information directly from the website. Here is how to do it in popular browsers:

    Note: This action will log you out of all the websites on your browser, and you will need to log in again.

    • For Google Chrome:
      • Click the three dots in the top-right corner.
      • Click on Delete browsing data.
      • In the new window, set the “Time range” to All time.
      • Check the box for Cached images and files. You can uncheck the other boxes.
      • Click Clear data.
    • For Mozilla Firefox:
      • Click the three lines in the top-right corner and choose Settings.
      • Go to the Privacy & Security panel.
      • Scroll down to “Cookies and Site Data” and click Manage Data.
      • Make sure Cached Web Content is checked, then click Clear.
    • For Microsoft Edge:
      • Click the three dots in the top-right corner and go to Settings.
      • Go to Privacy, search, and services.
      • Under “Clear browsing data,” click Choose what to clear.
      • Set the “Time range” to All time and check Cached images and files.
      • Click Clear now.

    Step 3: Flush Your Computer’s DNS Cache

    Like your browser, your computer also keeps a temporary memory of website addresses. This is called the DNS cache. If this cache contains outdated information, it can lead to the ERR_NAME_NOT_RESOLVED error. Flushing the DNS cache will clear this memory and force your computer to look up the website’s address again.

    If you want step-by-step instructions, you should refer to our recent blog post on How to Flush DNS Cache on Windows, Mac, and Linux, but if you are in a hurry, you can refer to the following steps.

    Here are the commands you can copy and paste for your operating system:

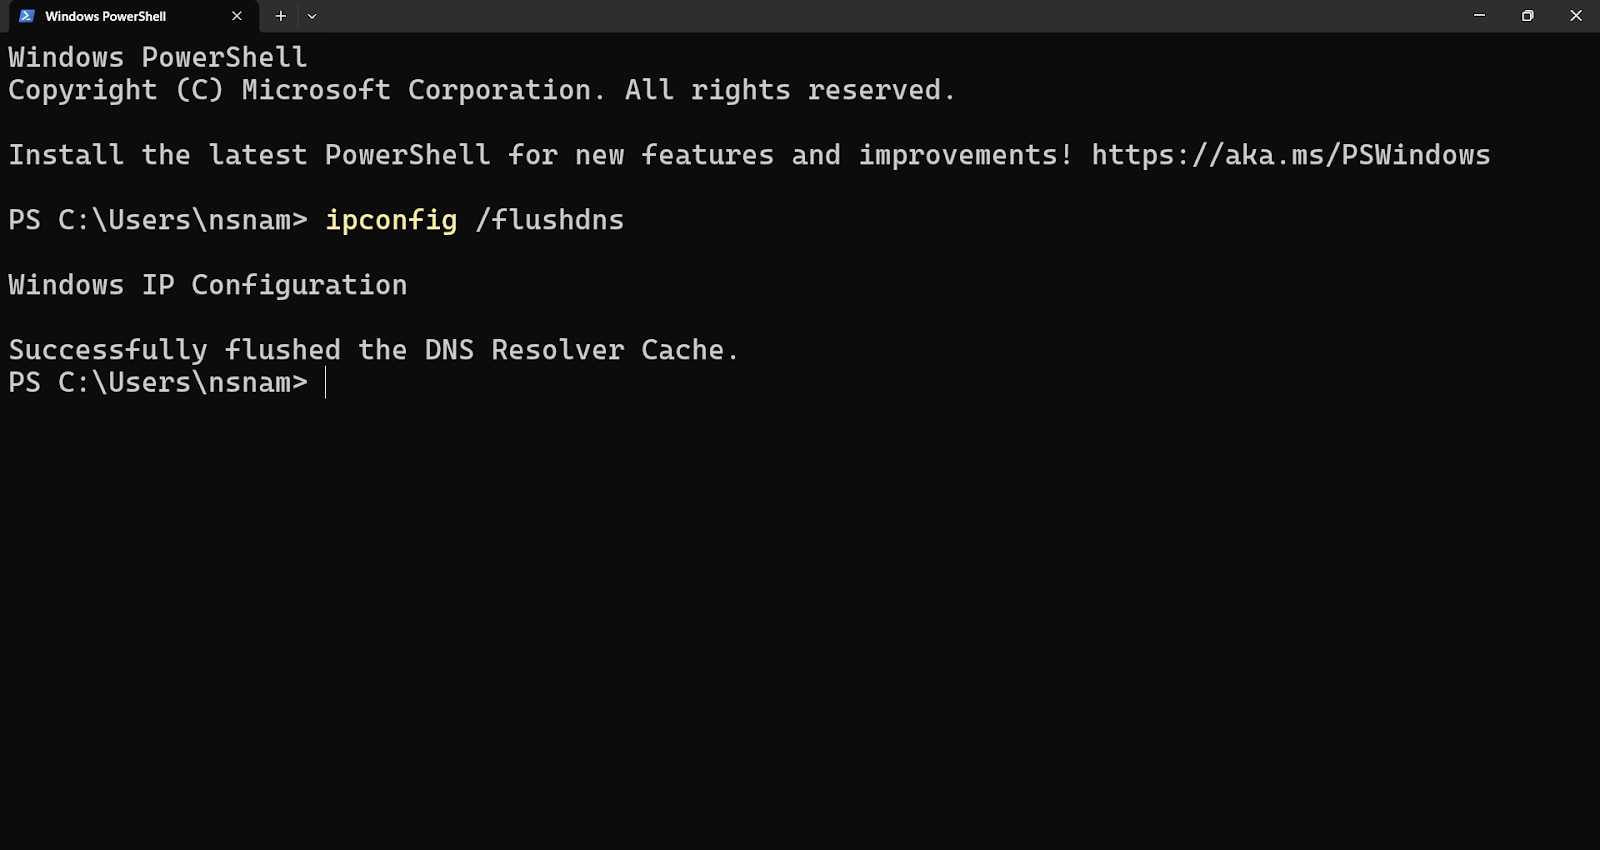
    • For Windows: Open the Start Menu and type cmd. In the black window, type the following command and press Enter:
    ipconfig /flushdns 
    • For macOS: Open the Terminal app (you can find it in Applications > Utilities). In the Terminal window, paste the following command and press Enter. You may need to enter your Mac password.
    sudo dscacheutil -flushcache; sudo killall -HUP mDNSResponder
    • For Linux (Ubuntu): Open the Terminal by pressing Ctrl + Alt + T. Paste the following command and press Enter. You will need to enter your password.
    sudo systemd-resolve --flush-caches

    Step 4: Restart Your Router and Modem

    The classic “turn it off and on again” trick works for a reason. Your router can get bogged down with temporary data or experience a small glitch. A simple restart clears its memory and allows it to establish a fresh, clean connection to the Internet.

    1. Unplug the power cords from your modem and router and wait for at least 60 seconds.
    2. Plug the modem back in first and wait for its lights to become stable (usually about a minute).
    3. Plug the router back in and wait for its lights to stabilize.
    4. Try visiting the website again.

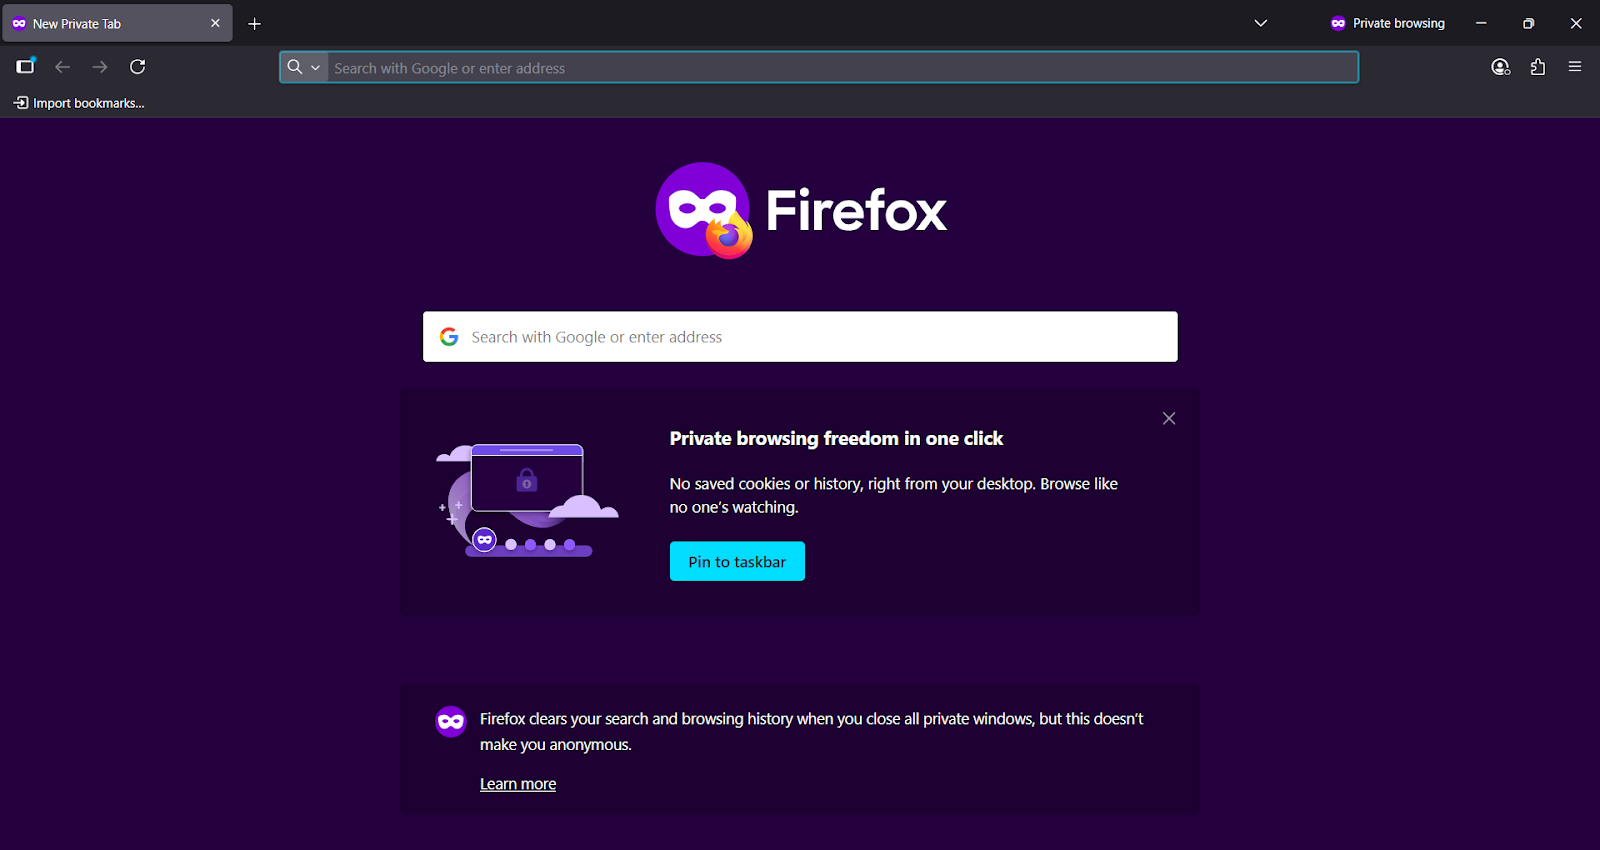
    Step 5: Try Incognito or Private Mode

    Sometimes, a browser extension (ad blocker or security tool) can interfere with your connection. Incognito (or Private) mode loads a clean browser window, usually with all extensions turned off. This is a great way to check if an extension is the cause of the ERR_NAME_NOT_RESOLVED error.

    • Google Chrome: Press Ctrl + Shift + N (or Cmd + Shift + N on Mac).
    • Firefox & Edge: Press Ctrl + Shift + P (or Cmd + Shift + P on Mac).

    Try visiting the website in this new private window. If it loads correctly, the problem is one of your extensions. Go back to your regular browser window and disable your extensions one by one to find the culprit.

    Adjusting Your Network Settings to Fix the ERR_NAME_NOT_RESOLVED Error

    If the quick fixes didn’t solve the problem, it’s time to look at your device’s network settings. These methods involve making small adjustments to how your computer connects to the internet. Don’t worry, these steps are safe and easy to follow, and they are often the most effective solutions for the ERR_NAME_NOT_RESOLVED error.

    Step 6: Change Your DNS Servers (A Powerful Fix)

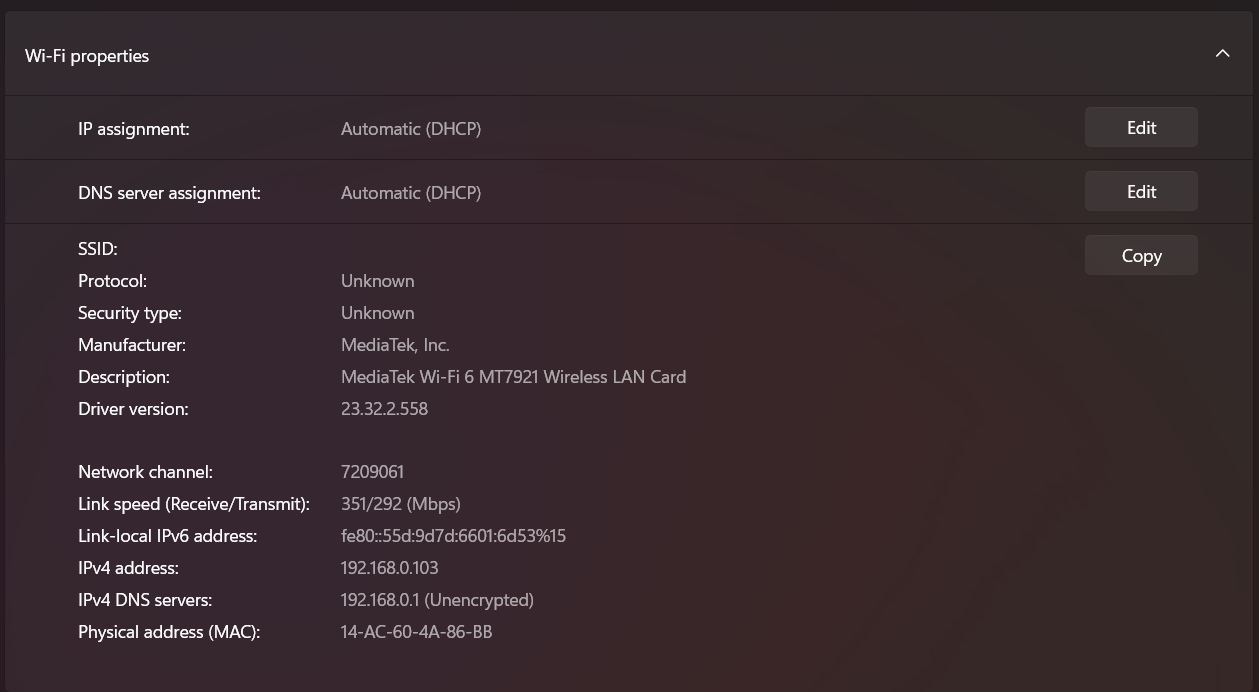
    This is one of the most common and successful solutions for this error. By default, your computer uses the DNS “phonebook” provided by your Internet Service Provider (ISP). Sometimes, your ISP’s DNS servers can be slow, unreliable, or temporarily down, which prevents your browser from finding the website you’re looking for.

    The solution is to manually switch to a free, public DNS server, like the ones offered by Google or Cloudflare. These services are often faster and more reliable than the default ones from your ISP.

    Step-by-Step Guide to Changing Your DNS Server:

    • On Windows 10 & 11:
      1. Right-click the Start button and select Network Connections.
      2. Click on Advanced network settings, then select More network adapter options.
      3. A new window will open. Right-click on your active internet connection (it will be either Wi-Fi or Ethernet) and choose Properties.
    1. In the list that appears, find and select Internet Protocol Version 4 (TCP/IPv4), then click the Properties button.
    2. Click the option that says Use the following DNS server addresses: and enter the following numbers:
      • Preferred DNS server: 8.8.8.8
      • Alternate DNS server: 8.8.4.4
    3. Click OK to save your changes and try visiting the website again.
    • On macOS:
      • Open System Settings from the Apple menu and click on Network.
      • Select your current connection (like Wi-Fi) from the list on the left.
      • Click the Details… button next to your network name.
      • Go to the DNS tab on the left.
      • Click the + button under “DNS Servers” and type 1.1.1.1.
      • Click the + button again and type 1.0.0.1.
      • Click OK to save the changes.
    • On Android & iOS: The process is very similar. Go to your Wi-Fi settings, select the network you are connected to, and look for an option to “Configure DNS” or change your IP settings from “DHCP” to “Static.” There, you can enter the same public DNS addresses mentioned above.

    Step 7: Check Your Firewall and Antivirus Software

    Your firewall and antivirus programs are designed to protect you from online threats. However, they can sometimes be overly cautious and mistakenly block a perfectly safe website, leading to connection errors. To see if this is the problem, you can temporarily disable them.

    1. You can find the icon for your antivirus or firewall software, usually in the bottom-right corner of your screen on the taskbar (or top-right on a Mac).
    2. Right-click the icon and look for an option like Disable protection, Turn off firewall, or Pause protection for 15 minutes.
    3. Once it is temporarily disabled, try to access the website again.

    If the website now loads, you have found the cause. You will need to go into your security software’s settings and add the website you are trying to visit to an “allow list” or “exceptions list.” Remember to always re-enable your firewall and antivirus immediately after testing.

    Step 8: Disable or Check Your VPN and Proxy

    A VPN (Virtual Private Network) or proxy server reroutes your internet traffic through a different location for privacy. If the VPN server you are connected to is having trouble, it can prevent you from resolving domain names correctly.

    The fix is simple: turn off your VPN or proxy and try to connect directly.

    • Open your VPN application and click the Disconnect button.
    • If you are using a proxy, go to your system’s network settings and disable it.
    • Once disconnected, try visiting the website again. If it works, the problem lies with your VPN or proxy service.

    Step 9: Reset Network Settings with Command Prompt (For Windows Users)

    Sometimes, the software on your computer that manages internet connections can become corrupted. For Windows users, a quick fix is to reset these settings back to their original state using the Command Prompt. This process rebuilds the catalogue of rules your computer uses to communicate online.

    1. Open the Start Menu and type cmd.
    2. Right-click on Command Prompt and choose Run as administrator.
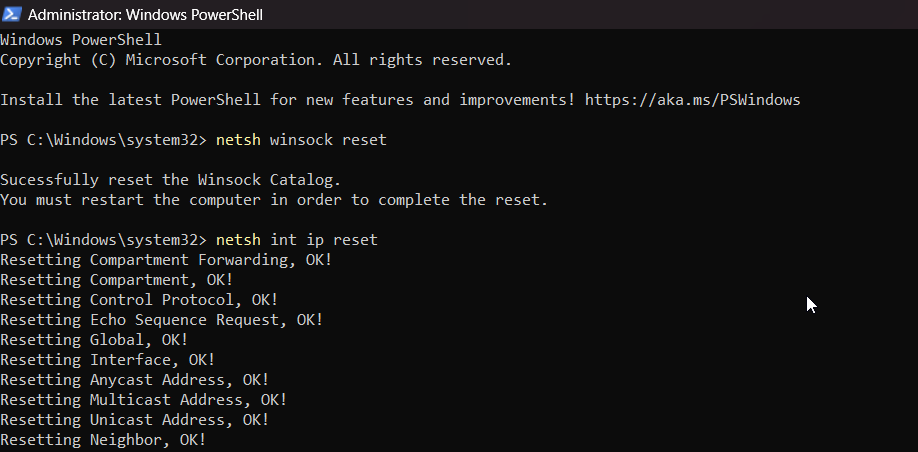
    3. In the black window that appears, type the first command below and press Enter:
    netsh winsock reset
    1. After it finishes, type the second command and press Enter:
    netsh int ip reset
    1. Once both commands are complete, you must restart your computer for the changes to take full effect.

    Advanced Solutions To Fix The ERR_NAME_NOT_RESOLVED Error

    If you have tried all the previous methods and the ERR_NAME_NOT_RESOLVED error persists, you will need to investigate the system further. The following solutions are more technical, so you should be extra careful when implementing them.

    Step 10: Check the hosts File to Fix The ERR_NAME_NOT_RESOLVED Error

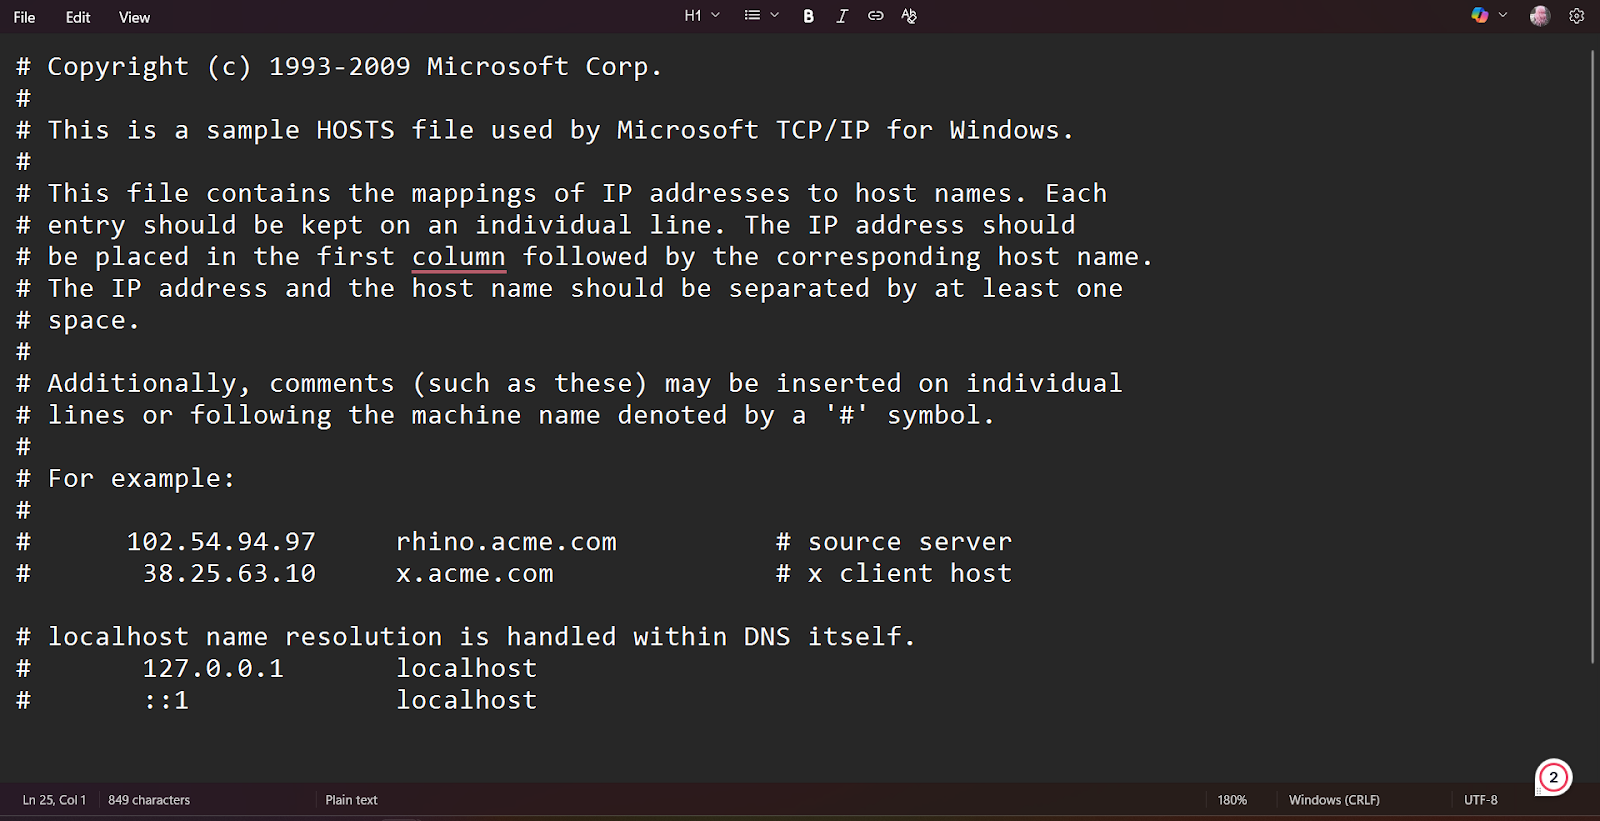
    The hosts file is a small, private address book on your computer. Before your computer asks the public internet’s DNS “phonebook” for a website’s address, it checks this local file first. Normally, this file is empty, but sometimes, malware or other software can add entries to it to block websites or redirect them to malicious locations.

    Warning: Be Extremely Careful. The hosts file is a sensitive system file. Editing it incorrectly can prevent your computer from connecting to the internet or other network services. Do not delete or change any lines unless you are absolutely certain they are causing the problem. We will only be looking for a specific entry related to the website you can’t access.

    How to Safely Check Your hosts File:

    • On Windows:
      1. Click the Start button, type Notepad, then right-click the Notepad icon and select Run as administrator. This is essential, as you cannot save changes to the file otherwise.
      2. In Notepad, go to File > Open.
      3. Navigate to the following folder path (you can copy and paste this into the address bar at the top): C:\Windows\System32\drivers\etc
      4. You may see an empty folder. In the bottom-right corner of the “Open” window, change the file type from “Text Documents (*.txt)” to All Files.
      5. You should now see a file named hosts. Click it and select Open.
    • On macOS:
      1. Open the Terminal app (you can find it in Applications > Utilities or search for it with Spotlight).
      2. Type the following command carefully and press Enter. This command opens the hosts file in a simple text editor called nano.
    sudo nano /private/etc/hosts
    1. You will be prompted to enter your Mac’s password. Type it and press Enter (you won’t see the cursor move, which is normal).

    What to Look For: Now that the file is open, look through the text. Most lines will start with a # symbol, which means they are comments and are ignored by the system. You are looking for any lines without a # symbol containing the website’s domain name that you cannot access.

    For example, if you can’t reach example.com, you might see a line that looks like this:

    127.0.0.1       example.com

    This line tells your computer to block example.com.

    How to Fix It: Instead of deleting the line, the safest way to disable it is to add a # symbol to the very beginning of it. This turns the line into a comment, and your computer will ignore it.

    # 127.0.0.1       example.com

    After making the change, save the file (File > Save in Notepad, or press Ctrl + X, then Y, then Enter in nano on a Mac). Try visiting the website again.

    Step 11: Update Your Network Adapter Drivers (Windows)

    A driver is software that allows your computer’s operating system (Windows) to communicate with its physical hardware, like your Wi-Fi card or Ethernet port. If this driver software is outdated or corrupted, it can cause a wide range of strange connection issues, including the ERR_NAME_NOT_RESOLVED error.

    This is a less common cause, but it’s a worthwhile step if nothing else has worked.

    How to Update Your Network Driver:

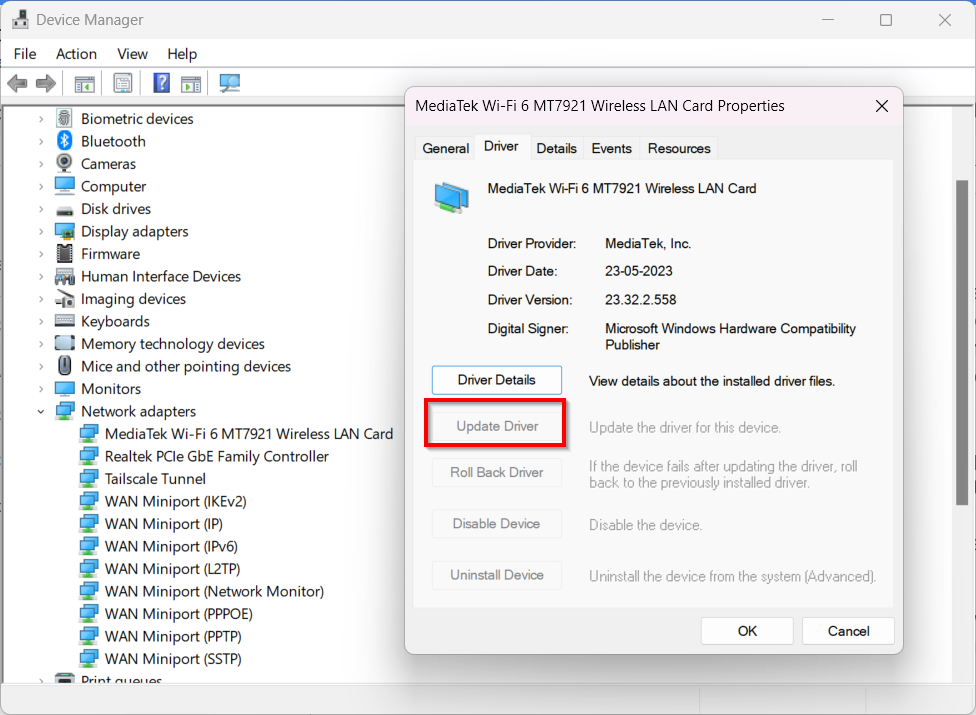
    1. Right-click on the Start button and select Device Manager from the menu.
    2. In the Device Manager window, look for a category called Network adapters and click the small arrow next to it to expand the list.
    3. You will see several items listed. You need to find your main network adapter. Its name usually includes terms like Wi-Fi, Wireless, Ethernet, or Gigabit Family Controller.
    4. Right-click on the correct network adapter and choose Update driver.
    5. A new window will appear with two options. First, choose Search automatically for drivers.
    6. Windows will now search for an updated driver. If it finds one, follow the on-screen instructions to install it.

    If Windows cannot find a driver automatically, you can visit the support website for your computer’s manufacturer (like Dell, HP, or Lenovo) or the network card’s manufacturer (like Intel or Realtek) to download the latest driver manually. However, the automatic search is usually sufficient.

    For Website Owners: Is the Problem on Your End?

    If customers or visitors report seeing the ERR_NAME_NOT_RESOLVED error when trying to access your site, you should immediately fix it. This error means their browsers simply cannot find your server on the Internet, and it is a critical issue that could be costing you traffic and business.

    Here are the essential steps to diagnose and fix the issue from your side.

    Step 1: Check Your Domain’s Expiration Status

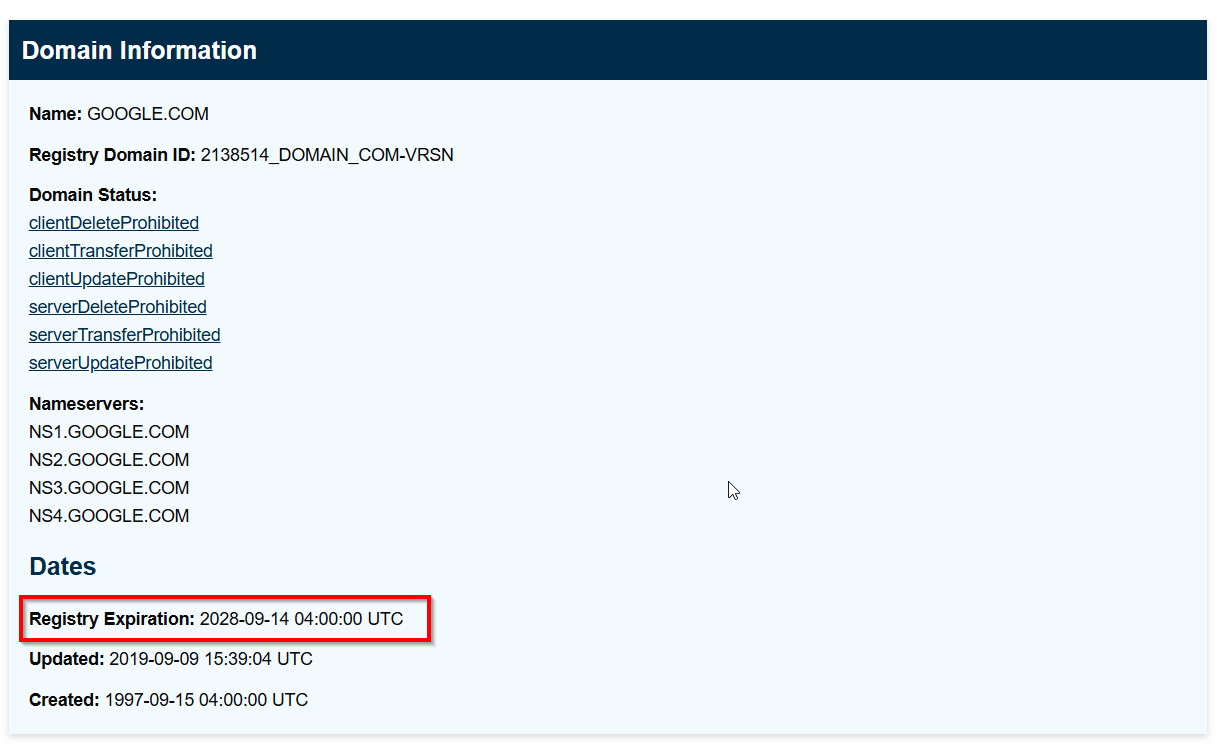
    Before diving into complex settings, check the most basic thing: has your domain name expired? An expired domain is like a disconnected phone number; the name exists, but it no longer connects to anything.

    • How to Check: Use a free online WHOIS lookup tool (like who.is or ICANN’s lookup). Enter your domain name.
    • What to Look For: Pay close attention to the “Expiration Date” and the “Registrar Status.” If the status is “pending renewal” or “redemption period”, then you will need to renew your domain name.

    If your domain has expired, contact your domain registrar (e.g., GoDaddy, Namecheap, Cloudflare, etc.) immediately to renew it. After renewal, it can take a few hours for the domain to become active again across the internet.

    Step 2: Verify Your DNS Records

    This is the most common server-side cause of the ERR_NAME_NOT_RESOLVED error. Your DNS (Domain Name System) records are like a forwarding address, telling the internet where to send traffic for your domain name. If this address is wrong, visitors will get lost.

    The two most important records to check are:

    • A Record: This record points your domain name (e.g., yourwebsite.com) directly to your server’s unique IP address (e.g., 192.0.2.1).
    • CNAME Record: This record points a subdomain (e.g., www.yourwebsite.com) to another domain name.

    You must log in to your domain registrar or DNS provider and ensure these records point to the correct server IP address provided by your host. A single typo in the IP address will cause the error.

    We understand that manually managing DNS records can be confusing and prone to error, especially when juggling credentials for domain registrars and hosting providers.

    That’s why we built RunCloud to streamline this entire process.

    By integrating with DNS providers like Cloudflare, RunCloud allows you to manage your server and DNS records from a single, intuitive dashboard, which significantly reduces the chance of misconfiguration. When you add a new web application, RunCloud can help ensure the correct DNS records are created, eliminating the guesswork.

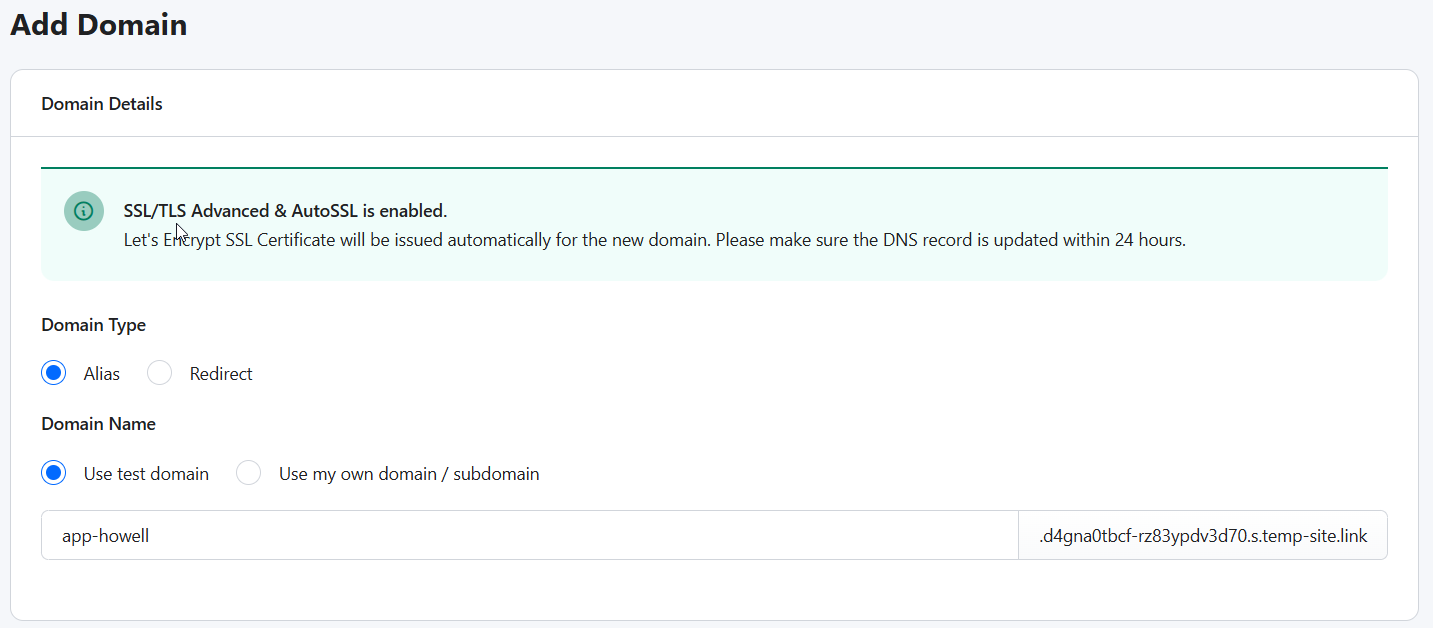
    In addition, RunCloud dramatically speeds up development and testing with its free test domain feature. For every application you deploy, RunCloud instantly provides a temporary domain. This allows you to build, test, and verify that your entire website works perfectly on the server before you even point your official domain to it.

    Step 3: Contact Your Hosting Provider

    If your domain is active and you have double-checked that your DNS records are correct in your registrar’s panel, but the error persists, the issue might be with your hosting provider’s network.

    Possible issues on their end could include:

    • Their own DNS servers are experiencing problems.
    • A network outage is affecting your server’s connectivity.
    • A server-side firewall is misconfigured.

    Open a support ticket with your hosting company. Provide them with your domain name and the exact error message, and let them know you have already confirmed that your domain is active and your DNS records are pointing correctly. This information will help them diagnose the problem on their end much faster.

    Conclusion: Putting the Error Behind You

    The ERR_NAME_NOT_RESOLVED error can be frustrating, but it’s rarely permanent. As this guide has shown, the problem is almost always a breakdown in communication between your device and the Internet’s address book, and you are now fully equipped to fix it. You can quickly get back to browsing or building by following these steps.

    If you are a website owner, you know that managing a website is not easy. That’s why we built RunCloud. It makes the complex task of server management incredibly simple, allowing you to deploy and manage new sites on your server with confidence.

    By streamlining everything from application setup to providing an instant test domain, RunCloud helps you avoid the very DNS configuration issues that cause these errors in the first place.

    Start using RunCloud today.

    Frequently Asked Questions (FAQs)

    Why do I see ERR_NAME_NOT_RESOLVED on only one website?

    This usually means that the problem isn’t with your internet connection but is specific to that website or your computer’s stored data about it. The website’s server could be down, or your system might have a corrupt DNS cache entry for that single domain. Flushing your DNS cache or simply checking if the site is down for everyone else can help you diagnose the issue.

    Can a virus cause the ERR_NAME_NOT_RESOLVED error?

    Certain types of malware or viruses can cause the ERR_NAME_NOT_RESOLVED error. They can achieve this by maliciously modifying your computer’s hosts file to block websites or changing your DNS settings to point to non-existent or harmful servers. If you suspect an infection, you should run a full system scan with reputable antivirus software.

    What’s the difference between ERR_NAME_NOT_RESOLVED and DNS_PROBE_FINISHED_NXDOMAIN?

    Think of ERR_NAME_NOT_RESOLVED as a general failure where your browser couldn’t even complete the DNS lookup for various reasons, including network issues or local misconfigurations. In contrast, DNS_PROBE_FINISHED_NXDOMAIN is a specific and definitive response from the DNS server confirming it was reached, but it has no record of that domain name (NXDOMAIN means Non-Existent Domain).

  • How to Create a Public Status Page for Your Website

    How to Create a Public Status Page for Your Website

    Your online store just went down.

    Support channels are flooding, and customer frustration is mounting on social media.

    What’s your first move?

    When things go wrong (and they inevitably do), clear and timely downtime communication is the key to maintaining user trust.

    This is where a dedicated status page comes in.

    Whether you’re looking to improve transparency, validate SLAs, or simply show your uptime status to customers, you’re in the right place. This guide will show you exactly how to create and set up a powerful status page for your business.

    Let’s get started!

    What is a Status Page and Why Do You Need One?

    A status page is a dedicated web page that communicates the current operational status of your online services. It is a centralized hub for all incident and maintenance-related information. Instead of flooding your support channels with inquiries during an outage, you can direct users to a single page with all the necessary information that is updated in real time.

    Benefits of Having a Status Page:

    • Builds Trust: A status page allows you to proactively communicate downtime, which shows transparency and reassures your customers that you are on top of the situation.
    • Reduces Support Load: It deflects a significant number of support tickets and calls during an incident, which frees up your team to focus on resolving the issue.
    • Validates SLA Breaches: For businesses with Service Level Agreements (SLAs), a status page provides a clear and public record of uptime and incidents, making it easier to validate any breaches.

    Tools to Get You Started

    There are many excellent tools available that allow you to create a status page, many of which offer free tiers to get you started. Some popular options include:

    • UptimeRobot: Known primarily for uptime monitoring, but also offers a simple and effective status page feature.
    • BetterStack: Provides a beautifully designed, free status page that integrates with their monitoring and incident management tools.
    • Cachet: A powerful, open-source, and self-hostable status page system that gives you complete control over your data and branding.

    While hosted solutions are convenient, self-hosting with a tool like Cachet offers unparalleled customization and control.

    If you value this flexibility, then it’s worth knowing that RunCloud makes managing and deploying web applications incredibly simple and efficient.

    In this tutorial, we will walk you through setting up a status page using Cachet, an open-source solution packed with features to make managing your downtime less stressful.

    Why Should You Use Cachet to Create Self-Hosted Status Pages?

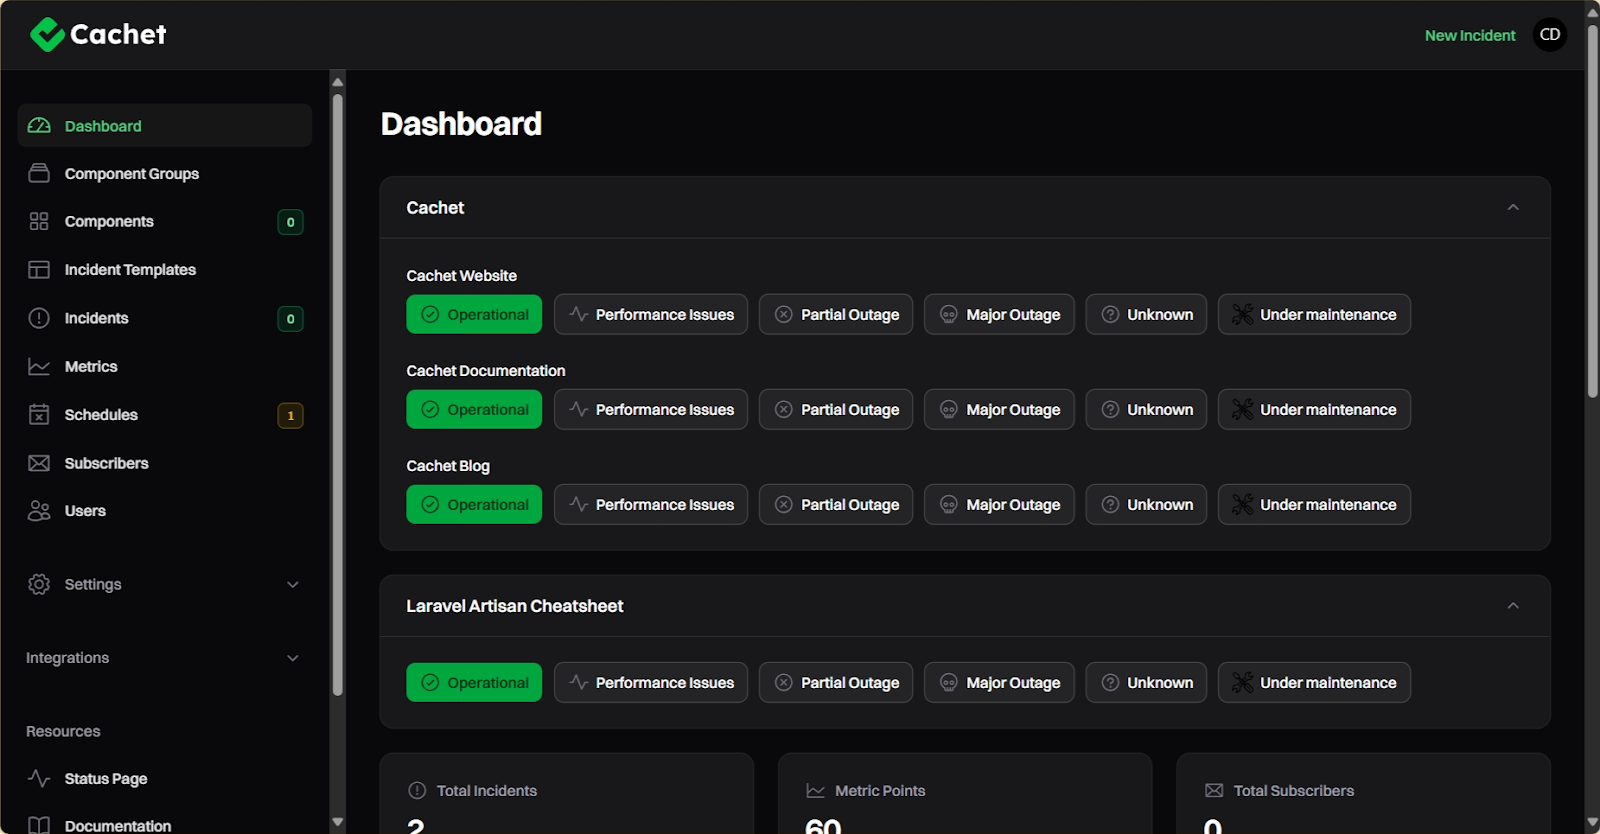
    Cachet is a feature-rich, open-source status page system built with Laravel. Here’s a quick rundown of its powerful features:

    • Component Management: Allows you to define and manage individual components of your application (e.g., API, Website, CDN).
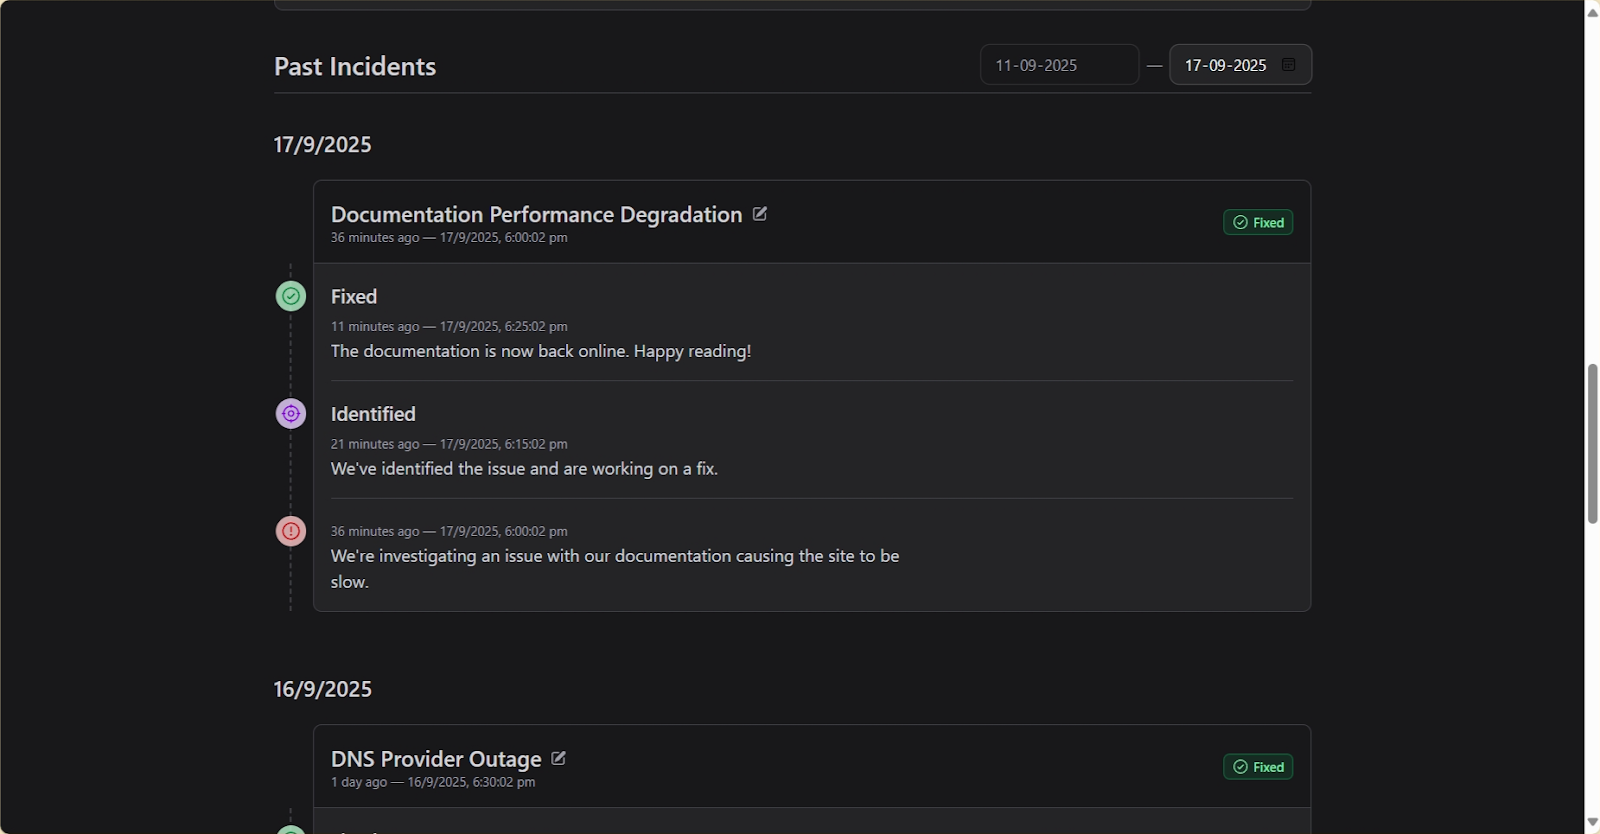
    • Incident Reporting: Use it to clearly communicate incidents with status updates like Investigating, Identified, and Fixed.
    • Scheduled Maintenance: Allows you to inform your users about upcoming maintenance windows proactively.
    • Metrics and Graphs: Display key performance metrics (e.g., response time, error rates) directly on your status page.
    • Multi-language Support: Cachet supports over 10 languages, which makes it accessible to a global audience.
    • Subscriber Notifications: Allows users to subscribe via email to receive real-time updates on incidents and maintenance.

    Step-by-Step: Installing Cachet with RunCloud

    Let’s set up your Cachet status page using the RunCloud server management panel to help streamline the process significantly. RunCloud handles server configuration and makes application deployments much simpler.

    Step 1: Create a Database and Web Application

    First, you’ll need a dedicated database for Cachet. In your RunCloud dashboard, navigate to the Databases section and create a new database and a database user. Securely store these credentials, as you will need them shortly.

    Next, create a new, empty Web Application in RunCloud. This will be the home for your Cachet installation.

    Step 2: SSH and Clone the Repository

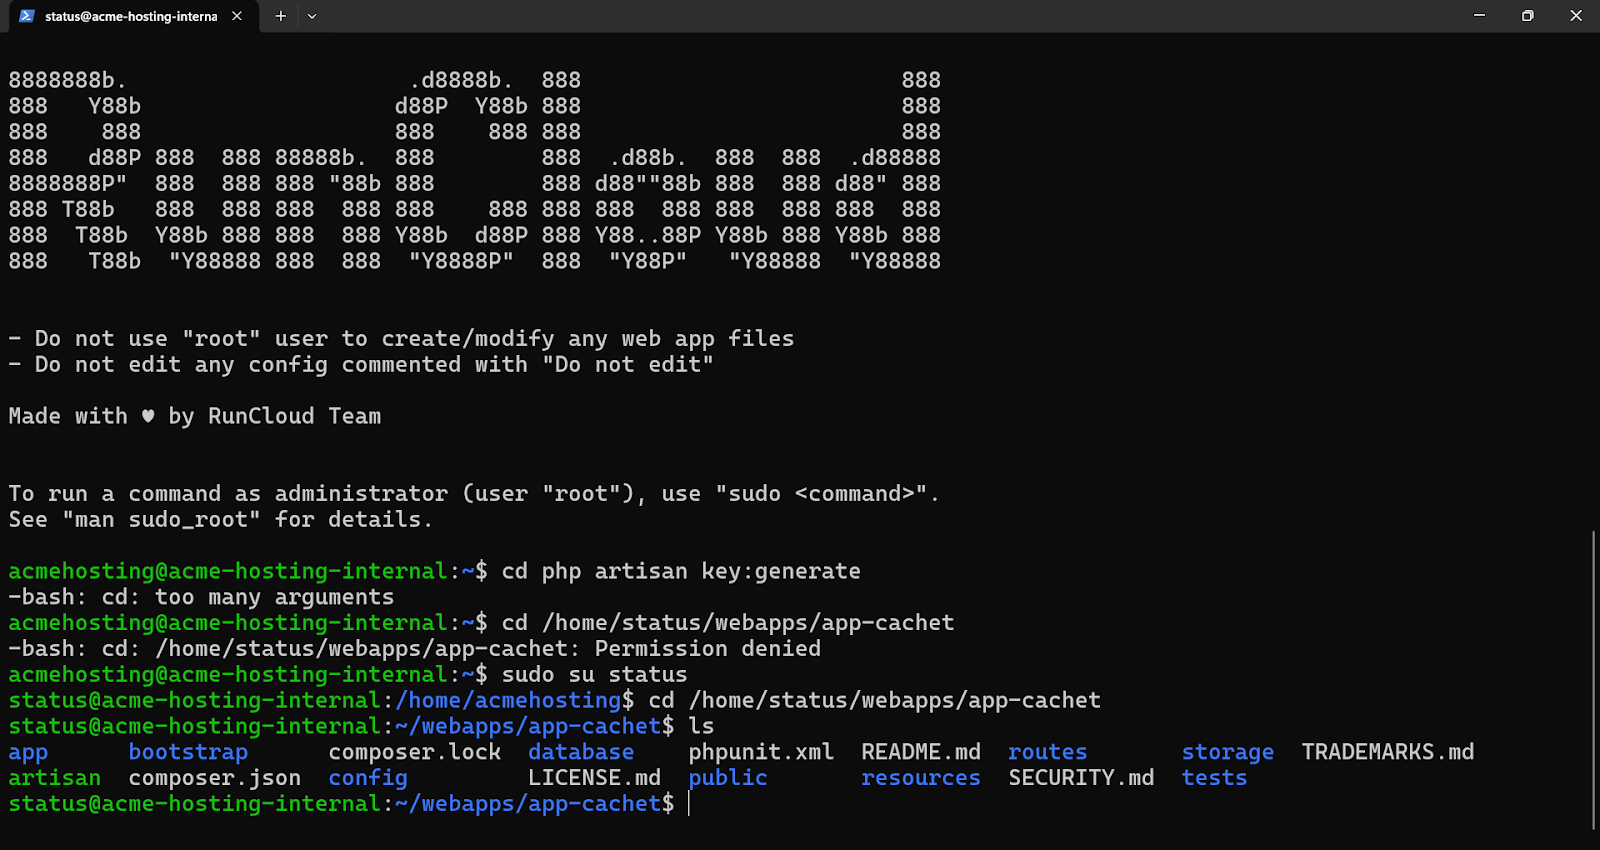
    SSH into your server using your preferred method and navigate to your newly created application’s root folder. The path will look something like /home/YOUR_USERNAME/webapps/YOUR_APP_NAME, and it is available in your RunCloud application dashboard.

    You can navigate to this directory by running the following command:

    cd <root path>

    In this folder, first, we will remove the default index.html file by running the following command:

    rm index.html

    Now, clone the latest version 3 of the Cachet repository into the current directory:

    git clone -b 3.x https://github.com/cachethq/cachet.git --depth 1 .

    The . at the end ensures the files are cloned directly into your application root, not a new subfolder.

    Step 3: Install Dependencies

    With the files in place, it’s time to install the required PHP dependencies using Composer.

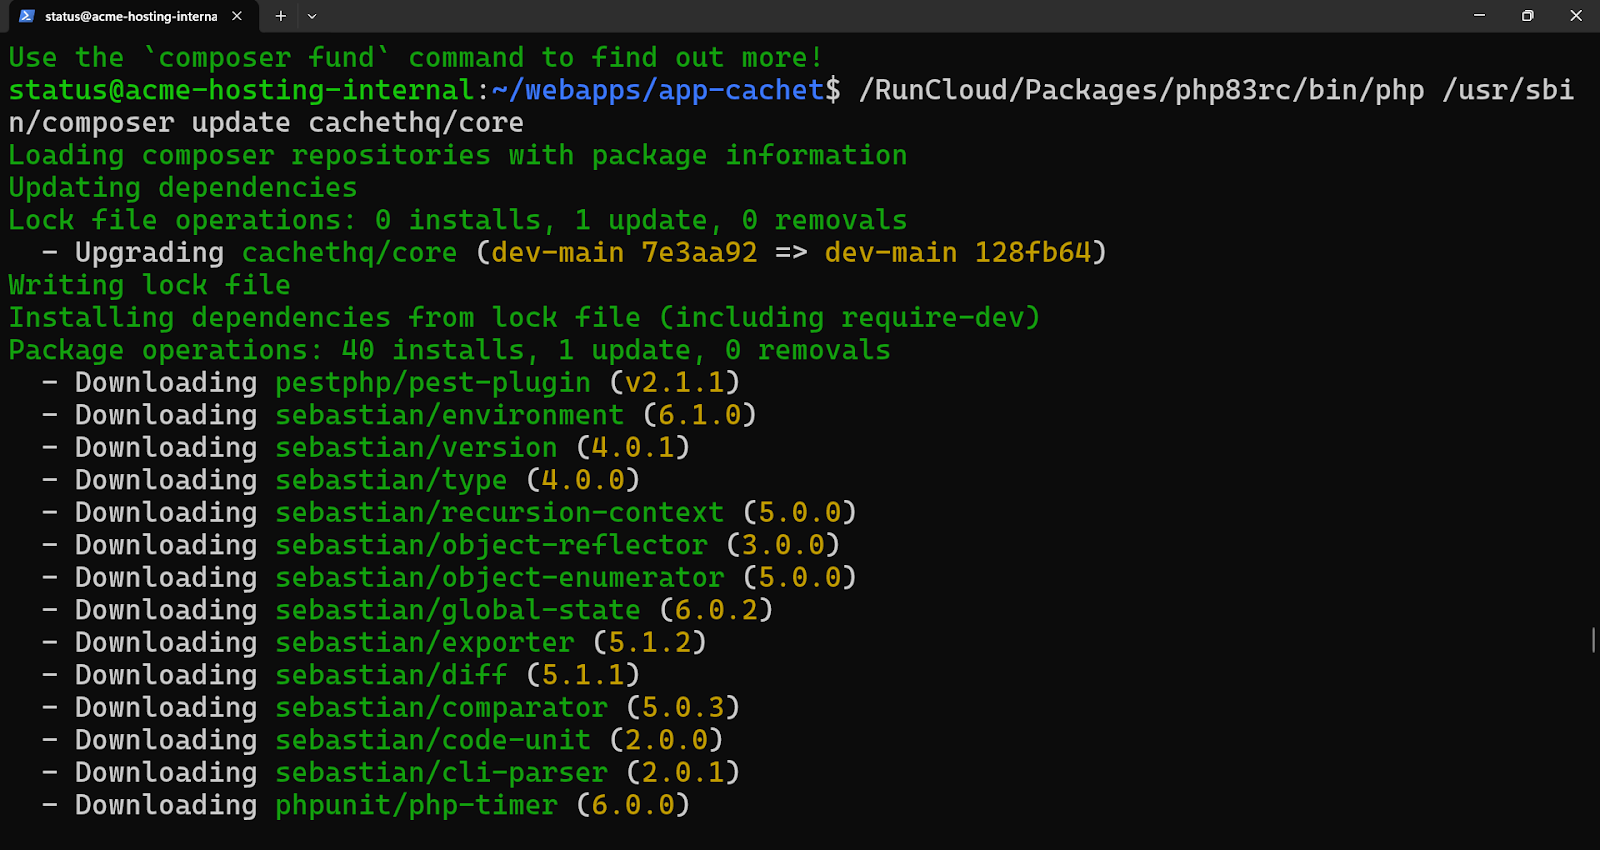
    A key advantage of RunCloud is its support for multiple, isolated PHP versions per application. To ensure you’re using the correct one, you may need to specify the absolute path to the PHP version you assigned to this app.

    You can refer to the PHP Cheat Sheet in the RunCloud Docs to find the absolute path of your PHP binary.

    Run the following commands:

    # Example for PHP 8.3
    /RunCloud/Packages/php83rc/bin/php /usr/sbin/composer install --no-dev -o
    /RunCloud/Packages/php83rc/bin/php /usr/sbin/composer update cachethq/core

    Step 4: Configure Your Environment

    Copy the example environment file to create your own configuration file:

    cp .env.example .env

    Next, generate a unique application key for security:

    # Again, using the RunCloud-specific PHP path
    /RunCloud/Packages/php83rc/bin/php artisan key:generate

    Step 5: Configure the Application in RunCloud

    Head back to your RunCloud dashboard, select your Cachet web application, and navigate to its settings.

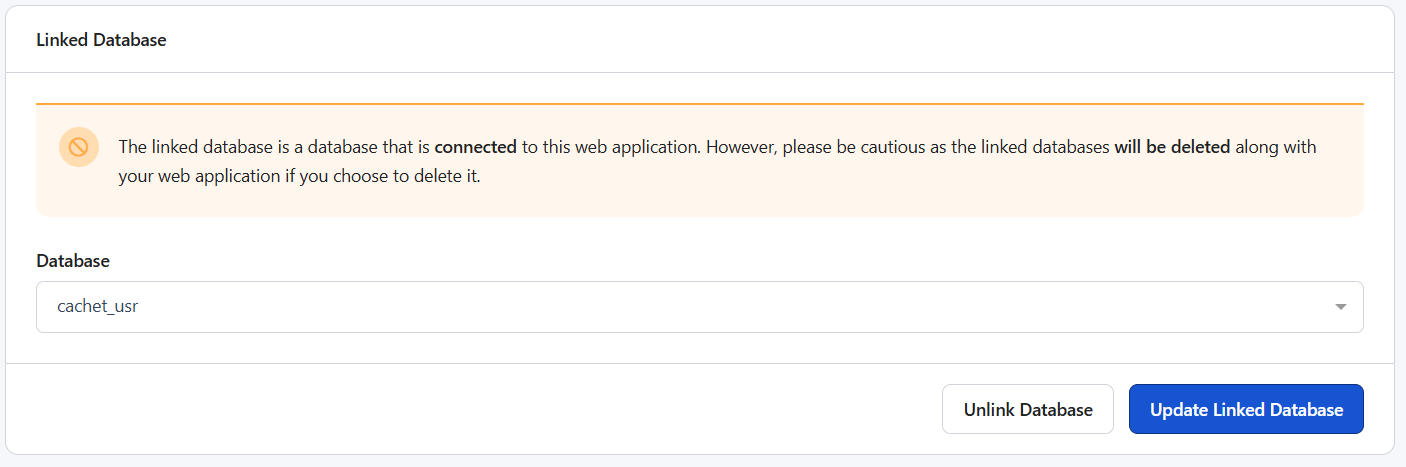
    1. Link the Database: In the Settings menu, find the Linked Database section. Select the database you created in Step 1 from the dropdown menu and save.
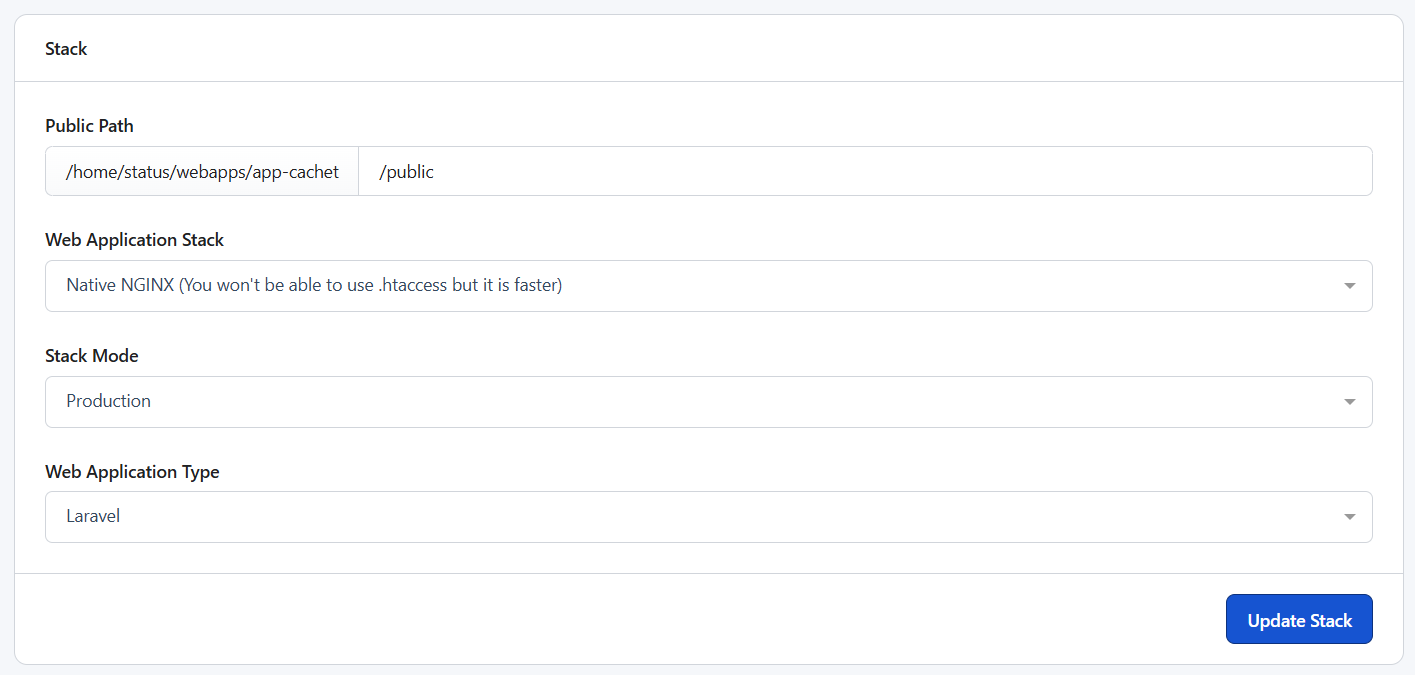
    1. Update Web Application Settings:
      • Public Path: Set this to /public.
      • Web Application Stack: For best performance, choose Native NGINX.
      • Stack Mode: Select Production.
      • Web Application Type: Set this to Laravel.
      • Click Update to save the changes.
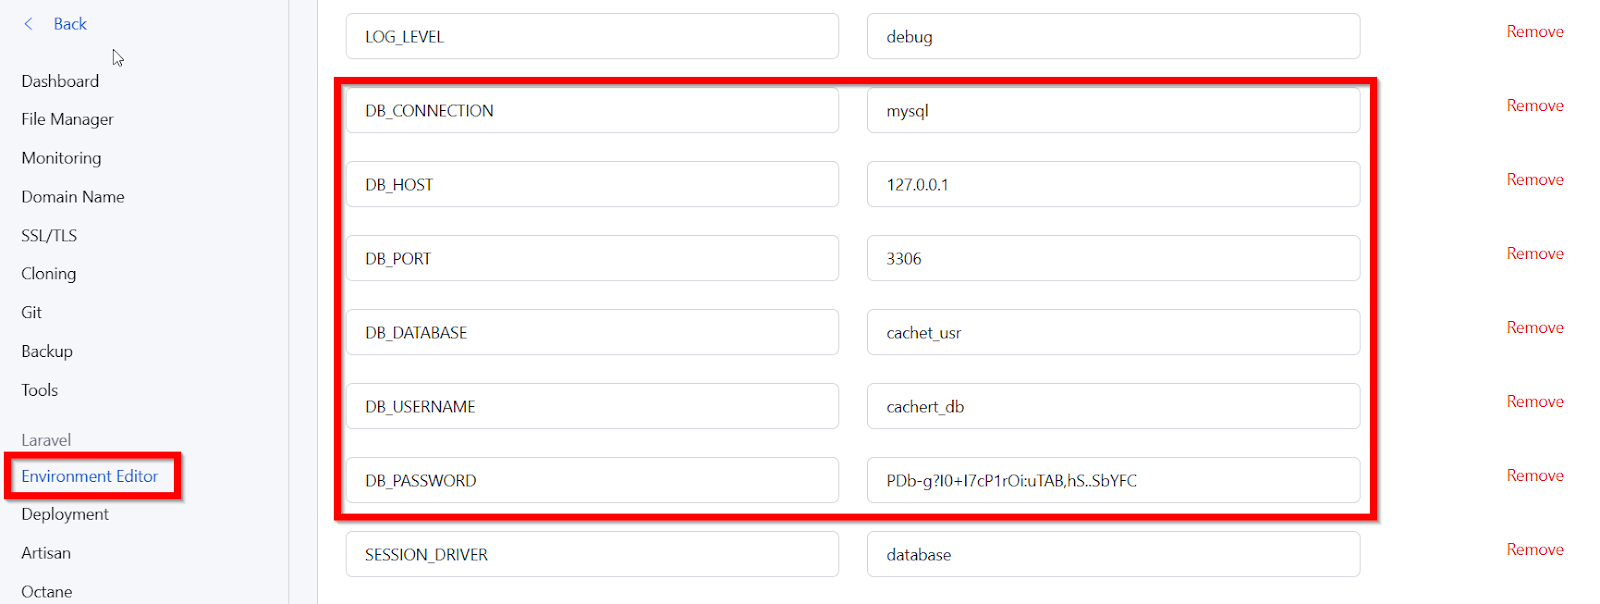
    1. Edit Environment Variables: Navigate to the Env Editor in the left-hand menu. This user-friendly interface is a fantastic RunCloud feature that prevents you from having to edit the .env file via the command line. Update the following database variables with the credentials you created earlier:
    DB_CONNECTION=mysql
    DB_HOST=127.0.0.1
    DB_PORT=3306
    DB_DATABASE=your_cachet_database_name
    DB_USERNAME=your_cachet_database_user
    DB_PASSWORD=your_database_password
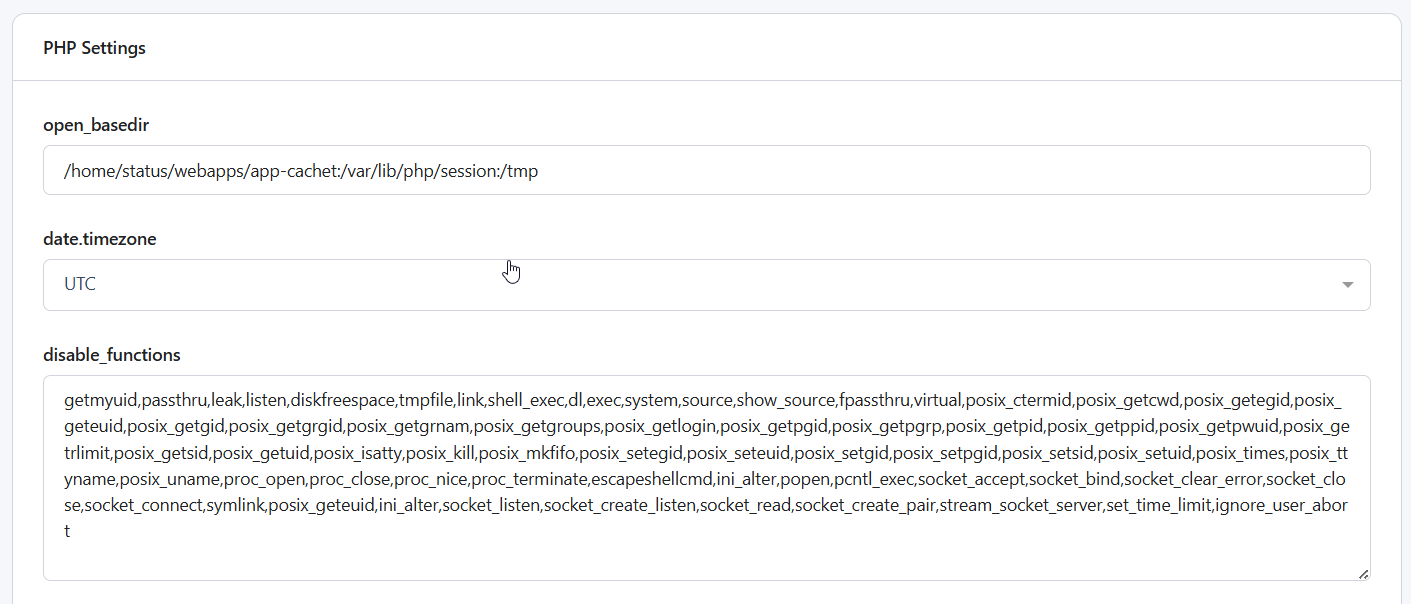
    1. Remove Disabled PHP function: Cachet requires the highlight_file function to be enabled to work properly. Navigate to your application settings and remove this function from the disabled list, then hit save.

    Step 6: Finalize Installation

    Now, back in your SSH session, run the final commands to set up the database and application assets.

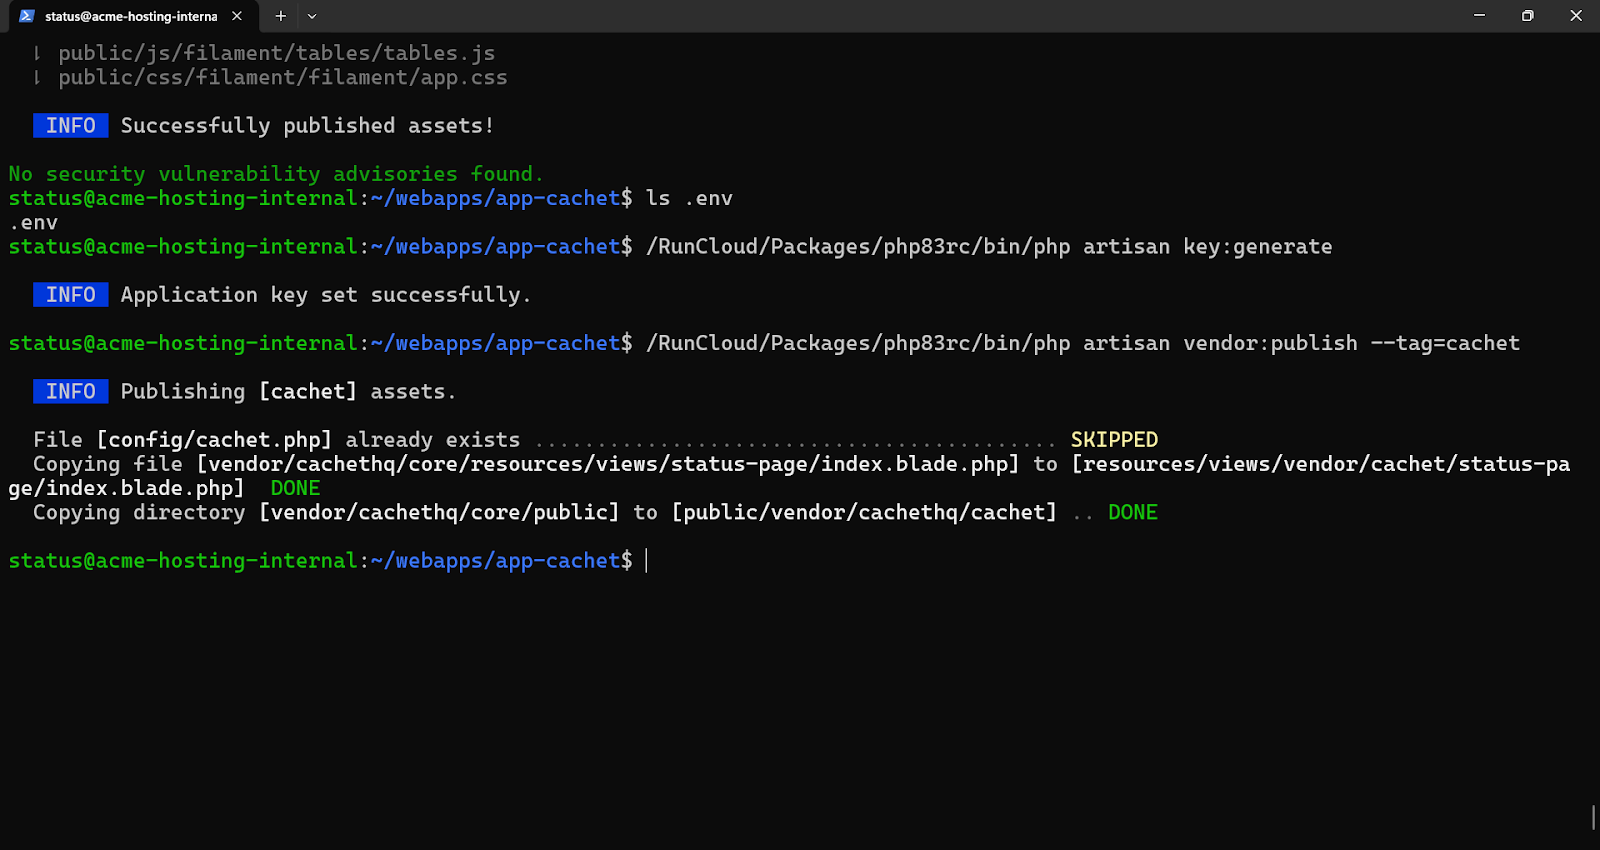
    Publish Cachet’s assets:

    /RunCloud/Packages/php83rc/bin/php artisan vendor:publish --tag=cachet

    Run the database migrations to create the necessary tables:

    /RunCloud/Packages/php83rc/bin/php artisan migrate

    Step 7: Create Your Admin User

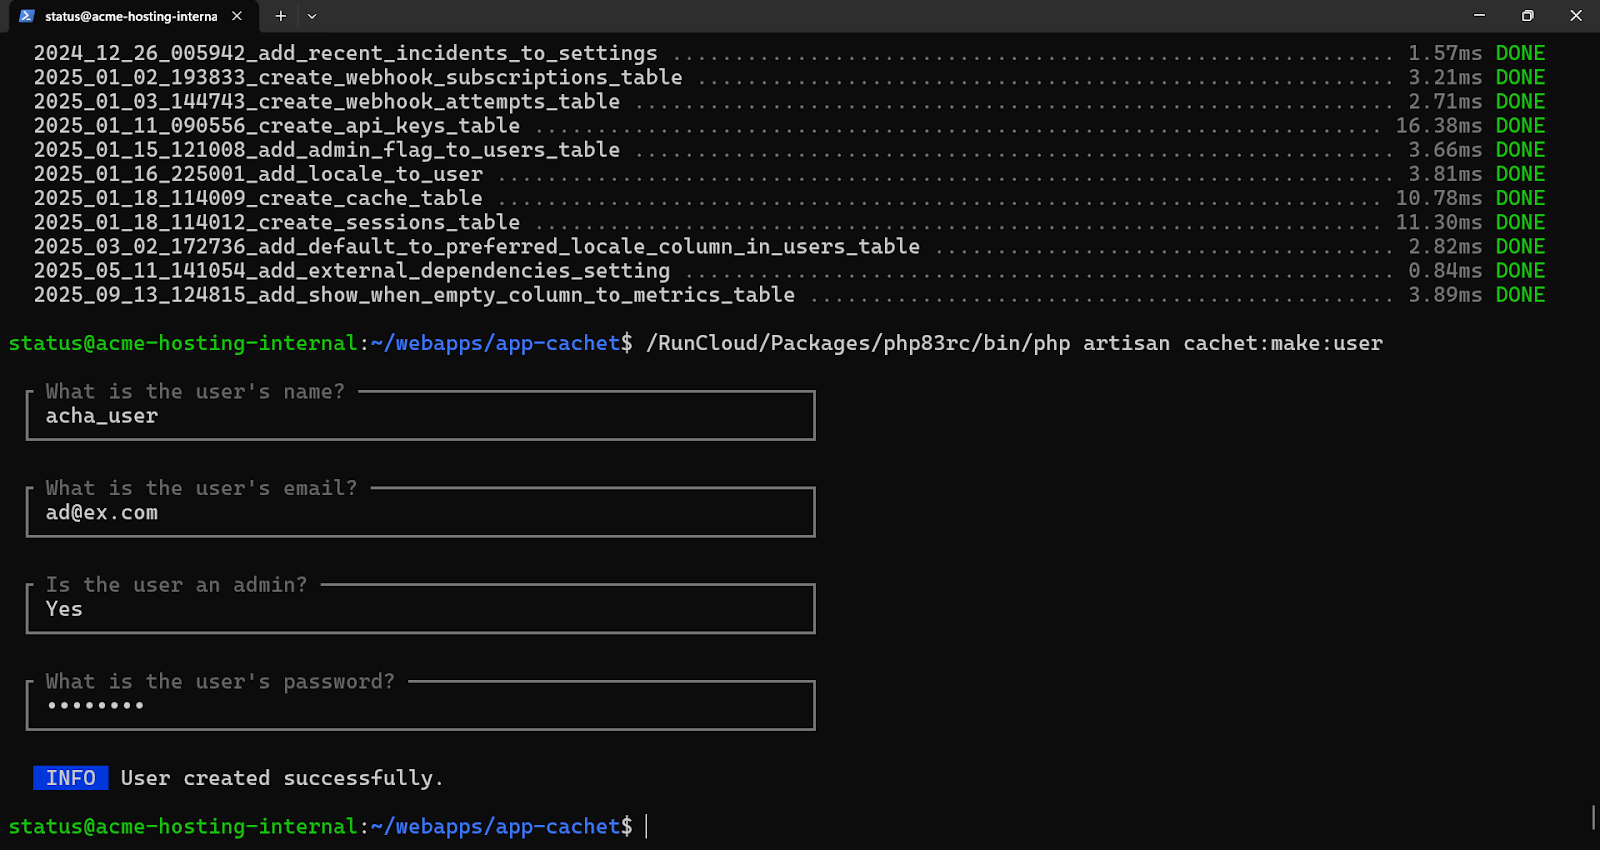
    Create the first user account, which will have administrative access to the Cachet dashboard, by following the interactive prompts:

    /RunCloud/Packages/php83rc/bin/php artisan cachet:make:user

    Step 8: Set Up the Scheduler Cron Job

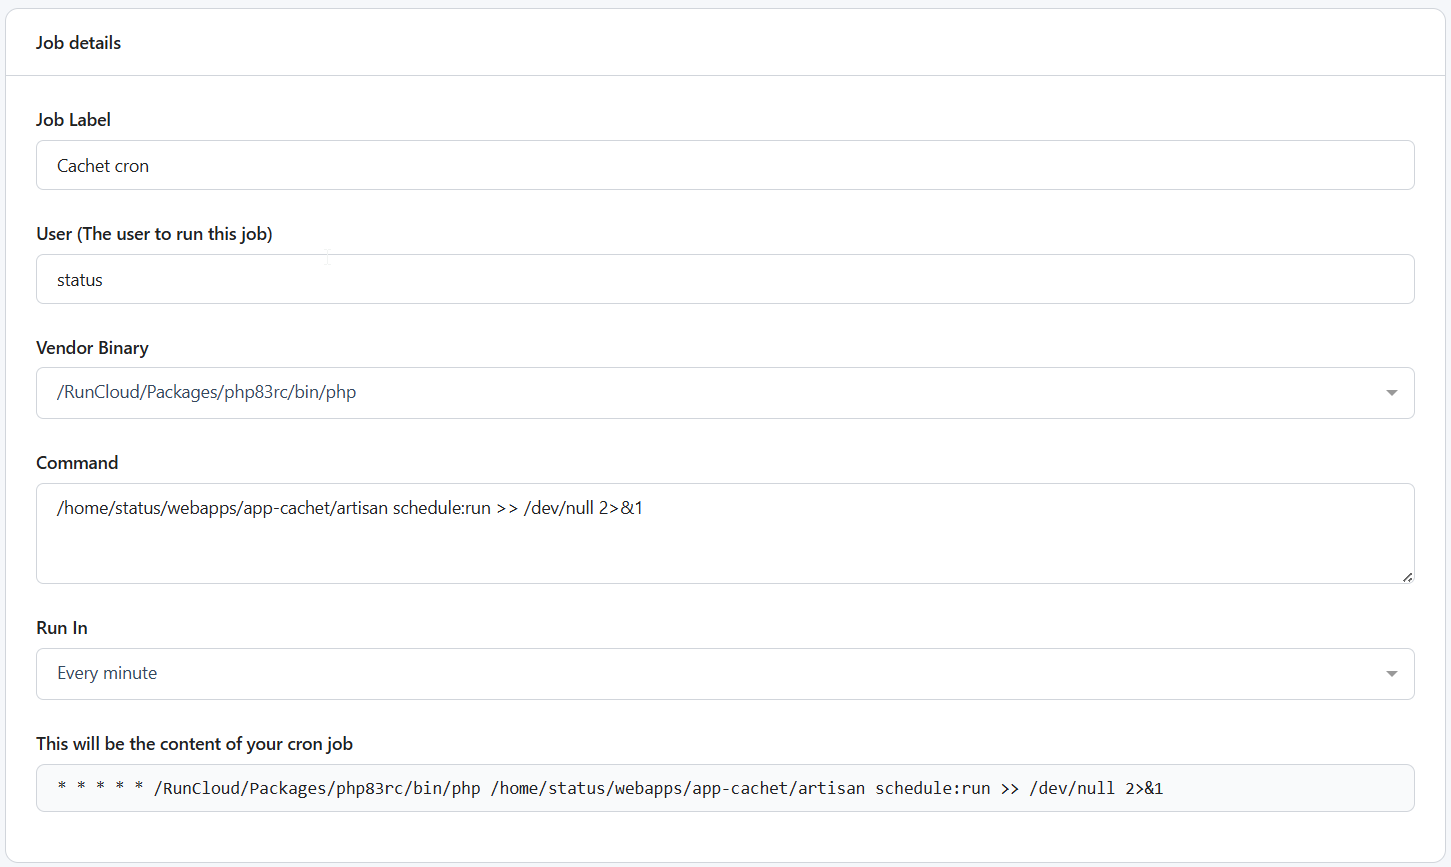
    Cachet requires a background task to be run every minute to check metrics and handle schedules. RunCloud’s Cron Job manager makes this extremely easy.

    1. In your RunCloud dashboard, go to Cron Jobs and click Add New Job.
    2. Fill in the details as follows:
      • Job Label: Cachet Cron
      • User: Your server user (e.g., runcloud)
      • Vendor Binary: Select the correct PHP version binary (e.g., /RunCloud/Packages/php83rc/bin/php)
      • Command: /home/YOUR_USERNAME/webapps/YOUR_APP_NAME/artisan schedule:run >> /dev/null 2>&1
      • Run In: Every minute

    Save the cron job, and you’re all set!

    After Action Report

    By now, you should have a fully functional, self-hosted status page. Go ahead and visit your domain to see it live, and log in at the /dashboard to begin customizing components, scheduling maintenance, and transparently communicating with your users.

    Investing a small amount of time to set this up builds a more resilient and trustworthy relationship with your customers. While powerful open-source tools such as Cachet provide the features, platforms like RunCloud offer the seamless experience.

    As you can see from the process above, RunCloud eliminates the complexity of server configuration, database linking, and cron job management, allowing you to deploy powerful applications with confidence and ease.

    Ready to take control of your servers without the headache? Sign up for RunCloud today.

    Frequently Asked Questions

    Why not use a hosted service like Statuspage.io or BetterStack?

    Hosted services are convenient, but you sacrifice control over your data, branding, and features. By self-hosting Cachet with RunCloud, you gain complete freedom to customize every aspect of your status page and avoid the recurring, often expensive subscription fees of third-party platforms.

    Is it difficult to set up a self-hosted status page with Cachet?

    While setting up any application directly on a server can be complex, a modern server panel like RunCloud makes it incredibly simple. RunCloud handles the server configuration, firewall, and database linking, providing a guided interface that turns a difficult command-line process into a few clicks. This gives you the power of a self-hosted solution without the traditional setup headaches.

    Can I fully customize my Cachet status page on RunCloud?

    Absolutely, and this is a key advantage of self-hosting. Because you have full control over the application files on your server managed by RunCloud, you can modify the code, apply custom themes, and integrate it deeply with your other systems. This level of customization is simply not possible with restrictive hosted solutions like UptimeRobot or Statuspage.io.

    How much does a self-hosted status page on RunCloud cost?

    A self-hosted solution is extremely cost-effective, as your only costs are the cloud server (from providers like DigitalOcean or Vultr) and your RunCloud subscription. This predictable, low monthly fee is often significantly cheaper than hosted status page services, which can charge high premiums based on the number of subscribers or components. With RunCloud, you get unlimited potential for a flat, reasonable price.

    Do I need to be a Linux expert to manage my server with RunCloud?

    Not at all. RunCloud is designed to empower users who want the power of a VPS without needing deep command-line expertise. It automates and simplifies critical server tasks like security updates, creating cron jobs, and managing databases through an intuitive graphical dashboard, giving you full control with none of the complexity.

  • 12 reCAPTCHA Alternatives To Protect Your Site from Spam

    12 reCAPTCHA Alternatives To Protect Your Site from Spam

    You’ve probably encountered CAPTCHA at some point while browsing the web. It’s that annoying test that asks you to prove you’re human by solving a puzzle, typing some letters, or clicking on some images.

    Captcha is supposed to protect your website from spam and abuse, but it can also drive away your visitors and customers.

    It can be frustrating, time-consuming, and discriminatory for some users, especially those with disabilities or low internet speed.

    In fact, CAPTCHA can reduce your website’s conversion rate by up to 3.2%!

    But what if we told you there’s a better way?

    A way to protect your website from bots without annoying your users. A way to improve your website’s user experience, security, and accessibility. A better way to distinguish between bots and real users.

    In this article, we will show you some of the top alternatives of Google’s reCAPTCHA service that you can use on your website today. These alternatives are easy to implement, effective, and user-friendly.

    Read on to find out more!

    Top Alternatives to reCAPTCHA for Web Developers

    Cloudflare Turnstile

    Cloudflare Turnstile is a strong contender against Google’s reCAPTCHA. It is easy to use, mobile-friendly, and customizable, and it can be easily integrated into your website using a simple JavaScript snippet.

    The best part is that Turnstile can validate users without any visual puzzle – significantly improving the user experience. It is also WCAG 2.1 Level AA compliant, making it accessible for users with disabilities. Cloudflare promises to protect the privacy of your users and never harvests data for ad targeting – similar can’t be said for other providers.

    Pricing: Cloudflare Turnstile is currently free for up to 10 widgets. If you want to use more than that, you need to sign up for Cloudflare’s Enterprise plan.

    Turnstile is Cloudflare's alternative to Google's reCAPTCHA

    hCaptcha

    hCaptcha uses image-based challenges to verify human users. Users need to select the images that match a given criterion, such as “select all the cars”. hCaptcha claims to collect zero personally identifiable information, and so it automatically satisfies all privacy standards such as GDPR, CCPA, and HIPAA – making it more secure and privacy-friendly than reCAPTCHA, as it doesn’t track user data or serve ads.

    Although visual tests are convenient tools for distinguishing bots, not everyone can solve a visual challenge. hCaptcha provides advanced accessibility options for serving not just people with visual impairments but also those with auditory processing issues. It is WCAG 2.1 Level AA compliant and offers features such as an accessibility cookie to help users bypass challenges. You can change the difficulty level of each challenge to make it easier or harder for your visitors to solve CAPTCHAs.

    Pricing: It is free for up to one million requests per month. Beyond that, you need to contact customer support for custom pricing.

    CAPTCHA service

    Friendly Captcha

    Friendly Captcha is a CAPTCHA solution that uses proof-of-work to verify human users. Instead of asking visitors to solve puzzles, a small computation runs in the browser to generate a proof-of-work token in the background. This makes the process invisible to users and removes the need for visual or audio tests.

    It supports a range of frameworks, including React, Node.js, and Vue, and can be integrated with a simple JavaScript widget. For organisations prioritizing privacy, Friendly Captcha is fully GDPR-compliant and operates EU-based data centres to ensure that personal data is not tracked or stored.

    The service also meets accessibility standards such as WCAG, meaning it works with screen readers and other assistive technologies, and can be used without creating additional barriers for people with disabilities.

    Pricing: Friendly Captcha offers four paid plans starting at €9 per month, with different options for security, scalability, and support. Plans vary in the number of protected domains, monthly request limits, and available features. A free non-commercial plan is also available for low-traffic websites.

    Altcha

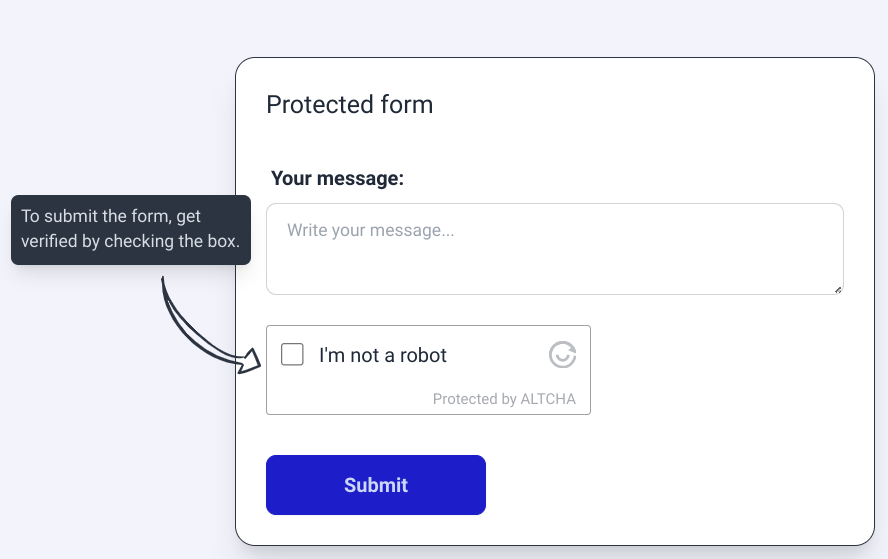
    ALTCHA is more than just a CAPTCHA alternative. It is a complete solution for protecting your website and online services from spam and abuse, while respecting your users’ privacy and experience. Instead of asking users to select the correct image, it uses a proof-of-work mechanism to validate users. With ALTCHA, you can:

    • Reduce server load and bandwidth by preventing bots and malicious actors from accessing your website and online services.
    • Enhance security and privacy by using a self-hosted, open-source solution that does not rely on third-party servers, cookies, or fingerprinting, and does not track your users or their behavior. ALTCHA is also WCAG 2.2 Level AA compliant, offering accessible alternatives to visual challenges.
    • Customize and brand the widget to match your website’s look and feel, and adjust the difficulty of the proof-of-work challenge to suit your needs and preferences.
    • Support humans and robots by using a machine-to-machine (M2M) verification system that allows automated systems to access your APIs and online services in a controlled and secure manner.

    Pricing: Thanks to its permissive MIT license, ALTCHA is free to use and free to modify. You can use it without charge on unlimited websites and online services, with no restrictions or limitations.

    Private Captcha

    Private Captcha is a modern CAPTCHA service focused on privacy. It’s designed for easy integration and can be implemented without the need for cookie banners. We particularly like it because it provides smart difficulty scaling, which allows you to increase or decrease CAPTCHA difficulty using a slider.

    Additionally, it has EU-only endpoints for data privacy and extensive widget customization. It also offers an invisible challenge option and can be self-hosted, allowing deployment on a company’s own infrastructure.

    The service boasts a strong ecosystem with a variety of integrations for both server-side and client-side applications. It supports a number of integrations, including a WordPress plugin and libraries for Go, PHP, Python, .NET, and JavaScript on the server side. For client-side implementation, a React component is available, and an OpenAPI definition is provided for backend integrations. This range of options allows developers to incorporate Private Captcha into their existing technology stacks.

    Pricing: Private Captcha costs €108/year, comes with a 14-day free trial, and does not require a credit card to get started. Additionally, it also has a self-hosted license, which starts at €29/month.

    SVG Captcha

    If you want a simple solution or if you’re a fan of older-style CAPTCHA, SVG Captcha is a great option for blocking automated traffic. It uses scalable vector graphics (SVG) to generate text-based challenges.

    Although this is one of the simplest forms of CAPTCHAs, it is still pretty useful, and you can use it in multiple ways. For example:

    • You can challenge users to type the text they see in the SVG image.
    • You can ask users to come up with the next character in a predictable sequence, such as multiples of 2.
    • You can ask visitors to compute the results of simple math problems.
    • Alternatively, if your visitors are fluent in English, you can ask them puzzles such as “how many vowels are present in the given word.”
    • You can also present visitors with simple math equations, such as “3 + 2 = 9,” and ask them whether they are true or false.

    SVG Captcha is more lightweight, flexible, and creative than CAPTCHA, which doesn’t use bitmap images or fonts. It also supports various options, such as noise, size, color, and style. You can integrate SVG Captcha into your website using a Node.js module.

    Pricing: It is open source and available under the MIT license.

    AWS WAF Captcha

    AWS WAF can deliver and validate CAPTCHA challenges for web requests that match your firewall rules. It is WCAG-compliant and supports accessibility features such as an audio CAPTCHA option. You can integrate AWS WAF Captcha into your website using Application Load Balancer, Amazon API Gateway, or AWS AppSync resources.

    AWS WAF Captcha allows you to customize the behavior and appearance of the CAPTCHA challenges, such as the difficulty level, the expiration time, the retry limit, and the theme. You can also use AWS WAF Managed Rules, such as AWS WAF Bot Control or the Amazon IP Reputation list, to trigger CAPTCHA challenges for suspicious requests. It can be a good solution if you already use AWS to manage your cloud resources.

    Pricing: AWS WAF charges you for two events: CAPTCHA attempts and challenge responses. A CAPTCHA attempt occurs when a user solves a CAPTCHA and sends it to AWS WAF for verification, and it costs $4.00 per ten thousand attempts analyzed. A challenge response occurs when a user is shown a challenge page by AWS WAF due to a suspicious request, and it costs $0.40 per million responses served.

    GeeTest Adaptive CAPTCHA

    Geetest adaptive CAPTCHA is a powerful and user-friendly online security and verification solution. It offers a variety of CAPTCHA challenges that can adapt to different scenarios and preferences. The WCAG-compliant service works with major screen readers, including ChromeVox, VoiceOver, NVDA, and JAWS.

    You can customize the interface style, language (78 different languages supported), and animation style of the CAPTCHA. You can also easily customize the type and difficulty of the CAPTCHA challenge that you want to use.

    We particularly like Slide CAPTCHA, a classic and popular option that requires users to drag a slider to match a puzzle piece. Icon CAPTCHA is another fun and interactive option that challenges users to select icons in the correct order.

    Pricing: Sign up for a free trial, and a sales representative will contact you.

    reCAPTCHA alternative

    Lemin Captcha

    Lemin Captcha is a CAPTCHA service that uses games and puzzles to verify users and secure websites. It is fun, easy, and accessible for users, and it also prevents bots, fraud, and spam on websites.

    Unlike other CAPTCHA services that ask users to click on images or type words, Lemin Captcha makes security enjoyable and engaging. Users can solve puzzles that are suitable for their skill level and preference. You can customize the style and theme color of the CAPTCHA to match your website or app design. It also respects users’ privacy and security by generating anonymized user IDs.

    Pricing: First 5,000 images are free every month, beyond which you will be charged $0.001 per puzzle image.

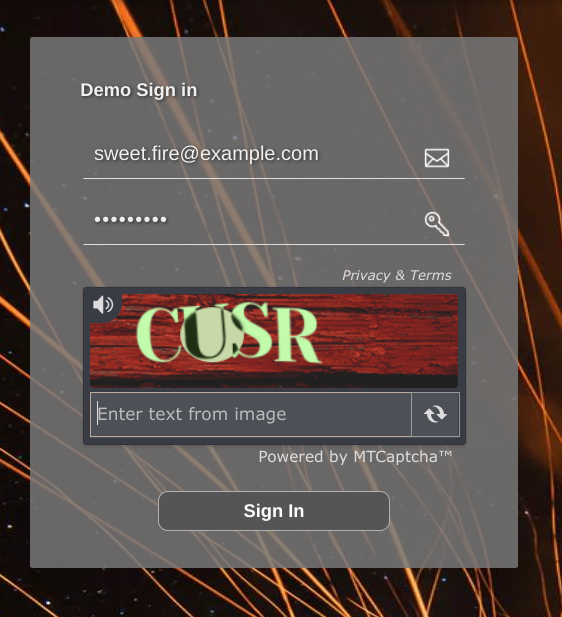
    MTCaptcha

    MTCaptcha is a CAPTCHA service that uses proof of work to prevent automated attacks on websites. Proof of work is a computation that makes attacks more difficult, expensive, and slow. MTCaptcha’s proof of work is adaptive, meaning that it adjusts to the risk level of the user and the network.

    For most users, proof of work is invisible and fast, but for suspicious users or regions, it becomes harder and longer. Proof of work can protect against brute-force attacks on passwords, keys, or IDs, but not against network-layer attacks.

    MTCaptcha is also compliant with GDPR and WCAG 2.0/2.1 AAA standards and offers features such as invisible CAPTCHA, adaptive CAPTCHA complexity, multi-user account management, and automated regression test support.

    Pricing: It is free for one fully qualified domain name, after which you need to pay $85 per site, per month.

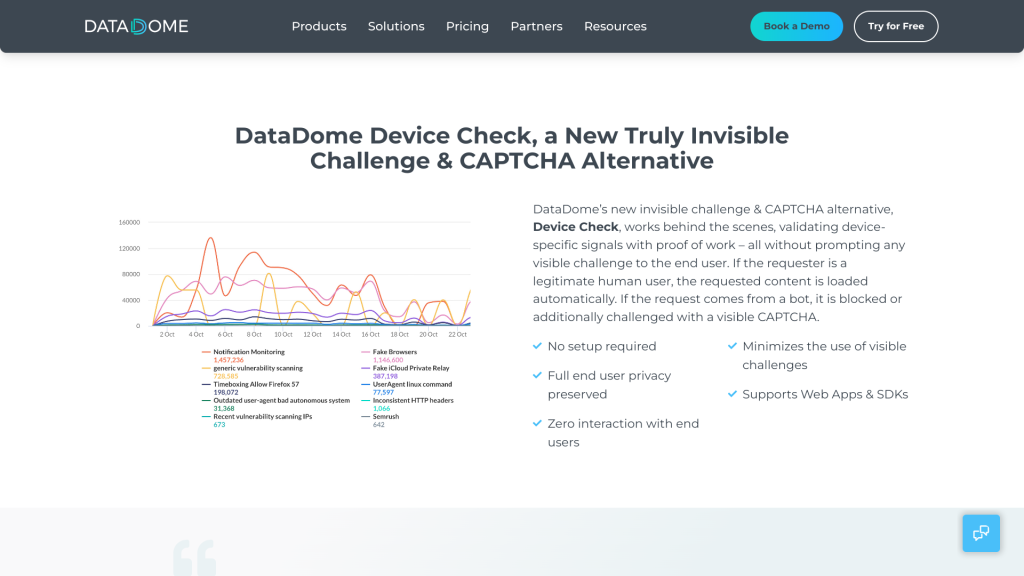
    DataDome’s Device Check

    DataDome offers Device Check, a tool that verifies the end user’s device and environment without any user interaction. Device Check can detect and block automation frameworks, spoofed environments, and programmatic access to user interfaces. It can also ensure the device’s authenticity by executing a proof of work and a fingerprinting challenge.

    Device Check runs on web browsers and mobile applications and respects the end user’s privacy by minimizing data collection. It is also advertised as WCAG 2.2 AA compliant. Device Check is like a CAPTCHA but without any challenge to the end user. It only challenges the requester if the check’s result is inconclusive.

    Pricing: There is no free plan – the business plan starts at $3,690 per month for up to 100 million requests.

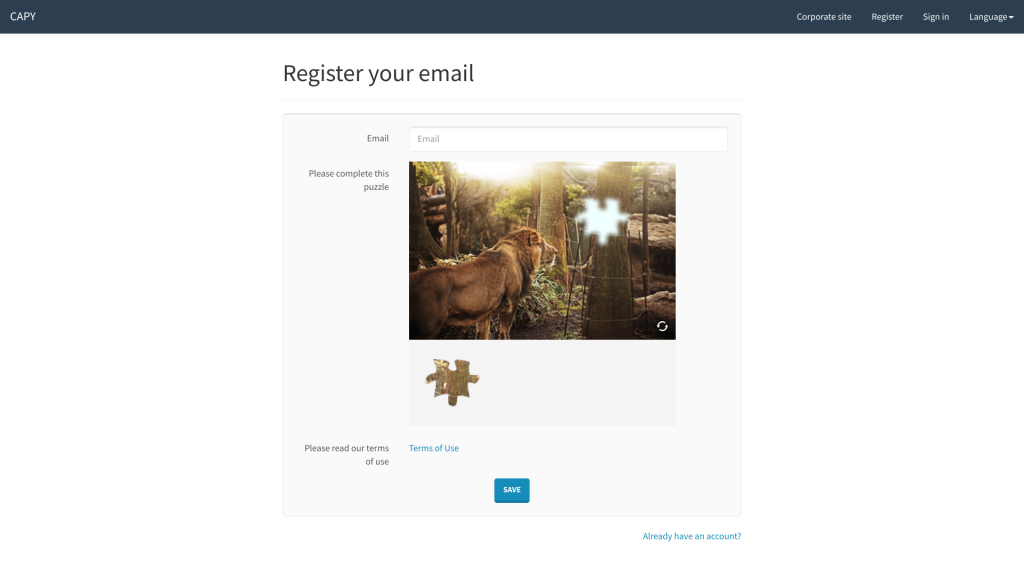
    Capy Puzzle CAPTCHA

    Capy offers a product called Capy Puzzle CAPTCHA, which is designed to protect websites from brute-force attacks and spam bots that attack passwords. Capy Puzzle CAPTCHA uses a puzzle-based mechanism that is easy for humans to solve but hard for computers to crack. It also allows website owners to customize the appearance and style of the puzzle and monitor the website’s security status with statistical data.

    It claims to reduce the user termination rate by 10% compared to conventional text-based CAPTCHA. Capy offers six different levels of security. You can choose the most appropriate level to strengthen the security or make it easier for users to pass the challenge.

    Pricing: Capy offers a 30-day free trial, and you can request an estimate by emailing them a monthly page view count or by providing an estimate of the number of CAPTCHA displays.

    Other Alternatives

    Although using CAPTCHA is one way to solve your bot problem, it is not the only solution. Besides the above-mentioned alternatives, there are some other ways to prevent bots from accessing or submitting web forms, such as:

    • Use passkeys: You can generate a unique passkey for each user session and embed it in a hidden field in your web form. You can then validate the passkey on the server side before processing the form data.
    • Send SMS/email: You can send a verification code to the user’s phone number or email address and ask them to enter it in your web form. You can then verify the code on the server side before processing the form data.
    • Hidden field detection: You can add a hidden field in your web form that is not visible to human users but can be filled by bots. You can then check if the hidden field is empty or not on the server side before processing the form data.

    Final Thoughts

    Differentiating between automated users and humans is essential to protect your website. In this post, we highlighted that Google’s reCaptcha is not the only way to protect your website from bots. There are many alternatives that offer better user experience, security, and accessibility. You can choose the one that suits your needs and preferences.

    However, CAPTCHA alternatives are not the only thing you need to consider when developing your website. You also need to think about how to manage your cloud infrastructure, which can be complex and time-consuming.

    That’s why we recommend using RunCloud, a cloud-based platform that makes it easy to deploy, manage, and scale your websites. With RunCloud, you can:

    • Create and launch your websites in minutes, using any PHP framework or CMS of your choice.
    • Monitor and optimize your website performance, security, and reliability, using a simple and intuitive dashboard.
    • Scale your websites with confidence, using features like Atomic Deployment, Firewalls, and backups.

    RunCloud is the trusted solution for web developers who want to focus on shipping great work, not managing their cloud infrastructure. Whether you are a beginner or an expert, RunCloud can help you create and manage your websites faster and better. We support all major cloud providers, such as AWS, DigitalOcean, Google Cloud, and more.

    Don’t waste time and money on complicated and expensive cloud infrastructure. Try RunCloud today for 7-days – free of charge!

  • The Best SMTP Servers for Marketing Emails in 2026 [Detailed Comparison]

    The Best SMTP Servers for Marketing Emails in 2026 [Detailed Comparison]

    In this post, we will discuss some of the best SMTP servers that you can use for marketing emails in 2026. But first, let’s briefly answer the question – what exactly is an SMTP server?

    If you want to start an online business then you will need to send emails to your customers, but which email service should you use?

    What are SMTP Servers?

    Simple Mail Transfer Protocol (SMTP) servers are the backbone of email delivery on the internet, sending emails from an email client to a recipient’s email server.

    SMTP servers are crucial for businesses and individuals alike, as they ensure that emails are correctly sent and received – making communication via email possible. SMTP servers act like a post office, handling the sending and routing of email messages. Without SMTP servers, email as we know it would not exist.

    Suggested read: 15 Best Email Hosting For Small Business (2026)

    How Do SMTP Servers Work?

    SMTP servers work in a series of steps:

    1. Connection: The process of sending email begins when your email client connects to the SMTP server using TCP (Transmission Control Protocol).
    2. Communication: The client then sends the email message to the SMTP server. This message includes the sender’s email address, the recipient’s email address, the subject line, and the body of the email.
    3. Sending: The SMTP server processes the email and sends it to the recipient’s SMTP server, using the DNS (Domain Name System) to find the recipient’s email server.
    4. Delivery: The recipient’s SMTP server checks the incoming email, and if everything is in order, it sends the email to the recipient’s email client.

    Suggested read: DKIM – What Is It & Why Your Emails Need It

    Best SMTP Servers for Email Marketing

    SMTP ProviderPrice
    Brevo300 FREE Emails/day + Starting at $10/mo
    SendGrid100 FREE Emails/day + Starting at $14.95/mo
    Mailtrap3,500 FREE Emails/day + Starting at $15/mo
    MailGun5,000 FREE Emails for 3 months + Starting at $35/mo
    AWS SES$0.10 per 1,000 Emails
    SMTP2Go1,000 FREE Emails/month + Starting at $14/mo
    MailerSend1,000 FREE Emails/month + Starting at $14/mo
    SendPulse15,000 FREE Emails/month + Starting at $6.40/mo

    Brevo

    Brevo is an all-in-one marketing platform that offers a range of services including email marketing, SMS marketing, WhatsApp marketing, and marketing automation. It provides a free plan with up to 300 emails per day and unlimited contacts.

    The platform also offers AI-generated email content and AI predictive sending to optimize the email send time for each recipient. It complies with both GDPR & CCPA, and offers different pricing plans catering to various business needs, from startups to large organizations.

    best SMTP Servers

    Brevo SMTP Pricing

    • 300 FREE Emails/day
    • Premium plans start at $10/mo

    SendGrid

    Twilio SendGrid offers an Email API and SMTP service that allows users to send emails reliably without needing their own email servers. SendGrid provides 24/7 support and features such as dynamic templates, email validation, and email testing.

    It also offers advanced features including SMTP relay services and RESTful APIs for better customer experience. SendGrid is used by startups, enterprises, high volume senders, marketers, and developers – which makes it a good choice for sending business critical emails.

    SendGrid SMTP Pricing

    • 100 FREE Emails/day
    • Premium plans start at $19.95/mo for up to 50k emails

    Mailtrap

    Mailtrap is an SMTP email service designed for developers and product teams, focused on high deliverability and fast delivery. It provides 25+ ready-to-use code snippets for quick and easy integration with your application. Features include a flexible RESTful email API, industry-best analytics, and automatic email authentication (SPF, DKIM, DMARC).

    Mailtrap SMTP Pricing

    • Free tier available
    • Paid plans from $15/month

    Mailgun

    Mailgun’s SMTP relay services allow senders to efficiently send both marketing and transactional emails without the need to manage their own mail servers. Even if you do have your own email server, pairing it with an SMTP service such as Mailgun offers additional benefits including better stability and deliverability.

    Mailgun’s log retention and email analytics allows you to track your email’s journey, monitor opens, clicks, and recipient habits, gaining insights into campaign performance – all of which makes it a solid choice for sending business emails.

    Mailgun Pricing

    • Free plan offers 5,000 emails per month
    • Paid plan starts at $35/month for 50k emails

    Suggested read: The 19 Best & Most Reliable Transactional Email Services 2026

    Amazon SES

    Amazon Simple Email Service (Amazon SES) provides a cloud-based email service that allows you to send emails without managing your own on-premises SMTP server. It handles hundreds of billions of emails per year, making it a reliable choice for both marketing and transactional emails.

    AWS SES Pricing

    • AWS offers 3,000 free emails/month for 12 months
    • Outgoing emails cost $0.10 for 1,000 emails (email attachments charged extra)
    • Incoming emails cost $0.10 for 100 emails

    SMTP2Go

    SMTP2GO is an email delivery service that handles the technical complexities behind the scenes, allowing your emails to be sent smoothly. It provides the ability to manage blacklist monitoring, and carry out reverse DNS, DKIM, ISP throttling, and other critical aspects.

    It can generate real-time reports that allow you to track every email from start to finish, including identifying bounced emails, which will help you understand why some messages don’t reach inboxes.

    SMTP2Go Pricing

    • Send 1,000 emails every month for free
    • Premium plans start at $10/month for 10,000 emails

    MailerSend

    MailerSend is a transactional email sending service that provides a fast, secure, and reliable SMTP relay service without the need to manage your own SMTP server. It supports sending email from any app, device, or email client using just an SMTP server name, port, username, and password – no complex coding required.

    It also offers a WordPress SMTP plugin that seamlessly connects your account to enable reliable high-volume email sending directly from your WordPress site.

    MailerSend Pricing

    • Free plan offers 3,000 emails with an option to pay additional $1 for 1,000 emails
    • Premium plan users get 50,000 emails for $30/month

    SendPulse

    SendPulse is a user-friendly email marketing service that allows you to send bulk emails and either build templates using its drag-and-drop template builder or select from 130+ ready-made email templates.

    You have the option to personalize your emails by adding text, images, buttons, videos, and social media links, as well as being able to track campaign results.

    You can create automated email flows for welcome messages, abandoned cart reminders, and more using Automation 360. You can also segment your mailing list using tags, and personalize emails based on subscribers’ interests and actions.

    SendPulse Pricing

    • Free plan allows sending 15,000 emails to 500 subscribers
    • Paid plans start at $8/month for unlimited number of emails

    Suggested read: How MailHog Can Transform Your Local Email Testing Process

    Wrapping Up

    The SMTP servers we’ve discussed in this post are some of the best options available for sending marketing emails in 2026. They offer a range of features and benefits that can help you optimize your email marketing campaigns and reach your target audience more effectively.

    However, the choice of an SMTP server should be based on your specific needs and requirements. Consider factors such as:

    1. The volume of emails you plan to send
    2. The level of customer support you require
    3. The specific features you need for your email marketing campaigns

    If you are looking for an easier way to manage your servers then you should check out RunCloud.

    RunCloud allows you to quickly deploy and manage your web applications without needing to be a Linux expert.

    Sign up for RunCloud today!

    FAQs About SMTP for Email Marketing

    Is SMTP needed for email?

    Yes, SMTP (Simple Mail Transfer Protocol) is essential for sending emails as it’s the standard protocol for email communication across the internet, acting as a guide for mail servers to send, receive, and relay emails among senders and recipients.

    Is Google SMTP free?

    Google’s SMTP service is free of charge, but it has some limitations. For example, you can send up to 500 emails per day with a free Gmail account or a free trial of Google Workspace.

    How many emails can you send with Google SMTP?

    With a free Gmail account, you can send up to 500 emails each day. If you have a Google Workspace paid account, the daily sending limit per user account is 2,000 emails per day.

    Can I run my own SMTP server?

    Yes, you can host your own SMTP server on a virtual private server (VPS) or a dedicated server. However, this approach requires some technical expertise, as well as enough resources to support the increased traffic.

    What is the difference between HTTP and SMTP?

    HTTP (Hypertext Transfer Protocol) and SMTP (Simple Mail Transfer Protocol) are both network layer protocols used to transfer information between hosts. HTTP is used for data and file transfer, while SMTP is used for mail services.

  • How to fix the ERR_SSL_PROTOCOL_ERROR

    How to fix the ERR_SSL_PROTOCOL_ERROR

    Seeing “This site can’t provide a secure connection” with the ERR_SSL_PROTOCOL_ERROR message can stop you in your tracks. For developers, agencies, or site owners, it’s more than an inconvenience – it can mean downtime, lost visitors, and support tickets piling up.

    This guide explains what the error means, why it happens, and how to fix it quickly, whether you’re troubleshooting from your own device or diagnosing an issue on your server.

    Let’s get started!

    What is the ERR_SSL_PROTOCOL_ERROR?

    When you connect to a website, your computer encrypts all the traffic between your browser and the remote server using a common SSL certificate. When your browser and the website’s server fail to establish a secure connection, the browser displays an ERR_SSL_PROTOCOL_ERROR.

    This error can pop up for various reasons, ranging from simple local issues on your computer to more complex problems with the website’s configuration.

    Common Causes of the ERR_SSL_PROTOCOL_ERROR

    Several factors can trigger this error, and they can originate from either the user’s end or the server’s end. Here are some of the most frequent culprits:

    • Incorrect System Time and Date: One of the simplest and most common causes is an incorrect date and time on your computer. SSL certificates have a specific validity period, and if your system’s clock is off, your browser may incorrectly perceive the certificate as expired or not yet valid.
    • Corrupted Browser Cache or SSL State: Your browser stores data from websites to load them faster on subsequent visits. However, this cached data can sometimes become outdated or corrupted, leading to SSL errors. Similarly, your operating system maintains an SSL cache, which can cause issues.
    • Interference from Antivirus or Firewall Software: Security software is designed to protect you, but can sometimes cause unexpected errors. For example, your antivirus or firewall might misinterpret a website’s SSL/TLS protocol as a threat and block the connection.
    • Outdated Browser or Operating System: An outdated browser may not support the latest SSL/TLS protocols used by modern websites, leading to a connection failure.
    • Browser Extension Conflicts: A browser extension can occasionally interfere with the SSL/TLS handshake process.
    • Server-Side SSL/TLS Configuration Issues: Sometimes, the problem might be on the server’s side. This could be due to a few things: maybe their security certificate has expired or wasn’t set up correctly, or the website uses an old and less secure protocol to connect.

    How to Fix the ERR_SSL_PROTOCOL_ERROR

    If you’re encountering this error on a website, try the following troubleshooting steps in the provided order:

    1. Check Your System’s Date and Time: This is the quickest and often most effective fix. Ensure your computer’s date, time, and timezone are all set correctly.
    2. Clear Your Browser’s Cache and Cookies: Clearing your browsing data forces your browser to fetch a fresh version of the website. To do this in Chrome, press Ctrl + Shift + Delete (or Cmd + Shift + Delete on a Mac) and select to clear your browsing data for 1 hour.
    3. Clear Your SSL State: Your operating system also stores a cache of SSL certificates. Clearing this can resolve the issue. In Windows, you can find this option in “Internet Properties” > “Content” tab > “Clear SSL state”.
    1. Disable the QUIC Protocol in Your Browser: QUIC (Quick UDP Internet Connections) is a protocol developed by Google that is enabled by default in Chrome. Although generally beneficial, it can sometimes be the source of SSL errors. To disable it, type chrome://flags/#enable-quic into your Chrome address bar, and change the setting from “Default” to “Disabled”.
    Disabling experimental settings in Chrome to fix the ERR_SSL_PROTOCOL_ERROR
    1. Review Your Antivirus and Firewall Settings: Temporarily disable your antivirus or firewall to see if it’s causing the issue. If the error disappears, you must adjust your security software’s settings to allow the website. Be cautious with this step and remember to re-enable your security software afterward.
    2. Disable Browser Extensions: Try disabling your browser extensions individually to see if a specific extension is causing the conflict.
    3. Update Your Browser and Operating System: Ensure that you are using the latest browser version and that your operating system has all the latest security updates installed.
    4. Disable Experimental TLS features: In newer versions of Chrome, Google sometimes releases experimental features that can interfere with the TLS handshake mechanism. Search for “TLS” in the Chrome flags and disable new features.

    For Website Owners: Ensuring a Secure Connection

    If you own a website and your users are reporting the ERR_SSL_PROTOCOL_ERROR, you need to investigate your server’s configuration.

    • Verify Your SSL Certificate Installation: Ensure you have a valid SSL certificate installed on your server. You can use online tools like SSL Shopper or SSL Labs to check the status of your certificate.
    • Check for Expired SSL Certificates: SSL certificates have an expiration date. Make sure your certificate is valid.
    • Correct Your SSL Configuration: Your server should be configured to use modern, secure encryption protocols such as TLS 1.2 or TLS 1.3. Configure your web server to use these modern protocols and disable older, vulnerable protocols like SSLv2 and SSLv3.
    • Ensure Correct DNS A Record: Your domain’s DNS A record should point to the correct IP address of your hosting server. If you have already configured your DNS server, then you need to wait for a few hours for the DNS changes to propagate across the globe.

    Final Thoughts

    The ERR_SSL_PROTOCOL_ERROR might look technical, but it often comes down to simple fixes, from adjusting your system clock to updating your browser. If you follow the steps in this guide, you can usually get your site or browsing session back on track in minutes.

    If you’d rather avoid SSL errors altogether, RunCloud can help.

    Every site you host with RunCloud gets a free, automatically renewing SSL certificate – no manual renewals, expired certificates, or downtime. Setup takes just a few clicks, even for advanced setups like WordPress Multisite.

    Spend less time troubleshooting and more time running your sites.

    Get started with RunCloud and secure your websites automatically.

    Frequently Asked Questions (FAQs)

    Why do I only see this error on some websites and not others?

    This usually means the problem is with that specific website’s security setup, not your computer. Your browser is successfully making secure connections to other sites, but it’s hitting a snag with that one in particular.

    Is the ERR_SSL_PROTOCOL_ERROR dangerous to my computer?

    No, the error message itself is not dangerous; it is actually a safety feature from your browser. It’s stopping you from connecting to a site that it can’t verify as secure, which helps protect your personal information.

    If I clear my browser cache, will I lose all my saved passwords?

    Most browsers allow you to choose what data you want to clear. When you go to clear the cache, simply uncheck the boxes for “Passwords” and “autofill form data” to keep them saved.

    Can my Wi-Fi network cause this SSL error?

    Yes, some public or office Wi-Fi networks have strict rules that can block certain connections and cause this error. Visiting the site using a different network, like your mobile data, is a good way to check if this is the cause.

    I’ve tried all the steps, and the error won’t disappear. What should I do?

    If you have tried all the user-side fixes, the issue is almost certainly on the website’s end. You can try contacting the website’s administrator to let them know, or simply wait a day or two for them to fix it.

  • A Step-by-Step Guide to Merging Individual WordPress Sites Into a Multisite Network

    A Step-by-Step Guide to Merging Individual WordPress Sites Into a Multisite Network

    Managing multiple WordPress sites can feel like playing an endless game of dashboard hop – logging in and out, repeating the same updates, and wasting time on work that could be done once.

    If your sites are related (part of the same business, organisation, or project), there’s a better way. A WordPress Multisite network lets you run them all from a single installation, with one login, shared themes and plugins, and updates that apply across the board.

    In this guide, you’ll learn exactly how to merge your existing WordPress sites into a single multisite network. We’ll cover when multisite is the right choice (and when it isn’t), how to prepare your sites for migration, and the step-by-step process for bringing all your content, themes, and media together under one roof.

    We will also provide a detailed pre-migration checklist to prepare your sites for a smooth transition and step-by-step instructions to activate your network and migrate all your content, themes, plugins, and media files.

    Let’s get started!

    The Benefits of a Multisite Network

    Moving your individual sites into a multisite network might seem like a bit of work upfront, but the long-term benefits are definitely worth it. Here’s why it’s such a great idea:

    • Centralized Management: This is the biggest win! Instead of juggling multiple usernames and passwords, you can manage every single one of your websites from a single dashboard. With a special “Super Admin” role, you have the power to oversee everything from one convenient location.
    • Efficient Updates: We all know how important it is to keep WordPress, themes, and plugins updated. With a multisite network, you only have to perform an update once. When you update a theme or plugin, that update becomes available across all the sites in your network instantly. This saves time and ensures all your sites are secure and running the latest versions.
    • Resource Savings: Every WordPress installation takes up space on your hosting server. When you have multiple separate sites, you have multiple copies of WordPress core files. A multisite network uses just one set of these core files for all your sites, which means it uses less server space and can be more efficient to run.
    • Consistency: If you want all your sites to have a similar look and feel, then you can use Multisite Network to share themes and plugins across the network. This makes it incredibly simple to maintain a consistent brand and user experience on all of your websites.

    When Should You Not Merge Your Sites?

    While a multisite network is a fantastic tool, it’s not the perfect solution for every situation. Before you go all-in, it’s important to understand when keeping your websites separate is better.

    The most important thing to remember is that all the sites in a multisite network are fundamentally connected. They share the same core WordPress files and the same user database.

    This is why a multisite network is the perfect choice when all your websites are related to each other. For example, it’s great for a single company that needs separate sites for its different departments, office locations, or regional branches. All of these sites operate under the umbrella of one parent company.

    However, you should not use a multisite network when managing websites for two completely different companies or brands unrelated to each other. For instance, you wouldn’t want to run the website for your freelance photography business and the website for your brother’s local pizza shop on the same multisite network. Because they share a user database, it could create confusion and potential security issues. You want to keep completely separate businesses, well, separate!

    If your main goal is simply to manage multiple, unrelated sites from one convenient dashboard without having to log in and out all the time, then a multisite network isn’t the right tool for the job. You should look at our post on the “10 Best WordPress Management Tools To Easily Manage Multiple Websites” to find the perfect solution for your needs.

    While creating a multisite network is awesome, merging existing sites into it can be a bit tricky. It’s a process that requires care and attention to detail. You might run into some bumps along the way, like issues with URLs not redirecting correctly, differences in how the databases are structured, or site-specific settings that don’t initially play nicely with the network.

    It’s very common to do some manual tweaking after the main work is done, such as double-checking your website links (permalinks) or adjusting a few settings to ensure everything is compatible with the multisite setup. Don’t let this scare you, but being prepared is good!

    Additionally, your site may have some downtime, so prepare accordingly.

    Part 1: Pre-Migration Checklist

    Before you dive in, taking a few preparatory steps will save you from future headaches and make the whole process much smoother.

    • Delete Old Data: Before you pack everything up, look around your current site and see if you can tidy up anything. This is a great time to get rid of any spam comments, delete old post drafts that you’ll never use, and remove any images or media files that are no longer needed. Every piece of data on your site must be packed up, moved, and then unpacked on the new site. The less you have to move, the faster the entire merging process. Plus, it will make your backup file much smaller and easier to manage.
    • Create a Complete Backup: This is, without a doubt, the most important step. Before you change any settings, you need a complete backup of your entire website. This includes your database, all your media files, themes, and plugins. If anything goes wrong, you can restore your site to exactly how it was before you started. If you are using RunCloud, you can do this with a simple click from the RunCloud dashboard.
    • Verify Hosting Support: Not all web hosting plans are created equal. Some, especially budget-friendly shared hosting plans, may not support or allow a WordPress Multisite network. Before you begin, contact your hosting provider’s support team or check their documentation to confirm that your plan can handle a multisite installation. If you are using RunCloud, you can continue safely, as RunCloud doesn’t impose any restrictions on WordPress Multisite installations.
    • Check for Plugin and Theme Compatibility: While many plugins and themes work perfectly in a multisite network, some don’t. Take a moment to review your most essential plugins and themes to make sure they are “multisite compatible.” A quick search on the plugin or theme’s page in the WordPress repository or the developer’s website will usually give you the answer.
    • Enable Pretty Permalinks: If your website’s links look something like yourdomain.com/?p=123, it’s best to change them to a more user-friendly and SEO-friendly structure, like yourdomain.com/sample-post. These are called “pretty permalinks.” Having this structure enabled before you start can prevent link-related issues after the merge. You can find this setting in your WordPress dashboard under “Settings” -> “Permalinks.”
    • Enable Maintenance mode: It is recommended that you enable WordPress maintenance mode on your old site by executing the wp maintenance-mode activate command. This will block users from accessing your site and reduce the chances of your data getting corrupted on highly dynamic sites.
    • Deactivate All Plugins: On the individual website that you are planning to merge, it’s a smart move to deactivate all of your plugins right before you export your content. Sometimes, plugins can interfere with the export process and cause conflicts.

    Part 2: Activating Your Multisite Network

    This next part is for anyone who has not yet built a multisite network. However, if you already have a multisite network up and running, you’re ahead of the game! Feel free to jump to the next section.

    There are two main ways to create a Multisite network:

    Method 1: Creating a brand-new multisite network

    This is the perfect option if you’re starting from scratch, maybe because you’re moving to a new hosting provider or haven’t even built the main site for your network yet. The biggest advantage here is that you begin with a completely clean WordPress installation, which is a great way to ensure you don’t run into any potential conflicts from old plugins or settings.

    If you are using RunCloud, you can install a multisite network with only a few clicks from your RunCloud dashboard.

    Method 2: Converting an existing WordPress site into a multisite network

    If you already have your primary website up and running, you should follow this method. For example, if your main business website is already built and you want to add a blog or a store as separate sites within the same network, you would convert your existing site to become the “command center” of your new network.

    1. Edit Your wp-config.php File: The first step is to edit the wp-config.php file in your main WordPress folder and add the following line of code: define(‘WP_ALLOW_MULTISITE’, true);
    2. Begin the Network Setup: Once you’ve saved the change to your wp-config.php file, log in to your WordPress dashboard. A new option will have magically appeared! Navigate to Tools and then click on Network Setup to get started.
    3. Choose Your URL Structure: This is a very important step, so take a moment to think it through. WordPress will ask you to decide how the web addresses for your new sites will be formatted. You have two choices: Subdomains (which look like site1.yourdomain.com) or Subdirectories (which look like yourdomain.com/site1). This choice is permanent and difficult to change later, so pay close attention and choose the one that makes the most sense for your project’s future.
    1. Install the Network: After you’ve made your choice, simply follow the on-screen instructions provided by WordPress. It will generate two snippets of code for you to copy and paste. One snippet will go back into your wp-config.php file (the same one from Step 1), and the other will go into a file called .htaccess (a server configuration file in the same directory). Once you’ve carefully added the code and saved the files, your multisite network will be active and ready to go

    Part 3: Merging WordPress Sites

    After performing all the above steps, we are finally ready to start the merging process. You must perform the following steps for each site you want to merge into your multisite network.

    Step 1: Export Your Content

    • From the individual WordPress site you want to merge, go to “Tools” -> “Export“.
    • Select “All content” and download the XML (WXR) file. This file contains your posts, pages, comments, and other content.

    Step 2: Create a New Site in Your Network

    Next, you need to create a new site in your Multisite network. This is where you will import the data we exported in the previous step.

    • In your multisite dashboard, navigate to “My Sites” -> “Network Admin” -> “Sites”.
    • Click “Add New” and create a new, empty site for the content you are about to import.

    Step 3: Import Your Content

    • Go to the dashboard of the newly created site.
    • Navigate to “Tools” -> “Import” and run the WordPress Importer.

    On the next screen, you must upload the XML file you exported in Step 1. Depending on the size of your site, you may run into issues with max_upload_size or PHP memory limits. You might need to contact your host to temporarily increase these.

    • You will be prompted to assign the imported content to existing users or create new ones. Be sure to check the box to download and import file attachments. When you check this box, the WordPress Importer does two things:
      • It downloads the files: It reads through all your posts and pages, finds where you’ve inserted images or other media (like PDFs or audio clips), and physically downloads a copy of each file from your old, separate site to your new site’s Media Library.
      • It updates the links: After downloading the files, it automatically updates the links within your posts and pages to point to the new location of those files inside your multisite network. This ensures that all the images and media show up perfectly when you view a blog post on your new site.

    What Happens if You Don’t Check the Box?

    If you forget to check this box, only the text content of your posts and pages will be imported correctly. Your website will look like it’s full of broken images. Because the posts will still contain image links pointing back to the Media Library on your old, separate website. When you take that old site offline, all those image links will break permanently, and the images will disappear from your new site.

    Step 4: Migrate Your Themes, Plugins, and Media

    Now that you’ve successfully imported your posts and pages, you’ve brought over the “soul” of your website. The next step is to bring over its “look and feel”, i.e., your themes, plugins, etc.

    If you decided not to download and import attachments in the previous step, then you can also import them manually in this step. This is where things get a bit more technical.

    While you can upload themes and plugins through the WordPress dashboard, moving a large library of media files efficiently and correctly often requires diving into the command line. Being comfortable with basic Linux commands is a huge advantage for a smooth migration, especially when moving from one server to another.

    Migrating Your Themes and Plugins

    First, you must install all the necessary theme and plugin files on your multisite network. You can easily download new themes and plugins by navigating to “Network Admin” -> “Plugins.” Once they are installed, click on “Network Activate” to make them available for all the sites in your network.

    Installing plugins in a WordPress multisite network

    Migrating Your Media Files via The Command-Line

    Your media files (everything in your old site’s wp-content/uploads folder) must be moved to a special directory in your multisite network.

    Each network site has its unique uploads folder, located at wp-content/uploads/sites/X, where X is the unique Site ID. You can easily find the Site ID by going to your “Network Admin” > “Sites” dashboard and hovering over or clicking “Edit” on your new site; the URL will contain its ID.

    For example, in the above screenshot, the site ID is 4.

    Manually downloading and re-uploading hundreds or thousands of files is slow and prone to errors. The ideal method is to copy the files directly from your old server to the new one using the command line.

    1. Connect to Your New Server: You’ll first need to connect to your new server’s command line using SSH (Secure Shell). Your hosting provider can give you the credentials and instructions for this.
    2. Navigate to a temporary directory: Once connected, navigate to a temporary folder where you want to temporarily upload your media files. The command will look something like this:
    mkdir /tmp/myWordPressContent
    cd /tmp/myWordPressContent
    1. Pull Files from the Old Server Using rsync: Rsync is a powerful command-line tool that efficiently synchronizes or copies files between two locations. It’s fast, reliable, and perfect for this job. From inside your new site’s uploads folder, you would run a command like this:
    rsync -avz --progress username@oldserver.com:/path/to/old/site/wp-content/uploads/* .

    Let’s quickly break down that command:

    • rsync -avz --progress: This tells rsync to run in archive mode (preserves file permissions and timestamps), be verbose (show what’s happening), compress the data to speed things up, and show a progress bar.
    • username@oldserver.com:/path/to/old/site/wp-content/uploads/*: This is the source. It’s the full path to all the files (*) inside the uploads folder on your old server.
    • .: This is the destination. The single dot means “copy everything to my current directory.”

    Note: If both your old and new sites are on the same server, you don’t need to copy the files to a different folder. You can use the cd command to navigate to the /wp-content/uploads/ folder of the old site and proceed to the next step.

    Importing the Media to WordPress

    Simply copying the files onto the server isn’t enough. You’ve moved the files, but your WordPress database has no idea they exist, and they won’t appear in your Media Library. You need to tell WordPress to scan the folder and register each file.

    With WP-CLI, you can run the wp media import command. This command goes through a directory of files and properly imports each into the WordPress Media Library, creating all the necessary thumbnails along the way.

    You would run a command like this:

    wp media import --url=newsite.yourdomain.com --path=/path/to/your/multisite/ ./*

    Let’s break that down:

    • wp media import: This tells WordPress we are performing a media import operation.
    • --url=newsite.yourdomain.com: This is essential for multisite. This flag tells WP-CLI exactly which site in the network these media files belong to.
    • --path=...: This provides the full path to your multisite’s root WordPress installation, so WP-CLI knows where to find the core files.
    • ./*: This is the path of media files you want to import. The ./ means the current directory, and * means all the files in this directory.

    When you fill in all the necessary values, the final command should look like this:

    wp media import --path=/home/runcloud/webapps/app-franecki --url=https://app-franecki.corxbbfou5-yk26eoz8z479.p.temp-site.link/site2/ ./*

    Completing this final command-line step ensures that all your migrated images and files are correctly registered and will appear perfectly within your new site’s Media Library.

    Part 4: Post-Migration Checks

    The heavy lifting is done, and your site has been moved into its new home, but don’t pop the champagne just yet! To ensure a seamless transition for both you and your visitors, it’s important to run through a final checklist. These small steps will catch any potential issues and ensure your new site runs perfectly.

    • Check and Reset Your Permalinks: Sometimes, the URL structure can get a little confused after a migration. A broken link is bad for your visitors and your SEO. Fortunately, the fix is very simple: go to the dashboard of your new site, navigate to Settings > Permalinks, and without changing anything at all, just click the “Save Changes” button. This simple action forces WordPress to rebuild its link structure and fixes most common link-related issues.
    • Verify All User Roles and Permissions: You must pay close attention to this area. The standard WordPress Importer is great for content, but does not import user roles. You will need to re-assign roles manually. Go to the Users tab on your new site’s dashboard and double-check that every user has the correct role (e.g., Administrator, Editor, Author). 
    • Review Your Settings from Top to Bottom: If you performed any tweaks to your original site, they didn’t come over with the import file. You’ll need to go through your settings and configure them again. Pay special attention to:
      • Theme Options: Go into your theme’s settings panel and set up your logos, colors, fonts, and layout options.
      • Plugin Settings: Check the settings for your key plugins, like contact forms, SEO tools, and caching plugins.
      • Widgets: Your widgets will likely need to be re-added and configured. Go to Appearance > Widgets to drag and drop them back into your sidebars and footers.
    • Test Everything… and We Mean Everything!
      Put on your visitor’s hat and browse your new site thoroughly. Click through the navigation menu, read a few blog posts, and ensure all the images display correctly. Test every key functionality; submit a message through your contact form, test your search bar, and go through a test purchase process if you have a store.
    • Add Redirects from the Old Site to the New: To avoid losing your hard-earned search engine rankings and to prevent visitors from landing on a dead page, you must set up 301 redirects. A 301 redirect tells browsers and search engines that your site has moved permanently. You’ll need to redirect traffic from your old standalone site’s URL to its new address within the multisite network (e.g., from oldsite.com to yournetwork.com/newsite). This can be easily done by adding rules to your .htaccess file.

    After Action Report

    Merging your WordPress sites into a multisite network is a powerful way to streamline your workflow and efficiently manage all of your websites. While the process can have challenges and technical hurdles, careful planning and following these steps will help ensure a smooth and successful transition.

    Tired of the Command Line? Let RunCloud Handle It.

    You’re not alone if you feel overwhelmed after reading through the steps involving SSH, rsync, and WP-CLI. Managing a Linux server can be complex and time-consuming, taking you away from what you do best – running your business.

    That’s where RunCloud comes in.

    We believe server management should be simple. Our platform provides a clean, powerful control panel that makes it incredibly easy to deploy websites, manage databases, and secure your server without ever touching the command line. You can focus on growing your business and creating great content, and leave the server management to us.

    Ready to experience a faster, simpler way to manage your WordPress sites? Sign up for a 7-day free RunCloud trial today!

  • How to Send Emails From WordPress Using Your Gmail Account for FREE (Step-By-Step Guide)

    How to Send Emails From WordPress Using Your Gmail Account for FREE (Step-By-Step Guide)

    Is your WordPress site failing to send emails? Are your contact form submissions getting lost, or are users complaining they never receive password reset links?

    The default WordPress email function is somewhat unreliable, with messages landing in spam folders or never arriving.

    There are countless reasons why your website needs to send emails reliably. These automated messages are the backbone of your site’s communication, from new user registrations and e-commerce receipts to important notifications for your internal team.

    While dedicated email services are an option, they often come with a monthly fee. But what if you could fix your WordPress email problems for free?

    This is where your existing Gmail account comes in.

    Configuring your site to send emails via Gmail’s powerful SMTP server can dramatically improve deliverability without spending a dime. This method is an excellent solution for handling low-volume, essential emails.

    This guide will teach you how to set up the Check & Log Email plugin to send all your WordPress emails through your Gmail account, ensuring they reach the inbox every time.

    Let’s get started!

    Understanding Gmail SMTP Sending Limits

    It’s important to understand that a personal Gmail account is not designed for mass-mailing. Google imposes sending limits to prevent spam and reduce the server load. At the time of writing, you can send up to 2,000 emails per day when using the Gmail SMTP server. If you exceed this limit or your sending behavior appears suspicious, Google might temporarily disable your account, or your emails could be flagged as spam.

    If you plan to send a large number of emails, such as newsletters or marketing campaigns, you should consider using a dedicated transactional email service or a newsletter platform.

    How to Configure Gmail SMTP in WordPress

    Step 1: Configure an App Password in Your Google Account

    You cannot use your regular Gmail password directly in the plugin for security reasons. Instead, you need to generate an “App Password.” This is a 16-digit passcode that gives an app or device permission to access your Google Account.

    1. Go to your Google Account.
    2. Select “Security.”
    3. Under “How you sign in to Google,” select “2-Step Verification.”
    4. At the bottom of the page, select “App passwords.”
    5. Enter a name for the app (e.g., “WordPress SMTP”) and click “Generate.”
    1. Google will generate a 16-character password. Copy this password to a safe place; you will need it for the plugin configuration.

    Step 2: Install and Configure the Check & Log Email Plugin

    Now it’s time to set up the plugin in your WordPress dashboard.

    1. Install the Plugin: From your WordPress dashboard, go to “Plugins” > “Add New,” search for “Check & Log Email,” and then install and activate it.
    1. Configure SMTP Settings: Navigate to the “Check & Log Email” settings. You will need to fill in the following fields:
      • Mailer: Select “Gmail”.
      • From: Enter your Gmail address.
      • From Name: Enter the name from which your emails will be sent.
      • SMTP Host: smtp.gmail.com
      • SMTP Secure: You can choose either “SSL” or “TLS”.
      • SMTP Port: Use 465 for SSL or 587 for TLS.
      • SMTP Authentication: Select “Yes.”
      • Username: Your full Gmail address (e.g., youremail@gmail.com).
      • Password: Paste the 16-digit App Password you generated in the previous step.

    Step 3: Send a Test Email

    Once you have saved your settings, it’s time to test if everything works correctly.

    1. Go to the “Test Email” tab within the plugin’s settings.
    2. Enter a recipient email address (you can use your own).
    3. Click “Send Test Email”.

    You will receive the test email in your inbox if the configuration is correct. You can also check the “Email Log” tab in the plugin to see a record of all emails sent from your WordPress site.

    Suggested read: 10 Best Self-Hosted Email Server Platforms to Use in 2025

    Final Thoughts

    Sending WordPress emails through Gmail is a quick, free way to fix common delivery problems for low-volume needs. It works well for critical tasks like password resets, form submissions, and team notifications, without extra monthly costs.

    However, reliable email is just one part of running a stable, high-performing WordPress site. Your site’s speed, security, and uptime ultimately depend on the server it runs on – and that’s where RunCloud comes in.

    RunCloud gives you a single, easy-to-use dashboard to manage your servers and WordPress sites, no matter where they’re hosted. You can connect cloud providers like AWS, Google Cloud, DigitalOcean, and Vultr, or even manage on-premise servers. You’ll have full control over performance, security, and deployments, without spending hours on server admin.

    Take the stress out of server management.

    Start using RunCloud today and focus on building your website – while we handle the heavy lifting behind the scenes.

  • The Best 6 FTP Clients for Windows and Mac

    The Best 6 FTP Clients for Windows and Mac

    Choosing the right FTP client can make a big difference to your workflow. Whether you’re deploying a website, updating server files, or managing backups, the right tool saves time, keeps your data secure, and works seamlessly on your operating system.

    In this guide, we’ve reviewed the best FTP clients for Windows and Mac – from popular free tools to advanced, professional-grade options. You’ll see what each one offers, who it’s best for, and how it can fit into your workflow, so you can pick the one that meets your exact needs.

    Let’s get started!

    What is an FTP Client?

    An FTP (File Transfer Protocol) client is a software application that enables you to transfer files between your local computer and a remote web server. In the RunCloud context, an FTP client allows you to manage files on your RunCloud-powered servers securely and efficiently. Popular FTP clients include FileZilla, Cyberduck, and WinSCP.

    When working with RunCloud servers, SFTP (Secure File Transfer Protocol) is the recommended protocol. It provides encrypted file transfers, ensuring your data remains secure during transmission.

    Benefits of Using FTP Client

    Easy File Management

    Managing files across servers becomes easier with FTP clients, as most modern clients offer intuitive drag-and-drop interfaces for seamless uploads and downloads. These tools provide comprehensive file management capabilities, allowing you to handle multiple files and folders simultaneously while maintaining a familiar desktop-like interface.
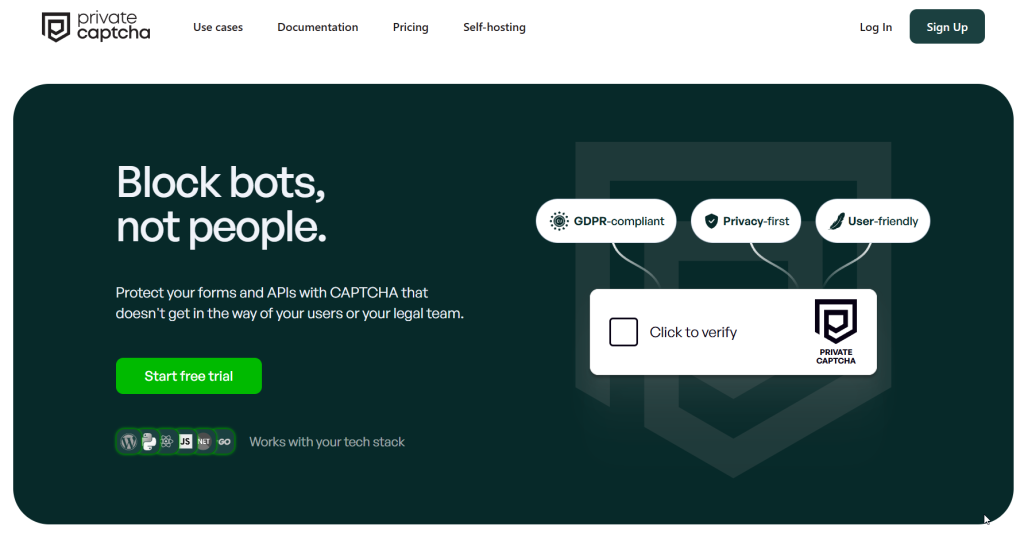
    The visual organization system makes it simple to track, move, and organize files across different server locations, significantly reducing the time spent on file management tasks.

    Enhanced Security

    Modern FTP clients prioritize security through robust SFTP encryption, ensuring all file transfers remain protected from potential threats. Implementing SSH key authentication and password protection provides multiple layers of security, making unauthorized access virtually impossible.

    Efficient Workflow

    FTP clients streamline your development workflow by offering quick file editing capabilities and real-time synchronization between local and remote servers. With features like automatic retry for failed transfers and smart bookmarking systems, these tools ensure uninterrupted work progress even during connection issues.

    Developer-Friendly Features

    Developers benefit from specialized features such as integrated file permission management and built-in text editors that allow quick code modifications without switching applications. These tools often include features like syntax highlighting and code comparison, making them invaluable for development work.

    Cross-Platform Compatibility

    Modern FTP clients offer seamless operation across Windows, macOS, and Linux, ensuring consistent functionality regardless of your operating system. These applications maintain a uniform interface and feature set across platforms, reducing the learning curve when switching between different systems.

    The standardized protocols and universal compatibility make file transfers between different platforms smooth and reliable.

    Suggested read: How to Edit Files on Remote Servers with SSH and Nano

    Best 5 FTP Clients for Windows & Mac

    When managing your RunCloud server, choosing the right FTP client is crucial for efficient file management and secure transfers.

    Here’s a comprehensive review of the top 5 FTP clients that excel in both Windows and Mac environments.

    Note: While it is possible to deploy websites using an FTP client, modern developers using RunCloud might find the platform’s built-in file management and Git deployment features more efficient for their workflow. Consider exploring these alternatives for a more streamlined development process.

    1. FileZilla

    FileZilla is the go-to FTP client for developers worldwide as it offers a perfect balance of power and simplicity that makes it suitable for both beginners and professionals.

    FileZilla’s intuitive interface contains a dual-pane view that displays local and remote directories side by side, making file transfers as simple as drag-and-drop operations. It includes support for all major protocols (FTP, FTPS, and SFTP), powerful queue management, and the ability to handle files larger than 4GB, making it a versatile tool for any web development project.

    What truly sets FileZilla apart is its extensive quality-of-life features that streamline the development workflow. The Site Manager allows you to store connection details for multiple servers, complete with encryption preferences and login credentials. At the same time, the synchronized directory browsing feature ensures you’re always working with the correct files.

    FileZilla

    Advanced features such as configurable transfer speed limits, filename filters, and remote file editing capabilities also make it a comprehensive solution for server management. The application’s remote file search functionality and directory comparison tools are particularly valuable when managing large projects, helping developers quickly locate files and identify discrepancies between local and remote versions.

    Whether you’re using Windows, macOS, or Linux, FileZilla provides a consistent experience with support for multiple languages and excellent handling of different character encodings. The application’s ability to resume interrupted transfers, coupled with its support for various proxy configurations and network types, makes it especially valuable in environments with unstable connections or strict network policies.

    Ideal for: Both beginners and advanced users who need a reliable, feature-rich FTP client.

    Suggested read: FTP vs. SFTP – What’s The Difference & Why It Matters

    2. Cyberduck

    Cyberduck is a powerful file transfer solution that offers an exceptional range of protocol support, including FTP, SFTP, WebDAV, and various cloud storage services – all in a single, elegant interface.

    What makes it particularly valuable for website deployment is its seamless integration with both Mac and Windows operating systems, featuring native system capabilities such as Keychain support for secure credential management and Quick Look preview functionality.

    It contains an intuitive bookmark system and supports creating connection profiles for popular hosting providers, which makes it incredibly easy to manage multiple website deployments across different servers.

    One of Cyberduck’s most compelling features for web developers is its robust file editing capabilities and external editor integration. You can edit files directly on the server using your preferred code editor, eliminating the need for constant downloading and re-uploading of files during development.

    Cyberduck

    The application’s synchronization feature is particularly useful for website deployments. It allows you to compare and sync local and remote directories with a preview of changes before execution. This helps prevent accidental overwrites and ensures your production environment stays consistent with your development files.

    Cyberduck also offers advanced features like bandwidth throttling, file filtering, and support for large file transfers, making it ideal for managing website assets of any size.

    Additionally, its integration with content delivery networks (CDNs) such as Amazon CloudFront allows developers to optimize their website’s global performance directly from the interface.

    Whether you’re managing a small personal website or handling enterprise-level deployments, Cyberduck’s combination of a user-friendly interface and professional-grade features makes it an excellent choice for modern web development workflows.

    Ideal for: Mac users who prefer a native-feeling application with cloud storage integration.

    Suggested read: ​How to Use SFTP with FileZilla to Securely Transfer Files on RunCloud

    3. WinSCP

    WinSCP is one of the most reliable and comprehensive file transfer clients specifically designed for Windows users, with an impressive track record of over 226 million downloads. What makes WinSCP particularly powerful is its dual-interface capability, which offers both a graphical user interface and a command-line interface, making it adaptable to different user preferences.

    What truly sets WinSCP apart is its extensive automation and scripting capabilities, which are invaluable for developers handling repetitive deployment tasks. The integrated text editor allows for quick file modifications directly within the application, while its scripting support enables task automation through both the command-line interface and .NET assembly integration.

    WinSCP

    It contains built-in synchronization tools that make it easy to keep local and remote directories in sync. It also has strong security features, including support for various authentication methods and encryption protocols. Additionally, WinSCP’s portable version offers the flexibility to carry your configured environment on a USB drive, making it an excellent choice for developers who work across different Windows machines.

    Ideal for: Windows power users who need advanced automation and scripting capabilities.

    Suggested read: How to Edit Files on Remote Servers with SSH and Nano

    4. Transmit (Mac Only)

    Transmit is a premium Mac-exclusive FTP client known for its sleek interface and powerful features. It has earned a reputation for its user-friendly interface and robust feature set. It simplifies the process of transferring files between your computer and various servers, including FTP, SFTP, and cloud storage services such as Amazon S3, Dropbox, and Google Drive.

    Transmit’s intuitive dual-pane view provides a clear visual representation of your files, making them easy to navigate and manage. Additionally, its file sync feature allows you to synchronize files between different locations, including remote servers, local folders, or even between two local folders, ensuring that your files are always up-to-date.

    Transmit

    Transmit offers numerous enhancements that streamline your workflow. You can easily organize and access your frequently used servers through its server management system, eliminating the need to manually enter server addresses each time.

    Additionally, Transmit supports advanced features such as batch renaming, built-in key management, and the ability to view file information directly within the application, further simplifying your file management experience.

    Ideal for: Professional Mac users willing to invest in a premium tool for the best possible experience.

    Suggested read: How To Use SSH Keys with PuTTY on RunCloud

    5. Commander One (Mac Only)

    Commander One offers a streamlined solution for managing your files across different locations. Its dual-pane file manager allows you to manage files on cloud services and remote servers as if they were on your local device.

    Its user-friendly, dual-pane interface lets you see your local and remote files in a single window, making dragging and dropping files between your computer and server very easy.

    The integrated Connection Manager supports various protocols, including FTP, SFTP, and FTPS, meaning you can connect to virtually any server. It also allows for direct file editing on the server, so you can make quick changes without downloading, editing, and re-uploading your files. Additionally, it has features such as file encryption and secure password storage, using the macOS Keychain to keep your data secure.

    What makes Commander One a top choice is its ability to centralize your file management. In addition to connecting to FTP servers, you can integrate and manage multiple cloud storage accounts, including Amazon S3, Dropbox, and Google Drive. This means you can easily transfer files between different cloud services, or from a cloud service to your server.

    Ideal for: Mac-exclusive users who need a single, unified application to efficiently transfer files between diverse local and cloud storage services like Amazon S3, FTP, and Google Drive.

    6. Classic FTP (Windows Only)

    Classic FTP is a no-nonsense approach to file transfer which prioritizes simplicity and functionality over bells and whistles. It’s designed for users who want a straightforward way to upload and download files to their websites or servers without being bogged down by complex features.

    The interface is clean and intuitive, making it easy to navigate and manage your files. Classic FTP’s strength lies in its reliability. It offers a stable and consistent way to transfer files, whether you’re a seasoned web developer or a casual user.

    Classic FTP focuses on the essentials: uploading, downloading, and synchronizing files. It supports secure FTP (SSL) for added protection and works seamlessly with all popular FTP servers. While it might not have the extensive range of features offered by some other FTP clients, Classic FTP delivers on its promise of providing a reliable and simple way to manage your files. It’s a perfect choice for those who prefer a straightforward and efficient file transfer experience.

    Ideal for: Windows users who prefer a lightweight, straightforward FTP client.

    Suggested read: Why Authentication Using SSH Public Key is Better than Using Password & How Do They Work?

    7. Wush (Bonus)

    Wush provides a modern approach to file transfer. It replaces traditional methods in favor of a secure, peer-to-peer connection powered by WireGuard VPN. Unlike conventional FTP tools that rely on centralized servers for authentication and file transfer, Wush uses a decentralized system where each user establishes a direct, encrypted connection with the other. This eliminates the need for trusting third-party servers, ensuring the privacy and integrity of your data.

    Wush takes advantage of the speed and efficiency of WireGuard, a cutting-edge VPN protocol known for its reliability and fast performance. It also uses Tailscale’s DERP (Dynamically Encrypted Relay Protocol) to establish secure connections, even through restrictive networks. This combination of technologies allows Wush to deliver fast and reliable file transfers without compromising on security.

    Additionally, Wush overcomes the limitations of traditional file transfer tools by offering a flexible platform. It’s not just about sending files, but also about creating secure connections for other purposes like remote access and execution. With Wush, you can establish a secure shell connection to a remote machine, facilitating remote work or managing your server infrastructure. This versatility, combined with its secure and efficient operation, makes Wush a compelling alternative to traditional file transfer tools, especially for those seeking a more modern and secure approach.

    Ideal for: Technically advanced users who are looking to replace traditional FTP.

    Suggested read: 5 Ways to Fix the SSH Connection Refused Error [SOLVED]

    Which FTP Client Should You Choose?

    First and foremost, your choice of an FTP client should prioritize security. When working with web servers, especially in a professional environment, you’ll want a client that supports SFTP (Secure File Transfer Protocol) – this is non-negotiable.

    For beginners, we strongly recommend starting with FileZilla. It’s like the WordPress of FTP clients – popular, well-supported, and user-friendly. Its interface might seem busy initially, but you’ll quickly appreciate having all those features at your fingertips.

    However, if you’re using a Mac and prefer software that feels more native to your system, Cyberduck is an excellent choice. It integrates beautifully with macOS and offers a more streamlined interface. As you progress in your development journey, you might want to consider premium options such as Transmit (for Mac) or professional versions of other clients.

    For Windows users who plan to do more advanced server management, WinSCP deserves serious consideration. Its automation features will become invaluable as you grow in your development career and need to handle repetitive tasks efficiently.

    Suggested read: How to Use SSH Keys with PuTTY on RunCloud

    Final Thoughts

    We’ve looked at the best FTP clients and what makes them worth using. But if you’re on RunCloud, you can skip many of these tools entirely.

    With RunCloud’s built-in File Manager and Git deployment, you can manage files, push updates, and roll back changes – all from your browser. Atomic Deployment gives you zero-downtime releases, keeps a full history, and makes rollbacks instant, so you never have to rely on manual FTP transfers.

    If you want faster, safer, and more reliable deployments than any FTP client can offer, connect your Git repository to RunCloud and let it handle the rest.

    Manage your files the modern way – try RunCloud now.

    FAQs on FTP Clients

    Are FTP clients safe?

    FTP clients are safe when used with secure protocols such as SFTP or FTPS, which encrypt all data during transfer. However, traditional FTP without encryption is not secure and should be avoided for sensitive data or professional web development, as it transmits credentials and data in plain text.

    What are the disadvantages of FTP?

    Standard FTP lacks encryption, making it vulnerable to security breaches and man-in-the-middle attacks during file transfers. Additionally, FTP can be slower than modern cloud-based solutions and may face issues with firewalls, while also lacking advanced features like real-time collaboration and version control.

    How do I choose an FTP client?

    Choose an FTP client that supports secure protocols (SFTP/FTPS) and offers features matching your specific needs, such as automated transfers, scheduling, or remote editing. Consider factors like your operating system, budget, user interface preferences, and whether you need advanced features like synchronization or scripting capabilities.

    Is there a better alternative to FileZilla?

    For Mac users, Cyberduck and Transmit offer more polished interfaces and better integration with the operating system, while WinSCP provides more advanced features for Windows users. However, these alternatives often come with a price tag, whereas FileZilla remains a robust, free option that satisfies most users’ needs.

    What is the safest FTP protocol?

    SFTP (SSH File Transfer Protocol) is the safest protocol as it encrypts both authentication credentials and file transfers using SSH encryption, making it virtually impossible for attackers to intercept data. This protocol is the industry standard for secure file transfers and is strongly recommended for all professional web development work.

  • Solved: “Cannot Use Import Statement Outside a Module” Error

    Solved: “Cannot Use Import Statement Outside a Module” Error

    The “Cannot use import statement outside a module” error is a common stumbling block for web developers. Encountering this error can be frustrating, especially when you’re eager to implement modern JavaScript features in your web projects.

    In this post, we’ll understand the causes of this error, explore effective solutions, and demonstrate how to integrate JavaScript modules seamlessly into your web development workflow. We’ll also touch on how RunCloud’s platform simplifies server management and deployment, making your life easier.

    Let’s get started!

    Understanding the “Cannot Use Import Statement Outside a Module” Error

    The “Cannot use import statement outside a module” error is caused by a fundamental misunderstanding between two different JavaScript module systems: ES Modules (ESM) and CommonJS.

    1. ES Modules were introduced with ECMAScript 6 (ES2015), and they are the modern standard for modularizing JavaScript code. They use import and export statements to share code between files.
    2. CommonJS is an older system predominantly used in Node.js environments. It uses require() and module exports for the same purpose.

    The conflict occurs when you try to use an import statement in a file that the JavaScript environment interprets as a CommonJS module. This is a frequent issue in Node.js projects and can also appear in web browsers if the script is not correctly identified as a module.

    How to Fix the “Cannot Use Import Statement Outside a Module” Error

    Here are the most effective solutions for resolving this error in both Node.js and browser environments:

    For Node.js Environments

    Method 1: Modify package.json File

    The most straightforward way to resolve this error in a Node.js project is to explicitly tell Node.js to treat your JavaScript files as ES Modules. You can do this by adding a single line to your package.json file:

    {
      "type": "module"
    }

    This configuration instructs Node.js to interpret all .js files in your project as ES Modules, allowing you to use import and export statements without any issues. If you need to use CommonJS for specific files, you can rename them with a .cjs extension.

    Method 2: Change File Extension to .mjs

    An alternative to modifying your package.json is to use the .mjs file extension for your modules. Node.js will automatically recognize any file ending in .mjs as an ES Module, even in projects that default to CommonJS. This approach is particularly useful when you have a mix of ES Modules and CommonJS files in the same project.

    Method 3: Use Babel to Compile Your Code

    If you’re working with an older version of Node.js that doesn’t fully support ES Modules, or you need to maintain compatibility with older environments, Babel is an excellent tool. Babel can transpile your modern JavaScript code, including import statements, into a version compatible with older systems.

    To set this up, you’ll need to install the necessary Babel packages:

    npm install --save-dev @babel/core @babel/preset-env babel-jest

    Then, configure Babel to transpile your modules by creating a babel.config.js file:

    module.exports = {
      presets: [['@babel/preset-env', {targets: {node: 'current'}}]],
    };

    This configuration will ensure that your import statements are correctly transformed into require() calls compatible with CommonJS. If you want step-by-step instructions for this process, we recommend reading How to Set Up Babel in Node.js by freeCodeCamp.

    Suggested read: Best web development tools for developers

    For Web Browser Environments

    When using ES Modules in a web browser, you must explicitly tell the browser that your script is a module. This can be done by adding the type=”module” attribute to your <script> tag in your HTML file:

    <script type="module" src="your-script.js"></script>

    By including this attribute, the browser will correctly interpret your import and export statements, preventing the “Cannot use import statement outside a module” error. It’s important to note that modules are deferred by default, executing after the HTML document has been parsed.

    For larger projects, managing multiple script tags and dependencies can become complex. This is where module bundlers like Webpack, Rollup, or Parcel come in. These tools analyze your project’s dependencies and bundle them into a single, optimized file that can be easily included in your HTML.

    cannot use import statement outside a module

    Module bundlers not only resolve the “Cannot use import statement outside a module” error but also offer additional benefits such as code minification, tree shaking (removing unused code), and transpilation for older browsers. If you’re building a modern web application, using a module bundler is a best practice that can significantly improve your development workflow and application performance.

    Best Practices for Using JavaScript Modules

    To avoid this error and write cleaner, more maintainable code, consider these best practices:

    • Be Consistent: Stick to one module system within your project. ES modules are the recommended choice if you’re starting a new project.
    • Clear and Explicit Imports: Always place your import statements at the top of your files. This makes it easier to see a file’s dependencies at a glance.
    • Organize Your Modules: Structure your project with a clear folder hierarchy for your modules. This improves code organization and makes it easier to find and reuse code.
    • Dynamic Imports for Performance: For large modules that are not immediately needed, consider using dynamic import() to load them on demand. This can improve your application’s initial load time.

    How RunCloud Enhances Your Development Workflow

    At RunCloud, we understand the importance of a seamless development experience. Our platform provides a robust and reliable hosting environment perfect for modern web applications.

    Our platform simplifies server management, allowing you to focus on what you do best: writing code. Whether you’re building a complex single-page application or a server-side rendered website, RunCloud provides the tools and support you need to deploy and manage your projects with ease.

    RunCloud is a powerful platform designed to simplify the complexities of web development and server management. It allows you to deploy and manage your web applications easily.

    • Effortless Server Setup: RunCloud enables you to deploy and manage your PHP applications on servers.
    • Easy Deployment: Deploy your websites to a server using a simplified workflow.
    • Simplified SSL Certificate Management: Easily install and manage SSL/TLS certificates to secure your websites with just a few clicks.
    • Enhanced Security: Benefit from the security features RunCloud offers, including automated updates and firewall integration.
    • Automated Backups: Set up automated backups to safeguard your data and website files.
    • Monitoring and Alerting: Monitor your server’s performance and receive alerts to stay informed about potential issues.
    • One-Click Application Deployment: RunCloud simplifies the deployment of popular web applications.

    By using RunCloud, you can focus on writing code and building your web applications without getting bogged down with server configurations and management.

    Conclusion

    The “Cannot use import statement outside a module” error is a common problem, but it’s easy to overcome with a clear understanding of JavaScript modules and the right configuration. By following the solutions and best practices outlined in this guide, you can ensure that your projects are set up for success.

    After building your website, you will need a place to host it, and that’s where RunCloud comes in. With RunCloud, you can spend less time managing your infrastructure and more time building amazing applications.

    Ready to take your web development to the next level? Sign up for RunCloud today and experience the benefits of a modern, streamlined hosting platform.