In this comprehensive guide, we’ll walk you through the process of installing WordPress on an Ubuntu server using the Apache web server. This setup, often referred to as a LAMP stack (Linux, Apache, MySQL, PHP), is a time-tested method for hosting WordPress sites.
We’ll cover everything from preparing your Ubuntu server and installing the necessary software packages to configuring Apache, setting up a MySQL database, and finally installing and configuring WordPress itself.
It’s worth noting that while this manual process offers a deep understanding of your server environment, it can be time-consuming and requires ongoing maintenance. For those seeking a more streamlined approach, we’ll also touch on how managed solutions such as RunCloud can simplify this process, offering features such as one-click WordPress installations, automated security updates, and easy server management.
Whether you’re a developer looking to understand the intricacies of WordPress hosting, a system administrator expanding your skill set, or simply an enthusiast wanting to take control of your web presence, this guide will equip you with the knowledge to set up a robust WordPress installation on your own Ubuntu server.
As the world’s most popular content management system, powering just under half of all websites on the Internet, WordPress’s flexibility, extensive plugin ecosystem, and user-friendly interface make it ideal for everything from personal blogs to large-scale enterprise websites.
While there are many ways to host WordPress, including managed solutions and one-click installers, understanding the manual installation process can provide valuable insights into the underlying technology stack and give you greater control over your web environment.
Before You Install WordPress
Before we explain how to install WordPress, let’s ensure you have everything necessary to successfully follow this tutorial step-by-step:
A Server Running the Latest Version of Ubuntu: You’ll need a server deployed with the most recent Ubuntu release. You can set this up with any cloud provider of your choice. For this tutorial, we’ll be using UpCloud, known for its user-friendly interface and straightforward setup process.
Privileged Access to Your Linux Server: When deploying your server, be sure to securely note down the credentials for the root user (or the privileged sudo user). You must have either root access or the ability to use the sudo command to install applications on your server.
Having these prerequisites in place will ensure a smooth installation process as we move forward with setting up WordPress on your Ubuntu server using Apache.
Steps for Installing WordPress on Ubuntu
In this section, we will provide you with the instructions for installing and configuring WordPress on a fresh Ubuntu server.
Step 1 – Installing All Of The Required Packages (LAMP)
The first step to setting up WordPress on your Ubuntu server is to install the necessary components of the LAMP stack: Apache, PHP, and MySQL.
Apache serves as the web server, processing and delivering web content to visitors.
PHP is the scripting language that WordPress is built upon, allowing for dynamic content generation.
MySQL, is a relational database management system, that stores all of WordPress’s content, user information, and settings.
Together, these components create a robust and efficient platform for running WordPress.
To begin this process, you’ll need to access your server via SSH (Secure Shell) using a terminal or command line interface. Once connected, you can execute the following command to update your server’s package manager cache to ensure you’re installing the most recent versions of the software and install the necessary packages:
After running these commands in your terminal, you will need to wait for a few minutes for the installation process to complete successfully.
After successfully installing the packages, it’s important to configure your server’s firewall to allow incoming HTTP traffic. This step is necessary if you want your website to be accessible on the internet. Simply run the following command to enable it:
sudo ufw allow in "Apache"
This command instructs the Uncomplicated Firewall (UFW) to create a rule allowing incoming connections to Apache. To confirm that the firewall rule has been properly applied, you can check the status of UFW at any time by running the command:
sudo ufw status
Additionally, you can verify that Apache is functioning correctly by opening a web browser and navigating to your server’s IP address (http://[your server ip]). If everything is set up properly, you should see Apache’s default welcome page. This default page serves as a confirmation that Apache is installed and responding to HTTP requests, even though your WordPress site isn’t set up yet.
Step 2 – Configure MySQL
After installing MySQL, it’s important to configure it securely, especially for production environments. The mysql_secure_installation script helps you improve the security of your MySQL installation. To begin the configuration, run the following snippet:
sudo mysql_secure_installation
This script will guide you through several security-related options:
Password Validation: You’ll be asked if you want to set up the VALIDATE PASSWORD component. For production sites, it’s recommended to answer ‘Y’ and choose a strong password policy (level 2 is the most secure). This ensures all MySQL passwords meet high-security standards.
Set Root Password: If you haven’t set a root password yet, you’ll be prompted to do so. Choose a strong, unique password for the MySQL root user.
Remove Anonymous Users: It’s advisable to remove anonymous users by answering ‘Y’. This prevents unauthorized database access.
Disallow Root Login Remotely: It’s safer to disallow root login from remote machines for single-server setups. Answer ‘Y’ to this prompt.
Remove Test Database: The test database is unnecessary for most installations. Removing it (by answering ‘Y’) reduces potential security risks.
Reload Privilege Tables: Answer ‘Y’ to this final prompt to ensure all changes take effect immediately.
For a test or development environment, you can be less stringent and skip the password validation setup, use a simpler root password, and potentially keep the test database. However, even for test sites, it’s generally good practice to remove anonymous users and disallow remote root login. These settings can be changed later if needed, but starting with a secure configuration is always recommended, even for test environments.
Step 3 – Create MySQL Database & User for WordPress
Having installed MySQL earlier, it’s now time to create a database for WordPress to store its content, including posts, pages, comments, and user information. To begin this process, open MySQL by running the following command:
sudo mysql
This command will open the MySQL prompt. If all previous steps were completed successfully, you should see the MySQL welcome message in your terminal. To create a new database for WordPress, execute the following SQL command:
CREATE DATABASE wordpress_db DEFAULT CHARACTER SET utf8 COLLATE utf8_unicode_ci;
You can replace ‘wordpress_db’ with any name you prefer for your database. Next, we need to create a MySQL user for WordPress and grant it access to the database. Run the following command to create a new user:
CREATE USER 'wp_user'@'localhost' IDENTIFIED BY 'your_secure_password';
Replace ‘wp_user’ with your chosen username and ‘your_secure_password’ with a strong, unique password. Make sure to record this information, as you’ll need it during the WordPress setup process. To grant the new user full privileges on the WordPress database, use this command:
GRANT ALL PRIVILEGES ON wordpress_db.* TO 'wp_user'@'localhost';
Ensure you replace ‘wordpress_db’ and ‘wp_user’ with the database and username you chose earlier. Finally, to apply these changes and exit MySQL, run these two commands in succession:
FLUSH PRIVILEGES;
exit;
These steps create a dedicated database and user for your WordPress installation, ensuring proper functionality and security.
Step 4 – Create a Virtual Host File in Apache
Apache’s virtual host functionality is a powerful feature that allows a single server to host multiple websites or applications, each with its own domain name. This concept is similar to NGINX’s server blocks.
In this section, we’ll set up a virtual host for our WordPress site, using ‘runcloud-example.com’ as our domain name. Remember to replace this with your actual domain throughout the process.
First, let’s create the necessary directory structure and set the appropriate permissions by executing the following commands:
After editing the configuration file, save and close it (press CTRL+X, then Y, then Enter). If you get stuck at any point, you should read our previous post, which explains how to edit files with nano.
Now, you need to enable the new virtual host and disable the default one by executing the following commands:
At this point, when you visit your server’s IP address or domain name in a web browser, you should see a directory listing or a default page, depending on the contents of your /var/www/runcloud-example.com directory. This indicates that your virtual host is correctly configured and Apache is serving content from the appropriate directory.
If you haven’t already, remember to update your domain’s DNS settings to point to your server’s IP address. This ensures that when someone visits your domain, they’re directed to your Apache server.
Step 5 – Installing WordPress
Once you have configured everything else, you can start downloading and setting up the WordPress files on your server. Run the following commands to download and extract the necessary files in the required directories:
After executing these commands, you can complete the WordPress installation through your web browser. Navigate to your server’s IP address or domain name, and you’ll be greeted by the WordPress setup wizard. Here, you’ll need to enter the database information that was created earlier (database name, username, and password).
Once you’ve submitted this information, WordPress will create the necessary database tables. You’ll then be prompted to set up your site title, admin username, and password.
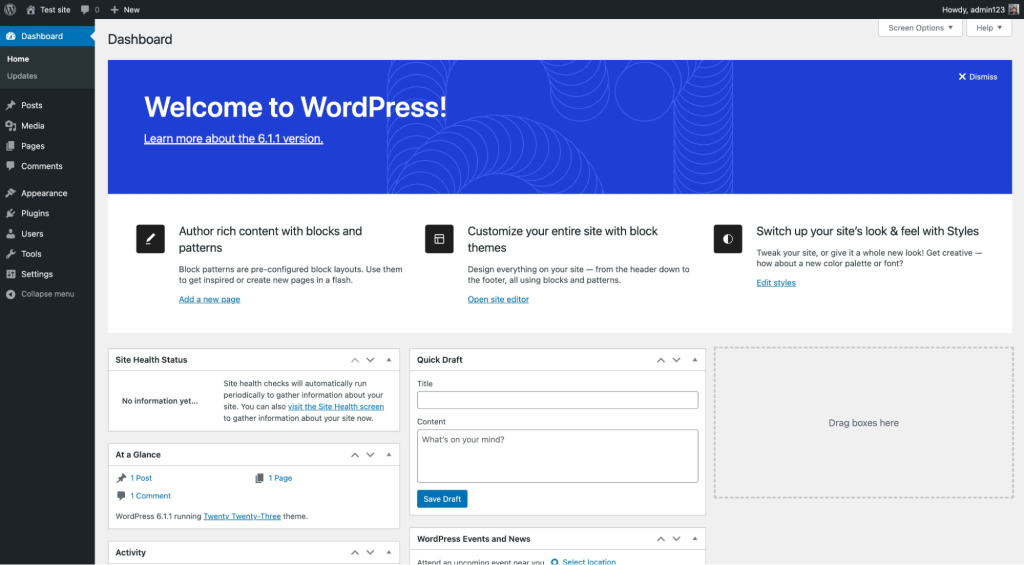
After this step, you will be able to log in to your new WordPress site and start customizing it to your needs.
While this process gives you a fully functional WordPress site, it’s important to note that manual installation can be complex and time-consuming, especially for those new to server management. It’s prone to errors and requires ongoing maintenance to keep the server secure and up-to-date.
This is why we recommend using RunCloud to manage your WordPress websites.
Effortless WordPress Setup with RunCloud
Setting up a WordPress website with RunCloud is refreshingly simple and straightforward. RunCloud’s user-friendly interface and automated processes take the complexity out of web hosting, allowing you to focus on what really matters – your content and your business.
Here’s how easy it is to get your WordPress site up and running with RunCloud:
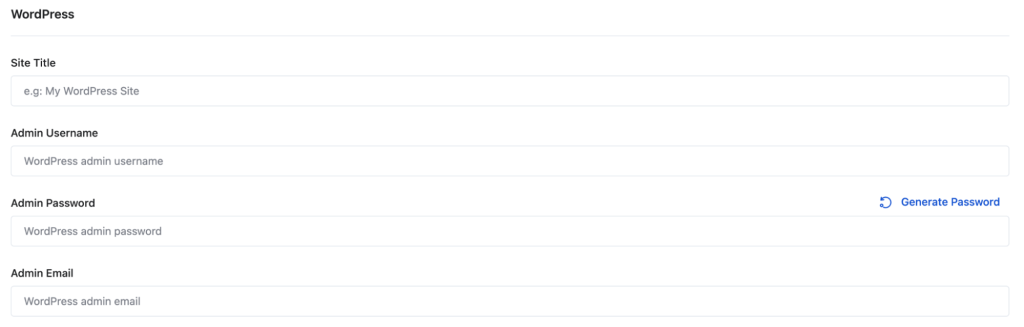
Enter Website Details: Simply provide a name for your new website. This name is for your reference within RunCloud and doesn’t have to be your final domain name.
Set Site Title: Enter the title for your website. Don’t worry, you can always change this later from within WordPress.
Create User Credentials: Choose a username and password for your WordPress admin account. These will be used to log in to your WordPress dashboard once the site is set up.
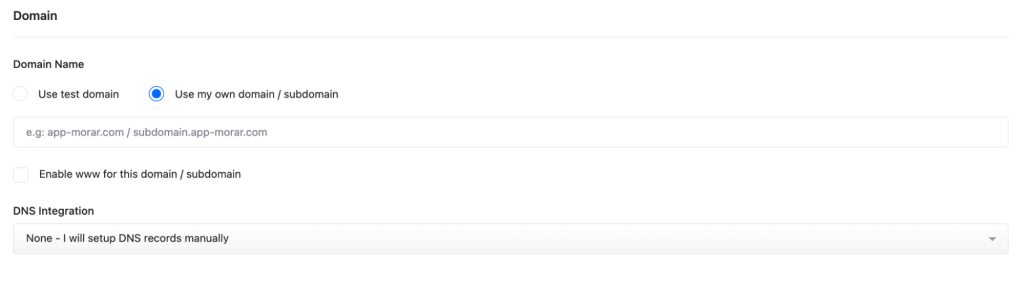
Configure Domain: RunCloud provides you with two different options:
Configure your own domain name if you have one ready to use.
Opt for RunCloud’s test domain, which allows you to start developing your site immediately and switch to your own domain later.
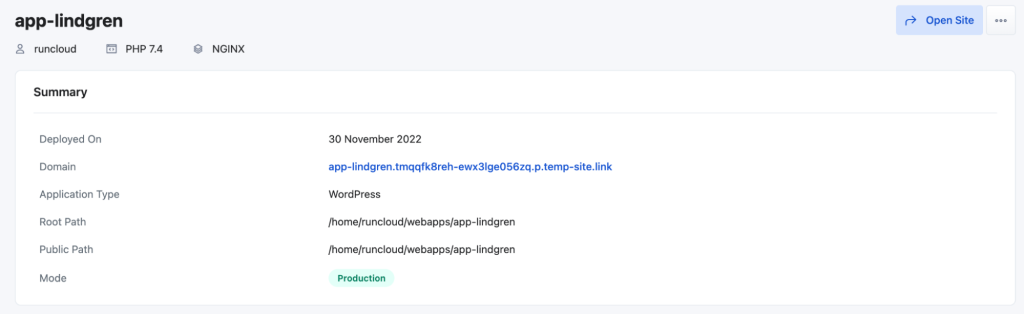
Deploy WordPress: With all details entered, simply click the “Deploy” button and let RunCloud work its magic.
And that’s it! In just a few minutes, RunCloud will have your WordPress site fully set up, secured, and ready for you to start customizing.
RunCloud’s streamlined process eliminates the need for complex server configurations, database setups, or file transfers. It’s perfect for developers who want to save time, agencies managing multiple client sites, or anyone who prefers to focus on creating great web content rather than wrestling with server management.
Moreover, RunCloud also provides features such as automatic updates, robust security measures, and easy scalability which not only simplifies the initial setup but also ensures your WordPress site remains secure with minimal effort on your part.
Final Thoughts: Simplify Your WordPress Management with RunCloud
In this guide, we’ve provided a comprehensive walkthrough for manually installing and configuring WordPress on an Ubuntu server with Apache. While this process offers valuable insights into the inner workings of web hosting, it’s clear that managing multiple websites across various servers can quickly become a complex and time-consuming task.
This is where RunCloud truly shines, offering a streamlined solution that simplifies website management without sacrificing control or performance. Here’s why RunCloud is the ideal choice for both novice and experienced web developers:
Integrated DNS Management – simplify your workflow by managing your domains directly within the RunCloud interface.
Versatility Beyond WordPress – seamlessly works with other popular applications such as Nextcloud, Ghost CMS, WHMCS, Laravel, and more.
Performance Optimization – leverage built-in caching and optimization tools to keep your sites running at peak performance.
While the manual process we’ve outlined provides a solid foundation for understanding WordPress hosting, RunCloud automates this knowledge, allowing you to focus on what truly matters – creating and managing outstanding websites.
Whether you’re a solo developer, part of an agency, or managing enterprise-level websites, RunCloud offers the tools and simplicity you need to succeed.
Are you launching a new WordPress site? If yes, then making the decision to install WordPress on Docker makes a great deal of sense.
Why use Docker for running a WordPress website?
You’re obviously looking at how to install WordPress on Docker, but it’s worth being fully aware of why this is a good idea.
In this article we’ll explain exactly what the benefits are of using Docker over a traditional VPS, and how you can easily install and run WordPress (as well as WooCommerce) on Docker.
But first, let’s see what Docker is and why people use it.
What is Docker?
Docker is a platform that uses containerization technology to enable developers to create, deploy, and manage applications in a consistent environment across different systems.
A container is a lightweight, standalone, and executable package that includes everything needed to run a piece of software: the code, runtime, system tools, libraries, and settings.
Unlike traditional virtual machines, containers share the host system’s kernel, which makes them more efficient in terms of resource usage and speed.
Docker provides a high level of isolation and security while allowing multiple containers to run on the same host system without interfering with each other. Containers are highly portable and can run consistently on any environment that supports Docker – from a developer’s local machine to large-scale production servers in the cloud.
Using Docker for WordPress offers several significant advantages:
Consistent Development Environments
Docker ensures that the WordPress environment is consistent across all stages of development, from local development to testing and production. This consistency eliminates the “it works on my machine“ problem, ensuring that if a WordPress site works in a Docker container on one machine, it will work in a Docker container on any other machine.
Simplified Dependency Management
WordPress sites often rely on specific versions of PHP, MySQL, and various extensions. Docker allows developers to define these dependencies in a Dockerfile and docker-compose.yml file, ensuring that everyone working on the project uses the same versions and configurations. This avoids issues arising from incompatible dependencies or missing libraries.
Isolation and Security
Docker containers run in isolated environments, which means that each WordPress instance is completely separated from others. This isolation enhances security by limiting the potential impact of vulnerabilities in one container on others. Additionally, Docker’s use of namespaces and control groups (cgroups) provides further isolation and resource control, enhancing the security and stability of the overall system.
Scalability and Load Balancing
Docker makes it easy to scale WordPress instances horizontally. By spinning up additional containers, you can distribute the load across multiple instances to handle increased traffic. Docker’s orchestration tools, such as Kubernetes and Docker Swarm, further simplify the process of managing multiple containers, load balancing, and ensuring high availability.
Resource Efficiency
Containers share the host system’s kernel and use fewer resources compared to traditional virtual machines. This efficiency means you can run more WordPress instances on the same hardware, reducing costs and improving performance. Docker’s lightweight nature also contributes to faster start-up times for containers, enhancing the overall responsiveness of the system.
Flexibility and Portability
Docker containers can run on any platform that supports Docker, including various Linux distributions, Windows, and macOS. This flexibility allows developers to work in their preferred environment and ensures that the WordPress site can be deployed across different infrastructures without modification. This portability is particularly beneficial for cloud deployments and hybrid environments.
How to Install WordPress on a Server Using Docker
Let’s walk through the steps for setting up a WordPress website using Docker Compose on a Linux server.
Prerequisites
Make sure you have Docker and Docker Compose installed on your Linux server. If you don’t, you can install them by following the official documentation for Docker and Docker Compose.
Once they are installed, you can check whether are are working properly using the following commands:
docker --version
docker-compose -v
Create a Project Directory
First, you need to log in to your server via SSH and create a directory where you’ll store your WordPress files – you can name it anything you like. For example, run the following code snippet to create a folder named my-wordpress-site:
mkdir my-wordpress-site
cd my-wordpress-site
Create a Docker Compose YAML File
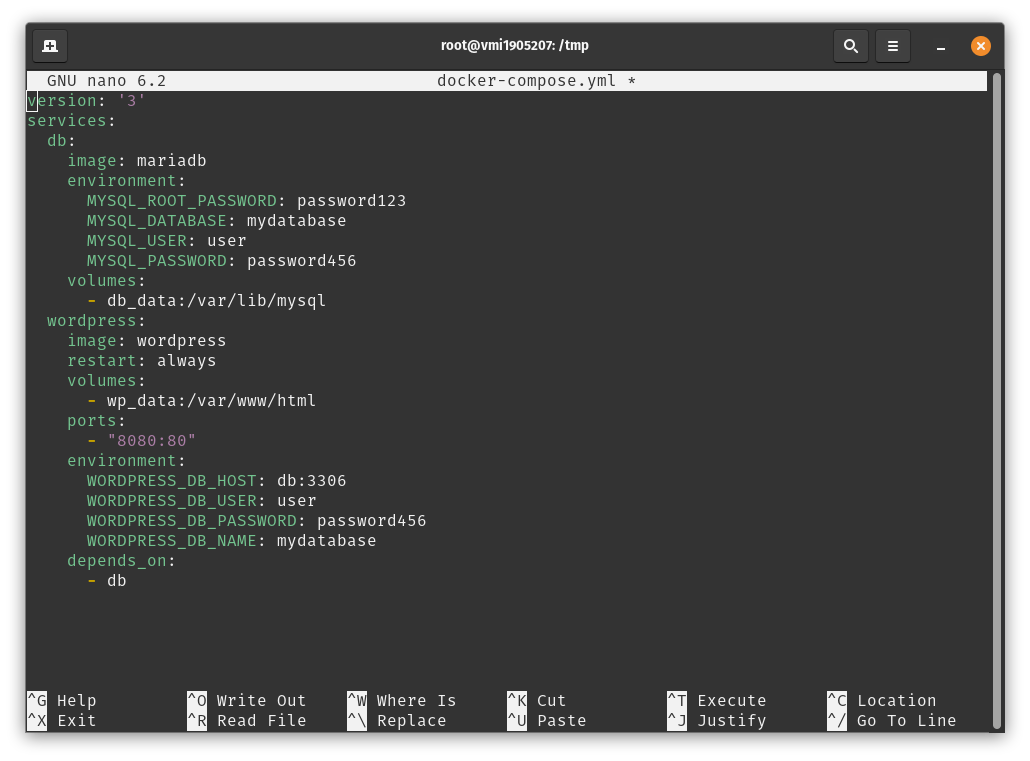
After creating the directory, you need to create a file named ‘docker-compose.yml‘. This file will define the services and configurations required for your WordPress installation.
Open the docker-compose.yml file in your preferred text editor (such as nano, vim, or gedit). Read our tutorial on how to edit files over SSH if you don’t know how to do this.
After opening the file in a text editor, add the following content to the file:
In the above snippet, replace your_mysql_root_password and your_mysql_password with your desired MySQL root password and WordPress database password, respectively. You can also change the database user if you want to set it to a custom value.
Start the Docker Containers
After creating the file, you need to run the following command in your project directory to start the Docker containers:
docker-compose up -d
When you run the above command, Docker Compose will pull the necessary images, set up the containers, and configure network connections. This process may take a few minutes.
Access Your WordPress Site
Once the containers are up and running, open a web browser and type the following URL to access your website:
http://your-server-IP:8000
Make sure you replace your-server-IP with the actual IP address of your server.
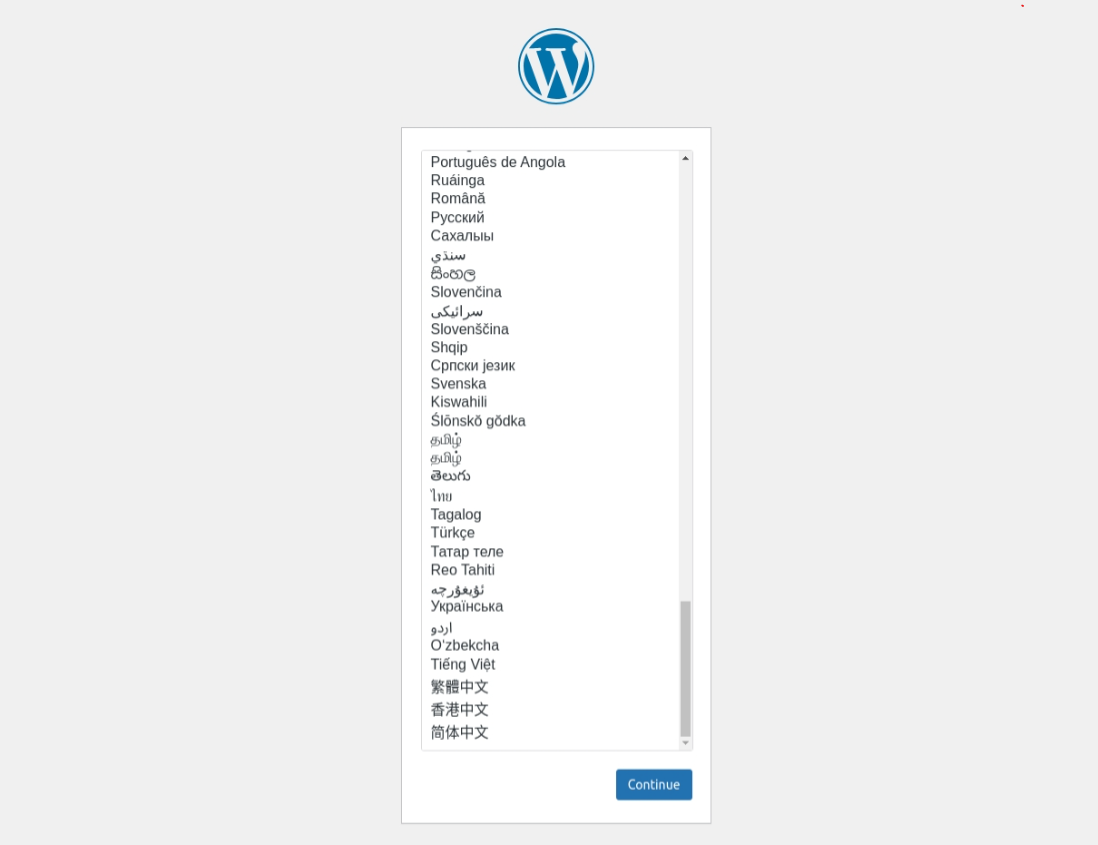
Once you open the above URL in your browser, the WordPress setup wizard should appear, guiding you through the initial configuration.
Follow the instructions in the setup wizard to complete the installation by setting your preferred language, site title, username, password, and email address. After successful setup, you’ll be taken to the WordPress admin dashboard where you can customize your website by installing themes, plugins, and publishing content.
Stop and Restart Containers
Once you have started the containers, they will keep running in the background until you shut them down. If you wish to stop the containers for any reason, then you can use the following command:
docker-compose down
This command will terminate and remove the containers while retaining the data in the database volume. If you want to restart the containers later, go to your project directory and run:
We have explained how to use Docker to install multiple websites on a single server, but did you know that you can also do this using RunCloud – and much more easily?
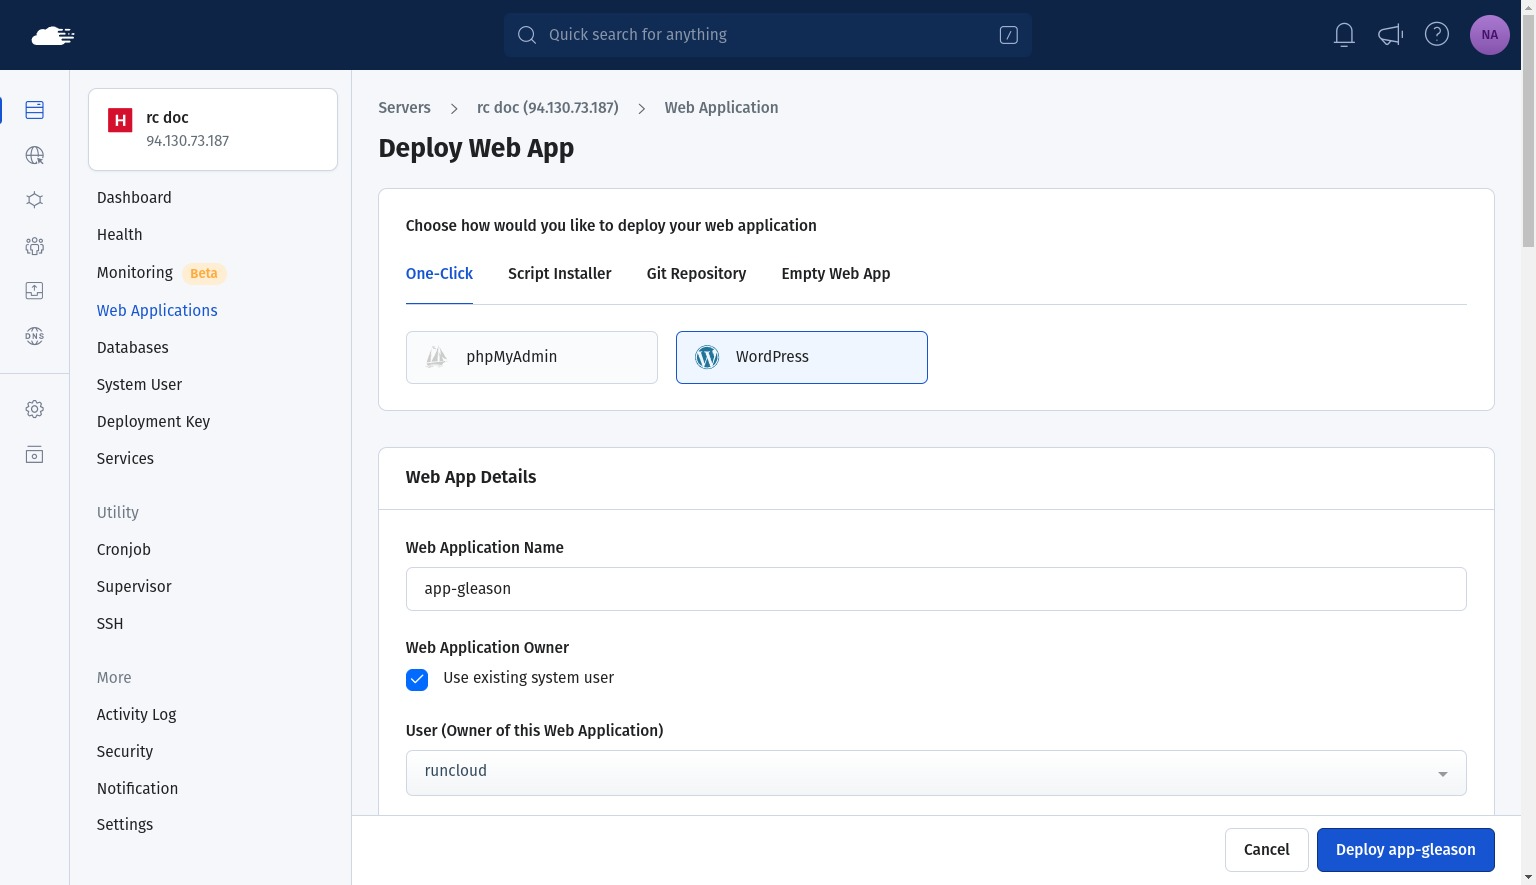
RunCloud allows you to install new WordPress applications with a single click, and provides you an option to choose between Nginx, OpenLiteSpeed, and Docker server environments.
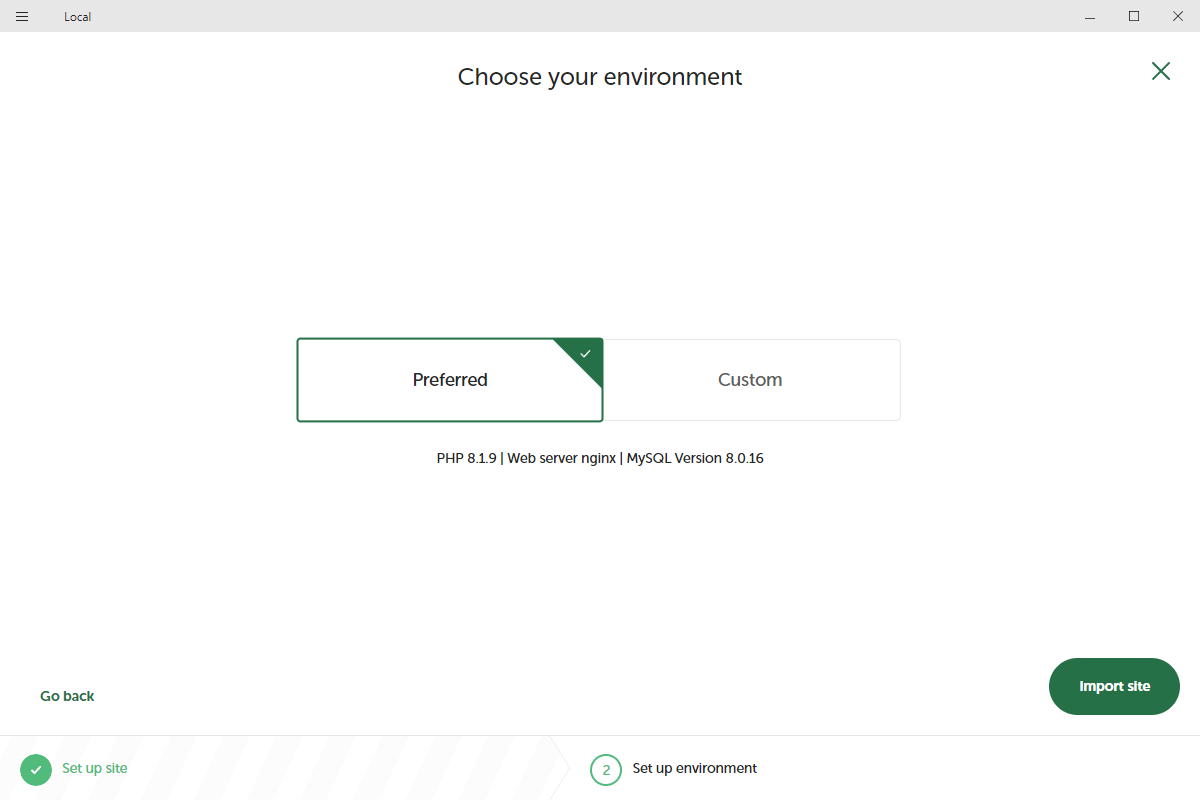
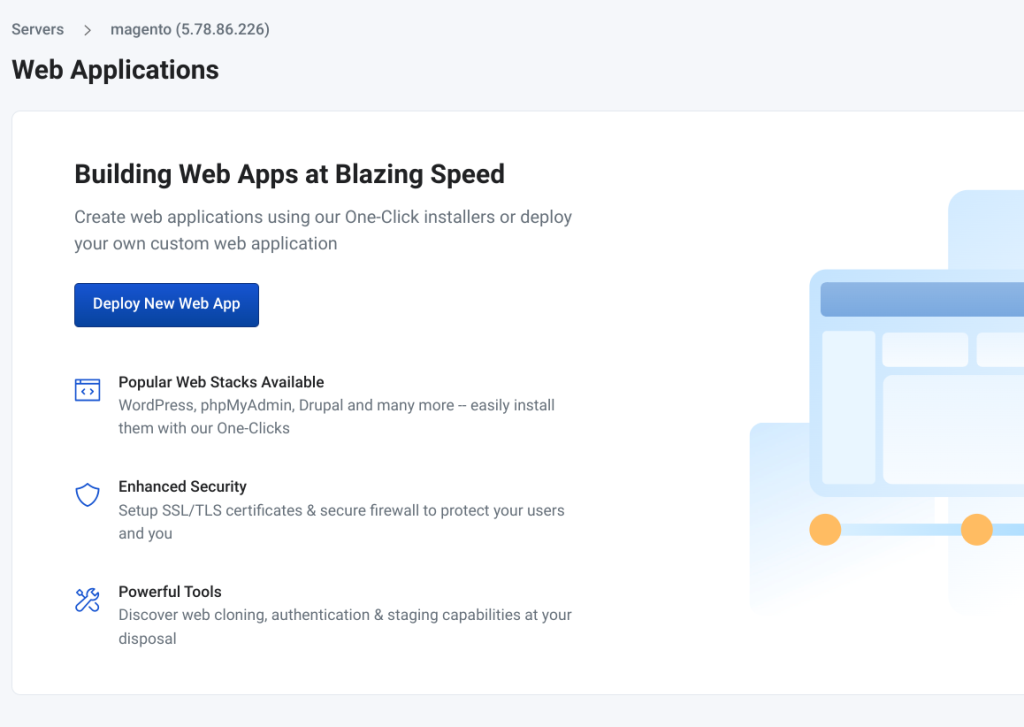
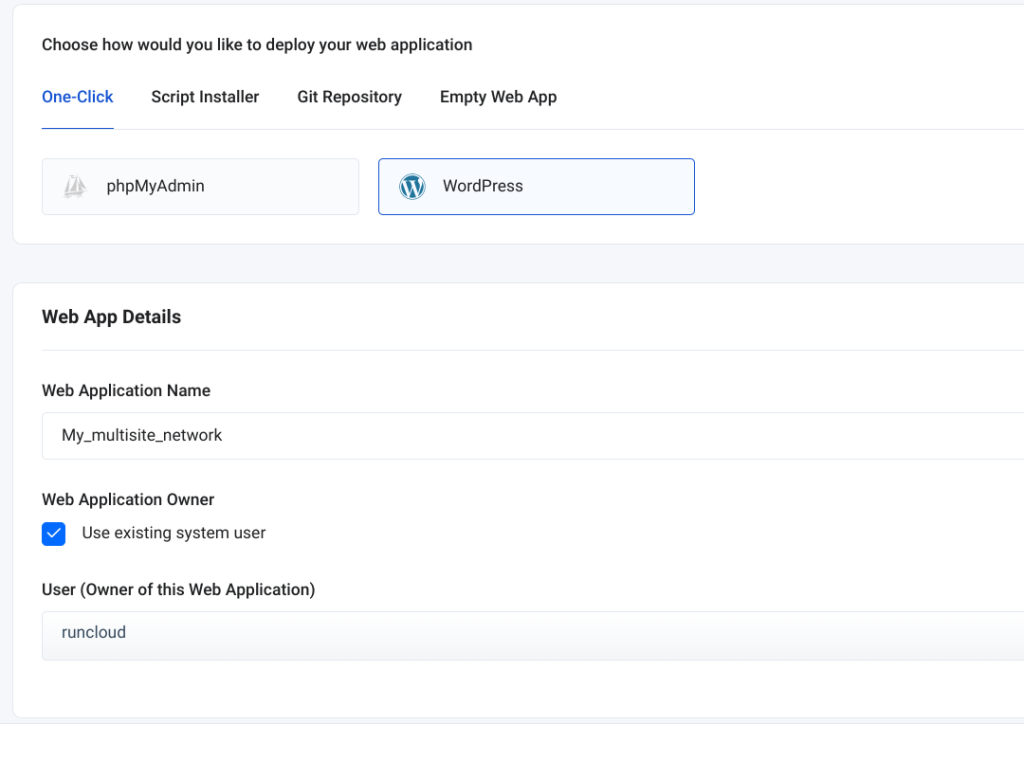
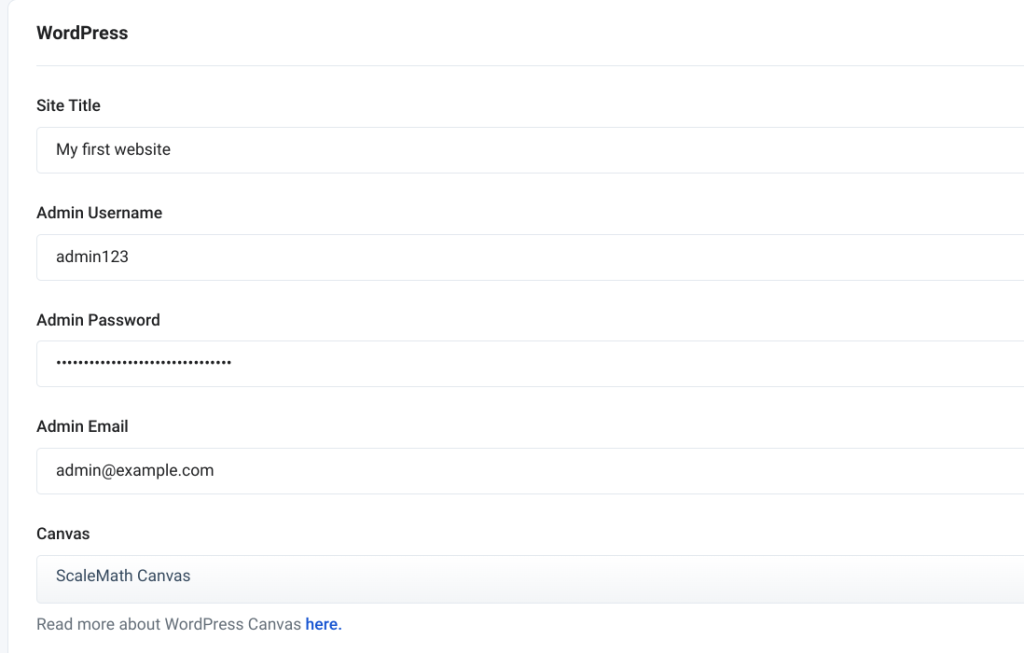
To launch a WordPress site, all you need to do is click “Deploy a web app” and fill in the basic details such as the name of the application (or use the default name provided by RunCloud).
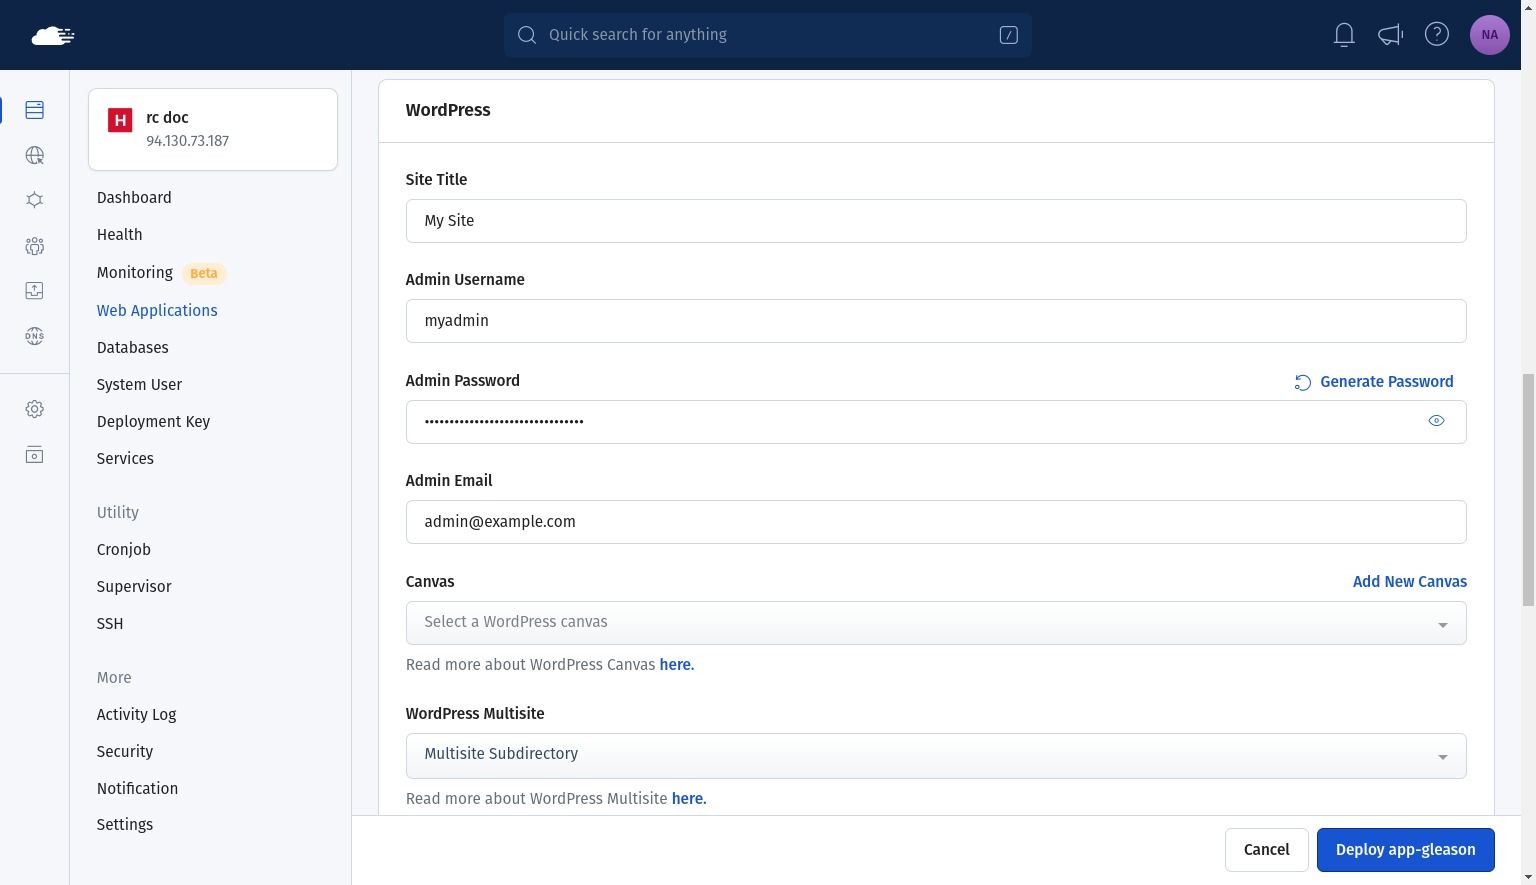
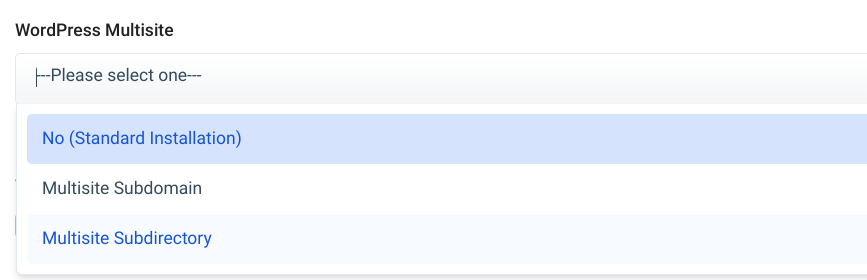
Next, you need to configure the login information for your WordPress dashboard, and other information such as site name, multisite option, etc.
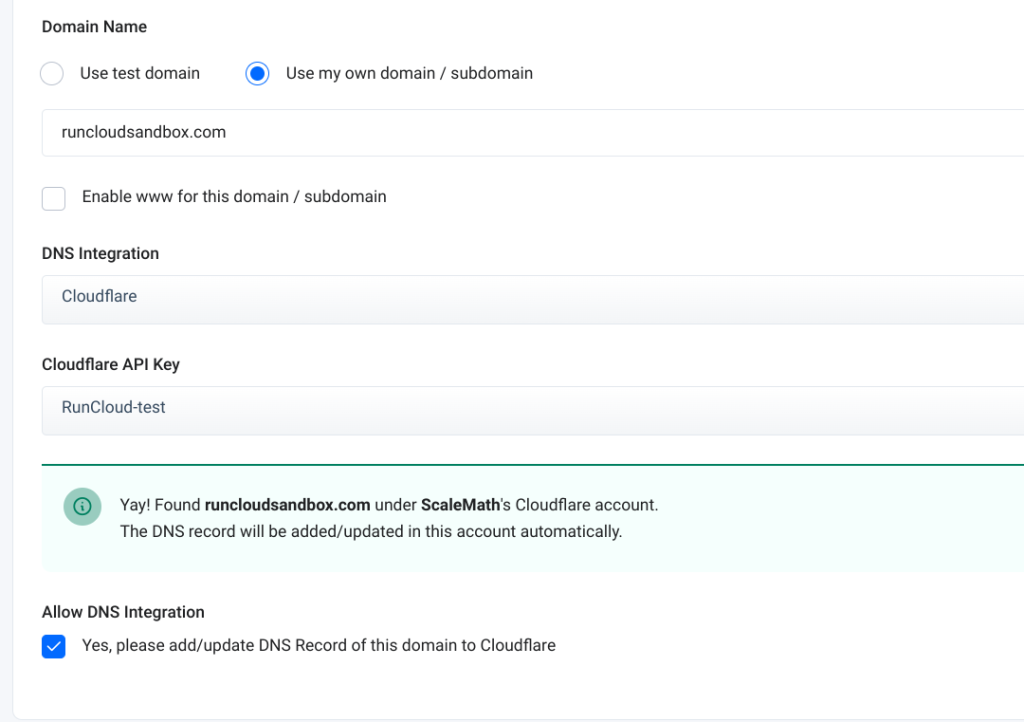
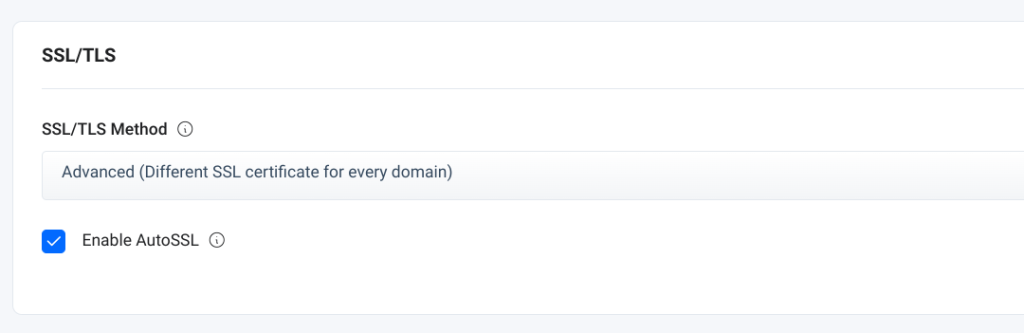
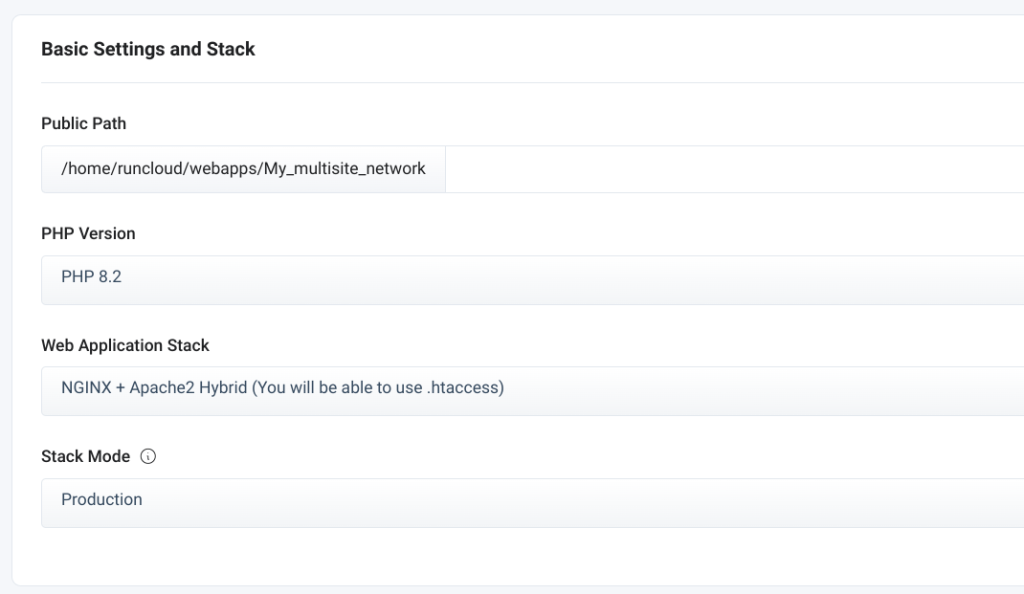
After you have configured the login credentials, you can continue setting DNS, backup, PHP version, etc. or just use the default configuration and change it later from the RunCloud dashboard.
After making the necessary changes, you can hit “Deploy” to automatically set up your website on your server – and the best part is that you can do the exact same process once again to install another site (or as many as you want) on the same server.
In this post, we have walked you through how to install WordPress on Docker. One of the main reasons people use Docker is because it allows them to run multiple applications on the same server, which saves costs.
But what if we told you that there is a better way to take advantage of the flexibility of Docker without leaving the comfort of a GUI dashboard?
RunCloud provides a feature rich dashboard which is compatible with any cloud provider and doesn’t impose arbitrary restrictions on the number of apps, backups, cron jobs, etc. – if your server can handle it, then you can do it!
Yes, WordPress can run on Kubernetes. While Docker is commonly used for local development and testing, Kubernetes provides a powerful orchestration platform for deploying and managing containerized applications, including WordPress. Kubernetes allows you to achieve scalability, resilience, and ease of management for your WordPress deployment.
What are the best practices for Docker in WordPress?
When using Docker for WordPress, consider the following best practices: Use Docker Compose: Docker Compose simplifies the setup by defining services, networks, and volumes in a single YAML file. It allows you to coordinate multiple containers (e.g., MySQL, Nginx, and WordPress) to work together. Separate Containers: Run WordPress and its components (like MySQL or Nginx) in separate containers. This isolation ensures better resource management and scalability. Persistent Volumes: Use persistent volumes to store data (e.g., WordPress files, database) outside the containers. This ensures data persistence even if containers are restarted or rescheduled. Security: Secure your containers by using environment variables for sensitive information (e.g., database credentials). Avoid hardcoding secrets in your Dockerfiles or Compose files. Regular Backups: Back up your data regularly. Docker volumes make it easier to back up and restore data.
How to update WordPress in a Docker container?
To update WordPress in a Docker container: Pull the Latest WordPress Image: Pull the latest WordPress image from Docker Hub using docker pull wordpress:latest. Stop and Remove Existing Containers: Stop and remove the existing WordPress container and its associated containers (e.g., MySQL, Nginx). Create New Containers: Create new containers using the updated WordPress image. Ensure that you use the same volumes for data persistence. Update Configuration: If necessary, update your configuration files (e.g., wp-config.php) to match any changes in the new WordPress version. Restart Containers: Restart the containers to apply the changes.
Default Login for WordPress Docker
There are no default credentials for WordPress regardless of Docker environments. You need to set up credentials when you log in to your WordPress dashboard for the first time.
WordPress is a popular and powerful content management system that powers millions of websites around the world. For that reason, and to ensure security, compatibility, and performance remain excellent, official updates are released on a regular basis.
This is why keeping your WordPress version up to date is crucial for the security, performance, and functionality of your site.
In this article, we will show you how to check your WordPress version using various methods, and how to upgrade your WordPress version using different options.
How to Check Your WordPress Version
There are several ways to check your WordPress version, depending on your level of access and preference. Here are some of the most common methods:
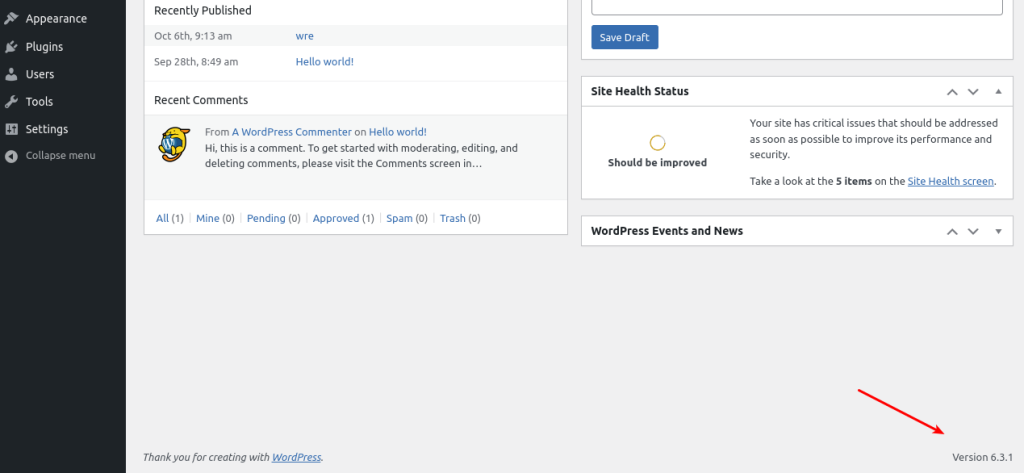
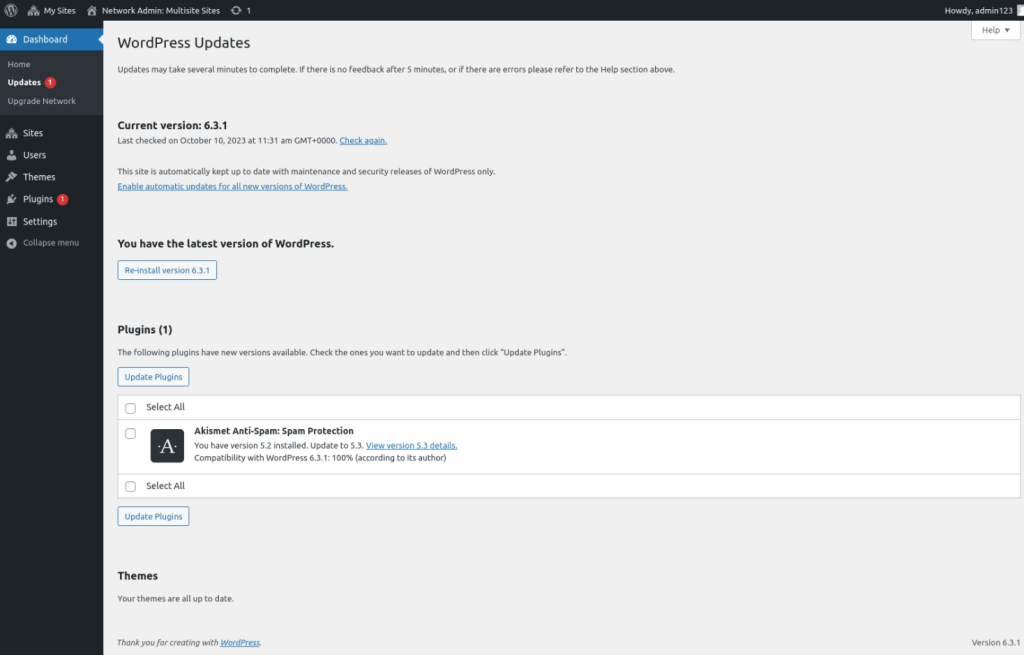
Check the WordPress dashboard: The easiest way to check your WordPress version is to log in to your WordPress dashboard and look at the bottom right corner of the screen. You will see a message that says “Thank you for creating with WordPress”, followed by the version number.
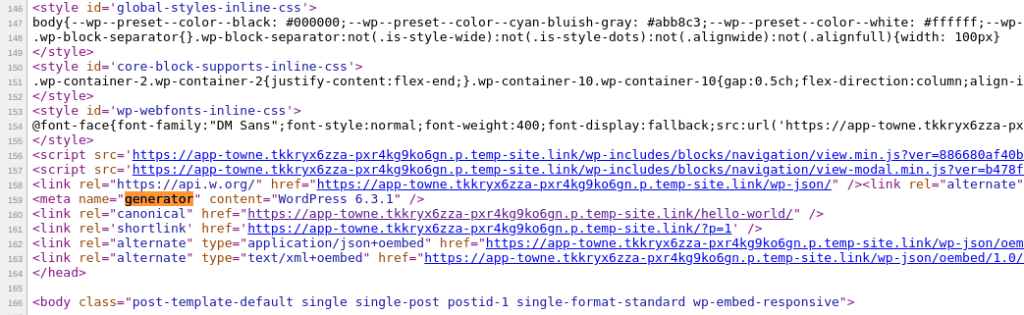
Check the source code of your website: Another way to check your WordPress version is to view the source code of your website in your browser. You can do this by right-clicking on any page of your website and selecting “View page source”.
Then, look for a line that starts with <meta name="generator" content="WordPress ..." The content attribute will show you the WordPress version.
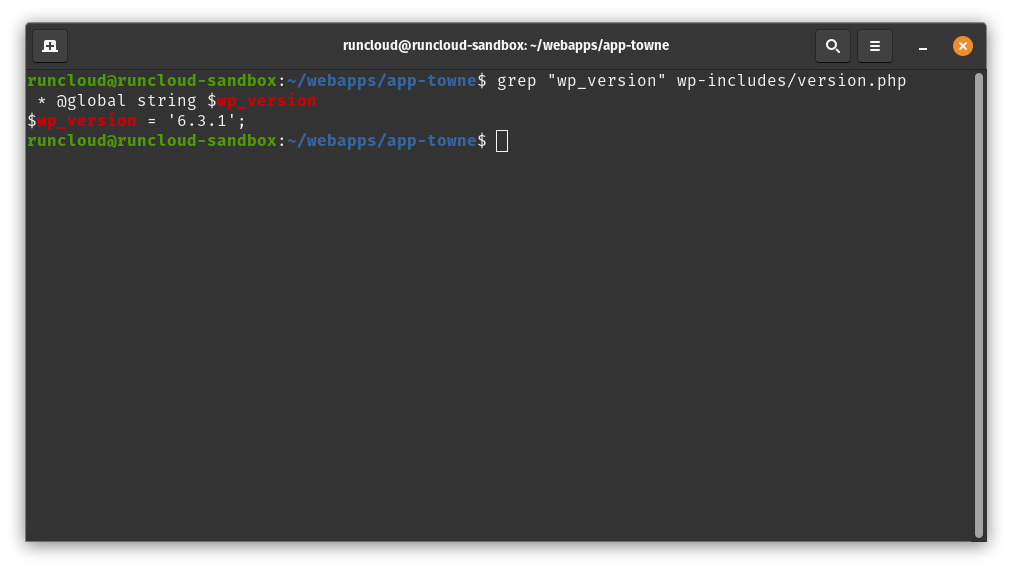
Check the wp-includes/version.php file: Another method to check your WordPress version is to access the wp-includes/version.php file in your WordPress root directory. You can do this by using an FTP client or a file manager tool in your hosting control panel. You will see a file that contains several PHP variables, one of which is $wp_version. The value of this variable is your WordPress version.If you have SSH access to your server, you can execute the following command in the root directory of your WordPress folder to see only the relevant lines instead of opening the entire text file.
grep "wp_version" wp-includes/version.php
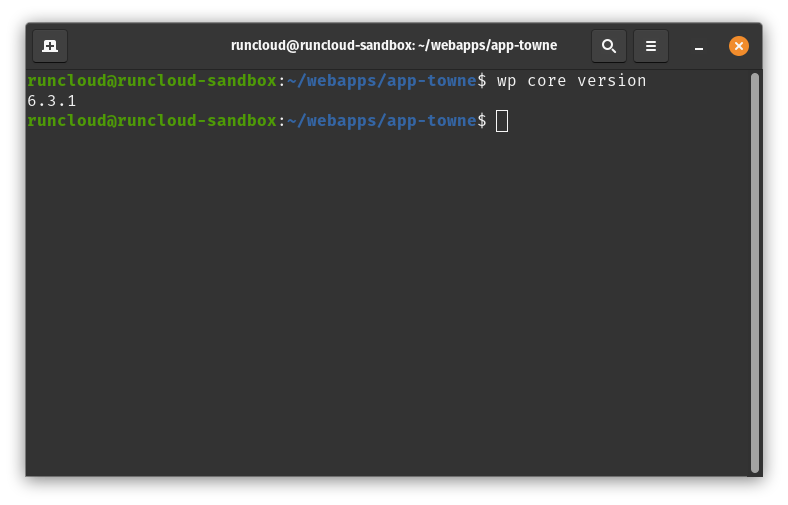
Use WP-CLI: Another way to check your WordPress version is to use the command-line interface (CLI) if you have SSH access to your server. To check your WordPress version, you need to navigate to your WordPress root directory, where the wp-config.php file is located, then, run the following command to check your WordPress version:
wp core version
How to Upgrade Your WordPress Version
Once you know your WordPress version, you may want to upgrade it to the latest version available. There are several benefits of upgrading your WordPress version, such as:
Improved security: Upgrading your WordPress version will protect your site from potential vulnerabilities and attacks that may exploit outdated code.
Improved performance: Upgrading your WordPress version will enhance the speed and efficiency of your site, as newer versions often include optimizations and bug fixes.
Improved functionality: Upgrading your WordPress version will enable you to use new features and functionalities that may not be compatible with older versions.
Before updating anything, it is always recommended to back up your site, including your files and database, in case something goes wrong during the update process.
There are different ways to upgrade your WordPress version, depending on your preference and situation. Here are some of the most common methods:
Use the Automatic Update Feature
The easiest way to upgrade your WordPress version is to use the automatic update feature that is built into WordPress. You can do this by logging in to your WordPress dashboard and clicking on “Updates” in the left sidebar.
You will see a message that tells you if there is a new version available, and a button that says “UpdateNow“. Clicking on this button will initiate the update process, which may take a few minutes.
Use the Manual Update Method
Another way to upgrade your WordPress version is to use the manual update method.
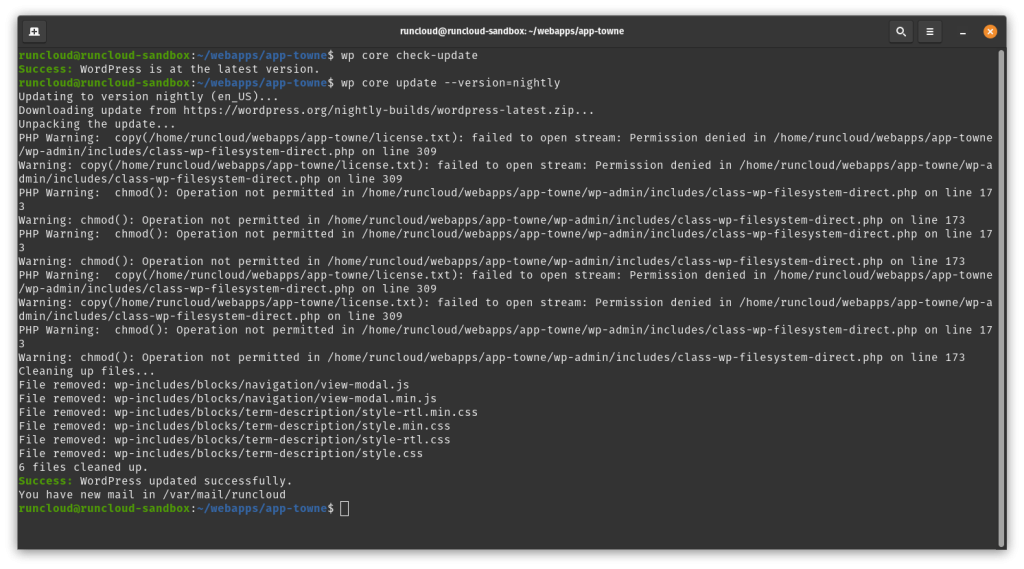
To update WordPress using the command-line interface (CLI), you can use the wp core update command, which updates WordPress to the latest stable version. You can also use some options to customize the update process, such as:
You can specify the zip file to use, instead of downloading from wordpress.org. For example, if you have a zip file named wordpress-6.3.0.zip in your current directory, you can run:
wp core update wordpress-6.3.0.zip
You can use the –minor flag to only install updates for minor releases, such as updating from WP 6.3 to 6.3.3 instead of 6.4.2. For example, if you want to update to the latest minor version, you can run:
wp core update --minor
You can specify the WordPress version using –version flag to update to a specific version, instead of to the latest version. You can also use nightly to update to the latest development version. For example, you can run:
When the installed WP version is greater than the requested version, you need to specify –force flag. This can be useful if you want to downgrade your WordPress version for some reason. For example, if you want to downgrade from WP 6.3 to WP 6.2, you can run:
wp core update --version=6.2 --force
By default, WordPress uses English. However you can specify the –locale option to select which language you want to download. For example, if you want to download the French version of WordPress, you can run:
wp core update --locale=fr_FR
Note: If you see “Error: Another update is currently in progress”, you may need to run wp option delete core_updater.lock after verifying that another update isn’t actually running.
Final Thoughts
Updating your WordPress version is essential for the security, performance, and functionality of your site. You should always keep your WordPress version up to date with the latest version available, or at least with the latest minor version.
In this article, we have shown you how to check and upgrade your WordPress version using various methods. We also explored how to use the command-line interface (CLI) to check and update your WordPress version.
If you are looking for an easy and convenient way to get started with WordPress, you should check out RunCloud. RunCloud is a cloud-based platform that allows you to manage your WordPress sites on any cloud server.
With RunCloud, you can easily install, update, backup, restore, clone, migrate, and secure your WordPress sites with just a few clicks. Sign up for RunCloud today!
The wp-config file is one of the core WordPress files, which means that understanding how you can navigate it, and make subtle but essential changes, can make a massive difference to your site.
Responsible for establishing the connections between your WordPress site and the database, the wp-config file is an essential element in determining how smoothly and error-free your site runs.
In this article, we’ll show you how to navigate your WordPress site’s wp-config file safely, and how to make simple changes that will help improve the security and performance of your site. Let’s get started!
What Is wp-config.php?
The wp-config.php file is a configuration file used by WordPress to initialize various settings and options for the website. The file is typically located in the root directory of a WordPress installation and is automatically created when WordPress is first installed. Alternatively, you can create it manually by renaming the wp-config-sample.php file and editing it with your own details.
Basic Settings in wp-config.php
The wp-config.php file plays a crucial role in the functioning of a WordPress website, providing the base configuration details, including:
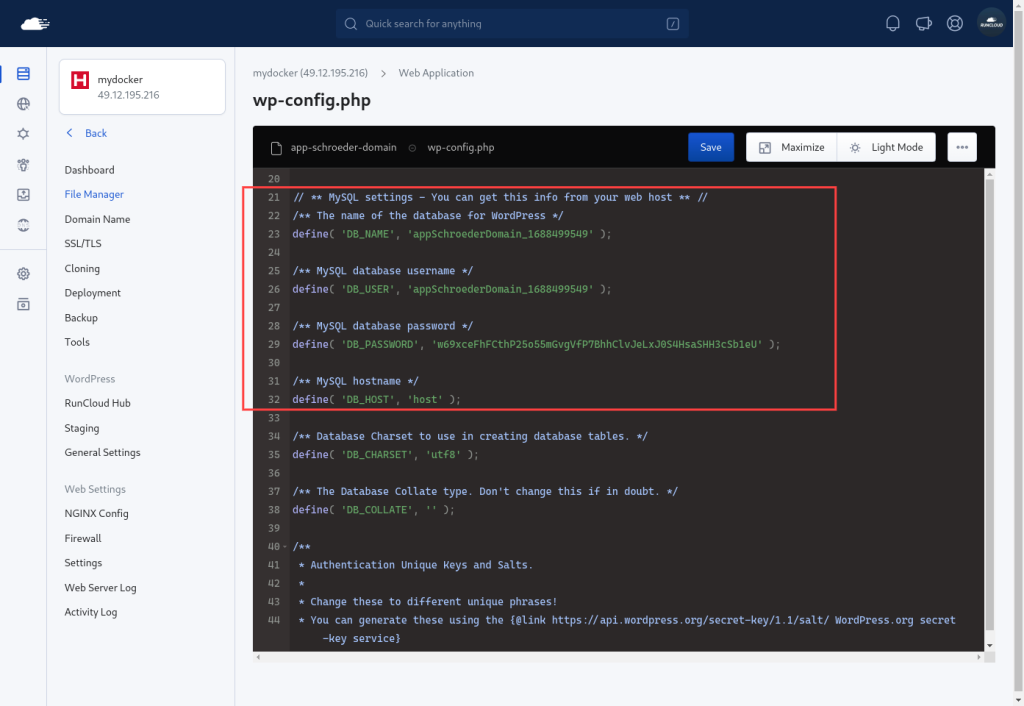
WordPress database connection settings: This includes the database name, username, password, and host. Without this information, your WordPress website will not work, and you will get the “error establishing database connection” error.
WordPress salts & keys: These are random strings of characters that are used to enhance the security of your WordPress site. They are used to encrypt information stored in cookies, such as user passwords and authentication data.
WordPress database table prefix: This is a prefix that is added to each table name in your WordPress database. By default, it is set to `wp_`, but you can change it to anything you want. Changing the table prefix can help prevent SQL injection attacks and conflicts with other applications that use the same database.
ABSPATH: This is a constant that defines the absolute path to the WordPress directory on your server. It is used by WordPress to locate files and directories.
In addition to its core functions, the wp-config.php file also allows for advanced customization of a WordPress website. For example, it can be used to enable debugging and caching options, set up a multi-site installation, and configure environmental variables.
Advanced Settings in wp-config.php
The wp-config.php file also allows you to customize various aspects of your WordPress site by defining constants and variables. Some of these are optional, but some are required for certain features or functions to work properly. For example, you can:
Enable or disable WordPress debugging mode: This is a mode that displays errors and notices on your website for troubleshooting purposes. By default, it is disabled, but you can enable it by setting the WP_DEBUG constant to true.
Increase memory allocated to PHP: This allows you to increase the amount of memory that PHP can use when running your WordPress site. By default, WordPress tries to increase the memory limit to 40MB for single sites and 64MB for multisites, but this may not be enough for some plugins or themes. You can increase the memory limit by defining the WP_MEMORY_LIMIT constant.
Disable or enable cron jobs:Cron jobs are scheduled tasks that run at specific intervals on your WordPress site. For example, cron jobs are used to check for updates, publish scheduled posts, and send pingbacks. By default, WordPress uses a pseudo-cron system that runs when a page is loaded. You can disable this system by defining the DISABLE_WP_CRON constant as true.
Change file permissions: File permissions are rules that determine who can read, write, or execute files on your server. By default, WordPress uses the file permissions set by your server, but you can override them by defining constants such as FS_CHMOD_FILE, FS_CHMOD_DIR, and FS_METHOD.
These are just some examples of what you can do with the wp-config.php file. There are many more constants and variables that you can define or modify to customize your WordPress site.
Where To Find The wp-config.php File
Locating the wp-config.php file in a WordPress installation is simple. Here are the steps to follow:
Log in to your web hosting account and access the file manager, or use an FTP client.
Locate the root directory of your WordPress installation. This is typically where you installed WordPress, such as public_html or www. RunCloud users can see the path of their web application in the RunCloud dashboard.
Look for the wp-config.php file in the root directory. It should be located alongside other core WordPress files, such as wp-content and wp-includes.
If you can’t find the file in the root directory, check the subdirectories. Sometimes, the wp-config.php file can be located in a subdirectory, such as /wp/.
If you still can’t find the file, try searching for it using the search feature in your file manager or FTP client.
What Happens If the wp-config.php File Is Missing
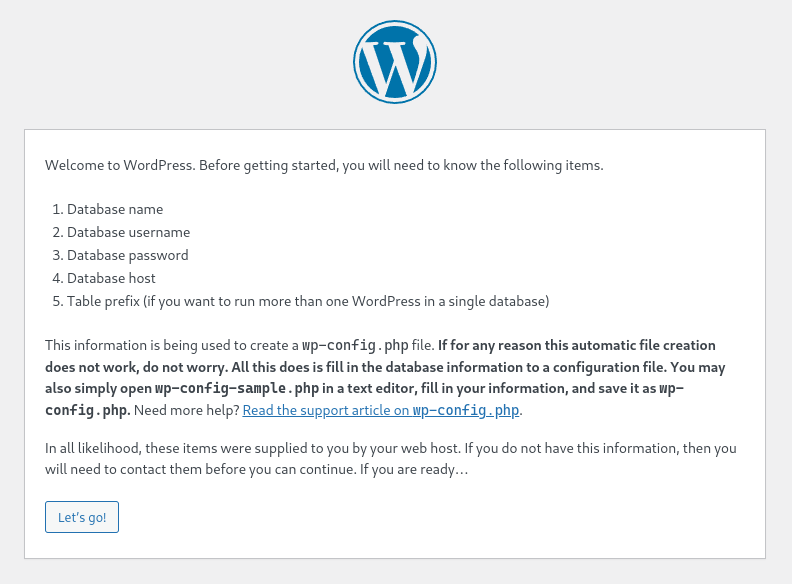
If the wp-config.php file is missing from your WordPress directory, you won’t be able to access your WordPress site or dashboard. Instead, you will be redirected to /wp-admin/setup-config.php.
This setup page will ask about your database connection details and other basic settings. Once you submit the form, WordPress will create a wp-config.php file for you, and install WordPress.
Alternatively, you can manually create the wp-config.php file by copying the wp-config-sample.php file from your WordPress directory, renaming it to wp-config.php, and then editing it with your own details.
Understanding the Structure and Format of the wp-config.php File
The structure and format of the wp-config.php file are as follows:
PHP Tags: wp-config.php is a php file that contains PHP code which defines the configuration settings for WordPress. All PHP files start with <?php and (optionally) end with ?>.
<?php
// content
?>
Comments: These are lines of text that are ignored by PHP and are used for information purposes only. They start with // for single-line comments or /* */ for multi-line comments. For example:
// MySQL settings
/* The name of the database for WordPress */
Constants: These are names that represent fixed values that can’t be changed. They’re defined using the define() function, which takes two parameters: the constant name and the constant value. The constant name is usually written in uppercase letters and underscores, and the constant value can be a string, a number, a boolean, or an array. For example:
Variables: These are names that represent values that can be changed. They are assigned using the = operator, and they start with a $ sign. The variable name can be any combination of letters, numbers, and underscores, and the variable value can be any data type supported by PHP. For example:
$table_prefix = 'wp_'; // Database table prefix
Require statements: These are statements that include or require another PHP file to be executed. They use the require_once() function, which takes one parameter: the file path of the file to be included or required. The file path can be absolute or relative to the wp-config.php file. For example:
It’s important to edit the wp-config.php carefully to avoid causing any issues. Here are the steps to do this safely:
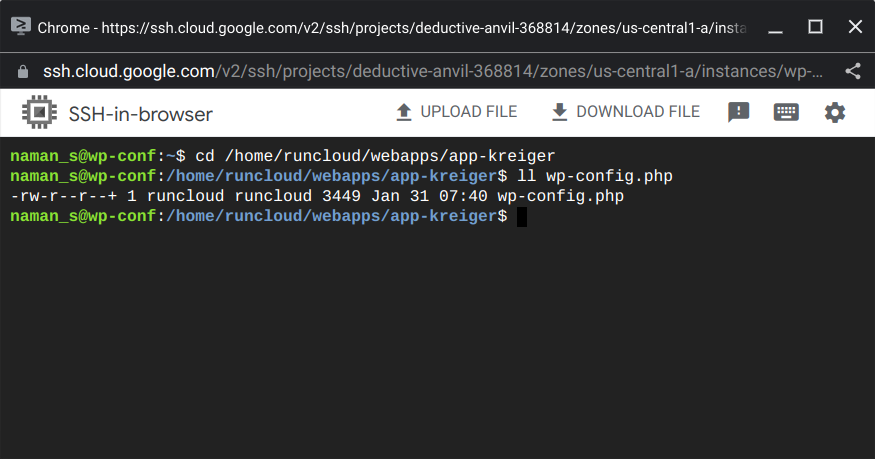
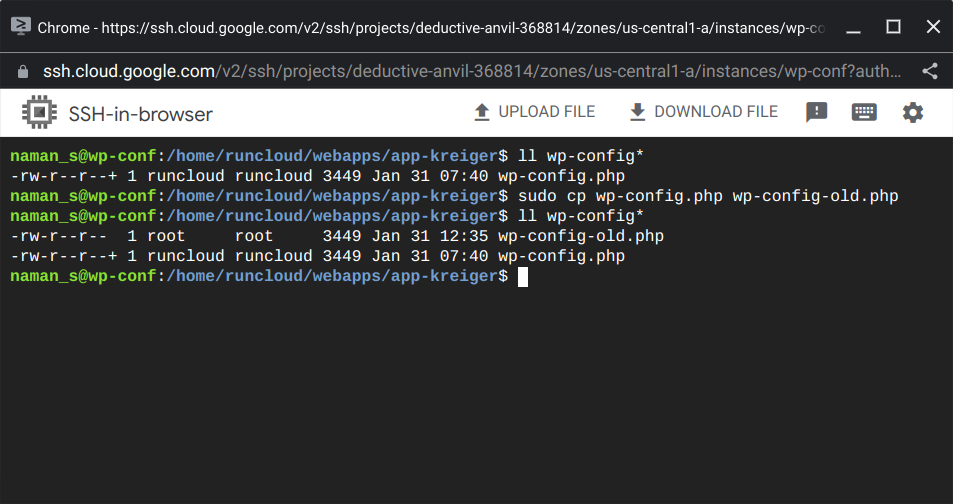
Back up your website: Before making any changes to your site, it’s essential to create a backup of your website in case something goes wrong. You can use a backup plugin or ask your hosting provider for backup options. If you don’t have a backup plugin installed on your site, you can simply copy the old file using the cp command and change the name, so it is abundantly clear which file is the old one, such as wp-config-BACKUP.
Open the file in a text editor: After backing up the wp-config.php file, open it in a text editor, such as VS Code, Sublime Text, or nano.
Make your changes: Once a file is open in a text editor, be cautious, as a small mistake can cause significant problems with your site.
Save the file: Once you have made your changes, save the file and close the text editor.
Test your site: After saving the changes, you should check your website to ensure it is functioning correctly. You can revert to the backup you created if there are any issues.
It’s important to remember that even small changes to the wp-config.php file can have a significant impact on your website, so be careful when making edits. If you’re not familiar with editing files, or are unsure about a change, it’s best to consult a developer or seek support from your hosting provider.
General Settings in wp-config.php File
Here are the most important settings that should be configured in the wp-config.php file relating to the functionality and security of your site:
Database Connection Settings
These settings define the connection to your database, and store information such as the database name, username, password, and host.
The database connection settings must match the information for your database, or you will receive an error message when trying to access your site.
You can define these settings as follows:
Security Keys and Salts
These keys are random strings of data that enhance the security of your site by adding an extra layer of protection against hacking attempts. They are used to encrypt information stored in cookies, such as user passwords and authentication data.
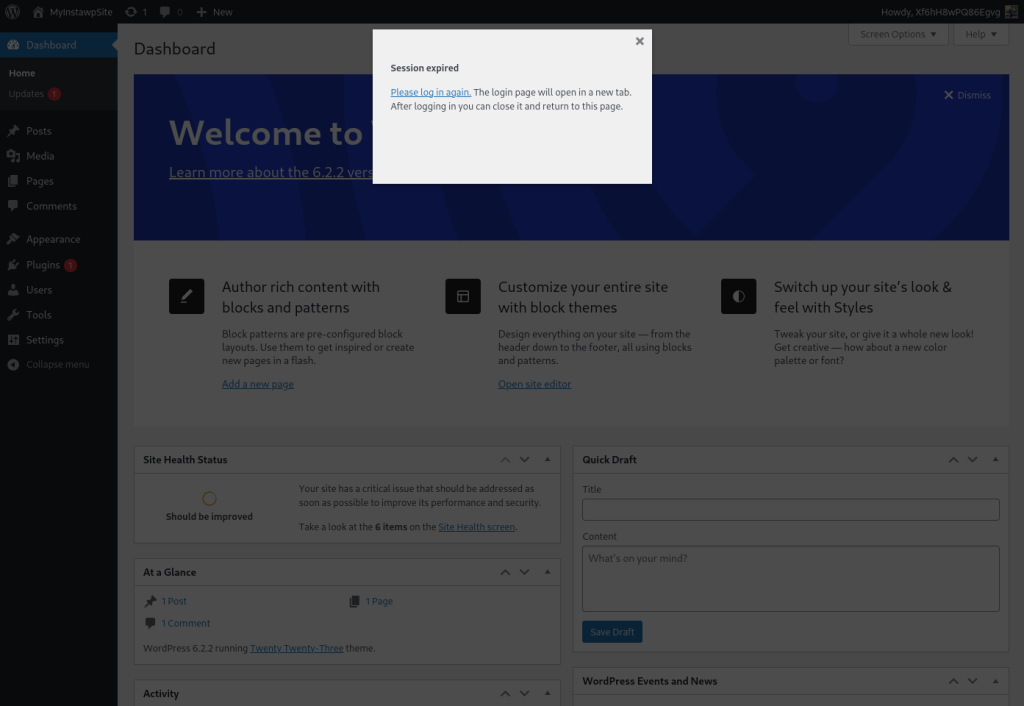
By changing these keys and salts periodically, you can invalidate any existing cookies and force users to log in again. This can help prevent cookie hijacking attacks and improve security.
You can generate new security keys and salts in several different ways:
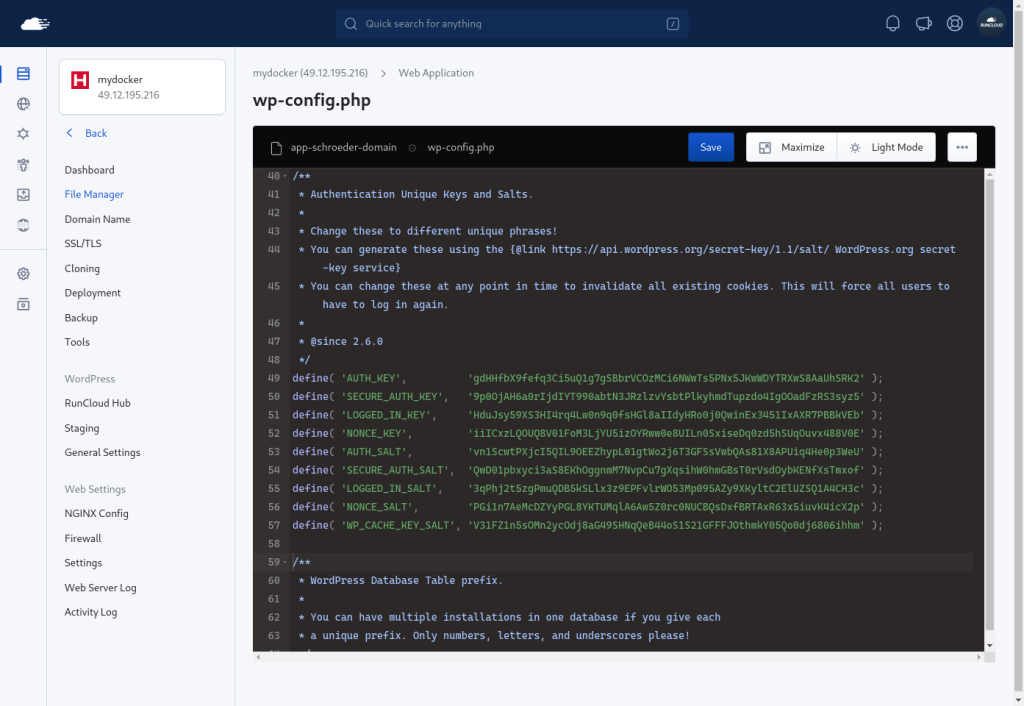
By visiting https://api.wordpress.org/secret-key/1.1/salt/ and copying the generated keys and salts. Then, you can paste them into your wp-config.php file, replacing the existing ones.
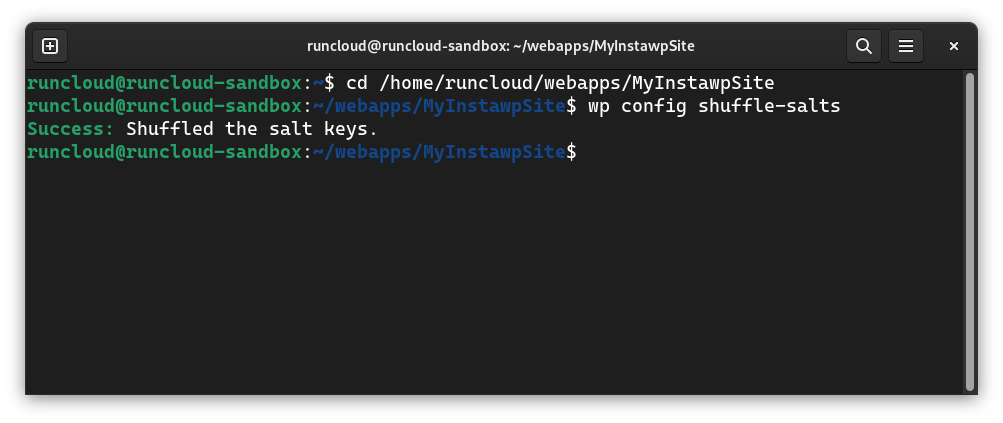
You can also use a WP CLI command to generate new security keys and salts without visiting any website. To do so, you need to:
Connect to your server via SSH or use a control panel.
Navigate to your WordPress installation directory with cd /path/to/wordpress.
Run the following command: wp config shuffle-salts.
You can also use a plugin to generate new security keys and salts without editing any file. One such plugin is Salt Shaker, which allows you to either change the keys and salts manually, or automatically on a schedule.
WP_CACHE Setting
This setting controls whether caching is enabled in WordPress. Caching can improve the performance of a WordPress site by storing frequently accessed data in a cache memory, which is significantly faster than re-processing it every time the page is loaded.
However, caching can also serve stale or outdated data, which can lead to an inconsistent user experience. Therefore, you should set this value carefully depending on your content and caching plugin. Read our deep dive on WordPress object caching to learn more.
By default, WP_CACHE is not defined, which means caching is disabled in WordPress. You can set it to true to enable caching in WordPress, which will use the caching plugin that you have installed and activated on your site.
define( 'WP_CACHE', true ); // Enable caching in WordPress
The default value of FS_METHOD is “direct”, which means WordPress accesses the file system directly without using any protocol.
This is usually sufficient for most hosting environments, but in some cases, you may need to change this value to resolve file permission issues. The possible values of FS_METHOD are:
direct: WordPress accesses the file system directly
ssh2: WordPress uses the Secure Shell (SSH) protocol to access the file system
ftpext: WordPress uses the File Transfer Protocol (FTP) to access the file system
ftpsockets: WordPress uses the FTP Secure (FTPS) protocol to access the file system
For example, you can define this setting as follows:
define( 'FS_METHOD', 'ssh2' ); // Use SSH to access the file system
Multi-site Setup
A multi-site installation allows you to create a network of multiple sites using a single WordPress installation. This can be useful if you want to run multiple websites with different themes and plugins, or if you want to manage multiple sites from a single dashboard. You can read more about WordPress multisite in our blog post.
You can enable multi-site by defining the WP_ALLOW_MULTISITE constant in your wp-config.php file. By default, this flag is not defined, which means multi-site functionality is disabled in WordPress. You can define this setting as follows:
define( 'WP_ALLOW_MULTISITE', true ); // Enable multi-site functionality in WordPress
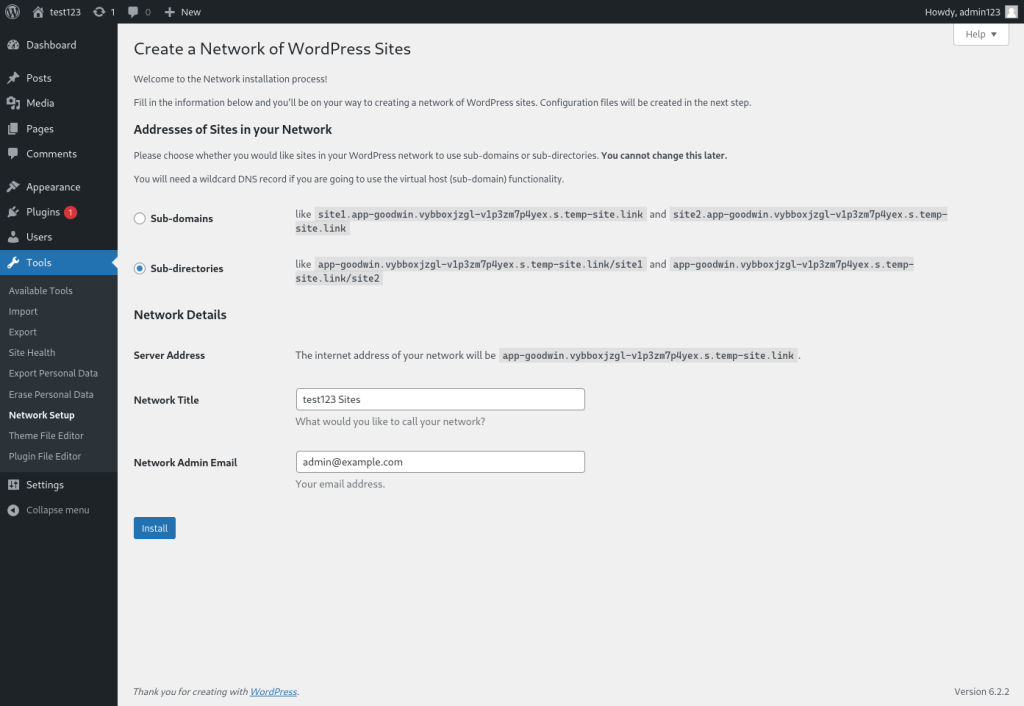
After defining this setting, you need to log in to your WordPress dashboard and navigate to the “Tools” menu. You should see the “NetworkSetup” option, which will guide you through the process of creating and configuring your network of sites.
Disabling Automatic Updates
You can edit your wp-config.php file to disable automatic updates for WordPress core releases, translations, themes, and plugins. While these updates can help keep your site secure and up-to-date, they can also cause compatibility issues – or break your site if something goes wrong.
Moreover, if you have customized your themes or plugins, automatic updates can overwrite your changes and erase your work.
// Disable all automatic updates
define( 'AUTOMATIC_UPDATER_DISABLED', true );
// Disable automatic updates for core
define( 'WP_AUTO_UPDATE_CORE', false );
// Disable automatic updates for themes
add_filter( 'auto_update_theme', '__return_false' );
// Disable automatic updates for plugins
add_filter( 'auto_update_plugin', '__return_false' );
These lines will disable all types of automatic updates for your WordPress site. If you want to enable only specific types of automatic updates, you can modify the corresponding lines. For example, if you want to enable automatic updates for minor core releases only, you can change WP_AUTO_UPDATE_CORE to minor.
Reading Environmental Variables
Environmental variables are a way to store configuration data that can be easily managed and changed without affecting the codebase. This is particularly useful in WordPress, where you might want to use different settings in different environments.
These variables are set outside of the WordPress code, usually in the server configuration or the .env file – very different from WordPress constants. WordPress constants are defined inside the WordPress code, usually in the wp-config.php file or a custom plugin.
Environment variables can be different for different environments (such as development, staging, or production), while WordPress constants are usually the same for all environments (unless they are conditionally defined).
One reason why someone would load their database credentials from environment variables is to keep them secure and out of the version control system. This way, they can avoid exposing sensitive information to unauthorized users or hackers.
Another reason is to make it easier to switch between different environments without having to edit either the wp-config.php file or the database.
For example, if you use a .env file for storing your database credentials, you can simply change the values in that file when you move your site from development to production, without affecting the rest of your WordPress code.
To retrieve the environmental variables in wp-config.php, you can use the PHP function getenv(). For example, if you have an environmental variable named “DB_PASSWORD”, you can retrieve it in wp-config.php using the following code in wp-config.php:
define( 'DB_PASSWORD', getenv('DB_PASSWORD'));
It’s essential to remember that environmental variables should be stored securely, and never included in either version control or shared publicly, as they often contain sensitive information.
Configure WordPress Environment
The WP_ENVIRONMENT_TYPE variable controls the environment type for a WordPress site. The possible values are local, development, staging, and production. The value of the environment type can affect how WordPress behaves, and how plugins and themes handle specific functionality.
There are two ways to set the WP_ENVIRONMENT_TYPE variable for your WordPress site:
Using a PHP environment variable: This can be done using various methods, depending on your server configuration and hosting provider.
Using a WordPress constant: To do this, you need to add the following line to your wp-config.php file:
define( 'WP_ENVIRONMENT_TYPE', 'production' );
Once you have set the WP_ENVIRONMENT_TYPE variable for your WordPress site, you can use it in various ways to customize and optimize your site’s behavior and functionality. For example, you can use it to enable or disable debugging features, automatic updates, caching, specific plugins or themes, and more.
To use the WP_ENVIRONMENT_TYPE variable in your code, you can use the wp_get_environment_type() function, which returns the current environment type as a string. For example, you can write something like this:
switch ( wp_get_environment_type() ) {
  case 'local':
    // do something for local sites
    break;
  case 'development':
    // do something for development sites
    break;
  case 'staging':
    // do something for staging sites
    break;
  case 'production':
  default:
    // do something for production sites or any other sites
    break;
}
This way, you can conditionally execute different code blocks depending on the environment type of your WordPress site.
WordPress stores all your themes, plugins, uploads, and other files in the wp-content folder by default. You can change this folder name and location by defining the WP_CONTENT_DIR and WP_CONTENT_URL constants in your wp-config.php file. Here is an example:
WordPress stores all your plugins in the wp-content/plugins folder by default. You can change this folder name and location by defining the WP_PLUGIN_DIR and WP_PLUGIN_URL constants in your wp-config.php file.
WordPress stores all your media files in the wp-content/uploads folder by default. You can change this folder name and location by defining the UPLOADS constant in your wp-config.php file. For example, to rename the uploads folder to ‘media’ and move it to the assets folder, you can add this line:
define( 'UPLOADS', 'assets/media' ); // Change uploads folder name and location
WordPress uses the latest default theme (such as Twenty Twenty-One) as the fallback theme when no other theme is available or active. You can define a custom default theme by using the WP_DEFAULT_THEME constant in your wp-config.php file. For example, to use a theme named ‘MyTheme’ as the default theme, you can add this line:
define( 'WP_DEFAULT_THEME', 'mytheme' ); // Use MyTheme as the default theme
Configuring Developer Settings
The wp-config.php file also allows you to configure some developer settings that can help you debug and optimize your WordPress site. Some of the most useful developer settings are:
Enabling Debugging
You can turn on the WP_DEBUG constant to display PHP errors and notices on your site. This can help you identify and fix any coding issues or compatibility problems.
By default, WP_DEBUG is set to false, which means the debugging mode is off. You can set it to true in order to turn on debugging mode. This will log errors and warnings to a file, and display them on your site.
You can also set WP_DEBUG_LOG to true to specify that debugging information should be logged to a file, and set WP_DEBUG_DISPLAY to false to hide debugging information from being displayed on your site. For example, you can define these flags as follows:
define( 'WP_DEBUG', true ); // Turn on debugging mode in WordPress
define( 'WP_DEBUG_LOG', true ); // Log debugging information to a file
define( 'WP_DEBUG_DISPLAY', false ); // Hide debugging information from being displayed on the site
define('SCRIPT_DEBUG', true); //loads the development (non-minified) versions of all scripts and CSS, and disables compression and concatenation.
Controlling Script Concatenation and Minification
WordPress concatenates (combines) and minifies (reduces) some of its core scripts and stylesheets to improve performance and reduce HTTP requests. However, this can sometimes cause issues with some plugins or themes that rely on specific scripts or styles. You can disable script concatenation and minification by adding the following line to your wp-config.php file:
define( 'CONCATENATE_SCRIPTS', true );
define('COMPRESS_SCRIPTS', true);
define('COMPRESS_CSS', true);
define('ENFORCE_GZIP', true); //forces gzip for compression instead of deflate
WordPress uses SQL queries to interact with the database and fetch data for your site. Sometimes, you may want to see what queries are being executed and how long they take. This can help you troubleshoot any database issues or optimize your site for speed. You can log SQL queries by adding the following lines to your wp-config.php file:
define( 'SAVEQUERIES', true );
global $wpdb;
print_r( $wpdb->queries );
Use Different Table Names for Users and Usermeta Tables
Change the users table name
WordPress uses the wp_users table to store user information by default. You can change this table name by defining the CUSTOM_USER_TABLE constant in your wp-config.php file. For example, to use a table named my_users instead of wp_users, you can add this line:
define( 'CUSTOM_USER_TABLE', $table_prefix . 'my_users' ); // Use my_users instead of wp_users
Change the usermeta table name
WordPress uses the wp_usermeta table to store user metadata by default. You can change this table name by defining the CUSTOM_USER_META_TABLE constant in your wp-config.php file. For example, to use a table named my_usermeta instead of wp_usermeta, you can add this line:
define( 'CUSTOM_USER_META_TABLE', $table_prefix . 'my_usermeta' ); // Use my_usermeta instead of wp_usermeta
Repairing and Optimizing The Database
Sometimes, your WordPress database may get corrupted or damaged due to various reasons, such as server errors, hacking attempts, plugin conflicts, or power failures. This can cause your site to malfunction or display errors.
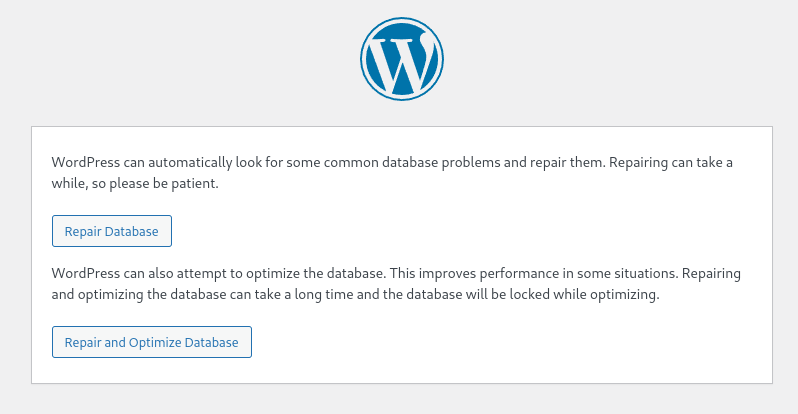
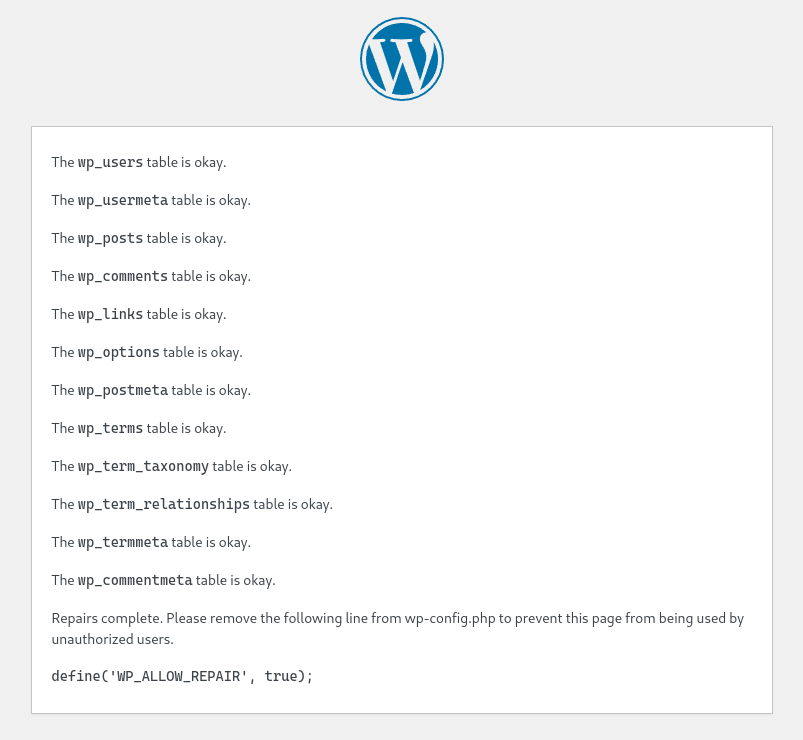
To fix your database, you can use the WP_ALLOW_REPAIR constant in your wp-config.php file. This will enable a database repair and optimization feature that you can access by visiting this URL: https://example.com/wp-admin/maint/repair.php
To enable this feature, add the following line to your wp-config.php file:
define( 'WP_ALLOW_REPAIR', true );
After visiting the URL, you can choose to either repair your database, or repair and optimize your database.
Once the process is complete, you should remove the WP_ALLOW_REPAIR line from your wp-config.php file to prevent anyone else from accessing the feature.
Disabling Table Updates
WordPress updates its database tables whenever a new version of WordPress is released, or when a plugin or theme requires a database change. This ensures that your site is compatible with the latest features and security patches.
However, sometimes you may want to disable table updates for various reasons, such as:
You have a large site with many tables, and updating them may take a long time or cause downtime.
You have a staging or development site that mirrors your live site and you don’t want to update the tables until you are ready to deploy the changes.
You have a specific scenario where updating the tables may break something on your site, or cause conflicts with other plugins or themes.
To disable table updates, you can add the following line to your wp-config.php file:
define( 'DO_NOT_UPGRADE_GLOBAL_TABLES', true );
This will prevent WordPress from updating any of the global tables, such as wp_users, wp_usermeta, wp_blogs, etc. However, this may also prevent some plugins or themes from working properly, so use this option with caution – and only when necessary.
Database Collation
WordPress does not create the database on installation. This is important to know because all tables within a database will inherit their charset and collation from the database setting. So you should ensure that the database’s charset and collation is properly set before WordPress is installed.
The default charset is ‘utf8’ and its collation is ‘utf8_general_ci’, which means case-insensitive comparison using the general rules of Unicode.
To change the database collation in wp-config.php you can simply modify the value of the DB_COLLATE constant to match your desired collation. For example, if you want to use ‘utf8mb4_unicode_ci’, you can write:
define( 'DB_COLLATE', 'utf8mb4_unicode_ci' );
Security and Performance
The wp-config.php file is not only a configuration file, but also a security file. It contains sensitive information that can compromise your WordPress site if exposed to unauthorized users or malicious attacks. Therefore, it is essential to protect the wp-config.php file from visitors and hackers, and to optimize it for better security and performance.
Protecting Access to wp-config.php by Visitors
If an attacker gains access to this file, they can compromise your site and database. Therefore, you need to protect the wp-config.php file from visitors by using one of the following methods:
Moving the wp-config.php file: One of the simplest ways to protect the wp-config.php file from visitors is to move it to a higher level, outside the public directory of your WordPress installation. This way, the file will not be accessible via a web browser, and only WordPress will be able to locate it. WordPress will automatically look for the file in the parent directory if it is not found in the root directory.
Block access to the file: Another way to protect the wp-config.php file from visitors is to use directives in .htaccess or Nginx configuration files. These are files that control how your server handles requests and responses. By adding some rules to these files, you can deny access to the wp-config.php file. If someone tries to access it, they will get a 403 Forbidden error.
Disabling File Editors
Another way to improve the security and performance of your WordPress site is to disable the file editors. These are the theme editor and the plugin editor that allow you to edit the code of your themes and plugins from within the WordPress dashboard.
While these editors can be useful for quick changes, they can also pose both a security risk and a performance issue. If someone gains access to your WordPress dashboard, they can use the file editors to inject malicious code or delete important files. Moreover, if you make a mistake while editing the code, you can break your site or introduce vulnerabilities.
To disable the file editors, you need to add the following line in your wp-config. php file:
define( 'DISALLOW_FILE_EDIT', true );
This line will remove the theme editor and the plugin editor from the WordPress dashboard. If you want to edit your themes or plugins, you will need to use an FTP client or a file manager.
Blocking External HTTP Requests
Another way to improve the security and performance of your WordPress site is to block external HTTP requests. These are requests that WordPress makes to other domains or servers for various purposes, such as checking for updates, fetching feeds, or loading scripts.
While some of these requests are necessary and beneficial, some of them may be unwanted, unnecessary, or malicious. Blocking external HTTP requests can help prevent unauthorized access, reduce bandwidth usage, and speed up your site.
To block external HTTP requests, you need to add the following line to your config file:
define( 'WP_HTTP_BLOCK_EXTERNAL', true );
This line will block all external HTTP requests made by WordPress, except for localhost and your own domain. This will make your site more secure and faster.
However, blocking all external HTTP requests may also break some features or functions of your WordPress site that rely on them. For example, you may not be able to check for updates, install themes or plugins, or use third-party services.
To allow some external HTTP requests, you can use another constant called WP_ACCESSIBLE_HOSTS. This constant allows you to specify a comma-separated list of domains or hosts that are allowed to make external HTTP requests. You can also use wildcards to allow subdomains. For example:
This line will allow external HTTP requests to api.wordpress.org and any subdomain of github.com. You can add or remove domains or hosts as per your needs.
Forcing SSL for Login Pages and the Dashboard
Although virtually all websites these days use HTTPS, some websites still might be serving content on HTTP for legacy reasons. You can improve the security and performance of your WordPress site by forcing SSL for login pages and the dashboard.
This prevents anyone from intercepting or tampering with your data, such as usernames, passwords, cookies, and other sensitive information. SSL also improves the performance of your site by enabling HTTP/2 – a faster and more efficient version of HTTP.
The following line of code will force SSL for login pages and the dashboard:
fine( 'FORCE_SSL_ADMIN', true );
Note: You’ll need to obtain an SSL certificate for your domain name, install it, and activate the SSL certificate on your server before enabling this setting. You may need to contact your hosting provider for assistance with this step.
WordPress moves deleted posts, pages, comments, and other items to the trash, where they remain for 30 days by default. You can change this duration by defining the EMPTY_TRASH_DAYS constant in your wp-config.php file.
For example, to empty the trash every 7 days, you can add this line:
define( 'EMPTY_TRASH_DAYS', 7 ); // Empty trash every 7 days
WordPress saves a copy of every post or page revision, which can increase the size of your database and slow down your site. You can disable revisions completely by defining the WP_POST_REVISIONS constant in your wp-config.php file. For example, to disable revisions, you can add either of these lines:
WordPress requires a certain amount of memory to run smoothly and efficiently. The default memory limit for WordPress is 40 MB for single sites, and 64 MB for Multisite installations. However, sometimes you may need more memory for your site, especially if you have a high number of plugins or themes installed, have complex functionality, or high traffic.
To increase the memory limit for WordPress, you can use the WP_MEMORY_LIMIT constant in your wp-config.php file. For example, to increase the memory limit to 128 MB, add the following line:
define( 'WP_MEMORY_LIMIT', '128M' );
You can also use the WP_MAX_MEMORY_LIMIT constant to set the maximum memory limit that WordPress can use for intensive tasks, such as image editing or cron jobs. For example, to set the maximum memory limit to 256 MB, add the following line:
define( 'WP_MAX_MEMORY_LIMIT', '256M' );
Note that these constants may not work if your server has a lower memory limit set by PHP or Apache. In that case, you may need to contact your hosting provider, or edit your php.ini or .htaccess files to increase the server memory limit.
WordPress autosaves your posts and pages every 60 seconds by default, which can be annoying or helpful, depending on your preference. You can change the autosave interval by defining the AUTOSAVE_INTERVAL constant in your wp-config.php file.
For example, to change the autosave interval to 120 seconds, you can add this line:
The WP Loading Process – When wp-config Loads (and What’s Already Loaded)
The wp-config.php file is one of the first files that WordPress loads when a page is requested. It’s loaded even before WordPress initializes its core functions, classes, and hooks.
The WP loading process is as follows:
When a page is requested, WordPress looks for the .htaccess file in the root directory of your WordPress installation. This file contains rules that rewrite URLs and direct them to the index.php file.
The index.php file requires another file called wp-blog-header.php.
The wp-blog-header.php file requires another file called wp-load.php.
The wp-load.php file is a bootstrap file that loads the WordPress environment and template. It looks for the wp-config.php file in two locations:
The root folder of your WordPress installation.
One directory above the root folder, if the file is not found in the root folder.
If wp-config.php is missing, it starts a fresh installation.
The wp-config.php file is a vital part of a WordPress website, and must be appropriately configured for the website to function correctly. It’s essential to understand how to locate and edit the file, and troubleshoot any issues that may arise.
With RunCloud, you can easily set up and manage your servers, including configuring your wp-config.php file, with just a few clicks.
RunCloud also offers a variety of features, such as automatic backups, monitoring, and scaling options to help ensure your site runs smoothly – all through a secure and user-friendly management panel.Don’t waste any more time on complicated server management – sign up for RunCloud today!
Or, that Google penalizes slow sites in its search rankings?
These are just some of the consequences of having a poorly performing WordPress site. And one of the main factors that affects your site’s performance is the amount of RAM and number of CPU cores that your hosting plan provides.
But what are RAM and CPU cores, and how do they relate to WordPress hosting?
How can you tell if your site needs more or less of them? And how can you scale them up or down to optimize your site’s performance?
In this article, we’ll answer all of these questions, and more. We will explain what RAM and CPU cores are, how they work, and why they matter for your WordPress site. We will also give you some examples of WordPress sites that require high RAM and CPU resources, and how to scale them accordingly. Finally, we will share some tips and best practices to improve your site’s performance, and avoid wasting resources.
If you want to learn how to make your WordPress site faster, smoother, and more reliable, read on!
Why Do Sites Need RAM and CPU?
RAM and CPU are the main components of your hosting server that determine how fast and reliable your WordPress site is. Let’s see what they do and why they matter.
What is RAM?
RAM stands for Random Access Memory, and is the temporary storage space that your WordPress site uses to load and process data. Every time someone visits your site, WordPress needs to access the database, load the files, and execute the code. All these operations require RAM to store the data temporarily.
RAM is typically measured in Megabytes and Gigabytes. Most cloud providers allow you to configure the amount of RAM available on your server. The more RAM you have, the more data your site can handle at once. This means your site can load faster, handle more traffic, and run more plugins – without crashing or slowing down.
What is a CPU?
CPU stands for Central Processing Unit, and is the “brain” of your WordPress site that executes commands and calculations. Every time someone visits your site, WordPress needs to perform some logic and calculations to generate the output. For example, it needs to check the user’s permissions, apply the theme’s settings, run the plugins’ functions, and so on. All these operations require a CPU to process the commands.
The CPU is measured in the number of cores. The more CPU cores you have, the more commands your site can execute at once. This means your site can perform faster, handle more complex tasks, and run more plugins without errors or delays.
As you can see, both RAM and CPU are essential for your WordPress site to function properly.
However, they also have limits.
The more RAM and CPU cores you have, the more processes you can run simultaneously, and the faster your site can respond to visitors. If your site receives a lot of traffic or runs complex tasks, it might need more RAM and CPU resources than are available on your current hosting plan. This can result in slow loading times, errors, or even crashes.
That’s why you need to choose a hosting plan that provides enough RAM and CPU resources for your WordPress site. You also need to monitor your site’s performance and usage regularly, and scale your resources up or down as needed. In this way, you can ensure that your WordPress site runs smoothly and efficiently at all times.
Which Sites Benefit From More RAM and CPU?
Not all WordPress sites need the same amount of RAM and CPU resources. Some sites are more demanding and complex than others, and they can benefit from having more RAM and CPU resources to run smoothly and efficiently.
Some examples of WordPress sites that require high RAM and CPU resources are:
E-commerce sites that handle a lot of transactions and inventory. These sites need to load and process a lot of data, such as product details, prices, images, reviews, cart items, payment methods, and so on. They also need to handle a lot of user requests, such as adding items to the cart, checking out, updating orders, etc. All these operations require a lot of server resources to avoid slow loading times, errors, or crashes.
Membership sites that have a lot of users and content. These sites need to store and manage a lot of user data, such as profiles, preferences, subscriptions, activities, etc. They also need to load and display a lot of content, such as posts, pages, videos, podcasts, courses, etc. A large amount of traffic will put additional strain on a server’s resources.
Media sites that stream or download large files. These sites need to handle a lot of bandwidth and storage for the media files, such as images, audio, video, etc. They also need to encode and decode the files for different formats and devices. All these operations require a lot of RAM and CPU resources to deliver high-quality media without buffering, lagging, or breaking.
Multisite networks that run multiple WordPress sites on one server. These sites need to share the same server resources for all of the sub-sites in the network. This means that each sub-site needs to have enough RAM and CPU resources to function properly without affecting the other sub-sites. Running multiple sites requires a large amount of server resources.
If your site experiences a sudden surge in traffic, such as during a launch, promotion, or viral event, you might need to scale up your RAM and CPU resources to handle the increased load. In this way, you can avoid slow loading times, errors, or crashes that can frustrate your users and hurt your conversions.
If your site runs complex plugins or tasks, you might need to scale up your RAM and CPU resources to run them smoothly and efficiently. In this way, you can avoid performance issues, bugs, or conflicts that can affect your site’s functionality and user experience.
Measuring Performance Gains
It’s widely believed that “a bigger server will obviously outperform a smaller server”.
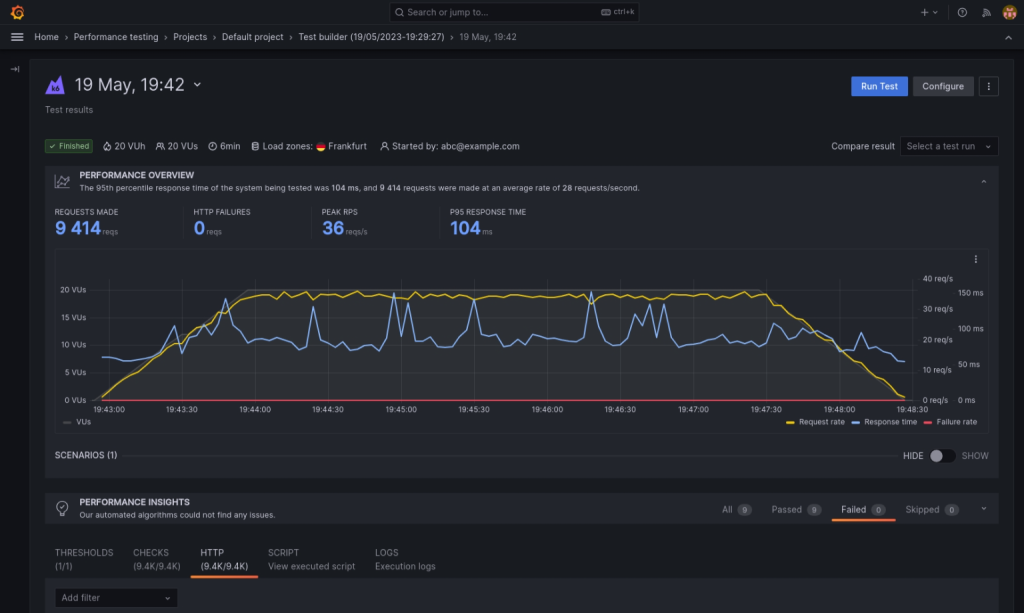
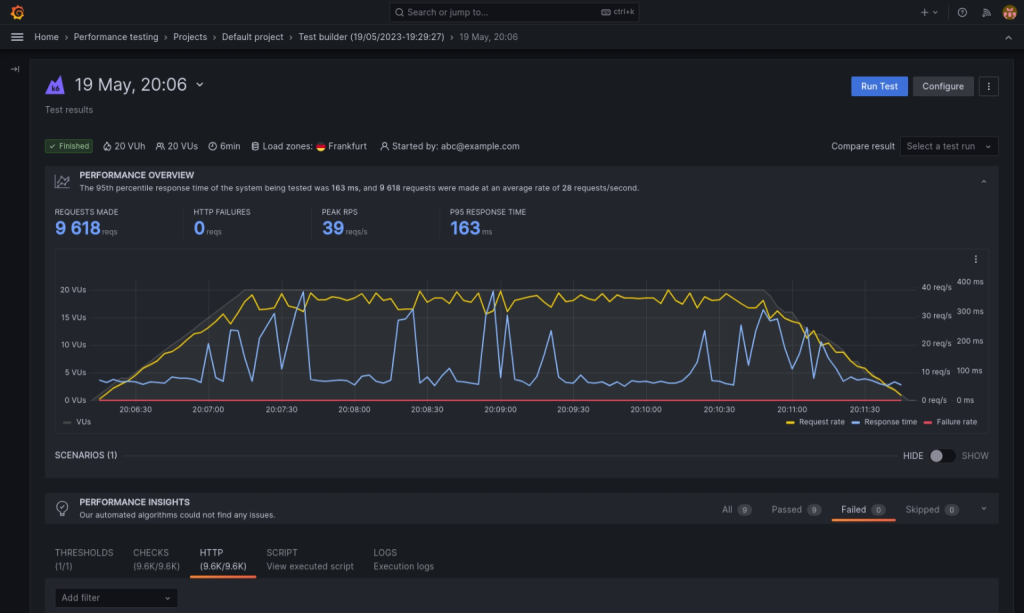
To put this to test, we created 3 identical websites on 3 fresh servers using WordPress 6.2. All of the servers had identical configurations – except the CPU and RAM.
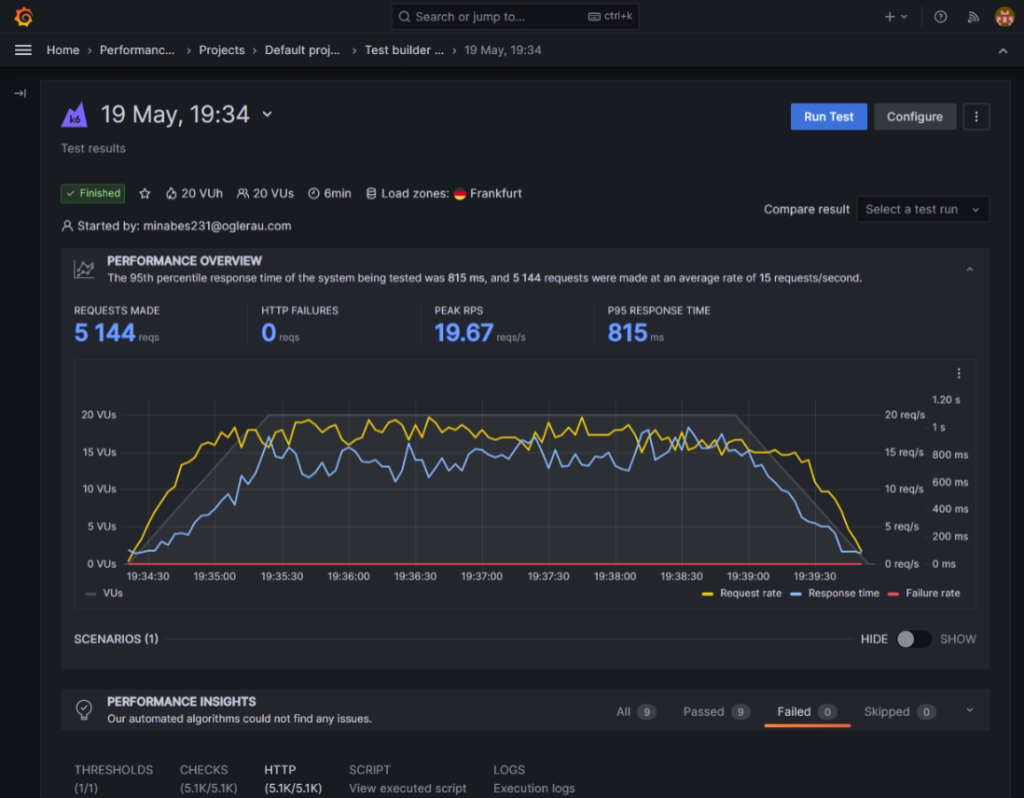
We ran load testing benchmarks using Grafana k6 to stress test the performance of our website, and measure the impact in 95 percentile response times. Since the purpose of this test is to put strain on CPU and RAM, we didn’t use any optimization techniques such as caching that are used in real world applications.
1v CPU 2 GB RAM
Our smallest server used the cheapest hosting plan offered by the cloud provider. It consisted of only 1 virtual CPU and 2 GB of RAM. Despite this, it was able to serve nearly 20 requests per second and had a p95 response time of 815ms. This is not bad considering it only costs <$5 to run. Most users will be able to afford it and will be satisfied with it – as long as the site doesn’t get too much traffic.
2v CPU and 8 GB RAM
Our second server was moderately priced, this one consisted of 2 virtual CPU cores and 8GB of RAM. This server size is probably unnecessary if you’re running a hobby site, but if you use your site for critical business transactions, then you should consider this.
Just by slightly increasing the resources, we were able to see a massive jump in the performance. The server completed nearly 36 requests every second with a p95 response time of 104ms. These numbers suggest that our server was limited by the number of resources during our first test. Let’s crank it up further and see if the numbers scale proportionally.
8v CPU 32 GB RAM
Our third server was the most expensive of the three, it contained 8 virtual CPUs and a whopping 32 GB of RAM. However, when we look at the numbers, they tell a different story. The number of requests per second metric saw only a minor bump from 36 to 39; furthermore, the p95 response time metric didn’t improve.
Trade Offs to Consider While Scaling RAM and CPU
You also need to be aware of the potential drawbacks or challenges of scaling RAM and CPU cores.
Unexpected Crashes
Scaling RAM and CPU cores might cause some unexpected issues or conflicts that can break your site.
For example, you might encounter compatibility problems with some plugins or themes that are not optimized for the new resources. Or you might face some server errors or configuration issues that prevent your site from loading properly.
These issues or conflicts can make your site inaccessible or unusable until you fix them, or revert to the previous state.
Planned Downtime
Furthermore, many hosting providers require you to shut down your server before you can increase or decrease your server’s RAM and CPU.
This means that your site will be offline for the duration of the upgrade. Although most providers will be able to scale up your server within a few minutes, this does vary from vendor to vendor, and depends on availability.
Increase in Hosting Costs
Finally, scaling RAM and CPU cores can also affect the price of your hosting plan. Some providers and plans might offer flexible or scalable pricing that adjusts to your resource usage. Others might charge you a fixed or flat rate regardless of your resource usage. And others might have different tiers or levels of pricing that correspond to different amounts of resources.
You need to weigh the costs and benefits of scaling, and find the best balance for your site’s budget and needs.
You need to consider how much scaling will improve your site’s performance and user experience, and how much it will increase your hosting expenses. You should also compare different providers and plans to find the one that offers the best value and quality for your site.
More Resources Might Not Benefit the Site
Simply adding more RAM and CPU cores does not guarantee better performance if there are other limiting factors such as network speed, disk speed, or PHP workers.
PHP workers are processes that handle PHP requests on your WordPress site. Some hosting providers limit the number of PHP workers available on your server. If you have too few PHP workers, your site may become slow or unresponsive when there are many concurrent visitors or complex tasks. If you have too many PHP workers, they may consume too much RAM and CPU resources, and cause your server to crash.
Final Thoughts – Thinking Beyond RAM and CPU
It’s clear that you can’t keep scaling up the hardware and expect proportional increase in performance.
Throwing money at the problem only works up to a point.
Beyond that, you need to fine tune your application to consume fewer resources, and find the optimal balance between RAM, CPU cores, and PHP workers for your WordPress site based on your traffic, content, and plugins. There are several ways to do this:
You can use caching, a technique that can improve your WordPress performance by storing frequently accessed data in memory or on disk, and serving it faster to visitors without invoking PHP workers.
There are different types of caching such as page caching, object caching, edge caching, etc. You need to choose the right caching solution for your WordPress site, depending on your needs and preferences.
If you’re tired of managing your own servers, you might want to check out RunCloud (yep, that’s us!).
RunCloud is built for developers that want to focus on shipping great work, not on managing their infrastructure. Experience what a painless server configuration feels like – get started with RunCloud today, and get up and running in minutes.
Tired of slow page load times and constant frustration with your WordPress site’s performance? The solution might just be something called ‘Object Caching’.
In this article we’ll dive into exactly what Object Caching is and how it works. Most importantly, we’ll guide you through the steps you’ll need to go through to start using Object Caching to significantly improve the speed and efficiency of your website.
Say ‘goodbye’ to sluggish load times, and ‘hello’ to a lightning-fast, smooth user experience.
Let’s get started!
What is Caching?
Caching is a technique used to store frequently accessed information in a more accessible and responsive location. If processing a website request takes a large amount of time then it can degrade the user’s experience, potentially impacting your sales and conversions on a regular basis.
Caching can help solve this problem by storing the frequently required data in a fast-to-access storage location. Any data that is accessed frequently and can be stored for a while is a good candidate for caching.
Caching is often associated with RAM, but it can be used with any storage media. For example, if downloading information from a server over the network takes ten seconds, you can save time by caching the file on your hard disk.
If reading the data from a hard disk takes too long, you can speed it up by caching the file in your RAM, which is many orders of magnitude faster than a hard disk.
Taking this one step further, you can even cache some vital information directly in the cache memory of your CPU if the delay caused by reading the data from RAM is unacceptable.
Although it is useful, caching is not a silver bullet. Cached data becomes outdated after a period of time, and this can cause unexpected glitches in the application. To ensure proper functioning of your application it will be necessary to constantly replace the old copy of data with a fresh copy at regular intervals.
One more thing to keep in mind is that as we shift towards faster storage media, the capacity decreases drastically along with the exponential increase in the cost. For example, cloud storage costs a few dollars a month for hundreds of GBs of storage. Modern SSDs are getting cheaper, but still cost hundreds of dollars for a single terabyte of storage. RAM is much faster than an SSD, but most modern computers only have about 16GB of RAM. As a surprise to no one, the cache memory size of a CPU is even lower. The Intel Core i9-13900 processor – the latest offering from Intel – still only offers 36MB of cache memory.
Overview of Different Types of Caching
Server caching: When the server processing the requests caches the queries, then it is called server caching. In WordPress, there are two main types of server caching techniques:
Object Caching: In this, WordPress stores the results of frequent database queries and other API requests. It is called Object Caching because the result of the query is often an object (such as an item of data from a database, a row from a table, or a document).
If you want to display the result of a complex database query, such as the number of 5 star reviews on a particular product, then Object Caching is the right choice for you as the number of reviews are likely to remain the same when a page is refreshed.
Page caching: This type of caching involves generating complete static pages and storing them. When a server receives a request, it serves this statically generated page instead of rendering a fresh copy of it.
If you are serving pages that mostly remain the same, but are heavily requested by your users, then you should use this. The homepage or the pricing page of your site are unlikely to change often and are a good fit for this type of caching.
CDN caching: This is a good option for caching static content, such as images, fonts, CSS, JS libraries, and HTML pages, on a content delivery network (CDN). If your site uses a CDN, then all of your customers’ requests will be routed through a CDN. If the CDN has a cached copy then it serves that, otherwise it asks your server for a fresh copy, serves that, and also stores it for future use. When the cached copy gets too old, it is automatically deleted and the CDN asks for a fresh copy.
Although this might seem like extra effort, this drastically reduces the number of requests that reach your server, and it also serves content faster to your visitors.
Browser caching: This is somewhat similar to CDN caching, but it happens in the user’s browser. If a user is visiting your site for the first time, they won’t notice a difference. However, returning users would already have a cached copy of your data and won’t need to make network requests; this can drastically reduce the request time.
Sometimes, even first time users will be able to take advantage of browser caching. For example, if you use third party assets such as Google Fonts or Google Analytics on your site, and the visitor has previously visited a different site that also uses these same assets, then the browser will already have a cached copy of them, and can use those.
What is Object Caching?
In WordPress, Object Caching is the technique of storing the results of complex database queries in memory. These saved results are then reused when executing subsequent requests and, since the results are already computed, it takes less time to serve those requests.
Object Caching reduces the load on the database and improves the overall performance and responsiveness of a WordPress site. As a result, you can serve more customers without needing to scale up the infrastructure, helping to save on server costs (and significantly improve the user experience).
When Do You Need Object Caching?
If you already have a CDN configured on your site then you might be thinking that you don’t need to use Object Caching. While a CDN does help in reducing the server load, it can’t replace Object Caching – no one particular caching solution can solve 100% of your problems.
A way to think about caching is as a series of nested filters, where each filter catches smaller and smaller things at each level. As data passes through each level of caching, it is checked against increasingly specific and targeted rules until only the most relevant and frequently accessed data remains in the cache.
Any WordPress site that receives a high volume of traffic, has complex queries, or requires fast and reliable performance, can benefit from Object Caching. Here are some scenarios where Object Caching can be especially beneficial:
High-traffic websites: Publishers and news sites that receive a high volume of traffic can benefit from Object Caching to improve page load times and reduce server load. Object Caching can help reduce the number of database queries required to load a page, which can make a big difference when dealing with large amounts of traffic.
eCommerce sites: Online stores that use WordPress plugins such as WooCommerce, Easy Digital Downloads, or NorthCommerce can benefit from Object Caching to improve the performance of their product pages, shopping cart, and checkout pages.
Course websites: WordPress sites that use a learning management system (LMS) such as LifterLMS, LearnDash, or SenseiLMS can benefit from Object Caching to improve the performance of their course pages, quizzes, and other interactive features.
WordPress multisite networks: Websites that use WordPress multisite networks can benefit from Object Caching and improve the performance of their entire network. Object Caching can help reduce the number of database queries required to load pages across the network, which can improve the overall speed and responsiveness of the sites.
What Are the Benefits of Using Object Caching?
Object Caching can offer several benefits for WordPress sites:
Improved Performance: Enabling Object Caching can significantly improve the performance of WordPress sites by reducing the amount of time it takes to serve a request. By caching commonly accessed data, such as queries or API calls, Object Caching can eliminate the need to repeatedly fetch the same data from the database. This can improve the speed and responsiveness of the site, resulting in a better user experience.
Better Lighthouse Scores: Object Caching can directly impact your Lighthouse Scores. A properly implemented caching strategy will reduce Time To First Byte (TTFB) and First Contentful Paint (FCP) – these metrics are important factors in determining Lighthouse scores. Having a good Lighthouse score is essential for a snappy user experience – and it also improves SEO.
Reduced Server Costs: Object Caching can also help to reduce the load on the server. Caching the response of commonly requested database queries leads to a reduction in the number of requests sent to the database. This reduces the load on the server, and ultimately reduces the amount of resources needed to serve the site. This can result in lower hosting costs and better scalability for WordPress sites.
What is WP_Object_Cache?
The WordPress engine provides a built-in Object Caching functionality that can be accessed via the WP_Object_Cache class, (a ‘class’ being a blueprint for a way data should be structured). This class acts as a layer between the programmer and the underlying architecture where data is processed. It’s not recommended to use the class directly – you can use pre-defined functions to set, clear, add, and update cache values.
Object Caching is typically achieved through the use of an external caching solution, such as Redis or Memcached, which acts as a fast, in-memory data store for cached objects. When used correctly, Object Caching can result in significant improvements in page load times, increased website stability, and a better user experience.
What Are Redis And Memcached?
Redis and Memcached are open-source database technologies. These are key value store databases which can each be thought of as a dictionary. In other databases, such as MySQL or MongoDB, you can store multiple values in one record, but in a key value database you can only store one value in each record.
For example, an SQL database can be thought of as a table that contains all the test scores of a student. The student might have scored well in the last exam, or they could have been absent. All this information can be stored in the table, the design of which can be modified to add or remove information.
SQL table:
In the case of a key-value database such as Redis there is only one field, and it cannot be modified. This is best visualized by imagining a dictionary which can only hold one definition for one word, and nothing else.
In this example, a key value store saves the value of a complex query which was run on above database:
No_of_students_absent
2
Avg_marks_of_Steve
24.3
Redis stores the data in RAM for much faster access compared with storing it on the hard disk. This simple architecture makes Redis, and other similar databases, ideal for storing cached data.
Both Redis and Memcached are designed to be used with a variety of programming languages and platforms. The key difference between the two is that Redis supports more advanced data structures, such as lists and hashes, while Memcached is simpler and focuses on the efficient storage and retrieval of key-value pairs.
Object Cache Pro – A Better Caching Solution
Object Cache Pro is a high-performance Object Caching plugin designed to meet the needs of mission-critical businesses. It offers a combination of performance, scalability, and reliability, which are essential for any high-traffic website. The development team uses test-driven development methodology with over 1,000 unit tests to ensure every update is safe and offers warnings about plugins that can lead to data loss.
It’s designed to provide a smooth user experience, with tools to help identify issues, built-in query monitoring, and logging. Additionally, it’s fully customizable and works even when Redis is not on the same machine, making it ideal for horizontally scaled environments of two servers or more.
How To Use Object Caching With WordPress
If you’re already a RunCloud customer then getting started with Object Caching is very straightforward, as our RunCloud Hub enables you to turn on caching with a few simple clicks.
With RunCloud Hub you don’t need the expertise of a server administrator to reap the benefits of caching – you can do so by simply installing the RunCloud Hub plugin and enabling the caching option. This installs all of the dependencies automatically, and configures them on your WordPress website.
For a more detailed guide on configuring caching, refer to our other articles:
Both of these are popular choices for Object Caching in WordPress, and the decision of which one to use depends on the server environment. Redis Object Cache is known to work well on servers with high CPU usage, while Memcached Object Cache is better suited for servers with limited memory.
Although these plugins provide a caching functionality for WordPress, they do require you to have access to a caching server. If you are using a shared hosting service you may need to contact your hosting provider for this. If that’s the case, then you should consider switching to RunCloud which makes it easy to manage your servers – and allows you to set up caching with only a few clicks.Sign up for managed hosting with RunCloud today!
After Action Report – Get All The Benefits of Object Caching When You Deploy With RunCloud
Improving website loading times is crucial for delivering a positive and responsive user experience, and can directly impact your website’s search engine rankings. Using caching is a smart and cost-effective solution to achieve faster website speeds without having to spend more money on hardware or infrastructure upgrades.
An absolute essential for any mission-critical business site, let alone any serious website – caching can significantly reduce the load on your database and improve load times by storing the results of expensive computations.
Whether you choose to set up caching on your server using Redis or Memcached plugins, or use an all-in-one solution such as RunCloud Hub, we’re sure you’ll be pleased to see the benefits of object caching.
If you aren’t quite comfortable with the idea of deploying servers and setting up object caching entirely from scratch, we’d love for you to give RunCloud a try (for free).
We built RunCloud so you don’t need to be a system administrator or Linux expert to manage your cloud infrastructure. With everything from backups, staging, cloning, atomic (Git) deployments, and more – we’re on a mission to make it truly enjoyable to manage your own production-grade infrastructure. Learn more & get started today.
If you have any questions about Object Caching or need help getting started, leave a comment below or tweet us on Twitter. We’ll be happy to help!
It’s vital that you test your websites thoroughly to provide your users with a first-rate browsing experience if you want to stand any chance of increasing your sales.
In this article, we will detail the steps you need to follow for setting up a WordPress staging environment and will demonstrate exactly how it can be used to test your website’s updates.
Our step-by-step guide will ensure your site is always running smoothly and keeping customers happy.
Let’s get started!
Understanding New WordPress Releases
At the time of writing, WordPress 6.2 is the latest release of WordPress (with 6.3 due to be released around August of 2023). This current release includes several major changes and enhancements that make web development easier.
For instance, the new default theme, Twenty-Twenty-Three, now includes ten style variations – which gives you a lot of flexibility in developing your new site.
One of the key highlights released is the enhancements in Query Loop blocks functionality. In addition to this there have been improvements in block placeholders which provide better consistency and control, and more responsive text with fluid typography.
You can track the latest release of WordPress on the new releases page.
Although new features make life easier, they sometimes cause compatibility issues with the existing site, especially if your site uses plugins or themes that have not been tested with the latest version. It’s a good idea to test that everything works before upgrading your website.
That’s where a solid staging environment comes in.
What is WordPress Staging?
A staging environment is a duplicate copy of your website where you can try out and thoroughly test any changes – without affecting the original site.
It’s often used to test and preview the changes to themes and plugins before making them live on the actual website. This way, website owners can test changes without any risk of disrupting users’ experiences on the live site.
Why Do You Need to Test WordPress?
Running and maintaining a staging site alongside your production site might seem like double the effort. However, doing this can save countless hours in debugging. Here are a few scenarios where it’s especially useful:
A staging site allows developers to work more efficiently as they don’t need to worry about the potential repercussions from any failure. If you’re making changes to a live site, you’ll take regular backups and carefully inspect everything before making each change. If your site is being actively developed, this can take a lot of time. Having a sandbox environment to test and refine changes makes the development process faster.
By testing the changes on a test site you can catch and fix issues before they go live. The ability to identify and proactively fix the issues even before they show up in your live environment makes it immensely valuable for businesses that cannot afford downtime.
Multiple developers can work simultaneously on the staging site without worrying about clashes and overwriting each other’s work. This can speed up the development time and reduce miscommunications.
When Should You Use WordPress Staging?
There are many scenarios where using a test environment is helpful. Here are some of the common examples:
Updating WordPress core, themes, or plugins: With WordPress, plugins can conflict with each other, leading to errors or crashes. With staging websites you can test new plugins, or updates to existing plugins, without risking the stability of the live site.
Design changes: Website owners can experiment with different design changes, such as a new color scheme, layout, or font, all without affecting the live site. This is much more useful than having a mockup of the design, because the staging site can be viewed on different devices to test both responsiveness and accessibility.
E-commerce changes: For e-commerce websites staging is especially useful when testing new payment gateways, product listings, or other updates that could affect the checkout process.
Setting Up a Test Environment
Step 1: Back Up Your Site
Ensure that you have a working backup of your site. If you don’t have a recent copy, you can use RunCloud’s automated backup functionality to quickly create a snapshot of your site. If you’re not using RunCloud to manage your servers yet, you can use a WordPress plugin such as WP Migrate Lite, or Duplicator to make a copy of your site.
Step 2: Setup A Test Environment
You need to create a consistent testing environment that closely resembles your actual hosting environment. This means you should use the same operating system, PHP version, and libraries in your staging environment. Ideally your test environment should not have anything running except your test site so that it’s isolated from all potential problems.
If you don’t have a fresh virtual machine then you can use tools such as Vagrant for building and managing virtual machine environments. It’s a customizable and scalable solution for advanced users who require more control over their development environment.
In this tutorial, we’ll be working with Local, a WordPress development environment. It’s specifically designed for testing WordPress sites. Start by downloading the Local binary on your computer and execute it.
The binary file will automatically download and install the necessary packages for your computer. Once you’re done, you should see a screen that looks something like this:
Step 3: Import Your Backup Into The Test Environment
Click on “Create a new site” and select the option to use an existing zip file. Locate the backup of your live website, and use that backup to create a new site.
Use the preferred settings for a seamless experience, and click “Import site”. Your firewall might prompt you to allow network access, so make sure you grant this access for a smooth installation.
Step 4: Make The Changes To The Staging Site
Once your site has been imported, click on the “Open site” button on the top right to view your staging site. Now you can log into your admin dashboard as you normally would, with the same credentials that you use for your live site.
Once you have the site up and running, you can access it on your local network and collaborate with other team members – all completely without affecting the live site.
After you have thoroughly tested the compatibility of your plugins and themes, you can make those changes on your live site without worrying about unexpected repercussions.
If you only made a few minor edits to your staging site, such as changing some text or colors, you can post these changes to your live site by manually implementing them. For example, you can edit the same file or setting on your live site, and then copy-paste the changes from your staging site. In this way, you can avoid overwriting your entire live site and preserve any user-generated data.
However, if you made a complex operation on your staging site, such as installing a new plugin or theme, adding custom code, or modifying the database, it may be wise to take a backup of your staging site – and overwrite your existing live site with it. This way, you can ensure that your live site matches your staging site exactly, and avoid any compatibility issues or errors. Before you do this, however, make sure you have a backup of your live site as well in case something goes wrong.
Creating A Staging Site on RunCloud
If you’re using RunCloud to manage your servers, then you can create a staging site with just a few clicks. RunCloud can automatically clone entire WordPress sites without requiring you to download anything.
To use RunCloud’s staging feature, go to your dashboard and open the “Staging” menu to set up a test environment. Click on the “Get Started” button to begin the process.
RunCloud will now ask you to enter the username and password that visitors will need to enter for browsing this site. This is not your WordPress admin dashboard password – your staging site will have the same login credentials as your production site.
You can turn off this option if you like. However, we recommend you keep this on as making the test site publicly available might potentially reveal some confidential information.
After configuring the access control of your site, you can configure the domain that you want to use. You can either use a different subdomain of your original site, or use a test domain.
After configuring the necessary settings, deploy the app by clicking the “Deploy Staging” button. Once deployed, you should see the following screen. Click on the “Open Site” button in the top right corner of the screen to browse your staging site.
After opening the site, you should see an alert asking you for login credentials. Enter the username and password that you just created. You should now be able to browse your site and make changes to it without affecting your main site.
After making the changes, you can go back to the staging dashboard and click on the “Sync” button to push changes from the test environment to the production.
WordPress Staging Plugins
Many WordPress backup and migration plugins also provide the option to create a staging environment. Here are some of the best WordPress staging plugins.
WP StageCoach WP Stagecoach provides the ability to easily create sandbox sites. It has some advantages over importing a backed-up copy of your test site, as it merges the database rather than overwriting the existing one. There are also some advanced features, such as protecting staging sites via a password, or offering the ability to revert changes instantly.
WP Staging The WP STAGING plugin for WordPress allows users to create backups, staging sites, and clones of their website. Some advanced features included are support for multisite networks, and migration to another host or domain – although these are locked behind a paywall. The staging environment can quickly test updates and restore backups if necessary, making it a good choice for managing your staging environment.
BlogVault Staging BlogVault is a WordPress backup plugin that also provides a staging environment. It can perform incremental automatic backups, and can revert to previous versions easily. This quick backup and recovery process allows you to speed up your development, as you’ll spend more time testing and less time waiting for backups.
The staging site runs on a separate server instead of running alongside your live site. This allows you to load-test the staging site without worrying about any possible performance impact on your live site.
After Action Report
It is essential to test any changes before pushing them to your live site. This is even more important if you’re running a business that relies on a website for its core services. Staging environments are a great way to test your site in a sandbox environment without worrying about compatibility issues.
We strongly encourage all WordPress site owners to test new releases and stay up to date with the latest software updates. This not only ensures that your site is functioning optimally but it also helps to ensure your site is secure. Outdated software can leave your site vulnerable to security threats, which can have serious consequences for your business.
If you’re tired of managing your own servers – you might want to check out RunCloud (yep, that’s us!). RunCloud is built for website owners that want to focus on their customers, not on managing their infrastructure. Experience painless server configuration, backups, and worry-free staging environment migration, without the need to spend hours figuring it out – get started with RunCloud today and get up and running in minutes. Get started with RunCloud today and get up and running in minutes.
Are you tired of managing multiple WordPress sites individually? Then say ‘goodbye’ to the hassle and ‘hello’ to efficiency with WordPress Multisite Network!
Discover how you can manage all your sites from one dashboard with ease using this game-changing feature.
In this guide, we’ll walk through what a WordPress multisite network is and discuss whether you should use one. We will also cover the benefits of using a multisite network and then explain how to set up a WordPress multisite network correctly.
Let’s get started!
What Is WordPress Multisite Network?
WordPress multisite is a feature in WordPress that allows you to run multiple websites on just one WordPress installation. This is different from running multiple WordPress engines on the same server. In a multisite network, the network admin has access to all of the sites in the network.
TheWordPress multisite feature is often used by large organizations that need multiple websites for different units, departments, or entities within their overall structure.
For example, if a university wants to give all its professors their own blog column on the university website, they can do so using WordPress’s multisite feature. Similarly, a large newspaper agency might have one common site for all articles, but have different WordPress sites for each of its categories, such as sports, finance, politics, etc – with each of these websites being operated and maintained by the respective departments.
Benefits Of Using A Multisite Network
Instead of managing multiple sites separately, you can access and control everything from one dashboard, which simplifies management.
When running multiple WordPress sites, you might need to maintain multiple servers. In addition to the hosting cost, it will also cost you more to maintain and upgrade these servers. Having one bigger server with multiple sites reduces server cost to some extent.
Launching a new site is quick and easy. You can simply go to the dashboard and with the click of a few buttons, your site will be up and running in less than ten seconds.
Running a multisite network makes it easier to enforce security policies and manage everything. The network admin can manage plugins, themes, and users for all sites from one dashboard.
Multisite networks make it easier to maintain a consistent brand identity across multiple sites.
If you use different servers for each of your sites, then you’ll need to monitor the traffic on them separately. This means you’ll need to upscale and downscale each server if traffic spikes or dips momentarily. On a multisite network, if you are using a bigger server to handle all your traffic, it will provide you better resilience to unforeseen traffic spikes.
Domain-based vs. Path-based Multisite Networks
WordPress provides two types of multisite network installations, so you can pick the one that suits your needs best.
Domain-Based Multisite Network
This option provides a separate domain name for each of your websites. This is especially useful for large organizations which might want to move one of the websites to a different server in the future. Having a separate domain gives you the freedom to manage each site independently in the future.
While this option does provide some flexibility, it comes with a few caveats. Most notably, you will need to manage a lot of domain names if you have a number of sub-sites. Domain names are infamous for being difficult to manage, and having multiple subdomains will only make the job harder. Moreover, unless you are using a wildcard SSL, you will need separate SSL certificates for each of your domains.
Path-Based Multisite Network
If you are happy with all of your sites running on the same domain, then this is the right option for you. It is ideal for bloggers and small businesses that need the additional functionality of multisite networks without all the hassle of managing DNS records.
Installing A WordPress Multisite Network
RunCloud makes it really easy to set up and install a multisite network. If you aren’t already using RunCloud for managing your servers, sign up to RunCloud today and follow along.
Log in to your RunCloud dashboard and select the server that you want to use. If you already have a server with some spare capacity connected to your RunCloud account, you can use that. If not, you can connect to a new server. Once connected, click “Deploy New Web App”.
On the “One-Click” installation tab, select “WordPress” and give a descriptive name to your application. This name will not be displayed to your visitors.
In the ‘Domain’ section, add the domain that you want to use – this will generate the DNS records for your site. RunCloud’s Cloudflare integration makes it easy to set up DNS records – just select the API key and everything works magically. However, if you are not using RunCloud’s Cloudflare integration you can manually add the DNS records to your nameserver. Usually, the nameserver is managed by your domain registrar.
Next, you will need to configure the SSL/TLS settings for your site. We recommend enabling AutoSSL.
Set the name and other details of your WordPress site. Be sure to use a strong password, and check everything carefully.
Once you have configured your WordPress settings, continue setting up your application. Enable backup to automatically backup your website at set intervals, and choose the latest version of PHP to take advantage of up-to-date security upgrades.
Once you have configured all of the settings, click the “Deploy My Site” button at the bottom right of your screen to launch the application.
Adding Sites to the Network
Once you have deployed your main site from the RunCloud dashboard, you no longer need to open RunCloud to deploy additional sites. Log in to WordPress and open the Network Admin dashboard.
Navigate to the “Sites” tab and click on “Add New” to create a new site.
Add the site address, title, and the admin email in the respective text boxes, and then click “Add Site”. If you are using a subdirectory based network, the URL of the site will be different, but the process is essentially the same.
Once you have added the site it should be visible in the Network Admin dashboard. Repeat the last step to create additional sites.
This step is only applicable to domain-based site networks; if you are using the path-based multisite network, you can skip this step.
After you have created a site on a new domain, you need to add DNS records so people on the internet will know where the site is hosted.
You can add “A records” for each individual subdomain if you like. However, a simpler option would be to just use CNAME records that point to your root domain. This way, if you switch servers in the future, you will only need to update one value.
The exact steps needed to add a DNS record will vary from one provider to another, but the record values remain the same. Simply look for the CNAME record option, and enter the subdomain prefix that you created in the WordPress dashboard (in the “name” field). Next, add “@” in the value/target field to point this record to your root domain and then save it.
In the dashboard, hover on the site name to reveal additional options for the site. You can click on the “Dashboard” link to open the dashboard of the new site. If you are not able to view your site immediately, wait for a few minutes for the DNS setting to propagate through the internet.
Managing the Network
Managing Users
In the Network Admin dashboard, open the Users tab to manage users. Click on “Add New” to add a new user, and then add any necessary details to create the new user.
Once the user has been added, you can go to the Users submenu to view all active user accounts, edit account privileges, or delete user accounts.
Managing Plugins
You can also add plugins to your WordPress multisite network from the plugins panel in the admin dashboard.
Click on “Add New” to open the WordPress plugins directory. From there, you can search for new plugins, and add them just as you normally would.
Once the plugin is installed, you can enable it across the network, i.e., install it for all the sites on the network. Similarly, you can also either upgrade or delete it for all sites.
Managing Themes
On your WordPress multisite installation, open the Network Admin dashboard. There you can find the “Installed Themes” submenu.
In the Theme menu, you can add, remove, or upgrade themes for all sites across the network. Many people find this option very useful, as having a consistent theme across all sites provides a better user experience.
After Action Report
Managing a multisite network can be challenging, but with the right tools and knowledge, it can be very useful for your organization.
Maintaining a multisite network has several advantages over running individual sites. The most prominent advantage is the ability to manage all the sites, users, plugins, and themes from a single dashboard, thereby saving both time and server resources.
Is your WordPress website slow? Are you dreading low PageSpeed scores? If yes, then you should use Redis Full-Page Caching to supercharge your WordPress website.
In this article, we will explain what Redis Full-Page Caching is and how it improves user experience.
What Is Server-Side Page Caching?
Before we talk about Redis Full-Page Cache, let’s talk about how your website works.
When a user visits your WordPress page, the web browser sends an HTTP/HTTPS request to Nginx.
Nginx passes the request to PHP-FPM, and Nginx will catch any PHP codes when trying to grab the page.
PHP-FPM processes the page and runs through the MariaDB/MySQL database query to retrieve the page.
PHP-FPM sends the generated “static” HTML page back to Nginx.
Nginx sends the generated HTML page to the web browser for the user.
What Are Benefits Of Using A Server-Side Cache
When using server-side page caching, the Nginx module will be in between Nginx and PHP-FPM and it is able to generate a cached HTML page from PHP-FPM.
When another user visits the same WordPress page, your website will not perform the same PHP and database requests again because the page is already cached and served by Nginx directly.
As a result, your server response time will be much faster after the initial load. Your PHP-FPM and MariaDB/MySQL will experience a reduced load and your server CPU resource usage will decrease.
This would mean that your server can handle more traffic with the same server specifications when using server-side page caching, ultimately allowing you to keep a more affordable server without having to scale any further.
RunCloud provides two different server-side page caching methods for Nginx – namely Redis Full-Page Cache and FastCGI Page Cache. Let’s see how Redis Caching works
What Is Redis Full-Page Caching?
Redis, which stands for Remote Dictionary Server, is a fast and open-source, in-memory data structure store used as a database, cache, and message broker.
In contrast to databases that store data on disk, all Redis data resides in memory, avoids seek time delays, and can access data super fast in microseconds.
Usually, Redis is used to cache database query results and used to enable object caching, not page caching.
Using the Nginx SRCache module, we can use Redis to serve a different purpose, to provide subrequest-based page caching as an alternative to Nginx FastCGI Cache.
Redis Full-Page Cache vs Nginx FastCGI Cache
Both Redis vs FastCGI Page Cache are a good solution for NGINX server-side page caching. Both of them can be installed easily in RunCloud without having to deal with Linux commands to setup, no complex process required.
You should try it on your WordPress site to find the one which works best for your current setup. You can even switch between Redis and FastCGI page cache in one-click.
Server-side Page Caching vs WordPress Caching Plugins
Both are good choices for your WordPress website and the answer depends on your specific needs.
If you are using regular shared hosting, Redis Full-Page Cache or Nginx FastCGI Cache might not be available. In this case, the only option available is to use the WordPress cache plugins.
If you are using a dedicated server, you can optimize your WordPress site using server-side page caching. With proper setup, server-side page caching can perform better than any WordPress cache plugin.
Who Needs Server-Side Page Caching For WordPress?
All WordPress pages can gain huge benefits when using RunCache server-side page caching.
For blogs, magazines, news, company profile websites, and all types of “static” WordPress sites, all WordPress pages can be fully cached and served faster, excluding WordPress admin pages, which are not cached for obvious reasons.
For e-commerce, membership, forum, and all types of “dynamic” WordPress sites, most WordPress pages can be fully cached and served faster, except for some pages that should stay dynamic.
For example, in the case of WooCommerce, the homepage, shop page, and single product page can be fully cached, but cart, checkout, and my account pages should be excluded. For these dynamic pages, you can use Redis Object Cache to reduce your MySQL database load and make your dynamic pages load faster, but you do not want to cache these pages fully as the latest changes will not be seen.
Performance Benchmarks Without Caching
Let us test the capacity of our server before we enable caching so we can quantify the improvement in performance.
For this test, we use a e2-medium instance on Google Cloud and default WordPress installation using Twenty Twenty-Three WordPress Theme.
We use the free Loader.io tool for stress testing.
First Test – From 0 To 250 Users In 1 Minute
In the first test, we request the same web page from 250 different devices over the course of one minute. Without any caching, our server can successfully handle all 250 requests and manages an average response time of 140 ms.
Second Test – From 0 To 750 Users In 1 Minute
In the second test, we request the same web page from 750 different devices over the course of one minute. Without any caching, our server can successfully handle all 750 requests and manages an average response time of 408 ms. This is slightly worse than the first test but still acceptable.
Third Test – From 0 To 2000 Users In 1 Minute
In the third test, we request the same web page from 2000 different devices over the course of one minute. In this case, our server had significantly higher response times and we observed timeout error in over 50% of requests. The successful requests had an average response time of 8028 ms which is unacceptable.
Let us see how we can improve this by enabling caching.
How To Install Redis Full-Page Cache Using RunCloud Hub
RunCloud Hub is a hub for all RunCloud plugins for WordPress. It is not only for server-side page caching but also Redis Object Cache and Server Health & Transfer Stats monitoring directly from your WordPress dashboard.
If you want to use server-side page caching, either Redis Full-Page Cache or Nginx FastCGI Cache to speed up your WordPress website, then RunCloud Hub is the perfect choice for you.
You can simply go to the RunCloud Hub menu under your web application in the RunCloud panel, choose the Nginx page caching method, and click the Install RunCloud Hub button.
Once you have installed the RunCloud Hub plugin, Redis Full-Page Cache (RunCache) is automatically installed and enabled in your WordPress website, no complex process is required.
How To Check If Redis Full-Page Cache Works
When using any cache WordPress plugin, usually the plugin adds a footprint at the of your web page source code to make it easy for you to check if your WordPress page has been cached or not.
Redis Full-Page Cache (RunCache) works on the server-side, which means there is no footprint on your web page, you need to check the headers of your website to see these possible values of X-RunCloud-SRCache-Fetch and X-RunCloud-SRCache-Store.
The X-RunCloud-SRCache-Fetch header returns the status of the “fetch” phase for Redis Full-Page Cache. Three values are possible.
HIT : Page is cached and served from the cache.
MISS : Page is served dynamically from the server, not from the cache. The response might then have been cached. Refreshing this page again should change the header from MISS to HIT or BYPASS.
BYPASS : Page is served dynamically from the server, not from the cache. It is excluded from the cache, for example, WordPress dashboard admin pages or WooCommerce cart/checkout pages.
The X-RunCloud-SRCache-Store header returns the status of the “store” phase for Redis Full-Page Cache. Two values are possible.
STORE : An Nginx subrequest is issued to save the HTML output of the page into Redis.
BYPASS : An Nginx subrequest is not issued because either it has been saved to Redis or it is excluded.
To make it easier for you to understand, usually, we can see 3 common pairs of these headers, for example:
“MISS” Fetch Status and “STORE” Store Status
This is when you visit a page for the first time where this page is served dynamically from the server and the output of this page will be saved to Redis.
“HIT” Fetch Status and “BYPASS” Store Status
This is when you visit a page where the cache version is available in the Redis and served directly from the Redis cache.
“BYPASS” Fetch Status and “BYPASS” Store Status
This is when you visit a page that is excluded from the Redis cache.
To check these headers, you can use some tools, for example:
Check HTTP Headers With GTMetrix
Gtmetrix is not only for testing your performance score, you can also use it to check the response header using the Waterfall feature. You can check the response header of your tested page under the Waterfall tab to see if this page is served by Redis Full-Page Cache (RunCache).
Check HTTP Headers With Google Chrome
You can also view the response HTTP headers in your web browser without using any additional tools by following these steps:
Visit the web page that you want to test and open Web Developer Tools by pressing F12 or right-click and selecting Inspect.
When opened, click and select the “Network” tab.
Refresh the page to get fresh page data.
Select the top HTTP request on the left panel and observe HTTP headers on the right panel.
Performance Benchmark: Handling More Traffics
By eliminating PHP-FPM and MariaDB/MySQL when serving your WordPress page from Redis Full-Page Cache, the huge benefit is your server can handle more traffic with the same server specifications.
First Test – From 0 To 250 Users In 1 Minute
For this test, we use Loader.io to send from 0 concurrent users and increase to 250 concurrent users within 1 minute.
Without Redis Full-Page Cache (RunCache), the average response time was 140 ms. After enabling the cache, the average response time reduces to 46 ms. This is great as our server is responding to requests nearly 3 times faster.
Second Test – From 0 To 750 Users In 1 Minute
In our second test, the average response time without Redis Full-Page Cache was 408 ms. Enabling cache lowers the response time to 43 ms. Therefore, our server can handle sudden surges in requests without degrading performance.
Third Test – From 0 To 2000 Users In 1 Minute
Without Redis Full-Page Cache, the average response time was 8028 ms and we also saw timeout error in over 50% of requests when the number of concurrent users surged to 360.
After enabling the cache, all our requests finished without error and we observed a steady response time of 41 ms. It is a clear improvement as we can handle many more concurrent requests without crashing the server.
Exploring RunCache Features
Using the RunCloud Hub WordPress plugin, you will have more controls on how RunCache works on your WordPress website.
RunCache Purger
Purger settings allow you to have more control when the cache is cleared, for example:
Automatically clean cache of homepage when post is edited or has a new post.
Automatically clean cache of homepage when post removed.
Automatically clean cache of post/page/CPT when published.
Automatically clean cache of post/page/CPT when comment approved and published.
Automatically clean cache of post/page/CPT when comment removed.
RunCache Rules / Exclusion
Rules settings allow you to control Cache Exclusion.
Exclude URL Path option allows you to exclude cache based on matching URL Path. This is very useful when you have dynamic pages that should not be cached in your website.
For example, in WooCommerce, you have the Cart, Checkout, and My Account page that must never be cached. For WooCommerce users, no action needed, these pages have been added by default.
Exclude Cookie option allows you to exclude cache based on matching Cookie name.
The Exclude Browser option allows you to exclude cache based on matching Browser User-Agent.
Exclude Visitor IP option allows you to exclude cache based on matching Visitor IP Address.
RunCache also has dedicated settings for query strings, because query strings will not cache by default.
Allow Cache Query String option makes it possible for you to allow cache based on matching query string, for example, UTM parameters (utm_source, utm_medium, utm_campaign), fbclid, gclid, etc.
Exclude Cache Query String option allows you to exclude cache based on matching Query string.
RunCache Preload
Preload settings allow you to generate caches of your pages without having to wait for a user to visit your pages. Normally, the cache is generated after a user visits a page.
You have the options to:
Preload caches automatically when any purge action is triggered.
Preload caches automatically based on schedule time (day/week/month).
Preload caches manually by clicking the “Run Cache Preload” link.
If you have a big number of posts/pages/products in your WordPress sites, the cache preload process sometimes can consume your server CPU resources. It is better to run a cache preload manually for this case.
Is It Compatible With Popular WordPress Cache / Optimization Plugins?
YES! The important thing to understand, Redis Full-Page Cache (RunCache) works on the server level and popular WordPress cache/optimization plugins work on the WordPress/application level.
They work in different spaces and it should be compatible. If needed, you can combine it with your favorite optimization plugin, for example:
Redis Full-Page Cache and Autoptimize Plugin
In fact, Autoptimize and RunCache are a perfect combination to optimize your WordPress site.
Autoptimize works on WordPress-side to optimize your Javascript / CSS / HTML files on your web page, and RunCache works on the server-side to cache the optimized version web page.
When using WP Rocket plugin, combined with Redis Full-Page Cache (RunCache), WP Rocket page caching feature is automatically disabled by RunCloud Hub.
It means Redis Full-Page Cache will handle the page caching, and you still can use other WP Rocket optimization features.
Summary
Redis full-page caching is a game-changer for WordPress websites looking to boost their performance. With its advanced caching capabilities, Redis offers a simple and effective solution for reducing server load times and delivering a smooth user experience.
If you want to apply server-side caching to one of your web applications within your server, then RunCache (RunCloud Hub) is your answer. RunCache allows you to utilize either Nginx FastCGI Cache or Redis Full-Page Cache to speed up your WordPress performance without having to deal with Linux commands to set up Nginx cache. Sign up today and see the difference for yourself.
By far the most popular content management system, WordPress powers more than 40% of the web, and of all websites globally that use a content management system, over 65% of them are powered by WordPress.
Combine RunCloud’s powerful server management capabilities with the #1 CMS in the world, and you have a winning formula. Fortunately, RunCloud’s server management console makes it extremely quick and simple to install WordPress on your server. With a one-click install, you can be up and running with a new site in just moments.
In this guide, we’re going to give you a comprehensive, step-by-step overview of how to install WordPress with RunCloud. Let’s get started!
How to Install WordPress with RunCloud
Here are the steps you need to follow to install WordPress with RunCloud.
Once you’re logged in, head to the Servers page, where you’ll be able to see all the connected servers:
You can perform a one-click install of WordPress on any listed server.
2. Deploy New Web App
If you click on Web Applications in the left sidebar, you’ll be able to see a list of all current web apps (such as WordPress) running on your servers. For instance, in the screenshot below, you can see that two WordPress installations are running on the same server:
To launch a new installation of WordPress, just click on Deploy New Web App. You’ll be prompted to select a server. Select the server you wish to deploy WordPress on, and click the Deploy Web App button.
3. Configure Your WordPress Installation
RunCloud gives you considerable flexibility when launching a new WordPress installation. For instance, you can choose the web application stack you want to use, as well as the PHP version that you wish to launch with.
RunCloud supports PHP 7.2 to PHP 8.1, and you have three options when selecting the web application stack:
During this process you can also select the site title, and set an admin username, password, and email:
4. Map Domain and Install the SSL
Security will almost certainly be a consideration, and this can also be selected during this process. RunCloud lets you install the SSL certificate before the site is launched, and you also have the option to use one SSL for all domains, or a different one for each:
Alternatively, you can enable AutoSSL, which deploys a new Let’s Encrypt SSL certificate for all new domains.
Once you’re done, the next step is to map the domain. You can either use a test domain from RunCloud, or use your own:
RunCloud also gives you the option to set your DNS records manually(through your host) or use Cloudflare. Once you’ve selected your preference, just click on Deploy Web App (in the bottom-right).
5. Review Your Newly Deployed WordPress Install
Within a few moments your new site will be installed and running, and you will be able to view traffic stats and information about your newly deployed WordPress installation within your RunCloud dashboard.
To view this information, click on Open Site from the top right of your RunCloud page to log into the WordPress dashboard automatically, as shown below:
The new WordPress installation will also appear in your Web Applications tab:
That’s it! You’ve successfully launched a new installation of WordPress using RunCloud!
After Action Report — RunCloud Makes Server Management Incredibly Easy
With RunCloud, launching a new web app, such as WordPress, is incredibly easy. RunCloud offers a 14-day money back guarantee, so you can try it out without a long-term commitment.
Have anything else to share? Join the conversation by sending us a Tweet! 💬
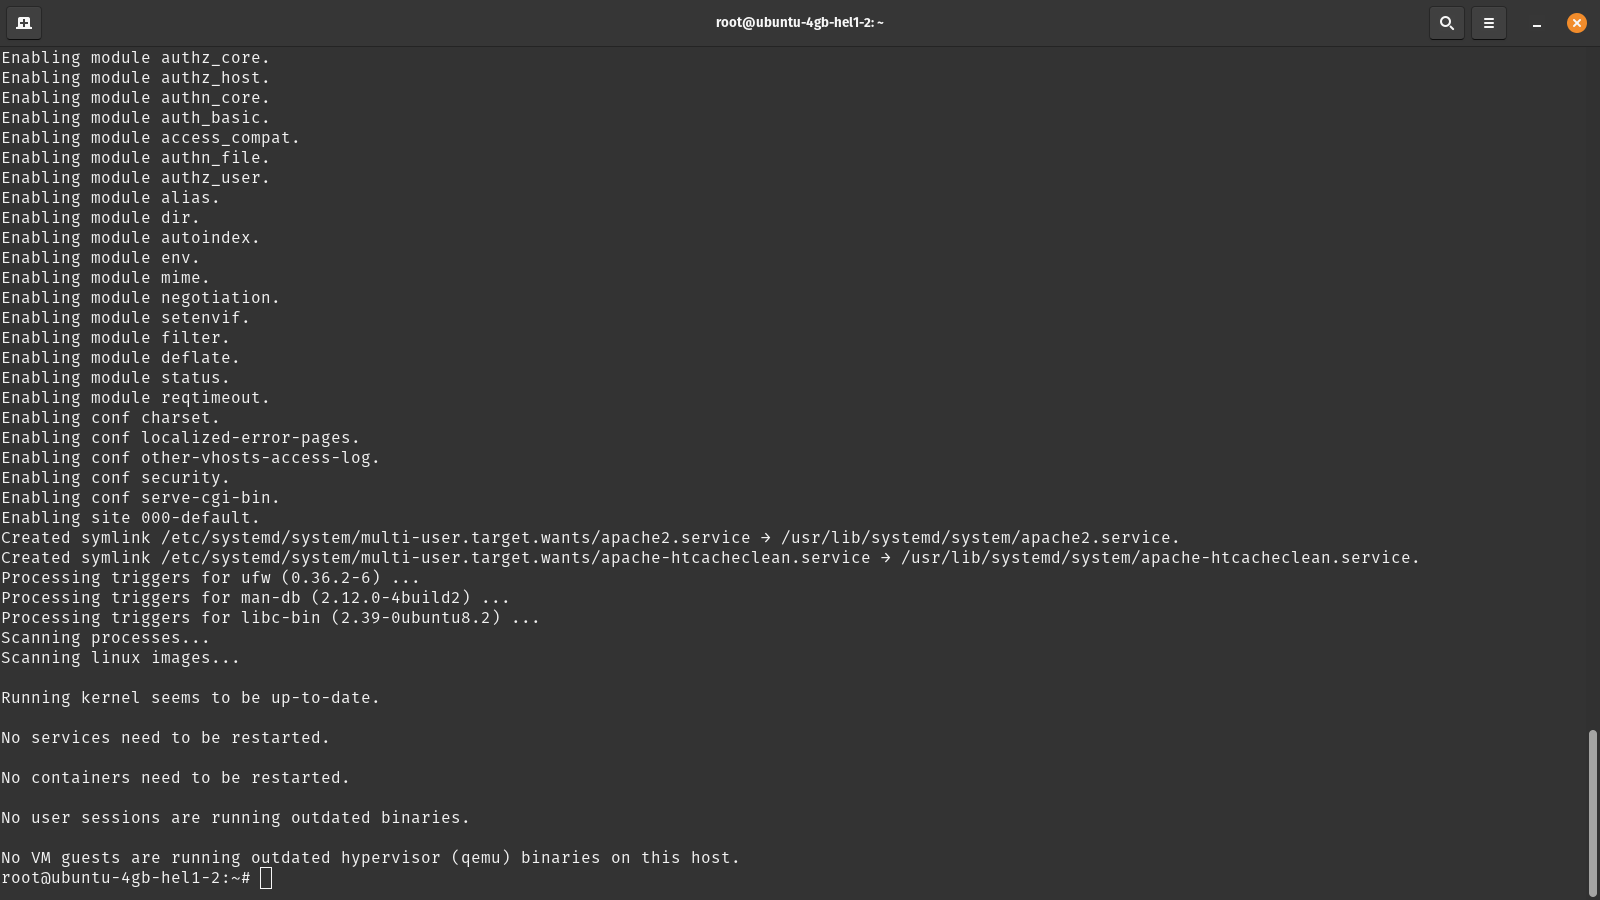
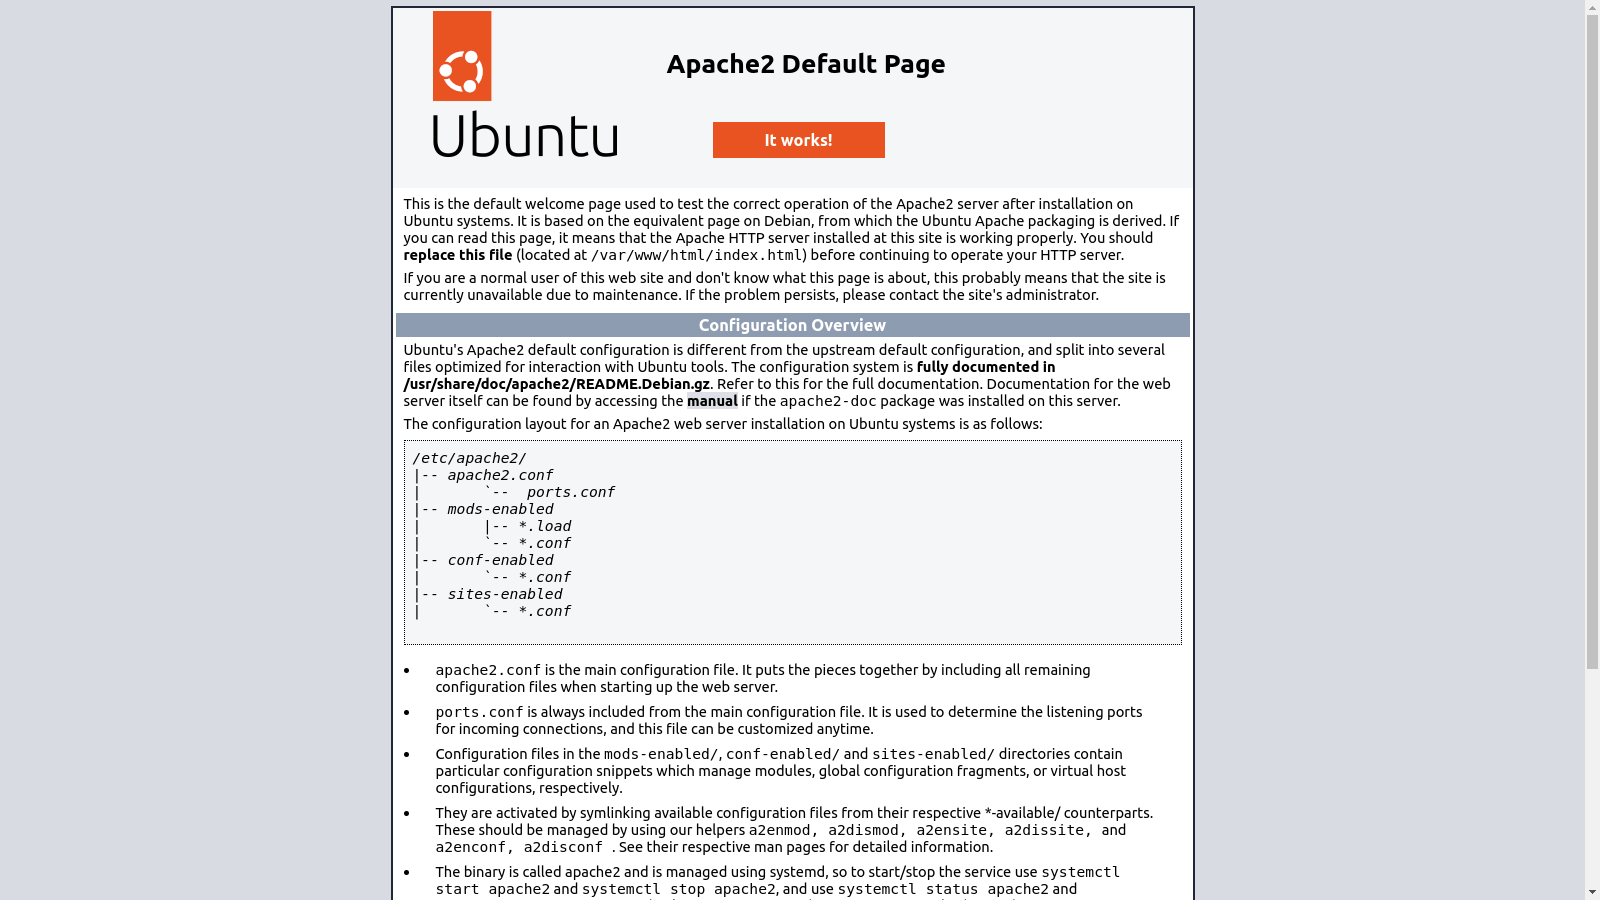

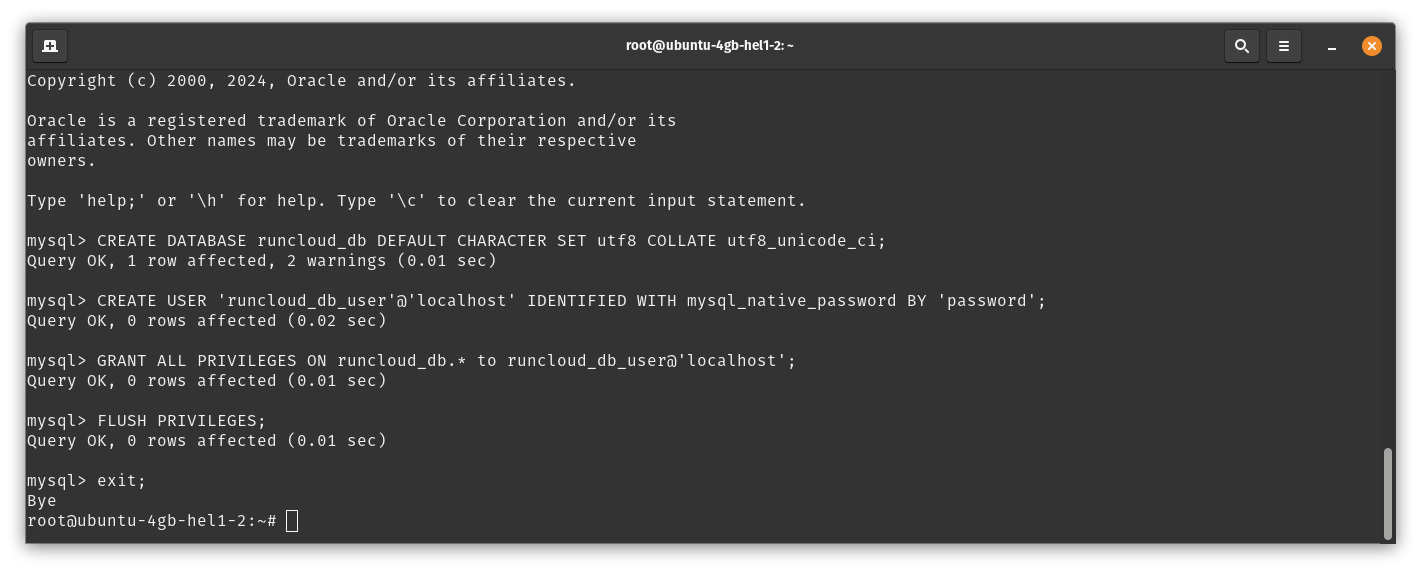
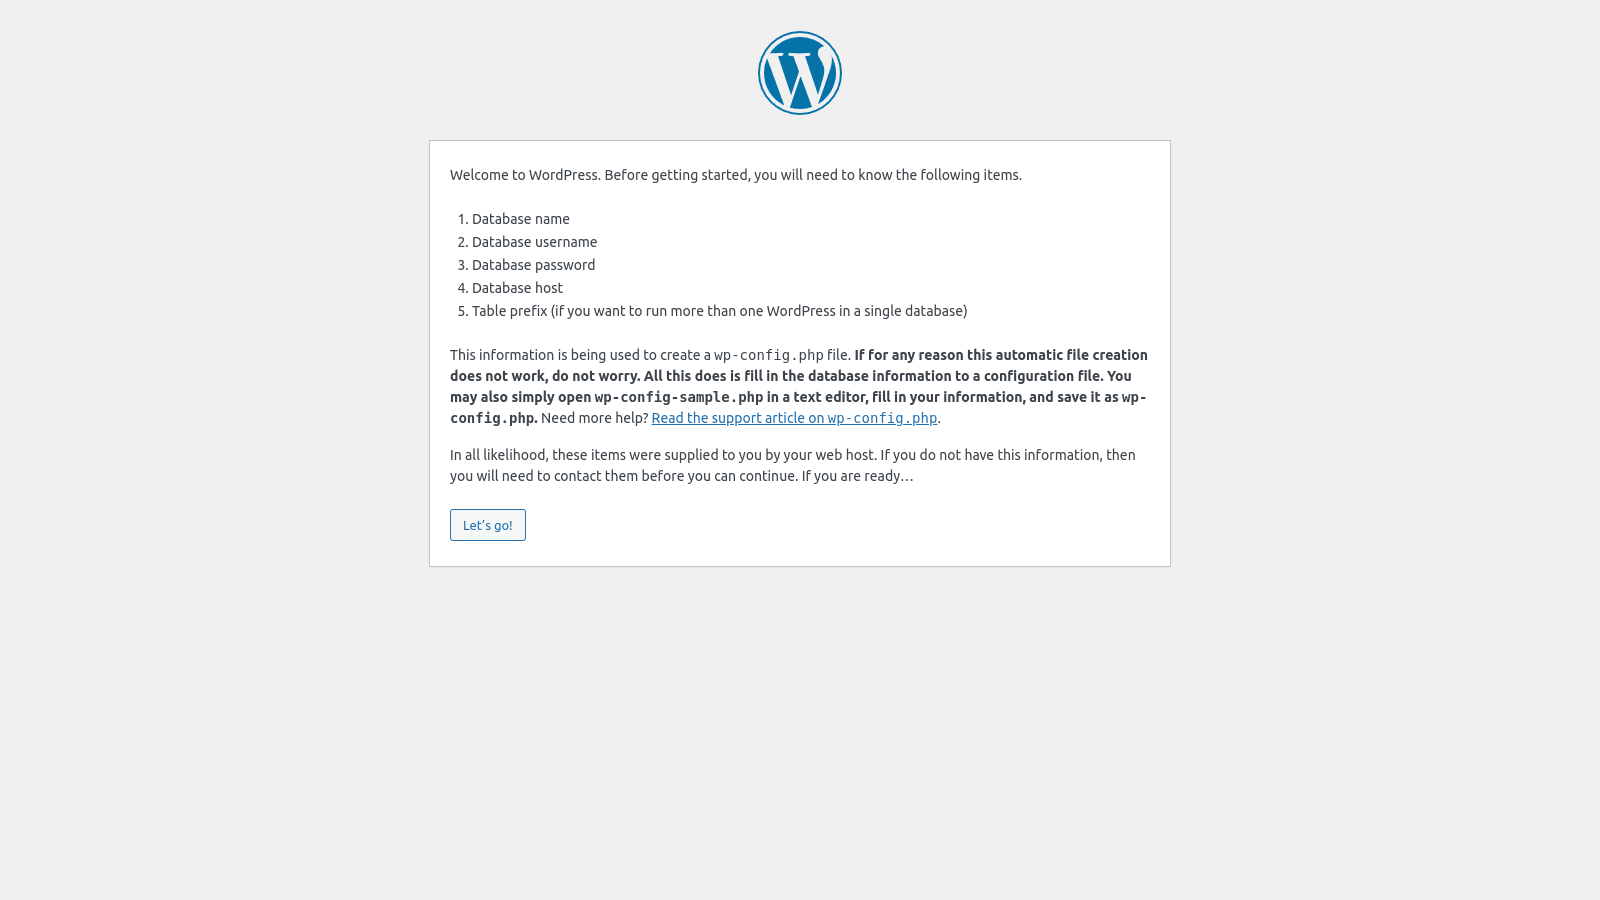


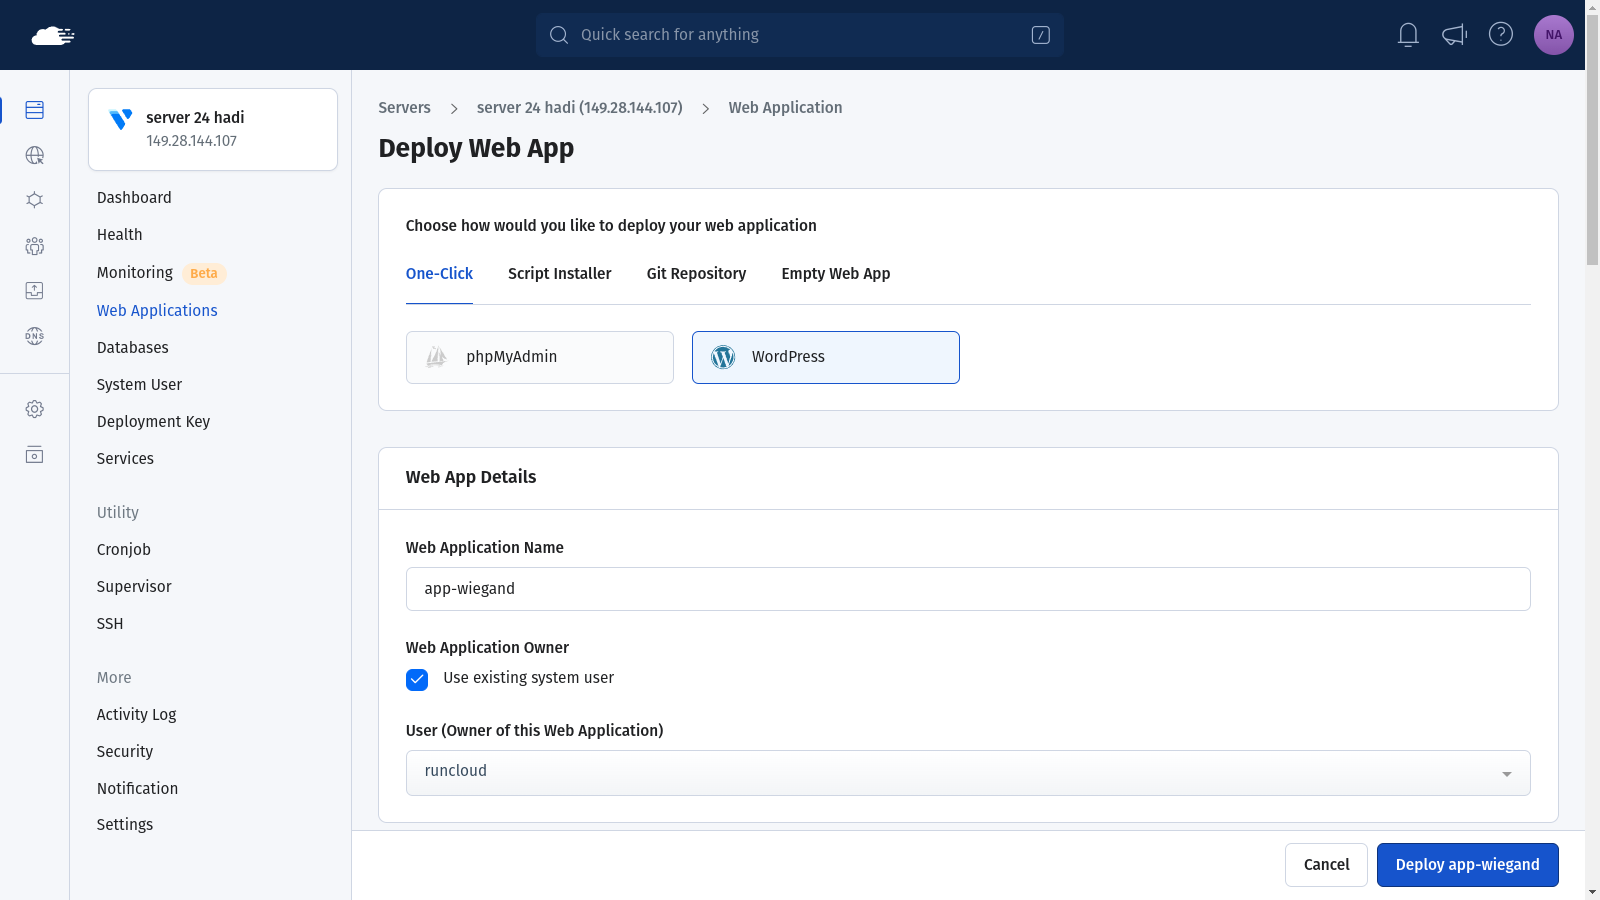
![How to Install WordPress on Docker in 2025 [Step-By-Step Guide]](https://rcwp.scalemath.dev/wp-content/uploads/2024/06/Docker-header.png)