Many users often have strong opinions about load balancing. Should you use it with your WordPress site, or is it overkill?
A load balanced WordPress site will have increased uptime and performance, as well as enhanced security. However, despite what you will hear some people claiming, it’s not always necessary.
In this article, we’ll discuss what load balancing is, how it works, and weigh up the benefits of using load balancing for WordPress.
How Load Balancing Works
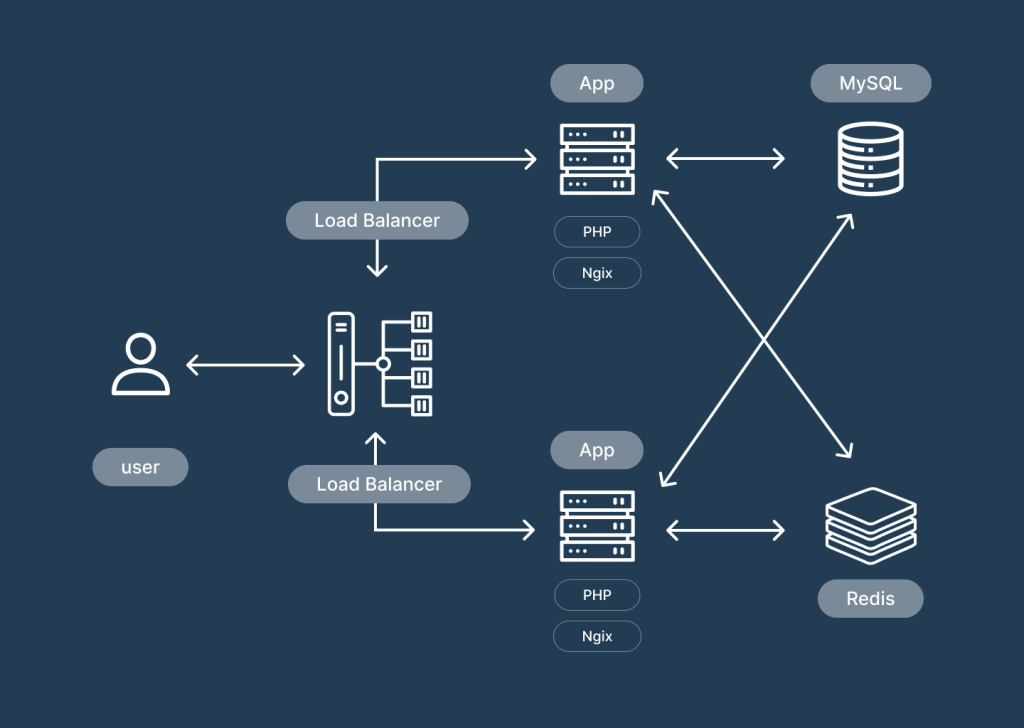
Load balancing improves site performance by distributing traffic evenly across a network of devices. This ensures that no single resource is overloaded and prevents bottlenecks. When traffic increases, more resources can be added to the network to accommodate the extra load.
As traffic decreases, the extra assigned resources can be removed. For WordPress websites, load balancing can help distribute traffic evenly across a cluster of servers so that no single server is overloaded and your website remains accessible even during peak traffic periods.
There are two main types of load balancing: hardware-based and software-based. Hardware-based load balancers use dedicated hardware devices to distribute traffic among a group of servers. Software-based load balancers, on the other hand, use software running on a general-purpose server to perform much the same task.
However, there are quite a few misconceptions about load balancing for WordPress. Before we discuss whether load balancing is really necessary, let’s briefly cover the most common misconceptions.
Common Misconceptions Around Load Balancing
Many think that load balancing will automatically improve their site’s performance, but that’s not always the case. Here’s a look at some of the reasons why it may not always be the best choice.
Increased Complexity
One of the main downsides of load balancing is that it can increase the complexity of a system. When you add an extra layer of infrastructure to a system, it inevitably makes that system more complex and more difficult to manage. This can lead to increased costs and longer deployment times for new features or updates.
Single Point of Failure
Another potential downside of load balancing is that it can create a single point of failure. If the load balancer itself goes down, then all traffic will be routed to a single server which could quickly become overloaded.
To mitigate this risk, it’s important to have redundant load balancers in place so that there is always a backup available if one fails.
Limited Scalability
Finally, another potential downside of load balancing is that it can limit scalability. In some cases, the load balancer itself can become a bottleneck as traffic increases.
This can be alleviated by using a more powerful load balancer or by distributing traffic across multiple load balancers – but it’s something to keep in mind if you’re expecting a lot of growth in web traffic.
Aligning Expectations
Many believe that load balancing will instantly improve performance, but that’s not always the case. The thing is, when you spread services across numerous servers, it actually increases latency on the network.
The information has to travel across several connections, which can have an adverse impact on performance. For load balancing to actually work effectively, your original server setup needs to be maxed out.
So, if the current server load is around 30%, and you have load balancing active, it’s actually likely to have a negative impact on response times due to network latency.
Furthermore, it’s important to understand that load balancing isn’t the same thing as auto scaling, which is when your server infrastructure scales according to the number of requests.
Instead, load balancing runs parallel to auto scaling (you’ll need both set up to see the benefits). It’s important to align expectations here because if you think that installing a load balancer will allow your server infrastructure to scale automatically, that’s not going to happen.
Benefits of Load Balancing
Before we focus on whether you should start using a load balancer, let’s first outline the benefits of using one.
Maintain Performance During Peak Traffic
Some people believe that only websites with millions of daily visitors need to worry about load balancing. However, this simply isn’t true. Any website that experiences spikes in traffic can benefit from load balancing.
For example, a small website might only receive a few hundred visitors per day on average but could experience a sudden influx of traffic due to a viral news article or social media post. In such cases, load balancing can help ensure that the website doesn’t crash under sudden strain.
It’s Quite Versatile
While it’s true that load balancing is often used to balance traffic between multiple servers, there are other uses for load balancing as well.
For example, some organizations use load balancers to route traffic between different types of devices (such as computers and mobile devices), different geographical locations (using different data centers), or even different network segments (such as different Wi-Fi networks).
When Should You Implement Load Balancing?
There are a few key scenarios where load balancing makes sense. If you’re expecting a spike in traffic – say, because of a sale or a new product launch – then load balancing can help ensure that your site can handle the increased demand without going down.
Similarly, if you have a global audience, load balancing can help ensure that users around the world have a good experience by connecting them to the server that’s closest to them.
Finally, if you have multiple servers running different components of your site or application (like a database, application server, and web server), then load balancing can help ensure that traffic is distributed evenly across all of your servers.
Is Load Balancing Always a Good Thing?
As mentioned above, load balancing isn’t always a good thing. In most situations, you could simply scale your infrastructure horizontally. For instance, porting your database on a separate server might help.
Similarly, if you serve images on your site, you should consider using a CDN. As long as you can reduce the load from your web server by allocating components that require more resources, you won’t need to worry about load balancing.
Are you planning on using load balancing? Or do you have any queries? Let us know, and join the conversation by commenting below! 💬
Email marketing is one of the most effective ways to connect with your customers. Whether you’re a small business trying to grow or an established brand, the right email marketing software can help you build relationships with your audience and increase revenue. But not all email marketing plugins are created equal, so we’ve put together this list of our favorite WordPress plugins.
Constant Contact for WordPress
Constant Contact for WordPress is a tool that will allow you to create email opt-ins and capture leads within your WordPress website. It’s an excellent choice for small businesses, bloggers, churches, and nonprofits.
The app allows you to set up forms in minutes and then send them out in email blasts or via social media. It also provides analytics so that you can see how many people have clicked on the link in their emails or opened it on social media.
Pros
There are a lot of great features that make Constant Contact an effective and successful marketing tool. It is easy to use, has a lot of features and functionality, and integrates well with WordPress.
You can create newsletters in minutes with their drag-and-drop editor, or you can choose from the thousands of templates available on their website. Their platform comes packed with features like autoresponders (which send automatic email responses when someone subscribes or unsubscribes) and social media management tools so you can easily share your newsletters on Facebook and Twitter.
Cons
The integration between Constant Contact for WordPress and your site involves several steps that are not necessarily intuitive or easy to navigate through. For beginners, this might be frustrating when trying to set up the plugin in the first place.
Because Constant Contact for WordPress integrates directly with your WordPress installation (and therefore requires access to certain files), it can slow down other areas of your website while it is running in the background or even cause certain pages on your site not to load properly due to conflicts between plugins or code errors during installation/setup process which may require some technical knowledge before implementing them into a production environment.
MailChimp for WordPress
The MailChimp for WordPress plugin is a free and easy way to add sign-up forms to your website. This integration allows you to create a form anywhere on your site – in content areas or in the header or footer. You can also add it directly into a post, page, or widget on a per-page basis as well.
The features MailChimp for WordPress provides are among the most robust in the industry, making it one of our top picks for anyone looking for an easy way to get started with email marketing automation without breaking the bank.
Pros
MailChimp for WordPress is a freemium plugin that offers a free version and an upgraded premium version, which comes with additional features. The free version is great for getting started and the interface is simple enough to be used by beginners.
The integration with other plugins, apps, and services is one of MailChimp’s strongest points: it has an API (Application Programming Interface) that allows you to connect your site with other software or services such as Zapier or Google Analytics, so you can send analytics data directly from those platforms into your email marketing campaigns without having to manually enter them into MailChimp.
You can also use third-party integrations like Easy Digital Downloads or WooCommerce if you want to automate your eCommerce sales funnel using MailChimp’s powerful automation features
Cons
The biggest con is that you can’t customize the exit popups. There are only two available options: one that shows an email signup form, and another that redirects users to a thank you page.
Another drawback of MailChimp for WordPress is the lack of custom fields. While you can add custom fields to your forms in order to collect more information from your subscribers, there’s no option to do so with Exit Popups or Exit Intent Popups.
Sendinblue – Newsletter & SMTP Plugin
Sending emails with Sendinblue is an excellent way to improve your email marketing strategy. The plugin has the same features as Mailchimp, and it’s easy to use. However, some users have reported issues with the plugin, especially when sending large volumes of emails. In addition, there are no templates available for this plugin like there are with Mailchimp.
Sendinblue offers a lot of features that you would expect from a plugin like this. It offers a wide range of templates and a drag-and-drop editor that allows users to build their own newsletter design quickly and easily. Users can also customize their newsletter by changing colors, fonts, and images within the Sendinblue interface.
Pros
Sendinblue is a great alternative to Mailchimp. It has a lot of features and integrations, which might make it seem like an intimidating option at first. But once you get used to Sendinblue’s interface, it becomes easy to use and you will be able to take advantage of all the options available.
It has a lot of pricing options as well, so there’s something for everyone: from free accounts with limited features up to enterprise solutions that include additional support options. And last but not least, if you ever have any questions or need help using our plugin they have great customer service available 24/7 via live chat or email.
Cons
SendinBlue has no tracking. This means that you’ll have to rely on your inbox to see how many clicks you’re receiving and if people are reading your emails.
SendinBlue also doesn’t have any automation or drip campaign capabilities, so if you want to automate the sending of future newsletters or track the performance of certain campaigns over time, SendinBlue won’t help much with this.
There are also no integrations with other services such as Zapier for automating tasks like adding subscribers into an email marketing service (like MailChimp), or Mandrill for sending transactional emails from Shopify stores. The lack of automation tools is particularly frustrating given how many options there are out there for managing these sorts of tasks.
Campaign Monitor for WordPress
Campaign Monitor for WordPress is a popular email marketing service that lets you design and send newsletters, sales updates, and other messages to subscribers. It has a number of advantages over other services like Mailchimp and Constant Contact – such as its integration with WordPress – but it also costs more than similar services.
Pros
Campaign Monitor for WordPress is a straightforward email marketing solution that doesn’t require any coding skills, so you can set up an effective newsletter without hiring a developer or designer.
The documentation on the plugin’s website is clear and easy to understand, and there’s also an active community forum where users can get help from other people who have used Campaign Monitor for WordPress before them. Additionally, the company offers email support for paid plans as well as free trials of their software.
This plugin integrates with popular WordPress plugins such as WooCommerce (for eCommerce), Yoast SEO (for search engine optimization), Jetpack (for social media integrations), and Google Analytics For WordPress Users
Cons
Campaign Monitor for WordPress costs up to $175 per month. That’s the same price as an annual subscription to MailChimp, which has more features and offers a better user interface than Campaign Monitor.
Also, the user interface is not as intuitive as it could be. While Campaign Monitor does include some helpful tutorials, they’re not very comprehensive—the plugin often doesn’t do what you think it should do until after reading through a few pages of instructions (and sometimes even then). Additionally, there aren’t any interactive walkthroughs available for users who want to learn how to use the plugin by doing rather than by reading about what they can do beforehand.
OptinMonster
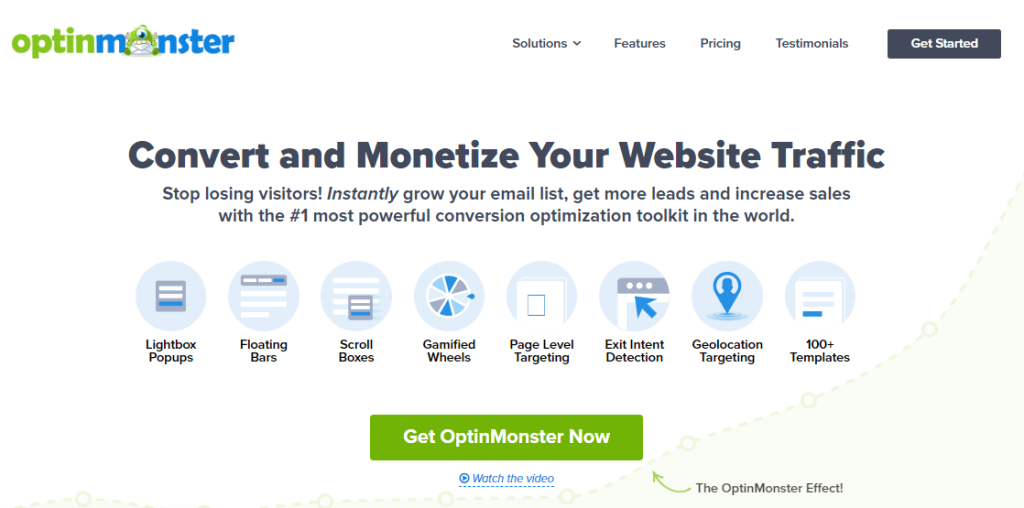
OptinMonster for WordPress is a popular email capture tool for WordPress. It offers a variety of email templates, email popups, exit-intent popups, and more. It’s a great tool for increasing email subscribers on your website or blog as it allows you to create engaging opt-ins that convert traffic into leads by using powerful lead generation tools like Opt-in Forms, Exit Popups or Slide-ins.
Pros
OptinMonster’s drag-and-drop interface makes it easy to add forms and campaigns to your website. You won’t need to be a developer or a designer to create beautiful, successful email marketing campaigns with the help of this plugin.
OptinMonster integrates seamlessly with all major email marketing platforms including MailChimp, Campaign Monitor, ConvertKit, ActiveCampaign, and more! This integration also allows you to import contacts from these top third-party providers as well as directly from WordPress itself – making it super simple for you to get started building your list on day one.
Because OptinMonster is built specifically for WordPress users who want better control over their site design than traditional webmail services like Gmail or Yahoo Mail offer (no matter what theme they’re using), there are almost no compatibility issues when using this plugin across various themes out there today – which means no more messing around trying figure out why things aren’t working right when they’re supposed too… just install/update/go!
Cons
There are a few drawbacks to OptinMonster for WordPress. First and foremost, the plugin has limited use. It’s best for blogs or websites that already have an email list and want to grow it further. If you don’t have an email list yet, then this isn’t the right tool for you – you’ll need something more robust like MailChimp instead.
Another drawback is that there aren’t many templates available in OptinMonster’s library of templates (though they’re working on increasing this). This means you won’t be able to create a lot of different kinds of forms quickly; instead, you’ll need to hire someone who can build them from scratch using their own code (or purchase another plugin) in order to get more options out there.
Lastly, while there are plenty of widgets available with OptinMonster for WordPress, not all of them will fit into your theme perfectly – so again: if you want complete control over how everything looks and works together on your site, then this may not be the best choice for your needs because it doesn’t have as much flexibility as some other plugins do!
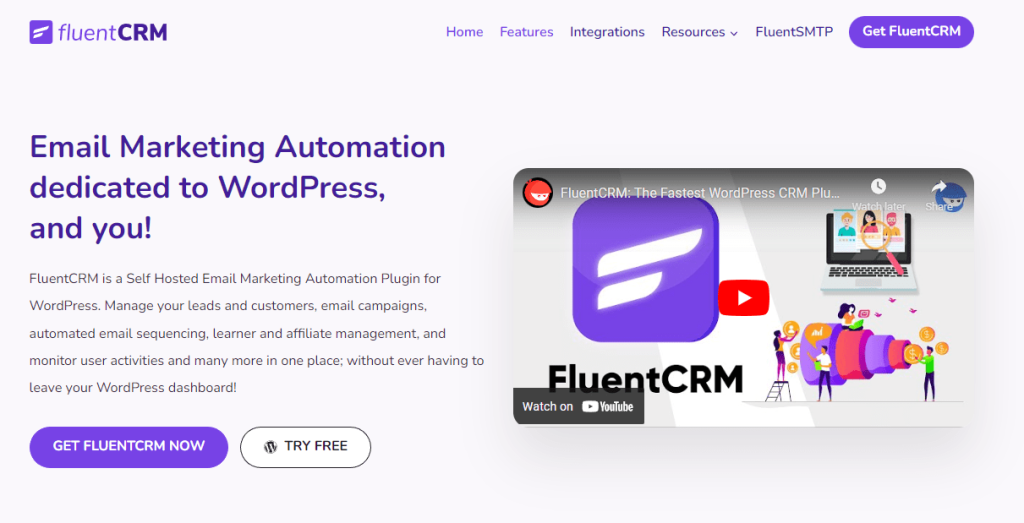
FluentCRM
The FluentCRM is a self hosted email marketing plugin for WordPress that allows you to send newsletter to your audience directly from the WordPress dashboard.
Pros
The software is easy to use, and everything happens within Gutenberg editor. Basically, everything you can do with blog post or page in Gutenberg, you can do with your email newsletter.
It offers incredible sorting features where you can create multiple categories, lists, and tags, all in your WordPress dashboard.
None of their plans have a limitation to how many emails you want/need to send.
Also, their reporting tool is amazing and very simplistic which makes tracking data super easy.
Cons
Even though self-hosted solutions are usually less expensive, FluentCRM pricing isn’t the most affordable option there, esspecially if you have multiple websites. Another downside is that they do not offer monthly subscription, but annual only.
Even though they offer 14-day refund, it’s still a con that they don’t offer a free trial.
WP Email Capture
WP Email Capture is a free and easy-to-use email marketing plugin for WordPress. It allows you to create and send email newsletters, email autoresponders, and campaigns.
WP Email Capture can be used by anyone with even a passing interest in digital marketing – from the business owner who wants to gain more customers through their website or blog, to the marketer who needs something simple yet effective for sending automated emails on behalf of their clients, all the way down to someone who wants an off-the-shelf solution so they can get started quickly.
Some of the most popular features of WP Email Capture include:
Autoresponder – Create autoresponders & email marketing campaigns in minutes, not weeks. WP Email Capture includes pre-made templates that you can edit to create your own unique emails.
Capture – Add an email capture form to any page or post on your website using the easy-to-use shortcode builder tool. Once someone fills out the form, their information is automatically added to your email list for future contact and follow-up.
Conversion – Monitor how many people visit your site, where they come from, what pages they visit and more with Google Analytics integration built right into WP Email Capture.
Segmentation – Create segments of your email list based on specific criteria like geographic location or browser type so you can send targeted emails only when it makes sense for them (i.e., don’t bother sending a discount code for shoes if someone has already bought a pair).
Email Builder – Create beautiful-looking emails using a drag & drop editor which comes with dozens of ready-made templates covering everything from abandoned cart reminders to end-of-year newsletters.
Email Marketing – Send personalized messages without having to touch code once thanks to its advanced autoresponder functionality which allows you to target specific users based on their actions within the past 6 months (or longer if needed).
Pros
The WP Email Capture interface is clean and intuitive, even for those who are new to the world of lead generation.
A large part of the success of any business is determined by its ability to provide excellent customer service, and this plugin doesn’t disappoint in this area. If you have any questions about using it or need assistance setting up your form, their team will help you out as quickly as possible (often within minutes).
Even if you’re not an experienced developer or designer, using this plugin will be a breeze since it has a simple drag-and-drop interface that makes building forms easy for anyone who knows how to use WordPress’ customizer feature. In fact, we were able to set up our first form with just one instruction because all we had to do was choose where we wanted the button on the page and select which fields should appear in our form (namely email address). The rest was handled automatically by WP Email Capture so all we had left was importing some HTML into our post editor via shortcodes before publishing.
Cons
The plugin only comes with one template to choose from, which may not suit your needs. There are no other templates available and there is no option to customize the template.
Also, while some of the features of this plugin can be customized, it’s important to note that there is no option for customization of the thank you page or confirmation page. The same applies to both the thank you email and confirmation email as well.
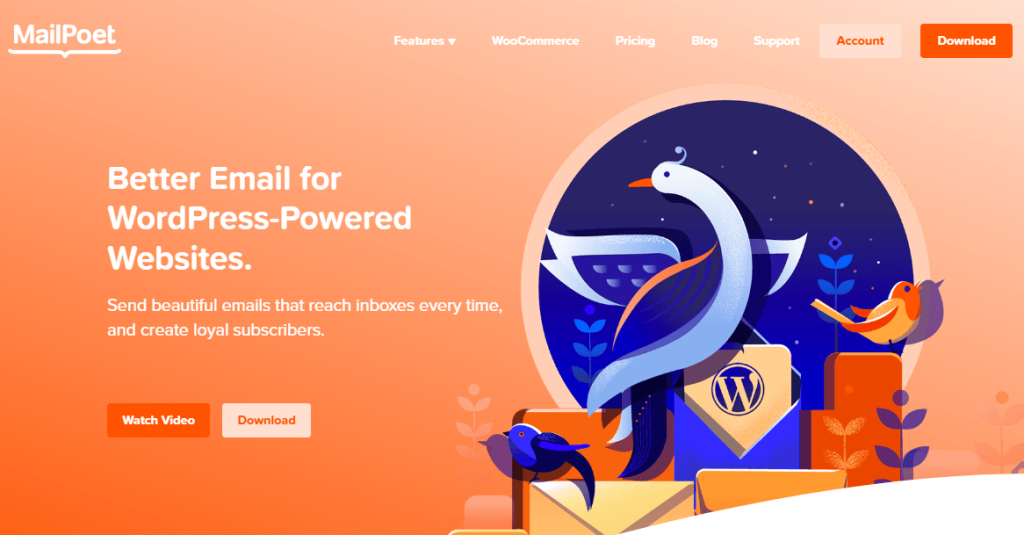
MailPoet
MailPoet, the popular WordPress plugin that is used to send newsletters and other transactional emails, has received mixed reviews from users. There are many positive aspects of MailPoet, including its ease of use and great features. However, some users have reported problems with MailPoet’s performance and scalability.
Pros
MailPoet is a WordPress email plugin with a drag-and-drop editor, so you can create beautiful emails without having to write code.
The plugin integrates seamlessly with WordPress and lets you manage your email campaigns easily.
It is easy to use, as it has an intuitive interface that allows even beginners to start creating their first newsletter right away.
You can also use its responsive design for mobile devices, which makes sure that your newsletter looks great no matter how the recipient accesses it.
Cons
As with any product, there are users that say MailPoet is not a good fit for their business. Some users report that the plugin is not very intuitive, while others say that it does not deliver emails as efficiently as they would like.
A few people also complain about how difficult it is to track email opens and clicks.
Icegram
Icegram for WordPress is a free, easy-to-use plugin that can be used to create pop-ups, lead generation forms, and opt-in boxes.
There are a few features that make Icegram different from other pop-up plugins. For one, it has multiple templates for you to choose from – you can create your own template, or choose one of the five that are included in the plugin. The second is its unique “targeting” feature, which allows you to target different users depending on their behavior on your site. For example, if someone visits a page without leaving any comments they may receive a different message than someone who leaves comments often.
This makes Icegram special because it gives you more control over how your popups appear and how they work in relation to how people interact with your website and content. You can use this feature by choosing what kind of action or interaction triggers an Icegram popup (like submitting contact info or filling out forms) and then creating rules that determine when a certain condition has been met (for example: when someone submits contact info).
Pros
Icegram for WordPress is a free plugin.
There are numerous options that you can use to customize your site, but the process of setting up this theme and adding it to your site takes just a few minutes.
Icegram for WordPress is responsive, which means that it’ll automatically adjust its layout based on what device is viewing it (desktop computer or mobile phone). This makes it easy for visitors from all devices to see the same things when they visit your website, regardless of how they’re accessing it – and no matter where they’re located in the world.
Cons
It is not a standalone plugin and requires the use of other plugins, such as WooCommerce or Easy Digital Downloads, to function properly. If you don’t plan on using either of these services, then you won’t be able to utilize Icegram’s full capabilities.
It can also be difficult to set up because it requires additional plugins and files that need to be installed manually in order for Icegram to work properly. This can make things confusing for users who aren’t familiar with WordPress or installing plugins on their site.
Additionally, once installed there may still be problems with ensuring that everything runs smoothly together; occasionally users have reported having trouble with integrating different aspects of their site (i.e.: their blog vs product pages).
After Action Report — Choose The Email Marketing Plugin That Fits Your Needs
These email marketing plugins represent a great choice, and a wide range, so not all will be suitable for everyone’s needs. But everyone should find at least one plugin which meets their needs perfectly.
When choosing which email marketing plugin to use, you’ll also want to consider a few other factors, including:
The email marketing plugin’s design. Does it fit in with your website’s current theme? Will it be easy for you to use and customize?
The quality of the support provided by the plugin creator. Is there live chat or phone support available? How often is the developer updating their product and adding new features?
How many active users are on that particular plugin? This isn’t necessarily an indicator of quality, but it will help you determine if there are any bugs in the code that might cause problems down the road.
It’s hard to narrow down the best email marketing plugins for WordPress, but these are some of the most popular options you should consider.
Which email marketing plugin have you used before? Anything that you believe we missed that’s worth mentioning? Let’s talk in the comments! 💬
WordPress caching is one of the most important ways in which you can significantly improve your website’s performance and speeds. Caching plugins simply store data that’s frequently accessed in temporary storage for more rapid retrieval.
This improves loading times whenever a person visits your site, as these elements can load up quicker straight from the cache. This works because in most cases, the posts or pages on your site aren’t going to change much after they’re published.
WordPress caching significantly reduces data transmissions from the user’s browser to the WordPress database and the server, which ultimately results in faster page load times.
If you aren’t already using a WordPress caching plugin, installing one could significantly improve your website’s performance, and result in a slew of other benefits.
Why Use a WordPress Caching Plugin?
Keep in mind that most browsers store a cache of your website’s page, so some form of caching is still active, even if you don’t use a plugin. However, with a caching plugin, you can significantly improve the process.
A WordPress caching plugin offers the following advantages:
Greater control over types of server-side caching, including an object or page caching
Additional features such as minifying JavaScript or CSS files
Improved SEO performance
Greater visitor engagement, which can result in a significantly reduced bounce rate
Improvement in your site’s Core Web Vitals and PageSpeed scores
The 8 Best WordPress Caching Plugins
Now, here are the eight best WordPress caching plugins that you can use to speed up your website’s performance.
1. WP Rocket
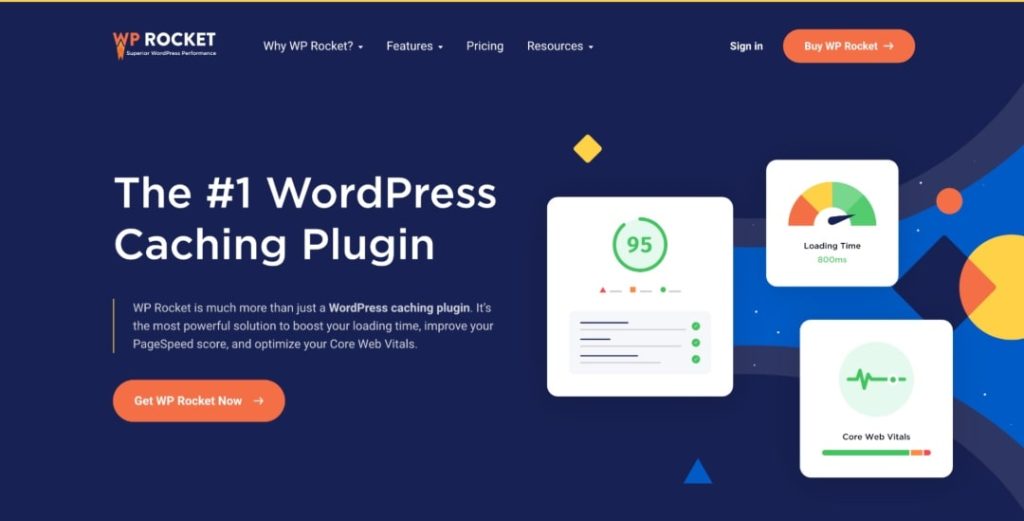
WP Rocket is widely regarded as one of the best plugins for improving your website’s performance, and for good reason.
WP Rocket offers control over both page caching and browser-side caching, and you can even set up Gzip compression so that web pages can be compressed on the server, and decompressed in the user’s browser.
What makes WP Rocket the top pick is simply the fact that, right after installation, many of the settings are preconfigured. This means that you will notice a significant uptick in performance without even tinkering with any key settings.
From delaying JavaScript scripts to lazy-loading media files, WP Rocket offers everything in a nifty, lightweight plugin. You can even integrate your CDN into WP Rocket’s dashboard or use their proprietary RocketCDN.
Key Features
WP Rocket supports a range of add-ons, such as Cloudflare, Varnish Cache, and Sucuri
Compatible with all the popular themes and plugins
Automatic eCommerce customization that removes sensitive pages from being cached
Extensive range of settings and options that offer granular control over how your website performs
2. Autoptimize
Autoptimize isn’t really a caching plugin, per se, but it does the job exceptionally well. Most caching plugins even recommend that you use Autoptimize along with them!
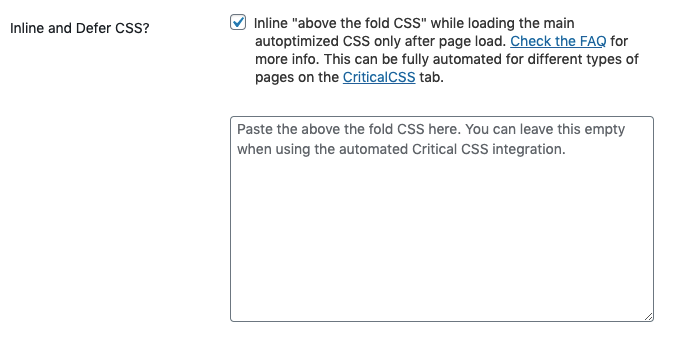
At its core, Autoptimize is a plugin that’s designed for minifying and aggregating scripts to improve your website’s performance. You can determine which scripts to load or completely ban, which results in a significant performance boost.
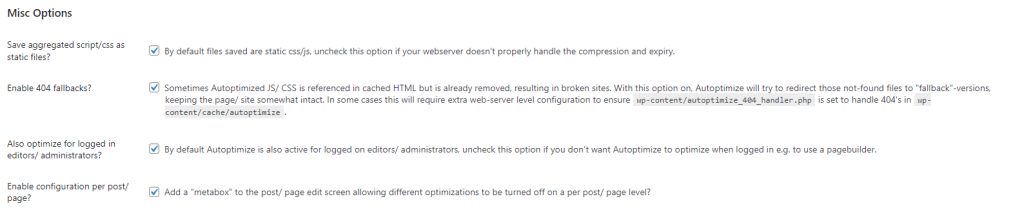
Another reason why Autoptimize is so popular is that it’s incredibly easy to use; the interface is very simple and presents you with all the options you need with brief descriptions.
The plugin itself is free to use, though the team charges an amount for setting it up and customizing it for your site, which is definitely worth it.
Key Features
Helps you fully optimize all scripts on your site
Has a free version
Quite simple for beginners, but also has advanced features that make it a suitable choice for technical professionals
3. W3 Total Cache
Third on the list is W3 Total Cache, a lightweight plugin that offers plenty of caching options. It offers optimized progressive rendering, which improves page load times and allows visitors to interact with them much faster.
W3 Total Cache offers support for the Secure Socket Layer and also lets you minify your HTML, CSS, and JS files, reducing bandwidth consumption significantly. More importantly, it also lets you cache feeds, on CDN, or on the disk.
Apart from that, you can choose to cache database objects, fragments in memory, search result pages, and a lot more. With this plugin, you can easily defer non-critical JS or CSS scripts to render pages faster.
It also offers comprehensive stats to help users better understand the impact of each setting they change.
Key Features
Offers reverse proxy integration using Varnish or Nginx
Lets you minify virtually all JavaScript, CSS, and other elements
Offers WP-CLI support for purging the cache
4. WP Super Cache
Automattic, the company behind WordPress itself, offers WP Super Cache as a fairly simple caching plugin. It generates static HTML files to reduce load times significantly, serving these instead of loading data dynamically.
It uses the Apache mod_rewrite module to bypass PHP, improving speeds dramatically. There are three options available:
Expert
Simple
WP-Cache caching
Each of these differs in terms of speed, with Expert being the fastest. If you need a reliable caching plugin that’s designed for optimizing website performance, you can’t go wrong with WP Super Cache.
Key Features
Has a Preload Mode that lets you preload as many posts as you want
Automatically deletes old files from the cache directory
Comes pre-configured with recommended settings
5. WP Fastest Cache
Popular amongst developers, WP Fastest Cache offers all the features that you need to quickly set up caching on your site. When you install it, the plugin automatically modifies your .htaccess file, so you don’t have to do much.
It deletes cache files when posts or pages are published, which keeps things running smoothly. Like WP Total Cache, it also lets you purge your cache using the command line interface.
You can easily enable or disable the cache option for users that have already logged in, or those on mobile devices. It also lets you disable emoji inline CSS, and lets you combine your CSS and JS scripts.
Key Features
Has both a free and a paid version
Lets you optimize all images on your site to reduce data consumption, while also offering an in-built WebP image converter
Lets you select elements to lazy load to further boost page load times
6. Swift Performance
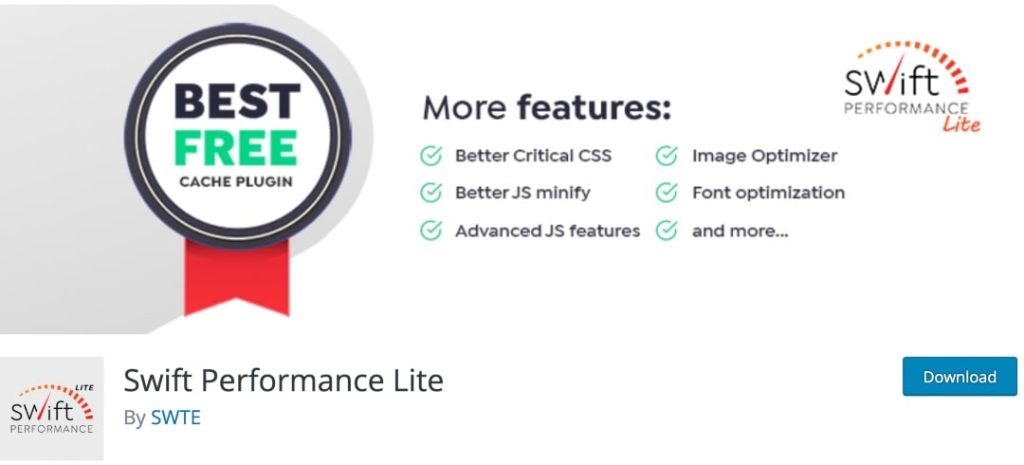
Swift Performance has both a free and a pro version (with the former known as Swift Performance Lite). It’s a fairly comprehensive WordPress caching plugin that automatically optimizes page caching once you activate the plugin.
It works seamlessly with WooCommerce, bbPress, Varnish Cache, Cloudflare, and several others. Furthermore, it lets you minify JS and CSS scripts, combining them to load simultaneously.
It also offers Gzip compression and has a built-in optimizer for cleaning databases. It automatically detects duplicate metadata and removes it. The Pro version also lets you schedule a time for optimizing your database.
Key Features
Supports WP Multisite for optimizing several sites
Offers browser caching right out of the box
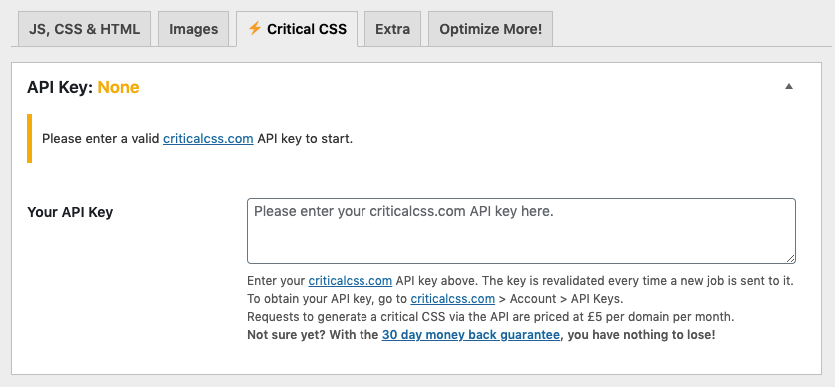
Can automatically generate critical CSS to prioritize content in specific folds
7. WP-Optimize
WP-Optimize was originally developed as a database optimizer, but since then the team behind the tool has added lots of new features to turn it into a plugin that offers full-scale caching.
It lets you cache, optimize, and significantly compress elements such as images on your site to improve loading times. There’s a free version, but to fully unlock all of its features, you’ll probably want to invest in the Pro plan.
That unlocks additional features such as Multisite support and more caching options. But, if you run a simple site and need a plugin to minify JS and CSS files and improve page load times, WP-Optimize is a good choice.
Key Features
Includes database optimization, image compression, and caching options
Improves website performance once you activate it automatically by optimizing common settings
Very responsive team of developers
8. LiteSpeed Cache
If you need a reliable caching solution, LiteSpeed Cache is a great choice. LiteSpeed Cache works well with web servers like (unsurprisingly) LiteSpeed, Nginx, Apache, and others.
If your website’s hosting stack features LiteSpeed, this is a good plugin to use. It offers object caching support, HTTP/2 push for both CSS and JS files, Cloudflare API, and multisite support.
The interface is intuitive, letting you choose whether to lazy load images, optimize PageSpeed scores, support for WP-CLI, schedule cache purges, and more.
Support for LiteSpeed Cache is excellent, with a dedicated Slack community, detailed documentation, and a huge support community. There’s an API for the themes and plugins that aren’t directly compatible with LSCache, making it a great choice all around.
Key Features
Has a built-in database optimizer
Supports both basic and advanced setting views
Multisite support is available
Using a WordPress Caching Plugin is Essential to Boost Performance
WordPress caching plugins aren’t just an “added bonus”. If your website has a lot of content and you intend to scale it in the future, you should use a caching plugin.
Without a caching plugin, you’d have to tweak every setting manually, which is obviously quite complicated. While there are quite a few caching plugins out there, these are some of the best choices, and most others usually offer similar features.
Let us know in the comments below if you have any questions or any recommendations for plugins that aren’t on the list, or the ones you prefer using!
Thanks to all the themes and plugins of WordPress, it is now very easy to build and manage a WordPress site. Once you have created your site, the Admin Panel allows you to manage it easily.
However, what if you prefer a command-line interface? It requires time and effort to manage WordPress websites through the Admin Panel. But, instead of taking steps manually, a command-line interface lets you quickly perform actions with simple commands.
That’s where WordPress Command Line Interface (WP-CLI) comes in. WP-CLI is a popular and powerful tool to generate backups, add/update themes and plugins, and manage your WordPress website using a simple command-line interface.
In this article, we’ll talk about what WP-CLI is and how you can use it to manage your WordPress website. We’ll also walk you through some of the basic WP-CLI commands:
What Is WP-CLI?
How To Install WP-CLI?
Getting Started With WP-CLI Commands
How to use WP-CLI from a remote server?
Conclusion
What Is WP-CLI?
WP-CLI is an open-source tool for web developers to maintain and update their WordPress sites through the Command Line Interface. Its main goal is to speed up the WordPress developer’s workflow.
WP-CLI’s various functions and commands manage common (and some not-so-common) tasks such as resetting passwords, managing post categories, adding/removing users, updating plugins, configuring multisite installations, and more. WP-CLI saves you time and increases your productivity because it allows you to complete multiple tasks quickly.
Daniel Bachhuber has maintained WP-CLI since 2003. Over the years, WP-CLI has been a requirement for other open-source projects like Bedrock and Trellis. In January 2017, this open-source tool officially moved to WordPress.org and was co-maintained by Alain Schlesser.
Installing WP-CLI is easy. From WP-CLI.org, download the Phar file to complete the installation process. For other installation methods (Homebrew, Docker, Composer), check out the WP-CLI documentation file.
Make sure that your environment meets the following requirements:
UNIX-like environment (OS X, Linux, FreeBSD, Cygwin); limited support in Windows environment
Check the Phar file to make sure it’s working by executing the following command in your Linux terminal after installing cURL:
php wp-cli.phar --info
To use the WP-CLI command, you need to first mark the file as an executable, as it’s still a Phar build. Then, you must move it in your PATH. Use the following command to make this happen:
Now, instead of typing wp-cli.phar, you can just type wp. When you run wp –info, you’ll see the following code, which means that WP-CLI is installed successfully:
$ wp --info
OS:     Linux 4.19.128-microsoft-standard #1 SMP Tue Dec 7 12:58:10 UTC 2021 x86_64
Shell:  /usr/bin/zsh
PHP binary:     /usr/bin/php

PHP version:    8.0.5
php.ini used:   /etc/php/8.0/cli/php.ini
MySQL binary:   /usr/bin/mysql
MySQL version:  mysql  Ver 8.0.23-0ubuntu0.20.04.1 for Linux on x86_64 ((Ubuntu))
SQL modes:
WP-CLI root dir:        /home/wp-cli/
WP-CLI vendor dir:      /home/wp-cli/vendor
WP_CLI phar path:

WP-CLI packages dir:    /home/wp-cli/.wp-cli/packages/
WP-CLI global config:
WP-CLI project config:  /home/wp-cli/wp-cli.yml
WP-CLI version: 2.5.0
If you did everything correctly, WP-CLI will work properly. If, however, you encounter an error, you’ll have to repeat the steps again.
To install WP-CLI on Windows, the process is slightly different. You should have the command line PHP for Windows in your system so you can execute PHP from any working directory.
Now, you can just use cURL to install WP-CLI (cURL ships natively with Windows 10).
Getting Started With WP-CLI Commands
In this section, we’ll learn some of the basic commands that are commonly used in WP-CLI.
WP-CLI commands generally begin with “wp.” A command and subcommand follow the “wp” to execute a query. A full WP-CLI command looks like this:
Let’s take a look at some basic WP-CLI commands with examples:
How To Install A Plugin With WP-CLI
Installing a plugin with WP-CLI is fairly straightforward. All RunCloud servers have WP-CLI installed by default, so you can easily connect to WP-CLI via the Terminal on Mac or through third-party software like PuTTY for Windows using your SSH key.
Once the connection is established, here’s what you do.
To install a public plugin through WP-CLI, type the following command:
wp plugin install [plugin name]
For example, to install the WooCommerce plugin, type:
wp plugin install woocommerce
To activate the plugin, type:
wp plugin activate [plugin name]
For example:
wp plugin activate woocommerce
Your plugin has now been activated.
Installing Multiple Plugins with WP-CLI:
You can install multiple plugins using the following command:
To find a plugin name, use the command wp plugin search term, which will give you a list of plugins in the terminal.
You can also install plugins from a remote file. This comes in handy if you’re developing a plugin or using a premium plugin. The following example installs two plugins from the repository and one from an Amazon S3 server:
This command is especially useful to troubleshoot compatibility issues. The best way to manage plugins that are not compatible is to deactivate all the plugins.
Get a list of plugins with WP-CLI
Run the following command to get the list of the available plugins:
wp plugin list
To see the list of active plugins, use the following commands:
wp plugin list --field=name --status=active --update=available
Managing WordPress themes with WP-CLI
To install a theme, type:
wp theme install [WordPress theme name]
For example:
wp theme install twentytwentytwo
Make sure to type the theme name exactly as it appears in the page URL.
To activate a theme, type:
wp theme activate twentytwentytwo
Your WordPress theme should now be activated.
To install and activate a theme from wordpress.org, run the following command:
$ wp theme install twentytwentytwo --activate
You can also install a theme from a local .zip file:
First, you have to download the ZIP file for your theme and upload it to your server. This is possible through SFTP using a client like FileZilla.
Once you’ve uploaded the file to your server, just run the following command:
To list all installed themes, run the following command:
$ wp theme list
It’s important to note that non-marketplace themes can’t be downloaded using the WP-CLI. Custom themes can be activated through their zip folder or through URL. You could also download them with curl and the themes package will have specific instructions to activate them through WP-CLI.
Make sure to use only trusted sources to download themes and plugins as themes/plugins installed from unverified sources are not safe to use.
Installing WordPress with WP-CLI
You can easily install WordPress through WP-CLI by using a few simple commands. This allows you to skip the standard WordPress installation process which can take some time as compared to completing the installation process through WP-CLI.
Step 1: To install WordPress through WP-CLI, you’ll have to locate the directory where you want to complete the setup process and run the following command:
wp core download
Step 2: The second command will set up the config file with the database access and some additional PHP.
Step 3: You’ll need to run the core install command to start the installation process. There are some extra parameters in the command such as email, admin username, and password, where you have to replace those parameters with your own variables.
WordPress should be installed to the latest version. After some time, you will need to update WordPress. You can use the following command to update the platform:
wp core update
Once the platform is fully updated, you’ll want to do the same for your database:
wp core update -db
Changing the WordPress URL with WP-CLI
Generally, WordPress is configured to work and accept requests through the URL which is set during the installation process. Sometimes, for various reasons, the URL is required to change. For example, you may need to move your WordPress installation from one subfolder/subdomain to a different one, or you might want to change your domain name. You may even need to force HTTPS connections to your website after installing an SSL certificate. Another reason may be when you want to install WordPress or want to move the site from local to production, then you need to update the WordPress and site address URLs.
Updating the URL is usually a complex job, as all the database entries containing the old URL need to be updated with the new URL. However, doing it through WP-CLI is much easier and quicker, and can be done by running one command:
wp option update home [URL homepage web address]
wp option update siteurl [URL homepage web address]
For example:
wp option update home 'http://www.domainofthewebsite.com'
wp option update siteurl 'http://www.domainofthewebsite.com'
Your WordPress URL should be updated.
There can be some hard-coded links to resources in your files that can contain old URLs. If you find any missing CSS files, missing images, or any other inconsistencies, check out your web browser’s error console for the particular errors. Also, you can open the error console by clicking F12.
Manage users with WP-CLI
You can use the following commands to manage users along with their roles, responsibilities, and metadata.
List users
In order to list all users you can use the following commands:
wp user list
You can also list users with certain roles (such as the administrator role in this case)
wp user list --role=administrator
Create a new user
New users can be created with the command:
wp user create name email.
If you want to assign the new user a role, then the command will need to include a suffix:
--role=whatevertheroleis
Examples:
Create a new editor role.
wp user create ron ron@alexa.com --role=editor

Success: Created user 4.
Password: WordPressAssignedPassword
Delete user and re-assign posts to another user
Delete function is simple as create command – run command
wp user delete name
If you want to re-assign posts to other users, add the suffix:
--reassign=username
Example:
Delete user ‘ron’ and reassign posts to user ‘tim’:
$ wp user delete ron --reassign=tim
Reset the password for one user
This is how to reset the password of any user:
Step 1:
$ wp user list
Find the ID of the user you’d like to update.
Step 2: update the user
$ wp user update 1 --user_pass=password
Replacing “1” with the ID of the user you want to update.
Change admin email address for one user
Step 1:
$ wp user list
List to see all users. Find the ID of the user you’d like to update.
Step 2: update the user
$ wp user update 1 --user_email=newemail
replacing “1” with the ID of the user you want to update
Set or modify a user role
Step 1:
Type the following to see all users:
$ wp user list
Find the ID of the user you’d like to update.
Step 2:
$ wp user set-role 1 administrator
Success: Added ronsmith (1) to http://yourdomain.com as author.
One of the best features of WP-CLI is that you can use it to manage your remote WordPress installations.
You will have to install WP-CLI in two places: on the system from where you’re running the command, and on your server.
In order to install WP-CLI on your system, you can use the guide above since we have already gone through this. Saying that here’s how to configure the server with WP-CLI.
Configuring Remote Server with WP-CLI:
You can configure your server through WP-CLI globally or locally.
To configure your server globally, use the config.yml file. You can also use wp-cli.yml or wp-cli.local.yml files in your current working directory. In one of your working files, type the following code:
Once this is done, write the following command to update WordPress on your server:
wp ssh core update --host=staging
Use Bash Scripts
Developers save up a lot of time by using bash scripts to automate tasks. With a single script, you can install WordPress or manage other tasks without typing multiple commands.
To use Bash scripts, you will have to build an “install.sh” file inside a directory and paste the following code:
The script will be good to go without any interference from the user. If you handle multiple websites, you can establish all your environments by creating similar bash scripts:
Bash scripts can free up your time when a new WordPress version is released.
After Action Report — Using WP-CLI Can Be Extremely Useful
WP-CLI solves many of the most common problems experienced by web developers and website managers. This saves you considerable time and effort, allowing you to focus elsewhere, safe in the knowledge your sites are taken care of.
As a web developer, you can quickly develop test sites, include test data, and import/export as required. You can easily manage site updates and different other jobs for various websites with one command. WP-CLI community commands such as WP-CLI-SSH also provide some amazing functions. If you encounter an issue, a good place to refer is the WP-CLI common issues documentation.
RunCloud easily allows hosts and lets you create and manage multiple WordPress websites with fast configuration. Using RunCloud in addition to WP-CLI, will give you back considerable time, and make site management easier.
What’s your favorite use case for WP-CLI? Did you come across any issues? Join the conversation & let us know in the comments below. 💬
Are WordPress.com and WordPress.org the same? It’s a question that on the surface seems so obvious, that many people don’t even think to ask it, let alone consider the answer. The truth is that those three little letters after the period make a huge difference, and could impact the success of your website in the future.
So, what are the differences between WordPress.com and WordPress.org? Besides sharing the name ‘WordPress’ there are a number of significant differences to be aware of when choosing the platform you want to use for your website.
In this post, we’ll dive deep into their backgrounds & how they’re different.
What Is The Difference Between WordPress.com and WordPress.org?
To make things as clear as possible, we’re going to cover all differences between WordPress.com and WordPress.org, starting with:
The Fundamental Difference
This is where people typically get confused. Both are called WordPress, yet aren’t the same.
The non-profit WordPress Foundation manages WordPress.org which is a self-hosted content management system (meaning that you can install it anywhere and buy your own domain to set up a site). Not only is it a self-hosted content management system, but it’s also the world’s leading content management system.
WordPress.com, on the other hand, is essentially the largest WaaS platform owned by Automattic, the company run by WordPress co-founder, Matt Mullenweg. It is powered by the WordPress.org open-source software.
TL;DR – WordPress.com vs. WordPress.org Differences
In short, WordPress.com is a limited version of WordPress.org that has been intentionally simplified for a completely different demographic.
WordPress.org is open-source meaning that the main difference is:
Hosting – you can either set up a server with a cloud provider like DigitalOcean, Linode or Vultr with the help of RunCloud (highly recommended, of course 😉) or using a shared hosting service (which we would not recommend due to the limited resource availability and sluggish performance).
While some of the most notable limitations of WordPress.com include:
No monetizationthrough ads is possible (you are locked in to using the “official” WordPress.com advertising program)
No plugin installation or updates on the free plan — bigger plans also have these limitations, just lighter
You only get to choose one out of a few free themes if you’re on a free plan
Customization of the appearance, features, and overall site is heavily limited
The free plan doesn’t let you use Google Analytics
You have to upgrade from the free plan if you want to use your domain without the WordPress.com subdomain
No eCommerce features or integrated payment on the free plan
No membership websites
Verdict
There are plenty more limitations with WordPress.com, however, you have more responsibility with WordPress.org as a result. This should affect your decision on whether you should go with WordPress.com or WordPress.org.
Pricing and Cost Differences
Budget is always one of the first things you have to figure out when you’re building something. In this case, there are big differences between the pricing and costs of WordPress.com and WordPress.org, so to help you plan your budget better, we have broken down both solutions.
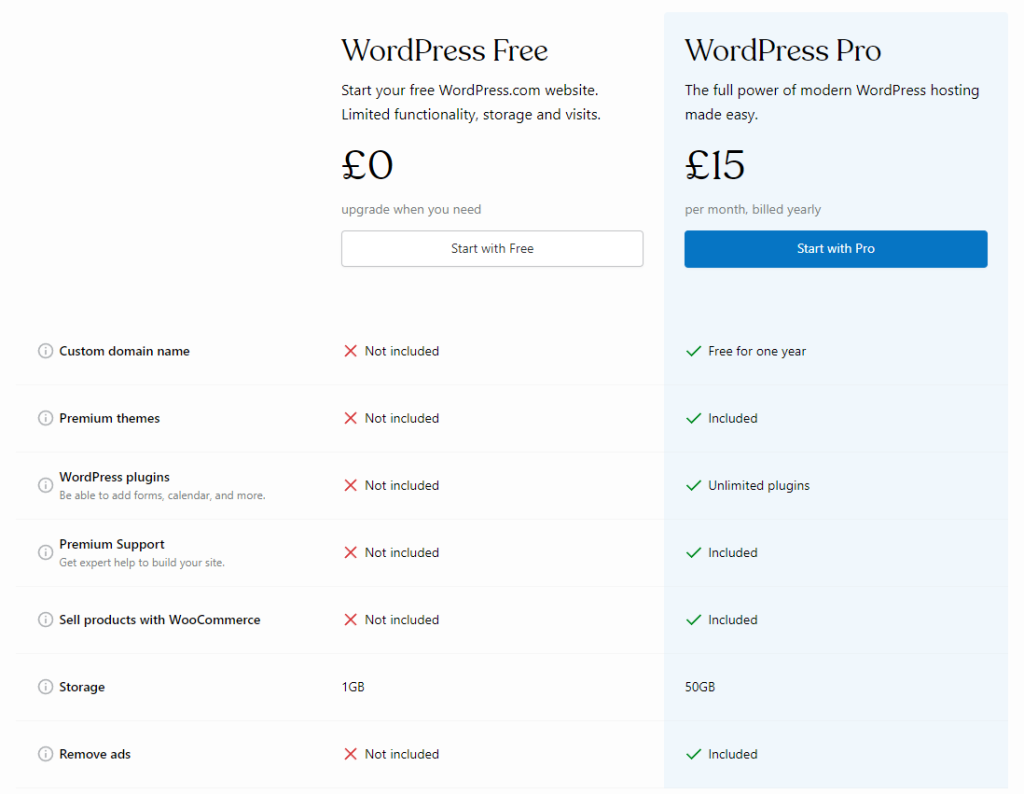
WordPress.com offers four different pricing plans that can be paid annually, upfront, or monthly.
Here’s a detailed pricing breakdown for WordPress.com
Besides these, WordPress.com does offer a free plan, and all you have to do is buy the domain. However, you will have their subdomain displayed e.g www.yourwebsite.wordpress.com.
When it comes to WordPress.org, it’s completely free to use. However, there are other costs that WordPress.org doesn’t cover, which WordPress.com covers for you. The costs that WordPress.org doesn’t cover are:
Hosting — you will have to choose where you will host your WordPress website. You can check out some of our solutions here!
Security — Depending on your hosting, you might need some premium security features or plugins that can cost up to $250 per year.
Premium themes — there are free ones, but to get the most out of WordPress.org, you’ll probably want to go with premium themes. They usually cost up to $150 per year.
Premium plugins — another optional thing, but if you’re serious about scaling your website fast, you will probably want to go with some premium plugins like Rank Math for SEO.
Verdict
The cheapest way to create a website with WordPress is to buy a domain and go with the WordPress.com free plan. However, how desirable the free plan is will depend on the nature of your site, as WordPress.com has greater limitations. If you go with WordPress.org, you may end up incurring more costs on what it doesn’t cover, spending more than you wanted.
Ease of Use
Both WordPress.com and WordPress.org have a learning curve, but which one is easier to overcome?
Since WordPress.org offers you a lot more freedom, you might frequently get lost if you’re a beginner. Whereas WordPress.com doesn’t have this issue. Their setup is more robust as you’re solely dependent on the plan you chose.
On the other hand, if you are a more advanced user, you’ll probably find your way faster with WordPress.org, as you’ll know exactly what you need to set up your intended site.
Setting up WordPress.com is a bit easier as it’s designed for blogging. Also, since it has far more limitations and doesn’t allow you to change many things you would normally be able to change on WordPress.org, fewer options mean it is easier to use.
Verdict
Considering WordPress.com has more limitations, it’s a lot easier to find your way around with their streamlined setup process. Therefore, WordPress.com wins this battle!
Hosting
Hosting is your own home in the internet realm. Without hosting, your site pretty much doesn’t have a place to live, and therefore no one can find it.
WordPress.com and WordPress.org differ when it comes to hosting options, and these differences are important to know.
With WordPress.com, you are already getting the hosting regardless of the plan you pick, since the service is self-hosted (free or premium). Effectively, hosting isn’t something to worry about if you decide to go with WordPress.com.
However, since WordPress.org is just software, you will need hosting with your WordPress site.
There are dozens of hosting providers out there offering you your new virtual house, and it can be a bit overwhelming sometimes to review all of them, especially if you’re not that tech-savvy.
It doesn’t matter if you’re a beginner or an expert — we’re certain that here at RunCloud, we can provide you with everything you need to get your site up and running with ultra-fast speed, maximum security, and features that will help you scale it sky-high. Make sure to check our plans here!
Verdict
Since WordPress.com will take care of all hosting-related stuff, it’s fair to say that WordPress.com is the simpler option to go with here. However, if you’re a more advanced user who wants more control, you’ll definitely want to host your website by yourself.
Theme Design & Customization
Themes are there so you can get your WordPress site to look exactly the way you want.
When speaking solely about themes, you have plenty of choice on both WordPress.com and WordPress.org.
However, here are some things worth mentioning:
With WordPress.com you:
Can’t upload any premium themes without the Business plan
Can choose from dozens of free themes
Are heavily limited with customizing themes
With WordPress.org you:
Can choose from plenty of free themes
Can upload whichever premium theme you want
Can edit absolutely everything if you know how to code
Customization is also a big part of deciding which of the two options is better in terms of design. Unfortunately, customization is impossible on WordPress.com which makes WordPress.org win this race by some margin.
This flexibility is a benefit if you’re an advanced user who already knows how things work and what exactly it is you need.
On the other hand, if you’re a beginner, you might be perfectly fine with the limitations of WordPress.com, as you are yet to develop your experience and are still learning what you actually need.
Verdict
WordPress.org wins hands down in terms of options and possibilities with your website design. It practically has no limits and you can do whatever you want to as long as you know how to do it properly. But once again, it all comes down to what you actually need out of your website, and WordPress.com is more beneficial if you are newer to the process.
Plugins
Plugins are coded programs that serve the purpose of performing certain functions on your website, and they can be anything from payment integrations to a simple table of contents.
There are major differences in handling plugins on WordPress.com and WordPress.org so you must familiarize yourself with these to make your choice better.
WordPress.com doesn’t allow you to use any plugin upload or installation unless you’re on the Business plan ($300) even though the majority of plugins from WordPress databases (over 50,000) are free.
This again represents a huge limitation in controlling your website, but the benefit is that WordPress.com pretty much handles a lot of things for you. Whereas you’d need to install more plugins yourself on WordPress.org.
Speaking of WordPress.org, you have zero limitations when it comes to playing with plugins. You can install any plugin you want, free or premium, and configure it however you want.
Verdict
Both platforms use the same plugin directory, but the fact that you can’t modify your plugins on WordPress.com without paying $300 per year, gives a huge advantage to WordPress.org. The advantage of WordPress.com is again for those with less experience and who prefer things being handled for them.
Blogging
If you’re looking to build a site for blogging, then both options can be great. It all depends on what you need.
If you have never previously had a blog, want to start one without planning to scale it sky-high, and don’t have much blogging experience, then in terms of structured SEO writing and setting the blog up WordPress.com is an amazing option for you.
You will learn a lot and it can be free (which we suggest). There’s no harm in trying new things out and as you don’t have to spend a dime (except on the optional domain of course) to tackle that learning curve, it’s a great option!
There are many blogs on the WordPress.com free plan, and we’re sure it will satisfy your needs as a beginner.
However, if you’re an experienced blogger, then WordPress.com probably won’t work for you.
WordPress.org is a much better option for experienced bloggers as you probably have WordPress knowledge and you know exactly what you need. There is likely to be an issue with WordPress.com because of its limitations.
Also, if you’re planning to scale your blog and make it a six-figure business, then WordPress.org might be a better solution as it gives you more options from the beginning.
Verdict
Both WordPress.com and WordPress.org are great options for blogging. WordPress.com is great for beginners, but if you’re planning to grow your blog rapidly then WordPress.org will be a better solution.
SEO (Search Engine Optimization)
SEO plays an important role if you’re planning to grow your site’s traffic organically.
WordPress is generally one of the best (if not the best) platforms when it comes to SEO, and both services will provide you with high-quality tools. Both will make sitemaps and send them to Google.
Both will leave you plenty of options for creating content no one can compete with.
The only difference here is with plugins.
As you already know, WordPress.com will not let you upload or install any plugins, which means no SEO plugins as well. Only if you go with a Business plan will you be able to install SEO plugins.
On WordPress.org, things are much easier, and for that purpose, we recommend Rank Math. It’s currently the best SEO plugin out there and we’re certain it will help you immensely with your SEO game.
Verdict
Both services offer a great SEO-friendly environment for creating top-notch content. But the advantage goes to WordPress.org as there are no limitations to boosting your SEO game with SEO plugins.
Analytics
Analytics also play an important role in growing your website. How else would you know what your readers want unless looking at analytics, stats, and data?
WordPress in general doesn’t have its own analytics. All you can track is site traffic, but that doesn’t tell you much, meaning you’ll need some plugins or hard-coded integrations.
Google Analytics is definitely the best analytics tool out there, but unfortunately, you can only have Google Analytics on your WordPress.com website site if you upgrade to the Premium Plan.
Besides that, Google Analytics isn’t the only analytics you might want. Depending on your site’s nature you might want to install a heatmap or some other form of the data collection system. Unfortunately, all this is unavailable with WordPress.com if you don’t go with their Business plan.
On the other hand, if you go with WordPress.org, you can install whatever you want, including Google Analytics. You can install Google Analytics through a hard-coded API, or use some of the other plugins like Rank Math, Jetpack, or others. Effectively all options are at your disposal!
Verdict
WordPress.org is a far better platform for tracking down data and getting insights into your audience, as you can use any plugin.
Maintenance
Technical maintenance of your website usually comes down to three things:
Web hosting maintenance
Security maintenance
Plugins maintenance
The benefit of having a website on WordPress.com is that they take care of everything for you. You don’t have to worry about hosting as WordPress.com is self-hosted. You don’t have to think about security as they keep everything together. Additionally, since you don’t have any plugins besides the ones they install for you, you don’t have to pay attention to them either.
On the other hand, you will need to take care of all these things if you decide to go with WordPress.org.
Most web hosting companies keep a very close eye on every upcoming WordPress update, making sure that the support is there should you need it.
With RunCloud this process is made considerably easier, as you have access to a server management control panel that allows you to monitor and update multiple WordPress installations much more quickly. This makes the process of keeping multiple sites secure significantly more practical.
When it comes to security, depending on the hosting provider you’re working with, you may need to install a security plugin. The Wordfence plugin is often recommended, which has a free option, but if you want to upgrade your security they have multiple plans available.
Also, WordPress.com provides you with a free SSL certificate which is a super important security requirement, as well as an increasingly important SEO metric. If you decide to go with WordPress.org you will have to take care of SSL yourself. Luckily most hosting providers have free SSL included in their plans.
Last but not least: plugins. You probably have heard of plugins crashing sites. How do you prevent that from happening to your site? Always keep everything updated! Yes, even though there might be a risk of your website experiencing issues after a plugin update, the chances are much higher of issues occurring when they’re not updated. Also, make sure not to use too many plugins!
Verdict
There are almost no differences between the two except that you will have to work a bit more on maintenance with WordPress.org.
Customer Support
If you’re a beginner, then support might come in handy, especially if you’re setting up your website for the first time.
WordPress.com doesn’t offer any support on a free plan, but if you upgrade to the Personal plan, you will get email support, although it might take several days for them to reply.
If you upgrade to the Business plan, however, you will get their live chat support which is far more responsive than email support.
WordPress.org doesn’t offer any type of support as there’s no need for them to provide it. The service is free and you have all the freedom to create whatever you want. However, they do offer documentation that you can use and gain a lot of useful information.
Speaking of support, for both platforms, you can actually find a lot of useful information on the WordPress forum, as issues you’re experiencing are likely issues other people have been experiencing as well.
Verdict
There is no support at WordPress.org as your websites are more your own. WordPress.com does offer some sort of support, which makes it more user-friendly in this case.
We have covered the main differences between WordPress.com and WordPress.org, so now we’ll answer some key common questions, before concluding.
How To Install WordPress With RunCloud
Installing WordPress on RunCloud is super simple, and we have a detailed guide here to help you with it!
Is WordPress.com or WordPress.org Better?
It all depends on your needs and what you want your website to be. If you are a beginner looking to build a small personal blog, then WordPress.com is a good option. However, if you’re looking to scale your website as an online business, WordPress.org offers much better solutions as it has fewer limitations.
Can You Switch From WordPress.com to WordPress.org?
Yes, you can switch from WordPress.com to WordPress.org. All you have to do is
Find a hosting provider where you will host your WordPress.org website
Export your WordPress.com website
Import your site to your new hosting provider (support can help with this)
Voila!
Some hosting services have an option where you submit your WordPress.com credentials, and they do all the heavy lifting and get it ready for you. Bear in mind this is highly likely to be a paid service.
What Should You Look For When Picking A WordPress Hosting Provider?
First and foremost you want to make sure that your hosting provider offers fast and secure servers with good uptime.
After that, their support is something you should also have in mind as it will often come in handy.
And last but not least, make sure your hosting provider offers decent pricing, with a range of plans to suit both your budget and your needs, as well as providing the flexibility to upgrade plans in the future as your business expands.
Here at RunCloud, we pride ourselves on offering top-notch server management tools, helping to improve the speed and responsiveness of your site. Our support is always ready to assist you in case of any need. Check out our server management plans here!
Can I Monetize A Free WordPress.com Website?
Yes, you can monetize the WordPress.com website. There are two popular ways you can go with this — either affiliate marketing or building a paid membership program. WordPress has written its own guide to membership programs if you’re interested in finding out more.
WordPress.com vs WordPress.org – Which One Is Better For eCommerce?
WordPress.org is far better for building an eCommerce website.
The reason for that is that with the WooCommerce plugin you can achieve so much without having to spend much more money on premium solutions or buying their extensions. In fact, if you’re starting as a simple eCommerce store, you don’t need any extra features of WooCommerce, which means you can run it almost free (domain and hosting needed only).
When it comes to WordPress.com, you can go with an eCommerce plan that costs $540 per year which is not the most affordable option, especially if you’re just starting out. Additionally, even with paying that amount, you will still have limitations you wouldn’t usually have with WordPress.org.
After Action Report — Use WordPress.org for Maximum Versatility & Control
Although both platforms have their advantages and disadvantages there’s really no question as to which is the best solution for any business that’s either already established or is planning on significant growth.
From the addons and plugins you can choose that allow you to integrate everything from payment portals to mailing lists, security to social media automation, to full control over your themes and website’s appearance, WordPress.org lets you have it all.
Have you already made your choice? What was the deciding factor for you? Leave a comment below and join the conversation either here or on Twitter @RunCloud_io. 💬
Trying to figure out what managed WordPress hosting is and whether you need it?
WordPress currently powers over 455 million websites, with 500 new WordPress websites every day. Well over a third of the top 1 million websites is WordPress based, so no one is ever going to deny its popularity or success, but that doesn’t mean that it’s immediately straightforward – there are key decisions to make right from the start which could have a long term impact on your website’s success.
In this guide, we’ll walk through when managed WordPress hosting can make sense and why for many use-cases running your own infrastructure (with the help of RunCloud) paired with a popular cloud provider like UpCloud, DigitalOcean, Vultr, etc. can be the better choice. Without further ado – let’s dive in.
What is Managed WordPress Hosting?
Managed WordPress hosting is a service that takes care of all the technical aspects of running a WordPress website. This generally includes everything from maintaining the performance, stability, and security of your hosting infrastructure all the way through to providing support for technical issues that arise.
For those willing to pay a premium to have everything taken care of for them, managed hosting can afford you some extra peace of mind. We’ll get into the advantages and disadvantages shortly.
Overall, the main attraction in finding a managed WordPress host is convenience. You delegate responsibility and let experts handle the technicalities, freeing up to do what you want to focus on which may not be anything related to your hosting infrastructure.
The Pros & Cons of Managed WordPress Hosting
Although the features and services may differ from host to host, you can still rest assured that the majority of these pros and cons will be present in every host.
Managed WordPress Hosting Pros
There are really only two main advantages of choosing managed WordPress hosting – support & the absence of responsibility.
Support
Managed WordPress hosting providers tend to pride themselves in the level of support they’re able to provide.
The Absence of Responsibility
When you work with sites where 100% uptime and maintaining security, stability, and performance are not things that you wish to be responsible for, they’re often a good choice.
Managed WordPress Hosting Cons
Price (better yet, what is your business model?)
Managed WordPress hosting is more expensive, but that’s not really what cost comes down to. Whether or not you choose to go with managed hosting as a result of the cost, realistically is a matter of what your business model is. If you’re a WordPress design and development agency that has made the decision they want to get into the hosting business (a billion-dollar industry), then running your own infrastructure, eventually staffing your own support, etc. becomes a more logical choice.
Whereas, if you wish to maintain the stance that hosting is not something you’re interested in getting into and you would rather focus solely on your area of expertise as a design and development partner, perhaps eventually expanding into offering other services like SEO, then going with a managed WordPress hosting provider – depending on the site – can make more sense for your business.
Less Control
When you go with managed WordPress hosting, you are tied into their ecosystem of how you can scale sites, and traffic and how you can optimize when you reach a certain point, i.e. can you decouple your database and use a dedicated database server & do you need to pay $100/month to enable Redis caching because your host offers it as an add-on? All of these are out of your control and tied to how your managed WordPress hosting provider wants you to handle them.
When Can Managed WordPress Hosting Make Sense?
We would distill the ideal customer profile of managed WordPress hosting providers don’t
To make the distinction of when to choose managed WordPress hosting over a solution like RunCloud (and vice versa), you can distill things into 2 ideal customer profiles:
The business owner who is not interested in having extra work to do, just wants things taken care of so is willing to pay a managed WordPress hosting provider.
The businesses that have the technical talent but don’t want to capitalize on WordPress hosting as a part of their business model (as a part of a strategic choice to focus on what their core service is, missing out on recurring revenue as a result, but this can be the right way to go of course).
While using a solution like RunCloud doesn’t require you to be a SysAdmin or expert by any stretch of the imagination, realistically anyone who can use WordPress to a decent level will (perhaps with some help from our incredible support team) get up & running, it is still slightly more involved than going with a managed WordPress hosting provider.
So if we go back to the two profiles above, it really comes back to what you want your business model to be. Do you want to take ownership of the hosting layer and become the expert or do you want this to be taken care of by a managed WordPress hosting provider that staffs a team of experts?
Or, better yet, a mix of both? This is what quite a few of our customers do.
For agencies that host sites for their clients but not all client sites are alike, some have bigger budgets and some have more complex sites. When there’s a site that’s too big for the agency’s appetite for managing in-house (with their current team) on RunCloud, they offload it to their managed WordPress hosting provider of choice. While the majority of sites tend to fall within the type of sites they want to manage in which case they choose RunCloud which makes total sense, because it really isn’t a completely black & white choice, and fortunately, isn’t an all or nothing choice either.
Managed WordPress Hosting vs. Shared Hosting
Now although this isn’t the focus of the article, there is one thing we do want to mention and that is shared hosting. Yes, we’re thinking exactly what you’re thinking – subpar support and terrible performance.
When To Avoid Shared Hosting?
Our personal stance on shared hosting is that it almost never makes sense for any kind of serious business owner. Sure, we’re well aware that the shared hosting providers in the industry occupy a very significant portion of the market share but realistically that is because many people that use WordPress aren’t necessarily running a business or working to accomplish something with their websites.
For the price of most shared hosting providers, you can easily maintain your infrastructure with RunCloud at a fraction of the cost so referring clients (if you’re a design and development agency) to a shared hosting provider is really just a huge missed opportunity. Because you’re both not going to satisfy them with your recommendation (given they are likely to not be happy with their experience) and will miss out on keeping them as a customer as a part of a hosting & support service offering.
After Action Report – Get Ready To Own The Hosting Layer & Grow Your Business
Now that you know how to decide on when to use or better yet, the type of sites it may make sense to host with a managed WordPress hosting provider, let’s take a moment to talk about how you can own the hosting layer and use it to grow your business.
Traditionally, managing your infrastructure with cloud providers like DigitalOcean, UpCloud, Vultr, Linode, AWS, the Google Cloud Platform (and more) required you to be extremely familiar with Linux to the point where you could essentially consider yourself a self-taught SysAdmin.
Fortunately thanks to RunCloud, this is no longer the case. Managing your own infrastructure, deploying servers with DigitalOcean of UpCloud all the way to setting up WordPress sites on those freshly-deployed servers can all be done in a matter of minutes. And, if you do run into any issues, you have a friendly support team of real people ready to jump in to help.
This only begins to scratch the surface of how you can use RunCloud, but here are some of the things you can expect to enjoy when managing your infrastructure with RunCloud:
Easy server deployments
1-click WordPress installation
Built-in tools for file management, Cron jobs, and more
1-click staging environments
Server and site monitoring
Server statistics and health checks
Atomic Deployment
Integrations with GitHub and Bitbucket
24/7 friendly & human support team
Built-in backups (including to external providers of your choice, i.e. S3 Buckets & more)
What really separates RunCloud from other similar solutions is ease of use and support. Other newer providers that throw together some copied version of what RunCloud offers come and go, we’ve been here for years and aren’t going anywhere. And we aren’t basing our product development timeline off of competitors.
One-click SSL, seamless integration with Cloudflare, and more make managing dozens of websites as a company of one (or more with a small team) is all possible with RunCloud.
Bonus: If I Do Choose To Go The Managed Route – Which Managed WordPress Hosting Providers Can You Recommend?
So, if you’ve made it to the end of this article and still have a specific use-case for managed WordPress hosting – this is a handpicked list (based on the hosting providers our team has actual experience with). These are all hosts that we can wholeheartedly recommend and are very well-reputed in the industry.
Servebolt
Servebolt is a next-level, high-performance managed hosting provider with a strong focus on scalability. Whereas most such hosting companies are built on other platforms, such as AWS or GCP, thereby limiting the extent to which they can optimize their service, Servebolt has built and maintains its own Linux distribution – and controls the stack from top to bottom. As such, they’re able to optimize for raw performance at every layer of their stack.
Built for true scale and raw performance
Friendly customer support
A hardcore approach to performance
Consistently outperforms all other managed hosting providers in independent WP Hosting Benchmarks across all tiers.
If you already aren’t using RunCloud to manage a server deployed with DigitalOcean or UpCloud, it makes sense to go with a hosting provider that hasn’t just built their infrastructure on top of AWS, the Google Cloud Platform, etc. Because maintaining their own hardware is what allows Servebolt to achieve the performance and optimize the stack from top to bottom while the other managed hosting providers (although we still recommend them) are simply powered by AWS and the Google Cloud Platform.
It’s also worth noting that Servebolt does not impose a limit on PHP workers, something we highly recommend when choosing a hosting provider, especially when looking at managed WordPress hosts which are by no stretch of the imagination extremely affordable. A limit on PHP workers is something that a lot of managed WordPress hosting providers like to do in order to throttle performance when your site starts to scale and charge extra to “add extra PHP workers to your site” to keep charging you more as you grow. Charging more as your site grows is fine, server costs will trend upwards as your site grows but throttling performance as a means of achieving this is not something Servebolt (nor we at RunCloud) are advocates for.
Pagely
Pagely is an enterprise-level WordPress host and is easily the most expensive service on this list. If you want a host to take care of all the heavy lifting and provide a premium, near hands-free experience, then keep reading.
World-class server speeds powered by AWS Cloud
Superb customer support (live chat and tickets)
Free SSL, CDN, and backups
Optimized WordPress sites
Simple staging tools
Automatic site-wide updates
Efficient hosting for eCommerce
Pagely’s higher pricing plans allow bigger businesses to host 30 to 60 websites and more. As a solution for enterprise companies, Pagely takes security very seriously. You’ll be protected against DoS/DDoS attacks and have all plugins up to date. Pagely also developed its own security architecture called PressArmor. Finally, since nothing is 100% safe, Pagely will automatically back up your website at no additional cost.
A premium price also requires stellar support, which Pagely proudly offers. Basic support means sending tickets and having access to live chat (only during business hours). If you opt for a more expensive plan, you can get access to phone calls and even have your own personal Slack channel.
Kinsta
One of the largest managed WordPress hosting sites in the industry, Kinsta caters to a wide range of customers, including new business owners as well as enterprise-level clients.
Whether you’re a small business or one that’s almost a household name, Kinsta has a pricing plan ready for you. In this review, we’ll be focusing on Kinsta’s cheapest pricing option, the Starter plan.
Here’s what you can expect from working with Kinsta:
Site staging features
Automatic database optimization
Automatic daily backups, with the option to create manual backup points
Free SSL
Limits on the number of PHP workers per site
24/7 live chat support team
It’s important to note that Kinsta doesn’t offer unlimited visits and CDN. Each plan has a monthly visit limit and if your visitors go past that number, you’ll be charged extra (notified ahead of time).
As a separate point, it’s worth keeping in mind that depending upon which plan you choose, you will have a cap on the number of PHP workers active on your site. For basic, static websites this is not generally a problem, but more dynamic sites should take this into consideration when comparing their options.
In addition, Kinsta also does not include server-level caching (Redis) that works for dynamic sites unless you pay an additional fee as they separate it from their plans to sell it as a premium add-on.
Still, the support team behind Kinsta feels passionate about their work. The reviews on Kinsta’s support team are some of the best you can read in this industry. If you’re a business with a sizable number of employees, Kinsta makes team management a breeze. You can add unlimited users to your site and easily set roles or permissions for each user.
As for security, Kinsta will fix your website for free if it’s hacked. Which frankly is unlikely given the GeoIP blocking, DDoS scanning, and other features that are protecting your site as standard. The only notable downside to Kinsta is their inability to provide an unlimited plan and their list of blocked plugins (to avoid slowing down the servers and your site).
All in all, Kinsta is a very flexible managed WordPress host. They have 10 pricing plans incremented by $100s from $30 all the way to $1,500. You can also save 2 months’ worth of hosting payments if you pay annually.
WP Engine
WP Engine is an all-around managed WordPress host with a long portfolio of innovation and consistent service.
The managed WordPress hosting service is specifically designed to manage WordPress sites. With patented optimization tools, good customer support, and a range of premium features, WP Engine is an affordable alternative that offers reliable quality.
Here’s what you can expect from using WP Engine:
24/7 customer service
Daily backups
Staging site features
Simplified website managing process
Reliable performance when it comes to speed and uptime
Quick and easy WordPress migration and installation
Premium themes
Automatic site-wide updates
Free fix in case of hacking incidents
WP Engine has a good list of features to help you build and maintain a solid website. Since their entire framework is specifically designed for WordPress, you’ll also be benefiting from consistent loading times and server speed.
If you’re looking for an entry-level managed WordPress host that executes all the basic features of a WordPress host well, then WP Engine makes a good case.
Beginner-friendly and inexpensive, WP Engine is a great option for new business owners. For those of you who have more websites and demands to solve, WP Engine also offers enterprise-level solutions with a pricing system that’ll be specific to your needs.
Autoptimize is a popular WordPress plugin to optimize your WordPress sites with more than 1 million active installs and around 1,200 five stars reviews at WordPress.org.
In this post, we’ll discuss how to use Autoptimize to improve the performance of your WordPress websites.
Who needs Autoptimize?
If you use lightweight WordPress theme/plugins in your WordPress site, you probably do not need any extra optimization. You only need to use a cloud server, and your WordPress will be fast. In this case, adding server-side page caching like RunCloud Hub is more than enough to improve WordPress performance.
But when you use a WordPress theme and some plugins that add extra JavaScript and CSS files to your site, you will probably need Autoptimize to improve your site performance.
In fact, Autoptimize and RunCloud Hub are a perfect combination to optimize your WordPress site.
Autoptimize works on the WordPress side to optimize your JavaScript / CSS / HTML files on your web page, and RunCloud Hub works on the server-side to cache the optimized version web page.
JavaScript Optimization
Autoptimize comes with some options to optimize JavaScript files on your web page. These JavaScript files come from WordPress core, theme, and active plugins. When you enable the “Optimize JavaScript Code?” option, JavaScript files will be minified and compressed to reduce the file size. A smaller JavaScript file size will make your web page more lightweight.
By default, the setting for JavaScript is “don’t aggregate but defer” and “also defer inline JS” and no exclusions. Aggregation is off by default since the number of HTTP requests aren’t as important with HTTP/2.
These two default options are enough for many WordPress sites to both minify and combine JavaScript files.
Please remember that these options work on your web page only if you have well-coded JavaScript codes. If you use a theme/plugin that has poorly coded JavaScript codes, these options can break some features in your web page that rely on JavaScript.
If these options work nicely on your site, then you can stop here or explore other JavaScript optimization features. You can also add a list of scripts that you do not want to optimize.
CSS Optimization
Autoptimize comes with some options to optimize CSS files on your web page. The main CSS files come from your active WordPress theme that controls the visual presentation of your web page. Other CSS files can come from your active WordPress plugins.
CSS aggregation is off by default, though you can enable it with a click. Please remember that these options work on your web page only if you have well-coded CSS codes. It’s off by default to prevent any major issues.
If you use a theme/plugin that has poorly coded CSS codes, these options can break your web page layout.
If these options work nicely on your site, you can try to enable the “Also aggregate inline CSS?” option. Autoptimize will aggregate CSS in the HTML.
HTML Optimization
HTML optimization is a bonus after you optimize JavaScript and CSS files in your site.
Enabling the “Optimize HTML Code?” option will minify the HTML output of your web page. It will make the HTML output code not easily readable, but the file size will be smaller.
Extra Optimization
Autoptimize has some extra auto-optimization options under the Extra tab.
Google Fonts Optimization
You can use this option to optimize Google font loading on your website.
We recommend using either the “Combine and link in head” or “Combine and link deferred in head” option. Please test to see which one works best on your site.
You can enable this option to remove WordPress core emoji’s inline CSS and inline JavaScript, except you use this emoji feature on your website.
Remove query strings from static resources
If you enable JavaScript and CSS optimization, this option is no longer needed.
But if you disable JavaScript and CSS optimization, you can try to enable this option.
Please remember that this option will not improve your web loading time and performance, but it might improve performance scores when you test your website using any page speed testing tool.
Remove global styles
Introduced with WordPress 5.9, global styles often add CSS & scalable vector graphics (SVG) to your pages automatically. An option is now available to remove global styles.
Critical CSS / Above-the-fold CSS
The CSS optimization in Autoptimize is enough to optimize your CSS files on your site. The optimized CSS file is loaded in the head with render-blocking. You probably know that Google Page Speed Insight complains about render-blocking CSS on your site. If you really want to optimize your website for Google Page Speed Insight, you will probably need above-the-fold CSS.
The idea is simple. Above-the-fold is all the content you see on page load, before scrolling. Above-the-fold CSS or critical CSS will be loaded inline on the head to render the content to your user as soon as possible. Other CSS files will be loaded later in non-render blocking after page load.
YES, critical CSS is part of CSS optimization, but not everyone needs it.
There are two ways to use critical CSS in your site using Autoptimize.
Same critical CSS for all pages
If you think you can use the same critical CSS for all pages, you can use the “Inline & defer CSS” option under the CSS Optimization section.
You can check this list of tools to generate critical CSS for your website.
Different critical CSS for different pages
In this case, you will need to sign up for a premium service criticalcss.com to generate different critical CSS for each page on your site automatically.
Rules Panel
A rules panel is now available to help users create manual rules, even if you do not have a Critical CSS API key.
Misc Options
You will probably see some options in the “Misc Options” section. If needed, you can enable all of these options.
The “Save aggregated script/css as static files?” option is very important to cache the optimized JavaScript/CSS files as static files.
This is why you will see the “Autoptimize – Delete Cache” option on the admin bar to allow you to remove the optimized JavaScript/CSS files, and it will be regenerated again.
If you use RunCloud Hub and Autoptimize combo, when you click “Delete Cache” on Autoptimize, it will automatically clear RunCloud Hub caches. And when you click “Clear All Cache” on RunCloud Hub, it will also automatically clear Autoptimize caches.
You can now “Enable configuration per post/page?” to change settings per page, or per post, which is ideal for optimizing Largest Contentful Paint for your site.
After Action Report — Autoptimize Helps Boost Site Performance
Autoptimize is a popular WordPress plugin to optimize JavaScript / CSS / HTML output of your web page to improve your WordPress performance. With its latest string of new features introduced in version 3.0.3, Autoptimize is a fantastic choice if you have additional CSS and Javascript files on your site. Do you use RunCloud’s server-side caching & are considering pairing it with Autoptimize? Awesome, feel free to join the conversation below to share your experience. 💬
WordPress website errors can be annoying to deal with. There’s never a one-stop solution for these problems, and a vast range of causes, from themes and plugins, causing compatibility issues, to out-of-date software and even web hosting problems.
A WordPress HTTP 500 server error is something no web developer wants to see. It can damage the rankings of your website and decrease user experience if left unattended for too long. Google is quite particular about broken links and the HTTP 500 error is counted as such.
In this article, we’ll be going over everything you need to know about the 500 server error. We’ll talk about why it happens, the general and technical solutions you can do to fix it, and how you can avoid this error in the future.
Let’s start troubleshooting.
What Is WordPress HTTP 500 Internal Server Error?
The HTTP 500 server error is when your page doesn’t load or can’t be accessible. It’s a generic error response that means the server couldn’t fulfill your request. There are multiple variations of the error. Here are some common examples:
500 Internal Server Error
Temporary Error (500)
The website cannot display the page – HTTP 500
As long as there’s a “500” attached, you can safely consider it an HTTP 500 error and the steps below should resolve this issue for you.
What Causes HTTP 500 Internal Server Error?
This internal server error can be caused by a lot of things, usually server and file-related cases. Example causes for this are:
Corrupt or badly installed WordPress theme
Incompatible or compromised plugins
PHP version incompatibility
Corrupt .htaccess file
Problem with your host server
Thankfully, you can fix most of this yourself, but it’s always a good idea to consult with your web host from the start, just to make sure that issue is not on their end.
General Fixes (Try These First)
These general fixes are steps you can do that don’t involve configuring your WordPress website and changing the settings. The steps below are simple to do and are great to get out of the way before you start going into the more technical fixes below.
Open page on a different browser or use Incognito mode
Try opening your page or website on a different browser or by using incognito mode. Using a different browser would be best here. Better yet, try opening your webpage with someone else’s computer.
If your website or page opens on your 2nd browser or elsewhere, then the problem might have to do with the caching or cookies of your 1st or default browser.
Clear browser cache and delete cookies
Browser caching stores useful webpage data in local storage, so that when you revisit that site, your local cache can load the site from there. This is especially useful since most websites don’t make huge changes and caching makes things faster for you. Unfortunately, if something does change, there’s a chance that the old information your browser is storing might cause an error on your side.
NOTE: Clearing your browser cache and cookies will completely log you out of all the websites. Only go through this step if you can open your page on another browser or another computer.
Clearing your browser cache and cookies will fix this problem, by loading the webpage from scratch. Now, the process for clearing cache and cookies is somewhat different for all browsers, so we’ll only cover the steps for Google Chrome since that’s the most used browser.
On your Google Chrome browser, click on the top-right icon with the three dots (⋮).
From there, click on More tools and go to Clear browsing data.
You can choose a time range, but generally, we’d go with All time.
After that, check the boxes for:
“Cookies and other site data”
“Cached images and files”
Click on Clear data.
Once you’re through with that, try loading your website now and see if you still get the HTTP 500 Error.
Flush your DNS
A Domain Name System or DNS is like the internet’s translator between you and servers online. Your DNS stores IP addresses that you’ve been to just like a cache system. So, when you search for sites like RunCloud.io or Facebook.com, your browser can just get the IP address from the DNS instead of searching for that IP through the internet.
If an IP address changes or the DNS is compromised, it will result in providing an IP address that doesn’t work. Flushing a DNS is another way of clearing the DNS cache, so you can update and resolve connectivity issues like the HTTP 500 Error.
Close your browsers first.
Next, press the Windows + R keys to open the Run dialog box.
Type in ‘cmd’ and press Enter.
On the command prompt, type in command ‘ipconfig /flushdns’ and press Enter.
For Mac users, here’s your step-by-step process:
Open up Spotlight by pressing Command + Space.
Type in ‘Terminal’ and press Enter.
Copy-paste the following command into the Terminal: sudo dscacheutil -flushcache;sudo killall -HUP mDNSResponder and hit Enter.
You’ll be asked to enter your Mac password. This is normal, the Terminal is just asking for verification.
There’s no success or ‘operation complete’ message from Terminal when you’re done flushing your DNS, so don’t wait for one. Once you’ve completed the steps below, reload your browser and see if it fixed the issue. If the 500 Error is still there, let’s start with the more technical fixes below.
How to Fix The HTTP 500 Error – Technical Fixes
Contact Your Host
Before we proceed, contact your host and ask their support team for help first. Although there’s a good chance that the problem is with your WordPress files, having your support ticket pending as early as now will help you get a reply while you tinker with the fixes below.
Besides, there’s a good chance that your host’s support team can help you with the technical solutions anyway.
PHP Version Incompatible
Another reason you have this problem might be because of different PHP versions. Some hosts automatically update their PHP versions, which can result in errors if your WordPress theme or plugin is outdated. For this problem, you’ll want to talk to your host first and include this query in your ticket request.
Backup Your Website
Backup your website first. While the steps below shouldn’t compromise your site, it’s always better to be safe and have a backup. Depending on your provider, you may already have a daily backup that you can just fall onto if you need it.
Otherwise, you can backup your site using a backup plugin. Here are a couple you can use:
A corrupt .htaccess file is one of the common reasons why the HTTP 500 Error happens.
The .htaccess file controls many of your website’s configurations, including URL redirects and loading custom error pages. It’s like the directory and navigation system of your site. Getting this file corrupted can result in HTTP 500 Errors, among many other possible problems like 404 messages.
NOTE: configuring your .htaccess file can be difficult for beginners and you may do more harm than good to your site if you mess with the file’s settings. In this fix, we’ll only be disabling the current .htaccess file so your website can make a new one. Ideally with no errors.
Connect FileZilla or SFTP of choice to your website.
Go to the directory that stores folders like wp-admin and wp-content, then look for the .htaccess file.
When you find it, right-click the file and rename it to ‘.htaccess-old’.
Refresh your website and check if the error message is gone.
If the error is fixed, then your old .htaccess file is corrupt and producing the error. Here’s how you can create a new .htaccess file:
Open the WordPress dashboard and go to Settings.
After that, look for Permalinks and open that menu.
Create a new .htaccess file and configure it as Plain.
Click on Save Changes.
Change the permalink structure to whatever works for you and click on Save Changes when you’re done.
That should recreate a new .htaccess file for you. Reload your website and see if it fixes the issue.
Check Your Plugins
Did you recently install a new plugin or update a plugin’s configuration settings?
Plugins are a great way to elevate your site, but they can be an arrow to the knee when you have too many. They may conflict with each other or be outdated from lack of maintenance. Either way, checking your plugins is a great place to begin. Start by deactivating the most recent plugin you installed and then check your website for the error. Here’s how you can do that:
Open your WordPress admin panel. The URL for that is www.sample.com/wp-admin but replace ‘sample’ with your website name.
From there, go to Plugins.
With all your plugins listed out, look for the most recent plugin you installed and disable that.
Open your website on another tab and see if it fixed the HTTP 500 Error.
Repeat this until you’ve gone through most, if not all, of the plugins.
If the error still persists, it’s safe to assume that it isn’t because of your plugins. You can reactivate them all again.
On the other hand, if the problem is fixed and the error disappears by disabling a plugin, activate all your other plugins one-by-one until the error pops back up. The remaining disabled plugins should be the main culprits. To fix that, you can either update the plugins or replace them with an alternative.
If updating the plugin doesn’t solve your problem, try Googling your current case. Chances are that other WordPress users have also come across your problem and may have the solution.
Reinstall or Switch Your Themes
Are you using a new theme or is your theme outdated?
A new theme can break pages in a site, especially if it isn’t installed properly. Before you reinstall your theme, try switching to your old theme or with a default WordPress theme like Twenty Sixteen. Does the HTTP 500 Error still occur? If yes, then the new theme might be the problem. If not, we advise you to move to the next solution.
Now, changing your theme can be risky if you’re inexperienced. Issues like incomplete theme files, installing the wrong version of a theme, and more can occur and possibly increase your problems. We suggest only doing this if you’re either familiar with manipulating WordPress files already or have a backup of your website that you can simply restore.
Here’s the step-by-step guide on how to do that:
Connect FileZilla or your SFTP of choice to your site.
Look for your wp-content folder and then go to themes.
Find the folder with the theme you’re currently using and rename the theme folder into ‘themename-oldver’. Adding ‘-oldver’ will help you identify your old theme from your new one.
Now, install a fresh copy of your theme like you normally would.
Alternatively, some drag-and-drop builders like Themify and Elementor allow you to easily re-install themes from the WordPress dashboard. The steps for these differ from builder to builder, but try looking for your theme and go over the options. The re-install button should be there.
Once done, the fresh theme should retain all your settings and personalizations. Verify if everything works correctly and open the problematic pages that had the HTTP 500 Error. If the problem is fixed, then your old theme probably has an issue. You don’t have to delete your theme’s old copy. Keep it there just in case, you can even change the label and add a date to it.
Check File Permissions and Make Sure Your Account is Permitted
File permissions determine who can read, write, and execute the files of your WordPress site. If you were setting up new permissions or creating a new type of user, the permissions file may have been mishandled.
Although fixing the permissions is pretty straightforward, it’s a repetitive process. Here’s how you can check file permissions and then set them correctly:
Open up FileZilla and connect it to your website.
Look for your wp-content first and right-click the folder.
Select File permissions.
In the new dialogue window, you can set permissions for three types of users: Owner, Group, and Public. Here’s what they mean:
Owner – owner of the website
Group – any staff you set that can handle and access the WordPress dashboard
Public – anyone who opens your website.
As a good rule of thumb, the Owner should have all the boxes checked, and the Group and Public are only permitted to ‘Read’. You’ll want to make sure that the page with the HTTP 500 Error has the permissions set correctly.
The Numerical value there is typically set to ‘644’ for sets and ‘755’ for directories and executables. This could be different with your host though. So, if you’re unsure about the correct values you can wait until you contact your host’s support team or Google the numerical value of your host.
Repeat steps 3 to 5 but with the folders and files that are having the HTTP 500 Error.
Insufficient PHP Memory Limit
For those of you who are experiencing the HTTP 500 Error on the WordPress admin dashboard side, then this fix might help.
The PHP memory limit for your site is usually enough for most things, but it can sometimes hit a limit when you’re uploading files or trying to publish a new post.
Open your Notepad or VS Code.
Type in ‘memory=64MB’ and save the file as ‘php.ini’.
Open up FileZilla and connect it to your website.
Look for your wp-admin folder and upload the php.ini file there.
Reload your WordPress admin dashboard and see if the error still persists. If increasing your PHP memory limit worked for you, then you’ll have to contact your host for some extra help.
Again, since the PHP memory limit on your site is usually enough for regular WordPress usage, hitting the limit so frequently is still a problem. You might be running a plugin that’s inefficiently coded or have a theme function that slows down your whole site. To assess this problem, we recommend asking your host to check this for you themselves. Their support team might have a better idea of what to disable and what alternatives to use.
Fortunately, if you’re using RunCloud – this couldn’t be easier.
You can increase your PHP memory limit straight from your RunCloud dashboard for any of the web applications you have on a server connected to RunCloud.
Simply navigate to your Web Application’s Settings in your and increase the value for the memory_limit there. Ensure you hit Update PHP Settings so your changes are applied. And that’s it!
This should resolve the issue for RunCloud users.
Restore Your Site With a Backup
Although this step is often cited across other sources, we don’t recommend you restoring or reinstalling your entire website through a backup. The chance of your personal WordPress files causing the HTTP 500 Error is low, while the risk of restoring your site with a backup as an inexperienced WordPress user is higher.
Some hosts backup your WordPress site for you as part of their payment plan, so just contact their customer support team. They’ll probably fix your problem before having to restore your site to a previous backup anyway.
Reinstall Core WordPress Files
Core WordPress files, however, are a different matter. These WordPress files are the skeletal system of your site and any issues with the files will certainly have a significant impact on your website. Thankfully, reinstalling WordPress isn’t complicated. Here’s the simplest way to do it:
Open your WordPress admin dashboard.
Navigate to Updates. You’ll find it below the Home tab to the left of your screen.
On the WordPress Updates page, look for and click on Re-install Now.
WordPress will automatically start downloading on your device and will reinstall with the latest version to your site. This shouldn’t take too long since the WordPress file itself is pretty small.
If you can’t access the WordPress admin dashboard, you can try reinstalling WordPress with your SFTP. You’ll need some sort of file archiver tool to unzip the file. If you don’t have one, you can use WinRAR.
Before you proceed with the steps below, we recommend backing up your website just to be safe. While you’ll only be overriding your old WordPress files with new ones, backing up your site is just good practice.
Open up WordPress.org and download the latest WordPress version. The button will be at the top-right corner of your screen.
Once the download completes, right-click the WordPress zip and look for Extract Files…. Click on that option.
A prompt will appear on your screen asking for confirmation, you can say Yes to all of them so you can start extracting the files.
When the file is done extracting, you’ll find a ‘wordpress-versionxxx’ folder. Open that and delete wp-content.
After that, open up FileZilla or any SFTP and connect it to your website.
Copy-paste all the files from the ‘wordpress-versionxxx’ folder to your root folder. This is typically named public or public_html.
FileZilla or the SFTP you’re using will open a prompt saying ‘Target file already exists’. Click on the Overwrite option and select Ok.
Your computer should start overwriting the old WordPress files with the new ones you just downloaded. This will overwrite all the core WordPress files without touching or deleting any of your themes, plugins, and overall content.
This should be the last fix you need to fix the HTTP 500 Error once and for all. If you’re still getting the HTTP 500 Error, make sure that you’ve contacted your host’s customer support team.
How to Prevent the HTTP 500 Error From Happening?
Prevention is better than a cure and that’s especially true with website errors. HTTP 500 Errors can negatively impact your website’s SEO and it may take you weeks or even months before finding these errors yourself. Here are some routine tips you can use to prevent the error from happening again.
Update your Plugins
Make sure that all your plugins are updated. Outdated plugins that are no longer supported by your PHP version can cause these errors, even more so if that plugin is responsible for a large portion of your site.
Keep File Permissions Up To Date
Whenever you create a new user or try to reconfigure your permissions, make sure that everything is in order before you close SFTP. Incorrect permissions, especially when creating new roles for your staff can create these HTTP 500 Errors.
Use WordPress Debugging
Still getting the error? Hopefully, your host has replied by now. This step is completely optional, but it can speed up the process of either looking for other solutions or providing your host with more information.
The debugging feature shows you specifically where the error is coming from. This will be valuable information for your host, as well as providing you with error messages you can copy-paste in Google to hopefully find someone who’s had the same specific error as you.
Keep in mind though that the debugging logs can be intimidating to understand if you’re new to server management. If you don’t understand the logs that come out from the debugging, at least you can present them to your host or support team to help them fix your problem.
Here’s how you can turn debugging on.
Open your Secure File Transfer Protocol (SFTP) app. If you don’t have one, the industry standard is FileZilla. Download and install the client from the link provided.
To connect FileZilla to your site, open FileZilla.
Click File and go to Site Manager.
Enter the ftp address of your website in the Host box. Here’s what that looks like: instead of http://www.sample.com the ftp address is ftp://ftp.sample.com or ftp://sample.com.
After that, just leave the Port box blank. The default value there should be 21 and you don’t need to change this unless indicated otherwise.
From the Logon Type box, select Normal.
Next, type in your full username in the User box. This can be a proper username or an email address, it depends on how your website was set up.
Finally, enter the Password.
FileZilla should now be connected to your website after these steps.
From there, look for and open the wp-config.php file. You don’t need a code editor for this step, but you can download VS Code if you prefer the cleaner interface instead of just the default Notepad.
With the wp-config.php file open, add the code below:
define( ‘WP_DEBUG_LOG’, true);
Save the .php file and reload your website.
Any errors that come out of your site should now be logged to your debug.log file. You can find that under the /wp-content/ directory with FileZilla. Don’t forget to change the value from true to false when you’re done debugging.
Now, just send your host the debug.log file so they can fix your issue.
After Action Report — Fixing The WordPress HTTP 500 Error
The WordPress HTTP 500 Error is a cumbersome problem to fix. It’s vague, which makes troubleshooting rough. We’ve arranged the steps above to go in order of importance, so hopefully, you were able to resolve this issue without having to reach the very bottom.
Which fix worked for you? If none of them did, how did you manage to resolve this issue? Let us know in the comments below!
The GDPR is Europe’s newest law on privacy and security. Despite applying only to citizens from European Union, websites with visitors from the EU are also affected by the new law. This means websites that offer information or products that EU visitors may intentionally or unintentionally visit. More on that below.
In this article, we’ll go over what this means for your website, how Google Fonts exactly violates the GDPR, and what you can do to fix this issue.
You don’t have to say goodbye to Google Fonts, just following the guide below.
Disclaimer: This article doesn’t provide any legal advice.
How Google Fonts Work
Google Fonts generally seems harmless. It’s a collection of fonts that beautify your site, optimize its performance, and even help avoid licensing hassles for you later on.
The problem starts when your computer, or your reader’s computer, opens your website and automatically requests the Google Fonts files from Google’s servers. For Google to send you the font, it has to know where to send it first and that means collecting your IP address. That specific action is what violates GDPR but before we elaborate on the problem, let’s cover what GDPR actually is.
What is GDPR?
The GDPR, or General Data Protection Regulation, is the official regulation set to effect back in May of 2018 with the sole purpose of protecting the data and privacy of EU citizens. Since the law focuses on protecting the individual, all websites one visits are obligated to honour GDPR, which means that every website that accepts visitors from European Union needs to be GDPR compliant.
But why after all these years are we hearing about the GDPR again?
Why GDPR Matters — You Have To Care
On January 20, 2022, a court in Munich, Germany, ruled that a website owner must pay €100 in damages to an undisclosed website visitor. The damages involved sending the visitor’s IP address to Google through the server request for Google Fonts. This means that any European citizens who visit your website and request Google Fonts from Google’s servers are visitors who have the right to sue you for violating their data.
To drive the point home, the GDPR applies outside of Europe. The whole point of the GDPR is to safeguard the personal information of European citizens. So even if you’re from the USA or any other country in the world, if someone from the European Union visits your site, you’re still accountable for any infringements made against the GDPR and your EU visitors.
These infringements could result in getting sued and being fined up to €20 million or 4% of your global market share. Whichever is higher.
Why Using Google Fonts Violates GDPR
It can be confusing to understand why using Google Fonts, which should just be a way to style your site, breaches the GDPR privacy law. To help boil it down to something simple, we’ll go through the step-by-step process of how Google Fonts violates the GDPR.
Here’s what happens when someone opens your website:
A visitor lands on your website
In order to display the content visitor wants to see, he has to download the website
Google Fonts is part of your website but you don’t have the font file hosted locally
So, the visitor has to request the Google Fonts file from Google’s servers.
In order for Google to know where to deliver the desired font, it uses visitor’s IP address
The Google server records the IP address of your visitor and sends them the Google Font file.
Your website loads with the provided Google Fonts file. But, Google doesn’t delete your visitor’s IP address.
If someone from the European Union is a website visitor, then Google storing the European citizen’s IP address breaches the GDPR privacy act.
To rephrase: Whenever a visitor opens a page on your website, the visitor’s IP address is also sent to Google. Why? Because Google needs the visitor’s IP address to send the Google Fonts files to your visitor.
So, can you just keep a copy of Google Fonts files on your website host to avoid Google connecting to your visitors? Well, yes you can.
Alternative Solutions To Using Fonts While Being GDPR Compliant
As long as Google doesn’t get the IP address of your visitors through Google Fonts, your website is in the green zone.
Here’s what you can do to avoid getting fined or sued for violating the GDPR with Google Fonts.
Host Google Fonts Locally
Locally saving the Google Fonts resources to your website server eliminates the need to get the resources from Google’s servers.
You can do this by downloading the Google Fonts files and uploading it to your web host. After that, you’ll have to add some rules to your CSS files regarding the font-face of your pages.
This can be a bit technical, especially if you don’t have any CSS or coding experience in general.
Use The OMGF WordPress Plugin
For those of you who are using WordPress, the best plugin for this purpose is OMGF.
OMGF automatically downloads the Google Fonts your WordPress site uses and generates a stylesheet for it. The sheet is integrated into your site’s header and loads locally together with everything else hosted on your web server.
Keep note that OMGF will work for most sites, but there are some themes and plugins that make it difficult to retrieve Google Font data. If you have difficulty with this on your site, you can try the OMGF Pro version or skip to the next two plugins on this list.
You can search for other similar plugins, but we chose OMGF because it was developed by a reputable source that spotted this issue years ago.
Use System Default Fonts
Finally, the simplest solution you can revert to is to simply use the default system fonts. These fonts are already stored locally in your WordPress servers, so your visitors will no longer have to connect with Google.
Granted, the obvious downside to this is the lack of creative freedom with fonts and limited choices.
Can you use Google Fonts and be GDPR compliant?
Yes, you can use Google Fonts and be GDPR compliant. The only time Google Fonts breaches the GDPR terms is when served via their content delivery network and no permission to send Google your website visitors’ IP addresses has been received.
If you can severe the need for your visitor to expose their IP address to Google, you can keep using Google Fonts on your website. To severe the connection between Google and your visitor, you can either locally host Google Fonts on your own website or revert to using WordPress’ system default fonts
Conclusion
The GDPR is a European law that protects the information of EU citizens. The law applies to websites all around the world, as long as it involves the private data of European citizens. Google Fonts breaches the GDPR because EU visitors have to send Google their IP address to ask for Google Fonts files when loading your website.
By locally hosting Google Fonts on your website, you’ll eliminate the need for your visitors to give Google their IP address. Meaning that yes, it is still possible to use Google Fonts and not directly violate GDPR.
WordPress is one of the most popular environments for building websites in the world, and one of the reasons it’s so great is because it’s incredibly flexible and you can manipulate it however you want.
In this article, we’ll talk about installing WordPress locally on your computer (Windows and Mac) and some benefits you might have for doing it.
Why Install WordPress Locally
Many developers and average users have WordPress installed locally — some for business reasons, some for private reasons. In general, a local WordPress setup can be extremely beneficial on multiple levels. Here are some of the best pros.
Learn and Develop Your Skills
If you want to become a pro at developing websites on WordPress, you must practice using it to learn about its features. For beginner WordPress developers, using it offline is the best option as you can make any necessary changes frequently, without worrying about how it affects the site.
Test New Features At Your Convenience
A live environment is not suitable for testing new features, because it can have a negative impact on the reputation of your site, as well as your business. So, you’re better off testing them locally and you will get a clearer idea of the themes, plugins, and other features.
Work Freely In Your Isolated Dev Environment
Your isolated dev environment is your playground to play with fresh codes, new features, etc. You can use all your creativity to implement new ideas without any risk of affecting a live project. As a result, you get to enjoy great flexibility in the locally running WordPress.
Get High Performance At Low Cost
As all the stages are running without an internet connection, you will get a much faster experience than you would online. And, using all the free software will save you a lot of money. Therefore, a local WordPress environment is also a financially convenient option.
Test New Updates
A local WordPress environment allows you to test new updates from features before applying them on your live site. This will give you a clearer idea about the latest security patches and the convenience of using updated interfaces.
How To Install WordPress Locally with XAMPP (Windows)
WordPress is used for complete website development involving a variety of things like designing, developing, testing, and hosting. And, all these require heavy technologies like a web server, PHP, and a database (preferably MySQL). Consequently, to create a suitable environment for installing WordPress on your local machine, you need to complete the following steps:
Setting up the installation environment
Downloading a stable WordPress version
Installing WordPress on your localhost
Windows is always reliable for providing a suitable environment to install and use the most popular technologies. WordPress is no exception and can be installed easily on Windows using the following steps:
Step 1: Download and Set Up XAMPP
WordPress needs the proper environment to run locally, and that requires setting up a server on your device. You can do that by installing XAMPP or WAMP (local server builders) on your machine. Using XAMPP is comparatively easy and advantageous so, here is a guide on installing that.
XAMPP is an app that hosts web servers for your website. You’ll be opening this app every time you want to launch your WordPress site locally. On the Apache website, navigate to the “Download” section and select the version that works best with the latest PHP version. PHP is the language used in the back end of most websites.
After the download is complete, run it to install XAMPP on your system.
After this screen, you will be prompted which features you want to install, and by default, all of them will be selected — regardless of what you need, there’s no harm in having all of them so feel free to proceed with the installation until it’s completed.
Also, at some point of installation, your Windows Defender might ask you if you want to allow access to XAMPP to slip past firewall rules and communicate on your private and public networks — make sure to allow access. Don’t worry about why XAMPP asks for these permissions, it just needs to do so because hosting a web server for your website requires accessing network features.
Step 2: Start required services
After the installation is finished, launch the XAMPP control panel to set the required status for Apache and MySQL.
Make sure to “Start” these two services to install WordPress locally. If the background color of Apache and MySQL changes to green, that means the modules are working properly.
Step 3: Download and Install WordPress
Even though this process is fairly simple, we’re going to break it down into separate steps so you can follow the process closely.
Step 3.1.: Download WordPress
Once you’ve finished setting up the webserver and database through XAMPP, download the WordPress setup from the official website.
Step 3.2.: Move and extract the downloaded file
When the download is finished, move the zip file to the /htdocs folder in the XAMPP directory. Unzip it there and navigate to the project directory.
Important Notes:
Confirm the Apache and MySQL services in the XAMPP control panel are properly set and normally running.
Rename the “wordpress” folder to the name of your new website.
Step 3.3.: Create a database in the phpMyAdmin portal
Now, for creating the database of your new WordPress site, visit the phpMyAdmin portal. Though this depends on your port configuration, most likely you will get the portal on the following URL.
http://localhost:80/phpmyadmin/
After opening the phpMyAdmin portal, go to New, name the database however you want, and then click Create. This will create the database your WordPress website will use.
Once you are done with creating the database, you will have to create a new User.
Step 3.4.: Create a new User
Go to the “User accounts” tab and click on “Add new user”.
A new window will open where you get basic information about the new user.
For this tutorial, the credentials we chose are:
Username: wpuser Password: qwerty12345
Make sure to set the Host name to Local as we’re installing WordPress locally.
Below, you will need to grant permissions to the new user — make sure to click on “Check all” under “Global privileges”
After that, on the bottom of the page click “Go” — your new user should be created successfully.
Step 3.5.: Launch WordPress Installation
Now you can proceed with installing WordPress. Before you do so, don’t forget to rename the folder you extracted (from the zip file you downloaded from WordPress) to the actual name of your website.
For this guide, we decided to name the folder “newwpsite”.
Launch the WordPress installation setup by visiting the following URL in your web browser.
There you will get the option to select your preferred language. Select it and click “Continue”.
Important note: In the “wordpress” folder or “newwpsite folder” (that’s how we named it) there is no wp-config.php file, only wp-config-sample.php if you’re choosing other installation methods. This method doesn’t involve editing the wp-config-sample.php file and making wp-config.php — WordPress installation should create it by itself.
Step 3.6.: Enter credentials
After you select the language you will be using, A prompt will appear asking for the information you previously created — Database Name, Username, and Password.
Since you are installing WordPress locally, Database Host can remain “localhost”.
Table Prefix is by default “wp_” and should be left like that.
Step 3.7.: Run the Installation and set up your login information
After you submit it, you should be able to run the installation successfully.
In case you didn’t enter proper information in the credentials section, you will face an error message, and will not be able to proceed to installation — doublecheck all information from previous steps to troubleshoot possible errors.
After you click Run the Installation, WordPress will have more information to enter for a successful installation.
This information is not related to the information you entered in phpMyAdmin so choose your WordPress login credentials and the name of your website. As the note in the installation guide suggests: you can always change these later.
Click on Install WordPress after filling in all necessary information.
Now you will see the page with the success message for WordPress installation and the button to launch the WordPress dashboard login page.
This will take you to the end of installing WordPress on your local Windows machine.
How To Install WordPress Locally with MAMP (Mac)
When it comes to performance, hardly anyone can ignore macOS. For Mac installation, we’ll be using a program called MAMP. It works similarly to XAMPP, except that it’s simpler and has fewer customizations available. If you want to try using XAMPP instead, you can still follow the process below as the installation process is very similar between both apps.
Step 1: Download and Set Up MAMP
Similar to windows, WordPress needs a server to run locally on Mac. And, that’s where MAMP will get a local server and database ready for you.
So, go to the MAMP official website and download the setup for macOS.
After the download is finished, proceed with running the installation wizard. It may ask you to install the pro version. However, the free version is good enough for your purpose. So, click on the grey folder to begin installing the free version.
Once the installation is complete, which will look like this:
Simply open the MAMP controller and start the server.
When the server is up and running smoothly, click “Open WebStart page”. It will launch phpMyAdmin.
Step 2: Download and Install WordPress
The official website to download WordPress provides a specific setup file for Mac. You can download it from there.
When the download is finished, proceed with unzipping the file and placing the folder inside the MAMP document root folder. It is a useful idea to name the folder as the name of the WordPress site.
Now, from the MAMP control panel, create the database using phpMyAdmin. The good news is that phpMyAdmin works the same in Mac and Windows. Next, you can proceed with adding the name of the database and navigating to the wp-config.php file to add database credentials.
Now, visit the following URL to run the WordPress installation wizard.
http://localhost/newwpsite
Select the language and the rest of the steps are the same as Windows installation. Follow the steps and you are ready to use WordPress on your Mac PC.
How To Install WordPress Locally Using Local (Windows and Mac)
You have already seen methods of installing WordPress locally on Windows and Mac using XAMPP and MAMP local servers. Now it’s time for you to know about the simplest method of building a WordPress site on your local machine using “Local”. It is pretty much the same for both Windows and Mac.
Step 1: Install and Set Up Local On Your Machine
Though the local servers provide a nice dev environment, they can be a bit of a hassle. On the other hand, localwp.com is the easiest, most efficient local WordPress development tool. You can start the short and straightforward journey by installing “Local” from localwp.com according to the OS you use. You have to enter your name and email ID so that you can be contacted for future products and updates.
When the download is complete, run the installer file. Then you will be redirected to a start-up screen. Just click the “Let’s Go!” button there.
A few programs will be installed in order to run Local smoothly. You have to agree to the terms & conditions and click “Next” whenever prompted during the installation process.
When the installation is complete, you will find yourself on the Local dashboard.
LocalWP offers a wide range of choices — by selecting the cloud icon, you can connect to managed WordPress hosting services and make copies of existing sites or push local sites live.
Using the “Options” menu in the top-left corner, you can configure various settings and preferences. For now, we’ll focus on creating your first local site.
Step 2: Create Your Local WordPress Site
Now when you click “CREATE A NEW SITE” on the Local dashboard, you will be asked to set a name for your site.
Consider setting a unique and descriptive name for your site. It will help you to maintain multiple local sites in the future.
The “Advanced Options” tab allows you to set some optional settings and configurations.
This tab allows you to set a domain and path for your site. You don’t need to worry about choosing a domain name and suffix. Whatever domain name and suffix you choose, Local will modify your hosts file to make it work. Here the choice is
my-first-local-site.local
Though Local will automatically create a directory to store your site’s files, you can set it to your preferred folder.
When you are done with entering your site’s name, continue to the next screen.
This page provides you with two options. One is selecting Preferred to set up your local site with a recommended set of tools. Another is Custom, in which you can choose to set specific configurations for your environment.
Preferred is the better option for beginners. And, Custom is a more advanced option that is most suitable for developers, because it allows you to set more specific requirements. However, remember that choosing the Custom option will exempt you from connecting your site to Flywheel (if you want to publish it). You will need to download some additional files for that.
Whatever option you choose, now you move to the last step.
On this page, you can set a WordPress username, a strong & secure password, and an admin email address. In the “Advanced Options” tab, you can select if you want to make it a multisite setup. When you are done with entering the credentials, hit the “Add Site” button.
Within a few seconds, your site will get listed in the dashboard. You can see all of its information there.
This page confirms that your site is ready and you can click the Admin button to log into your site and work on it. Additionally, this dashboard will always allow you to make changes to your local site’s setup or domain.
Finally, your fully-featured WordPress site is now ready. It is open for doing any experiment with installing plugins, adding custom themes, breaking the site, fixing it again, etc. Conduct all your creative experiments here without any fear of hampering a live site.
After Action Report — Run WordPress Locally To Simplify Your Development Workflow
We went through the relatively simple processes of installing and running WordPress on your Windows or Mac PC. Being able to use such an amazing tool locally on your device is indeed a great opportunity for you to learn a lot.
If you followed the steps carefully, we’re certain you installed WordPress successfully on your machine. Any questions about the process? Let us know in the comments below! 💬