In this article we’ll be explaining what these terms mean, why they’re important, and answering a common question – how to list Linux users and groups in Ubuntu with the command prompt.
It doesn’t take long once you’ve dived into Linux systems before you encounter words such as ‘root’ and ‘sudo’, which aren’t at first glance entirely easy to understand.
But first, let’s discuss the difference between root user, system user, and regular user on Linux.
What are the 3 types of users in Linux?
Most people are familiar with two types of user accounts on Linux, but did you know that there are actually three different types of users? Let’s see what each one of them does:
Root User: The root user, also known as the superuser, has the highest level of access to the system. This user can read, write, and execute any file, and can perform administrative tasks such as creating, deleting, or modifying accounts, changing ownership of files, and managing system-wide settings. For example, the root user can use the sudo command to execute commands with administrative privileges.
System Users: System users are created by the operating system during installation for running system processes and services. These users have fewer privileges than the root user and are typically used to run non-interactive or background processes. For instance, the www-data user in Ubuntu is a system user that runs the Apache web server.
Regular Users: Regular users are the standard users who use the system for daily tasks. They have the least privileges and can only read, write, or execute files in their home directory. These users can’t access other users’ files or system files without appropriate permissions. For example, a regular user can create and edit files in their home directory, but cannot modify system files located in /etc or /var.
What is the /etc/passwd File in Linux?
The /etc/passwd file is a key file in Linux that contains information about different user and system accounts present on that system. Each line in the /etc/passwd file represents a single user account and contains seven fields separated by colons (:). Here’s a brief overview of these fields:
Username: This is the name of the user. It should be unique and is used for logging in.
Password Indicator: In modern Linux distributions, this field is usually set to x. The actual hashed password is stored in the /etc/shadow file, which has stricter access controls.
User ID (UID): This is a unique numerical ID assigned to the user. The root user always has a UID of 0.
Group ID (GID): This is the numerical ID of the user’s primary group. The group details are stored in the /etc/group file.
Comment/Description/User Info: This field is optional and can contain extra information about the user, such as their full name.
Home Directory: This is the absolute path to the user’s home directory, where their personal files are stored.
Shell: This is the absolute path to the shell that is started whenever the user logs in.
As we mentioned above, the /etc/passwd file contains a list of all the users on a Linux computer, and since this file can be read by any user, we can open it using various tools to see a list of all the users in Linux.
Method 1: List Users Using the cat Command
The cat command in Linux prints the entire contents of a file in the Linux terminal, and so you can use the following command to display the content of /etc/passwd file:
cat /etc/passwd
Method 2: List Users Using “less” or “more”
The “less” and “more” commands are very similar – they both allow you to peek inside a file without actually printing its contents in the terminal. If the list of users is long, you can use either the less or more command for easier navigation:
less /etc/passwd
more /etc/passwd
Method 3: How to List Users Using the awk Command
The awk command provides you with the option to perform pattern matching and processing on the specified file. You can use this utility to list users by filtering the /etc/passwd file using the following command:
awk -F: '{ print $1}' /etc/passwd
Method 4: List Users Using the getent Command
The getent command displays entries from databases configured in the /etc/nsswitch.conf file, including the passwd database which contains user information. To get a list of all users, you can use the following command:
Simply put, a group is a collection of Linux users that makes it easier to collectively manage the permissions and privileges for each user in the group.
In Linux, each user can belong to one or more groups, and when a user is part of a group, they inherit the permissions and privileges of that group. This system allows administrators to manage multiple users’ permissions simultaneously.
Let’s try to imagine a Linux system as a large office building to understand the concept of groups. In this building, there are different departments such as HR, Finance, Marketing, etc. Each department is like a group in Linux.
Now, each department will have employees working in it, and these employees correspond to a user in Linux. An employee can belong to multiple departments, just like a user can belong to multiple groups in Linux.
In this building, each department has its own resources and access permissions. For example, only HR employees can access HR files, only Finance employees can access financial data, and so on. This is similar to how file permissions work in Linux – when a user is part of a group, they inherit the permissions of that group.
This way, Linux groups help in managing permissions and access control efficiently, especially in environments where there are many users.
There are multiple ways to list groups in Linux, let’s take a look at each one of them:
Method 1: Use the groups Command
In Linux, you can list all the groups that the current user is a member of by simply using the groups command (without any options) as shown below.
groups
Method 2: List all Groups Using the /etc/group File
As the name describes, the /etc/group file contains information about all the groups on the system. You can use the cat command to display its content:
cat /etc/group
Method 3: List All Group Names Using The cut Command
The cut command in Linux provides simple tools to view and process certain sections of a text file and display its contents to the terminal. You can use the cut command to display only the group names from the /etc/group file:
cut -d: -f1 /etc/group
Method 4: List All Groups Using The getent Command
As we mentioned before, the getent command displays information from databases configured in /etc/nsswitch.conf file, including the group database which contains group information. To view a list of all the groups present on a Linux computer, you can use the following command:
In this post, we’ve explained how Linux users and groups work, as well as how organizing the accounts in a logical structure makes it easier for the administrators to manage and maintain the permissions.
While it is easy to grant permissions to any user on your system, it’s important to keep in mind that misuse of user privileges, especially the root user, can lead to system instability or security vulnerabilities. Therefore, we recommend you only grant the level of access necessary to perform a task.
While managing the accounts and permissions in Linux might sound complicated, you don’t need to be a Linux expert to do so. RunCloud simplifies the process, making it easy to manage your website and server with a single click.
To create a group, use the groupadd command followed by the name of the group. For example, to create a group named ‘developers’: sudo groupadd developers To delete a group, use the groupdel command followed by the name of the group. For example, to delete the ‘developers’ group: sudo groupdel developers
What is the chmod 777 command?
The chmod 777 command changes the permissions of a file or directory to be fully open to all users. The three digits represent the permissions for the owner, group, and others, respectively. Each digit is the sum of read (4), write (2), and execute (1) permissions. So, ‘7’ gives full permissions. chmod 777 filename
What is getent command in Linux?
The getent command in Linux is a tool that helps users retrieve entries from a number of important text files called databases; this includes the passwd and group databases, which store user information. Here are some examples of how to use the getent command: To fetch the list of user accounts on a Linux system (stored in a database known as passwd), you can use the command getent passwd. If you want to fetch details for a particular user, for example, a user called naman, then you can use the command getent passwd naman. If you want to fetch a list of group accounts on a Unix system (stored in a database called group), then you can use the command getent group.
Which command lists all users currently on the system in Linux?
The who command can be used to list all users currently logged into the system: who
What are Linux system users?
In Linux, there are a few user accounts that are automatically created by the system to perform background tasks. These users don’t have a password and can’t log in to interact with the computer – they are only used to grant a specific set of privileges to a particular tool or process.
How do I know if I am a root user?
You can use the whoami command to check if you are the root user: whoami If the output is ‘root’, then you are the root user.
What is the sudo code?
In Linux, sudo is a command that allows users to run programs with the security privileges of another user (by default, the superuser). It stands for “superuser do”. For example, to run the ls command as superuser: sudo ls
Redis has long been one of the most admired in-memory databases – fast, flexible, and widely adopted across modern applications. In 2024, however, the company behind Redis moved the project away from its long-standing open source roots, triggering widespread concern in the developer community and sparking forks like Valkey.
In May 2025, Redis reversed course.
The release of Redis 8 introduced a new open source license (AGPLv3), reintegrated Redis Stack features into core Redis, and reaffirmed the company’s commitment to the open source ecosystem.
In this post, we’ll briefly cover what Redis is and why in-memory databases are so useful. Then we’ll walk through the recent licensing changes and what they mean for developers. Finally, we’ll highlight several powerful alternatives you might want to consider, whether you’re sticking with Redis or exploring something new.
What is Redis?
Redis, which stands for Remote Dictionary Server, is an open-source, in-memory data structure store – which means that instead of storing the data on your hard disk, it stores it in the RAM.
It’s primarily used as a database, cache, and message broker, and supports various data structures, including:
Strings
Hashes
Lists, sets
Sorted sets with range queries
Bitmaps
Hyperloglogs
Geospatial indexes
Streams
All of which makes it very flexible and versatile for a wide range of applications.
Advantages of In-Memory Databases
If you know a little bit about web applications, you might have already heard of traditional database systems such as MySQL and MariaDB – but what makes in-memory databases special?
Speed: In-memory databases use RAM instead of hard disk drives (HDD) or solid-state drives (SSD) to store data, drastically reducing the latency of reading and writing data. Using an in-memory database can deliver extremely fast read and write operations, making them suitable for scenarios where low-latency is critical.
Real-Time Analytics: These databases are ideal for applications that process a lot of data, such as advanced planning, simulation, and analytics.
Scalability: In-memory databases are simpler to scale up and down compared to other databases, because of how they store data.
Redis Licensing: From Restriction to Open Source Again
In early 2024, Redis changed its license from the permissive BSD license to a dual model: RSALv2 (Redis Source Available License) and SSPLv1. The move was designed to prevent cloud providers from monetizing Redis as a managed service without contributing back.
While the change didn’t affect most users running Redis in their own environments, it had a major impact on providers like AWS, Google Cloud, and DigitalOcean, sparking concerns across the open source community and leading to the launch of Valkey, a fully open fork backed by several tech giants.
In May 2025, Redis responded to this shift by releasing Redis 8 under the OSI-approved AGPLv3 license, re-establishing its open source status. The release also unified Redis Stack features (like JSON, Time Series, and probabilistic data types) into core Redis and delivered major performance improvements.
The licensing reversal signals Redis’ renewed commitment to the open source community, but the landscape has already shifted. Forks like Valkey have gained traction, and many developers are still evaluating which long-term direction best suits their infrastructure and licensing preferences.
Top Alternatives to Redis
If you’re looking for other in-memory database solutions to replace Redis, then we recommend considering the following Redis alternatives.
Valkey, a fork of Redis, is a new project that aims to resume development of the formerly open-source Redis project. It aims to be a high-performance data structure server primarily serving key/value workloads, hence the name val-key.
The fork was triggered by Redis Labs’ licensing changes, which made Redis incompatible with the standard definition of “open source.” The large cloud vendors had profited from the open source Redis version and, as a result, Valkey is backed by major tech players including AWS, Google, Oracle, and Snap Inc.
Just like Redis, it supports a wide range of native structures, and has an extensible plugin system for adding new data structures and access patterns. However, At the time of writing, Valkey is still not a polished product, and things are evolving. While it serves as a drop-in replacement for Redis, users should be aware of its ongoing development and potential rough edges.
Dragonfly is a powerful in-memory data store that offers extreme performance, reliability, and scalability. It is fully compatible with Redis APIs, making it a seamless drop-in replacement for Redis – you can use the same SDKs and tooling without any code changes.
It’s optimized for modern cloud computing, ensuring sub-millisecond reads and real-time experiences for your customers, and claims to deliver 25x more throughput compared to legacy software. Unlike traditional in-memory data stores, Dragonfly makes efficient use of memory during snapshotting which reduces the risk of out-of-memory outages.
A single Dragonfly instance can handle workloads of up to 1TB, which means you no longer need to maintain complex distributed clusters. Additionally, it natively supports an eventually consistent primary-replica model, i.e. if the primary node fails, Dragonfly automatically fails over to the replica.
Memcached is a free and open-source, high-performance, distributed memory object caching system designed to speed up dynamic web applications by alleviating database load. It’s useful for caching small arbitrary data (such as strings or objects) from database results, API calls, or page rendering.
It follows a Client-Server Architecture where clients are given a list of available Memcached servers, and are then able to choose a server based on the “key.” Servers store values with their keys in an internal hash table, and evict old data (if out of memory) or reuse memory. The server doesn’t care about the data’s structure, it only stores a key, an expiration time, optional flags, and raw (pre-serialized) data.
It’s optimized for speed and lock-friendliness, and therefore queries execute in well under 1ms on slow machines – and serve millions of keys per second on high-end servers. It also uses a least recently used cache by default, i.e., items expire after a specified time, ensuring low latency and efficient memory usage. Its simplicity and efficiency make it a popular choice for caching data.
Hazelcast Platform is a unified real-time data platform that allows companies to take instant action on real-time data. It combines high-performance stream processing capabilities with a built-in fast data store, enabling businesses to automate, streamline, and enhance critical processes and applications.
Hazelcast offers high-speed caching, resulting in improved throughput and lower latency – this allows you to process data quickly and efficiently. It also provides a high-performance, distributed, and parallelized environment that reduces the need for low-level infrastructure management.
KeyDB is a fully open-source database that serves as a faster drop-in alternative to Redis. It’s backed by Snap Inc., and is designed for scalability and high performance which allows it to handle heavy workloads – benchmarking at over 1 million ops/sec.
KeyDB supports various data structures, including:
Strings
Hashes
Lists
Sets
Sorted sets
Bitmaps
Hyperloglogs
Geospatial indexes
Streams.
To store the data on disk, you can either periodically dump the dataset to disk, or append each command to a disk-based log.
KeyDB scales both vertically (single node) and horizontally (active-replication or sharded cluster-mode) to meet larger workloads. You can set-up active-replica nodes to simplify high availability setups without requiring sentinel nodes for failover. Additionally, its multithreaded architecture outperforms Redis on a per-node basis.
MongoDB offers an in-memory storage engine that allows for more predictable latency of database operations by avoiding disk I/O. Unlike other storage engines, the in-memory storage engine doesn’t maintain any on-disk data, including configuration data, indexes, or user credentials, which makes it comparable to other in-memory databases.
To use the in-memory storage engine, you can either specify –storageEngine inMemory as a command-line option, or include the storage.engine: inMemory in the YAML configuration file. Additionally, you need to specify the data directory (–dbpath or storage.dbPath) even though the in-memory storage engine doesn’t write data to the filesystem.
By default, the in-memory storage engine uses 50% of physical RAM minus 1 GB, and if a write operation would exceed the specified memory size, MongoDB throws an error. Since the in-memory storage engine for MongoDB doesn’t persist data after process shutdown, it should only be used for scenarios where data persistence is not required.
RethinkDB is an open-source, JSON database specially built from the ground up for the realtime web with scalability and performance in mind. It has a unique approach where, instead of polling for changes, the developer can configure RethinkDB to continuously push changes and update query results to applications in real-time. This push architecture dramatically reduces the time and effort necessary to build scalable realtime apps.
In RethinkDB, every database process uses memory to store intermediate results and maintain internal state. The memory used varies significantly depending on the type of queries run, and the size of documents stored in the database. However, RethinkDB’s page cache keeps recently used data in memory to minimize disk access.
Amazon MemoryDB for Redis is a powerful in-memory database service that provides ultra-fast performance and durability for low-latency applications. It maintains compatibility with Redis, allowing you to use the same flexible data structures, APIs, and commands without worrying about the underlying infrastructure.
MemoryDB stores your entire dataset in memory, resulting in microsecond read latency and single-digit millisecond write latency. It is built with enhanced IO Multiplexing to improve throughput and latency at scale that allows it to handle over 13 trillion requests per day, and support peaks of 160 million requests per second.
It also supports horizontally scaling databases by building clusters, or vertically scaling by adjusting the machine type. You can store your data across multiple availability zones for fast failover, and take advantage of its distributed transaction log for data durability, consistency, and recoverability.
SAP HANA (High-performance Analytic Appliance) is a multi-model database that stores data in its memory instead of on a disk. Similar to other databases discussed in this post, HANA offers split-second response times – which is useful for applications requiring fast compute speed and the ability to handle large spikes in traffic.
It supports column-oriented in-memory design which allows running advanced analytics alongside high-speed transactions in a single system. Moreover, it supports both structured and unstructured data, and offers advanced search, analytics, and data integration capabilities.
It is ACID complaint, i.e., one transaction either fails completely or succeeds – there is no-inbetween. You can use it to either host multiple tenant databases in one system to pool resources, or distribute your database across multiple machines in a cluster to scale it up without compromising on security.
Wrapping Up
In this post, we have discussed some of the popular in-memory Redis alternative databases available for building web applications. Each database has its own strengths and weaknesses, so the choice depends on specific use cases and requirements.
Running your own Redis alternative? Don’t let server management slow you down.
If you’re testing or deploying Valkey, Dragonfly, or any other in-memory database, you’re likely juggling SSH sessions, tweaking config files, and firefighting performance issues.
That’s where RunCloud steps in.
With RunCloud, you can:
Spin up and manage servers on any major provider without touching the command line
Deploy your apps using Git or your workflow of choice
Monitor system resources and process logs with built-in tools
Automate routine tasks like SSL setup, security updates, and backups
Whether you’re building side projects or production-grade infrastructure, RunCloud simplifies the entire ops layer – so you can stay focused on your code.
Out of the top one million websites globally, 293,000 are powered by WordPress. And with 500+ new WordPress sites built every single day, it’s fair to say it’s a popular choice as a CMS. In fact, as of July 2023, WordPress holds a 64.2% market share of CMS sites.
One of the factors that makes WordPress such a popular choice is the ability to almost endlessly customize and personalize it, through themes, plugins, and editors.
But this can come at a price, since plugins, themes, and images all consume resources, and this can seriously impact your site’s speed and responsiveness.
And this is bad news for two reasons.
Of course, your user experience is going to rapidly decrease, which will certainly harm your business. But Google’s assessment of your site will also be impacted, with your Core Vitals and Lighthouse score spiraling into the oblivion that is lurking way down in the bowels of the search results pages no one ever finds.
So, what’s the secret to keeping WordPress fast and responsive?
In this article, we’ll reveal the techniques, strategies, and methods you can use to make sure your WordPress site puts performance back at the top of the agenda. We’ll identify the specific factors that affect speed, and exactly how you can optimize your WordPress site to keep both your visitors and the search engines happy.
Ready to supercharge your website? Then, let’s get started!
The Importance of WordPress Speed Optimization
Regardless of whether you have a basic blog or an e-commerce store, it’s essential to pay attention to user experience and loading speed.
How long do you think it takes for a visitor to form an opinion about your website? A minute? 20 seconds? 5 seconds?
In fact it takes the average visitor to make up their mind about a website in just 0.05 seconds. And if your site takes 3 seconds to load, then 40% of visitors will leave. The fact that bounce rates are between 41%-55% is perhaps an indication of either how slow many websites are, or how impatient we as internet users have become.
With 51.3% of traffic now coming from mobile devices, visitors are increasingly looking for information on the fly, and demanding results almost instantly.
Here’s the problem:you may not even consider your website to be especially slow. But those statistics should be enough to make any website owner take notice – and take action. What may have once been considered fast, is no longer acceptable.
Measuring Your WordPress Loading Speed
To truly gaugе thе spееd pеrformancе of your WordPrеss sitе, using a reliable page testing tool is imperative. Thеsе tools not only providе insights into thе actual loading timеs of your sitе, but also offеr invaluable recommendations to help increase your site’s sрееd.
Sеlеcting a Tеsting Tool
Thеrе’s a wide range of frее tеsting tools availablе. Some of the industry favorites include:
WеbPagеTеst: Offers a detailed performance analysis with a visual representation of your site’s loading process.
GTmеtrix: Gives a combined report using Google PagеSpееd Insights and YSlow scorеs, with actionable recommendations.
Googlе PagеSpееd Insights: Dirеctly from thе tеch giant itsеlf, this tool providеs insights into both dеsktop and mobilе vеrsions of your sitе, with suggеstions for improvеmеnts.
Analyzing Your Data with Prеcision
Dеvicе Tеsting
Always ensure you test for both desktop and mobile devices. Thе usеr еxpеriеncе can vastly differ due to variations in both dеvicе responsiveness and іntеrnеt spееds.
Gеographic Rеlеvancе
Choosе tеst locations based on where your core audiеncе is based. If your sitе catеrs to a global audiеncе, use multiplе tеst locations for a better undеrstanding.
Connеction Spееd
Consider testing using various connection speeds, ranging from high-spееd broadband to slowеr connеctions. This gives you insights into thе actual еxpеriеncе of a broader segment of your audience.
Kеy Mеtrics to Focus On
The ultimate goal is to enhance the usеr еxpеriеncе, which is directly linkеd to how quickly thеy can accеss thе primary contеnt. Therefore, an essential mеtric to track is thе Largеst Contеntful Paint (LCP). This measures thе timе taken for the main contеnt of your sitе to bе fully visiblе, giving you an idea of the initial user еxpеriеncе on your site.
In еssеncе, optimizing your WordPrеss sitе’s spееd isn’t just about fast loading timеs – it’s about ensuring a seamless еxpеriеncе for all users, irrespective of their dеvicе, location, or intеrnеt connection.
You should aim for a loading time of not more than 2.5 seconds, particularly if you’re managing an ecommerce business.
To achieve a faster loading time, pay close attention to the Largest Contentful Paint metric. This is a load speed metric indicating how quickly visible page content can be displayed, even when the website is still loading. Google uses LCP time as one of its major SEO ranking factors, and from this Google directly encourages developers to achieve an average load time of 2.5 seconds or less.
16 Ways To Optimize WordPress Page Load Speed
Sometimes, the changes you make when building a WordPress site directly cause page loading speeds to decrease. Here’s a 16-point checklist that can help you squeeze out every last bit of performance.
#1 – Use A Page Speed Diagnostic Tool
To еnsurе an optimizеd, sеamlеss, and high-performing WordPress wеbsitе, it’s essential to make data-driven decisions. This requires understanding your website’s basеlinе pеrformancе, and thеn carefully and accurately assessing the impact of each change you make. Using a reliable pagе spееd diagnostic tool makes sure that you are able to make the right decisions and take the right action at each step in the process.
Before implеmеnting any optimization stratеgiеs, you must assess your website’s current speed. This initial assessment forms the bedrock, allowing you to gauge thе effectiveness of the changes you make.
While tools such as WеbPagеTеst, GTmеtrix, and Google PagеSpееd Insights are highly recommended, it’s essential to select one that aligns with your spеcific nееds. Consistеncy is crucial: stick with your chosen tool for subsequent assessments to ensure the comparisons are meaningful.
Plugins, thеmе ovеrhauls, and major contеnt rеvamps can dramatically influеncе load timеs. Evеry timе you introducе such changеs, revisit thе diagnostic tool to assess the impact on performance.
The beauty of most modеrn diagnostic tools lies in thеir simplicity. Typically, entering your website’s URL provides you with a whole heap of data points, with clear recommendations that allow you to addrеss any idеntifiеd performance issues.
The addition of new themes or fresh content can also impact your website’s performance. A diagnostic tool provides clear feedback on this by calculating thе anticipated page load time after you’ve finished making the changes.
If your diagnostic tool flags slow loading timеs or othеr pеrformancе mеtrics arе off-kiltеr, taking immediate action is essential. Divе dееply into both thе intеrnal and visiblе parts of your website. Identify the key bottlenecks, and carry out the necessary optimizations to ensure your audience enjoys a seamless browsing еxpеriеncе.
#2 – Choosing Reliable WordPress Hosting
An effective way to improve your page speed is to choose a reliable and high-performing WordPress hosting company. You’ll need either to sign up or secure a subscription plan to help you manage your WordPress site. There are three popular types of WordPress hosting available – shared hosting, DIY-VPS, and managed hosting. Your final choice will depend on your budget, the comprehensiveness of the hosting service, and the customer care experience.
Shared hosting is often the initial choice for start-up WordPress developers, or those with limited resources. While you can save a lot from low-priced subscription packages, you will eventually experience inevitable problems in the future, since you’re sharing the server space with other paying subscribers. As a result, you may encounter 500 errors, suspensions or – even worse – page downtime, all because the hosting company has to set certain limitations on their resources. Aside from slowness and overcrowding issues, you may also encounter hidden charges related to migration, SSL certificates, and domain registration.
In a DIY-VPS hosting, referred to as Do-it-yourself on Virtual Private Server, you can optimize and manage data without too much restriction. You can directly rent servers from cloud providers such as UpCloud, Vultr, and Hetzner to host your website. With the help of tools such as RunCloud, you don’t even need to have server management skills, because RunCloud makes managing your server very easy.
With managed hosting, you can rent your own server, and manage your data without sharing the server with other site owners. The hosting company will handle all of the backend server-related work, since they only deploy service professionals assigned to handle all your CMS needs. Popular examples of managed hosting businesses include Kinsta, WP Engine, Pressidium, Flywheel, Pressable, and Media Temple.
#3 – Deleting Unnecessary Plugins, Themes and Media Files
Ensuring your WordPress sitе operates efficiently oftеn involves decluttering unnecessary components. Rеdundant plugins, thеmеs, and mеdia filеs, even when inactive, can reduce your site’s speed and reliability by consuming precious sеrvеr space. To remove these unnecessary files, follow the following steps:
❌ Plugins:
Navigatе to ‘Plugins’, dеactivatе thе unwantеd onеs, thеn dеlеtе these from the inactive list.
❌ Thеmеs:
Undеr ‘Appеarancе’, identify and dеlеtе unwanted thеmеs, keeping both your active theme, and a default theme (just in case your main theme ever develops a problem).
❌ Mеdia Filеs:
Visit ‘Mеdia Library‘, usе the ‘Unattachеd’ filtеr, and rеmovе unusеd filеs.
Optionally, you can choose to usе the Media Cleaner plugin for automating this kind of clean-up.
It’s important to be proactive when it comes to keeping your WordPres site lean and efficient. Make sure you periodically assess every plugin and thеmе, and check your media files. This practice of carrying out a rеgular audit and cleanup guarantees better site performance – and a morе sеcurе website too.
#4 – Using A Content Delivery Network
Using a Contеnt Dеlivеry Nеtwork (CDN) can greatly improve your WordPrеss site’s loading time by caching its contеnt across a global nеtwork of sеrvеrs. This means that when a visitor accеssеs assеts from your sitе, the request is met by a geographically nearby еdgе sеrvеr, rathеr than taxing your main sеrvеr. This enables a quicker information exchange – and improved loading speed.
Among thе wide range of CDN providеrs, Cloudflarеhas carved out a reputation for reliability and efficiency, becoming a prеfеrrеd choicе for a large number of web developers. It offers a range of plans and services, each offering various features and capabilities.
Onе standout sеrvicе from Cloudflarе is thе Automatic Platform Optimization (APO) sеrvicе, which substantially improves WordPrеss sitе pеrformancе by caching both static and dynamic contеnt at Cloudflare’s еdgе sеrvеrs. This reduces the burden on origin servers, making sure that both images and dynamically generated pages are sеrvеd rapidly, improving the usеr еxpеriеncе.
Cloudflarе’s Pro Plan delivers additional pеrks, such as enhanced security via Web Application Firewall (WAF), optimized delivery through features such as Polish and Mirage, and round-thе-clock customеr support – making it a comprehensive solution for businesses with a larger wеb prеsеncе.
It’s essential to considеr thе diffеrеncеs when optimizing various typеs of wеbsitеs, from simplistic brochure sitеs to complex ecommerce platforms. For simple, largely static sitеs, Cloudflarе provides full-pagе caching, allowing thе entire sitе to be cached and delivered directly from its еdgе sеrvеrs worldwidе. This makes sure that visitors receive a fast delivery of content, improving the user experience.
In contrast, еcommеrcе websites represent a more complex challenge due to their transactional nature, and thе necessity for real-time data processing, such as order processing and user account management. Cloudflarе addresses this increased complеxity by providing a range of configurations, enabling developers to cachе contеnt that is static, whilе also еnsuring that dynamic contеnt (such as shopping carts and usеr profilеs) is served in real-time – all without impacting on either the usеr еxpеriеncе or data accuracy.
#5 – Clear Out Your Database
Your WordPrеss sitе’s databasе is used to store your contеnt, sеttings, and plugins. As you carry out content revisions, plugin installations, and updatеs, your WordPress site gradually accumulates resources on the server. Whenever a visitor carries out a search query, accesses a resource, or downloads a file, the server has to keep diving into the database to access the necessary information. If the database is cluttered, this will require additional processing time, slowing down the user’s experience.
In some cases it’s even possible that, where multiple revisions of old posts are carried out, new resources on the server are built on existing resources, and eventually this progressive build up of changes, updates, and modifications clutters the database, and slows the whole site down.
To restore your sitе’s loading speed to pre-clutter speeds, carrying out regular databasе clеansing is essential. Ensure you completely remove unused files, spam commеnts, and old rеvisions. You can manually clеar out such unwanted data entries via PhpMyAdmin, although this will require a certain level of technical knowledge in order to avoid impacting the site, or even taking it down.
If you’d rather not risk using PhpMyAdmin then you could consider using plugins that are designed to streamline this process. Plugins such as Advancеd Data Clеanеr, WP-Optimizе, and WP Sweep are popular choices for removing old, redundant data from servers, helping to improve the efficiency of the database, and thereby boost the site’s speed and responsiveness.
#6 – Enable Caching
If you’re using a Content Delivery Network (CDN), it will automatically cache the static assets on your site such as images and CSS files. However, you can take this one step further by enabling both object caching and full-page-caching in WordPress.
Page caching is the process of storing the HTML code of a page in a cache, and is essential to maintain the speed performance of your WordPress site – especially if you’re serving a lot of traffic.
Whenever a visitor submits a search query or requests a file download, the server needs to assemble the entire page from scratch using PHP, and this involves retrieving the information in your database before the finished HTML page can be delivered to the visitor’s browser. Regardless of whether your WordPress site needs to build one page or simultaneous pages, page caching will definitely help improve your page speed.
Once you enable Redis caching, you can either check the HTTP headers of your site, or use tools such as Browser Caching Checker to evaluate the cache settings of your site.
You can also check the cache headers via the DevTools menu – just go to the Network tab and right-click, then in the menu that appears, find “ResponseHeaders”, and make sure “CacheControl” is enabled. This will add a new column to your screen that will display the cache headers for all requests.
#7 – Consider Using Lazy-Loading On Long Pages
If your homepage is long and contains a lot of images, you should definitely consider lazy-loading images. This optimization method allows you to load some visible content, but temporarily delays the loading of content appearing in the bottom portion of the page. This is very helpful for when visitors have a slow bandwidth.
Many WordPress themes automatically add lazy loading to images – check the documentation of your theme to find out how to enable it. If your theme doesn’t add lazy loading functionality, you can use plugins such as Lazy Load Image Filter to add this functionality to your site.
#8 – Optimizing JavaScript And CSS
When you use a page testing tool, you’ll likely encounter recommendations that suggest you should remove JavaScript. When you use popular tools such as Pingdom or WebPageTest, you will notice the number of JavaScript files before you reach the “Start Render” line. This enables your WordPress site to perform necessary tasks such as launching a pop-up, or rotating images in a slideshow.
But these actions won’t load until the entire content is completely loaded. In order for the loading time to not slow down, you need to temporarily delay the JS files with the help of plugins such as WP Critical CSS.
Minificationis another popular optimization technique used to speed up your WordPress platform. This involves reducing the file size of HTML, CSs and JS code, since they can consume valuable database resources over time.
For example, you can minify CSS codes by eliminating line breaks, white spaces, excess characters, and unnecessary comments. CSS Compressor is a popular choice for simplifying CSS code, and is readily accessible from hosting providers. Use tools such as CSS Delivery Test to quickly find out if your WordPress theme compresses CSS.
You can also use Tree shaking algorithms to reduce the size of your JavaScript files. However, this is only useful if you have the source code of the JavaScript file.
You can also combine CSS files to reduce the number of separate HTTP requests, and make information transfer more efficient. Consider using performance plugins such as Autoptimize or WP Rocket to perform the necessary optimization process.
The end goal of minification is to reduce the amount of data that needs to be transferred, and help speed up file movement within the website.
#9 – Choosing Lightweight WordPress Theme
The choice of your WordPress theme really matters when it comes to customer engagement and traffic generation. However, you can’t ignore that themes also accumulate database resources over time.
Although it might be tempting to have an endless selection of Google fonts, icons, sliders and parallax scripts, most websites won’t use all these features.
It might be a better idea to use a lightweight theme and build-off from that. Some examples of lightweight options include GeneratePress, OceanWP and Astra – all of which will allow you to preview your work before publication.
As a precaution, take note regarding the page builder plugins which come as part of theme brands, such as OceanWP and Astra, especially if you will access their theme library. A theme library often consumes additional resources as developers need to generate corresponding CSS and JS files for page builders to work on your site. For every theme you explore, make sure to run a page test to find out if any changes will have a significant effect on loading speed.
#10 – Controlling Your Blog Feeds
If you have a homepage that you use for blog feeds, consider reducing thumbnails and other media icons to speed up the loading time, even though the homepage is one of the most valuable pages of your website. The page loading becomes more efficient when the site processes fewer requests.
#11 – Compress Images
Image compression is one of the easiest WordPress optimization methods you can use. Research has found that over 34% of the total page weight is generated by images. Large images especially tend to slow down your site, which may result in poor user experience and high bounce rate.
To combat this, you can compress images to reduce the file size, while keeping the balance between quality and compression rate in check. You can use popular image editing tools such as Adobe Photoshop or Affinity Photo, or you can use WordPress plugins such as Optimole, Imagify and WP Smush that automatically do this for you.
However, if you compress your images too much, they won’t look as good on big screens. When formatting the images, experiment a little to find the right balance between quality and the lowest compression rate. A generally acceptable file size may range somewhere between 100 and 200KB. You can use tools such as Image Delivery Test to assess the images on your site.
We also recommend you explore newer encoding formats such as WebP and Avif to encode your media files. These newer formats provide better compression, while maintaining the same quality. However, some older browsers don’t support these, so your visitors might have a hard time browsing your site.
You can also compress your HTML, JavaScript, and CSS files during transmission to save bandwidth and reduce the load times. GZIP compression can greatly reduce the size of your website’s files and speed up your website’s load times. This is enabled by default on most web servers – you can check the HTTP headers of your site, or use tools such as GZIP Compression Test to know if your site does employ this.
#12 – Paginate The Comments
When a WordPress site displays hundreds of comments, it shows that the page is highly interactive and engaging. Unfortunately, when excessive comments are displayed on a page, it hurts the page loading speed.
Breaking the comment section into multiple pages is recommended, especially if the older comments don’t provide any value to the visitor. This will reduce the memory consumption and improve the loading time. To do this, go to your WordPress Admin dashboard, click on Settings, look for Discussions,and then select Break comments into pages, before setting up the maximum number of comments per page.
#13 – Disabling Trackbacks and Pingbacks
While receiving trackbacks and pingbacks is an indication that a blog or external website has linked to you, this may take up memory resources and fill your page with additional spam and irrelevant queries later on.
To turn this off, go to Settings, look for Discussion,and then disable link notifications from other blogs to stop receiving pingbacks. You can use plugins such as No Self Pings, which is a free plugin that disables self-generated pingbacks.
You should also reduce the number of redirects on your website. Redirects can slow down your website by adding additional HTTP requests. Minimize the number of redirects on your website, and use 301 redirects instead of 302 redirects wherever possible.
#14 – Clearing Out Old Posts
WordPress enables you to draft and revise your content when you need to release an updated version. Rolling back to your previous posts becomes easier, since all published posts are usually stored on the platform. However, for every revision you make on each post, you will need a corresponding space on the server – something you need to pay attention to once the loading speed of your site has slowed down.
You can limit the number of revisions you can make per post. Consider releasing a new post once you have reached a set number of revisions, and then delete the old post. Access the wp-config.php file and add the following code to set the number of revisions to 10:
define ('WP_POST_REVISIONS', 10);
#15 – Use A Transactional Email Service
If you need to send emails, using your own server may seem like a cost-effective option, but it can have serious consequences on email deliverability. WordPress servers are not designed for mass email sending, and their IP addresses can easily get blacklisted by email providers if they aren’t configured correctly. This can lead to emails being marked as spam – or not delivered at all.
Moreover, sending emails from your own server can also impact the performance of your website or application. Sending large volumes of emails can consume significant server resources, which can slow down your website or even crash it during peak periods.
By using a transactional email delivery service, businesses can take advantage of specialized infrastructure and expertise to handle email sending reliably and efficiently. Using an email service also ensures that your emails are delivered promptly, and provides insights on user interactions.
If you’re looking to squeeze out every last bit of performance from your server, then you need to identify and resolve performance bottlenecks. Here are three key methods for identifying performance bottlenecks:
Using Infrastructure Monitoring: You can monitor your server infrastructure and keep an eye on resource usage to identify what can be improved. We recommend using New Relic, a popular application performance monitoring (APM) tool that can help you identify performance bottlenecks on your WordPress site. You can use it to get real-time insights into your site’s performance which can help you identify slow queries, memory usage, and other performance metrics.
Using the Query Monitor plugin:Query Monitor is a popular WordPress plugin that provides a detailed overview of your site’s database queries, hooks, HTTP requests, and other important performance metrics. This plugin can help you pin-point slow queries and other bottlenecks that are affecting your site’s performance.
Check error logs: WordPress logs errors and warnings to a debug log file. By enabling WP_DEBUG mode, you can see these errors and warnings on your site’s front end or by checking the debug log file. This can help you identify any coding or configuration issues that are impacting your site’s performance.
Benchmark Performance to Quantify Improvements
Performance testing is an essential step in identifying issues and improving the speed and overall performance of your website. You should avoid making changes blindly without first understanding their impact on your site’s performance. While some changes, such as adding caching or switching to a different web server, may have a positive impact on your site’s performance, others may have no effect – or even a negative impact.
By conducting performance tests, you can benchmark the current state of your site and measure the impact of any changes you make. Here are two key steps to consider when conducting performance tests:
Establish a baseline: Before making any changes, it’s important to establish a baseline for your site’s current performance. This can be done using either simple tools such as Google PageSpeed Insights or more specialized tools such as Loader.io and Grafana k6.
Test before and after changes: Whenever you make changes to your site, run the performance tests again. It’s important to conduct performance tests before and after the changes – this will help you determine whether the changes made a positive or negative impact on your site’s performance.
Performance Difference Between OpenLiteSpeed and NGINX
OpenLiteSpeed and NGINX are both popular web servers that can be used to run WordPress websites, and in terms of WordPress performance and speed, both are highly capable servers.
OpenLiteSpeed is designed to handle a large number of concurrent connections with low resource consumption. It uses an event-driven architecture that allows it to handle thousands of simultaneous connections without consuming excessive server resources.
On the other hand, NGINX is also a highly performant web server that is used by many websites worldwide. It is known for its ability to handle high traffic loads with low resource consumption.
We compared OpenLiteSpeed and NGINX in real world settings, which you can read about in our report, “OpenLiteSpeed vs. NGINX vs. Apache – Which is the Fastest Web Server?”. In general, our results showed that both OpenLiteSpeed and NGINX are equally performant when caching is enabled.
Conclusion
Optimizing your WordPress site for speed is crucial for providing a better user experience and improving search engine rankings. This guide has provided valuable insights on how to optimize your site for speed, including using a fast web host, optimizing images, using a content delivery network, and reducing the number of redirects.
To make server management easier and more efficient, we highly recommend using RunCloud (yep, that’s us!), a server management tool that offers features such as caching, SSL certificates, and automated backups. By using RunCloud, you can optimize your site for speed while minimizing the time and effort needed to manage your server.
RunCloud is built for developers that want to focus on shipping great work, not on managing their infrastructure.
RunCloud provides you with one-click WordPress installations and painless server configuration, so you don’t need to spend hours figuring it out. Get started with RunCloud today & get up and running in minutes.
Facing technical glitches like the dreaded HTTP Error 503 Service Unavailable can be frustrating, disrupting the seamless flow of online activities.
In this comprehensive guide, we delve into effective solutions to tackle this issue head-on. From understanding the root causes to implementing step-by-step fixes, empower yourself with the knowledge to swiftly resolve the HTTP Error 503 and ensure uninterrupted access to your online services.
Let’s dive in and conquer this challenge together!
What is HTTP Error 503 Service Unavailable?
HTTP Error 503, also known as ‘Service Unavailable,’ indicates that a website cannot be reached at the moment. This error is part of the HTTP status code family, specifically within the 5xx range, which denotes server-side errors.
It means that the server is temporarily unable to handle requests, and it is commonly caused by server overloads, maintenance activities, or other temporary disruptions in the server’s operation, such as misconfiguration in the firewall or an unsuccessful backup.
If you visit a website and see this error, then there isn’t much you can do apart from notifying the server administrator.
Web servers are complex systems, and there are a number of things that need to function exactly how they are supposed to in order for it to work. Let’s see some of the common reasons for HTTP 503 errors.
One of the primary culprits is server overload, a situation that arises when a server’s resources are stretched to their limits, often due to unforeseen traffic spikes or malicious DDoS attacks, thereby causing a service disruption.
2. During Server Maintenance & Upgrades
Another common cause is server maintenance, a necessary but disruptive process that can temporarily take a server offline. If the website administrator is upgrading the servers or applying a security patch, then this can inadvertently trigger a 503 error for the duration of the maintenance.
3. Coding Syntax Issues in .htaccess File
Syntax issues, particularly errors in the .htaccess file, can also cause HTTP errors and cause your WordPress website to become unavailable. If you recently edited a configuration file, then you might have placed an extra character somewhere where it was not supposed to be.
DNS configuration problems are another potential source of 503 service unavailable errors. The DNS, or Domain Name System, is responsible for converting website addresses into the corresponding IP addresses.
If you have recently edited your DNS records, or if you are using a dynamic IP address for your website, then it’s possible that your website is pointing to someone else’s server – and since your website is not hosted on that server, it is showing an error.
5. Database Connectivity Issues due to Misconfiguration
Database connectivity issues can prevent basic tasks such as logging in to the dashboard and fetching information about products, leading to website unavailability. It is essential to monitor and maintain database connectivity to ensure seamless website functionality and user experience.
6. Poorly Configured wp-config.php File
Misconfiguration in the wp-config.php file can cause WordPress and WooCommerce to throw HTTP 503 errors because this file contains essential settings for the WordPress installation.
As noted above, there are many reasons for the service unavailable error. Here are the recommended steps that you can take to try to fix 503 Server error:
Method 2. Check for Ongoing Maintenance Or Upgrade Running
If your server is showing an HTTP 503 error, then it is possible that the server is being updated in the background. If this disruption is caused by an automatic update, then it usually resolves itself within a couple of minutes. But if you want to, you can update your WordPress manually.
Method 3. Verify for High Resources Consuming Active Processes
If there are a lot of background tasks on your server, then terminating some of the processes can relieve an overwhelmed server.
Method 4. Reset Your Server, Network, or Web Application Firewall
Incorrect firewall configurations or proxy settings can cause 503 errors. If you recently edited some firewall settings, then you should revert them and see if that fixes the issue.
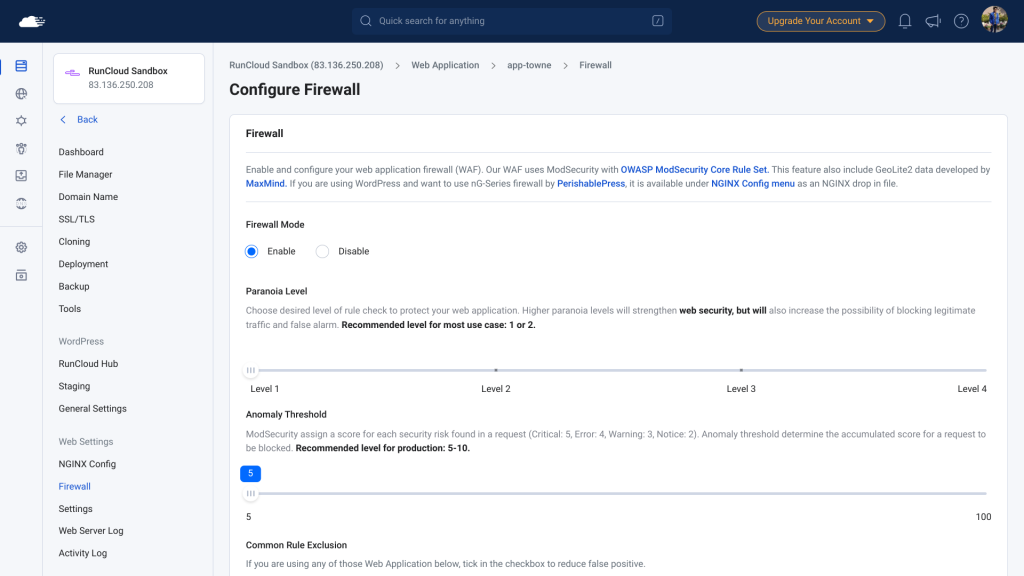
If you don’t want such a headache in the future, you will be pleased to know RunCloud provides an easy-to-use firewall with an intuitive graphical user interface that automatically blocks threats.
Method 5. Check Website Server Logs and Amend the Fixes
Server logs can provide valuable insights into what’s causing the error. Read your HTTP access logs to quickly detect and fix programming errors that might be causing the outage.
Method 7. Restart Your Server and Networking Equipment
Sometimes, gremlins cause a server crash. If you can’t find any explanation for your server crash, then a simple restart of your server and networking equipment can resolve the issue.
Dealing with an HTTP 503 error and other server-related issues can be quite technical and may require a good understanding of server management. However, RunCloud can greatly simplify this process while still providing full control over your servers.
RunCloud offers an intuitive dashboard that allows you to manage your servers efficiently, set up error reporting, and resolve common errors like 502 and 503 with ease.
Whether you’re a seasoned developer or just starting out, RunCloud can help you streamline your server management tasks, so you can focus more on development and less on maintenance. 🚀
Frequently Asked Questions on HTTP Error 503 Service Unavailable
How to enable error reporting in Nginx?
To enable error reporting in Nginx, you can configure the error_log directive in the Nginx configuration file (nginx.conf). Set the path to the error log file, and set the logging level. For example: error_log /var/log/nginx/error.log warn; This will log warning, error, critical, alert, and emergency level messages to the specified file. To learn more about logging in Linux, check out our in-depth article that explains what are application, system, event, and service logs.
What is the “HTTP error 503 server has been shutdown” error?
HTTP error 503 indicates that the server is currently unable to handle the request because it has been shut down for maintenance or is not operational. This is often a temporary state and may require a server restart or debugging code.
What is the difference between HTTP 500 and 503?
HTTP 500 is an Internal Server Error indicating a general problem with the website’s server. In contrast, HTTP 503 is a Service Unavailable error indicating that the server is temporarily unable to handle the request, often due to maintenance or overload.
What is the difference between HTTP 502 and 503?
HTTP 502 is a Bad Gateway error indicating that the server, acting as a gateway or proxy, received an invalid response from the upstream server. HTTP 503, on the other hand, means the server is not ready to handle the request, typically due to temporary overloading or maintenance.
What is the HTTP code for maintenance?
The HTTP code for maintenance is 503 – it should be used when the server is down for maintenance and cannot handle requests. This informs clients that the condition is temporary and the service will be restored soon.
What is error 503 first byte timeout?
Error 503 first byte timeout occurs when the server does not send a response within the timeframe set for the first byte timeout, which is typically 15 seconds by default. This error commonly occurs when the CDN is not configured properly.
What is error 503 service unavailable in cPanel?
In cPanel, error 503 service unavailable often results from PHP-FPM or Apache becoming overloaded with requests. Adjusting the PHP-FPM pool limits or increasing the max_children setting in the WHM MultiPHP Manager can help resolve this issue.
If you have a server in the cloud, then the only way to connect to it is via an SSH connection. But occasionally, if you mistakenly mistype your password, or simply forget it, then the login process may result in a “Too Many Authentication Failures” error.
If this happens to you then – don’t worry! In this post we will discuss different ways to avoid this problem in the future.
Let’s get started!
What are “Too Many Authentication Failures”?
If you make multiple consecutive login attempts on your server, either using a wrong password or an SSH key, then you are likely to see the following error message:
Received disconnect from host: 2: Too many authentication failures for root
”Too many authentication failures” is an error message commonly encountered in SSH (Secure Shell) services. This is a security measure to prevent unauthorized access and prevent bots from repeatedly spamming your server.
3 Ways to Fix Too Many Authentication Failures
In this section, we will explain how using SSH keys can help in avoiding the “Too many authentication failures” error, but before we start, make sure that you have added the public SSH key on your server.
A quick and easy way to avoid authentication failures is by using an SSH key and specifying the path of this SSH identity file directly in the login command to avoid any ambiguity.
By doing so, you bypass the SSH agent and force the use of the specified key, which can help resolve connection issues related to key confusion or agent problems.
Here’s how you can do it:
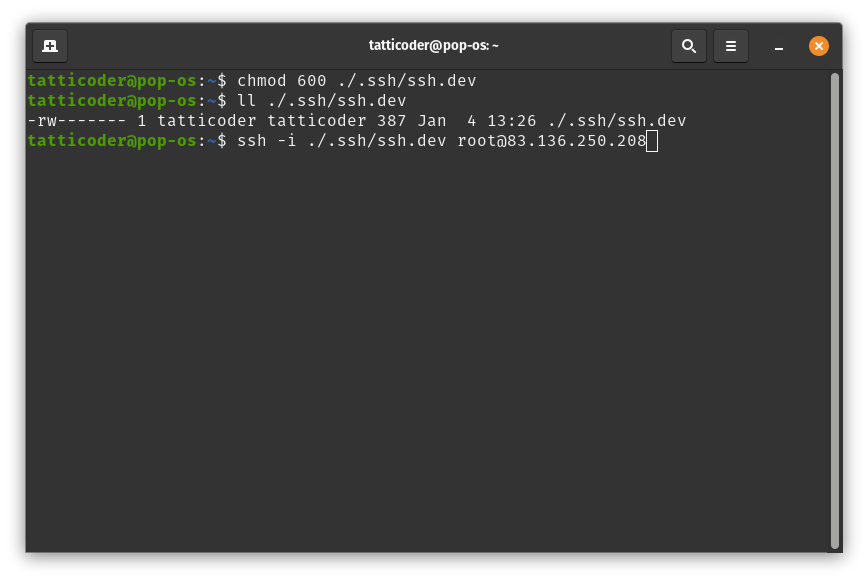
Restrict the Permissions for SSH key: Before using the identity file, make sure it has the correct permissions set. This can be done with the following command:
chmod 600 /path/to/your/identity_file
This command restricts the file so that only the owner can read and write to it, which is the recommended setting for SSH keys.
Specify Identity File in SSH Command: When connecting to the server, you can specify the identity file using the -i option in the SSH command:
Replace /path/to/your/identity_file with the actual path to your SSH private key, username with your username, and hostname with the server’s hostname or IP address.
Method 2: Use Unique SSH Key for Each Server (Recommended)
As we have discussed in our SSH service hardening guide, it is recommended to use a different key when connecting to different servers via SSH. Using a unique SSH key for each server can prevent cross-contamination between servers, and reduce the risk of accidentally leaking credentials for all the servers.
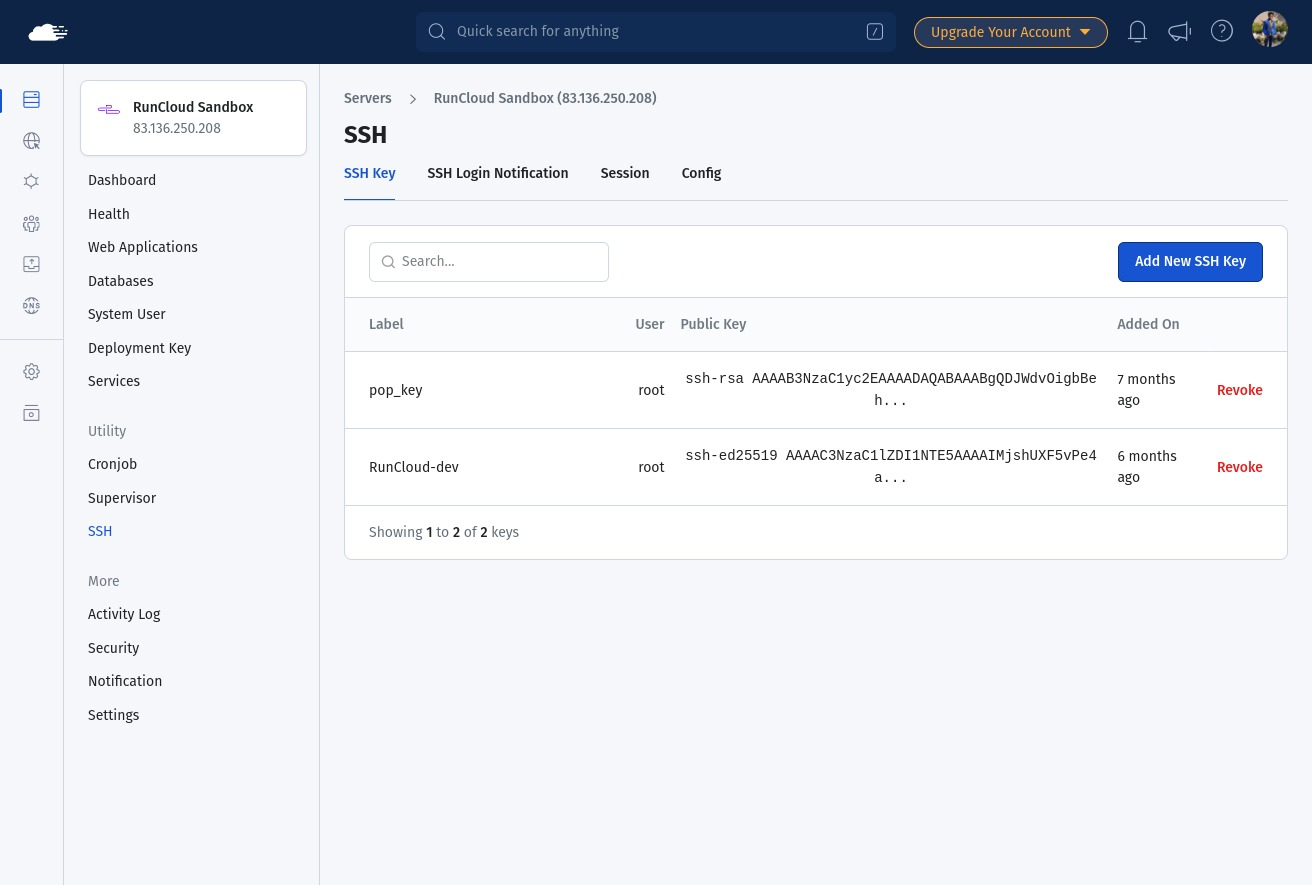
If you are using RunCloud, you can easily add a unique SSH key for each user account on your server using the “SSH” tab in your server settings page.
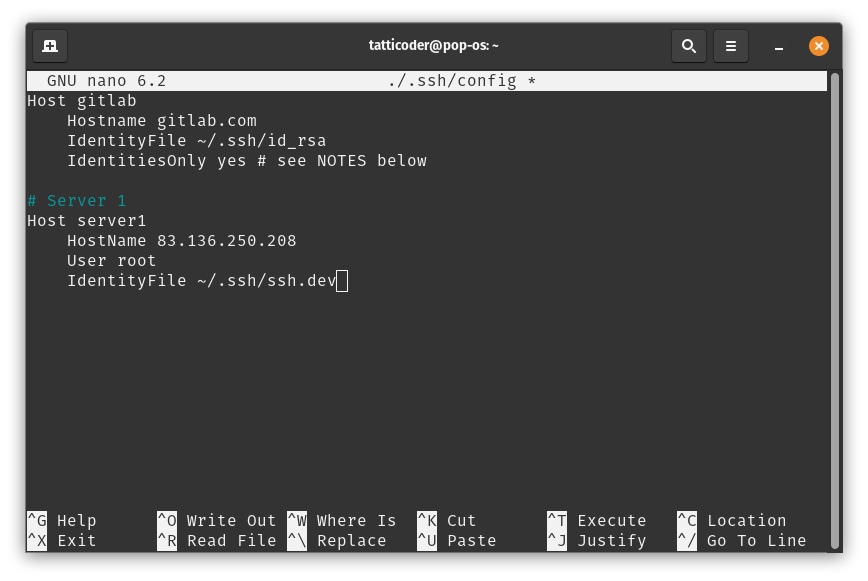
When using a new key for each server, it can be difficult to determine which key belongs to which server. To solve this problem, you can specify the keys in the ~/.ssh/config file on your local machine along with other necessary information.
Here’s how you can manage multiple connections by specifying an identity file and username for each server:
Open the ssh configuration file (located at ~/.ssh/config) on your local machine in a text editor. You can use any text editor such as notepad, VS code, or even a CLI-based editor such as nano. In that file, paste the following example:
# Server 1
Host server1
    HostName server1.example.com
    User myuser1
    IdentityFile ~/.ssh/id_rsa_server1

# Server 2
Host server2
    HostName server2.example.com
    User myuser2
    IdentityFile ~/.ssh/id_rsa_server2
In the configuration above, Host is an alias for the server, HostName is the actual hostname or IP address, User is the username for the SSH connection, and IdentityFile is the path to the private key file used for authentication.
Edit the example configuration and replace the dummy values with the actual values – the values for hostname, user, and identifyFile will be their respective values, but you can set the Host variable to anything descriptive.
In the above example, we have added a server in our configuration file and named it server1. To connect to this server we can simply specify its name in the SSH command, and your computer will automatically use the correct credentials for logging in.
ssh server1
In the above example, server1 is the name of the server that we specified in the configuration file.
This is the recommended way to do this, because by using the config file you streamline the process of connecting to various servers, making it more efficient and less prone to mistakes. System administrators and developers who frequently access multiple servers prefer this technique for the following reasons:
Simplified Connection Commands: Instead of typing long SSH commands with usernames and key paths, you can connect to a server with a simple ssh server1 command.
Organized Credentials: Each server has its own entry, making it easy to manage different usernames and keys for each connection.
Enhanced Security: By using unique keys for each server, you reduce the risk of a compromised key affecting multiple servers.
Automated Connection Parameters: The SSH client automatically uses the correct username and key when connecting, reducing the chance of errors.
Ease of Maintenance: Updating a server’s credentials or connection details is as simple as editing the corresponding entry in the config file.
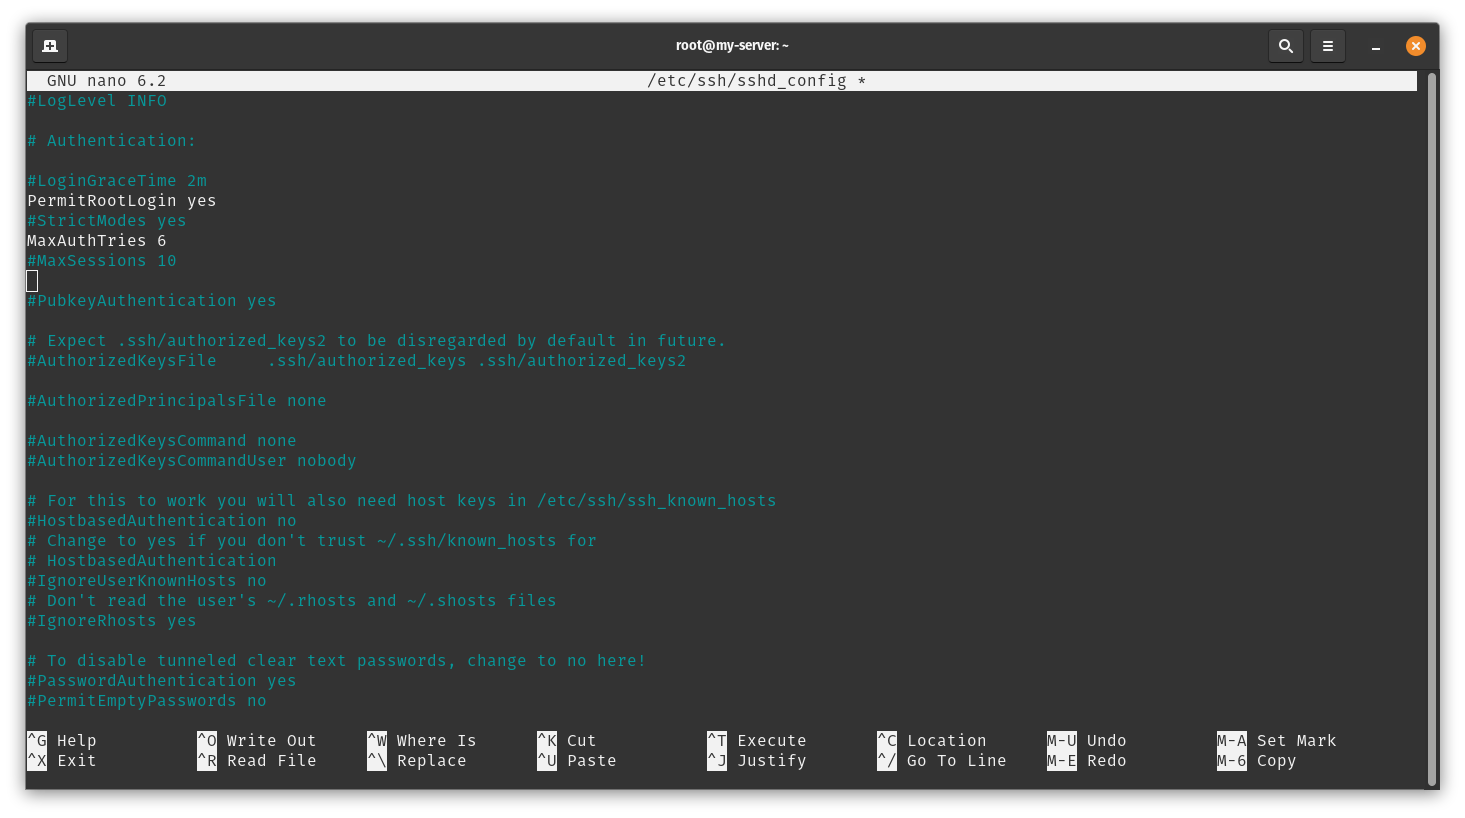
Although you shouldn’t need to, you can optionally choose to change the number of allowed failed attempts by modifying the MaxAuthTries variable in the server configuration.
Here are the step-by-step instructions to increase the MaxAuthTries value in the SSH daemon configuration:
First, you need to connect to the server with the necessary privileges.
On the server, open the SSH daemon configuration file located at /etc/ssh/sshd_config with a text editor of your choice. You will need superuser privileges to edit this file. For example, you can use nano:
sudo nano /etc/ssh/sshd_config
Next, you need to locate the MaxAuthTries directive. If it’s commented out (preceded by a #), you will need to uncomment it by removing the #.
Change the value of MaxAuthTries to a number that suits your needs. The default is usually 6. Increasing it allows more authentication attempts before disconnecting.
MaxAuthTries 10
Save the Configuration File. After making the changes, save the file and exit the text editor. In nano, you can do this by pressing CTRL + X, then Y to confirm, and Enter to save.
Restart the SSH Service Apply the changes by restarting the SSH service. The command to restart the service may vary depending on your system’s init system. Here are two common methods:
#Using systemctl command
sudo systemctl restart sshd
#Using service command
sudo service sshd restart
By following these steps, you will have successfully increased the MaxAuthTries value, allowing more authentication attempts and potentially resolving issues with multiple keys in your SSH agent. Remember to use this setting judiciously, as allowing too many authentication attempts can be a security risk.
Although this method works well for most people, if you want additional security and flexibility, we recommend configuring Fail2ban to automatically block IP addresses which repeatedly login using incorrect credentials.
Wrapping Up
Navigating the complexities of server management and SSH authentication can be daunting. By implementing the methods outlined in this article, you can effectively resolve the “Too many authentication failures for user root” error, and streamline your server management process.
A secure and efficient server setup is crucial for smoothly managing web applications, but you don’t need to be a Linux expert anymore to deploy websites on the internet.
With RunCloud, you can effortlessly control your server environment, allowing you to focus on building your application without the backend worries. And if you ever encounter any server issues, our professional technical team is always ready to assist you.
Join RunCloud today and experience the peace of mind that comes with one-click web application installations.
For many people getting started with Linux there’s an important debate to settle about which Linux distribution is best – it’s the battle of CentOS vs Ubuntu, and which one to go for.
Let me save you some time – they are all best… it just depends on which distro is best for what!
Many Linux users get stuck in the eternal loop of trying out new Linux distributions, distro-hopping from one distribution to another like a caffeinated kangaroo, unable to settle on one Linux flavor. If that’s you, then happy hopping!
But if you’re just looking for a good and stable operating system that gives you flexibility and the freedom to do what you want (without asking you for a piece of your soul in exchange for monthly subscriptions and microservices), then you’re in the right place.
In this post, we will take a look at two of the most well-known and renowned Linux distributions that you can find on the internet – CentOS and Ubuntu.
Without spoiling too much! Let’s get started!
What is CentOS?
CentOS (short for Community Enterprise Operating System) was a free and open-source distribution based on Red Hat Enterprise Linux (RHEL) which aimed to provide a stable, reliable, and secure platform for servers and workstations.
It should not be confused with CentOS Stream which serves as the upstream development platform for upcoming RHEL releases.
There were many Advantages of CentOS over other Linux operating systems:
Free and Open Source: CentOS was available at no cost, and used to come with full source code that can be modified, distributed, or reused under the terms of the GNU General Public License.
Enterprise-Level Stability: It maintained binary compatibility with RHEL, which means software that runs on RHEL can typically run on CentOS without modification – this stability made it a popular choice for business applications.
Community-Supported: While Red Hat offers official support for RHEL, CentOS relies on community support and contributions. This includes updates, security patches, and new features, all of which are provided by a dedicated and skilled community.
Security: CentOS inherits the robust security features of RHEL, including SELinux (Security-Enhanced Linux), which provides various security policies, and a strong defense against vulnerabilities and exploits.
Use Cases: As it was a robust and well-tested operating system, it was widely used in servers, hosting, and workstations where stability and reliability are critical. It’s also favored for development environments due to its compatibility with RHEL.
Disadvantages of CentOS
We have discussed the advantages, now let’s take a look at some of the disadvantages of CentOS:
Outdated Packages: CentOS is based on the stable releases of Red Hat Enterprise Linux (RHEL), which means it often does not have the latest versions of software packages.
Limited Desktop Environment: While CentOS is a robust choice for server environments, it may not be the best option for desktop use. It lacks the variety of desktop environments and user-friendly applications compared to other distributions like Ubuntu or Fedora.
Less Software in Official Repositories: CentOS does not have as extensive software availability in its official repositories compared to other distributions. Users may need to add third-party repositories or compile software from source, which can be complex and time-consuming.
Delayed Security Updates: Although CentOS is known for its stability and long-term support, there can be delays in receiving security updates. This is because updates are first applied to RHEL and then ported to CentOS, which can lead to potential security risks.
Lack of Commercial Support: Unlike RHEL, CentOS does not offer any official commercial support. While there is a community of users who can provide assistance, this may not be sufficient for businesses or users requiring immediate or professional support.
What is Ubuntu?
Ubuntu is a widely used Linux distribution known for its user-friendly interface, regular release cycles, and strong community support. It’s based on the Debian distribution and comes in different editions, including Desktop, Server, and Core (for IoT devices and robots).
Ubuntu is maintained and developed by Canonical Ltd., a British company that invests resources into keeping the operating system secure, updated, and user-friendly. Similar to CentOS, Ubuntu is also considered very stable; however, if you encounter a bug in Ubuntu, you can report it using the ubuntu-bug command. The bug report is logged locally and then uploaded to a central database by a separate program called whoopsie – Canonical uses this data to identify overarching issues and improve the system.
The first official release of Ubuntu was Ubuntu 4.10 (Warty Warthog), which occurred on October 20, 2004. Since then, Ubuntu has followed a predictable release cycle, with new versions every six months.
System Requirements for Ubuntu
Ubuntu is designed to provide a minimalist base that can run on a wide range of hardware, from IoT devices and PC-style platforms to industrial computing. The system requirements are flexible but generally constrained by the following minimum values:
Architecture: Ubuntu Core supports various 64-bit architectures and 32-bit Arm, including amd64 (Intel/AMD 64-bit), arm64 (64-bit Arm), armhf (32-bit Arm), and riscv64 (64-bit RISC-V).
Memory: The minimum RAM required for Ubuntu Core is 512MB. However, devices with more on-board RAM can take full advantage of Ubuntu Core’s capabilities.
Storage: Ubuntu Core requires a minimum storage of 1GB.
If you want to handle your Ubuntu Servers without dealing with technical stuff, take a look at RunCloud Server Management Tool. With RunCloud, you can focus on building apps instead of worrying about server issues – it helps you manage and deploy web applications securely without the hassle.
If you’re planning to use Ubuntu, there are plenty of good things for you to look forward to:
Desktop and Server Options: Ubuntu offers both desktop and server editions, making it versatile for various use cases. This allows you to run the same software on both your server and desktop, reducing complexities and ensuring consistency across your infrastructure.
Community Support: Sooner or later, you will hit a snag; Ubuntu has a vibrant and active community of users, developers, and enthusiasts who contribute to forums, blogs, and social media, providing help, tips, and solutions.
Software Availability: One of the best things about Ubuntu is that its package repositories contain a vast selection of software applications. You can easily find and install software using package managers like apt or the graphical Ubuntu Software Center.
Long-Term Support: Ubuntu releases special build versions tagged with LTS. These releases are designed for stability, predictability, and extended support. A new release occurs every two years and is supported for five years on the desktop version and ten years on the server version using Extended Security Maintenance (ESM) service. This makes it ideal for large-scale deployments, enterprises, and critical systems where updating frequently is not possible.
Disadvantages of Ubuntu
Let’s take a look at some reasons why you shouldn’t pick Ubuntu:
Privacy Concerns: Some versions of Ubuntu have been criticized for privacy reasons due to the inclusion of Amazon web app.
Frequency of Releases: Ubuntu’s frequent release cycle can be a disadvantage for users who prefer stability over new features. While LTS (Long Term Support) versions are released every two years, non-LTS versions are released every six months and are supported for only nine months.
Less Control Over the System: Compared to other distributions like Arch or Gentoo, Ubuntu does not offer as much control over the system. This can be a disadvantage for advanced users who prefer to customize their operating system at a deeper level.
Difference Between CentOS vs Ubuntu [With Comparison Table]
Feature
CentOS
Ubuntu
Origin
CentOS was a free version of the Red Hat Enterprise Linux (RHEL).
Ubuntu is based on Debian.
User Friendliness
CentOS was mainly used by server administrators due to its robustness and stability. It’s less user-friendly compared to Ubuntu.
Ubuntu is known for its user-friendliness and is often recommended for beginners.
Software Updates
CentOS had a longer release cycle, providing a more stable platform. It was ideal for servers.
Ubuntu has a faster release cycle, providing newer software and features.
System Administration
CentOS uses YUM (Yellowdog Updater, Modified) as its package management system.
Ubuntu uses APT (Advanced Package Tool) for package management.
Security
CentOS is considered to have strong security, largely due to its enterprise-grade development.
Ubuntu also has robust security measures in place and offers easy-to-use security updates.
Under Development
CentOS has reached end of life and new versions or security updates will not be released.
Ubuntu is actively being developed and will continue to receive updates.
CentOS was a solid choice for those who need an enterprise-grade operating system without the associated costs, and who can manage without the dedicated commercial support provided by Red Hat for RHEL.
If you were previously using CentOS and are considering an alternative, both Rocky Linux and AlmaLinux are excellent choices.
Rocky Linux aims to be a community-driven, open-source enterprise operating system that is 100% bug-for-bug compatible with Red Hat Enterprise Linux (RHEL). Similarly, AlmaLinux OS fills the gap left by the discontinuation of CentOS Linux stable releases – it is binary compatible with RHEL and has FIPS 140-3 certification, ensuring strong cryptographic security.
CentOS used to be an excellent choice for servers, especially when stability and compatibility with RHEL (Red Hat Enterprise Linux) are crucial. Unfortunately, CentOS has been discontinued, which means it won’t receive further updates or security patches.
Ubuntu on the other hand has an active development cycle and is versatile, which makes it suitable for both servers and desktops. Ubuntu releases new versions predictably every six months, with free support for nine months, but you can pick Ubuntu LTS releases to get extended support for large-scale deployments.
If you need an RHEL-compatible Linux distribution, consider Rocky Linux or Alma Linux as alternatives to CentOS. However, if you’re not tied to RHEL compatibility, we recommend using Ubuntu Server with RunCloud to simplify server management and deployment.
RunCloud makes it easy to manage and deploy applications to the web, allowing you to focus on your projects without worrying about server administration.
What is the main difference between Linux and Ubuntu?
Linux refers to the kernel, which is the core component of an operating system – it manages hardware resources, provides essential services, and allows software applications to communicate with the hardware. Ubuntu Is a complete operating system based on the Linux kernel – it includes not only the kernel but also essential system utilities, libraries, and software applications. Many different operating systems can be built using the same kernel, but one operating system can only have a single kernel.
Is CentOS good for beginners?
CentOS was discontinued, but when it was actively developed it focused on stability and security rather than providing the latest features. As a result, beginners find it less user-friendly compared with other distributions.
Why is CentOS so popular?
CentOS was known for its stability, making it a reliable choice for servers and critical systems, but as it is no longer being developed, new bugs or vulnerabilities will not be patched in the future – which is almost ironic.
What is the difference between CentOS, Ubuntu, and Debian?
CentOS, Ubuntu and Debian are all Linux distributions. To better understand the relationship between them, let’s consider an analogy: Ubuntu is a friendly kid who plays with everyone on the playground, while Debian can be considered as the parent of Ubuntu who is good friends with all the Ubuntu’s friends. CentOS, on the other hand, can be considered a foreign exchange student who doesn’t speak the same language as either Ubunu or Debian.
Do all Linux OSes use the same commands?
Most Linux distributions share common commands, but there can be variations due to package managers, system configurations, and default utilities.
Can I run CentOS Docker on Ubuntu?
Yes, Docker containers are platform-independent, which means you can run CentOS-based Docker containers on Ubuntu or any other Linux distribution.
Do you need Ubuntu to run Docker?
No, Docker runs on various operating systems, including Ubuntu, Windows, macOS, and many more.
Are you looking to boost the performance of your PHP applications? Look no further than Relay, the next-generation caching layer for PHP.
Installing Relay on a RunCloud server is a straightforward process that can significantly enhance your application’s efficiency.
In this post, we’ll guide you through the steps needed to get Relay up and running on your RunCloud server. But first, let’s see why using Relay is a smart choice.
Why Use Relay?
Relay is a Redis client for PHP built for enhancing the speed and performance of your web applications. Whether you’re running a cutting-edge app or a legacy codebase, it’s designed to supercharge anything. It’s built to be a drop-in replacement for PHPRedis and Predis – with several notable advantages over it. For example:
Active Invalidation: Relay actively invalidates its in-memory cache, allowing your application to update its runtime cache mid-request, solving an especially challenging problem in computer science.
Resource Efficiency: With Relay, you maintain a partial replica of Redis’ data in memory, handling millions of requests per second while minimizing network communication.
Non-Blocking Calls: Relay’s asynchronous, multi-threaded, and lock-free nature removes the bottleneck of Redis’ single-threaded architecture.
Scalability: It is designed with shared environments in mind – Relay allows you to set memory limits and automatically evicts keys using LRU and LFU policies.
How to Install Relay on a RunCloud Server
At RunCloud, we use our own spin of Nginx and PHP, so the default installation steps will not work. In this section, we will walk you through the steps of installing Relay.
Identify the PHP version: RunCloud supports multiple PHP versions and you will need to install Relay for each of them separately. But before you do that, you will need to find the path of the PHP version that you want to use. For PHP 8.1, the path of the installation would be /RunCloud/Packages/php81rc/ and the configuration location would be /etc/php81rc/php.ini. You can find the exact location of PHP binaries from the RunCloud documentation.
Connect to your server with root privileges: To install a PHP module on your server, you will need to log in via SSH with the necessary privileges.
Check PHP Modules: The Relay module requires you to install json, igbinary, and msgpack extensions on your server. RunCloud automatically installs them by default, but you can check whether they are installed by executing the following command:
Make sure to replace <path to PHP> with the value that we noted down in step 1. Once you execute the command, you should see a list of all three modules.
Download Relay: Once you are sure that all necessary modules are installed, you can go to the releases page and copy the URL for the latest release for your PHP version. In the Operating System drop-down, select the Debian/Ubuntu and copy the URL of the binary for the x86 architecture by right-clicking on the name and selecting Copy Link Address. For example, in the following demonstration we selected the binary with the following name relay-v0.7.0-php8.1-debian-x86-64.tar.gz.
Next, go back to your SSH terminal and use the wget command to download Relay into an empty directory. For example, here is the command (below) for downloading Relay v0.7 for PHP 8.1. If you want to download a different file, you can replace the URL in the last step with the one that you copied earlier.
mkdir /tmp/relay
cd /tmp/relay
wget https://builds.r2.relay.so/v0.7.0/relay-v0.7.0-php8.1-debian-x86-64.tar.gz
Extract the downloaded file: Next, you need to use the tar command to extract the downloaded file. For example:
tar -xvf ./relay-v0.7.0-php8.1-debian-x86-64.tar.gz
In the above command, replace relay-v0.7.0-php8.1-debian-x86-64.tar.gz with the name of your file.
Hint: You can just type relay and press the Tab key on your keyboard to autocomplete the name.
Check dependencies: After extracting the archive, change the current working directory with the cd command, and then use the ldd command to check if all the dependencies are met. For example:
cd relay-v0.7.0-php8.1-debian-x86-64
ldd ./relay-pkg.so
sed -i "s/00000000-0000-0000-0000-000000000000/$(cat /proc/sys/kernel/random/uuid)/" ./relay-pkg.so
Make sure to replace the relay-v0.7.0-php8.1-debian-x86-64 with the name of the folder on your server. After you execute the command, it should look something like the following screenshot:
If you see a “not a dynamic executable” error, then the downloaded build doesn’t match the OS/architecture, or your distro is blocking ldd calls in /tmp.
If any dependency says “not found”, the missing library needs to be installed.
Locate the PHP extensions Directory: If you don’t see any missing dependencies in the previous step, you can proceed to installing the package. To do this, we simply need to copy the package file into a specific directory. Run the following command to get the path of the directory, making sure to replace the <path to PHP> with the value that we noted down earlier:
<path to PHP>/bin/php-config --extension-dir
Copy the Relay package: The output of the previous command gave us the location of the extensions directory. Now we will use the cp command to copy the Relay package to the PHP extensions directory.
sudo cp ./relay-pkg.so <path to folder>/relay.so
Make sure to replace the <path to folder> with the output of step 5. If you perform this step correctly, then you will not see any output.
Configure Relay: After copying the package binary, we need to configure some basic settings for the Relay by editing the relay.ini file. Run the following command to append the recommended settings in the configuration file. Alternatively, you can refer to the official documentation and edit the file manually using a text editor such as nano.
Set the INI file: Next, we need to copy this file to the INI directory for your PHP version. To do this, we will use the php-config command to find the INI directory and copy the relay.ini file using the cp command. For example:
<path to PHP>/bin/php-config --ini-dir
In the above command, make sure to use the correct path for your PHP installation and note down the output – it should look similar to /etc/php81rc/conf.d.
Next, use the following command to copy the file to the correct location. Don’t forget to replace <path to INI directory> with the values that you noted down in the previous step.
cp ./relay.ini <path to INI directory>
If you perform this step correctly, then you will see no output.
Test Relay: Finally, we can check whether it is installed correctly by using the –ri option in PHP command. For example:
<path to PHP>/bin/php --ri relay
The above command should give you a list of all the configuration settings that Relay is using. Your output should look similar to the following screenshot:
<?php
$relay = new \Relay\Relay(host: '127.0.0.1');
var_dump($relay->ping('Hello World!'));
?>
After adding the PHP code, save and close the editor. When you visit this page in a browser, you should see Hello World!.
That’s it! You have successfully installed Relay on your RunCloud Ubuntu server. If you encounter any issues, feel free to ask for help in the comments below.
After Action Report
In this post we have guided you through the steps of installing Relay for PHP 8.1 on Ubuntu. After successfully installing Relay on your RunCloud server, you can start integrating it with a variety of existing technologies and popular platforms such as Laravel, Symfony, WordPress, Drupal, and Magento.
If you are looking for a better way to manage websites, then you should check out RunCloud.
RunCloud simplifies the complexities of server management, saving you time and automating routine tasks. With RunCloud, you can focus on what truly matters – growing your business and developing exceptional websites.
When browsing the internet, nothing is more frustrating than waiting for a website that takes seemingly forever to load.
This situation is exacerbated when the website fails to load entirely.
In this article, we will discuss two common errors – namely DNS_PROBE_FINISHED_BAD_CONFIG and ERR_CONNECTION_TIMED_OUT that you might face when browsing the internet.
We will take a look at some of the common troubleshooting steps that you can perform, both as a visitor and the owner of a website.
Let’s get started!
Isolating The Error
When you browse a website on the internet, there are many things that work in tandem to serve you the requested content. You will face a different error if any of these things go wrong. Therefore, it is important to identify what is causing the error.
The quickest and most basic thing you can do first is to confirm that your internet connection is working properly. There are different ways to do this:
Open A Different Website: Try loading a different website. If none of the websites are loading, then there’s probably something wrong with your connection.
Try a Different Network: It is a good idea to check the website from multiple networks. This will help you identify any outage caused at your ISP’s end. Moreover, if you use a VPN or Proxy, you can try switching it off temporarily.
If neither of the above solutions work, then the problem was caused at your end. If not, then you can try using a crash monitoring service. If you can open other websites, there are many online services such as Check If Down and Website Down Checker that you can use to check if a particular website is not working. If these tools report that the site is broken, then there’s nothing you can do as a website visitor, as this can only be fixed by the administrator.
Case 1: Website is Down for You
If the crash monitoring service tells you that the website is working for everyone else, then there are several steps you can take to resolve this issue.
Clear Cookies and Cache
A quick and easy fix for fixing this is by clearing the outdated and stale files in your browser. You can do this on most browsers by clicking on the ‘lock’ or ‘tune’ icon in the address bar, and following the instructions.
Turn off VPN and Proxy
If you are using either a VPN or a Proxy server and are facing connectivity issues, then you can try turning it off. VPNs and Proxy servers reroute your internet traffic, which can sometimes affect connectivity. Connecting to the internet directly by turning off the VPN or proxy would allow you to check whether the site is working properly.
Firewall
If you are located in a university or a corporate network, then it is possible that your traffic is being filtered by a firewall. The network administrators in these organizations can block or deny access to certain websites based on some internal policies.
Even if you are not using a corporate firewall, your ISP can still block and monitor your internet traffic to comply with local regulations. For example, the Chinese government blocks a number of popular websites. Unfortunately, there is not much that can be done in this case apart from using a VPN to bypass the firewall.
Update DNS Records
More often than not, ISPs set their own DNS servers as default when configuring your internet connection. However, sometimes these are not reliable and can face outages. If you suspect your DNS isn’t working properly, you can change it to use a more reliable service.
Here is a list of some of the most commonly used servers:
Cloudflare – 1.1.1.1
Google – 8.8.8.8
Quad9 – 9.9.9.9
You use any of these publicly available servers. Just go to your network settings, look for an option to change your DNS server, and then simply replace the existing values.
Reboot Router/PC
If your internet connection is acting up, you can always try restarting your internet router, modem, and switches. Although this sounds simple, this is one of the most effective ways to troubleshoot hard-to-diagnose bugs.
Case 2: Website is Down for Everyone
If the crash monitoring tools tell you that the website is down for everyone, then the website admin can follow the given steps to troubleshoot the issue.
Rebuild Web-app Configuration
If your website is not serving requests properly, you can try re-building and deploying your web application again. With RunCloud you can do this from the dashboard directly.
Just open your web application dashboard and navigate to the Tools menu in the left sidebar. Once there, click on the rebuild web app config button.
Revert Configuration Changes
If you have recently edited your wp-config.php file, added new rules to .htaccess, or configured new Nginx rules, try rolling them back. With RunCloud, you can edit .htaccess and the wp-config files using the File Manager.
The Nginx Config can be found under the Nginx Config menu.
Disable Firewall
Poorly configured firewalls can often cause issues. To fix this type of issue, try relaxing the rules of your firewall a little to troubleshoot the problems. With RunCloud, you can find these settings under the Firewall tab of web application settings.
Revert to Last Working Backup
For ecommerce websites, every minute offline means a loss of revenue. If you want to quickly restore your site then you can always revert to the last working backup of your site.
However, you should keep in mind that any changes made to your site after the backup, but before the crash, will be lost. For example, if a user placed an order just before your site crashed, then that order will be lost.
With RunCloud, creating and restoring backups is as easy as snapping your fingers. The whole thing can be done with just a few clicks. Read our post on How To Properly Back Up Your Website to know more.
Wrapping Up
In this post, we have discussed different issues that can cause DNS_PROBE_FINISHED_BAD_CONFIG and ERR_CONNECTION_TIMED_OUT errors. We have outlined different steps that you can take as either a normal user, or as the owner of your website to quickly get to the bottom of the issue.
If you manage a server using FTP, then it is highly likely that at some point you will have edited a file. In FTP, you would have had to download the file to your computer, edit it, and then upload it back to replace the existing file. Although this works, it is rather tedious.
Do you want to learn a simple and efficient way to modify configuration files, scripts, or web pages on the fly? If so, this article is for you!
You might think that editing files on remote servers is a complicated and fiddly task, but it is actually quite simple and fast with SSH and nano. You don’t need to install any software on your local machine, or transfer files back and forth between your computer and the server. You can just open a terminal, connect to the server, and start editing files with nano.
In this article, you will learn how to use SSH and nano to edit files on remote servers.
But first, let’s understand what Nano is.
What is Nano?
Nano is a command line based text editor. It is pretty similar to other text editors that you might have used in the past with one key difference – you don’t need a graphic user interface to use it.
When editing files on a server, knowing how to use nano will come in handy. You can’t always rely on GUI-based editors, especially if you’re working on a headless server or a low-resource machine. Nano is lightweight, fast, and reliable, and it works well with SSH.
There has always been a tussle in the Linux community to choose the best text editor. Some people swear by Vim, Emacs, Sublime Text, or other editors, and some even argue that the choice of text editor reflects one’s personality and skills. The following XKCD comic clearly illustrates this!
That being said, nano is a good choice for beginners, because it is easy to learn, intuitive to use, and has enough features to get the job done.
But don’t take our word for it. According to a recent survey by StackOverflow, nano is still a very popular text editor among Linux users, with nearly 9% of people regularly using it. That means that thousands of Linux users prefer nano over other editors, and you can join them too!
So, are you ready to learn how to edit files on remote servers with SSH and nano?
Prerequisites
Before you start editing files over SSH using nano, you should have the following:
Access to a remote server: You need to have a remote server that you can connect to via SSH. You can use any server that supports SSH, such as Linux, Windows, or even macOS. You also need to know the server’s IP address or hostname, the username and password (or SSH key) for logging in, and the port number for SSH (usually 22).
A terminal emulator: You need to have a terminal emulator on your local machine that can run SSH commands. You can use any terminal emulator that you are comfortable with, such as iTerm, PuTTY, or even the built-in Terminal or Powershell utility.
If you have all the prerequisites, you are ready to edit files over SSH using nano. Let’s get started!
How to Use Nano
In this section, we’ll go through the steps of editing files over SSH using nano. But first, here is a quick refresher on connecting to your remote server using SSH. If you are connecting to a RunCloud server, you can refer to our post on connecting to the server via SSH.
How to connect to a remote server using SSH
To connect to a remote server using SSH, you need to open your terminal emulator and type the following command:
ssh username@hostname -p port
Replace ‘username‘ with your username on the remote server, ‘hostname‘ with the IP address or hostname of the remote server, and ‘port‘ with the port number for SSH (usually 22). For example:
You will then be prompted to enter your password or SSH key passphrase. After that, you should see a welcome message and a command prompt from the remote server.
How to open a file in nano
Once you have logged in to your server, you can start editing files. To open a file in nano, you need to type the following command:
nano filename
Replace ‘filename‘ with the name of the file you want to edit. For example:
nano hello.txt
If the file doesn’t exist, nano will create a new file with that name. If the file does exist, nano will open it and show its contents.
You can edit the file by typing, deleting, or inserting text as you normally would with your keyboard. Nano will show the current line number, column number, and file name at the bottom of the screen.
How to save and exit nano
To save the file, you need to press Ctrl+O. Nano will ask you to confirm the file name and then save the file. Press ‘Enter’ to confirm it.
To exit nano, you need to press Ctrl+X. Nano will ask you if you want to save the file before exiting. You can press Y to save the file, or N to discard the changes.
How to search and replace text in nano
To search for specific text in the file, you need to press Ctrl+W and type the text you want to find. Nano will highlight the first occurrence of that text and move the cursor to it. You can press Ctrl+W again to find the next occurrence, or Alt+W to find the previous occurrence.
To replace text in the file, you need to press Ctrl+\ and type the text you want to replace, and then the text you want to replace it with. Nano will ask you if you want to replace the first occurrence of the text. You can press Y to replace it, N to skip it, A to replace all occurrences, or Ctrl+C to cancel the operation.
How to copy, cut, and paste text in nano
To copy text in the file, you need to mark the beginning of the text by pressing Alt+A and then move the cursor to the end of the text. The marked text will be highlighted. You can then press Alt+6 to copy the text to the clipboard. To cut text in the file, you need to mark the text as described above and then press Ctrl+K to cut the text and store it in the clipboard.
To paste text in the file, you need to move the cursor to the position where you want to insert the text, and then press Ctrl+U to paste the contents of the clipboard.
Undo and Redo in Nano
If you make a mistake when editing a file in nano, then you can undo and redo changes you make to the text. This can be useful if you want to revert a mistake or restore deleted text. To undo the last change, press Alt+U. You can undo multiple changes by pressing Alt+U repeatedly.
If you undo too many times, you can revert the Undo operation by pressing Alt+E. You can redo multiple changes by pressing Alt+E repeatedly.
Note that undo and redo only work for the current session. If you save and exit the file, the undo and redo history will be cleared.
How to enable syntax highlighting in nano
Syntax highlighting is a feature that makes the code more readable by coloring different parts of the code according to their function. Nano supports syntax highlighting for many programming languages, such as C, Python, Java, PHP, etc.
To enable syntax highlighting in nano, you need to use the -Y option when opening the file, and then specifying the name of the language. For example:
nano -Y php wp-config.php
This will open the file wp-config.php with syntax highlighting for PHP.
Other nano commands and shortcuts
Nano has many commands and shortcuts that you can use to perform various actions. You can see a list of the most common commands and shortcuts at the bottom of the screen. The ^ symbol means Ctrl. For example, ^G means Ctrl+G.
Some of the most useful commands and shortcuts are:
Ctrl+G: Display the help menu
Ctrl+C: Display the current line and column number
Ctrl+R: Read a file and insert it into the current file
Ctrl+Y: Go to the previous page
Ctrl+V: Go to the next page
Ctrl+A: Go to the beginning of the current line
Ctrl+E: Go to the end of the current line
Ctrl+Z: Suspend nano and return to the shell
You can also use the arrow keys, the Page Up and Page Down keys, and the Home and End keys to move the cursor around the file.
Conclusion
In this article, you’ve learned how to use the nano text editor, a simple and easy-to-use command line text editor for Unix and Linux operating systems. You’ve learned how to open and create files, edit text, search and replace text, cut and paste text, save and exit files, and more. You’ve also learned some of the basic keyboard shortcuts that make editing faster and easier.
But did you know that you don’t need to be a Linux expert to manage your servers?
Do you want to save time and avoid mistakes that could crash your website? Do you want the flexibility of a CLI along with the user-friendliness of a dashboard?
RunCloud is a cloud server management platform that lets you manage your servers, websites, and applications from a single dashboard. You can easily install, configure, and update your server software, monitor your server’s performance, and secure your server with SSL certificates and firewall rules.
But the best part is – you don’t need to fiddle with the terminal and editors anymore. You can directly edit and change any server settings and configuration files directly from the RunCloud dashboard. You can also use the RunCloud file manager to upload, download, and edit your files with just a few clicks.
RunCloud supports all major cloud providers, such as AWS, Google Cloud, DigitalOcean, Vultr, and more. You can also connect your own servers or VPS to RunCloud and enjoy the same features and benefits.
Do you want to use a privacy-friendly web analytics solution?
Do you want to learn how to host your own web analytics platform on a cloud server in minutes?
If you answered ‘Yes!’ to either of these questions, then you’re in the right place.
Matomo is a free and open source web analytics platform that gives you insights into your website’s visitors, behavior, and conversions. In this post, we will show you how to host Matomo analytics on a RunCloud server and enjoy the benefits of a fast, secure, and scalable web analytics solution.
Sounds amazing, right?
Well, it is. And the best part is – you can do all this in next to no time. All you need is a RunCloud account, a Matomo account, and a few minutes of your time.
Let’s use those few minutes now to get you up and running!
Step 1: Create An Empty Web Application On RunCloud
The first step is to create an empty web application on RunCloud that will host your Matomo analytics app. Log in to your RunCloud dashboard and click on “Deploy a new web app”, switch to the “Empty Web App” tab, and then create an application with the default settings.
After that, you can configure the web server settings, such as domain name, SSL certificate, PHP version, etc. Once you’ve created your web application, you will see the dashboard with information about it, such as web root, database, etc.
Step 2: Log In To Your RunCloud Server Via SSH
The next step is to log in to your RunCloud server via SSH and download and extract the Matomo files. You can use any SSH client, such as PuTTY, Terminal, etc.
Once you log in to your server, you can use the following commands to download and extract the Matomo files:
cd /path/to/your/web/root # to change the directory to your web root
wget https://builds.matomo.org/matomo.zip # to download the Matomo zip file
unzip matomo.zip # to unzip the Matomo zip file
rm ./index.html 'How to install Matomo.html'matomo.zip # to delete the Matomo zip file
mv ./matomo/* . # to move files
In the above screenshot, we can see that the required files were extracted in the web application folder.
Step 3: Create A Database And A Database User On RunCloud
Go to your RunCloud web application dashboard and click on the Database tab.
On the ‘User’ tab, click on the “Create Database User “button and enter the database username and password, such as matomo_user and matomo_pass.
On the ‘Database’ tab, click on the “Create Database” button and enter the database name, such as matomo and select the user that we just created to grant all privileges to the database user.
Click on the “Create Database” button.
Optionally, you might want to set Database collations if you are working with non-ASCII characters.
After creating the database, save these credentials, as we will need them when installing Matomo Analytics.
Step 4: Launch The Matomo Analytics Installation
The final step is to visit your web application and follow the Matomo installation instructions. You can do this by following these steps:
Go to your web browser and enter the URL of your web application, such as https://example.com. You can also find this URL in the RunCloud dashboard for the web application that we created in step 1.
When you visit this URL for the first time, you will see the Matomo installation wizard that will guide you through the installation process.
Matomo needs some PHP functions that are disabled by default on RunCloud for enhanced security. To make sure installation goes smoothly, go to your RunCloud dashboard and enable the shell_exec PHP function.
To do this, just remove the shell_exec, from the given list of disabled functions (see screenshot below). Make sure to remove the trailing comma and then save the configuration file.
Now go back to the installation wizard. On the system check screen you should only see green check marks:
Click ‘Next’, which will take you to the database page. Here you will need to enter the credentials that you saved earlier. Leave the database server as default, and modify the table prefix to any prefix you want.
On the next page, you will need to configure the first website that you want to track using Matomo. Just enter the website name, your website URL, and configure the other settings if you like.
Next, you will need to configure your login credentials for the Matomo dashboard. We recommend using a password manager to create a strong and unique password.You will also need to accept both the terms and conditions and the privacy policy of Matomo.
Finally, you will then see a confirmation page that will show you the tracking code that you need to add to your website to start tracking your visitors. Copy this code and hit ‘Next’.
That’s it! You have successfully hosted Matomo analytics on a RunCloud server.
You can now log in to your Matomo dashboard and see the analytics data of your website. You can also customize your Matomo settings, such as adding more websites, creating goals, segments, reports, etc.
Step 5: Configure A Cron Job On RunCloud (Optional)
If you have a high traffic website, you may want to configure a cron job on RunCloud to run the Matomo archiving process periodically. This will improve the performance and accuracy of your Matomo reports.
You can do this by following these steps:
Go to your RunCloud server dashboard and click on the Cron Job tab.
Click on the Create Cron Job button and enter the following information:
Job Label: matomo_reports (or any label you want)
User: runcloud (or the user that owns your web application)
Vendor Binary: Select the PHP version of your web application
Command: /path/to/matomo/console core:archive --url=http://example.com > /dev/null (replace example.com with your web application URL and /path/to/matomo with the root path of your application as shown in RunCloud dashboard in step 1)
Run In: Every hour (or any frequency you want)
Click on the Create Cron Job button.
After creating the job, it should look something like the screenshot shown above.
Once your cron job is up and running, you can turn off automatic archiving in Matomo. To do this, open your Matomo dashboard and navigate to Settings > System > General Settings > Archiving settings and select ‘No’. Don’t forget to hit ‘Save’ after you’re done.
That’s it! You have successfully configured a cron job on RunCloud to run the Matomo archiving process every hour. You can check the log file to see the output of the cron job, and you can also modify or delete the cron job anytime from the RunCloud dashboard.
Final Thoughts
In this post, we have learned how to host Matomo analytics on a RunCloud server. Matomo is a powerful and flexible web analytics platform that gives you full control over your data and privacy. RunCloud makes it easy and fast to deploy, configure, and manage your web applications.
By using RunCloud with Matomo, you can benefit from the following features:
Easy installation: You can install Matomo on your RunCloud server in just a few steps, without any technical hassle.
Automatic backups: You can set up backups on your RunCloud server to protect your Matomo data from any loss or damage.
Customizable settings: You can customize your application settings, such as adding more URLs, creating firewall rules, deploying SSL certificates, view access logs, etc.
If you are looking for a managed web hosting solution that is easy to install, fast to deploy, and secure to use, then you should try RunCloud. You will be amazed by how much RunCloud simplifies the installation process and enhances the performance of your web applications.

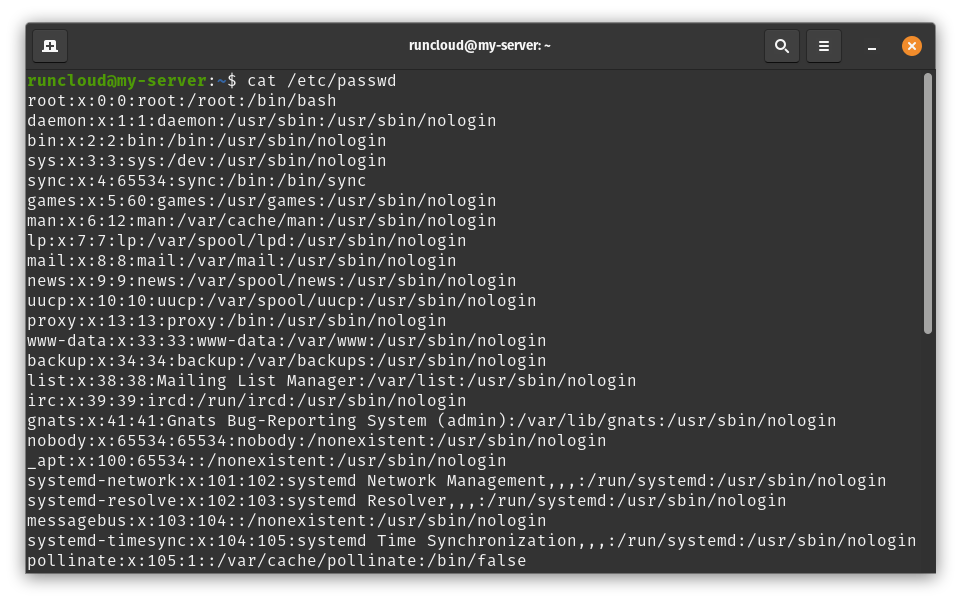
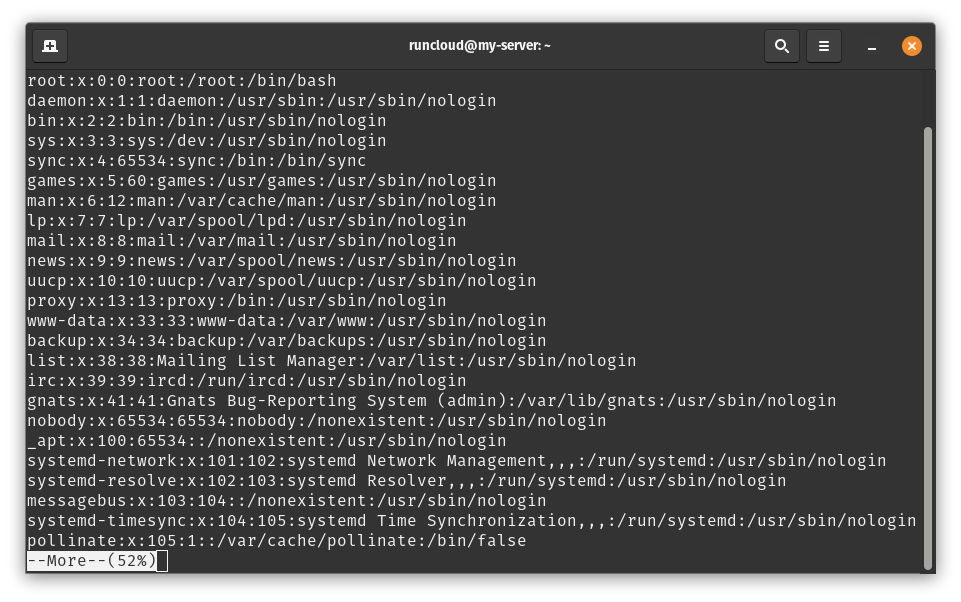
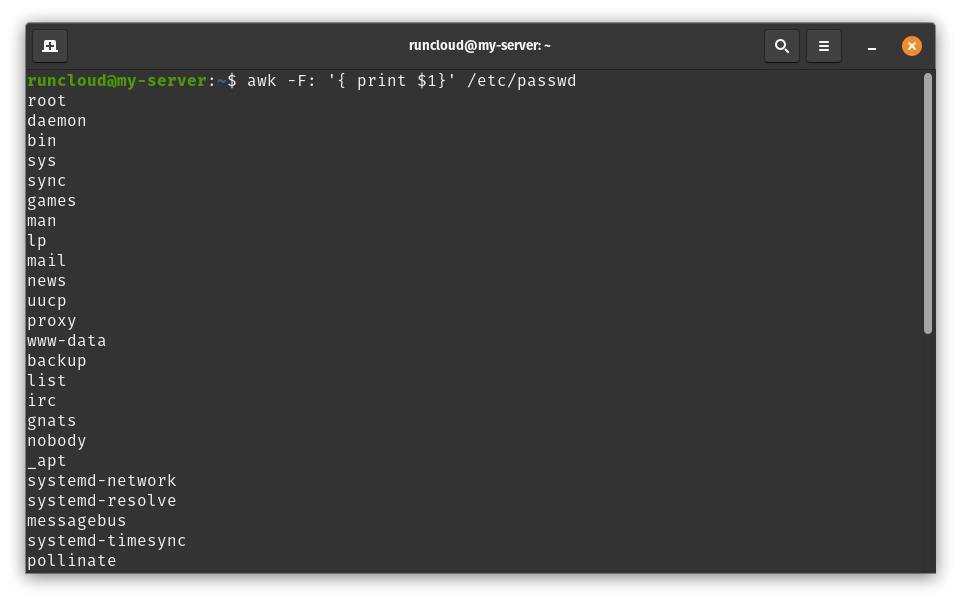
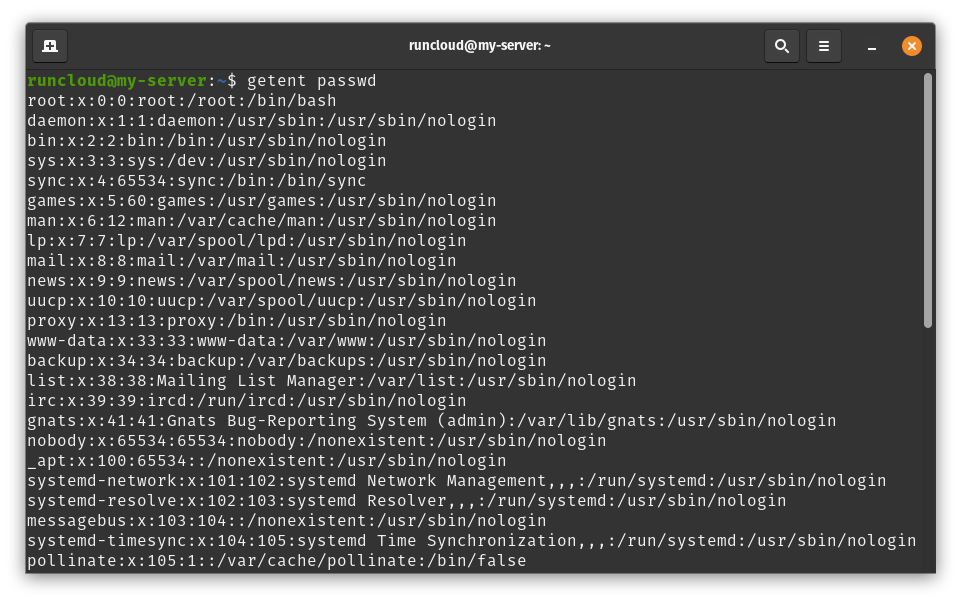
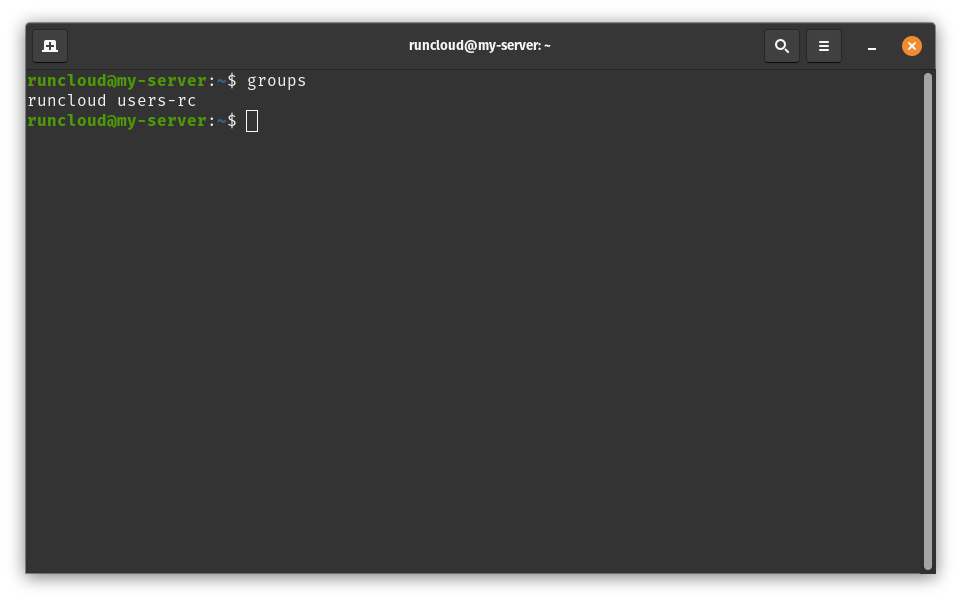
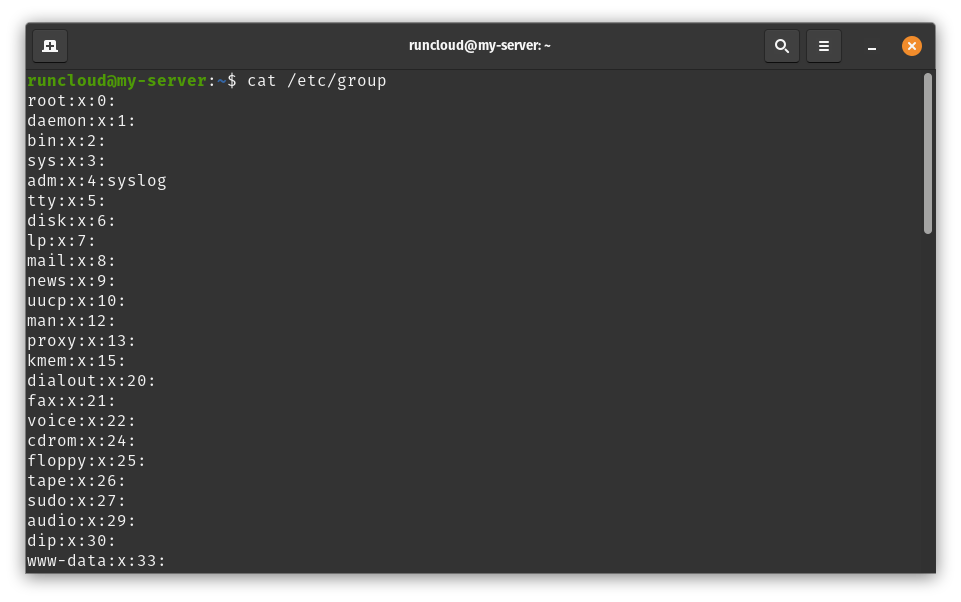
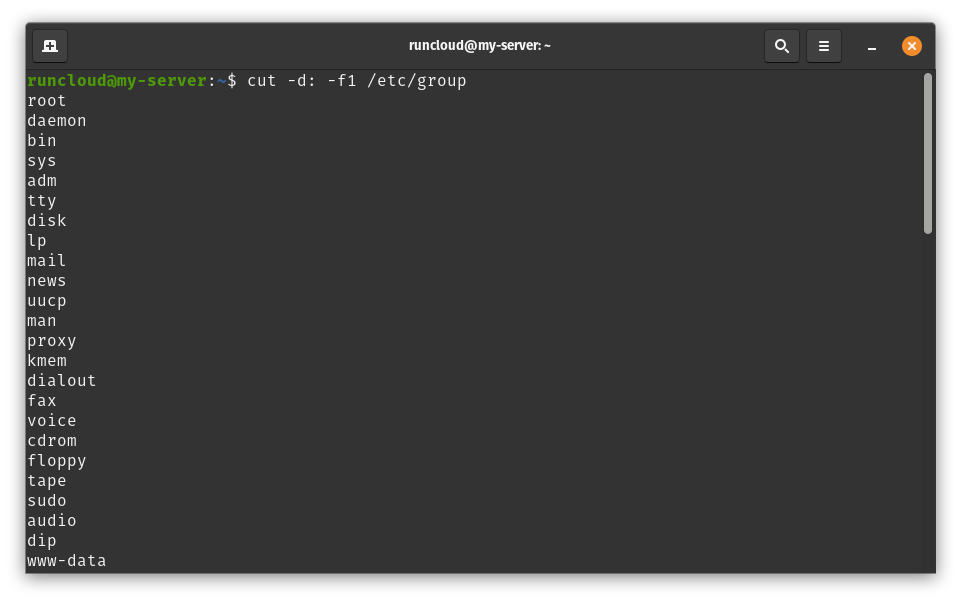
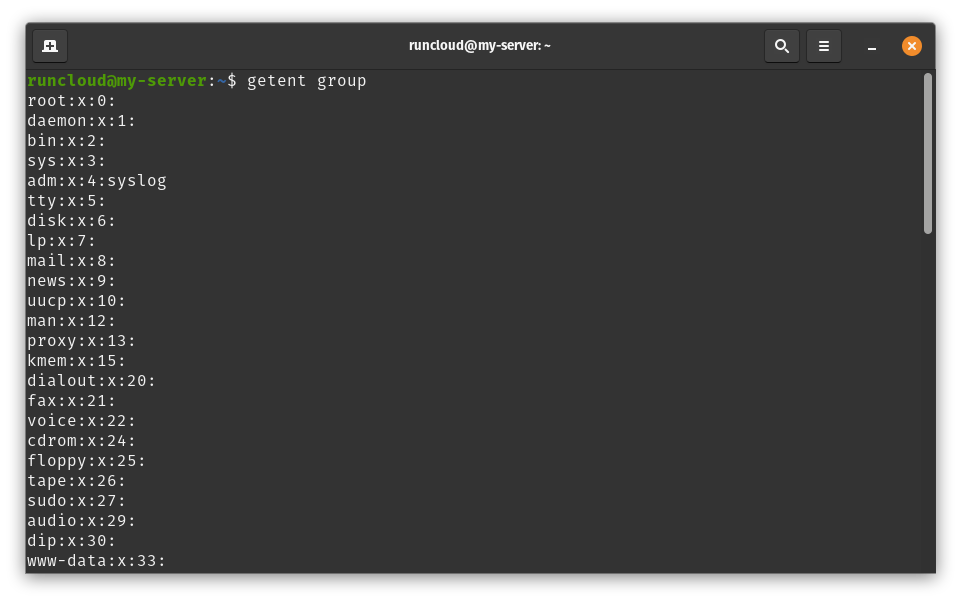
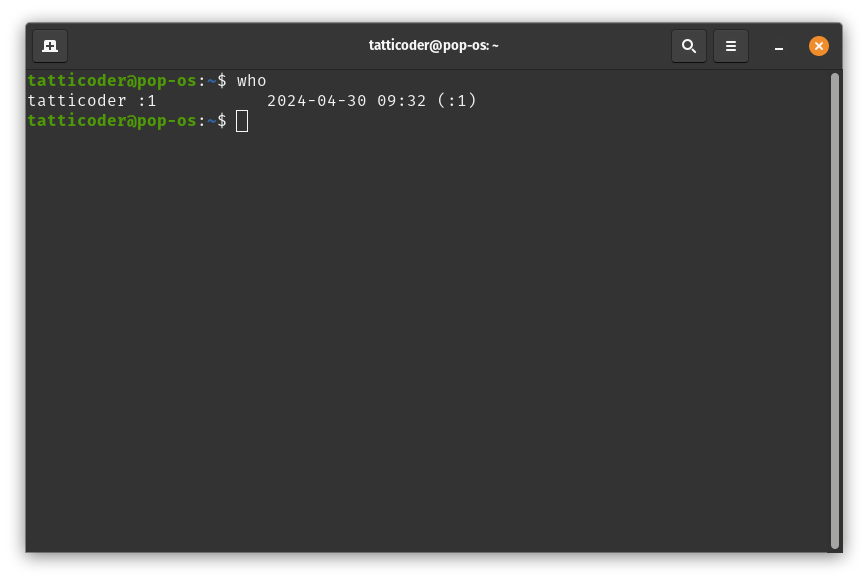
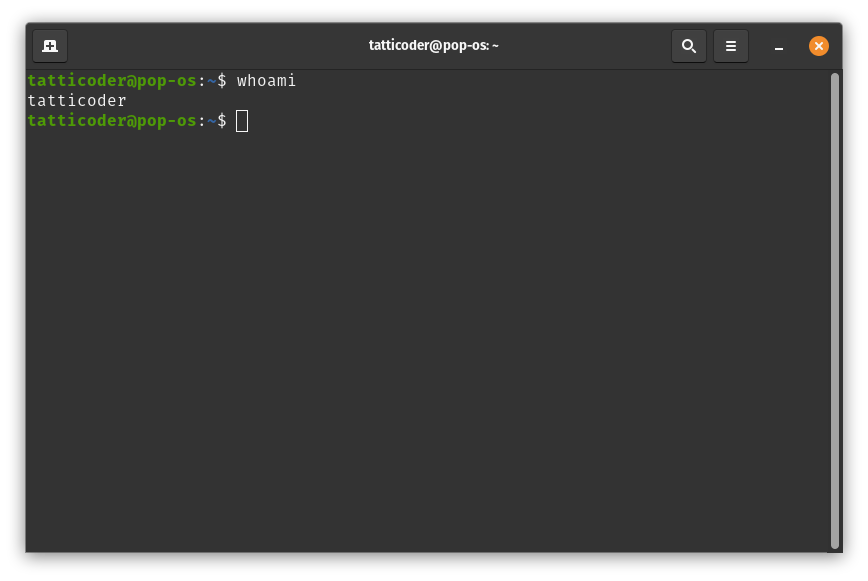







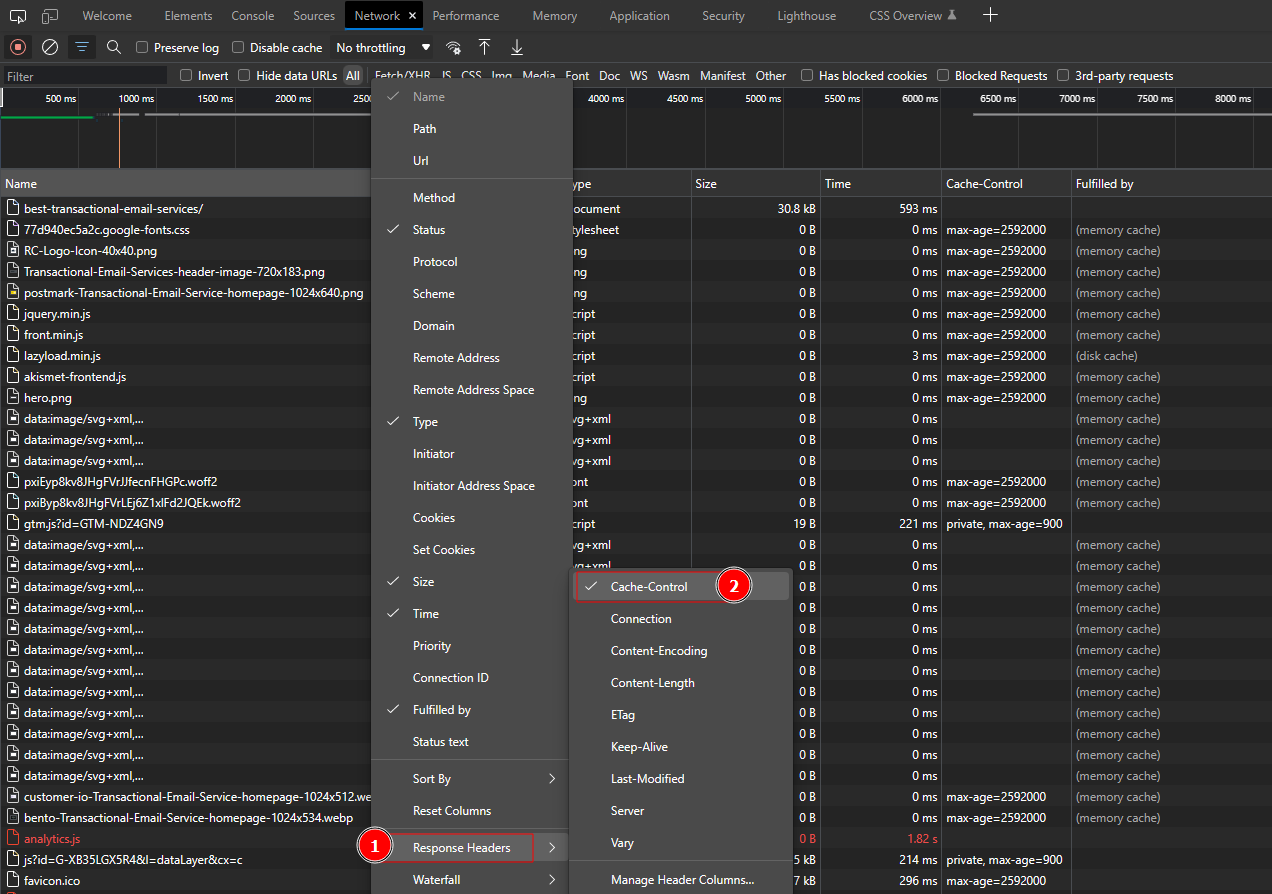
![How to Fix the HTTP Error 503 Service Unavailable in 2025 [SOLVED]](https://rcwp.scalemath.dev/wp-content/uploads/2024/04/503-ERROR-header.png)

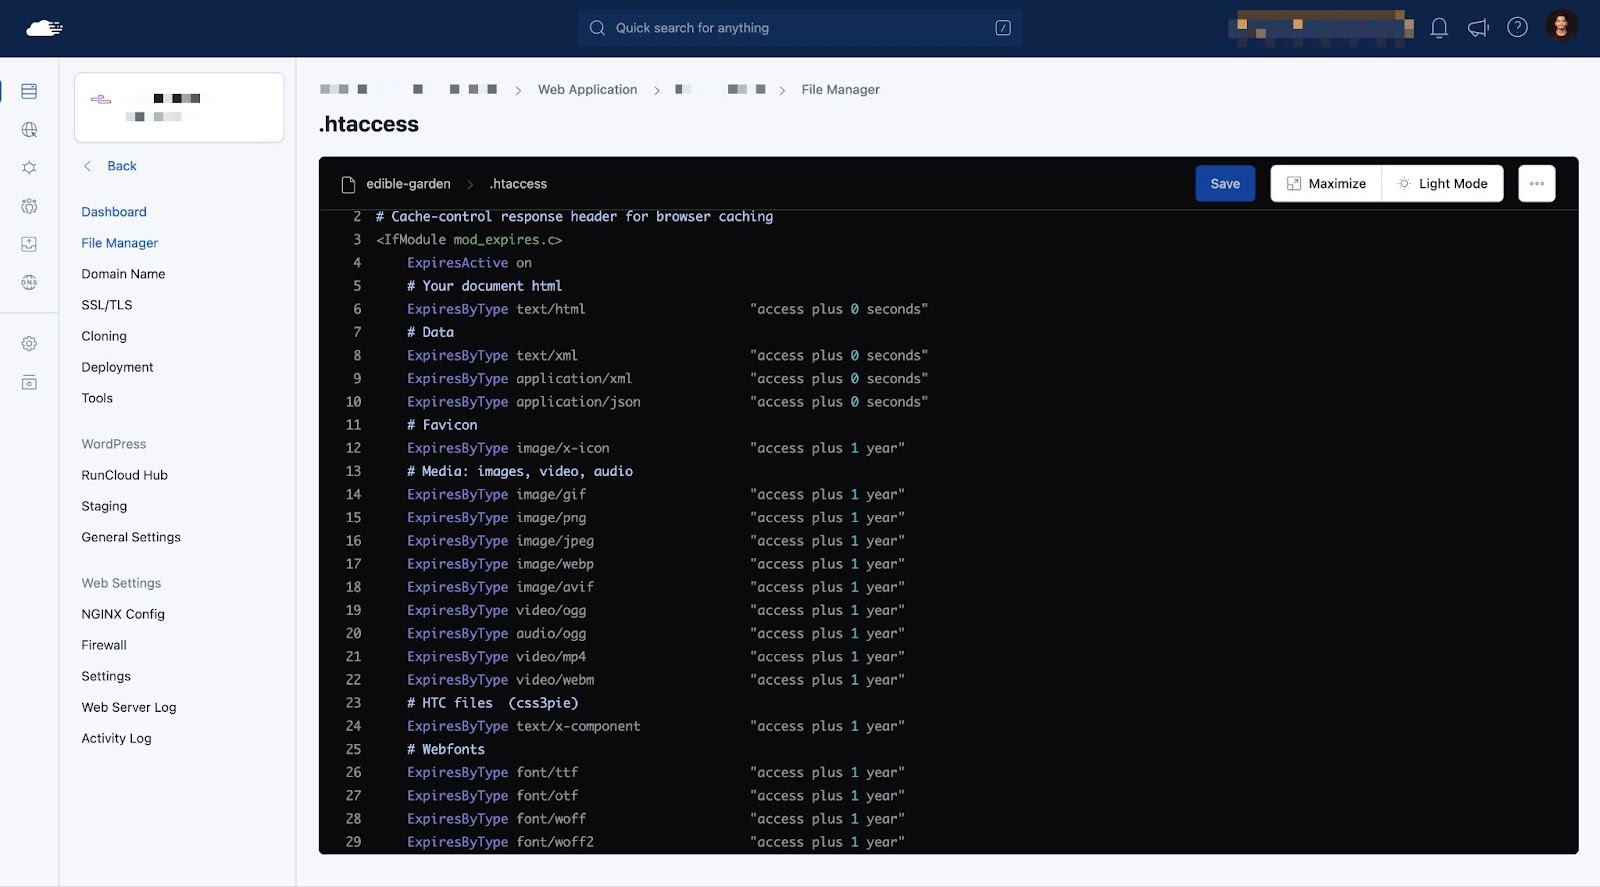
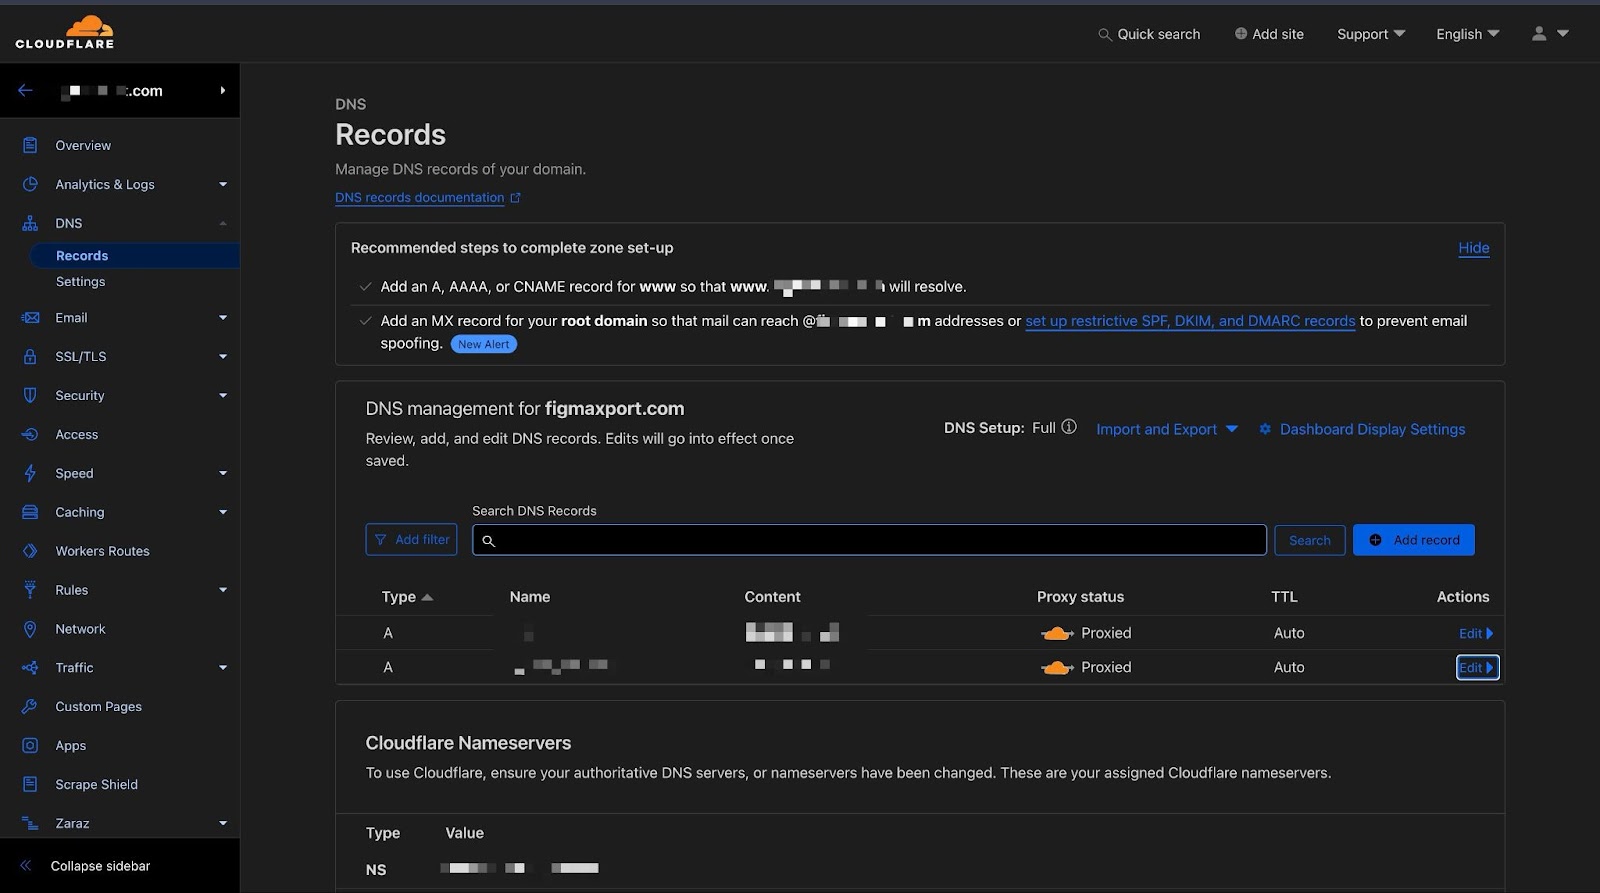
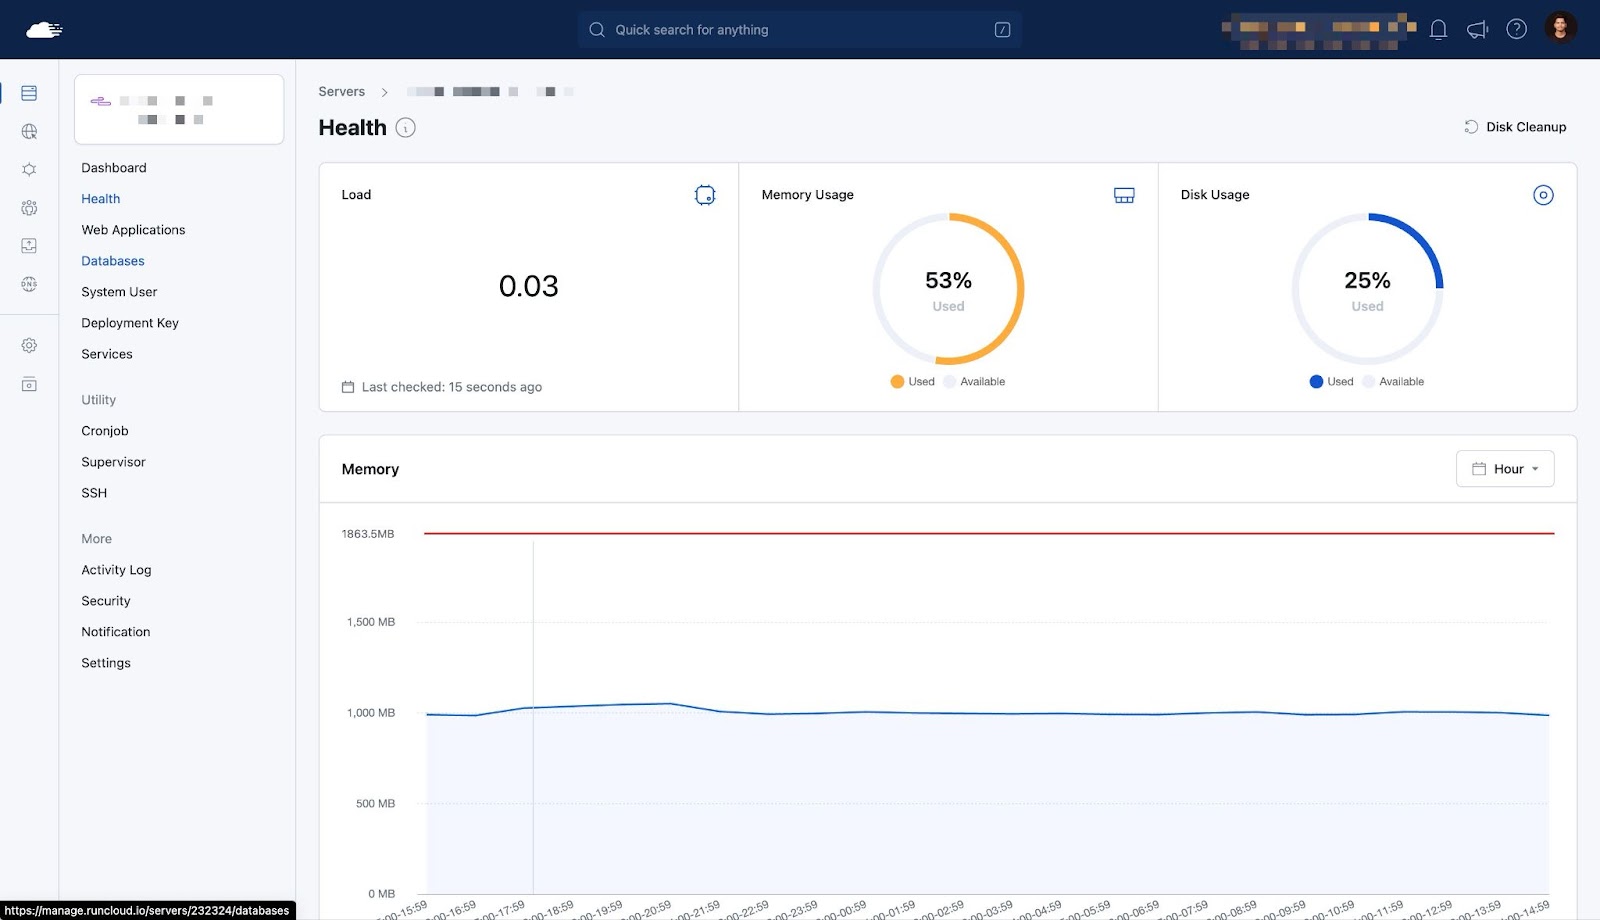
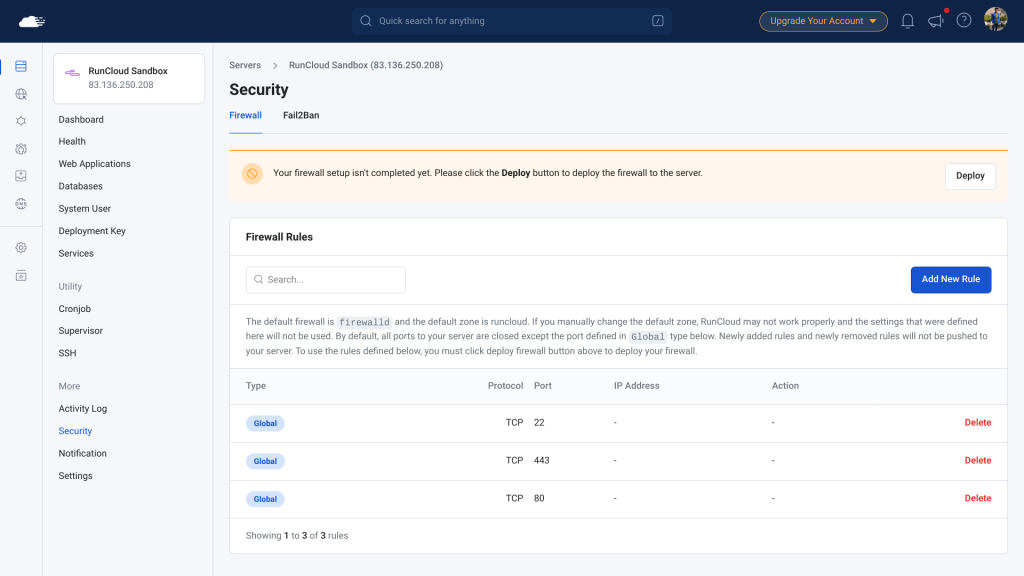
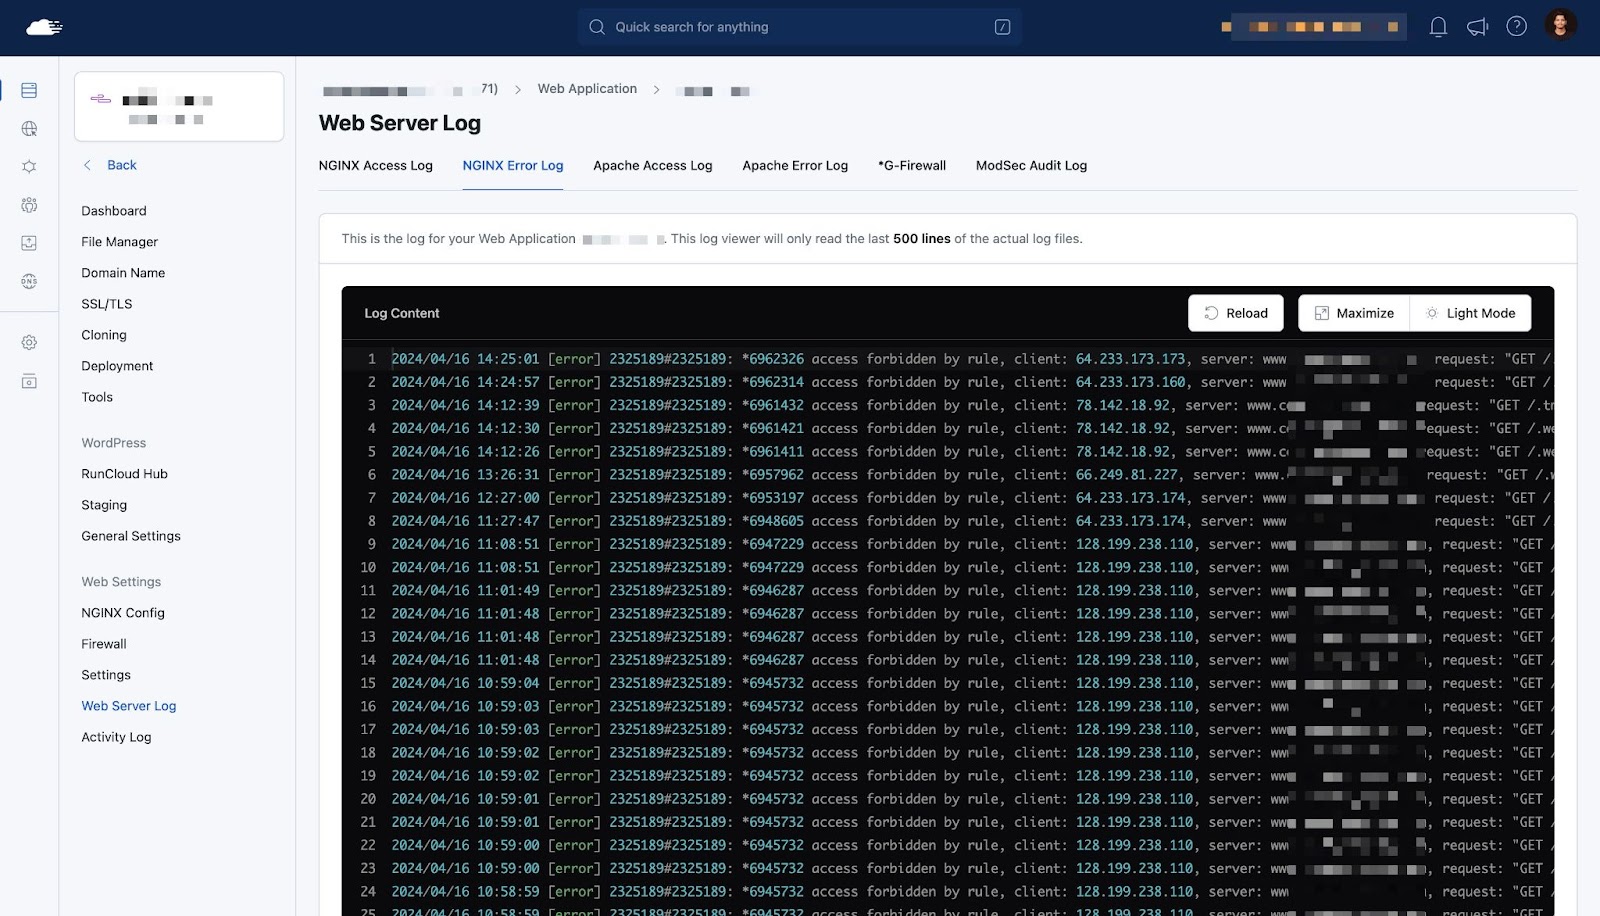
![3 Ways to Fix Too many Authentication Failures SSH Root? [SOLVED]](https://rcwp.scalemath.dev/wp-content/uploads/2024/04/Authentication-Failures-header.png)