Category: Server Management

  • What Are Linux Logs? What Are They & How To Use Them

    What Are Linux Logs? What Are They & How To Use Them

    Linux logs offer developers and system administrators a detailed account of all events, requests, and activity on the server. Log files can be used to monitor critical events in the kernel, the server, and for any services or applications actively running.

    Server administrators can review comprehensive diagnostic information about performance, ranging from kernel events to user actions. In this post, we’re going to talk about Linux logs, what they are, why they’re important, and focus on the most important Linux logs. 

    What Are Linux Logs?

    A Linux log is simply a file that records specific information relating to events, applications, and the kernel. When you face an issue, these files can prove to be a critically important tool for troubleshooting.

    In case of a problem, administrators can simply analyze these files to determine and create a timeline for the series of events that occurred, and which eventually led to the problem.

    Linux logs are generally stored in plain text and are available in the /var/log directory. Linux logs can be found for virtually everything, including boot processes, package managers, kernel, Apache, MySQL, and others. 

    The Most Important Linux Logs

    Broadly speaking, Linux logs can be categorized under the four main headings:

    1. Application Logs
    2. System Logs
    3. Service Logs
    4. Event Logs

    Since Linux logs are generally stored in plain text files, sifting through each one is incredibly difficult. That’s one of the main reasons why developers often prefer using different tools, such as log file viewers. Examples of these include Logmaster or MultiTail.

    But as a system administrator, there are some Linux logs that really demand your attention. Here are the ones that you should definitely know about.

    Application Logs

    1. /var/log/syslog

    This is a simple Linux log that shows you general information regarding system performance. Essentially, this log shows all the activity that has occurred in the system. This is the same as /var/log/messages, and shows you a generic log of all system activity.

    All non-critical and informational messages are shown here. For Debian systems, you will use /var/log/syslog. But for other Redhat systems, such as Rhel, you will use /var/log/messages.

    How to use /var/log/syslog

    These Linux logs let you track any errors related to application services or any other messages that are logged when the system boots up. Commonly, this is often the first Linux log that administrators look at when something goes wrong.

    It gives you a basic understanding of any errors, so in case an issue was detected during system startup, administrators can simply go through these messages to find out what went wrong.

    1. /var/log/maillog

    These Linux logs are used for storing information relating to mail servers. This is quite handy for any email-related services that are active on your server. It is also useful for postfix or for the SMTP daemon process.

    How to use /var/log/maillog

    If you’re running email-centric services such as MailScanner, you can find information related to them. With these logs, you can also track all incoming or outgoing emails within a defined period. 

    In any situation where mail delivery has failed, simply refer to the logs to find out why. More importantly, these Linux log files will also give you information about the origins of incoming emails. If there were any spamming attempts detected and blocked by the server, you can find these in the log files too.

    1. /var/log/yum.log

    If you have any packages installed that utilize the yum command, information related to those will be found in these Linux logs. This can be useful for determining if everything went well.

    How to use /var/log/yum.log

    You can see Linux logs that confirm whether packages were installed correctly or not, including information about other software and system components that have been installed.

    In case a software package was not installed correctly, you can find information related to that in these logs. These logs will help you identify any malfunctions and correct them by identifying the underlying issue.

    System Logs

    1. /var/log/boot.log

    These Linux logs contain startup messages and information pertaining to the boot. This includes the initialization script, which sends all bootup information to the log file.

    Think of this as a comprehensive log file that offers detailed information about the server startup process, including all messages that are logged as the server starts up.

    How to use /var/log/boot.log

    In case there were issues with startup or shutdown, you will find relevant information here. This also includes information relating to any boot failures or random restarts.

    These Linux logs are generally useful for determining issues related to system downtime, especially if the server experienced random shutdowns.

    1. /var/log /dmesg

    Another way to view Linux logs is dmesg. This shows you all Kernel ring buffer messages, including information that relates to any hardware components and their drivers.

    The kernel is capable of detecting physical hardware devices that are connected to the server as it boots up, which is why it is capable of logging hardware errors or the general status of these components. It also includes other general logs.

    How to use /var/log /dmesg

    If there’s an issue with a certain piece of hardware connected to the server, you can check the dmesg logs to determine the problem and fix it. It’s great for server management, as these logs are mainly for dedicated server customers.

    1. var/log/mysqld.log

    Finally, this is the MySQL log file. All messages related to debugging, failure, or success of the MySQL daemon are logged here.

    If you’re running RedHat or Fedora distros, you will find these under /var/og/mysqld.log. For Ubuntu or Debian distros, just search through the /var/log/mysql.log directory.

    How to use var/log/mysqld.log

    Any issues related to running or halting mysqld can be found here, so use these logs to determine what’s wrong and make changes. You can also glean valuable information about client connections to the MySQL directory using these logs.

    Service Logs

    1. /var/log/auth.log

    The auth.log generally stores Linux logs associated with authentication and includes information for both failed and successful logins. Again, for Debian or Ubuntu-based systems, you can find the relevant Linux logs in /var/log/auth.log. 

    But, for Redhat or CentOS distros, you will find them under /var/log/secure. All relevant information regarding the user authentication process can be found here.

    How to use /var/log/auth.log

    If you feel that there might have been a security breach on the servers, you may want to check these logs to determine successful or failed logins. Server administrators generally keep a watchful eye and instantly become suspicious if they notice a JavaScript file out of place or anything that doesn’t make sense.

    With these logs, you can quickly and efficiently analyze any suspicious activity, including failed login attempts. Since it records all activity related to user authentication, you can easily figure out if your server was the target of a brute force attack.

    1. /var/log/cron

    This log stores all messages related to cron jobs, including the time when the cron daemon began a job, any relevant failure messages, or other status information.

    How to use /var/log/cron

    Every time a cron job is executed, these Linux logs are used to maintain detailed information, including any error messages or issues relating to the successful execution. If your scheduled cron isn’t running properly, you might want to review these logs.

    Event Logs

    1. /var/log/faillog

    The /var/log/faillog records all relevant information related to failed logins. This is very handy for honing in and finding out about any security breaches. It’s similar to the one above, but instead of showing both successful and unsuccessful logins, it only returns failed logins.

    How to use /var/log/faillog

    If you feel that your server was targeted in a username or password hack, these Linux logs will give you comprehensive information about any such activity.

    1. /var/log/httpd

    This is a directory of Linux logs that contain access_log and error_log files associated with the Apache server. The information is stored in two different log files, with errors kept in the error_log file and memory issues related to requests via HTTP stored in access_log.

    How to use /var/log/httpd

    You can view all errors related to http daemon access using the error_log file, including any system-specific problems. More importantly, the Apache server records events and errors here that occur during http request processing.

    In case you experience an issue with your Apache web server, you can check the logs to determine the issue. In addition, the logs also contain IP addresses and user IDs of all clients that serve a connection request.

    It also contains information about the status of all server requests, including those that were successful or ones that failed.

    1. /var/log/kern

    This log offers information about the kernel and any warnings. Kernel logs can be accessed with this terminal, so in case of any errors or warnings, you can check it out.

    How to use /var/log/kern

    If you’re facing issues with custom kernels, you can check warning data through this log and troubleshoot problems. It gives you comprehensive information about any kernel errors, making it easy to find problems and fix them.

    Frequently Asked Questions

    How Do I Analyze a Log File in Linux?

    You can use a command line tool such as grep to run plain text searches. These can help you analyze log files and are generally found by default in most Linux distros.

    How Do I Manually Create a Log File In Linux?

    To create a log file entry in Linux, you can simply use the logger command. The command helps you connect with the syslog module. To create a log file, simply type “logger” (without the speech marks), followed by your message, and Linux will automatically add it in the /var/log/syslog directory.

    Where Are Logs Kept in Linux?

    You can find most of the Linux log files as plain ASCII text files. They’re commonly stored in the /var/log directory and its subdirectories.

    What Is The Purpose Of Logs in Linux?

    The main purpose of Linux logs is to provide a detailed event timeline in the Linux OS. It can be an excellent tool for diagnostics and for troubleshooting and is commonly used by administrators to determine what went wrong. 

    After Action Report – RunCloud Dashboard Makes Log Viewing Easy

    Linux logs are an excellent way to identify any errors and correct them. The RunCloud dashboard makes it easy for users to find logs within their Web Application. Simply click on the Web Application, and navigate to Web Server Log.

    Are you using Linux logs to keep track of server performance or to identify errors? If so, we’d love to know more about how you use them. Let us know in the comments below!
  • Understanding Continuous Integration vs. Continuous Deployment

    Understanding Continuous Integration vs. Continuous Deployment

    If you work in DevOps, you may have heard, or be familiar with, continuous integration and continuous deployment. Often, people use these terms interchangeably, but this is incorrect.

    Consider that you wish to implement a change to your web application – for simple changes, these are often made directly. But when you’re considering improving your development workflow, you’ll want to be able to stage these changes, test them in a separate environment, and deploy them – all without causing your site to be temporarily inaccessible to end-users.

    In essence, continuous integration and continuous deployment are two related, but separate processes for automated deployment to make changes to code. They are ways to change code in order to keep things smooth, with less need for manual testing and changing. While they do relate to each other, each is a distinct concept that needs to be understood.

    In this guide, we’ll break down what these terms mean, how they’re different, the benefits of taking advantage of them in your workflow, and how to implement them properly in WordPress – so, let’s dive right in.

    What Are Continuous Integration And Continuous Deployment?

    As we mentioned previously, they are both methods to deploy changes to code. If you need to make some changes to the code of a site, you will need to understand both continuous integration and deployment to do so.

    However, to make matters potentially a bit confusing, they can work together, with each aspect, integration, and deployment representing different factors. You have to use continuous integration as part of continuous deployment, but you may opt out of continuous deployment, however. So, they are not the same, and they need to be understood independently. Let’s dive into looking at exactly what each of these terms mean.

    What Is Continuous Integration?

    Continuous integration is the first element of a good CI/CD setup in your development workflow, and it is the automated method of combining code versions and validating results. This is particularly useful the more frequently you make changes, as you can create a CI pipeline that automatically builds and tests changes before you merge them.

    This is especially true if you’ve developed automated tests. The benefit of CI is that developers can focus on development while the key tests run in the background to catch any changes that conflict with any other existing code. This can be in the form of deploying to a staging environment or simply running automated tests in the background.

    What Is Continuous Deployment?

    Continuous deployment (CD), on the other hand, is the last element of a CI/CD workflow. Once the modifications have been integrated and tested via your CI pipeline, the next step is to deploy your new release. Many developers still do this manually, which is a huge waste of time. Fortunately, if you use a service like RunCloud to manage your server infrastructure, you can easily automate your deployments making it possible to seamlessly release your code as frequently as you’d like.

    No more sleepless nights thinking of launch days and pushing individual features.

    Deploy with no downtime for your users and easily roll back changes if you spot anything that’s acting up in production that wasn’t caught during your testing.

    Note: There is another term that is sometimes used: continuous delivery. This is very similar to continuous deployment in that it forms an important part of the development approach involved with ensuring that changes can be pushed at any time. This means that building, testing, and releasing software can take place more efficiently.

    What Is The Difference Between Continuous Integration And Continuous Deployment?

    Effectively, continuous integration is how to make the code updates work for the developers, assisting them in the implementation of code changes into the main branch. Continuous deployment is about getting the code to the end-user in a way that doesn’t interfere with the branch, and testing to make sure that changes are automatically implemented without issue. They both relate to each other, in that continuous integration plays a role in continuous deployment, but deployment is the step to get the results to the end-user.

    How Can Continuous Integration And Continuous Deployment Work Together?

    You need continuous integration if you want to do continuous deployment. In that, if a commit is being deployed regularly to production, it needs to be working, and you need to be sure of that. Continuous integration allows you to ensure that it works. So, if you want to do continuous deployment of regular commits, you need to do continuous integration.

    However, if you do not have regular changes, you may not need to do continuous deployment; rather, you may choose to opt for continuous delivery and integration. The integration ensures all code changes work, and delivery requires manual approval of the implementation of the changes. Deployment becomes more useful when you are comfortable with the testing process, and you have more regular changes to implement.

    Why Use Continuous Integration?

    Continuous integration is useful for you and your team to ensure that code changes work. There are several reasons you should use this approach, which we outline now:

    Advantages Of Continuous Integration

    • Fewer Bugs — Because of the automated tests, bugs get caught early on, and there is less chance of breaking.
    • Easy Building Of Release — As you are ensuring that integration matters are taken care of early, the release can be built much easier.
    • Less Context Switching — Developers immediately know when something breaks, allowing them to fix it prior to changing tasks.
    • Less Testing Costs — Continuous integration servers can handle hundreds of tests per second. This reduces your costs considerably.
    • Less Documentation — If you just use continuous integration without continuous deployment, you will have less need to document each and every automatic deployment.
    • Less Need For Top Level Testing — Similarly, if you forgo continuous deployment, you don’t need as much top-level testing to ensure that your automatic deployment works. In fact, you have more manual control over the process.

    Why Use Continuous Deployment?

    With continuous deployment, you make your life considerably easier in the long run. It allows for efficient deployments, and given that you trust your testing, it means that you can spend more time developing instead of worrying whether your changes will work outside of production.

    Here are the reasons to consider using continuous deployment:

    Advantages Of Continuous Deployment

    • Fast Development — There is no need to pause development for each and every release. Rather, the pipelines get automatically triggered to make changes.
    • Less time-consuming tasks — Continuous deployment automates a range of tasks, saving a lot of time.
    • No Daily Merging Of Changes — If you just use continuous integration, you have to take care of merges every day, but continuous deployment does this for you.
    • No tests for each feature — Just using continuous integration requires tests for each new feature. Continuous deployment takes care of that for you.
    • Less Risky Releases — With continuous deployment, you can release small batches of code, which are easier to fix.
    • Daily Improvements — The end users get to experience constant improvement on a daily basis.

    How To Adopt Continuous Deployment?

    If you want the benefits of continuous deployment, but so far are only using continuous integration and delivery, how easy it would be to adopt continuous deployment will vary depending on where you are with your project status.

    When starting a project, you can implement continuous deployment as soon as possible. You can automate deployments before having end-users, to ensure all things are running smoothly, and generally check that everything is working fine. You can increase the testing and when eventually you are content with the deployment process, you can then launch with a whole continuous deployment process in place.

    If your project is already running, and end-users are already present, there are some things to consider changing:

    1. Start with continuous integration and delivery, in order to have more control and checks over the process.
    2. Then create basic tests for automatic execution, to avoid making things too difficult.
    3. Then you can start automating deployments so that eventually all deployments are done automatically.
    4. When you are ready for full continuous deployment you need to ensure that everyone is ready and aware of the nature of any changes to the code, as this can affect customers. Constant planning is also required as are top-level testing capabilities.

    The Best CI/CD Tools We Recommend

    There are multiple tools out there to do the heavy lifting with both continuous integration and continuous deployment. Generally, they help facilitate the integration and automated deployment of code.

    If you already use RunCloud to manage cloud infrastructure, we offer built-in Atomic Deployment, so you don’t have to worry about setting up, configuring, and paying for yet another service to handle your continuous integration and deployment needs.

    That being said, other big names that provide services for continuous integration and deployment are Jenkins, CircleCI, and GitLab, among many others.

    Jenkins is an open-source automation server, with building and integration processes, and it supports hundreds of plugins to help with integration as well as deployment.

    With CircleCI, you are able to have an automated pipeline, from building to deployment, and it is compatible with many other programs, including Jenkins, GitLab, and others. It also hosts continuous integration on the cloud or behind a firewall on your own server.

    GitLab is a Git repository manager and lets you trigger builds, run tests, or deploy code at each push or commit.

    Find what tools you require to help with your continuous integration and deployment needs.

    How Does Continuous Integration Or Continuous Deployment Work With WordPress?

    Generally, WordPress projects are a bit different, due to the lack of suites for built-in units and integration tests. However, these processes can still apply to WordPress. The main concern for developers when it comes to WordPress is ensuring everything works without affecting the speed of pages. Continuous integration and continuous deployment can take care of this.

    Do bear in mind the nature of the structure will be affected if the project has a standalone theme or plugin, or WordPress’s feature themes.

    Generally, you would first need to build your dependencies.

    Second, you test your code. If you use continuous integration and continuous deployment, you can test within your site. Different developers use different approaches, but it is something that can be done with WordPress.

    Finally, you can deploy. When you deploy in WordPress, it is most likely you are deploying a plugin, theme, or full site.

    RunCloud’s Atomic Deployment feature is platform-independent, which means it works with WordPress, but it also works with other platforms, such as Laravel. PHP management tools are essential for WordPress. 

    After Action Report – Implement CI/CD In Your Development Workflow Today

    Continuous integration and continuous deployment are two terms that are used interchangeably, in part because they are often linked together. However, we explained the different natures of each of these things. Whether you wish to use continuous deployment is up to you, but it is a good way to save a lot of time and effort, once set up.

    It is generally better if you can trust your testing capabilities or are in the early stages of project development. Consider learning more about how RunCloud’s Atomic Deployment can help with your site. Here are some sources you can find out more about Atomic Deployment:

    Do you have any specific questions about continuous integration and continuous deployment? Or think we’ve missed something worth including in this post? Join the conversation by leaving a comment below. 💬

  • When And Why To Use Docker

    When And Why To Use Docker

    Docker is a popular containerization platform that has been used by developers and teams to build and scale containerized applications. However, many non-technical professionals are unaware of its capabilities, or why Docker is such a popular choice.

    In the following article, we are going to do a deep dive into Docker, and explain why it is so popularly adopted and used.

    What is Docker?

    At its core, Docker is simply a containerization platform that’s available open-source. For those who don’t know, containerization simply refers to packaging software code using simply the libraries of the operating system and the dependencies needed to run the code.

    It’s all packaged in a single, lightweight “container”, allowing consistent execution on any kind of infrastructure. Containers are preferred by developers instead of virtual machines (VMs) because they are more portable and can be used for running modern cloud-based applications.

    Docker makes it easy for developers to create containers, making the process for building, managing, and deploying containers incredibly straightforward. Think of it as a toolkit that lets you manage containers using a single, straightforward API.

    Here are some other reasons why Docker is so popular:

    • It simplifies infrastructure management
    • Ideal for building and sharing disk images
    • It can be used to maintain a centralized repository of all disk images

    For instance, while you write code in Java and run it using a JVM, you can create a Dockerfile and deploy it on a Docker server.

    And, like Git, Docker makes the same promises, except you can track changes in systems, instead of changes in code. Docker lets you track changes throughout your entire system, letting you pull history to see all recent updates.

    We already made an entire post on what Docker is, so if you want to know more details about it, make sure to check our post here.

    Why Use Docker?

    So, now that you understand the basics, let’s talk about the many reasons why so many dev teams and technical professionals prefer Docker over other options, such as Kubernetes or Microsoft Azure Container Registry.

    1. Security

    One of the main reasons why Docker is such a preferred choice for dev teams is because it adds a layer of security that developers don’t get if they build outside of Docker. For starters, you get the option of separating individual components of a larger application into separate containers.

    This way, should a single container become compromised, you won’t have to worry about the effect permeating through the rest of the application. With distributed teams working on different components, additional security is always good.

    2. Version and Environment Control

    Docker has the ability to track discrete versions of container images. This gives you unprecedented version control, letting you roll back to a previous iteration, view past-built versions, including developers who worked on them, and how the work was done.

    More importantly, you can also decide to upload exclusively just the changes that were highlighted between an existing version of a container and the new version.

    If your software runs in different environments, there’s also a risk of identifying inconsistencies in behavior depending on the machine or environment that the software runs on.

    For instance, one element that works on a developer’s computer might not work on a specific server, which would be a new environment.

    However, since Docker lets you isolate software in containers, you can run them separately without having to worry about environmental changes.

    3. Identical Code Reproduction

    One of the biggest advantages of Docker is its ability to reproduce code in an identical fashion on any system, as long as it is capable of running Docker. Just like Java apps, which tend to run in the same way as long as the machine supports Java VM, Docker containers can do the same.

    You can view the exact specifications of different containers using their Dockerfiles. This way, when working in teams, you can guarantee that all software images that are built using the same Dockerfile will function the same way.

    And, having consistent code documentation is obviously going to make it easier for you to identify issues and track your application development in a better manner.

    4. Isolated Environment

    This one links with additional security. Since the dependencies of one container don’t affect other installations on the container or other containers, developers can prevent any kind of conflicts between dependencies.

    For instance, you can use separate containers for front-end development or for servers. This makes it easy for dev teams to run multiple projects on the same server, without having to worry about any conflicting dependencies.

    5. Easy Technology Management

    Docker makes it incredibly easy to manage new technologies and to test them out. If you’re interested in trying out new programming languages or new databases, you can easily do so. The Docker Hub has a fantastic collection of ready-to-use docker images.

    Just search for a relevant Docker image, and you’re good to go. You can seamlessly add it to your existing Docker configuration. This helps teams save a great deal of time that would otherwise be spent on debugging or installing new images.

    When To Use Docker

    Not sure about when Docker might be useful for your development? We’ve put together a range of situations to give you a better idea about when to use Docker.

    1. When Running Orchestration Engines Like Kubernetes

    While it’s easy to manage a handful of containers directly from the Docker Engine, things do become a bit confusing when your software deployment includes thousands of containers and several services.

    That’s why you might want to consider using an orchestration engine, such as Kubernetes. Container orchestration tools such as Kubernetes are incredibly powerful and are the preferred choice for most developers.

    Docker does have its own orchestration engine, entitled Docker Swarm, though Kubernetes far outranks it in terms of popularity.

    It helps automate several tasks associated with containerized architectures. This makes it incredibly easy to run multiple servers and even lets you deploy your services on several new services.

    2. Ideal for Implementing Version Control

    As stated above, Docker containers make it easy for you to standardize the environment and speed up software development cycles. For instance, if you perform an upgrade on a specific component that ends up breaking the entire environment, you can easily roll back to a previous Docker image.

    Docker is much faster than conventional VM backups, allowing you to quickly replicate the changes and launch new Docker images.

    3. When You Have Developers Working In Different Setups

    Development teams tend to change quite frequently. It’s always a bit time-consuming when you are onboarding new developers to an existing project. Before they can start writing code, you need to make sure that they have a local development environment set up.

    Depending upon the project complexity, this can take quite a bit of time, especially when you have to add third-party libraries and databases too. Docker simplifies this process, virtually automating it to the point where developers just have to run a single command, and Docker will do the rest.

    This way, not only do you save a great deal of time, but it also allows you to activate new team members from the first day.

    4. Isolating Apps

    Developers tend to add new libraries, dependencies, and services to software on a daily basis. This tends to get more complex over time, which is why it’s important for you to make sure that you keep track of all parts, and above all, prevent the software from breaking.

    Docker lets you isolate apps or settings within specific containers so that they won’t affect other installations or instances of apps running on the same system.

    5. When You Want to Move Away From Amazon AMI Marketplace or the Warden Project

    There are a couple of alternatives available to Docker, including the Amazon AMI Marketplace, which is arguably the closest substitute. However, the problem with AMIs is that they run exclusively on Amazon.

    That’s not the issue with Docker, since you can run it on any Linux server, as long as it supports Docker. More importantly, Docker container services also work on Amazon EC2 (Elastic Compute Cloud).

    Another option is the Warden Project, which was written for Cloud Foundry. However, Docker again wins in this field as it contains more social options, letting developers share images with others who are on the same Docker Index.

    After Action Report — Docker Is Application Development Standard

    Docker is a fantastic choice in most cases, but it’s not always the best choice. For instance, while Docker’s a fantastic choice for web apps, it’s not viable if you’re developing a desktop application. While you can build such apps on Docker, it’s generally not the natural environment for running apps that have rich GUIs.

    All in all, Docker’s a fantastic open-source platform that greatly helps development teams streamline workflows and manage development more effectively.

    Have you worked with Docker before? What are your thoughts on it? Let’s discuss in the comments!

  • What is Docker And How Does it Work

    What is Docker And How Does it Work

    Software development is a process that evolves every year, but very few things in the industry have become the standard, like Docker.

    Since 2013 when it was publicly released, Docker has been used for developing, shipping, and running applications. To this day, it’s a vital part of software development that many experienced developers use.

    In this article, we’ll be covering what exactly Docker is, the advantages, and disadvantages of using it, and how it actually works.

    What is Docker?

    docker homepage

    Docker is an open-source containerization platform that develops, ships, and runs apps separate from your local or host infrastructure. It’s a platform that creates and manages containers that are isolated from one another but can communicate with each other through defined channels.

    The reason why Docker is a popular PaaS is because of the concept of containers, where they use fewer resources than VMs.

    What Are Containers and What Do They Solve?

    Before we elaborate on what Docker does, let’s first understand its components.

    All apps and programs are developed to run in specific environments. These environments either have the libraries or tools required by the app or run the software version that the app is compatible to run on.

    Containers are such environments and include all of the libraries and tools for apps to run in. What a container does is pack these apps inside containers together with the app’s libraries and tools so that it can run anywhere without having to rely on the host’s environment.

    Here’s a simple analogy:

    IKEA sells furniture that requires self-assembly. But, how do they know that all their customers have the tools to assemble their furniture? They don’t. IKEA ships the tools together with the furniture so any customer in the world can set it up the moment the IKEA package arrives on their doorstep.

    This is essentially how containers work, making developing and shipping software easier. By including all the tools necessary in the container environment, developers no longer have to worry about incompatibility issues with different servers or hosts. Another term that’s often thrown around with containers is microservices.

    What Does Docker Do?

    Docker is simply a platform that manages these containers so that you can build different, specific environments easily.

    The Docker platform lets developers and programmers use containers seamlessly throughout their workspace. Whether you’re an in-house or remote team with members around the world, using Docker to ship and run your containers is a low-cost way of building software more efficiently.

    But there are many more benefits to using Docker aside from convenience. We’ll talk more about how containerization is faster, more secure, and better suited for scaling, later on in this article.

    What Does Docker Solve?

    Docker solves the problem of creating containers yourself and managing them across an entire team. This becomes especially important when you want to optimize the workflow of your development process.

    The Advantages and Disadvantages of Using Docker

    Aside from just the managerial side, Docker also solves numerous other complex, arduous problems.

    Here are the key advantages of using Docker

    • Reliability. Containerization with Docker ensures that your apps will run virtually anywhere that has Docker installed. You don’t have to worry about having incompatible versions or manually installing dependencies.
    • Efficiency. A huge bottleneck in software development is when apps or software break down in computers without their environment. By using containers, you can get rid of these bottlenecks and streamline workflow to focus on developing software and not getting sidetracked by installing dependencies.
    • Scalability. Having the option to quickly create new containers and deploy them allows for faster patches or updates to your software. Unlike monolithic programming which typically means building into existing code and then restarting it to update the program, containers let you build on top of each other independently. This means that you can add and remove containers without damaging other containers and their functionality, making it easier to scale your software.
    • Accessible. The routine check-up and optimization process of software maintenance is also easier with containers. Since containers work independently from each other, you can configure, update, and then deploy a container without having to shut down or disturb other containers. This makes containers easily accessible.
    • Lightweight. Containers are a lightweight alternative to virtual machines that need operating systems to function. Containers avoid the need to do this by sharing the host’s resources, like RAM and CPU, instead of virtual machines that require dedicated resources even if unused.
    • Version-freedom. Since containers are isolated from each other, you can run a container with the latest version of JavaScript while another container runs an older version. There’s no perfect version for every language and programmers are more familiar with some versions than others. Having the creative freedom to use any version without damaging other lines of code through containers makes your software all the more versatile.

    Nothing is perfect and Docker is far from being the one-stop solution for everything. The platform does have its own fair share of disadvantages that you should look out for.

    Disadvantages of using Docker

    • Steep Learning Curve. Although Docker is convenient and fast, there’s no denying the learning curve it takes to become proficient with the platform. You won’t be a master at using Docker overnight and you can expect your team members to have the same struggle. You’ll also have to learn about Linux if you need to conduct maintenance or customizations on your Docker Engine.
    • Platform to platform communication. Although containers talk to each other seamlessly, the companies that work in this space don’t always see eye to eye. Rival container companies don’t often work with each other, which can be a deal-breaker if you want to expand the tech you’re using.
    • Temporary containers. Once a container’s use is finished, such as when it finishes a process and is no longer used, the container shuts down together with all the data it processed. The data isn’t saved unless you use Volumes to store your data to the Docker Engine. This isn’t necessarily a bad thing, but it’s something noteworthy for the development process of your software. Docker has no automated solution for this yet.
    • Command line interface. Docker’s interface is similar to a command line, making it a bad choice for running apps that require a graphical interface. It’s mainly optimized for apps and programs that are run through commands on a terminal.

    Lastly, a common problem new companies face with Docker is when they try to use it without understanding how to design and orchestrate development architecture first. Docker isn’t meant to be a one-size-fits-all platform and some programs are just better off without it.

    How Docker Works

    Docker works on a client-server basis. The Docker client, which is what you see, talks to the Docker daemon which takes care of executing and managing tasks.

    Docker’s Core Components and Architecture

    Beneath all that, there are more features from Docker that serve different functions. For today, we’ll only be focusing on Docker’s four core components.

    Docker Client

    The Docker client is the interface between you and the Docker daemon. This is where you’ll be inputting your commands, running programs, and mainly interacting with Docker.

    Docker Daemon

    The daemon is what manages everything on your Docker platform, whether it’s images, containers, volumes, or networks. In simpler terms, this is the mastermind behind your entire Docker operation. All the commands you send through the client are processed by the daemon and managed by it. Daemons can also connect with daemons from other servers.

    Docker Registries

    The Docker registry is an open-source system where you can store and download Docker images. You can even set up a private registry in your workspace that’s shared with your colleagues.

    Docker Images

    Docker images are read-only files with instructions for creating Docker containers. In simpler terms, it’s like a blueprint that tells the Docker daemon what environment to run. This is part of what makes container creation much easier and faster. Combined with the Docker registry, you can find presets of images that are publicly available or even create custom ones for your workspace that your colleagues can use.

    Docker or Kubernetes

    A question that’s often asked by newcomers to Docker and containerization is “What’s better, Docker or Kubernetes?”

    The answer to that is surprisingly simple: both.

    What is Kubernetes?

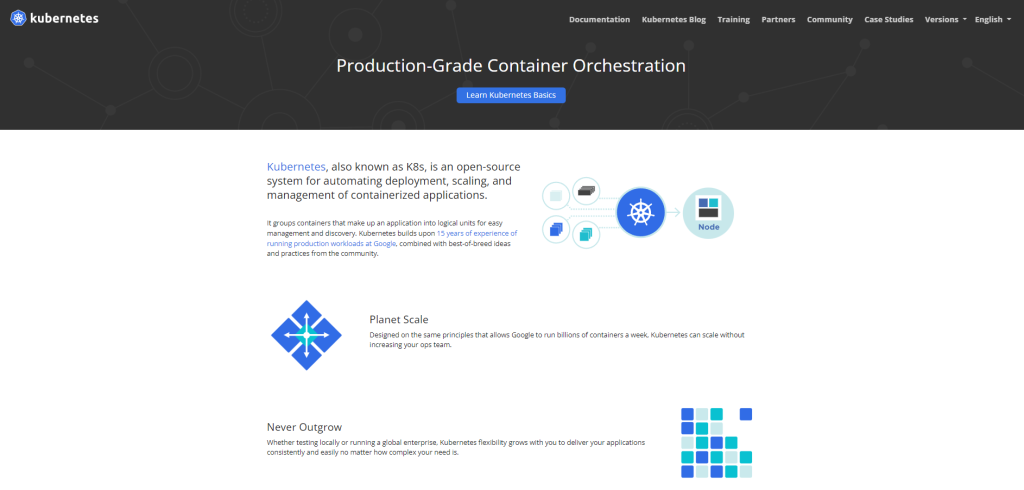
    kubernetes homepage

    Kubernetes is a system developed by Google to manage deployment automation and containerized services. It’s built to handle and manage containers in the hundreds or thousands, and to optimize how these containers work with each other. Kubernetes does this through nodes that are built for special functions.

    These nodes can be categorized into two things: workhorse nodes and head nodes. Workhorse nodes are responsible for anything computational and do all the heavy lifting. This requires more resources than the head nodes. On the other hand, head nodes are responsible for assigning tasks and receiving the final outputs.

    In short, Kubernetes is made to manage and optimize the entire workflow of containers with each other, and this makes it very different from Docker.

    What’s the Difference Between Docker and Kubernetes?

    Docker is a containerization platform that builds, ships, and runs containers. It’s a platform that lets you build containers just as easily as you can deploy them.

    In contrast, Kubernetes shines more on container management and efficiency. It handles lots of containers and optimizes them to work faster through nodes.

    After Action Report – Should You Use Docker?

    So, should you use Docker for your software? Well, it depends.

    Related: When And Why To Use Docker

    Docker generally has the highest impact on your development process if you need to port your environment often. The next biggest consideration for using Docker is if you’re working with large teams that have to continually test your apps back and forth. Teams that work between developers and operations managers who need to run apps on different computers would find Docker a lifesaver.

  • How To Fix The WordPress HTTP 500 Internal Server Error (Easy)

    How To Fix The WordPress HTTP 500 Internal Server Error (Easy)

    WordPress website errors can be annoying to deal with. There’s never a one-stop solution for these problems, and a vast range of causes, from themes and plugins, causing compatibility issues, to out-of-date software and even web hosting problems.

    A WordPress HTTP 500 server error is something no web developer wants to see. It can damage the rankings of your website and decrease user experience if left unattended for too long. Google is quite particular about broken links and the HTTP 500 error is counted as such.

    In this article, we’ll be going over everything you need to know about the 500 server error. We’ll talk about why it happens, the general and technical solutions you can do to fix it, and how you can avoid this error in the future.

    Let’s start troubleshooting.

    What Is WordPress HTTP 500 Internal Server Error?

    The HTTP 500 server error is when your page doesn’t load or can’t be accessible. It’s a generic error response that means the server couldn’t fulfill your request. There are multiple variations of the error. Here are some common examples:

    • 500 Internal Server Error
    • Temporary Error (500)
    • The website cannot display the page – HTTP 500

    As long as there’s a “500” attached, you can safely consider it an HTTP 500 error and the steps below should resolve this issue for you.

    What Causes HTTP 500 Internal Server Error?

    This internal server error can be caused by a lot of things, usually server and file-related cases. Example causes for this are:

    • Corrupt or badly installed WordPress theme
    • Incompatible or compromised plugins
    • PHP version incompatibility
    • Corrupt .htaccess file
    • Problem with your host server

    Thankfully, you can fix most of this yourself, but it’s always a good idea to consult with your web host from the start, just to make sure that issue is not on their end.

    General Fixes (Try These First)

    These general fixes are steps you can do that don’t involve configuring your WordPress website and changing the settings. The steps below are simple to do and are great to get out of the way before you start going into the more technical fixes below.

    Open page on a different browser or use Incognito mode

    Try opening your page or website on a different browser or by using incognito mode. Using a different browser would be best here. Better yet, try opening your webpage with someone else’s computer.

    If your website or page opens on your 2nd browser or elsewhere, then the problem might have to do with the caching or cookies of your 1st or default browser.

    Clear browser cache and delete cookies

    Browser caching stores useful webpage data in local storage, so that when you revisit that site, your local cache can load the site from there. This is especially useful since most websites don’t make huge changes and caching makes things faster for you. Unfortunately, if something does change, there’s a chance that the old information your browser is storing might cause an error on your side.

    NOTE: Clearing your browser cache and cookies will completely log you out of all the websites. Only go through this step if you can open your page on another browser or another computer.

    Clearing your browser cache and cookies will fix this problem, by loading the webpage from scratch. Now, the process for clearing cache and cookies is somewhat different for all browsers, so we’ll only cover the steps for Google Chrome since that’s the most used browser.

    1. On your Google Chrome browser, click on the top-right icon with the three dots (⋮).
    2. From there, click on More tools and go to Clear browsing data.
    3. You can choose a time range, but generally, we’d go with All time.
    4. After that, check the boxes for:
      • “Cookies and other site data”
      • “Cached images and files”
    5. Click on Clear data.

    Once you’re through with that, try loading your website now and see if you still get the HTTP 500 Error.

    Flush your DNS

    A Domain Name System or DNS is like the internet’s translator between you and servers online. Your DNS stores IP addresses that you’ve been to just like a cache system. So, when you search for sites like RunCloud.io or Facebook.com, your browser can just get the IP address from the DNS instead of searching for that IP through the internet.

    If an IP address changes or the DNS is compromised, it will result in providing an IP address that doesn’t work. Flushing a DNS is another way of clearing the DNS cache, so you can update and resolve connectivity issues like the HTTP 500 Error.

    1. Close your browsers first.
    2. Next, press the Windows + R keys to open the Run dialog box.
    3. Type in ‘cmd’ and press Enter.
    4. On the command prompt, type in command ‘ipconfig /flushdns’ and press Enter.

    For Mac users, here’s your step-by-step process:

    1. Open up Spotlight by pressing Command + Space.
    2. Type in ‘Terminal’ and press Enter.
    3. Copy-paste the following command into the Terminal: sudo dscacheutil -flushcache;sudo killall -HUP mDNSResponder and hit Enter.
    4. You’ll be asked to enter your Mac password. This is normal, the Terminal is just asking for verification.

    There’s no success or ‘operation complete’ message from Terminal when you’re done flushing your DNS, so don’t wait for one. Once you’ve completed the steps below, reload your browser and see if it fixed the issue. If the 500 Error is still there, let’s start with the more technical fixes below.

    How to Fix The HTTP 500 Error – Technical Fixes

    Contact Your Host

    Before we proceed, contact your host and ask their support team for help first. Although there’s a good chance that the problem is with your WordPress files, having your support ticket pending as early as now will help you get a reply while you tinker with the fixes below.

    Besides, there’s a good chance that your host’s support team can help you with the technical solutions anyway.

    PHP Version Incompatible

    Another reason you have this problem might be because of different PHP versions. Some hosts automatically update their PHP versions, which can result in errors if your WordPress theme or plugin is outdated. For this problem, you’ll want to talk to your host first and include this query in your ticket request.

    Backup Your Website

    Backup your website first. While the steps below shouldn’t compromise your site, it’s always better to be safe and have a backup. Depending on your provider, you may already have a daily backup that you can just fall onto if you need it.

    Otherwise, you can backup your site using a backup plugin. Here are a couple you can use:

    Learn more about performing website backups the right way in our complete guide.

    Corrupt .htaccess File

    A corrupt .htaccess file is one of the common reasons why the HTTP 500 Error happens.

    The .htaccess file controls many of your website’s configurations, including URL redirects and loading custom error pages. It’s like the directory and navigation system of your site. Getting this file corrupted can result in HTTP 500 Errors, among many other possible problems like 404 messages.

    NOTE: configuring your .htaccess file can be difficult for beginners and you may do more harm than good to your site if you mess with the file’s settings. In this fix, we’ll only be disabling the current .htaccess file so your website can make a new one. Ideally with no errors.

    1. Connect FileZilla or SFTP of choice to your website.
    2. Go to the directory that stores folders like wp-admin and wp-content, then look for the .htaccess file.
    3. When you find it, right-click the file and rename it to ‘.htaccess-old’.
    4. Refresh your website and check if the error message is gone.

    If the error is fixed, then your old .htaccess file is corrupt and producing the error. Here’s how you can create a new .htaccess file:

    1. Open the WordPress dashboard and go to Settings.
    2. After that, look for Permalinks and open that menu.
    3. Create a new .htaccess file and configure it as Plain.
    4. Click on Save Changes.
    5. Change the permalink structure to whatever works for you and click on Save Changes when you’re done.

    That should recreate a new .htaccess file for you. Reload your website and see if it fixes the issue.

    Check Your Plugins

    Did you recently install a new plugin or update a plugin’s configuration settings?

    Plugins are a great way to elevate your site, but they can be an arrow to the knee when you have too many. They may conflict with each other or be outdated from lack of maintenance. Either way, checking your plugins is a great place to begin. Start by deactivating the most recent plugin you installed and then check your website for the error. Here’s how you can do that:

    1. Open your WordPress admin panel. The URL for that is www.sample.com/wp-admin but replace ‘sample’ with your website name.
    2. From there, go to Plugins.
    3. With all your plugins listed out, look for the most recent plugin you installed and disable that.
    4. Open your website on another tab and see if it fixed the HTTP 500 Error.
    5. Repeat this until you’ve gone through most, if not all, of the plugins.

    If the error still persists, it’s safe to assume that it isn’t because of your plugins. You can reactivate them all again.

    On the other hand, if the problem is fixed and the error disappears by disabling a plugin, activate all your other plugins one-by-one until the error pops back up. The remaining disabled plugins should be the main culprits. To fix that, you can either update the plugins or replace them with an alternative.

    If updating the plugin doesn’t solve your problem, try Googling your current case. Chances are that other WordPress users have also come across your problem and may have the solution.

    Reinstall or Switch Your Themes

    Are you using a new theme or is your theme outdated?

    A new theme can break pages in a site, especially if it isn’t installed properly. Before you reinstall your theme, try switching to your old theme or with a default WordPress theme like Twenty Sixteen. Does the HTTP 500 Error still occur? If yes, then the new theme might be the problem. If not, we advise you to move to the next solution.

    Now, changing your theme can be risky if you’re inexperienced. Issues like incomplete theme files, installing the wrong version of a theme, and more can occur and possibly increase your problems. We suggest only doing this if you’re either familiar with manipulating WordPress files already or have a backup of your website that you can simply restore.

    Here’s the step-by-step guide on how to do that:

    1. Connect FileZilla or your SFTP of choice to your site.
    2. Look for your wp-content folder and then go to themes.
    3. Find the folder with the theme you’re currently using and rename the theme folder into ‘themename-oldver’. Adding ‘-oldver’ will help you identify your old theme from your new one.
    4. Now, install a fresh copy of your theme like you normally would.

    Alternatively, some drag-and-drop builders like Themify and Elementor allow you to easily re-install themes from the WordPress dashboard. The steps for these differ from builder to builder, but try looking for your theme and go over the options. The re-install button should be there.

    Once done, the fresh theme should retain all your settings and personalizations. Verify if everything works correctly and open the problematic pages that had the HTTP 500 Error. If the problem is fixed, then your old theme probably has an issue. You don’t have to delete your theme’s old copy. Keep it there just in case, you can even change the label and add a date to it.

    Check File Permissions and Make Sure Your Account is Permitted

    File permissions determine who can read, write, and execute the files of your WordPress site. If you were setting up new permissions or creating a new type of user, the permissions file may have been mishandled.

    Although fixing the permissions is pretty straightforward, it’s a repetitive process. Here’s how you can check file permissions and then set them correctly:

    1. Open up FileZilla and connect it to your website.
    2. Look for your wp-content first and right-click the folder.
    3. Select File permissions.
    4. In the new dialogue window, you can set permissions for three types of users: Owner, Group, and Public. Here’s what they mean:
      • Owner – owner of the website
      • Group – any staff you set that can handle and access the WordPress dashboard
      • Public – anyone who opens your website.
    5. As a good rule of thumb, the Owner should have all the boxes checked, and the Group and Public are only permitted to ‘Read’. You’ll want to make sure that the page with the HTTP 500 Error has the permissions set correctly.

    The Numerical value there is typically set to ‘644’ for sets and ‘755’ for directories and executables. This could be different with your host though. So, if you’re unsure about the correct values you can wait until you contact your host’s support team or Google the numerical value of your host.

    Repeat steps 3 to 5 but with the folders and files that are having the HTTP 500 Error.

    Insufficient PHP Memory Limit

    For those of you who are experiencing the HTTP 500 Error on the WordPress admin dashboard side, then this fix might help.

    The PHP memory limit for your site is usually enough for most things, but it can sometimes hit a limit when you’re uploading files or trying to publish a new post.

    1. Open your Notepad or VS Code.
    2. Type in ‘memory=64MB’ and save the file as ‘php.ini’.
    3. Open up FileZilla and connect it to your website.
    4. Look for your wp-admin folder and upload the php.ini file there.

    Reload your WordPress admin dashboard and see if the error still persists. If increasing your PHP memory limit worked for you, then you’ll have to contact your host for some extra help.

    Again, since the PHP memory limit on your site is usually enough for regular WordPress usage, hitting the limit so frequently is still a problem. You might be running a plugin that’s inefficiently coded or have a theme function that slows down your whole site. To assess this problem, we recommend asking your host to check this for you themselves. Their support team might have a better idea of what to disable and what alternatives to use.

    Fortunately, if you’re using RunCloud – this couldn’t be easier.

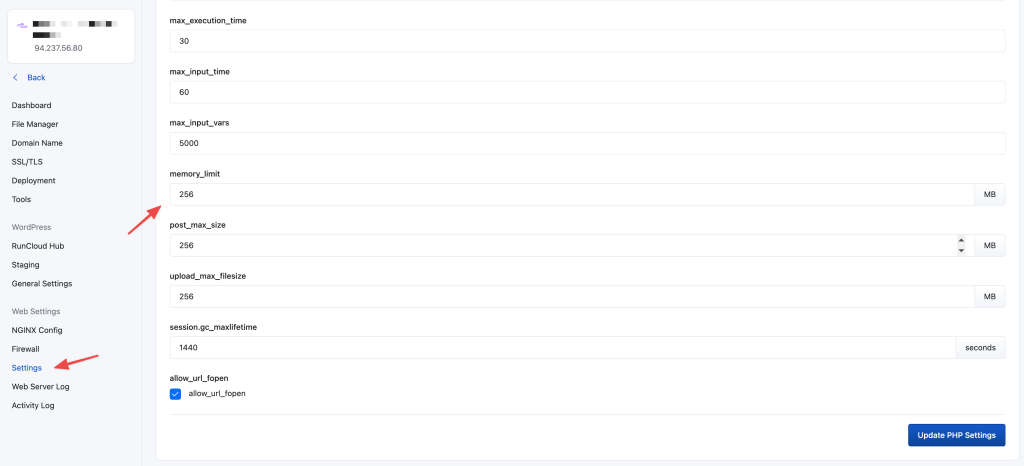
    You can increase your PHP memory limit straight from your RunCloud dashboard for any of the web applications you have on a server connected to RunCloud.

    Simply navigate to your Web Application’s Settings in your and increase the value for the memory_limit there. Ensure you hit Update PHP Settings so your changes are applied. And that’s it!

    PHP memory limit

    This should resolve the issue for RunCloud users.

    Restore Your Site With a Backup

    Although this step is often cited across other sources, we don’t recommend you restoring or reinstalling your entire website through a backup. The chance of your personal WordPress files causing the HTTP 500 Error is low, while the risk of restoring your site with a backup as an inexperienced WordPress user is higher.

    Some hosts backup your WordPress site for you as part of their payment plan, so just contact their customer support team. They’ll probably fix your problem before having to restore your site to a previous backup anyway.

    Reinstall Core WordPress Files

    Core WordPress files, however, are a different matter. These WordPress files are the skeletal system of your site and any issues with the files will certainly have a significant impact on your website. Thankfully, reinstalling WordPress isn’t complicated. Here’s the simplest way to do it:

    1. Open your WordPress admin dashboard.
    2. Navigate to Updates. You’ll find it below the Home tab to the left of your screen.
    3. On the WordPress Updates page, look for and click on Re-install Now.

    WordPress will automatically start downloading on your device and will reinstall with the latest version to your site. This shouldn’t take too long since the WordPress file itself is pretty small.

    If you can’t access the WordPress admin dashboard, you can try reinstalling WordPress with your SFTP. You’ll need some sort of file archiver tool to unzip the file. If you don’t have one, you can use WinRAR.

    Before you proceed with the steps below, we recommend backing up your website just to be safe. While you’ll only be overriding your old WordPress files with new ones, backing up your site is just good practice.

    1. Open up WordPress.org and download the latest WordPress version. The button will be at the top-right corner of your screen.
    2. Once the download completes, right-click the WordPress zip and look for Extract Files…. Click on that option.
    3. A prompt will appear on your screen asking for confirmation, you can say Yes to all of them so you can start extracting the files.
    4. When the file is done extracting, you’ll find a ‘wordpress-versionxxx’ folder. Open that and delete wp-content.
    5. After that, open up FileZilla or any SFTP and connect it to your website.
    6. Copy-paste all the files from the ‘wordpress-versionxxx’ folder to your root folder. This is typically named public or public_html.
    7. FileZilla or the SFTP you’re using will open a prompt saying ‘Target file already exists’. Click on the Overwrite option and select Ok.

    Your computer should start overwriting the old WordPress files with the new ones you just downloaded. This will overwrite all the core WordPress files without touching or deleting any of your themes, plugins, and overall content.

    This should be the last fix you need to fix the HTTP 500 Error once and for all. If you’re still getting the HTTP 500 Error, make sure that you’ve contacted your host’s customer support team.

    How to Prevent the HTTP 500 Error From Happening?

    Prevention is better than a cure and that’s especially true with website errors. HTTP 500 Errors can negatively impact your website’s SEO and it may take you weeks or even months before finding these errors yourself. Here are some routine tips you can use to prevent the error from happening again.

    Update your Plugins

    Make sure that all your plugins are updated. Outdated plugins that are no longer supported by your PHP version can cause these errors, even more so if that plugin is responsible for a large portion of your site.

    Keep File Permissions Up To Date

    Whenever you create a new user or try to reconfigure your permissions, make sure that everything is in order before you close SFTP. Incorrect permissions, especially when creating new roles for your staff can create these HTTP 500 Errors.

    Use WordPress Debugging

    Still getting the error? Hopefully, your host has replied by now. This step is completely optional, but it can speed up the process of either looking for other solutions or providing your host with more information.

    The debugging feature shows you specifically where the error is coming from. This will be valuable information for your host, as well as providing you with error messages you can copy-paste in Google to hopefully find someone who’s had the same specific error as you.

    Keep in mind though that the debugging logs can be intimidating to understand if you’re new to server management. If you don’t understand the logs that come out from the debugging, at least you can present them to your host or support team to help them fix your problem.

    Here’s how you can turn debugging on.

    1. Open your Secure File Transfer Protocol (SFTP) app. If you don’t have one, the industry standard is FileZilla. Download and install the client from the link provided.
      1. To connect FileZilla to your site, open FileZilla.
      2. Click File and go to Site Manager.
      3. Enter the ftp address of your website in the Host box. Here’s what that looks like: instead of http://www.sample.com the ftp address is ftp://ftp.sample.com or ftp://sample.com.
      4. After that, just leave the Port box blank. The default value there should be 21 and you don’t need to change this unless indicated otherwise.
      5. From the Logon Type box, select Normal.
      6. Next, type in your full username in the User box. This can be a proper username or an email address, it depends on how your website was set up.
      7. Finally, enter the Password.

    FileZilla should now be connected to your website after these steps.

    1. From there, look for and open the wp-config.php file. You don’t need a code editor for this step, but you can download VS Code if you prefer the cleaner interface instead of just the default Notepad.
    2. With the wp-config.php file open, add the code below:

    define( ‘WP_DEBUG_LOG’, true);

    1. Save the .php file and reload your website.

    Any errors that come out of your site should now be logged to your debug.log file. You can find that under the /wp-content/ directory with FileZilla. Don’t forget to change the value from true to false when you’re done debugging.

    Now, just send your host the debug.log file so they can fix your issue.

    After Action Report — Fixing The WordPress HTTP 500 Error

    The WordPress HTTP 500 Error is a cumbersome problem to fix. It’s vague, which makes troubleshooting rough. We’ve arranged the steps above to go in order of importance, so hopefully, you were able to resolve this issue without having to reach the very bottom.

    Which fix worked for you? If none of them did, how did you manage to resolve this issue? Let us know in the comments below!
  • How To Install & Run WordPress Locally on Windows or Mac

    How To Install & Run WordPress Locally on Windows or Mac

    WordPress is one of the most popular environments for building websites in the world, and one of the reasons it’s so great is because it’s incredibly flexible and you can manipulate it however you want.

    In this article, we’ll talk about installing WordPress locally on your computer (Windows and Mac) and some benefits you might have for doing it.

    Why Install WordPress Locally

    Many developers and average users have WordPress installed locally — some for business reasons, some for private reasons. In general, a local WordPress setup can be extremely beneficial on multiple levels. Here are some of the best pros.

    Learn and Develop Your Skills

    If you want to become a pro at developing websites on WordPress, you must practice using it to learn about its features. For beginner WordPress developers, using it offline is the best option as you can make any necessary changes frequently, without worrying about how it affects the site.

    Test New Features At Your Convenience

    A live environment is not suitable for testing new features, because it can have a negative impact on the reputation of your site, as well as your business. So, you’re better off testing them locally and you will get a clearer idea of the themes, plugins, and other features.

    Work Freely In Your Isolated Dev Environment

    Your isolated dev environment is your playground to play with fresh codes, new features, etc. You can use all your creativity to implement new ideas without any risk of affecting a live project. As a result, you get to enjoy great flexibility in the locally running WordPress.

    Get High Performance At Low Cost

    As all the stages are running without an internet connection, you will get a much faster experience than you would online. And, using all the free software will save you a lot of money. Therefore, a local WordPress environment is also a financially convenient option.

    Test New Updates

    A local WordPress environment allows you to test new updates from features before applying them on your live site. This will give you a clearer idea about the latest security patches and the convenience of using updated interfaces.

    How To Install WordPress Locally with XAMPP (Windows)

    WordPress is used for complete website development involving a variety of things like designing, developing, testing, and hosting. And, all these require heavy technologies like a web server, PHP, and a database (preferably MySQL). Consequently, to create a suitable environment for installing WordPress on your local machine, you need to complete the following steps:

    • Setting up the installation environment
    • Downloading a stable WordPress version
    • Installing WordPress on your localhost

    Windows is always reliable for providing a suitable environment to install and use the most popular technologies. WordPress is no exception and can be installed easily on Windows using the following steps:

    Step 1: Download and Set Up XAMPP

    WordPress needs the proper environment to run locally, and that requires setting up a server on your device. You can do that by installing XAMPP or WAMP (local server builders) on your machine. Using XAMPP is comparatively easy and advantageous so, here is a guide on installing that.

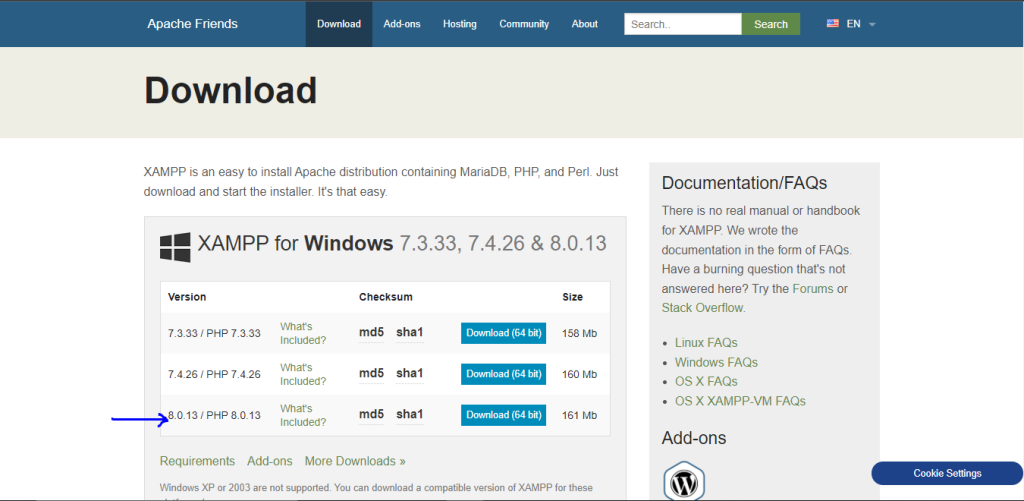
    XAMPP is an app that hosts web servers for your website. You’ll be opening this app every time you want to launch your WordPress site locally. On the Apache website, navigate to the “Download” section and select the version that works best with the latest PHP version. PHP is the language used in the back end of most websites.

    apache website xampp download

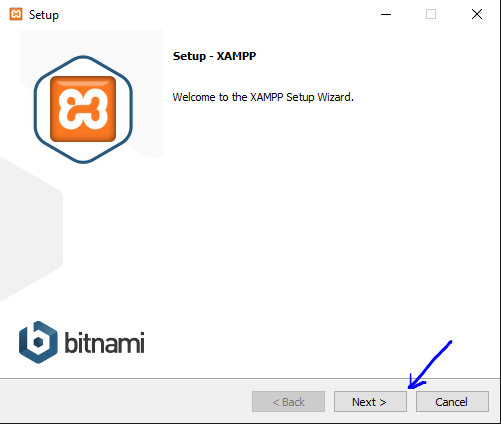
    After the download is complete, run it to install XAMPP on your system.

    xampp setup wizzard step 1

    After this screen, you will be prompted which features you want to install, and by default, all of them will be selected — regardless of what you need, there’s no harm in having all of them so feel free to proceed with the installation until it’s completed.

    Also, at some point of installation, your Windows Defender might ask you if you want to allow access to XAMPP to slip past firewall rules and communicate on your private and public networks — make sure to allow access. Don’t worry about why XAMPP asks for these permissions, it just needs to do so because hosting a web server for your website requires accessing network features.

    Step 2: Start required services

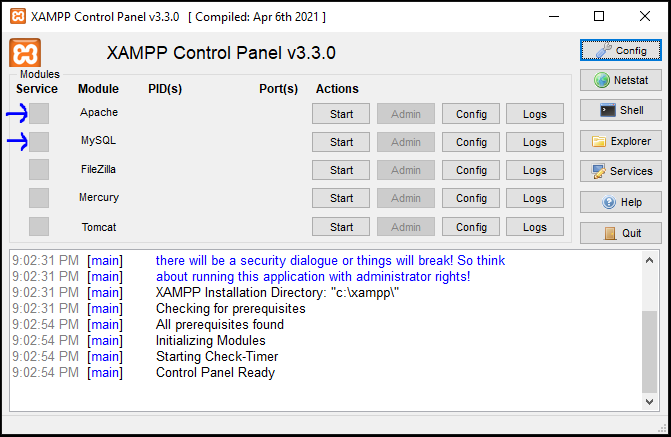
    After the installation is finished, launch the XAMPP control panel to set the required status for Apache and MySQL.

    xampp control panel apache and mysql process running

    Make sure to “Start” these two services to install WordPress locally. If the background color of Apache and MySQL changes to green, that means the modules are working properly.

    Step 3: Download and Install WordPress

    Even though this process is fairly simple, we’re going to break it down into separate steps so you can follow the process closely.

    Step 3.1.: Download WordPress

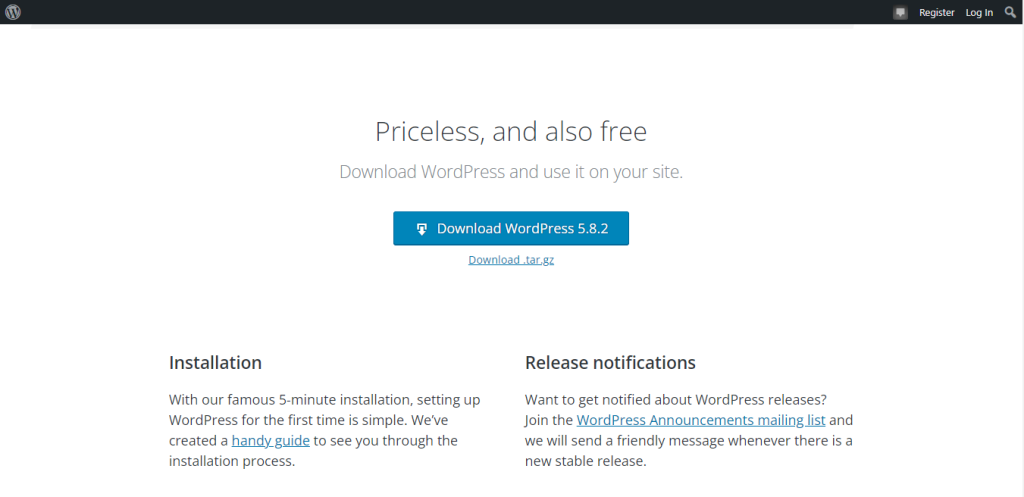
    Once you’ve finished setting up the webserver and database through XAMPP, download the WordPress setup from the official website.

    wordpress download page

    Step 3.2.: Move and extract the downloaded file

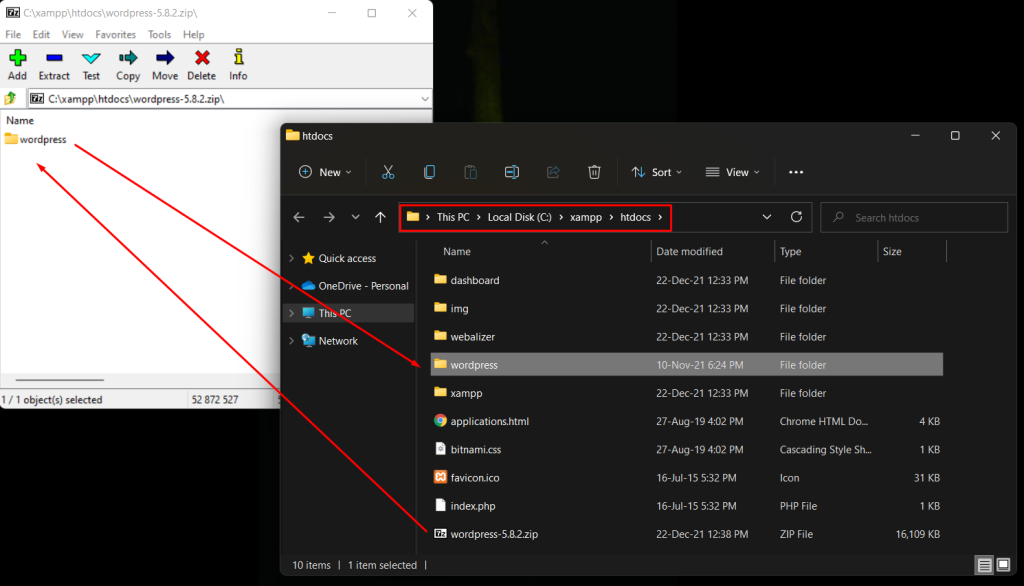
    When the download is finished, move the zip file to the /htdocs folder in the XAMPP directory. Unzip it there and navigate to the project directory.

    extracted files to htdocs

    Important Notes:

    1. Confirm the Apache and MySQL services in the XAMPP control panel are properly set and normally running.
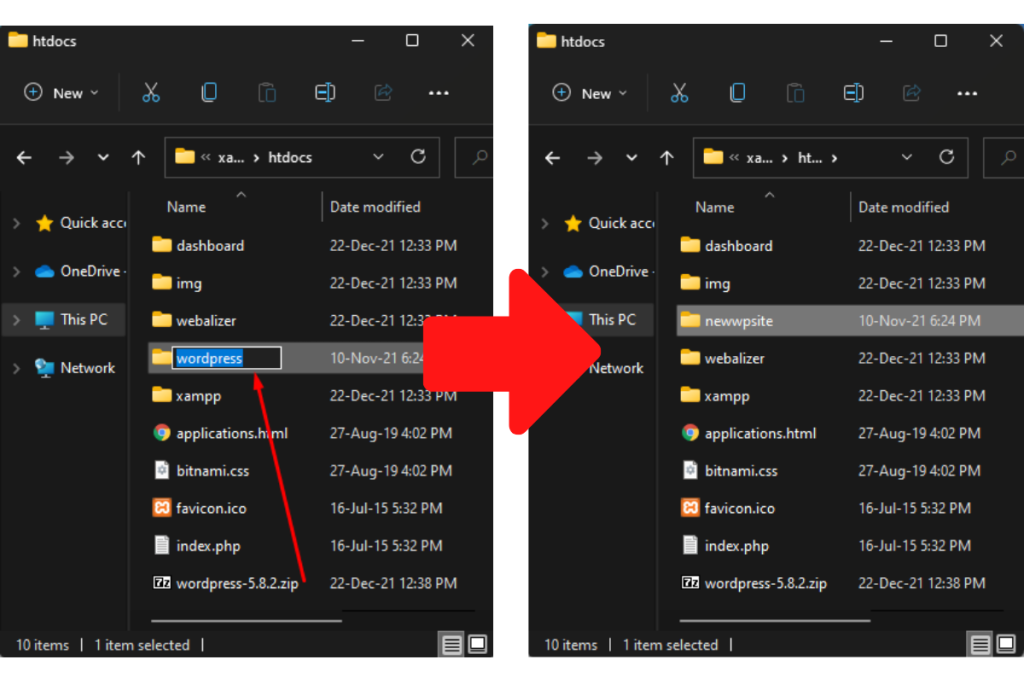
    2. Rename the “wordpress” folder to the name of your new website.

    Step 3.3.: Create a database in the phpMyAdmin portal

    Now, for creating the database of your new WordPress site, visit the phpMyAdmin portal. Though this depends on your port configuration, most likely you will get the portal on the following URL.

    http://localhost:80/phpmyadmin/

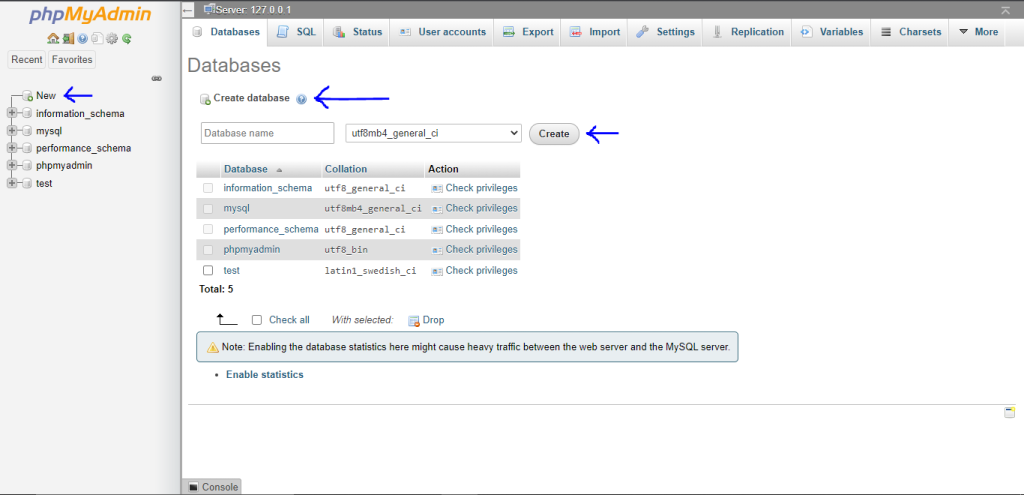
    After opening the phpMyAdmin portal, go to New, name the database however you want, and then click Create. This will create the database your WordPress website will use.

    creating database in phpmyadmin portal

    Once you are done with creating the database, you will have to create a new User.

    Step 3.4.: Create a new User

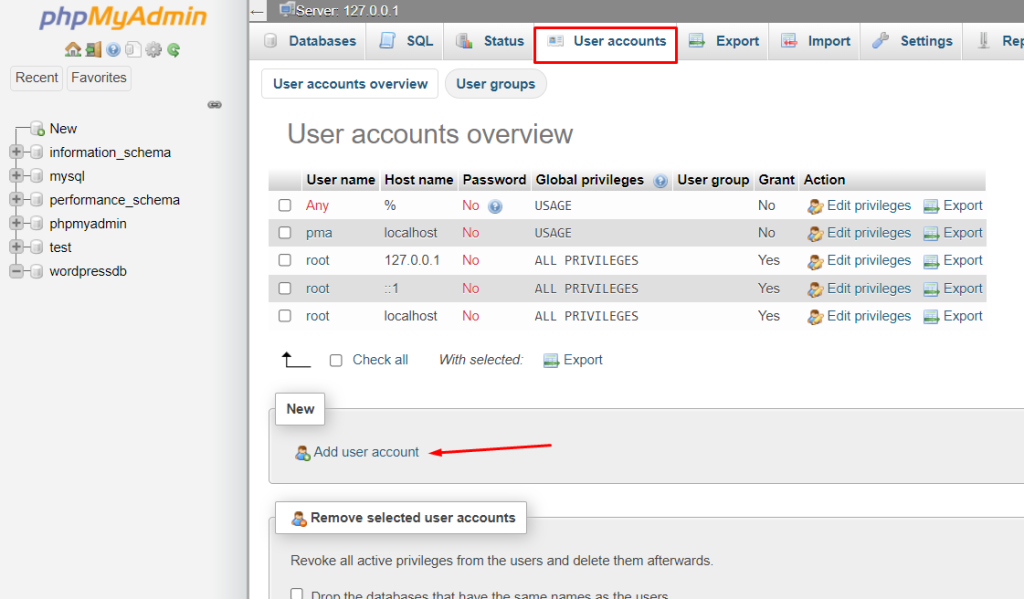
    Go to the “User accounts” tab and click on “Add new user”.

    adding new user to phpmyadmin

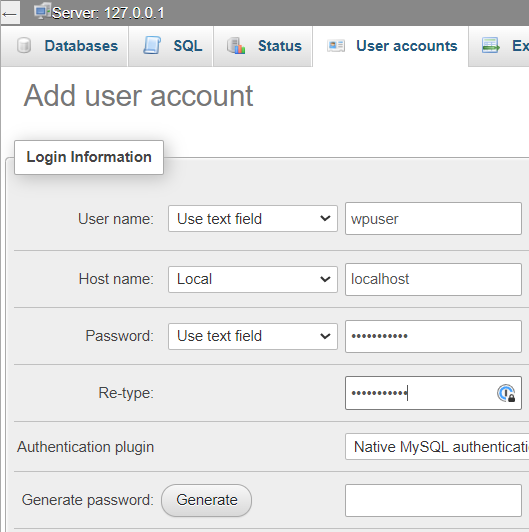
    A new window will open where you get basic information about the new user.

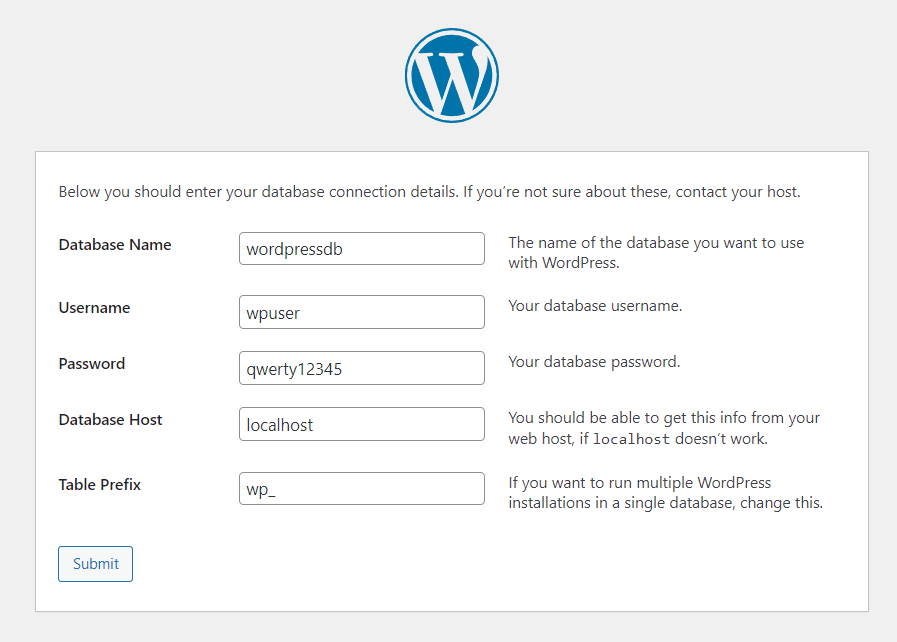
    For this tutorial, the credentials we chose are:

    Username: wpuser
    Password: qwerty12345

    Make sure to set the Host name to Local as we’re installing WordPress locally.

    adding new user in phpmyadmin step 2

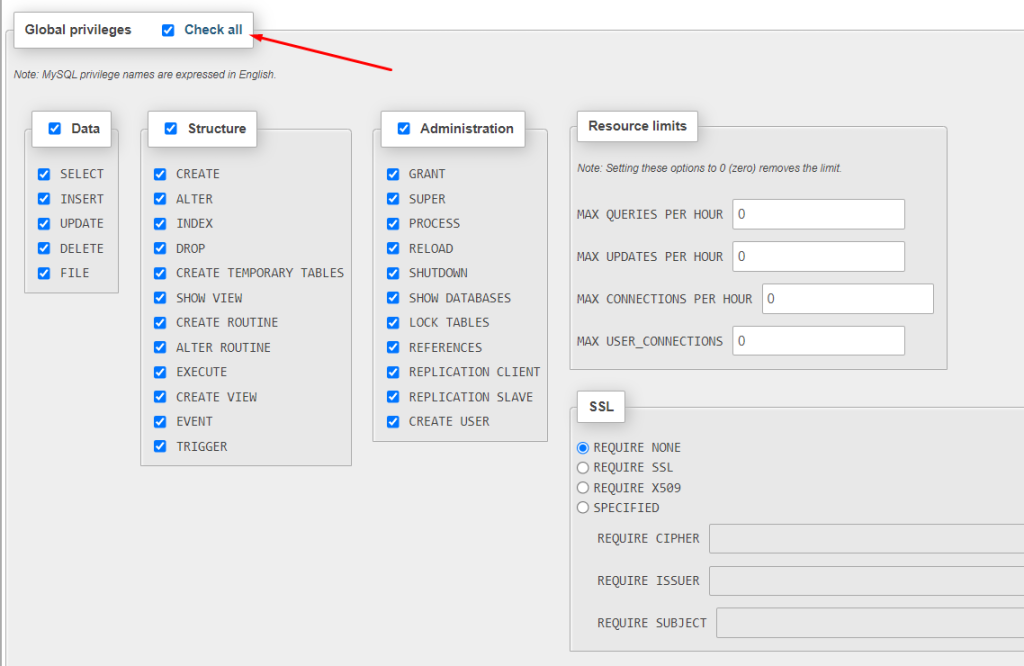
    Below, you will need to grant permissions to the new user — make sure to click on “Check all” under “Global privileges”

    setting global privileges to all checks

    After that, on the bottom of the page click “Go” — your new user should be created successfully.

    Step 3.5.: Launch WordPress Installation

    Now you can proceed with installing WordPress. Before you do so, don’t forget to rename the folder you extracted (from the zip file you downloaded from WordPress) to the actual name of your website.

    For this guide, we decided to name the folder “newwpsite”.

    changing wordpress folder to website name

    Launch the WordPress installation setup by visiting the following URL in your web browser.

    http://localhost:80/newwpsite/wp-admin/setup-config.php

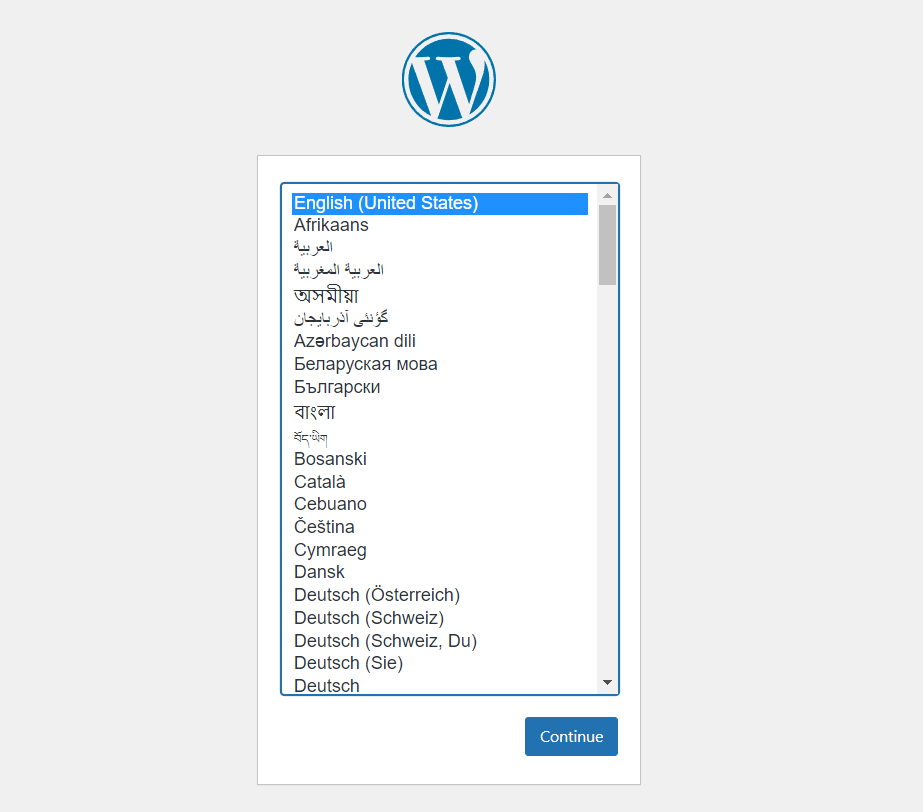
    There you will get the option to select your preferred language. Select it and click “Continue”.

    setting language during wordpress installation

    Important note: In the “wordpress” folder or “newwpsite folder” (that’s how we named it) there is no wp-config.php file, only wp-config-sample.php if you’re choosing other installation methods. This method doesn’t involve editing the wp-config-sample.php file and making wp-config.php — WordPress installation should create it by itself.

    Step 3.6.: Enter credentials

    After you select the language you will be using, A prompt will appear asking for the information you previously created — Database Name, Username, and Password.

    setting up credentials during wordpress installation

    Since you are installing WordPress locally, Database Host can remain “localhost”.

    Table Prefix is by default “wp_” and should be left like that.

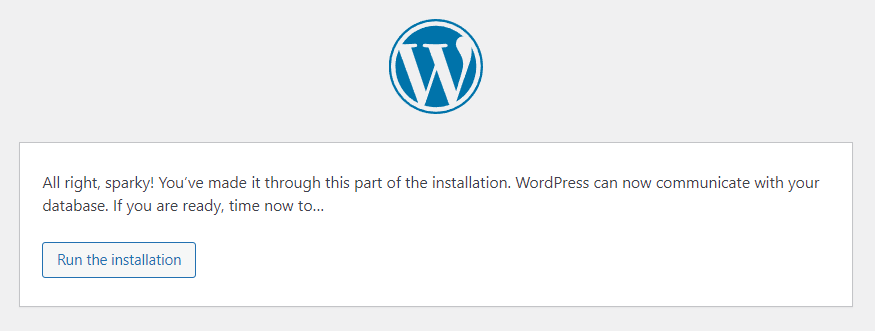
    Step 3.7.: Run the Installation and set up your login information

    After you submit it, you should be able to run the installation successfully.

    final stage of running wordpress installation

    In case you didn’t enter proper information in the credentials section, you will face an error message, and will not be able to proceed to installation — doublecheck all information from previous steps to troubleshoot possible errors.

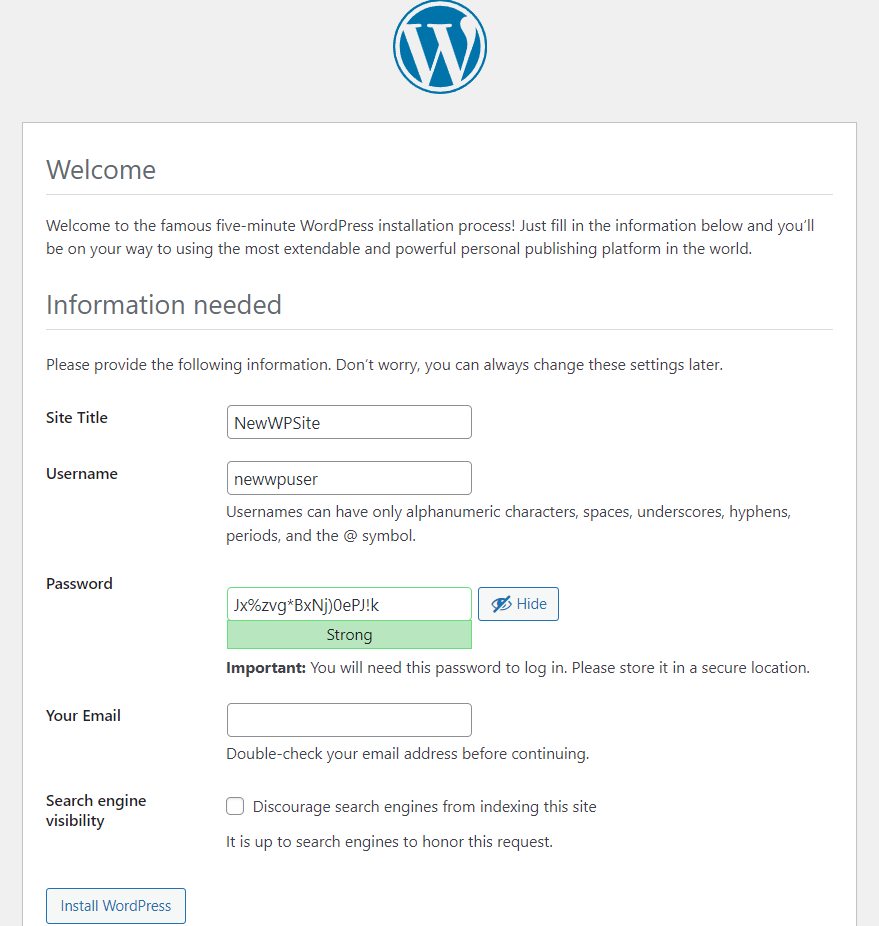
    After you click Run the Installation, WordPress will have more information to enter for a successful installation.

    setting up site name and wordpress user

    This information is not related to the information you entered in phpMyAdmin so choose your WordPress login credentials and the name of your website. As the note in the installation guide suggests: you can always change these later.

    Click on Install WordPress after filling in all necessary information.

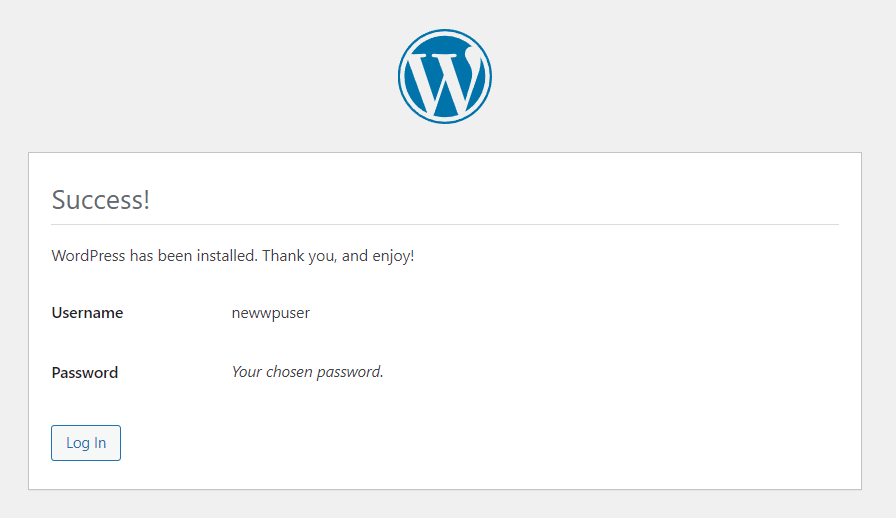
    Now you will see the page with the success message for WordPress installation and the button to launch the WordPress dashboard login page.

    wordpress installation completed

    This will take you to the end of installing WordPress on your local Windows machine.

    How To Install WordPress Locally with MAMP (Mac)

    When it comes to performance, hardly anyone can ignore macOS. For Mac installation, we’ll be using a program called MAMP. It works similarly to XAMPP, except that it’s simpler and has fewer customizations available. If you want to try using XAMPP instead, you can still follow the process below as the installation process is very similar between both apps.

    Step 1: Download and Set Up MAMP

    Similar to windows, WordPress needs a server to run locally on Mac. And, that’s where MAMP will get a local server and database ready for you.

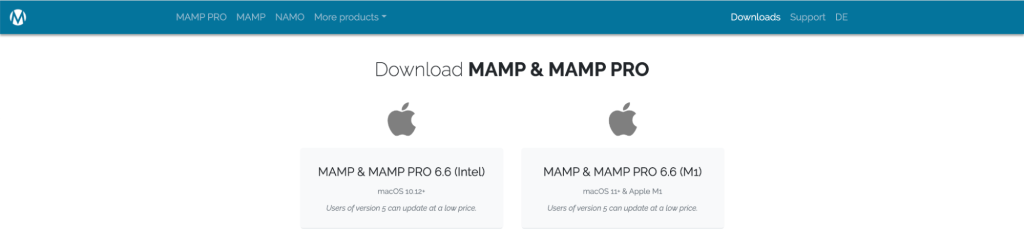
    So, go to the MAMP official website and download the setup for macOS.

    downloading MAMP & MAMP PRO

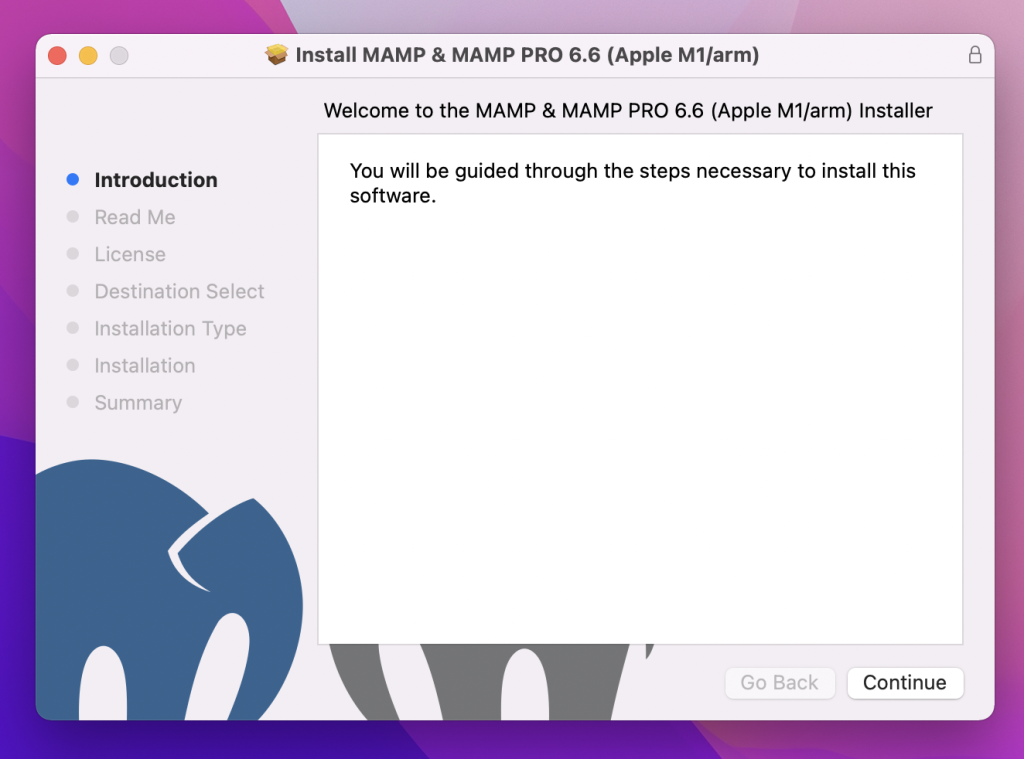
    After the download is finished, proceed with running the installation wizard. It may ask you to install the pro version. However, the free version is good enough for your purpose. So, click on the grey folder to begin installing the free version.

    MAMP installation step 1

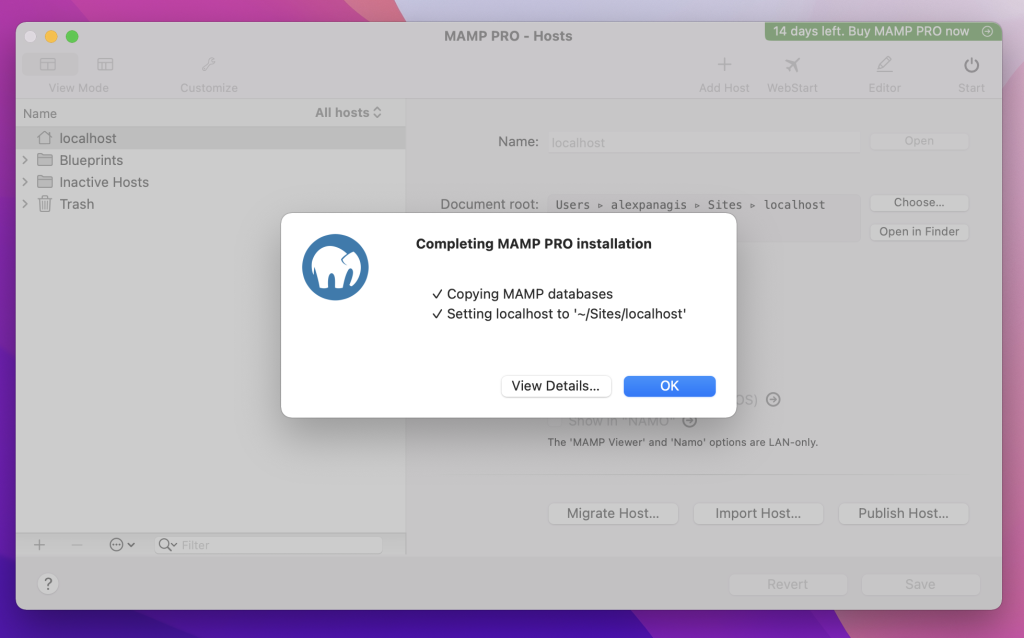
    Once the installation is complete, which will look like this:

    MAMP installation complete

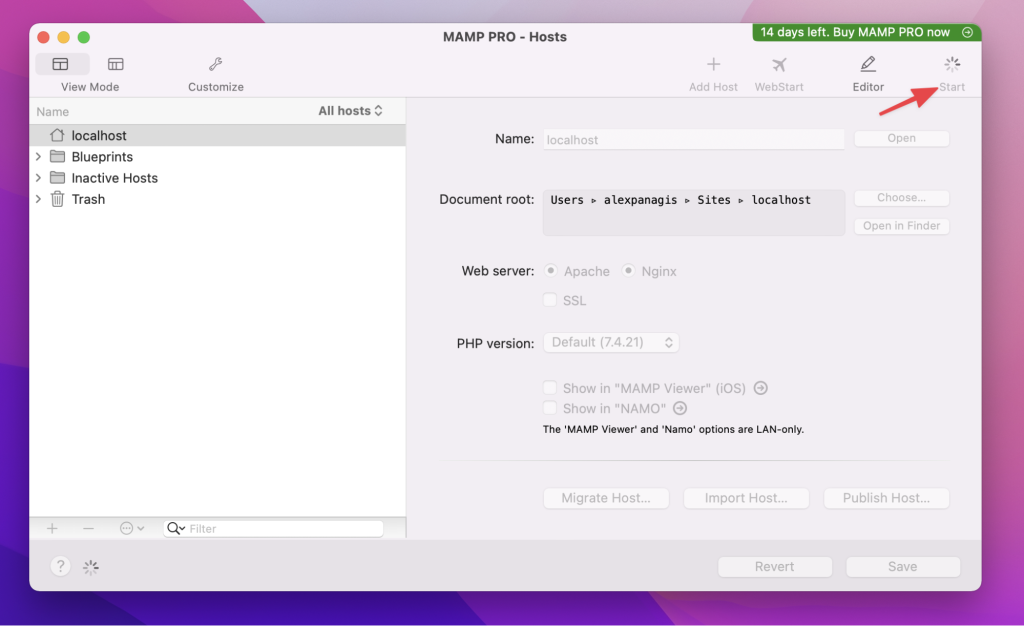
    Simply open the MAMP controller and start the server.

    starting server in MAMP

    When the server is up and running smoothly, click “Open WebStart page”. It will launch phpMyAdmin.

    Step 2: Download and Install WordPress

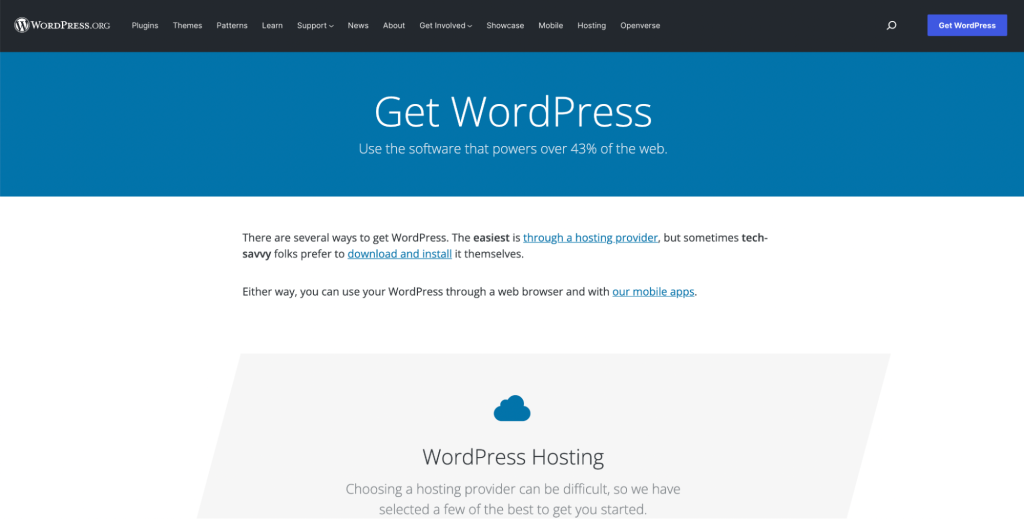
    The official website to download WordPress provides a specific setup file for Mac. You can download it from there.

    download wordpress for mac

    When the download is finished, proceed with unzipping the file and placing the folder inside the MAMP document root folder. It is a useful idea to name the folder as the name of the WordPress site.

    Now, from the MAMP control panel, create the database using phpMyAdmin. The good news is that phpMyAdmin works the same in Mac and Windows. Next, you can proceed with adding the name of the database and navigating to the wp-config.php file to add database credentials.

    Now, visit the following URL to run the WordPress installation wizard.

    http://localhost/newwpsite

    Select the language and the rest of the steps are the same as Windows installation. Follow the steps and you are ready to use WordPress on your Mac PC.

    How To Install WordPress Locally Using Local (Windows and Mac)

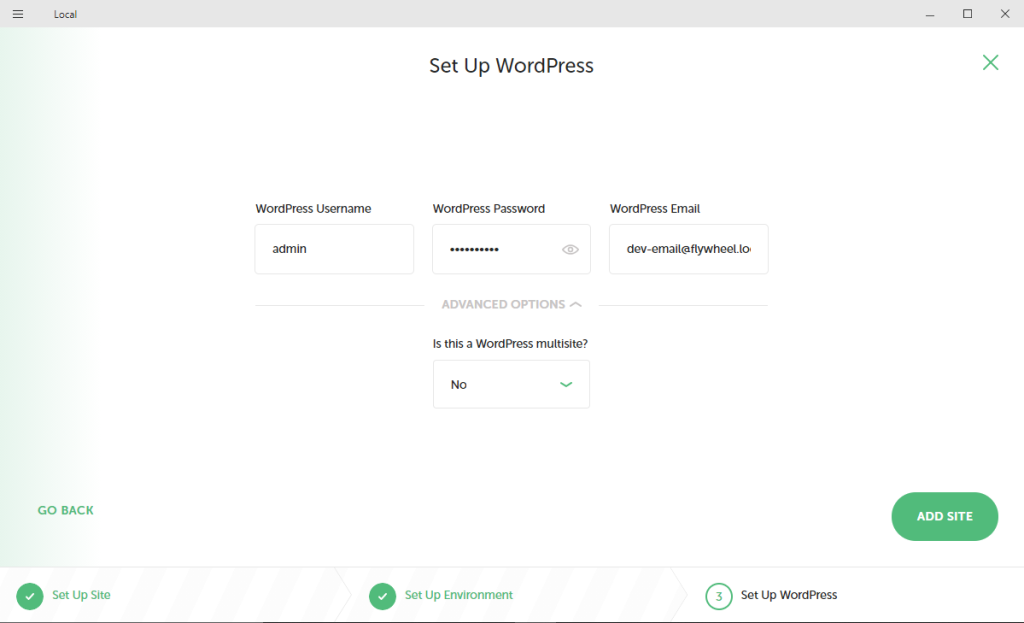
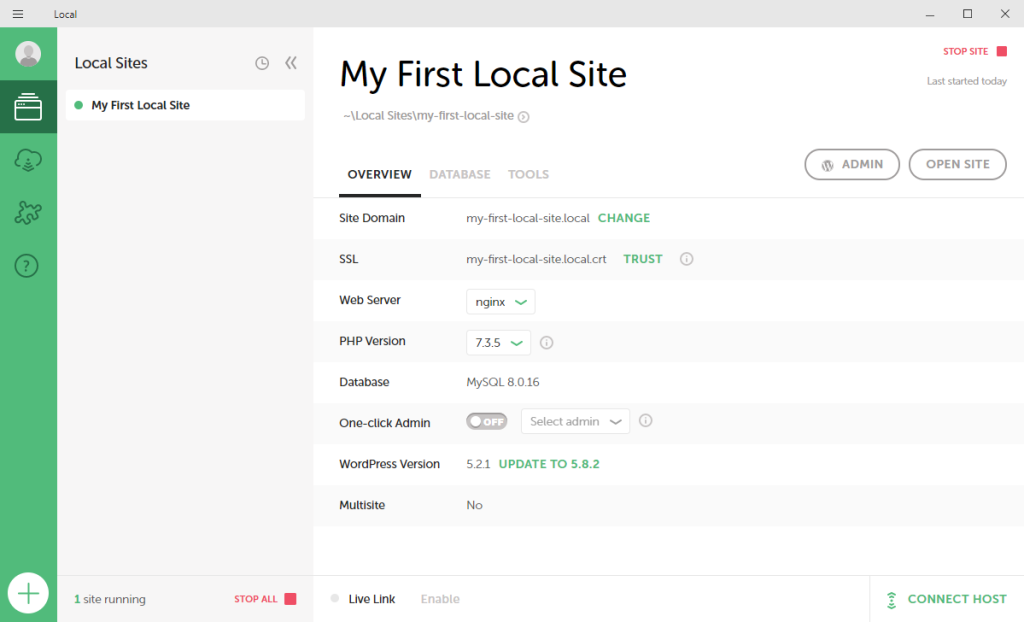
    You have already seen methods of installing WordPress locally on Windows and Mac using XAMPP and MAMP local servers. Now it’s time for you to know about the simplest method of building a WordPress site on your local machine using “Local”. It is pretty much the same for both Windows and Mac.

    Step 1: Install and Set Up Local On Your Machine

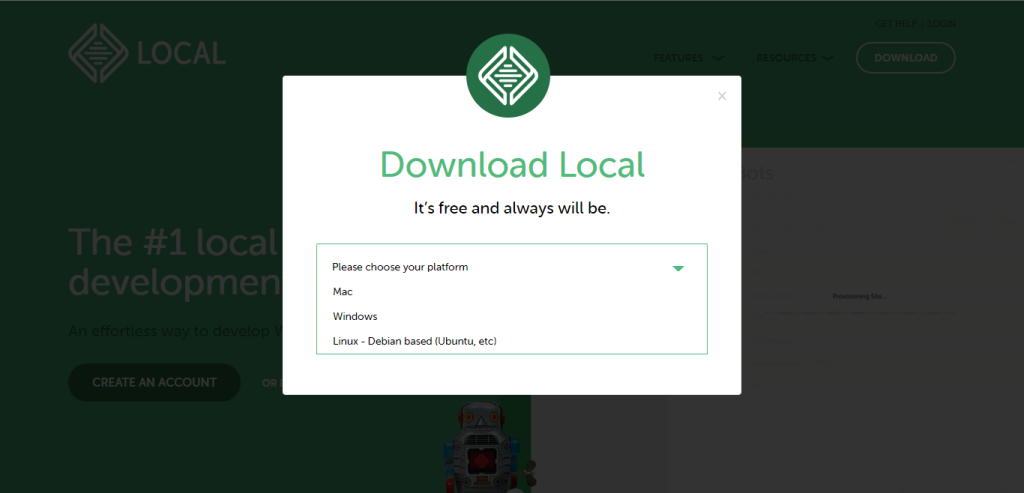
    Though the local servers provide a nice dev environment, they can be a bit of a hassle. On the other hand, localwp.com is the easiest, most efficient local WordPress development tool. You can start the short and straightforward journey by installing “Local” from localwp.com according to the OS you use. You have to enter your name and email ID so that you can be contacted for future products and updates.

    download local

    When the download is complete, run the installer file. Then you will be redirected to a start-up screen. Just click the “Let’s Go!” button there.

    A few programs will be installed in order to run Local smoothly. You have to agree to the terms & conditions and click “Next” whenever prompted during the installation process.

    When the installation is complete, you will find yourself on the Local dashboard.

    local dashboard after installation

    LocalWP offers a wide range of choices — by selecting the cloud icon, you can connect to managed WordPress hosting services and make copies of existing sites or push local sites live.

    Using the “Options” menu in the top-left corner, you can configure various settings and preferences. For now, we’ll focus on creating your first local site.

    Step 2: Create Your Local WordPress Site

    Now when you click “CREATE A NEW SITE” on the Local dashboard, you will be asked to set a name for your site.

    setting up site's name

    Consider setting a unique and descriptive name for your site. It will help you to maintain multiple local sites in the future.

    The “Advanced Options” tab allows you to set some optional settings and configurations.

    advanced option on setting up site's name

    This tab allows you to set a domain and path for your site. You don’t need to worry about choosing a domain name and suffix. Whatever domain name and suffix you choose, Local will modify your hosts file to make it work. Here the choice is

    my-first-local-site.local

    Though Local will automatically create a directory to store your site’s files, you can set it to your preferred folder.

    When you are done with entering your site’s name, continue to the next screen.

    choosing environment in local

    This page provides you with two options. One is selecting Preferred to set up your local site with a recommended set of tools. Another is Custom, in which you can choose to set specific configurations for your environment.

    Preferred is the better option for beginners. And, Custom is a more advanced option that is most suitable for developers, because it allows you to set more specific requirements. However, remember that choosing the Custom option will exempt you from connecting your site to Flywheel (if you want to publish it). You will need to download some additional files for that.

    Whatever option you choose, now you move to the last step.

    last step in local, setting up wordpress credentials

    On this page, you can set a WordPress username, a strong & secure password, and an admin email address. In the “Advanced Options” tab, you can select if you want to make it a multisite setup. When you are done with entering the credentials, hit the “Add Site” button.

    Within a few seconds, your site will get listed in the dashboard. You can see all of its information there.

    new local site overview dashboard

    This page confirms that your site is ready and you can click the Admin button to log into your site and work on it. Additionally, this dashboard will always allow you to make changes to your local site’s setup or domain.

    Finally, your fully-featured WordPress site is now ready. It is open for doing any experiment with installing plugins, adding custom themes, breaking the site, fixing it again, etc. Conduct all your creative experiments here without any fear of hampering a live site.

    After Action Report — Run WordPress Locally To Simplify Your Development Workflow

    We went through the relatively simple processes of installing and running WordPress on your Windows or Mac PC. Being able to use such an amazing tool locally on your device is indeed a great opportunity for you to learn a lot.

    If you followed the steps carefully, we’re certain you installed WordPress successfully on your machine. Any questions about the process? Let us know in the comments below! 💬
  • How to Fix ERR_SSL_VERSION_OR_CIPHER_ MISMATCH

    How to Fix ERR_SSL_VERSION_OR_CIPHER_ MISMATCH

    If you’ve come across the ERR_SSL_VERSION_OR_CIPHER_MISMATCH error on someone’s site and are wondering what it is or, better yet, are experiencing it on your own site and want to know what you can do to fix the issue – you’ve come to the right place.

    What Is ERR_SSL_VERSION_OR_CIPHER_MISMATCH Error?

    ERR_SSL_VERSION_OR_CIPHER_MISMATCH is a relatively common SSL error that occurs when the web browser fails to establish a secure connection with the website.

    ERR_SSL_VERSION_OR_CIPHER_MISMATCH display error

    The error can occur in any web browser – regardless of whether it’s Firefox, Google Chrome, or Microsoft Edge.

    When a website visitor attempts to connect to your website by connecting to the server that hosts your website using SSL/HTTPS – various steps take place to ensure that this connection is established securely:

    If any of the steps mentioned above doesn’t happen properly, it can lead to the ERR_SSL_VERSION_OR_CIPHER_MISMATCH error.

    So, what could cause the ERR_SSL_VERSION_OR_CIPHER_MISMATCH error on your site or someone else’s site?

    What Causes the ERR_SSL_VERSION_OR_CIPHER_MISMATCH Error?

    The ERR_SSL_VERSION_OR_CIPHER_MISMATCH error only occurs on websites that use HTTPS encryption and SSL certificates to secure access and information exchange. These websites usually have a lock icon in the URL bar.

    Another reason why ERR_SSL_VERSION_OR_CIPHER_MISMATCH error usually happens is due to the use of old web browsers or operating systems.

    To break this down even more, let’s break down the name of the error:

    • SSL has had multiple versions since its creation
    • Cipher is a set of rules, instructions, or algorithms that determines how the secure connection will be established

    Therefore, when the error occurs, it’s pretty self-explanatory where is the actual problem — either the SSL version doesn’t match, or the cipher has no way to establish a secure connection between you and the webserver because you’re not using the same cipher.

    Other causes that can lead to ERR_SSL_VERSION_OR_CIPHER_MISMATCH error are:

    • Server-side issues
      • The problem with your SSL certificate
      • Certificate name mismatch
      • The latest version of TLS is not being used
      • Use of RC4 Cipher Suite
    • Client-side issues
      • Using an old version of the Operating system or web browser
      • Use of QUIC Protocol
      • Settings of your antivirus software interfere with your browser’s default security settings.
      • SSL state not being updated

    All the issues, as mentioned earlier, become a cause of the ERR_SSL_VERSION_OR_CIPHER_MISMATCH error. However, they can be easily fixed, which will be discussed in the next section.

    How To Fix the ERR_SSL_VERSION_OR_CIPHER_MISMATCH Error?

    Let’s see each one of the causes and what you can do to fix them.

    Server-side Issues

    To check if the error is from the server-side, you will need to look at the following things:

    Check The SSL certificate

    Ensure your SSL certificate is correct and is issued by a trusted CA, which you can check from the free SSL certificate checker, and it takes only a few minutes to scan your website’s SSL/TLS configuration on your web server.

    You can use Qualys SSL Labs to check your SSL certificate.

    • Go to the website and click on ‘Test your server’.
    • In the given field, type your hostname and press enter.

    After a few seconds, you can see all the information about your SSL certificate to ensure that everything with the certificate is okay.

    qualys ssl labs server test results

    If something turns out to be a problem and your SSL certificate is incorrect, we advise switching to an SSL certificate from a trusted CA.

    Certificate Name Mismatch

    Check if the name in the certificate is incorrect. It’s important to see if the domain name and the name on the certificate are the same. According to SSL labs, other reasons for mismatch are:

    • The website uses a content delivery system that doesn’t support SSL.
    • The website doesn’t use SSL, though the IP address is shared with a different site.
    • The website is unavailable, but the domain still mentions the old IP address, where there is some other website.

    One way to check for certificate name mismatch is through Chrome DevTools, which you can do so by:

    • Right-click on the website.
    • Go to Inspect → Security Tab → View Certificate.

    This will show all the required details of the certificate. If the information doesn’t match, then there is an issue with the certificate.

    certificate mismatch fix

    Sometimes, the error will not allow you to let in the Chrome DevTools, further confirming the issue in the certificate.

    Use The Latest Version Of TLS

    Whether an old or unsupported version of TLS is being used, the hosting service providers will generally use TLS version 1.2 or higher. Regardless, check the TLS version and look at the backward compatibility because some users might be using an old operating system that supports the older version of TLS.

    The latest TLS version can be checked by going to the server test results from your SSL labs. Just under the site score, you can see what TLS version your site supports.

    Also, it can happen that TLS 1.3 is supported by your server, but it is not enabled. You can find the same by entering ‘chrome://flags’ into the address bar of the Chrome browser. It will show you the Chrome Experimental Page, where enter ‘TLS 1.3’ into the search bar. The search results will show TLS 1.3 hardening for local anchors, where you need to select the enable button in the dropdown menu. Restart your browser and visit the website again.

    Verify The RC4 Cipher Suite

    RC4 cipher is an old encryption tool that modern browsers don’t support. If your website is still configured for RC4, you will likely face the ERR_SSL_VERSION_OR_CIPHER_MISMATCH error on the latest browsers.

    To avoid the error, move your website from RC4 or disable it and add the TLS 1.3 protocol, which you can do so by going to the configuration page of your SSL Labs and checking what is listed under the Cipher Suites. Generally, TLS 1.3 protocol should be listed there instead of RC4. But if RC4 is listed, it will be shown in red that you can disable it under the Protocol details section.

    Client-side Issues

    In case your client is using an old web browser or operating system, they are likely to face the ERR_SSL_VERSION_OR_CIPHER_MISMATCH error. The error can be avoided by:

    Updating Web Browser And Operating System

    Old web browsers or operating systems do not support the TLS 1.3 version, and because of that, SSL error occurs. Hence, it’s recommended to use the latest operating system and web browser.

    Here we will show you how to update the Chrome browser. The steps will be similar if you’re using a different browser.

    update google chrome

    To update the Chrome browser:

    • Click on the three vertical dots → Help → About Chrome
    • The About Chrome page will show you whether you’re using the latest web version or if it needs an update
    • If it needs an update, click on the update button. After Chrome gets updated, restart the web browser and visit the website again

    Disable QUIC Protocol

    The QUIC (Quick UDP Internet Connections) protocol is a popular alternative to HTTP2, TLS/SSL, and other security protocols. It is Google’s experimental project that sends simple data packages via User Datagram Protocol (UDP) without using any connection.

    However, using a QUIC protocol can cause ERR_SSL_VERSION_OR_CIPHER_MISMATCH error, which you can avoid by turning it off. You can disable the QUIC protocol by following the given steps:

    • In the address bar of the new Chrome Tab, type ‘chrome://flags’, which will take you to the experimental page
    • There, enter ‘quic’ in the search bar, which will show you all the searches related to ‘quic’
    • On the first few searches, you will find ‘Experimental QUIC Protocol’. Next to it, click on the disable button from the dropdown menu
    • Reboot your computer. The changes will be applied, and you can visit the website.
    disable quic protocol

    Turning Off Antivirus Software Temporarily

    Antivirus software creates a layer between the web and your browser with their certificates, creating issues with the website’s settings. Additionally, they have their SSL/HTTPS protection function that becomes a cause for the ERR_SSL_VERSION_OR_CIPHER_MISMATCH error. Thus, to avoid the issue, you can temporarily turn off your antivirus software.

    Disable your antivirus for a few minutes or for an hour, just so you can test this. Once you disabled it, try opening the website where you encountered the issue.

    If the problem persists, then your antivirus is not causing the issue. If you are, however, able to open the website without encountering this error, consider disabling the HTTPS scanning feature or selecting a different antivirus program.

    Clearing the SSL State of Your Computer.

    Sometimes your computer SSL state stores old SSL certificates that aren’t necessary anymore, which can also become a case of ERR_SSL_VERSION_OR_CIPHER_MISMATCH error.

    You can clear the SSL state in Windows by following the given steps:

    • Type in “Internet Properties” in your search bar
    • Once you open the Internet Properties or Internet Options box go to the Content tab
    • Click “Clear SSL State”
    clear ssl state

    This will clean the old SSL certificates and obtain a new one once you go back to Chrome, visiting websites.

    What If the ERR_SSL_VERSION_OR_CIPHER_MISMATCH Error Persists?

    Even after checking through all the above-mentioned solutions, if you still face the ERR_SSL_VERSION_OR_CIPHER_MISMATCH error, then try:

    • Resetting your computer’s date and time.
    • Delete all the cookies and cache from your web browser.
    • Upgrade your operating system.
    • Or, try using a different device.

    Sometimes, not having a system up-to-date also contributes to the issue. But upgrading your web browser and resetting your computer’s date/time will fix the error.

    Conclusion

    Running into SSL errors is without a doubt not enjoyable – especially if it’s for your own site. We hope this guide has helped you get to the bottom of the SSL error you ran into today.

    If you have any other questions about the ERR_SSL_VERSION_OR_CIPHER_MISMATCH SSL error and how to fix it – join the conversation & leave a comment below!
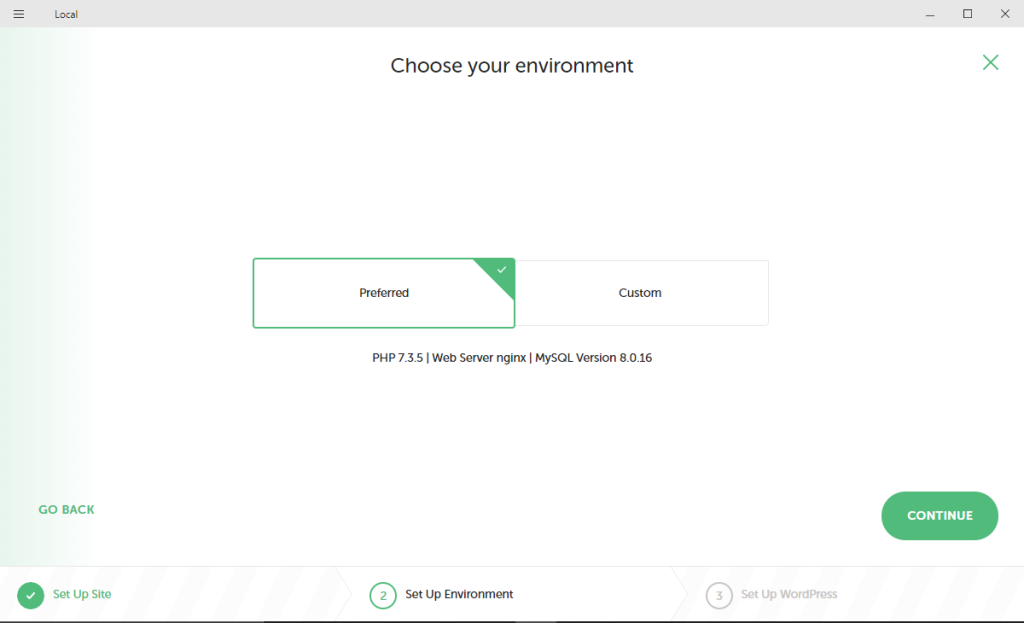
  • How to Fix the 504 Gateway Timeout Error

    How to Fix the 504 Gateway Timeout Error

    You may have encountered the 504 Gateway Timeout Error a few times while trying to visit websites.

    It can be frustrating as the 504 Gateway Timeout Error is one of the most common errors faced by users and site owners. Unfortunately, it’s also a mysterious error because it doesn’t specify what the issue is.

    If you own a website or a blog, it will be helpful to understand what the 504 Gateway Timeout Error is, find out what is causing it, and ultimately fix it.

    This article will help explain all you need to know about the 504 Gateway Timeout Error.

    What is the 504 Gateway Timeout Error?

    In simple terms, the 504 gateway timeout error happens when the website doesn’t receive a timely response from a server. Each time you visit a website, the browser will send a request to the server where the site is hosted. The server processes the requests and responds to the website with the requested resources.

    The 504 gateway timeout error is mysterious and can be challenging to fix. It indicates the server was unable to process the request, but it doesn’t tell you why it was unable to do so. It also tells you the server is aware it couldn’t carry out the request but was unable to fix the issue in time.

    Variations of the 504 Gateway Timeout Error

    Depending on your operating system and browser, the 504 gateway timeout error can appear in various ways.

    Some of the common 504 error messages may look like this:

    • HTTP 504
    • HTTP Error 504
    • 504 Gateway Timeout
    • The page isn’t working – Domain took too long to respond

    Your browser and certain websites can customize how the error message is displayed. Though the message can be worded in different ways, it points to the same server error.

    Potential Causes of the 504 Gateway Timeout Error

    So, what could cause the 504 gateway timeout error? Since the error refers to the server timing out on a request, it usually points to an issue with the network rather than with the device.

    server overheating causing 504 gateway timeout error

    Some of the possible causes could be:

    • Server is currently not working or under maintenance
    • Server is not functioning properly
    • Connection between server and internet was interrupted
    • Server may be overloaded with requests

    Now that you understand the issue sits with the server and not the client-side, you can eliminate your device or internet connection when trying to fix the 504 gateway timeout error.

    How to Fix the 504 Gateway Timeout Error: 5 Ways

    It can be a challenge to figure out what is causing the timeout error. Since this is considered a network error in the server and not with your computer, there are many reasons why the error message popped up, which we’ll talk about later in this article. Here are a few things you can do to try fixing the issue.

    1. Reloading Your Website

    You can try reloading the website you’re trying to visit. If you’re trying to visit the website on your computer, you can click the refresh button or the F5 key to see if it was just a temporary interruption with the connection. Otherwise, you can also try some of these suggestions.

    • Turn off your VPN, then refreshing the website
    • Try another browser
    • Restart your browser

    Some 504 gateway timeout errors happen when the server is temporarily overloaded. By clicking refresh or reload, the website will send out a new request to the server. If it was just a temporary overload or connection issue, the website should load in your browser.

    2. Restart All Network Devices

    A temporary disruption in your network connection can cause the gateway timeout error. You can try restarting all your network devices, including your modem and router to see if it will fix the issue.

    It’s as easy as unplugging both your router and modem, then waiting for 30 seconds before plugging it back in. You’ll have to wait another 60 seconds to start everything up and see if the issue persists.

    3. Check The Proxy Server Settings

    Check the proxy settings in your browser and application, and make sure they’re correct. Incorrect proxy settings can cause 504 errors. Some computers don’t have proxy settings at all.

    If you have Windows 10 or Windows 11, you don’t have to set your proxy settings in each browser. You can check and change the settings directly in Windows 10 or Windows 11, and it’ll apply to Google Chrome, Opera, Microsoft Edge, and Firefox.

    Here are the steps:

    1. Open the Start menu and select the gear icon (Settings).
    2. In Settings, select Network and Internet.
    3. In the left-hand pane, click Proxy.
    4. You’ll be able to view all the proxy settings in Windows. Everything should be set to off. If there is something turned on, it means your web traffic is going through a proxy.

    The steps are similar if you are using macOS. This will apply to the settings in Safari as well:

    1. Open System Preferences and select Network.
    2. On the left tab, make sure to select the active network connection.
    3. Then click Advanced at the bottom
    4. Select Proxies.
    5. You’ll see a list of proxy servers you’ll be able to configure.

    You can follow these steps if you’re using Internet Explorer:

    Open Internet Explorer, then click Internet Options.

    1. Click on the Connections tab, then LAN settings to open the LAN settings window.
    2. If you’re using a proxy server with a URL, check the box for “use automatic configuration script”.
    3. Then in the Address field, type the URL.
    4. If you’re using a proxy server with an IP address, check the box for “use a proxy server for your LAN”.
    5. When you’ve made your selections, click OK to save your changes

    In most cases, everything in your proxy settings should be set to off, or to “automatically detect settings”. This allows your computer to automatically select the best proxy settings for you.

    4. Change DNS Servers

    If you’ve tried connecting to the website on other devices but you’re still getting the same error message, you can consider changing your DNS servers. The Google Public DNS server provides a secure DNS connection. You can change your DNS server to some of the free public DNS servers listed below.

    • Google DNS – 8.8.8.8
    • Cloudflare – 1.1.1.1
    • OpenDNS – 208.67.222.222

    It’s possible the DNS server you’re using is causing the issue with the 504 gateway timeout error. We’ve listed the steps you can take to change your DNS server.

    Changing DNS server on Windows:

    1. Open the Start menu and select the gear icon (Settings).
    2. Once you’re in settings, click Network and Internet.
    3. Select Change adapter options.
    4. Right-click your chosen internet connection and select Properties.
    5. Click Internet Protocol Version 4, then click the Properties button.
    6. Click the item labeled Use the following DNS server addresses.
    7. Enter your two chosen addresses.
    8. Click OK to save your changes.

    Changing DNS server on macOS:

    1. Select Preferences from the Apple Menu.
    2. Launch the Network app.
    3. Select your internet connection and click the Advanced button.
    4. In the Advanced window, select the DNS tab.
    5. Use the plus-sign on the right to add your chosen DNS addresses.
    6. Click OK to save your changes.

    If you decide to change the DNS server on your router, just remember that this will affect all your connected devices. This also includes smart appliances and home security. Before starting, search “how to change DNS” for the make and model of your router. You’ll need instructions that are specific to your router’s model.

    5. Temporarily Disable Your Site’s Content Delivery Network

    The content delivery network you’re connecting to can sometimes cause the error message. If the website’s origin server is unreachable, the CDN will try to load the website from its cache. However, some CDNs don’t have this feature enabled as it can be complicated to cache certain assets on websites. An easy way to do this is to temporarily disable your CDN.

    The WordPress Popup plugin uses a CDN server to store files like images, and CSS libraries. You can temporarily disable this with the following steps:

    • Head to the WordPress admin area of your website.
    • Under the Settings tab, select the Popup plugin.
    • Activate the “Disable CDN usage” option.
    • Save changes.

    If you’re using the Onyx CDN, you can follow these steps:

    • Login to your Onyx dashboard.
    • Select the website you want to disable the CDN for.
    • In the left-hand menu, select CDN.
    • Select the Disable CDN button.

    WP Engine utilizes MaxCDN in their CDN offering. It only offloads wp-content directory files including images, CSS and Javascript. If you’re using WP Engine’s CDN, you can use these steps to temporarily disable the CDN:

    1. Log in to the User Portal.
    2. Click Sites.
    3. Select the production environment name.
    4. Select CDN.
    5. Uncheck the box on the right to indicate you’re disabling CDN.
    6. Be sure to save your changes.

    Various Examples of 504 Gateway Timeouts (How the Errors Look/What the Differences Are)

    There are two main ways the 504 gateway timeout error can show up on your screen. It can be helpful to differentiate between the two to find out where the issue lies.

    Certain CDNs, like Cloudflare that provide full proxy services, have additional firewalls between their servers and yours. This may cause you to encounter the error message more frequently.

    The error message above usually occurs when the issue is caused by Cloudflare itself. If you see this message, it’s advisable to contact their user support or check their status page.

    A custom error message like the one above indicates the issue is with the webserver and not Cloudflare. You can see from the diagram where the issue lies. If you own a website and encounter this message, you can get in touch with your hosting provider for support.

    In Windows-based programs, the 504 gateway timeout error might pop up in a small dialog box with a message saying HTTP_STATUS_GATEWAY_TIMEOUT. A Windows update will generate an error code 0x80244023 or display an error message WU_E_PT_HTTP_STATUS_GATEWAY_TIMEOUT.

    Why Are You Seeing The 504 Gateway Timeout Error Message?

    There are many reasons why you would encounter the 504 bad gateway timeout error message. We’ve listed some of the more common reasons below.

    1. Server Issues (Check With Your Host)

    One of the reasons why you would encounter the 504 gateway timeout error message is server issues. This is especially common with high-traffic websites like WordPress blogs, e-commerce sites, or online stores.

    There are a few steps you can take to troubleshoot the issue and decide if you should contact your host.

    1. Try accessing the website from other devices, for example, your mobile phone. If you are able to view the website on your mobile phone, but not your computer, it tells you the problem lies with the settings in your computer and not the server. However, if it does not work on all your devices, you should call your hosting provider for assistance.
    2. Websites like Downdetector will also be able to tell you if the website is currently experiencing technical issues and if other people are having problems connecting to it.
    3. You can also do a Google search “is abc.com down” or check Twitter to see if other people are experiencing the same issue.
    4. It’s recommended for you to check your WordPress host’s status page as well.

    You should check with your host if they have plans or resources to fix this issue if it happens regularly. However, there can be other reasons for the error message.

    2. Firewall Issues

    Improper configuration can cause your server’s firewall to have some errors. It could be that a few of the firewall’s rules are preventing the server from establishing a proper connection.

    You can check your server’s error logs to see if your firewall is the one causing the issues. To view the raw access and WordPress error logs via FTP, you can follow these steps.

    1. Connect your site via SFTP.
    2. You’ll see a folder named “logs” in the root folder.
    3. Your access and error logs will be in that folder.

    3. Slow Server Infrastructure

    The server you’re using to host your website may not have enough resources to handle the traffic. This happens when the server is overloaded, causing it to timeout while trying to load the website. You can fix this by upgrading to a server with better and stronger infrastructure.

    4. Network Connectivity problems

    Issues with the connection between the proxy server and your web server can be the cause of not responding to requests. A load balancer can also cause network connection issues.

    5. HTTP Timeouts

    HTTP timeouts happen when the connection between the web server and the client is kept open for too long. If you’re using WordPress websites, this can happen with WordPress imports. One easy way to solve this is to just switch to a better internet connection.

    6. Needs more PHP Workers

    Each website requires different resources. An online business website will require more resources than a blog because it receives more traffic. PHP workers are used to executing your website’s code. If the PHP workers are busy, a queue will build up. If the queue gets too large, the server will forgo old requests for new ones, which causes the 504 gateway timeout error. You can request more PHP workers from your host to avoid this.

    7. Spam, Bots, or DDoS Attacks

    If your website has been attacked by DDoS or spammed by bots, it can overload the server. You can troubleshoot this by requesting a report from your host provider. 

    spam, bots and ddos attacks cause 504 error

    There are three reports you can look at. The first is the top-end customer’s IP addresses which is useful if you notice your website is suddenly generating a lot of traffic. You can use this to distinguish if the traffic is genuine or if your website has been attacked by bots.

    The second is the requests and bots report. You can compare the number of people visiting your website versus the number of bots. The third report is the cache analysis report. In this report, you can see what requests are missing in the cache. You should try to cache as many requests as possible to provide the best stability for your website.

    8. Corrupted WordPress Database

    A corrupted WordPress database or files can cause 504 gateway timeout errors. This can also happen if your website is experiencing security issues or has been hacked. Repairing the database will depend on the problem it’s having. Certain plugins like WP-DBManager can help you diagnose any issues with the database and repair them.

    Troubleshooting (Health Mode)

    There are a few ways you can tell if there is a problem with your WordPress database. One of them is the “error establishing a database connection” message. You can troubleshoot the database issues by understanding the common problems we’ve listed for databases.

    • Connection problems
    • Incorrect credentials
    • Corrupted database tables or files
    • Limited or exceeded PHP Memory
    • Your website has been hacked

    Check Your Site’s Plugins, Theme, and Server Error Logs

    There is a small chance that third-party plugins can cause server timeouts by queuing up one too many uncached requests. This takes up a lot of PHP workers and can cause the 504 gateway timeout error to occur.

    You can simply troubleshoot this problem by deactivating all your plugins and checking if your site is working properly.

    If it does, you’ll then have to enable each plugin and test the site after each plugin has been enabled. You should also ensure your WordPress core, including the plugins and themes, are updated.

    1. Configure Apache or Nginx Settings Properly

    Bugs and faulty plugins in the Apache or Nginx can cause the 504 bad gateway timeout error. You’ll need to analyze the error logs to find out if this is the case.

    2. 504 Gateway Timeout Error on Nginx + FastCGI (PHP-FHM)

    The 504 gateway timeout error is common when using Nginx with PHP-FHM. This usually means the PHP-FHM took a longer time to generate the response. Some of the reasons for this to happen could be:

    • The web server was overloaded and it took longer than usual to process requests.
    • The database behind the PHP application was slow
    • Nginx timeout configuration included small values

    A great way to fix this is to increase the PHP maximum_execution_time, and PHP-FHM request termination time.

    3. 504 Gateway Timeout Error on Nginx Proxy

    To fix the 504 gateway timeout error on Nginx proxy, you can try adding these variations to the nginx.conf file:

    • proxy_connect_timeout 600;
    • proxy_send_timeout 600;
    • proxy_read_timeout 600;
    • send_timeout 600;

    4. Other HTTP Errors Like 504 Gateway Timeout

    There are other HTTP errors similar to the 504 gateway timeout error. Some of these include:

    • 500 Internal Server Error
    • 502 Bad Gateway Error
    • 503 Service Unavailable

    Conclusion

    Troubleshooting and fixing a 504 gateway timeout can seem difficult and overwhelming. But there are many ways to fix the error message as long as you know what could be causing it. If you suspect it’s the server causing the issue, you can always contact your host provider to help you.

    Potential topics:

    • Troubleshooting and repairing WordPress database issues
  • How to Fix a 502 Bad Gateway Error

    How to Fix a 502 Bad Gateway Error

    The 502 bad gateway error is one of the many status codes a WordPress site may experience from time to time.

    Though the error message is also popular with other platforms like Twitter or Cloudflare, it is one of the more common errors for WordPress. The 502 bad gateway error can have an impact on your site’s SEO.

    There are many reasons why you’re seeing the 502 error message. It can be caused by issues with your DNS server settings or PHP timeout settings. It can be frustrating trying to troubleshoot the exact problem causing the error message.

    In this article, we’ll explain what is a 502 bad gateway error, what could be causing the error, and the different ways to fix it.

    What is a 502 Bad Gateway Error?

    Your browser sends a request to the webserver every time you visit a website. The web server receives the request and processes it. It then sends the requested resources back to the browser.

    Simply put, the 502 bad gateway error occurs when the server has received an invalid response from the inbound server. The error message tells you the request was accepted, but an issue occurred while trying to fulfill the request.

    502 Bad Gateway Error Examples

    The 502 bad gateway error message can appear in a number of ways. You may see a blank white screen or some of these variations in the error message.

    • Error 502
    • 502 Proxy Error
    • 502 Service Temporarily Overloaded
    • 502 Bad Gateway
    • HTTP Error 502 – Bad Gateway
    • HTTP 502
    • 502 server error

    Your browser and certain websites are able to customize how the error message is shown. How the message is displayed to you depends on your browser, web server, and operating system.

    502 Errors Impact on SEO

    A 502 error can have a negative impact on your SEO if it’s not fixed soon. If your website is experiencing this issue for only a few minutes and it’s consistently being crawled, the crawler may just get the page delivered from the cache folder. There may be a chance Google will not be able to re-crawl before the site is working again. If this is what you’re experiencing, it won’t impact your SEO rankings.

    However, if your website has not been fixed for more than a few hours, Google might consider the 502 error as a site-level issue that needs to be addressed immediately. This can affect your SEO rankings.

    How to Fix the 502 Bad Gateway Error: 5 Ways

    The 502 bad gateway error is usually an issue with the network or server. While it can also be an issue on the client side, it’s not very common. Here are some ways you can use to try fixing the 502 bad gateway error.

    1. Try Reloading the Page

    One of the simplest first steps you should try is to wait a while before reloading the website. There is a possibility the host or server is overloaded, or there was a temporary connection problem.

    To reload your browser, click the refresh button or the F5 key to prompt the website to send another request. If it was a temporary interruption, the page will start loading after the refresh. Alternatively, you can try some of these other suggestions.

    • Turn off your VPN, then refresh the website again
    • Try a different browser
    • Restart your browser

    If the 502 bad gateway error was caused by a temporary connection issue, these steps will help you fix it, and load your website. Refreshing a page sends the server a new request asking for the latest version of the website you’re viewing. It’s possible you’ve encountered a temporary connection issue, especially if the server was maintenance.

    2. Restart Your Network Devices

    Any temporary disruption in your network connection can cause the gateway timeout error. A simple way to troubleshoot this is to restart all your network devices, including your modem and router.

    All you have to do is unplug both your modem and router. Then wait at least 30 seconds before plugging it back in. After that, you’ll have to wait for at least 60 seconds before starting everything back up to see if the issue is still there.

    3. Clearing Your Browser Cache

    The second easiest step is to clear your browser cache. Your browser saves certain information from the website you’re visiting. This is helpful as it speeds up the time it takes to look for that information and removes the need to constantly download the same resources.

    But sometimes, the saved cache can be corrupted, which will cause the 502 bad gateway error. There are different ways to clear your cache, depending on the browser you’re using.

    For Google Chrome:

    1. Head to the three-dot menu at the upper-right corner of Chrome.
    2. From there, click on More tools at the bottom area of the pop-up menu.
    3. Then select Clear browsing tools.
    4. This will then open a dialog box to delete all your browsing and download history.
    5. Check the box with Cached images and files.
    6. Select All time.
    7. Click Clear data.

    For Microsoft Edge:

    1. Head to the three-dot Menu at the upper-right corner of Microsoft Edge.
    2. Select Settings from the list.
    3. Click on Privacy, search and services.
    4. Select Clear Browsing Data.
    5. Select what you would like to clear and then click Clear now.

    For Internet Explorer:

    1. Select the gear icon on the upper left of Internet Explorer.
    2. From the menu, select Internet Options.
    3. Alternatively, you can click the Delete button to delete all your history, cookies, and cached data.

    You’ll want to restart your browser once you’ve cleared the cache as well, just to make sure your browser is in order. If you’re using a browser like Brave, Opera, or something else, you can easily Google the steps to delete your browser cache. You should find the steps fairly easily after that.

    4. DNS Issue

    The 502 gateway error can also happen when the domain is not providing the correct IP address or if the DNS server is not responding. DNS servers are assigned by your ISP by default, but you can change this yourself to see if it will fix the issue. You can try third-party DNS servers, which might solve the problem.

    Some of the best free public DNS servers can be found below:

    • Google DNS – 8.8.8.8
    • OpenDNS – 208.67.222.222
    • Cloudflare – 1.1.1.1

    There are two ways to change your DNS settings. The first is to change your router settings, and the second is to add the new DNS right into your device.

    To change the DNS server on Windows:

    1. Open the Start menu and select the gear icon (Settings).
    2. Once you’re in settings, click Network and Internet in the Settings menu.
    3. From there, select Change adapter options.
    4. After that, right-click your chosen internet connection and select Properties.
    5. Click Internet Protocol Version 4, then click the Properties button.
    6. Next, select the item labeled Use the following DNS server addresses.
    7. Enter your two chosen addresses.
    8. Click OK to save your changes.

    Changing DNS Server on macOS:

    1. Select Preferences from the Apple Menu.
    2. Launch the Network app.
    3. Select your internet connection then click the Advanced button.
    4. In the Advanced window, select the DNS tab.
    5. Use the plus sign on the right to add your chosen DNS addresses.
    6. Click OK to save your changes.

    Changing the DNS server directly on your router will affect all your connected devices, including home security and smart appliances. To do this, we recommend doing a web search on “how to change DNS” followed by the make and model of your router. This will provide you with instructions that are specific to the router you’re using.

    This might help solve the 502 bad gateway error message. When you change the assigned DNS server on your router or devices, you’re prompting your devices to use a different domain to search for the IP addresses. This might help you access sites your ISP has chosen to block for any reason, which can cause the 502 bad gateway error.

    5. Check With Your Host

    One of the main reasons for a 502 bad gateway error is an issue with the web host. A request may take too long, resulting in it being canceled by the server. Certain hosts implement a “kill script” feature that terminates a request after some time, so it doesn’t affect the main site or other users.

    Here are a few steps you can take to see if there are issues with the server and if you should contact your host.

    1. Try accessing the website from other devices, for example, your mobile phone. If you are able to view the website on your mobile phone, but not your computer, it tells you the problem lies with the settings in your computer and not the server. However, if it does not work on all your devices, you should call your hosting provider for assistance.
    2. You can also do a Google search “is abc.com down” or check Twitter to see if other people are experiencing the same issue.
    3. Websites like Downdetector will also be able to tell you if the website is currently experiencing technical issues and if other people are having problems connecting to it.
    4. It’s recommended for you to check your WordPress host’s status page as well.

    If you’re experiencing the 502 bad gateway on a regular basis, it’s a good idea to contact your host to find out if that is the reason or if the site is just under maintenance.

    6. Temporarily Disable CDN or Firewall

    The content delivery network (CDN) or firewall you’ve selected could also be causing the 502 bad gateway error. If the original server of the website cannot be reached, the CDN will automatically load the website from its cache folder. However, this feature isn’t enabled in some CDNs.

    If you’re using WordPress, the website provides a Popup plugin that uses a CDN server to store files including images, Javascript, and CSS libraries. Here’s how you can disable the CDN temporarily:

    1. Go to the WordPress admin dashboard.
    2. In the Settings tab, select the Popup plugin.
    3. Activate the ‘Disable CDN usage’ option.
    4. Make sure to save your changes.

    If you’re using WP’s Engine CDN, these are the steps you need to take to temporarily disable CDN:

    1. Login to WP Engine’s User Portal.
    2. Select Sites.
    3. Click on the production environment name.
    4. Click CDN.
    5. Make sure to uncheck the box on the right to indicate you disable CDN.
    6. Save your changes.

    While it isn’t usually recommended, you can also try disabling your firewalls to check if it’s interfering with opening the website. Certain host providers offer full proxy services that may include extra firewalls, which could cause a 502 bad gateway error.

    If you’re using Windows 10, you can disable your firewall with the following steps. This will also disable the firewall in Google Chrome, Opera, Microsoft Edge, and Firefox.

    1. Open Control Panel.
    2. Click on System and Security.
    3. Select Windows Firewall.
    4. Select Turn Windows Firewall on or off.
    5. Check the icon next to Turn Off Windows Firewall (not recommended).
    6. Click OK to save the changes.

    You can follow these steps if you’re using macOS:

    1. Open the Apple Menu.
    2. Select System Preferences.
    3. Click Security & Privacy.
    4. Click Firewall.
    5. Select Firewall Options to disable the firewall temporarily.

    Temporarily disabling the CDN or firewall may fix the issue of the 502 bad gateway error message. If it doesn’t, you can always refer to these steps to change your settings to their original form.

    Cloudflare 502 Bad Gateway Error

    The Cloudflare 502 bad gateway error occurs when the server you were trying to connect to receives a bad response from another server. This can happen when a server is overloaded or experiencing some network issues between the two servers. There are two variations to the Cloudflare 502 bad gateway error.

    502 Bad Gateway Cloudflare (Variation 1)

    The below image indicates the problem that occurred on Cloudflare’s end. If you see this error message, you can reach out to them for support. It’s also helpful to check Cloudflare’s status page for assistance or to see if they are experiencing an outage.

    502 bad gateway error variation 1 example

    502 Bad Gateway Cloudflare (Variation 2)

    The next variation, as described in the image below, indicates the problem is with the hosting provider. If this happens, you can either follow the steps we’ve listed earlier in the article or get in touch with your host provider for support.

    502 bad gateway error variation 2 cloudflare example

    Check Your Plugins and Themes (Troubleshooting Mode)

    Using third-party plugins or themes in your WordPress website can sometimes cause queries to be canceled by the server. This happens when there’s bad code on your site. You can troubleshoot this by simply disabling all your plugins and checking if your website is loading properly.

    If it is, you’ll know there’s a bad plugin somewhere. You’ll need to find which one by enabling each plugin one at a time and seeing if the website loads after each one. You should always ensure your WordPress core, plugins, and themes are updated.

    Take A Look At Your Error Logs

    If the problem persists, you may need to further investigate what’s causing it. Error logs can be helpful when troubleshooting problems on your WordPress site. You can access your error logs by using a logging tool. In the error log, you’ll be able to see how often the 502 bad gateway error is happening to see if it is a one-time occurrence or if it requires further attention.

    You can use the following steps to view the raw access and WordPress error logs via FTP:

    1. Connect your site via SFTP.
    2. You’ll see a folder named “logs” in the root folder.
    3. Your access and error logs will be in that folder.

    If the host does not have a logging tool, you can enable this in your wp-config.php file to allow logging. WordPress features its built-in debug tool that is useful for debugging WordPress. All you have to do is enable the WordPress debug mode and WordPress debug log, then specify a custom file path where you’ll be able to access it later.

    Restart PHP and Rebuild Web Application in RunCloud

    You can try restarting PHP through your host settings. If your host doesn’t provide this, you can request a support ticket.

    Many people also manage their servers through RunCloud, a control panel for cloud servers. It’s an easy way to build and manage web servers. If you’re encountering the 502 bad gateway error regularly, especially when you’re in the process of building your website, you can choose to rebuild your web application in RunCloud or simply reach out to us and we’ll help you out!
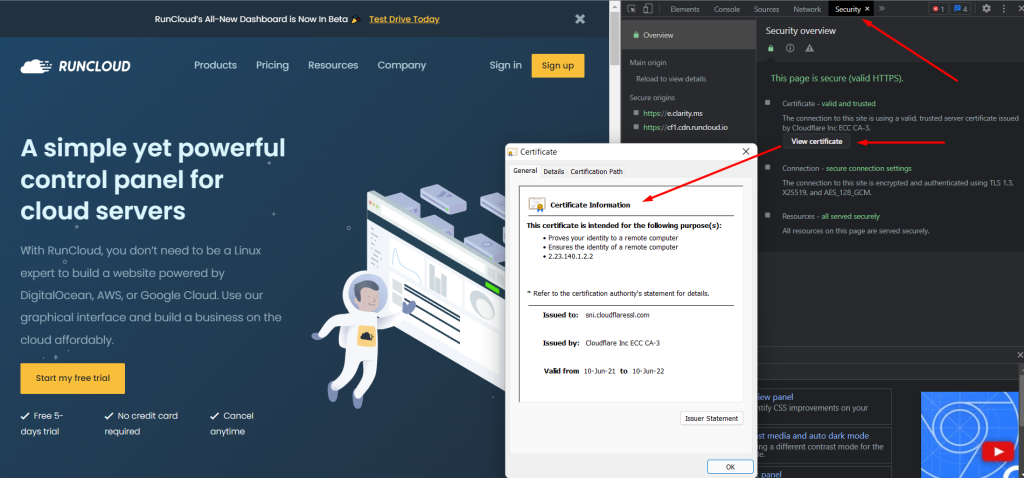
    PHP Timeout Issue

    PHP timeouts happen when one PHP process runs longer than the max_input_time or max_execution_time that has been set in your server’s PHP configuration. This is a common issue, especially when you’re conducting large WordPress imports. If you encountered the 502 bad gateway error because of PHP timeouts, then you’ll need to check and evaluate the values set in your server.

    Conclusion

    There are many issues that can cause the 502 gateway error, but there are also many ways for you to troubleshoot the issue. Most of the time, the issue will be with your host and not with the client. It’s important to remember that third-party plugins with bad codes are also common causes for the 502 gateway error. Lastly, if you’re still receiving the error after running through all the necessary steps, it may be a good idea to rebuild your web application in RunCloud.

  • Website Load Testing – How To Test Website Performance At Scale

    Website Load Testing – How To Test Website Performance At Scale

    Ever wondered how much your $5/month Digital Ocean Droplet or VPS with UpCloud can handle? Well, in this guide – we’ll show you how to run website load tests with loader.io.

    1 – Register For A Loader.io Account

    The registration process is super simple, simply navigate over to loader.io and then click Sign Up Now on their homepage.

    2 – Choose A Suitable Loader.io Plan

    You’ll then be prompted to choose your preferred Loader.io plan. You’ll be pleased to hear that, for the purposes of this guide and initial testing, you can use their generous free plan:

    3 – Enter Your Account Details

    Once you’ve selected your plan of choice, all you need to do is create your account by enter your company name, email address and creating a password:

    4 – Verify Your Email Address

    And once you’ve created your account, before you’ll be able to run any tests, you’ll have to verify your email address.

    Navigate to the email address used during the registration process and look for an email from Loader.io that looks like this one right here:

    And simply click Verify me to verify your account & email address are valid.

    Once verified, this is what you’ll see:

    5 – Create A New Target Host For Your Load Test

    Now, it’s time to start setting up your first test. To get started, you’ll first need to create a New Host. To do so, simply click + New Host as highlighted below:

    6 – Enter The Domain Name of the Web Application You Wish To Test

    A host is simply the domain that you wish to test as a part of this website load test. So, for example, if we’d be testing the scalability of the RunCloud Blog – we’d enter blog.runcloud.io here:

    Note: This has to be a website that you actually own as otherwise, you will not be able to run a load test as the next step will require that you verify ownership of this domain.

    7 – Verify Ownership of That Web Application/Domain

    Next, you’ll need to verify that you’re the actual owner and operator of this domain name. This is simply to avoid anyone & everyone from being able to run load tests against websites they don’t actually own (which with some setups could result in taking sites offline).

    If you’re on the free plan you’ll only be eligible to verify over HTTP which is super simple. Simply navigate to the web application in your RunCloud dashboard (or your server management dashboard of choice) and upload the file to the root folder of the site. In the case of WordPress sites, this is the same folder that contains the folders: wp-admin, wp-content, etc.

    Once uploaded, hit the blue Verify button and you’ll see the following confirmation:

    This means you can now start creating your first website load test for this target host.

    8 – Create & Run Your Website Load Test

    Once ready, proceed to the next step by clicking New Test.

    This will then take you to the following test configuration settings page where you can adjust the type of requests you want to use in this load test as well as how many clients and what the duration of the test itself should be.

    For the purposes of this demonstration, we recommend only setting a suitable test name and leaving the other settings unchanged. If you’re performing improvements or want to evaluate the difference between servers, be sure to perform tests both before & after changes are made so that you actually have data for comparison (again using suitable names so they are easy to refer back to but not changing other settings as this would otherwise create variance in the test data that would need to be accounted for).

    Once you’re ready to run this test – click Run Test as shown below:

    And that’s it, your website load test is now underway! 🎉

    Once the test completes (i.e. for the standard settings after one minute), you’ll be able to review the results and see how your website performance (i.e. response time) was affected as the number of clients hitting your site/making requests to your server increased throughout the one minute period.

    And that’s it – if you have any other questions about website load testing you’d like us to cover in this guide, feel free to leave a comment below & join the conversation. 💬