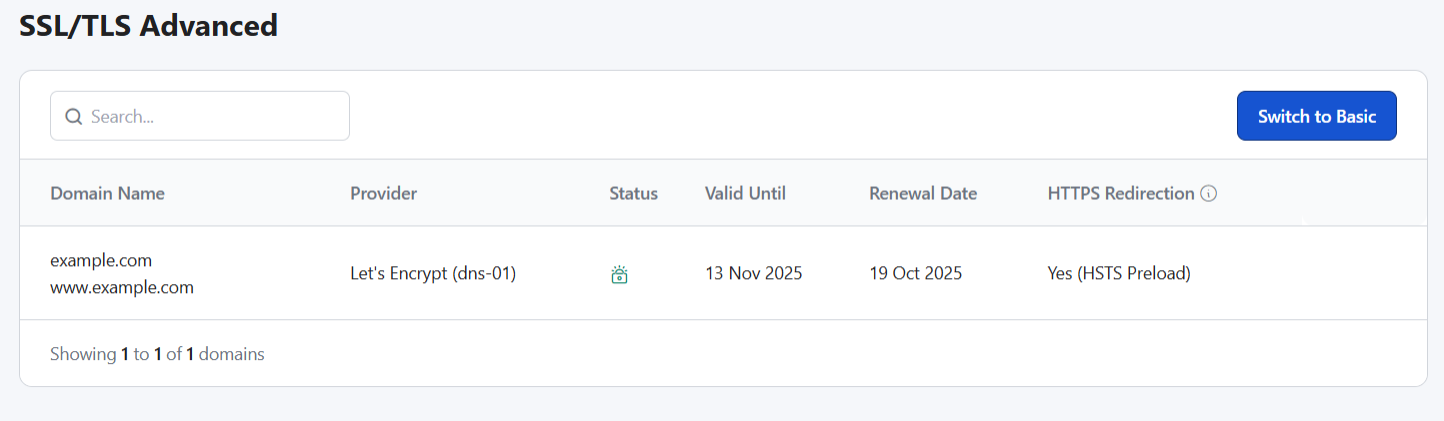
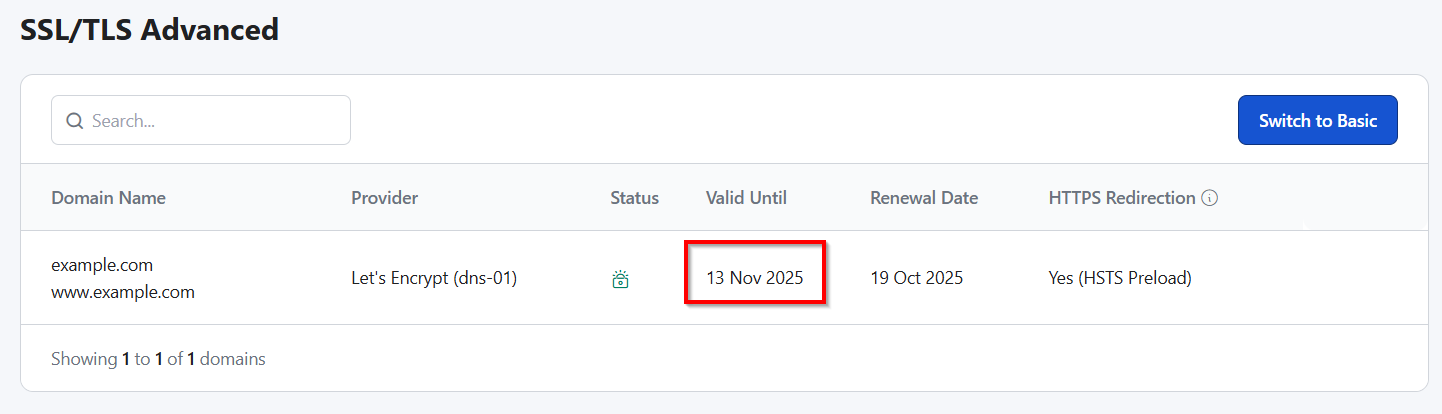
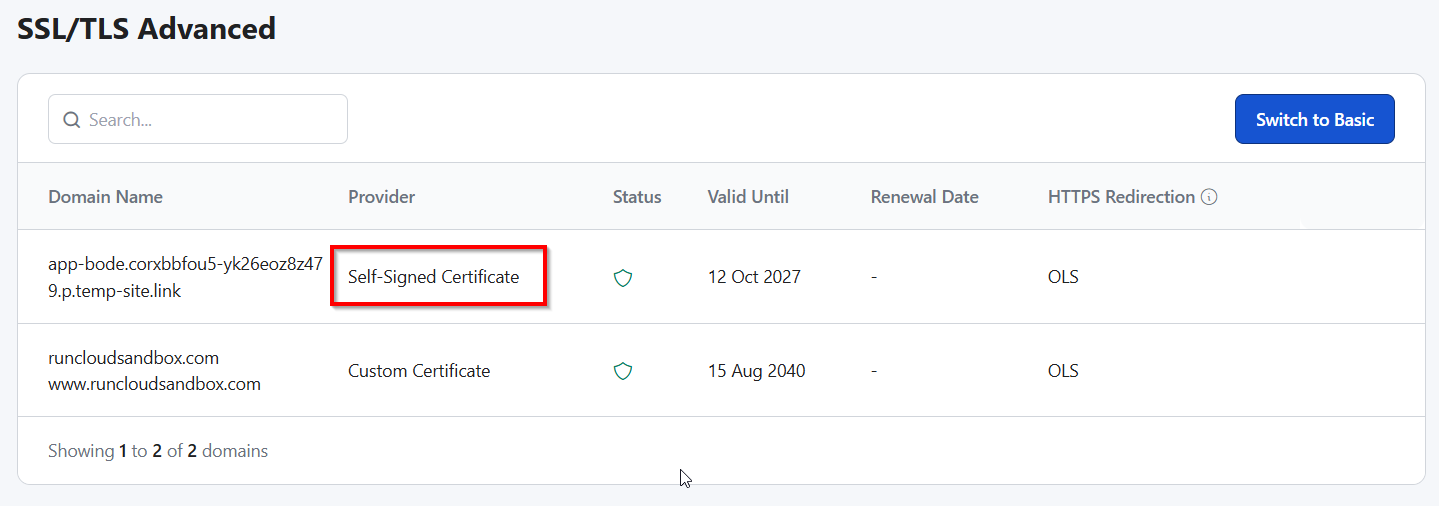
Have you ever encountered the “memory size exhausted” message on your website? If yes, then you’ll probably know that this single issue can bring your entire site to a halt.
If you are seeing this message, don’t panic. It’s one of the most common issues WordPress users face – and is completely fixable.
This fatal error simply means that a script on your site (usually from a plugin or theme) required more server memory (RAM) than your web hosting environment was configured to provide.
In this guide, we will walk you through everything you need to know to solve the “memory size exhausted” problem for good.
You’ll learn how to check your current WordPress memory limit and discover proven methods to increase it, whether by editing the wp-config.php file, the .htaccessfile, or the master php.ini file.
Let’s get started!
How to Check Your Current PHP Memory Limit in WordPress
Before you can fix a memory exhausted error, you first need to identify your current limit. There are several ways to do this.
1. Using the Site Health Tool in the WordPress Dashboard
The easiest and safest way for any user to check the PHP memory limit is directly within the WordPress dashboard. WordPress has a built-in “Site Health” tool that reports your website’s configuration and server environment.
To access it:
Navigate to your WordPress admin area and go to Tools > Site Health.
Click on the “Info” tab at the top of the page, which will reveal a series of expandable sections.
Click on the “Server” dropdown, and you will see a detailed list of your server’s configuration.
Look for the “PHP memory limit” entry to see the value configured for your site.
2. Checking PHP Info or Server Configuration Files
If you want more information or can’t access the WordPress dashboard, you can create a phpinfo file. This method queries the server directly and displays the master PHP configuration.
To do this, you just need to create a new file named info.php in your website’s root directory using an FTP client or a file manager, and place the following single line of code inside it:
<?php phpinfo(); ?>
Save the file, then visit yourwebsite.com/info.php in your browser. You will see a detailed page with all PHP settings; search for memory_limit to find the current value.
Note: for security reasons, you must delete the info.php file from your server immediately after you are finished, as it exposes sensitive server configuration details.
3. Identifying Memory Limit via Hosting Control Panel (cPanel, RunCloud, etc.)
Most modern hosting environments provide a graphical interface to view and manage server settings. In traditional control panels like cPanel, you might find this information under a “MultiPHP INI Editor” or “Select PHP Version” tool.
On a more powerful platform like RunCloud, this information is even more accessible and transparent. Simply navigate to your Web Application > Settings within the RunCloud dashboard.
Here, you will see your current PHP version and its associated memory limit clearly displayed:
How to Fix the WordPress Memory Exhausted Error (7 Proven Methods)
There are several ways to fix the WordPress Memory Exhausted error, ranging from simple configuration file edits to leveraging your hosting control panel. Let’s explore these methods in detail to help you get your WordPress site back on track.
1. Increase PHP Memory Limit via wp-config.php File
This is the standard WordPress method for increasing the memory available to your application. The wp-config.php file contains your site’s base configuration and is located in the root directory of your WordPress installation.
(Before editing, it is recommended that this file be backed up.)
First, you need to open the wp-config.php file either using your FTP client or the RunCloud File Manager. In this file, add the following line of code just before the line that says /* That’s all, stop editing! Happy publishing. */:
define('WP_MEMORY_LIMIT', '256M');
If needed, you can change 256 MB to a higher value, like 512 MB. This command instructs WordPress to override the default PHP memory limit for its own processes.
If editing wp-config.php doesn’t work, it may be because your hosting provider has locked that setting at the server level. In some Apache servers, you can also edit the .htaccess file, which is also located in your site’s root directory. This file controls server configurations for your specific directory.
Again, ensure you have a backup before proceeding. Open the .htaccess file and add the following line at the very end of the file:
The php.ini file is the master configuration file for PHP on your server. Modifying this file changes the memory limit for all PHP applications, not just WordPress, which makes it the most powerful method. However, on shared hosting, you typically do not have access to this file, so this method is primarily for users on a VPS or dedicated server where you have root or sudo privileges.
If you have server access, you must first locate the correct php.ini file, as its location varies significantly by Linux distribution and PHP version. For instance, on a server running Ubuntu or Debian with PHP 8.1 and Apache, the path is /etc/php/8.1/apache2/php.ini. If you’re using NGINX with PHP-FPM, the path would instead be /etc/php/8.1/fpm/php.ini. On distributions like CentOS or AlmaLinux, a common location is simply /etc/php.ini.
The most reliable way to find the exact path your web server is using is to check the “Loaded Configuration File” line within a phpinfo() page, as explained above. Once you have located and backed up the correct file, you will find and change the following line:
4. Use the Hosting Control Panel or the RunCloud Dashboard to Increase Memory
The safest and most recommended method for novice users is to use the tools provided by your hosting provider or server management panel. These interfaces are designed to prevent the configuration errors that can occur when editing files manually. Most control panels have a section for managing PHP settings where you can select your domain and choose a new memory limit from a dropdown menu.
RunCloud excels at this, and it provides a dedicated and intuitive control for each web application. From your dashboard, go to Web Application > Settings, where you can easily adjust the PHP memory_limit with a simple input field.
After you make the necessary changes, you can save the settings without any need for SSH or FTP.
Sometimes, the problem isn’t the memory limit itself, but a single plugin consuming an excessive amount of resources. A poorly coded plugin or a feature-heavy one (like a page builder or a complex backup solution) can easily trigger a memory error by creating a memory leak or simply by performing a task that is too resource-intensive for your server’s configuration.
In this case, increasing the memory limit will not solve the issue, and you will need to identify the specific component causing the issue without disrupting your live site.
Instead of resorting to the time-consuming method of deactivating all plugins on your live site, your first step should be to check the server logs. The NGINX error logs, for instance, often contain the exact PHP script path that triggered the fatal error.
Furthermore, a plugin that exhausts memory is frequently a slow-performing one; this is where RunCloud’s built-in slow script monitoring becomes invaluable. It helps you identify scripts that are taking too long to execute and are likely candidates for high memory usage.
Once you have identified a suspect, the safest way to confirm your diagnosis is in a non-production environment. Instead of deactivating plugins on your live site and risking further downtime, use RunCloud’s one-click staging functionality. This creates an identical, isolated copy of your site where you can safely deactivate the suspected plugin and test thoroughly without impacting your visitors. If the error disappears on the staging site, you’ve found your culprit and can proceed with deactivating or replacing it on your live production site.
6. Optimize Images and Media Files to Reduce Memory Usage
One of the most common reasons for memory exhaustion is uploading large, high-resolution images. When you upload a picture, WordPress doesn’t just store it directly; it uses PHP to process it and create multiple smaller versions (thumbnails). This image processing is a very memory-intensive task, and a large file can easily push PHP past its limit.
To prevent this, always optimize and resize your images before uploading them to WordPress using a tool like Photoshop or an online image compressor. You can also use a WordPress plugin that optimizes images on the fly, but be mindful that the optimization plugin itself will also consume resources. By reducing the initial file size, you significantly decrease the amount of memory needed for processing.
7. Upgrade Your Hosting Plan for Higher PHP Memory Allocation
If you have tried all the above methods and are still hitting memory limits, especially on a shared hosting plan, it may be time to upgrade. Shared hosting environments place strict, and often low, caps on resources like RAM to ensure stability for all users on the server. No amount of configuration file editing can overcome a hard limit imposed by your provider.
Upgrading to a VPS (Virtual Private Server) gives you dedicated resources and full control over your server environment. With RunCloud managing your VPS, you can easily set your PHP memory limit to 512 MB, 1GB, or whatever your applications require.
Wrapping Up: Best Practices to Prevent the WordPress Memory Exhaustion Error
In this post, we have shown you not only how to fix the WordPress memory exhausted error but also how to build a resilient and high-performing website. After fixing the error, you can optimize your site by implementing a couple of best practices to prevent this in the future.
One of the most powerful preventative measures is to reduce your server’s overall workload. Every time a visitor loads a page on your site, WordPress executes PHP scripts and queries the database, all of which consume memory. Caching drastically reduces this workload by storing and serving a static HTML version of your page, bypassing the need for most PHP executions.
With RunCloud, you can enable a highly optimized server-level solution like RunCache (NGINX FastCGI cache) with a single click. This immediately lowers your server’s memory and CPU usage and makes your site significantly faster.
This is just one example of how RunCloud transforms server management from a reactive chore into a proactive strategy.
The most effective method is to edit your wp-config.php file by adding the line define('WP_MEMORY_LIMIT', '256M'); just before the “That’s all, stop editing!” comment. If this doesn’t work, your host may be overriding it, so you can try setting the memory_limit value in your .htaccess or php.ini file.
What causes memory limit errors in WordPress?
Memory limit errors occur when a WordPress script, typically from a plugin or theme, requires more RAM than the server has allocated for PHP. This exhaustion is often triggered by resource-intensive functions, poorly coded components, or complex database queries that push the process beyond its allowed memory threshold.
Why does my site crash when uploading images?
Image uploads are a memory-intensive process because WordPress must not only receive the file but also process it to create multiple smaller sizes (thumbnails). If the original image is very large or your PHP memory limit is low, this process can easily exceed the allocated memory and trigger a fatal error.
How do I find my current PHP memory limit?
The easiest way is to navigate to “Tools > Site Health” in your WordPress dashboard, click the “Info” tab, and expand the “Server” section. Alternatively, a more direct server-level approach is to create a file named info.php in your root directory containing <?php phpinfo(); ?> to view the master memory_limit value.
Can plugins cause memory exhaustion?
Yes, plugins are the most frequent cause of memory exhaustion errors in WordPress. A single poorly coded plugin or too many plugins running complex operations simultaneously (like page builders, backup solutions, or security scanners) can quickly consume all available memory.
What is the ideal PHP memory limit for WordPress?
A baseline of 128M is a good starting point for a modern website, but 256M is a safer and more common recommendation. For robust sites, especially those running e-commerce platforms like WooCommerce or numerous plugins, setting the limit to 512 MB is often ideal for preventing memory-related errors.
How do I fix fatal errors in WordPress?
First, enable WP_DEBUG in your wp-config.php file to see a more detailed error message that often points to the culprit plugin or theme. If it’s a memory issue, increase the PHP memory limit; otherwise, the standard troubleshooting procedure is to deactivate all plugins and switch to a default theme to isolate the problem.
Does changing themes affect memory usage?
Absolutely, themes can have a significant impact on memory usage, as modern themes often bundle complex features and functionality. A lightweight, well-optimized theme will consume far less memory than a large, multipurpose theme packed with page builders, sliders, and extensive integrations.
Cloudflare CAPTCHA errors are a common frustration for both users and developers.
These verification failures waste time, interrupt logins, and can even block legitimate visitors from accessing your site.
In this guide, you’ll learn what causes Cloudflare CAPTCHA to fail – including network, browser, and configuration issues – and how to fix them effectively, whether you’re troubleshooting as a user or optimizing your setup as a site administrator.
What Cloudflare CAPTCHA Does
Cloudflare CAPTCHA, now evolving into Cloudflare Turnstile, verifies that site visitors are human before allowing sensitive actions like logins, registrations, or form submissions.
Protects against brute-force attacks by blocking automated login attempts.
Prevents spam and abuse in forms, comments, or mass account creation.
Verifies human interaction to maintain service integrity.
Reduces fraudulent activity by preventing bot-driven actions.
Common Reasons Cloudflare CAPTCHA Fails
Cloudflare uses machine-learning models to classify traffic as safe or suspicious. These models aren’t perfect, meaning legitimate users can sometimes be challenged or blocked.
The most common triggers include:
Suspicious IP addresses: Shared or blacklisted IPs from VPNs, proxies, or hotel Wi-Fi can be misclassified.
High challenge frequency: When multiple users share an IP previously linked to abuse, Cloudflare increases CAPTCHA prompts.
Aggressive security rules: Overly strict firewall or bot protection settings can block genuine visitors.
To reduce false positives:
Use reputable VPNs.
Avoid public or shared networks for login attempts.
Review Cloudflare’s Firewall Rules and Bot Fight Mode for overly restrictive settings.
How to Fix CAPTCHA Failures (for Users)
Captcha failures can indeed be a source of frustration, but there are several steps you can take to resolve common issues.
Here is our three-point checklist of how to troubleshoot Cloudflare Captcha failures:
#1 – Clear Your Browser’s Cache and Cookies
Cached data and cookies are essential components of your browsing experience, designed to improve website performance and remember your preferences. However, if the cached version of a webpage becomes outdated or corrupt, it may not interact properly with current versions of web applications – this can lead to Captcha either not loading or not validating your inputs correctly.
Additionally, cookies can sometimes store incorrect or outdated session data, which may conflict with the Captcha validation process. For example, if a cookie retains an old session state, it might prevent the Captcha from recognizing that you’ve entered the correct response.
How to Clear Cached Data and Cookies:
Access Browser Settings: Open your browser settings or preferences. This is usually found in the menu in the upper right corner of your browser.
Locate Clearing Options: Look for an option that says something like “Clear browsing data,” “Clear cache,” or “Clear cookies and site data”.
Select Data to Clear: Choose to clear cached images and files (cache) and cookies. You may also have the option to clear browsing history, but this is not typically necessary for resolving Captcha issues.
Clear the Data: Confirm the action to clear the selected data from your browser.
By clearing your cache and cookies, you remove any potentially corrupted or outdated files that could be causing issues with Captcha. This can often resolve problems where Captcha won’t load or won’t accept your input, even when you’re sure you’ve got it right.
#2 – Update Your Browser
Modern web applications, including Captcha systems, are built using the latest web standards; an outdated browser may not be compatible with these standards, leading to functionality issues.
Update your browser regularly as new updates introduce new features or improve existing ones, including those related to accessibility and user interaction, which can affect how Captchas are displayed and function.
#3 – Disable Browser Extensions
Browser extensions can significantly enhance your browsing experience by adding functionality or improving privacy. However, they can also interfere with how web pages load and function, and this can include the operation of Captcha systems.
Many extensions use JavaScript to modify web pages, which can lead to altering or blocking scripts that are essential for Captcha to work. Some privacy-focused extensions might actually block or restrict web requests that Captcha systems use to verify responses. To fix this, considertemporarily disabling extensions:
Open Extension Settings: Launch your browser and enter chrome://extensions/ (for Chrome) or the equivalent in your browser’s address bar.
Disable Extensions: You’ll see a list of installed extensions with toggle switches. Turn off all extensions by clicking these switches.
Test Captcha: With all extensions disabled, try accessing the Captcha again. If it works, extensions are likely the cause of the problem.
Consider Alternatives: If you identify an extension that’s causing issues, look for alternative extensions that don’t interfere with Captcha, or adjust the extension’s settings if possible.
Managing CAPTCHA Behavior (for Site Admins)
If you are a website owner, administrator, or developer, then you need to understand why your legitimate users are being challenged and how to fine-tune your settings for a better experience without compromising security.
In this section, we will teach you how to diagnose issues with Cloudflare analytics, configure Turnstile for modern applications, and test your implementation correctly.
Use Turnstile Analytics to Diagnose Issues
Cloudflare’s Turnstile Analytics dashboard is your best diagnostic tool for understanding how security challenges affect real users.
Key metrics to review include:
Challenge volume: Identify sudden increases that may indicate new bot activity or overly strict firewall rules.
Challenge solve rate (CSR): A low CSR suggests legitimate users are being challenged or abandoning the process.
Challenge type metrics: Track whether certain challenge types (e.g., managed vs. interactive) correlate with failures.
Regularly reviewing these metrics helps ensure your configuration maintains security without compromising user experience.
Enable Pre-Clearance for Single-Page Apps
Single-page applications (SPAs) don’t reload full pages, which can lead to repeated Turnstile challenges as users navigate between views.
Cloudflare’s Pre-Clearance feature solves this by issuing a temporary verification cookie after a user completes one challenge. This cookie confirms the user’s authenticity for the rest of their session, preventing unnecessary prompts and improving usability.
Exclude Turnstile from Automated Testing
If you are running automated tests on your application, then you will need a way to bypass Turnstile verification. Continuously solving real challenges in a test environment is impractical and unreliable. Cloudflare provides dedicated testing keys for this purpose.
You should use the official test credentials provided in Cloudflare documentation for your testing environments. Cloudflare’s servers will always accept these keys without presenting a real challenge.
Warning: Never use these test credentials in a production environment. Your deployment process must have safeguards to ensure that only your production keys are used on your live website.
Troubleshooting Repeating CAPTCHA Loops
A “challenge loop” happens when users solve one CAPTCHA only to face another immediately after.
Common causes:
Unstable or low-quality network connections (e.g., public Wi-Fi or VPNs).
Outdated browsers (Internet Explorer is unsupported).
Disabled JavaScript – Turnstile cannot function without it.
Fix: Ensure JavaScript is enabled, test on a modern browser, and avoid VPNs or shared connections when possible. For persistent cases, check your Cloudflare logs for repeated bot classifications from the same IP range.
Final Thoughts and Next Steps
Cloudflare’s Captcha serves as a critical line of defense against bots and automated threats, although it’s not without its quirks. While Captcha challenges can sometimes be a source of frustration, they play a vital role in maintaining the integrity and security of online services. If you find yourself battling Captcha failures, remember to:
Lower Security Settings: High security settings are great, but they can sometimes be overzealous. If you’re facing persistent Captcha challenges, consider temporarily dialing back your security settings.
Incognito Mode: This mode isn’t just for private browsing – it can also help bypass troublesome browser settings that might be interfering with Captcha.
Check for IP Ban: Too many failed attempts can lead to a temporary IP ban. If you suspect this is the case, then consider restarting your router and trying again after a few hours.
Use a Different Device: Device-specific issues can cause unexpected Captcha failures. Switching devices can be a quick fix.
Managing server security, SSL, and configuration doesn’t need to be time-consuming.
RunCloud simplifies everything, from automatic configuration and PHP management to real-time monitoring and SSL setup, all from one intuitive dashboard.
Cloudflare Turnstile is a user-friendly, privacy-preserving alternative to traditional Captchas. It automatically blocks bot traffic using a suite of non-intrusive browser challenges based on telemetry and client behavior. As a result, many find it to be a better option due to its less intrusive nature and privacy considerations.
Does Cloudflare use Google CAPTCHA?
Cloudflare previously used Google’s reCAPTCHA service, but now it has developed its own CAPTCHA alternative, Turnstile, to address privacy concerns and provide more flexibility.
Are CAPTCHA systems outdated for spam protection?
While CAPTCHAs are still commonly used, their effectiveness against spam and automated threats has been questioned. Advanced bots have found ways to bypass CAPTCHAs, and alternatives such as Cloudflare’s Turnstile are emerging as more effective solutions.
Is Cloudflare Turnstile CAPTCHA Free?
Yes, Cloudflare Turnstile is a free service that aims to deliver frustration-free web experiences and confirms visitors are real without the data privacy concerns or the need for users to solve puzzles.
How can I prevent my own team from being challenged by Cloudflare during development and testing?
The best practice is to use IP Access Rules in the Cloudflare dashboard under Security > WAF > Tools. By adding your office’s or team members’ static IP addresses to the “Allow” list, you can ensure they bypass Cloudflare’s security checks entirely. This is the most reliable way to prevent trusted traffic from being challenged.
My Turnstile widget appears correctly on the frontend, but my server-side verification keeps failing. What should I check?
This issue almost always points to one of two problems. First, double-check that you are using your secret key for the server-side API call, as mistakenly using the public sitekey here is a common error. Second, ensure that your server’s firewall allows outgoing HTTPS requests to Cloudflare’s API endpoint.
Will adding Cloudflare Turnstile negatively impact my site’s Core Web Vitals?
No, Turnstile is specifically designed to be lightweight and performance-friendly. Unlike traditional CAPTCHA, which can be render-blocking, Turnstile runs non-intrusive JavaScript challenges that have a minimal impact on metrics like Largest Contentful Paint (LCP) and First Input Delay (FID). It is a much better choice for performance-conscious developers than older, more disruptive challenge systems.
Launching an e-commerce store can seem complex, especially when dealing with server configurations and deployment complexities. But what if you could deploy a feature-rich, Laravel-based eCommerce platform in just a few simple steps?
In this guide, we’ll show you exactly how to install Bagisto, a leading open-source eCommerce solution, using the power and simplicity of the RunCloud server management panel.
In this tutorial, we will provide a complete, step-by-step walkthrough designed for users with limited knowledge of Linux CLI. You will learn how to set up your server environment, deploy the Bagisto application, connect your database, and perform the final installation, all with the help of RunCloud’s intuitive dashboard.
Let’s get your online store up and running!
What is Bagisto and Why Should You Use It?
Bagisto is a powerful, open-source eCommerce platform built on top of Laravel. It provides a complete solution for businesses looking to create and manage an online store.
If you’re already familiar with Laravel, then you should definitely try out Bagisto as it extends Laravel’s built-in features, elegant syntax, and extensive ecosystem. This means developers don’t have to build an eCommerce system from scratch; instead, they can use Bagisto’s pre-built modules and extend its functionality using familiar Laravel patterns, which can significantly speed up the development process.
Key Features of Bagisto:
Multi-Source Inventory: Manage your stock across multiple locations and channels from a single platform.
Multi-Currency and Locale: Easily configure your store to support different currencies, languages, and regional taxes to sell to a global audience.
Access Control Level (ACL): Implement a role-based permission system to control what your team members can access and manage within the admin panel.
Built-in Payment Integrations: Bagisto supports popular payment gateways, making it simple to start securely accepting payments.
Advanced Reporting: Gain insights into your sales, customers, and products with detailed reports and analytics.
Step-by-Step Guide for Installing Bagisto via RunCloud
RunCloud is a powerful server management panel that makes deploying and managing web applications like Bagisto incredibly straightforward. By handling the complex server configuration, it allows you to focus on building your application.
Follow the steps below to get your Bagisto store up and running with RunCloud.
Step 1: Create a New Database and Database User
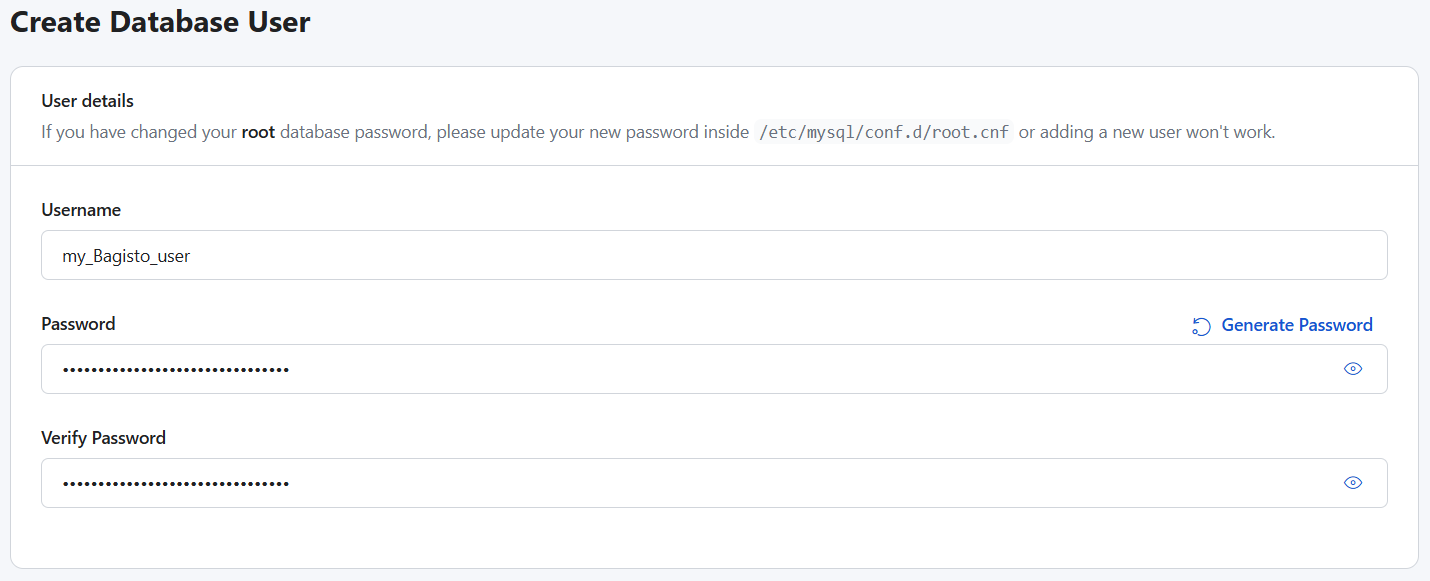
First, your application needs a database to store all its information, such as products, orders, and customer details. Log in to your RunCloud dashboard and navigate to the “Databases” tab on your server.
Once you have created the user, make sure you’re in the Database tab and click “Add New Database”. Give your database a name, and from the dropdown menu, select the user you just created to grant it access.
Step 2: Create a New Web Application
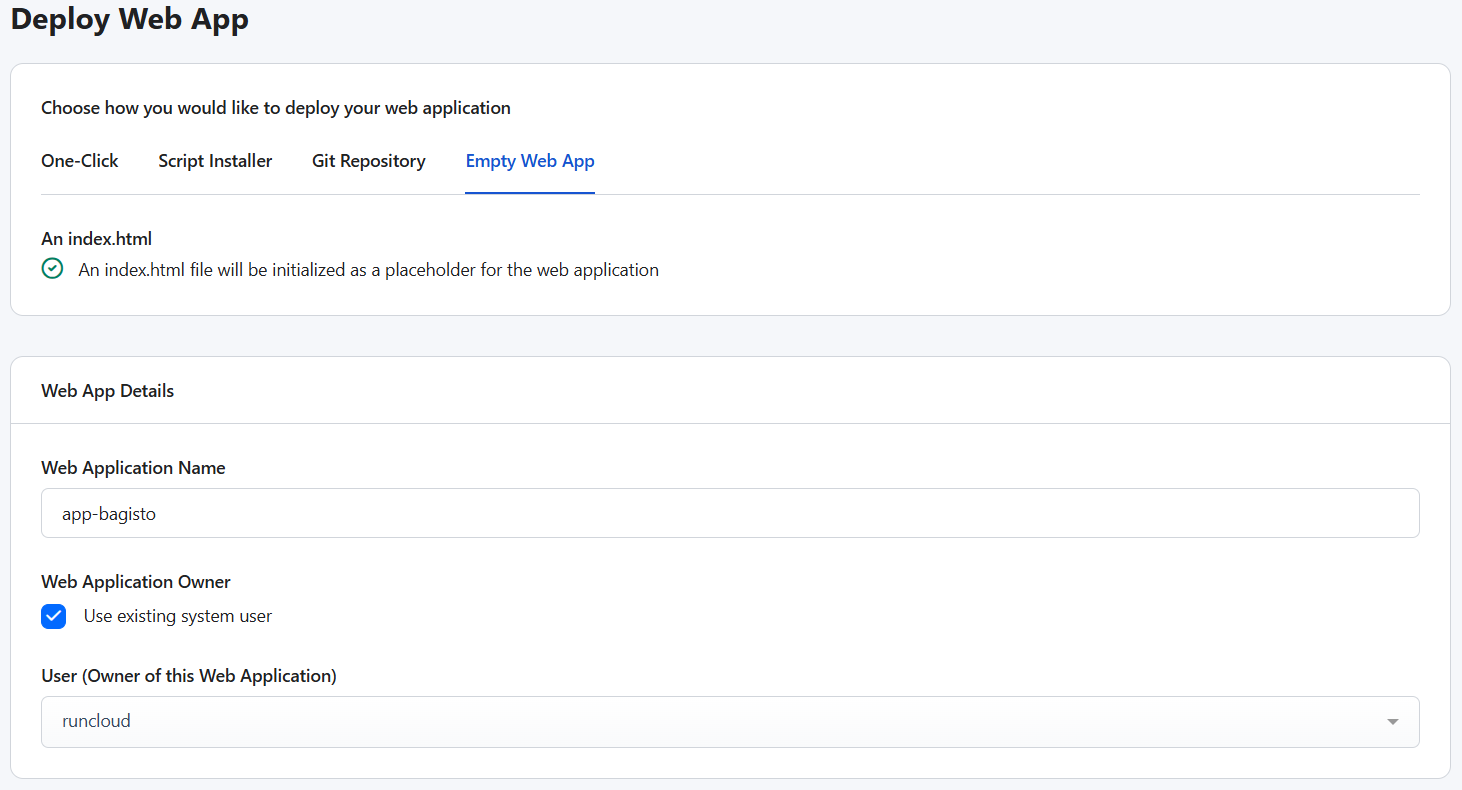
Next, you need to set up the web application environment where your Bagisto files will be stored. In your RunCloud dashboard, go to the “Web Applications” section and click “Create Web Application“.
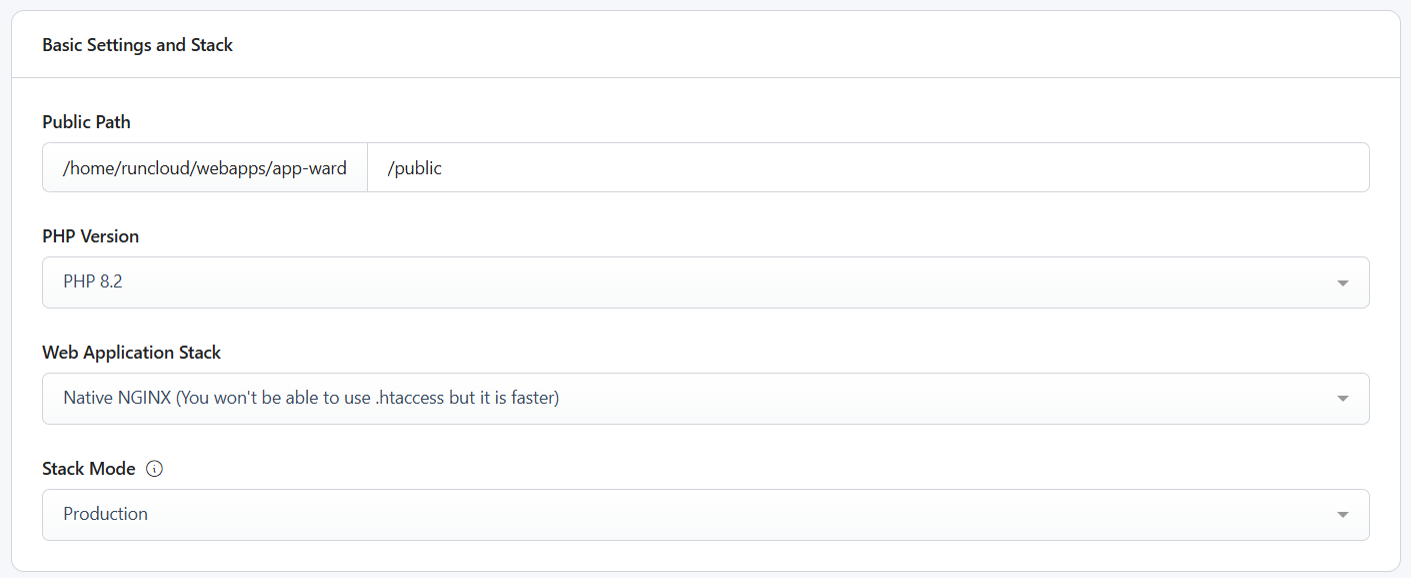
Switch to the “Empty Web App” tab and fill in the basic details for your application.
You will need to configure a few settings here to ensure Bagisto runs correctly:
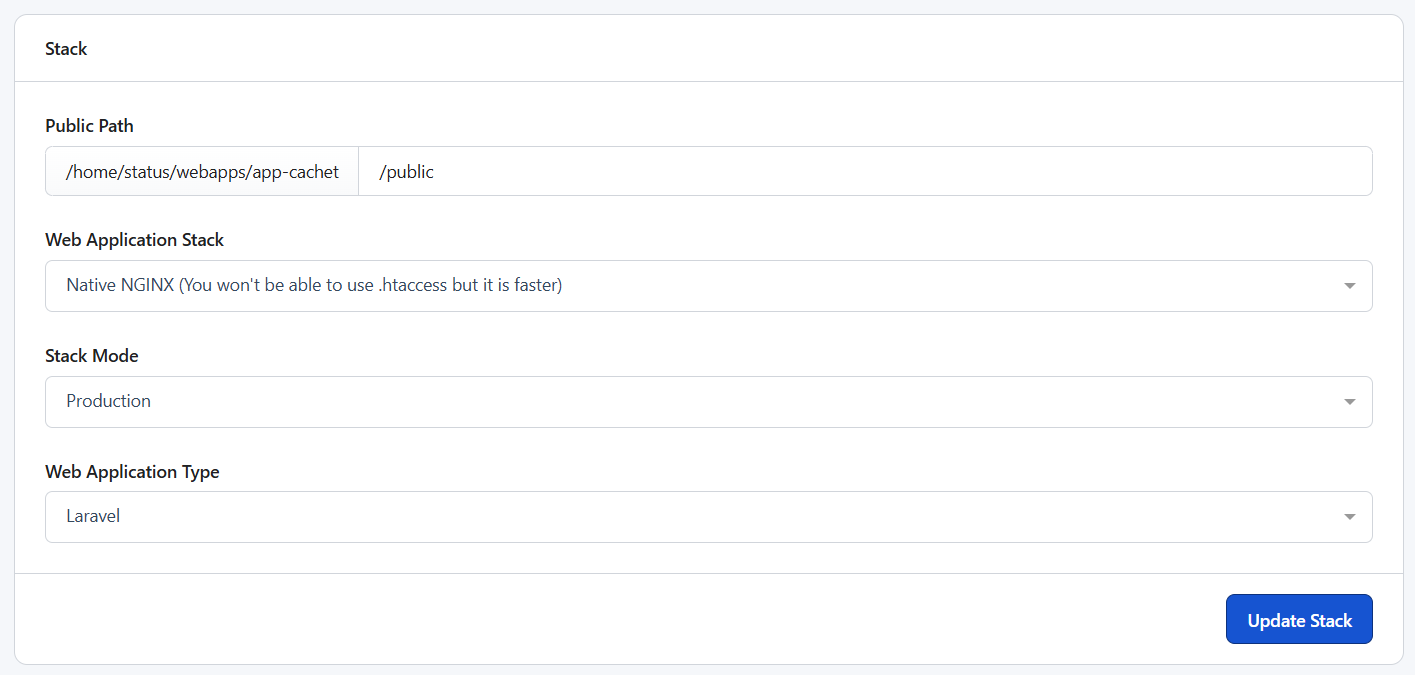
Finally, under “Web Application Settings“, change the Public Path from its default to /public, which is the standard directory structure for Laravel applications.
Once you have made the necessary changes, you can deploy the application on your server.
Step 3: Connect the Database
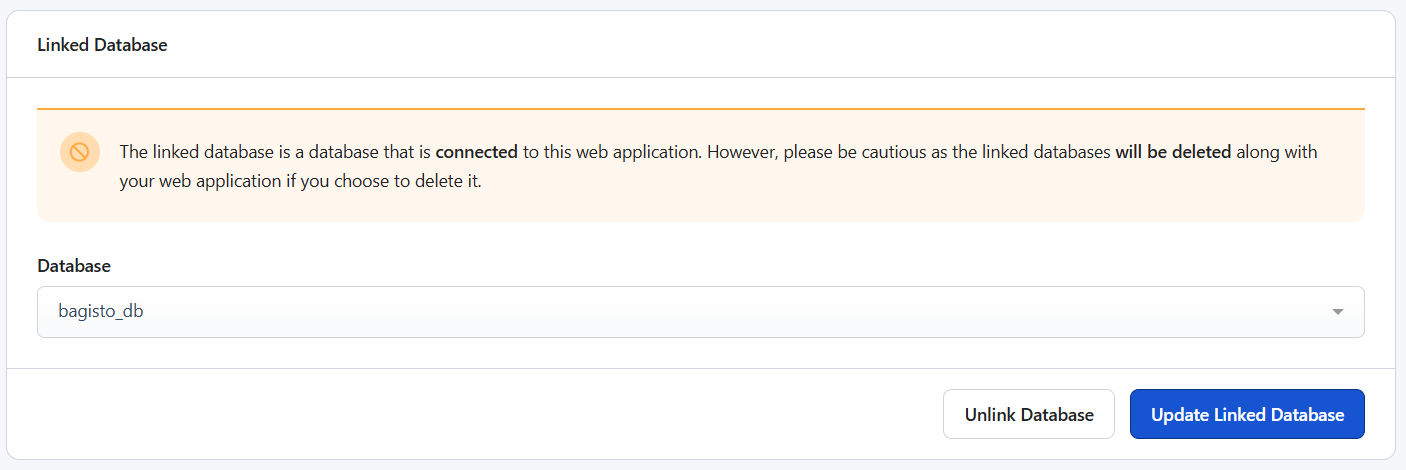
After you create the web application, you need to connect the database you created in the first step.
Go to your new web application in the RunCloud dashboard and find the “Settings” tab on the left-hand menu.
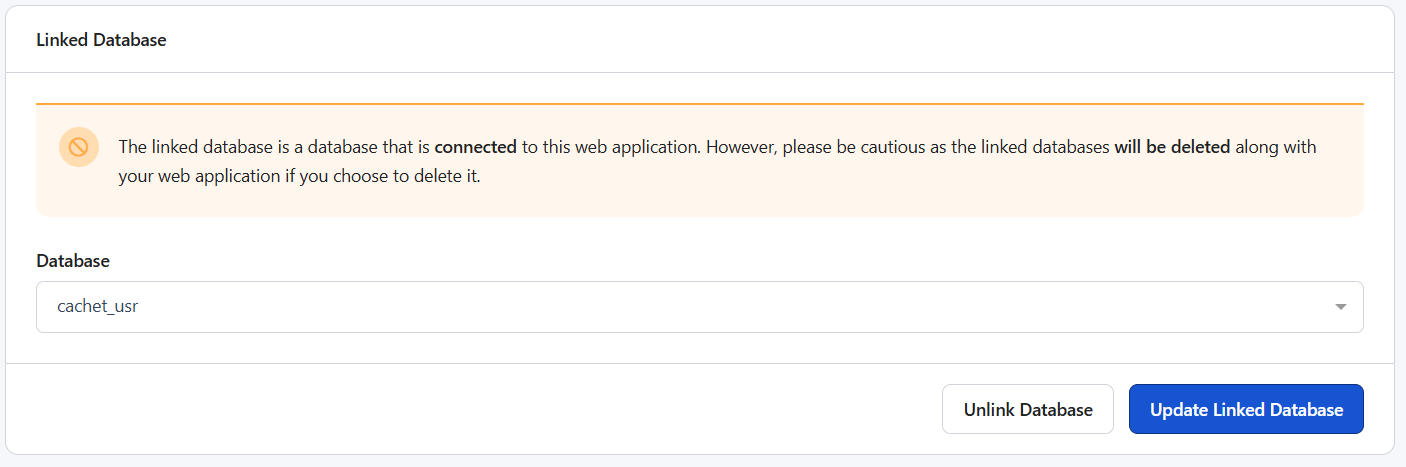
On this page, you can select your Bagisto database and user from the dropdown menus to attach them to the application. This step ensures that when RunCloud performs a backup of your application, it will include both the files and the connected database in a single backup file.
Step 4: Connect to Your Server via SSH and Prepare the Directory
Once connected, you need to navigate to your application’s root directory using the following command, replacing <root path> with the root path of your application, which is displayed in the RunCloud dashboard:
cd <root path>
When RunCloud creates a new application, it places a default public folder with an index.html file inside. Since Bagisto’s installation process will create its own public folder, you must first delete the existing one. You can do this by running the following command in your terminal:
rm -rf public
Step 5: Install Bagisto with Composer
You can now install Bagisto using Composer. Execute the following command in your application’s root directory to download and install all the necessary Bagisto files. The . at the end of the command tells Composer to install the files in the current directory:
composer create-project bagisto/bagisto .
Step 6: Initialize the Bagisto Application
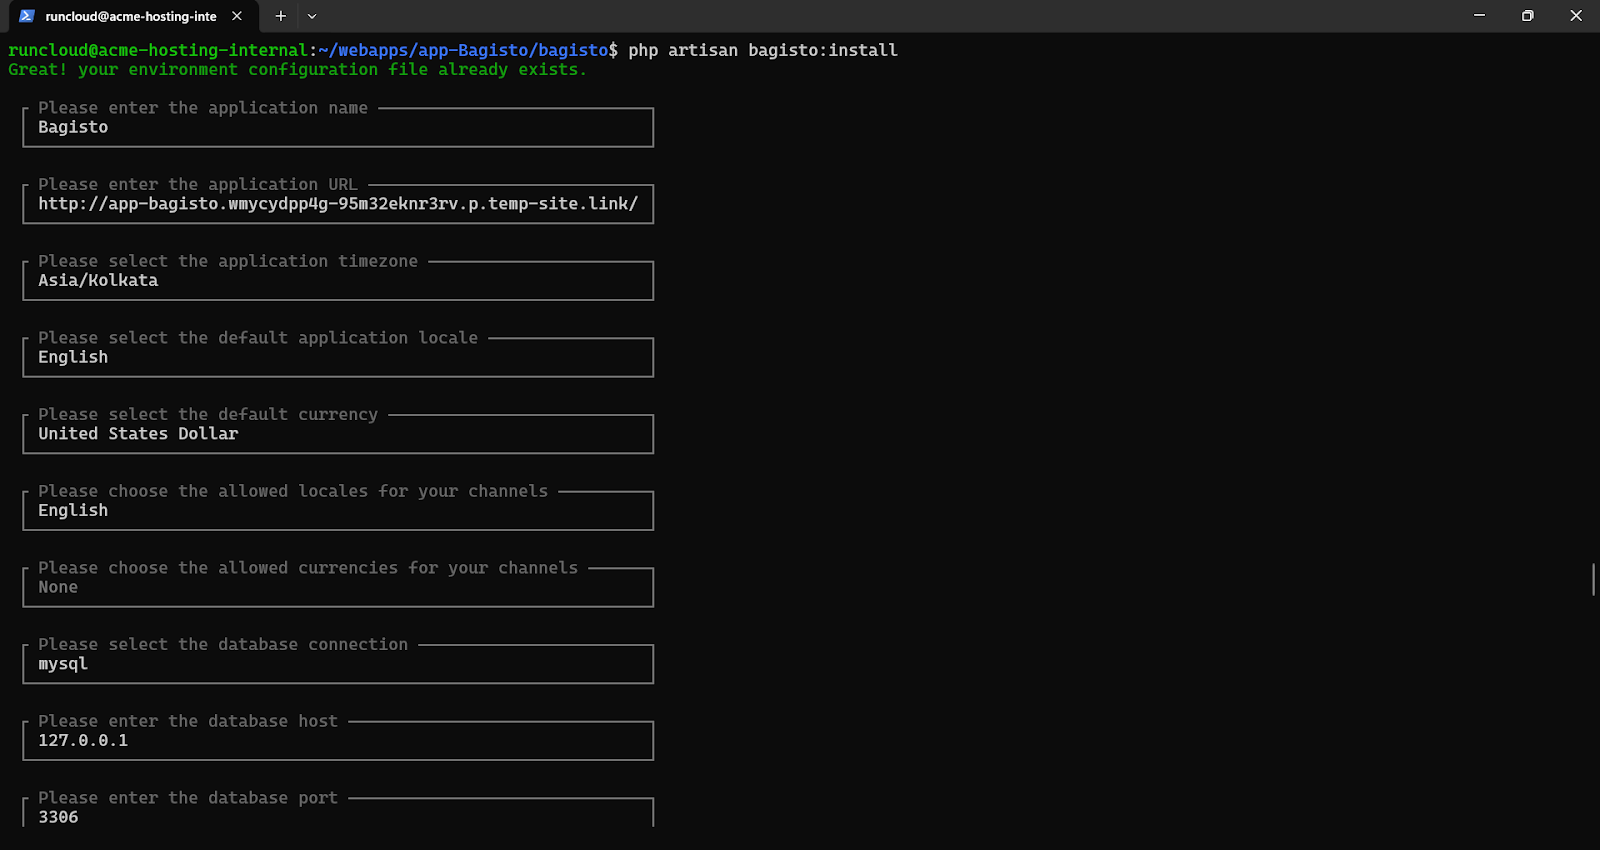
After Composer has finished downloading the files, you need to run the Bagisto installation script. This script will set up your database tables, create your administrator account, and configure other essential settings for your store. To start this process, run the following command in your terminal:
php artisan bagisto:install
The installer will prompt you to enter several details:
Your database name
Username
Password (which you created in Step 1)
Your desired admin email and password
Once you have filled in all the information, the installation will complete, and you will see a message confirming its success, along with your admin login URL.
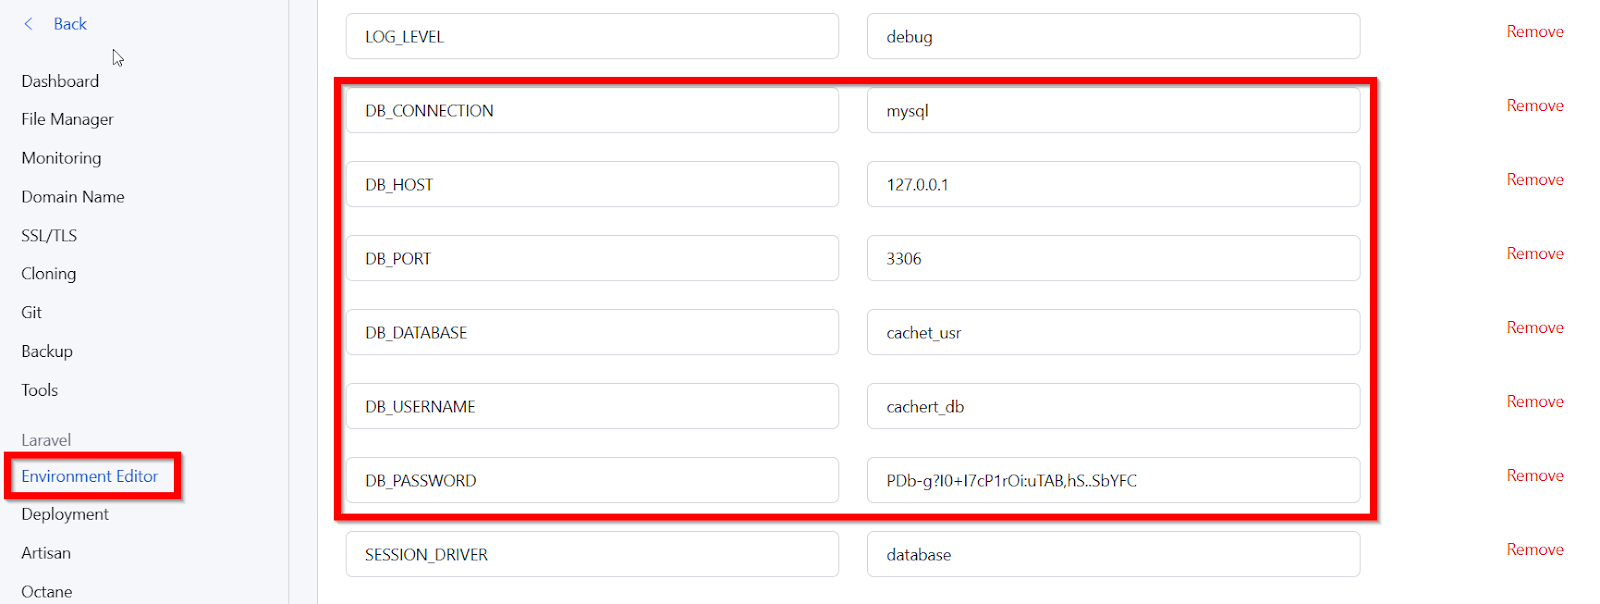
Note: If you are using a Dockerized server on RunCloud, you will need to use the host value (instead of localhost) in your database configuration. To learn more about this, refer to the documentation on Networking in a RunCloud Containerized Server.
Step 7: Log In and Start Building Your Store
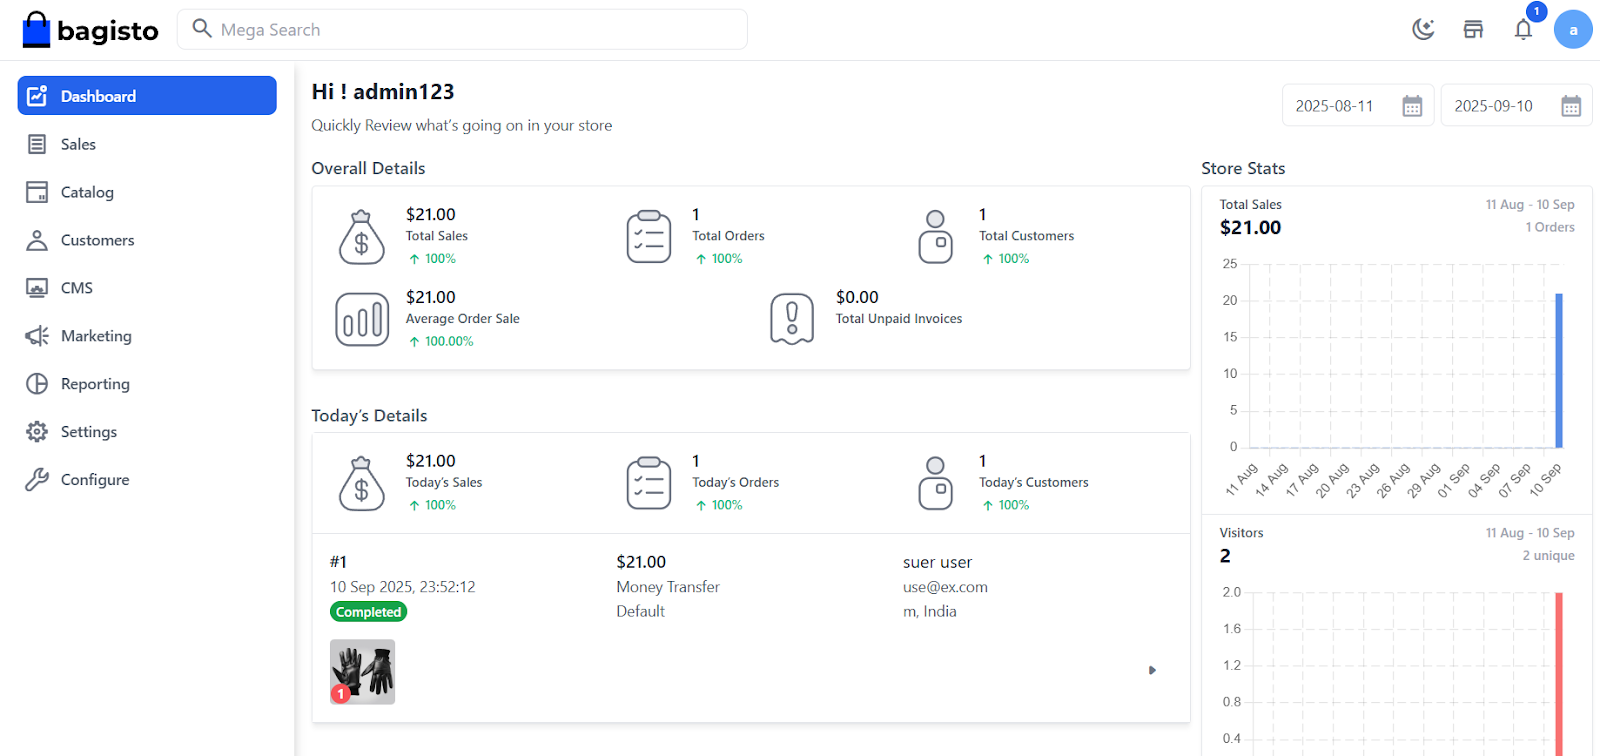
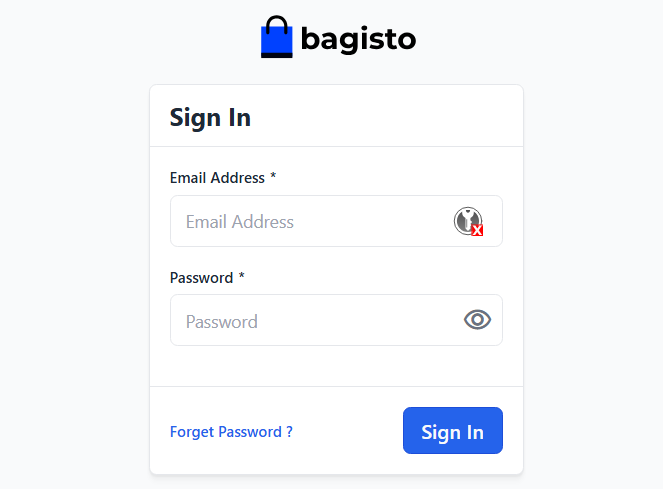
Congratulations, your Bagisto store is now installed! You can now access the admin panel by navigating to your domain, followed by /admin (e.g., http://runcloud-demo.com/admin). Use the credentials you set up during the installation process to log in and begin adding products, configuring settings, and customizing your new eCommerce store.
Step 8: Optimize Your Application Type in RunCloud
To make managing your new Bagisto store even easier, there is one final step you can take within the RunCloud dashboard.
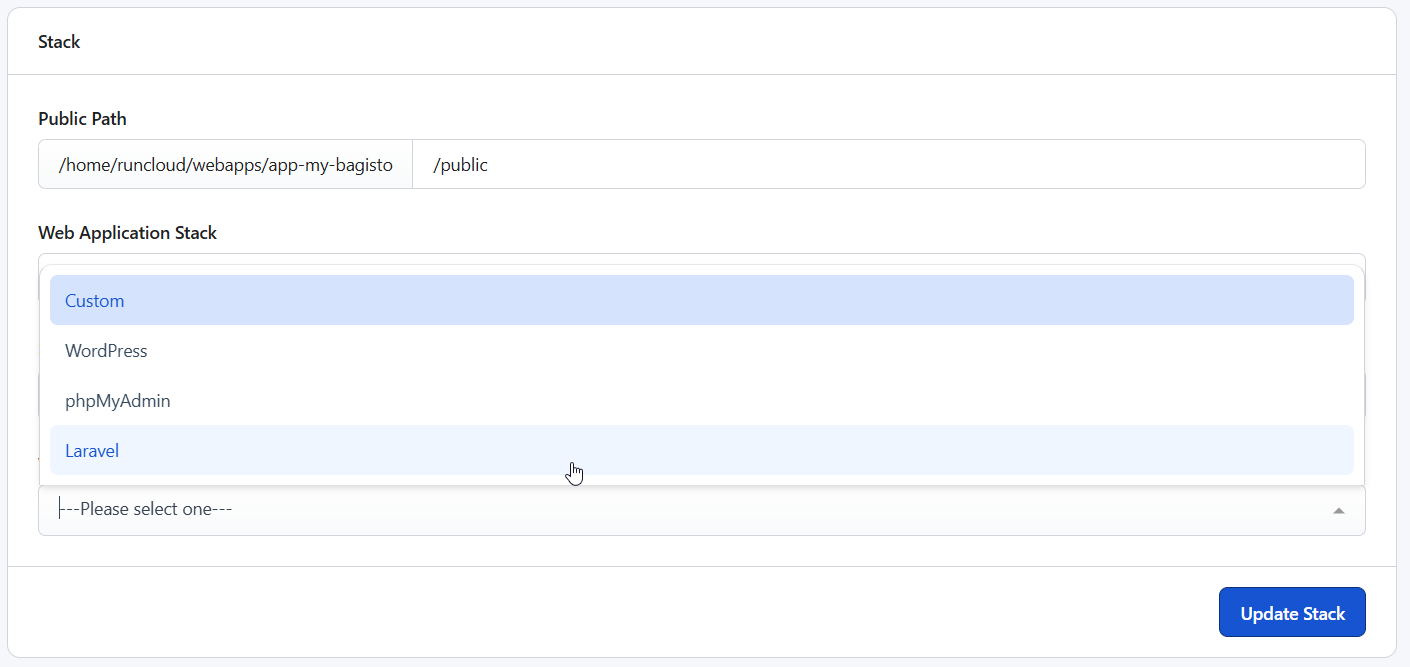
Navigate to your web application’s “Settings” page and change the “Application Type” from “General” to “Laravel.” This change unlocks a suite of powerful, Laravel-specific features in your RunCloud dashboard.
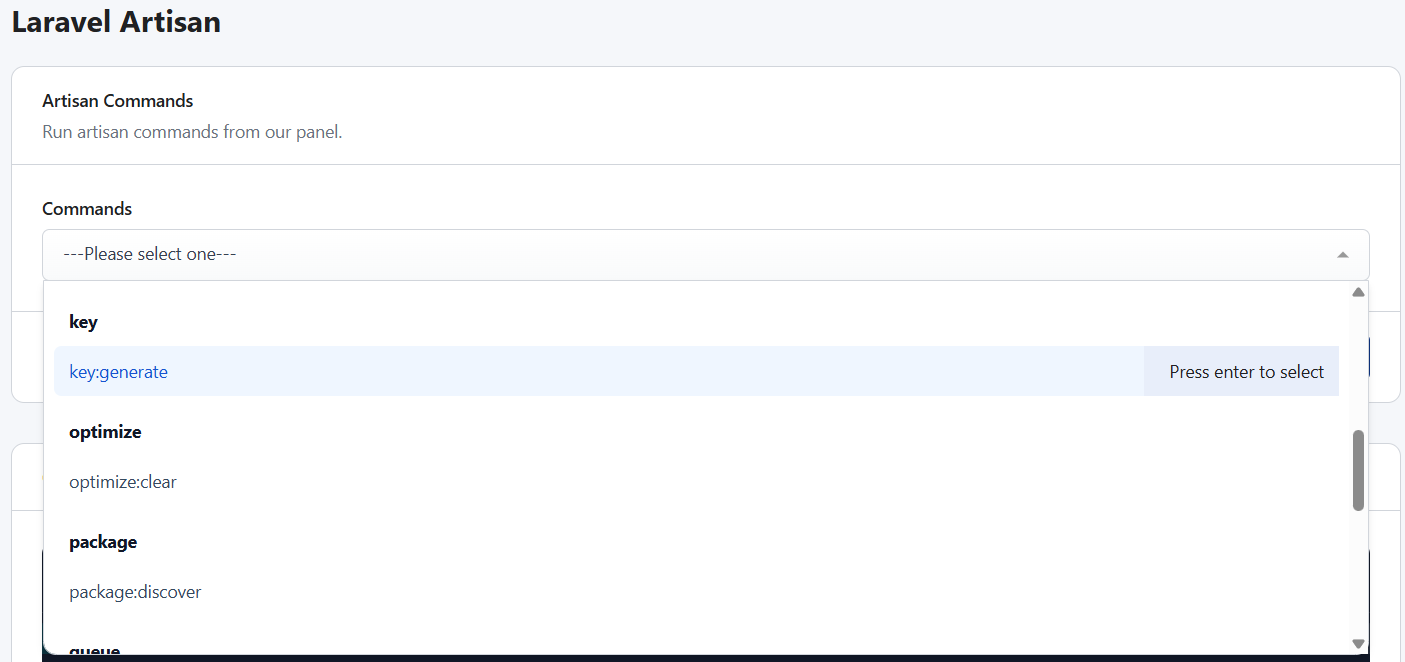
You will see new menu items that allow you to run Artisan commands, manage scheduled tasks (cron jobs), and configure message queues directly from the web interface, without ever needing to log in via SSH for these routine tasks. This feature is one of the many ways RunCloud simplifies application management and maintenance.
Step 9: Enable Backups and Harden Your Server for Production
Now that your Bagisto store is running, the final and most critical steps are to secure your application by setting up automated backups and hardening your server’s security settings.
RunCloud makes this incredibly simple; just navigate to the “Backup” section of your web application in the dashboard, choose your preferred cloud storage provider, and set a schedule.
Once configured, RunCloud will automatically back up your application files and the connected database, giving you complete peace of mind.
For securing the server, we recommend reading the following resources:
And there you have it! In just a few steps, you have successfully deployed a powerful, production-ready Bagisto eCommerce store. You can now log in, start adding your products, and customize your storefront to match your brand.
Throughout this process, you’ve seen firsthand how RunCloud streamlines what can often be a complex and time-consuming task. From creating databases and managing application settings with a few clicks to providing powerful, application-aware features, RunCloud handles the heavy lifting of server management so you can focus on what truly matters: building your online business.
While this tutorial focused on Bagisto, a Laravel-based application, RunCloud’s power and flexibility extend far beyond a single framework. Whether you’re looking to host a modern blog using Ghost, set up your own private cloud with Nextcloud, or deploy a custom application built with Next.js, our platform is designed to make it simple and efficient. We encourage you to explore our other guides to see just how versatile RunCloud is.
Windows 10 support is ending. Before you send your computer to the landfill, give it a second life with Linux. In minutes, you can turn an old PC into a fast, secure, and reliable machine – no new hardware required.
While you might think Linux is difficult to use, it has become more user-friendly and accessible than ever.
The real challenge today isn’t learning to use Linux, but choosing the best distribution for your needs. With so many great options available, hunting for the perfect fit can feel daunting, a sentiment perfectly captured in the famous XKCD comic:
Comic created by xkcd.
That’s why we’ve put this article together, helping to narrow the field down from over 1,000 to just the 16 best Linux distros for 2026. We’ll help you understand exactly what Linux distros are and how they differ from each other, and then reveal our top recommended Linux distributions you should consider.
A Linux distribution (or “distro”) is a version of the Linux operating system. Each distro includes the Linux kernel plus everything needed to run your computer – drivers, apps, and a software manager for installing updates and programs.
Although all Linux distributions use the same underlying kernel, they can change many things to fine-tune and tweak the operating system:
Variety: There are hundreds of Linux distros catering to different user needs. Some are designed for general purposes, such as Ubuntu, Fedora, and Debian, while others target specific users or applications, such as Kali Linux for security testing or Raspbian for Raspberry Pi.
Community and Commercial Distros: Some distros, such as Debian and Fedora, are community-driven, while others are commercially backed, including Ubuntu (Canonical Ltd.) and Red Hat Enterprise Linux (Red Hat Inc.).
Package Management: Each distro comes with a package management system, such as APT for Debian-based distros or YUM for RPM-based distros, which handles software installation and updates.
Desktop Environments: Distros may come with different desktop environments that define the user interface, such as GNOME, KDE, Xfce, and LXDE.
Customizability: Linux distros are highly customizable, and users can choose what to install and how to configure it. Advanced users can even build their own distro using tools such as Linux From Scratch (LFS).
You can do just that by replacing your old operating system with Linux. If your computer was made after 2010, it’s more than likely powerful enough to run a modern Linux distribution smoothly, allowing you to keep using your trusted machine for years to come.
Making the switch is the best choice for several reasons:
It’s cost-effective: Linux operating systems are free, as are the countless software updates, saving you from expensive hardware and licensing fees.
Your privacy is respected: Unlike Windows, which can be filled with ads and tracking, Linux puts you back in control of your data.
This is not only better for your privacy but also good for the planet. Extending the life of your computer is one of the most effective ways to reduce carbon emissions and electronic waste.
With a vibrant community and professional support available both online and locally, you’re never alone. If you are looking for offline events, we strongly recommend checking out the End of 10 website for beginner-friendly Linux events.
Ubuntu is a comprehensive operating system that combines advanced features, high performance, and a user-friendly design suitable for both personal use and professional development.
It’s equipped with GNOME 46, a modern desktop environment, and receives regular kernel updates, which ensure smooth operation and compatibility with a wide range of hardware. With Ubuntu, you also get improved access to accessibility options such as screen readers, keyboard navigation, and more, ensuring a polished user experience that caters to a diverse range of user needs.
One of the standout features of Ubuntu is its support for the ZFS file system, which is a modern filesystem known for its high availability, and improved guidance for dual-boot setups – this makes the system highly versatile, and suitable for various user requirements. Furthermore, Ubuntu supports hardware-backed full disk encryption, providing an additional layer of security that protects user data.
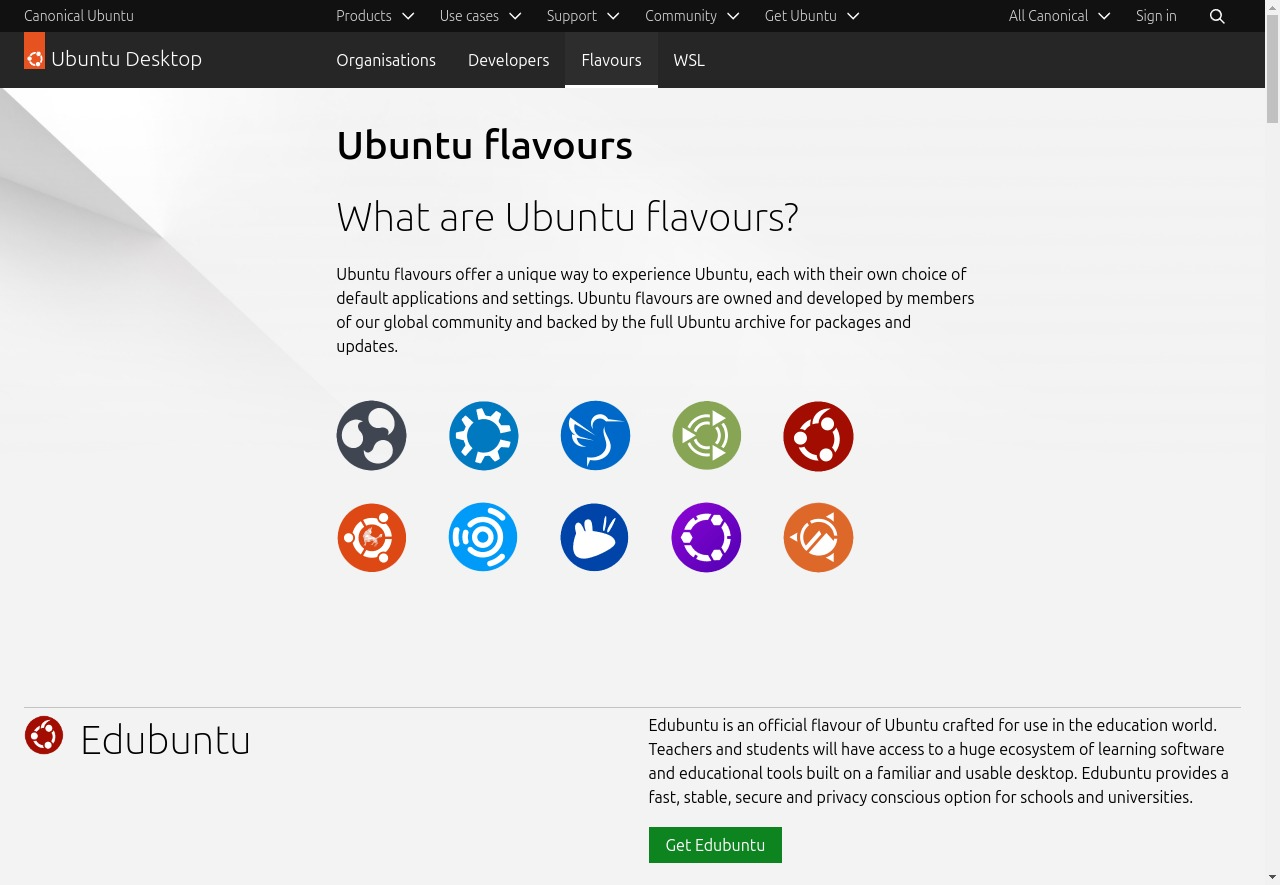
Ubuntu offers a unique way to experience Linux through its various flavors, each with their own default applications and settings. These flavors are developed by people from across the world and cater to specific user needs and preferences, providing a diverse range of options for users to choose from.
For example, if you are a content creator, then you should use Ubuntu Studio, but if you live in China, then you will probably find it more comfortable to use Ubuntu Kylin.
System Requirements for Ubuntu 24.04 LTS
CPU: 2 GHz dual-core processor or faster
RAM: Minimum 4GB, recommended 8GB
Storage: Minimum 25GB
Looking to deploy an Ubuntu server?
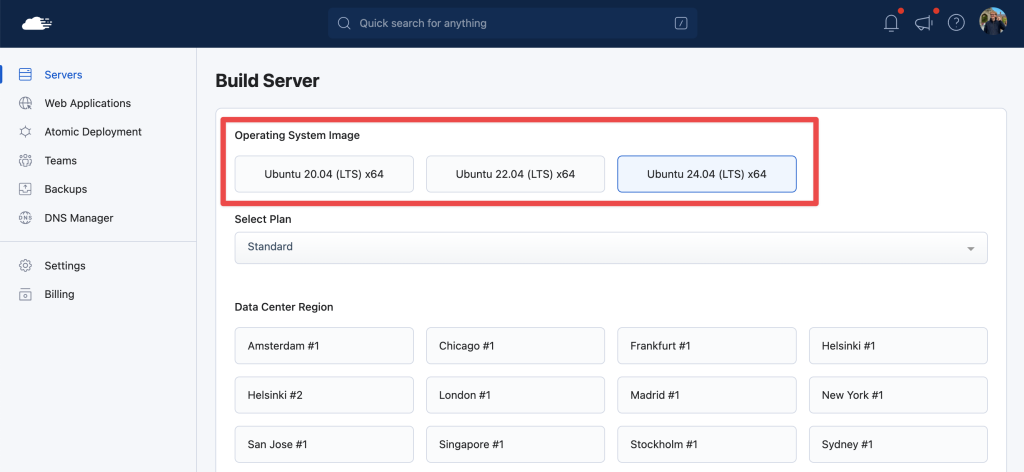
If you’re exploring Linux distributions – Ubuntu should be your go-to if you’re looking to deploy anything to a server, i.e., host your web applications and databases. And the best part is that RunCloud makes it incredibly easy to deploy production workloads to your cloud provider(s) of choice – AWS, UpCloud, Vultr, Linode, and many more.
The end result is that you benefit from the best combination of reliability, flexibility, and performance without the high markup. Learn more & get started.
All available from the convenience of your RunCloud dashboard, with built-in support to deploy straight to your favorite cloud providers:
Note: RunCloud doesn’t deploy the Ubuntu OS. We configure and deploy all the necessary services to run your web applications on Ubuntu machines with your cloud provider of choice.
Fedora Workstation is a high-quality and easy-to-use desktop that is built on the latest open-source technology, and which receives regular updates. The main reason why people use Fedora Workstation is reliability – a new version is released approximately every 13 months, and upgrades between versions are quick and easy.
Fedora works with hardware vendors to make sure users get excellent hardware support across a range of devices, ensuring device compatibility. Moreover, it is free – there are no ads and it does not collect any user data, giving you maximum privacy.
Fedora offers a fantastic collection of apps and utilities such as Clocks, Weather, and Maps which cater to every need, making it a great choice for everyone. For developers, Fedora makes virtualization easy with Boxes, boosts hardware speed with performance mode, and provides the latest container tools from the Red Hat ecosystem. It includes all the packages, tools, and runtimes developers might need – up to date, and ready for use with just a single command.
Pop!_OS is an operating system designed for STEM and creative professionals who use their computer as a tool to discover and create. The operating system is designed for fast navigation, easy workspace organization, and a fluid, convenient workflow.
Although it is a versatile operating system that is compatible with almost any computer or laptop, if you wish, you can purchase a new computer from system76 – the company behind Pop!_OS – and this will come pre-configured with their own operating system.
One of the standout features of Pop!_OS is its auto-tiling feature, which organizes your work for you, saving you time and increasing efficiency. It also offers workspaces to keep relevant content together, and irrelevant content out of sight.
Pop!_OS is compatible with most software tools, with the vast software libraries of Ubuntu and Flatpak combining to make all of your tools available in a single location, called the Pop!_Shop.
Pop!_OS has also been optimized for the Raspberry Pi 4/400, a mini computer which enables people to learn and explore computing. This version of the operating system, called Pop!_Pi, gives users the same powerful software tools at their disposal, making it ideal for people who are on a tight budget.
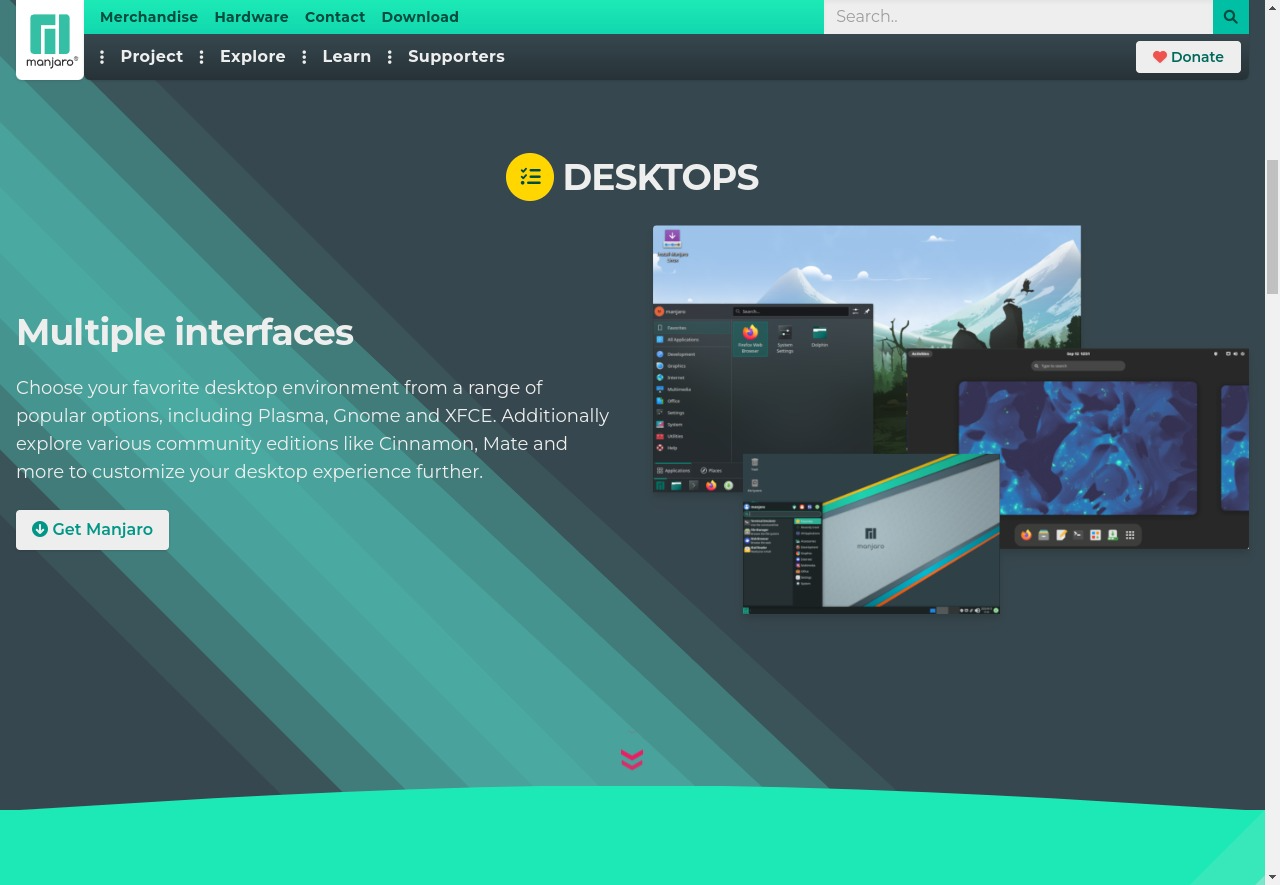
Manjaro is a versatile open-source Linux operating system that prioritizes user privacy, and offers extensive control over hardware. It supports both x86-64 and ARM architectures, making it an ideal choice for a wide range of devices and computing environments.
Manjaro allows users to choose their preferred desktop environment from popular options such as Plasma, Gnome, and XFCE – each of these desktop environments provide the same underlying operating system but with slightly different design elements and functionality. If this is confusing, then you can think of it as buying a car that has the same engine – but a nicer stereo system.
On top of official flavors, Manjaro also has various community editions, such as Cinnamon and Mate, for further customization. You can think of it as your neighbor who bought his car from the showroom and then painted it in his favorite color in his garage. This is one of the primary reasons people use Linux – it gives you freedom to do anything that you want, even if what you are trying to do is stupid!
Kali Linux is an open-source, Debian-based Linux distribution that is designed for various information security tasks, such as penetration testing, security research, computer forensics, and reverse engineering.
It can be installed on various platforms, including mobile devices, containers, ARM, cloud providers, Windows Subsystem for Linux, pre-built virtual machines, and installer images. It also provides a well-documented ISO customization process, making it easy to generate an optimized version of Kali for specific needs.
Kali Linux has a vibrant and active community with active forums, an IRC Channel, Kali Tools listings, an open bug tracker system, and even community-provided tool suggestions.
System Requirements for Kali Linux 2024.1
CPU: 1GHz or faster processor is recommended
RAM: At least 1GB for i386 and AMD64 architectures, and 2GB for ARM architecture
Linux Mint is a popular desktop Linux distribution, and considered one of the best alternatives to Microsoft Windows and Apple MacOS due to its modern, elegant, and comfortable interface that is both powerful and easy to use.
Linux used to be infamous for having broken sound drivers, but Linux Mint works out of the box with full multimedia support and is extremely user-friendly.
Linux Mint is suitable for both individuals and companies as it is designed to be comfortable and easy to use, but also powerful and configurable – making it ideal for a wide range of users. It is one of the most popular desktop Linux distributions and is used by millions of people, with user feedback playing a crucial role in its consistent improvement. For companies, Linux Mint provides Long-Term Support (LTS) releases which are supported for a duration of 5 years.
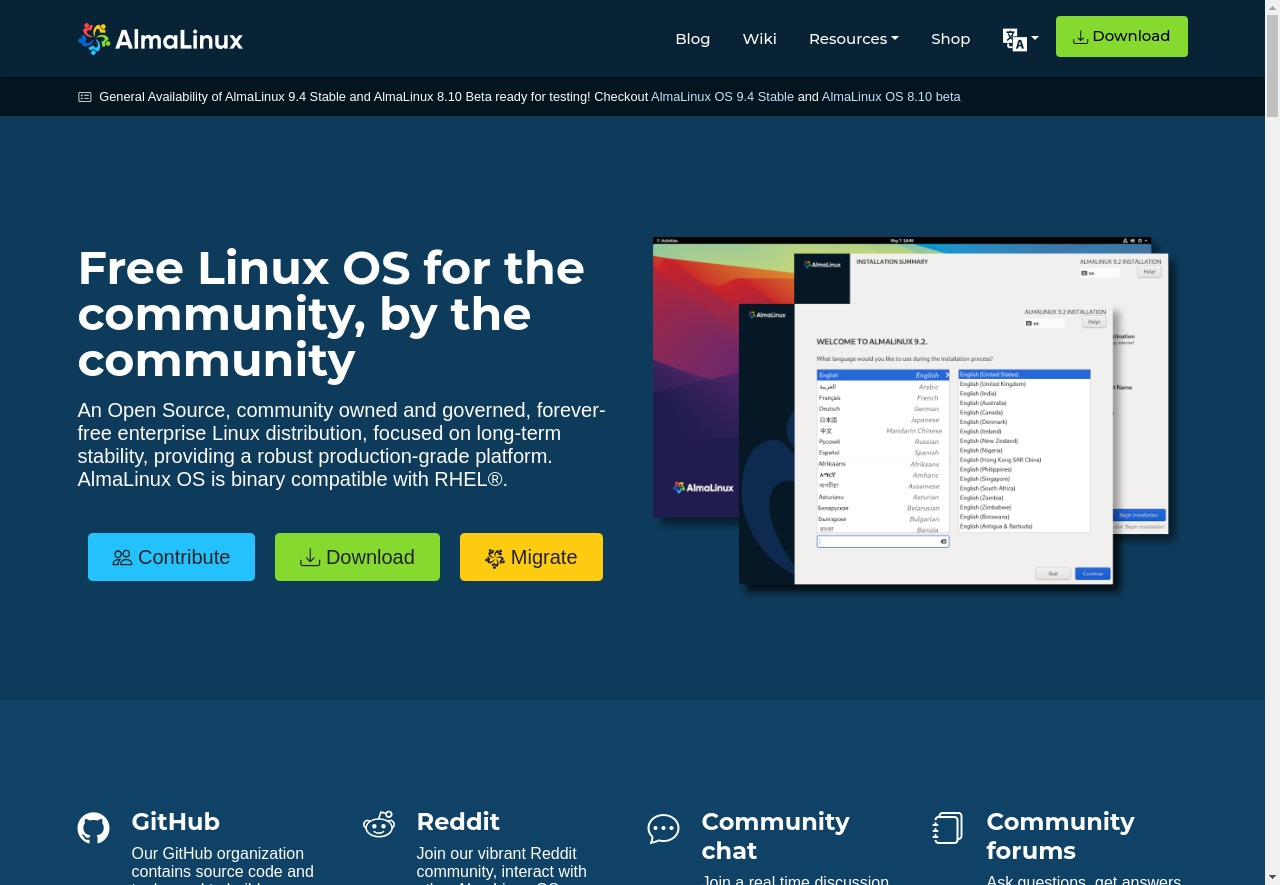
AlmaLinux OS is an open-source, community-driven Linux operating system that was developed to fill the gap left by the discontinuation of the CentOS Linux stable release.
It has binary compatibility with RHEL – this ensures that software developed and tested on RHEL can be easily deployed on AlmaLinux without modifications. It also supports various architectures and provides official images for cloud providers, container images, live media images, Vagrant boxes, LXC/LXD images, Raspberry Pi images, and even a terminal environment for Windows.
AlmaLinux OS is suitable for both individuals and organizations that require an enterprise-grade Linux distribution, without the need for a commercial license agreement. It is also a perfect replacement for anyone who has historically relied on the CentOS Linux releases to achieve computing objectives, and for whom CentOS Stream is not the right solution.
System Requirements for Alma Linux
Supported Architecture: Intel/AMD x86_64, Arm aarch64, IBM ppc64le, Power LE s390x
Rocky Linux is an open-source enterprise operating system that is designed to be 100% “bug-for-bug” compatible with Red Hat Enterprise Linux (RHEL). It is another popular Linux distribution that was developed by the community to replace the CentOS after it reached the end of life.
Rocky Linux rebuilds sources directly from RHEL, ensuring a super stable experience, no matter the use-case. On top of that, it is an enterprise-ready distro which provides solid stability with regular updates and a 10-year support lifecycle – all at no cost.
Asahi Linux is a project with the goal of porting Linux to Apple Silicon Macs, starting with the 2020 M1 Mac Mini, MacBook Air, and MacBook Pro. While Apple still controls the boot process and the firmware that runs on its processor, it allows booting unsigned/custom kernels on Apple Silicon Macs without a jailbreak. As long as no code is taken from macOS to build the Linux support, the result is completely legal to distribute and for end-users to use.
The project is developed by a thriving community of free and open-source software developers, and it currently supports most machines of the M1 and M2 generations.
The current flagship distro is Fedora Asahi Remix, a collaboration between Asahi Linux and the Fedora Project. It aims to provide a fully integrated distro with all Asahi platform-specific packages in upstream Fedora and fully supported in Fedora Linux 42.
The distro offers a high-quality experience with Fedora’s excellent 64-bit ARM support and mature development process. It is based on Fedora Linux 42, the latest Fedora Linux release with the newest software versions. All M1 and M2 series MacBook, Mac Mini, Mac Studio, and iMac devices are supported.
As we mentioned earlier, playing audio on Linux used to be difficult, but Asahi has worked with the PipeWire and WirePlumber projects to add support for fully automatic and transparent DSP configuration, which provides high-quality audio right out of the box.
Although the community’s effort is great, it doesn’t fully take advantage of Apple hardware; some features, such as Thunderbolt 4 ports and Touch ID, are not supported.
System Requirements for Asahi Linux
Machine: M1, M1 Pro, or M1 Max machine from Apple
macOS: 12.3 or later, logged in as an admin user
Disk Space: At least 50 GB of free disk space (Desktop install)
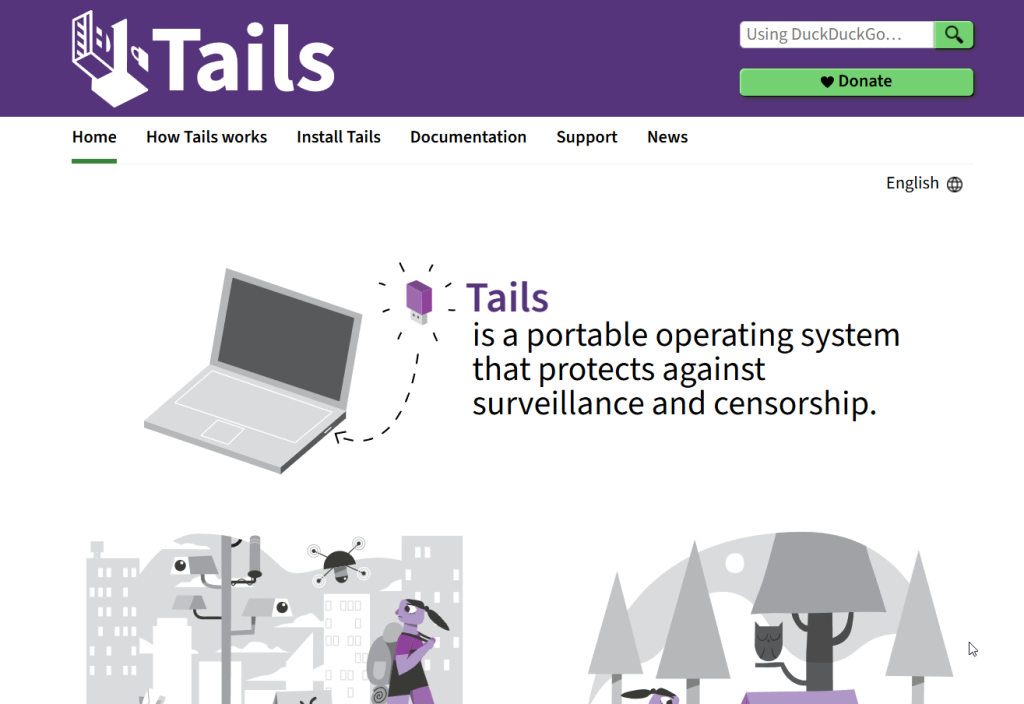
Tails is a Linux distribution that is specially built for anonymity and privacy. It is a live operating system that you can start on almost any computer from a USB stick. What makes Tails unique is its focus on forcing all internet traffic through the Tor network, which anonymizes your connection by routing it through a series of relays.
This makes it very difficult for anyone to trace your online activity back to you. It is designed to leave no trace on the computer you are using, as it runs independently of the machine’s own operating system and does not write to the hard drive.
Furthermore, Tails comes with a suite of pre-configured applications that are ready to use for secure communication and work. These include the Tor Browser for anonymous web browsing, Thunderbird with Enigmail for encrypted emails, and other tools for secure messaging and file management. This makes it a great distro for journalists, social rights activists, and really paranoid people.
System Requirements for Tails
The following are the generally known minimum system requirements for running Tails.
Gentoo Linux is a highly flexible distribution that appeals to Linux enthusiasts who want maximum control over their system. Unlike binary distributions that provide pre-compiled software, Gentoo compiles every package from its source code directly on the user’s machine. This process is managed by its powerful package management system, Portage.
The biggest advantage of this approach is the ability to customize and optimize every part of the operating system and its applications specifically for the host’s hardware architecture. This fine-grained control allows users to build a system tailored precisely to their needs, free from unwanted features or dependencies.
The unique nature of Gentoo offers a learning experience that is unparalleled among most other distributions. The installation process is manual and in-depth, guiding the user through partitioning, kernel configuration, and system bootstrapping, which provides a deep understanding of the inner workings of a Linux system.
While this makes it more challenging for beginners, it gives advanced users the power to build a lean, fast, and highly optimized environment.
System Requirements for Gentoo Linux
The system requirements for Gentoo are highly variable and depend on the user’s compilation choices and intended use. However, there are some general minimums to get started with the installation.
RAM: At least 256 MB of RAM is needed for the installation process, but 1 GB or more is recommended for a graphical desktop environment and for compiling larger packages.
Disk Space: The installation requires a minimum of 2.5 GB of free disk space. However, significantly more will be needed for the source code of packages and the final installed system, with 15-20 GB being a more realistic starting point for a desktop environment.
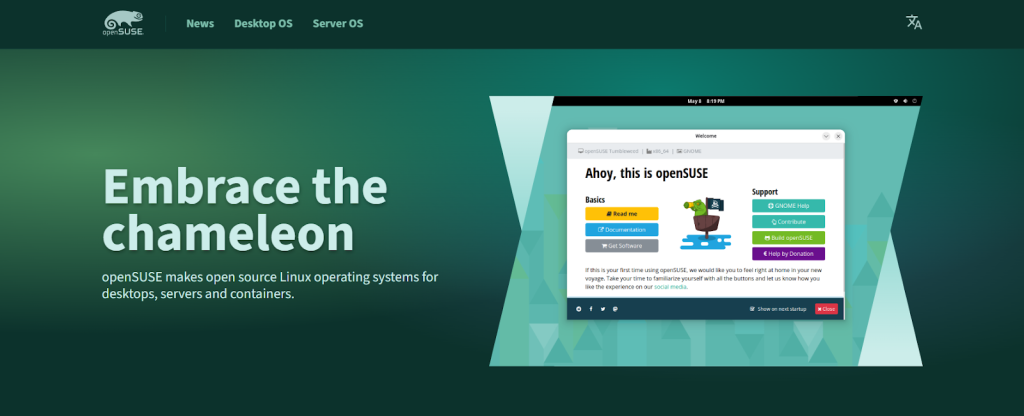
openSUSE is a versatile Linux distribution backed by a strong community and corporate sponsors. It offers two distinct release models that cater to different needs.
openSUSE Leap is a stable release that shares its core with SUSE Linux Enterprise, which makes it an excellent option for servers and professional workstations where long-term stability is important.
openSUSE Tumbleweed is more suitable for those who prefer the latest software updates. It offers a tested rolling-release model, providing a continuous stream of new packages without sacrificing dependability.
One of the most distinguished features of openSUSE is its powerful and comprehensive configuration tool, YaST (Yet another Setup Tool). YaST provides a centralized control center for managing virtually every aspect of the system, from software installation and hardware setup to network configuration and security settings, all through an easy-to-use graphical interface.
It also has the Btrfs filesystem, which enables users to create system snapshots and easily roll back changes. This provides a safety net against problematic updates or configuration errors.
System Requirements for openSUSE
The following are the general minimum system requirements:
CPU: It supports pretty much all types of CPUs as long as they are a 2 GHz dual-core processor or better.
RAM: 2 GB of RAM is recommended for a smooth experience.
Disk Space: A minimum of 10 GB of hard-drive space for a minimal installation, with 20-40 GB recommended for a standard graphical desktop installation.
CachyOS is based on Arch Linux and engineered for high performance. Its primary goal is to provide users with enhanced speed, security, and ease of use, which makes it suitable for seasoned Linux users.
CachyOS has a highly optimized, custom kernel named linux-cachyos, which uses the advanced BORE (Burst-Oriented Response Enhancer) Scheduler for superior system performance and interactivity. This focus on speed is further extended to its software packages, which are compiled with modern instruction sets like x86-64-v3 and x86-64-v4, and with optimizations like Link Time Optimization (LTO), ensuring that applications run as efficiently as possible on compatible hardware.
If you are a gamer, then you’ll be thrilled to know that the CachyOS Handheld Edition provides a GameMode-like experience and comes with preinstalled gaming tools. It officially supports the Rog Ally, Steam Deck OLED and LCD, Legion GO, and Lenovo Legion Go S.
During installation, CachyOS offers a wide selection of desktop environments and window managers, including popular options like KDE Plasma, GNOME, and XFCE, and tiling window managers such as i3, Sway, and Hyprland. This extensive choice allows users to build a desktop environment perfectly tailored to their workflow and preferences.
System Requirements for CachyOS
The official website for CachyOS does not list specific minimum system requirements. However, as it is a modern, performance-oriented distribution based on Arch Linux, the general requirements would be:
CPU: A 64-bit processor with x86-64-v3 instruction set support is highly recommended to fully take advantage of the distribution’s optimizations.
RAM: 4 GB of RAM is a realistic minimum for a smooth experience with a modern desktop environment.
Disk Space: At least 15-20 GB of free space is recommended for a standard installation.
Parrot Security OS is a Debian-based Linux distribution designed with a strong focus on security, privacy, and development. It is widely recognized as a comprehensive toolkit for cybersecurity professionals, penetration testers, and digital forensics experts.
The operating system comes pre-installed with a vast arsenal of security-oriented tools for reverse engineering, cryptography, and vulnerability assessment. Unlike many of its counterparts that are strictly focused on offensive security, Parrot OS also provides a full suite of tools for defense and privacy, including anonymization services and encrypted communication platforms, making it a versatile choice for a wide range of security-related tasks.
In addition to its security features, Parrot OS is engineered to be a lightweight and efficient daily driver for developers and privacy-conscious users. It ships with a custom MATE desktop environment and is optimized to run smoothly even on older hardware with limited resources.
System Requirements for Parrot Security OS
The following are general minimum system requirements, but these can vary depending on the desktop environment and intended workload.
CPU: 1 GHz dual-core 64-bit processor (x86-64/AMD64) or better is recommended.
RAM: A minimum of 1 GB of RAM, with 2 GB or more recommended for a smooth experience.
NixOS is a new Linux distribution that changes how operating systems are managed by adopting a purely functional configuration model. This means the entire system (the kernel, applications, system packages, and configuration files) is built from a declarative language called Nix.
Additionally, NixOS supports atomic upgrades and rollbacks: every configuration is stored in its own unique hash-identified directory, and activating a new configuration simply requires creating a new symlink. If a change breaks the system, the user can instantly and safely roll back to a previous, known-working state.
This declarative and reproducible approach makes NixOS an exceptionally stable and reliable operating system, particularly appealing to developers, system administrators, and those who manage complex configurations.
System Requirements for NixOS
The system requirements for NixOS are generally modest, but software compilation can be resource-intensive.
CPU: A 64-bit processor (Intel or AMD).
RAM: 1 GB of RAM is a minimum, but 4 GB or more is highly recommended for building packages.
Disk Space: 10 GB of free hard drive space is required for a minimal installation, but significantly more is needed if you plan to keep multiple configuration generations or build many packages from the source.
Void Linux is a completely independent project developed from the ground up by a team of volunteers. It is not a fork of any other distribution, and this independence is most evident in its custom-built package management system, XBPS, and its source package build system, xbps-src.
Void is a stable, rolling-release distribution, which means users can install it once and receive continuous updates without needing to perform major system upgrades. This model is designed to provide stability over having the absolute latest “bleeding-edge” software.
System Requirements for Void Linux
The official Void Linux website does not specify a concrete set of minimum system requirements, as this can vary greatly depending on the desktop environment and intended use. However, given its design as a lean and independent distribution, it is generally considered to be lightweight and suitable for a wide range of hardware, including older machines.
Which Linux Distro is Best for You? (Beginners Guide)
Choosing the right Linux distro can be daunting, especially for beginners. Here’s an at-a-glance guide highlighting the best Linux distros based on different use-cases:
Beginners: Ubuntu or Linux Mint – both easy to install, stable, and packed with support.
Developers: Fedora – cutting-edge tools and languages.
Tinkerers: Arch Linux or CachyOS – full control over every component.
This post has only scratched the surface of the best Linux distros. Many great distros, such as Elementary OS or Zorin OS, were not included in this post. Don’t be afraid to experiment until you find the one that fits you best!
You now know the best Linux distros for every type of user – from beginners to developers and server admins. The next step is to decide where to install it: on your PC, or directly on a server.
While you can definitely install Linux on your computer right away, there is a way for you to use Linux alongside your existing operating system.
Whether it’s Windows and Linux – or any other combination – dual booting allows users to switch between different environments for various purposes such as work, development, or testing without needing separate machines. This is particularly beneficial if you need to use specific software that only runs on a particular operating system. It also enables you to experiment with different operating systems without having to buy separate hardware.
If you are looking to install Linux on a PC, then dual booting is a good way to start, but if you are looking to install Linux on a server, then managing a Linux server can be daunting for beginners.
That’s where RunCloud comes in – an all-in-one server management platform designed to simplify the process of deploying web applications.
RunCloud makes it simple.
Deploy, configure, and manage your web apps from one clean dashboard – no terminal required.
Gentoo and Arch are often cited as one of the most challenging Linux distros to use as they provide a high level of customization and control, but require a deep understanding of Linux.
What is the most customizable Linux distro?
Arch Linux is renowned for its unparalleled customizability as it allows users to build a system tailored to their specific needs.
Is Linux more difficult than Windows?
The difficulty of using Linux or Windows depends on the specific needs and familiarity of the user. While Linux offers more control and customization, it may require more technical knowledge to perform certain tasks.
Which is better, Arch Linux or Ubuntu?
Both Arch Linux and Ubuntu have their strengths – Arch Linux is known for its flexibility and control, making it suitable for experienced users. Ubuntu, on the other hand, is user-friendly, making it a good choice for beginners.
Is Mint better than Ubuntu?
Both Mint and Ubuntu are excellent choices for beginners and experienced users as they both have a large user community and extensive software availability.
Is CentOS being discontinued?
Yes, CentOS Linux 7 will reach end of life (EOL) on June 30, 2024.
Will Linux run on my old Windows 10 computer?
Yes, almost certainly. Linux is famously efficient and runs exceptionally well on older hardware that can no longer keep up with modern Windows, making it the perfect way to revitalize your aging PC or laptop.
Can I keep my files and documents when switching to Linux?
Absolutely, most Linux Distros allow you to keep data from other operating systems. However, before installing Linux, you should still back up your important data, such as photos and documents, to an external drive or cloud storage.
Do I have to delete Windows 10 to try Linux?
No, you don’t have to delete Windows. You can try most Linux distributions directly from a USB stick without altering your computer, or you can set up a “dual-boot” system to choose between Windows and Linux each time you start your PC.
Will my software, like Microsoft Office or Adobe Photoshop, work on Linux?
While Microsoft Office and Adobe software don’t run natively on Linux, there are many powerful and free alternatives like LibreOffice and GIMP. For some Windows applications, compatibility tools like Wine or Proton can allow them to run on Linux.
Is it difficult for a Windows user to install Linux?
Not anymore. Modern Linux distributions feature simple, graphical installers that walk you through the process step-by-step. If you can install Windows, you can comfortably install Linux.
The ERR_NAME_NOT_RESOLVED is a frustrating error message that prevents you from browsing the web. The good news is that this error is almost always fixable, and you don’t need to be a tech expert to do it.
This post will show you exactly how to fix the ERR_NAME_NOT_RESOLVED error. We will walk you through a series of proven, step-by-step solutions, starting with the simplest checks that take less than a minute.
Let’s get started!
What is the ERR_NAME_NOT_RESOLVED Error in Simple Terms?
When you type a website address like www.google.com, your browser needs to find its actual location online, which is a number called an IP address. This is done using the internet’s phonebook, known as the DNS (Domain Name System), which handles this lookup for you.
When you get the ERR_NAME_NOT_RESOLVED error, it means your browser looked for the website name you typed but couldn’t find its IP address in the phonebook. Because your browser can’t find the website’s address, it cannot make a connection and shows you this error instead.
What Causes the ERR_NAME_NOT_RESOLVED Error?
This DNS lookup can fail for several reasons. Here are the most common reasons:
The website you are trying to visit is actually down.
Your browser has stored old, outdated information (an outdated cache).
Your computer’s own record of website addresses is corrupt.
Your router or Wi-Fi modem needs to be restarted.
The internet provider’s DNS servers are having problems.
Your firewall or antivirus software is accidentally blocking the connection.
Your device has an incorrect network setting.
Check to See if the Website is Down for Everyone
Before changing any settings on your computer, you first need to find out whether the problem is on your end or the website’s. If the website is offline for everyone, none of the fixes on your computer will work. This simple check can save you a lot of time and frustration.
A quick way to find this is by using a free online tool called a “down detector.”
Type or paste the address of the website giving you the error and press Enter.
The tool will give you a clear answer in seconds.
If it says the site is down for everyone, the problem is with the website’s server. Your only option is to wait for them to fix it and try again later.
If it says the site is up and it’s just you, then the problem is with your device or network. Follow the quick fixes below to solve it.
Simple Fixes to Solve the ERR_NAME_NOT_RESOLVED Error
If the website is working for others, the ERR_NAME_NOT_RESOLVED error is most likely caused by a simple glitch on your side. Start with these easy methods, as one of them will often solve the problem right away.
Step 1: Check the URL for Typos
The simplest solution is often the one we overlook. Your browser cannot resolve a domain name that doesn’t exist, and a small spelling mistake is a common cause of this error.
Look closely at the address you typed in the browser’s address bar. For example, a common typo is typing gogle.com instead of google.com. Double-check the spelling and make sure it is exactly right, then press Enter again.
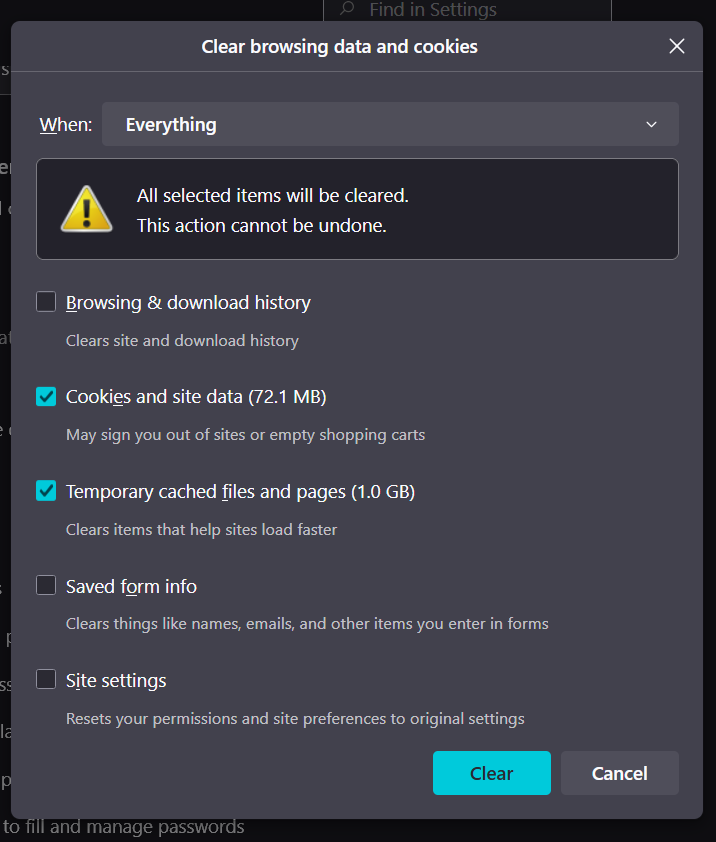
Step 2: Clear Your Browser’s Cache and Cookies
Your browser saves bits of information from websites to help them load faster next time. This saved information is called the “cache.” Sometimes, this cache can become outdated or corrupt, causing your browser to use a “bad address” for a website.
Clearing your browser’s cache forces it to get the newest information directly from the website. Here is how to do it in popular browsers:
Note: This action will log you out of all the websites on your browser, and you will need to log in again.
For Google Chrome:
Click the three dots in the top-right corner.
Click on Delete browsing data.
In the new window, set the “Time range” to All time.
Check the box for Cached images and files. You can uncheck the other boxes.
Click Clear data.
For Mozilla Firefox:
Click the three lines in the top-right corner and choose Settings.
Go to the Privacy & Security panel.
Scroll down to “Cookies and Site Data” and click Manage Data.
Make sure Cached Web Content is checked, then click Clear.
For Microsoft Edge:
Click the three dots in the top-right corner and go to Settings.
Go to Privacy, search, and services.
Under “Clear browsing data,” click Choose what to clear.
Set the “Time range” to All time and check Cached images and files.
Click Clear now.
Step 3: Flush Your Computer’s DNS Cache
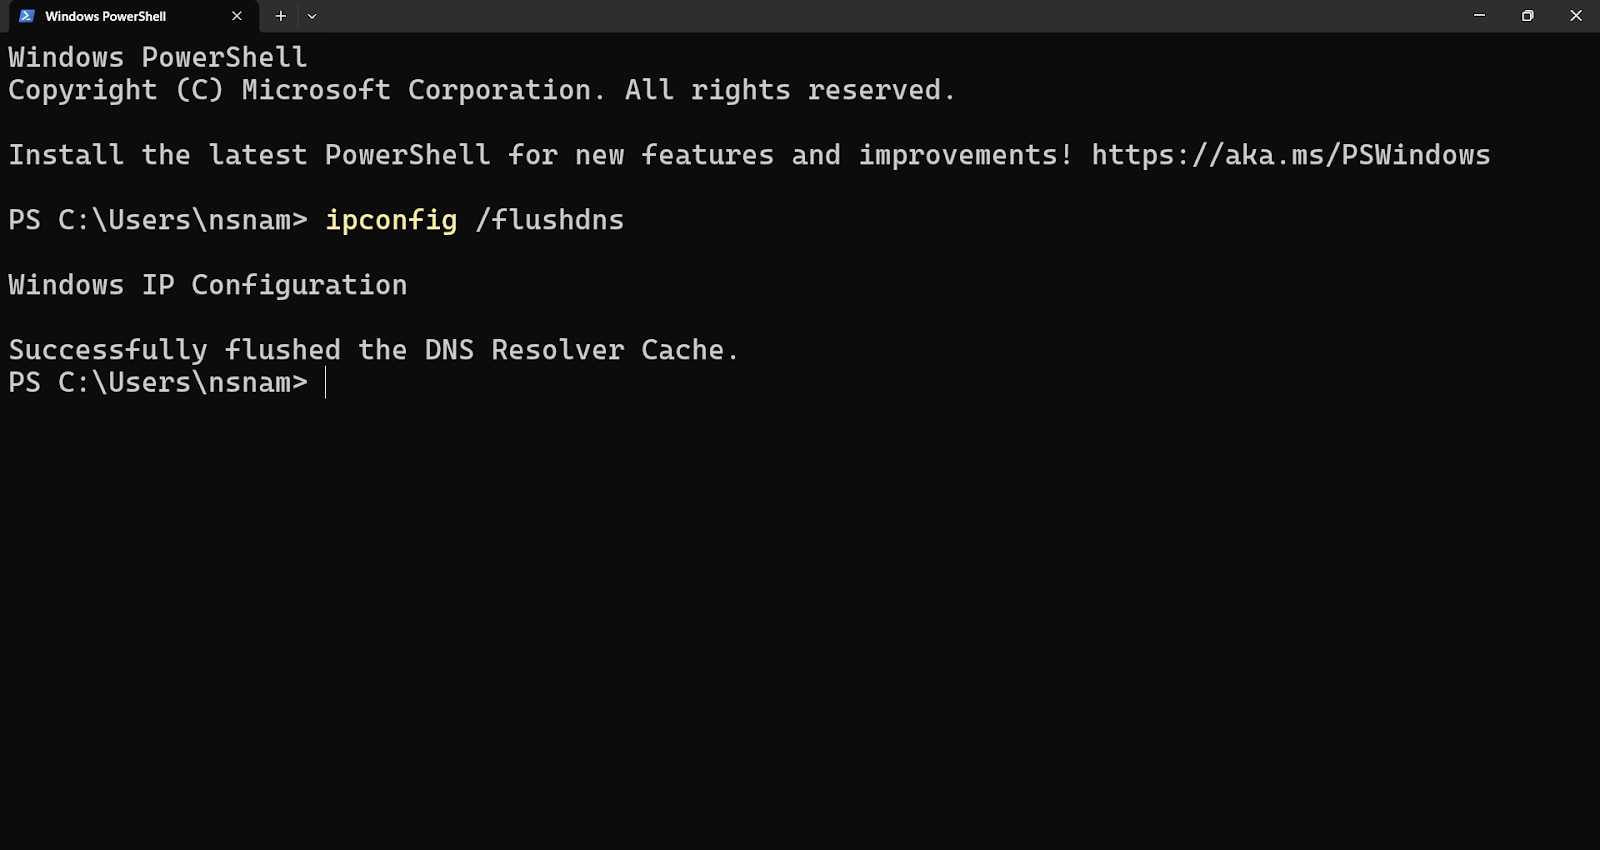
Like your browser, your computer also keeps a temporary memory of website addresses. This is called the DNS cache. If this cache contains outdated information, it can lead to the ERR_NAME_NOT_RESOLVED error. Flushing the DNS cache will clear this memory and force your computer to look up the website’s address again.
If you want step-by-step instructions, you should refer to our recent blog post on How to Flush DNS Cache on Windows, Mac, and Linux, but if you are in a hurry, you can refer to the following steps.
Here are the commands you can copy and paste for your operating system:
For Windows: Open the Start Menu and type cmd. In the black window, type the following command and press Enter:
ipconfig /flushdns
For macOS: Open the Terminal app (you can find it in Applications > Utilities). In the Terminal window, paste the following command and press Enter. You may need to enter your Mac password.
For Linux (Ubuntu): Open the Terminal by pressing Ctrl + Alt + T. Paste the following command and press Enter. You will need to enter your password.
sudo systemd-resolve --flush-caches
Step 4: Restart Your Router and Modem
The classic “turn it off and on again” trick works for a reason. Your router can get bogged down with temporary data or experience a small glitch. A simple restart clears its memory and allows it to establish a fresh, clean connection to the Internet.
Unplug the power cords from your modem and router and wait for at least 60 seconds.
Plug the modem back in first and wait for its lights to become stable (usually about a minute).
Plug the router back in and wait for its lights to stabilize.
Try visiting the website again.
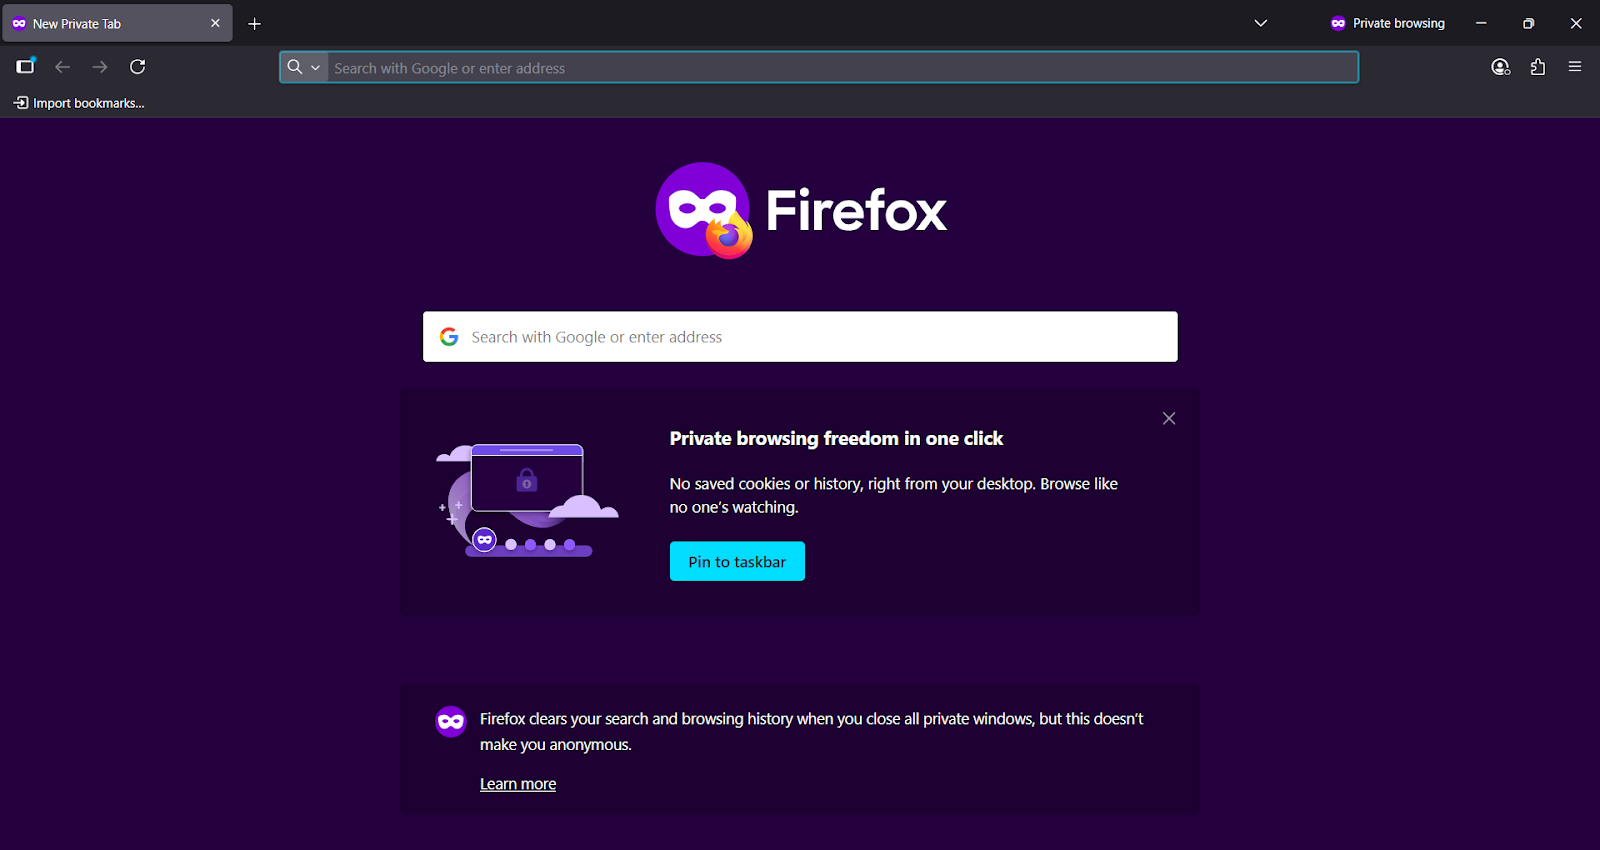
Step 5: Try Incognito or Private Mode
Sometimes, a browser extension (ad blocker or security tool) can interfere with your connection. Incognito (or Private) mode loads a clean browser window, usually with all extensions turned off. This is a great way to check if an extension is the cause of the ERR_NAME_NOT_RESOLVED error.
Google Chrome: Press Ctrl + Shift + N (or Cmd + Shift + N on Mac).
Firefox & Edge: Press Ctrl + Shift + P (or Cmd + Shift + P on Mac).
Try visiting the website in this new private window. If it loads correctly, the problem is one of your extensions. Go back to your regular browser window and disable your extensions one by one to find the culprit.
Adjusting Your Network Settings to Fix the ERR_NAME_NOT_RESOLVED Error
If the quick fixes didn’t solve the problem, it’s time to look at your device’s network settings. These methods involve making small adjustments to how your computer connects to the internet. Don’t worry, these steps are safe and easy to follow, and they are often the most effective solutions for the ERR_NAME_NOT_RESOLVED error.
Step 6: Change Your DNS Servers (A Powerful Fix)
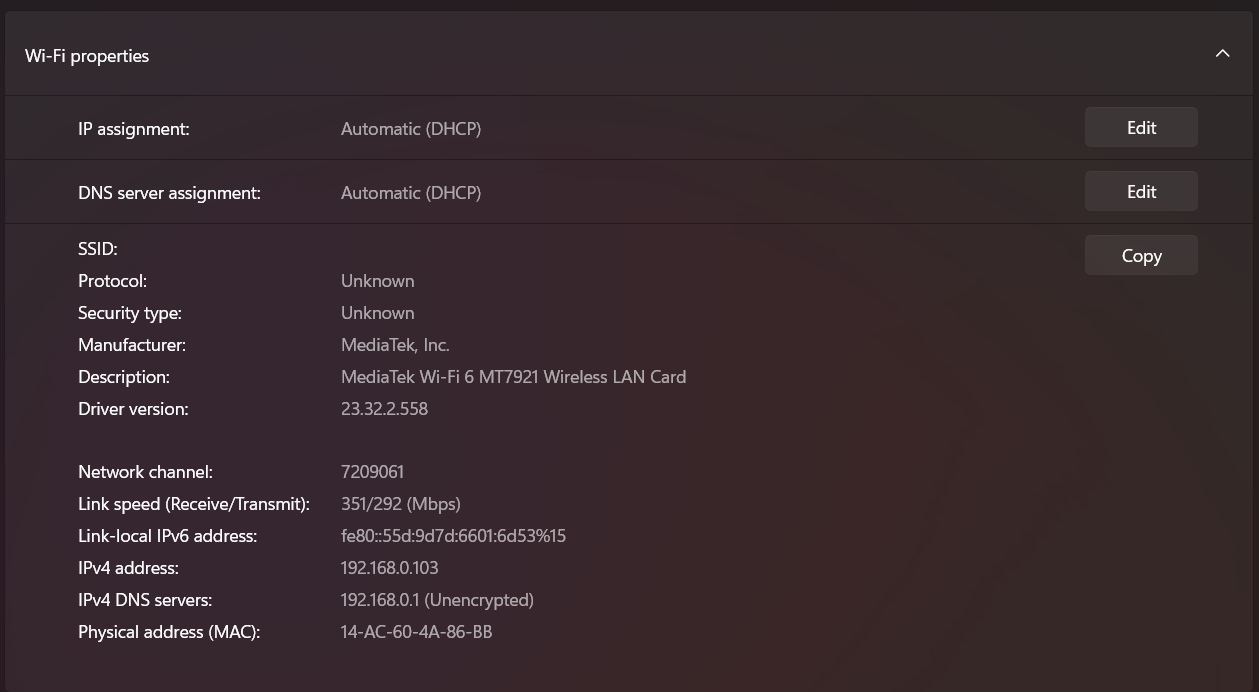
This is one of the most common and successful solutions for this error. By default, your computer uses the DNS “phonebook” provided by your Internet Service Provider (ISP). Sometimes, your ISP’s DNS servers can be slow, unreliable, or temporarily down, which prevents your browser from finding the website you’re looking for.
The solution is to manually switch to a free, public DNS server, like the ones offered by Google or Cloudflare. These services are often faster and more reliable than the default ones from your ISP.
Step-by-Step Guide to Changing Your DNS Server:
On Windows 10 & 11:
Right-click the Start button and select Network Connections.
Click on Advanced network settings, then select More network adapter options.
A new window will open. Right-click on your active internet connection (it will be either Wi-Fi or Ethernet) and choose Properties.
In the list that appears, find and select Internet Protocol Version 4 (TCP/IPv4), then click the Properties button.
Click the option that says Use the following DNS server addresses: and enter the following numbers:
Preferred DNS server: 8.8.8.8
Alternate DNS server: 8.8.4.4
Click OK to save your changes and try visiting the website again.
On macOS:
Open System Settings from the Apple menu and click on Network.
Select your current connection (like Wi-Fi) from the list on the left.
Click the Details… button next to your network name.
Go to the DNS tab on the left.
Click the + button under “DNS Servers” and type 1.1.1.1.
Click the + button again and type 1.0.0.1.
Click OK to save the changes.
On Android & iOS: The process is very similar. Go to your Wi-Fi settings, select the network you are connected to, and look for an option to “Configure DNS” or change your IP settings from “DHCP” to “Static.” There, you can enter the same public DNS addresses mentioned above.
Step 7: Check Your Firewall and Antivirus Software
Your firewall and antivirus programs are designed to protect you from online threats. However, they can sometimes be overly cautious and mistakenly block a perfectly safe website, leading to connection errors. To see if this is the problem, you can temporarily disable them.
You can find the icon for your antivirus or firewall software, usually in the bottom-right corner of your screen on the taskbar (or top-right on a Mac).
Right-click the icon and look for an option like Disable protection, Turn off firewall, or Pause protection for 15 minutes.
Once it is temporarily disabled, try to access the website again.
If the website now loads, you have found the cause. You will need to go into your security software’s settings and add the website you are trying to visit to an “allow list” or “exceptions list.” Remember to always re-enable your firewall and antivirus immediately after testing.
Step 8: Disable or Check Your VPN and Proxy
A VPN (Virtual Private Network) or proxy server reroutes your internet traffic through a different location for privacy. If the VPN server you are connected to is having trouble, it can prevent you from resolving domain names correctly.
The fix is simple: turn off your VPN or proxy and try to connect directly.
Open your VPN application and click the Disconnect button.
If you are using a proxy, go to your system’s network settings and disable it.
Once disconnected, try visiting the website again. If it works, the problem lies with your VPN or proxy service.
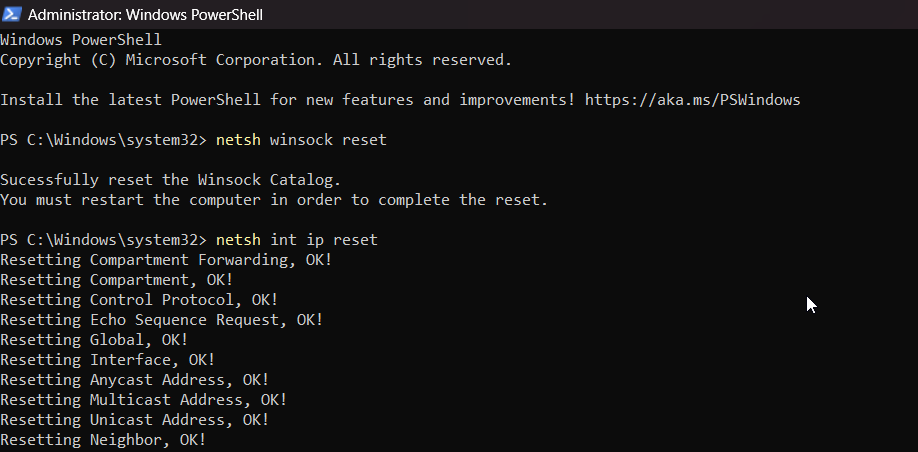
Step 9: Reset Network Settings with Command Prompt (For Windows Users)
Sometimes, the software on your computer that manages internet connections can become corrupted. For Windows users, a quick fix is to reset these settings back to their original state using the Command Prompt. This process rebuilds the catalogue of rules your computer uses to communicate online.
Open the Start Menu and type cmd.
Right-click on Command Prompt and choose Run as administrator.
In the black window that appears, type the first command below and press Enter:
netsh winsock reset
After it finishes, type the second command and press Enter:
netsh int ip reset
Once both commands are complete, you must restart your computer for the changes to take full effect.
Advanced Solutions To Fix The ERR_NAME_NOT_RESOLVED Error
If you have tried all the previous methods and the ERR_NAME_NOT_RESOLVED error persists, you will need to investigate the system further. The following solutions are more technical, so you should be extra careful when implementing them.
Step 10: Check the hosts File to Fix The ERR_NAME_NOT_RESOLVED Error
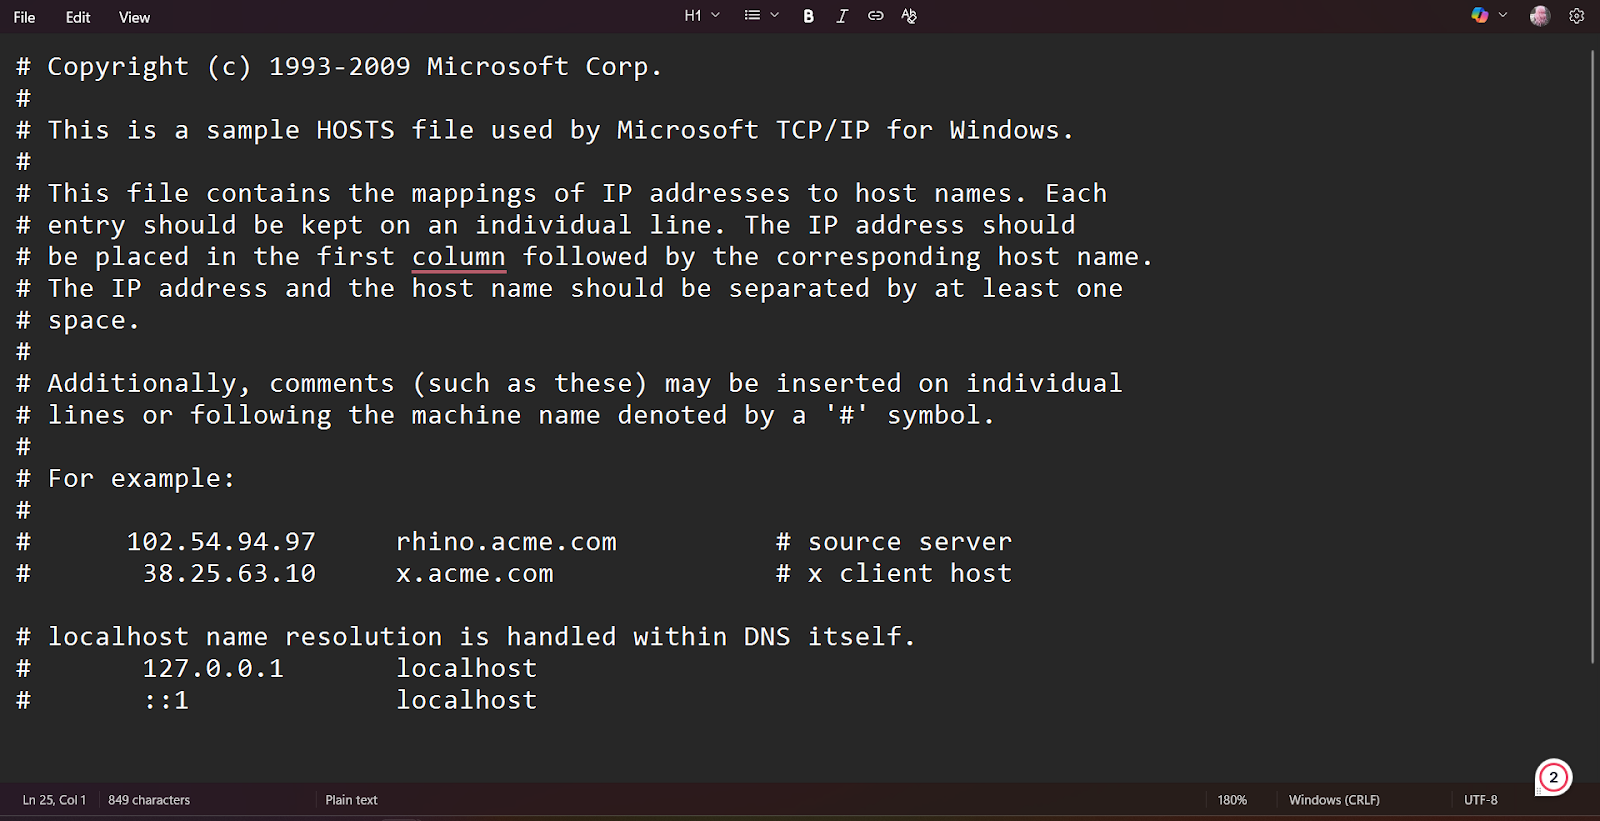
The hosts file is a small, private address book on your computer. Before your computer asks the public internet’s DNS “phonebook” for a website’s address, it checks this local file first. Normally, this file is empty, but sometimes, malware or other software can add entries to it to block websites or redirect them to malicious locations.
Warning: Be Extremely Careful. The hosts file is a sensitive system file. Editing it incorrectly can prevent your computer from connecting to the internet or other network services. Do not delete or change any lines unless you are absolutely certain they are causing the problem. We will only be looking for a specific entry related to the website you can’t access.
How to Safely Check Your hosts File:
On Windows:
Click the Start button, type Notepad, then right-click the Notepad icon and select Run as administrator. This is essential, as you cannot save changes to the file otherwise.
In Notepad, go to File > Open.
Navigate to the following folder path (you can copy and paste this into the address bar at the top): C:\Windows\System32\drivers\etc
You may see an empty folder. In the bottom-right corner of the “Open” window, change the file type from “Text Documents (*.txt)” to All Files.
You should now see a file named hosts. Click it and select Open.
On macOS:
Open the Terminal app (you can find it in Applications > Utilities or search for it with Spotlight).
Type the following command carefully and press Enter. This command opens the hosts file in a simple text editor called nano.
sudo nano /private/etc/hosts
You will be prompted to enter your Mac’s password. Type it and press Enter (you won’t see the cursor move, which is normal).
What to Look For: Now that the file is open, look through the text. Most lines will start with a # symbol, which means they are comments and are ignored by the system. You are looking for any lines without a # symbol containing the website’s domain name that you cannot access.
For example, if you can’t reach example.com, you might see a line that looks like this:
127.0.0.1 example.com
This line tells your computer to block example.com.
How to Fix It: Instead of deleting the line, the safest way to disable it is to add a # symbol to the very beginning of it. This turns the line into a comment, and your computer will ignore it.
# 127.0.0.1 example.com
After making the change, save the file (File > Save in Notepad, or press Ctrl + X, then Y, then Enter in nano on a Mac). Try visiting the website again.
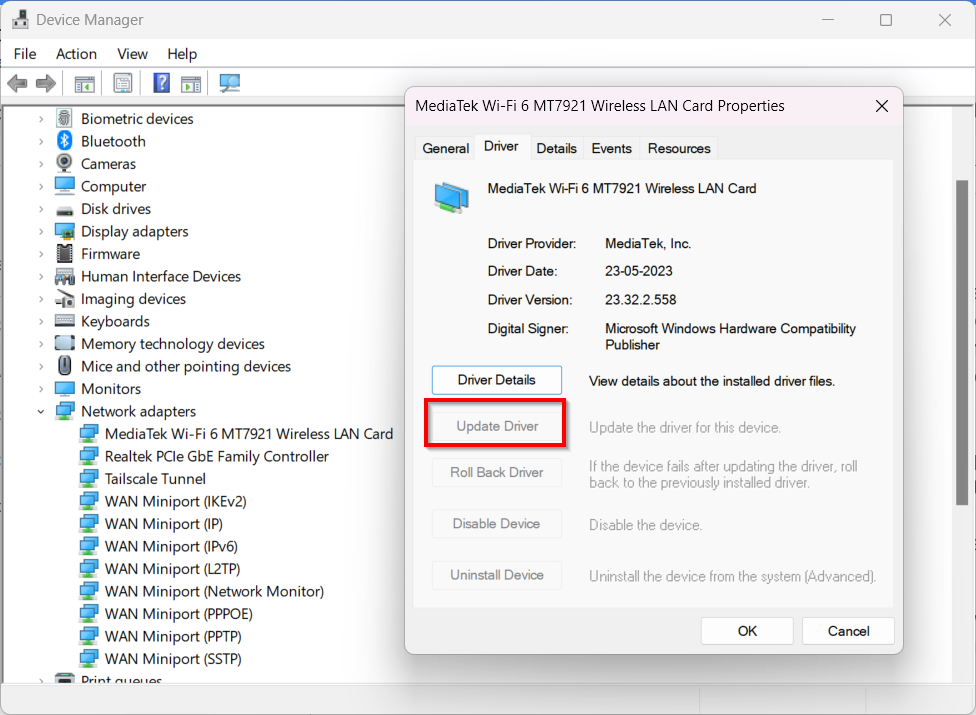
Step 11: Update Your Network Adapter Drivers (Windows)
A driver is software that allows your computer’s operating system (Windows) to communicate with its physical hardware, like your Wi-Fi card or Ethernet port. If this driver software is outdated or corrupted, it can cause a wide range of strange connection issues, including the ERR_NAME_NOT_RESOLVED error.
This is a less common cause, but it’s a worthwhile step if nothing else has worked.
How to Update Your Network Driver:
Right-click on the Start button and select Device Manager from the menu.
In the Device Manager window, look for a category called Network adapters and click the small arrow next to it to expand the list.
You will see several items listed. You need to find your main network adapter. Its name usually includes terms like Wi-Fi, Wireless, Ethernet, or Gigabit Family Controller.
Right-click on the correct network adapter and choose Update driver.
A new window will appear with two options. First, choose Search automatically for drivers.
Windows will now search for an updated driver. If it finds one, follow the on-screen instructions to install it.
If Windows cannot find a driver automatically, you can visit the support website for your computer’s manufacturer (like Dell, HP, or Lenovo) or the network card’s manufacturer (like Intel or Realtek) to download the latest driver manually. However, the automatic search is usually sufficient.
For Website Owners: Is the Problem on Your End?
If customers or visitors report seeing the ERR_NAME_NOT_RESOLVED error when trying to access your site, you should immediately fix it. This error means their browsers simply cannot find your server on the Internet, and it is a critical issue that could be costing you traffic and business.
Here are the essential steps to diagnose and fix the issue from your side.
Step 1: Check Your Domain’s Expiration Status
Before diving into complex settings, check the most basic thing: has your domain name expired? An expired domain is like a disconnected phone number; the name exists, but it no longer connects to anything.
How to Check: Use a free online WHOIS lookup tool (like who.is or ICANN’s lookup). Enter your domain name.
What to Look For: Pay close attention to the “Expiration Date” and the “Registrar Status.” If the status is “pending renewal” or “redemption period”, then you will need to renew your domain name.
If your domain has expired, contact your domain registrar (e.g., GoDaddy, Namecheap, Cloudflare, etc.) immediately to renew it. After renewal, it can take a few hours for the domain to become active again across the internet.
Step 2: Verify Your DNS Records
This is the most common server-side cause of the ERR_NAME_NOT_RESOLVED error. Your DNS (Domain Name System) records are like a forwarding address, telling the internet where to send traffic for your domain name. If this address is wrong, visitors will get lost.
The two most important records to check are:
A Record: This record points your domain name (e.g., yourwebsite.com) directly to your server’s unique IP address (e.g., 192.0.2.1).
CNAME Record: This record points a subdomain (e.g., www.yourwebsite.com) to another domain name.
You must log in to your domain registrar or DNS provider and ensure these records point to the correct server IP address provided by your host. A single typo in the IP address will cause the error.
We understand that manually managing DNS records can be confusing and prone to error, especially when juggling credentials for domain registrars and hosting providers.
That’s why we built RunCloud to streamline this entire process.
By integrating with DNS providers like Cloudflare, RunCloud allows you to manage your server and DNS records from a single, intuitive dashboard, which significantly reduces the chance of misconfiguration. When you add a new web application, RunCloud can help ensure the correct DNS records are created, eliminating the guesswork.
In addition, RunCloud dramatically speeds up development and testing with its free test domain feature. For every application you deploy, RunCloud instantly provides a temporary domain. This allows you to build, test, and verify that your entire website works perfectly on the server before you even point your official domain to it.
Step 3: Contact Your Hosting Provider
If your domain is active and you have double-checked that your DNS records are correct in your registrar’s panel, but the error persists, the issue might be with your hosting provider’s network.
Possible issues on their end could include:
Their own DNS servers are experiencing problems.
A network outage is affecting your server’s connectivity.
A server-side firewall is misconfigured.
Open a support ticket with your hosting company. Provide them with your domain name and the exact error message, and let them know you have already confirmed that your domain is active and your DNS records are pointing correctly. This information will help them diagnose the problem on their end much faster.
Conclusion: Putting the Error Behind You
The ERR_NAME_NOT_RESOLVED error can be frustrating, but it’s rarely permanent. As this guide has shown, the problem is almost always a breakdown in communication between your device and the Internet’s address book, and you are now fully equipped to fix it. You can quickly get back to browsing or building by following these steps.
If you are a website owner, you know that managing a website is not easy. That’s why we built RunCloud. It makes the complex task of server management incredibly simple, allowing you to deploy and manage new sites on your server with confidence.
By streamlining everything from application setup to providing an instant test domain, RunCloud helps you avoid the very DNS configuration issues that cause these errors in the first place.
Why do I see ERR_NAME_NOT_RESOLVED on only one website?
This usually means that the problem isn’t with your internet connection but is specific to that website or your computer’s stored data about it. The website’s server could be down, or your system might have a corrupt DNS cache entry for that single domain. Flushing your DNS cache or simply checking if the site is down for everyone else can help you diagnose the issue.
Can a virus cause the ERR_NAME_NOT_RESOLVED error?
Certain types of malware or viruses can cause the ERR_NAME_NOT_RESOLVED error. They can achieve this by maliciously modifying your computer’s hosts file to block websites or changing your DNS settings to point to non-existent or harmful servers. If you suspect an infection, you should run a full system scan with reputable antivirus software.
What’s the difference between ERR_NAME_NOT_RESOLVED and DNS_PROBE_FINISHED_NXDOMAIN?
Think of ERR_NAME_NOT_RESOLVED as a general failure where your browser couldn’t even complete the DNS lookup for various reasons, including network issues or local misconfigurations. In contrast, DNS_PROBE_FINISHED_NXDOMAIN is a specific and definitive response from the DNS server confirming it was reached, but it has no record of that domain name (NXDOMAIN means Non-Existent Domain).
Support channels are flooding, and customer frustration is mounting on social media.
What’s your first move?
When things go wrong (and they inevitably do), clear and timely downtime communication is the key to maintaining user trust.
This is where a dedicated status page comes in.
Whether you’re looking to improve transparency, validate SLAs, or simply show your uptime status to customers, you’re in the right place. This guide will show you exactly how to create and set up a powerful status page for your business.
Let’s get started!
What is a Status Page and Why Do You Need One?
A status page is a dedicated web page that communicates the current operational status of your online services. It is a centralized hub for all incident and maintenance-related information. Instead of flooding your support channels with inquiries during an outage, you can direct users to a single page with all the necessary information that is updated in real time.
Benefits of Having a Status Page:
Builds Trust: A status page allows you to proactively communicate downtime, which shows transparency and reassures your customers that you are on top of the situation.
Reduces Support Load: It deflects a significant number of support tickets and calls during an incident, which frees up your team to focus on resolving the issue.
Validates SLA Breaches: For businesses with Service Level Agreements (SLAs), a status page provides a clear and public record of uptime and incidents, making it easier to validate any breaches.
Tools to Get You Started
There are many excellent tools available that allow you to create a status page, many of which offer free tiers to get you started. Some popular options include:
UptimeRobot: Known primarily for uptime monitoring, but also offers a simple and effective status page feature.
BetterStack: Provides a beautifully designed, free status page that integrates with their monitoring and incident management tools.
Cachet: A powerful, open-source, and self-hostable status page system that gives you complete control over your data and branding.
While hosted solutions are convenient, self-hosting with a tool like Cachet offers unparalleled customization and control.
If you value this flexibility, then it’s worth knowing that RunCloud makes managing and deploying web applications incredibly simple and efficient.
In this tutorial, we will walk you through setting up a status page using Cachet, an open-source solution packed with features to make managing your downtime less stressful.
Why Should You Use Cachet to Create Self-Hosted Status Pages?
Cachet is a feature-rich, open-source status page system built with Laravel. Here’s a quick rundown of its powerful features:
Component Management: Allows you to define and manage individual components of your application (e.g., API, Website, CDN).
Incident Reporting: Use it to clearly communicate incidents with status updates like Investigating, Identified, and Fixed.
Scheduled Maintenance: Allows you to inform your users about upcoming maintenance windows proactively.
Metrics and Graphs: Display key performance metrics (e.g., response time, error rates) directly on your status page.
Multi-language Support: Cachet supports over 10 languages, which makes it accessible to a global audience.
Subscriber Notifications: Allows users to subscribe via email to receive real-time updates on incidents and maintenance.
Step-by-Step: Installing Cachet with RunCloud
Let’s set up your Cachet status page using the RunCloud server management panel to help streamline the process significantly. RunCloud handles server configuration and makes application deployments much simpler.
Step 1: Create a Database and Web Application
First, you’ll need a dedicated database for Cachet. In your RunCloud dashboard, navigate to the Databases section and create a new database and a database user. Securely store these credentials, as you will need them shortly.
SSH into your server using your preferred method and navigate to your newly created application’s root folder. The path will look something like /home/YOUR_USERNAME/webapps/YOUR_APP_NAME, and it is available in your RunCloud application dashboard.
You can navigate to this directory by running the following command:
cd <root path>
In this folder, first, we will remove the default index.html file by running the following command:
rm index.html
Now, clone the latest version 3 of the Cachet repository into the current directory:
The . at the end ensures the files are cloned directly into your application root, not a new subfolder.
Step 3: Install Dependencies
With the files in place, it’s time to install the required PHP dependencies using Composer.
A key advantage of RunCloud is its support for multiple, isolated PHP versions per application. To ensure you’re using the correct one, you may need to specify the absolute path to the PHP version you assigned to this app.
# Example for PHP 8.3
/RunCloud/Packages/php83rc/bin/php /usr/sbin/composer install --no-dev -o
/RunCloud/Packages/php83rc/bin/php /usr/sbin/composer update cachethq/core
Step 4: Configure Your Environment
Copy the example environment file to create your own configuration file:
cp .env.example .env
Next, generate a unique application key for security:
# Again, using the RunCloud-specific PHP path
/RunCloud/Packages/php83rc/bin/php artisan key:generate
Step 5: Configure the Application in RunCloud
Head back to your RunCloud dashboard, select your Cachet web application, and navigate to its settings.
Link the Database: In the Settings menu, find the Linked Database section. Select the database you created in Step 1 from the dropdown menu and save.
Update Web Application Settings:
Public Path: Set this to /public.
Web Application Stack: For best performance, choose Native NGINX.
Stack Mode: Select Production.
Web Application Type: Set this to Laravel.
Click Update to save the changes.
Edit Environment Variables: Navigate to the Env Editor in the left-hand menu. This user-friendly interface is a fantastic RunCloud feature that prevents you from having to edit the .env file via the command line. Update the following database variables with the credentials you created earlier:
Remove Disabled PHP function: Cachet requires the highlight_file function to be enabled to work properly. Navigate to your application settings and remove this function from the disabled list, then hit save.
Step 6: Finalize Installation
Now, back in your SSH session, run the final commands to set up the database and application assets.
By now, you should have a fully functional, self-hosted status page. Go ahead and visit your domain to see it live, and log in at the /dashboard to begin customizing components, scheduling maintenance, and transparently communicating with your users.
Investing a small amount of time to set this up builds a more resilient and trustworthy relationship with your customers. While powerful open-source tools such as Cachet provide the features, platforms like RunCloud offer the seamless experience.
As you can see from the process above, RunCloud eliminates the complexity of server configuration, database linking, and cron job management, allowing you to deploy powerful applications with confidence and ease.
Why not use a hosted service like Statuspage.io or BetterStack?
Hosted services are convenient, but you sacrifice control over your data, branding, and features. By self-hosting Cachet with RunCloud, you gain complete freedom to customize every aspect of your status page and avoid the recurring, often expensive subscription fees of third-party platforms.
Is it difficult to set up a self-hosted status page with Cachet?
While setting up any application directly on a server can be complex, a modern server panel like RunCloud makes it incredibly simple. RunCloud handles the server configuration, firewall, and database linking, providing a guided interface that turns a difficult command-line process into a few clicks. This gives you the power of a self-hosted solution without the traditional setup headaches.
Can I fully customize my Cachet status page on RunCloud?
Absolutely, and this is a key advantage of self-hosting. Because you have full control over the application files on your server managed by RunCloud, you can modify the code, apply custom themes, and integrate it deeply with your other systems. This level of customization is simply not possible with restrictive hosted solutions like UptimeRobot or Statuspage.io.
How much does a self-hosted status page on RunCloud cost?
A self-hosted solution is extremely cost-effective, as your only costs are the cloud server (from providers like DigitalOcean or Vultr) and your RunCloud subscription. This predictable, low monthly fee is often significantly cheaper than hosted status page services, which can charge high premiums based on the number of subscribers or components. With RunCloud, you get unlimited potential for a flat, reasonable price.
Do I need to be a Linux expert to manage my server with RunCloud?
Not at all. RunCloud is designed to empower users who want the power of a VPS without needing deep command-line expertise. It automates and simplifies critical server tasks like security updates, creating cron jobs, and managing databases through an intuitive graphical dashboard, giving you full control with none of the complexity.
One common task in Linux is to delete all text in a file using the Vi/Vim editor. Whether you’re clearing a log, resetting a config file, or preparing a test dataset, knowing the right commands saves time and prevents mistakes.
In this guide, you’ll learn:
Several methods for wiping a file clean in Vi/Vim
Why this approach is safer than deleting and recreating the file
Step-by-step instructions for saving or exiting afterward.
When Do You Need to Delete All Text in a File with Vi/Vim?
Before looking at the commands, it helps to know when clearing a file is better than deleting it entirely. You will often find that emptying a file is a more appropriate solution than deleting it entirely. Here are some common examples:
Managing Large Log Files: Applications and services constantly write to log files, which can quickly grow large. Clearing them is safer than deleting the file, since active processes may still rely on it. For long-term management, see our Logrotate Troubleshooting Guide.
Resetting Temporary or Cache Files: When working with programs that use temporary or cache files, you may need to clear them out before running a process. This ensures that you start with a clean slate and that old data does not interfere with the new operation.
Resetting Configuration Files: Sometimes, you may need to reset a configuration file by clearing its contents before pasting in a new configuration. If you’re working with web server configs, see our guide on configuring NGINX log rotation for related best practices.
Preparing for Development and Testing: In a development environment, it is common to run tests that read from or write to specific data files. Clearing these files between each test run allows us to ensure that the results of one test do not influence the outcome of the next.
Why Not Just Delete and Recreate the File in Linux?
Deleting and recreating a file might seem simpler, but it often causes problems. First, deleting a file resets its ownership and permission settings, which you would then need to reconfigure manually.
Additionally, this action will break any symbolic or hard links pointing to the original file. Most importantly, if another application is actively using the file, deleting it can cause that application to crash or behave unexpectedly. For these reasons, editing the file in place to clear its contents is a much safer and more reliable practice.
To help you follow along with the examples in this guide, you can create a temporary practice file filled with random data. Please open your terminal and execute the following command. This will create a file named tmp.abc in the /tmp/ directory, which you can use to test the commands safely.
How to Delete All Text in a File Using Vi/Vim Commands
Vi/Vim is a powerful text editor, and deleting all text in a file is a straightforward process once you know the right commands. Here are a few of the most effective methods:
Method 1: Delete All Text in Vi/Vim with ggdG
This method combines three Vim commands into one sequence that’s easy to remember. Let’s break it down into its individual components.
The first part of the sequence, gg, is a command that instantly moves your cursor to the very first character on the first line of the file.
Next, the d key acts as the delete operator. By itself, d does not delete anything; instead, it signals to Vim that you intend to perform a deletion and waits for a subsequent motion command to define the range of text that should be removed.
The final part of the sequence, G, provides the motion command that the d operator was waiting for. When used alone, the G command moves the cursor to the very last line of the file.
When you type these commands together as ggdG, the editor is directed to “delete from the first line to the last line,” removing every line in the current buffer.
Step-by-Step: Using ggdG to Clear a File
Here is a detailed, step-by-step guide on how to use this command to clear a file’s content.
Open Your File in Vi/Vim: First, launch your terminal and open the desired file by typing vim your_file.txt. Make sure to replace your_file.txt with the actual path and name of your file.
Ensure You Are in Normal Mode: Once the file is open, you must be in Normal mode to execute commands. This is the default mode when you first open a file. If you have been typing or are otherwise unsure of your current mode, simply press the Esc key to return to Normal mode.
Execute the Deletion Command: With Normal mode active, carefully type the command sequence ggdG in succession. You do not need to press the Enter key. As soon as you type the final G, Vim will immediately execute the full command, and all text within the file will be deleted, leaving you with a blank screen.
Enter Insert Mode to Add New Content: Now that the file is empty, you can begin adding new content. To do this, press the i key to switch from Normal mode to Insert mode. You will notice that your cursor may change shape, and you can now start typing text as you would in any standard editor.
Save and Close the File: Once you are satisfied with your changes, you will need to save the file. The section below provides detailed instructions on the various commands used to save your work and exit the Vim editor.
Method 2: Delete All Text in Vi/Vim with :%d
You can also use Vim’s Command-line mode, also known as Ex mode. To delete everything, you can simply type :%d.
To see how it works, let’s look at each part of the command.
Typing the colon (:) immediately shifts Vim from Normal mode into Command-line mode. This action moves the cursor to the bottom of the screen, which indicates that Vim is now ready to accept a typed command.
The percentage symbol (%) is a special character that represents the entire file.
Finally, the d character is the command to be executed across the specified range. In Command-line mode, d is the direct command for “delete”.
Step-by-Step: Using :%d to Clear a File
Here is a detailed, step-by-step guide on how to use the :%d command to clear all text from a file.
Open Your File in Vi/Vim: To begin, you will need to open the file you wish to modify by executing the following command in your terminal: vim your_file.txt.
Ensure You Are in Normal Mode: Before you can enter a command-line instruction, make sure you are in Normal mode. If you have just opened the file, you are already in this mode. However, if you have been editing or are uncertain, simply press the Esc key to ensure you return to Normal mode.
Enter Command-line Mode and Execute the Command: Now, type a colon (:). You will see the cursor jump to the bottom-left corner of your screen, which indicates that Vim is now in Command-line mode. Next, you need to type %d after the colon and then press the Enter key to confirm and execute the full command. The entire content of the file will be deleted instantly.
Enter Insert Mode to Add New Content: With the file now empty, you can switch into Insert mode to begin adding your new text. Press the i key to enable insert mode. This will allow you to type freely within the file.
Save and Close the File: After you have finished typing your new content, you will need to save your changes and exit the editor. Please refer to the section below to learn how to save and close the file with Vim.
How to Save and Exit After Deleting Text in Vi/Vim
After clearing a file, the changes exist only in Vim’s memory. To make them permanent, you need to save (or “write”) the buffer to disk.
Save Without Exiting in Vi/Vim (:w)
There may be situations where you want to save your progress but continue working within the file. The :w command allows you to do just this.
First, press the Esc key to ensure you are in Normal mode.
Type :w and then press the Enter key.
Vim will save the file, and you will see a confirmation message at the bottom of the screen with the file name and the number of lines and characters written. After you execute this command, you will remain inside the editor and this allows you to continue your work.
Save and Quit in Vi/Vim (:wq or ZZ)
This is the most frequently used command when you have finished your work and wish to save it and close the editor in a single step.
The :wq command is a combination of the “write” command (w) and the “quit” command (q). It first saves the file and then exits the Vim editor.
An even faster alternative is the ZZ command (note the capital letters). This is a Normal mode shortcut that performs the exact same action as :wq. It saves the file if it has been modified and then quits the editor.
How to use :wq in Vim:
Press the Esc key to enter Normal mode.
Type :wq and press the Enter key to save your changes and exit.
How to use ZZ in Vim:
Ensure you are in Normal mode by pressing the Esc key.
Without typing a colon, simply type the capital letters ZZ in succession. The editor will immediately save the file and close it.
Quit Without Saving in Vi/Vim (:q!)
If you accidentally delete the file’s content and want to revert, then you can close the file without saving. The q stands for “quit,” while the exclamation mark (!) is a “force” modifier. By adding !, you are telling Vim to quit immediately and to discard all changes made since the last time the file was saved.
How to use it:
Return to Normal mode by pressing the Esc key.
Type :q! and press the Enter key.
Vim will close instantly without saving.
Final Thoughts: Easier File Management with RunCloud
You’ve seen how easy it is to delete all text in a file using Vi/Vim with commands like ggdG or:%d. Once you know them, these commands are quick and give you full control from the terminal. If your goal is freeing up storage, our guide on checking disk space in Linux shows how to spot problems before they cause downtime.
Still, managing files directly from the terminal takes time and leaves room for error. That’s where modern server management tools can make a difference.
With RunCloud, you get both SSH access and a browser-based file manager. That means you can edit, clear, and manage files in seconds — without needing to remember Vim shortcuts.
Our platform gives you a secure, browser-based file manager alongside full SSH access, so you can edit, clear, and manage files in seconds — without memorising Vim shortcuts.
Try RunCloud today and simplify the way you manage files on your servers.
At a Glance: Commands to Delete Text in Vi/Vim
If you just need the key commands in one place, here’s a quick reference you can scan before diving into the FAQs.
Command
What it does
Example usage
ggdG
Deletes all text in the file using normal mode
Open file → type ggdG
:%d
Deletes all text in the file using command mode
:%d then press Enter
dd
Deletes the current line
Move to a line → type dd
u
Undoes the last change
Press u after a deletion
:q!
Quits without saving changes
:q! then press Enter
:wq
Saves and quits after deleting
:wq then press Enter
FAQs on Deleting All Text in a File Using Vi/Vim
How do I delete a single line in Vi/Vim instead of all text?
Use the dd command. Move the cursor to the line you want to delete and press dd. That removes just that one line.
Can I undo deleting all text in Vi/Vim?
Yes. Press u to undo the last change. If you deleted everything with ggdG or :%d, pressing u will bring the text back.
What’s the difference between ggdG and :%d in Vi/Vim?
Both commands delete all text in the file. The difference is how you use them. ggdG is a normal-mode command sequence, while :%d is an Ex command typed on the command line inside Vim.
How do I delete text in Vi/Vim without saving the changes?
After clearing the file, exit with :q!. That quits Vim without saving, so the file stays unchanged on disk.
What’s the fastest way to clear a very large file in Vi/Vim?
Both ggdG and :%d work quickly, even on large files. If the file is extremely big, :%d is usually a little faster because it runs as a single command.
If you’re seeing Cloudflare HTTP Error 526 (Invalid SSL Certificate) on your site, it means Cloudflare couldn’t verify the SSL certificate on your server. The result is that your visitors are blocked from accessing your website until it’s fixed.
In this guide, we’ll show you how to fix the Cloudflare HTTP Error 526 step by step. You’ll learn what the error means, the most common causes, and the exact fixes you can apply on your RunCloud-managed server to get your site back online quickly and securely.
Let’s get started!
What Causes Cloudflare HTTP Error 526?
The HTTP Error 526 is a specific error message generated by Cloudflare. It tells us that Cloudflare successfully connected to your origin web server (the server you manage with RunCloud), but it was unable to validate the SSL/TLS certificate presented by that server.
Your Visitor → Cloudflare → Your RunCloud Server
Your Visitor → Cloudflare → Your RunCloud Server
The error occurs on the second leg of this journey, between Cloudflare’s network and your server. Cloudflare is acting as a security guard, and when it approached your server, the identification (the SSL certificate) was either missing, expired, or not from a trusted source.
Cloudflare SSL/TLS Modes Explained (and How They Affect Error 526)
The root cause of the Error 526 almost always lies within your Cloudflare SSL/TLS encryption settings. Cloudflare offers several ways to secure the connection to your server. The mode you have selected determines how strictly Cloudflare validates your server’s SSL certificate.
You can find this setting in your Cloudflare dashboard under SSL/TLS > Overview:
Flexible: This mode encrypts traffic between the visitor and Cloudflare, but not between Cloudflare and your server. This is not the most secure method, but it is good enough for hobby sites.
Full: This mode encrypts the entire connection, but Cloudflare does not verify the identity of the SSL certificate on your origin server. It will accept an expired, self-signed, or unmatching CN/SAN entry for the requested hostname.
Full (Strict): This is a secure and recommended mode. It encrypts the entire connection and requires that your origin server has a valid, unexpired SSL certificate issued by a publicly trusted Certificate Authority (CA) such as Let’s Encrypt or Cloudflare’s own Origin server.
The HTTP Error 526 occurs when your Cloudflare SSL/TLS mode is set to Full (Strict), but the certificate on your RunCloud server does not meet these strict requirements.
Our goal is to fix the server’s certificate, not to downgrade this security setting.
How to Fix Cloudflare HTTP Error 526: Step-by-Step Guide
Follow these steps in order to diagnose and fix the problem efficiently.
Step 1 – Check Your Cloudflare SSL/TLS Encryption Settings
First, let’s be certain that the Full (Strict) setting is the trigger.
Log in to your Cloudflare account and select your domain.
Navigate to the SSL/TLS section from the left-hand menu.
On the Overview tab, look for the SSL/TLS Encryption mode.
Confirm that it is set to Full (Strict). If it is, proceed to the next step.
Step 2 – Verify Your SSL Certificate on RunCloud
Now, we need to inspect the SSL certificate that is installed on your server for the specific web application.
Method A: Check SSL Certificates in the RunCloud Dashboard
The RunCloud dashboard provides an easy way to check your SSL status.
Log in to your RunCloud account and navigate to your server.
Select Web Applications from the menu.
Click on the name of the web application that is experiencing the error.
In the application’s menu, click on SSL.
Here, you will see the current SSL status. Pay close attention to the Provider, the Status (it should be “Active”), and the Valid Until date to ensure it has not expired.
Method B: Check SSL Certificates with External Tools
For a definitive, external check, you can use an online SSL checker or a command-line tool like openssl. These tools verify what the outside world, including Cloudflare, sees.
Using the openssl command from your local terminal (replacing yourdomain.com with your actual domain and YOUR_SERVER_IP with your server’s IP address):
In the output, look for the certificate details, including the “subject” (which should match your domain name) and the “notAfter” date (the expiration date).
Based on what you discovered in Step 2, here are the most common scenarios and their solutions within RunCloud.
Fix 526 Error: No SSL Certificate Installed
If the RunCloud dashboard shows “No SSL Configuration” or an external check fails, you simply need to install a certificate.
In the RunCloud SSL section for your web application, select Let’s Encrypt as the SSL Provider. Ensure your domain’s DNS is pointing correctly to the server, then click “Install SSL Certificate”. RunCloud will automatically provision and install a trusted certificate.
Fix 526 Error: Expired SSL Certificate
Let’s Encrypt certificates are issued with a 90-day validity period. RunCloud attempts to automatically renew your certificates well before they expire. However, this process can occasionally encounter issues, such as temporary DNS validation problems or other specific server conditions, which may prevent the renewal from completing successfully.
If the automated renewal has failed, you can simply click the “Renew” button to trigger the process manually. This action immediately sends a new request to Let’s Encrypt to provision and install a valid certificate.
Fix 526 Error: Self-Signed Certificate
A self-signed certificate can be created by anyone and is used for testing within internal networks. Because it lacks external validation from a trusted third party, it cannot be automatically verified for authenticity.
Therefore, when Cloudflare’s SSL/TLS encryption is set to the highly secure Full (Strict) mode, it will always reject a self-signed certificate and trigger the HTTP 526 error. The most secure and permanent solution is to replace the self-signed certificate with a certificate from a trusted authority.
On the RunCloud platform, you can easily do this by removing the existing custom SSL configuration and using the integrated Let’s Encrypt functionality to install a valid, trusted certificate.
Fix 526 Error: Certificate Name Mismatch
This happens when the certificate does not cover all the hostnames for your site. For example, the certificate might only be for example.com, but visitors (and Cloudflare) are trying to reach www.example.com.
When installing the Let’s Encrypt certificate in RunCloud, make sure to add all domain variations you use (e.g., both the root domain and the www subdomain) to the list of domains to be included in the certificate.
Fix 526 Error: Incomplete SSL Certificate Chain
A trusted SSL certificate relies on a “chain of trust,” which includes intermediate certificates linking your domain certificate back to a trusted root CA.
This is rare when using RunCloud’s Let’s Encrypt integration, as it provides the complete chain. If you are installing a Custom SSL certificate from another provider, ensure you are pasting the entire certificate chain (often called fullchain.pem or a .crt file with multiple certificate blocks) into the “SSL Certificate” field, not just the single-domain certificate.
Permanent Fix – Install a Cloudflare Origin Certificate
If you want a permanent and guaranteed solution, you can use a Cloudflare Origin Certificate. This is a free, long-lasting certificate that you install on your RunCloud server. It is not publicly trusted, but it is specifically trusted by Cloudflare’s network, which resolves the 526 error perfectly.
In Cloudflare, navigate to SSL/TLS > Origin Server.
Click Create Certificate. Follow the prompts, leave all the values to default, and generate the certificate.
Cloudflare will show you an Origin Certificate and a Private Key. Copy both of these.
In your RunCloud application’s SSL section, choose the Custom SSL option.
Paste the Origin Certificate into the “Certificate” box and the Private Key into the “Private Key” box.
Click Install SSL Certificate.
Temporary Workaround – Switch to “Full” Mode in Cloudflare
If your site is experiencing critical downtime and you need an immediate, temporary fix while you sort out the certificate issue, you can downgrade Cloudflare’s security.
Go to Cloudflare > SSL/TLS > Overview and change the mode from Full (Strict) to Full.
This will bring your site back online, but this is not a permanent solution.
Downgrading your Cloudflare security exposes a potential security gap between Cloudflare and your server. Your top priority should still be to install a valid certificate on your server and switch back to Full (Strict) mode as soon as possible.
Fix Cloudflare HTTP Error 526 with RunCloud
The Cloudflare HTTP Error 526 is not a server crash, it’s a warning that your SSL setup isn’t fully trusted. With the right configuration, you can resolve it quickly and make sure it doesn’t come back.
From one dashboard, you can install Let’s Encrypt, renew certificates automatically, or configure a Cloudflare Origin Certificate for long-term stability. That means less downtime, fewer SSL headaches, and a more secure experience for your visitors.
Whether you’re running Ubuntu, Arch, Debian, or any other Linux distribution, knowing how to quickly and accurately identify your OS version can be the difference between smooth operations and compatibility nightmares.
And knowing your Linux OS version precisely is essential when troubleshooting a software installation, planning a system upgrade, or ensuring security patch compatibility.
This straightforward guide will demystify the process of checking your Linux operating system version and provide multiple command-line techniques that work across various distributions, such as Ubuntu, CentOS, Fedora, and more.
Understanding Linux Versions and Distributions
Before checking your system’s version, remember that Linux comes as a “distribution” – a complete operating system built around the Linux kernel. While hundreds of different distributions are available, most systems you will encounter belong to one of two major families: Debian or Red Hat.
For example, many servers run on distributions from the Red Hat family, such as Red Hat Enterprise Linux (RHEL) itself or others built to be compatible with it, like Rocky Linux, AlmaLinux, and CentOS Stream. On the other hand, an enormous community of developers and desktop users prefers distributions from the Debian family; the most famous is Ubuntu, which is based directly on Debian.
This family relationship is important because software packaged for one distribution, like RHEL, will often work on its close relatives. Similarly, an application designed for Debian will usually run perfectly on Ubuntu.
Although most Linux systems are based on these two lineages, a handful of users rely on other excellent independent distributions like Arch Linux or SUSE. Therefore, identifying your OS version is about finding the specific distribution name (e.g., Ubuntu) and its release number (e.g., 22.04), which tells you about its features and software family.
How to Check OS Version in Linux Command Line
There are six ways to check your Linux version via the command line. Here’s our guide to all six methods.
1. How to Check OS Version in Linux with lsb_release
The lsb_release -a command provides comprehensive information about your Linux distribution, including version details and codename. This command works across most Linux distributions and offers a quick, standardized way to retrieve system information.
2. How to Check OS Version in Linux with /etc/os-release
The /etc/os-release file contains detailed distribution-specific information that can be viewed using the cat command. It provides the operating system name, version, and other identification details. This method offers a reliable and consistent approach to checking the OS version across different Linux distributions.
3. How to Check OS Version and Kernel in Linux with uname
The uname -a command displays system information, including kernel version and system architecture, which helps identify the core operating system details. If you want to check the kernel version, you can use uname -r to view the kernel release information.
Let’s break down this example piece by piece so you can understand what it is telling you:
Field
Example value
Meaning
Kernel name
Linux
The kernel in use
Hostname
server01
The system’s network name
Kernel rel.
6.8.0-52-generic
Kernel version number
Build info
#53-Ubuntu SMP Fri Jul…
Who built it and when
Arch
x86_64
CPU architecture (64-bit here)
OS type
GNU/Linux
Confirms the operating system
Knowing this information is extremely useful when downloading software, as you must choose a package that matches your system’s architecture (x86_64 or arm64).
The hostnamectl command offers a modern, systemd based approach to retrieving system information. It displays detailed operating system and hardware details in a clean, readable format. This command is particularly useful for systems using systemd as their init system.
The /etc/issue file briefly describes the operating system and can be viewed using the cat command. It provides a quick glimpse of the system’s distribution and version. This method offers a simple, straightforward way to check basic system identification information.
The cat /proc/version command reads the Linux kernel version directly from the virtual /proc filesystem, offering a quick and direct method to view kernel information. This command provides raw kernel details and is particularly useful for technical users seeking precise system information.
Checking the Linux Kernel Version via CLI
The Linux kernel is software responsible for managing your computer’s hardware and resources. While you will more frequently need to know your distribution’s version, sometimes a specific piece of software or a troubleshooting guide will require you to know the version of the Linux kernel itself.
The kernel has its own version number, separate from the distribution’s version number. Fortunately, there is a simple and universal command to find this information on any Linux system.
To see which kernel version your system is running, type the following command into the terminal and press Enter:
uname -r
After you run the command, your terminal will display your kernel version. In the above screenshot, the kernel version is 6.8.0-78-generic. This tells you the kernel’s major and minor release numbers that your system is currently using.
Quick Guide: Checking Your Linux OS Version
If you just want the commands without explanations, here’s a quick reference:
Command to Type
What It Shows You
When to Use It
hostnamectl
A clean, easy-to-read summary including the distribution name, version, and kernel.
Best for a quick overview.
lsb_release -a
The full distribution name, version number, and official codename (e.g., “Jammy Jellyfish”).
Use this when you need the official distribution details.
cat /etc/os-release
Detailed information about the distribution is formatted as simple text variables.
This file is on almost all modern Linux systems and is a great alternative if other commands fail.
cat /etc/issue
A single line of text usually identifies the distribution and its version.
This file contains the message shown before you log in, so it’s a simple way to see the OS name.
uname -a
The Linux kernel version and system architecture (e.g., 64-bit), not the distribution version.
Use this specifically when you need to know the kernel version for a driver or advanced software, not the OS name like “Ubuntu.”
cat /proc/version
Extremely detailed information about the Linux kernel, including how and when it was compiled.
This advanced command is useful for deep troubleshooting or when you need technical details about the kernel itself.
Wrapping Up: When and Why to Check Your Linux OS Version
Understanding your Linux OS version becomes particularly important when deploying web applications, and this is where platforms such as RunCloud shine for developers and website owners.
RunCloud simplifies the complex process of Linux server management, enabling users without deep technical expertise to deploy, manage, and scale web applications effortlessly.
Whether you’re a seasoned developer or a beginner looking to launch your first web application, RunCloud eliminates the traditional barriers associated with Linux server management.
RunCloud provides an intuitive interface that abstracts the technical complexities, allowing you to focus on your application rather than server configuration intricacies.
To find the Linux kernel version, use the command uname -r in the terminal. This command will display the current kernel release number, providing a quick and straightforward way to identify the specific kernel version running on your system.
Which command shows the full OS version?
The command cat /etc/os-release provides comprehensive information about your Linux distribution, including the full OS version and name. Alternatively, lsb_release -a offers detailed distribution-specific information in a user-friendly format.
Is there a graphical way to check the OS version?
Most Linux desktop environments, such as GNOME and KDE, offer system information tools accessible through the settings menu. This menu displays OS version details in a graphical interface. These built-in utilities provide an easy, user-friendly method for checking system information without using terminal commands.
Can I check the OS version remotely?
You can check the OS version remotely using SSH by executing version commands such as uname -a or cat /etc/os-release on the remote Linux system. Ensure you have proper authentication and access permissions before attempting remote system information retrieval.
Are there differences in commands across Linux distributions?
While core commands like uname are consistent across distributions, specific version-checking methods can vary between Linux systems including Ubuntu, CentOS, or Fedora.
What is the significance of the OS version number?
The OS version number indicates the current release, including kernel updates, security patches, and feature improvements. Understanding your version helps manage system compatibility and security and determines eligibility for software and hardware support.
Are you tired of unresponsive programs, resource-hogging applications, or rogue processes slowing your Linux system down? While knowing how to kill a process on Linux from the command line is a fundamental skill for any Linux user, the story doesn’t end with a simple kill command.
What if you can’t find the process ID (PID)?
What’s the difference between a “job” and a “process” – and how do you manage them?
If you’ve ever found yourself searching for answers to these follow-up questions, you’re in the right place. This article will move past the basic ps aux | grep command and discuss more efficient tools like pgrep and pidof to find exactly what you’re looking for.
We will learn how to manage foreground and background jobs – an essential skill for multitasking in the terminal.
We’ll also tackle common points of confusion, such as the difference between jobs and processes, and how to find resource-hungry processes without relying on top.
But before we kill processes, let’s first refresh our knowledge of what processes are!
What is a Process in Linux?
In Linux, a process is an instance of a running program. Each process has its own memory space, system resources, and a unique Process ID (PID) that the kernel assigns.
Processes can be applications, system services, or background tasks essential for the operating system’s functionality.
Killing a process in Linux means terminating or stopping a program forcefully. This action is often necessary when a process becomes unresponsive, consumes too many system resources, or needs to be stopped for maintenance or security reasons.
Linux provides several methods to kill processes, ranging from graceful termination signals to forceful stops.
When you kill a process, you’re essentially sending a signal to that process, instructing it to terminate. The most common signal used for this purpose is SIGTERM (signal 15), which allows the process to perform cleanup operations before exiting.
In cases where a process doesn’t respond to SIGTERM, users can employ stronger signals such as SIGKILL (signal 9), which forces immediate termination without allowing for cleanup.
Before you can stop a process, you need to find it, but multiple processes with similar names can run simultaneously. In Linux, every process running on your system has a unique Process ID (PID).
While many users are already familiar with the ps aux | grep command, there are often faster and more precise tools for the job.
Let’s explore the best ways to locate processes.
Using the ps command in Linux
The ps (process status) command gives you a snapshot of the currently running processes. It has many options, but a few combinations are incredibly useful.
ps aux: This is one of the most common commands for tracking processes, as it shows all processes running for all users. You should use ps aux when you need to identify which user owns a process and how much CPU or memory it’s using.
The ‘aux’ in this case comprises the following three parameters:
a = show processes for all users
u = display the process’s user/owner
x = also shows processes not attached to a terminal
Example: To find the process ID of the RunCloud agent, you could type:
ps aux | grep runcloud
The second column in the output is the PID you need. You’ll notice that the output presented here is quite complex because of the number of columns, and it can be hard to locate what you need.
Let’s look at some of the better alternatives below, which provide us with the Process ID without any other complex information.
ps -ef: This command is similar to ps aux and shows every process on the system in a different format. You should use this command if you also need to find a process’s Parent Process ID (PPID).
-e = select every process
-f = display full-format listing
Example:
ps -ef | grep runcloud
This command returns cleaner output; the process ID is in the second column. However, some users might still find it hard to read. Let’s look at some of the better options below, which produce even simpler output in human-readable format.
ps -C <process_name>: In the previous commands, the ps utility returned a very long list of processes, and we used a different tool (grep) to extract only what we needed and discard everything else. This command provides a much cleaner way to find a process by its name without needing grep.
-C = select by the command name
Example:
ps -C runcloud
This will list only the processes named “runcloud” with a clean output showing the PID and how long this process has been running. This command displays the information in a presentable format that is easy to read. However, it can still be cumbersome to extract the process ID of a particular process in an automated manner.
Using the pgrep Command in Linux
The pgrep (process grep) command is a modern and efficient tool for finding PIDs. It’s faster and less cumbersome than piping ps to grep. If you want to learn more about Linux pipes, we recommend reading our recent blog post on pipes vs xargs.
Basic pgrep: Simply type pgrep followed by the process name.
pgrep runcloud
This command will return only the PIDs of the sshd process, nothing more.
pgrep -l: If you want to see the process name alongside the PID, then you can use the -l (list-name) option
pgrep -l runcloud
pgrep -u <username>: If you need to find all processes run by a specific user, you can use the -u (user) option.
pgrep -l -u root
This will list the PID and name of every process owned by the user “root.”
Using the pidof Command in Linux
All the commands we discussed have returned some extra information. If you just want to see the process ID and nothing else, you can use the pidof command with the process name. This command is simple, fast, and doesn’t require data processing to extract the necessary information. This makes it extremely easy to integrate into bash scripts.
Example:
pidof runcloud
In the above example, if any process named ‘runcloud’ is running, this command will output its PID.
Using the top Command to find the Process ID
The top command provides a real-time, interactive view of your system’s running processes. Just type top to launch it, and you’ll see a constantly updated list of processes, sorted by CPU usage by default. The PID is in the first column, and the command is in the last column. Once you have found what you are looking for, press the ‘q’ key to exit.
The above example shows that the ‘runcloud’ process has the process ID 670.
Managing Background and Foreground Tasks in Linux
When you run a command in your terminal, it typically runs in the foreground. This means it occupies your terminal, and you must wait for it to finish before entering another command. But what if you need to run a time-consuming task and continue using your terminal?
This can be done using the built-in job control functionality. A job is a wrapper around one or more processes, allowing you to manage them within your current terminal session.
Sending a Job to the Background in Linux Shell
You can start a process directly in the background by adding an ampersand (&) at the end of the command.
Example: Let’s say you’re running a script that takes a long time.
./my-long-script.sh &
The script will start, and the terminal will immediately return you to the command prompt. You’ll see output similar to [1] 12345, where [1] is the job ID and 12345 is the PID.
The above example shows that the ls command was launched in the background and assigned the PID 241370.
Viewing and Managing Jobs with jobs
It is easy to forget once you have sent a job to the background. The jobs command lists all jobs associated with your current terminal session.
jobs -l
The -l option also shows the PID, which is very useful.
The above example shows that the current terminal session has two jobs running in the background.
Bringing Jobs to the Foreground and Background
fg (Foreground): If you need to interact with a background job again, you can bring it to the foreground with the fg command followed by its Job ID.
fg %1
This command brings job ID 1 back to the foreground and makes it the active process in your terminal.
bg (Background): If you’ve stopped a foreground process (using Ctrl+Z), you can send it to the background to continue running with bg.
bg %1
How to Kill a Process in Linux
There are several ways to kill a process in Linux, but the first step is always to identify the process you want to kill. Once you identify the process, you can choose the following method based on your needs:
How to Kill a Process Using the kill Command With a PID
Using the kill command: Once you have the PID, you can use the kill command to terminate the process:
kill PID
Replace “PID” with the actual number you found. For instance:
kill 1234
This sends a SIGTERM signal, asking the process to shut down gracefully.
Forceful termination: If the process doesn’t respond to the regular kill command, you can use a stronger signal, SIGKILL (9), which forces immediate termination:
kill -9 PID
Be cautious with SIGKILL as it doesn’t allow the process to clean up, potentially leading to data loss or corruption.
How to Kill Multiple Processes
Sometimes, you need to terminate multiple processes simultaneously. Linux provides efficient ways to do this:
Using kill with multiple PIDs: If you know the PIDs of all processes you want to terminate, you can list them after the kill command:
kill PID1 PID2 PID3
For example:
kill 1234 5678 9101
Using command substitution: A more dynamic approach is to use command substitution with pgrep. This method kills all processes matching a name:
kill $(pgrep process_name)
For instance, to kill all Firefox processes:
kill $(pgrep firefox)
This command first uses pgrep to find all PIDs associated with Firefox, then passes these PIDs to the kill command.
The pkill command simplifies process termination by allowing you to kill processes based on their names rather than PIDs:
Basic usage: To kill a process by name, simply type: pkill process_name This will terminate all processes with “process_name” in their names.
Case-insensitive matching: If you need clarification on the exact capitalization of the process name, use the -i option. For instance: pkill -i firefox will match “Firefox”, “firefox”, or any other case variation.
How to Kill a Process Using the killall Command
The killall command is similar to pkill but requires an exact match of the process name:
Basic usage: To kill all processes with an exact name match: killall process_name
Forceful termination: For stubborn processes use the -9 option (equivalent to SIGKILL): killall -9 process_name
Killing processes by name is often more convenient than using PIDs. There are several ways to do this:
Using pkill: The simplest method is by running the following command: pkill process_name. Don’t forget to replace process_name with the name of the process you are trying to kill.
Partial name matching: Use the -f option to match a substring in the process name for more flexible matching. This is useful for processes with long or complex names. The syntax of this command is as follows:
pkill -f "partial_process_name"
For example, pkill -f "firefox" would match any process with “firefox” anywhere in its command line.
How to Kill a Process in Linux with Bash Script
Creating a bash script for process termination can be helpful for repetitive tasks. Follow the steps below to avoid typing the long and complex commands:
Create the script: Use a text editor to create a file named kill_process.sh. For example, you can use the nano editor to create the file using the following command: nano kill_process.sh.
Add the script content: After creating the file, paste the following content into it:
#!/bin/bash
process_name=$1
pid=$(pgrep -f "$process_name")
if [ -z "$pid" ]; then
    echo "Process not found."
else
    kill $pid
    echo "Process $process_name (PID: $pid) killed."
fi
Once you add the content, you can save it and exit it from the file editor. This script takes a process name as an argument, finds its PID, and terminates it.
Before you can execute the script, you need to make it executable. Change the file permissions by executing the following command to make it executable:
chmod +x kill_process.sh
After changing the file permissions, you can run the script by simply typing its name in the command line, followed by the name of the process you want to kill. For example:
./kill_process.sh firefox
The above command will attempt to kill a process named “firefox” on your computer.
Linux Process Management: At a Glance
This table provides a quick reference for common commands used to manage processes directly from the command line.
Action / Goal
Bash Command Example
When to Use It
Kill a process by its PID
kill 1234
The standard way to terminate a process when you know its exact PID. This sends a graceful shutdown signal (SIGTERM).
Force-kill a process by PID
kill -9 1234
A last resort to forcibly terminate a non-responsive process. This sends a SIGKILL signal that cannot be ignored.
Kill multiple specific processes
kill 1234 5678
When you have a specific list of PIDs, you need to terminate all at once.
Kill a process by partial name
pkill 'node'
To conveniently kill a process that matches a name or pattern, without needing to find the PID first.
Kill all processes with an exact name
killall 'firefox'
To terminate all instances of a specific program (e.g., all open Firefox windows). It’s safer than pkill if other processes have similar names.
Kill all processes owned by a user
pkill -u 'Alex'
To terminate all processes running under a specific user account, often for administrative or security reasons.
Wrapping Up
In this post, we’ve explored various methods for killing processes in Linux from the command line. From using the kill command with a process ID to tools such as pkill and killall, you should now understand how to terminate unwanted or misbehaving processes on your Linux system.
While a good understanding of the Linux command line helps manage your website, it is not a requirement.
With the help of a hosting platform like RunCloud, you can easily manage your Linux server without getting bogged down in the technical details.
RunCloud provides a user-friendly interface that simplifies server management, allowing you to focus on building and growing your online presence.
Whether you’re a seasoned Linux user or just getting started, RunCloud makes it easy to deploy, monitor, and handle mundane tasks like performing regular backups.
Ready to take your website to the next level? Sign up for RunCloud todayand let us handle the Linux management so you can spend more time on what matters most – your business.
FAQs on Killing Linux Processes
How do you kill unnecessary processes in Linux?
To kill unnecessary processes in Linux, you can use commands such as kill, pkill, or killall to terminate the unwanted processes based on their process ID (PID) or name.
What command can you use to kill a process?
The kill -9 PID command, which sends the SIGKILL signal, can be used to forcefully terminate a process that is not responding to a regular termination signal.
How do you find the killed process in Linux?
To find a killed process in Linux, you can use the ps command to list all running processes or the pgrep command to search for processes by name.
How do I gracefully shut down a process in Linux?
To gracefully shut down a process in Linux, you can use the kill command without any signal options, which will send the SIGTERM signal and allow the process to perform cleanup operations before exiting.
How do you end a process by keystroke?
In Linux, you can use the Ctrl+C keyboard shortcut to interrupt and terminate the currently running foreground process.
How do you abort a run in Linux?
To abort a running process in Linux, you can use the Ctrl+C keyboard shortcut. This will send the SIGINT signal and interrupt the process’s execution.
Which key is used to cancel a process?
The Ctrl+C keyboard shortcut is commonly used to cancel or interrupt the currently running process in Linux.
How do I kill a high CPU process in Linux?
In Linux, you can use the top command to identify a process that consumes a large amount of CPU resources and then use the kill command to terminate it.
What’s the difference between a “job” and a “process” in Linux
A process is any program that is currently running on the operating system. The Linux kernel manages all processes. A job is a shell-level concept that manages one or more processes within a single terminal session. Think of it as a label for a task you’re running. You can move a job to the background or foreground, but the kernel still manages it as a process.
How can I see processes in a tree-like view?
It’s useful to see which processes were started by other processes (parent-child relationships). The pstree command is perfect for this, as it gives you a visual map of everything running on your system, which can be very helpful for troubleshooting.

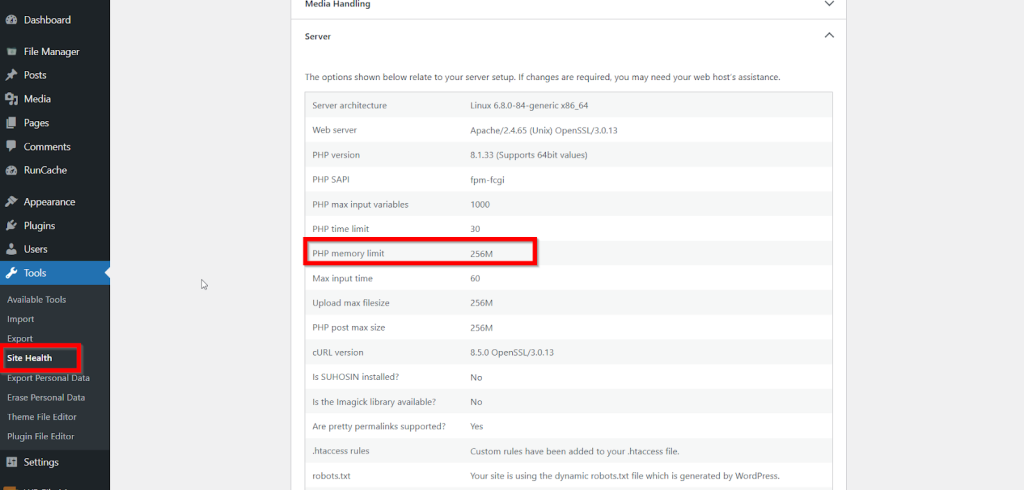
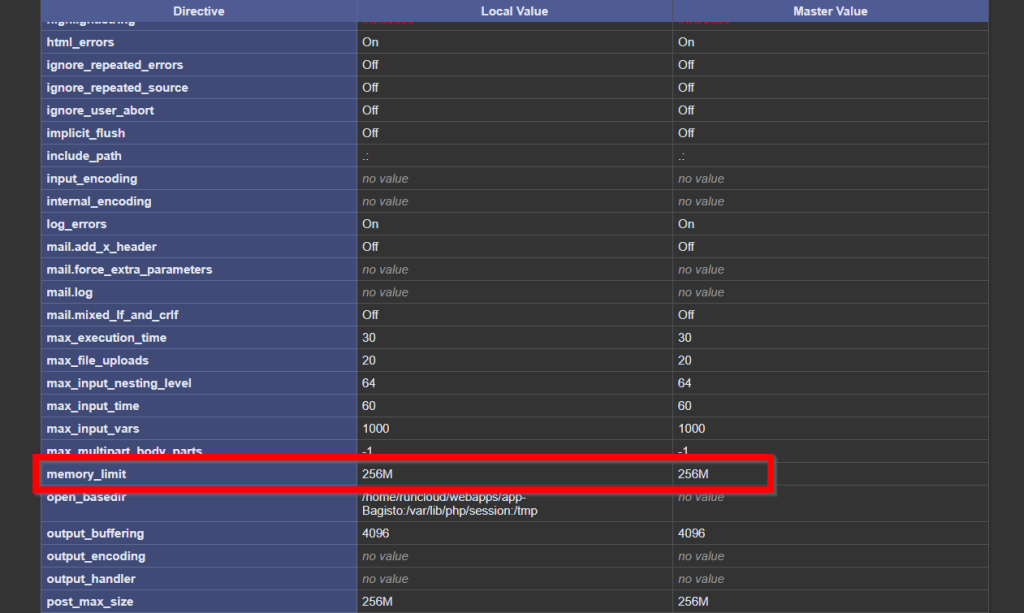
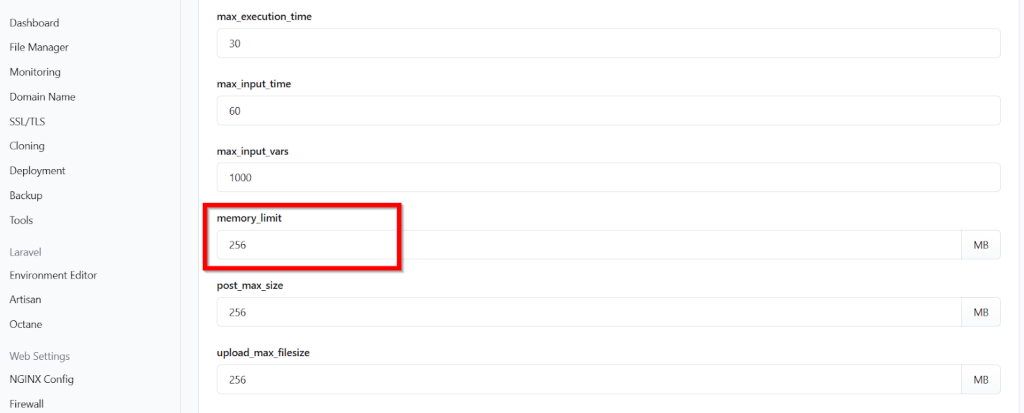
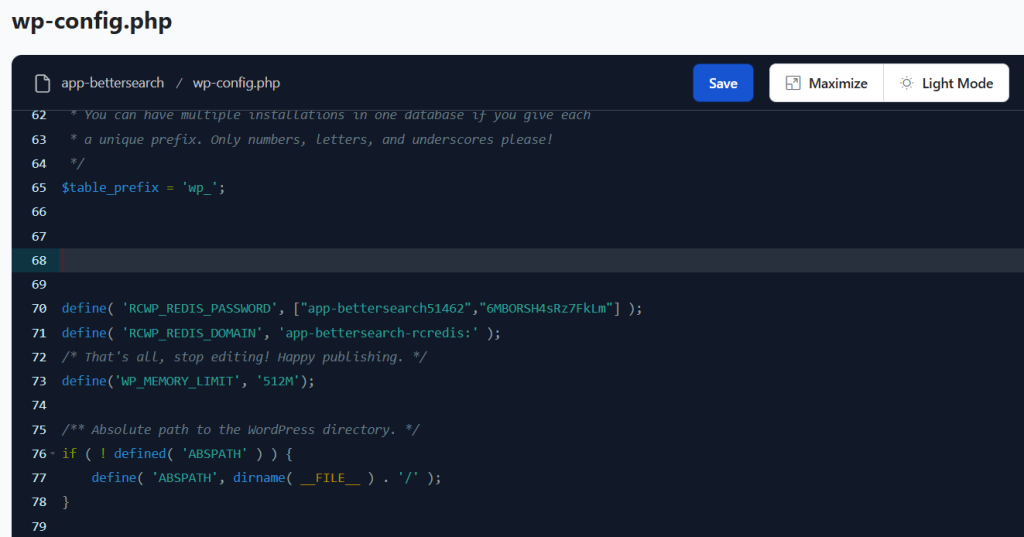
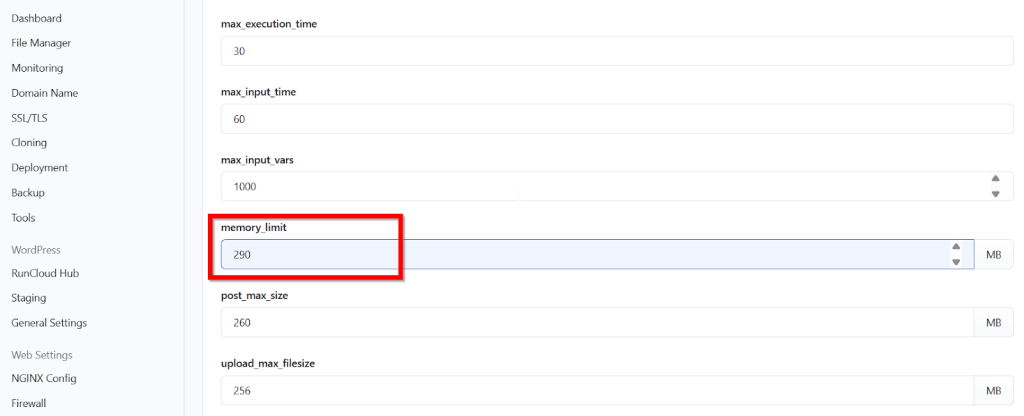
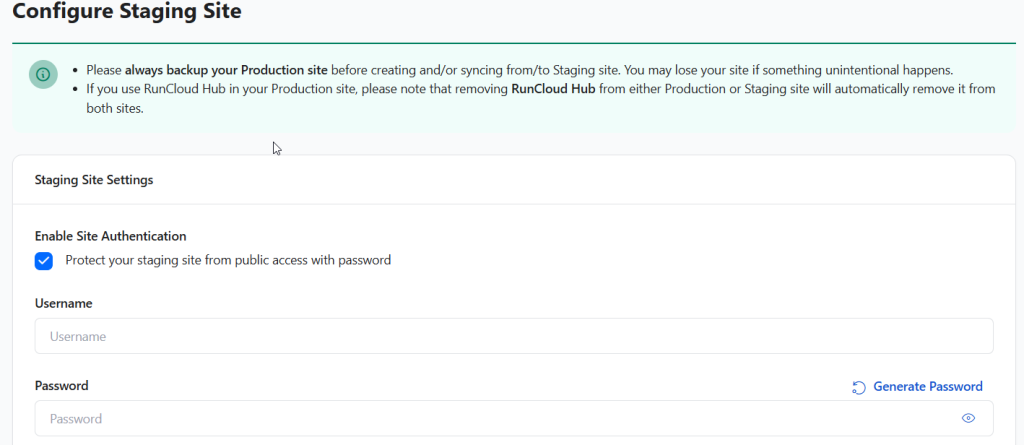
![How to Fix Cloudflare Captcha Failure in 2026 [SOLVED]](https://rcwp.scalemath.dev/wp-content/uploads/2024/04/Cloudflare-Turnstile-header.png)