DNS cache can speed up internet access and improve browsing experiences by storing recent domain name lookups and their corresponding IP addresses.
Clearing this cache periodically can enhance your browsing speed and resolve connectivity issues.
Modern operating systems generally cache DNS lookup results and IP addresses to process requests more quickly. Whenever you write a URL in your browser, it sends a request to the DNS servers to “locate” the site. But instead of sending that request every single time, the browser often caches the information. This way, the next time you type in that address, the browser looks it up through the DNS cache, allowing it to return the results much faster.
However, cached DNS records can become outdated or corrupted over time, potentially leading to browsing issues, including connection errors or the display of outdated website versions. Flushing your DNS cache occasionally is a good practice to ensure you’re accessing up-to-date versions of websites and protecting yourself from security risks like DNS spoofing.
In this article we will explain how to flush the DNS cache on different operating systems, including Windows, macOS, and Linux, as well as detailing the several reasons why it is so important to flush the DNS regularly.
How to Flush DNS Cache on Different Operating Systems
How to Flush DNS Cache on Windows 10 & 11
If you’re using Windows 10 or 11, here are the steps you can follow to flush the DNS cache:
Click on Start, then search for Command Prompt. Right-click it and select “Run as Administrator.”
Once the Command Prompt is open, type ipconfig /flushdns and press Enter.
A message will appear confirming that the DNS Resolver Cache was flushed.
In addition to flushing the DNS, performing an IP release and renewal can help resolve network connection problems. Here’s how to do it:
How to Perform an IP Release, Renew, and DNS Flush on Windows
Open Command Prompt with administrative privileges.
Type ipconfig /release and press Enter to release the current IP address.
Next, type ipconfig /renew to obtain a new IP address.
Finally, type ipconfig /flushdns to clear the DNS cache.
How to Flush DNS Cache on macOS
Flushing the DNS cache on macOS involves using the Terminal app. Follow these steps:
Press cmd + space to open Spotlight Search.
Type Terminal and open the application (you can also find it in the Other section in the Launchpad).
Type the following command: sudo dscacheutil -flushcache; sudo killall -HUP mDNSResponder.
Enter your administrator password when prompted. Once you do, you will receive confirmation that the DNS cache has been flushed.
Note: The command can vary depending on your macOS version. Here’s how to check your macOS version:
Click on the Apple menu in the upper-left corner of your screen.
Select About This Mac.
Depending on your macOS version, use the appropriate command:
Click the Clear Host Cache button to flush the browser’s DNS cache.
This action will ensure that Chrome fetches fresh DNS data from the websites you visit.
Why Should You Flush Your DNS Cache?
There are several reasons why flushing the DNS cache periodically is important:
Resolve DNS Errors
If you’re encountering issues such as DNS_PROBE_FINISHED_NXDOMAIN or CONNECTION_TIMED_OUT, flushing the DNS cache may help resolve the problem. These errors often arise due to outdated or incorrect DNS information.
Speed Up DNS Propagation
After making changes to your DNS records, such as transferring a domain to a new hosting provider, DNS propagation can take time to fully update across the internet. Flushing your DNS cache ensures that your device picks up these changes more quickly, allowing you to see the updates sooner.
Prevent DNS Spoofing
DNS spoofing (or poisoning) occurs when an attacker manipulates DNS cache entries to redirect users to fraudulent or malicious websites. Flushing your DNS cache helps mitigate this risk by clearing any potentially corrupted entries.
Avoiding 404 Errors
A 404 error might indicate that your system is pulling up an outdated version of a website. Flushing the DNS cache ensures that your browser accesses the most current version of the site, which can help you avoid such errors.
Remove Old DNS Data
When you change DNS providers, such as switching to Google DNS or OpenDNS, it’s important to flush your DNS cache. This ensures that your system doesn’t use outdated data from the previous provider, helping to prevent connectivity issues.
After Action Report – Flush Your DNS Cache Periodically
Flushing your DNS cache is a simple yet effective way to resolve connectivity issues, speed up website access, and prevent security risks like DNS spoofing. Whether you’re using Windows, macOS, Linux, or even just browsing on Google Chrome, clearing your DNS cache periodically is a good habit to ensure optimal performance.
Do you regularly flush your DNS cache? Let us know if you have any tips or questions! Join the conversation below by leaving a comment! 💬
Wrapping Up
RunCloud is a powerful and easy-to-use platform that helps you manage your websites on any cloud server. With RunCloud, you don’t need to be a Linux expert to set up, secure, and optimize your web applications. You can do everything from a simple and intuitive dashboard, saving you time and hassle.
RunCloud supports various web servers, PHP versions, databases, and frameworks. You can also monitor your server performance, back up your data, and automate your tasks with RunCloud. Whether you are a developer, a freelancer, or a business owner, RunCloud can help you run your websites faster and smoother.
What are you waiting for? Join RunCloud today and enjoy the best web hosting solution for your websites. It’s free for 7 days, no strings attached!
Frequently Asked Questions (FAQ)
Is clearing the DNS cache safe?
Clearing the DNS cache is safe and does not affect your saved passwords, browser history, or other personal data. It removes outdated DNS information, ensuring your computer can fetch up-to-date DNS records.
How often should I flush my DNS cache?
There’s no hard rule on how often you should flush the DNS cache, but it’s a good idea to do it when you experience connection issues or DNS errors or after making changes to your network configuration (such as switching DNS providers).
Does flushing the DNS cache affect my internet speed?
Flushing the DNS cache may temporarily slow down website access on the first visit, as the DNS lookup will need to be performed again. However, once the cache is refreshed, your browser will store the new DNS records, which can speed up access to frequently visited websites.
How do I know if my DNS cache was successfully flushed?
After running the appropriate command to flush the DNS cache (such as ipconfig /flushdns on Windows), your system usually displays a message confirming that the DNS Resolver Cache was successfully flushed.
Will clearing the DNS cache fix DNS errors?
In many cases, yes. If you encounter errors like DNS_PROBE_FINISHED_NXDOMAIN or CONNECTION_TIMED_OUT, flushing the DNS cache can help resolve these problems by removing outdated or corrupted DNS entries.
Deleting a large directory with thousands of files in Linux can be slow or even fail with basic commands. Whether you’re cleaning up old logs, project files, or datasets, knowing the right commands makes the process faster and more reliable.
In this guide, we’ll show you how to delete directories with thousands of files in Linux using several methods – from rm and find to faster alternatives like rsync. You’ll learn which approach is best for different scenarios, how to avoid common errors, and how to free up disk space safely.
Why Would You Need to Delete Thousands of Files at Once in Linux?
If you use a computer professionally, you may have stored many files on your hard drive over time. These files can include documents, photos, videos, music, and more. Some of these files may be important and useful, while others may be outdated and unnecessary.
Here are some possible scenarios:
You are a web developer and you have a project folder that contains thousands of files, such as HTML, CSS, JavaScript, images, etc. You want to delete the project folder because you no longer need it or you want to start from scratch.
You are a data analyst and you have a directory that contains thousands of CSV files, each containing data that you have processed or analyzed. You want to delete the directory because you have finished your analysis, and you want to free up some disk space.
You are a system administrator and you have a directory that contains thousands of log files, each recording system events or errors. You want to delete the directory because you have resolved the issues. If you want to clear the logs periodically then you should also read our article on log-rotation.
You are a photographer and you have a directory that contains thousands of RAW images, each capturing moments that you have taken with your camera. You want to delete the directory because you have edited or backed up the images, or you want to make room for new photos.
Having too many files can affect your computer’s performance and disk space. Therefore, it is advisable to periodically delete the files that you no longer need or want.
How Do You Delete a Directory in Linux?
There are multiple ways to delete a file or folder in Linux. Let’s take a look at some of these ways.
However, be careful when using these commands, as they are irreversible and may delete important files if used incorrectly.
Always double-check the path and the options before executing them.
How to Delete a Large Directory in Linux with rm
The rm command is one of the most common and basic commands for deleting files and directories in Linux. To delete a directory and all its contents, you can use the -r option, which stands for recursive.
For example, if you want to delete a directory named project, you can use the command:
rm -r project
However, this command may take a long time and generate a lot of output if there are too many files in the directory. To speed up the process and suppress the output, you can use the -f option, which stands for force.
This option will delete the files and directories without prompting for confirmation or showing any messages.
rm -rf project
How to Delete Files and Directories in Linux with find
Alternatively, you can use the find command, which is a powerful and flexible command for finding and manipulating files and directories in Linux.
To delete a directory and all its contents, you can use the -delete option, which will find and delete all the files and directories under a given path. For example:
find project -delete
The find command also has many other options that allow you to selectively delete files based on different criteria, such as pattern, date, time, or size.
How to Use rsync to Delete a Directory in Linux
The rsync command is generally used to transfer and synchronize files between local and remote devices in an efficient way. It uses a special algorithm that only sends the differences between the source and destination files, which reduces the network usage and speeds up the transfers.
This can be used for various scenarios, such as backup, mirroring, updating, copying, or even deleting files and directories. To delete a folder using rsync, you can use the following simple command:
rsync -a --delete source/ destination/
This command will sync the contents of the source folder to the destination folder, and delete any files or subfolders in the destination that do not exist in the source. The options used in this command are:
-a archive mode, which preserves almost everything (such as symbolic links, file permissions, user & group ownership, and timestamps).
--delete delete mode, which deletes extraneous files from the destination location.
Note that you need to add a trailing slash (/) after the source and destination folder names, otherwise rsync will treat them as file names and create a subfolder in the destination.
For example, if you use rsync -a --delete source destination, rsync will create a subfolder named source in the destination and sync the contents of the source folder to it.
How to Securely Delete Files in Linux with shred
Shred is used to permanently erase or destroy files so that no one can recover them. It is better than deleting normally, because a normal deletion only removes the reference to the file in the file system, but the actual data remains on the disk until it is overwritten by other data.
A deleted file can be recovered using special software or hardware tools that can scan the disk for traces of data. Shred prevents this by overwriting the file multiple times with random data, making it impossible to reconstruct the original data.
Shred also adds a final overwrite with zeros to hide the fact that the file was shredded. Therefore, shred is more secure and reliable than deleting normally, especially for sensitive or confidential files.
To shred a document in Linux, you can use the following simple command:
shred -uvfz document
This command will overwrite the data in the document file several times, making it harder for third party software and hardware probing to recover the data. The options used in this command are:
-u flag will remove the file or directory after overwriting it with random data.
-v verbose mode, which shows information on shredded files.
-f force mode, which changes permissions to allow writing if necessary.
-z zero mode, which adds a final overwrite with zeros to hide shredding.
The shred command can only be used to delete files and not directories. However, it is possible to use it in conjunction with other commands to create automated scripts that shred entire directories.
For example, you can use the ‘find’ command with the -exec option to execute the shred command on each file found by ‘find’. Here is an example of how to shred and delete all the files in a directory named ‘secret’:
find secret -type f -exec shred -u {} \;
This command will find all the files in the secret directory and execute the shred command with the -u option on each of them.
However, be aware that the shred command relies on the assumption that the underlying file system overwrites the same physical block when writing new data. Many newer file systems do not follow this assumption, and may use techniques such as journaling, copy-on-write, or wear leveling, which may prevent the shred command from effectively destroying the data. Therefore, shred may not work as expected on some file systems, such as ext3, ext4, btrfs, xfs, etc.
How to Selectively Delete Files in Linux
There are also a number of different ways in which it is possible to selectively delete files in Linux, depending on the criteria that you want to use. Here are some examples:
How to Delete Files by Pattern in Linux
You can use the rm command with a wildcard character (*), which matches any number of characters. This way, you can delete files that match a certain pattern, such as files with a specific extension, name, or prefix.
For example, if you want to delete all the files that have the .txt extension in the current directory, you can use the command:
rm *.txt
If you want to delete all the files that start with the prefix test in the current directory, you can use the command:
rm test*
How to Delete Files by Date or Time in Linux
You can use the find command with various options that locate files based on their modification (-mtime or -mmin), change (-ctime or -cmin), or access (-atime or -amin) time.
These options take a number as an argument, which can be preceded by either a plus sign (+) or a minus sign (-). A plus sign means more than the given number, while a minus sign means less than the given number.
The number can be either days (-mtime or -ctime) or minutes (-mmin, -cmin, or -amin).
For example, if you want to delete all the files that were modified more than 10 days ago in the current directory, you can use the command:
find . -mtime +10 -delete
If you want to delete all the files that were accessed less than 30 minutes ago in the current directory, you can use the command:
find . -amin -30 -delete
How to Delete Files by Size in Linux
You can use the find command with the -size option, which finds files based on their size.
This option takes a number as an argument, which can be followed by a suffix that indicates the unit of measurement. The suffix can be either bytes (b), kilobytes (k), megabytes (M), gigabytes (G), or blocks (c).
A plus sign (+) or a minus sign (-) before the number means larger than or smaller than respectively.
For example, if you want to delete all the files that are larger than 100 MB in the current directory, you can use the command:
find . -size +100M -delete
If you want to delete all the files that are smaller than 1 KB in the current directory, you can use the command:
find . -size -1k -delete
Key Takeaways on Deleting Large Directories in Linux
Deleting files in Linux may seem like a simple action, but there are lots of hidden nuances and challenges that you may encounter. In this article, we have explained how to delete directories with a large number of files in Linux using a variety of different commands and options.
We have also shown you how to selectively delete files based on different criteria, such as pattern, date, time, or size. However, you need to be careful when using these commands, as they are irreversible and may delete important files if used incorrectly. Always double-check the path and the options before executing them.
If you are struggling with the Linux command line, then you should take a look at RunCloud. RunCloud allows you to manage your sites effectively without needing to become a Linux system administrator. You can easily create, deploy, and update your websites with just a few clicks.
RunCloud supports various web servers, such as Apache, Nginx, and LiteSpeed. You can also switch between different PHP versions with the click of a button. RunCloud works with any cloud provider, such as AWS, Google Cloud, DigitalOcean, and more. Sign up to RunCloud today and forget all the hassle!
FAQs on Deleting Large Directories and Files in Linux
What Does the “Argument List Too Long” Error Mean in Linux?
This error occurs when a command like rm * expands to more filenames than the system can handle at once. You must use a more robust method, like the find or rsync commands, which process files individually or in batches.
Why Is rm -r Slow in Linux and How Can I See Progress?
rm can be slow because it has to process the metadata for every single file before deleting it. To see progress, you can add the verbose flag (rm -rv), which will print each file name as it’s deleted, though this can slow the process further.
What Is the Difference Between rm -r and rm -rf in Linux?
The -r flag means “recursive” to delete a directory and everything inside it. The -f flag means “force,” which suppresses confirmation prompts and ignores non-existent files, making it much more dangerous if you make a typo.
Can I Do a Dry Run Before Deleting Files in Linux?
Yes, before running a delete command, you can first list the files you intend to target by using find /path/to/directory -type f -print to be sure you’re in the right place.
What Is the Fastest Way to Delete a Large Directory in Linux?
The rsync method is often the fastest as it is highly optimized for this task. It works by syncing an empty directory over your target directory, which efficiently removes the files with minimal overhead.
How Do I Fix “Permission Denied” Errors When Deleting Files in Linux?
This means your user doesn’t have the rights to delete those files. You may need to run the command with sudo at the beginning, but be extremely careful as this grants root privileges and a mistake can damage your system.
Can I Recover Files After Deleting Them in Linux?
Unfortunately, no; command-line deletion in Linux is permanent and does not use a Trash or Recycle Bin. This is why you must always double-check your command and ensure you have reliable backups.
What Happens If I Cancel a Deletion Mid-Process in Linux?
The command will stop, but the files that were already deleted are gone forever. You will be left with a partially deleted directory that you can attempt to delete again later.
If you’ve ever searched for information on how to SSH into a Docker container, you’ve probably found conflicting advice. The truth is, you don’t usually need to run an SSH server inside a container at all. Instead, Docker provides built-in commands that give you secure, direct access to your containers.
In this guide, we’ll show you the correct ways to get a shell inside a running container, explain the difference between docker exec and docker attach, and demonstrate how to safely detach without stopping your application. We’ll also cover when copying files makes sense, and why adding a full SSH server inside a container should be avoided except in rare cases.
Let’s get started!
Why should you use CLI over Docker Desktop?
While graphical user interfaces for Docker exist, the CLI is the primary and most powerful way to interact with the Docker daemon and containers. There are several scenarios where you’ll need to access your Docker server via the CLI:
Automation and Scripting: The most significant advantage is the ability to script any Docker operation. The CLI allows you to build a CI/CD pipeline, automate deployments, create complex multi-container setups with Docker Compose, and much more.
Server Environments: Most servers run headless (without a graphical interface). When you SSH into a remote production server, the CLI is the only way to manage Docker containers.
Precision and Control: The CLI gives you fine-grained control over every possible Docker option and flag. This level of precision is often abstracted or unavailable in GUIs.
Resource Efficiency: The CLI is lightweight. GUIs consume additional system resources that are better allocated to your applications, which is critical on a production server.
Universality: The Docker CLI is consistent across all platforms (Linux, macOS, and Windows). This universal experience makes it a reliable tool for developers and administrators, regardless of their local operating system.
When debugging an issue in a Docker container, shell access is extremely helpful because it lets you monitor and inspect individual services.
The phrase “SSH into a container” is common, but technically a misnomer. The most common and recommended methods do not involve running an SSH server inside the container at all. Let’s explore the primary techniques for gaining access and their common use cases.
Using the ‘docker exec’ command (Recommended)
The docker exec command is the most direct and recommended method for getting an interactive shell in a running container. This command starts a new process inside the container, letting you run commands without attaching to its primary process. Use the following command to get CLI access to your Docker container:
docker exec -it <container_name_or_id> <command>
-i (–interactive): Keeps STDIN open, allowing you to type commands.
-t (–tty): Allocates a pseudo-TTY, which connects your terminal to the container’s shell, making it interactive.
<command>: The command to run. To get a shell, this is typically /bin/bash or /bin/sh.
In the above example, we executed the date command inside a container with the ID ba06f65c55e7. It returned the current date and time of the Docker container (which was different from the host system).
When to use the ‘docker exec’ Command
Debugging a Live Application: If your web server is running in a container and throwing errors, you can use docker exec to get a shell, check log files that aren’t being piped to stdout, inspect the environment variables (env), or use tools like curl from inside the container to test network connectivity to other services.
docker exec -it my-web-app /bin/bash
Running Database CLI Tools: You need to inspect a database running inside a container. To do so, you can exec into the container and use a command-line client like psql or mysql.
Installing Debugging Tools: Your container uses a minimal base image and doesn’t include tools like ping or vim. You can use exec to open a shell and install them temporarily for the current session.
# Get a shell and then install curl
docker exec -it my-app /bin/sh
# Inside the container shell:
# apt-get update && apt-get install -y curl
Note: Changes made via docker exec (like installing a package) are ephemeral. If the container restarts, they will be gone. To make permanent changes, you should modify your Dockerfile and rebuild the image.
Using the ‘docker attach’ Command
The docker attach command connects your terminal’s input and output streams directly to the container’s main process (PID 1). This is fundamentally different from docker exec, which starts a new process. Execute the following command to attach to a Docker container:
docker attach <container_name_or_id>
When to use the ‘docker attach’ Command:
Interactive Applications: If you use a container that runs an interactive process by default (like a Python REPL or a shell itself), you can use the docker attach command to connect to it.
# Start a basic container with an interactive shell process
docker run -it --name my-interactive-shell ubuntu /bin/bash
# If you detach, you can re-attach with:
docker attach my-interactive-shell
Viewing Real-time Logs: If a container’s main process is an application that logs directly to stdout, docker attach will show you that live output, similar to the docker logs -f command.
How to Detach from a Docker Container Safely
When you use the docker attach command, you should understand that your terminal session becomes directly wired to the container’s primary process (PID 1). This means that keyboard signals like Ctrl-C are passed directly through to the application. If the main process within the container is a shell or an application that isn’t specifically programmed to handle this interrupt signal, it will interpret Ctrl-C as a command to terminate.
And since a Docker container’s lifecycle is tied directly to its main process, this action will cause the process to shut down, and as a result, the container itself will stop completely. This often surprises new users, who expect to just exit the logs, but instead end up shutting down the entire application.
To safely disconnect from an attached container without terminating it, you must use Docker’s specific escape sequence: holding the Ctrl key and pressing P, followed immediately by Q. This key combination is intercepted by the Docker client on your local machine and is not sent to the process running inside the container.
The docker cp command copies files to and from a Docker container. Before using it, though, it’s worth understanding that Docker Volumes are usually a better way to handle persistent data.
When Not to use the docker cp Command
A Docker Volume is a standard mechanism for decoupling the data your application generates from the container’s lifecycle. A volume is like a USB drive that can be attached to one or more containers. The biggest advantage of using volumes is that the data within a volume persists even if the container is stopped, deleted, or rebuilt. This makes it ideal for databases, application logs, user-uploaded content, and critical configuration files.
If you need a consistent and reliable way to share files between your host machine and a container, or ensure that your data survives container restarts, you should always use volumes by mounting them when you first run the container (e.g., using the -v or --mount flag with docker run).
When to use the docker cp Command
While volumes are the correct solution for persistent application data, there are specific scenarios where you might need to perform a one-time, manual file transfer. This is where the docker cp command becomes an invaluable utility for ad-hoc operations.
The docker cp command is useful in several situations, such as:
Quickly pulling a specific log file from a running container for analysis
Pushing a hotfix configuration file without rebuilding the image
Extracting a build artifact that was generated inside a temporary container.
While technically possible, running an SSH server inside your container is considered an anti-pattern. Docker containers are designed to be lightweight, disposable, and focused on a single process. Adding an SSH server adds unnecessary bulk and complexity.
When Might You Actually Need It?
Legacy Systems: You’re containerizing a legacy application, and existing management scripts or tools rely exclusively on SSH to function.
Providing Sandboxed User Environments: You are using a container to give a user a sandboxed environment on a shared server, and they need to connect with a standard SSH client.
If you must do this, you would need to:
Modify your Dockerfile to install an SSH server (e.g., openssh-server).
Configure the SSH server, add user accounts, and manage SSH keys.
EXPOSE port 22 in the Dockerfile.
Run the container, mapping a host port to the container’s port 22 (e.g., docker run -p 2222:22 …).
Final Thoughts
You now know the right way to SSH into a Docker container – by using Docker’s own tools like docker exec for most cases, and docker attach when you need to connect to a container’s main process. Running a full SSH server inside a container isn’t just unnecessary – it adds complexity and risks that Docker was designed to avoid.
Mastering these commands gives you confidence in managing containers directly. But if you want to go further – scaling deployments, automating workflows, and simplifying day-to-day server management – RunCloud gives you the best of both worlds: a clean interface with the full power of the CLI underneath.
Sign up for RunCloud today and make managing your servers and Docker environments faster, easier, and more reliable.
Choosing the right FTP client can make a big difference to your workflow. Whether you’re deploying a website, updating server files, or managing backups, the right tool saves time, keeps your data secure, and works seamlessly on your operating system.
In this guide, we’ve reviewed the best FTP clients for Windows and Mac – from popular free tools to advanced, professional-grade options. You’ll see what each one offers, who it’s best for, and how it can fit into your workflow, so you can pick the one that meets your exact needs.
Let’s get started!
What is an FTP Client?
An FTP (File Transfer Protocol) client is a software application that enables you to transfer files between your local computer and a remote web server. In the RunCloud context, an FTP client allows you to manage files on your RunCloud-powered servers securely and efficiently. Popular FTP clients include FileZilla, Cyberduck, and WinSCP.
When working with RunCloud servers, SFTP (Secure File Transfer Protocol) is the recommended protocol. It provides encrypted file transfers, ensuring your data remains secure during transmission.
Benefits of Using FTP Client
Easy File Management
Managing files across servers becomes easier with FTP clients, as most modern clients offer intuitive drag-and-drop interfaces for seamless uploads and downloads. These tools provide comprehensive file management capabilities, allowing you to handle multiple files and folders simultaneously while maintaining a familiar desktop-like interface.
The visual organization system makes it simple to track, move, and organize files across different server locations, significantly reducing the time spent on file management tasks.
Enhanced Security
Modern FTP clients prioritize security through robust SFTP encryption, ensuring all file transfers remain protected from potential threats. Implementing SSH key authentication and password protection provides multiple layers of security, making unauthorized access virtually impossible.
Efficient Workflow
FTP clients streamline your development workflow by offering quick file editing capabilities and real-time synchronization between local and remote servers. With features like automatic retry for failed transfers and smart bookmarking systems, these tools ensure uninterrupted work progress even during connection issues.
Developer-Friendly Features
Developers benefit from specialized features such as integrated file permission management and built-in text editors that allow quick code modifications without switching applications. These tools often include features like syntax highlighting and code comparison, making them invaluable for development work.
Cross-Platform Compatibility
Modern FTP clients offer seamless operation across Windows, macOS, and Linux, ensuring consistent functionality regardless of your operating system. These applications maintain a uniform interface and feature set across platforms, reducing the learning curve when switching between different systems.
The standardized protocols and universal compatibility make file transfers between different platforms smooth and reliable.
When managing your RunCloud server, choosing the right FTP client is crucial for efficient file management and secure transfers.
Here’s a comprehensive review of the top 5 FTP clients that excel in both Windows and Mac environments.
Note: While it is possible to deploy websites using an FTP client, modern developers using RunCloud might find the platform’s built-in file management and Git deployment features more efficient for their workflow. Consider exploring these alternatives for a more streamlined development process.
FileZilla is the go-to FTP client for developers worldwide as it offers a perfect balance of power and simplicity that makes it suitable for both beginners and professionals.
FileZilla’s intuitive interface contains a dual-pane view that displays local and remote directories side by side, making file transfers as simple as drag-and-drop operations. It includes support for all major protocols (FTP, FTPS, and SFTP), powerful queue management, and the ability to handle files larger than 4GB, making it a versatile tool for any web development project.
What truly sets FileZilla apart is its extensive quality-of-life features that streamline the development workflow. The Site Manager allows you to store connection details for multiple servers, complete with encryption preferences and login credentials. At the same time, the synchronized directory browsing feature ensures you’re always working with the correct files.
Advanced features such as configurable transfer speed limits, filename filters, and remote file editing capabilities also make it a comprehensive solution for server management. The application’s remote file search functionality and directory comparison tools are particularly valuable when managing large projects, helping developers quickly locate files and identify discrepancies between local and remote versions.
Whether you’re using Windows, macOS, or Linux, FileZilla provides a consistent experience with support for multiple languages and excellent handling of different character encodings. The application’s ability to resume interrupted transfers, coupled with its support for various proxy configurations and network types, makes it especially valuable in environments with unstable connections or strict network policies.
Ideal for: Both beginners and advanced users who need a reliable, feature-rich FTP client.
Cyberduck is a powerful file transfer solution that offers an exceptional range of protocol support, including FTP, SFTP, WebDAV, and various cloud storage services – all in a single, elegant interface.
What makes it particularly valuable for website deployment is its seamless integration with both Mac and Windows operating systems, featuring native system capabilities such as Keychain support for secure credential management and Quick Look preview functionality.
It contains an intuitive bookmark system and supports creating connection profiles for popular hosting providers, which makes it incredibly easy to manage multiple website deployments across different servers.
One of Cyberduck’s most compelling features for web developers is its robust file editing capabilities and external editor integration. You can edit files directly on the server using your preferred code editor, eliminating the need for constant downloading and re-uploading of files during development.
The application’s synchronization feature is particularly useful for website deployments. It allows you to compare and sync local and remote directories with a preview of changes before execution. This helps prevent accidental overwrites and ensures your production environment stays consistent with your development files.
Cyberduck also offers advanced features like bandwidth throttling, file filtering, and support for large file transfers, making it ideal for managing website assets of any size.
Additionally, its integration with content delivery networks (CDNs) such as Amazon CloudFront allows developers to optimize their website’s global performance directly from the interface.
Whether you’re managing a small personal website or handling enterprise-level deployments, Cyberduck’s combination of a user-friendly interface and professional-grade features makes it an excellent choice for modern web development workflows.
Ideal for: Mac users who prefer a native-feeling application with cloud storage integration.
WinSCP is one of the most reliable and comprehensive file transfer clients specifically designed for Windows users, with an impressive track record of over 226 million downloads. What makes WinSCP particularly powerful is its dual-interface capability, which offers both a graphical user interface and a command-line interface, making it adaptable to different user preferences.
What truly sets WinSCP apart is its extensive automation and scripting capabilities, which are invaluable for developers handling repetitive deployment tasks. The integrated text editor allows for quick file modifications directly within the application, while its scripting support enables task automation through both the command-line interface and .NET assembly integration.
It contains built-in synchronization tools that make it easy to keep local and remote directories in sync. It also has strong security features, including support for various authentication methods and encryption protocols. Additionally, WinSCP’s portable version offers the flexibility to carry your configured environment on a USB drive, making it an excellent choice for developers who work across different Windows machines.
Ideal for: Windows power users who need advanced automation and scripting capabilities.
Transmit is a premium Mac-exclusive FTP client known for its sleek interface and powerful features. It has earned a reputation for its user-friendly interface and robust feature set. It simplifies the process of transferring files between your computer and various servers, including FTP, SFTP, and cloud storage services such as Amazon S3, Dropbox, and Google Drive.
Transmit’s intuitive dual-pane view provides a clear visual representation of your files, making them easy to navigate and manage. Additionally, its file sync feature allows you to synchronize files between different locations, including remote servers, local folders, or even between two local folders, ensuring that your files are always up-to-date.
Transmit offers numerous enhancements that streamline your workflow. You can easily organize and access your frequently used servers through its server management system, eliminating the need to manually enter server addresses each time.
Additionally, Transmit supports advanced features such as batch renaming, built-in key management, and the ability to view file information directly within the application, further simplifying your file management experience.
Ideal for: Professional Mac users willing to invest in a premium tool for the best possible experience.
Commander One offers a streamlined solution for managing your files across different locations. Its dual-pane file manager allows you to manage files on cloud services and remote servers as if they were on your local device.
Its user-friendly, dual-pane interface lets you see your local and remote files in a single window, making dragging and dropping files between your computer and server very easy.
The integrated Connection Manager supports various protocols, including FTP, SFTP, and FTPS, meaning you can connect to virtually any server. It also allows for direct file editing on the server, so you can make quick changes without downloading, editing, and re-uploading your files. Additionally, it has features such as file encryption and secure password storage, using the macOS Keychain to keep your data secure.
What makes Commander One a top choice is its ability to centralize your file management. In addition to connecting to FTP servers, you can integrate and manage multiple cloud storage accounts, including Amazon S3, Dropbox, and Google Drive. This means you can easily transfer files between different cloud services, or from a cloud service to your server.
Ideal for: Mac-exclusive users who need a single, unified application to efficiently transfer files between diverse local and cloud storage services like Amazon S3, FTP, and Google Drive.
Classic FTP is a no-nonsense approach to file transfer which prioritizes simplicity and functionality over bells and whistles. It’s designed for users who want a straightforward way to upload and download files to their websites or servers without being bogged down by complex features.
The interface is clean and intuitive, making it easy to navigate and manage your files. Classic FTP’s strength lies in its reliability. It offers a stable and consistent way to transfer files, whether you’re a seasoned web developer or a casual user.
Classic FTP focuses on the essentials: uploading, downloading, and synchronizing files. It supports secure FTP (SSL) for added protection and works seamlessly with all popular FTP servers. While it might not have the extensive range of features offered by some other FTP clients, Classic FTP delivers on its promise of providing a reliable and simple way to manage your files. It’s a perfect choice for those who prefer a straightforward and efficient file transfer experience.
Ideal for: Windows users who prefer a lightweight, straightforward FTP client.
Wush provides a modern approach to file transfer. It replaces traditional methods in favor of a secure, peer-to-peer connection powered by WireGuard VPN. Unlike conventional FTP tools that rely on centralized servers for authentication and file transfer, Wush uses a decentralized system where each user establishes a direct, encrypted connection with the other. This eliminates the need for trusting third-party servers, ensuring the privacy and integrity of your data.
Wush takes advantage of the speed and efficiency of WireGuard, a cutting-edge VPN protocol known for its reliability and fast performance. It also uses Tailscale’s DERP (Dynamically Encrypted Relay Protocol) to establish secure connections, even through restrictive networks. This combination of technologies allows Wush to deliver fast and reliable file transfers without compromising on security.
Additionally, Wush overcomes the limitations of traditional file transfer tools by offering a flexible platform. It’s not just about sending files, but also about creating secure connections for other purposes like remote access and execution. With Wush, you can establish a secure shell connection to a remote machine, facilitating remote work or managing your server infrastructure. This versatility, combined with its secure and efficient operation, makes Wush a compelling alternative to traditional file transfer tools, especially for those seeking a more modern and secure approach.
Ideal for: Technically advanced users who are looking to replace traditional FTP.
First and foremost, your choice of an FTP client should prioritize security. When working with web servers, especially in a professional environment, you’ll want a client that supports SFTP (Secure File Transfer Protocol) – this is non-negotiable.
For beginners, we strongly recommend starting with FileZilla. It’s like the WordPress of FTP clients – popular, well-supported, and user-friendly. Its interface might seem busy initially, but you’ll quickly appreciate having all those features at your fingertips.
However, if you’re using a Mac and prefer software that feels more native to your system, Cyberduck is an excellent choice. It integrates beautifully with macOS and offers a more streamlined interface. As you progress in your development journey, you might want to consider premium options such as Transmit (for Mac) or professional versions of other clients.
For Windows users who plan to do more advanced server management, WinSCP deserves serious consideration. Its automation features will become invaluable as you grow in your development career and need to handle repetitive tasks efficiently.
We’ve looked at the best FTP clients and what makes them worth using. But if you’re on RunCloud, you can skip many of these tools entirely.
With RunCloud’s built-in File Manager and Git deployment, you can manage files, push updates, and roll back changes – all from your browser. Atomic Deployment gives you zero-downtime releases, keeps a full history, and makes rollbacks instant, so you never have to rely on manual FTP transfers.
If you want faster, safer, and more reliable deployments than any FTP client can offer, connect your Git repository to RunCloud and let it handle the rest.
FTP clients are safe when used with secure protocols such as SFTP or FTPS, which encrypt all data during transfer. However, traditional FTP without encryption is not secure and should be avoided for sensitive data or professional web development, as it transmits credentials and data in plain text.
What are the disadvantages of FTP?
Standard FTP lacks encryption, making it vulnerable to security breaches and man-in-the-middle attacks during file transfers. Additionally, FTP can be slower than modern cloud-based solutions and may face issues with firewalls, while also lacking advanced features like real-time collaboration and version control.
How do I choose an FTP client?
Choose an FTP client that supports secure protocols (SFTP/FTPS) and offers features matching your specific needs, such as automated transfers, scheduling, or remote editing. Consider factors like your operating system, budget, user interface preferences, and whether you need advanced features like synchronization or scripting capabilities.
Is there a better alternative to FileZilla?
For Mac users, Cyberduck and Transmit offer more polished interfaces and better integration with the operating system, while WinSCP provides more advanced features for Windows users. However, these alternatives often come with a price tag, whereas FileZilla remains a robust, free option that satisfies most users’ needs.
What is the safest FTP protocol?
SFTP (SSH File Transfer Protocol) is the safest protocol as it encrypts both authentication credentials and file transfers using SSH encryption, making it virtually impossible for attackers to intercept data. This protocol is the industry standard for secure file transfers and is strongly recommended for all professional web development work.
Have you ever clicked on a webpage and felt like you were waiting an eternity for it to load? Nobody likes a slow website; if you’ve been frustrated, you’re far from alone. Conservative estimates suggest the average person spends four months of their life sitting, waiting for websites to load!
Caching is one of the easiest ways to speed up your website. However, a poorly implemented caching strategy can lead to “cache miss” warnings, worsening your website. Frequent cache misses can severely impact your site’s performance and reduce efficiency.
Understanding the difference between a cache hit and a cache miss is the first step toward optimizing your site.
This post will show you how to improve your cache hit rate, ensure better scalability, and reduce your website’s load times.
Let’s get started!
Cache Miss vs Cache Hit
A cache hit is the ideal scenario. When the requested data is found in the cache, it can be delivered almost instantly. This results in faster page load times, reduced server load, and a better user experience.
In contrast, a cache miss means the data was not found in the cache. This forces the server to generate the content from scratch, which consumes more time and resources. The fundamental difference lies in performance: cache hits speed up your website, while cache misses slow it down.
Why Reducing Cache Misses Matters for Website Performance
Reducing cache misses is essential for maintaining a fast and responsive website. Every cache miss introduces a delay, as the server must expend CPU cycles and memory to fetch data from the database and rebuild the requested page. This increased processing time directly translates to slower page load speeds, which can frustrate visitors and negatively impact your SEO rankings.
By minimizing cache misses, you ensure more requests are served instantly from the cache, dramatically reducing server load, and speeding up your site for your users.
How to Reduce Cache Misses [Proven Method]
1. Increase Cache Lifespan and Expiry Time
One of the most direct ways to reduce cache misses is to store cached data for a longer period. A longer Time-to-Live (TTL) or expiry time means that assets remain in the cache longer, increasing the probability of a cache hit for subsequent requests. This is especially effective for static content that doesn’t change often, such as images, CSS files, and blog posts.
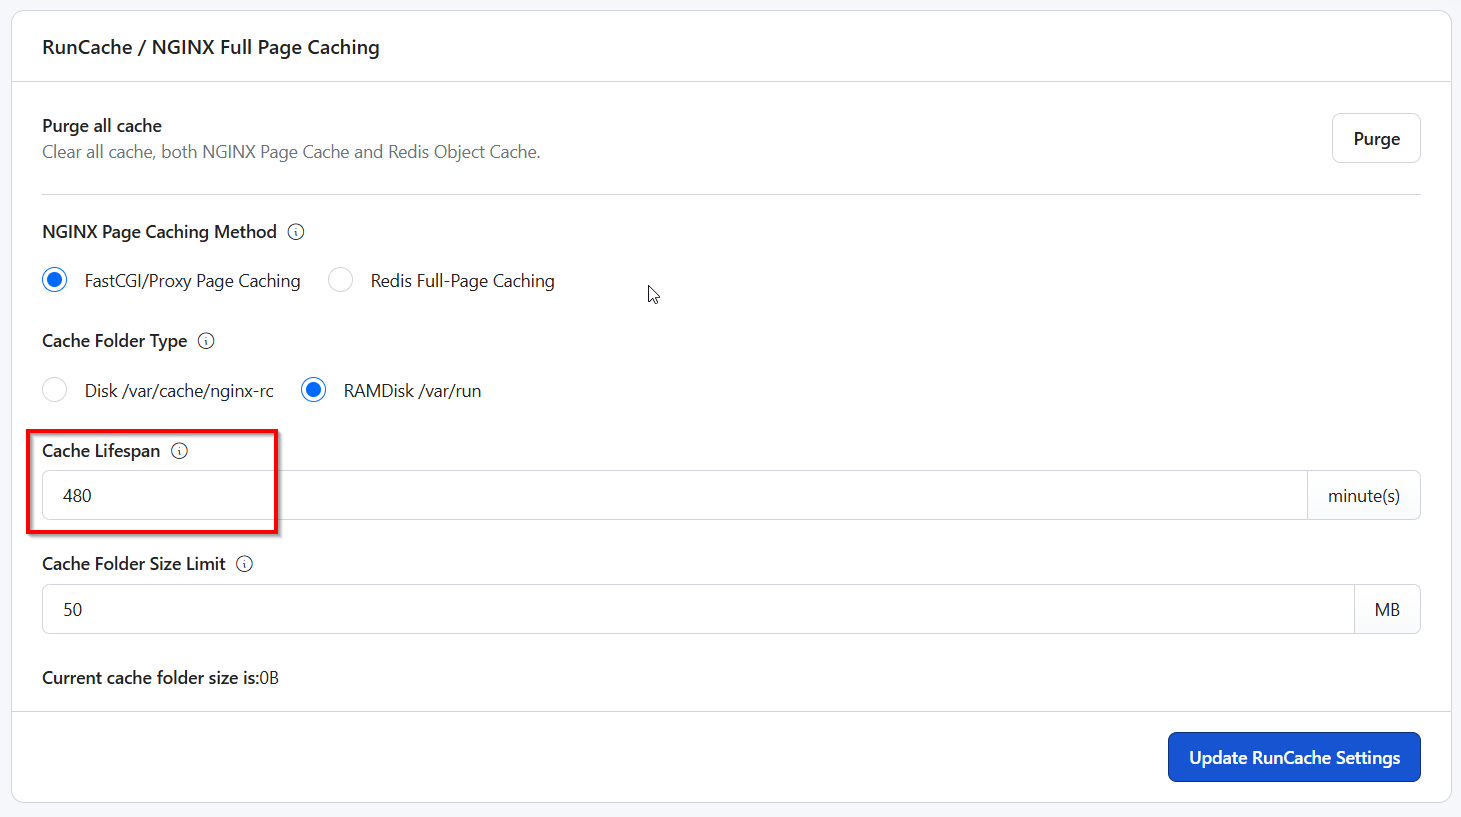
With RunCloud Hub, you can effortlessly configure the TTL for your cached content directly from the dashboard by modifying the “Cache Lifespan” value. This allows you to set an optimal cache duration, such as 30 days for static sites, ensuring your content remains cached longer to improve your hit rate.
A cache is nothing but data stored in your computer’s memory. As you use your application, the cached data grows naturally, eventually filling up your entire cache storage. When a cache becomes full, a replacement policy decides which items to discard to make room for new ones.
An inefficient policy can evict frequently accessed data, leading to unnecessary cache misses. Common policies include Least Recently Used (LRU) and First-In, First-Out (FIFO), and choosing the right one depends on your application’s data access patterns.
RunCloud uses highly optimized, server-level caching with NGINX FastCGI and Redis. These systems use advanced replacement policies to ensure that the most relevant and frequently accessed data is retained in the cache, minimizing misses without requiring manual configuration.
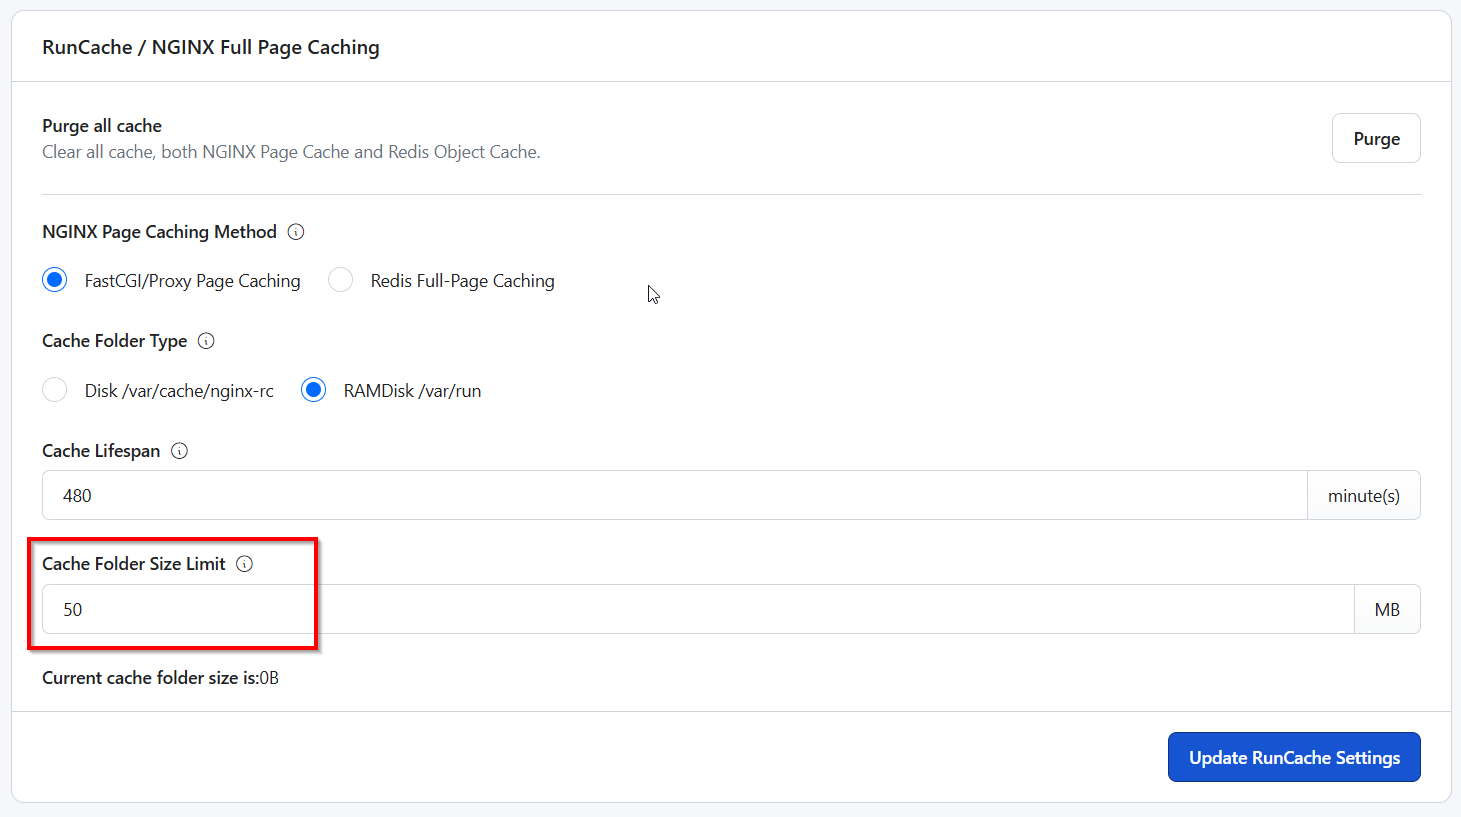
A “capacity miss” occurs when the cache is too small to hold all the data your website needs. If your working data set is larger than your cache, the system will constantly evict and reload data, leading to poor performance. Increasing your server’s RAM allows for a larger cache size, providing more space to store frequently accessed assets and reducing the likelihood of capacity misses.
In RunCloud Hub, you can easily configure this by modifying the “Cache Folder Size Limit” value in your RunCloud dashboard.
The right tool can make all the difference in implementing an effective caching strategy. While many plugins exist, they often run at the application level, adding their processing overhead. A server-level caching solution is far more efficient as it handles requests before they even hit your application (e.g., WordPress), resulting in faster response times.
This is where RunCloud Hub shines.
RunCloud Hub offers a suite of caching technologies designed to significantly enhance your website’s speed and reliability. It empowers you with multiple server-side caching options and allows you to choose the best fit for your workload:
NGINX FastCGI/Proxy Page Caching: This method uses NGINX to store and serve static HTML pages directly from your server’s disk or memory. It bypasses the need to execute PHP or query the database for every request, dramatically reducing server load and response times.
Redis Full-Page Caching: This technique stores the entire page cache in your server’s memory and enables lightning-fast delivery for high-traffic and complex web applications.
Redis Object Cache: Ideal for dynamic websites with complex database queries. Redis Object Cache stores the results of these queries in memory, which minimizes the strain on your database and reduces PHP execution times, leading to a more responsive user experience.,
To provide further optimization, RunCloud Hub allows you to select the storage location for your cache, balancing between performance and resource usage:
Disk: You can store your cache on the server’s disk at /var/cache/nginx-rc. This is a dependable option, particularly for servers with multiple sites.
RAMDisk: For maximum performance, you can use a RAMDisk, which stores the cache in the server’s RAM at /var/run. This offers the fastest possible access to cached content.
Wrapping Up: Common Causes of Cache Misses and How to Avoid Them
In this article, we have discussed how to improve the performance of your website by optimizing your caching strategy. We also covered the most common causes of cache misses and how to fix them.
RunCloud Hub is designed to solve these problems effortlessly.
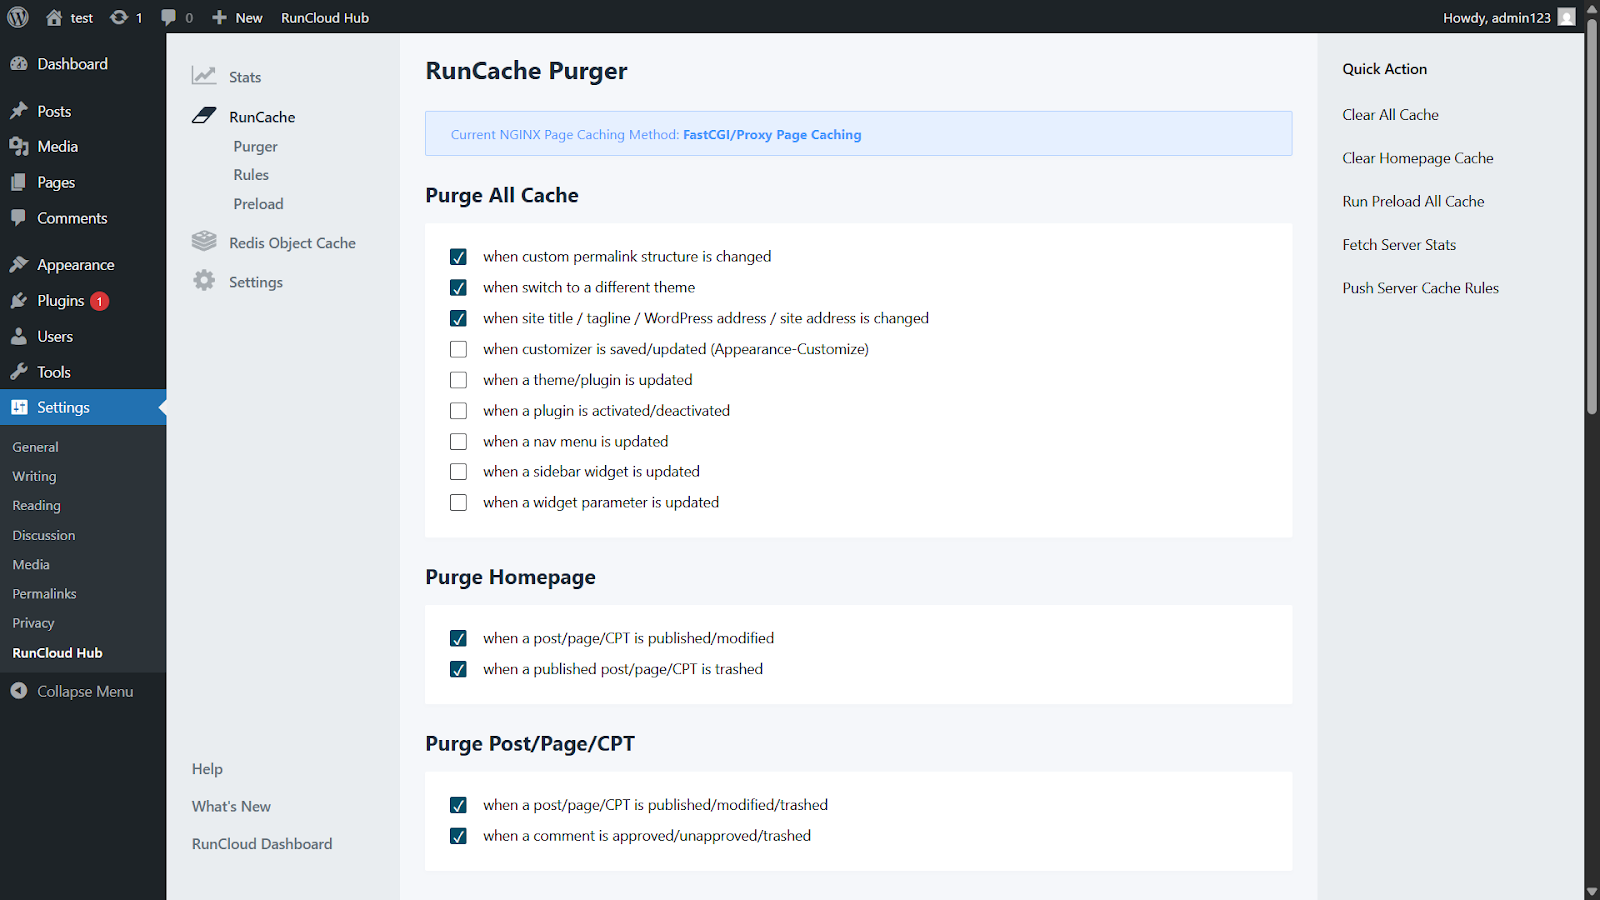
Its automated cache management and smart purging ensure the cache is cleared only when content is updated, preventing unnecessary misses.
RunCloud Hub is much more than just a plugin – it’s your all-in-one dashboard for server-level caching, engineered to eliminate cache misses and deliver superior performance. By maximizing your cache hit rate, RunCloud Hub significantly reduces the number of database queries and the overall load on your server. This leads to blazing-fast page loads, an improved user experience, and a more stable, efficient server.
With RunCloud Hub, you can stop worrying about complex cache configurations. It simplifies cache miss reduction and puts the full power of server-level caching at your fingertips.
FAQs on Reducing Cache Misses & Cache Optimization
What causes cache misses?
A cache miss occurs when a system or application requests data from the cache but cannot find it. This can happen if the data was never stored in the cache, has been evicted to make space for newer data, or if its time-to-live has expired.
How to improve cache hit rate?
To improve your cache hit rate, you can increase the duration for which data is stored in the cache and enable caching for more resources on your website or application. It’s also recommended to use stable cache keys and prefetch resources before they are needed.
What is a cache miss penalty?
A cache miss penalty is the delay or extra time required to retrieve data from the main memory or a lower-level cache when it’s not found in the immediate cache. This retrieval process is slower than accessing data directly from the cache, and the penalty is typically measured in clock cycles. Frequent cache misses and their associated penalties can significantly slow down application performance.
How many types of cache misses exist?
There are primarily four main types of cache misses that can occur in a system. These include compulsory misses (also known as cold misses), capacity misses, conflict misses, and coherence misses.
What is a CPU cache miss?
A CPU cache miss happens when the processor attempts to read or write data and fails to find it in its local cache memory. This forces the CPU to fetch the data from the much slower main memory (RAM), causing a delay in processing known as a “stall”. Reducing CPU cache misses is essential for maximizing processor efficiency and overall system performance.
How does cache memory work?
Cache memory is a small, high-speed storage layer that temporarily stores frequently accessed data and programs close to the CPU. When the CPU needs data, it first checks this faster cache; if the data is present (a “cache hit”), it can be retrieved quickly. If the data isn’t there (a “cache miss”), the system fetches it from the slower main RAM and copies it to the cache for future access.
What is cache coherence?
Cache coherence refers to the consistency of shared data stored in multiple local caches within a multiprocessor system. It ensures that when one processor updates a piece of data, all other processors are aware of this change, preventing them from using outdated information. This uniformity is maintained through protocols that manage how caches communicate and coordinate with each other.
How to calculate cache miss penalty?
The cache miss penalty can be calculated by understanding the time it takes to access different levels of memory. It is the additional time required to fetch data from a lower-level memory (like RAM) compared to the time it would have taken to retrieve it from the cache. The average memory access time (AMAT) is a key metric calculated as AMAT = Hit Time + (Miss Rate x Miss Penalty).
How to reduce cache misses in applications?
To reduce cache misses in your applications, optimize data access patterns and localize data to improve retrieval speed. You can also leverage techniques like prefetching, where the system anticipates and fetches data before it’s explicitly requested. With RunCloud’s optimized server configurations, you can efficiently manage your application’s caching mechanisms to minimize these misses.
How often should I clear or expire the cache to reduce misses?
The ideal frequency for clearing or expiring your cache depends on how often your website’s content is updated. For static sites, a longer cache lifespan, such as 30 days, can improve your cache hit rate by reducing the need for the server to re-fetch content. If your content changes frequently, you should set a shorter expiration time to ensure users see the most current version.
Can increasing RAM reduce cache misses?
Increasing your server’s Random Access Memory (RAM) can help reduce certain cache misses. A larger RAM allows for a larger overall cache size, which can store more data and decrease the likelihood of capacity misses, where the cache is too small for the working data set.
Whether installing new software, following an online tutorial, or troubleshooting an issue, one of the first questions you’ll face is, “What version of Ubuntu are you running?” Your operating system details are necessary for managing your system’s health and functionality.
The version number of your operating system determines which applications and Personal Package Archives (PPAs) you can safely install, as many are built for specific releases. It also informs you about your system’s support lifecycle. For example, knowing you are on a Long-Term Support (LTS) version confirms that you will receive critical security updates for several years.
Additionally, countless online guides tailor their instructions to a particular version, such as 22.04 or 24.04, so using the correct one prevents errors. Finally, when you ask for help on a forum or file a bug report, providing your version number is the first and most critical step toward getting a fast and accurate solution from the community.
In this quick guide, we will show you two simple methods for finding your Ubuntu version: the graphical and command-line methods.
Let’s get started!
Method 1: The Graphical (GUI) Way
If you prefer clicking over typing, Ubuntu’s graphical user interface (GUI) provides a straightforward path to find your system’s information. This method is ideal for desktop users and requires no command-line knowledge.
Follow these simple steps:
Open the Activities Overview. To do so, click the Activities button at the top-left corner of your screen. Alternatively, press your keyboard’s Super (Windows) key to open the same view.
Find the Settings Application. Once the overview is open, begin typing the word Settings. An icon for the Settings application will appear in the search results. Click on this icon to launch the program.
Navigate to the About Section. The Settings window will open. In the navigation panel on the left-hand side, scroll to the bottom and click on the About tab.
This will open a screen dedicated to your system’s details. Look for the OS Name line. This line displays your Ubuntu version number and its release type, for example, Ubuntu 24.04 LTS.
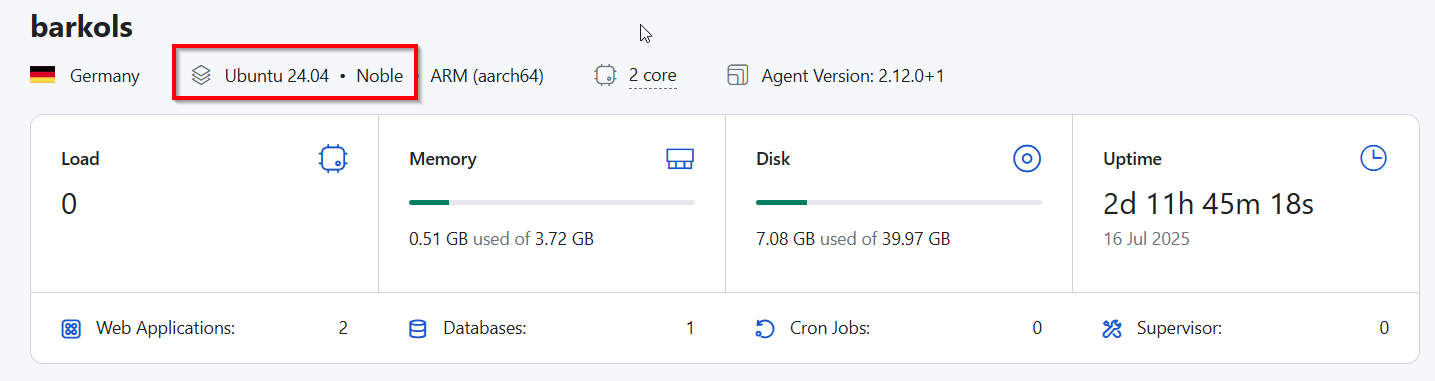
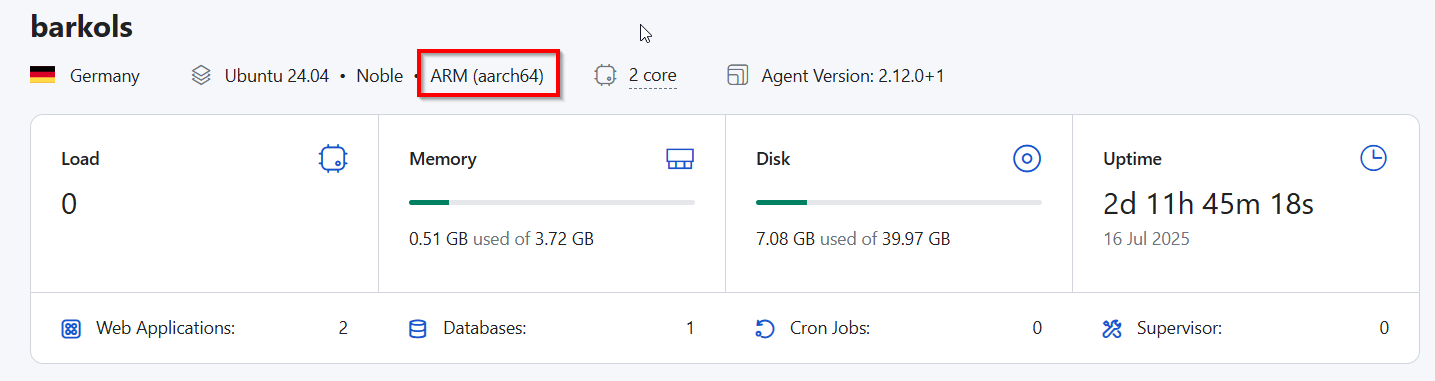
If you are using RunCloud to manage your servers, then you can also see this information in the server dashboard summary section:
The terminal offers the fastest way to get system information if you are a server administrator, developer, or anyone who prefers working with text-based commands. The Command-Line Interface (CLI), or terminal, is a powerful tool that allows you to communicate directly with your computer.
Even if you are not a server administrator, we recommend you try this out. These commands are simple, safe, and incredibly useful.
To begin, open your terminal. The quickest way to do this on a desktop is by pressing the keyboard shortcut Ctrl+Alt+T.
Option A: The Best All-Around Command (lsb_release)
This is the standard and most recommended command for checking your Ubuntu version. lsb_release stands for Linux Standard Base, a standardized way for Linux systems to report their identity. Using this command ensures you get clear, well-formatted information.
In your terminal, type the following command and press Enter:
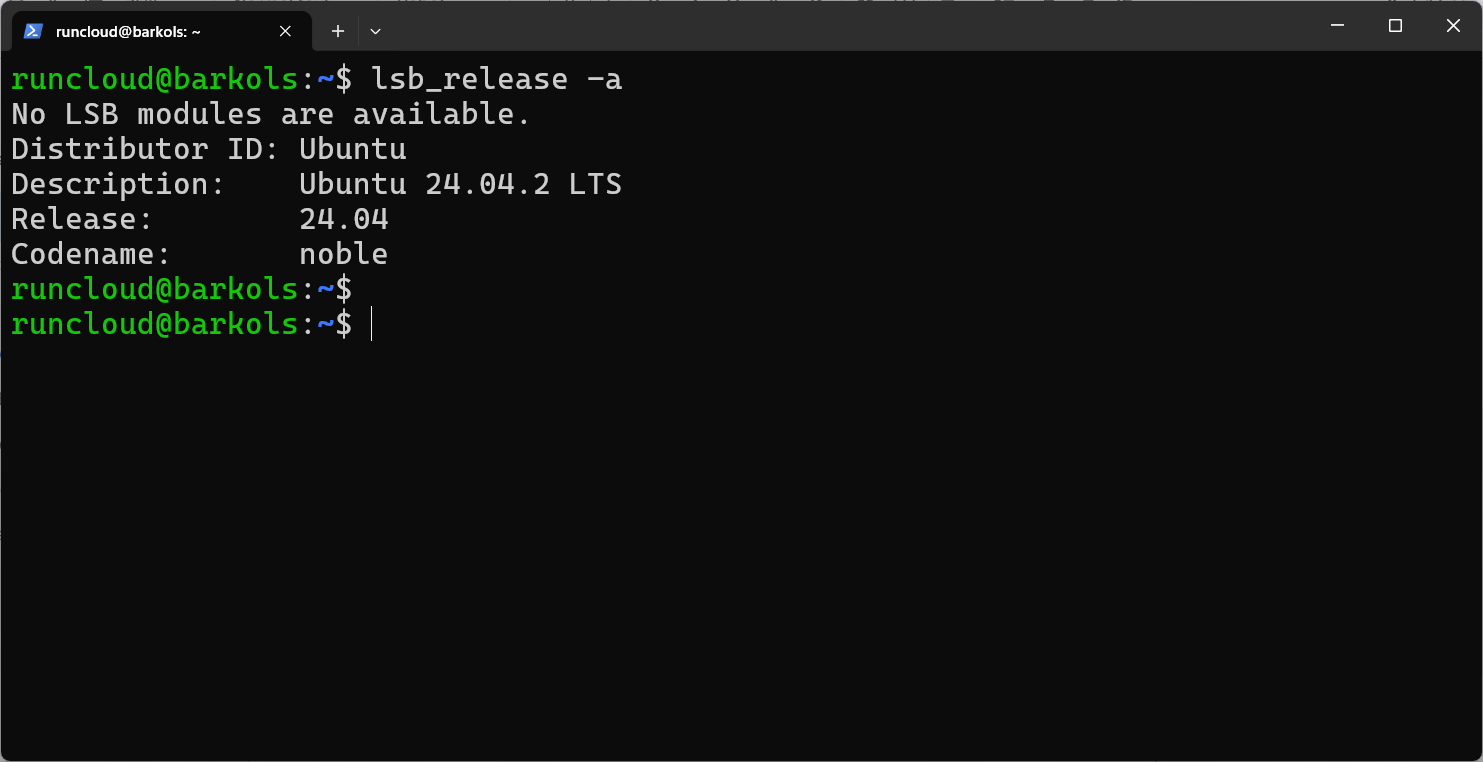
lsb_release -a
Your screen will display an output similar to this. Let’s break down what each line means:
Distributor ID: This simply confirms that your operating system is Ubuntu.
Description: This is the most important line for most users. It provides the full, human-readable version name, such as Ubuntu 24.04 LTS. The “LTS” signifies a Long-Term Support release, guaranteeing five-year security updates.
Release: This shows you just the version number (24.04), which can be useful for scripts or when a guide asks only for the number.
Codename: Every Ubuntu version has a unique, alliterative codename (such as “Noble Numbat” or “Jammy Jellyfish”).
The Codename is more than just a name. You will often use it when adding new software sources, known as PPAs (Personal Package Archives), to your system. The codename ensures you download the correct package built specifically for your version of Ubuntu.
Option B: Checking the /etc/os-release file
This alternative method is wonderfully simple and works on nearly all modern Linux systems, not just Ubuntu. Instead of running a specific program, this command directly reads and displays the contents of a system configuration file.
Type the following command into your terminal and press Enter:
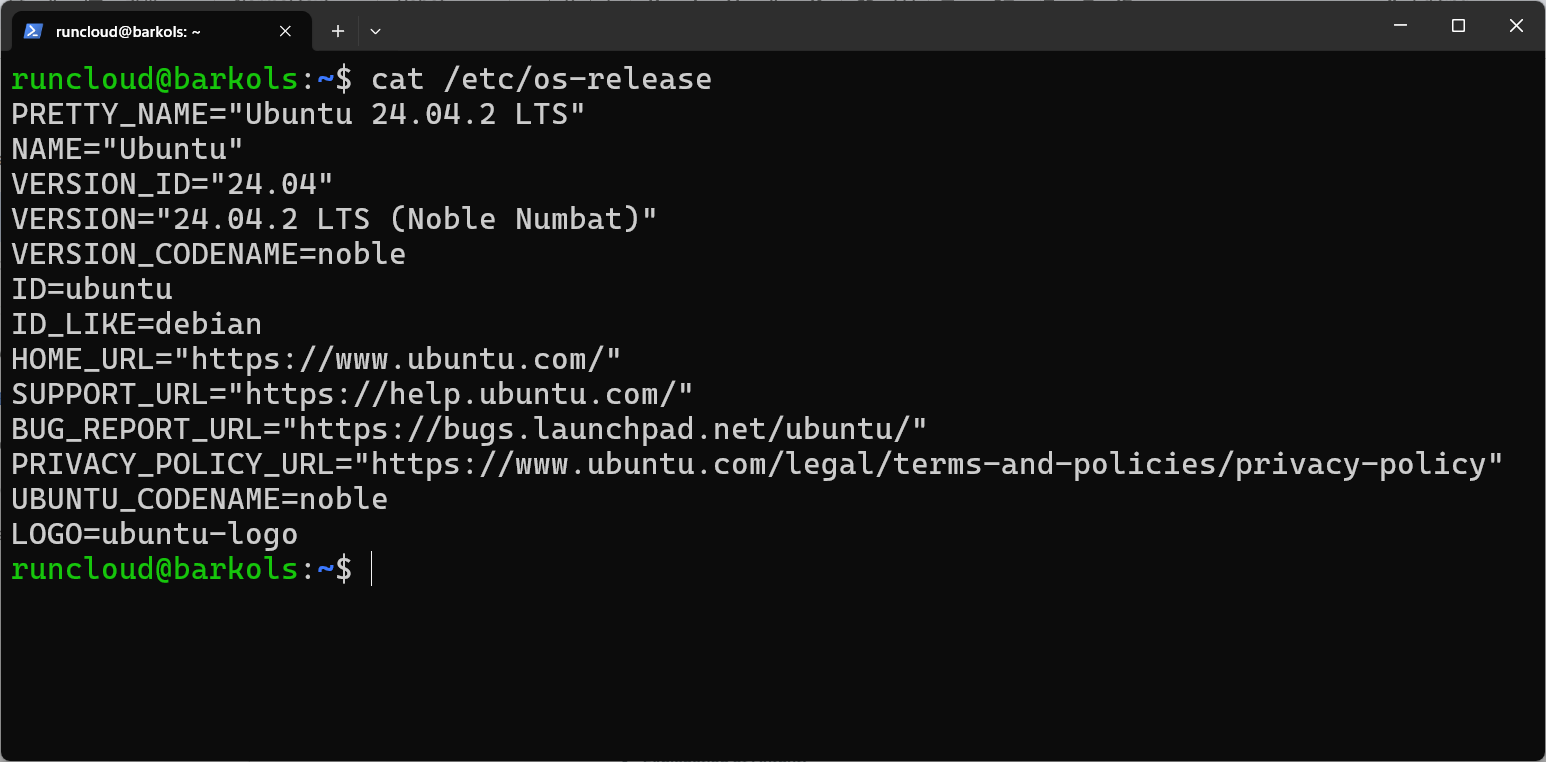
cat /etc/os-release
The cat command is a classic utility used to display the contents of files. Here, you are asking it to show you what’s inside the os-release file located in the /etc directory.
While that looks like a lot of information, you only need to focus on one line. The PRETTY_NAME variable gives you exactly what you need in a clean, easy-to-read format: “Ubuntu 24.04 LTS”.
Bonus Tip: Checking Your System Architecture (32-bit or 64-bit)
Knowing your Ubuntu version is important, but sometimes it’s only half the story. When you visit a software download page, you will often see different files listed for the version and the architecture. This refers to the type of processor your computer uses. Installing software built for the wrong architecture will simply not work, so it’s an essential piece of information to have.
Thankfully, finding your system’s architecture is as easy as finding its version. In your terminal, run the following command:
uname -m
On most modern desktop and laptop computers, the command will almost always output: x86_64. This indicates you are running a 64-bit system. You will often see this referred to as amd64 in software package names.
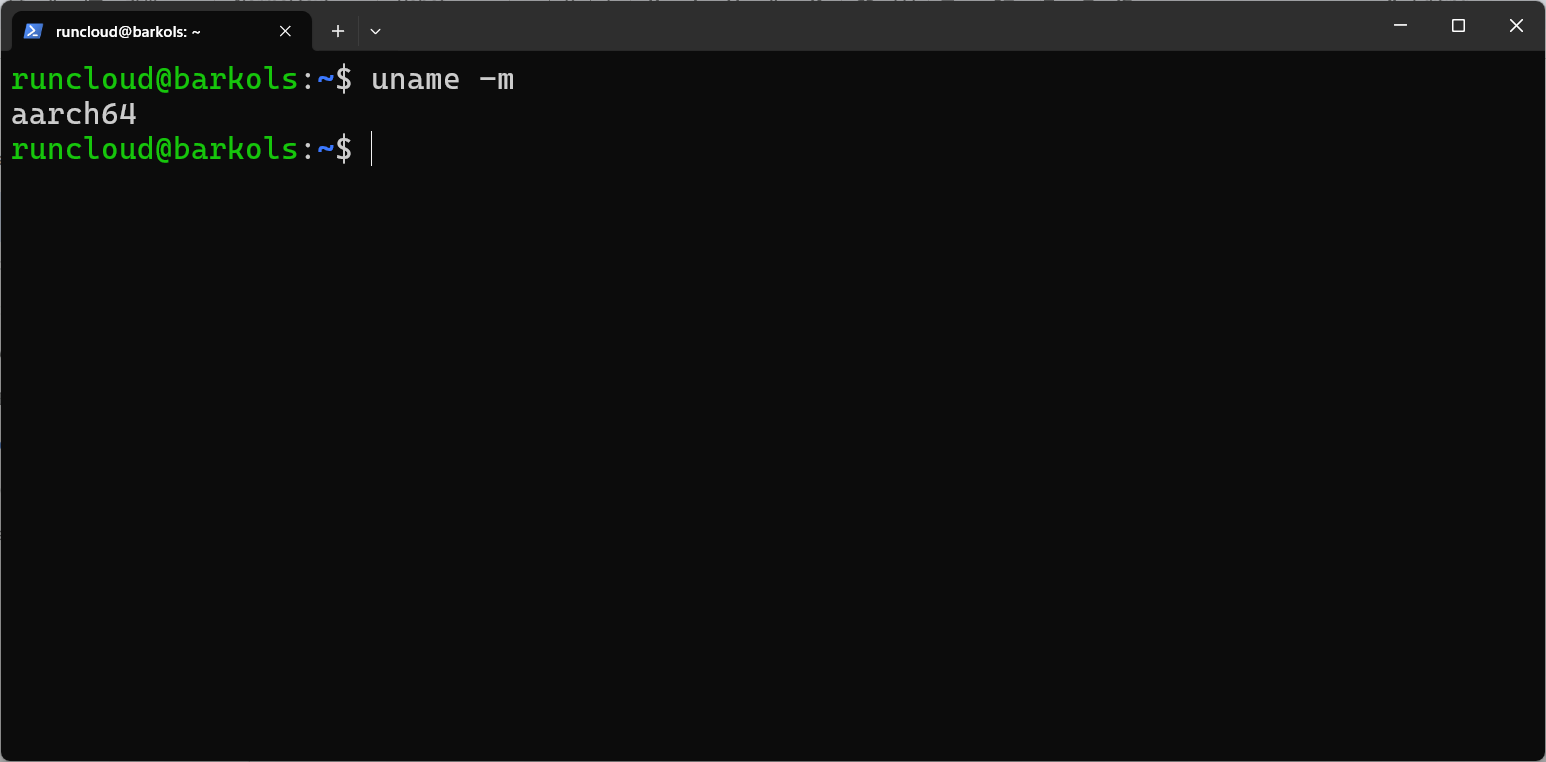
However, you might encounter a different output, especially on cloud servers or single-board computers like the Raspberry Pi. For example, we see a different result when we run this command on our cloud server managed by RunCloud:
An output of aarch64 (or sometimes arm64) indicates that the server uses an ARM-based processor. Many people and cloud providers now choose ARM because these processors are designed to be extremely power-efficient. This efficiency means they consume less electricity to perform their tasks, directly translating into lower operational and hosting costs.
So, if you’re using a modern, cost-effective cloud server, don’t be surprised to find it’s running on an ARM architecture.
Combining your version (24.04 LTS) with your architecture (x86_64 or aarch64) gives you all the information you need to download the correct software package every time.
If you are a RunCloud user, you can get this information directly from your server dashboard summary:
Ubuntu Version Reference Cheat Sheet
What you want to know
The command to use
Full Version Details
lsb_release -a
Human-Readable Version
cat /etc/os-release
System Architecture
uname -m
Final Thoughts
Whether you prefer the visual approach of clicking through the Settings panel or the speed of typing a quick command in the terminal, you can now instantly find both your Ubuntu version and system architecture.
Knowing your system’s details is the first step to becoming a more confident and capable Ubuntu user.
Do you have a favorite method or a useful tip we didn’t cover? Let us know in the comments below!
If you manage one or more servers, there’s an even easier way. Constantly logging in to a terminal just to check basic stats can be time-consuming. RunCloud allows you to directly check the Ubuntu version of your server from the RunCloud dashboard, alongside other critical server health information. RunCloud makes it incredibly easy to manage your Linux servers by providing a clean, powerful interface for tasks that would otherwise require complex command-line work.
Ready to take the complexity out of managing your Linux servers?
Are you staring at that stubborn “Leverage Browser Caching” warning in your Google PageSpeed Insights report? You’re not alone. It’s one of the most common performance recommendations, and it often sounds far more complicated than it is.
In this guide, we will explain browser caching from a server-level perspective and show you how to fix the leverage browser caching warning in WordPress by setting the correct Cache-Control and Expires headers.
By the end of this article, in addition to fixing the “Leverage Browser Caching” warning in WordPress, you will see noticeable speed improvements in your website.
Let’s get started!
What is the “Leverage Browser Caching” Warning in WordPress?
When someone visits your site for the first time, their browser has to download all the website’s assets, such as your logo, stylesheets (CSS), and scripts (JavaScript). Browser caching is a set of instructions that your server can send along with these files that says, “These files can be stored on your computer for a while. You don’t need to download them again on your next visit.”
When these instructions are missing, the browser has to re-download all those files on every page load, making the site feel much slower for returning visitors.
Why Does Google PageSpeed Insights Show The “Leverage Browser Caching” Warning?
Google PageSpeed Insights shows the “Leverage Browser Caching” warning because adding proper caching controls speeds up the website for repeat users. When Google recommends a website to its users in search results, Google’s goal is to provide the best experience for its users, and that includes sending them to sites that load quickly.
The warning is triggered for two main reasons:
Slows Down Repeat Visits: Without caching, returning visitors have the same slow, “first-time” loading experience every time they visit. Fixing this makes the site feel almost instantaneous for them, which greatly boosts user experience.
Wastes Resources: Forcing the browser to re-download the duplicate files repeatedly uses unnecessary bandwidth (both for the user and your server) and increases your server’s workload.
How to Fix the “Leverage Browser Caching” Warning in WordPress
You can easily fix the “Leverage Browser Caching” warning by adding specific rules, known as caching headers, to your server’s configuration. In this section, we’ll explore the primary methods to implement this on your server.
⚠️ But before we go any further, here is a note of warning!
We understand that editing server configuration files or even .htaccess can feel intimidating. What if you make a mistake?
This is where RunCloud provides a layer of confidence with automated backups. Before implementing any of the caching rules discussed in this guide, you can take a one-click, on-demand backup of your entire web application’s files. If anything goes wrong, you’ll be able to quickly and easily restore your entire website to its previous state in seconds.
#1 – Setting Cache-Control Headers
The Cache-Control header is the most powerful way to manage browser caching. It gives the browser precise instructions on how to handle a file. The max-age directive in this header tells the browser how many seconds it takes to keep a file cached before asking for it again.
For example, a max-age of 31536000 tells the browser to store the file for one year. You can also specify directives such as public, meaning the file can be cached by any cache (like a browser or a CDN), or private for user-specific data.
On a RunCloud server using an NGINX + Apache2 hybrid or OpenLiteSpeed stack, you can add these rules to your .htaccess file. For a pure NGINX stack, you would use the “NGINX Config” editor in your RunCloud dashboard. A typical rule looks like this for your .htaccess file, targeting different file types with appropriate expiration times:
<IfModule mod_headers.c>
  <filesMatch "\.(ico|jpeg|jpg|png|gif|svg|webp)$">
    Header set Cache-Control "max-age=31536000, public"
  </filesMatch>
  <filesMatch "\.(css)$">
    Header set Cache-Control "max-age=2592000, public"
  </filesMatch>
  <filesMatch "\.(js)$">
    Header set Cache-Control "max-age=2592000, public"
  </filesMatch>
</IfModule>
#2 – Using Expires Headers to Set Expiration Dates for Static Assets
The Expires header is an older, simpler method for enabling browser caching. Instead of specifying a duration in the same way Cache-Control does, the Expires header sets a specific future date and time when the cached file should be considered “stale”.
While Cache-Control is the modern standard, and it will override the Expires header if both are present, including Expires headers is still good practice for compatibility with older proxy servers and browsers.
Adding expiration headers is very straightforward, especially in the .htaccess file found on RunCloud’s Apache2 or OpenLiteSpeed stacks. The mod_expires module allows you to set human-readable expiration times, making configuration easy.
For example, you can specify “access plus 1 year” for images and “access plus 1 month” for CSS and JavaScript files. This tells the browser to calculate the expiration date based on when the user first accessed the file.
Here is a simple and effective ruleset to add to your .htaccess file:
<IfModule mod_expires.c>
  ExpiresActive On
  ExpiresByType image/jpeg "access plus 1 year"
  ExpiresByType image/png "access plus 1 year"
  ExpiresByType image/gif "access plus 1 year"
  ExpiresByType image/webp "access plus 1 year"
  ExpiresByType text/css "access plus 1 month"
  ExpiresByType application/javascript "access plus 1 month"
</IfModule>
#3 – Fixing “Leverage Browser Caching” Warning for Third-Party Scripts and Resources
One of the most common frustrations for site owners is seeing a caching warning for scripts that aren’t even hosted on their own server. This frequently happens with resources such as Google Analytics, Google Fonts, or Facebook Pixel. You can’t control their caching headers because these files are located on Google’s or Facebook’s servers. This is why PageSpeed Insights will still flag them, even if your server is perfectly configured.
While you technically can’t “fix” the headers on their servers, the only workaround is to host these scripts locally on your server. For example, you could download the Google Fonts files and serve them directly from your domain.
However, the biggest downside to this approach is maintenance. When Google updates its Analytics script or adds new font characters, your local copy will become outdated, and you are responsible for manually updating it.
For most users, the performance gain from caching these small third-party scripts locally is not worth the maintenance and potential security risks of running outdated code. Also, hosting third-party content on your own servers might break copyright laws in some jurisdictions. The best practice is often to correctly configure caching for all your assets and accept the warning for these third-party services.
Best WordPress Plugins to Fix the “Leverage Browser Caching” Warning
For many users, manually editing server configuration files can be daunting. Thankfully, the WordPress ecosystem has many powerful plugins that can automatically configure these settings with just a few clicks.
#1 – How Litespeed Cache Solves Browser Caching Issues
If your WordPress site runs on a RunCloud server with the OpenLiteSpeed (OLS) stack, you can quickly configure the LiteSpeed Cache for WordPress (LSCache).
Unlike other caching plugins, LSCache is not a third-party plugin that provides basic caching solutions. It is a server-level solution that integrates directly with the OpenLiteSpeed web server. This deep integration allows it to manage caching with incredible efficiency.
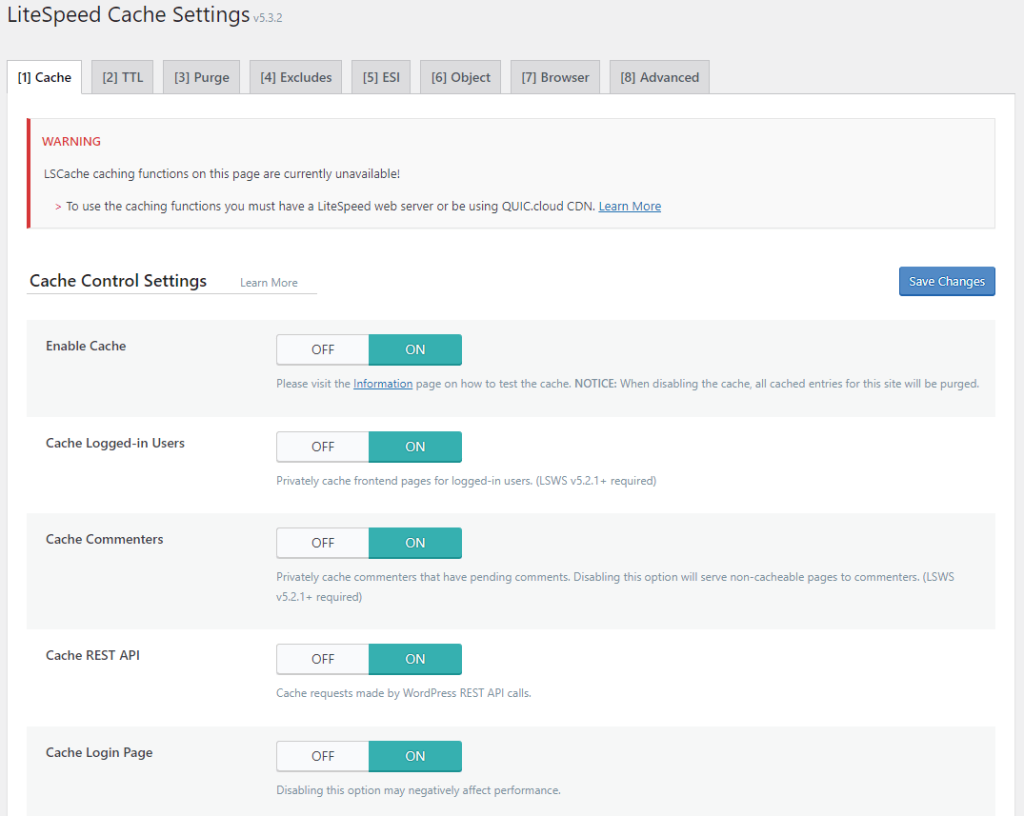
When you install and activate the LSCache plugin, you can navigate to the LiteSpeed Cache > Cache > Browser tab in your WordPress dashboard. You’ll find a simple toggle switch for “Browser Cache” here. Turning this on will automatically add the optimal Cache-Control and Expires rules to your .htaccess file.
This configuration also sets long cache lifetimes for your static assets, instantly solving the “Leverage Browser Caching” warning for all files hosted on your server. Additionally, this plugin is “talking” directly to the OLS server, and it can create highly optimized rules and work seamlessly with its other powerful features, like full-page caching and ESI.
#2 – Using RunCloud Hub to Manage Browser Caching Automatically
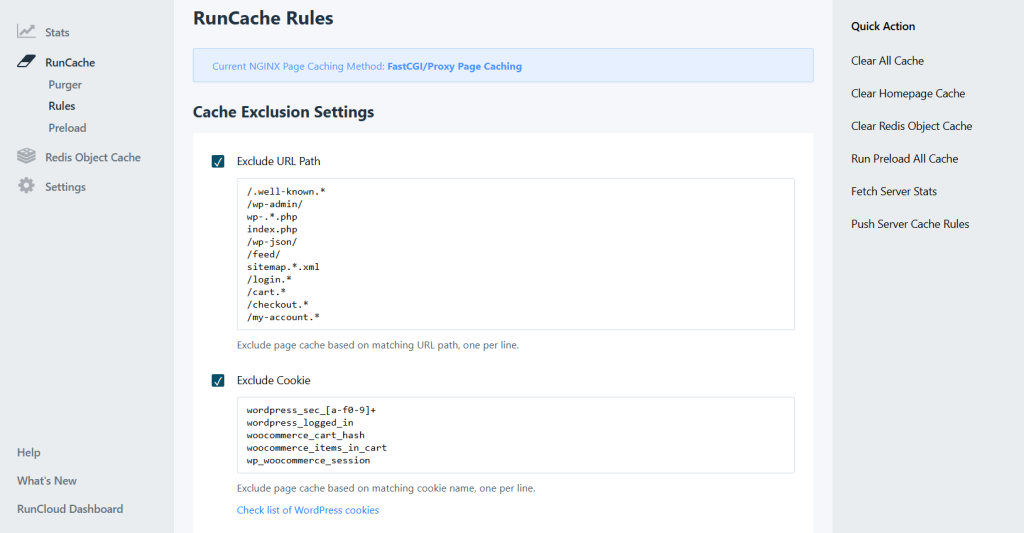
If your site is running on the NGINX stack, then you can use RunCloud’s highly optimized page cache solution called RunCache. When you install the RunCloud Hub on your WordPress site, RunCloud automatically applies an advanced NGINX configuration that serves your site with incredible speed. This default configuration already includes best-practice rules for browser caching.
This means that for most users, RunCache automatically solves the browser caching warning without you needing to do anything extra. It’s configured to tell browsers to cache static assets like images, CSS, and JS for a long period.
We recommend reading the following documentation posts if you want to learn more about RunCloud Hub:
The “Leverage Browser Caching” warning is a direct signal that you’re sacrificing site speed and user experience. You should fix this warning as soon as you see it, as this improvement directly impacts user satisfaction, reduces bounce rates, and sends positive signals to search engines like Google, which heavily favor fast, responsive websites as part of their Core Web Vitals initiative.
And with a platform like RunCloud, you can move beyond basic plugin solutions to implement a far superior, server-level caching strategy.
A typical WordPress caching plugin operates within the WordPress environment. WordPress and its underlying PHP code must first be loaded into memory for a cache to be built or served. While this is better than nothing, it still consumes server resources including memory and PHP workers.
RunCloud Hub allows you to configure RunCache, its native NGINX FastCGI cache. This server-level cache intercepts requests before they even reach WordPress. It serves a pre-made, static HTML version of your page directly from the web server’s memory. This method is dramatically faster and more efficient, bypassing the resource-intensive process of loading PHP and the WordPress application.
RunCloud provides a powerful, intuitive Hub with server-level performance tools like RunCache at your fingertips.
FAQs on Fixing Browser Caching Warnings in WordPress
How do I enable browser caching?
Enabling browser caching requires adding specific instructions (headers) to your server’s configuration. These headers tell a visitor’s browser which files to store and for how long. With a Plugin: The easiest method for most WordPress users is to use a caching plugin like RunCloud Hub (RunCloud’s native NGINX page cache), W3 Total Cache, or WP Rocket. These plugins automatically add the necessary rules for you. Manually: For Apache or OpenLiteSpeed stacks, you can add caching rules directly to your .htaccess file. For NGINX-only stacks, you must add these rules to your NGINX location configuration file via the RunCloud dashboard.
How do I set cache expiration?
While both Cache-Control and Expires headers can be used to control how long a browser stores your files, we recommend using Cache-Control with the max-age directive, as it is the modern standard. The max-age value is set in seconds. For files that change frequently (like CSS or JavaScript), a shorter cache time is best. For static files that rarely change (like images, fonts, or videos), you should use a long cache time. Here are some common max-age values to use: 1 Hour: max-age=3600 1 Day: max-age=86400 1 Week: max-age=604800 1 Month: max-age=2592000 1 Year: max-age=31536000 For example, to cache a logo image for one year, you would set the header: Cache-Control: max-age=31536000.
How to cache static files?
To cache static files, you target them by their file extension. The most common static files to cache are: Images: .jpg, .jpeg, .png, .gif, .svg, .webp, .ico Stylesheets: .css JavaScript: .js Fonts: .woff, .woff2, .ttf, .eot You can create a block in your .htaccess or NGINX config file that applies caching headers specifically to these file types.
How to fix caching issues?
Caching issues, like seeing old content, usually stem from one of three places: Server Cache: Your server might be serving a cached page version. Use your plugin’s “Clear Cache” button or purge the cache via RunCloud Hub plugin. Browser Cache: Your browser has an old version stored. Perform a hard refresh (Ctrl+Shift+R or Cmd+Shift+R) or completely clear your browser’s cache. CDN Cache: If you use a CDN such as Cloudflare, you may need to purge its cache through the CDN provider’s dashboard.
How do I clear the browser cache?
Clearing your browser cache forces it to download the newest versions of all files from your website. Keyboard Shortcut: The quickest way is to press Ctrl+Shift+Delete (on Windows/Linux) or Cmd+Shift+Delete (on Mac). This opens a dialog to clear browsing data. Hard Refresh: To bypass the cache for a single page load, use Ctrl+F5 or hold Shift while clicking the reload button.
How do I disable caching temporarily?
You can temporarily disable caching in your browser’s Developer Tools for development or debugging. Press F12 (or right-click and “Inspect”) to open Developer Tools. Go to the “Network” tab. Check the box labeled “Disable cache”. The browser will not use its cache for that tab as long as the Developer Tools window is open.
How do I cache third-party scripts?
You cannot directly control the cache headers for scripts hosted on third-party servers (like Google Analytics, Facebook Pixel, or Google Fonts). Their servers determine the cache policy. This is a common reason why performance tools still show a “leverage browser caching” warning. Hosting those scripts on your own server is the only way to fix this. However, you are responsible for manually updating them, which can be a maintenance and security risk. For most users, it is safe to ignore caching warnings related to these major third-party scripts.
What if you could spot and fix critical errors in your PHP application before your users even notice?
If you manage a PHP application on a RunCloud server, integrating a powerful monitoring tool is the fastest way to identify performance bottlenecks and eliminate bugs. New Relic provides an all-in-one solution for both server and application monitoring that offers a single dashboard to view resource usage, analyze logs, and track application health.
In this step-by-step guide, we will show you exactly how to integrate New Relic with your server to begin monitoring your PHP applications, so you can spend less time debugging and more time building.
Let’s dive right in!
Steps to Integrate New Relic on Ubuntu Servers to Monitor PHP Applications
In this section, we will provide step-by-step instructions for RunCloud users to manage and monitor their server infrastructure, logs, and data using New Relic.
Prerequisite: Sign Up For a New Relic Account
Before we can install New Relic on your server, you’ll need to create a New Relic account. Don’t worry about any paid plans, the free plan is perfectly sufficient for the purposes of this tutorial.
Step 1: Select Monitoring Method
After logging in to your New Relic account and selecting “Integrations & Agents” > “Data source”, you will be prompted to choose your data collection method. To monitor your RunCloud servers, select the “On a host (tar archive)” button. This is a generic installation that is highly compatible with various server setups.
Step 2: Enter Your Credentials
You will need to provide your New Relic license key and user key. These keys link the monitoring agent to your account. Enter the required keys in the respective fields to proceed. If you don’t have the keys, click the “Create a new key” button.
Before installation, verify your server’s installed PHP version, as New Relic supports multiple versions. Run the provided command to check your PHP installation and ensure compatibility. RunCloud servers support multiple PHP versions, and you can find the location of your PHP installation by reading the PHP Cheat Sheet.
Step 4: Download the Tar Distribution
Run the provided command in your SSH terminal to find the appropriate tar archive for your server’s operating system. The file should be named something like newrelic-php5-11.10.0.24-linux.tar.gz.
Enter the file’s name in the provided textbox, which will automatically generate a curl command that you can execute on your server to download the file.
Step 5: Install the PHP Agent
Once the download is complete, execute the provided command on the next page to perform the following steps:
Decompress the downloaded tar archive.
Change the directory to the newly created folder.
Run the installation script with your New Relic credentials.
Step 6: Configure the PHP Agent
To properly link your application with New Relic, you must configure the agent:
Name your application: Use the same name as your web application. This allows New Relic to automatically find the correct php-fpm process.
Configure the agent: Run the provided newrelic-install script with your application name. This command will configure all PHP apps on your host to report to a single APM entity unless you configure them separately.
Step 7: Restart Your Application
You must restart your web server services for the configuration changes to take effect.
Restart your services: Use the appropriate command for your server setup, for instance, systemctl restart php82rc-fpm for PHP 8.2 FPM.
Send data to New Relic: To manually initialize the agent and ensure it starts sending data, run the command php -r 'phpinfo(INFO_GENERAL);'.
Step 8: Optional – Connect Logs and Infrastructure
You can connect infrastructure metrics and logs to get a comprehensive view of your server. Run the provided curl command to install the necessary components. If you have already performed this step for another web application on the same server, you can skip it.
Step 9: Test the Connection
After completing the installation and configuration, test the connection to verify that your agents are reporting correctly to New Relic. The status for the PHP agent should show “Successful,” which indicates that the agent is installed correctly.
Reviewing New Relic Dashboard
And that’s it – you’re all set! Your New Relic account will now be collecting data and monitoring your server. You should be able to see your server metrics, along with any additional monitors that you have installed in the New Relic dashboard.
If you have a general purpose web application then you can track its metrics in the “APM & Services” section. There you can see error rates, logs and set alerts to notify you in case of a failure.
If you are running a website then you can take advantage of “Browser” monitoring functionality, which tracks your website’s Core Web Vitals.
And then, once you’ve successfully logged in – run the installation command provided in New Relic’s dashboard which will look something like this:
After Action Report
Using a server monitoring platform such as New Relic will allow you to quickly identify and resolve issues that affect your website’s performance. You can set up real-time monitoring and alerts to proactively assess potential problems that can cause downtime.
Integrating New Relic with RunCloud can provide you with invaluable insights into your server’s performance and help you optimize it for better speed and reliability. By following the above steps you can easily set up New Relic to monitor your server’s metrics, including CPU usage, memory consumption, and network traffic.
Have any other questions, or already using New Relic to monitor your web applications? Let us know & join the conversation by leaving a comment below. 💬
New Relic and RunCloud FAQs
How do I restart the correct PHP-FPM service on my RunCloud server?
On a RunCloud server, PHP-FPM services are named according to their version, such as php82rc-fpm for PHP 8.2. To restart the correct service, use the command sudo systemctl restart phpXXrc-fpm, replacing XX with your specific PHP version number.
Where can I find my New Relic license and user keys?
Your New Relic license and user keys are provided during the guided installation process within your New Relic account. You can also find your license key under ‘API keys’ in your account settings.
Do I need to connect infrastructure and logs if I only want to monitor my application’s performance?
While not strictly required for application performance monitoring (APM), connecting your infrastructure and logs is highly recommended. Correlating your application’s performance with server metrics like CPU usage and memory provides a more complete picture, which helps in diagnosing issues more effectively.
How can I confirm that the New Relic agent installation was successful?
After completing all the installation steps, you can use the “Test connection” feature in the New Relic setup guide. The PHP agent’s “Successful” status confirms that it is properly configured and will report data to your account.
Why should I use New Relic to monitor my RunCloud server?
New Relic provides powerful performance monitoring and observability for your applications and server infrastructure. Integrating it with your RunCloud-managed server lets you gain deep insights into your PHP application’s performance, track down errors, and monitor server health to ensure optimal operation.
Server migration doesn’t have to be stressful. Whether you’re upgrading hardware, switching providers, or changing location, the process should be strategic, not risky.
Server migrations are necessary for any growing application to move to more powerful hardware, a better network, or a more strategic geographic location. However, this migration often requires some downtime to move things over successfully.
At RunCloud, we believe migrating your entire infrastructure shouldn’t be a gamble. It should be a strategic, controlled, and predictable process.
In this guide, we’ll provide you with step-by-step instructions for moving your servers with minimal, and in many cases, virtually zero, user-facing downtime.
Let’s get started!
Phase 1: Preparing For Server Migration
You might already know this, but the key to a successful migration is 90% preparation. Rushing this phase is the single most common cause of failure. Follow the steps below to start the migration process:
Configure DNS TTL
Your Domain Name System (DNS) records are the internet’s address book. When users type your-app.com, DNS tells their browser which server IP to connect to. Most computers store this information for an extended period to avoid making the same requests repeatedly. This isn’t a problem as these records are seldom updated. However, you will need to update these records when migration starts.
Therefore, at least one week before your planned migration, you must lower the Time-To-Live (TTL) value on your relevant DNS records (typically the ‘A’ record for your domain and subdomains). The TTL tells resolvers how long to remember the IP address before asking for it again. A standard TTL might be 24 hours; you want it as low as possible for a migration.
Set your TTL to the lowest value your provider allows. On platforms like Cloudflare, the minimum is 2 minutes (120 seconds). This ensures that when you finally “flip the switch,” the global change will propagate with incredible speed, minimizing the window where some users might still be directed to the old server.
Exception for Cloudflare Proxy Users: It is important to note that if you are using Cloudflare’s orange-cloud proxy service (not the “DNS Only” grey-cloud mode), this step is unnecessary. Because all traffic is already routed through Cloudflare’s network, they control the IP change internally. When you update the IP in your Cloudflare dashboard, the change is virtually instantaneous for your users.
Create New Server Environment
Before you can move your data, you must build an identical environment on the new server. This can sometimes take significant effort as manually installing NGINX/Apache, multiple PHP versions, Redis, Supervisor, and editing configurations can be challenging.
This is precisely where RunCloud transforms a multi-day headache into a few clicks.
Provision Your New Server: Get a fresh server from your favorite provider (DigitalOcean, AWS, Vultr, etc.).
Connect to RunCloud: Instead of SSH’ing in and running complex setup scripts, you simply connect your new server to your RunCloud account. RunCloud automatically installs and configures a highly optimized server stack (your choice of NGINX or OpenLiteSpeed, MariaDB, multiple PHP versions, Redis, Memcached, and more).
If you want step-by-step instructions for this process, refer to our help documentation article that outlines the getting-started process. Once the core server is ready, you will need to recreate the application-specific environments on the server.
If you have several web applications, manually creating each one, along with their specific PHP versions, system users, databases, and cron jobs, is tedious and prone to human error.
Using RunCloud, you can compile a complete list of your web applications, database names, and cron jobs. You can then loop through that list and execute API calls to replicate the entire structure on your new server.
Phase 2: Copying Files and Databases to the New Server
After creating a replica of your environment on the new server, it’s time to move the actual data.
Syncing Web Application Files with rsync
We have already written an in-depth article that explains 3 Free Ways To Migrate WordPress From Shared Hosting To Cloud Server, but if you are in a hurry, then you can use rsync, which is a powerful and versatile command-line utility designed for efficiently synchronizing files and directories between two locations.
Initial Sync: You will perform an initial, comprehensive sync of your web application files from the old server (Server A) to the new one (Server B). A typical command looks like this:
Let’s understand the different options in the above command:
-a (archive mode): This option creates an archive of the source.
-v (verbose): This flag tells rsync to give you detailed output. As it runs, it will list every file being transferred, which is extremely helpful for monitoring progress and diagnosing issues. You might remove this flag for a cron job to keep logs clean.
-z (compress): This instructs rsync to compress the file data before sending it across the network. The destination server then uncompresses it. This significantly reduces network bandwidth usage and can dramatically speed up the transfer, especially for text-based files like code (PHP, HTML, CSS, JS).
--delete (optional): This option is useful for creating a perfect mirror. It tells rsync to delete any file from the destination directory if that file does not exist in the source directory. This is essential for a clean migration, as it removes old temporary files, logs, or user-uploaded content that has since been deleted from the live site.
⚠️ Word of Caution: Use the –delete flag with care. Always double-check that your source and destination paths are correct. If you accidentally reverse them, this flag would wipe out your source directory!
The destination path:user@new-server-ip:/home/runcloud/webapps/my-app/ specifies where the files should be sent. It’s composed of these parts:
user: The username on the new server that has permission to write to the destination directory.
new-server-ip: The IP address (or a resolvable hostname) of the new server you are migrating to.
The colon (:) is the separator that divides the remote user/host information from the file path on that remote machine.
/home/runcloud/webapps/my-app/: This is the absolute path on the destination server where the files will be placed.
If your web application has frequent file uploads or changes, it is possible that its data will change by the time the migration is finished. In this case, you can set up a cron job on your old server to run this rsync command incrementally (e.g., every 5 or 10 minutes). rsync is incredibly efficient and will only transfer the files that have changed, keeping the new server’s content almost perfectly in sync with the old one.
Database Migration
This is the most sensitive part of the migration. A mistake here can lead to data loss. The goal is to get a live, real-time copy of the database running on the new server before the final cutover. The strategy you choose will depend entirely on the size of your database and how frequently it is updated.
Method 1: The Classic Dump and Import (For Simple Sites)
The simplest way is often the best for websites with minimal data or where content and user activity are infrequent. You can use the built-in mysqldump command to export your entire database into a single .sql file. You can then run the provided command on the new server to import this data.
This method is very useful if you have minimal data. To transfer the exported file, you can even use rsync to make a fast and reliable copy. This approach is perfectly acceptable when the risk of new data being written between the time you export and import the database on the new server is very low.
Method 2: Live Replication for Active, High-Traffic Sites
If you are running a busy e-commerce store or an active community forum, then the classic dump-and-import method might not be suitable. The database might get updated several times in the window it takes to move the SQL dump to the new server and restore it. This gap will inevitably lead to lost transactions and customer data.
A word of extreme caution: while you might be tempted to rsync your raw MySQL/MariaDB data directory, this is extremely dangerous for a live database and will almost certainly lead to corruption. Copying the core database files while the service is running will result in an inconsistent, broken state on the destination server.
The recommended method to migrate the database is by establishing Master-Slave (or Primary-Replica) Replication. This process creates a live, continuously updating mirror of your database on the new server. Here’s how it works conceptually:
Setup: Configure your old database server (Server A) as the “Master” and your new database server (Server B) as the “Slave”.
Initial Data Dump: You’ll take a consistent snapshot of the master database that captures the precise replication position from the server’s binary log.
Start Replicating: After importing this initial dump onto the slave server, you instruct it to connect to the master and begin replicating from the captured position. From this point forward, any change made to the database on Server A (new users, blog posts, sales orders) is automatically and instantly copied to the database on Server B.
This leaves you with a live, read-only, up-to-the-second copy of your production data on the new server.
The complete, step-by-step process of setting up database replication is a detailed technical procedure and is out of scope for this article. However, we strongly recommend you read:
If your servers are within the AWS ecosystem, you can consider using the AWS Database Migration Service (DMS). It acts as an intermediary that connects to your source and destination databases. DMS handles the initial load and then captures ongoing changes (Change Data Capture – CDC) to keep the two in continuous sync.
Migrating Custom Configurations
After migrating the files, you need to check:
If you have added a custom NGINX include file to handle special redirects.
If you modified your php.ini file to increase memory limits or execution times for a demanding script
These small, often-overlooked configuration files are the unique DNA of your server’s behavior; they are vital and must be moved to the new server to ensure your applications function correctly after the migration.
This is where the benefit of a standardized environment provided by RunCloud becomes incredibly clear.
On a manually configured server, these critical files can be scattered across numerous directories, making finding and backing them up a tedious and error-prone scavenger hunt.
RunCloud eliminates this chaos by providing a user-friendly GUI-based dashboard for all your custom configurations. This standardization makes your custom files easy to locate, backup, and copy to the identical path on your new server, guaranteeing a consistent environment and ensuring that the nuanced rules that make your application work perfectly are never left behind.
You can refer to the following documentation articles to quickly configure your new server environment and set custom configurations:
RunCloud empowers you with the flexibility to manage your server through either our intuitive graphical dashboard for individual tasks or our powerful API for mass automation.
Phase 3: Flipping the Migration Switch for a Seamless Cutover
If you have followed all the steps, the final switch should be simple and controlled if everything has been set up properly. Once you are ready to migrate, follow the steps below:
Initiate Maintenance Mode (Optional, But Recommended): Briefly put your application on the old server in “maintenance mode”. This prevents new data from being written in the final minutes before the switch, ensuring 100% data integrity. Read our article on How to Temporarily Disable Your Web App or Show a Maintenance Page to learn more.
Perform a Final Sync: Run your rsync command one last time to catch any last-second file changes.
Promote the New Database: If replication is used, this is the most important step. You will stop the replication process and promote your “Slave” database on Server B to be the new “Master”. It is now the primary, writable database.
Update Application Configurations: Point your application’s configuration file to the new server to use the local database (localhost). At this point, you will ensure that the applications on the new server can use the new database to make requests.
The DNS Switch: Finally, you will need to go to your DNS provider (e.g., Cloudflare) and change the IP address in your ‘A’ record from the old server’s IP to the new server’s IP. After the DNS records are updated, your new website should be automatically visible to your visitors, as the new site’s maintenance mode was never enabled.
Verify: Thanks to your low TTL, the change should occur within minutes. Start testing your domain. Check that it resolves to the new IP and that the application is fully functional.
Decommission:Do not shut down the old server immediately! Leave it running for 24-48 hours as a safety net. Once you are confident that the new server is stable and handling all traffic, you can safely power down and delete the old server.
After Action Report
This article explains why server migration is a complex dance of DNS, environment replication, data synchronization, and precise timing. While the process requires careful planning, the right tools can eliminate most of the manual labor and risk.
Frequently Asked Questions (FAQ) for Server Migration
Is a zero-downtime server migration possible?
While achieving zero downtime is technically challenging, a “near-zero” downtime migration is achievable with proper planning. By synchronizing files and databases in real-time before the final DNS switch and using a very low DNS TTL, the cutover period can be reduced to just a few minutes.
Why should I lower my DNS TTL before a server migration?
Lowering your DNS Time-To-Live (TTL) value a week before migration is an important preparatory step. A low TTL, such as 2 minutes, tells web browsers and resolvers to check for your server’s IP address more frequently, ensuring that when you finally point your domain to the new server, the change spreads across the internet rapidly.
How can I move a live MySQL database with minimal downtime?
The safest and most effective method for moving a live MySQL or MariaDB database is establishing master-slave (or primary-replica) replication. This technique creates a perfect, real-time, synchronized copy of your database on the new server while the old one remains active. This allows you to instantly switch to a fully up-to-date database on migration day, preventing data loss.
What is the safest way to copy website files to a new server?
The industry-standard tool for safely copying website files is rsync, a command-line utility that efficiently synchronizes directories. For a minimal downtime migration, you should perform an initial full sync and then set up a cron job to run rsync incrementally. This ensures that any last-minute file changes on the old server are automatically copied to the new server right up until the final cutover.
How does RunCloud make server migration easier?
RunCloud dramatically simplifies server migrations by automating the most tedious and error-prone step: setting up the new server. Instead of manually installing and configuring NGINX, PHP, and databases, RunCloud provides an optimized, secure server that can be installed in minutes. Furthermore, its powerful API allows you to programmatically recreate all your web applications and cron jobs, saving dozens of hours of manual work.
Do I need to change my DNS TTL if I use Cloudflare’s proxy (orange cloud)?
No, you do not need to manually lower your DNS TTL if you use Cloudflare’s proxy service (the “orange cloud”). Because all your traffic is routed through Cloudflare’s network, they handle the IP address switch internally. When you update the IP in your Cloudflare dashboard, their system propagates the change to your users almost instantaneously.
Running into the “HTTP error” when uploading images to WordPress is frustrating, especially when everything else seems to be working fine.
There’s no detail in the message, no hint at the cause, and no obvious fix. It could be a plugin conflict, a server setting, or something else entirely.
This quick guide walks you through the most common causes and reliable fixes. Whether you’re a beginner or managing multiple sites, you’ll be able to get uploads working again in minutes.
What is the WordPress HTTP Error When Uploading Images?
The WordPress HTTP error is a common issue when uploading an image or video to the media library fails. Unfortunately, this error message is generic and doesn’t pinpoint the exact cause, making troubleshooting tricky.
This error message signals that something went wrong during the upload process, but WordPress couldn’t determine the reason. When you’ve found the perfect image and are suddenly faced with a vague error message, it can be very frustrating to have your workflow interrupted.
Many things can trigger the WordPress HTTP error when uploading images. These errors can be caused by either client-side issues (like your browser or internet connection) or server-side problems (related to your hosting environment or WordPress configuration).
One of the most common causes of this error is insufficient memory to handle the upload process. If you are using image optimization or security plugins, this can also cause plugin or theme conflicts and interfere with media uploads.
Additionally, if you haven’t configured your WordPress settings correctly, you can encounter issues like incorrect file permissions for the uploads directory, an outdated PHP version, or problems with image processing libraries like Imagick. Sometimes, the problem can be as simple as a temporary glitch in your browser’s connection to WordPress or an expired login session.
It is possible that the specific image file itself is causing the WordPress HTTP error. WordPress and web servers have limits on the maximum size of a file that can be uploaded; if your image exceeds this limit, the upload will fail. Depending on your hosting provider’s settings, this limit can range from a few megabytes to much larger. You can check your site’s current upload limit in your WordPress dashboard’s Media > Add New section.
The type of file you’re trying to upload matters as well. WordPress has a default list of permitted file types for security reasons. If you attempt to upload a file format that isn’t on this allowed list (e.g., trying to upload a .tff font file or an .svg file without specific configuration), you’ll likely encounter an error.
Finally, how you name your image files can also lead to upload failures. Depending on your WordPress instance, file names containing special characters (like $, *, &, #, %, @, !, etc.), accent marks, spaces, or unusual punctuation can cause issues with the WordPress media library. It’s always best to use simple, web-friendly file names consisting only of letters, numbers, and hyphens to avoid such problems. For instance, a filename like “my-awesome-image-1.jpg” is much less likely to cause an error than “My Awesome Image #{1}.jpg”.
Step-by-Step Solutions to Fix the WordPress HTTP Error
If you encounter the WordPress HTTP error while uploading images, you can try the following solutions to solve this problem:
#1 – Refresh and Re-log in to WordPress
Before diving into more complex fixes, it is a good idea to try the simplest one first. Refresh the page and try uploading the image again. Sometimes, temporary browser glitches or a brief loss of internet connectivity can cause the HTTP error.
If refreshing doesn’t work, log out of your WordPress admin area and log back in, as your login session might have expired, leading to a security token mismatch that prevents uploads.
#2 – Resize or Rename Your Image Files
As we mentioned above, large image files can exceed your server’s upload limits, triggering the HTTP error. To solve this, you can try reducing the image’s dimensions or compressing its file size using an image editor before uploading.
Additionally, ensure your image file names don’t contain special characters, spaces, or accents, as these can cause conflicts; rename files using only letters, numbers, and hyphens (e.g., my-new-image.jpg).
In the past, we have also noticed that some poorly configured firewall rules block images with names that contain certain sensitive words. So, if your image name contains the phrase wp-login.php or wp-admin, you should consider renaming it to something else and trying again.
#3 – Deactivate Plugins and Themes Temporarily
Updating a plugin or theme in the background can easily cause a WordPress HTTP error. To check for this, temporarily deactivate all your plugins and try uploading the image; if it works, reactivate the plugins individually, testing after each, to find the problematic one.
If plugins aren’t the issue, switch to a default WordPress theme like Twenty Twenty-Four to see if your current theme is causing the error.
#4 – Increase PHP Memory Limit for WordPress
WordPress and its plugins require a certain amount of server memory (RAM) to function correctly. If an image upload process demands more memory than allocated, it can result in an HTTP error.
The exact step to modify this limit will vary depending on your hosting environment. Some hosting providers allow you to set this limit by defining the WP_MEMORY_LIMIT variable in the wp-config.php file, whereas others require you to modify the memory_limit directive in the php.ini file.
However, if you are using RunCloud, this can be done with just a single button.
By default, the directory permissions should be 755 or 744, and individual file permissions should be 644. You can check and change these permissions using an FTP client or your hosting control panel’s file manager.
You might already know this, but running an outdated version of PHP can lead to various compatibility issues, including the HTTP error during image uploads. Ensure your server is using a recent, stable PHP version recommended by WordPress.
The exact steps to change your PHP runtime will vary depending on your operating system and hosting provider. However, if you are using RunCloud, you can easily update the PHP runtime of your WordPress application by going to Settings > PHP Version and simply selecting from the dropdown list.
Additionally, if you need to use an outdated version of PHP for your website, then RunCloud also provides a secure way to use EOL PHP runtimes without compromising the security of your other web applications.
#7 – Temporarily Disable Security Modules
If your web server uses security modules like mod_security (an Apache module) or Content-Security-Policy (CSP) to block suspicious activity, these can occasionally misinterpret legitimate image uploads as a threat and block them, resulting in an HTTP error.
If you suspect this is the issue, you can temporarily disable the necessary security module and try again.
However, disable security features cautiously and only temporarily for testing, as they are important for your site’s protection.
We recommend consulting your host before making these changes, as they can have a lasting impact on your website.
#8 – Use FTP or Add From Server Plugin as a Last Resort
Note:This is a workaround rather than a direct fix for the HTTP error, but it can be a lifesaver when you’re in a hurry.
If all other troubleshooting steps fail and you urgently need to upload images, then you can bypass the WordPress media uploader by using an FTP client (like FileZilla) to upload images directly to a temporary folder on your server. Read our previous articles to learn how to do this effectively.
After uploading via FTP, the images will not show up automatically in your WordPress dashboard, and you will need to run a specific WordPress command to register these images with the WordPress media library so they appear within your dashboard.
After logging in to your server via SSH, you can run the wp media import ~/picture.jpg command from your WordPress installation directory. This command instructs WordPress to scan the specified path (in this example, a file named picture.jpg within the home directory) and import it into the Media Library.
If you have uploaded the image to a different directory, you can simply replace the ~/picture.jpg with the path of your image file. You can specify the exact path to a single image file or use wildcards like * to match and import multiple images simultaneously.
After executing the above command, you will receive a confirmation message for each image imported into the WordPress media library.
Why Choose RunCloud for WordPress Hosting and Support?
RunCloud is a powerful server management panel that simplifies WordPress hosting, development, and maintenance, especially when tackling issues such as the HTTP error during image uploads.
RunCloud provides developers and agencies with the tools they need for efficient workflows. By offering a suite of specialized features, RunCloud ensures your WordPress sites run smoothly, securely, and are easy to manage. Here are a few reasons why you should use RunCloud to manage your servers:
Reason 1: Expert WordPress Support for Troubleshooting Errors
Simplified Problem Isolation: RunCloud offers a clean and controlled server environment, which makes it easier to pinpoint the causes of WordPress errors, including the HTTP error.
Staging Environments: RunCloud allows you to easily create WordPress staging environments. These allow you to test solutions for errors like the HTTP upload issue, experiment with PHP versions, or try deactivating plugins without affecting your live site, significantly reducing the risk of breaking things.
Access to Logs: RunCloud provides straightforward access to server logs, which are invaluable for diagnosing complex WordPress errors that don’t provide much information on the front end.
Reason 2: Optimized Server Performance for Seamless Image Uploads
Optimized Stack: RunCloud configures your server with an optimized stack (e.g., NGINX, Apache, various caching options like Redis or Memcached) out of the box. This ensures your WordPress site has the resources and speed needed for smooth operations, including handling image uploads efficiently and reducing the likelihood of HTTP errors caused by resource limitations.
Easy Resource Scaling: If insufficient server resources are causing upload errors, RunCloud makes it simpler to manage your server resources or to guide you if you need to upgrade your server plan with your chosen cloud provider (like DigitalOcean, Vultr, AWS, Google Cloud, etc.).
PHP Version Management: The RunCloud dashboard makes it easy to switch and manage multiple PHP versions. This is important for ensuring compatibility with the latest WordPress versions and for resolving HTTP errors that might stem from outdated or problematic PHP versions.
Reason 3: Easy Management and Advanced Security for WordPress Sites
User-Friendly Interface: RunCloud provides an intuitive dashboard that simplifies complex server management tasks, such as setting up new WordPress sites, managing databases, and configuring SSL certificates, even for non-Linux experts.
Git Integration and Deployment: For developers, RunCloud supports WordPress deployment via Git. This means you can version control your WordPress projects, including themes and plugins, and deploy changes systematically from your Git repository to your staging or production environments, streamlining your development workflow and making rollbacks easier.
Team Collaboration and Permissions: RunCloud facilitates teamwork by allowing you to assign specific permissions to team members for different servers and applications. This granular control ensures that colleagues or clients only have access to what they need, and changes can be tracked, enhancing security and accountability.
Security Features: RunCloud implements various security measures, including easy SSL certificate deployment (Let’s Encrypt), firewall management, and regular security updates for server packages. This proactive approach helps protect your WordPress sites from threats that could otherwise lead to errors or downtime.
Wrapping Up: Fixing WordPress HTTP Errors When Uploading Images
In this post, we have provided you with several solutions to resolve the HTTP error in your WordPress installation. By working through the solutions above, you should be able to restore your site’s media uploading functionality and get back to creating engaging content.
Your hosting environment plays a crucial role in ensuring that your WordPress site runs smoothly and that image handling is optimized. RunCloud significantly simplifies the management of these aspects.
For instance, RunCloud supports Imagick, a powerful image processing library that WordPress can use to improve image manipulation and quality. RunCloud also uses various caching mechanisms (such as Redis or Memcached), dramatically speeding up your website’s loading times by serving optimized images and content more efficiently.
One of RunCloud’s most valuable features for troubleshooting and development is its provision for WordPress staging environments.
Before you apply any fix for the HTTP error, update PHP, or change critical settings on your live website, you can test everything in a safe, isolated staging copy. This allows you to confirm that your changes work as expected and don’t introduce new problems.
Ready to take control of your WordPress hosting and eliminate frustrating errors for good?
FAQs on the WordPress HTTP Error When Uploading Images
Why does WordPress show HTTP errors when uploading images?
WordPress displays a generic HTTP error when it encounters an issue during the image upload process that it can’t specifically identify. This could be due to insufficient server resources, such as memory limits, incorrect file permissions, or temporary server-side glitches.
How do I increase the upload size limit in WordPress?
You can increase this limit by modifying directives like upload_max_filesize and post_max_size in your server’s php.ini file or via .htaccess. With RunCloud, managing these PHP settings for your WordPress sites is straightforward through your control panel, simplifying the adjustment.
Will changing my theme or plugins fix the HTTP error?
Potentially, yes, if a theme or plugin is poorly coded and consumes excessive server resources or interferes with the upload process. Temporarily deactivating them can help isolate if one is the culprit behind the HTTP error.
Can server issues cause the HTTP error in WordPress?
Absolutely. Server-side problems such as insufficient PHP memory limits, low disk space, or outdated PHP versions are common culprits for the HTTP error. A platform like RunCloud helps you easily manage server configurations and resources to prevent such issues.
What is the best way to optimize images for WordPress uploads?
The best approach is to compress images before uploading using tools or plugins to reduce file size without significant quality loss. Choosing appropriate formats like WebP or JPEG for photos and ensuring dimensions are suitable for web display also significantly helps.
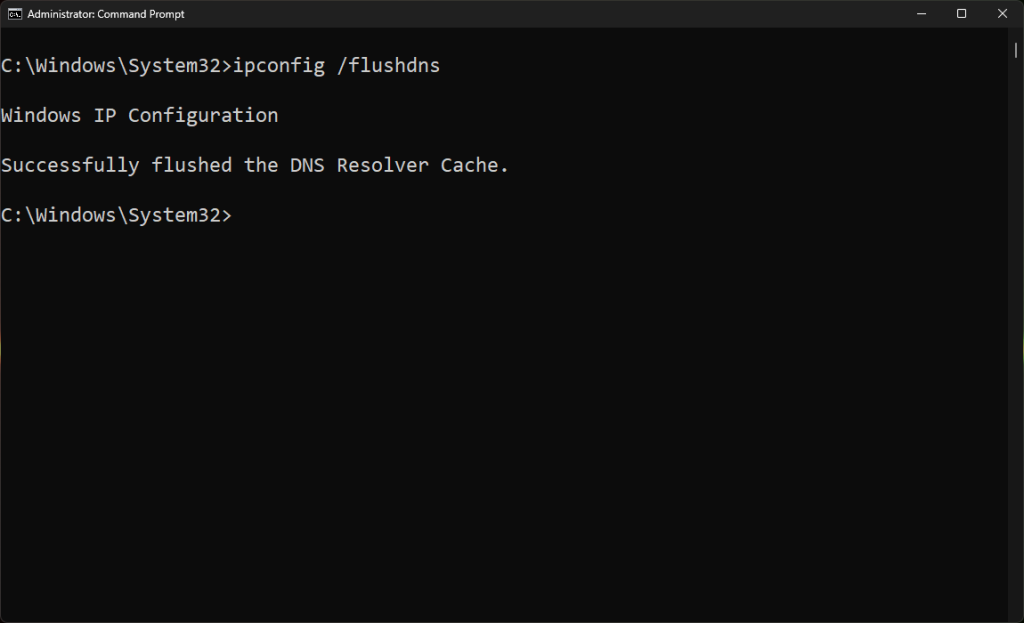
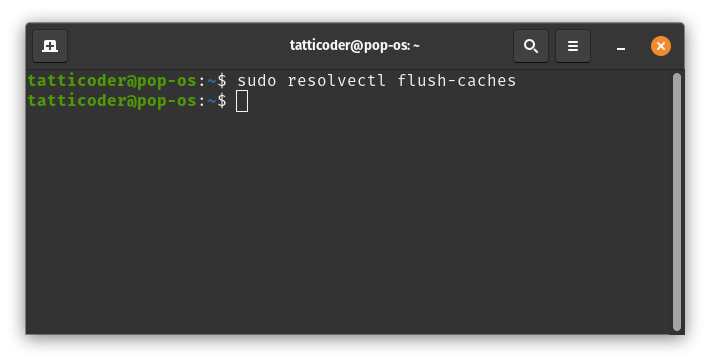
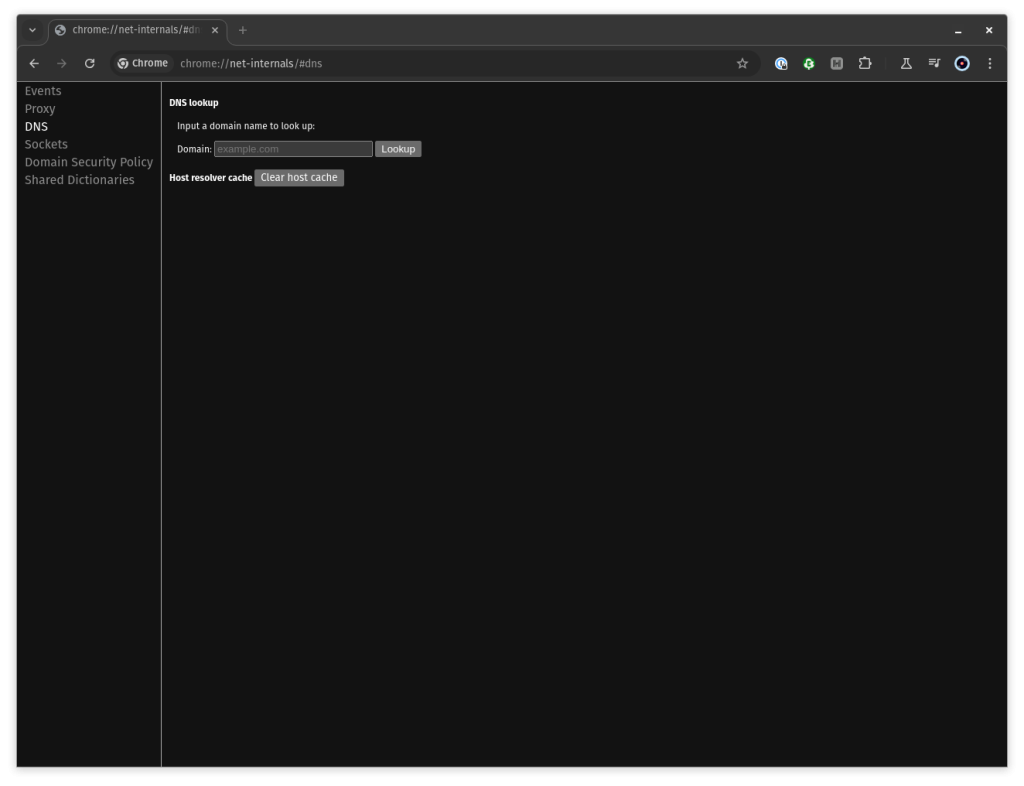

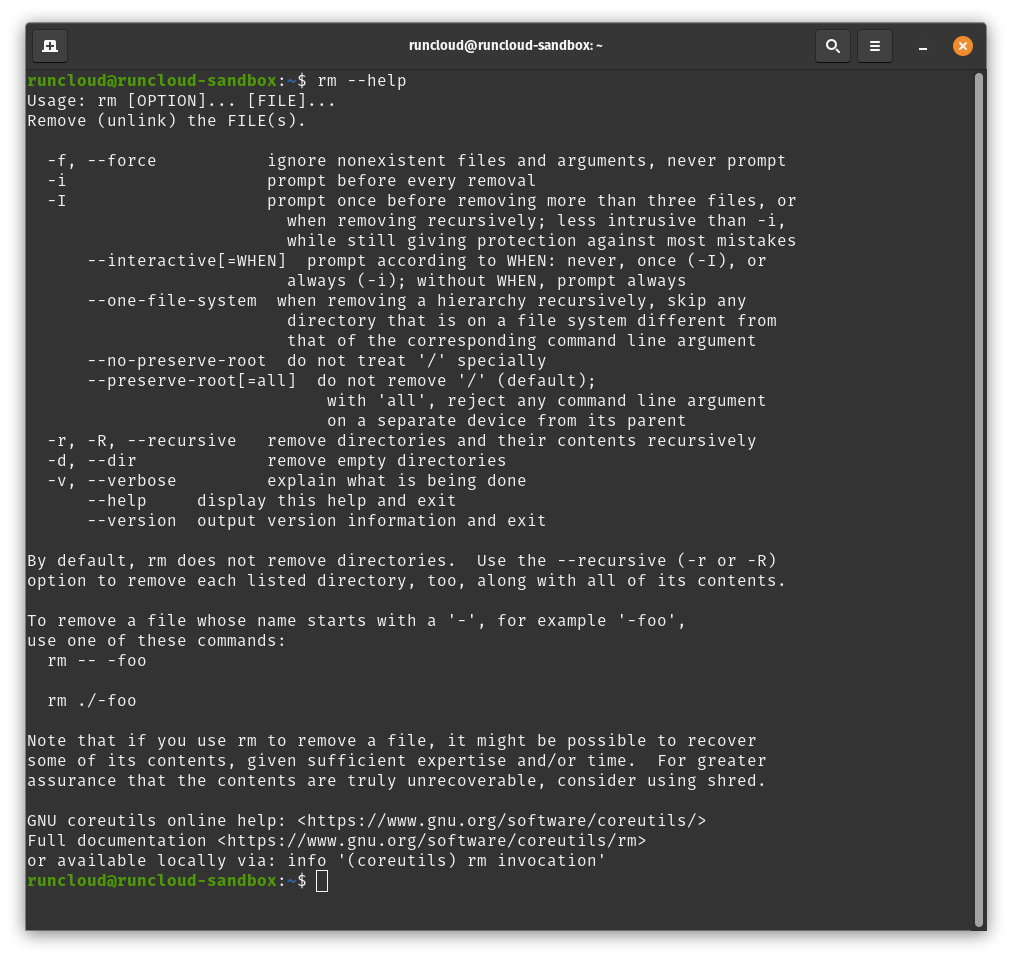
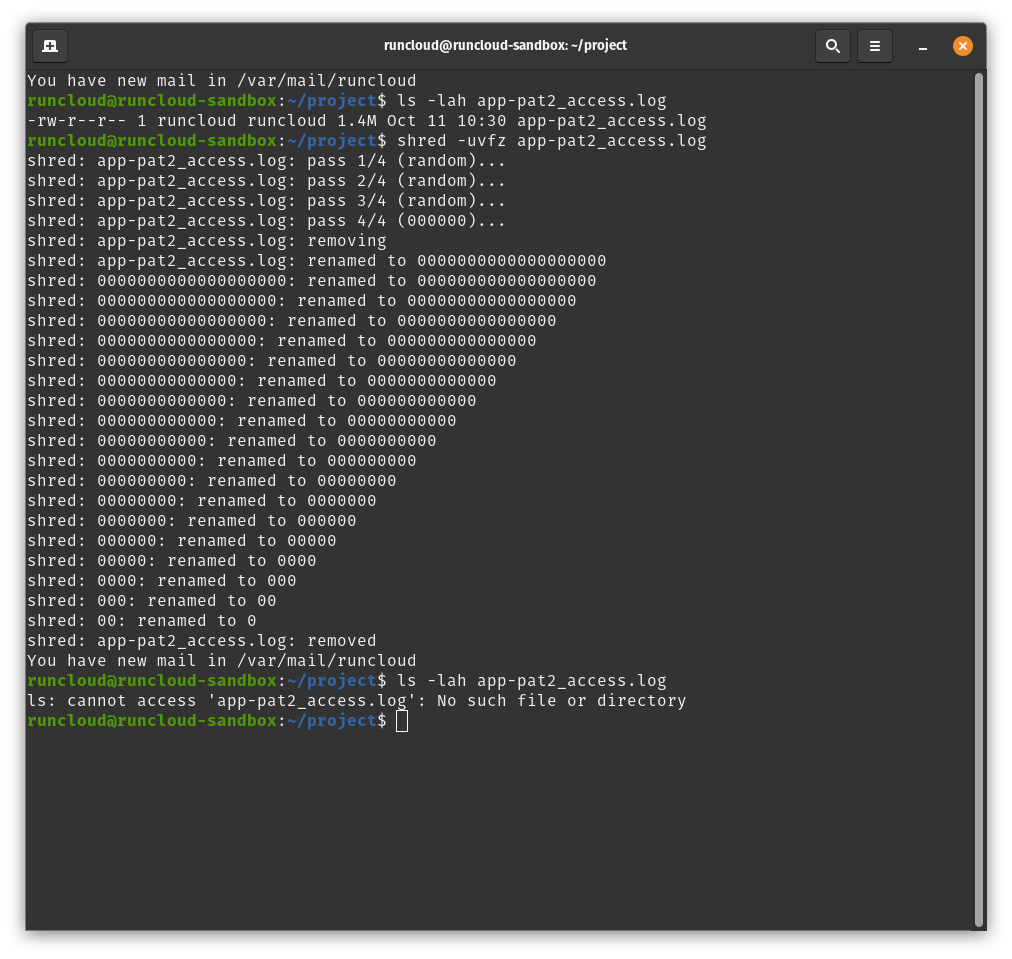

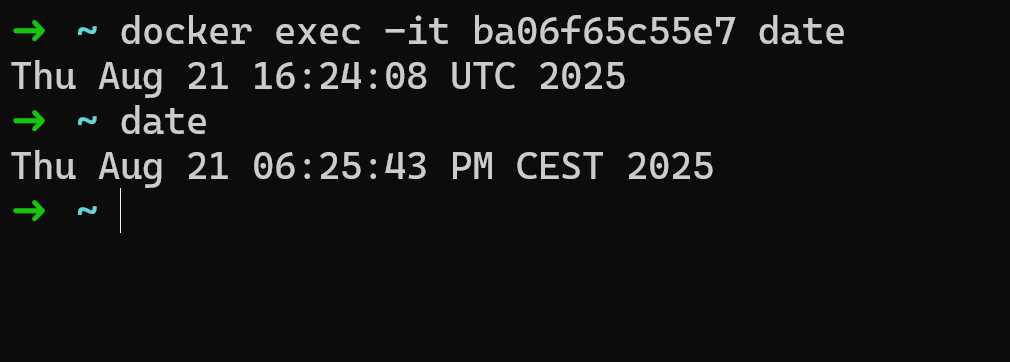
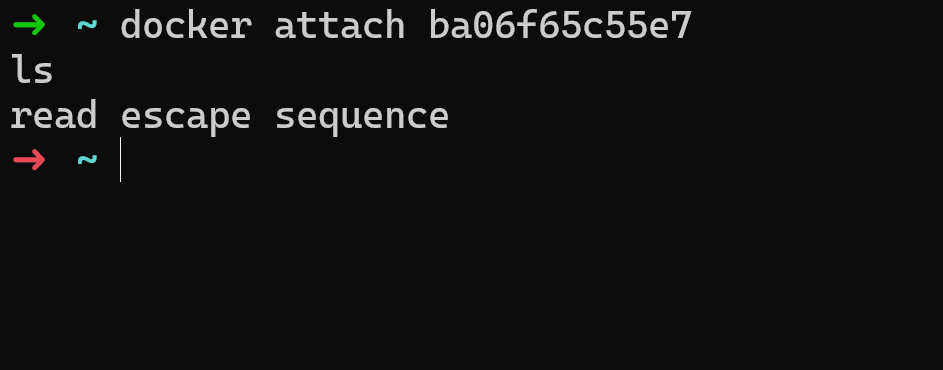
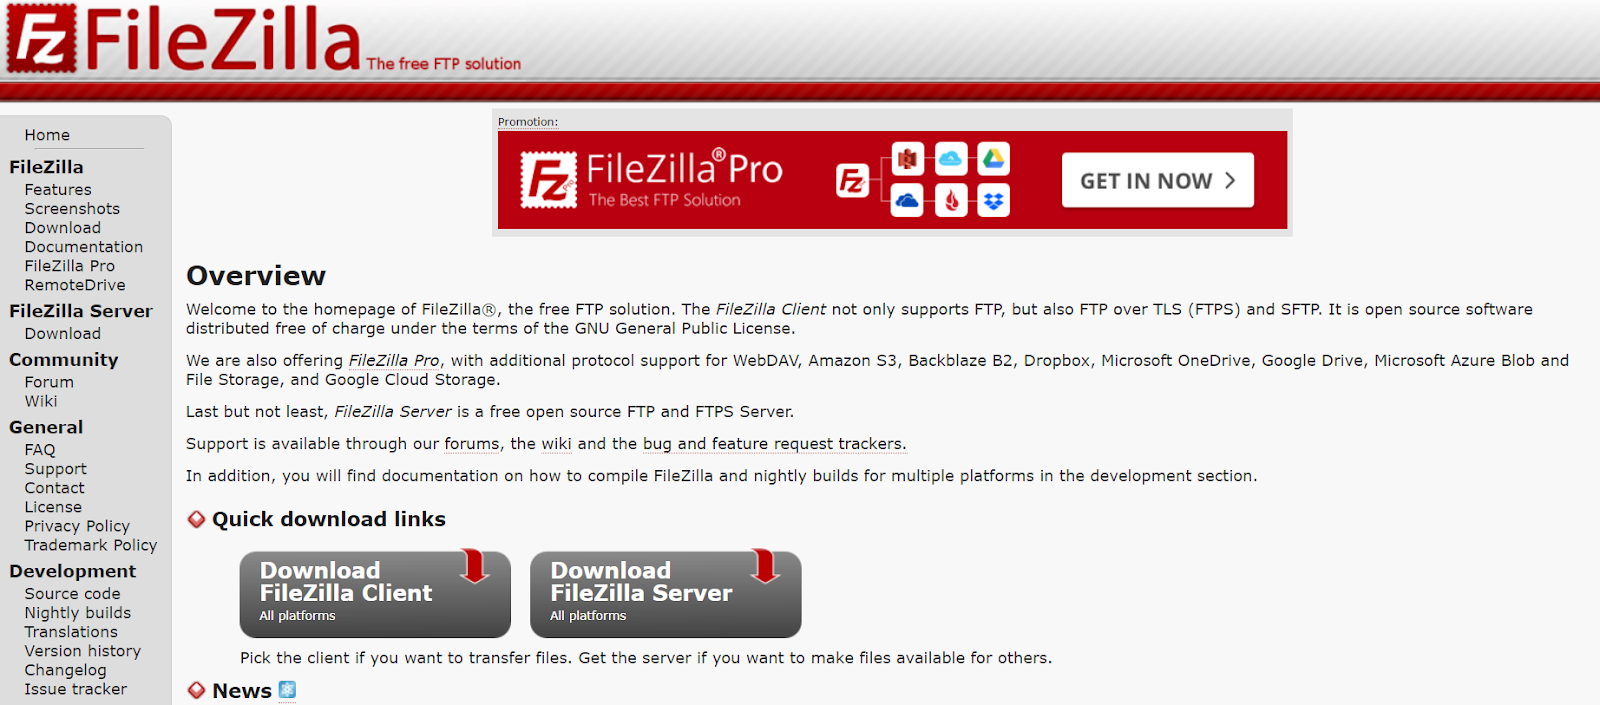
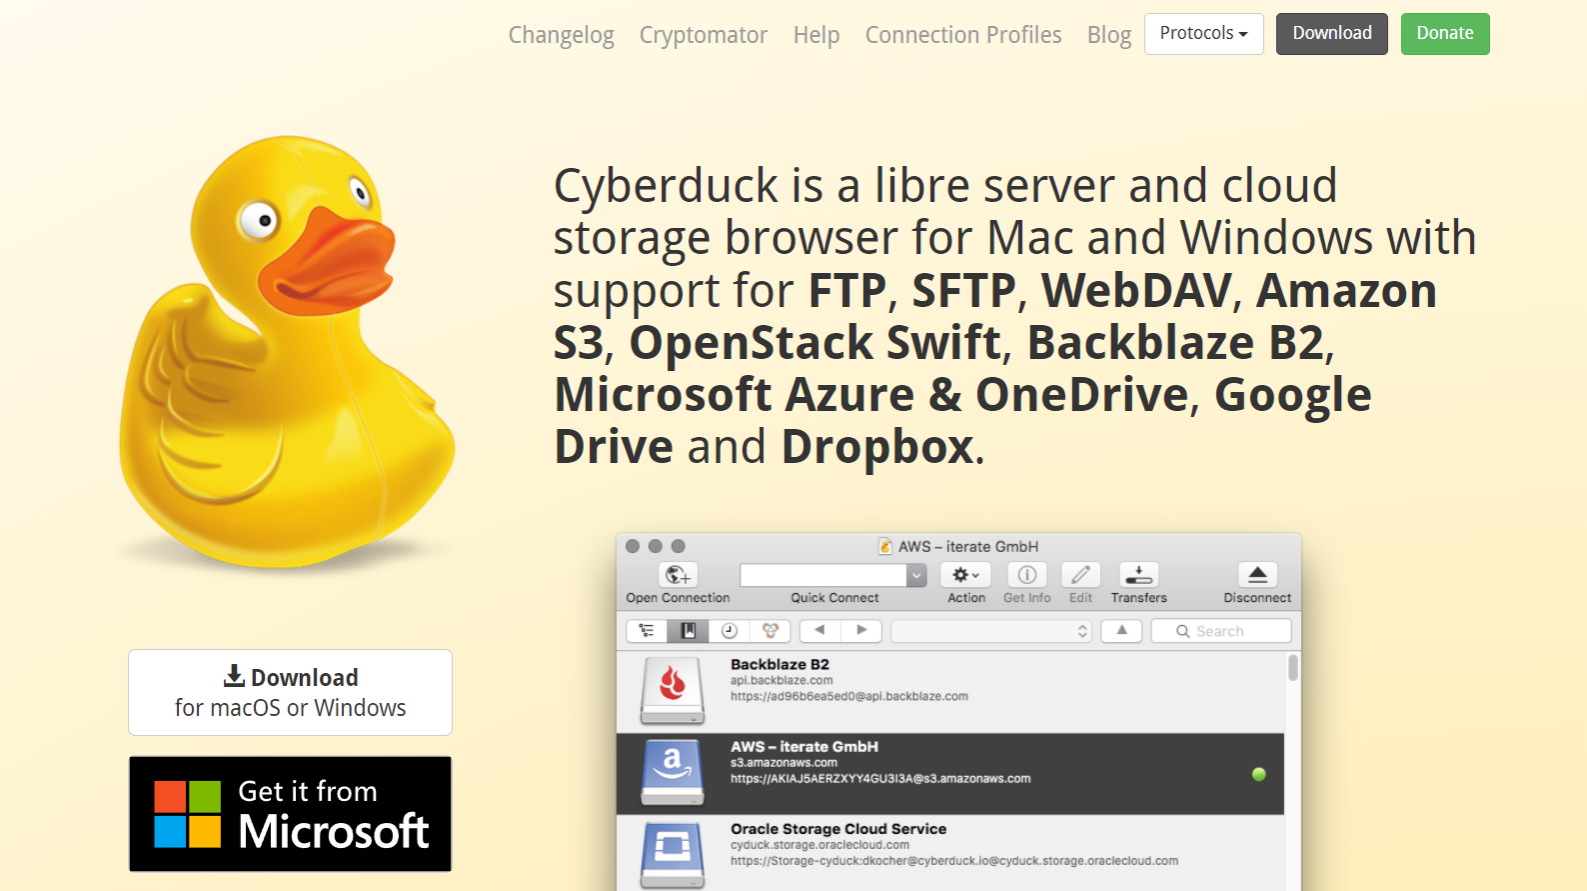
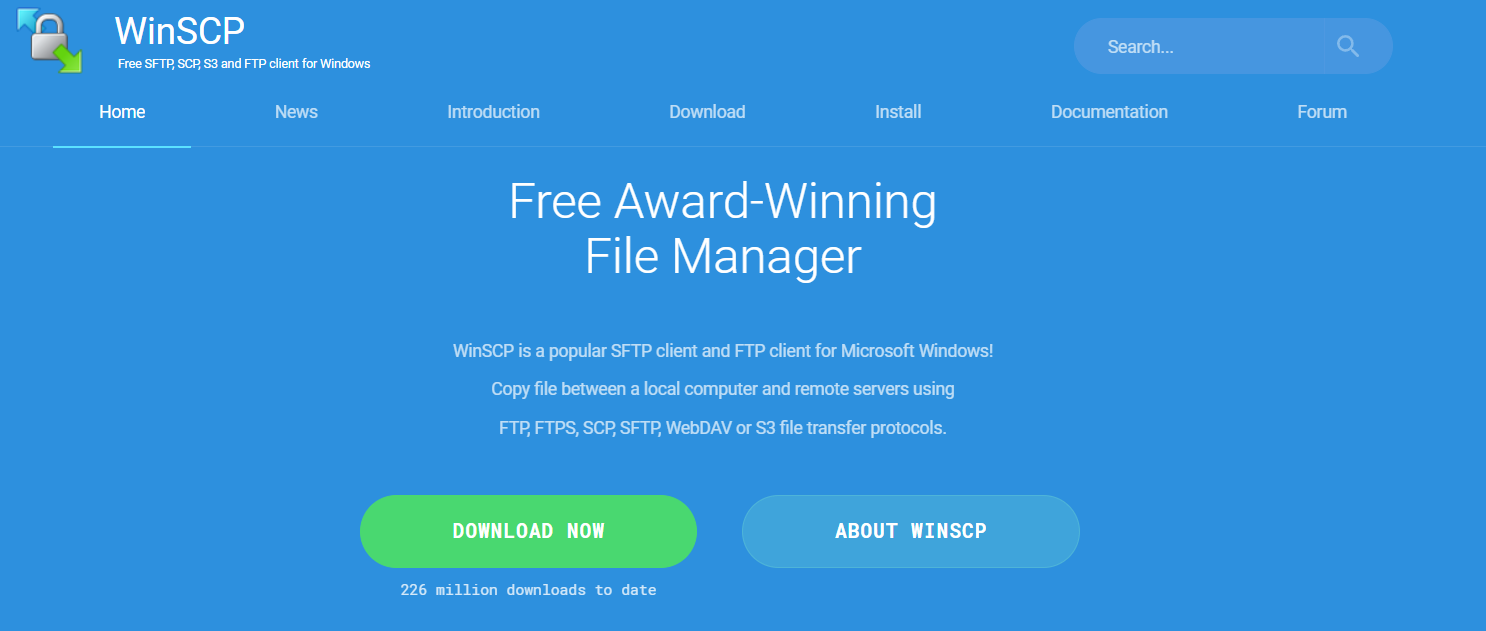
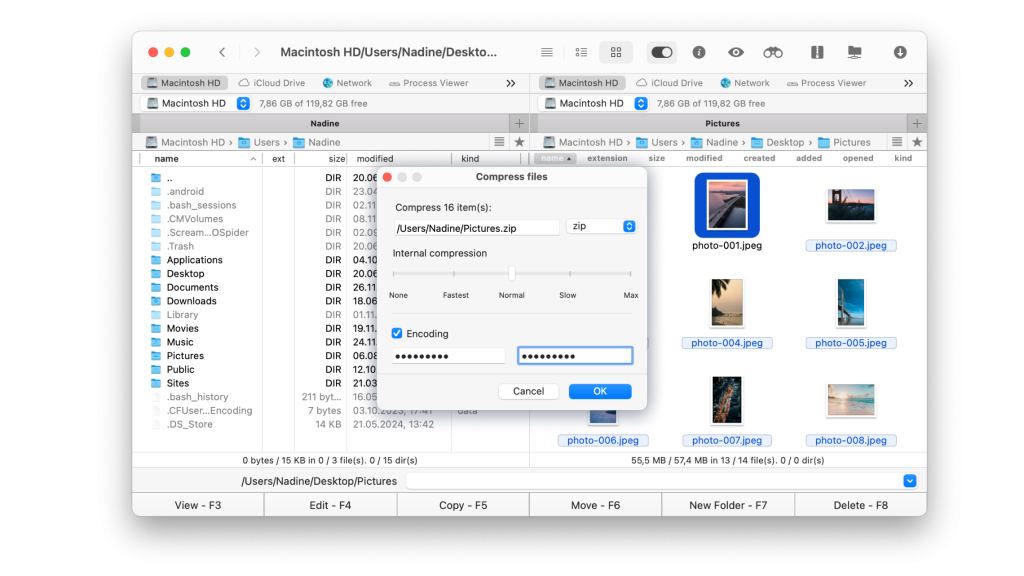
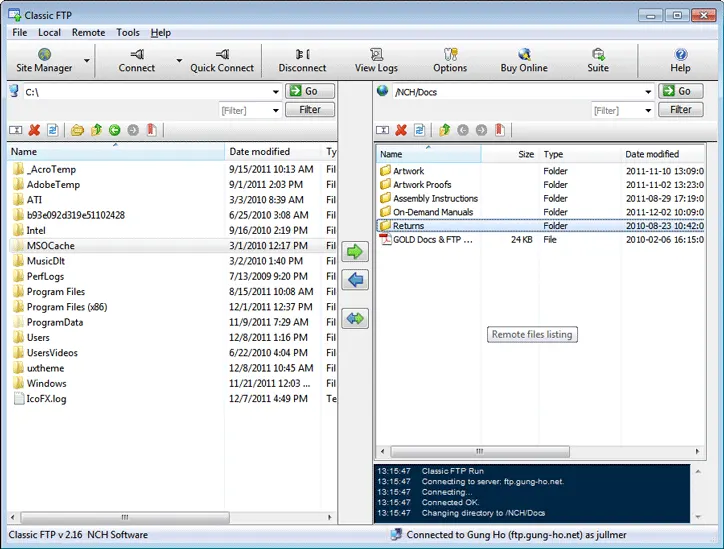
![How to Reduce Cache Misses & Avoid Them: Proven Tips [FIXED]](https://rcwp.scalemath.dev/wp-content/uploads/2025/08/BLOG-46.png)